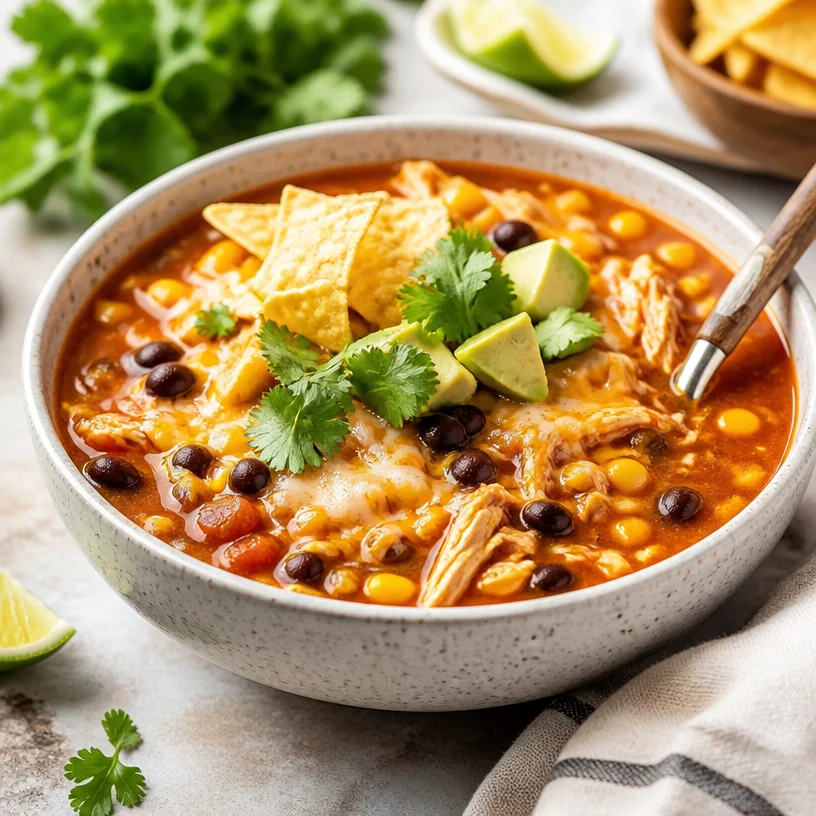
Chicken Enchilada Soup
Cozy Up to Comfort: Perfect Chicken Enchilada Soup
Hello, lovely readers! If you’re looking for a bowl of comfort that warms not only your body but also your soul, you’ve landed in the right spot. Today, we’re diving into a dish that embodies cozy evenings spent with family and friends—Chicken Enchilada Soup. This vibrant, flavorful soup is everything you love about enchiladas, turned into a delightful, easy-to-savor bowl of goodness.
Now, picture this: it’s a chilly evening, the kind that makes you want to huddle up under a blanket with something warm in hand. That’s when this recipe shines. It’s a combination of hearty chicken, zesty enchilada sauce, and lusciously creamy beans, all simmering together to create a soul-satisfying experience. Trust me; even the pickiest eaters won’t be able to resist!
My Chicken Enchilada Soup Story
Let me share a little story. A few years back, I hosted a small gathering for friends at my home to celebrate a milestone. It was one of those nights where laughter flowed as freely as the wine, the candles flickered softly, and the air was filled with fantastic aromas from the kitchen. I wanted to create something that was a crowd-pleaser but also simple enough for me to manage while also mingling with my guests. That’s when I settled on this Chicken Enchilada Soup recipe, inspired by my childhood love for enchiladas.
Growing up, my family often made that classic dish on special occasions. The house would turn into a whirlwind of color, with vibrant artwork on our tables and heaps of cheese melting on top of the tortillas. I remember my mother pouring her heart into the food, and as we gathered around the table, we knew we were in for a treat. Bringing this soup to life felt like capturing all those heartwarming memories in one delicious bowl.
Ingredients
Here’s what you’ll need to whip up this delightful Chicken Enchilada Soup:
- 2 cups cooked chicken
Shredded or cubed—use rotisserie chicken for a quick knock-off or any leftover chicken you have on hand. - 2 cups enchilada sauce
You can buy this pre-made or whip up a homemade version. Homemade gives a fresher taste, but a store-bought one is great for a time-saver. - 1 can (15 oz) black beans
These add protein and fiber. If you prefer, substitute with pinto beans or white beans—whatever you have on hand! - 1 cup corn (canned or frozen)
Sweet corn is a great addition. If you have fresh corn, roast it for a smoky flavor! - 1 medium onion, diced
The base of flavor! You can swap it for shallots or leeks for something a bit sweeter. - 2 cloves garlic, minced
Always use fresh garlic when possible! If you’re in a pinch, jarred minced garlic works too, but fresh triumphs in flavor. - 1 cup chicken broth
This adds depth! Use low-sodium broth or homemade for a richer flavor. You can also sub it with vegetable broth if you want to keep things lighter. - 1 tsp cumin
It’ll add that warm, earthy flavor. Adjust to your liking; more can intensify the depth! - Salt and pepper, to taste
Always taste as you go. Remember, you can always add but can’t take away. - 1 cup shredded cheese (for topping)
A blend of Mexican cheeses works beautifully. Monterey Jack or Cheddar will melt luxuriously; feel free to skip it for a lighter version.
Step-by-Step Instructions
Now that we’ve gathered our ingredients, let’s get cooking! Here’s how to create your Chicken Enchilada Soup:
-
Prep Time: Start by shredding your cooked chicken. If you’re using a store-bought rotisserie chicken, just remove the skin, shred the meat, and set it aside. Easy peasy!
-
Sauté the Base: In a large pot, heat a drizzle of olive oil over medium heat. Add the diced onion and sauté until translucent, about 3-4 minutes. This is where those lovely flavors begin to build! I like to sprinkle a pinch of salt in here—it helps the onion release its moisture and sweeten.
-
Garlic Action: Add the minced garlic and sauté for an additional minute until fragrant. Don’t let it brown; we want sweet garlic flavor, not burnt pieces! This step is so aromatic—it’ll have everyone wondering what’s cooking!
-
Mix It All Together: Next, add your shredded chicken, black beans, corn, enchilada sauce, and broth to the pot. Stir well to combine.
-
Spice It Up: Toss in the cumin, along with some salt and pepper to taste. Bring the mixture to a gentle boil over medium-high heat, then reduce it to low and let it simmer. This is where the magic happens! Let it bubble for about 20 minutes—you’ll want those flavors to meld together.
-
Final Adjustments: After simmering, taste your soup! Adjust the seasoning if needed. Sometimes a splash more of broth or a dash of salt and pepper does the trick.
-
Serve It Up: Ladle the hot soup into bowls and finish it off with your choice of shredded cheese. You can let the cheese melt right on top in the hot soup—it’ll be just divine.
Serving Suggestions
For a complete experience, consider adding toppings such as diced avocado, fresh cilantro, tortilla strips, or a dollop of sour cream. You can rearrange your toppings to fit the mood of the night—maybe a garnish of lime or a sprinkle of jalapeño for those who like a little heat.
Recipe Variations
Here are some twists you could try for added fun:
- Spicy Enchilada Soup: Add chopped jalapeños or a splash of hot sauce to give your soup a kick!
- Vegetarian Delight: Replace chicken with more beans or even some roasted vegetables like zucchini or bell peppers for a hearty veggie version.
- Creamy Comfort: Add a swirl of cream or cream cheese for a richer, creamier texture. You could turn it into a creamy chicken enchilada soup—yum!
- Bulk It Up: Want to stretch it out? Add diced potatoes or even quinoa for a heartier soup!
- Herbaceous Flavor: Toss in fresh herbs like cilantro or parsley right before serving for an herbal freshness that elevates the dish!
Chef’s Notes
This recipe has evolved while I’ve tinkered with it over the years. Originally, I was a stickler for traditional flavors, but I love how versatile it can be now! I remember one time I had too many canned goods in the pantry; that week, we had soup every day with different toppings and variations. It sparked so much creativity that I’ve become never-endingly inspired to play with flavors. It’s such a forgiving dish—perfect for a kitchen beginner or someone seasoned like many of you, my lovely readers!
FAQs and Troubleshooting
Q: How can I make the soup thicker?
A: If you prefer a thicker soup, try adding more beans or a little cornmeal mixed with water to the pot during simmering. You can also blend a portion of it to create a creamier texture.
Q: Can I freeze Chicken Enchilada Soup?
A: Absolutely! Let it cool completely before transferring to an airtight container, and it’ll keep in the freezer for about three months. Just make sure to separate the toppings, such as cheese and avocado, at the time of serving.
Q: What can I serve this soup with?
A: It pairs beautifully with corn tortillas or crunchy tortilla chips. A fresh salad on the side can also provide a delightful contrast!
Q: What if I don’t like beans?
A: No worries! Leave them out and add more veggies or even some pasta. You can also try rice for a comforting heartiness!
Nutritional Info
While I always encourage enjoying food without guilt, here’s a little breakdown of approximate nutritional values for a typical serving (without excess toppings):
- Calories: Approximately 300
- Protein: 25g
- Carbs: 35g
- Fat: 10g
Cooking is all about love, creativity, and sharing, and this Chicken Enchilada Soup embodies all of those qualities. Whether you’re gathering friends for a cozy evening or treating yourself to a comforting meal, this soup will tick all the boxes. So, tie on your apron, and let’s make some magic in the kitchen! Enjoy!
PrintChicken Enchilada Soup

A vibrant and flavorful soup that combines hearty chicken, zesty enchilada sauce, and creamy beans, creating a soul-satisfying experience perfect for chilly evenings.
- Prep Time: 15 minutes
- Cook Time: 30 minutes
- Total Time: 45 minutes
- Yield: 4 servings 1x
- Category: Main Course
- Method: Stovetop
- Cuisine: Mexican
- Diet: Non-Vegetarian
Ingredients
- 2 cups cooked chicken
- 2 cups enchilada sauce
- 1 can (15 oz) black beans
- 1 cup corn (canned or frozen)
- 1 medium onion, diced
- 2 cloves garlic, minced
- 1 cup chicken broth
- 1 tsp cumin
- Salt and pepper, to taste
- 1 cup shredded cheese (for topping)
Instructions
- Prep the chicken by shredding it if using a rotisserie chicken.
- Sauté the diced onion in olive oil until translucent, about 3-4 minutes.
- Add the minced garlic and sauté for an additional minute until fragrant.
- Mix the shredded chicken, black beans, corn, enchilada sauce, and broth into the pot.
- Toss in the cumin and season with salt and pepper, then bring to a gentle boil.
- Reduce heat and let the soup simmer for about 20 minutes.
- Taste the soup and adjust the seasoning as necessary.
- Serve hot, topped with shredded cheese and any additional toppings of your choice.
Notes
For a complete experience, consider adding diced avocado, fresh cilantro, tortilla strips, or a dollop of sour cream as toppings.
Nutrition
- Serving Size: 1 serving
- Calories: 300
- Sugar: 3g
- Sodium: 800mg
- Fat: 10g
- Saturated Fat: 4g
- Unsaturated Fat: 4g
- Trans Fat: 0g
- Carbohydrates: 35g
- Fiber: 8g
- Protein: 25g
- Cholesterol: 70mg
Keywords: soup, enchilada, chicken, comfort food, Mexican recipes
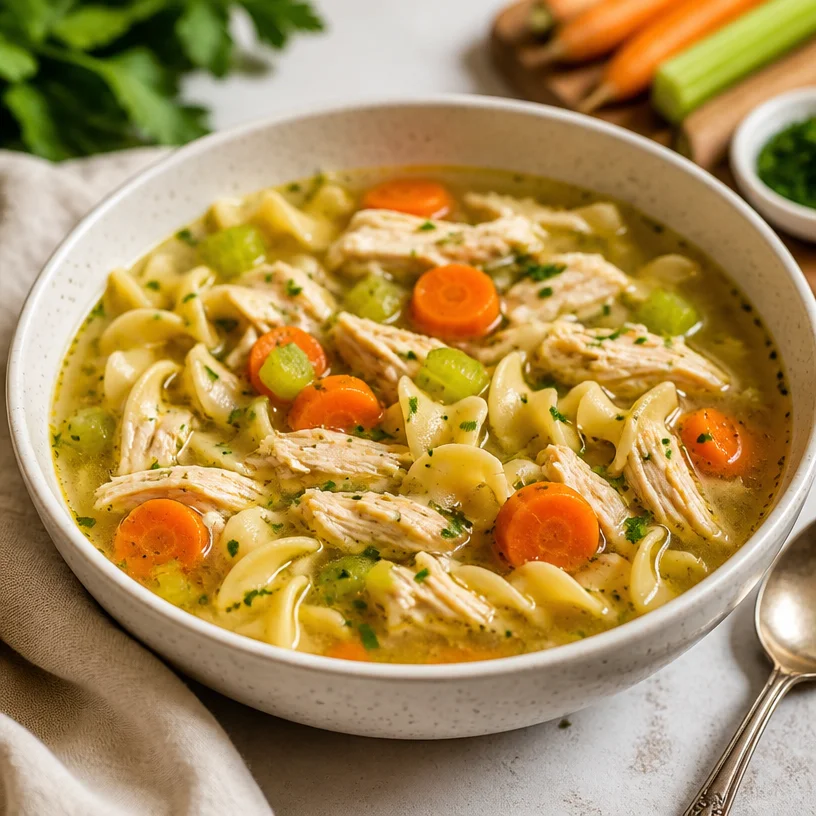
Minute One-Pot Chicken Noodle Soup for Busy Weeknights
The Comfort of Chicken Noodle Soup: A Timeless Classic
Hello, dear food friends! Today, we’re diving into one of my all-time favorite dishes: Chicken Noodle Soup. It’s a nostalgic recipe that warms the heart, brings family together, and serves as a culinary remedy on chilly days. Whether it’s the first snowfall of the year or just an ordinary Tuesday evening, there’s something wonderfully comforting about a steaming bowl of chicken noodle soup. Join me as we explore the magic behind this classic dish, share a personal cooking story, and whip up a batch that will make your kitchen feel like home.
A Spoonful of Nostalgia
Let me take you back to my childhood kitchen. I can still picture my mom stirring a large pot of chicken noodle soup on a rainy afternoon, the delicious aroma wafting through the house. I’d drift into the kitchen, drawn in by the scent of savory broth and tender chicken. She would always let me sneak slivers of carrots and noodles as we prepped the ingredients together. Those moments were filled with laughter, stories, and a sprinkle of love that only home-cooked meals can provide.
One of my favorite memories was when I got to help her make the soup for my grandparents’ visit. It was a simple affair, but the joy on their faces as they savored each bite made me realize that food isn’t just about nourishment; it’s about connection. Now, I find myself recreating that soup, adding my own little spins, yet maintaining the essence of that cherished recipe. Let’s whip up a pot of this classic together; I promise it will bring just as much warmth to your table as it did to mine!
Ingredients You’ll Need
Here’s a list of what you will need to create your very own delicious chicken noodle soup:
-
Chicken: I recommend using bone-in, skin-on chicken thighs for added flavor and richness. If you’re short on time, rotisserie chicken works wonders, too! Just shred it up and throw it in at the end.
-
Egg Noodles: These tender noodles soak up the broth beautifully. If you need a gluten-free option, try using rice noodles or spiralized zucchini for a fresh twist.
-
Carrots: Sweet and colorful, carrots add a lovely crunch. You can switch them out for parsnips for a slightly sweeter flavor.
-
Celery: Celery is essential for that classic flavor profile, contributing a subtle crispness. It can be substituted with fennel if you like a slightly anise-like taste.
-
Broth: Homemade is best! However, store-bought or low-sodium chicken broth works wonderfully. You can also combine chicken and vegetable broth for a richer flavor.
Step-by-Step Instructions
-
Prep Your Chicken: Start by rinsing your chicken pieces under cold water, then pat them dry with paper towels. Season them generously with salt and pepper. This will enhance their natural flavors.
Chef Tip: You can sear the chicken in a bit of olive oil before adding it to the pot for an extra layer of depth. Just brown it for about 5 minutes on each side.
-
Sauté the Aromatics: In a large soup pot, heat a tablespoon of olive oil over medium heat. Add diced carrots and celery, cooking for about 5 minutes until they start to soften. Throw in a minced garlic clove for an extra flavor punch in the last minute.
Little Chef Hack: If you’re feeling adventurous, add a splash of white wine after sautéing the vegetables—let it reduce for a couple of minutes to enhance the flavor.
-
Add the Broth: Pour in about 8 cups of chicken broth, then add your seasoned chicken to the pot. Bring this to a gentle boil, then reduce the heat, covering partially to let it simmer. Cook for 30-40 minutes, or until the chicken is tender and fully cooked.
Chef Insight: Skimming the surface of the broth occasionally will help keep your soup clear and beautiful!
-
Shred the Chicken: Once the chicken is cooked through, carefully remove it from the pot and let it cool for a few minutes. Once it’s safe to handle, shred it using two forks. Return the shredded chicken to the pot.
-
Noodle Time: Now, add the egg noodles to the pot and let them cook for about 8-10 minutes or until they are tender. Stir occasionally to prevent them from sticking.
Quick Tip: If you prefer firmer noodles, add them toward the end of the cooking time.
-
Final Touches: Taste your soup and adjust the seasoning with extra salt, pepper, or herbs like thyme or parsley. I also love a squeeze of lemon juice at the end for a fresh pop of flavor!
-
Serve Immediately: Nothing beats the aroma of freshly cooked chicken noodle soup. Ladle it into bowls and garnish with fresh parsley for that inviting touch.
Serving Suggestions
To really elevate your chicken noodle soup experience, consider serving it with a side of crusty bread or a light salad. A sprinkle of freshly cracked pepper and a dash of chili flakes can also add a nice touch. And let’s not forget the importance of a cozy atmosphere—light some candles and get ready for a delightful meal!
Recipe Variations
-
Herbed Twist: Experiment with fresh herbs like dill or thyme for a different aromatic profile.
-
Spicy Kick: Add a pinch of red pepper flakes or a swirl of sriracha for those who like a bit of heat.
-
Creamy Version: For a rich and creamy chicken noodle soup, stir in a dollop of heavy cream toward the end of cooking.
-
Vegetarian Delight: Substitute chicken with hearty vegetables like mushrooms or chickpeas, and use vegetable broth for a satisfying, meat-free version.
-
Pasta Upgrade: Switch out egg noodles for gnocchi for a special twist that adds a fluffy texture to the soup.
Chef’s Notes
Chicken noodle soup is a timeless recipe that has evolved along with my cooking journey. I fondly recall the first time I attempted to make this dish all on my own; let’s just say it was an adventure filled with mishaps and some overcooked noodles! However, after many batches and tweaks, I’ve found a rhythm that works and a recipe that feels just right. The beauty of this soup is how customizable it is; every bowl can tell a different story!
FAQs and Troubleshooting
-
Why is my soup watery?
If your soup ends up too watery, it might be because you added too much broth or not enough noodles. To thicken it, let it simmer uncovered for a longer time to allow some liquid to evaporate or add a cornstarch slurry as a thickener. -
How can I store leftovers?
Store your chicken noodle soup in an airtight container in the fridge for up to 4 days. To freeze, portion out the soup into freezer-safe containers, leaving space for expansion. -
What if my noodles are mushy?
Mushy noodles usually happen if they are cooked too long. Next time, add them towards the final cooking stages or cook them separately and mix them in just before serving. -
Can I make it in a slow cooker?
Absolutely! Simply combine all the ingredients except the noodles in your slow cooker and cook on low for 6-8 hours. Add the noodles in the last 30 minutes of cooking.
Nutritional Info
(Optional, but helpful—calculating details to provide based on serving sizes, ingredients used, and cooking method can complement your readers’ dining choices.)
So there you have it—my take on the classic chicken noodle soup, shared with a sprinkle of love and a dash of nostalgia. I hope this recipe helps you create cozy moments and delicious memories around your own table. Don your apron, bring some friends over, and let’s make those beautiful moments last! Happy cooking!
PrintClassic Chicken Noodle Soup
A comforting chicken noodle soup recipe that warms the heart and brings family together.
- Prep Time: 15 minutes
- Cook Time: 40 minutes
- Total Time: 55 minutes
- Yield: 4 servings 1x
- Category: Main Course
- Method: Stovetop
- Cuisine: American
- Diet: Gluten-Free Option
Ingredients
- 4 bone-in, skin-on chicken thighs
- 8 cups chicken broth
- 2 cups egg noodles
- 2 carrots, diced
- 2 celery stalks, diced
- 1 garlic clove, minced
- 1 tablespoon olive oil
- Salt and pepper, to taste
Instructions
- Prep your chicken: Rinse chicken pieces under cold water, pat dry, and season with salt and pepper.
- Sauté the aromatics: In a pot, heat olive oil and cook carrots and celery for 5 minutes, adding garlic in the last minute.
- Add the broth: Pour in chicken broth, add chicken, bring to a boil, then simmer for 30-40 minutes until chicken is tender.
- Shred the chicken: Remove chicken from pot, let cool, shred, and return to pot.
- Noodle time: Add egg noodles to the pot and cook for 8-10 minutes until tender.
- Final touches: Taste and adjust seasoning with salt, pepper, and herbs. Add lemon juice if desired.
- Serve immediately: Ladle soup into bowls and garnish with parsley.
Notes
Serve with crusty bread or a light salad for an elevated experience. Customize with herbs or spices for different flavor profiles.
Nutrition
- Serving Size: 1 serving
- Calories: 350
- Sugar: 5g
- Sodium: 400mg
- Fat: 12g
- Saturated Fat: 3g
- Unsaturated Fat: 7g
- Trans Fat: 0g
- Carbohydrates: 45g
- Fiber: 3g
- Protein: 22g
- Cholesterol: 80mg
Keywords: chicken noodle soup, comfort food, classic recipe, soup recipes, warming soup
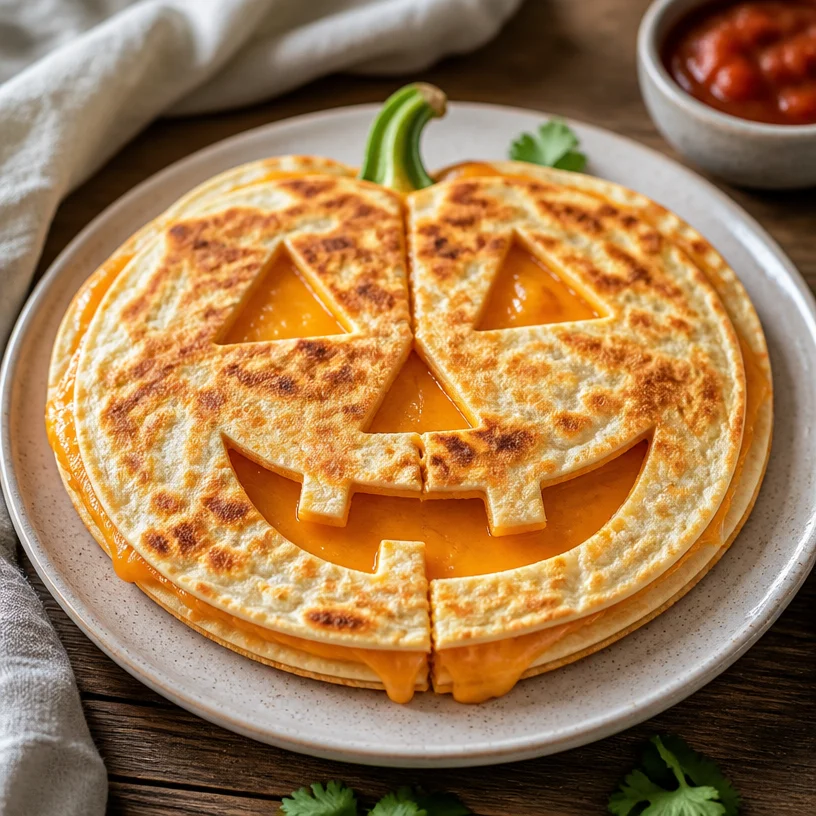
Jack-o’-Lantern Quesadillas
Jack-o’-Lantern Quesadillas: A Spooktacular Treat for Halloween!
Hello, fellow foodies! As October rolls in and the air becomes crisp, my kitchen transforms into a festive hub of creativity and culinary delight. When Halloween approaches, I find that food isn’t just about flavor; it’s an opportunity to have some fun and inject a little whimsy into our meals. Today, I’m excited to share a delightful recipe that’s not only easy to whip up but also brings a smile to everyone’s face – Jack-o’-Lantern Quesadillas!
These playful quesadillas are shaped like Jack-o’-lanterns and filled with gooey cheese, making them a perfect snack for kids and adults alike. Whether you’re hosting a spooky gathering, celebrating Halloween, or just looking to add some fun to dinner, these quesadillas are sure to be a hit. They are quick to make and can even be a crafty kitchen project to involve the little ones!
So, grab your favorite apron, and let’s dive into this culinary adventure that’s as fun to make as it is to eat!
My Personal Story: Halloween Memories in the Kitchen
Growing up, Halloween was always one of my favorite holidays. The excitement of choosing costumes, decorating the house with cobwebs and pumpkins, and, of course, the Halloween treats! I fondly recall my mom and I spending the days leading up to the 31st crafting spooky snacks. One year, we decided to have a Halloween-themed dinner party for our family, and that’s when the idea of festive food struck us.
We created all kinds of delightful dishes, but the star of the show was our pumpkin-shaped quesadillas. We used cookie cutters to give them that authentic Jack-o’-lantern look, and the cheese melted to perfection inside. It wasn’t just about the food; it was about creating lasting memories and giggles in the kitchen. As we all sat together, munching on our ghoulish goodies, I realized that Halloween wasn’t just about the spooky vibes; it was about gathering people around the table for fun, laughter, and, of course, fantastic food! These Jack-o’-Lantern Quesadillas bring back those cherished memories, and I can’t wait for you to create your own stories with them.
Ingredients
Let’s talk about the ingredients you’ll need to create these festive Jack-o’-Lantern Quesadillas. Simple, wholesome, and straightforward! Here’s what you need:
-
Tortillas:
- Use any type you prefer, such as flour or corn. Flour tortillas are generally more flexible and easier to work with, especially for shaping. You can even find whole grain or gluten-free options if you have dietary needs.
-
Cheddar Cheese:
- A classic choice, cheddar melts beautifully and provides a nice sharp flavor that pairs well with the tortilla. You can substitute with Monterey Jack for a mild taste or pepper jack for a spicy kick. If you’re looking for a dairy-free or vegan alternative, shredded vegan cheese works remarkably well too!
-
Optional Add-Ins:
- Feel free to layer in extras like beans, pre-cooked chicken, or veggies for added flavor and nutrition. Just remember to keep the filling relatively thin so the quesadillas stay crispy!
Step-by-Step Instructions
Okay, time to roll up those sleeves and get cooking! Here’s a detailed guide to creating your Jack-o’-Lantern Quesadillas:
Step 1: Prep Your Space
Set up your cooking area: grab a frying pan, spatula, a cutting board, and a sharp knife. It’s always a good idea to have everything organized before you start – saves time and avoids the last-minute scramble.
Step 2: Make the “Face”
Using a small pumpkin-shaped cookie cutter or a knife, cut out fun Jack-o’-lantern faces from one side of the tortilla. You can give them silly smiles or spooky grins – the choice is yours! Lay the tortilla flat on your cutting board and gently press down the cookie cutter. If you’re using a knife, be careful and go slowly to ensure you don’t accidentally cut all the way through.
Step 3: Heat the Pan
Heat your non-stick frying pan over medium heat. You want it hot but not too hot to scorch your quesadillas. A well-heated pan ensures that the cheese will melt perfectly while keeping the outside delightfully crispy.
Step 4: Assemble the Quesadilla
Now, it’s time to fill those tortillas! Place one uncut tortilla in the pan. Sprinkle a generous layer of shredded cheddar cheese on one half, leaving room for the other half to fold over. If you’re adding extra fillings (like cooked chicken or beans), layer them on top of the cheese evenly.
Step 5: Fold and Cook
Fold the quesadilla in half. Press it down gently with your spatula to encourage even cooking. Cook for about 2-3 minutes on one side until the cheese begins to melt and the tortilla turns golden brown. Keep an eye on it, as cooking times can vary based on your stovetop.
Step 6: Flip and Finish
Gently flip the quesadilla using your spatula and cook on the other side for another 2-3 minutes. Once it’s perfectly crispy and golden on both sides, remove it from the pan and let it sit for a minute. This resting period allows the cheese to settle a bit, making it easier to slice and serve.
Step 7: Cut and Serve
Using a sharp knife or pizza cutter, slice the quesadilla into wedges. You can also use a bit of kitchen shears to do this, which may be easier, especially for those fun shapes! Serve them warm with salsa, sour cream, or guacamole for dipping.
Quick Chef Hacks:
- To prevent your tortillas from getting soggy, avoid adding too many extra fillings.
- You can keep the finished quesadillas warm in a low oven while you cook the rest.
- For extra flavor, consider sprinkling some chili powder or taco seasoning into the cheese blend.
Serving Suggestions
Presentation is key! Arrange your Jack-o’-Lantern Quesadillas on a festive Halloween-themed platter. You can garnish with sprigs of fresh cilantro or parsley for a bright pop of color. Pair them with a bowl of salsa, guacamole, or sour cream for dipping – it adds both flavor and a fun touch. You might even consider serving them alongside a Halloween-inspired salad, maybe one with black olives and shredded carrots for a spooky effect!
Recipe Variations
Now that you’ve mastered the classic Jack-o’-Lantern version, here are some tasty variations to keep the fun going:
- Cheesy Veggie Quesadillas: Add in finely chopped peppers, spinach, or zucchini for a healthy twist.
- Spicy Chicken Quesadillas: Layer in shredded rotisserie chicken with a sprinkle of taco seasoning for added protein.
- Sweet Treat Quesadillas: For dessert, try adding cream cheese and a sprinkle of cinnamon with thinly sliced apples between two tortillas. Cook until golden and serve with caramel sauce!
- Black Bean & Cheese: Combine black beans with the cheese for a protein-rich option that’s satisfying and flavorful.
Chef’s Notes
Let me share a little kitchen quirk: one year, in my excitement to serve these Jack-o’-Lantern Quesadillas at a Halloween party, I accidentally mistook the cumin for cinnamon! The result? Well, it was an interesting flavor profile, to say the least. Everyone had a good laugh, and I think I found a new recipe in the process! Cooking is about experimenting and enjoying the ride, and this recipe is no different. I encourage you to play around with flavors and have fun in the kitchen!
FAQs and Troubleshooting
1. Can I make these quesadillas in advance?
Absolutely! You can assemble the quesadillas ahead of time and store them in the refrigerator. When you’re ready to serve, just heat them in a pan or bake them in the oven until warm and crispy.
2. My quesadillas are falling apart. What did I do wrong?
If your quesadillas are falling apart, it often means they were overstuffed. Stick to a moderate amount of filling, and ensure you have the tortilla sealed well before flipping.
3. How can I make them healthier?
You can use whole grain tortillas, reduce the amount of cheese, and pack them with more veggies, like spinach, mushrooms, or roasted peppers.
4. What if I don’t have cookie cutters?
No problem! You can use a sharp knife to carve out the pumpkin shapes. It takes a little more effort but can be a fun activity on its own, especially for kids.
Nutritional Info
While I don’t have precise nutritional info for this recipe, you can estimate it based on the tortillas and cheese you use. Generally, a single quesadilla (about 2 servings) can range from 300-500 calories depending on the ingredients.
Happy cooking, everyone! I hope these Jack-o’-Lantern Quesadillas bring joy, laughter, and deliciousness to your Halloween festivities. Remember, cooking should always be fun! So tie on that apron and let your creativity shine. Let’s gather around the table and enjoy some spooky good eats!
PrintJack-o’-Lantern Quesadillas

These playful quesadillas are shaped like Jack-o’-lanterns and filled with gooey cheese, making them a perfect snack for Halloween festivities.
- Prep Time: 15 minutes
- Cook Time: 6 minutes
- Total Time: 21 minutes
- Yield: 2 servings
- Category: Appetizer
- Method: Pan-frying
- Cuisine: Mexican
- Diet: Vegetarian
Ingredients
- Tortillas (flour or corn)
- Cheddar Cheese (or Monterey Jack, pepper jack, or vegan cheese)
- Optional Add-Ins: beans, pre-cooked chicken, or veggies
Instructions
- Prep Your Space: Set up your cooking area with all necessary tools.
- Make the “Face”: Cut out fun Jack-o’-lantern faces from the tortillas.
- Heat the Pan: Warm a non-stick frying pan over medium heat.
- Assemble the Quesadilla: Fill one tortilla with cheese and optional add-ins.
- Fold and Cook: Fold the quesadilla in half and cook until golden brown.
- Flip and Finish: Cook the other side until crispy and golden.
- Cut and Serve: Slice into wedges and serve with dipping options.
Notes
Avoid overstuffing to prevent soggy tortillas. Keep finished quesadillas warm in a low oven if needed.
Nutrition
- Serving Size: 1 quesadilla
- Calories: 400
- Sugar: 2g
- Sodium: 350mg
- Fat: 15g
- Saturated Fat: 7g
- Unsaturated Fat: 5g
- Trans Fat: 0g
- Carbohydrates: 45g
- Fiber: 3g
- Protein: 12g
- Cholesterol: 35mg
Keywords: Halloween, Quesadillas, Jack-o'-Lantern, Fun Food, Kid-Friendly
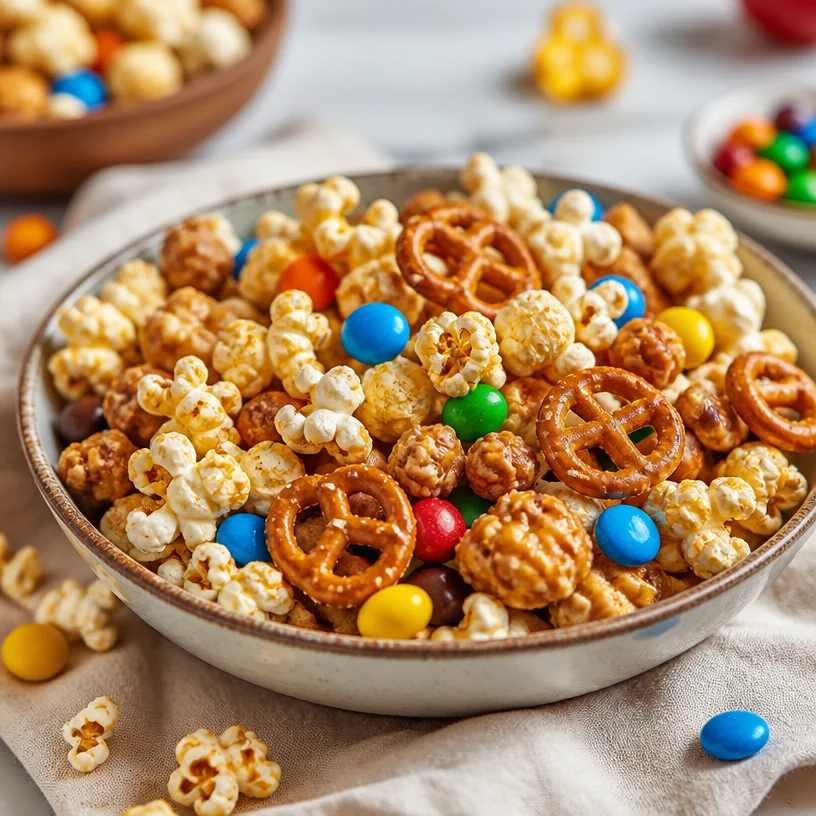
Ingredient Monster Trail Mix for Busy Weeknights
Unleashing Joy with Monster Trail Mix: A Perfect Snack for Any Occasion
Welcome to my cozy corner of the kitchen, where we’ll dive into something that every pantry should boast — a delicious, colorful, and utterly delightful creation known as Monster Trail Mix! 🎉 Whether you’re planning a lively movie night, a road trip, or just need a pick-me-up after a long day, this trail mix has got your back. It’s a celebration of textures and flavors, combining the crunch of pretzels, the fluffiness of popcorn, and the sweetness of candy into one unforgettable snack.
Let me tell you, making your own trail mix is not just about tossing some ingredients into a bowl. It’s a chance to express creativity! Picture yourself in the kitchen, sifting through your pantry, finding those treats that spark joy. Once you start mixing, you’ll find that the colors, flavors, and even the aromas create an inviting atmosphere that makes cooking an adventure.
One of the best parts about Monster Trail Mix is you can customize it to suit your cravings or seasonal themes! Maybe you want something extra festive for the holidays, or perhaps you’re looking for that perfect blend to fuel your hiking adventure. Trust me, once you’ve nailed down the basics, the variations are endless!
So grab your favorite mixing bowl, turn on some upbeat tunes, and let’s jump into the world of Monster Trail Mix. Your snack game is about to elevate!
A Little Kitchen Memory: My First Trail Mix Experience
I can still vividly remember the first time I made a version of Monster Trail Mix. I was in middle school, and my excitement for school parties was at an all-time high. The task was simple — bring a snack to share with classmates. I rummaged through our pantry and unearthed a plethora of treats: leftover popcorn from movie night, some pretzels that had been sitting dormant for far too long, and a colorful assortment of candy from Halloween. As I poured everything into a bowl, my heart raced with anticipation.
My mom walked by, raised an eyebrow, and asked, “What’s this?” I proudly declared it the “Monster Mix!” She laughed and helped me add some crushed nuts for good measure. The mixture was a hit at school, with everyone eagerly reaching for more. That moment ignited my passion for creating snacks that were not only delicious but also fostered connections. Each handful of trail mix became a bridge to shared laughter, friendship, and joy. And honestly, isn’t that what good food is about?
Ingredients for Your Monster Trail Mix
Here’s a simple yet fun list of ingredients to get you started on your own Monster Trail Mix. Feel free to consider these options as a jumping-off point!
- Pretzels: The salty crunch of pretzels adds great texture and balances out the sweetness of other ingredients. For a twist, use chocolate-covered pretzels or even flavor-infused varieties like sour cream and onion.
- Popcorn: Light and airy, popcorn is a fantastic vehicle for flavor. Use plain, kettle corn, or even cheesy popcorn for extra flair. Pro tip: Freshly popped popcorn is always a hit, but you can easily use the pre-packaged varieties for convenience.
- Candy: This is where the fun really happens! Use your favorite candies — chocolate M&Ms, gummy bears, Reese’s Pieces, or even fruit-flavored chews. Substituting with healthier options like yogurt-covered raisins or dried fruit can add a nutritious twist!
- Nuts (optional): For a protein boost and an extra crunch, throw in a handful of mixed nuts. Almonds, peanuts, or cashews all work wonderfully. For nut-free mixes, sunflower seeds are a solid alternative.
- Dried Fruit (optional): Add some chewy goodness with dried cranberries, apricots, or banana chips. They bring a lovely sweetness and can complement the salty flavors beautifully.
With these base ingredients, you’re primed for creativity!
Step-by-Step Instructions to Craft Your Monster Trail Mix
Let’s whip up this festive snack with ease and flair! Here’s how to do it:
-
Gather Your Ingredients: Set out your pretzels, popcorn, candy, nuts, and dried fruit. Having everything in front of you makes the process feel organized and exciting!
-
Pop Your Popcorn: If you’re using freshly popped popcorn, go ahead and pop it according to package instructions or your preferred method. I recommend air-popping for a healthier option, but if you love a buttery taste, make it your way! Allow the popcorn to cool slightly to avoid any melting issues when combining.
-
Mix the Base Ingredients: In a large mixing bowl, combine the pretzels and popcorn. Don’t worry about being precise; the charm lies in its rustic nature! Stir them together gently, so the pretzels don’t crumble — we want that delightful crunch!
-
Add Sweetness: This is where the fun begins! Start adding in the candy of your choice. I usually dump in a couple of generous handfuls, but adjust based on your sweet tooth. Remember, it’s all about balance! You might want to taste it as you go to find your ideal sweetness level.
-
Nuts and Dried Fruit: If you’ve chosen to include nuts and/or dried fruit, add them in now. The nuts provide protein and heartiness, while dried fruit offers a chewy counterpart to the crunchiness. So tasty!
-
Toss It All Together: Gently mix all the ingredients with your hands or a large spoon, ensuring an even distribution of all those delicious flavors. It’s a little messy, but hey, that’s half the fun!
-
Taste Test: Here comes the best part — grab a small handful and give it a taste! Adjust anything (like adding more candy) based on your preference. Feeling adventurous? Try drizzling a little melted chocolate over the top for an extra indulgence.
-
Storage: If you’re not devouring it all right away, store your newly made Monster Trail Mix in an airtight container. It can last a week or even longer if you’re mindful — although I doubt it’ll last that long!
Serving Suggestions
When it comes to serving your Monster Trail Mix, presentation can elevate the experience! You can fill small bags for easy snacking on the go or serve it in a charming bowl at a party. For an extra touch, use fun, colorful cups for guests to scoop their mix and enjoy while mingling.
Consider labeling the bowls if you have several mixes to showcase. This way, everyone can get a hint of what flavors await them!
Recipe Variations to Try
Here are a few fun variations to inspire your creativity:
-
Chocolate Lover’s Mix: Add dark chocolate chips, chocolate-covered pretzels, and chunks of a chocolate candy bar. Yum!
-
Tropical Twist: Use coconut flakes, dried mango, and macadamia nuts for a tropical vibe.
-
Trail Adventure: Snag classic trail mix ingredients like multigrain cereal, pumpkin seeds, and cinnamon-roasted almonds for a hearty, energy-boosting mix.
-
Savory Explosion: Swap candy for seasoned chickpeas, add cheese crisps, or use pretzel crisps for an exciting savory treat!
-
Nut-Free Delight: Focus entirely on pretzels, popcorn, chocolate candies, and dried fruits. Perfect for those who may have nut allergies!
Chef’s Notes
Over the years, I’ve come to cherish Monster Trail Mix as a go-to snack for any occasion. It’s perfect for kids’ birthday parties, road trips, or even cozy evenings on the couch with a good book!
One of my funniest memories revolves around an impromptu family gathering. I had made a gigantic batch of Monster Mix for my niece’s birthday party. Amidst the excitement, I accidentally spilled most of it across the floor! While I panicked initially, we all burst into laughter as we picked up the sweet, crunchy goodness, tossing it into the serving bowl. We ended up mingling around an impromptu snack, and that moment became one of our favorite family stories.
FAQs and Troubleshooting
-
Can I use microwave popcorn?
Absolutely! Microwave popcorn works great and is super convenient. Just be mindful of added flavors or butter, which can change the overall taste of your trail mix. -
How do I store the trail mix?
Keep your Monster Trail Mix in an airtight container at room temperature. It should stay fresh for a week or more, but I bet you won’t have any leftovers! -
What if it’s too sweet?
If you find your mix leaning heavily on the sweet side, consider balancing it out with more pretzels or some unsalted nuts. You could even sprinkle in some spices, like cinnamon or cayenne, for a delightful kick! -
How do I make it more nutritious?
Opt for dark chocolate, whole grain pretzels, and add more nuts or seeds! Dried fruits can also provide vitamins while keeping that sweet touch.
Nutritional Info
While I won’t go into too much detail on the nutrition side (because sometimes, we just want to indulge!), it’s worth mentioning that making your own trail mix allows you to control the ingredients—making it as healthy or indulgent as you desire.
Embrace the joy of snacking and get creative in your kitchen with this Monster Trail Mix! Remember, cooking should be fun and stress-free. So tie on your apron, pour a little something sparkling, and enjoy the delicious moments with friends and family around your table. Happy snacking! 🍿🥨🍬
PrintMonster Trail Mix

A delightful and customizable trail mix combining pretzels, popcorn, candy, and optional nuts and dried fruits, perfect for any occasion.
- Prep Time: 15 minutes
- Cook Time: 5 minutes
- Total Time: 20 minutes
- Yield: 6 servings
- Category: Snack
- Method: Mixing
- Cuisine: American
- Diet: Vegetarian
Ingredients
- Pretzels
- Popcorn
- Candy (e.g., chocolate M&Ms, gummy bears)
- Nuts (optional)
- Dried fruit (optional)
Instructions
- Gather your ingredients: Set out your pretzels, popcorn, candy, nuts, and dried fruit.
- Pop your popcorn according to package instructions or your preferred method.
- Mix the base ingredients in a large bowl, combining pretzels and popcorn gently.
- Add the candy of your choice, adjusting based on your sweet tooth.
- Add nuts and/or dried fruit if desired.
- Toss all ingredients together gently for even distribution.
- Taste test and adjust sweetness if necessary.
- Store in an airtight container if not consuming immediately.
Notes
Customize your trail mix with different ingredients and flavors based on your preference.
Nutrition
- Serving Size: 1 serving
- Calories: 250
- Sugar: 15g
- Sodium: 150mg
- Fat: 10g
- Saturated Fat: 1g
- Unsaturated Fat: 8g
- Trans Fat: 0g
- Carbohydrates: 35g
- Fiber: 2g
- Protein: 5g
- Cholesterol: 0mg
Keywords: trail mix, snack, healthy recipes, customizable snacks
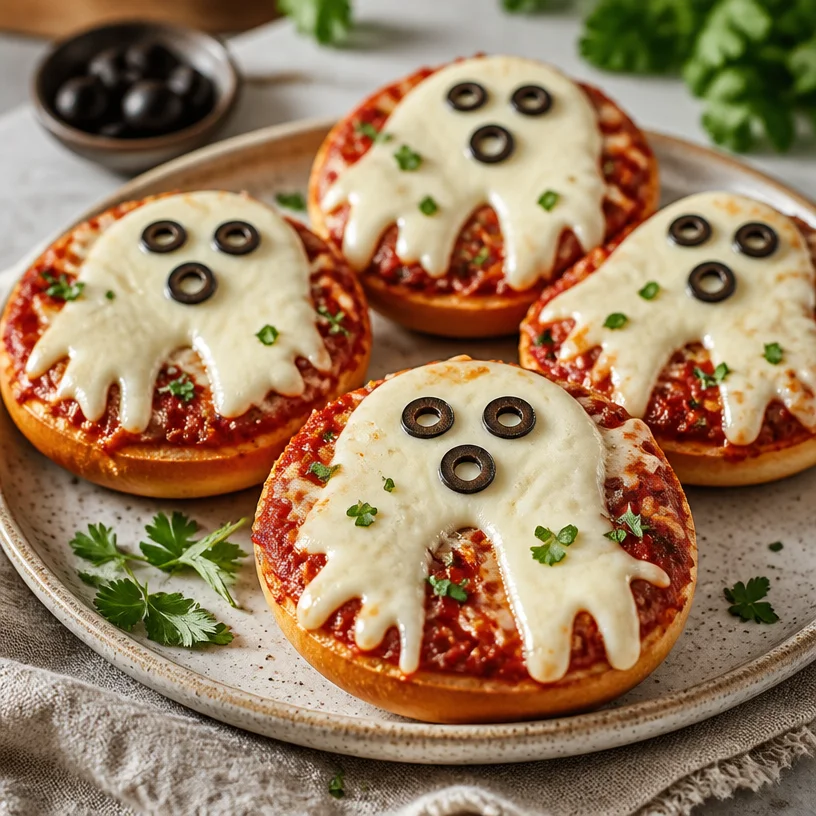
Minute Ghost Pizza Bagels: Quick Spooky Weeknight Meal
Ghost Pizza Bagels: A Spooktacular Treat for Every Occasion
Welcome to the ultimate pizza adventure, my dear foodie friends! Today, we’re diving into a fun, easy, and oh-so-delicious recipe that will summon the ghostly vibes of Halloween while being perfect for any time of year: Ghost Pizza Bagels! Whether you’re hosting a gathering, enjoying a cozy night in, or simply looking for a playful treat that brings a smile, these whimsical bagels will have everyone asking for seconds. So grab your apron and let’s unleash some culinary magic!
A Nostalgic Tale of Ghost Pizza Bagels
I’ll never forget my first spooky season after college when I decided to throw a Halloween party. I wanted to impress my guests but also keep things simple. One evening, while rummaging through my kitchen, I had an idea: why not make pizza bagels with a haunting twist? Armed with a bag of bagels, some pizza sauce, and my love for creativity, I turned ordinary pizza bagels into spooky delights by adding ghostly cheese shapes and olive “eyes.”
The laughter and joy that filled the room as my friends took their first bites were priceless. Every ghost pizza bagel brought back a wave of nostalgia, reminding me of family pizza nights in my childhood. The simplicity of putting them together allowed for laughter and light-hearted banter—my favorite part of any cooking experience! It reminded me that food is not just about nourishment; it’s about connection. And let me tell you, while these delightfully spooky bagels looked great, they tasted even better!
Ingredients
Before we conjure up these ghostly delights, here’s what you need:
-
Bagels
These are your canvas! Whether you go for plain, garlic, or everything bagels, they all work beautifully. If you want a gluten-free option, there are great gluten-free bagels available that will hold up just as nicely. -
Pizza Sauce
Use your favorite pizza sauce, whether store-bought or homemade! Feel free to substitute with marinara or even a creamy alfredo sauce if you’re feeling adventurous. It all depends on what flavors you want to play with. -
Mozzarella Cheese
Fresh mozzarella is fantastic if you want that ooey-gooey texture. Shredded mozzarella is quicker and easier for melting! For a vegan alternative, try almond or cashew cheese—a delicious creamy substitute. -
Olives
Black olives are perfect for those little eyes, but you can also experiment with green olives or even cherry tomatoes for a splash of color. Just slice them up creatively to make sure they look spooktacular on your bagels!
Step-by-Step Instructions
Now, let’s get into the fun part—cooking! Follow these steps to create your ghost pizza bagels:
-
Preheat the Oven
Start by preheating your oven to 375°F (190°C). This step is crucial! A properly preheated oven ensures even cooking and that delightful golden crust. -
Prep Your Bagels
Take your bagels and slice them in half horizontally. Lay them cut-side up on a baking sheet lined with parchment paper. Baking them on parchment makes for an easy clean-up and prevents sticking—who doesn’t love that? -
Spread the Pizza Sauce
Grab a spoon and generously spread pizza sauce over each bagel half. Use as much or as little as you like. If you have kids helping, let them dab on the sauce! -
Add the Mozzarella
Here’s where the fun begins! Sprinkle a generous amount of mozzarella cheese over the saucy bagels. You can layer it on thick for that gooey pizza effect. If you’re feeling creative, use a cookie cutter to shape the mozzarella into ghostly silhouettes! -
Create the Ghostly Features
Now, take your olives and slice them into small circles for the "eyes." Place a slice or two on each ghostly pizza bagel. Feel free to get imaginative—how about some peppers as well for the mouths? -
Bake to Perfection
Pop the baking sheet into your preheated oven and bake for about 12-15 minutes, or until the cheese is wonderfully melted and the edges of the bagels are golden. Keep an eye on them—oven times may vary! -
Cool and Serve
Once baked, let them cool for a couple of minutes. I know it’s hard to wait, but trust me, your mouth will thank you later when you aren’t burning your tongue!
Serving Suggestions
When it comes to presentation, keep it playful. I love to serve my ghost pizza bagels on a black platter to channel spooky vibes. Scatter some decorative plastic spiders for a lively touch, or serve them on parchment paper for a rustic feel. If you have it, a sprinkle of fresh basil can add a lovely pop of color. Feel free to get creative with the arrangement—make it a mini ghost pizza bagel platter for everyone to enjoy!
Recipe Variations
Want to switch things up? Here are some creative twists for your ghost pizza bagels:
-
Spicy Ghosts
Add some sliced jalapeños or pepperoncini for a spicy kick—perfect for those who love a little heat! -
Herb-Infused
Mix in some fresh herbs like basil or oregano into the pizza sauce for extra flavor. -
Mini-Bagels
Use mini bagels for bite-sized versions—great for parties where guests can try more than one! -
Fun Shapes
Instead of ghost shapes, try using cookie cutters to create other Halloween shapes like bats or pumpkins! -
Veggie Lovers’ Ghosts
Top with assorted vegetables like bell peppers, mushrooms, or spinach for a nutritious twist.
Chef’s Notes
As with all great recipes, this one has evolved over the years. Initially, they were just simple pizza bagels, but every Halloween rolled around, I added new twists based on what I had on hand or whatever caught my eye at the store. One memorable year, I even attempted to make a “frankenstein” version using green food coloring and green olives for eyes! It was a hit with the kids (and a huge mess!).
Never be afraid to experiment in the kitchen! It’s through creativity that flavor profiles expand, and beautiful moments at the table are created.
FAQs and Troubleshooting
Q: Can I use different kinds of bagels?
Absolutely! Feel free to use whatever flavor bagels you love—everything bagels add a delightful crunch of flavor!
Q: How do I store leftovers?
These bagels are best enjoyed fresh, but if you have leftovers, store them in an airtight container in the fridge for up to three days. Reheat them in the oven for a few minutes to bring back that melty goodness.
Q: What if my cheese doesn’t melt well?
If your cheese isn’t melting as you desire, try placing the bagels under the broiler for a couple of minutes at the end of baking. Just watch them closely to avoid burning!
Q: Can I make these ahead of time?
You can pre-prep the bagels and keep them covered in the fridge for a few hours before baking. Just add a few extra minutes to the baking time if they’re cold out of the fridge.
Nutritional Info
While I don’t have specific nutritional information prepared, these ghost pizza bagels are definitely a fun treat! To make them healthier, consider using whole-grain bagels, low-fat cheese, and load them up with veggies.
There you have it! Ghost Pizza Bagels that will surely impress anyone at your table while bringing joyous memories of spooky celebrations. So gather your fellow foodies, tie on your apron, and let’s make some new kitchen stories together! Happy cooking!
PrintGhost Pizza Bagels

A playful twist on traditional pizza bagels, perfect for Halloween or any occasion.
- Prep Time: 10 minutes
- Cook Time: 15 minutes
- Total Time: 25 minutes
- Yield: 4 servings
- Category: Snack
- Method: Baking
- Cuisine: American
- Diet: Vegetarian
Ingredients
- Bagels (plain, garlic, or everything)
- Pizza Sauce (store-bought or homemade)
- Mozzarella Cheese (fresh or shredded)
- Olives (black or green for decoration)
Instructions
- Preheat your oven to 375°F (190°C).
- Slice the bagels in half horizontally and lay them cut-side up on a lined baking sheet.
- Spread pizza sauce over each bagel half.
- Sprinkle a generous amount of mozzarella cheese over the saucy bagels.
- Create ghostly features by slicing olives for eyes and placing them on the bagels.
- Bake for about 12-15 minutes, or until the cheese is melted and edges are golden.
- Cool for a couple of minutes before serving.
Notes
For variations, try mini bagels, add jalapeños for spice, or mix in fresh herbs into the sauce.
Nutrition
- Serving Size: 1 bagel half
- Calories: 250
- Sugar: 3g
- Sodium: 350mg
- Fat: 9g
- Saturated Fat: 4g
- Unsaturated Fat: 4g
- Trans Fat: 0g
- Carbohydrates: 30g
- Fiber: 2g
- Protein: 10g
- Cholesterol: 20mg
Keywords: pizza, bagels, halloween, snacks, easy recipes

Bang Bang Chicken Skewers: 15-Minute Weeknight Dinner
Bang Bang Chicken Skewers: A Flavorful Adventure
Hello, fellow foodies! Are you ready to embark on a delicious journey with me? Today, we’re making Bang Bang Chicken Skewers! Imagine succulent chicken pieces, tender and juicy, smothered in a creamy, spicy sauce that has that perfect balance of sweetness and heat. It’s a dish that’s not only bursting with flavor but is also incredibly fun to make and share. Whether you’re hosting friends, having a family dinner, or just want to enjoy a tasty treat, these skewers are sure to elevate your meal.
Cooking has always been a way for me to express love and creativity, and Bang Bang Chicken Skewers hold a special place in my heart. I remember the first time I made these for a small gathering at my home. The sun was setting, and I had set up my patio with twinkling lights, creating a perfect ambiance. As I grilled the chicken skewers, the fragrance danced in the air, drawing my friends closer, and as we savored our first bite, smiles lit up their faces. The combination of flavors was an instant hit! It was one of those moments where I truly felt the magic of cooking – it brought people together around great food.
With that in mind, let’s dive into this recipe and bring some of that magic to your table!
Ingredients
Here’s what you’ll need for your Bang Bang Chicken Skewers:
-
1 pound chicken breast, cubed
- The star of the dish! Chicken breast is lean and cooks quickly, making it perfect for skewers. If you prefer a more tender option, you can also use chicken thighs for extra juiciness.
-
1 tablespoon olive oil
- Perfect for seasoning and keeping the chicken moist while cooking. Feel free to swap it for vegetable or canola oil if that’s what you have on hand.
-
1/4 teaspoon salt
- Essential for balancing flavors; it enhances the chicken’s natural taste. You could also use garlic salt for an extra punch.
-
1/4 teaspoon black pepper
- A must-have for seasoning; it adds a nice warmth. Want a kick? Consider adding some red pepper flakes!
-
1/2 cup mayonnaise
- This creamy base brings richness to our sauce. If you’re looking for a lighter option, try Greek yogurt as a healthier substitute.
-
2 tablespoons sweet chili sauce
- The sweet-and-spicy element. It adds a lovely glaze as well! If you want it spicier, use extra sriracha in its place.
-
1 tablespoon sriracha
- This fiery ingredient gives the dish its signature zing! Adjust according to your heat preference.
-
1 tablespoon lime juice
- Fresh lime juice brightens up the flavors. In a pinch, lemon juice could work nicely.
-
Skewers
- Wooden or metal, either will do! If using wooden skewers, remember to soak them in water for about 30 minutes to prevent burning.
Step-by-Step Instructions
Step 1: Prepare the Chicken
Start by washing and patting dry your chicken breasts. Once they’re nice and dry, cube them into bite-sized pieces, about 1 to 1.5 inches. This size ensures they cook evenly. While you’re chopping, feel free to share any kitchen stories or misadventures with friends (it makes the cooking process more enjoyable)!
Step 2: Marinate
In a bowl, combine the cubed chicken with olive oil, salt, and black pepper. Mix well to ensure every piece is coated. Marinating the chicken enhances the flavor and tenderness. Let it sit for at least 15 minutes; however, if you have time, longer marination is better!
Step 3: Prepare the Sauce
In another bowl, it’s sauce time! Whisk together mayonnaise, sweet chili sauce, sriracha, and lime juice until smooth and creamy. Taste it along the way; adjust the sweet or spicy level based on your preference. This sauce is where the magic happens—creamy, spicy, and perfectly tangy!
Step 4: Skewering Time
Now that your chicken is marinated and your sauce is ready, it’s time to thread the chicken onto the skewers. Using metal skewers? Just slide the cubes on! Prefer wooden skewers? Make sure they’ve been soaked. Leave a little space between each piece for even cooking. If you want to have fun with it, add bell peppers or zucchini between the chicken pieces!
Step 5: Grill or Bake
Heat your grill to medium-high or preheat your oven to 400°F (200°C). If you’re using an outdoor grill, aim for that beautiful char; it adds incredible flavor! Place the skewers on the grill or a baking sheet if you’re oven-baking. Cook for about 10-12 minutes, turning halfway through. You’ll know they’re done when the chicken is cooked through and opaque.
Step 6: Sauce it Up!
Once the chicken skewers are done, remove them from the heat. Drizzle or brush those beautiful skewers with the remaining Bang Bang sauce. Give them a moment to soak up that flavor, and watch your friends’ eyes widen with anticipation when they see the scrumptious presentation!
Serving Suggestions
Plate your Bang Bang Chicken Skewers with a sprinkle of fresh herbs like cilantro or green onions for added freshness. These skewers pair beautifully with jasmine rice or a crunchy slaw to balance the richness of the sauce. Don’t forget a wedge of lime on the side to squeeze on top for that extra zing!
Recipe Variations
Want to mix things up? Here are some creative twists to try:
- Add Veggies: Alternate with cherry tomatoes, bell peppers, or red onions on the skewers for extra color and nutrients.
- Switch Proteins: Try shrimp or tofu for a delightfully different take!
- Change the Heat: Use a different hot sauce for variety—try chipotle or chili garlic sauce!
- Sweeten the Deal: Add a drizzle of honey to your sauce for extra sweetness.
- Make It Smooth: Blend the sauce until smooth for a luxurious feel instead of leaving it creamy.
Chef’s Notes
When I first developed this recipe, I was living in a cozy apartment with limited space. Balancing a frying pan on my tiny stovetop while dodging the cat at my feet made for quite the amusing evening! Over the years, I’ve honed this recipe, always excited to share it with friends. Every time I make it, I’m reminded of how food can transform any gathering into a memorable event. I encourage you to unleash your creativity and make this dish your own!
FAQs and Troubleshooting
1. My chicken skewers are dry. What went wrong?
Dry chicken can often be traced back to cooking too long or using overly lean cuts. Always check for doneness with a meat thermometer—165°F (75°C) is your friend here!
2. How can I prepare these skewers ahead of time?
You can marinate the chicken the night before and store it in the fridge. Assemble and cook them when you’re ready to serve!
3. What do I do if my skewers burn?
If you’re grilling over direct heat, starting too high can cause burning. Try moving them to a cooler part of the grill or turning down the heat.
4. Can I bake them instead of grilling?
Absolutely! Baking is a great alternative. Place them on a lined baking sheet and roast them in a preheated oven at 400°F (200°C) until cooked through, about 12-15 minutes.
Nutritional Info (optional)
Per serving (based on skewers made with chicken breast):
- Calories: ~275
- Protein: ~30g
- Carbohydrates: ~5g
- Fat: ~15g
Now, grab your apron, fire up that grill, and get ready for a flavor explosion! Whether it’s a casual weeknight dinner or a gathering with friends, these Bang Bang Chicken Skewers are sure to impress. Happy cooking, and let’s continue to create beautiful memories around the table!
PrintBang Bang Chicken Skewers

Succulent chicken skewers smothered in a creamy, spicy sauce that balances sweetness and heat.
- Prep Time: 15 minutes
- Cook Time: 12 minutes
- Total Time: 27 minutes
- Yield: 4 servings 1x
- Category: Main Course
- Method: Grilling
- Cuisine: Asian
- Diet: Gluten-Free
Ingredients
- 1 pound chicken breast, cubed
- 1 tablespoon olive oil
- 1/4 teaspoon salt
- 1/4 teaspoon black pepper
- 1/2 cup mayonnaise
- 2 tablespoons sweet chili sauce
- 1 tablespoon sriracha
- 1 tablespoon lime juice
- Skewers
Instructions
- Prepare the Chicken: Start by washing and patting dry your chicken breasts. Cube them into bite-sized pieces, about 1 to 1.5 inches.
- Marinate: In a bowl, combine the cubed chicken with olive oil, salt, and black pepper. Mix well and let it sit for at least 15 minutes.
- Prepare the Sauce: In another bowl, whisk together mayonnaise, sweet chili sauce, sriracha, and lime juice until smooth.
- Skewering Time: Thread the marinated chicken onto the skewers, leaving a little space between each piece.
- Grill or Bake: Heat your grill to medium-high or preheat your oven to 400°F (200°C). Cook for about 10-12 minutes, turning halfway through.
- Sauce it Up!: Once done, remove the skewers from heat and brush with the remaining sauce, allowing it to soak in.
Notes
Serve with a sprinkle of fresh herbs and a wedge of lime for an extra zing.
Nutrition
- Serving Size: 1 skewer
- Calories: 275
- Sugar: 5g
- Sodium: 400mg
- Fat: 15g
- Saturated Fat: 2g
- Unsaturated Fat: 10g
- Trans Fat: 0g
- Carbohydrates: 6g
- Fiber: 0g
- Protein: 30g
- Cholesterol: 70mg
Keywords: Bang Bang Chicken, Chicken Skewers, Grilled Chicken, Spicy Chicken Recipe, Easy Dinner

Ingredient Sausage French Toast Roll-Ups for Busy Mornings
Indulge in Breakfast Bliss: Sausage French Toast Roll-Ups
Hello, lovely foodies! Today, I am absolutely thrilled to share a dish that combines comfort, nostalgia, and a delightful twist on two breakfast classics. Say hello to Sausage French Toast Roll-Ups! Imagine crispy sausage wrapped in fluffy, sweet French toast, dipped in syrup, and devoured hot. This recipe embraces everything we love about breakfast while adding a playful touch that’ll make everyone at your table smile. Ready to dive in? Let’s get started!
A Morning to Remember
I’ll never forget the morning I first made this dish for my closest friends during a cozy brunch gathering. The sun was streaming through the windows, and we were savoring our morning coffee when I decided to shake things up a bit. With leftover sausage and some soft bread sitting in the pantry, inspiration struck! Before I knew it, my kitchen was bustling, laughter filled the air, and the aroma of sizzling butter mingled with cinnamon and sweetness — a perfect recipe for great memories.
As I rolled out the French toast and filled it with sausage, I couldn’t help but feel that I was creating something more than just dish; I was crafting a delightful experience. My friends were enchanted, and I instantly knew I had stumbled upon something special. From that day forward, this recipe became a staple in my brunch rotation, and every time I serve it, it’s like hosting a little morning celebration.
Ingredients
Let’s gather our ingredients! Here’s what you’ll need to whip up these divine Sausage French Toast Roll-Ups:
- 6 sausage links: Opt for your favorite type — breakfast sausage, spicy sausage, or even turkey sausage for a leaner option. You can also swap in plant-based sausage for a vegetarian twist!
- 6 slices of soft bread: White bread, brioche, or challah are perfect for this recipe. If gluten-free is your jam, feel free to use gluten-free bread too!
- 3 eggs: Eggs give our French toast that lovely, custardy texture. You can also use flax eggs (1 tablespoon of ground flaxseed mixed with 3 tablespoons of water) as a vegan alternative.
- 1/2 cup milk: Whole milk will make it creamy, but feel free to substitute almond milk, oat milk, or any nut milk for a dairy-free option.
- 1 teaspoon vanilla extract: This adds a warm, comforting flavor that elevates the dish. Use the real deal for the best taste, but if you’re in a pinch, imitation vanilla will do.
- 1 teaspoon cinnamon: A must for that true French toast flavor! You can swap it out with pumpkin pie spice for a seasonal twist.
- Butter (for frying): The key to that beautiful golden crust! Coconut oil or any neutral oil can work if you’re looking for a dairy-free option.
- Maple syrup (for serving): A drizzle on top is a must! You can also try honey or agave nectar if that’s more your style.
Step-by-Step Instructions
Alright, let’s get cooking! Here’s how to make these irresistible roll-ups:
-
Cook the Sausage: Start by cooking the sausage links in a skillet over medium heat until they’re browned and cooked through. This usually takes about 8-10 minutes. Once they’re done, remove them from the skillet and let them cool slightly. Pro tip: You can bake the sausages in the oven at 400°F (200°C) for an easier hands-off approach!
-
Prepare the Bread: While the sausages are cooling, trim the crusts off the bread slices. This step is key, as it allows the bread to roll more easily. If you’re feeling adventurous, try using a mix of different breads! Once the crusts are off, gently flatten each slice using a rolling pin. This gives us the perfect canvas for our roll-ups.
-
Make the Custard Mixture: In a shallow bowl, whisk together the eggs, milk, vanilla extract, and cinnamon. Ensure everything is well-combined. This mixture will soak into our bread and add that dreamy flavor.
-
Roll It Up: Take one slice of the flattened bread, place one cooked sausage link at the edge, and roll it up tightly. Pinch the ends to seal and keep the filling inside. Repeat with the remaining slices and sausage links.
-
Heat the Skillet: Add a generous pat of butter to the same skillet over medium heat. If you’re feeling like a true chef, sprinkle some cinnamon in the butter to create a fragrant base!
-
Dip & Fry: Dip each roll-up into the custard mixture, making sure to coat all sides. Place them seam-side down in the skillet. Cook for about 2-3 minutes per side or until golden brown and crispy. Don’t rush this step; patience will give you that gorgeous crust!
-
Serve with Love: Once they’re done, remove them from the skillet and let them rest on a paper towel to soak up any excess butter. Serve warm with a drizzle of maple syrup — the crowning glory of this dish!
Serving Suggestions
When it comes to presentation, I love to serve these roll-ups arranged on a beautiful platter, drizzled with maple syrup, and garnished with fresh berries or a sprinkle of powdered sugar. It’s all about creating that enticing look that makes everyone want to dig in right away! If you want to amp up the experience, add a side of fresh fruit or yogurt to balance the richness.
Recipe Variations
Ready to get creative? Here are a few ideas to switch things up with your Sausage French Toast Roll-Ups:
- Sweet Potato Surprise: Mash some cooked sweet potato into the custard mixture for a deliciously sweet twist.
- Add Cheese: Place a slice of cheese inside the roll-up before adding the sausage. Melty cheese will take these to a whole new level!
- Berry Bliss: Add fresh berries or chocolate chips to the bread before rolling for added sweetness and flavor.
- Savory Spin: Use seasoned sausage patties, and swap in herbs like fresh thyme or chives in the custard mixture. You’ll create a unique breakfast experience!
Chef’s Notes
These roll-ups have quickly become a crowd favorite in my home, and they’ve undergone a few transformations over the years. Originally, I made them as a quick fix for breakfast, but today they hold a special place in my heart as a brunch mainstay. The joy of watching friends and family indulge in these delightful bites never gets old!
Oh, and here’s a fun kitchen story: One time, I accidentally combined breakfast sausage with chorizo, thinking I’d enhance the flavor. What a surprise it was when everyone around the table perked up at the unexpected heat! Sometimes kitchen mistakes lead to the best discoveries!
FAQs and Troubleshooting
1. What can I do if my roll-ups unravel while cooking?
If your roll-ups aren’t holding together, ensure you’ve pinched the ends well, and consider securing them with a toothpick before frying.
2. Can I make the roll-ups in advance?
Absolutely! You can prepare the roll-ups ahead of time and refrigerate them. Just add a few minutes to the cooking time if you’re frying them cold.
3. How can I make these more kid-friendly?
Try using sweet or mild sausages and let your kids dip the roll-ups into their favorite sauces or toppings—even fruit preserves for a fun twist!
4. What if I don’t have eggs?
For an egg-free version, you can use aquafaba (the liquid from canned chickpeas). About 3 tablespoons of aquafaba can replace one egg in the custard mixture.
Nutritional Info
While keeping comfort food in mind, here’s a quick breakdown (approx. per serving):
- Calories: 320
- Protein: 15g
- Carbohydrates: 36g
- Fat: 15g
- Fiber: 1g
This recipe is delicious but watch out for the syrup! It’s best enjoyed occasionally for a special treat.
And there you have it, dear friends—a cozy recipe for Sausage French Toast Roll-Ups that’s sure to become a beloved staple in your kitchen! I hope you enjoy making these as much as I do. Remember, cooking is about creating connections and sharing joy, so gather your loved ones, tie on your apron, and let’s make some unforgettable breakfasts together! Happy Cooking!
PrintSausage French Toast Roll-Ups

Indulge in crispy sausage wrapped in fluffy, sweet French toast, dipped in syrup, and devoured hot. A delightful twist on two breakfast classics!
- Prep Time: 15 minutes
- Cook Time: 20 minutes
- Total Time: 35 minutes
- Yield: 4 servings 1x
- Category: Breakfast
- Method: Frying
- Cuisine: American
- Diet: Omnivore
Ingredients
- 6 sausage links (breakfast, spicy, or turkey sausage)
- 6 slices of soft bread (white, brioche, challah, or gluten-free)
- 3 eggs (or flax eggs for a vegan alternative)
- 1/2 cup milk (whole, almond, oat, or nut milk)
- 1 teaspoon vanilla extract
- 1 teaspoon cinnamon
- Butter (for frying)
- Maple syrup (for serving)
Instructions
- Cook the sausage: Cook the sausage links in a skillet over medium heat until browned and cooked through, about 8-10 minutes. Let cool slightly.
- Prepare the bread: Trim the crusts off the bread slices and flatten them with a rolling pin.
- Make the custard mixture: Whisk together the eggs, milk, vanilla extract, and cinnamon in a shallow bowl.
- Roll it up: Place a sausage link at the edge of a bread slice and roll tightly, pinching the ends to seal.
- Heat the skillet: Melt butter in the skillet over medium heat, optionally adding cinnamon.
- Dip & Fry: Dip each roll-up into the custard mixture, coating all sides, and cook seam-side down for 2-3 minutes per side until golden brown.
- Serve with love: Let them rest on paper towels and serve warm with maple syrup.
Notes
Feel free to get creative with fillings and serve with fresh berries.
Nutrition
- Serving Size: 1 roll-up
- Calories: 320
- Sugar: 10g
- Sodium: 500mg
- Fat: 15g
- Saturated Fat: 6g
- Unsaturated Fat: 7g
- Trans Fat: 0g
- Carbohydrates: 36g
- Fiber: 1g
- Protein: 15g
- Cholesterol: 120mg
Keywords: Sausage, French Toast, Breakfast, Brunch, Comfort Food
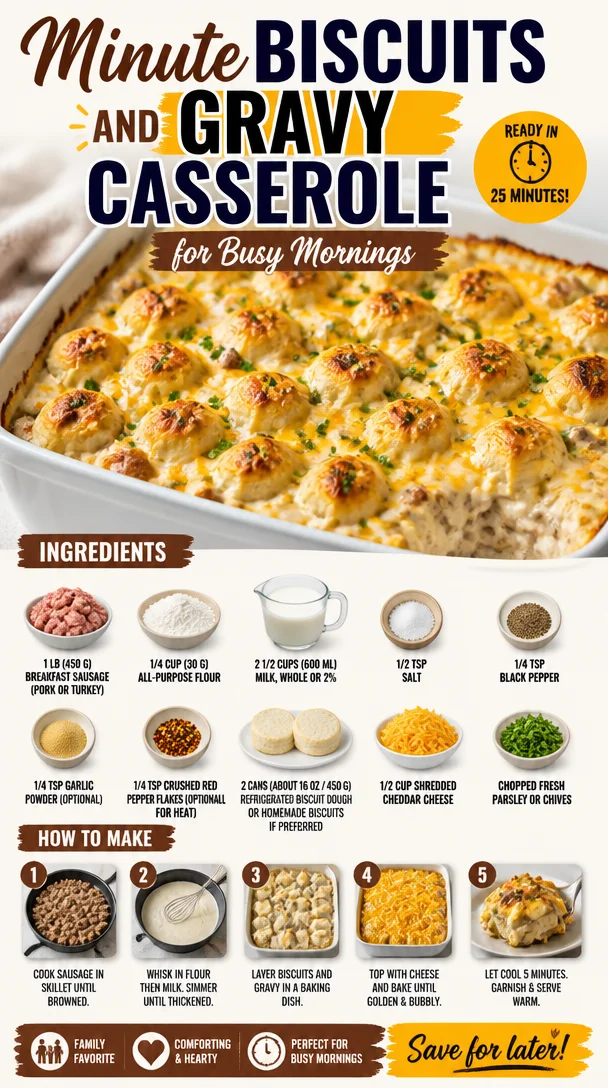
Minute Biscuits and Gravy Casserole for Busy Mornings
Biscuits and Gravy Casserole: The Ultimate Comfort Food
Hello, food lovers! If you’re looking for a hearty dish that encapsulates the warmth and comfort of home-cooked meals, you just hit the jackpot. Today, we’re diving into a delightful Biscuits and Gravy Casserole. Imagine soft, flaky biscuits drenched in creamy, savory sausage gravy—it’s like a warm hug on a plate! Perfect for brunch, family gatherings, or even a cozy weeknight dinner, this dish is sure to please everyone around your table. So, roll up your sleeves, tie on your apron, and let’s get started on this delicious journey!
A Heartwarming Memory
When I think of biscuits and gravy, memories of lazy Sunday mornings flood my mind. I remember gathering around the kitchen table with my family, the smell of freshly baked biscuits wafting through the air. My grandmother would be bustling around the kitchen, her laughter mingling with the sizzle of sausage on the stovetop. She had a knack for making everything feel special, and her biscuits were always the star of the show. I still can’t replicate that perfect flaky texture, but I’ve made it my mission to create dishes inspired by those cozy mornings we shared. This casserole captures that essence, combining the comforting elements of biscuits and gravy into a generous, shareable dish that’s just as warm and inviting as those Sunday breakfasts.
Ingredients
Here’s what you’ll need to whip up this Biscuits and Gravy Casserole:
-
1 lb (450 g) breakfast sausage (pork or turkey)
Use your favorite brand, or try a local butcher for a homemade experience! For a lighter option, turkey sausage works beautifully as a substitute. -
1/4 cup (30 g) all-purpose flour
This is the secret to thickening your gravy and giving it that luscious texture. If you’re gluten-free, a 1:1 gluten-free flour blend can do the trick! -
2 1/2 cups (600 ml) milk, whole or 2%
Whole milk adds richness, but 2% works just fine. For a dairy-free option, almond or oat milk can be good substitutes. -
1/2 tsp salt
Essential for enhancing flavors! Adjust as needed based on your sausage, as some brands can be saltier than others. -
1/4 tsp black pepper
Gives a nice subtle kick. If you’re a fan of spice, feel free to add more! -
1/4 tsp garlic powder (optional)
Garlic powder adds depth and flavor. Fresh garlic can substitute if you prefer! -
1/4 tsp crushed red pepper flakes (optional for heat)
Just a pinch can elevate your dish! Adjust based on your spice tolerance. -
2 cans (about 16 oz / 450 g) refrigerated biscuit dough
Store-bought biscuits are quick and convenient. If you’re feeling adventurous, homemade biscuits can take this casserole to the next level. -
1/2 cup shredded cheddar cheese
Cheddar cheese adds creaminess and flavor. Try pepper jack for a little extra kick, or a blend of your favorites! -
Chopped fresh parsley or chives
A sprinkle on top not only adds color but freshens the dish!
Step-by-Step Instructions
-
Preheat Your Oven
Begin by preheating your oven to 350°F (175°C). It’s essential to start with a hot oven for that perfect bake. -
Cook the Sausage
In a large skillet, heat the breakfast sausage over medium heat. Break it up with a spoon and cook until it’s browned and cooked through, about 5-7 minutes. Don’t forget to savor that amazing aroma! For a twist, consider adding diced onions or bell peppers to the sausage as it cooks. -
Make the Gravy
Once your sausage is beautifully browned, sprinkle in the flour directly into the skillet. Stir it for about a minute to cook out that raw flour taste. Gradually whisk in the milk, ensuring no lumps form. Bring the mixture to a simmer. Season with salt, pepper, garlic powder, and crushed red pepper flakes. Let it bubble for a few minutes until it thickens – this is your silky gravy! -
Prepare the Biscuits
While your gravy simmers, prepare the biscuit dough. If you’re using canned biscuits, simply cut each biscuit into quarters. Feel free to bake homemade biscuits concurrently if time permits! -
Combine in a Casserole Dish
Lightly grease a 9×13 inch casserole dish (or whatever you have on hand). Spread half of the biscuit pieces evenly on the bottom of the dish. Pour half of the savory sausage gravy over the biscuits, then layer the remaining biscuits and top with the rest of the gravy. -
Add Cheese
Sprinkle the shredded cheddar cheese liberally on top of the dish. Trust me; it’ll melt into gooey deliciousness! -
Bake
Pop your casserole in the preheated oven and bake for 25-30 minutes, or until it’s hot, bubbly, and the biscuits are cooked through. You want that golden brown color on top—almost as irresistible as it smells. -
Garnish and Serve
Once your gorgeous casserole is out of the oven, finish with a sprinkle of freshly chopped parsley or chives for that delightful pop of color and flavor.
Serving Suggestions
To serve this comforting dish, scoop generous portions into bowls or onto plates. For an extra special touch, accompany it with fresh fruit or a light garden salad to balance the richness of the casserole. A side of orange juice or your favorite morning beverage completes the experience beautifully!
Recipe Variations
Feeling adventurous? Here are a few delicious twists you can try:
-
Spicy Sausage: Use spicy breakfast sausage for an extra kick.
-
Veggie Delight: Add sautéed mushrooms, spinach, or bell peppers to the sausage for a veggie-rich casserole.
-
Cheese Galore: Mix different cheeses like Monterey Jack or Gouda for a layered flavor experience.
-
Herb Infusion: Try adding fresh rosemary or thyme into the gravy for a fragrant touch.
-
Gluten-Free: Substitute the all-purpose flour with a gluten-free flour mix and use gluten-free biscuit dough.
Chef’s Notes
This Biscuits and Gravy Casserole has evolved with each stirring and tasting session in my kitchen. I’ve played with different sausage types, milks, and cheese combinations, but at its core, it remains an ode to those cherished family breakfasts. One fun thing I’ve learned along the way? Always save a little bit of gravy to drizzle on top just before serving! Your guests will appreciate that extra flavor—trust me.
FAQs and Troubleshooting
1. My casserole turned out dry. What went wrong?
If your casserole results are dry, it may be due to overbaking or insufficient gravy. Ensure you’re using enough milk, and keep an eye on your baking time.
2. Can I make this dish ahead of time?
Absolutely! Assemble it the night before, cover it tightly, and refrigerate. Bake it in the morning, and you’ll have a delicious breakfast ready to go!
3. Can I freeze leftovers?
Yes, you can freeze portions of the casserole. Once cooled, cover it tightly and store it in the freezer for up to three months. Just remember to reheat thoroughly!
4. What can I serve with this casserole?
Pair it with a fresh fruit salad or a light green salad for a well-rounded meal. A side of freshly brewed coffee or mimosas is perfect for brunch!
Nutritional Info (Optional)
Per Serving (Based on 8 servings):
- Calories: 450
- Protein: 20g
- Carbohydrates: 30g
- Fat: 30g
- Fiber: 1g
- Sugars: 2g
There you have it! A Biscuits and Gravy Casserole that’s not only packed with flavor but also sprinkled with memories. I can’t wait for you to give this recipe a try. It’s all about creating those special moments around your table. So let your culinary creativity shine, and enjoy every bite! Happy cooking!
PrintBiscuits and Gravy Casserole

A hearty Biscuits and Gravy Casserole that combines soft, flaky biscuits with creamy, savory sausage gravy, perfect for brunch or family gatherings.
- Prep Time: 15 minutes
- Cook Time: 30 minutes
- Total Time: 45 minutes
- Yield: 8 servings 1x
- Category: Main Course
- Method: Baking
- Cuisine: American
- Diet: None
Ingredients
- 1 lb (450 g) breakfast sausage (pork or turkey)
- 1/4 cup (30 g) all-purpose flour
- 2 1/2 cups (600 ml) milk, whole or 2%
- 1/2 tsp salt
- 1/4 tsp black pepper
- 1/4 tsp garlic powder (optional)
- 1/4 tsp crushed red pepper flakes (optional for heat)
- 2 cans (about 16 oz / 450 g) refrigerated biscuit dough
- 1/2 cup shredded cheddar cheese
- Chopped fresh parsley or chives
Instructions
- Preheat your oven to 350°F (175°C).
- Cook the breakfast sausage in a large skillet over medium heat, breaking it up and cooking until browned, about 5-7 minutes.
- Make the gravy by sprinkling flour into the skillet, stirring for a minute, then gradually whisking in the milk and seasoning until thickened.
- Prepare the biscuit dough by cutting canned biscuits into quarters.
- Combine the biscuit pieces and gravy in a greased 9×13 inch casserole dish.
- Add cheese on top before baking.
- Bake for 25-30 minutes until hot, bubbly, and golden brown.
- Garnish with parsley or chives before serving.
Notes
For a lighter option, try turkey sausage. You can also use gluten-free substitutions if needed.
Nutrition
- Serving Size: 1 serving
- Calories: 450
- Sugar: 2g
- Sodium: 900mg
- Fat: 30g
- Saturated Fat: 12g
- Unsaturated Fat: 8g
- Trans Fat: 0g
- Carbohydrates: 30g
- Fiber: 1g
- Protein: 20g
- Cholesterol: 70mg
Keywords: biscuits, gravy, casserole, comfort food, brunch
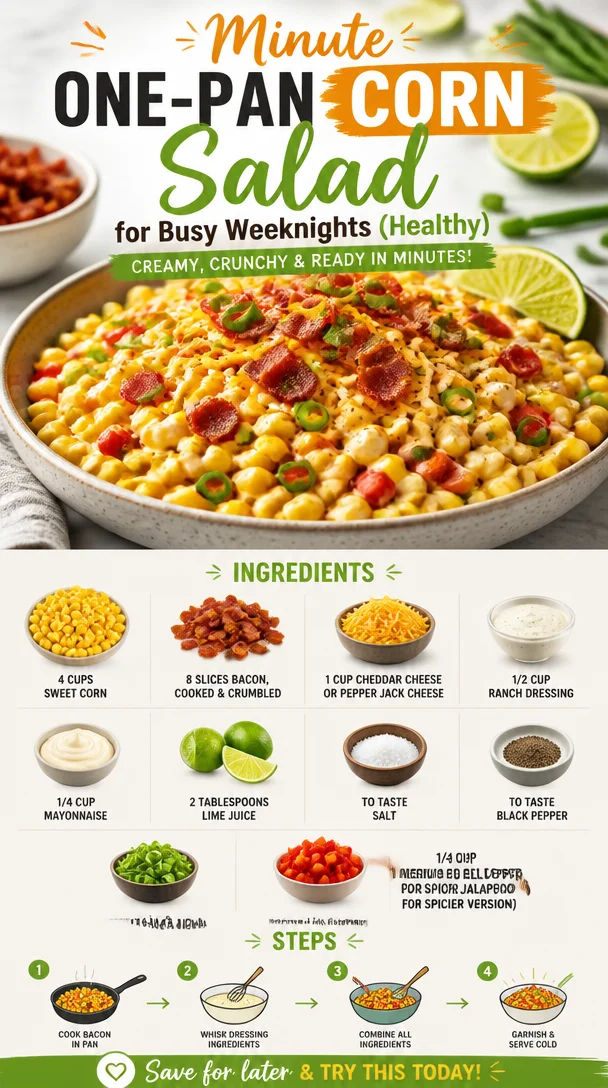
Minute One-Pan Corn Salad for Busy Weeknights (Healthy)
Crack Corn Salad: A Celebration of Summer Flavors
Every summer brings its own set of memories, a tapestry of laughter, sunshine, and the delightful scent of grilling meat wafting through the air. One dish that always manages to steal my heart (and the spotlight at potlucks) is the ever-so-vibrant Crack Corn Salad. It’s colorful, creamy, and absolutely bursting with flavor, which makes it perfect for gatherings or simple family dinners. But what I love most is the story behind it—one that resonates with warm gatherings and good friends.
A Nostalgic Journey
As a child, summers at my grandmother’s house were magical. Her backyard was a verdant paradise with tall corn stalks swaying gently in the breeze. I can still visualize the joyful chaos of family coming together with pots and pans, music playing softly in the background, and laughter echoing from every corner. Among the seemingly endless array of dishes was my grandmother’s famous corn salad — creamy, crunchy, and oh-so-delicious.
This Crack Corn Salad, as we dubbed it, was an essential part of our summer BBQs. I remember sneaking bites while the adults were busy chatting, a little bit of bacon falling over my fingers and cheese sticking to my lips as I savored each spoonful. Every bite transported me back to those carefree days. Today, as I share this recipe with you, I hope it brings a sprinkle of nostalgia and joy to your own table.
Ingredients
Let’s dive into the ingredients! Here’s what you’ll need to create this delightful dish, along with some chef insights to help you personalize it:
-
4 cups sweet corn (fresh, frozen, or canned)
Whether you’re using fresh, sweet corn cut straight off the cob or grabbing frozen during off-seasons, the key here is to ensure it’s dried well if frozen or canned. Sweet corn is the star of this salad, bringing sweetness and crunch! -
8 slices bacon, cooked and crumbled
Bacon adds a delightful smokiness and crisp texture. You can substitute with turkey bacon or crispy chickpeas for a healthier or vegetarian option. -
1 cup cheddar cheese or pepper jack cheese, shredded
Cheese adds a creamy richness; cheddar offers a classic taste while pepper jack brings a lovely hint of spice. Feel free to experiment with your favorite! -
1/2 cup ranch dressing
I recommend store-bought for convenience and consistency, but homemade ranch is always a hit! Plus, you can control the flavors to suit your preference. -
1/4 cup mayonnaise
Adds extra creaminess! Swap it out for Greek yogurt if you’re looking to lighten things up—a great source of protein too! -
2 tablespoons lime juice
Freshly squeezed is highly recommended; it brightens up the salad and enhances all those gorgeous flavors. -
To taste salt
Start with a pinch, and adjust based on the saltiness of your cheese and bacon. -
To taste black pepper
Start light and adjust based on your palate. A bit of pepper can really elevate the dish! -
1/4 cup green onions, sliced
They bring a fresh crunch, but feel free to omit them if you’re not a fan—scallions or chopped chives are also great. -
1 medium red bell pepper, diced
For a pop of color and sweetness. If you’re in the mood for heat, swap this with a jalapeño!
Step-by-Step Instructions
Now, let’s get cooking! Follow these steps to whip up your own Crack Corn Salad:
-
Prep the Ingredients: Whether you’re using fresh corn, bacon, or veggies, the first step is to prepare everything. If you’re using fresh corn, grill or boil it for a few minutes until tender. If frozen or canned, just make sure it’s dried well.
-
Cook the Bacon: In a skillet over medium heat, cook the bacon until crispy. This should take about 5-7 minutes, depending on the thickness. Once done, transfer it to a paper towel-lined plate to drain. Save a bit for garnish!
-
Combine the Core Ingredients: In a large bowl, mix the corn, crumbled bacon, shredded cheese, and diced red bell pepper.
-
Make the Dressing: In a separate bowl, whisk together the ranch dressing, mayonnaise, and lime juice until smooth. This creamy dressing is what ties everything together—don’t skip it!
-
Add Seasonings: Pour the dressing over the corn mixture and sprinkle in salt and pepper. Mix gently until everything is well coated. Remember, you can always add more seasoning later, so start small!
-
Fold in the Greens: It’s time to add the sliced green onions. Gently fold them in, ensuring they’re evenly distributed throughout the salad.
-
Chill & Serve: Cover the salad and let it chill in the fridge for at least 30 minutes. This will allow all those lovely flavors to mingle and develop.
-
Plate It Up: When you’re ready to serve, scoop the salad into a beautiful bowl or a platter, sprinkle a little reserved bacon on top for garnish, and voilà! You’ve got a showstopper on your hands ready to impress.
Serving Suggestions
Crack Corn Salad is best served cold or at room temperature. For a stunning presentation, consider serving it in a beautiful, wide bowl. Garnish it with a sprinkle of fresh herbs or edible flowers if you’re feeling fancy. This dish pairs beautifully with grilled meats, burgers, or as a refreshing side for a picnic.
Recipe Variations
- Southwestern Twist: Add black beans and corn chips for a bit of crunch.
- Mediterranean Style: Swap out the ranch for a yogurt-based dressing and add kalamata olives and minced garlic.
- Fruit Addition: Throw in some diced avocado or fresh diced tomatoes to add sweetness and creaminess—a fantastic summer addition!
- Vegan Version: Replace bacon with smoked tempeh and use dairy-free cheese and yogurt!
Chef’s Notes
Over the years, my Crack Corn Salad has become a canvas for creativity. What started as my grandmother’s simplest recipe evolved into a fan-favorite that I now love to personalize for every gathering. One time, I decided on a whim to add chopped jalapeños for a spicy kick, and it instantly became a hit with my friends! Remember, cooking is all about experimenting. Don’t be afraid to throw in your own flair!
FAQs and Troubleshooting
1. Can I make this salad ahead of time?
Absolutely! It tastes even better the next day as the flavors meld together. Just be sure to give it a good stir before serving.
2. What should I do if the salad seems too dry?
If you find your salad lacking moisture, simply mix in a bit more ranch dressing or a splash of lime juice until you get the desired consistency.
3. Is there a gluten-free version?
Yes! Just ensure that your dressing is gluten-free, and you’re good to go. Most ranch dressings available on the market are naturally gluten-free, but it doesn’t hurt to check.
4. How do I store leftovers?
Store any leftovers in an airtight container in the fridge. Enjoy them within a couple of days for the best flavor.
Creating dishes that bring people together is what I love most about cooking. This Crack Corn Salad is not just a crowd-pleaser; it’s a reminder of those sunny days and shared moments spent around the table. So why not gather your loved ones, whip up this delightful dish, and recreate those memories in your own kitchen? Tie on your apron, pour yourself a sparkling drink, and let the joy of cooking lead the way! Enjoy every bite!
PrintCrack Corn Salad
A colorful and creamy salad bursting with summer flavors, perfect for potlucks and family gatherings.
- Prep Time: 15 minutes
- Cook Time: 10 minutes
- Total Time: 45 minutes
- Yield: 8 servings 1x
- Category: Salad
- Method: Chilling
- Cuisine: American
- Diet: Pescatarian
Ingredients
- 4 cups sweet corn (fresh, frozen, or canned)
- 8 slices bacon, cooked and crumbled
- 1 cup cheddar cheese or pepper jack cheese, shredded
- 1/2 cup ranch dressing
- 1/4 cup mayonnaise
- 2 tablespoons lime juice
- To taste salt
- To taste black pepper
- 1/4 cup green onions, sliced
- 1 medium red bell pepper, diced
Instructions
- Prep the ingredients: Whether using fresh corn, bacon, or veggies, prepare everything. Grill or boil fresh corn for a few minutes until tender.
- Cook the bacon: In a skillet over medium heat, cook the bacon until crispy, about 5-7 minutes. Transfer to a paper towel-lined plate.
- Combine the core ingredients: In a large bowl, mix the corn, crumbled bacon, shredded cheese, and diced red bell pepper.
- Make the dressing: In a separate bowl, whisk together the ranch dressing, mayonnaise, and lime juice until smooth.
- Add seasonings: Pour the dressing over the corn mixture and sprinkle in salt and pepper. Mix gently until well coated.
- Fold in the greens: Add the sliced green onions and gently fold them into the salad.
- Chill & serve: Cover the salad and let it chill in the fridge for at least 30 minutes.
- Plate it up: Serve in a beautiful bowl or platter, garnished with a little reserved bacon.
Notes
Tastes even better the next day as flavors meld together. Feel free to personalize with additional ingredients.
Nutrition
- Serving Size: 1 serving
- Calories: 320
- Sugar: 4g
- Sodium: 600mg
- Fat: 22g
- Saturated Fat: 7g
- Unsaturated Fat: 12g
- Trans Fat: 0g
- Carbohydrates: 28g
- Fiber: 4g
- Protein: 8g
- Cholesterol: 20mg
Keywords: corn salad, summer salad, BBQ side dish, potluck dish
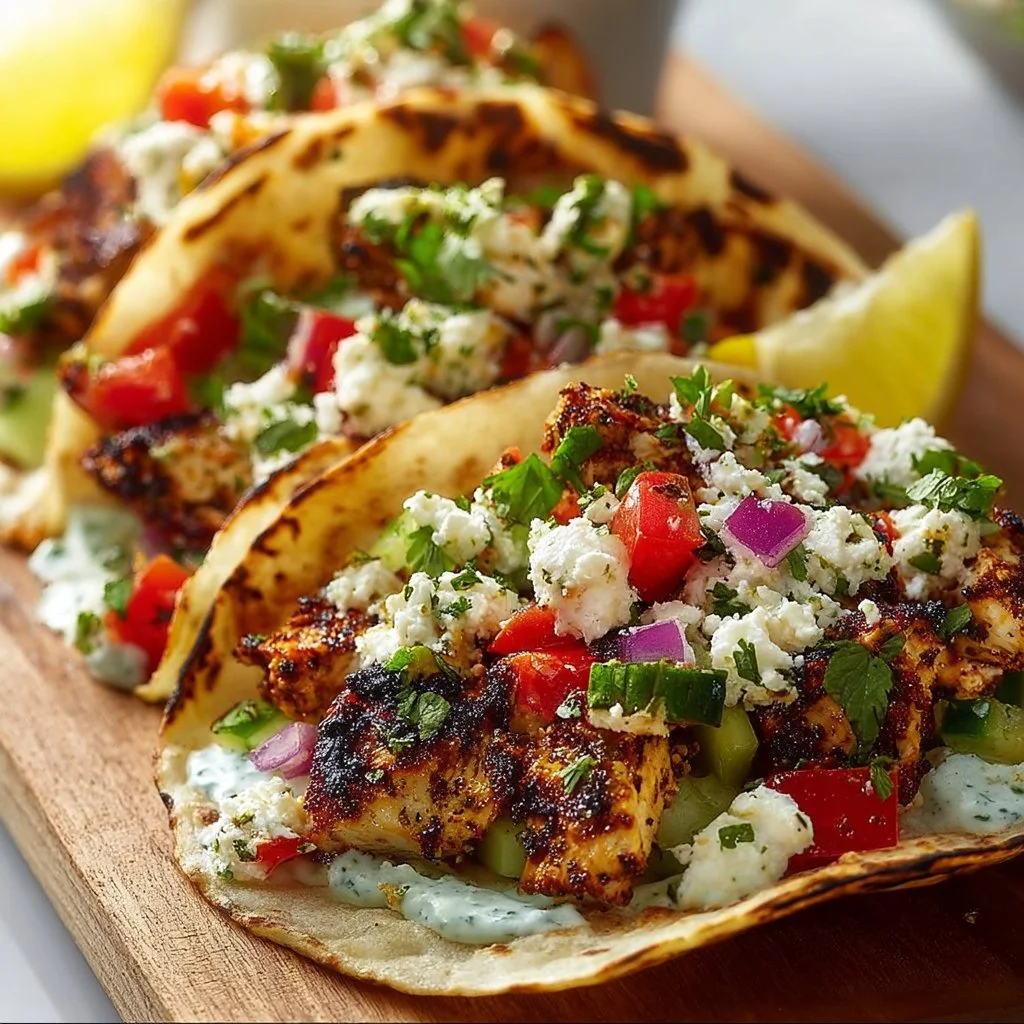
Healthy Mediterranean Chicken Tacos
Healthy Mediterranean Chicken Tacos: A Flavorful Journey to the Table
Hello, fabulous foodies! Today, let’s take a flavorful journey to the Mediterranean coast with a twist your dinner table will love—Healthy Mediterranean Chicken Tacos! Who says tacos can’t be both delicious and nutritious? I’ve always been a believer that food can be a wholesome joy without skimping on flavor, and these tacos embody that philosophy perfectly.
Picture this: tender, juicy chicken marinated to perfection with fragrant spices, nestled in warm tortillas, and topped with crunchy veggies and creamy feta cheese. Oh, my mouth is watering just thinking about it! These tacos are the epitome of simple, vibrant cooking that brings the best of both worlds—a casual dining experience with a hint of gourmet elegance.
Whether you’re cooking for friends, family, or just for yourself after a long day, this dish will elevate your meal without overwhelming your senses. With fresh ingredients, bright flavors, and a beautiful presentation, you’ll capture the essence of Mediterranean cuisine all in one bite. So, grab your apron and let’s dive in together!
Personal Story
Let me take you back to one sun-kissed summer in southern Greece. I was visiting a charming coastal town, where the air smelled of fresh herbs and the sound of waves crashing lightly soothed my busy mind. It was during a spontaneous beach picnic with locals that I first encountered the concept of Mediterranean tacos. We sat beneath a vibrant tree, laughter filling the air as we enjoyed assorted grilled meats paired with fresh veggies—each bite bursting with flavor and freshness.
Fast forward a few years, and I’ve made it my mission to recreate those memories in my own kitchen. The best part? I’ve learned how to embrace approachable ingredients from the Mediterranean and marry them with the beloved taco format! These Healthy Mediterranean Chicken Tacos are an homage to that glorious day, a reminder that good food unites people, even those from different corners of the world.
Ingredients
Here’s what you’ll need to whip up these taste bud-tingling tacos:
-
1 lb lean chicken breast, diced
Why lean? It’s packed with protein without the extra calories! You can swap it for turkey breast or even chickpeas for a plant-based option. -
2 tbsp olive oil
A must-have in Mediterranean diets! Extra virgin olive oil brings depth and richness. If you prefer, you can use avocado oil for a similar flavor profile. -
1 tsp cumin
This spice adds a warm, earthy flavor that complements chicken beautifully. Feel free to substitute with coriander for a slightly different kick. -
1 tsp paprika
Sweet or smoked, paprika adds a hint of sweetness and color. If you’re looking for a little heat, try some cayenne pepper instead! -
Salt and pepper to taste
Basic, yet essential. Always season to taste, but remember—less is more until you’ve found your desired flavor! -
Corn or flour tortillas
These are your taco vessel! I adore a good corn tortilla for its authenticity, but flour tortillas give a soft texture. Choose the one that suits your palate! -
1 cup cherry tomatoes, halved
Bursting with sweetness and juiciness! If out of season, just use regular tomatoes diced into small pieces—keep that flavor intact! -
1 cucumber, diced
For that refreshing crunch, cucumbers never disappoint. If you crave something spicier, try diced jalapeños instead! -
1/2 red onion, thinly sliced
Red onions bring a nice bite and color. White onions work too, but these are milder and sweeter! -
1/4 cup feta cheese, crumbled
Ah, feta—the creamy tangy star of Mediterranean cooking. To make it dairy-free, try tofu feta or leave it off entirely! -
Fresh parsley, chopped
A sprinkle of freshness to finish! If parsley isn’t your thing, cilantro is a great alternative, giving a different yet delightful flavor. -
Tzatziki sauce (optional)
This creamy, herby delight is the perfect topping! You can whip up a quick version with yogurt, cucumber, garlic, and dill, or store-bought works too!
Step-by-Step Instructions
Alright, let’s get cooking! Roll up those sleeves and fire up that stovetop because this is where the magic happens.
-
Marinate the Chicken
In a mixing bowl, combine the diced chicken breast with olive oil, cumin, paprika, salt, and pepper. Toss until every piece is beautifully coated. Let it marinate for at least 15-30 minutes—this is where the magic begins! If time allows, marinating it longer will develop deeper flavors. Feel free to put it in the fridge while you prepare the veggies. -
Prepare the Veggies
While the chicken marinated, let’s chop those cherry tomatoes, cucumber, and red onion! Try to cut them to a consistent size for uniform cooking and serving. Once chopped, place them in a bowl, season with a pinch of salt and pepper, and stir in some olive oil and chopped parsley. This mix is fresh, vibrant, and will beautifully complement your chicken! -
Cook the Chicken
Heat a skillet or a grill pan over medium-high heat. Add a splash of olive oil, and once it’s shimmering, carefully add the marinated chicken. Cook for about 5-7 minutes, tossing occasionally until the chicken is golden brown and cooked through (internal temperature should reach 165°F). The spices will start making your kitchen smell incredible! -
Warm the Tortillas
While your chicken is cooking, warm the tortillas! You can do this in a dry skillet for about 30 seconds on each side or even wrap them in foil and pop them in the oven at 350°F for a few minutes. This step makes all the difference—they’ll be flexible and warm, ready to embrace that filling! -
Assemble the Tacos
Now comes the fun part! Take a warm tortilla and fill it generously with the cooked chicken. Top it with the cucumber-tomato mixture and sprinkle crumbled feta cheese on top. You can add a dollop of tzatziki if you like—trust me, it makes the dish even more scrumptious! -
Garnish and Serve
For the finishing touch, sprinkle some more fresh parsley on top and serve with a slice of lemon or lime for that extra zing! Your vibrant Healthy Mediterranean Chicken Tacos are ready to impress, so gather your loved ones, plate them up, and enjoy!
Serving Suggestions
To make your dining experience even more delightful, consider serving these tacos family-style. Arrange them on a large platter, accompanied by an array of toppings like extra tzatziki, hot sauce, or assorted sliced veggies. Even better, pair these tacos with a simple side salad or roasted vegetables to round out the meal!
Recipe Variations
Here are a few creative twists to keep things fun in the kitchen:
-
Spicy Southwest Chicken Tacos
Swap out the Mediterranean spices for some chili powder and cumin and add black beans to your veggie mix for a zesty fusion. -
Cauliflower Rice Tacos
For a low-carb option, use grilled or roasted cauliflower rice instead of chicken. Toss it with lemon juice, cumin, and a touch of garlic for flavor. -
Mediterranean Meatball Tacos
Try using turkey or beef meatballs as a filling, seasoned with the same spices and fried or baked until golden brown. -
Chickpea Tacos
For a vegetarian twist, swap chicken for roasted chickpeas seasoned with olive oil, garlic powder, and cumin—a protein-packed and colorful option! -
Greek-Style Pita Wraps
Turn these tacos into pitas! Load a whole wheat pita with the same filling and enjoy the Mediterranean flavors in a different format.
Chef’s Notes
Over the years, these tacos have evolved from simply being a fun dish I prepared for friends to becoming a staple in my weekly meal rotation. They’re delightful for lazy Sunday evenings or casual dinner parties alike. I’ve had some culinary “oops” moments too; once, I forgot to marinate the chicken altogether—spoiler alert: it still tasted good! That’s what I love about cooking: it doesn’t always have to be perfect.
FAQs and Troubleshooting
Q: Can I use frozen chicken?
Absolutely! Just ensure to thaw it in the fridge overnight before marinating. Cooking times might slightly vary, so keep an eye on it to make sure it is cooked through.
Q: What if I don’t have tzatziki?
No worries! A simple yogurt with chopped cucumber and dill can serve as a quick substitute. Or you can enjoy the tacos without any sauce—there’s plenty of flavor from the spices and veggies!
Q: Can I prepare these in advance?
Yes! You can marinate the chicken and prepare the chopped veggies in advance. Just store them in separate containers in the fridge. When it’s time to eat, cook the chicken and warm the tortillas—it’s that simple!
Q: How can I make this low-sodium?
Simply reduce or omit the added salt while marinating the chicken and seasoning the veggies. Let the freshness of the ingredients shine!
Q: What’s a great drink pairing?
I recommend a light white wine, like a Pinot Grigio! A refreshing lemonade or sparkling water with mint is also fantastic and keeps the Mediterranean vibe alive.
Nutritional Info (if applicable)
As a bonus, here’s a rough estimate of the nutritional values per serving (excluding toppings):
- Calories: 250
- Protein: 30g
- Carbohydrates: 20g
- Fat: 10g
- Fiber: 3g
Feel free to adjust based on your ingredient choices!
So there you have it, my culinary friends—Healthy Mediterranean Chicken Tacos that are not just a treat for the taste buds but also a joyful gathering around the table! Now, go ahead and bring the beauty of the Mediterranean to your next meal, and remember: good food isn’t just about the dish; it’s about the memories created around it. Happy cooking! 🍽️
PrintHealthy Mediterranean Chicken Tacos
Delicious and nutritious Mediterranean chicken tacos, perfect for a casual dining experience.
- Prep Time: 30 minutes
- Cook Time: 10 minutes
- Total Time: 40 minutes
- Yield: 4 servings 1x
- Category: Main Course
- Method: Grilling
- Cuisine: Mediterranean
- Diet: Healthy, High-Protein
Ingredients
- 1 lb lean chicken breast, diced
- 2 tbsp olive oil
- 1 tsp cumin
- 1 tsp paprika
- Salt and pepper to taste
- Corn or flour tortillas
- 1 cup cherry tomatoes, halved
- 1 cucumber, diced
- 1/2 red onion, thinly sliced
- 1/4 cup feta cheese, crumbled
- Fresh parsley, chopped
- Tzatziki sauce (optional)
Instructions
- Marinate the chicken by combining it with olive oil, cumin, paprika, salt, and pepper. Let it marinate for at least 15-30 minutes.
- Prepare the veggies by chopping cherry tomatoes, cucumber, and red onion, then season with salt, pepper, olive oil, and parsley.
- Cook the marinated chicken in a skillet over medium-high heat for 5-7 minutes until golden brown.
- Warm the tortillas in a dry skillet for 30 seconds on each side.
- Assemble the tacos by filling tortillas with chicken and topping with the veggie mix and feta cheese.
- Garnish with fresh parsley and serve with lemon or lime.
Notes
Feel free to substitute chicken with turkey or chickpeas for variations. Serve family-style for more sharing options.
Nutrition
- Serving Size: 1 taco
- Calories: 250
- Sugar: 4g
- Sodium: 300mg
- Fat: 10g
- Saturated Fat: 2g
- Unsaturated Fat: 6g
- Trans Fat: 0g
- Carbohydrates: 20g
- Fiber: 3g
- Protein: 30g
- Cholesterol: 60mg
Keywords: Mediterranean, Chicken Tacos, Healthy Recipe