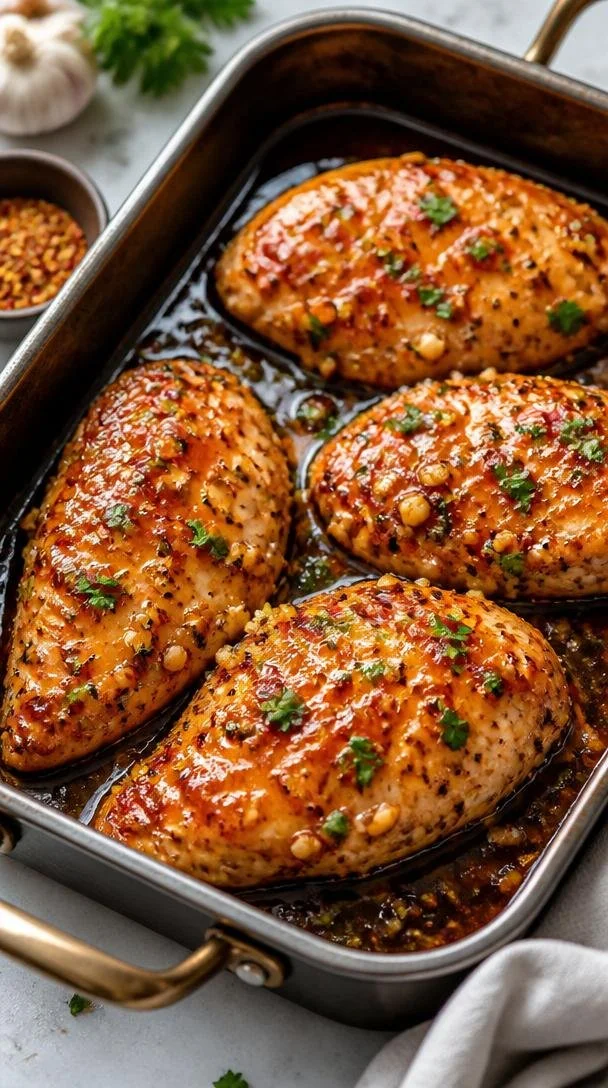
One-Pan Honey Garlic Chicken Bake: Juicy Weeknight Dinner
Baked Honey Garlic Chicken Breast: Easy Juicy Dinner Idea
Hello, fellow food lovers! Today, I’m excited to share with you one of my go-to recipes that beautifully combines simplicity and flavor—the Baked Honey Garlic Chicken Breast. It’s the kind of dish that practically cooks itself while you enjoy a glass of wine or gather your loved ones around the table. Whether you’re trying to impress a special someone or just want to whip up something delicious on a weeknight, this recipe will not disappoint. Let’s dive in!
Introduction
Imagine this: it’s a busy night after a long day, and you’re craving something tasty yet effortless to prepare. You open your fridge and spot some chicken breasts, and suddenly inspiration strikes! This Baked Honey Garlic Chicken Breast recipe uses a handful of everyday ingredients to create a dish that’s sweet, savory, and utterly irresistible.
The best part? It’s baked in the oven, freeing you up to talk, laugh, and unwind while your kitchen fills with the delicious aroma of garlic and honey. Plus, cleanup is a breeze! I mean, who doesn’t love a one-pan meal that delivers on both flavor and ease? As I share this recipe, I’ll sprinkle in some of my favorite kitchen tips and personal stories to make your cooking experience even more enjoyable. So, tie on your apron, and let’s get started!
Personal Story
Ah, chicken—a staple that has a special place in my heart as well as my kitchen. I’ll never forget the first time I tried making a honey garlic sauce. I was in college and threw a small dinner party for my friends before finals week. All I knew was I wanted a dish that was easy and would impress. After experimenting with a few different flavor combinations, I crafted a honey garlic sauce that was just perfect.
We gathered around my tiny dining table—papers strewn about, laughter and memories shared. The highlight of the evening was definitely that chicken. My friends devoured it and begged for the recipe. It became a tradition in our group; we would always cook it for our study nights. Nostalgia washes over me each time I prepare it now. It’s funny how some recipes carry so many memories, isn’t it?
Ingredients
Here’s what you’ll need for this delightful dish:
-
4 boneless, skinless chicken breasts (about 6 ounces / 170 grams each)
Tender and juicy, these are the perfect canvas for our honey garlic sauce. You can substitute with thighs if you prefer a bit more flavor! -
1/4 cup honey (85 grams)
Sweet and sticky, honey adds a rich flavor. You can swap it with maple syrup for a different sweetness or agave for a vegan option. -
4 cloves garlic, minced
Garlic is the heart of this dish—it adds depth and pungency. Fresh is best, but you can use jarred minced garlic in a pinch. Use less if you’re not a garlic fan! -
1/4 cup low sodium soy sauce (60 ml)
This brings the savory umami flavor. For gluten-free options, tamari will work wonders! -
1 tablespoon apple cider vinegar (15 ml)
A little acidity balances the sweetness of the honey. You can substitute with rice vinegar or lemon juice if that’s what you have on hand. -
2 tablespoons olive oil (30 ml)
This not only adds to the flavor but helps keep the chicken moist. Feel free to use avocado oil for a subtle touch. -
1/2 teaspoon freshly ground black pepper
Black pepper adds an aromatic kick! You can omit it if you prefer a milder dish. -
1/4 teaspoon red pepper flakes (optional)
A hint of heat, this can be skip or adjusted based on personal preference—level up the spiciness by adding a pinch more! -
Fresh parsley, chopped (for garnish)
A pop of color and freshness to finish off the dish! You can also use cilantro for a different flair.
Step-by-Step Instructions
Now, let’s get to the good part—cooking! Here’s how to create this heavenly dish:
-
Preheat Your Oven:
Start by preheating your oven to 375°F (190°C). This ensures that your chicken breasts will cook evenly and become juicy and tender while you prepare the marinade. -
Make the Marinade:
In a medium-sized bowl, whisk together the honey, minced garlic, soy sauce, apple cider vinegar, olive oil, black pepper, and red pepper flakes. As you mix, take a moment to inhale the warm, sweet smell of the honey and garlic mingling together. It’s a taste of what’s to come! -
Prepare the Chicken:
In a baking dish, layout your chicken breasts in a single layer. Make sure they’re spaced out a bit—this helps them cook uniformly. -
Add the Marinade:
Pour the marinade over the chicken, making sure it’s well-coated. Use a spoon to dollop extra marinade on top—don’t be shy! Allow the chicken to marinate at room temperature for about 20 minutes if you have time, or stick it in the fridge for up to 4 hours. The longer it soaks, the more flavor it absorbs. -
Bake the Chicken:
Pop the baking dish into the preheated oven and bake for about 25-30 minutes. You want your chicken to reach an internal temperature of 165°F (74°C). If you have a digital meat thermometer, now’s the time to pull it out! -
Broil (Optional):
For a little extra color, switch your oven to broil and broil the chicken for an additional 2-3 minutes. This gives it a beautiful glaze and a delightful crispy top—just keep an eye on it so it doesn’t burn! -
Rest and Serve:
Once done, remove the chicken from the oven and let it rest for about 5 minutes. This allows the juices to redistribute, making each bite luscious and flavorful.
Serving Suggestions
Now, it’s time to plate up! Slice the chicken breasts and serve them on a beautiful platter. Drizzle some of that luscious honey garlic sauce from the baking dish over the top. Sprinkle freshly chopped parsley for a pop of color, and don’t forget to add your favorite sides! This dish pairs perfectly with steamed broccoli, fluffy rice, or a fresh salad.
Recipe Variations
Feel free to get creative with this dish! Here are a few variations you might enjoy:
- Add Citrus: Incorporate the zest and juice of a lemon or orange into the marinade for a zesty twist.
- Spice It Up: Mix in some Sriracha or your favorite hot sauce to the marinade for extra heat.
- Herbaceous Flavors: Add fresh thyme or rosemary to the marinade for an aromatic touch.
- Fruit Fusion: Toss in some sliced pineapples or peaches for a sweet addition that caramelizes beautifully in the oven.
- Make it Sticky Rice: Serve with coconut sticky rice instead of regular rice for a Thai-inspired flair.
Chef’s Notes
I’ve been making variations of this honey garlic chicken for years now. What started as a simple way to impress friends has turned into a staple in my home cooking repertoire! Over time, I’ve played around with flavor profiles and sides to match my mood or what’s in season. It’s incredible how one recipe can adapt and grow with you, much like hosting itself!
Oh, and I have to share this story: I once hosted a dinner party, and the chicken was so good that it became a running joke. I had friends asking me weekly if I was serving "the chicken" for dinner. They even started showing up unexpectedly because they could smell it wafting from my kitchen!
FAQs and Troubleshooting
1. My chicken turned out dry. What happened?
Cooking chicken can be tricky! Make sure you’re not overcooking it, as it can dry out quickly. Aim for 165°F internal temperature, and let it rest before cutting.
2. Can I marinate it overnight?
Absolutely! Marinating overnight can enhance the flavors even more. Just remember not to leave it longer than 24 hours, as the chicken can start to get mushy.
3. How do I know if chicken is done without a thermometer?
If you don’t have one, you can cut into the thickest part of the breast; the juices should run clear and there should be no pink remaining!
4. Can I use frozen chicken?
Frozen chicken is a no-go for this recipe. Thaw it in the fridge before marinating and baking to ensure even cooking.
Nutritional Info (Optional)
While I don’t usually focus on nutritional info, if you’re curious, this dish provides protein, healthy fats, and can be balanced with colorful veggies on the side!
There you have it—a warm, welcoming dive into one of my favorite dishes! I hope you’re inspired to try this Baked Honey Garlic Chicken Breast recipe in your own kitchen. Remember, cooking should be fun and not a chore. Enjoy the process, gather around the table, and create wonderful memories with the people you love. Happy cooking!
PrintBaked Honey Garlic Chicken Breast

A sweet and savory baked chicken dish that’s easy to prepare and perfect for any weeknight dinner.
- Prep Time: 15 minutes
- Cook Time: 30 minutes
- Total Time: 45 minutes
- Yield: 4 servings 1x
- Category: Main Course
- Method: Baking
- Cuisine: American
- Diet: None
Ingredients
- 4 boneless, skinless chicken breasts (about 6 ounces / 170 grams each)
- 1/4 cup honey (85 grams)
- 4 cloves garlic, minced
- 1/4 cup low sodium soy sauce (60 ml)
- 1 tablespoon apple cider vinegar (15 ml)
- 2 tablespoons olive oil (30 ml)
- 1/2 teaspoon freshly ground black pepper
- 1/4 teaspoon red pepper flakes (optional)
- Fresh parsley, chopped (for garnish)
Instructions
- Preheat Your Oven: Start by preheating your oven to 375°F (190°C).
- Make the Marinade: In a medium-sized bowl, whisk together the honey, minced garlic, soy sauce, apple cider vinegar, olive oil, black pepper, and red pepper flakes.
- Prepare the Chicken: In a baking dish, layout your chicken breasts in a single layer.
- Add the Marinade: Pour the marinade over the chicken, making sure it’s well-coated.
- Bake the Chicken: Pop the baking dish into the preheated oven and bake for about 25-30 minutes.
- Broil (Optional): For a little extra color, switch your oven to broil and broil the chicken for an additional 2-3 minutes.
- Rest and Serve: Once done, remove the chicken from the oven and let it rest for about 5 minutes.
Notes
Feel free to experiment with add-ins like citrus or herbs to customize the flavor.
Nutrition
- Serving Size: 1 serving
- Calories: 350
- Sugar: 20g
- Sodium: 600mg
- Fat: 12g
- Saturated Fat: 2g
- Unsaturated Fat: 10g
- Trans Fat: 0g
- Carbohydrates: 38g
- Fiber: 0g
- Protein: 30g
- Cholesterol: 70mg
Keywords: chicken, honey garlic, baked chicken, easy dinner, weeknight meal
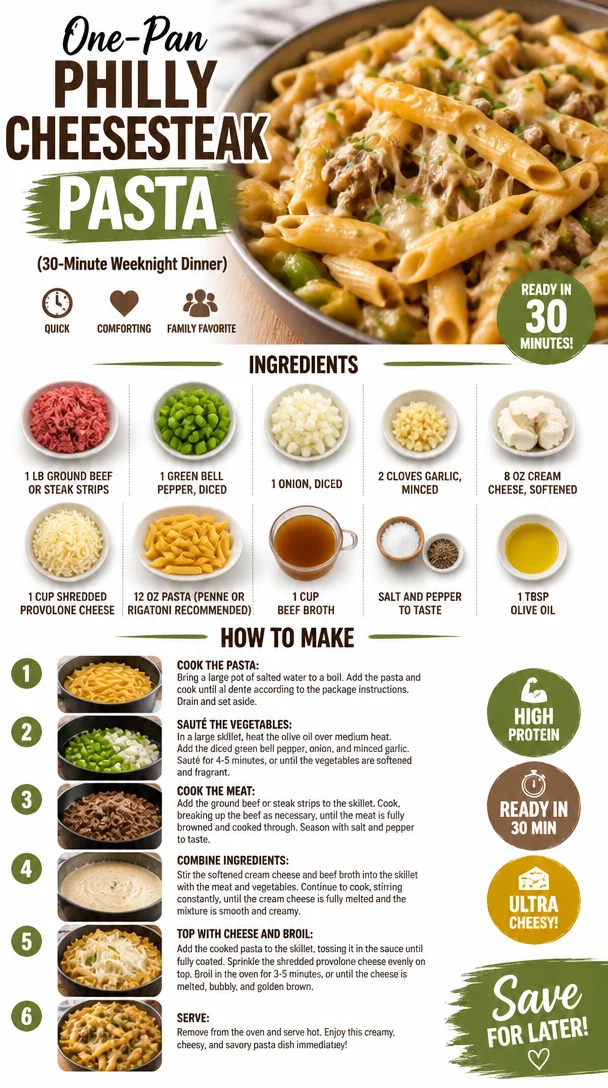
One-Pan Philly Cheesesteak Pasta (30-Minute Weeknight Dinner)
Philly Cheesesteak Pasta: A Comfort Food Fusion
Hello friends! Today, I am beyond excited to take you on a culinary journey where two incredible comfort foods meet in a warm, cheesy embrace: the Philly cheesesteak and pasta. Yep, you heard that right! We’re marrying the flavors of an iconic sandwich with the inviting textures of pasta. Grab your apron, because this dish is a showstopper that will have your family or guests cheering for more.
A Personal Tale
Before we dive into the cooking part, let me share a little story. Growing up, weekends in my house were synonymous with comfort food. I have vivid memories of my dad whipping up his famous Philly cheesesteaks. The sizzle of thinly sliced beef hitting the hot griddle, the aroma of onions caramelizing, and, of course, the delightful dance of melted cheese makes my mouth water just thinking about it. Each bite was pure bliss, a celebration of flavors wrapped in a buttery hoagie.
Fast forward to my culinary adventures, where I began experimenting and fusing classic dishes together. One day, while brainstorming dinner ideas, I thought: why not give those nostalgic flavors a new twist? And that’s how Philly Cheesesteak Pasta was born! It’s a perfect meal to evoke those fond memories while keeping things fresh and innovative. So let’s jump into this delightful recipe — your taste buds will thank you!
Ingredients
Before we roll up our sleeves, let’s gather everything we need to make this magical dish happen:
-
1 lb ground beef or steak strips
Use whatever you have on hand! If you’re looking for a leaner option, turkey or chicken can work as substitutes too. -
1 green bell pepper, diced
Feel free to swap in a red or yellow bell pepper for a splash of color and sweetness. -
1 onion, diced
Sweet or yellow onions are my go-to, but red onions add a lovely bite if you prefer. -
2 cloves garlic, minced
Garlic brings a depth of flavor. If you’re in a pinch, garlic powder works too—use about 1/2 teaspoon. -
8 oz cream cheese, softened
This adds that luscious creaminess we love. For a lighter version, you can use Neufchâtel cheese. -
1 cup shredded provolone cheese
Provolone is classic, but cheddar or mozzarella can definitely do the trick! -
12 oz pasta (penne or rigatoni recommended)
These shapes grab all that gooey sauce so perfectly. Feel free to use gluten-free pasta if needed! -
1 cup beef broth
Homemade is best, but store-bought works great as well. Vegetable broth can be an alternative for a vegetarian touch. -
Salt and pepper to taste
Don’t skimp on seasoning! It’s what makes flavors pop. -
1 tbsp olive oil
For sautéing! You can use butter for a richer flavor or even avocado oil for a twist.
Step-by-Step Instructions
Now that we have all our ingredients lined up, let’s get cooking!
-
Cook the Pasta
Bring a large pot of salted water to a boil. Add your pasta and cook according to package instructions until al dente. This usually takes about 8-10 minutes. TIP: Reserve about 1 cup of pasta water before draining; it’ll help create a silky sauce later! -
Sauté the Vegetables
In a large skillet, heat the olive oil over medium heat. Toss in the diced onion and bell pepper. Sauté them for about 5-7 minutes or until the onion becomes translucent and the peppers soften. The aroma will be heavenly! -
Add the Garlic
Next, add in the minced garlic and cook for an additional 1-2 minutes, stirring constantly to avoid burning. Garlic loves to brown quickly, and nobody likes bitter flavors in their pasta! -
Cook the Beef
Push the vegetables to the side of the skillet and then add the ground beef (or steak strips) into the pan. Season with salt and pepper. Brown the meat for about 5-7 minutes, breaking it apart with a spatula until cooked through. Combine the beef with the veggies towards the end. -
Creamy Base Creation
Reduce the heat to low, then add your softened cream cheese and pour in the beef broth. Stir until the cream cheese melts and everything becomes beautifully creamy. If the mixture feels too thick, slowly add some pasta water until you reach your desired sauce consistency. -
Cheesy Goodness
Remove the skillet from the heat and fold in the shredded provolone cheese until everything is thoroughly mixed and wonderfully cheesy! This will be a moment of joy, friends—just wait for the smell! -
Combine with Pasta
Finally, toss your cooked pasta into the skillet and mix to coat all those delightful flavors and textures together. If needed, you can always add a splash more of the reserved pasta water to help coat the pasta evenly.
Serving Suggestions
Time to plate up! Transfer generous scoops of the creamy Philly cheesesteak pasta into bowls. For an elegant touch, sprinkle some additional provolone cheese or fresh parsley on top. A sprinkle of crushed red pepper flakes can add a delightful kick too! This dish is a showstopper and perfect for both weeknight dinners or special gatherings.
Recipe Variations
Why not get adventurous? Here are a few fun twists to consider for your Philly Cheesesteak Pasta:
- Mushroom Madness: Add sliced mushrooms for an earthy flavor that pairs beautifully with the beef.
- Spice It Up: Mix in some jalapeños for a spicy kick or use hot sausage instead of ground beef.
- Veggie Delight: For a meat-free option, double the veggies or substitute tofu or lentils for protein.
- Mac and Cheese Style: To give it a mac and cheese flair, mix in some sharp cheddar alongside the provolone.
- Herbed Infusion: Fresh thyme or oregano can be added for an herbal note that brightens up the pasta.
Chef’s Notes
Oh, there’s always that “oops” moment in the kitchen, right? The first time I made this dish, I accidentally reached for cayenne pepper instead of black pepper. Let’s just say, “spicy” is an understatement! It was a lesson in distractions, but honestly, that fiery version sparked a whole new love affair with this pasta. Now, I always keep a good balance of flavor when making it!
Over the years, I’ve evolved this recipe from its original concept to something I feel fully embraces the cheesy comfort while remaining easy to whip up whenever the craving strikes.
FAQs and Troubleshooting
1. Why is my sauce too thick?
If your sauce turned out thicker than you’d like, don’t panic! Just gradually stir in some reserved pasta water until you get that silky texture.
2. Can I use other types of cheese?
Absolutely! This dish is quite versatile with cheese. Experiment with a mix of cheeses depending on what lures you!
3. How do I store leftovers?
This dish stores well in an airtight container in the fridge for about 3-4 days. Just reheat gently on the stove, adding a touch of broth or water to revive that creaminess.
4. What if I can’t find provolone cheese?
Don’t fret! Mozzarella or even gouda would work in a pinch. Just remember, the melt factor is key to achieving that ooey-gooey goodness!
Nutritional Info
While I encourage you to indulge in comfort food, a rough estimate for one serving of Philly Cheesesteak Pasta is around 450-500 calories. It’s packed with protein and flavor, making it a delightful choice for dinner.
So there you have it, my friends! A recipe that not only celebrates the flavors of Philly but also crafts new memories around your table. Get ready for compliments when you serve this one up—enjoy every bite, and remember, cooking should always be fun! Until next time, happy cooking from all of us here at Ivory Apron.
PrintPhilly Cheesesteak Pasta
A delicious fusion of classic Philly cheesesteak flavors combined with creamy pasta for a comforting meal.
- Prep Time: 15 minutes
- Cook Time: 30 minutes
- Total Time: 45 minutes
- Yield: 4 servings 1x
- Category: Main Course
- Method: Stovetop
- Cuisine: American
- Diet: None
Ingredients
- 1 lb ground beef or steak strips
- 1 green bell pepper, diced
- 1 onion, diced
- 2 cloves garlic, minced
- 8 oz cream cheese, softened
- 1 cup shredded provolone cheese
- 12 oz pasta (penne or rigatoni recommended)
- 1 cup beef broth
- Salt and pepper to taste
- 1 tbsp olive oil
Instructions
- Cook the Pasta: Bring a large pot of salted water to a boil. Add your pasta and cook according to package instructions until al dente (about 8-10 minutes). Reserve about 1 cup of pasta water before draining.
- Sauté the Vegetables: In a large skillet, heat the olive oil over medium heat. Toss in the diced onion and bell pepper. Sauté for about 5-7 minutes until the onion is translucent and the peppers soften.
- Add the Garlic: Add the minced garlic and cook for an additional 1-2 minutes, stirring constantly.
- Cook the Beef: Push the vegetables to the side of the skillet and add the ground beef. Season with salt and pepper and brown the meat for 5-7 minutes until cooked through.
- Creamy Base Creation: Reduce the heat to low, then add the softened cream cheese and the beef broth. Stir until everything is creamy, adding pasta water if needed.
- Cheesy Goodness: Remove from heat and fold in the shredded provolone cheese until well mixed.
- Combine with Pasta: Toss your cooked pasta into the skillet and mix to coat with the sauce, adding more pasta water if necessary.
Notes
For extra flavor, consider adding spices or serving with crushed red pepper flakes. Store leftovers in an airtight container for 3-4 days.
Nutrition
- Serving Size: 1 serving
- Calories: 450
- Sugar: 4g
- Sodium: 600mg
- Fat: 25g
- Saturated Fat: 10g
- Unsaturated Fat: 8g
- Trans Fat: 1g
- Carbohydrates: 40g
- Fiber: 3g
- Protein: 25g
- Cholesterol: 70mg
Keywords: Philly Cheesesteak, Pasta, Comfort Food, Fusion, Cheesy Dish
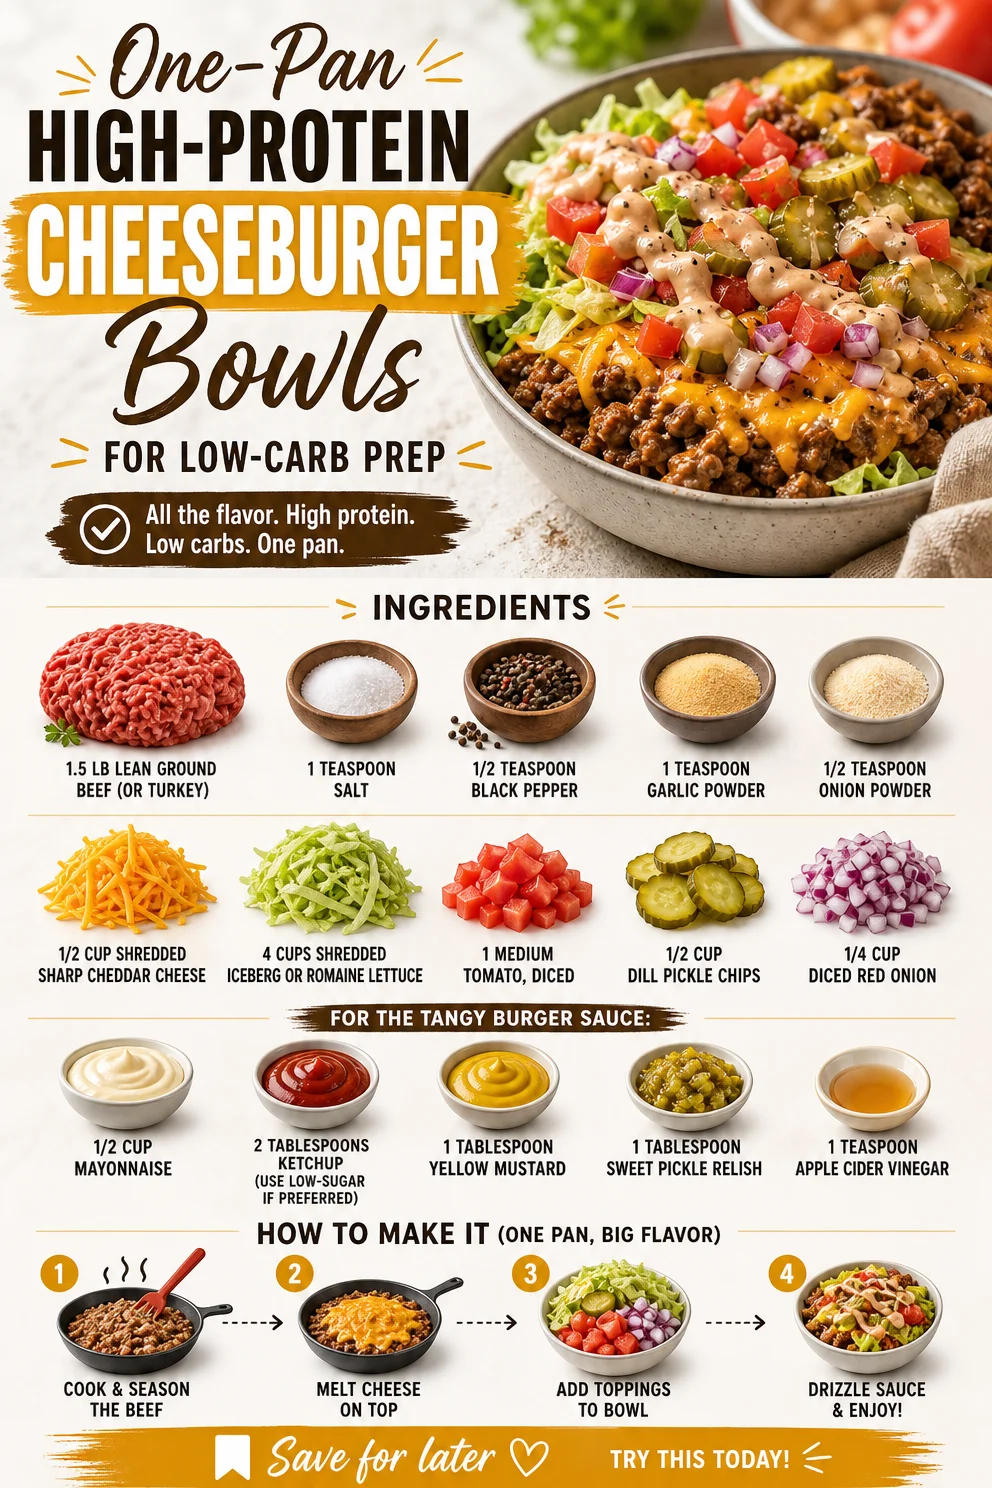
One-Pan High-Protein Cheeseburger Bowls for Low-Carb Prep
High-Protein Cheeseburger Bowls: Easy Low-Carb Meal Prep
Hello, lovely foodies! Today, we’re diving into a dish that’s not just satisfying but also packed with flavor: High-Protein Cheeseburger Bowls. For those looking to enjoy all the juicy, savory goodness of a cheeseburger while keeping things low-carb and meal-prep-friendly, this recipe is a fantastic option. Picture this: a delicious, hearty bowl filled with seasoned ground beef (or turkey, for my leaner friends), fresh veggies, melty cheese, and a tangy burger sauce that pulls it all together. It’s a simple, yet gourmet meal that makes weeknight dinners feel special and keeps you on track with your health goals.
As we journey into this recipe together, I’ll share playful insights, helpful tips, and even a bit of my kitchen history. Trust me; you’ll want to keep your apron on for this one! Let’s roll up those sleeves and create a dish that satisfies cravings and nourishes your body, one simple step at a time.
Personal Story
One of my fondest memories in the kitchen is a summer night spent grilling with my family. Picture this: the sun setting, a slight breeze rustling the leaves, and the smell of burgers cooking on the grill wafting through the air. My siblings and I would dart around, setting the picnic table, and waiting impatiently for our dad to deliver those delicious patties. As soon as the burgers hit the table, we’d pile them high with toppings, trying to outdo each other with extravagant creations.
This memory always brings a smile to my face—a reminder of laughter, love, and that joy of sharing good food with great company. Fast-forward to today, and while I’ve traded the grill for a stovetop on some days, the essence of those cheeseburgers remains. These High-Protein Cheeseburger Bowls embrace that nostalgic flavor with an elegant twist that fits my lifestyle today. Let’s capture that fun spirit of summer nights in a wholesome bowl that you can enjoy all week long!
Ingredients
Let’s get started on gathering our ingredients! I promise, they’re simple, and many are likely already hanging out in your pantry or fridge. Here’s what you’ll need:
-
1.5 lb Lean Ground Beef (or Ground Turkey):
- I prefer lean ground beef for a juicy burger flavor, but ground turkey is a fantastic low-fat substitute. Just make sure you season it well, as turkey can be a bit bland on its own.
-
1 teaspoon Salt:
- Essential for enhancing flavor! If you’re watching sodium, try using a low-sodium blend instead.
-
1/2 teaspoon Black Pepper:
- Freshly cracked pepper elevates the entire dish. Feel free to adjust according to your spice tolerance.
-
1 teaspoon Garlic Powder:
- A pantry staple that delivers that savory depth. If you have fresh garlic on hand, you can use 1-2 minced cloves for an extra kick.
-
1/2 teaspoon Onion Powder:
- Similar to garlic powder, it adds a warm flavor without the texture of fresh onions.
-
1/2 cup Shredded Sharp Cheddar Cheese:
- Cheddar adds creaminess and a bold flavor. You can swap it for pepper jack for some extra heat.
-
4 cups Shredded Iceberg or Romaine Lettuce:
- This is the base of your bowl! Feel free to mix in different greens, like spinach or kale, for variety and nutrition.
-
1 Medium Tomato, Diced:
- Freshness matters! You can swap for cherry tomatoes if you prefer those sweet little bites.
-
1/2 cup Dill Pickle Chips:
- The crunchiness and acidity of pickles complement the richness beautifully. If you’re not a fan, try sliced jalapeños for a spicy note instead.
-
1/4 cup Diced Red Onion:
- This adds a nice bite and color to your bowl. For a milder flavor, use green onions or omit altogether.
For the Tangy Burger Sauce:
-
1/2 cup Mayonnaise:
- A creamy base for your sauce. Try Greek yogurt for a lighter version!
-
2 tablespoons Ketchup:
- A touch of sweetness. You can opt for a sugar-free version to reduce the carbs.
-
1 tablespoon Yellow Mustard:
- Adds that classic tang! Feel free to use Dijon for a fancier twist.
-
1 tablespoon Sweet Pickle Relish:
- For that sweet-and-sour flavor! You can also use chopped olives for a different taste.
-
1 teaspoon Apple Cider Vinegar:
- A splash of acidity brightens the whole sauce. You can replace it with regular vinegar if that’s what you have.
Step-by-Step Instructions
Now that your ingredients are ready, let’s get cooking! Here’s how to make these delicious High-Protein Cheeseburger Bowls:
-
Cook the Ground Meat:
- In a large skillet over medium heat, add your ground beef or turkey. Use a wooden spoon to break it apart as it cooks. Cook until browned, about 8-10 minutes.
- Chef Tip: Ensure the pan is hot enough before adding the meat. It sears the surface, locking in flavors!
-
Season It Up:
- Once the meat is cooked through, sprinkle salt, black pepper, garlic powder, and onion powder over it. Stir well to distribute the spices evenly.
- Commentary: Trust me, the seasoning is key! Feel free to adjust based on your taste preferences.
-
Prepare the Burger Sauce:
- In a medium bowl, mix together the mayonnaise, ketchup, mustard, relish, and apple cider vinegar until smooth. Taste and adjust seasonings if needed.
- Chef Hack: If you’re a sauce lover, make a double batch! It’s also great on sandwiches or as a dip for veggies.
-
Assemble the Bowls:
- Start by placing a generous portion of shredded lettuce at the bottom of each bowl. Add a scoop of the seasoned meat on top.
- Plating Tip: You can layer it strategically for a beautiful presentation—lettuce on the bottom, meat in the middle, and topping at the end!
-
Add Fresh Toppings:
- Scatter diced tomatoes, dill pickle chips, and red onion over the meat. Top it all with shredded cheddar cheese.
- Chef Insight: If you’re using hot meat, the cheese will melt slightly, making it extra tasty!
-
Drizzle the Sauce:
- Spoon the tangy burger sauce over the cheese and toppings. Don’t be shy—this sauce packs the flavor!
- Presentation Note: Drizzle it artistically for that extra touch of elegance!
-
Serve and Enjoy:
- Dig in while it’s warm! These bowls can be enjoyed right away, but they also store beautifully for meal prep throughout the week.
- Final Tip: If you’re meal prepping, keep the lettuce separate until serving to prevent wilting.
Serving Suggestions
When it comes to serving these High-Protein Cheeseburger Bowls, keep it casual yet elevated. Dish out generous portions in wide bowls to encourage everyone to dig in! You can garnish with fresh herbs like parsley or chives for an added pop of color and flavor. If you’re feeling fancy, serve with a side of roasted veggies or zucchini fries for that classic diner experience. Enjoy it with a sparkling drink or a refreshing iced tea for that perfect meal vibe.
Recipe Variations
Get creative with your High-Protein Cheeseburger Bowls! Here are some fun twists you can try:
- Spicy Kick: Add sliced jalapeños or a sprinkle of crushed red pepper flakes for heat.
- Southwest Style: Toss in black beans, corn, and avocado for a southwestern flair.
- Mediterranean Twist: Swap the beef for lamb, add feta cheese, olives, and a drizzle of tzatziki for a Greek-inspired bowl.
- Cauliflower Substitute: For a low-carb spin, replace the lettuce with cauliflower rice.
- Vegan Option: Use lentils or mushrooms as your base, and swap the mayo for a vegan alternative.
Chef’s Notes
As I reflect on how this recipe evolved, it’s amusing to recognize how many interpretations it’s taken over the years. Initially inspired by those summer burger nights, I wanted to create something that felt indulgent yet healthy. Since then, I’ve played with flavors, textures, and ingredients, making it a staple in my kitchen. One memorable dinner, I mistakenly added way too much garlic powder, and the family joke became my “garlic cheeseburger bowls.” The laughter shared over food is what keeps me cooking and experimenting in the kitchen!
FAQs and Troubleshooting
Q: Can I make this in advance for meal prep?
A: Absolutely! These bowls store well in individual containers. Just keep the lettuce separate until you’re ready to eat to keep it fresh. They last for about 3-4 days in the fridge!
Q: What if I don’t have certain ingredients?
A: No worries! Feel free to swap out ingredients based on what you have. Use different greens, cheeses, or proteins; adapt it to your taste!
Q: Is this recipe family-friendly?
A: Yes! Kids love the handheld nature of burger bowls, and you can let them customize their toppings for extra fun.
Q: How can I reduce the fat content?
A: Opt for ground turkey or extra-lean ground beef. You can also reduce or omit the cheese and use a lighter sauce!
Nutritional Info
(Nutritional info is optional and based on specific serving sizes. Consider including it for audience specificity.)
Enjoy the journey of cooking these High-Protein Cheeseburger Bowls! It’s all about savoring the flavors, making memories, and gathering around the table. Happy cooking, my friends! Let’s create something timeless together at Ivory Apron.
PrintHigh-Protein Cheeseburger Bowls
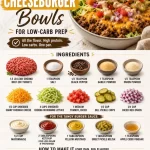
Enjoy all the juicy goodness of a cheeseburger in a low-carb bowl packed with seasoned meat, fresh veggies, and a tangy sauce.
- Prep Time: 15 minutes
- Cook Time: 30 minutes
- Total Time: 45 minutes
- Yield: 4 servings 1x
- Category: Main Course
- Method: Stovetop
- Cuisine: American
- Diet: Low-Carb
Ingredients
- 1.5 lb Lean Ground Beef (or Ground Turkey)
- 1 teaspoon Salt
- 1/2 teaspoon Black Pepper
- 1 teaspoon Garlic Powder
- 1/2 teaspoon Onion Powder
- 1/2 cup Shredded Sharp Cheddar Cheese
- 4 cups Shredded Iceberg or Romaine Lettuce
- 1 Medium Tomato, Diced
- 1/2 cup Dill Pickle Chips
- 1/4 cup Diced Red Onion
- 1/2 cup Mayonnaise
- 2 tablespoons Ketchup
- 1 tablespoon Yellow Mustard
- 1 tablespoon Sweet Pickle Relish
- 1 teaspoon Apple Cider Vinegar
Instructions
- Cook the ground meat in a large skillet over medium heat for about 8-10 minutes until browned.
- Season the meat with salt, pepper, garlic powder, and onion powder.
- Prepare the burger sauce by mixing mayonnaise, ketchup, mustard, relish, and vinegar until smooth.
- Assemble the bowls with a base of shredded lettuce, then add the seasoned meat.
- Add fresh toppings: diced tomatoes, dill pickles, and red onion, followed by shredded cheese.
- Drizzle the tangy burger sauce over the top.
- Serve warm and enjoy!
Notes
For meal prep, store the lettuce separately until serving to keep it fresh.
Nutrition
- Serving Size: 1 bowl
- Calories: 450
- Sugar: 3g
- Sodium: 600mg
- Fat: 25g
- Saturated Fat: 10g
- Unsaturated Fat: 10g
- Trans Fat: 0g
- Carbohydrates: 15g
- Fiber: 3g
- Protein: 35g
- Cholesterol: 90mg
Keywords: cheeseburger bowls, meal prep, low-carb, healthy dinner, savory
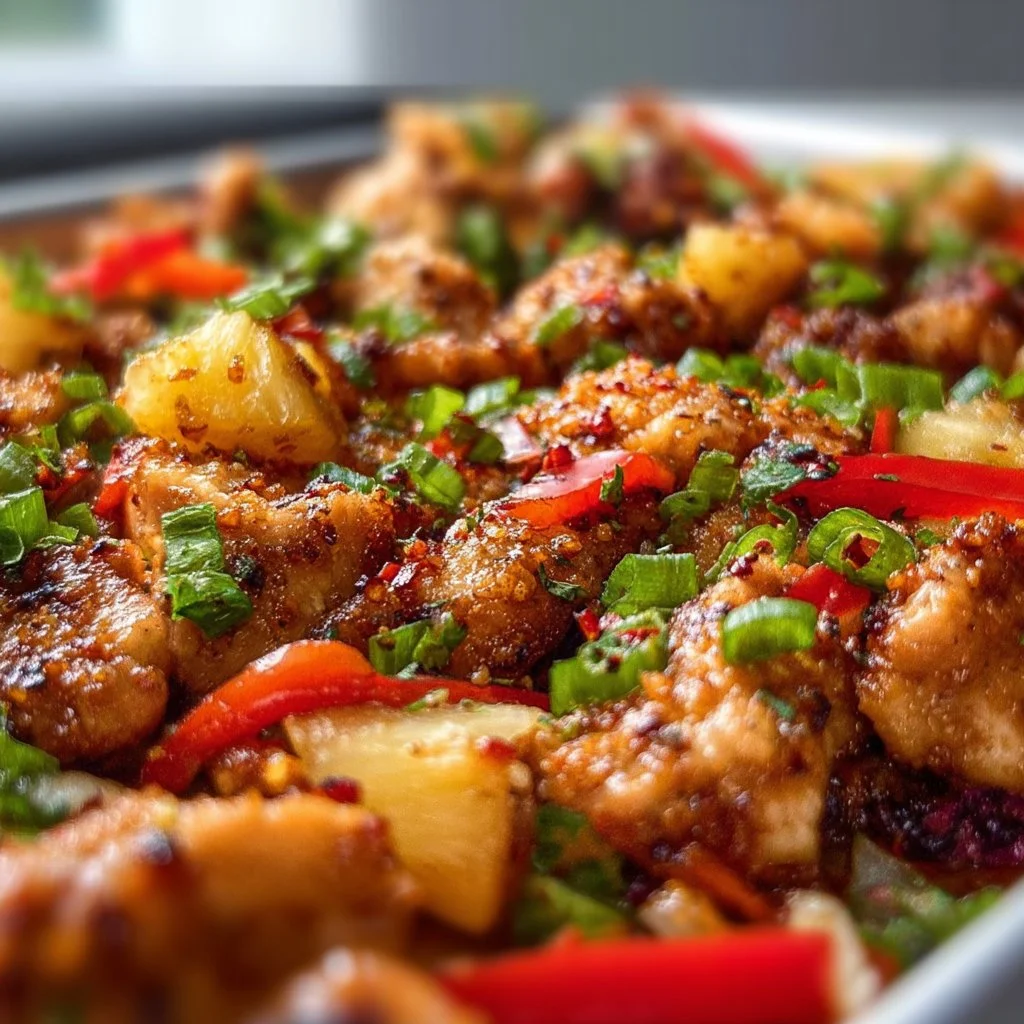
One-Pan Hawaiian Chicken: 30-Minute Sheet Pan Dinner
Hawaiian Chicken Sheet Pan: A Tropical Escape Right at Home
Hello, fellow foodies! Are you ready to embark on a vibrant culinary journey to the tropics without leaving your kitchen? Today, I’m thrilled to guide you through the deliciousness of my Hawaiian Chicken Sheet Pan recipe. It’s bright, colorful, and packed with flavors that will have you dreaming of sandy beaches and swaying palm trees.
This dish is not just easy; it’s also the perfect way to gather friends and family around the table for an unforgettable meal. Imagine the aroma of sweet pineapple mingling with tender chicken, fresh veggies, and a delightful soy sauce glaze wafting through your kitchen. Doesn’t that sound heavenly? Let’s dive into it!
A Memory to Savor
Whenever I think of Hawaiian flavors, I’m transported back to my childhood summers spent with my Auntie Mae in her kitchen. She had a flair for combining sweet and savory ingredients in a way that felt magical. I remember the first time she made Hawaiian chicken for us; I was skeptical at first. Chicken and pineapple? Really? But, oh boy, was I blown away!
She taught me that cooking is an adventure, a chance to explore flavors and get messy in the process. Our laughter echoed as we tossed ingredients together, and by the time the dish was out of the oven, the family had gathered around, eager to taste. Every bite was a celebration, a reminder that food doesn’t just nourish our bodies but also feeds our souls.
That’s the spirit I want to share with you today through this Hawaiian Chicken Sheet Pan — a dish that brings joy and togetherness, with every delicious mouthful transporting you to a sunny getaway.
Ingredients
Here’s what you need for this tropical delight:
-
1 ½ lbs (700 g) boneless skinless chicken breasts, cut into 1-inch pieces:
- Tender chicken is a must for this dish, soaking up all that delicious sauce! If you’re looking for alternatives, boneless skinless chicken thighs are fantastic for added flavor.
-
1 red bell pepper (chopped):
- Sweet and vibrant, red bell peppers add a crunch to the dish. You can swap it for green bell pepper if you prefer a sharper taste.
-
1 yellow bell pepper (chopped):
- This pepper contributes color and sweetness. Orange bell peppers are a great substitution too!
-
1 small red onion (cut into wedges):
- The zing of red onion complements the other flavors brilliantly. If red is not available, use yellow or white onion.
-
1 ½ cups fresh pineapple chunks (or canned, drained):
- Fresh pineapple truly shines here, but canned doesn’t come with all the fuss! Just make sure to drain it well if you choose canned.
-
2 tbsp olive oil:
- Olive oil adds richness. Feel free to use avocado oil if you want something more neutral.
-
2 cloves garlic (minced):
- Because who can resist that aromatic garlicky goodness? If you’re in a pinch, garlic powder works (about 1/2 tsp).
-
½ tsp salt:
- Essential for flavor enhancement! You can adjust this based on your dietary preferences.
-
½ tsp black pepper:
- A staple seasoning that melds beautifully with the other ingredients.
-
½ tsp paprika:
- This adds warmth and depth. If you’re looking for a little kick, smoked paprika would be great here!
-
¼ tsp chili flakes (optional):
- For those who enjoy a touch of heat, feel free to sprinkle in a little more.
For the Sauce:
-
⅓ cup low-sodium soy sauce:
- The heart of our sauce! Tamari is a great gluten-free alternative.
-
¼ cup pineapple juice (from the can or fresh):
- This adds a lovely tropical sweetness. If you don’t have any, orange juice could work too.
-
3 tbsp honey (or brown sugar):
- Sweetness brings balance. Maple syrup can be a great substitute for a vegan option.
-
2 tbsp rice vinegar (or apple cider vinegar):
- This gives a nice tanginess. If you can’t find rice vinegar, white wine vinegar is a good swap.
-
1 tbsp cornstarch + 2 tbsp water (slurry, optional for thickening):
- If you prefer a thicker sauce, this slurry will do the trick!
Step-by-Step Instructions
Now that you’ve gathered your ingredients, let’s get cooking. Here’s how to bring your Hawaiian Chicken Sheet Pan to life!
-
Preheat Your Oven:
Preheat your oven to 425°F (220°C). A hot oven ensures you get that lovely caramelization on your chicken and vegetables. -
Prepare Your Chicken:
In a large bowl, toss the diced chicken with olive oil, garlic, salt, black pepper, paprika, and chili flakes if using. Make sure every piece is coated generously. The olive oil helps the chicken stay moist and flavorful. -
Chop Up Those Veggies:
Add the chopped bell peppers and red onion to the chicken mixture. Toss everything together again to combine. The veggies will roast beautifully alongside the chicken, soaking up all those flavors. -
Create the Sweet Sauce:
In a separate bowl, whisk together the soy sauce, pineapple juice, honey (or brown sugar), rice vinegar, and cornstarch slurry if you’re using it. This sauce packs a punch and creates a beautiful glaze for the chicken and veggies. -
Arrange Everything on the Sheet Pan:
Line a large baking sheet with parchment paper for easy cleanup. Spread the chicken and vegetable mixture evenly across the sheet pan in a single layer. This ensures even cooking and crispy edges. -
Drizzle with Sauce:
Drizzle about half of the prepared sauce over the chicken and veggies. Reserve the rest for later – we’ll use it for a finishing touch! -
Roast in the Oven:
Place your sheet pan in the preheated oven and roast for about 20-25 minutes. Check halfway through and give everything a stir to ensure even cooking. The chicken should be cooked through and slightly caramelized, while the veggies are tender and vibrant. -
Final Touch:
Remove the sheet pan from the oven and drizzle the remaining sauce over the top for that extra hit of flavor. If you want to intensify the sauce’s flavor, you can quickly broil everything for 2-3 minutes to caramelize the sugars. Just keep an eye on it – you want that perfect golden brown without burning! -
Let It Rest:
Allow your dish to rest for about five minutes before serving. This resting time lets the juices redistribute in the chicken, giving you a juicier bite.
Serving Suggestions
Serve your Hawaiian Chicken directly from the sheet pan, letting everyone dig in family-style. Pair it with fluffy jasmine rice or coconut rice for a complete Hawaiian experience. A sprinkle of sesame seeds and chopped green onions on top adds a lovely finishing touch. Don’t forget a few lime wedges on the side for that zesty kick!
Recipe Variations
Feel free to get creative with this dish! Here are some fun variations to try:
- Add More Veggies: Toss in snap peas, zucchini, or carrots for extra color and crunch.
- Substitute Proteins: Try shrimp or cubed firm tofu for a pescatarian or vegetarian version!
- Spicy Kick: For those who love heat, add some diced jalapeños or sriracha to your sauce.
- Tropical Fruit Medley: Mix in mango or papaya for an added burst of sweetness!
- Gluten-Free: Use coconut aminos instead of soy sauce to keep it gluten-free.
Chef’s Notes
This Hawaiian Chicken Sheet Pan recipe has been a crowd favorite in my circle for years. I still remember the first time I made it for my friends; they all gathered eagerly around the kitchen table, and the compliments just flowed! Over time, I’ve adapted it to accommodate various dietary needs, and it has evolved beautifully. My favorite part? It’s always a hit, even with those who are usually picky!
Whenever I make this dish, I can’t help but think of that joyous moment when we all shared the first bite together. The whole experience is a reminder that cooking is not just about the food but the connection it brings.
FAQs and Troubleshooting
1. My chicken isn’t cooking evenly! What should I do?
Don’t worry! Make sure the pieces are all roughly the same size for even cooking. Also, give the pan a shake halfway through to redistribute everything.
2. What can I do if I have leftover sauce?
You can store it in the fridge for a week or use it as a marinade for chicken or veggies. Just remember to bring it to a boil before using to ensure food safety!
3. What if I run out of pineapple juice?
No stress! A splash of orange juice can replace pineapple juice nicely, giving a citrusy flavor to the dish.
4. Can I make this dish ahead of time?
Absolutely! You can prep everything in advance, store it in the fridge, and then roast it when you’re ready for an easy meal.
Nutritional Info
While I focus more on the joy of cooking than strict nutritional guidelines, this Hawaiian Chicken Sheet Pan is full of lean proteins and colorful veggies, making it a well-rounded option for family meals. With a balance of healthy fats from the olive oil and the natural sweetness of the fruits, it embodies a deliciously healthy choice.
With each bite of this vibrant dish, may you feel a warm Hawaiian breeze and the spirit of connection it brings. Enjoy cooking and savoring every moment at your table! Ready to toss on that apron and dive in? Let’s get to it! 🌺🍍🍗
PrintHawaiian Chicken Sheet Pan
A vibrant and flavorful dish featuring tender chicken, fresh veggies, and a sweet soy glaze, perfect for a family meal.
- Prep Time: 15 minutes
- Cook Time: 25 minutes
- Total Time: 40 minutes
- Yield: 4 servings 1x
- Category: Main Course
- Method: Baking
- Cuisine: Hawaiian
- Diet: Gluten-Free
Ingredients
- 1 ½ lbs (700 g) boneless skinless chicken breasts, cut into 1-inch pieces
- 1 red bell pepper, chopped
- 1 yellow bell pepper, chopped
- 1 small red onion, cut into wedges
- 1 ½ cups fresh pineapple chunks (or canned, drained)
- 2 tbsp olive oil
- 2 cloves garlic, minced
- ½ tsp salt
- ½ tsp black pepper
- ½ tsp paprika
- ¼ tsp chili flakes (optional)
- ⅓ cup low-sodium soy sauce
- ¼ cup pineapple juice (from the can or fresh)
- 3 tbsp honey (or brown sugar)
- 2 tbsp rice vinegar (or apple cider vinegar)
- 1 tbsp cornstarch + 2 tbsp water (optional for thickening)
Instructions
- Preheat your oven to 425°F (220°C).
- Toss the diced chicken with olive oil, garlic, salt, black pepper, paprika, and chili flakes in a large bowl.
- Chop the bell peppers and red onion and add them to the chicken mixture.
- Whisk together the soy sauce, pineapple juice, honey, rice vinegar, and cornstarch slurry in a separate bowl.
- Line a large baking sheet with parchment paper and spread the chicken and vegetable mixture evenly across the pan.
- Drizzle half of the sauce over the chicken and veggies.
- Roast for about 20-25 minutes, stirring halfway through.
- Remove the pan from the oven and drizzle the remaining sauce on top.
- Allow to rest for about five minutes before serving.
Notes
Serve with jasmine or coconut rice and garnish with sesame seeds and lime wedges for an extra zing.
Nutrition
- Serving Size: 1 serving
- Calories: 400
- Sugar: 20g
- Sodium: 600mg
- Fat: 10g
- Saturated Fat: 1g
- Unsaturated Fat: 5g
- Trans Fat: 0g
- Carbohydrates: 45g
- Fiber: 3g
- Protein: 25g
- Cholesterol: 60mg
Keywords: Hawaiian chicken, sheet pan, easy dinner, tropical recipe, family meal