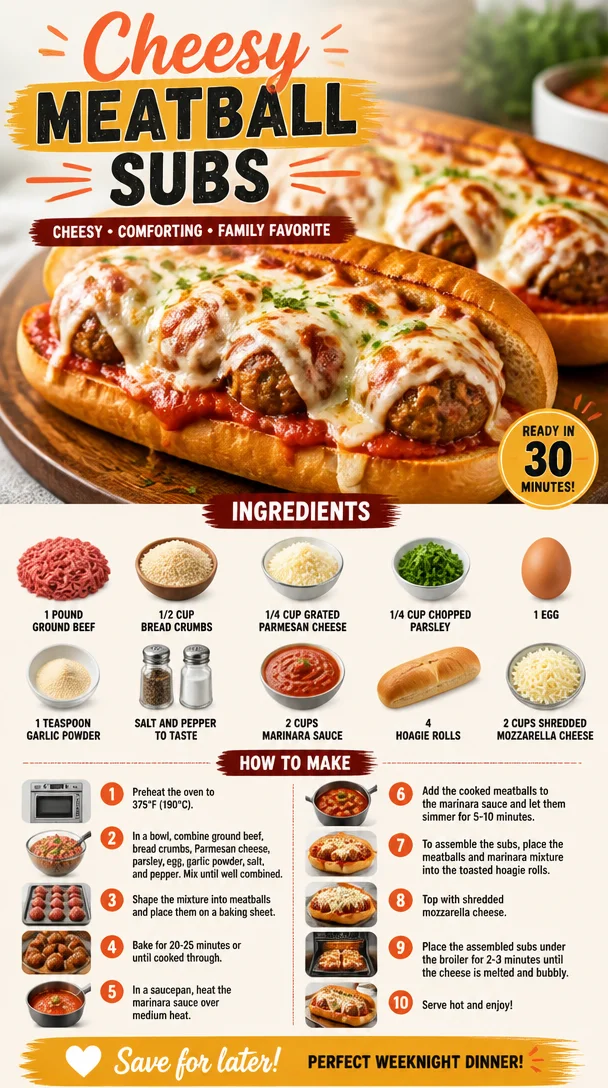
Cheesy Meatball Subs
Cheesy Meatball Subs: A Slice of Nostalgia and Flavor
Hello, lovely foodies! Today, we’re diving into a dish that is pure comfort food bliss: Cheesy Meatball Subs. Picture this: a warm, crusty hoagie roll stuffed with juicy meatballs, slathered in rich marinara sauce, and bubbling over with melted mozzarella cheese. It’s the kind of dish that wraps you up in a cozy hug and makes even the dreariest of days feel special.
These subs not only deliver on taste but come with a delightful dash of nostalgia for many of us. They evoke memories of family gatherings, game nights, and lazy afternoons when takeout always felt justified (because, let’s be honest, who could possibly resist a hearty sub?). Whether you’re hosting friends for a weekend movie marathon or just want a satisfying weeknight dinner, this recipe has you covered. Let’s roll up our sleeves and get to work!
A Taste of Nostalgia
I can still remember the first time I had a meatball sub. It was during my college days when every corner deli offered them as a quick, reliable option. I vividly remember sinking my teeth into that sandwich, the warm meatballs collapsing into the marinara sauce with each bite. I was instantly hooked. Not only was it delicious, but it was also a perfect post-study snack; just what I needed after a long day of classes.
Fast forward years later, and I find myself recreating that very same dish in my kitchen, infusing it with my own twists while keeping the essence of those deli memories alive. Now, every time I make Cheesy Meatball Subs, it’s not just about the flavors—it’s about the warm, inviting memories they hold.
Ingredients
Let’s gather what you need to create these cheesy wonders. Here’s the list, along with some tips and tricks to get the most out of each ingredient:
-
1 pound ground beef: This is your meatball’s foundation. Look for a blend with a bit of fat, like 80/20, for juicier meatballs. If you prefer, you can substitute turkey or chicken for a leaner option.
-
1/2 cup bread crumbs: These give structure to the meatballs. You can use plain or Italian seasoned bread crumbs, or even crushed crackers if that’s what you have on hand!
-
1/4 cup grated Parmesan cheese: A great way to add a subtle nutty flavor. If you’re aiming for a vegan option, use nutritional yeast or omit altogether.
-
1/4 cup chopped parsley: This adds fresh color and flavor. If parsley isn’t your thing, fresh basil or oregano can work well too!
-
1 egg: This acts as a binder, helping to hold everything together. If you’re vegan or egg-free, try a flax egg instead (1 tablespoon ground flaxseed mixed with 2.5 tablespoons water).
-
1 teaspoon garlic powder: A flavorful powerhouse that amplifies the taste of your meatballs. Freshly minced garlic works, too, if you want that extra punch!
-
Salt and pepper to taste: Essential for enhancing flavors. Don’t shy away from using freshly cracked pepper for a more robust taste.
-
2 cups marinara sauce: Choose your favorite jarred variety, or make your own for a personal touch. Simply simmer canned tomatoes with garlic, onion, and herbs for a quick homemade sauce.
-
4 hoagie rolls: Soft yet sturdy rolls are ideal for holding all that goodness. Substitutes could include baguettes or even sturdy burger buns.
-
2 cups shredded mozzarella cheese: The gooey element that makes this sub irresistible! For a twist, try a blend of Italian cheeses or even some provolone.
Step-by-Step Instructions
Alright, let’s bring these flavors to life! Follow me closely to create these flavorful Cheesy Meatball Subs.
-
Preheat your oven to 400°F (200°C). We want to ensure our meatballs bake to perfection while the cheese melts gloriously on top.
-
Mix the meatball ingredients: In a large mixing bowl, combine the ground beef, bread crumbs, Parmesan cheese, chopped parsley, egg, garlic powder, salt, and pepper. Use your hands to gently mix everything together, but be careful not to overmix—this keeps the meatballs tender!
-
Form the meatballs: Using your hands, scoop out about 2 tablespoons of the mixture and roll it into a ball. Repeat until all the mixture is used, placing the meatballs on a baking sheet lined with parchment paper for easy cleanup.
-
Bake the meatballs: Slide them into the preheated oven and let them bake for about 20-25 minutes, or until they are nicely browned and cooked through. The internal temperature should reach 160°F (70°C). Turn on the broiler for the last 2-3 minutes for an extra golden touch!
-
Simmer the marinara sauce: While the meatballs are baking, pour the marinara sauce into a medium saucepan and let it heat on low, stirring occasionally. Don’t skip this step; the flavors meld beautifully as they warm together!
-
Assemble the subs: Once the meatballs are cooked, take them out of the oven and gently toss them in the warmed marinara sauce. Load the hoagie rolls with several meatballs, ensuring you drizzle extra sauce on top.
-
Top with mozzarella: Generously sprinkle the shredded mozzarella over the top of each loaded hoagie. Trust me, this is where the magic happens!
-
Broil for gooey goodness: Place the subs back under the broiler for another 2-3 minutes, just until the cheese is bubbling and starting to brown. Keep a close eye on this; it can go from perfectly golden to burnt in the blink of an eye!
-
Serve: Remove from the oven, let cool for a minute, then devour!
Serving Suggestions
To really impress, serve your Cheesy Meatball Subs on a rustic wooden board with a side of crispy potato chips or a simple arugula salad topped with a squeeze of lemon. You can even sprinkle some extra chopped parsley or basil over the top for a pop of color!
Recipe Variations
Feeling adventurous? Here are some delightful twists you can try:
-
Spicy Meatball Subs: Add crushed red pepper flakes to the meatball mixture or drizzle some sriracha on top for a kick.
-
BBQ Meatball Subs: Swap out the marinara for your favorite BBQ sauce and mix it into the baked meatballs. Top with coleslaw for a Southern twist.
-
Veggie Meatball Subs: Replace the ground beef with lentils, black beans, or a pre-made veggie meat product for a plant-based option.
-
Mediterranean Meatball Subs: Incorporate feta cheese and herbs like oregano into the meatball mixture, then serve with a tzatziki sauce instead of marinara.
Chef’s Notes
Whenever I make these subs, I can’t help but reminisce about the countless friendly debates over who can craft the ultimate meatball. There’s so much room for creativity! Over the years, I’ve played around with different meat blends, sauces, and toppings, often laughing about the ‘fails’ that turned into kitchen improv nights.
One time, I accidentally mixed up my garlic powder with cinnamon while making a batch. Long story short, it was a culinary disaster, but that’s how recipes evolve and take on a life of their own!
FAQs and Troubleshooting
1. Why are my meatballs dry?
If your meatballs turn out dry, it could be due to overmixing or not enough moisture. Ensure you’re using enough fat (like the right meat blend) and consider adding a splash of milk or broth to the mixture for added moisture.
2. How can I make my meatballs more flavorful?
Enhance flavors by adding more aromatic ingredients like minced onion, fresh herbs, or even Worcestershire sauce. Some people like to add a dash of hot sauce in the meat mixture for a flavor boost!
3. Can I prepare these ahead of time?
Absolutely! You can make the meatballs in advance and store them in the fridge or freeze them. Just reheat in sauce before assembling your subs. Just remember to adjust bake times if using frozen meatballs!
4. What’s the best way to store leftovers?
If you happen to have leftovers (which is rare!), store any extra subs in an airtight container in the fridge for up to 3 days. You can reheat them in the oven to regain that crispy bread texture, or microwave them for convenience.
Nutritional Info
While I don’t generally focus on nutritional charts, a rough estimate for one meatball sub would be about 500 calories, depending on the sauce and bread used. They’re a hearty option, packed with flavors to keep you satisfied!
So there you have it! My twist on Cheesy Meatball Subs that infuse flavor and fond memories alike. I hope this recipe not only tantalizes your taste buds but also inspires you to gather your loved ones around the table. Happy cooking, and don’t forget to tie that apron—I’m here with you in spirit!
PrintCheesy Meatball Subs
A delicious comfort food featuring juicy meatballs, rich marinara sauce, and melted mozzarella cheese, all wrapped in a warm hoagie roll.
- Prep Time: 15 minutes
- Cook Time: 25 minutes
- Total Time: 40 minutes
- Yield: 4 servings 1x
- Category: Main Course
- Method: Baking
- Cuisine: American
- Diet: None
Ingredients
- 1 pound ground beef
- 1/2 cup bread crumbs
- 1/4 cup grated Parmesan cheese
- 1/4 cup chopped parsley
- 1 egg
- 1 teaspoon garlic powder
- Salt and pepper to taste
- 2 cups marinara sauce
- 4 hoagie rolls
- 2 cups shredded mozzarella cheese
Instructions
- Preheat your oven to 400°F (200°C).
- Mix the meatball ingredients: In a large mixing bowl, combine the ground beef, bread crumbs, Parmesan cheese, chopped parsley, egg, garlic powder, salt, and pepper.
- Form the meatballs: Scoop out about 2 tablespoons of the mixture and roll it into a ball.
- Bake the meatballs: Place the meatballs on a baking sheet and bake for about 20-25 minutes, until they are browned and cooked through.
- Simmer the marinara sauce: Heat the marinara sauce in a medium saucepan on low.
- Assemble the subs: Toss the cooked meatballs in the sauce and load them into the hoagie rolls.
- Top with mozzarella: Sprinkle shredded mozzarella over the subs.
- Broil for gooey goodness: Broil for another 2-3 minutes until the cheese is bubbling.
- Serve: Remove from the oven, let cool for a minute, then enjoy!
Notes
Feel free to experiment with different meats and sauces. These subs are versatile and can be customized to your taste.
Nutrition
- Serving Size: 1 sub
- Calories: 500
- Sugar: 8g
- Sodium: 800mg
- Fat: 20g
- Saturated Fat: 10g
- Unsaturated Fat: 8g
- Trans Fat: 0g
- Carbohydrates: 45g
- Fiber: 2g
- Protein: 28g
- Cholesterol: 80mg
Keywords: meatball subs, cheesy subs, comfort food, easy recipes, Italian food
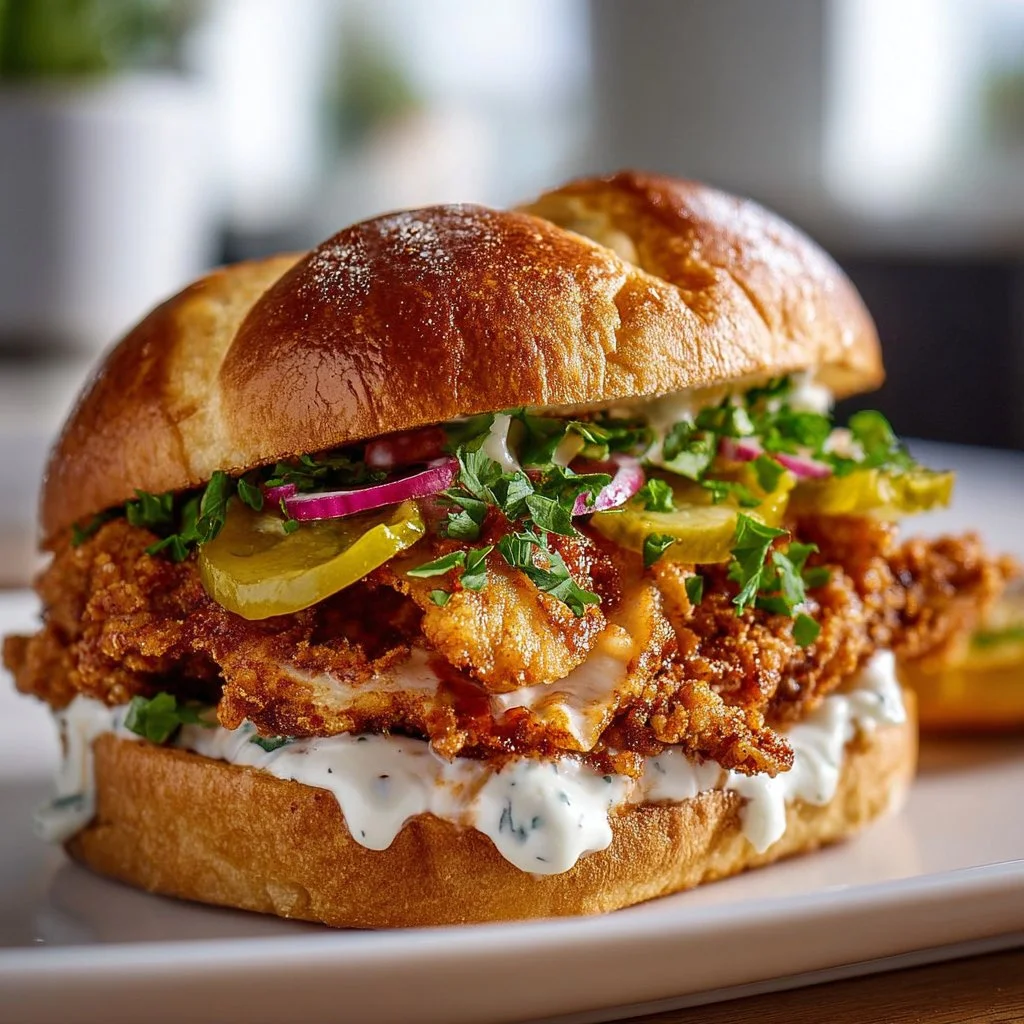
Cajun Crispy Chicken Sandwich with Garlic Aioli: Irresistibly Juicy!
Cajun Crispy Chicken Sandwich with Garlic Aioli: Irresistibly Juicy!
Hello, food friends! Are you ready to step into my kitchen and whip up something wonderfully delicious? Today, we’re diving into a dish that’s not only crispy and juicy, but it also carries a little bit of Southern flair. That’s right — we’re making a Cajun Crispy Chicken Sandwich with Garlic Aioli! This beauty will have your taste buds dancing the second you take a bite.
Nothing beats the satisfying crunch of a well-fried chicken sandwich paired with just the right amount of spice — and let me tell you, this sandwich has it all. Just imagine: tender chicken breasts marinated in smooth buttermilk, coated in a perfect blend of Cajun spices, deep-fried to golden perfection, and topped off with a luscious garlic aioli that adds just the right kick. Oh, and don’t forget the fresh lettuce and juicy tomatoes on a fluffy brioche bun!
Now, back when I first experimented with this recipe, I was just beginning to cook more seriously. I was sitting down for dinner one rainy evening with friends, and we wanted something that felt comforting, yet a bit adventurous. Burgers were an option, but we all craved something crispier, flavorful, and with plenty of character. That’s when I tossed the idea of a fried chicken sandwich into the ring, but I needed more than just the basics — I wanted a dish that told a story.
After some back-and-forth experimenting, I settled on a Cajun twist. The spices, the flavors — they brought me back to a road trip I took to New Orleans, where I relished the rich culinary heritage of the South. There’s magic in the combination of spices and fresh ingredients, and the moment you bite into this sandwich, you’ll be right there with me. So, let’s roll up our sleeves and get cooking!
Personal Story
I fondly remember a family road trip we took down to Louisiana. From the moment we crossed the state line, the air was filled with the fragrant aroma of spices wafting through the window. Our first stop was a bustling roadside cafe. It was there that I had my first bite of a truly authentic fried chicken sandwich. The crispy exterior gave way to juicy chicken, enhanced by tart pickles and that secret sauce that just tied everything together.
At that moment, I knew I wanted to encapsulate those bold flavors in my own kitchen. What I didn’t know was that it would lead to countless dinner parties, laughter-filled gatherings, and many happy friends leaving with full bellies and big smiles. Fast forward to today, I’ve crafted my own twist that honors that nostalgic sandwich. So let’s recreate that moment together in your kitchen!
Ingredients
Let’s break down the wonderful ingredients that will transform simple chicken breasts into a spectacular milestone of flavor:
For the Chicken:
- 2 boneless, skinless chicken breasts: The stars of our show! They’ll soak up all the flavor and become juicy crunchy enjoyment. If you’re looking to switch it up, thinly sliced chicken thighs are a fantastic substitute!
- 1 cup buttermilk: Key for marinating our chicken to keep it tender and moist. You can use regular milk with a splash of vinegar or lemon juice as a quick buttermilk substitute!
- 1 tablespoon Cajun seasoning: This is where the magic happens. If you don’t have Cajun seasoning on hand, don’t fret! You can make a quick blend using paprika, cayenne pepper, and garlic powder.
- 1 cup all-purpose flour: The base for our crispy coating! If you’re avoiding gluten, use a gluten-free flour blend and tweak your proportions a bit.
- 1 teaspoon paprika: Just a little for added depth of flavor.
- 1 teaspoon garlic powder: Because what’s a good fried chicken sandwich without some garlicky goodness?
- 1 teaspoon onion powder: Enhances the savory flavor profile of our breading.
- 1/2 teaspoon salt: Essential for seasoning!
- 1/2 teaspoon black pepper: For a bit of warmth without overpowering the flavor.
- Vegetable oil for frying: Peanut oil is an excellent option if you’d like a higher smoke point and a clean taste.
For the Garlic Aioli:
- 1/2 cup mayonnaise: The creamy base of our sauce. If you’re feeling adventurous, you can substitute with Greek yogurt for a healthier option!
- 2 cloves garlic, minced: Fresh garlic to create that punchy flavor.
- 1 tablespoon lemon juice: Adds a touch of acidity to brighten the aioli.
- 1/2 teaspoon salt: Balances out the flavors.
- 1/4 teaspoon black pepper: Just a whisper to tie it all together.
For Assembly:
- 4 brioche buns: Soft, buttery, and perfect for holding everything together.
- Leafy romaine lettuce: Adds a crisp freshness to your sandwich.
- Sliced tomatoes: Juicy and vibrant, they create a beautiful contrast against the crispy chicken.
Step-by-Step Instructions
Ready to cook? Let’s turn up the heat!
Step 1: Marinate the Chicken
Start by placing your chicken breasts in a mixing bowl. Pour in the buttermilk and sprinkle in the Cajun seasoning. This marinade tenderizes the chicken and infuses it with that delicious flavor. Let it soak for at least 30 minutes; if you have time, let it sit in the fridge for a few hours.
Step 2: Make the Garlic Aioli
While the chicken is marinating, let’s whip up that addictive garlic aioli. In a small bowl, combine mayonnaise, minced garlic, lemon juice, salt, and black pepper. Mix until smooth and creamy. Don’t taste it yet, or you might find it hard to stop! Cover and place it in the fridge to let those flavors mingle.
Step 3: Prepare the Breading Station
In three separate bowls, create your breading station:
- In the first bowl, mix together the flour, paprika, garlic powder, onion powder, salt, and black pepper.
- In the second bowl, set aside the remaining buttermilk.
- Leave the third bowl empty for the chicken once it’s coated!
Step 4: Heat the Oil
In a deep skillet or pan, pour in enough vegetable oil to submerge a chicken breast (about 1-2 inches deep), and heat over medium-high heat. Use a thermometer if you have one; you’re looking for about 350°F. To test the oil, drop a pinch of flour into the pan—if it sizzles, you’re good to go!
Step 5: Bread the Chicken
Remove the chicken breasts from the buttermilk marinade and let excess buttermilk drip off. Dredge each chicken breast in the seasoned flour, making sure to coat evenly on both sides. Give it a gentle shake to remove any excess flour. Now, place it on the empty plate.
Step 6: Fry Away!
Carefully lower the breaded chicken into the hot oil. Fry for about 5–7 minutes on each side or until golden brown and cooked through (internal temperature should reach 165°F). If your chicken is browning too quickly, lower the heat. You want it crispy, not burnt!
Step 7: Drain and Rest
Once fried to perfection, remove the chicken and place it on a wire rack or paper towel-lined plate to drain any excess oil. Give it a few minutes to rest; this helps keep it juicy!
Step 8: Toast the Buns
While the chicken is resting, it’s time to toast the brioche buns. You can do this in a dry skillet over medium heat or pop them under the broiler for a quick minute or two. Just keep an eye on them—they toast up quickly!
Serving Suggestions
Now comes the fun part! On the bottom half of each toasted brioche bun, place a generous spoonful of garlic aioli. Next, pile on that crispy chicken, followed by leafy romaine lettuce and juicy tomato slices. Top with the other half of the bun, and there you have it—your irresistibly juicy Cajun crispy chicken sandwich is all assembled!
Recipe Variations
Feeling creative? Here are a few delicious twists you can try:
- Spicy Cajun: Add a dash of hot sauce to the buttermilk marinade for an extra kick!
- BBQ Chicken Sandwich: Replace the garlic aioli with your favorite barbecue sauce and top with pickles.
- Mediterranean Twist: Substitute the Cajun seasoning with dried herbs like thyme and oregano, and serve with tzatziki instead of aioli.
- Vegan Version: Use eggplant slices or cauliflower steaks coated in the same breading, baking them instead of frying.
- Cheesy Delight: Top your sandwich with a slice of melting cheddar or pepper jack cheese for some ooey-gooey bliss.
Chef’s Notes
Every recipe tells a story, and this one has definitely evolved over time! Initially, I made this dish with just basic seasoning, but as I experimented, I discovered how richness and bold spices could elevate the experience. One hilarious story comes to mind: the first time I made this, I mistook cayenne for chili powder and ended up with quite the spicy surprise! Friends were sweating (and loving it), and now I can’t help but add a little extra heat every time I cook it.
FAQs and Troubleshooting
1. Why did my chicken come out dry?
If your chicken is dry, it could be due to overcooking. Make sure to use a meat thermometer for accuracy, and let it rest after frying!
2. Can I bake the chicken instead of frying?
Absolutely! To bake, preheat the oven to 400°F, place the breaded chicken on a baking sheet, spray with cooking oil, and bake for about 20–25 minutes or until cooked through, flipping halfway through.
3. What if my aioli is too garlicky?
If you find your aioli too strong, balance it out by adding a little more mayonnaise or a squeeze of lemon juice to cut through the flavor.
4. How can I make this spicy?
Add some cayenne pepper to the Cajun mix or toss in sliced jalapeños with the lettuce and tomatoes for an added punch!
So there you have it! With vibrant flavors, crispy texture, and that irresistible garlic aioli, this Cajun Crispy Chicken Sandwich will become a staple in your home. Whether it’s for a weeknight dinner or a weekend gathering, everyone will be lining up for seconds. So tie on your apron, turn on some tunes, and enjoy this culinary journey to flavor town.
Happy cooking, and as always, let’s keep making beautiful moments around the table! 🥳
PrintCajun Crispy Chicken Sandwich with Garlic Aioli
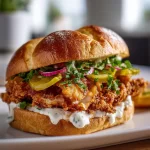
Irresistibly juicy Cajun crispy chicken sandwich served with a luscious garlic aioli, fresh lettuce, and sliced tomatoes on a fluffy brioche bun.
- Prep Time: 30 minutes
- Cook Time: 20 minutes
- Total Time: 50 minutes
- Yield: 4 servings 1x
- Category: Main Course
- Method: Frying
- Cuisine: Southern
- Diet: None
Ingredients
- 2 boneless, skinless chicken breasts
- 1 cup buttermilk
- 1 tablespoon Cajun seasoning
- 1 cup all-purpose flour
- 1 teaspoon paprika
- 1 teaspoon garlic powder
- 1 teaspoon onion powder
- 1/2 teaspoon salt
- 1/2 teaspoon black pepper
- Vegetable oil for frying
- 1/2 cup mayonnaise
- 2 cloves garlic, minced
- 1 tablespoon lemon juice
- 1/2 teaspoon salt
- 1/4 teaspoon black pepper
- 4 brioche buns
- Leafy romaine lettuce
- Sliced tomatoes
Instructions
- Marinate the chicken by placing it in a bowl with buttermilk and Cajun seasoning for at least 30 minutes.
- Make the garlic aioli by mixing mayonnaise, minced garlic, lemon juice, salt, and black pepper in a bowl; refrigerate.
- Prepare a breading station with flour mixture in one bowl, buttermilk in the second, and an empty plate for coated chicken.
- Heat vegetable oil in a deep skillet over medium-high heat to 350°F.
- Bread the chicken by dredging each breast in flour before placing on a plate.
- Fry the chicken for 5–7 minutes on each side until golden brown and cooked through.
- Drain the fried chicken on a wire rack or paper towel-lined plate.
- Toast the brioche buns in a skillet or under the broiler until golden.
- Assemble the sandwiches by spreading garlic aioli on the buns, adding crispy chicken, lettuce, and tomatoes.
Notes
For added spice, consider adding hot sauce to the buttermilk marinade or using cayenne pepper in the breading. Adjust aioli’s garlic level to taste.
Nutrition
- Serving Size: 1 sandwich
- Calories: 450
- Sugar: 3g
- Sodium: 800mg
- Fat: 24g
- Saturated Fat: 4g
- Unsaturated Fat: 18g
- Trans Fat: 0g
- Carbohydrates: 40g
- Fiber: 2g
- Protein: 22g
- Cholesterol: 80mg
Keywords: Cajun, chicken sandwich, garlic aioli, fried chicken