
Minute One-Pan Garlic Parmesan Chicken & Potatoes Skillet
Garlic Parmesan Chicken and Potato Skillet: A Comforting Classic
Hello, fellow foodies! Today, I’m thrilled to share one of my all-time favorite dishes that packs a punch of flavor while being incredibly easy to prepare: Garlic Parmesan Chicken and Potato Skillet. This delightful meal is the epitome of comfort food, bringing together juicy chicken thighs and perfectly roasted potatoes all in one pan. It’s perfect for a weeknight dinner or a cozy gathering with friends. So, let’s dive into the flavors and joy of this dish!
A Taste of Nostalgia
You know, every recipe holds a special memory, and Garlic Parmesan Chicken and Potato Skillet is no different for me. I remember one rainy Tuesday evening when my friends had come over after a long day at work. We needed something hearty that wouldn’t keep us slaving away in the kitchen for hours. As the rain drizzled down outside, I decided to whip up this skillet meal. The aroma of garlic filling the air was enough to draw everyone into the kitchen, and soon, we were sharing laughs, stories, and more than a few “just one more bite” moments.
Sitting around the table with warm, gooey cheese falling off the tender chicken paired with golden, crispy potatoes felt like the ultimate hug in a bowl. After that night, this dish became a staple in my cooking repertoire—easy to make and even easier to enjoy. I can’t wait for you to experience that same comfort!
Ingredients
Here’s what you’ll need for this delightful dish:
-
4 chicken thighs: Juicy and tender, chicken thighs have the perfect amount of fat for flavor. If you prefer, you can substitute them with boneless, skinless chicken breasts, but remember they might cook a bit quicker.
-
4 medium potatoes, diced: Potatoes provide that comforting base for this meal. Feel free to use any variety you have on hand—Yukon gold, red, or even sweet potatoes for a different flavor profile!
-
3 tablespoons olive oil: This is our secret to achieving that lovely golden crust. If you’d like, avocado oil works similarly, but stay away from oils with strong flavors like sesame oil.
-
1 tablespoon minced garlic: Fresh garlic adds a fragrant punch. You can substitute it with garlic powder, but use about one teaspoon since it’s more concentrated.
-
1 cup grated Parmesan cheese: This cheese brings a nutty, salty flavor to the dish. Pecorino Romano can be a great alternative if you’re looking for something sharper in taste.
-
Salt and pepper to taste: Essential for elevating the dish, adjust these to your preference.
-
1 tablespoon chopped fresh parsley (for garnish): This adds a lovely pop of color and freshness to your plate. If parsley’s not your jam, try fresh basil or thyme!
Step-by-Step Instructions
Now, let’s get cooking! Follow these steps, and I promise you’ll have a delicious meal in no time.
-
Prep your ingredients: Start by washing and dicing your potatoes into bite-sized pieces. This ensures even cooking. Next, pat your chicken thighs dry with a paper towel and season both sides generously with salt and pepper. Seasoning before cooking helps lock in that flavor.
-
Heat the pan: Grab a large skillet (preferably cast iron for that perfect crust) and drizzle in the olive oil. Heat the pan over medium-high heat until the oil shimmers. This is a crucial step—make sure it’s hot enough before adding your chicken to get that glorious sear.
-
Sear the chicken: Place the chicken thighs skin-side down in the skillet. Don’t overcrowd the pan—if your skillet is small, cook in batches. Sear them for about 5-7 minutes until the skin is crispy and golden, then flip and cook for another 5 minutes. If your chicken starts to brown too much, lower the heat to medium.
-
Add the potatoes and garlic: Once the chicken is browned, toss in those diced potatoes and minced garlic around the chicken. Give them a good mix to coat everything in that residual oil and chicken flavor.
-
Cover and cook: Reduce the heat to medium-low and cover the skillet with a lid. Let it cook for about 20-25 minutes. During this time, the chicken will cook through, and the potatoes will become tender and flavor-packed. Stir occasionally to prevent sticking and ensure even cooking.
-
Add the cheese: When the chicken is cooked through (165°F internal temperature) and the potatoes are tender, sprinkle the grated Parmesan cheese evenly over the top, cover the skillet again, and let it melt for about 3-5 minutes. The melted cheese creates a creamy, delicious topping that pulls this dish together beautifully!
Serving Suggestions
Now that everything is cooked to perfection, it’s time to plate! Transfer the garlic Parmesan chicken and potato skillet onto a large serving platter. To elevate the presentation, sprinkle the dish with freshly chopped parsley. You can serve this alongside a simple green salad and a glass of your favorite white wine for a complete dining experience.
Recipe Variations
Looking to switch things up? Here are some fun variations to consider:
-
Lemon Herb: Add lemon zest and a splash of lemon juice before serving for a bright, zesty finish.
-
Spicy Kick: Toss some red pepper flakes in with the garlic for an extra layer of flavor.
-
Creamy Mushroom: Sauté sliced mushrooms when you add the garlic for a rich, earthy twist.
-
Veggie Boost: Adding some diced bell peppers or zucchini will introduce more color and flavor to the dish.
-
Herbed Cheese: Swap Parmesan for feta or goat cheese if you’re in the mood for something a bit tangier.
Chef’s Notes
This recipe has had its fair share of kitchen adventures! I remember one time experimenting with different cheeses and ended up with a crazy mix of cheddar and mozzarella. Believe me, it was a gooey disaster that littered my kitchen with cheese strings! But through those mishaps, I learned the beauty of simplicity and sticking to what works.
One last tip: Always taste as you go! Cooking is as much about your palate as it is about the recipe. Trust your instincts and adjust flavors as you see fit!
FAQs and Troubleshooting
Q: What if my chicken is undercooked?
A: No worries! Simply lower the heat and cover the skillet again, cooking for a few more minutes. Always check for the internal temperature to reach 165°F.
Q: Can I use the oven for this recipe?
A: Absolutely! You can sear the chicken on the stovetop and then transfer it to a preheated oven at 375°F to finish cooking—just make sure to use an oven-safe skillet!
Q: Why are my potatoes not crisping up?
A: Make sure your potatoes are diced evenly to ensure they cook at the same rate, and give them room to breathe in the pan. If they are packed tightly, they’ll steam instead of crisp.
Q: Can I make this recipe gluten-free?
A: Yes! All the ingredients listed are gluten-free. Just ensure your Parmesan cheese is certified gluten-free if you’re concerned about cross-contamination.
Nutritional Info
While I could give you the exact nutritional breakdown here, the best part is this dish offers a balanced combination of protein from the chicken, carbohydrates from the potatoes, and healthy fats from the olive oil. It’s not only delicious but also satisfying and nourishing!
So there you have it! Garlic Parmesan Chicken and Potato Skillet—a dish that feels like getting a warm hug while sitting at your favorite café. I hope you enjoy making this as much as I do. Tie on your apron, gather your ingredients, and let’s bring a little magic to your table tonight. Happy cooking!
PrintGarlic Parmesan Chicken and Potato Skillet

A comforting skillet meal featuring juicy chicken thighs and crispy potatoes, infused with garlic and topped with melted Parmesan.
- Prep Time: 15 minutes
- Cook Time: 30 minutes
- Total Time: 45 minutes
- Yield: 4 servings 1x
- Category: Main Course
- Method: Skillet
- Cuisine: American
- Diet: Gluten-Free
Ingredients
- 4 chicken thighs
- 4 medium potatoes, diced
- 3 tablespoons olive oil
- 1 tablespoon minced garlic
- 1 cup grated Parmesan cheese
- Salt and pepper to taste
- 1 tablespoon chopped fresh parsley (for garnish)
Instructions
- Prep your ingredients: Wash and dice the potatoes into bite-sized pieces. Pat the chicken thighs dry and season with salt and pepper.
- Heat the pan: Drizzle olive oil in a large skillet and heat over medium-high until shimmering.
- Sear the chicken: Place chicken thighs skin-side down in the skillet, searing for 5-7 minutes. Flip and cook for another 5 minutes.
- Add the potatoes and garlic: Toss in the diced potatoes and minced garlic, mixing to coat in oil and chicken flavor.
- Cover and cook: Reduce heat to medium-low, cover, and cook for 20-25 minutes until chicken is cooked through and potatoes are tender.
- Add the cheese: Sprinkle Parmesan cheese over the top, cover again, and let it melt for 3-5 minutes.
Notes
Always taste as you go to adjust flavors. For gluten-free, ensure Parmesan is certified gluten-free.
Nutrition
- Serving Size: 1 serving
- Calories: 400
- Sugar: 4g
- Sodium: 350mg
- Fat: 18g
- Saturated Fat: 6g
- Unsaturated Fat: 8g
- Trans Fat: 0g
- Carbohydrates: 32g
- Fiber: 3g
- Protein: 30g
- Cholesterol: 100mg
Keywords: chicken, skillet, comfort food, garlic, Parmesan, one-pan meal

Pineapple Chicken and Rice: An Incredible Ultimate Recipe
Pineapple Chicken and Rice: An Incredible Ultimate Recipe
Introduction
Hello, fellow food lovers! Today, I’m thrilled to share a recipe that not only warms the heart but also, quite literally, brings the sunshine to your plate—Pineapple Chicken and Rice! This dish is a delightful blend of savory and sweet, featuring succulent chicken pieces, juicy pineapple, colorful bell peppers, and fluffy rice that all come together in a beautiful harmony. Imagine sitting down to a colorful plate that evokes tropical vibes, making it hard to resist a smile.
I started whipping up this dish during college when the grocery budget was tight, and the craving for flavor was high. This could easily be a frequent flyer on your dinner party menu because it’s not only scrumptious but also visually appealing, making it perfect for impressing your guests. Plus, it’s versatile! Whether you’re serving a casual weeknight dinner or entertaining friends, this dish is sure to be a hit.
Just think about that first bite—tender chicken melded with the sweetness of fresh pineapple, complemented by the herby brightness of green onions. And let’s not forget the rice; it soaks up all that flavor like a little sponge, ensuring no deliciousness goes to waste.
Ready to dive into this culinary adventure? Grab your apron, and let’s get started!
Personal Story
I can never forget the first time I made Pineapple Chicken and Rice for my closest friends. It was a warm summer evening, and we had gathered on my apartment balcony, fairy lights twinkling in the backdrop—the perfect ambiance. I was anxious since I wanted to impress them without spending hours in the kitchen. Thankfully, everything came together flawlessly, and as that first bite was taken, the room erupted in compliments!
What I didn’t know was that this simple dish would become a tradition amongst my friends. Our monthly get-togethers evolved into themed evenings focused on different cuisines, with my Pineapple Chicken and Rice invariably stealing the spotlight. It became a comfort food staple that not only satisfied our taste buds but also nourished our friendship, creating beautiful memories together. Each time, I’d switch up the ingredients a little, making it fun and new yet familiar all at once.
Ingredients
Now that we have you dreaming of that first bite, let’s gather our ingredients:
-
2 cups of cooked white rice
Use leftover rice or cook fresh rice just before starting your dish. If you’re feeling adventurous, try brown rice for a nuttier flavor! -
1 pound chicken breast, cut into bite-sized pieces
Chicken thighs can also be a great substitute for juicier meat. Don’t skimp on seasoning them ahead of time! -
1 cup fresh pineapple chunks (or canned, drained)
Fresh pineapple adds vibrancy and sweetness, while canned pineapple works in a pinch. Just make sure to drain it well to avoid excess liquid. -
1 tablespoon olive oil
Olive oil adds a lovely richness. Avocado oil works fine, too, if you’re looking for a different flavor profile. -
1 small onion, diced
Sweet onions are great, but any kind will do. Sautéing brings out their natural sweetness, adding depth to the dish. -
2 cloves garlic, minced
Fresh garlic takes this recipe to another level. If you’re short on time, pre-minced garlic works! -
1 bell pepper (red or green), chopped
Red bell peppers bring sweetness, while green offers slight bitterness. Choose whichever you’d prefer or mix them for a colorful flair! -
1 cup chicken broth
Homemade broth is the best option, but store-bought works well if you need convenience. Just check for low-sodium options if you’re watching salt. -
2 tablespoons soy sauce
This adds a savory umami punch. Tamari or coconut aminos are excellent gluten-free alternatives. -
1 tablespoon brown sugar
A hint of sweetness balances the savory components. You could also use honey or maple syrup. -
1 teaspoon ginger, minced
Fresh ginger adds vibrant warmth! If you only have ground ginger, start with half the amount as it packs a different punch. -
Salt and pepper to taste
Always adjust to your liking! I recommend seasoning in layers as you cook for maximum flavor. -
Chopped green onions for garnish (optional)
These lend freshness and color; don’t skip them if you can help it!
Step-by-Step Instructions
Now for the fun part! Here’s how to bring this delightful dish to life:
-
Prep Your Ingredients: Start by cutting your chicken into bite-sized pieces and dicing your onion and bell pepper. Try to keep everything around the same size for even cooking. Also, chop your pineapple chunks if you’re using fresh pineapple.
-
Cook the Rice: You can use previously cooked rice (it’s often even better as it fluffs up!) or cook your rice now. If cooking fresh, follow package instructions, or start by boiling water, adding a pinch of salt, then simmer until all the water is absorbed and rice is fluffy. Set aside once done.
-
Heat the Oil: In a large skillet or wok, heat the olive oil over medium-high heat. You want it hot enough to brown the chicken without burning!
-
Cook the Chicken: Once the oil shimmers, add the chicken pieces in a single layer. Season with a sprinkle of salt and pepper. Cooking in batches can prevent overcrowding. Brown them for about 5-6 minutes until they turn golden. Stir occasionally and watch for that irresistible golden crust!
-
Sauté the Vegetables: Add the diced onion and bell pepper to the skillet. Cook these for about 3-4 minutes, stirring frequently, until they start to soften and become fragrant. This step will build a lovely flavor base.
-
Add Garlic and Ginger: Toss in your minced garlic and ginger, cooking for another minute or until fragrant. Be cautious not to burn the garlic—it can become bitter quickly.
-
Incorporate Pineapple and Chicken Broth: Gently fold in the pineapple chunks, followed by the chicken broth, soy sauce, and brown sugar. Bring this bubbling beauty to a simmer.
-
Simmer and Combine: Allow it to simmer for about 5-7 minutes, letting all those rich flavors meld beautifully. If you notice it’s thickening too much, add a splash more chicken broth!
-
Bring It Together: Once that simmering is done, add the cooked rice right into the skillet. Gently fold the rice into the mix, ensuring every grain gets coated in the glorious sauce. Taste and adjust seasoning as needed—maybe a little more soy sauce or a dash of pepper for that added zing!
-
Serve and Garnish: Once everything is well combined and heated through, remove from heat. Scooping it onto plates, sprinkle with chopped green onions for that fresh touch.
Serving Suggestions
For a lovely presentation, serve your Pineapple Chicken and Rice family-style on a big, colorful platter, or plate it individually in bowls to show off that gorgeous medley of colors. A sprinkle of cilantro can add a pop of green, and fresh lime wedges served alongside enhance those tropical vibes.
Recipe Variations
Get creative with this dish! Here are a few ideas to mix things up:
-
Tropical Twist: Add other fruits like mango or desiccated coconut for a beachy flavor.
-
Spicy Kick: Throw in some red pepper flakes or a splash of sriracha for heat.
-
Vegetarian Option: Swap out the chicken for firm tofu or chickpeas for a plant-based version that still retains protein.
-
Curry Flavor: Add a teaspoon of curry powder to the mix for a warm, exotic flavor twist.
-
Nutty Delight: Top with toasted cashews or almonds for a crunchy contrast!
Chef’s Notes
I can fondly recall one night when a friend inadvertently added way too much brown sugar—resulting in a sweet surprise that turned out to be absolutely delicious! Those kitchen mishaps often lead to the best discoveries. I find the beauty in celebrating each unique creation, not just the perfect ones. Over the years, my Pineapple Chicken and Rice has evolved to include seasonal additions that keep it fresh, so don’t hesitate to make this recipe your own.
FAQs and Troubleshooting
1. What if my chicken is tough or dry?
It might be overcooked. Next time, monitor your cooking time closely and avoid cooking on high heat for extended periods.
2. Can I make this dish ahead of time?
Absolutely! Just store the components separately in airtight containers. Reheat gently in the microwave or stovetop to avoid overcooking.
3. Why is my rice mushy?
If your rice ends up mushy, it may have had too much water while cooking. Ensure you’re following the cooking instructions carefully next time.
4. How can I make this gluten-free?
Use tamari instead of soy sauce, and check all ingredient labels to ensure there are no hidden gluten sources.
Nutritional Info
(Optional: Adjust based on your specific recipe and ingredient usage)
- Calories: Approximately 400 per serving
- Protein: 35g
- Carbohydrates: 45g
- Fat: 12g
And there you have it! An incredible Pineapple Chicken and Rice recipe that’s simplistic yet so full of flavor. May your kitchen be filled with warmth and laughter as you create new memories around the table. Enjoy every delicious bite!
PrintPineapple Chicken and Rice

A delightful blend of savory and sweet featuring chicken, pineapple, colorful bell peppers, and fluffy rice that brings tropical vibes to your plate.
- Prep Time: 15 minutes
- Cook Time: 30 minutes
- Total Time: 45 minutes
- Yield: 4 servings 1x
- Category: Main Course
- Method: Stovetop
- Cuisine: Tropical
- Diet: Gluten-Free
Ingredients
- 2 cups cooked white rice
- 1 pound chicken breast, cut into bite-sized pieces
- 1 cup fresh pineapple chunks (or canned, drained)
- 1 tablespoon olive oil
- 1 small onion, diced
- 2 cloves garlic, minced
- 1 bell pepper (red or green), chopped
- 1 cup chicken broth
- 2 tablespoons soy sauce
- 1 tablespoon brown sugar
- 1 teaspoon ginger, minced
- Salt and pepper to taste
- Chopped green onions for garnish (optional)
Instructions
- Prep your ingredients: Start by cutting your chicken into bite-sized pieces and dicing your onion and bell pepper.
- Cook the rice: Use previously cooked rice or cook your fresh rice now.
- Heat the oil: In a large skillet or wok, heat the olive oil over medium-high heat.
- Cook the chicken: Add the chicken pieces and season with salt and pepper, browning for about 5-6 minutes.
- Sauté the vegetables: Add the diced onion and bell pepper, cooking for about 3-4 minutes until softened.
- Add garlic and ginger: Toss in your minced garlic and ginger, cooking for another minute.
- Incorporate pineapple and chicken broth: Fold in the pineapple, chicken broth, soy sauce, and brown sugar.
- Simmer and combine: Allow it to simmer for about 5-7 minutes.
- Bring it together: Add the cooked rice and gently fold everything to combine.
- Serve and garnish: Remove from heat and sprinkle with chopped green onions before serving.
Notes
Feel free to switch up ingredients for variety, such as adding tropical fruits or a spicy kick with red pepper flakes.
Nutrition
- Serving Size: 1 serving
- Calories: 400
- Sugar: 8g
- Sodium: 600mg
- Fat: 12g
- Saturated Fat: 2g
- Unsaturated Fat: 10g
- Trans Fat: 0g
- Carbohydrates: 45g
- Fiber: 2g
- Protein: 35g
- Cholesterol: 70mg
Keywords: Pineapple Chicken, Tropical Rice, Comfort Food, Easy Dinner Recipe
One-Pan Honey Garlic Chicken Bake: Juicy Weeknight Dinner
Baked Honey Garlic Chicken Breast: Easy Juicy Dinner Idea
Hello, fellow food lovers! Today, I’m excited to share with you one of my go-to recipes that beautifully combines simplicity and flavor—the Baked Honey Garlic Chicken Breast. It’s the kind of dish that practically cooks itself while you enjoy a glass of wine or gather your loved ones around the table. Whether you’re trying to impress a special someone or just want to whip up something delicious on a weeknight, this recipe will not disappoint. Let’s dive in!
Introduction
Imagine this: it’s a busy night after a long day, and you’re craving something tasty yet effortless to prepare. You open your fridge and spot some chicken breasts, and suddenly inspiration strikes! This Baked Honey Garlic Chicken Breast recipe uses a handful of everyday ingredients to create a dish that’s sweet, savory, and utterly irresistible.
The best part? It’s baked in the oven, freeing you up to talk, laugh, and unwind while your kitchen fills with the delicious aroma of garlic and honey. Plus, cleanup is a breeze! I mean, who doesn’t love a one-pan meal that delivers on both flavor and ease? As I share this recipe, I’ll sprinkle in some of my favorite kitchen tips and personal stories to make your cooking experience even more enjoyable. So, tie on your apron, and let’s get started!
Personal Story
Ah, chicken—a staple that has a special place in my heart as well as my kitchen. I’ll never forget the first time I tried making a honey garlic sauce. I was in college and threw a small dinner party for my friends before finals week. All I knew was I wanted a dish that was easy and would impress. After experimenting with a few different flavor combinations, I crafted a honey garlic sauce that was just perfect.
We gathered around my tiny dining table—papers strewn about, laughter and memories shared. The highlight of the evening was definitely that chicken. My friends devoured it and begged for the recipe. It became a tradition in our group; we would always cook it for our study nights. Nostalgia washes over me each time I prepare it now. It’s funny how some recipes carry so many memories, isn’t it?
Ingredients
Here’s what you’ll need for this delightful dish:
-
4 boneless, skinless chicken breasts (about 6 ounces / 170 grams each)
Tender and juicy, these are the perfect canvas for our honey garlic sauce. You can substitute with thighs if you prefer a bit more flavor! -
1/4 cup honey (85 grams)
Sweet and sticky, honey adds a rich flavor. You can swap it with maple syrup for a different sweetness or agave for a vegan option. -
4 cloves garlic, minced
Garlic is the heart of this dish—it adds depth and pungency. Fresh is best, but you can use jarred minced garlic in a pinch. Use less if you’re not a garlic fan! -
1/4 cup low sodium soy sauce (60 ml)
This brings the savory umami flavor. For gluten-free options, tamari will work wonders! -
1 tablespoon apple cider vinegar (15 ml)
A little acidity balances the sweetness of the honey. You can substitute with rice vinegar or lemon juice if that’s what you have on hand. -
2 tablespoons olive oil (30 ml)
This not only adds to the flavor but helps keep the chicken moist. Feel free to use avocado oil for a subtle touch. -
1/2 teaspoon freshly ground black pepper
Black pepper adds an aromatic kick! You can omit it if you prefer a milder dish. -
1/4 teaspoon red pepper flakes (optional)
A hint of heat, this can be skip or adjusted based on personal preference—level up the spiciness by adding a pinch more! -
Fresh parsley, chopped (for garnish)
A pop of color and freshness to finish off the dish! You can also use cilantro for a different flair.
Step-by-Step Instructions
Now, let’s get to the good part—cooking! Here’s how to create this heavenly dish:
-
Preheat Your Oven:
Start by preheating your oven to 375°F (190°C). This ensures that your chicken breasts will cook evenly and become juicy and tender while you prepare the marinade. -
Make the Marinade:
In a medium-sized bowl, whisk together the honey, minced garlic, soy sauce, apple cider vinegar, olive oil, black pepper, and red pepper flakes. As you mix, take a moment to inhale the warm, sweet smell of the honey and garlic mingling together. It’s a taste of what’s to come! -
Prepare the Chicken:
In a baking dish, layout your chicken breasts in a single layer. Make sure they’re spaced out a bit—this helps them cook uniformly. -
Add the Marinade:
Pour the marinade over the chicken, making sure it’s well-coated. Use a spoon to dollop extra marinade on top—don’t be shy! Allow the chicken to marinate at room temperature for about 20 minutes if you have time, or stick it in the fridge for up to 4 hours. The longer it soaks, the more flavor it absorbs. -
Bake the Chicken:
Pop the baking dish into the preheated oven and bake for about 25-30 minutes. You want your chicken to reach an internal temperature of 165°F (74°C). If you have a digital meat thermometer, now’s the time to pull it out! -
Broil (Optional):
For a little extra color, switch your oven to broil and broil the chicken for an additional 2-3 minutes. This gives it a beautiful glaze and a delightful crispy top—just keep an eye on it so it doesn’t burn! -
Rest and Serve:
Once done, remove the chicken from the oven and let it rest for about 5 minutes. This allows the juices to redistribute, making each bite luscious and flavorful.
Serving Suggestions
Now, it’s time to plate up! Slice the chicken breasts and serve them on a beautiful platter. Drizzle some of that luscious honey garlic sauce from the baking dish over the top. Sprinkle freshly chopped parsley for a pop of color, and don’t forget to add your favorite sides! This dish pairs perfectly with steamed broccoli, fluffy rice, or a fresh salad.
Recipe Variations
Feel free to get creative with this dish! Here are a few variations you might enjoy:
- Add Citrus: Incorporate the zest and juice of a lemon or orange into the marinade for a zesty twist.
- Spice It Up: Mix in some Sriracha or your favorite hot sauce to the marinade for extra heat.
- Herbaceous Flavors: Add fresh thyme or rosemary to the marinade for an aromatic touch.
- Fruit Fusion: Toss in some sliced pineapples or peaches for a sweet addition that caramelizes beautifully in the oven.
- Make it Sticky Rice: Serve with coconut sticky rice instead of regular rice for a Thai-inspired flair.
Chef’s Notes
I’ve been making variations of this honey garlic chicken for years now. What started as a simple way to impress friends has turned into a staple in my home cooking repertoire! Over time, I’ve played around with flavor profiles and sides to match my mood or what’s in season. It’s incredible how one recipe can adapt and grow with you, much like hosting itself!
Oh, and I have to share this story: I once hosted a dinner party, and the chicken was so good that it became a running joke. I had friends asking me weekly if I was serving "the chicken" for dinner. They even started showing up unexpectedly because they could smell it wafting from my kitchen!
FAQs and Troubleshooting
1. My chicken turned out dry. What happened?
Cooking chicken can be tricky! Make sure you’re not overcooking it, as it can dry out quickly. Aim for 165°F internal temperature, and let it rest before cutting.
2. Can I marinate it overnight?
Absolutely! Marinating overnight can enhance the flavors even more. Just remember not to leave it longer than 24 hours, as the chicken can start to get mushy.
3. How do I know if chicken is done without a thermometer?
If you don’t have one, you can cut into the thickest part of the breast; the juices should run clear and there should be no pink remaining!
4. Can I use frozen chicken?
Frozen chicken is a no-go for this recipe. Thaw it in the fridge before marinating and baking to ensure even cooking.
Nutritional Info (Optional)
While I don’t usually focus on nutritional info, if you’re curious, this dish provides protein, healthy fats, and can be balanced with colorful veggies on the side!
There you have it—a warm, welcoming dive into one of my favorite dishes! I hope you’re inspired to try this Baked Honey Garlic Chicken Breast recipe in your own kitchen. Remember, cooking should be fun and not a chore. Enjoy the process, gather around the table, and create wonderful memories with the people you love. Happy cooking!
PrintBaked Honey Garlic Chicken Breast

A sweet and savory baked chicken dish that’s easy to prepare and perfect for any weeknight dinner.
- Prep Time: 15 minutes
- Cook Time: 30 minutes
- Total Time: 45 minutes
- Yield: 4 servings 1x
- Category: Main Course
- Method: Baking
- Cuisine: American
- Diet: None
Ingredients
- 4 boneless, skinless chicken breasts (about 6 ounces / 170 grams each)
- 1/4 cup honey (85 grams)
- 4 cloves garlic, minced
- 1/4 cup low sodium soy sauce (60 ml)
- 1 tablespoon apple cider vinegar (15 ml)
- 2 tablespoons olive oil (30 ml)
- 1/2 teaspoon freshly ground black pepper
- 1/4 teaspoon red pepper flakes (optional)
- Fresh parsley, chopped (for garnish)
Instructions
- Preheat Your Oven: Start by preheating your oven to 375°F (190°C).
- Make the Marinade: In a medium-sized bowl, whisk together the honey, minced garlic, soy sauce, apple cider vinegar, olive oil, black pepper, and red pepper flakes.
- Prepare the Chicken: In a baking dish, layout your chicken breasts in a single layer.
- Add the Marinade: Pour the marinade over the chicken, making sure it’s well-coated.
- Bake the Chicken: Pop the baking dish into the preheated oven and bake for about 25-30 minutes.
- Broil (Optional): For a little extra color, switch your oven to broil and broil the chicken for an additional 2-3 minutes.
- Rest and Serve: Once done, remove the chicken from the oven and let it rest for about 5 minutes.
Notes
Feel free to experiment with add-ins like citrus or herbs to customize the flavor.
Nutrition
- Serving Size: 1 serving
- Calories: 350
- Sugar: 20g
- Sodium: 600mg
- Fat: 12g
- Saturated Fat: 2g
- Unsaturated Fat: 10g
- Trans Fat: 0g
- Carbohydrates: 38g
- Fiber: 0g
- Protein: 30g
- Cholesterol: 70mg
Keywords: chicken, honey garlic, baked chicken, easy dinner, weeknight meal

Marry Me Chicken
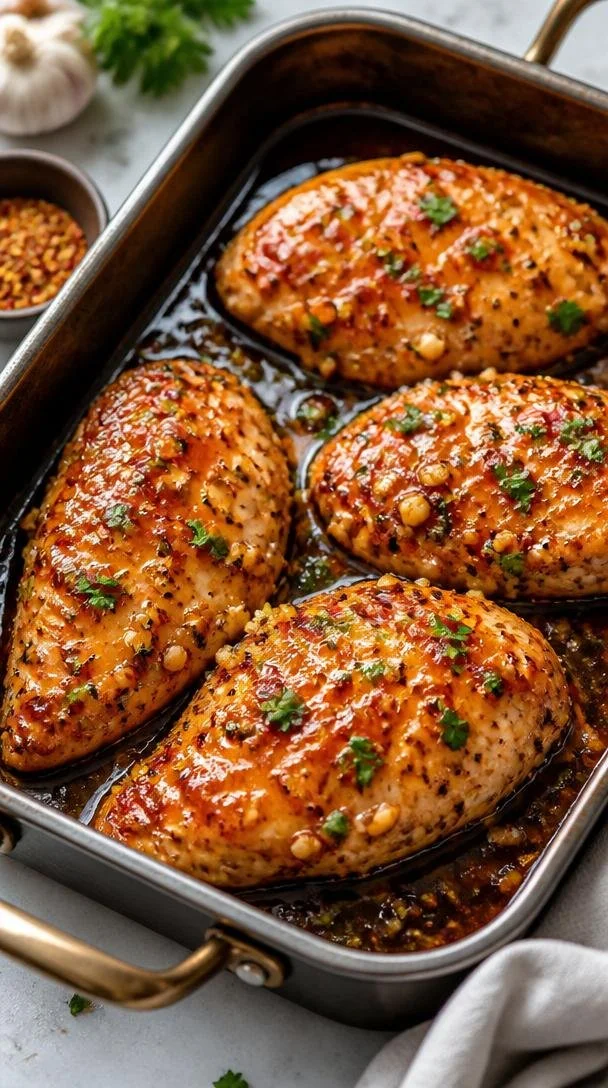
Marry Me Chicken: A Love Story in Every Bite
Introduction
Welcome back, culinary adventurers! Today, we’re diving into one of the most romantic dishes you’ll ever have the pleasure of crafting in your kitchen: Marry Me Chicken. What’s in a name, you ask? Well, let me tell you, this dish isn’t just about chicken – it’s a whole experience! With its creamy, dreamy sauce, sun-dried tomatoes, and vibrant spinach, Marry Me Chicken is a dish that promises to steal hearts and make taste buds dance.
Now, picture this: you’ve just come home from a long day, your kitchen is your little sanctuary, and you want something that looks elegant but feels cozy. Every time I prepare Marry Me Chicken, it reminds me of those laid-back evenings spent with friends and family where laughter fills the air, glasses are raised, and the aroma of good food invites everyone to the table. It’s the kind of dish that makes you feel like a culinary magician, effortlessly transforming a few ingredients into something extraordinary.
When I first discovered this recipe, I didn’t just fall in love with its rich flavors; I fell in love with how simple it was to impress my loved ones. The first time I served it, there were gasps around the table – gasps of joy, that is! Spoiler alert: there may have been a proposal – and no, not from me! This dish has a way of making moments memorable, and I can’t wait for you to experience it for yourself. So, let’s roll up our sleeves, tie on those aprons, and create some magic!
Personal Story
I’ll never forget the first time I made Marry Me Chicken. It was a warm summer evening, and I had invited a few of my closest friends over for dinner. The sun was setting, and the golden light cast a dreamy glow in my small kitchen. I wanted to impress, but my goal was also to create a cozy atmosphere where everyone would feel at home.
As I prepared this dish, I could hear the laughter of my friends wafting in from the living room. When I served them, their eyes lit up! The first bite was met with silence, and that’s how I knew I had success. After a few moments, one of my friends declared, “If I didn’t know better, I’d say this tastes like I’m dining in an upscale restaurant!” Little did I know, that night would solidify a tradition of gathering friends around the table, sharing not just food, but love, laughter, and unforgettable memories. Every time I cook Marry Me Chicken, I’m transported back to that beautiful moment – a reminder of the magic that happens when we share food with those we cherish.
Ingredients
To create this heartwarming dish, you’ll need the following ingredients:
-
4 boneless, skinless chicken breasts: This is your canvas! You can substitute with chicken thighs if you prefer a richer flavor or even use turkey cutlets for a lighter option.
-
Salt and pepper to taste: Essential for enhancing flavors. Feel free to experiment with other seasonings, but these basics are a must.
-
2 tablespoons olive oil: A healthier fat that adds flavor and helps to sear the chicken. You can swap olive oil with avocado oil for a different flavor profile.
-
4 cloves garlic, minced: Garlic adds depth and aroma. You can use garlic powder in a pinch, but fresh truly shines here!
-
1 teaspoon dried Italian herbs (basil, oregano, thyme): This a blend of classic Italian flavors. Substitute with Herbes de Provence for a twist.
-
1 cup heavy cream: The star of the show for that luscious sauce. For a lighter version, you might use half-and-half, but be aware it won’t have the same richness.
-
1 cup chicken broth: This enhances the sauce’s richness. You can use vegetable broth if you want to make it vegetarian-friendly.
-
1/2 cup sun-dried tomatoes, chopped: A burst of tangy sweetness! If you can’t find sun-dried tomatoes, you could use roasted red peppers for a different flavor.
-
1 cup spinach: This adds color and nutrition. Kale can be a fabulous substitute if you’d like a sturdier green.
-
Parmesan cheese, grated for serving: The finishing touch that brings it all together. Feel free to sprinkle with pecorino or nutritional yeast for a dairy-free option.
Step-by-Step Instructions
-
Prepare Your Ingredients
Start by gathering all your ingredients. This makes the cooking process smoother and less stressful. Take a moment to admire all the beautiful colors and textures. Trust me, cooking is way more fun when you feel inspired! -
Season the Chicken
Lightly season your chicken breasts with salt and pepper. Don’t be shy – this is where flavor starts! Heat your olive oil in a large skillet over medium-high heat. Once hot, add the chicken. -
Sear the Chicken
Cook the chicken for about 6-7 minutes on each side until it’s golden brown and cooked through. You want a nice caramelization for depth of flavor. Use tongs to flip them; that satisfying sizzle is music to my ears! -
Make the Garlic Magic
Remove the chicken from the skillet and set aside. Lower the heat to medium and toss in the minced garlic. Sauté for about 30 seconds until fragrant – but be careful not to burn it! It’s a fine line, and burnt garlic is a no-go! -
Add the Flavors
Stir in the dried Italian herbs and chicken broth. Be sure to scrape up any brown bits from the bottom of the pan – that’s flavor gold! Let it bubble gently for a minute or two. -
Creamy Indulgence
Pour in the heavy cream and let it come to a gentle simmer. This is where the magic happens, folks! You’ll notice the sauce thickening and becoming luscious. Add the sun-dried tomatoes and spinach. Stir until the spinach wilts and everything is coated in this dreamy sauce. -
Bring It All Together
Return the chicken to the skillet and allow it to soak in all those fantastic flavors for another 5 minutes. Turn off the heat, and sprinkle with grated Parmesan cheese. Let your kitchen soak in that delightful aroma!
Serving Suggestions
To plate your Marry Me Chicken, serve it over a bed of al dente pasta, creamy mashed potatoes, or even fluffy rice. Ladle that rich sauce generously over the chicken and garnish with a sprinkle of additional Parmesan and fresh herbs. Setting the table with some candles and a beautiful cloth can really create an inviting atmosphere, perfect for any gathering or even a special dinner for one.
Recipe Variations
-
Spicy Twist: Add some crushed red pepper flakes to the garlic for a spicy kick that will wake up your taste buds.
-
Mushroom Lover: Sauté sliced mushrooms alongside the garlic for an earthy addition.
-
Pesto Delight: Stir in a tablespoon of pesto instead of the Italian herbs for a different depth of flavor.
-
Citrusy Zing: Squeeze some fresh lemon juice into the sauce right before serving for a bright, refreshing finish.
-
Vegan version: Use plant-based chicken substitutes, coconut cream instead of heavy cream, and vegetable broth for a delightful vegan twist.
Chef’s Notes
Whenever I make Marry Me Chicken, it feels nostalgic. It reminds me of years spent trying to impress my friends and family with my cooking skills – and boy, did I learn a lot along the way! You can bet many failed soufflés and dry chicken breasts have led me to this creamy perfection. I love talking with my friends about our culinary experiences, and we often share stories about the dishes that transformed our home cooking.
Over time, I have played around with the recipe, adding different ingredients and spices, but I always come back to this version. It’s simple, elegant, and never fails to make everyone around the table feel special. Plus, there’s something utterly charming about a dish that’s downright swoon-worthy yet so easy to prepare!
FAQs and Troubleshooting
-
What can I serve with Marry Me Chicken?
Great question! This dish pairs beautifully with pasta, rice, or a fresh green salad. Garlic bread or crusty baguette is also a crowd-pleaser for soaking up that creamy sauce! -
Can I make this dish ahead of time?
Absolutely! You can cook it a few hours in advance and then reheat it gently on the stove. Just be cautious not to overheat or dry out the chicken. -
Why is my sauce not thickening?
If your sauce isn’t thickening, make sure you’re letting it simmer long enough. If it’s still runny, you can mix a cornstarch slurry (1 tablespoon of cornstarch and 2 tablespoons of cold water) and gradually add it to the sauce while stirring. -
Can I freeze Marry Me Chicken?
Yes! Allow it to cool fully before transferring it to an airtight container. It should last up to 3 months in the freezer. Just remember to thaw it in the fridge before reheating!
Nutritional Info
While it’s not the primary focus of this dish, an approximate nutritional breakdown per serving (based on 4 servings) includes:
- Calories: ~520
- Protein: ~36g
- Carbohydrates: ~6g
- Fat: ~40g
And there you have it! A delightful journey through Marry Me Chicken that’s sure to become a staple in your home. This dish is all about love, warmth, and creating cherished moments around the dinner table. Happy cooking, dear friends! Don’t forget to share your own culinary stories and transformations – I can’t wait to hear about your delicious adventures!
PrintMarry Me Chicken

A romantic dish featuring creamy sauce, sun-dried tomatoes, and vibrant spinach that is perfect for impressing loved ones.
- Prep Time: 15 minutes
- Cook Time: 30 minutes
- Total Time: 45 minutes
- Yield: 4 servings 1x
- Category: Main Course
- Method: Sautéing
- Cuisine: Italian
- Diet: Mediterranean
Ingredients
- 4 boneless, skinless chicken breasts
- Salt and pepper to taste
- 2 tablespoons olive oil
- 4 cloves garlic, minced
- 1 teaspoon dried Italian herbs (basil, oregano, thyme)
- 1 cup heavy cream
- 1 cup chicken broth
- 1/2 cup sun-dried tomatoes, chopped
- 1 cup spinach
- Parmesan cheese, grated for serving
Instructions
- Prepare your ingredients by gathering all of them for a smooth cooking process.
- Season your chicken breasts with salt and pepper, then heat olive oil in a large skillet over medium-high heat.
- Sear the chicken for about 6-7 minutes on each side until golden brown and cooked through.
- Make the garlic magic by sautéing minced garlic for 30 seconds in the same skillet.
- Add the dried herbs and chicken broth, scraping up any brown bits from the bottom of the pan.
- Pour in the heavy cream and allow to simmer until thickened, stirring in the sun-dried tomatoes and spinach.
- Bring the chicken back into the skillet and let it soak in the flavors for another 5 minutes.
Notes
This dish pairs beautifully with pasta, rice, or a fresh green salad. You can prepare it in advance and reheat when ready to serve.
Nutrition
- Serving Size: 1 serving
- Calories: 520
- Sugar: 5g
- Sodium: 600mg
- Fat: 40g
- Saturated Fat: 16g
- Unsaturated Fat: 20g
- Trans Fat: 0g
- Carbohydrates: 6g
- Fiber: 1g
- Protein: 36g
- Cholesterol: 100mg
Keywords: chicken, creamy sauce, romantic dinner, Italian recipe, comfort food
Garlic Parmesan Chicken and Potatoes
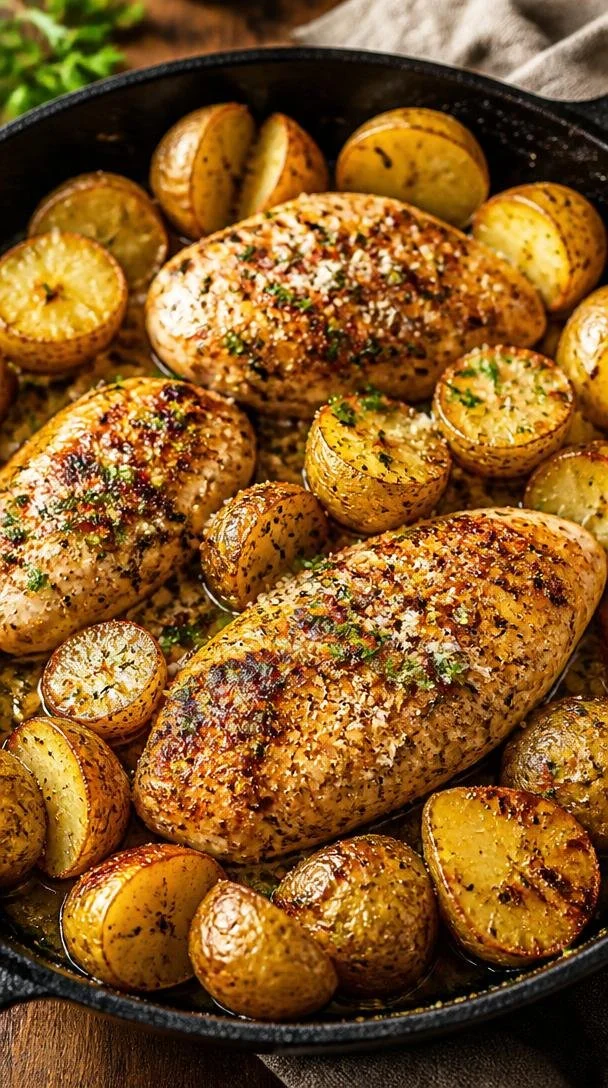
Garlic Parmesan Chicken and Potatoes: A Timeless Comfort
Hello, fellow food lovers! Today, I am beyond thrilled to share one of my all-time favorite comfort dishes: Garlic Parmesan Chicken and Potatoes. This dish is everything you crave—crispy, cheesy, and oh-so-satisfying. It’s the kind of meal that effortlessly brings warmth to the table, and it’s perfect for weeknights or special occasions alike. With just the right balance of garlic and creamy parmesan, this dish will have your loved ones asking for seconds!
There’s something really special about gathering around a warm meal with friends or family. It’s that magical moment where conversations flow, laughter fills the air, and everyone feels at home. Garlic Parmesan Chicken and Potatoes is one of those meals that never fails to spark joy. Just imagine the aroma wafting through your kitchen as the garlic and herbs dance together in harmony. Ah, bliss!
So grab your apron, and let’s dive into this delightful recipe that combines ease, elegance, and oh-so-delicious flavors. Whether you’re cooking for your family or impressing guests, this dish is sure to shine!
A Special Memory in the Kitchen
Looking back, I can’t help but smile at the memories I have of my grandmother bustling around her kitchen, filling the air with the rich aroma of garlic and rosemary. She had a knack for turning simple ingredients into something extraordinary. Garlic Parmesan Chicken and Potatoes reminds me of those cherished Sundays spent in her kitchen, where the whole family gathered around a big table, eagerly waiting for the feast to begin.
One particular Sunday, she decided to try her hand at turning her classic chicken dish into something special for a family gathering. With a few tweaks here and there—more garlic, an extra sprinkle of cheese, and her unparalleled love—the dish became an instant hit! Everyone raved about it, and the laughter that filled the room was the perfect accompaniment to that delicious meal. Now, any time I make Garlic Parmesan Chicken and Potatoes, I can’t help but feel like I’m channeling my grandmother’s spirit—it’s comfort food that tells a story.
Ingredients
Here’s what you’ll need for this delightful dish:
-
1 ½ lbs boneless (skinless) chicken breasts (about 3–4 pieces)
Juicy and lean, these chicken breasts are the perfect canvas for all the flavors to shine. If you’re looking for a heartier option, feel free to swap them out for skin-on chicken thighs—just be sure to adjust cooking time accordingly! -
1 ½ lbs baby potatoes (halved or quartered if large)
These little gems are just the right size for roasting and have a lovely creaminess. If you can’t find baby potatoes, regular potatoes will do just fine; just cut them into similar-sized pieces for even cooking. -
3 tbsp olive oil (divided)
A must-have in any kitchen! The olive oil not only helps to roast the chicken and potatoes but also provides a subtle flavor. If you prefer, avocado oil is an excellent alternative for its high smoke point. -
4 cloves garlic (minced)
Ah, garlic—the star of the show! It imparts a robust flavor that really elevates the dish. If you’re feeling adventurous, try roasting the garlic first for a sweeter, milder taste! -
1 tsp Italian seasoning
This delightful blend brings a bit of the Italian countryside right to your kitchen! If you don’t have Italian seasoning, a combination of dried oregano, basil, and thyme works beautifully too. -
½ tsp paprika
Paprika adds not just a hint of color, but also a warm, smoky flavor. For a spicier kick, don’t hesitate to use smoked paprika or add a pinch of cayenne pepper! -
½ tsp salt (more to taste)
Salt enhances every flavor; however, adjust to your preference, especially if you’re using parmesan cheese, which can already be salty. -
½ tsp black pepper
Freshly ground black pepper adds a lovely warmth to the dish. Don’t skimp on it! -
½ cup grated Parmesan cheese
This cheese brings that creamy, umami flavor that pairs so beautifully with the garlic and chicken. If you’re looking for a non-dairy version, consider nutritional yeast for a cheesy flavor without the dairy! -
2 tbsp fresh parsley (chopped, for garnish)
A sprinkle of fresh parsley adds a pop of color and freshness. You could also use fresh thyme or basil for a delightful twist in flavor! -
2 tbsp unsalted butter (melted)
Butter elevates the richness of the dish and helps the garlic and herbs cling beautifully to the chicken and potatoes. If you’re avoiding dairy, feel free to substitute with olive oil or a plant-based butter.
Step-by-Step Instructions
Now, let’s get our hands a little messy and cook up this wonderful dish together!
1. Preheat the Oven
Start by preheating your oven to 400°F (200°C). A hot oven not only helps to crisp up the chicken and potatoes but also seals in all those delicious flavors.
2. Prepare Your Baking Dish
Grab a large baking dish (or a sheet pan works great too!) and drizzle 1 tablespoon of olive oil across the bottom. This will create a non-stick base for your chicken and potatoes while adding extra flavor right from the start.
3. Season the Chicken
In a small bowl, whisk together the remaining olive oil, minced garlic, Italian seasoning, paprika, salt, and black pepper. This fragrant mixture will coat your chicken beautifully! Take your chicken breasts and season them generously with the marinade, making sure to coat all sides. If you have time, let them marinate for about 15–30 minutes to really enhance those flavors!
4. Prep the Potatoes
While your chicken is soaking up the flavors, it’s time to prep the baby potatoes! Halve or quarter them, depending on their size. Add the potatoes to the baking dish and pour the remaining marinade over them. Give everything a good toss until the potatoes are well-coated. You can use your hands for this—nothing beats the old-fashioned way of getting in there!
5. Add to the Oven
Place the chicken on top of the potatoes in the baking dish. This allows the chicken juices to drip down and flavor the potatoes as they cook. Slide the baking dish into the preheated oven and let it roast for about 30-35 minutes. The chicken should reach an internal temperature of 165°F (74°C), and the potatoes should be fork-tender and beautifully browned.
6. Cheese Time!
Once your chicken and potatoes are done roasting, pull them out of the oven and sprinkle the grated Parmesan cheese evenly over the chicken and potatoes. Switch your oven to broil and pop them back in for 2–3 more minutes, just until the cheese is golden and bubbly. Keep a close watch during this time so it doesn’t burn!
7. The Finishing Touch
Once the cheese is perfectly melted, drizzle the melted butter over the dish for that additional richness and shine. Finally, garnish with freshly chopped parsley for a burst of color and flavor. Step back and admire your creation—it’s about to impress everyone!
Serving Suggestions
To serve, dish out generous portions of the Garlic Parmesan Chicken alongside the potatoes, making sure to include that browned, cheesy goodness on top. For a lovely presentation, you can serve this dish on a large platter, atop a bed of fresh arugula or lemon-dressed greens for extra freshness. Pair with a light white wine, and you’re ready for a fabulous night in!
Recipe Variations
Feeling adventurous? Here are some fun twists you can put on this classic dish:
-
Add Veggies: Toss in seasonal vegetables like bell peppers, asparagus, or zucchini alongside the potatoes for a colorful medley.
-
Spicy Kick: Add a pinch of crushed red pepper flakes or a dash of hot sauce to the marinade for a bit of heat.
-
Herbed Butter: Mix fresh herbs into softened butter and baste the chicken with it before serving for an extra punch of flavor.
-
Creamy Spin: For an indulgent twist, add a splash of cream or a dollop of sour cream to the potatoes before serving.
-
Lemon Zest: Incorporate lemon zest in the marinade for a bright, fresh flavor that dances on the palate!
Chef’s Notes
Every time I make this dish, I’m reminded of how cooking can be both simple and sophisticated. It’s all about layering flavors and using quality ingredients. One of my favorite things about Garlic Parmesan Chicken and Potatoes is that it’s incredibly versatile—you can easily adapt it to suit any season or occasion!
I once had an unexpected kitchen mishap while preparing this dish, where I mistook paprika for cinnamon. The resulting flavor was…interesting, to say the least! Thankfully, my guests were kind and didn’t mention it, allowing me to laugh about it afterward and learn to always double-check my spices!
FAQs and Troubleshooting
1. What if my chicken isn’t cooking evenly?
Ensure your pieces are of similar size for even cooking. Using a meat thermometer will help you avoid undercooked chicken!
2. How can I make it ahead of time?
You can marinate the chicken and prepare the potatoes in advance. Just cover and refrigerate until you’re ready to bake—perfect for meal prep!
3. Why are my potatoes not getting crispy?
Make sure not to overcrowd the baking dish. If the potatoes are too close together, they’ll steam rather than roast. Ensure they get enough space to turn golden brown!
4. Can I freeze leftovers?
Absolutely! Store any leftovers in an airtight container. They can be frozen for up to two months. To reheat, simply bake in a preheated oven until heated through.
Nutritional Info
While I recommend enjoying this dish in moderation, here’s a quick glance at the estimated nutritional breakdown per serving (based on four servings):
- Calories: 450
- Protein: 42g
- Total Fat: 24g
- Saturated Fat: 6g
- Carbohydrates: 18g
- Dietary Fiber: 3g
- Sugars: 1g
There you have it! Your very own Garlic Parmesan Chicken and Potatoes is ready to impress. Remember, it’s not just about the food; it’s about the moments created around it. Enjoy cooking, and happy gathering! 🥂
PrintGarlic Parmesan Chicken and Potatoes

A comforting dish featuring crispy, cheesy garlic parmesan chicken served with tender baby potatoes.
- Prep Time: 15 minutes
- Cook Time: 35 minutes
- Total Time: 50 minutes
- Yield: 4 servings 1x
- Category: Main Course
- Method: Baking
- Cuisine: Italian
- Diet: None
Ingredients
- 1 ½ lbs boneless (skinless) chicken breasts (about 3–4 pieces)
- 1 ½ lbs baby potatoes (halved)
- 3 tbsp olive oil (divided)
- 4 cloves garlic (minced)
- 1 tsp Italian seasoning
- ½ tsp paprika
- ½ tsp salt (more to taste)
- ½ tsp black pepper
- ½ cup grated Parmesan cheese
- 2 tbsp fresh parsley (chopped, for garnish)
- 2 tbsp unsalted butter (melted)
Instructions
- Preheat the oven to 400°F (200°C).
- Prepare a large baking dish by drizzling 1 tablespoon of olive oil across the bottom.
- In a small bowl, whisk together the remaining olive oil, minced garlic, Italian seasoning, paprika, salt, and black pepper. Coat the chicken with this marinade.
- Halve or quarter the baby potatoes and add them to the baking dish. Pour the remaining marinade over them and toss well.
- Place the chicken on top of the potatoes, then roast in the oven for about 30-35 minutes.
- Once cooked, sprinkle grated Parmesan cheese over the chicken and potatoes and broil for 2-3 minutes until golden.
- Drizzle melted butter over the dish and garnish with fresh parsley.
Notes
For added flavor, consider including seasonal vegetables or spices. This dish can be prepared ahead of time by marinating the chicken and preparing the potatoes in advance.
Nutrition
- Serving Size: 1 serving
- Calories: 450
- Sugar: 1g
- Sodium: 500mg
- Fat: 24g
- Saturated Fat: 6g
- Unsaturated Fat: 14g
- Trans Fat: 0g
- Carbohydrates: 18g
- Fiber: 3g
- Protein: 42g
- Cholesterol: 90mg
Keywords: Garlic, Parmesan, Chicken, Potatoes, Comfort Food, Italian
Minute Garlic Ginger Chicken Skillet (Weeknight Dinner)
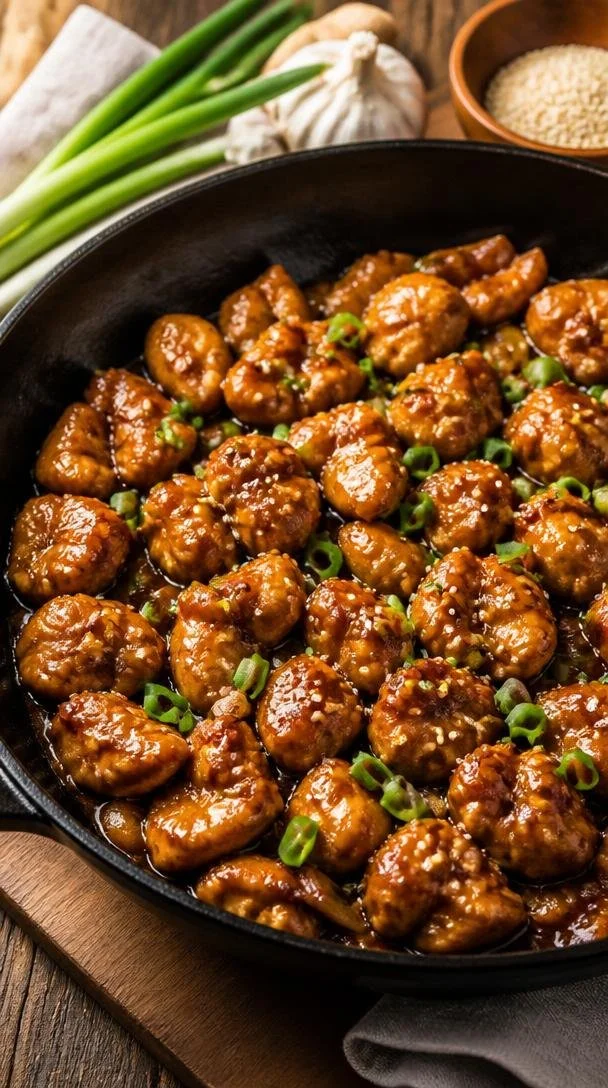
The Joy of Garlic Ginger Chicken: A Flavorful Journey
Hello, fellow food lovers! Today, we’re diving deep into a dish that captures the essence of cozy home cooking—Garlic Ginger Chicken. This dish combines the intoxicating flavors of garlic and ginger with tender chicken thighs, creating a meal that’s not only delicious but also comforting. So, grab your apron, and let’s get started on a culinary adventure that’s both elegant and approachable!
Our Flavor Adventure Begins
I remember the first time I made Garlic Ginger Chicken. I was hosting a small get-together with friends after a long week of work, and I wanted to prepare something that felt special without requiring me to spend all day in the kitchen. Scrolling through my collection of favorite recipes, I stumbled upon this gem, and it felt like a warm hug on a plate.
As the aroma of ginger and garlic filled my kitchen, my friends gathered around, sipping on sparkling drinks and sharing stories. When I finally pulled the pan off the stove, we dove into the vibrant flavors of that first bite, all laughter and oohs and aahs. As we feasted, I realized that this dish wasn’t just about mixing ingredients; it was about creating memories. It’s a recipe I hold dear, like an old friend you always welcome back into your life.
That’s the magic of Garlic Ginger Chicken—it connects us through food. Now, let’s break down the fantastic ingredients that bring this dish to life!
Ingredient List
-
1 lb. Chicken Thighs (boneless, skinless – cut into small chunks)
Chicken thighs are juicy and packed with flavor. If you’re looking for a leaner option, feel free to use chicken breast; just be mindful that it cooks faster and can dry out. -
1 Egg
The egg serves as a binder in this recipe, helping the cornstarch adhere to the chicken for a lovely crunchy texture. If you’re vegan, you can substitute with a flaxseed egg (1 tablespoon ground flaxseed + 3 tablespoons water). -
3 tbsp Cornstarch
Cornstarch is your secret weapon for achieving that delightful crispy coating! You can swap this with arrowroot powder for a gluten-free alternative or even potato starch if that’s what you have on hand. -
3/4 cup Water
Water helps create the sauce’s silky consistency. You can also use chicken broth for an added flavor boost if you have it on hand. -
1 tbsp Fresh Ginger (very finely chopped)
Ginger provides that aromatic zing that brightens the dish. If you can’t find fresh ginger, ground ginger can work in a pinch—just use about 1 teaspoon. -
1 tbsp Fresh Garlic (very finely chopped)
Nothing quite beats the delicious punch of freshly chopped garlic. In case of a garlic shortage, use garlic powder (1 tsp) or garlic paste for a similar effect. -
1 tbsp Yellow/White Onion (very finely chopped)
Onion adds a subtle sweetness and depth. Shallots are a lovely alternative for a more delicate flavor. -
3 tbsp Soy Sauce
Soy sauce gives this dish its umami goodness. For a gluten-free option, choose tamari or coconut aminos. -
3 tbsp Brown Sugar
Brown sugar balances the salty notes of soy sauce beautifully. If you’re looking to cut sugar, consider using honey or a sugar alternative like maple syrup. -
1 tbsp White Wine Vinegar
This tangy addition brightens all the flavors. Apple cider vinegar would be a solid swap if you’re out of white wine vinegar. -
1 tsp Sesame Oil
Sesame oil brings a warm, nutty flavor. If you don’t have it, feel free to use another oil—just look for something that complements the dish. -
2 tbsp Avocado Oil
This oil is great for sauteing at high temperatures and adds a subtle flavor. Canola oil or light olive oil can easily replace it. -
Green Onions (for garnish)
These not only add a pop of color but also a fresh crunch. If you’re out of green onions, cilantro or parsley can bring a delightful twist. -
Sesame Seeds (for garnish)
Sprinkling sesame seeds lends a lovely crunch and an elegant finish. You can skip them if you don’t have any on hand, but they do elevate the dish!
Step-by-Step Instructions
-
Marinate the Chicken
In a medium bowl, whisk together the egg, cornstarch, and a pinch of salt. Add the chicken chunks and toss until they are coated evenly. Let them marinate for about 15-20 minutes. This step ensures a crispy exterior when cooked! -
Prepare the Sauce
While your chicken marinated, grab another bowl and whisk together the water, soy sauce, brown sugar, white wine vinegar, sesame oil, garlic, ginger, and onion. It should smell divine already! This mixture will bring a burst of flavor to your chicken while it cooks. -
Heat Your Oil
In a large skillet or wok, heat the avocado oil over medium-high heat. You want it hot enough to sizzle but not smoke! An easy tip: test the oil by dropping a small piece of chicken in; if it sizzles immediately, it’s time to cook. -
Cook the Chicken
Carefully add the marinated chicken and cook for about 5-7 minutes until the chicken is golden brown and cooked through, turning occasionally. Cooking in batches can help maintain that gorgeous crispiness! -
Add the Sauce
Once the chicken is cooked, pour in your prepared sauce. Stir gently to coat the chicken pieces evenly. Cook for an additional 3-4 minutes; this allows the sauce to reduce and thicken, coating the chicken beautifully. -
Final Touches
Remove from heat and let it rest for about a minute. This helps the sauce cling to the chicken even better. Garnish with fresh green onions and a sprinkle of sesame seeds before serving.
Serving Suggestions
Plate your Garlic Ginger Chicken over a bed of jasmine rice or crispy noodles for an inviting and hearty meal. To add a fresh touch, include a side of stir-fried vegetables or a light salad dressed in sesame vinaigrette.
Recipe Variations
-
Spicy Garlic Ginger Chicken
Add crushed red pepper flakes or some diced jalapeños to the marinade for a spicy kick! -
Coconut Curry Garlic Ginger Chicken
Mix in coconut milk with the sauce for a creamy, tropical twist. -
Lemon Garlic Ginger Chicken
Squeeze in fresh lemon juice for a zesty bright flavor. -
Honey Soy Garlic Ginger Chicken
Swap out brown sugar for honey for a richer sweetness. -
Veggie-Packed Garlic Ginger Stir-Fry
Toss in bell peppers, snap peas, or bok choy for added nutrition and texture.
Chef’s Notes
This recipe has been a staple in my kitchen for years. I started with it as a base and played around with different flavors and techniques. Over time, it has gone from a simple skillet dish to a family favorite, often requested for potlucks and casual Sunday dinners.
My favorite memory was when I introduced it to my neighbors during a summer BBQ, and they couldn’t believe how easy it was yet tasted like something straight from a restaurant menu. Little did they know the secret was just a few quality ingredients and a little love!
FAQs and Troubleshooting
-
Can I use chicken breast instead of thighs?
Yes! Just keep an eye on the cooking time; chicken breasts can cook faster and might dry out if overcooked. -
The sauce turned out too salty. What happened?
This can happen if your soy sauce is on the saltier side. Next time, try low-sodium soy sauce or adjust the amount to your taste. -
Why isn’t my chicken crispy?
Make sure your oil is hot enough before adding the chicken and avoid overcrowding the pan, which can cause the chicken to steam instead of sear. -
What sides go well with Garlic Ginger Chicken?
Steamed jasmine rice, sautéed bok choy, or a simple cucumber salad provide a refreshing counterbalance to the rich flavors of the chicken.
Nutritional Info
While I won’t go too in-depth, Garlic Ginger Chicken is a wonderful source of protein and can be a healthy addition to your meal, especially when served alongside vegetables. Enjoy it in moderation as part of a balanced diet.
Let’s Create Something Timeless
I hope you find joy in making this Garlic Ginger Chicken! It’s a celebration of flavors that will surely fill your kitchen with warmth and laughter. Remember that cooking isn’t just about the food; it’s about the experience and connections we build along the way. So, tie your apron, turn up that music, and let’s create beautiful moments around our tables together! Happy cooking!
PrintGarlic Ginger Chicken

A flavorful and comforting dish featuring tender chicken thighs marinated in a savory garlic and ginger sauce.
- Prep Time: 20 minutes
- Cook Time: 15 minutes
- Total Time: 35 minutes
- Yield: 4 servings 1x
- Category: Main Course
- Method: Stir-frying
- Cuisine: Asian
- Diet: Gluten-Free
Ingredients
- 1 lb. Chicken Thighs (boneless, skinless – cut into small chunks)
- 1 Egg
- 3 tbsp Cornstarch
- 3/4 cup Water
- 1 tbsp Fresh Ginger (very finely chopped)
- 1 tbsp Fresh Garlic (very finely chopped)
- 1 tbsp Yellow/White Onion (very finely chopped)
- 3 tbsp Soy Sauce
- 3 tbsp Brown Sugar
- 1 tbsp White Wine Vinegar
- 1 tsp Sesame Oil
- 2 tbsp Avocado Oil
- Green Onions (for garnish)
- Sesame Seeds (for garnish)
Instructions
- Marinate the Chicken: In a medium bowl, whisk together the egg, cornstarch, and a pinch of salt. Add the chicken chunks and toss until they are coated evenly. Let them marinate for about 15-20 minutes.
- Prepare the Sauce: While your chicken marinates, grab another bowl and whisk the water, soy sauce, brown sugar, white wine vinegar, sesame oil, garlic, ginger, and onion together.
- Heat Your Oil: In a large skillet or wok, heat the avocado oil over medium-high heat until hot but not smoking.
- Cook the Chicken: Carefully add the marinated chicken and cook for about 5-7 minutes until golden brown and cooked through.
- Add the Sauce: Pour in your prepared sauce and stir gently to coat the chicken evenly. Cook for an additional 3-4 minutes.
- Final Touches: Remove from heat and garnish with fresh green onions and a sprinkle of sesame seeds before serving.
Notes
Serve over jasmine rice or crispy noodles. Can be adapted with various spices or vegetables.
Nutrition
- Serving Size: 1 serving
- Calories: 350
- Sugar: 10g
- Sodium: 800mg
- Fat: 18g
- Saturated Fat: 2g
- Unsaturated Fat: 12g
- Trans Fat: 0g
- Carbohydrates: 22g
- Fiber: 1g
- Protein: 25g
- Cholesterol: 90mg
Keywords: Garlic Ginger Chicken, Chicken Recipe, Easy Chicken Dinner

Melt-In-Your-Mouth Chicken
Melt-In-Your-Mouth Chicken: The Ultimate Comfort Dish
Hello, fellow food lovers! If you’re anything like me, there’s nothing quite like stepping into the kitchen, apron on, armed with delicious ingredients, ready to create something beautiful. Today, we’re diving into a recipe that is sure to become a beloved staple in your home: Melt-In-Your-Mouth Chicken. This dish embodies everything I love about cooking—rich flavors, creamy textures, and the ability to make any day feel a little more special.
Imagine this: It’s a chilly evening, and you’ve just wrapped up a long day. You enter your cozy kitchen, flick on the lights, and set out to make a comforting meal that warms the heart and home. Each time you take a bite of this succulent chicken, it’s like wrapping yourself in a warm hug. Trust me, whether you’re looking to impress your friends or just treating yourself, this dish is your new best friend. So, let’s roll up our sleeves, and get cooking!
My Chicken Journey
Let me take you on a little trip down memory lane. When I was growing up, my mom made a version of this dish every other week. It became an unspoken family tradition, an ingredient in our stories around the dinner table. We would set a big table, lights glaring against the soft glow of candles, and as we dug into the melt-in-your-mouth chicken, laughter would fill the air, dancing through the aromas of tasty spices.
One particular evening stands out vividly in my mind. It was my little brother’s birthday, and amidst the cake and presents, my mom’s chicken was the star of the show. Friends and family gathered, forks clinking against plates, voices raised in laughter, as we savored each tender bite. The smiles on everyone’s faces were irreplaceable. Afterward, my mom shared her secret to the perfect creamy sauce—a combination of cream of chicken soup and sour cream. Now, it’s my turn to share that love and warmth through this recipe with you.
Ingredients
Gather round, friends! Here’s what you’ll need to whip up this delightful dish:
-
4 boneless, skinless chicken breasts
This is your main event! Choose high-quality chicken for the best flavor. If you’re in a pinch, you can substitute with chicken thighs for a richer taste that also holds moisture beautifully. -
1 cup cream of chicken soup
The magic ingredient! This creamy goodness provides a rich base. If you’re searching for a lighter alternative, look for low-fat versions or make your own using chicken broth and a roux. -
1/2 cup sour cream
Creamy and tangy, sour cream adds depth. Greek yogurt can be an excellent substitute, giving you that same creaminess with a lovely tang! -
1 cup shredded cheese (cheddar or mozzarella)
Give or take, depending on your cheese preference! Cheddar brings a sharp bite, while mozzarella melts beautifully. Feel free to experiment with pepper jack for a spicy kick! -
1 tablespoon garlic powder
A home-cooked flavor must-have! You can use fresh minced garlic if you prefer—just remember, one clove roughly equals half a teaspoon of garlic powder. -
1 tablespoon onion powder
A great base flavor! If you want to swap it for fresh onion, about 1/4 cup of finely chopped onion will work as well. -
Salt and pepper to taste
Essential for bringing out the flavors! Don’t be shy here; taste as you go, and season to your liking. -
1/2 teaspoon paprika (optional)
Paprika adds a beautiful color and mild flavor. If you’re feeling adventurous, smoked paprika is a fantastic twist that adds a lovely flavor complexity.
Step-by-Step Instructions
Ready to cook? Let’s dive into the magic of creating this luxurious dish step by step!
Step 1: Preheat and Prepare
Start by preheating your oven to 350°F (175°C). Meanwhile, take those chicken breasts and pat them dry with a paper towel. A dry chicken will sear and cook better! Since we’re baking, you won’t get a crispy skin, but we’ll achieve tenderness and flavor that will leave you speechless.
Step 2: Season the Chicken
Sprinkle salt, pepper, garlic powder, onion powder, and paprika evenly over both sides of each chicken breast. Seasoning is key here! Giving your chicken a good rub ensures that every bite is flavorful. Let it sit for about 5 minutes to absorb those flavors while you prepare the creamy sauce.
Step 3: Mix the Sauce
In a mixing bowl, combine the cream of chicken soup and sour cream until smooth. Fold in the shredded cheese (saving a bit for topping later!). This creates a rich, luscious sauce that will blanket your chicken like a cozy comforter.
Step 4: Assemble
In a greased, oven-proof dish, place your seasoned chicken breasts. Spoon the creamy cheese mixture generously over the chicken, making sure each piece is blanketed thoroughly. No chicken left behind!
Step 5: Bake
Cover the dish with aluminum foil (remember to avoid letting the foil touch the cheese mixture) and bake for 25 minutes. After 25 minutes, remove the foil and sprinkle the reserved cheese on top. Bake uncovered for an additional 15-20 minutes, or until the chicken is cooked through and bubbling.
Step 6: Rest and Serve
Once out of the oven, let your chicken rest for five minutes. This is a crucial step that allows the juices to redistribute! Trust me, your patience will be rewarded.
Serving Suggestions
To serve your Melt-In-Your-Mouth Chicken, plate it up with a heap of fluffy mashed potatoes or a side of roasted vegetables. Drizzle some of that creamy sauce from the baking dish over the top to make it truly stunning. Add a sprig of fresh parsley or a squeeze of lemon for a pop of color and a hint of brightness.
This dish can also shine alongside a simple green salad or your favorite crusty bread, perfect for scooping up that creamy goodness.
Recipe Variations
-
Herb-Infused Chicken: Add a tablespoon of minced fresh herbs like thyme or rosemary for an aromatic twist.
-
Spicy Kick: Mix in chopped jalapeños or a dash of hot sauce to the sauce mixture for a spicy kick.
-
Mushroom Delight: Sauté some mushrooms and stir them into the sauce before pouring it over the chicken for an earthy flavor.
-
Lighter Version: Use low-fat cream of chicken soup and Greek yogurt instead of sour cream for a healthier twist without sacrificing the delicious taste.
-
Citrus Zest: A tablespoon of lemon juice or zest in the sauce adds a refreshing bite that cuts through the creaminess.
Chef’s Notes
As I reflect on how this recipe has evolved in my kitchen, it’s brought me closer to loved ones, just as it did in my childhood. I remember once I tried to swap out the sour cream with a non-dairy version during one of my dinner parties, and while it didn’t turn out quite as I had hoped, my guests laughed it off, proving that it’s really all about the company and the love shared at the table.
Cooking is a journey. Embrace the mess, the mishaps, and the splendid successes!
FAQs and Troubleshooting
Q: Why does my chicken still seem raw after baking?
A: Ensure your oven is properly preheated and check the internal temperature of the chicken. It should reach 165°F (75°C) to be safe to eat.
Q: Can I use frozen chicken?
A: It’s best to defrost chicken breasts before cooking for even cooking. If you decide to use frozen chicken, increase baking time and ensure it reaches the appropriate temperature.
Q: Can I make this recipe in advance?
A: Absolutely! Prep the dish, cover it tightly, and store it in the fridge for up to 24 hours. Bake when ready, adding a few extra minutes to the time as needed.
Q: What should I do if the sauce is too thick?
A: If your sauce turns out too thick, whisk in a splash of chicken broth or milk until you reach your desired consistency before pouring it over the chicken.
Now you’re all set to create a melt-in-your-mouth experience that is sure to delight! This easy-going recipe marries simplicity with elegance, bringing the spirit of home cooking to your table. I can’t wait to hear all about your kitchen adventures and the smiles you’ll create with this dish. Happy cooking!
PrintMelt-In-Your-Mouth Chicken

A comforting dish featuring tender chicken breasts smothered in a rich, creamy sauce, perfect for any cozy evening.
- Prep Time: 15 minutes
- Cook Time: 40 minutes
- Total Time: 55 minutes
- Yield: 4 servings 1x
- Category: Main Course
- Method: Baking
- Cuisine: American
- Diet: None
Ingredients
- 4 boneless, skinless chicken breasts
- 1 cup cream of chicken soup
- 1/2 cup sour cream
- 1 cup shredded cheese (cheddar or mozzarella)
- 1 tablespoon garlic powder
- 1 tablespoon onion powder
- Salt and pepper to taste
- 1/2 teaspoon paprika (optional)
Instructions
- Preheat your oven to 350°F (175°C) and pat the chicken dry.
- Sprinkle salt, pepper, garlic powder, onion powder, and paprika over both sides of the chicken.
- Combine the cream of chicken soup and sour cream in a bowl until smooth, then fold in the shredded cheese.
- Place the seasoned chicken in a greased oven-proof dish and cover with the creamy cheese mixture.
- Cover with aluminum foil and bake for 25 minutes, then uncover and sprinkle on reserved cheese before baking for an additional 15-20 minutes.
- Let the chicken rest for five minutes before serving.
Notes
Serve with fluffy mashed potatoes or roasted vegetables. For additional flavor, consider adding fresh herbs or a squeeze of lemon.
Nutrition
- Serving Size: 1 serving
- Calories: 350
- Sugar: 5g
- Sodium: 400mg
- Fat: 12g
- Saturated Fat: 4g
- Unsaturated Fat: 6g
- Trans Fat: 0g
- Carbohydrates: 45g
- Fiber: 3g
- Protein: 15g
- Cholesterol: 30mg
Keywords: chicken, comfort food, baked chicken, creamy chicken, family recipe
One-Pot Garlic Parmesan Chicken and Rice Weeknight Meal Prep
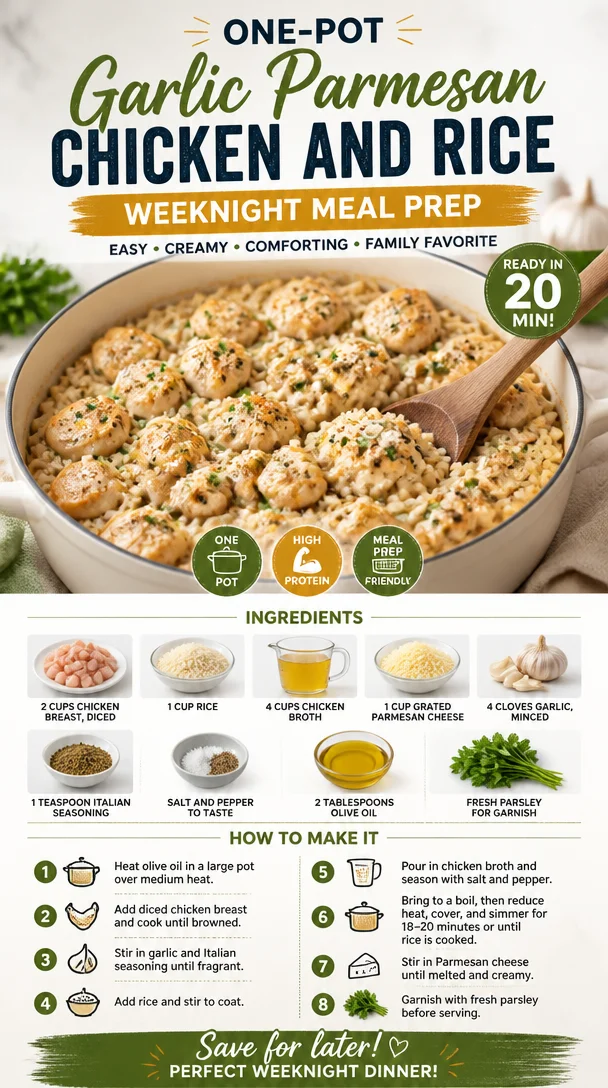
One-Pot Garlic Parmesan Chicken and Rice: A Cozy Classic
Hello, fellow food lovers! Today, we’re diving into a dish that perfectly embodies comfort, simplicity, and deliciousness: One-Pot Garlic Parmesan Chicken and Rice. This recipe has become a staple in my home, not only for its rich, creamy flavor but also for how easy it is to whip up. It’s the kind of meal that wraps you in a warm hug, and you’ll find yourself reaching for it time and time again.
Imagine this: a busy weeknight, and you’ve had a long day. You want something hearty, satisfying, and—most importantly—easy. That’s where this one-pot wonder shines! It allows for minimal cleanup while delivering maximum flavor. Plus, who can resist that savory aroma of garlic mingling with creamy Parmesan? It’s like a mini celebration every time you make it.
Cooking should always feel approachable, fun, and rewarding. That’s why I’m so excited to share this recipe with you! Grab your apron, and let’s get cooking!
Personal Story: The Dinner Party that Sparked a Love
Let me take you back to a dinner party I hosted a few summers ago. My friends and I had gathered for what was supposed to be a casual evening. I had originally planned to serve some fancy pasta dish, but as the sun dipped below the horizon, life threw me a curveball—I realized I had forgotten the essential ingredients!
With a little panic and a lot of creativity, I rummaged through my pantry and my fridge and pulled together chicken, rice, and, you guessed it—garlic and Parmesan. This dish wasn’t part of my original plan, but the moment the wonderful aromas began to swirl through my home, I felt that familiar rush of joy that only comes from sharing good food.
As we sat around the table, some with curious plates and others with eager forks, it became an instant hit! The laughter that filled the room, paired with those comforting flavors, made me realize how much I love cooking for friends and family. It truly turned a scrappy situation into a memorable feast, and that’s the beauty of home cooking!
Ingredients: What You’ll Need
Let’s get to the good stuff! Here’s what you’ll need to create your own One-Pot Garlic Parmesan Chicken and Rice:
-
2 cups chicken breast, diced
Fresh and lean, chicken breast is your protein-packed star here. If you’re short on chicken, shredded rotisserie chicken works beautifully! -
1 cup rice
I prefer long-grain white rice for its fluffy texture. Brown rice can be used, but remember it takes longer to cook—about 45 minutes. -
4 cups chicken broth
This is your flavor base! You can use homemade broth for the best taste, but low-sodium store-bought work just fine. Vegetable broth is a great substitute for a vegetarian twist. -
1 cup grated Parmesan cheese
Rich, nutty, and creamy, Parmesan takes this dish to the next level. Feel free to use Pecorino Romano for a sharper flavor or nutritional yeast for a vegan option. -
4 cloves garlic, minced
Fresh garlic brings that irresistible aroma and taste. You can use jarred minced garlic in a pinch, but fresh is always best. -
1 teaspoon Italian seasoning
A mix of herbs like basil, oregano, and rosemary. If you don’t have it, try dried herbs individually or even fresh. -
Salt and pepper to taste
Essential for enhancing flavors. Always taste your dish as you go! -
2 tablespoons olive oil
This will help brown the chicken and add richness. Avocado oil is a wonderful alternative and has a high smoke point. -
Fresh parsley for garnish
Not just for decoration! Fresh herbs add a pop of color and brightness. You can substitute with basil or even some zingy lemon zest.
Step-by-Step Instructions: Bring It All Together
Now that we’ve gathered our ingredients, let’s make magic happen in the kitchen!
-
Heat the Olive Oil
Start by heating your olive oil in a large pot or Dutch oven over medium heat. We want that lovely shimmer! This is your base, so let it warm up just a few moments.Chef Tip: Instead of adding cold oil, warming it first enhances the flavor of the dish and helps prevent sticking.
-
Sear the Chicken
Add your diced chicken breast to the pot. Season generously with salt and pepper. Cook until the chicken is browned and cooked through—about 5-7 minutes.Chef Insight: Avoid overcrowding the pot; working in batches if needed allows for even cooking and browning.
-
Add the Garlic
Once the chicken is beautifully golden, toss in the minced garlic and Italian seasoning. Cook for about 1 minute until fragrant; your kitchen will start to smell amazing! -
Stir in the Rice
Next, add the rice and stir to coat it in all those glorious flavors. It’s crucial to toast the rice slightly—it enhances the nuttiness. -
Pour in the Broth
Now, it’s time for the chicken broth! Add it all in, scraping up any bits stuck to the bottom of the pan. This is where all the flavor lies. Bring it to a gentle simmer.Chef Hack: If you have wine on hand, a splash (about 1/4 cup) added here takes the flavor to another level!
-
Cook It Down
Cover the pot and let it simmer for about 20 minutes or until the rice is tender and has absorbed the liquid. Give it a gentle stir halfway through to prevent sticking. -
Incorporate the Cheese
Once the rice is tender, turn off the heat and stir in the grated Parmesan cheese. The cheese will melt nicely into the dish, creating that risotto-like creaminess.Chef Tip: For an even creamier texture, you can add a splash of milk or cream at this stage.
-
Garnish and Serve
Finally, garnish with fresh parsley and an extra sprinkle of Parmesan. Serve it directly from the pot for that cozy, family-style feel!
Serving Suggestions: The Perfect Plate
To serve your One-Pot Garlic Parmesan Chicken and Rice, scoop generous portions into wide, shallow bowls. This allows for that delicious cheesy goodness to shine. Pair it with a simple arugula salad dressed with lemon vinaigrette or crusty bread for that homey touch. Both options complement the dish beautifully!
Recipe Variations: Twist It Up
Feeling adventurous? Here are some fun variations to keep your cooking exciting:
-
Add Veggies
Toss in some frozen peas, chopped spinach, or diced bell peppers during the last few minutes of cooking to amp up the nutrition and color. -
Spice It Up
For a kick, add red pepper flakes or sauté sliced jalapeños with the garlic. -
Lemon Garlic Chicken Rice
Add the zest and juice of 1 lemon right before serving for a bright and zesty twist. -
Creamy Mushroom Addition
Sauté some sliced mushrooms with the chicken for that earthy flavor. The mushrooms pair wonderfully with the creamy sauce. -
Vegan Twist
Substitute chicken for chickpeas and use vegetable broth, alongside a plant-based cheese for a creamy vegan version.
Chef’s Notes: A Journey Through Cooking
As a chef, I’ve learned that every recipe is usually a work in progress. This dish has evolved over the years based on seasons, availability of ingredients, and of course, my family’s preferences. The first time I made it, it was a bit haphazard, but with every iteration, I found ways to simplify and enhance those bold flavors.
One of my favorite kitchen memories happened when my niece asked me if we could make it together. She was just learning to cook, and her excitement reminded me of how I felt in the kitchen as a child. We laughed, spilled a little rice, and made a delightful mess, but we created a dish that tasted even better than usual because it was made with love and enthusiasm.
FAQs and Troubleshooting
-
Can I use brown rice instead of white rice?
Yes! Just keep in mind that brown rice takes longer to cook. You’ll want to increase the broth to 4.5 cups and simmer for about 45-50 minutes. -
Why is the rice sticking to the bottom of my pot?
This can happen if the heat is too high. Always start with medium heat, and make sure to stir occasionally for the best results. -
How do I reheat leftovers without drying them out?
To reheat, add a splash of broth or water to the pot before warming it over low heat. Cover it to create steam which helps retain moisture. -
Can this dish be frozen?
Absolutely! It freezes well in an airtight container for up to 3 months. Just remember to thaw it in the refrigerator before reheating.
Nutritional Info (Optional)
If you’re curious about the nutritional breakdown, here it is for one serving of this delightful dish:
- Calories: 450
- Protein: 30g
- Carbs: 50g
- Fat: 15g
- Fiber: 2g
Let that tempting aroma fill your kitchen as you enjoy creating this One-Pot Garlic Parmesan Chicken and Rice! Whether for a casual weeknight or a special gathering, it’s bound to become a cherished favorite in your home. So go ahead, tie on that apron, and let’s make cooking fun and approachable—like it should be! Happy cooking, and bon appétit!
PrintOne-Pot Garlic Parmesan Chicken and Rice

A comforting and easy one-pot meal featuring chicken, rice, garlic, and Parmesan cheese.
- Prep Time: 10 minutes
- Cook Time: 30 minutes
- Total Time: 40 minutes
- Yield: 4 servings 1x
- Category: Main Course
- Method: Cooking
- Cuisine: Italian
- Diet: None
Ingredients
- 2 cups chicken breast, diced
- 1 cup rice
- 4 cups chicken broth
- 1 cup grated Parmesan cheese
- 4 cloves garlic, minced
- 1 teaspoon Italian seasoning
- Salt and pepper to taste
- 2 tablespoons olive oil
- Fresh parsley for garnish
Instructions
- Heat the olive oil in a large pot or Dutch oven over medium heat.
- Sear the diced chicken breast, seasoning with salt and pepper, until browned and cooked through—about 5-7 minutes.
- Add the minced garlic and Italian seasoning; cook for about 1 minute until fragrant.
- Stir in the rice to coat it with the flavors.
- Pour in the chicken broth, scraping up any bits from the bottom of the pan, and bring to a simmer.
- Cover and let simmer for about 20 minutes until the rice is tender.
- Incorporate the grated Parmesan cheese, stirring until melted and creamy.
- Garnish with fresh parsley and serve.
Notes
For an extra creamy texture, consider adding a splash of milk or cream. Optional variations include adding vegetables or spices.
Nutrition
- Serving Size: 1 serving
- Calories: 450
- Sugar: 1g
- Sodium: 600mg
- Fat: 15g
- Saturated Fat: 5g
- Unsaturated Fat: 8g
- Trans Fat: 0g
- Carbohydrates: 50g
- Fiber: 2g
- Protein: 30g
- Cholesterol: 80mg
Keywords: One-Pot, Garlic, Parmesan, Chicken, Rice, Easy Dinner

One-Pan Honey BBQ Chicken Rice: Quick Weeknight Dinner
One-Pan Bold Honey BBQ Chicken Rice: A Symphony of Flavor
Hello, fellow food enthusiasts! Are you ready to dive into a delicious dish that will not only satisfy your taste buds but also simplify your weeknight cooking? Today, I’m excited to share my One-Pan Bold Honey BBQ Chicken Rice recipe with you. This is a delightful meal that marries rich BBQ flavors with tender chicken, fluffy rice, and vibrant veggies—all cooked in one convenient pan. Who doesn’t love a recipe that’s easy to make and clean up?
Cooking is a journey, and I believe every dish we create tells a story. This one, in particular, is close to my heart because it encapsulates the joys of gathering friends and family around the dinner table. Honestly, what could be better than a gathering full of laughter and delicious scents wafting through the air? So, let’s grab our aprons and get ready to make some memories with this easy, flavorful dish!
A Trip Down Memory Lane
Growing up, my family had this tradition of Sunday dinners. We would all gather around the table, and my mom would whip up something that could feed an army. One of our favorite meals was her BBQ chicken. The aroma would fill our home, enticing everyone to come to the table. I remember watching her pour that sticky-sweet BBQ sauce over the chicken, giggling as the sauce splashed while she tossed everything together. There was just something magical about those moments—the laughter, the warmth, and, of course, the food.
Fast forward a few years, and I found myself hosting my first dinner party. With the memory of those Sunday dinners fresh in my mind, I thought, “Why not recreate that magic?” But in true Savannah fashion, I wanted to keep it simple and easy. That’s when I developed my One-Pan Bold Honey BBQ Chicken Rice recipe! It’s a dish that embodies everything I love about cooking: simplicity, flavor, and the joy of bringing people together.
Ingredients
Let’s talk about what you’ll need to whip up this mouthwatering meal:
-
1 lb boneless, skinless chicken thighs or breasts
You can’t go wrong with either cut! I love thighs for their juicy texture, but breasts work just as well. If you’re looking for a leaner option, chicken breasts are the way to go! -
1 cup long-grain rice
Long-grain rice beautifully fluffs up and is perfect for absorbing the BBQ sauce. If you’re in a pinch, jasmine or basmati rice will work like a charm, too! -
2 cups chicken broth
This is the secret to tender, flavorful rice! You can use low-sodium broth if you’re watching your salt intake, or make your own for a personal touch. -
½ cup BBQ sauce
Choose your favorite brand or homemade sauce! Got a spice tolerance? Opt for a spicy BBQ sauce to kick things up a notch. -
¼ cup honey
This is the sweetness that balances the BBQ flavors. Light or dark honey works; if you’re looking for a swap, maple syrup can also bring that lovely sweetness. -
1 cup mixed vegetables (frozen or fresh)
I love using a colorful mix of bell peppers, carrots, and peas. Feel free to swap in your favorites! -
1 tsp garlic powder
A flavor powerhouse! Fresh minced garlic can be used as well; just be cautious about adding too much. -
1 tsp onion powder
Onion powder adds depth. If you have a fresh onion on hand, sautéing it with the chicken can bring even more flavor! -
½ tsp smoked paprika
This adds a delicious smoky flavor. Regular paprika can work in a pinch, though the smokiness is divine! -
Salt and pepper to taste
Always adjust according to your preference! Don’t be shy—seasoning makes all the difference in elevating your dish.
Step-by-Step Instructions
Ready to get cooking? Let’s jump right in! This dish is as concise as it is delicious:
-
Prep Your Ingredients
- Before you begin, gather all your ingredients. This makes the cooking process smoother. Chop your mixed veggies if you’re using fresh ones, and season your chicken thighs or breasts generously with salt, pepper, garlic powder, and onion powder.
-
Sear the Chicken
- In a large skillet or a deep frying pan over medium-high heat, heat a splash of oil. Once hot, place the chicken in the pan. Sear each side for about 4-5 minutes until golden brown. This step locks in the juices and adds flavor. Chef’s Tip: Do not overcrowd the pan; cook them in batches if needed!
-
Make Your BBQ Sauce Mixture
- While the chicken is searing, in a bowl, whisk together the BBQ sauce and honey. This flavorful combo will become the star of your dish!
-
Add the Rice and Broth
- Once the chicken is nicely browned, remove it from the pan (it will continue cooking later) and add your rice to the same pan. Stir it for about a minute to coat it in the drippings left behind. Then, pour in the chicken broth. Stir gently to combine and bring to a gentle simmer.
-
Stir in Your Chicken
- Place the seared chicken back into the pan, then drizzle the BBQ-honey mixture all over it. Give everything a gentle stir to ensure the chicken and rice are coated.
-
Add the Vegetables
- Finally, stir in your mixed vegetables. Cover the skillet with a lid and reduce the heat to low. Let it all simmer for about 20-25 minutes, or until the rice is cooked through and has absorbed all the delicious liquid. Chef’s Hack: Check occasionally to ensure the rice isn’t sticking; give it a gentle stir if needed.
-
Fluff and Serve
- Once done, turn off the heat and let it sit for an additional 5 minutes. This resting time allows the flavors to meld together beautifully. Fluff up the rice with a fork, ensuring everything is mixed well.
Serving Suggestions
Now comes the best part—serving it up! Plate a generous scoop of the chicken and rice in a bowl and drizzle any remaining BBQ sauce over the top. Garnish with freshly chopped parsley or even some sliced green onions for a pop of color! You can also serve this dish with a simple side salad or some crusty bread to soak up all that lovely sauce.
Recipe Variations
Feeling a bit adventurous? Here are some creative twists you can try:
-
Spicy Kick: Add a splash of hot sauce or crushed red pepper flakes to the BBQ honey mixture for a fiery twist.
-
Herb-Infused Rice: Add fresh herbs like thyme or rosemary to the broth for an aromatic twist.
-
Southwest Style: Substitute the BBQ sauce with a chipotle sauce and include corn and black beans for a southwestern flavor profile.
-
Quinoa Substitute: Swap out the rice for quinoa for a protein-packed dish!
-
Vegetarian Version: Replace the chicken with chickpeas or tofu for a plant-based meal that retains all those wonderful flavors.
Chef’s Notes
This recipe has been a staple in my home, and it has evolved over time. It began with just the chicken and BBQ sauce, but I couldn’t resist adding rice and veggies to enhance the dish’s substance. The flavors are bold, but the approach remains effortless. One of my fondest memories is the first time I served this at my dinner party—everyone went back for seconds! A little laughter mixed with good food creates an unforgettable evening.
FAQs and Troubleshooting
-
Q: My rice turned out mushy! What went wrong?
A: It’s likely that it absorbed too much liquid. Always measure your broth carefully, and avoid stirring too much while cooking. -
Q: Can I make this dish ahead of time?
A: Absolutely! You can prepare it in advance and store it in the fridge. Just reheat it gently on the stove or in the microwave before serving. -
Q: What if I don’t have chicken broth?
A: Water will work in a pinch! Just season to taste, or you can use vegetable broth for a lighter option. -
Q: How can I store leftovers?
Transfer them to an airtight container and refrigerate for up to 3 days. It also freezes well, so keep that in mind for future meals!
Nutritional Info
If you’re curious about the nutritional benefits of this dish, here are the estimated values per serving (based on 4 servings):
- Calories: 425
- Protein: 30g
- Carbohydrates: 50g
- Fat: 9g
- Fiber: 3g
There you have it, my friends! A deliciously easy, one-pan meal that’s perfect for any evening when you want something hearty yet simple. I hope you embrace the joy of cooking as much as I do and enjoy making the One-Pan Bold Honey BBQ Chicken Rice. Remember, it’s all about the little moments around the table—happy cooking!
PrintOne-Pan Bold Honey BBQ Chicken Rice

A delightful meal that marries rich BBQ flavors with tender chicken, fluffy rice, and vibrant veggies—all cooked in one convenient pan.
- Prep Time: 10 minutes
- Cook Time: 30 minutes
- Total Time: 40 minutes
- Yield: 4 servings 1x
- Category: Main Course
- Method: Stovetop
- Cuisine: American
- Diet: None
Ingredients
- 1 lb boneless, skinless chicken thighs or breasts
- 1 cup long-grain rice
- 2 cups chicken broth
- ½ cup BBQ sauce
- ¼ cup honey
- 1 cup mixed vegetables (frozen or fresh)
- 1 tsp garlic powder
- 1 tsp onion powder
- ½ tsp smoked paprika
- Salt and pepper to taste
Instructions
- Prep Your Ingredients
- Sear the Chicken
- Make Your BBQ Sauce Mixture
- Add the Rice and Broth
- Stir in Your Chicken
- Add the Vegetables
- Fluff and Serve
Notes
Feel free to personalize this recipe with your favorite BBQ sauce or additional vegetables!
Nutrition
- Serving Size: 1 serving
- Calories: 425
- Sugar: 20g
- Sodium: 500mg
- Fat: 9g
- Saturated Fat: 2g
- Unsaturated Fat: 7g
- Trans Fat: 0g
- Carbohydrates: 50g
- Fiber: 3g
- Protein: 30g
- Cholesterol: 70mg
Keywords: BBQ chicken, one-pan meal, easy dinner, flavorful rice, weeknight cooking
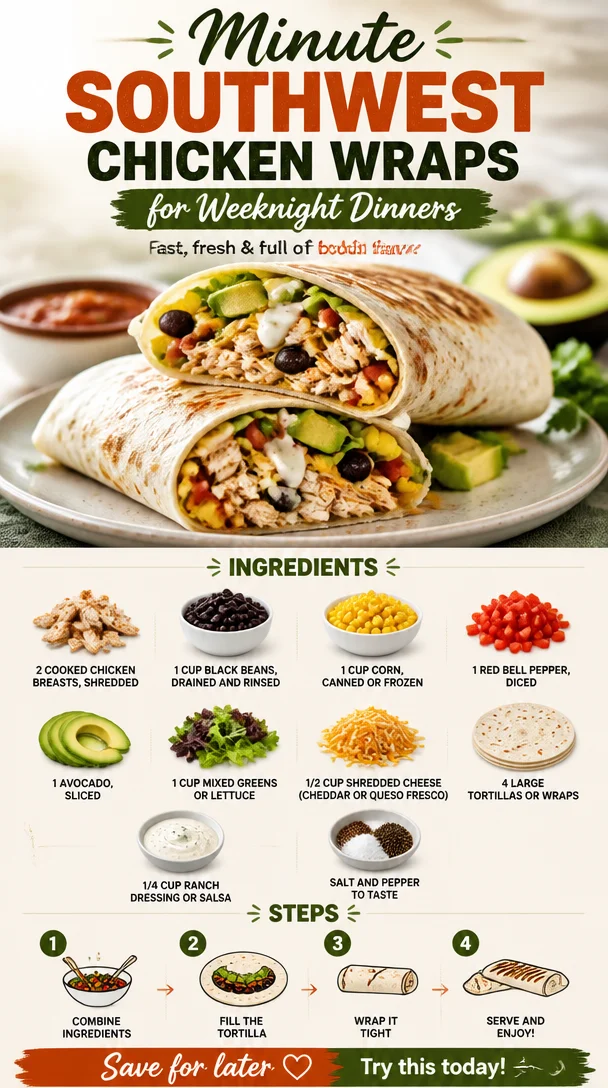
Minute Southwest Chicken Wraps for Weeknight Dinners
Southwest Chicken Wraps: A Flavorful Journey to Your Kitchen Table
Hello, fellow food lovers! Today, we’re diving into a dish that’s not only scrumptious but also a fiesta of flavors: Southwest Chicken Wraps! This recipe is close to my heart for many reasons, from its vibrant ingredients to its effortless preparation. It’s the perfect balance of health, satisfaction, and a touch of fun that makes it an ideal meal for any day of the week! So, grab your apron, and let’s whip up something truly delightful.
A Taste of Nostalgia
One of my fondest memories is from a lazy summer afternoon spent at my best friend Mia’s house. With the sun pouring through her kitchen window and laughter filling the air, we decided to make wraps for lunch—specifically, Southwest Chicken Wraps. I vividly remember the clatter of the knife against the cutting board as we diced bell peppers, the sound of laughter as we debated which dressing was the best, and the satisfaction of rolling our wraps with just the right amount of filling.
Mia’s mom, an expert home cook, quietly guided us while also sharing stories from her childhood in the Southwest. Each ingredient came with a story and a sprinkle of love. Once we sat down to devour our creations, it felt less like a meal and more like a celebration. Every bite was a burst of flavor, and we felt like culinary geniuses. That day instilled in me the joy of cooking for friends and family—something I cherish deeply and aim to replicate with my own recipes today.
Ingredients
Now, let’s talk about what you’ll need to create these delightful Southwest Chicken Wraps. Each ingredient is a key player in shaping the dish—a mix of textures and flavors that come together harmoniously.
-
2 cooked chicken breasts, shredded
For the best results, use grilled or rotisserie chicken. You can substitute with turkey or even chickpeas for a vegetarian twist! -
1 cup black beans, drained and rinsed
These not only add protein but also give a wonderful creamy texture. You could swap them out for pinto beans if you prefer. -
1 cup corn, canned or frozen
Sweet corn brings a burst of freshness. If you’re feeling adventurous, try roasted corn for deeper flavor! -
1 red bell pepper, diced
Sweet, crunchy, and colorful! Feel free to use yellow or orange peppers for a different taste palette. -
1 avocado, sliced
Creamy goodness! If avocados are out of season, consider using guacamole—just keep the seasoning in check! -
1 cup mixed greens or lettuce
Any green will do! Spinach or arugula can add a peppery kick. -
1/2 cup shredded cheese (cheddar or queso fresco)
Add a layer of creaminess with cheese! Try pepper jack for an extra kick or vegan cheese for a dairy-free option. -
4 large tortillas or wraps
Choose whole-wheat for a healthier option or a gluten-free wrap if necessary. -
1/4 cup ranch dressing or salsa
This is where you can really play with flavors! Swap ranch for a creamy chipotle dressing, or go full salsa for something fresher. -
Salt and pepper to taste
Always taste as you go to get the seasoning just right!
Step-by-Step Instructions
Let’s get cooking! Here’s how to bring these mouthwatering Southwest Chicken Wraps to life.
-
Prepare the Chicken
In a large bowl, shred your cooked chicken breasts using two forks. If you’re short on time, pre-shredded chicken from the store could also work! Season with salt and pepper and toss in with a tablespoon of salsa or ranch dressing for added flavor.
Little tip: If you’re using leftover chicken, warming it slightly in a pan can enhance the flavor! -
Mix in the Goodies
Add the drained black beans, corn, diced red pepper, and a pinch of salt to the bowl with the chicken. Mix thoroughly to combine the ingredients. You’re aiming for a colorful combination that looks as good as it tastes!
Commentary: Tossing the ingredients allows the black beans to soak up some of the chicken’s juices, making everything even more flavorful! -
Assemble the Wrap
Lay out your tortillas on a clean surface. Begin by placing a generous scoop of the chicken mixture in the center of each tortilla. Layer on a few slices of avocado, a handful of mixed greens or lettuce, and a sprinkle of cheese. Drizzle with more ranch or salsa if desired.
Chef hack: Always keep your filling towards the center, leaving space on the sides to fold in! -
Rolling It Up
To wrap, fold in the sides first, then roll from the bottom upwards to create a neat little parcel. Make sure to tuck as you roll to keep everything in place!
Pro tip: If you’re worried about your wrap falling apart, you can secure it with a toothpick or wrap it in parchment paper for serving! -
Finish with a Toast
If you’re feeling fancy and want to add a touch of crispiness, place the wraps seam-side down in a skillet over medium heat. Cook for about 2-3 minutes on each side or until golden brown.
Little chef secret: This step not only crisp up the wraps but also warms them nicely!
Serving Suggestions
Now that your Southwest Chicken Wraps are ready, it’s time to plate! Cut each wrap in half to showcase the colorful filling inside. Serve with a side of extra salsa or even guacamole for dipping. You might want to include some tortilla chips or a light salad on the side to balance the meal. Enjoyably messy, these wraps are meant to be eaten with your hands—perfect for a casual gathering or weeknight dinner!
Recipe Variations
A little creativity goes a long way! Here are some fun twists on our Southwest Chicken Wraps:
- Spicy Southwest Wrap: Add diced jalapeños or a drizzle of hot sauce for that extra kick.
- Mediterranean Twist: Swap chicken for shredded lamb or falafel and add tzatziki sauce instead of ranch.
- Vegan Delight: Replace chicken with grilled portobello mushrooms and use hummus instead of ranch.
- Breakfast Wrap: Fill with scrambled eggs instead of chicken, along with sautéed veggies and cheese for a hearty breakfast!
- Mango Salsa Kick: Toss in a spoonful of mango salsa for a sweet and savory flavor.
Chef’s Notes
Making Southwest Chicken Wraps reminds me of those sun-soaked afternoons with friends. They’ve been a staple in my kitchen since that summer, evolving along the way as I experimented with different flavors and ingredients. What started as a fun lunch has blossomed into a delightful dinner favorite.
I must tell you—a funny story: the first time I made these wraps, I was so excited to impress my friends that I forgot the avocado and ran out to the grocery store mid-prep! I laughed at myself for the extra trip, but that’s the beauty of cooking—there’s always room for a little improvisation.
FAQs and Troubleshooting
1. What if my wraps fall apart?
To avoid this, don’t overfill your wraps. Tuck the filling in tightly while rolling, and consider using a toothpick to hold them together until serving.
2. Can I make these wraps ahead of time?
Absolutely! Assemble the wraps, and wrap them tightly in plastic or parchment paper. Store in the fridge for up to 24 hours. Just wait to add the avocado until right before eating to keep it fresh.
3. What if I don’t like ranch dressing?
No problem! You can always swap ranch for your favorite dressing, or simply use a squeeze of lime and sprinkle of cumin for a fresh, zesty flavor.
4. Can I freeze these wraps?
Not ideal for freezing as the veggies may lose their crispness upon thawing. However, you can freeze the chicken mixture and assemble the wraps fresh when you’re ready!
Nutritional Info (Optional)
If you’re interested in the nutritional content of these delicious Southwest Chicken Wraps, a typical serving provides approximately:
- Calories: 450
- Protein: 30g
- Carbohydrates: 40g
- Fat: 18g
(Note: Nutritional values may vary based on specific ingredients used.)
So there you have it, a comprehensive guide to crafting your own Southwest Chicken Wraps from scratch! I hope you find joy in preparing these tasty wraps as much as I do. Remember, cooking is about sharing love and laughter, and there’s no better way to do that than around the table. Until next time, happy cooking, and don’t forget to tie on your apron!
PrintSouthwest Chicken Wraps

A flavorful journey with succulent chicken, black beans, corn, and fresh veggies wrapped in a tortilla, perfect for casual gatherings or weeknight dinners.
- Prep Time: 15 minutes
- Cook Time: 10 minutes
- Total Time: 25 minutes
- Yield: 4 servings 1x
- Category: Main Course
- Method: Assembling and Cooking
- Cuisine: Mexican
- Diet: None
Ingredients
- 2 cooked chicken breasts, shredded
- 1 cup black beans, drained and rinsed
- 1 cup corn, canned or frozen
- 1 red bell pepper, diced
- 1 avocado, sliced
- 1 cup mixed greens or lettuce
- 1/2 cup shredded cheese (cheddar or queso fresco)
- 4 large tortillas or wraps
- 1/4 cup ranch dressing or salsa
- Salt and pepper to taste
Instructions
- Prepare the Chicken: In a large bowl, shred your cooked chicken breasts using two forks. Season with salt and pepper and toss in with a tablespoon of salsa or ranch dressing for added flavor.
- Mix in the Goodies: Add the drained black beans, corn, diced red pepper, and a pinch of salt to the bowl with the chicken. Mix thoroughly to combine the ingredients.
- Assemble the Wrap: Lay out your tortillas on a clean surface. Place a generous scoop of the chicken mixture in the center of each tortilla. Layer on a few slices of avocado, a handful of mixed greens or lettuce, and a sprinkle of cheese.
- Rolling It Up: Fold in the sides first, then roll from the bottom upwards to create a neat little parcel. Tuck as you roll to keep everything in place!
- Finish with a Toast: If desired, place the wraps seam-side down in a skillet over medium heat. Cook for about 2-3 minutes on each side or until golden brown.
Notes
These wraps can be made ahead of time. Store in the fridge for up to 24 hours. Consider using a toothpick to secure wraps while serving.
Nutrition
- Serving Size: 1 wrap
- Calories: 450
- Sugar: 2g
- Sodium: 600mg
- Fat: 18g
- Saturated Fat: 4g
- Unsaturated Fat: 10g
- Trans Fat: 0g
- Carbohydrates: 40g
- Fiber: 8g
- Protein: 30g
- Cholesterol: 70mg
Keywords: Southwest chicken wraps, easy wrap recipe, Mexican wraps, healthy wraps, chicken recipes