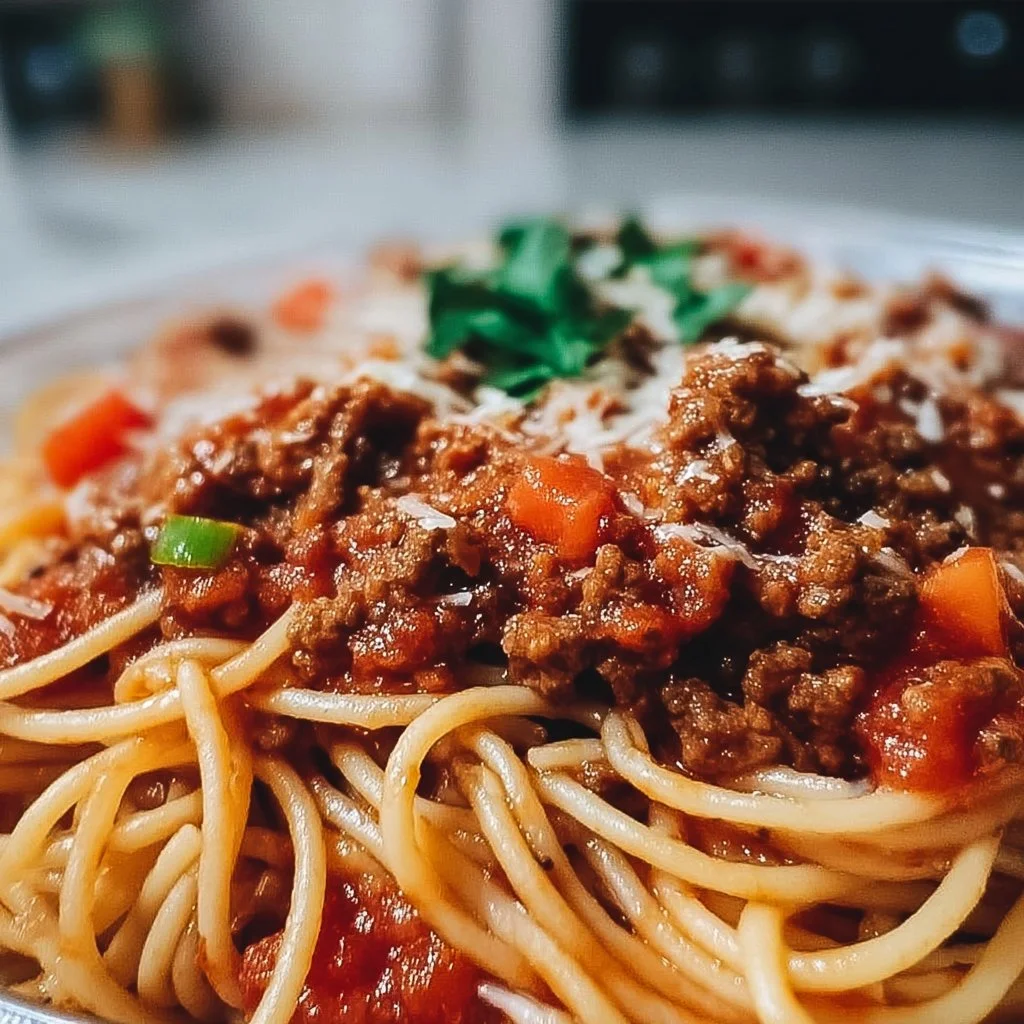
Spaghetti with Meat Sauce
The Perfect Spaghetti with Meat Sauce: A Home Cook’s Delight
Cooking is one of life’s great pleasures, and there’s nothing quite like the comforting embrace of a bowl of spaghetti with meat sauce. It’s simple, satisfying, and a dish I believe everyone should know how to make. Today, I’m excited to share my favorite recipe with you, dripping with nostalgia and flavor—it’s sure to make your kitchen glow with warmth and laughter!
A Personal Memory with Spaghetti
When I think of spaghetti and meat sauce, my mind drifts back to my childhood kitchen, a bustling hub of activity every Sunday evening. My parents, determined to keep our family traditions alive, would host what we called "Sunday Funday." The aroma of simmering sauce would fill the house, mingling with laughter and chatter as my siblings and I set the table, eager for what was about to unfold.
My dad spent the afternoon preparing the sauce, a secret family recipe, which had been passed down through generations. The whole kitchen transformed into an aromatic wonderland of browning meat, caramelizing onions, and garlic that had us all salivating before the first forkful. I remember sneaking bits of the sauce when he wasn’t looking, my taste buds rejoicing with every savory bite. When it finally came time to sit around the table, we served up plates heaped high, ready to enjoy a meal crafted with love. It was more than just food; it was a bond that brought us together.
So, let’s dive into making this classic deliciousness! Follow along, and soon your kitchen will be filled with the same rich scents that have graced my family dinners.
Ingredients: Gather Your Essentials
Before we start, let’s get all your ingredients lined up:
-
Spaghetti: The star of the show! You can opt for traditional wheat pasta or switch it up with whole wheat or gluten-free options. Just cook it according to package instructions for that perfect al dente texture.
-
Ground Beef or Sausage: Either will do! Ground beef gives a classic taste, while sausage adds a delightful zing. Feel free to mix it up for a unique kick!
-
Onion, Chopped: This ingredient adds sweetness and depth. If you’re sensitive to onions, shallots are a lovely substitute or you can even use leeks!
-
Garlic, Minced: Because garlic makes everything better! Fresh garlic is ideal, but if you’re in a pinch, garlic powder works too—just adjust the amount so you don’t overpower the dish.
-
Canned Tomatoes (Crushed or Diced): For that luscious sauce base, choose high-quality canned tomatoes. If fresh tomatoes are in season, feel free to use them; just remember to peel and deseed for a smoother sauce.
-
Tomato Paste: This intensifies the tomato flavor and thickens the sauce. If you’re out, a bit of tomato sauce can work, but the richness might not be as pronounced.
-
Italian Seasoning: Essential for that comforting Italian flavor profile. You can DIY this mix with dried basil, oregano, thyme, and rosemary.
-
Salt: A little goes a long way in enhancing flavors. Keep it handy!
-
Pepper: Freshly ground is always best for that extra kick.
-
Parmesan Cheese (Optional): For a deliciously nutty finish! Other hard cheeses like Pecorino Romano work great too.
Step-by-Step Instructions: Let’s Cook!
Now comes the fun part! Here’s how you bring this dish together:
-
Start by boiling the spaghetti:
- Fill a large pot with salted water and bring it to a rolling boil. When it’s bubbling like mad, toss in your spaghetti. Set a timer based on the package directions—typically 8-10 minutes—for perfectly cooked pasta. Don’t forget to stir occasionally to prevent sticking!
-
Sauté your aromatics:
- While the pasta cooks, grab a large skillet (preferably non-stick) and heat over medium heat. Add a drizzle of olive oil—about a tablespoon should do. Once hot, throw in your chopped onion and sauté until it’s translucent and fragrant, around 3-5 minutes. Then, add the minced garlic and cook for another minute until it gets that lovely golden color and fragrance.
-
Cook the meat:
- Increase the heat to medium-high. Time to add in your ground beef or sausage! Break it apart with a spatula and let it brown evenly, about 5 minutes. Make sure to stir often to avoid clumps and ensure everything caramelizes beautifully.
-
Add the tomatoes and seasonings:
- Once your meat is browned, it’s time to add the canned tomatoes and tomato paste. Stir them in well, then sprinkle in your Italian seasoning, salt, and pepper. Bring the mixture to a gently simmer. This is where the magic happens! Allow the sauce to cook for at least 15 minutes on low heat. If you have the time, let it simmer longer—this is where those flavors deepen and develop!
-
Combine pasta and sauce:
- When your spaghetti is perfectly cooked, reserve about a cup of pasta water, then drain it. Add the drained spaghetti directly into your sauce. Toss to coat the noodles evenly. If the sauce is too thick, add a splash of that reserved pasta water until you reach your desired consistency.
Serving Suggestions: Plating It Up
Presentation does wonders, so let’s make those plates pop! Serve your spaghetti in shallow bowls, twirling the noodles into a nest-like shape for that elegant touch. Top each serving with a generous scoop of meat sauce and finish it off with a sprinkle of freshly grated Parmesan cheese. Add a sprinkle of fresh basil or parsley for a burst of color and flavor—trust me, your guests will be delighted!
Recipe Variations: Get Creative!
This recipe is incredibly versatile! Here are some fun twists to try:
-
Vegetarian Delight: Swap the meat for lentils or a mix of sautéed mushrooms, spinach, and zucchini for a hearty plant-based option.
-
Spicy Kick: Add crushed red pepper flakes to the sauce for heat—just adjust to your spice preference!
-
Creamy Dream: Stir in a splash of heavy cream or a dollop of ricotta just before serving for a rich, creamy sauce.
-
Extra Veggies: Toss in bell peppers, spinach, or other veggies into the sauce—great for sneaking in some extra nutrition!
-
Zoodles: For a low-carb version, use spiralized zucchini instead of spaghetti!
Chef’s Notes: Personal Reflections
Growing up, my dad often insisted that the secret to a great sauce was patience. I’ve learned through the years that allowing the flavors to meld together makes all the difference. As I began experimenting, I incorporated more herbs for freshness and ended up creating a version of the sauce that I can proudly serve to friends and family alike.
And don’t worry about everything being perfect! One time, I mistakenly grabbed chili powder instead of olive oil while cooking. Surprisingly, it made for a deliciously smoky twist that I still replicate today. Cooking is about exploration, so don’t shy away from mistakes—they often lead to remarkable discoveries!
FAQs and Troubleshooting
1. Why did my sauce turn out too watery?
This can happen if there’s excess liquid in the canned tomatoes. To fix it, simmer the sauce uncovered to help it thicken or incorporate a bit of tomato paste.
2. My meat is tough; what did I do wrong?
It’s likely that the meat was cooked at too high a temperature or for too long. Aim for a medium heat and keep stirring to avoid overcooking.
3. How do I store leftovers?
Let the leftovers cool completely, then transfer them to an airtight container. They last in the fridge for 3-4 days or can be frozen for up to 3 months.
4. Can I make this sauce ahead of time?
Absolutely! The sauce actually tastes better the next day as the flavors develop. Just reheat it gently on the stovetop before serving.
Nutritional Info
While I believe the love you put into your food is just as important as the calories, here’s a rough estimate for one serving:
- Calories: 550
- Protein: 25g
- Carbohydrates: 75g
- Fat: 15g
Cooking spaghetti with meat sauce is not just about the ingredients; it’s about the stories, the memories, and the lovely moments shared at the table. I hope this recipe brings you as much joy as it has brought me, so grab that apron, pour yourself a glass of something bubbly, and enjoy every step of the process. Happy cooking!
PrintPerfect Spaghetti with Meat Sauce
A comforting and classic spaghetti with meat sauce recipe that brings warmth and nostalgia to your kitchen.
- Prep Time: 15 minutes
- Cook Time: 30 minutes
- Total Time: 45 minutes
- Yield: 4 servings
- Category: Main Course
- Method: Cooking
- Cuisine: Italian
- Diet: Non-Vegetarian
Ingredients
- Spaghetti
- Ground Beef or Sausage
- Onion, Chopped
- Garlic, Minced
- Canned Tomatoes (Crushed or Diced)
- Tomato Paste
- Italian Seasoning
- Salt
- Pepper
- Parmesan Cheese (Optional)
Instructions
- Start by boiling the spaghetti: Fill a large pot with salted water and bring it to a rolling boil. Toss in your spaghetti and set a timer based on package directions, typically 8-10 minutes. Stir occasionally.
- Sauté your aromatics: Heat a large skillet over medium heat and add olive oil. Once hot, add chopped onion and sauté for 3-5 minutes. Add minced garlic and cook for another minute.
- Cook the meat: Increase heat to medium-high and add ground beef or sausage. Brown evenly for about 5 minutes, stirring often.
- Add the tomatoes and seasonings: Once the meat is browned, add canned tomatoes and tomato paste, then sprinkle in Italian seasoning, salt, and pepper. Simmer for at least 15 minutes on low heat.
- Combine pasta and sauce: Reserve a cup of pasta water, then drain spaghetti. Add drained spaghetti to the sauce and toss to coat.
Notes
For extra flavor, let the sauce simmer longer than 15 minutes. Consider adding vegetables or trying variations like vegetarian options.
Nutrition
- Serving Size: 1 serving
- Calories: 550
- Sugar: 7g
- Sodium: 600mg
- Fat: 15g
- Saturated Fat: 5g
- Unsaturated Fat: 7g
- Trans Fat: 0g
- Carbohydrates: 75g
- Fiber: 5g
- Protein: 25g
- Cholesterol: 70mg
Keywords: spaghetti, meat sauce, Italian recipe, comfort food, family meal

Queso Chicken Enchiladas for a Quick and Cheesy Dinner Delight
Queso Chicken Enchiladas for a Quick and Cheesy Dinner Delight
Hello, fellow food lovers! If there’s one dish in my recipe arsenal that never fails to bring a smile to my face — and to the faces of my loved ones — it’s my Queso Chicken Enchiladas. With their creamy queso sauce, tender chicken, and cheesy goodness, these enchiladas are not just a meal; they’re a cozy hug in a tortilla. Whether you’re looking to whip up a weeknight dinner for the family or impress your friends at the next gathering, this recipe has you covered.
Cooking for me has always been about more than just feeding people; it’s about connecting, sharing stories, and creating memories around the table. I fondly remember the first time I made these enchiladas. It was a chilly autumn evening, and I wanted to make something comforting after what felt like a long week. I rifled through my pantry, found a few staple ingredients, and voila! My Queso Chicken Enchiladas were born. The aroma that filled my kitchen was intoxicating, and the laughter that followed at the dinner table was priceless.
Are you ready to dive into this cheesy delight? Let’s gather our ingredients and start cooking! You’ll be so glad you did.
Personal Story
Looking back, one of my fondest memories of making these enchiladas was the first time I prepared them for my close-knit group of friends during a cooking night. The atmosphere was relaxed; we sipped on sparkling water and reminisced about our college days, laughter and stories filling the air. As the enchiladas baked in the oven, the scent wafted through the house, coaxing everyone into the kitchen. When I finally pulled out that bubbling pan of cheesy goodness, the cheers were exhilarating!
The platter was nearly wiped clean in minutes, and every bite was accompanied by compliments and joyful exclamations. It was the perfect blend of nostalgia and new memories. This dish has since become a staple when I’m hosting, always reminding me that great food brings people together. And let me tell you, there’s nothing better than watching someone take a bite and smile with delight!
Ingredients
To make these tasty Queso Chicken Enchiladas, gather these simple yet delicious ingredients:
-
4 Burrito Size Flour Tortillas
Flour tortillas lend a pillowy texture to the enchiladas, but corn tortillas are a fabulous gluten-free alternative. Just remember to warm them up slightly on a skillet to keep them from cracking! -
2 Cups Shredded Chicken
Feel free to use rotisserie chicken for a quicker prep, or if you’re in the mood, poach or bake some chicken breasts. Leftover turkey also works brilliantly here! -
1 Packet Taco Seasoning
You can batch-make your own seasoning mix with spices like cumin, chili powder, and garlic for a personalized touch! Store-bought is convenient, but homemade can really amp up the flavor! -
1 Cup Sour Cream
Creamy, tangy, and rich, this plays well with the queso. Substitute with Greek yogurt for a healthier twist if desired! -
1 Cup Shredded Cheddar Cheese
Sharp Cheddar adds a delightful bite. For extra creaminess, mix in some Monterey Jack cheese — it melts like a dream! -
1 Can Chopped Green Chilies
These add a nice mild heat. Feel free to adjust the quantity based on your heat preference or even substitute with jalapeños for a kick! -
1 Can Diced Tomatoes with Green Chilies (Undrained)
The liquid helps keep the enchiladas moist. You can use regular diced tomatoes if you prefer! -
16 oz Queso Blanco Velveeta
This is the star of the dish! It melts beautifully, creating that indulgent creamy sauce. If you’re feeling adventurous, try using a block of cheese from the deli — just ensure it has good melting properties.
Step-by-Step Instructions
-
Preheat Your Oven
Preheat your oven to 350°F (175°C). This step is vital to ensure your enchiladas get that lovely golden finish while baking. -
Prepare the Filling
In a mixing bowl, combine the shredded chicken, taco seasoning, sour cream, chopped green chilies, and half of the shredded cheese. Mix well until everything is beautifully coated. This filling is so flavorful, you might find yourself sneaking bites before even wrapping it up! -
Assemble the Enchiladas
On a warm tortilla, spoon about ¼ cup of the chicken mixture into the center. Roll tightly from one end to the other and place seam-side down in a greased baking dish. Repeat with the remaining tortillas. There’s something therapeutic about rolling these babies up — just imagine the joy they’re going to bring! -
Make the Queso Sauce
In a saucepan over medium heat, melt the Velveeta queso. Add the diced tomatoes (with their juice) and stir until completely melted and combined. I like to add a touch of milk or chicken broth if I want a thinner sauce. Keep stirring to prevent it from sticking! -
Pour the Queso Sauce
Once your queso is smooth, pour it over the rolled enchiladas in the baking dish, making sure to cover them generously. You want every bite to be infused with that gooey goodness! -
Top with Cheese
Sprinkle the remaining shredded cheese on top of the enchiladas, allowing for that glorious cheesy crust we all crave. -
Bake
Place the baking dish in your preheated oven and bake for 20-25 minutes or until the cheese is bubbly and slightly golden on the edges. Your kitchen is going to smell divine — trust me! -
Serve
Once they’re done, let them sit for a few minutes before serving. This allows everything to set just a touch, making for easier cutting. Pair with a fresh salad or some tortilla chips for crunch!
Serving Suggestions
For plating these enchiladas, grab a large serving spoon and scoop them out onto a beautiful platter. Garnish with a sprinkle of fresh cilantro or a dollop of sour cream for a pop of color and flavor. Serve alongside a crisp green salad or some homemade salsa for added freshness. And don’t forget the margaritas — they pair oh-so-well!
Recipe Variations
- Spicy Kick: Add sliced jalapeños to the filling or substitute spicy taco seasoning to elevate the heat.
- Veggie Lovers: Replace the chicken with black beans, corn, or sautéed vegetables for a delicious vegetarian option.
- Creamy Avocado Sauce: Instead of queso, make a creamy avocado sauce to drizzle over the enchiladas before serving for a fresh twist.
- Herb Infusion: Add chopped fresh herbs like cilantro or chives to the filling for an aromatic upgrade.
- Different Cheeses: Swap out the cheddar and use pepper jack for a hint of spice or feta for a Mediterranean flair.
Chef’s Notes
These Queso Chicken Enchiladas are one of those recipes that have truly evolved in my kitchen. I started with a basic version many years ago, but over time, I’ve added little twists and turned it into something that feels uniquely mine. I also have to admit, there have been times where I tried using every cheese in my fridge, resulting in an accidental but delicious fusion of flavors!
One of my funniest kitchen stories related to this dish happened when I made them for a big family gathering. I mistakenly used a spicy bean dip instead of queso, and let’s just say they definitely left an impression! Lesson learned: always double-check your ingredients.
FAQs and Troubleshooting
Q: What if my enchiladas break when rolling?
A: Make sure to warm up your tortillas before filling them. This helps prevent breakage. If they do break, just layer the ingredients like a lasagna — it’ll still taste fantastic!
Q: Can I make these ahead of time?
A: Absolutely! You can assemble them and store them in the fridge covered for up to a day before baking. Just add a few extra minutes to the baking time since they’ll be cold from the fridge.
Q: What can I substitute for Velveeta?
A: If you want a more natural cheese option, try a block of cream cheese paired with a melting cheese like Monterey Jack or mozzarella. Just blend the cream cheese smooth before adding!
Q: How do I make them less greasy?
A: Opt for lower-fat cheese options or use Greek yogurt instead of sour cream to lighten them up a bit. You can also drain the diced tomatoes well to reduce moisture if necessary.
Nutritional Info
While everyone’s dietary needs can vary, here’s a rough estimate per serving (based on 4 servings):
- Calories: 450
- Protein: 28g
- Carbohydrates: 45g
- Fat: 20g
Remember to adjust based on your ingredient choices and serving sizes!
So there you have it, my beloved Queso Chicken Enchiladas — not just a meal, but a delightful experience in the kitchen and around the table! Whether you’re making these for a casual night or a special occasion, they’re sure to bring joy and warmth. Now, tie on your apron, turn up the music, and let’s make something delicious! Happy cooking!
PrintQueso Chicken Enchiladas

Creamy and cheesy Queso Chicken Enchiladas perfect for a cozy dinner, filled with tender chicken and topped with a luscious queso sauce.
- Prep Time: 15 minutes
- Cook Time: 25 minutes
- Total Time: 40 minutes
- Yield: 4 servings 1x
- Category: Main Course
- Method: Baking
- Cuisine: Mexican
- Diet: Gluten-Free Option Available
Ingredients
- 4 Burrito Size Flour Tortillas
- 2 Cups Shredded Chicken
- 1 Packet Taco Seasoning
- 1 Cup Sour Cream
- 1 Cup Shredded Cheddar Cheese
- 1 Can Chopped Green Chilies
- 1 Can Diced Tomatoes with Green Chilies (Undrained)
- 16 oz Queso Blanco Velveeta
Instructions
- Preheat your oven to 350°F (175°C).
- Combine the shredded chicken, taco seasoning, sour cream, chopped green chilies, and half of the shredded cheese in a mixing bowl.
- On a warm tortilla, spoon about ¼ cup of the chicken mixture into the center, roll tightly, and place seam-side down in a greased baking dish.
- Melt the Velveeta queso in a saucepan over medium heat, adding diced tomatoes and stirring until combined.
- Pour the queso sauce over the rolled enchiladas, covering them generously.
- Sprinkle the remaining shredded cheese on top of the enchiladas.
- Bake for 20-25 minutes until cheese is bubbly and golden.
- Let sit for a few minutes before serving.
Notes
Serve with fresh cilantro, sour cream, or a crisp salad. Feel free to modify the recipe to suit your taste, such as adding spicy elements or veggie substitutes.
Nutrition
- Serving Size: 1 serving
- Calories: 450
- Sugar: 4g
- Sodium: 800mg
- Fat: 20g
- Saturated Fat: 10g
- Unsaturated Fat: 6g
- Trans Fat: 0g
- Carbohydrates: 45g
- Fiber: 2g
- Protein: 28g
- Cholesterol: 80mg
Keywords: enchiladas, chicken, queso, cheesy, dinner, comfort food
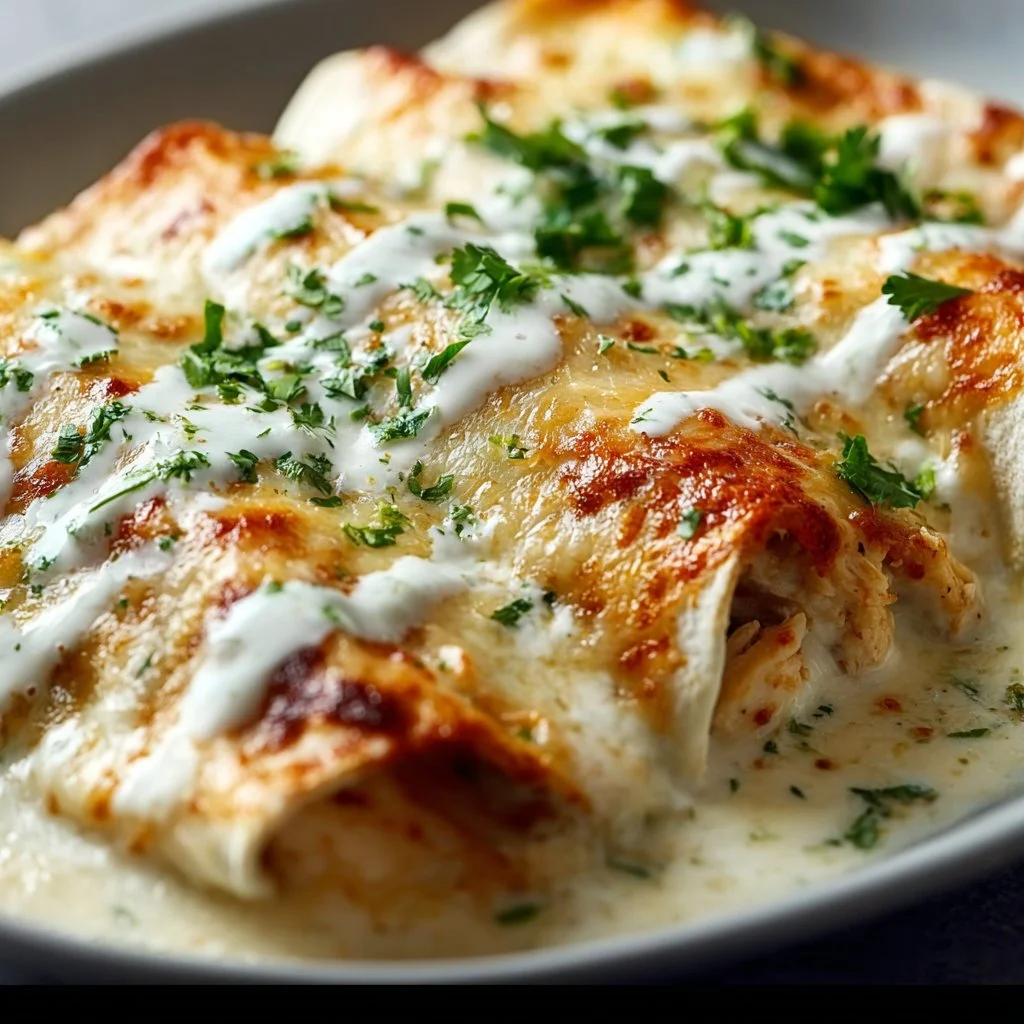
Creamy White Chicken Enchiladas
Creamy White Chicken Enchiladas: A Delicious Journey
Hello there, fellow food lovers! Today, I’m excited to share with you a dish that embodies comfort, warmth, and a whole lot of flavor: Creamy White Chicken Enchiladas. These delightful rolls are not only a feast for the eyes but also a warm hug for the taste buds. Picture melty cheese, tender chicken, and a luscious white sauce all wrapped in soft tortillas—what’s not to love?
When I think of my time in the kitchen crafting this recipe, it brings back fond memories of family gatherings, where laughter and delicious aromas filled the air. There’s something magical about sharing a cozy meal with the people you love, and I firmly believe these enchiladas deliver just that!
Whether you’re looking to impress friends at a dinner party or simply want to treat yourself to a comforting weeknight meal, this dish has got you covered. Let’s dive into this culinary adventure together!
My Culinary Memory
One of my favorite kitchen memories revolves around these delightful creamy white chicken enchiladas. I remember the first time I made them for my closest friends during a cozy winter gathering. The flurry of the season had everyone seeking warmth and comfort, and there I was, armed with my trusty apron, ready to create something special.
The moment those enchiladas came out of the oven—golden, bubbling, and simply irresistible—the entire room filled with the heavenly aroma of melted cheese and spices. As we gathered around the table, plates piled high with enchiladas, I couldn’t help but feel a deep sense of joy. We laughed, shared stories, and indulged in seconds (and maybe even thirds!). It was then that I realized how food has this incredible ability to bring people together and create cherished memories. So, grab your apron, and let’s recreate that magic in your kitchen!
Ingredients
Here’s what you’ll need to whip up these delectable Creamy White Chicken Enchiladas:
-
8-10 flour tortillas (medium size): Flour tortillas are soft and pliable—perfect for rolling. If you prefer a gluten-free option, corn tortillas work wonderfully too!
-
3 cups cooked shredded chicken: You can use rotisserie chicken for convenience or poach your own for freshness. Bonus points for flavor if you season the chicken while cooking!
-
2 cups shredded Monterey Jack cheese (divided): This cheese melts beautifully, adding a creamy texture to your dish. Feel free to substitute with white cheddar for a sharper taste.
-
1 cup shredded cheddar cheese (divided): Classic cheddar brings a delicious tanginess. Go for a sharp variety for more robust flavor!
-
1/2 cup diced green chiles (canned or fresh): These little guys add a delightful kick. If you prefer a milder flavor, opt for canned mild chiles or skip this ingredient altogether.
-
1/4 cup chopped fresh cilantro: Fresh cilantro brightens the dish! If you’re not a fan of cilantro, parsley can be used instead, although it offers a different flavor profile.
-
1 small onion (diced): Onions provide depth and sweetness. You can substitute with shallots for a more subtle flavor.
-
3 tablespoons butter: Butter adds that rich, velvety texture to our sauce. If you need a dairy-free option, use olive oil or vegan butter.
-
3 tablespoons all-purpose flour: This is essential for making the roux that thickens our white sauce. You can use gluten-free flour if necessary.
-
2 cups chicken broth: Homemade is best! But store-bought works perfectly in a pinch. Just be sure it’s low-sodium for better control over your seasonings.
-
1 cup sour cream (room temperature): Adds creaminess and tang! You can substitute with Greek yogurt for a healthier alternative.
-
1/2 teaspoon cumin (ground): Cumin brings warmth and earthiness to the dish. Feel free to adjust this based on your personal taste!
-
Salt and pepper (to taste): Essential seasonings that enhance the flavors!
Step-by-Step Instructions
Now that we’ve got our ingredients lined up, let’s get cooking! I promise it’ll be easier than you think!
-
Prepare Your Cooking Area: Start by preheating your oven to 350°F (175°C). Grab a 9×13-inch baking dish and lightly grease it with cooking spray or a drizzle of olive oil. This will help prevent sticking and make for easier cleanup.
-
Make the White Sauce: In a medium saucepan over medium heat, melt the butter. Once it’s bubbling, add the diced onions and cook for about 3-4 minutes until they’re translucent and fragrant. Here’s a little chef hack: stir occasionally to prevent burning and let them get that lovely caramelized color!
-
Create the Roux: Stir in the flour to create a roux. Combine it with the butter and onions, whirling it until it looks like a paste. Cook for another minute to cook out the raw flour flavor. You want it to be a light golden color.
-
Add Chicken Broth and Season: Gradually whisk in the chicken broth, ensuring there are no lumps. Increase the heat slightly and keep whisking until the mixture thickens, about 2-3 minutes. Once it’s nice and creamy, fold in the sour cream, cumin, salt, and pepper. Voila! Your white sauce is ready!
-
Combine Chicken and Sauce: In a large mixing bowl, combine your shredded chicken, half of the Monterey Jack cheese, green chiles, and half of the cilantro. Pour in a cup of the creamy white sauce and mix until everything is evenly coated.
-
Assemble the Enchiladas: Take one tortilla and spoon about 1/3 cup of the chicken mixture into the center. Roll it up tightly and place it seam-side down in your prepared baking dish. Repeat until all tortillas are filled. This might get a little messy, but isn’t that part of the fun?
-
Top it Off: Once all your enchiladas are snug in their dish, pour the remaining white sauce over them. Sprinkle the rest of your cheeses on top (the more cheese, the better!). Finish with a sprinkle of salt and pepper.
-
Bake to Perfection: Pop the baking dish in the preheated oven and bake for about 25-30 minutes, or until the top is golden and bubbly. You might want to crank the broiler for an extra minute or two at the end to get that perfect golden crust—just keep a close eye on it!
-
Garnish and Serve: Once removed from the oven, sprinkle the remaining cilantro over the top. Allow it to cool for a few minutes before serving.
Serving Suggestions
When it comes to plating, I like to keep it simple yet inviting. Serve your enchiladas directly from the baking dish for a homey vibe, letting your guests dive right in! Add a fresh side salad with a zesty vinaigrette to cut through the creaminess and maybe some avocado slices to add a hint of richness. Don’t forget to put out a bowl of sour cream and salsa for toppings—it’s all about personalization!
Recipe Variations
Feel like switching things up a bit? Here are a few creative spins on this classic:
- Spicy Salsa Verde Variety: Swap the white sauce for a zesty salsa verde for an unexpected twist that adds both flavor and spice!
- Vegetarian Option: Replace the chicken with black beans or roasted vegetables. This offers a hearty meatless meal while keeping all the creamy goodness.
- Extra Cheesy: For the cheese lovers, add another layer of cheese between the enchiladas and top with crushed tortilla chips before baking for a delightful crunch.
- Herb Infusion: Experiment with different herbs like oregano or thyme mixed into the filling for additional aromatic flavors!
- Breakfast Enchiladas: Substitute shredded chicken with scrambled eggs, black beans, and pepper jack cheese for a delicious breakfast twist!
Chef’s Notes
These Creamy White Chicken Enchiladas have a special place in my heart because of their versatility. They’ve evolved over time based on what I have on hand or what my friends are craving. I’ve thrown in everything from leftover grilled chicken to a variety of cheeses, and every time they’ve turned out divine. I once made a version with a little chipotle sauce for a smoky kick, and let me tell you, it was a hit!
In the kitchen, things don’t always go perfectly—once, I accidentally grabbed flour instead of cornstarch while trying to thicken a sauce. Long story short, we ended up with a delightful gravy that paired beautifully with some leftover steak! So remember, every cooking experience is an opportunity to learn and grow—embrace it!
FAQs and Troubleshooting
1. What if my sauce is too thick when I make it?
If your sauce gets too thick, don’t fret! Simply whisk in a bit more chicken broth until it reaches your desired consistency.
2. Can I freeze leftover enchiladas?
Yes! These enchiladas freeze beautifully. Just make sure to cover them well with plastic wrap and aluminum foil. They can be stored for up to 3 months. Thaw in the refrigerator and then bake as directed.
3. What’s the best way to reheat them?
Reheat your enchiladas in a preheated oven at 350°F (175°C) for about 15-20 minutes, until heated through. You can cover them with foil to prevent the cheese from browning too quickly.
4. Why are my enchiladas falling apart?
If your enchiladas are falling apart, it may be due to overfilling or undercooking the tortillas. Ensure they’re warmed slightly before filling to make them pliable, and don’t overload them with filling!
Nutritional Info (Optional)
Each serving of these Creamy White Chicken Enchiladas (based on a recipe serving 8) is approximately:
- Calories: 320
- Protein: 22g
- Carbohydrates: 28g
- Fat: 15g
Remember, nutrition can vary based on specific ingredients used, so adjust accordingly!
And there you have it! Beautiful, creamy white chicken enchiladas that are as enjoyable to make as they are to eat. I hope this recipe brings you as much joy as it has brought me over the years. Now, tie on that ivory apron of yours, tap into your culinary spirit, and let’s make some delicious memories together. Happy cooking!
PrintCreamy White Chicken Enchiladas

Comforting enchiladas filled with shredded chicken and smothered in a creamy white sauce.
- Prep Time: 15 minutes
- Cook Time: 30 minutes
- Total Time: 45 minutes
- Yield: 8 servings 1x
- Category: Main Course
- Method: Baking
- Cuisine: Mexican
- Diet: Gluten-Free Option
Ingredients
- 8–10 flour tortillas
- 3 cups cooked shredded chicken
- 2 cups shredded Monterey Jack cheese (divided)
- 1 cup shredded cheddar cheese (divided)
- 1/2 cup diced green chiles
- 1/4 cup chopped fresh cilantro
- 1 small onion (diced)
- 3 tablespoons butter
- 3 tablespoons all-purpose flour
- 2 cups chicken broth
- 1 cup sour cream
- 1/2 teaspoon cumin (ground)
- Salt and pepper (to taste)
Instructions
- Preheat your oven to 350°F (175°C) and grease a 9×13-inch baking dish.
- Melt the butter in a medium saucepan over medium heat. Add the diced onions and cook for 3-4 minutes until translucent.
- Stir in the flour to create a roux and cook for another minute.
- Whisk in the chicken broth gradually until thickened, about 2-3 minutes. Fold in the sour cream, cumin, salt, and pepper.
- Combine shredded chicken, half of the Monterey Jack cheese, green chiles, and half of the cilantro in a mixing bowl. Add a cup of the white sauce and mix well.
- Fill each tortilla with the chicken mixture, roll tightly, and place seam-side down in the dish.
- Pour the remaining white sauce over the top and sprinkle with the remaining cheese.
- Bake for 25-30 minutes until golden and bubbly.
- Garnish with remaining cilantro before serving.
Notes
These enchiladas can be frozen for up to 3 months. Reheat in a preheated oven at 350°F (175°C) for 15-20 minutes.
Nutrition
- Serving Size: 1 serving
- Calories: 320
- Sugar: 4g
- Sodium: 600mg
- Fat: 15g
- Saturated Fat: 8g
- Unsaturated Fat: 6g
- Trans Fat: 0g
- Carbohydrates: 28g
- Fiber: 2g
- Protein: 22g
- Cholesterol: 50mg
Keywords: enchiladas, creamy chicken, comfort food, Mexican cuisine

This meal feels like family
This Meal Feels Like Family: A Soulful Recipe for Gathering Around the Table
Hello, dear foodies! Gather round because today, we’re diving into a dish that transcends mere sustenance. It’s all about flavors that wrap you in warmth and memories that transport you back to the best times shared with loved ones. I’m talking about a comforting, home-cooked meal that feels like family, no matter who you’re with.
Picture this: the aroma of something delicious wafting through your home, the laughter of friends or family echoing off the walls, and a beautifully set table ready to welcome everyone in. Whether it’s a hearty casserole that brings everyone together or a pot of fragrant stew bubbling on the stove, this meal embodies the essence of gathering and sharing. Cooking isn’t just about putting food on the table; it’s about crafting experiences and creating memories—one bite at a time.
Today, I’ll be sharing a recipe that feels like a big, warm hug. It’s downright necessary for those cozy nights in, family gatherings, or just when you need a little comfort after a long day. This dish is packed with flavors that tell a story—a story of nourishment, love, and togetherness. So, let’s roll up our sleeves, tie on our aprons, and get cooking!
Personal Story
This dish brings back a flood of memories from my childhood—the kind where your nose is pressed up against the kitchen window, eagerly watching your parent or grandparent work their magic. I remember standing on a stool, arms akimbo, watching my grandmother stirring a big pot of her famous chicken and rice on chilly Sunday afternoons. It was a simple dish, but to me, it felt extravagant. The savory chicken melded beautifully with tender rice, infused with spices that transported me to a place of sheer happiness.
As she cooked, she would share stories from her own childhood, tales of family gatherings around the table where laughter and love flowed freely, just like the food. It was in those moments that I learned about the importance of creating a warm, inviting atmosphere around the dinner table. Every dish was not just a meal; it was a celebration of family and heritage. That simple chicken and rice recipe became a cherished tradition in our home, a meal that everyone looked forward to—filled with not just flavors, but love and connection.
Today, I’m excited to share my take on that timeless classic, where modern flavors meet nostalgic comfort. Let’s make this meal together!
Ingredients
Here’s what you’ll need to make a comforting Chicken and Rice that feels like family, along with some insights for each ingredient:
-
Bone-in Chicken Thighs (4-6, skin-on)
These add flavor and juiciness. Customize with boneless thighs or even chicken breasts if you prefer, but be mindful of cooking times! -
Long-Grain Rice (2 cups)
Opt for jasmine or basmati for a fragrant touch. If you want a healthier alternative, quinoa or brown rice would also work beautifully! -
Onion (1 large, diced)
The backbone of flavor. Shallots or leeks can be substituted for a sweeter profile. -
Garlic (4 cloves, minced)
Because garlic makes everything better! If you’re short on fresh garlic, garlic powder works too; just use about 1 teaspoon. -
Carrots (2 medium, diced)
Adds sweetness and color. Feel free to switch to parsnips or sweet potatoes for a different twist. -
Celery (2 stalks, diced)
Provides crunch and flavor depth. You can skip it if you must—just add more carrots or onions instead. -
Chicken Broth (4 cups)
Homemade is best if you have it, but store-bought works just fine! For vegetarians, vegetable broth is a great substitute. -
Fresh Herbs (1 cup, a mixture of parsley and thyme)
Freshly chopped herbs elevate the dish. If you don’t have fresh herbs, dried herbs can be used—start with 1 tablespoon each (but remember, dried are more potent!). -
Salt and Pepper (to taste)
Seasoning is key! Always taste as you go, and adjust to your liking! -
Olive Oil (2 tablespoons)
A splash for searing the chicken; avocado oil is an excellent, neutral substitute. -
Lemon Juice (from 1 lemon)
Adds brightness! Lime juice could also work if you’re feeling zesty.
The heart of this recipe is all about balance and using ingredients that represent your taste. Dive in and customize with what makes your spirit sing!
Step-by-Step Instructions
Alright, friends, it’s time to get cooking! Here’s how you bring this gathering of flavors together:
-
Prep Your Ingredients
Start by gathering all your ingredients and giving them a good wash and chop. Cooking is much easier when it’s organized! It also gives you a chance to check if you’re missing anything—no one wants to discover a missing ingredient halfway through cooking! -
Season the Chicken
Take those fabulous chicken thighs and season them generously with salt and pepper—don’t be shy! This step is crucial for flavorful meat. Heat up a large pot or Dutch oven over medium-high heat and add the olive oil. Once the oil is hot, carefully place the chicken skin-side down in the pot. Listen for that beautiful sizzle! -
Sear the Chicken
Let the chicken sear for about 5-7 minutes until the skin is deeply golden brown and crispy. This will lock in those amazing juices. Flip the chicken over and cook for an additional 5 minutes. Once done, remove the chicken from the pot and set aside. -
Sauté the Vegetables
In the same pot (don’t wash it—those brown bits are flavor!), add the onions, garlic, carrots, and celery. Sauté for about 5 minutes until softened. The goal here is to coax out all those delicious flavors. -
Add the Rice and Broth
Once your veg is fragrant and tender, stir in the rice, making sure to coat it well with the vegetables. This is the moment where things start to smell goooood! Pour in the chicken broth and bring the mixture to a gentle boil. -
Return the Chicken
Nestle those beautifully seared chicken thighs back into the pot, skin-side up, and squeeze in the lemon juice. The acidity of the lemon will brighten everything up and balance the rich flavors. Reduce the heat to low, cover the pot, and let it simmer gently for 30-35 minutes. Don’t lift the lid; that steam is cooking your meal to perfection! -
Fluff, Add Herbs, and Serve
After the time is up, take off the lid and marvel at the deliciousness you created! Remove the chicken thighs for a moment while you gently fluff the rice with a fork, incorporating the herbs. If the rice feels a little too al dente, just let it sit covered for a few more minutes. Finally, place the chicken back on top, sprinkle with extra herbs, and you’re ready to dig in!
Pro Tip:
While the dish is simmering away, set the table with your favorite plates and maybe a little candlelight. Creating a beautiful setting elevates the experience even more!
Serving Suggestions
To serve, dish up a generous portion of that mouthwatering chicken and rice on a lovely plate—don’t forget to include some veggies! It’s all about balance. A sprinkle of freshly chopped herbs on top adds a refreshing pop of color and aroma. Pair this meal with a crisp green salad and perhaps a glass of white wine for an extra touch of elegance. If you’re feeling it, add some warm crusty bread on the side to soak up all that delicious broth.
Recipe Variations
Feel free to customize to your heart’s content! Here are a few creative twists:
- Spicy Chicken and Rice: Add a teaspoon of red pepper flakes or diced jalapeños during the vegetable sauté for an added kick!
- Curry Chicken and Rice: Stir in a tablespoon of curry powder while sautéing the veggies for a fragrant, Indian-inspired twist.
- Creamy Chicken and Rice: Stir in a splash of heavy cream or coconut milk when fluffing the rice for a rich, comforting vibe.
- Vegetarian Option: Swap the chicken for chickpeas or your favorite hearty vegetables like cauliflower or mushrooms. Ensure you have enough vegetable broth to replace the chicken broth.
- One-Pot Lemon Herb Quinoa: Use quinoa instead of rice for a high-protein, gluten-free alternative; simply adjust cooking times as needed.
Chef’s Notes
Cooking is such a fluid experience—this meal has evolved countless times depending on the season and what I had on hand. I once had a complete disaster trying to use frozen chicken and neglected to adjust my cooking time. The chicken took twice as long to cook, resulting in a rice dish that nearly turned into a risotto! I embraced that “epic fail” and turned it into a creative cooking tutorial, reminding myself (and my audience) that we’re all learning and growing in the kitchen.
In the end, this dish is about enjoying the process of cooking and sharing meals with loved ones, even amidst imperfect moments. So, if things don’t go entirely according to plan, smile and adapt with grace!
FAQs and Troubleshooting
1. What if my chicken is dry?
If you find your chicken is dry, it could be due to overcooking. To avoid this, use a meat thermometer to check for doneness—160°F (70°C) is ideal for chicken.
2. What should I do if my rice is too soggy?
If your rice has turned out too soggy, it may have cooked too long or absorbed too much liquid. Try spreading it out on a baking sheet to cool and dry out a bit.
3. Can I freeze leftovers?
Absolutely! This meal freezes like a dream. Just make sure it cools completely before packing it in airtight containers. It can last up to 3 months in the freezer—perfect for when you’re short on time!
4. How can I make this dish ahead of time?
You can prep the vegetables and season the chicken ahead of time. Just keep everything stored separately in the fridge until you’re ready to cook. If all else fails, you can also cook it entirely in advance and simply reheat it gently on the stove when you’re ready to serve.
Nutritional Info (Optional)
This meal is packed with protein from chicken, fiber from veggies and rice, and essential vitamins and minerals. Each serving roughly contains:
- Calories: 420
- Protein: 30g
- Carbohydrates: 45g
- Fat: 15g
- Fiber: 3g
(Please note that these values can vary based on specific ingredients and serving sizes.)
So there you have it, a meal that feels like family! I hope you enjoy making and sharing this recipe as much as I do. Remember, the kitchen is a place of love and creativity—let your personality shine through, and don’t forget to invite those you love to join you. Happy cooking, my friends!
PrintComforting Chicken and Rice

A heartwarming chicken and rice recipe that brings families together, infused with flavors of love and nostalgia.
- Prep Time: 15 minutes
- Cook Time: 45 minutes
- Total Time: 60 minutes
- Yield: 4 servings 1x
- Category: Main Course
- Method: One-Pot Cooking
- Cuisine: Southern
- Diet: None
Ingredients
- 4–6 Bone-in Chicken Thighs (skin-on)
- 2 cups Long-Grain Rice (jasmine or basmati)
- 1 large Onion (diced)
- 4 cloves Garlic (minced)
- 2 medium Carrots (diced)
- 2 stalks Celery (diced)
- 4 cups Chicken Broth
- 1 cup Fresh Herbs (parsley and thyme)
- Salt and Pepper (to taste)
- 2 tablespoons Olive Oil
- Juice from 1 Lemon
Instructions
- Prep Your Ingredients: Gather and wash all ingredients.
- Season the Chicken: Season chicken thighs generously with salt and pepper and heat olive oil in a large pot.
- Sear the Chicken: Sear chicken skin-side down for 5-7 minutes until golden. Flip and cook for another 5 minutes, then remove.
- Sauté the Vegetables: In the same pot, add onions, garlic, carrots, and celery. Sauté for about 5 minutes.
- Add the Rice and Broth: Stir in rice, then add chicken broth and bring to a gentle boil.
- Return the Chicken: Nestle chicken back into the pot, add lemon juice, cover, and simmer for 30-35 minutes.
- Fluff, Add Herbs, and Serve: Fluff rice with a fork, mix in herbs, then place chicken back on top before serving.
Notes
Set the table beautifully to enhance the dining experience. Customize with your favorite ingredients as desired.
Nutrition
- Serving Size: 1 serving
- Calories: 420
- Sugar: 4g
- Sodium: 750mg
- Fat: 15g
- Saturated Fat: 4g
- Unsaturated Fat: 8g
- Trans Fat: 0g
- Carbohydrates: 45g
- Fiber: 3g
- Protein: 30g
- Cholesterol: 80mg
Keywords: chicken, rice, comforting recipes, family meals, one-pot dish
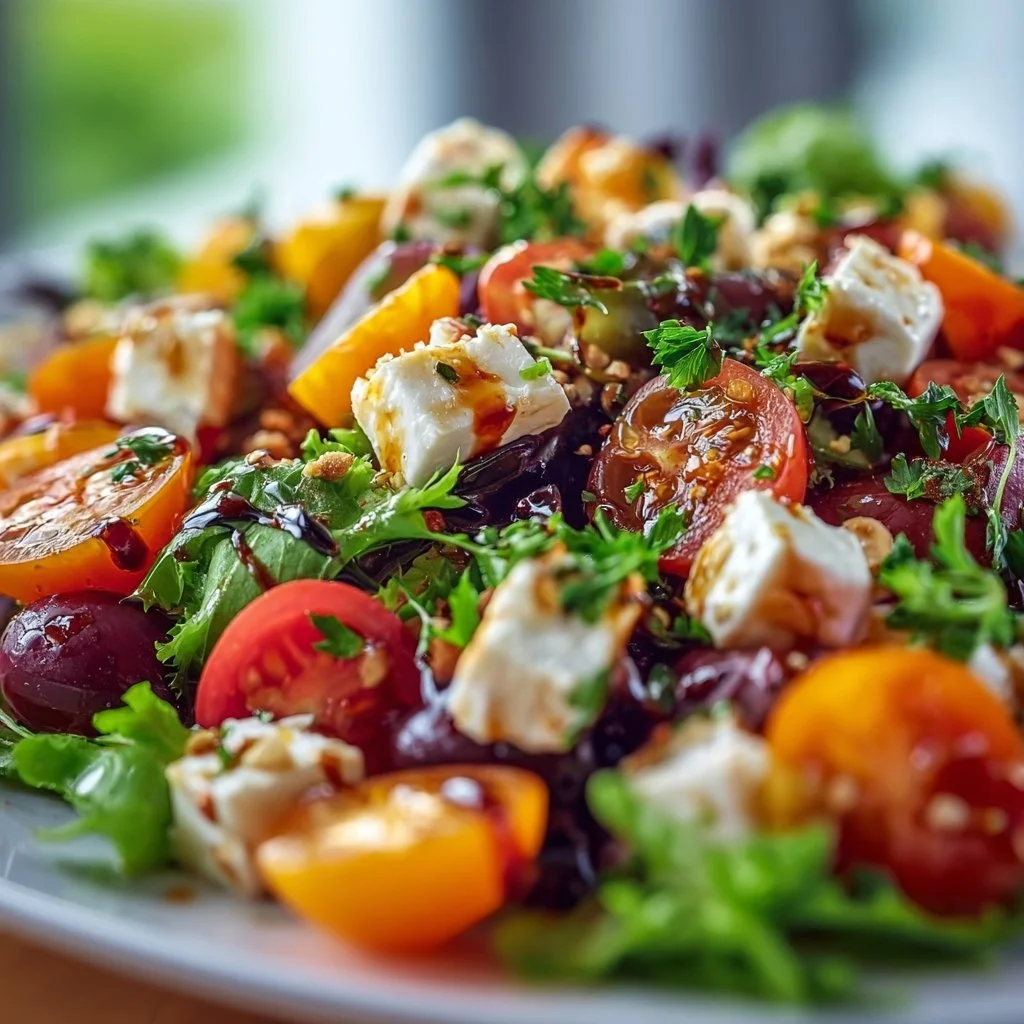
Marry Me Salad
The Perfect Marry Me Salad: A Recipe for Romance and Joy
Hello, fellow food lovers! Welcome back to Ivory Apron, where we transform kitchen moments into memorable creations! Today, we’re diving into a recipe so delightful, it’s practically got a love letter written all over it — yes, I’m talking about the Marry Me Salad! Imagine a bowl brimming with fresh, vibrant ingredients, harmonious flavors, and a crunch that’ll make your taste buds sing. This isn’t just a salad; it’s a celebration of love, friendship, and the sheer joy of sharing a beautiful meal at the table.
What’s in a name, you ask? Well, the legend goes that this salad is so delicious that one could fall head over heels for it—or at least feel like making a commitment. Whether you’re planning a romantic dinner for two, looking to impress your friends at a dinner party, or simply in need of a refreshing and healthy option for lunch, this salad is the perfect companion. With its lush greens, creamy avocado, and tangy feta, it’s both a visual feast and a taste sensation that brings a little elegance to everyday cooking.
In our time together today, I’ll share not just the recipe, but also stories, tips, and tricks that will make preparing this salad simple and fun. So grab your apron, and let’s whip up something truly special.
Personal Story
Let me take you back to a sunny Saturday afternoon when I first encountered the Marry Me Salad — a delightful blend of flavors that still dances in my memory. I was at my dear friend Julia’s house for an impromptu brunch gathering. Julia is known for her magical ability to transform simple ingredients into something extra-special, and that day was no exception.
As we gathered around her sunlit kitchen, she expertly tossed together a medley of greens, vibrant cherry tomatoes, and creamy avocado. I watched with awe as she explained the origins of the salad, her eyes sparkling with excitement. Every bite was a burst of culinary joy, and before I knew it, I had guiltily helped myself to seconds—and thirds.
That day not only sparked my love for this salad but also deepened my bond with Julia. It was about more than just food; it was about the laughter shared at the table, the instinctive ‘oohs’ and ‘aahs’ as we indulged, and the kind of culinary experience that leaves a mark on your heart. Ever since, the Marry Me Salad has become my go-to dish for gatherings, guaranteed to elicit smiles and, perhaps, even a few marriage proposals!
Ingredients
Here’s what you’ll need to create this delightful Marry Me Salad. Remember, great cooking starts with quality ingredients, so select the best you can!
-
4 cups mixed greens: A blend of baby spinach, arugula, and romaine makes for a refreshing base. Feel free to substitute with whatever greens you prefer or have on hand!
-
1 cup cherry tomatoes, halved: These sweet and juicy little gems add a pop of color and sweetness. If tomatoes aren’t in season, diced bell peppers can be a great alternative.
-
1 avocado, diced: Ah, the creaminess! It provides a rich texture to the salad. If you’re in a pinch, sub with a scoop of hummus or a sprinkle of creamy tahini for that velvety feel.
-
1/2 cup cucumber, sliced: Crisp and refreshing, cucumbers add a nice crunch. Try swapping in radishes for a zesty kick!
-
1/4 cup red onion, thinly sliced: It adds a beautiful punch of flavor. If you want to mellow it out, soak the slices in cold water for about 10 minutes to tone down the bitterness.
-
1/2 cup feta cheese, crumbled: The tanginess of feta complements the salad beautifully. If you’re vegan or dairy-free, try using almond feta or omit the cheese altogether.
-
1/4 cup walnuts, chopped: Crunchy and nutty, walnuts provide a delightful texture. Pecans or sunflower seeds can also work well if you prefer a different nut or seed.
-
1/4 cup olive oil: Fresh olive oil is key for that luxurious mouthfeel. For a twist, you might try a flavored oil like lemon-infused olive oil.
-
2 tablespoons balsamic vinegar: The perfect touch of acidity! A citrus vinaigrette can lend a refreshing alternative.
-
Salt and pepper to taste: Don’t skimp on seasoning! Adjust according to your taste.
Step-by-Step Instructions
Ready to craft this delectable Marry Me Salad? Let’s break it down, step by step, to ensure your kitchen adventure is seamless and enjoyable!
-
Prep Your Ingredients: Start by washing your mixed greens thoroughly and spin them dry in a salad spinner. You want them crisp and fresh! Slice the cherry tomatoes in half, dice your avocado, and slice your cucumber and red onion. This prep work not only makes cooking easier but elevates the whole experience!
-
Combine the Greens: In a large salad bowl, add your mixed greens. I like to arrange them as the foundation before layering in the other ingredients. It gives a beautiful rustic charm.
-
Layer and Toss: Add the halved cherry tomatoes, diced avocado, sliced cucumber, and thinly sliced red onion directly on top. Now, gently toss the ingredients together to combine. Here’s a little chef hack: Avoid smashing the avocado! You want the chunks to remain intact for that buttery, creamy texture.
-
Add Feta and Walnuts: Sprinkle the crumbled feta cheese and chopped walnuts over the salad now. The feta will slightly melt into the greens, bringing all the flavors together beautifully.
-
Dress the Salad: In a small bowl, whisk together the olive oil, balsamic vinegar, salt, and pepper. Once mixed, drizzle it over the salad. The key here is to start with less dressing; you can always add more later. Toss gently to coat everything evenly without bruising your greens or smashing your avocado!
-
Taste and Adjust: Give your salad a taste test. This is a moment of joy! Does it need more salt? A touch more acid? This is your creation, so feel free to adjust based on your palate.
-
Chill or Serve Immediately: You can let the salad sit for about 10-15 minutes to marry the flavors or serve immediately. If you choose to chill it, wrap it with a damp paper towel in the fridge to keep the greens fresh.
Serving Suggestions
Presentation is key when it comes to food, and as you know, I believe that even simple dishes deserve a dash of elegance. Serve the Marry Me Salad on a beautiful platter to showcase the vibrant colors of all the ingredients. You can garnish with extra feta and walnuts on top, perhaps a sprig of fresh basil or mint for that added pop of color. A slice of lemon or a few edible flowers can elevate the look even further — because, why not?
Pair this salad with a light, crisp white wine, or for a non-alcoholic option, a refreshing sparkling water with a twist of lime. It’s about making the meal feel special and elevating those small moments around your table!
Recipe Variations
Here are a few ideas to switch things up and customize the Marry Me Salad to your taste:
-
Grilled Chicken: Add strips of grilled chicken breast on top for a protein-packed variation that turns this salad into a complete meal.
-
Quinoa Boost: Toss in cooked quinoa for added texture and a healthful boost of nutrients.
-
Fruit Twist: Try adding slices of ripe pear or berries for a sweet contrast against the salty feta.
-
Spicy Kick: Add a pinch of red pepper flakes or sliced jalapeños for some heat — perfect if you’re feeling adventurous.
-
Herb-Infused: Experiment with a handful of fresh herbs like mint or cilantro for a fresh twist on flavors.
Chef’s Notes
As with any recipe, I’ve made this Marry Me Salad a million different ways over the years, and it’s always evolving. One of my favorite memories is making it for a spontaneous picnic in the park with friends. Everything was bright and sunny, and we all dug in with sheer delight— laughter, stories, and gorgeous food created the perfect day.
Another tip? If you have leftover ingredients, don’t let them go to waste! Feel free to incorporate them into your next meal. Toss over some cooked pasta for a quick lunch or layer it in a wrap for a delightful sammich. The beauty of this salad is that it serves as a canvas for creativity — make it your own!
FAQs and Troubleshooting
1. My avocado turned brown too quickly! What can I do?
- To help keep your avocado fresh, squeeze a little lemon or lime juice on it before adding it to the salad. This acidity helps prevent oxidation. If it does happen, don’t fret; it’s still safe to eat!
2. How can I prepare this salad ahead of time?
- You can wash and chop ingredients a day in advance, but add the avocado just before serving to avoid browning. Store everything in airtight containers in the fridge. Dress the salad right before serving for the freshest taste.
3. What if I don’t like feta cheese?
- You can certainly omit it or swap it out with goat cheese, fresh mozzarella, or skip cheese altogether. The salad will still shine beautifully!
4. My dressing turned out too sour! What can I do?
- If your dressing is too tangy, add a touch more olive oil to mellow out the flavors. A little pinch of sugar or honey can also balance the acidity!
Nutritional Info
Each serving approx. (based on salads without additional proteins):
- Calories: 200
- Protein: 5g
- Carbohydrates: 14g
- Fat: 15g
- Fiber: 5g
(Nutritional values will vary based on actual serving sizes and specific ingredients used.)
There you have it, my friends! The Marry Me Salad is not just a recipe; it’s a creation filled with heart, creativity, and joy. Remember, food has the magical ability to bring us closer together, so whether you’re sharing this salad with loved ones or enjoying it solo, I hope it adds a little sparkle to your day. Until next time, keep cooking, keep sharing, and don’t forget to savor those small moments around your table! Happy cooking!
PrintMarry Me Salad

A delightful blend of fresh greens, creamy avocado, and tangy feta, this Marry Me Salad is perfect for impressing loved ones or enjoying a refreshing lunch.
- Prep Time: 15 minutes
- Cook Time: 0 minutes
- Total Time: 15 minutes
- Yield: 4 servings 1x
- Category: Salad
- Method: No Cooking Required
- Cuisine: American
- Diet: Vegetarian
Ingredients
- 4 cups mixed greens (baby spinach, arugula, romaine)
- 1 cup cherry tomatoes, halved
- 1 avocado, diced
- 1/2 cup cucumber, sliced
- 1/4 cup red onion, thinly sliced
- 1/2 cup feta cheese, crumbled
- 1/4 cup walnuts, chopped
- 1/4 cup olive oil
- 2 tablespoons balsamic vinegar
- Salt and pepper to taste
Instructions
- Prep Your Ingredients: Start by washing your mixed greens thoroughly and spin them dry.
- Combine the Greens: In a large salad bowl, add your mixed greens.
- Layer and Toss: Add the halved cherry tomatoes, diced avocado, sliced cucumber, and thinly sliced red onion.
- Add Feta and Walnuts: Sprinkle the crumbled feta cheese and chopped walnuts over the salad.
- Dress the Salad: In a small bowl, whisk together the olive oil, balsamic vinegar, salt, and pepper.
- Taste and Adjust: Give your salad a taste test and adjust seasoning as needed.
- Chill or Serve Immediately: Let the salad sit for about 10-15 minutes or serve immediately.
Notes
You can customize this salad by adding grilled chicken, quinoa, or fresh herbs. Squeeze lemon juice on avocado to prevent browning.
Nutrition
- Serving Size: 1 serving
- Calories: 200
- Sugar: 3g
- Sodium: 200mg
- Fat: 15g
- Saturated Fat: 3g
- Unsaturated Fat: 11g
- Trans Fat: 0g
- Carbohydrates: 14g
- Fiber: 5g
- Protein: 5g
- Cholesterol: 15mg
Keywords: salad, vegetarian, healthy, avocado, feta, easy recipe

Sheet Pan Pork Chops and Potatoes
The Ultimate Sheet Pan Pork Chops and Potatoes: A Friendly Culinary Adventure
Welcome to my cozy kitchen! If you’re looking for a delicious, hearty dish that brings the family together while requiring minimal cleanup — boy, do I have a treat for you! Picture this: succulent pork chops, golden-brown potatoes, and aromatic herbs sizzling together in harmony on one very convenient sheet pan. Grab your apron and let’s dive into one of my favorite weeknight dinners that feels fancy without fuss.
Cooking should be a joyful experience, and one of the greatest joys I’ve discovered is creating beautiful meals using just one pan — minimal mess but maximum flavor. Trust me when I say that this Sheet Pan Pork Chops and Potatoes recipe is going to become a staple in your home. With every bite, you’ll be reminded that dinner can feel both elevated and uncomplicated. Ready? Let’s lay down the culinary groundwork!
A Personal Culinary Memory
As I stepped into my grandmother’s kitchen as a child, the first thing that welcomed me was the delightful aroma of her cooking. She had a knack for making simple ingredients taste gourmet. One of my fondest memories is watching her prepare scrumptious pork chops in her vintage oven, always paired with roasted vegetables. We gathered around the table, where laughter mixed with the aroma of herbs and spices, making ordinary nights feel special.
Her secret? It was all about the love and simplicity she infused into every dish. She believed that the best meals didn’t require complicated techniques but rather a thoughtful approach to flavors. That same philosophy is what inspired this sheet pan recipe — marrying sorts of tenderness, juicy flavors, and crispy textures, all while putting minimal burden on the cook.
The Ingredients You’ll Need
Let’s break down the ingredients, shall we?
-
4 Pork Chops: Select bone-in or boneless according to your preference! Bone-in carries more flavor and remains juicier, while boneless cooks a bit faster. If you’re in the mood for a lighter option, feel free to swap with chicken breasts.
-
1 Pound of Potatoes (diced): For this recipe, I suggest using Yukon Gold or red potatoes. Their natural creaminess keeps them tender when roasted. Couldn’t find those? Sweet potatoes work perfectly, lending a wonderful sweetness and vibrant color.
-
2 Tablespoons Olive Oil: A heart-healthy fat that adds flavor and helps with browning. If you’re after a different flavor profile, try using avocado oil or melted butter for a richer taste.
-
1 Teaspoon Garlic Powder: For that aromatic kick! Feel free to use fresh minced garlic instead (about 3 cloves), which brings a fresher punch to the dish.
-
1 Teaspoon Paprika: This will give a beautiful depth and reddish hue. For a smoky twist, opt for smoked paprika or even a pinch of cayenne if you’re feeling adventurous.
-
Salt and Pepper to taste: Essential for enhancing flavors! I always recommend using kosher salt for a well-rounded seasoning.
-
Fresh herbs (like rosemary or thyme) for garnish: Fresh herbs elevate the dish with aromatic flavors. Dried herbs work too, but fresh is best when you want to impress!
Cooking Up a Storm: Step-by-Step Instructions
Now, let’s get to the fun part — cooking this delightful dish! Follow along as we create a wonderfully easy meal that’s packed with flavor.
Step 1: Preheat Your Oven
Preheat your oven to 400°F (200°C). This ensures that the pork chops and potatoes roast to crispy perfection. The magic truly happens in a hot oven!
Step 2: Season the Pork Chops
While the oven warms up, let’s season our pork chops! Pat them dry with paper towels (this helps achieve a beautiful sear later). Drizzle half of the olive oil on the chops, then sprinkle with garlic powder, paprika, salt, and pepper. Give those babies a good rub to coat all sides evenly. Allow them to marinate in those flavors for about 10 minutes while you prep the potatoes.
Step 3: Prepare the Potatoes
In a mixing bowl, add the diced potatoes and the remaining olive oil. Toss them around and add a pinch of salt, pepper, and a sprinkle of paprika for added flavor. You want the potatoes to shine against the pork chops!
Step 4: Arrange Everything on a Sheet Pan
Grab a large rimmed baking sheet and spread the seasoned potatoes evenly across it. Make sure to carve out space for the pork chops! Next, arrange the pork chops on top of the potatoes. The drippings from the pork will flavor the potatoes beautifully, so this step is crucial!
Step 5: Roast in the Oven
Slide the sheet pan into the preheated oven and roast for 25-30 minutes, or until the pork reaches an internal temperature of 145°F (63°C). If you like a crispy exterior, broil for an additional 2-3 minutes at the end. Just keep an eye on it to avoid burning!
Step 6: Garnish and Serve
Once the chops and potatoes are cooked to perfection, remove the pan from the oven. Let it rest for about 5 minutes — this ensures all the juices stay locked in. Sprinkle freshly chopped herbs on top for that inviting, aromatic finish.
Serving Suggestions
Now, plate up your delectable dish! Consider serving your Sheet Pan Pork Chops and Potatoes on a rustic wooden board, garnished with lemon wedges and a sprinkle of extra herbs for a pop of color. Pair it with a simple green salad drizzled with vinaigrette to balance the richness of the pork and potatoes — take your meal to the next level!
Recipe Variations
This recipe is quite versatile! Here are some twists you might enjoy:
-
Add Veggies: Toss in some seasonal vegetables like Brussels sprouts, carrots, or bell peppers alongside the potatoes for a complete one-pan meal.
-
Switch Up the Herbs: Try fresh sage or oregano for an entirely different flavor profile.
-
Marinate Overnight: For pork chops that are extra flavorful, marinate them overnight in your favorite marinade. Soy sauce, honey, and garlic make a delightful combo.
-
Spicy Kick: Add a sprinkle of red pepper flakes over the pork chops before roasting for some heat.
-
Different Protein: Swap the pork for chicken thighs or salmon fillets for a totally new taste!
Chef’s Notes
This recipe has evolved over the years. I remember my first attempt at sheet pan cooking; let’s just say it was an edible but chaotic explosion of flavors! Over time, I learned to be mindful of how flavors interact and balanced cooking times. The beauty of sheet pan cooking is learning to let go of noise and focus on simplicity — which fits perfectly into my cooking ethos.
My grandmother’s comforting memories linger in this dish, always reminding me that cozy family meals needn’t be overwhelming to create. As you cook, infuse your unique touches and make this dish your own!
FAQs and Troubleshooting
1. What if my pork chops are tough?
Tough pork can result from overcooking. Always use a meat thermometer and cook until the internal temperature reaches 145°F (63°C). Also, allow it to rest after cooking; this helps the meat stay juicy.
2. Can I use frozen pork chops?
Yes! If using frozen pork chops, make sure to thaw them completely before prepping and seasoning them. This ensures even cooking.
3. My potatoes didn’t cook through. What happened?
If your potatoes are diced too large, they may require more time to cook. Ensuring uniform, small pieces will help them cook evenly and quickly.
4. How do I store leftovers?
Once cooled, store leftovers in an airtight container in the fridge for up to 3 days. Reheat in the oven to maintain that wonderful crispy texture, or microwave when in a hurry.
Nutritional Info (Optional)
This dish offers a balanced meal with protein, healthy fats, and carbohydrates. Here’s a quick nutritional estimate per serving (based on the entire dish serving four):
- Calories: Approximately 350
- Protein: 30g
- Fat: 18g
- Carbohydrates: 20g
- Fiber: 3g
Now that you have all the info you need, it’s time to roll up those sleeves and get cooking! As you embark on this culinary adventure, remember—the kitchen is your playground, and the heart of your home. With each dish you create, you’re not just cooking; you’re making lasting memories. Happy cooking, and enjoy those lovely moments around your table with family and friends!
PrintUltimate Sheet Pan Pork Chops and Potatoes

A delicious, hearty dish featuring succulent pork chops, golden-brown potatoes, and aromatic herbs, all cooked together on one convenient sheet pan.
- Prep Time: 15 minutes
- Cook Time: 30 minutes
- Total Time: 45 minutes
- Yield: 4 servings 1x
- Category: Main Course
- Method: Baking
- Cuisine: American
- Diet: Paleo
Ingredients
- 4 Pork Chops (bone-in or boneless)
- 1 Pound of Potatoes (diced, preferably Yukon Gold or red)
- 2 Tablespoons Olive Oil
- 1 Teaspoon Garlic Powder
- 1 Teaspoon Paprika
- Salt and Pepper to taste
- Fresh herbs (like rosemary or thyme) for garnish
Instructions
- Preheat your oven to 400°F (200°C).
- Season the pork chops by patting them dry, drizzling with half of the olive oil, and sprinkling with garlic powder, paprika, salt, and pepper. Marinate for 10 minutes.
- Prepare the diced potatoes by tossing them with the remaining olive oil, salt, pepper, and paprika in a mixing bowl.
- Arrange the seasoned potatoes on a large rimmed baking sheet, leaving space for the pork chops, which should be placed on top of the potatoes.
- Roast in the oven for 25-30 minutes or until the pork reaches an internal temperature of 145°F (63°C). Optionally, broil for an additional 2-3 minutes for a crispy exterior.
- Garnish with freshly chopped herbs and let it rest for 5 minutes before serving.
Notes
For a complete meal, consider adding seasonal vegetables. You can also marinate the pork chops overnight for more flavor.
Nutrition
- Serving Size: 1 serving
- Calories: 350
- Sugar: 2g
- Sodium: 400mg
- Fat: 18g
- Saturated Fat: 6g
- Unsaturated Fat: 10g
- Trans Fat: 0g
- Carbohydrates: 20g
- Fiber: 3g
- Protein: 30g
- Cholesterol: 80mg
Keywords: pork chops, sheet pan, easy dinner, family meal, one pan recipe