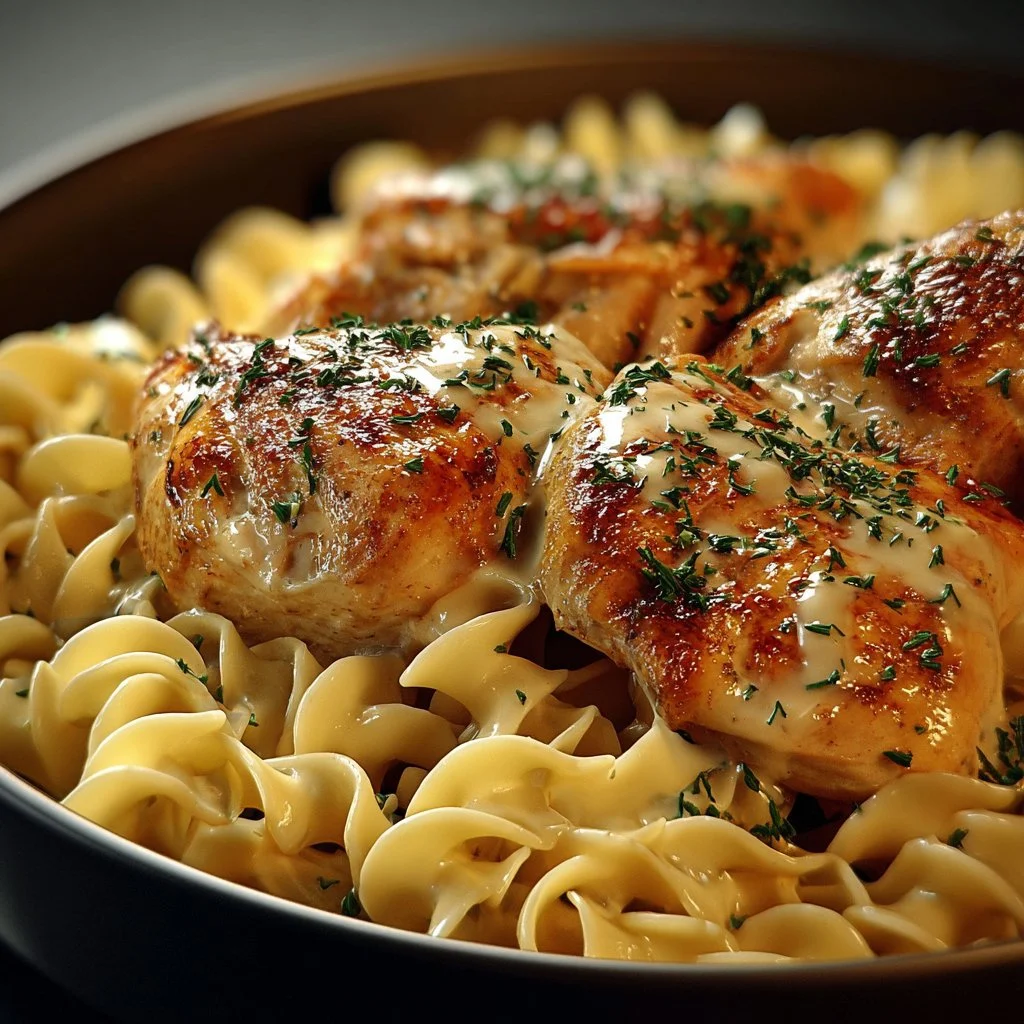
One-Pan Chicken with Buttered Noodles
One-Pan Chicken with Buttered Noodles: A Cozy Family Favorite
Hello, fellow food lovers, and welcome back to the enchanting world of Ivory Apron! Today, we’re preparing a dish that’s as comforting as a warm hug—One-Pan Chicken with Buttered Noodles. This classic recipe is the epitome of a cozy weeknight dinner and is sure to become a staple in your culinary repertoire.
Have you ever had one of those evenings where you just want something simple yet satisfying? You know the kind—after a long day at work, the idea of spending hours in the kitchen can feel a tad overwhelming. Trust me, I get it! That’s why I adore this recipe; it’s effortless, wholesome, and requires minimal cleanup. One pan, one delicious meal, and absolutely no fuss. You’ll be serving up a perfect dinner in about 30 minutes!
The best part about One-Pan Chicken with Buttered Noodles is that it showcases quality ingredients and easy techniques without sacrificing flavor. Both chicken and noodles soak in the delicious chicken broth, bringing a gentle richness to every bite. And let me tell you, there’s something magical about the combination of tender chicken and silky noodles coated in buttery goodness. Yum!
So, grab your apron, and let’s gather around the table. I can already envision the smiles as you serve this delightful dish, and as always, feel free to let your creativity flow while cooking. Let’s dive into this heartwarming recipe!
Personal Story
I have a vivid memory wrapped around simple, cozy dinners with my family when I was growing up. It was a crisp autumn evening, and the scent of garlic and herbs filled our little kitchen. My mom would often whip up her version of chicken and noodles, making it a favorite family tradition. We’d gather around the table with warm bowls and forks in hand, eagerly sharing stories from our day.
One particular evening stands out in my mind. My little brother was trying to impress my parents with his “professional” table-setting skills, but let’s say that the forks and knives weren’t quite in sync! We all burst out laughing, and my mom, smiling over her pot of bubbling noodles, reminded us that it’s moments like these that bring warmth to our home.
That love of togetherness, elevating simple comfort food into something special, inspired me to create my own version of One-Pan Chicken with Buttered Noodles. I cherish the idea that food brings people together, and I hope this recipe helps you to create beautiful moments with your loved ones, too!
Ingredients
Here are the ingredients you’ll need to whip up this One-Pan Chicken with Buttered Noodles:
-
4 boneless, skinless chicken breasts (1.5 lbs)
Chicken breasts are lean and cook beautifully quickly. For a heartier option, you can substitute with boneless, skinless thighs, which provide a richer flavor and juicier bite. -
8 oz egg noodles
These noodles are perfect for soaking up the savory sauce. If you’re gluten-free, feel free to use rice noodles or gluten-free pasta. -
4 tbsp real butter
Butter adds a luscious, rich flavor to the sauce. If you prefer, use olive oil for a lighter option, though you might miss some creamy richness. -
4 cloves garlic, minced
Garlic enhances the overall flavor profile. If you’re a garlic lover, don’t be shy—extra cloves will bring an even more intense aroma and taste. -
2 cups low-sodium chicken broth
Chicken broth is the backbone of this dish, bringing moisture and deep flavor. If you’re vegetarian, swapping for vegetable broth works perfectly as well! -
¼ cup fresh parsley, chopped
Fresh parsley adds brightness to the dish. If you have thyme or oregano on hand, feel free to experiment with those herbs for a different taste. -
Salt and pepper to taste
The classic duo helps balance the flavors. Remember to taste as you go to build layers of seasoning perfectly.
These simple ingredients come together in one harmonious dish that’s comforting and easy to prepare. Let’s get to cooking!
Step-by-Step Instructions
Now, let’s dive into the cooking process and turn those ingredients into a delicious One-Pan Chicken with Buttered Noodles!
Step 1: Season Your Chicken
Begin by lightly seasoning the chicken breasts on both sides with salt and pepper. This step might seem basic, but it really sets the stage for flavor in your dish.
Step 2: Sear the Chicken
In a large, deep skillet or pan, melt 2 tablespoons of butter over medium heat. Once the butter is bubbling and beautifully golden, add the seasoned chicken breasts. Sear the chicken for about 5–7 minutes on each side, or until it’s golden brown and cooked through. The goal here is to develop that lovely crust—we want texture!
Chef Tip: Resist the urge to move the chicken too much while it’s searing! Let it develop that gorgeous crust without fussing over it.
Once done, transfer the chicken to a plate and cover it with foil to keep it warm.
Step 3: Sauté the Garlic
In the same skillet, add the minced garlic and sauté for about 30 seconds, until fragrant. The residual heat and flavor from the chicken will enhance the garlic wonderfully.
Chef Hack: If you find you’ve got bits of brown goodness stuck to the skillet, don’t be afraid! That’s flavor! Just give it a little scrape with a wooden spoon as you sauté the garlic.
Step 4: Cook the Noodles
Add the chicken broth to the skillet, allowing it to mix in with the garlic. Bring it to a gentle simmer, and then toss in the egg noodles. Cook the noodles according to package instructions, mixing occasionally (about 7–9 minutes) until they’re tender and have absorbed some of that fabulous broth.
Hint: Remember, the noodles will continue to absorb liquid, so don’t fret if it seems watery at first!
Step 5: Combine Chicken and Sauce
While the noodles are cooking, check the chicken to ensure it’s properly cooked through (the internal temperature should reach 165°F). Once the noodles are finished, return the chicken to the skillet atop the noodles. Pour any delicious juices from the chicken plate into the pan. Add the remaining 2 tablespoons of butter and chopped parsley, stirring until everything is coated and lush.
Serving Tip: The butter will add a delightful glossiness, elevating the presentation—aka, happy bellies ahead!
Step 6: Fluff and Serve
At this point, gently fork through the noodles to fluff them up and ensure the chicken is nestled beautifully among them. This will make for a lovely final presentation.
Chef Note: Dressing up the dish with a bit more fresh parsley just before serving pays homage to its fresh flavors!
Serving Suggestions
To serve this One-Pan Chicken with Buttered Noodles, plate a generous serving of noodles, ensuring to place a piece of chicken right on top. Drizzle with extra butter if you’re feeling indulgent! A handful of chopped fresh parsley sprinkled on top will make everything look inviting and vibrant. You could also add a sprinkle of freshly grated Parmesan or a squeeze of lemon juice for brightness!
Recipe Variations
Feel free to get creative and customize this dish according to your taste! Here are some delicious twists:
-
Veggie Medley: Add in some fresh or frozen peas, spinach, or cherry tomatoes during the last few minutes of cooking to brighten the dish up with veggies!
-
Spicy Kick: Toss in a pinch of red pepper flakes with the garlic for a subtle heat that livens things up.
-
Creamy Version: Stir in a splash of heavy cream near the end for an even more decadent, creamy sauce that coats the noodles beautifully!
-
Flavorful Herb Swap: Instead of parsley, consider using fresh basil or dill for a fresh twist.
-
Lemon Zing: For an extra layer of flavor, add a splash of lemon juice and some lemon zest—this gives a refreshing lift!
Chef’s Notes
Cooking in the kitchen is truly an adventure! When I first started making this recipe, I remember overlooking the importance of resting the chicken post-cooking. Letting it sit allows the juices to redistribute, creating a much more succulent bite!
I also played around with different noodle shapes as I experimented; while egg noodles remain my favorite, I’ve found that farfalle or even whole grain pasta works wonderfully in a pinch!
Cooking, after all, is an art, and each recipe evolves with our experiences and creativity. I encourage you to embrace that process.
FAQs and Troubleshooting
1. What if the noodles are sticking together?
Noodles can stick if they’re not given enough space or if they didn’t have enough liquid while cooking. Make sure to stir them occasionally and add enough broth to keep them coated.
2. Can I make this ahead of time?
Absolutely! You can prep the chicken and noodles ahead, store them separately in the fridge, and simply combine and reheat when you’re ready to serve.
3. How do I know when the chicken is fully cooked?
The best way is to use a meat thermometer. The chicken should reach an internal temperature of 165°F. If you don’t have one, simply cut into the thickest part to check for no pinkness inside.
4. Can I freeze the leftovers?
Yes! This dish freezes beautifully. Just ensure it’s fully cooled before transferring to an airtight container. When reheating, add a splash of additional broth to help revive the noodles and sauce.
Nutritional Info
Note: The nutritional values can vary based on specific brands and measurements. The following is a general estimate for one serving of One-Pan Chicken with Buttered Noodles (based on 4 servings):
- Calories: 400
- Protein: 32g
- Carbohydrates: 40g
- Fat: 16g
- Saturated Fat: 8g
- Sodium: 500mg
Thank you for joining me in creating this kitchen-friendly, One-Pan Chicken with Buttered Noodles! I hope it brings warmth and joy to your dining table, just like it does to mine. Remember, good food is about making beautiful memories together, so don’t hesitate to gather those you love and enjoy a delightful meal! Happy cooking!
PrintOne-Pan Chicken with Buttered Noodles

A cozy and comforting dish featuring tender chicken and silky noodles in a rich buttery sauce. Perfect for a weeknight dinner!
- Prep Time: 10 minutes
- Cook Time: 30 minutes
- Total Time: 40 minutes
- Yield: 4 servings 1x
- Category: Main Course
- Method: Sautéing
- Cuisine: American
- Diet: Paleo, Gluten-Free Option
Ingredients
- 4 boneless, skinless chicken breasts (1.5 lbs)
- 8 oz egg noodles
- 4 tbsp real butter
- 4 cloves garlic, minced
- 2 cups low-sodium chicken broth
- ¼ cup fresh parsley, chopped
- Salt and pepper to taste
Instructions
- Season your chicken breasts on both sides with salt and pepper.
- Sear the chicken in a large skillet with melted butter over medium heat for 5–7 minutes per side or until golden brown.
- Transfer the chicken to a plate and cover with foil.
- Sauté the minced garlic in the same skillet for about 30 seconds until fragrant.
- Cook the noodles by adding chicken broth to the skillet, bringing to a simmer, then tossing in the egg noodles. Cook according to package instructions (7–9 minutes).
- Combine the chicken back into the skillet with the cooked noodles, add the remaining butter and chopped parsley, stirring until evenly coated.
- Fluff the noodles gently and serve with fresh parsley on top.
Notes
Let the chicken rest after cooking for a more succulent texture. Customize by adding veggies or using different herbs.
Nutrition
- Serving Size: 1 serving
- Calories: 400
- Sugar: 2g
- Sodium: 500mg
- Fat: 16g
- Saturated Fat: 8g
- Unsaturated Fat: 6g
- Trans Fat: 0g
- Carbohydrates: 40g
- Fiber: 2g
- Protein: 32g
- Cholesterol: 80mg
Keywords: chicken, one-pan, noodle, comfort food, easy recipes

Creamy Honey Pepper Chicken Mac and Cheese Delight
Creamy Honey Pepper Chicken Mac and Cheese Delight: A Comfort Food Adventure
Hello, fellow food lovers! If you’ve ever found yourself staring into your fridge, wondering what to whip up for dinner, you’re in for a treat today. Allow me to take you on a delightful journey through one of my favorite comfort foods: Creamy Honey Pepper Chicken Mac and Cheese Delight. Imagine creamy pasta enveloping juicy chicken, paying homage to the classic mac and cheese while adding unique flavors that scream elegance while keeping it approachable.
This recipe brings together the rich, nostalgic taste of macaroni and cheese with a twist you didn’t know you needed: the sweetness of honey and the gentle kick of black pepper. It’s like a warm hug on a chilly evening, perfect for weeknight dinners or when you want to impress guests without breaking a sweat in the kitchen.
In my kitchen, we don’t just cook—we create memories. And, of course, cooking is always more fun when we do it together, so tie on your apron, and let’s dive right into this recipe that’s gone straight into my comfort food hall of fame!
Personal Story
Ah, mac and cheese! The dish that takes me back to my childhood—when days were longer, summers felt endless, and life revolved around family dinners. I can still picture my mom bustling around the kitchen, pots steaming on the stove and the air filled with buttery goodness. She had a knack for making the simplest ingredients taste like magic, and her secret? Always adding a touch of warmth and love.
One particularly rainy Saturday, my siblings and I were stuck indoors. Mom decided it was the perfect time to experiment in the kitchen. With a glint in her eye, she combined our beloved macaroni and cheese with whatever she could find—some chicken from the fridge, a drizzle of honey, and a sprinkle of black pepper. It was a surprise hit! That meal not only filled our bellies but was also the start of something wonderful. Little did I know then that many years later, I would be taking her spontaneous spirit and turning it into my own signature dish. This Creamy Honey Pepper Chicken Mac and Cheese Delight is inspired by those childhood memories but elevated for the modern kitchen—because who says you can’t have a bit of nostalgia with a twist?
Ingredients
Here’s what you’ll need for this delightful dish. Remember, cooking is all about using quality ingredients and finding what works for you, so feel free to get creative!
-
2 cups macaroni: The classic base of any delicious mac and cheese—feel free to switch it up with whole wheat or gluten-free pasta for a healthier alternative!
-
2 cups shredded cheddar cheese: Cheddar provides that rich and creamy texture. If you want a more gourmet touch, try mixing in some Gruyère for a nutty flavor.
-
1 cup milk: Whole milk works best for a creamy consistency, but you can substitute with almond or oat milk for a dairy-free option.
-
3 tablespoons butter: For that luscious base, but you could also use olive oil if you’re looking to make things a bit healthier.
-
3 tablespoons all-purpose flour: This is crucial for our roux. If gluten is a concern, go ahead and use gluten-free flour.
-
1 pound chicken breast, diced: Chicken adds protein and heartiness to your dish. Tofu or chickpeas would make great vegetarian substitutes.
-
1/4 cup honey: This is the star of our dish, bringing a slight sweetness that complements the savory flavors. If you’re looking for a sugar substitute, agave syrup can do the trick!
-
1 teaspoon black pepper: Adds a gentle kick! You could swap this for a pinch of cayenne if you’re feeling adventurous.
-
Salt to taste: Always season to your preference.
-
Breadcrumbs (optional, for topping): If you love a crispy topping, don’t skip this! Use panko for an extra crunch—or crush some crackers for a twist.
Step-by-Step Instructions
Now that we’ve gathered our ingredients, let’s dive into the cooking process! Follow these step-by-step instructions, and remember, cooking is all about discovering your rhythm.
Step 1: Boil the Pasta
Start by bringing a large pot of salted water to a boil. Add the macaroni and cook according to package instructions until al dente. Tip: Make sure to stir it a few times to prevent sticking. Once done, drain and set aside.
Step 2: Sauté the Chicken
In a large skillet, melt 1 tablespoon of butter over medium heat. Add your diced chicken breast, sprinkling it with a pinch of salt and pepper. Cook for about 6-7 minutes until the chicken is browned and cooked through. Chef’s hack: If you want extra flavor, sprinkle a bit of garlic powder or onion powder on the chicken as it cooks!
Step 3: Prepare the Cheese Sauce
In a separate pan, melt the remaining butter over medium heat. Once melted, whisk in the flour, forming a roux. Continue to whisk for 1-2 minutes, ensuring it doesn’t burn. Pro tip: This is crucial for thickening our sauce without lumps! Gradually add the milk while whisking vigorously. Allow the mixture to simmer and thicken.
Step 4: Combine Cheese with the Sauce
As your sauce thickens, add the shredded cheddar cheese gradually, stirring continuously until completely melted and smooth. This is where the magic happens! Tip: Taste the sauce at this point! You can adjust salt and pepper to your preference.
Step 5: Introduce Honey and Pepper
Now, stir in the honey and black pepper. The magic combination of sweet and spicy will elevate your dish to new heights. Quick thought: Feel free to add more honey if you prefer a sweeter dish!
Step 6: Bring it All Together
In a large mixing bowl, combine the cooked macaroni, sautéed chicken, and creamy cheese sauce. Make sure every piece of pasta is drenched in that lovely sauce.
Step 7: (Optional) Bake for Extra Texture
If you want a crispy topping, transfer the mixture into a baking dish, sprinkle breadcrumbs over the top, and pop it into a preheated oven at 350°F (175°C) for about 15-20 minutes, or until bubbly and golden on top. Chef’s note: This step is optional, but don’t you love a little crunch?
Step 8: Cool & Serve
Let it cool for a few minutes—if you can resist! Scoop into bowls, and prepare for compliments all around.
Serving Suggestions
There’s something about presentation that makes food taste even better! For this Creamy Honey Pepper Chicken Mac and Cheese Delight, I like to serve it in deep, rustic bowls. A light sprinkle of fresh parsley or chives on top adds a pop of color and freshness. Arrange on a wooden board alongside a crisp side salad tossed with a simple vinaigrette for a well-rounded meal.
Recipe Variations
Feeling adventurous? Try out one of these variations:
-
Spicy Sriracha Twist: Drizzle some Sriracha into the cheese sauce for a fun spicy kick!
-
Veggie Delight: Toss in some sautéed broccoli or spinach to sneak in extra greens.
-
Mediterranean Flavor: Add sun-dried tomatoes and feta cheese for a Mediterranean flair.
-
Smoky BBQ Version: Replace honey with your favorite BBQ sauce for a smoky twist!
-
Nutty Addition: Swirl in some crushed walnuts or pecans for a nice crunch and nutty flavor.
Chef’s Notes
Every recipe has a story—this one is no different! I’ve tweaked this creamy mac and cheese over the years, experimenting with different cheeses and proteins and even trying out different liquids like heavy cream or broth. It’s now a staple in my home because it brings everyone together. Plus, who doesn’t love bowls of cheesy goodness?
Once, during a dinner party, I made this dish but forgot to add the honey! Everyone enjoyed it nonetheless, but they all kept asking, “What’s that missing magic ingredient?” It turned into a running joke in our family and inspired me to never skip the honey again!
FAQs and Troubleshooting
Q1: My cheese sauce came out lumpy. What did I do wrong?
- This usually happens if the roux isn’t whisked enough or if the milk is added too quickly. Always whisk continuously when adding liquids to ensure a smooth sauce.
Q2: Can I make this dish ahead of time?
- Absolutely! Prepare everything up to the baking step and store it in the fridge. When you’re ready to eat, just bake it until bubbly and golden.
Q3: How do I reheat leftovers?
- Reheat in the oven at 350°F (175°C) for about 20 minutes or until heated through. You can also use the microwave, but add a splash of milk to keep it creamy.
Q4: Can I freeze this?
- Yes! Just make sure it’s well sealed and eat it within a month for the best quality. When you reheat, add a little milk for that creamy texture.
Nutritional Info
(Since you might want to manage your intake, here’s a quick glance at one serving):
- Calories: ~550
- Protein: 35g
- Carbs: 42g
- Fat: 25g
- Fiber: 2g
Now that you have everything you need to make this Creamy Honey Pepper Chicken Mac and Cheese Delight, I can’t wait to hear how it turns out! Remember, the kitchen is about creating memories, so enjoy the process! Happy cooking, and let’s set the table for a delicious evening ahead!
PrintCreamy Honey Pepper Chicken Mac and Cheese Delight

A delightful twist on classic mac and cheese with creamy cheese sauce, tender chicken, honey sweetness, and a hint of black pepper.
- Prep Time: 15 minutes
- Cook Time: 30 minutes
- Total Time: 45 minutes
- Yield: 4 servings 1x
- Category: Main Course
- Method: Baking
- Cuisine: American
- Diet: Non-Vegetarian
Ingredients
- 2 cups macaroni
- 2 cups shredded cheddar cheese
- 1 cup milk
- 3 tablespoons butter
- 3 tablespoons all-purpose flour
- 1 pound chicken breast, diced
- 1/4 cup honey
- 1 teaspoon black pepper
- Salt to taste
- Breadcrumbs (optional, for topping)
Instructions
- Boil the Pasta: Start by bringing a large pot of salted water to a boil. Add the macaroni and cook according to package instructions until al dente. Drain and set aside.
- Sauté the Chicken: In a large skillet, melt 1 tablespoon of butter over medium heat. Add diced chicken, sprinkle with salt and pepper, and cook for 6-7 minutes until browned.
- Prepare the Cheese Sauce: In a separate pan, melt remaining butter over medium heat. Whisk in the flour to form a roux, then gradually add the milk while whisking until thickened.
- Combine Cheese with the Sauce: Add shredded cheddar gradually, stirring until melted and smooth. Adjust salt and pepper to taste.
- Introduce Honey and Pepper: Stir in honey and black pepper for sweetness and a kick.
- Bring it All Together: In a large bowl, combine cooked macaroni, sautéed chicken, and creamy cheese sauce.
- Bake for Extra Texture: (Optional) Transfer to a baking dish, sprinkle breadcrumbs over the top, and bake at 350°F (175°C) for 15-20 minutes until golden.
- Cool & Serve: Let cool for a few minutes before serving in bowls with a sprinkle of fresh parsley or chives.
Notes
Feel free to get creative with flavors and toppings! This dish also freezes well for future meals.
Nutrition
- Serving Size: 1 serving
- Calories: 550
- Sugar: 10g
- Sodium: 500mg
- Fat: 25g
- Saturated Fat: 12g
- Unsaturated Fat: 12g
- Trans Fat: 0g
- Carbohydrates: 42g
- Fiber: 2g
- Protein: 35g
- Cholesterol: 85mg
Keywords: mac and cheese, chicken, comfort food, creamy pasta, easy dinner
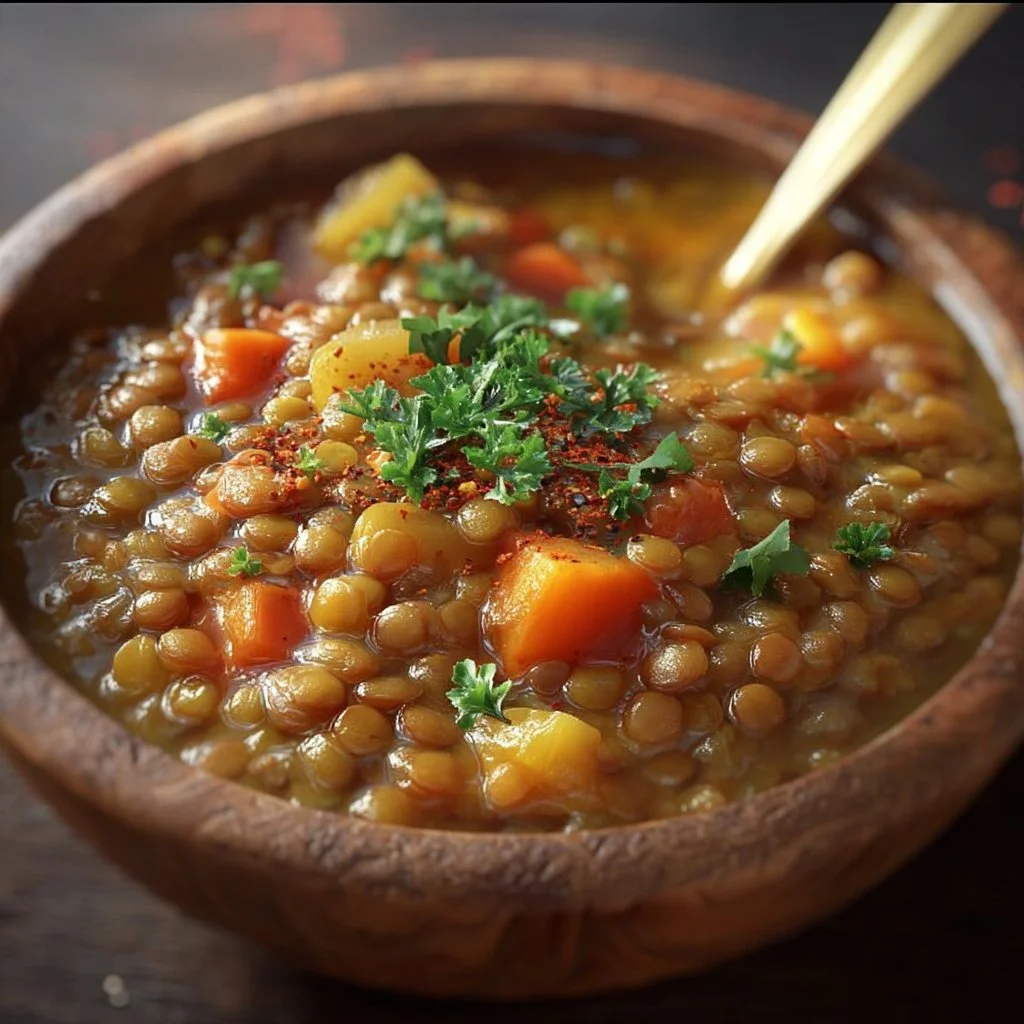
Lentil Stew
Embrace the Comfort: A Cozy Lentil Stew to Warm Your Heart
Hey there, fellow food enthusiasts! Welcome back to Ivory Apron, where we elevate your everyday cooking experience, one delicious dish at a time. If you’re anything like me, there’s something magical about coming home after a long day and being embraced by the warm and inviting aromas of a simmering stew. Today, I’m excited to share with you one of my all-time favorites: Lentil Stew!
This dish is more than just a recipe; it’s a big, cozy hug in a bowl. It’s hearty, nutritious, and perfect for a busy weeknight dinner or a leisurely weekend gathering. But more than that, it represents those moments when life slows down and we find joy in sharing delicious food with those we love.
When I think of lentil stew, I’m reminded of rainy Sundays spent in my grandmother’s kitchen, where the aroma of simmering lentils greeted us as soon as we walked through the door. She’d pull out her well-worn recipe cards and whisper about the benefits of lentils being not just stellar for our bodies, but also for our taste buds. And frankly, she was right!
As we dive into this recipe, I’m here to assure you that cooking your own lentil stew is not only simple but also provides a wonderful canvas for your culinary creativity! So, roll up those sleeves, tie on your ivory apron, and let’s make some magic in the kitchen together!
Personal Story
As a child, there was one dish that never failed to light up my family’s table: my grandmother’s lentil stew. It was a simple dish, but the comfort it brought was anything but ordinary. Growing up in a bustling household, we often gathered around the table after a long week. Every Sunday, culinary anticipation filled the air as I entered my grandmother’s kitchen.
I vividly remember standing on tiptoes, peering over the stovetop as she stirred that bubbling pot of goodness. For her, cooking was an art form that required few ingredients but an abundance of love. She would gaze at me with a twinkle in her eye, saying, "Cooking is about intention, darling." And how right she was!
Back then, my little hands would help her dice the vegetables while she shared family stories — and a sprinkle of cumin with every ingredient, of course! It wasn’t just about the food; it was about the time we spent together. This lentil stew became our calming ritual, a vessel for connection, laughter, and unforgettable memories. To this day, every ladleful serves as a timely reminder of those soulful Sundays, and it warms my heart to pass along that tradition here with you!
Ingredients
Let’s have some fun gathering our ingredients! Here’s what you’ll need:
-
1 cup lentils, rinsed: Lentils are the star of this show! They’re packed with protein and fiber, making them a nutritious choice. You can use green, brown, or even red lentils for different flavors and textures.
-
1 onion, diced: Onions are the base of flavor. They add depth to the stew. If you’re out of onions, shallots are a great substitute, providing that sweet onion taste!
-
2 carrots, diced: Carrots bring a natural sweetness and vibrant color to the stew. If you’re feeling adventurous, sweet potatoes can offer a similar feel.
-
2 celery stalks, diced: Celery adds a lovely earthiness and slight crunch. For a different flavor profile, try adding leeks!
-
3 cloves garlic, minced: Garlic makes everything better — it’s practically the secret ingredient! If you’re not a fan of strong garlic flavor, add less or roast it first for a milder taste.
-
1 can diced tomatoes: Tomatoes add acidity and balance to the stew. If you have fresh tomatoes, feel free to sub them in — just remember to remove the skins for a smoother texture.
-
4 cups vegetable broth: Broth is the soul of any stew! It adds layers of flavor. Use homemade broth if you have it; otherwise, store-bought works just fine. If you’re low on broth, you can use water too, but enhance the seasoning a bit more.
-
1 teaspoon cumin: Cumin imparts a warm, earthy flavor that enhances the lentils beautifully. If you’d like to try something different, coriander or even curry powder can work well.
-
1 teaspoon paprika: This adds a subtle sweetness and color! You might switch it up with smoked paprika for more depth.
-
Salt and pepper to taste: Always a necessary balance of flavors! Adjust to your liking, but remember to taste as you go!
-
2 tablespoons olive oil: This will help sauté the veggies and add healthy fats! You could swap in coconut oil or butter for variations in flavor.
-
Fresh herbs (optional, for garnish): Fresh herbs like parsley or cilantro can brighten up your dish at the end. If they’re not available, dried herbs can work in a pinch!
Step-by-Step Instructions
Ready to dive into the cooking process? Let’s roll up our sleeves and get started! Here’s how we’ll make our delicious lentil stew:
-
Prep Your Ingredients: Begin by rinsing the lentils in cold water until the water runs clear. This removes any dust or impurities. Set them aside while you chop your veggies.
-
Sauté the Aromatic Veggies: In a large pot, heat the olive oil over medium heat. Once the oil shimmers, add the diced onion. Sauté for about 3-4 minutes until the onion becomes translucent. This is where your kitchen starts to smell fantastic!
-
Add Remaining Vegetables: Toss in the diced carrots and celery, stirring them in. Let them cook for another 5 minutes, allowing the flavors to meld. You can hear the veggies softly whispering to each other!
-
Garlic Time: Once your veggies are tender, add the minced garlic and sauté for another minute. Keep an eye on it; burnt garlic can go from delicious to bitter in a flash!
-
Stir in Spices and Tomatoes: Next, it’s time to add your spices! Stir in the cumin and paprika, letting them roast for about 30 seconds to release their essential oils. Then, add in the can of diced tomatoes (along with the juices) and mix well. Oh, what a glorious color you have now!
-
Pour in the Broth and Lentils: Pour in the vegetable broth and add the rinsed lentils, stirring to combine. Bring the stew to a boil over high heat, then reduce the heat to low. Cover the pot and let it simmer for about 25-30 minutes.
-
Taste Test and Season: After simmering, taste your stew for seasoning. Add salt and pepper as desired. If the lentils are tender and the flavors are well balanced, you’re ready for the next step!
-
Adjust Consistency: If the stew seems too thick, add a splash more broth or water until you reach your desired consistency. Sometimes a little more liquid goes a long way!
-
Garnish and Serve: When you’re ready to serve, take it off the heat and let it rest for a minute. Garnish with fresh herbs (if using), and give it a gentle stir.
Serving Suggestions
Now that your lentil stew is bubbling deliciously, let’s talk about how to plate it beautifully! Serve it in deep, cozy bowls and make sure to scoop up plenty of those lentils and veggies. You can drizzle a touch of extra virgin olive oil for added richness and a sprinkle of fresh herbs for a pop of color. Pair it with some crusty bread or a side salad for a complete meal.
Recipe Variations
Feeling adventurous? Here are some creative twists you can try with this lentil stew:
-
Spicy Kick: Toss in a pinch of red pepper flakes or some chopped jalapeños for heat.
-
Creamy Comfort: Stir in a splash of coconut milk or cream for a rich, creamy texture.
-
Protein Boost: Feel free to add in cooked sausage or shredded chicken for an added protein punch!
-
Veggie Medley: Get creative with your vegetables! Throw in bell peppers, spinach, or kale for added nutrition and color.
-
Herbaceous Lift: Experiment with different herbs. A sprig of thyme or rosemary can change the entire flavor profile and make it seasonal!
Chef’s Notes
Oh, how I love sharing this recipe! It’s evolved over time as I’ve crafted it into my own version of comfort. When I first started making lentil stew, I followed my grandmother’s recipe to the tee. As I became more adventurous in the kitchen, I began to tweak it, adding my own flair and seasonal ingredients. So remember, make it yours! Be fearless in the kitchen, and trust your instincts!
This recipe is one of those dishes that often tastes even better the next day, once the flavors have had even more time to mingle. It’s perfect for meal prep too — you can keep it in the fridge for up to 5 days, so make a big batch!
FAQs and Troubleshooting
-
What if my lentils are mushy?
- If your lentils are mushy, they may have been overcooked. For the best texture, keep an eye on the cooking time and test them a few minutes before the recommended time.
-
Can I freeze leftover stew?
- Yes, you can freeze lentil stew! Just store it in an airtight container. When you’re ready to enjoy it again, thaw it in the refrigerator overnight and reheat on the stove over medium heat.
-
What if I have no vegetable broth?
- If you find yourself without vegetable broth, you can use water instead. Just elevate the seasoning by adding more herbs and spices!
-
Can I use split lentils instead of whole lentils?
- Absolutely! Split lentils cook faster, so decrease the cooking time by about 10-15 minutes for a delicious result.
Nutritional Info
Although specific nutritional values can vary based on ingredients and portions, here’s a rough breakdown for one serving of this delicious lentil stew:
- Calories: 250
- Protein: 13g
- Carbohydrates: 41g
- Dietary Fiber: 15g
- Fat: 5g
This nutrient-packed stew makes for a wholesome and filling meal that you can feel good about!
And there you have it! Your ultimate lentil stew recipe, straight from the ivory apron kitchen to your own. Isn’t it great how food can tell stories and create connections? So tie on that apron, get cooking, and let’s fill our tables with warmth and comfort. If you have any questions or want to share your own variations, I’d love to hear from you. Happy cooking!
PrintCozy Lentil Stew

A warm and inviting lentil stew, perfect for busy weeknights or leisurely gatherings. Hearty, nutritious, and simple to prepare.
- Prep Time: 15 minutes
- Cook Time: 30 minutes
- Total Time: 45 minutes
- Yield: 4 servings 1x
- Category: Main Course
- Method: Stovetop
- Cuisine: Comfort Food
- Diet: Vegan
Ingredients
- 1 cup lentils, rinsed
- 1 onion, diced
- 2 carrots, diced
- 2 celery stalks, diced
- 3 cloves garlic, minced
- 1 can diced tomatoes
- 4 cups vegetable broth
- 1 teaspoon cumin
- 1 teaspoon paprika
- Salt and pepper to taste
- 2 tablespoons olive oil
- Fresh herbs (optional, for garnish)
Instructions
- Prep your ingredients: Rinse the lentils and set aside.
- Sauté the aromatic veggies in olive oil over medium heat until the onion is translucent.
- Add remaining vegetables and cook for another 5 minutes.
- Garlic time! Stir in minced garlic and sauté for another minute.
- Stir in spices and tomatoes, and let cook for 30 seconds.
- Pour in the broth and add lentils, bringing to a boil then reduce to a simmer for 25-30 minutes.
- Taste and season as needed, adjusting consistency if necessary.
- Garnish with fresh herbs if desired, and serve hot.
Notes
This lentil stew is perfect for meal prep and often tastes better the next day! Store in the fridge for up to 5 days.
Nutrition
- Serving Size: 1 serving
- Calories: 250
- Sugar: 5g
- Sodium: 400mg
- Fat: 5g
- Saturated Fat: 0g
- Unsaturated Fat: 5g
- Trans Fat: 0g
- Carbohydrates: 41g
- Fiber: 15g
- Protein: 13g
- Cholesterol: 0mg
Keywords: lentil stew, vegan comfort food, easy dinner, healthy soup

Easy Street Corn Chicken Bowl
Easy Street Corn Chicken Bowl: A Flavorful Adventure
Hey there, foodie friend! If you’re anything like me, you probably have a few go-to recipes that never fail to bring joy to your dinner table. Today, I’m thrilled to share one of those delightful creations: the Easy Street Corn Chicken Bowl! This dish is a vibrant medley of flavors and textures — tender chicken, sweet corn, colorful veggies, and creamy avocado, all drizzled with zesty lime juice. Sounds delicious, right?
As we embark on this culinary journey together, I’ll share not only the recipe but also a sprinkle of personal stories and kitchen wisdom I’ve gathered over the years. This bowl is perfect for those busy weeknights when you need something quick yet elegant. Plus, it’s versatile enough for entertaining or just a cozy night in! So, let’s take a step into the kitchen and whip up something wonderful.
Personal Story
One of my fondest memories involving corn goes back to a family gathering in late summer when the corn was at its peak. We gathered at my grandparents’ home, a charming farmhouse surrounded by fields of golden corn swaying in the breeze. My grandmother would always bring out her famous street corn salad, a vibrant mix of grilled corn, fresh lime, and crumbled cheese.
I remember sneaking into the kitchen, practically salivating, as she mixed everything in an oversized bowl. If only you could smell the aroma! That memory still ignites a nostalgic warmth in my heart, and today, as I create my own twist on this classic element with the Easy Street Corn Chicken Bowl, I’m reminded of that love and care that goes into every meal. It’s those small moments around the table that turn into lifelong memories. Now, let’s dive into this bowl of goodness!
Ingredients
Here’s what you’ll need to create your own Easy Street Corn Chicken Bowl:
-
2 cups cooked chicken, shredded
Perfect for using up leftover rotisserie chicken! You can substitute it with grilled chicken or any protein you prefer, like turkey or chickpeas for a vegetarian option. -
1 can corn, drained
Sweet, juicy corn adds a pop of flavor. Fresh corn on the cob works wonderfully, too—just grill or roast it and then cut it off the cob! -
1 cup cooked rice
I love using brown rice for extra nutrients, but white rice or quinoa can also be excellent choices. -
1 bell pepper, diced
Grab any color you like—red, yellow, or green! Each adds a unique flavor and color to the dish, making it visually appealing. -
1/2 cup red onion, diced
For a zesty bite! If red onion is a bit too sharp for your taste, yellow onion or green onions can make a nice substitute. -
1 avocado, sliced
Creamy and dreamy! Not only does avocado add richness, but it also brings healthy fats. If you’re in a pinch, you can replace it with a dollop of Greek yogurt. -
1/4 cup cilantro, chopped
Fresh herbs elevate the dish. If cilantro doesn’t tickle your taste buds, fresh parsley or basil can give a different, yet equally delightful flair. -
1 tablespoon lime juice
Citrus is key here! Fresh lime juice brightens everything up. Lemon juice works too, but I must say, lime has that authentic zing. -
Salt and pepper to taste
Essential for balancing those flavors, so season to your liking. -
1 tablespoon olive oil
A little drizzle adds richness. You can swap it with avocado oil or even skip it entirely if you’re keeping it light!
Step-by-Step Instructions
Ready to start cooking? Here’s how to assemble your Easy Street Corn Chicken Bowl step by step:
-
Prepare the Base: Start by reheating your cooked rice. You can do this in a pot on low heat or in the microwave for a quick fix. If you’re using freshly cooked rice, savor that warm, fluffy goodness!
-
Sauté the Veggies: In a large skillet, heat the olive oil over medium heat. Once hot, add the diced red onion and bell pepper. Sauté for about 3-5 minutes, or until they soften. This little step adds depth and sweetness—the aroma will make your kitchen smell absolutely divine!
-
Add the Corn: Toss in the drained corn after your peppers and onions are soft. Give it a good stir and let it cook for another 2 minutes. The warmth will bring out the sweet flavor and that beautiful golden color will start to shine.
-
Mix in the Chicken: Stir in your shredded chicken. This is where the magic happens, my friends. Mix thoroughly, and allow everything to heat through—about 3-4 minutes. If you want to spice things up a bit, this is the perfect time to sprinkle in some cumin or chili powder!
-
Season to Perfection: Once everything is in the skillet, add salt, pepper, and lime juice. It’s your chance to taste! Adjust as needed—maybe a little more lime for that refreshing zing or a pinch more salt to balance it all out.
-
Assemble the Bowl: Time for the fun part! In a large serving bowl, spoon a generous layer of your warm rice at the bottom. Top it with the chicken, corn, and veggie mixture, then elegantly pile on slices of avocado. Isn’t that a beautiful sight?
-
Finish It Off: Garnish with the chopped cilantro. It’s like confetti for your bowl! Serve it warm, and don’t forget to squeeze a little extra lime juice on top just before digging in. Trust me, it makes all the difference.
Serving Suggestions
Plating can be as simple or elegant as you desire! For a casual touch, serve this bowl family-style, straight from the skillet, allowing everyone to make their own perfect portions. You can offer additional toppings on the side—think shredded cheese, extra lime, or a dollop of sour cream. If you’re aiming for a more refined presentation, layer the components in a clear glass bowl for a beautiful, take-your-breath-away display!
Recipe Variations
-
Spicy Twist: Add some jalapeños or a sprinkle of red pepper flakes to the skillet for those who crave heat!
-
Southwest Flavor: Incorporate black beans and serve with a creamy chipotle dressing to take it to the next level.
-
Taco Bowl: Serve the mixture over crushed tortilla chips for a fun, taco-inspired twist; don’t forget the salsa!
-
Vegetarian Delight: Substitute chicken with roasted butternut squash or add more beans for a satisfying, meat-free alternative.
-
Herb Variations: Experiment with different herbs like dill or tarragon for a flavor bump that takes it in new directions.
Chef’s Notes
Every recipe tells a story, and this one is no different! The Easy Street Corn Chicken Bowl began as a quick weeknight meal where I had a random assortment of odds and ends in my fridge. Over the years, I’ve refined it to strike a balance between comfort and elegance. Just remember that cooking is an adventure—don’t be afraid to make it your own! And trust me, if you overcook the rice or misjudge the lime juice, it’s not the end of the world—just a chance to learn and grow in the kitchen!
FAQs and Troubleshooting
-
What can I use instead of cooked chicken?
You can try roasted veggies, canned chickpeas, or even tofu. Just ensure they’re well-seasoned to taste amazing! -
How can I store leftovers?
Store any leftovers in an airtight container in the refrigerator for up to 3 days. Just keep your avocado separate to prevent browning! -
Can I prep this dish in advance?
Absolutely! You can prepare the chicken and corn mixture ahead of time. Reheat it when ready to serve, then layer it over freshly cooked rice. -
What if my dish turns out bland?
It happens, even to the best of us! Taste it as you cook and add salt, pepper, or a splash of lime juice until it sings!
Nutritional Info
While I like to focus on flavor, I also care about nutrition. Here’s a quick estimate for a serving of this bowl:
- Calories: Approximately 450
- Protein: 30g
- Carbohydrates: 45g
- Fats: 15g
- Fiber: 7g
Remember, each ingredient can alter these numbers, but it shows that you’re on the right path to a balanced meal!
There you have it! The Easy Street Corn Chicken Bowl brings comfort, color, and flavor to your table. I hope this recipe brings a smile to your face and warmth to your heart as you gather around the table with those you love. Happy cooking! 🌟
PrintEasy Street Corn Chicken Bowl

A vibrant medley of flavors and textures featuring tender chicken, sweet corn, colorful veggies, and creamy avocado, drizzled with zesty lime juice.
- Prep Time: 15 minutes
- Cook Time: 15 minutes
- Total Time: 30 minutes
- Yield: 4 servings 1x
- Category: Main Course
- Method: Stovetop
- Cuisine: Mexican
- Diet: Gluten-Free, Dairy-Free
Ingredients
- 2 cups cooked chicken, shredded
- 1 can corn, drained
- 1 cup cooked rice
- 1 bell pepper, diced
- 1/2 cup red onion, diced
- 1 avocado, sliced
- 1/4 cup cilantro, chopped
- 1 tablespoon lime juice
- Salt and pepper to taste
- 1 tablespoon olive oil
Instructions
- Prepare the base: Start by reheating your cooked rice.
- Sauté the veggies: In a large skillet, heat the olive oil over medium heat. Add the diced red onion and bell pepper. Sauté for about 3-5 minutes.
- Add the corn: Toss in the drained corn after your peppers and onions are soft and cook for another 2 minutes.
- Mix in the chicken: Stir in your shredded chicken and heat through for about 3-4 minutes.
- Season to perfection: Add salt, pepper, and lime juice to taste.
- Assemble the bowl: Spoon a layer of warm rice, then top with the chicken, corn, and veggie mixture, and slices of avocado.
- Finish it off: Garnish with chopped cilantro and serve warm with extra lime juice.
Notes
Serve this bowl family-style or in elegant presentations. Add toppings like shredded cheese or sour cream for extra flavor.
Nutrition
- Serving Size: 1 serving
- Calories: 450
- Sugar: 5g
- Sodium: 500mg
- Fat: 15g
- Saturated Fat: 2g
- Unsaturated Fat: 10g
- Trans Fat: 0g
- Carbohydrates: 45g
- Fiber: 7g
- Protein: 30g
- Cholesterol: 75mg
Keywords: chicken, corn, bowl, healthy meal, quick dinner, easy recipe

Cheesy Ground Beef and Rice Casserole
Comfort in a Casserole: Cheesy Ground Beef and Rice Casserole Recipe
Hello, fellow food lovers! Today, I’m inviting you on a delicious journey to one of those cozy dishes that brings pure comfort to your table — Cheesy Ground Beef and Rice Casserole. If you’ve ever walked into a friend’s house on a chilly evening and been greeted by the rich, warming aroma of something bubbling away in the oven, then you know the pure joy that a casserole can bring. It’s like a warm hug after a long day!
This dish is a nostalgic favorite of mine, hailing from those busy weeknights when dinner needed to be not just quick but also satisfying. Cheesy Ground Beef and Rice Casserole is one of those recipes that effortlessly combines heartiness with cheesiness in a balanced blend that is as delicious as it is uncomplicated. Plus, it’s all made in one dish, which means fewer dishes to wash—a win-win at any time!
Imagine your kitchen filled with enticing aromas as you create this dish. The satisfaction doesn’t just come from the meal but from the memories being made around your table. Whether you’re feeding a hungry family, hosting a friend, or simply wanting to treat yourself, this casserole hits the spot every time.
So, grab your apron, preheat that oven, and let’s dive into creating this comforting treasure together.
Personal Story
There is something so deeply nostalgic about casseroles for me. Growing up, my family had a tradition of “casserole night” every Thursday. My mom would whip up different variations, but one night, she made a cheesy ground beef and rice casserole that forever etched itself into my memory. My younger self was mesmerized as she stirred the mixture of beef, fluffy rice, and melted cheese together, and each bite transported me into a delicious dream world.
I remember setting the table with mismatched dinner plates and the warmth of our kitchen filled with laughter. My siblings and I would compete for the last scoop, and it didn’t take long for us to dub it "the famous cheesy pile." Those moments were more than just about the food; they were about gathering, sharing, and love.
Now, as an adult, whenever I make this dish, it brings back waves of those cherished memories. It reminds me to slow down, savor the flavors, and prioritize the beautiful connections that food fosters. So let’s recreate that sense of warmth and togetherness right in your own home!
Ingredients
Here’s what you’ll need to make this delicious Cheesy Ground Beef and Rice Casserole:
-
1 lb lean ground beef
The star of our dish! Lean beef keeps it hearty but doesn’t add unnecessary grease. Looking for a substitute? Ground turkey or chicken works well if you prefer lighter meat. -
1 small onion, diced
This adds a sweet depth to our dish. If you’re not a fan of onions, leeks or shallots can offer similar flavor. You can also skip this entirely if you’d like a milder taste! -
2 cloves garlic, minced
Garlic is a must for flavor! If you’re in a pinch, garlic powder can be used instead; just 1/2 teaspoon will do. -
2 cups cooked white rice
Feel free to use leftover rice or even try brown rice for a nuttier flavor! Just make sure it’s fully cooked before adding. -
1 can (10.5 oz) cream of mushroom soup (or cream of chicken)
This creamy goodness acts as the binding agent that brings everything together. If you’re looking for a healthier alternative, try making your own cream of mushroom soup from scratch. -
1/2 cup milk or beef broth
This adds additional moisture to the casserole. Vegetable broth is a great option for vegetarians, while heavy cream can lend an even richer texture. -
2 cups shredded cheddar cheese (divided)
Because, let’s be honest, the more cheese, the better! Try swapping with Monterey Jack or a mix of your favorites. -
1 tsp paprika
Paprika adds a subtle smokiness to the dish. You can substitute with smoked paprika for more depth or even cayenne for a kick! -
Salt and pepper to taste
Don’t forget these essentials! Freshly cracked black pepper delivers the best flavor. -
Optional: chopped parsley for garnish
A sprinkle of fresh parsley adds color and a touch of brightness to your dish before serving.
Step-by-Step Instructions
Step 1: Preheat the Oven
Preheat your oven to 350°F (175°C). This step is crucial for ensuring your casserole bakes evenly, allowing all those delicious flavors to meld together perfectly.
Step 2: Cook the Beef
In a large skillet over medium heat, add the ground beef and diced onion. Season with salt and pepper. Cook until the beef is browned and the onions are translucent, around 5-7 minutes. Use a spatula to break the beef into small crumbles. Here’s a handy chef tip: if you’re using lean beef, cooking it in a non-stick pan can help it brown beautifully without sticking!
Step 3: Add Garlic and Rice
Stir in the minced garlic and cook for another minute until fragrant. This makes the whole kitchen smell divine! Next, add in your cooked rice. Mix gently to combine. Pro tip: using leftover rice makes this step quicker — just ensure it’s cold and fluffy to avoid mushiness.
Step 4: Create the Sauce
In a separate bowl, combine the cream of mushroom soup and milk (or beef broth). Whisk until smooth, then pour this mixture over the beef and rice in the skillet. Stir well to blend everything together. This creates a creamy, flavorful base for our casserole.
Step 5: Add Cheese and Seasonings
Add in 1½ cups of shredded cheddar cheese and the paprika, mixing well until everything is coated in cheesy goodness. Don’t be shy about tasting at this point—just a little bit to ensure the seasoning is right!
Step 6: Transfer to Casserole Dish
Grease a 9×13-inch casserole dish with a bit of cooking spray or butter. Pour the mixture into the prepared dish and spread it out evenly. Don’t worry about it looking perfect; it will all blend and bubble together beautifully in the oven!
Step 7: Top It Off
Sprinkle the remaining ½ cup of cheddar cheese on top. This will create a golden, bubbly crust that you’ll look forward to digging into!
Step 8: Bake
Pop the casserole into your preheated oven and bake for about 30-35 minutes, or until the cheese is bubbly and golden. Enjoy the aromas wafting through your home during this time! It’s like an olfactory hug that brings everyone together.
Step 9: Chill and Serve
Once ready, remove the casserole from the oven, and let it sit for about 5-10 minutes before serving. This gives it a chance to set and makes serving a whole lot easier. Trust me, your friends and family will want to dive in right away, but it’s worth the wait!
Serving Suggestions
When it comes to serving, remember that presentation can elevate any dish. Scoop generous portions onto plates, letting the gooey cheese stretch tantalizingly. Add a sprinkle of chopped parsley for a pop of color. Serve with a side salad or some crusty bread for a complete meal. Trust me, the sight of cheesy goodness is enough to keep your guests coming back for seconds!
Recipe Variations
Feeling adventurous? Here are a few fun twists and variations you can try with this casserole:
-
Vegetable-Packed Casserole: Throw in cooked vegetables like spinach, bell peppers, or peas for added nutrition and color.
-
Mexican-Inspired: Add taco seasoning, black beans, and corn for a Mexican flair. Top with jalapeños or avocado before serving.
-
Sautéed Mushrooms: For those mushroom lovers, sauté some fresh mushrooms along with the beef for an extra layer of flavor.
-
Different Cheeses: Experiment with different cheese combinations like gouda or pepper jack for a flavor twist.
-
Gluten-Free Alternative: Use gluten-free cream of mushroom soup or create a homemade version from scratch without flour.
Chef’s Notes
Ah, the evolution of this recipe! It has been a staple in my house and has transformed over the years, from using whatever I had in the fridge to being a full-on crowd-pleaser at gatherings. I once accidentally added too much garlic (is there such a thing?) and discovered it resulted in a surprisingly delightful flavor!
I often reminisce about my "Casserole Night" and how this dish fits perfectly as comfort food. It’s one of those meals that not only satisfies the stomach but also warms the heart.
FAQs and Troubleshooting
Q: Can I make this casserole ahead of time?
A: Absolutely! You can assemble the casserole and keep it covered in the refrigerator for up to 24 hours. Just pop it in the oven when you’re ready to bake!
Q: How do I store leftovers?
A: Store any leftovers in an airtight container in the fridge for up to 3 days. You can reheat portions in the microwave or pop it back in the oven.
Q: My casserole seems dry; what did I do wrong?
A: Casseroles can dry out if they’re baked too long or if there’s insufficient moisture. Ensure you’re not overcooking it and double-check the liquid ratio before baking.
Q: Can I freeze this casserole?
A: Definitely! This casserole freezes well. Just cool it completely before cutting leftovers into portions and storing in an airtight container. Thaw overnight in the fridge before reheating!
Nutritional Info
While the exact nutritional content will vary based on specific ingredient choices and serving sizes, a serving of Cheesy Ground Beef and Rice Casserole generally contains:
- Calories: ~400-450
- Protein: ~25g
- Carbohydrates: ~45g
- Fat: ~20g
(Nutritional info calculated based on standard ingredients; always check labels for accuracy!)
Now that you have all the tips and tricks for crafting this delectable Cheesy Ground Beef and Rice Casserole, I’m excited to hear how it turns out! Remember, this dish is not just about food; it’s about community, joy, and those moments that linger long after the last bite. Happy cooking, my friends! 🍽️
PrintCheesy Ground Beef and Rice Casserole

A comforting and hearty casserole combining ground beef, rice, and cheese, perfect for cozy dinners.
- Prep Time: 15 minutes
- Cook Time: 35 minutes
- Total Time: 50 minutes
- Yield: 4 servings 1x
- Category: Main Course
- Method: Baking
- Cuisine: American
- Diet: Carnivore
Ingredients
- 1 lb lean ground beef
- 1 small onion, diced
- 2 cloves garlic, minced
- 2 cups cooked white rice
- 1 can (10.5 oz) cream of mushroom soup
- 1/2 cup milk or beef broth
- 2 cups shredded cheddar cheese (divided)
- 1 tsp paprika
- Salt and pepper to taste
- Optional: chopped parsley for garnish
Instructions
- Preheat your oven to 350°F (175°C).
- Cook the ground beef and diced onion in a skillet until the beef is browned.
- Add the minced garlic and cook for another minute.
- Combine the cream of mushroom soup and milk (or beef broth) in a separate bowl.
- Add 1½ cups of shredded cheddar cheese and paprika to the beef mixture.
- Transfer the mixture to a greased casserole dish.
- Top it off with the remaining ½ cup of cheddar cheese.
- Bake for about 30-35 minutes until bubbly and golden.
- Chill for 5-10 minutes before serving.
Notes
Feel free to modify the ingredients or add in your favorite veggies for a twist.
Nutrition
- Serving Size: 1 serving
- Calories: 400
- Sugar: 3g
- Sodium: 750mg
- Fat: 20g
- Saturated Fat: 10g
- Unsaturated Fat: 8g
- Trans Fat: 0g
- Carbohydrates: 45g
- Fiber: 2g
- Protein: 25g
- Cholesterol: 70mg
Keywords: casserole, beef, cheese, comfort food, easy dinner

Red Lobster Biscuit Chicken Pot Pie
Red Lobster Biscuit Chicken Pot Pie: A Cozy Culinary Adventure
Ah, comfort food! There’s nothing quite like curling up with a hearty dish that wraps you in warmth and familiarity. If there’s one dish that embodies both comfort and culinary delight, it’s the Red Lobster Biscuit Chicken Pot Pie. This dish takes comfort food to the next level, combining tender, savory chicken, vibrant veggies, and the fluffy, iconic Red Lobster cheddar biscuits you know and love. It’s like a warm hug on a chilly evening or a reminder of cozy family dinners from your past.
Let’s embark on this culinary journey together! Imagine the rich aroma wafting through your kitchen as you whip up this tantalizing dish. As you prepare, you’ll blend the satisfying textures and flavors that make eating a delightful experience. Best of all? I’ll guide you step by step, making it easy for you to replicate this exceptional meal right in your kitchen. So grab your apron and let’s get started—you’re going to impress yourself.
Personal Story: A Lesson from My Grandma
I fondly remember sitting under my grandma’s kitchen table as she whipped up her famous chicken pot pie. The scent of her flaky pastry was something I would dream about. I can still see her rolling out the dough, her face lit up with joy. She often involved me in the cooking, teaching me how to knead the dough just right while sharing tales of family dinners and the importance of gathering around the table.
One day, she introduced me to her secret: a sprinkle of garlic powder added to the filling that elevated the entire dish. That little touch brought a burst of flavor and transformed an ordinary meal into something spectacular. This Red Lobster Biscuit Chicken Pot Pie pays homage to those cherished memories and combines it with the irresistible cheddar biscuits that I was always jealous of while trying to sneak bites from her leftover batch. Let’s create that kind of flavorful magic in your kitchen!
Ingredients
To make this delightful Red Lobster Biscuit Chicken Pot Pie, gather the following ingredients:
-
3 cups cooked chicken, diced
(You can use rotisserie chicken to save time—just shred it off the bone; it’s easy and delicious.) -
1 cup frozen mixed vegetables
(This typically includes peas, carrots, and corn, but feel free to substitute your favorites!) -
1 cup cream of chicken soup
(This adds creaminess and boasts lovely flavor; you can also use homemade soup for a fresher taste.) -
1 teaspoon garlic powder
(This will be used both for flavoring the filling and the biscuit topping. Adjust according to your taste!) -
1 teaspoon onion powder
(This brings a subtle sweetness and depth of flavor to the dish; it’s an unsung hero!) -
Salt and pepper to taste
(Always taste as you go; seasoning makes all the difference!) -
1/2 cup chicken broth
(Essential for keeping your filling moist and flavorful; low-sodium options work well here.) -
2 1/2 cups all-purpose flour
(A necessary base for those luscious biscuits; you can replace with gluten-free flour if needed.) -
1 tablespoon baking powder
(This is the leavening agent that will give your biscuits that delightful rise!) -
1 teaspoon salt
(For the biscuits; it balances the flavors beautifully.) -
1/2 cup unsalted butter, cold and cubed
(Cold butter is the key to flaky biscuits; don’t skimp on this part!) -
1 cup shredded cheddar cheese
(The star ingredient—use sharp cheddar for an extra oomph of flavor!) -
3/4 cup milk
(This hydrates the biscuit dough; you can also use a plant-based milk for a dairy-free version.) -
1 tablespoon garlic powder (for the Red Lobster touch)
(A hallmark of those beloved biscuits; it brings nostalgia in every bite.)
Step-by-Step Instructions
Now that we’ve prepped our ingredients, it’s time to dive into the cooking! Follow these steps for your Red Lobster Biscuit Chicken Pot Pie:
-
Preheat Your Oven
Preheat your oven to 375°F (190°C). A hot oven is crucial for a perfectly baked biscuit crust and a nicely bubbling filling! -
Prepare the Filling
In a large mixing bowl, combine your cooked chicken, frozen mixed vegetables, cream of chicken soup, garlic powder, onion powder, salt, pepper, and chicken broth. Mix well until everything is evenly coated. Don’t be shy with the seasonings; good food is tastily seasoned food!Chef Tip: Taste your filling before pouring it into the baking dish to ensure the flavors are just right. You might want to add a pinch of extra salt or perhaps a splash more chicken broth for moisture.
-
Pour into Baking Dish
Transfer that luscious filling into a greased casserole or baking dish. Spread it out evenly to set the base for the biscuit topping. -
Make the Cheddar Biscuits
In a large bowl, whisk together the all-purpose flour, baking powder, and salt. Next, add the cold, cubed unsalted butter. Using a pastry cutter or your fingers, work the butter into the flour until it resembles coarse crumbs. This step is crucial for that flaky texture—don’t rush it! -
Add Cheese and Milk
Gently fold in the shredded cheddar cheese, followed by the milk. Stir until just combined; the dough might be a bit sticky, but that’s okay! -
Drop the Biscuit Topping
Using a spoon or a cookie scoop, drop spoonfuls of the biscuit dough over the chicken filling. It doesn’t have to be perfect, so let the tangling tendrils of dough create a rustic look—those golden peaks will ooze the charm. -
Sprinkle with Garlic Powder
For that famous Red Lobster touch, light sprinkle about 1 tablespoon of garlic powder over the biscuit topping before popping it into the oven. -
Bake to Perfection
Place the dish in the oven and bake for about 30-35 minutes, or until the biscuits are golden brown and the filling is bubbling up. Your kitchen will smell like pure bliss; prepare for some serious culinary praises! -
Let It Rest
Once out of the oven, let your dish rest for about 10 minutes. This is tough, I know, but it helps the filling set a bit more and makes serving less messy.
Serving Suggestions
When serving your Red Lobster Biscuit Chicken Pot Pie, consider a simple but elegant plating. Use a large serving spoon to scoop out a generous portion, showing off the delicious filling and flaky biscuit. Pair it with a light side salad dressed with a tangy vinaigrette to balance the richness of the dish. Finish it off with a sprinkle of some fresh parsley or chives for a splash of color!
Recipe Variations
Feeling adventurous? Here are some delightful creative twists or dietary swaps to consider:
- Spicy Twist: Add a dash of cayenne pepper or diced jalapeños for a kick.
- Herb Infusion: Include fresh herbs like thyme or rosemary in the filling for added aroma and complexity.
- Vegetarian Option: Swap the chicken for hearty vegetables like mushrooms, zucchini, and bell peppers. Use vegetable broth for the filling.
- Biscuits on the Side: If you want a different experience, serve your filling and homemade cheddar biscuits separately, allowing guests to customize their portions.
- Cheesy Dream: Add more cheese! Mix in some cream cheese for an extra creamy filling.
Chef’s Notes
This recipe has evolved over the years, influenced by family gatherings, friends at dinner parties, and the need to create something special without too much fuss. I remember once trying to impress some friends with this dish but accidentally added too much garlic powder to the filling! It turned into a favorite mishap after a few laughs—we now jokingly call it "Garlic Galore Pot Pie." Cooking is about having fun and being imperfectly perfect, after all!
FAQs and Troubleshooting
Q1: My biscuits didn’t rise! What happened?
A: This could be due to either the butter being too soft or not enough baking powder. Ensure your butter is cool and check the freshness of your baking powder, so it packs a punch.
Q2: Can I freeze the pot pie?
A: Absolutely! Assemble the pot pie but avoid baking it until you’re ready to enjoy. You can freeze it before cooking for up to 3 months. Just add additional baking time when you bake it from frozen.
Q3: How do I store leftovers?
A: Store leftover pot pie in an airtight container in the refrigerator for up to 3 days. To reheat, pop it back in the oven for a bit to help restore the biscuit’s lovely texture.
Q4: What’s the best way to make the biscuits?
A: Remember, minimal handling is key! Mix until just combined and not a second longer for those beautifully soft, flaky biscuits.
Nutritional Info
While I like to keep things flexible around here, you could estimate that a serving of the Red Lobster Biscuit Chicken Pot Pie has about 450-500 calories, depending on the exact ingredients and portion size. It’s wholesome comfort food—you’ll savor every bite!
So, gather your loved ones, set the table, and dive into this cozy, nostalgic Red Lobster Biscuit Chicken Pot Pie. Here’s to creating small, beautiful moments around your dining table, no matter what day of the week it is. Happy cooking! 🌟
PrintRed Lobster Biscuit Chicken Pot Pie

A hearty dish combining tender chicken, vibrant veggies, and fluffy Red Lobster cheddar biscuits, perfect for a cozy meal.
- Prep Time: 15 minutes
- Cook Time: 35 minutes
- Total Time: 50 minutes
- Yield: 6 servings 1x
- Category: Main Course
- Method: Baking
- Cuisine: American
- Diet: Gluten-Free Option Available
Ingredients
- 3 cups cooked chicken, diced
- 1 cup frozen mixed vegetables
- 1 cup cream of chicken soup
- 1 teaspoon garlic powder
- 1 teaspoon onion powder
- Salt and pepper to taste
- 1/2 cup chicken broth
- 2 1/2 cups all-purpose flour
- 1 tablespoon baking powder
- 1 teaspoon salt
- 1/2 cup unsalted butter, cold and cubed
- 1 cup shredded cheddar cheese
- 3/4 cup milk
- 1 tablespoon garlic powder (for the Red Lobster touch)
Instructions
- Preheat your oven to 375°F (190°C).
- Combine cooked chicken, frozen mixed vegetables, cream of chicken soup, garlic powder, onion powder, salt, pepper, and chicken broth in a large mixing bowl.
- Transfer the filling into a greased casserole or baking dish.
- Whisk together flour, baking powder, and salt in a large bowl.
- Add cold, cubed unsalted butter and work into the flour until it resembles coarse crumbs.
- Fold in shredded cheddar cheese and then add milk, stirring until just combined.
- Drop spoonfuls of the biscuit dough over the chicken filling.
- Sprinkle garlic powder over the biscuit topping.
- Bake for about 30-35 minutes, or until biscuits are golden brown.
- Let the dish rest for about 10 minutes before serving.
Notes
Taste the filling before baking to ensure the flavors are just right.
Nutrition
- Serving Size: 1 serving
- Calories: 450
- Sugar: 5g
- Sodium: 600mg
- Fat: 22g
- Saturated Fat: 12g
- Unsaturated Fat: 8g
- Trans Fat: 0g
- Carbohydrates: 40g
- Fiber: 3g
- Protein: 25g
- Cholesterol: 80mg
Keywords: chicken pot pie, comfort food, Red Lobster biscuits, cozy meal, dinner recipe
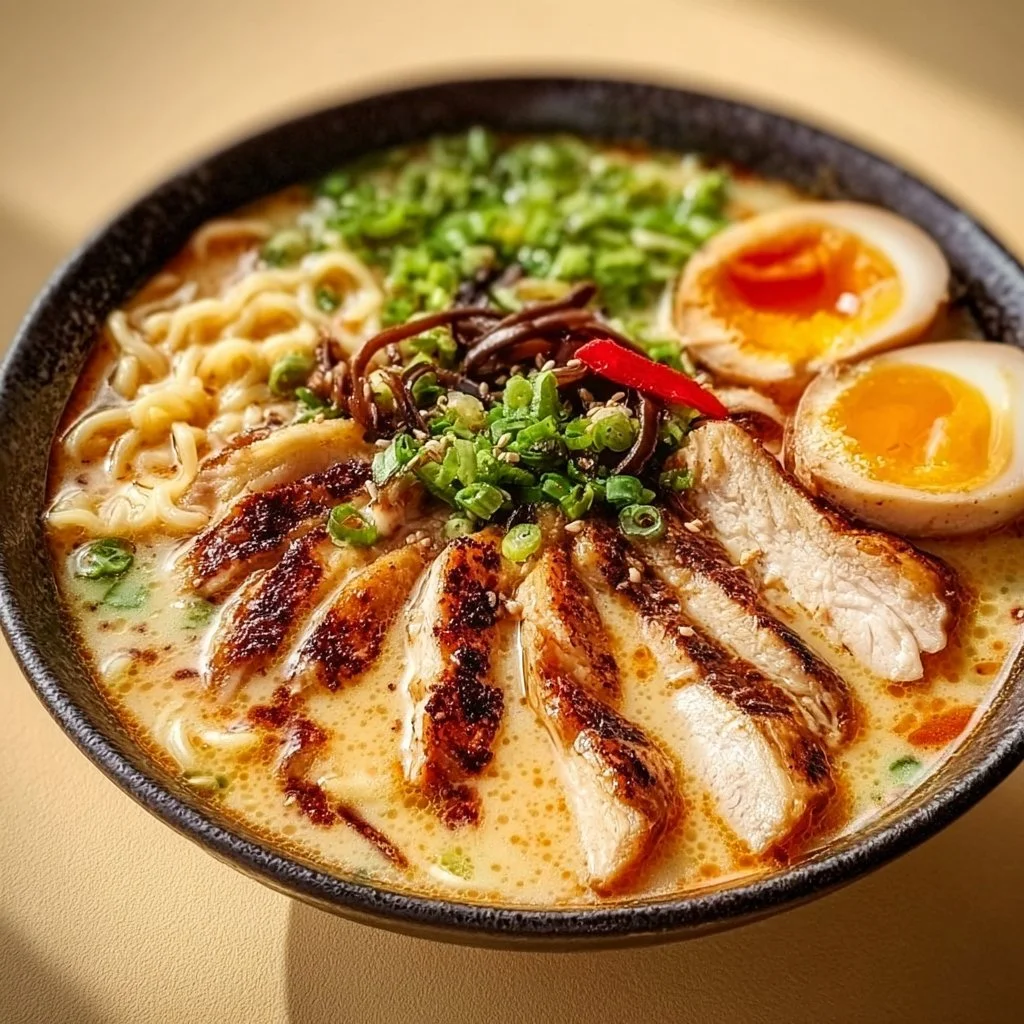
Creamy Garlic Chicken Ramen
Creamy Garlic Chicken Ramen – A Deliciously Cozy Bowl of Comfort
Welcome, foodies! Today, we’re diving into the world of creamy, savory goodness with a delightful dish that’s sure to warm your heart and fill your stomach — Creamy Garlic Chicken Ramen. Perfect for a cozy night in or impressing friends at your next gathering, this dish is the epitome of indulgence and comfort. Plus, I promise it’s easier than you might think!
Why Ramen, You Ask?
Oh boy, where do I even start? Ramen is the ultimate comfort food! It’s the dish you turn to when you’re in need of a warm hug in a bowl. The perfect balance of garlic aroma, creamy texture, and hearty flavors make this ramen a staple in my kitchen, especially when the weather turns chilly or when life just needs a sprinkle of something special.
Don’t let the eye-catching presentation fool you; it’s a recipe designed for real life. Seriously — if you’ve got a few ingredients and a little time, you’re on your way to crafting a meal that feels elegant but tastes like a warm and satisfying embrace.
My Personal Story
Ah, ramen! It brings back such warm memories. I remember my college days, hunched over a steaming bowl of instant ramen, feeling completely derailed by exams and late-night study sessions. Those days were simple, and they taught me the beauty of good food — even if it came from a plastic packet! But my love for ramen really blossomed during a winter gathering at a friend’s house. We had a ramen bar set up, complete with broth, proteins, and an array of toppings. I was charmed by the creative ways we could customize our bowls! From crunchy veggies to soft-boiled eggs, the options seemed endless.
When I returned home, I couldn’t stop thinking about how to elevate that basic concept into something a bit more indulgent — cue the creamy garlic chicken ramen! The delicate balance of flavors and textures, paired with the nostalgia of those simpler days, makes this dish a go-to favorite in my household!
Ingredients
Gathering quality ingredients makes all the difference. To create your creamy garlic chicken ramen, here’s what you’ll need:
-
2 chicken breasts, sliced
This lean protein is your star! Feel free to substitute with boneless thigh meat for extra flavor or use tofu for a vegetarian option. -
4 cups chicken broth
Homemade or store-bought, chicken broth adds depth to the ramen. Vegetarian broth works beautifully if you’re looking for a plant-based delight. -
2 packs of ramen noodles
You can use instant ramen, but consider upgrading to fresh or artisanal noodles for a restaurant-like experience. Just remember to cook them al dente! -
1 cup heavy cream
This is the secret to that luscious, creamy texture. If you want a lighter version, try half-and-half or coconut milk for a dairy-free twist. -
4 cloves garlic, minced
Garlic is the hero! Fresh garlic elevates the flavor to another level. For a milder taste, try roasted garlic instead. -
1 cup fresh vegetables (like spinach, carrots, and bell peppers)
Fresh veggies add not only nutrition but also vibrant colors. You can swap them with whatever you have on hand, like broccoli or snap peas. -
2 tablespoons soy sauce
This salty umami booster gives depth to the broth. Tamari or coconut aminos can replace traditional soy sauce for a gluten-free option. -
1 tablespoon olive oil
Extra virgin olive oil has that fruity character. Feel free to use sesame oil for a more pronounced flavor. -
Salt and pepper to taste
Always the essentials! Just remember to season gradually — you can always add more, but you can’t take it away. -
Chopped green onions for garnish
These tasty little notes bring brightness and a pop of color to your bowl!
Step-by-Step Instructions
Let’s get cooking! Here’s how to whip up this delicious creamy garlic chicken ramen, step by step.
-
Prep Your Ingredients
Before you hit the stove, take a moment to slice your chicken, mince your garlic, and chop those vibrant veggies. Always have everything prepped so you can move quickly! -
Sear the Chicken
In a large pot or Dutch oven, heat the olive oil over medium-high heat. Add the sliced chicken breasts, seasoning lightly with salt and pepper. Sear them for about 5-7 minutes, or until they are cooked through and have a lovely golden color. This adds a beautiful depth of flavor to your broth!Tip: Don’t overcrowd the pan. Work in batches if necessary to get that perfect sear!
-
Add Garlic and Veggies
Toss in the minced garlic right after the chicken is cooked. Sauté for about 30 seconds until it becomes aromatic. Add your fresh vegetables immediately and stir them together. The key is to heat the veggies just enough to make them tender yet vibrant!Chef Hack: If you want a sweet and savory touch, add a sprinkle of sugar to the veggies as they cook.
-
Pour in the Broth
Now, bring on that glorious chicken broth! Carefully pour it into the pot, scraping up any delightful brown bits stuck to the bottom from the chicken (that’s pure flavor!).Pro Tip: Taste your broth at this point. If it needs it, add a bit more soy sauce or seasoning.
-
Add the Ramen Noodles
Add the ramen noodles directly into the pot.Note: If you’re using fresh ramen, they may require just a couple of minutes to cook. Instant noodles will take just a couple of minutes, typically 3-4 minutes.
-
Incorporate the Cream
Once the noodles are cooked, it’s time to create that creamy goodness. Slowly and gently stir in the heavy cream and allow everything to simmer for an additional minute. The beautiful creamy texture will transform your broth into a delightful sauce!Chef Insight: If the sauce is too thick, you can always add a splash of more broth or water to reach your desired consistency.
-
Final Seasoning
Taste your ramen one last time before serving. Adjust the flavors as necessary — a little more soy sauce, salt, or pepper goes a long way! -
Serve
Ladle the ramen into bowls and top generously with chopped green onions. Optional: sprinkle with sesame seeds or chili flakes for added flair.
Serving Suggestions
Ramen is all about presentation. Serve each bowl with a few extra greens on top, perhaps a drizzle of sesame oil, and don’t forget to place your chopsticks stylishly on the side. Light a candle, play some soothing music, and you just might forget you’re dining at home!
Recipe Variations
Want to mix things up? Here are some creative spins on this creamy garlic chicken ramen:
-
Add a Soft-Boiled Egg: A perfectly-runny soft-boiled egg on top adds richness and a lovely texture contrast.
-
Spice It Up: Toss in some sriracha or chili oil to give your bowl a spicy kick!
-
Herb It Up!: Try adding fresh basil or cilantro for a lovely herbal note against the creaminess.
-
Ultimate Vegan Ramen: Replace the chicken with tofu or tempeh, use vegetable broth, and switch heavy cream for coconut cream.
-
Brothy Version: If you prefer a lighter dish, skip the cream altogether and enjoy a clear broth with tons of garlic and veggies!
Chef’s Notes
This creamy garlic chicken ramen has become a staple in my home. It has evolved since its inception; the more I cooked it, the more I played around with flavors and textures. I once accidentally added too much garlic, making it an instant hit for unexpected guests. They loved the warmth of its flavor and mouthed each modulated bite like poetry!
Remember, cooking is as much about experimentation as it is about following a recipe. Don’t shy away from making this dish your own!
FAQs and Troubleshooting
-
Can I make this ramen ahead of time?
Absolutely! Just store the broth and ingredients separately. The flavors will only get better with time! -
What if my broth is too salty?
Adding a bit of water or unsalted broth helps dilute the saltiness. Alternatively, you can toss in a chunk of raw potato for 10-15 minutes, which will absorb excess salt. -
How can I store leftovers?
Store the ramen in an airtight container in the refrigerator for up to 3 days. Reheat gently on the stovetop, adding a splash of broth to restore creaminess. -
Is it normal for ramen to get thick when stored?
Yes! Ramen noodles absorb the broth as they sit, thickening the dish. Always add a bit of broth or water while reheating to loosen it up.
Nutritional Info
(Optional; include if relevant)
- Calories: 450 per serving
- Protein: 30g
- Carbohydrates: 30g
- Fat: 20g
(Note: Nutritional values may vary based on specific ingredients used.)
Thank you for joining me on this creamy chicken ramen adventure! I hope you discover the joy of creating this cozy bowl of comfort and serve it with love to those around your table. Be sure to tag me (@IvoryApron.com) when you give it a try — I can’t wait to see your delicious creations! Happy cooking! 🥢
PrintCreamy Garlic Chicken Ramen

A deliciously cozy bowl of creamy garlic chicken ramen, perfect for warming your heart and filling your stomach.
- Prep Time: 15 minutes
- Cook Time: 30 minutes
- Total Time: 45 minutes
- Yield: 4 servings 1x
- Category: Main Course
- Method: Stovetop
- Cuisine: Japanese
- Diet: Non-Vegetarian
Ingredients
- 2 chicken breasts, sliced
- 4 cups chicken broth
- 2 packs of ramen noodles
- 1 cup heavy cream
- 4 cloves garlic, minced
- 1 cup fresh vegetables (like spinach, carrots, and bell peppers)
- 2 tablespoons soy sauce
- 1 tablespoon olive oil
- Salt and pepper to taste
- Chopped green onions for garnish
Instructions
- Prep your ingredients: Slice your chicken, mince your garlic, and chop the vegetables.
- Sear the chicken: Heat olive oil in a large pot and sear the chicken for 5-7 minutes.
- Add garlic and veggies: Sauté minced garlic and fresh vegetables for about 30 seconds.
- Pour in the broth: Add chicken broth and scrape up any bits from the pot.
- Add the ramen noodles: Stir noodles into the pot and cook according to package instructions.
- Incorporate the cream: Stir in heavy cream and simmer for an additional minute.
- Final seasoning: Adjust flavors with soy sauce, salt, or pepper as needed.
- Serve: Ladle ramen into bowls and top with chopped green onions.
Notes
This ramen can be customized with toppings like a soft-boiled egg, sriracha, or fresh herbs to elevate its flavor.
Nutrition
- Serving Size: 1 serving
- Calories: 450
- Sugar: 3g
- Sodium: 800mg
- Fat: 20g
- Saturated Fat: 10g
- Unsaturated Fat: 8g
- Trans Fat: 0g
- Carbohydrates: 30g
- Fiber: 3g
- Protein: 30g
- Cholesterol: 90mg
Keywords: ramen, creamy pasta, chicken ramen, comfort food, cozy meals