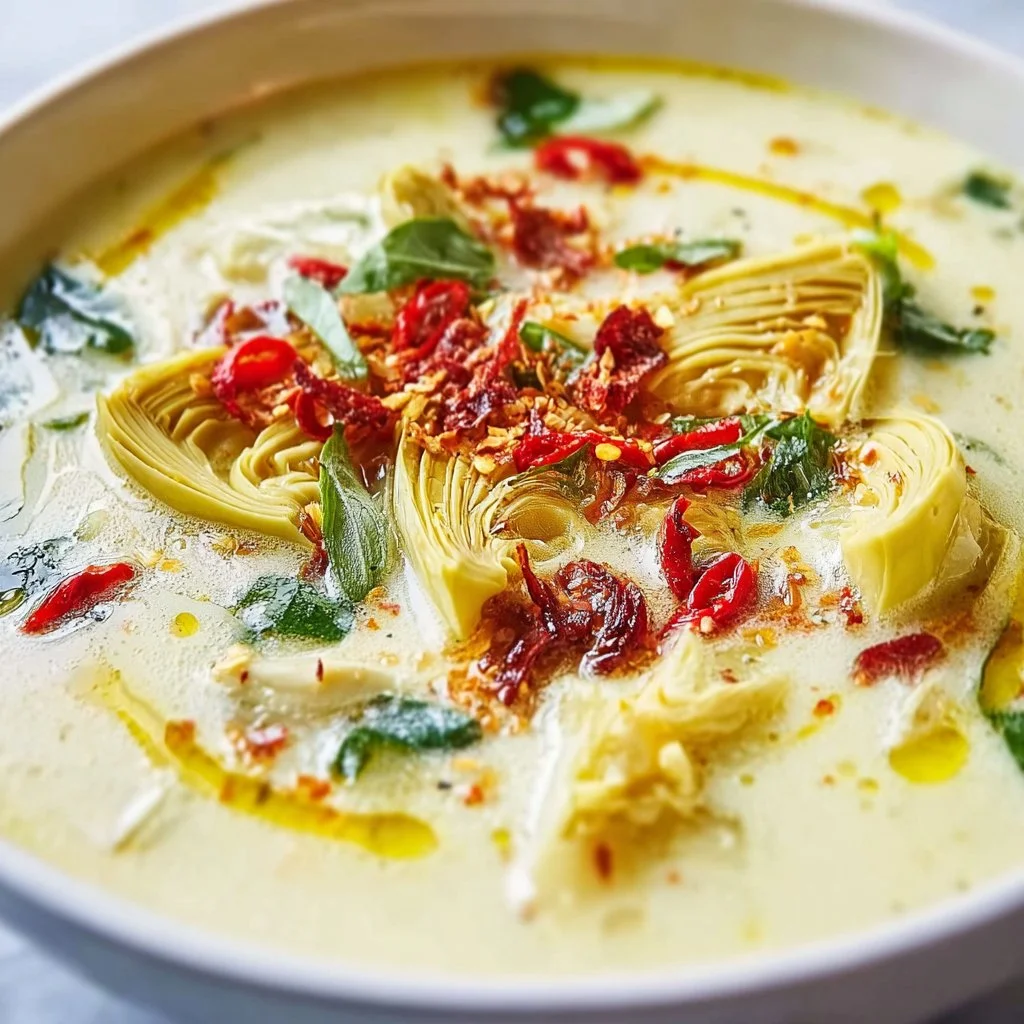
Creamy Lemony Tuscan Artichoke Soup for Ultimate Comfort
Creamy Lemony Tuscan Artichoke Soup for Ultimate Comfort
Hello, fellow food enthusiasts! Today, we’re diving into a bowl of warm and deliciousness that’s perfect for those chilly evenings or whenever you’re in need of a little culinary comfort. Trust me, there’s something utterly magical about a creamy soup that envelops you in warmth and love, and this Creamy Lemony Tuscan Artichoke Soup is no exception.
Imagine walking into a cozy kitchen, the ambiance filled with the rich aroma of sautéed vegetables mingling perfectly with the zestiness of lemon. You close your eyes, take a deep breath, and instantly feel transported to a sun-kissed Italian villa, surrounded by lush greenery and the sweet sound of laughter echoing around the dinner table. Yep, that’s the kind of vibe we’re going for today!
I created this recipe to capture that essence — the elegance of Tuscan flavors balanced with a creamy, comforting finish. The creamy texture is so satisfying, and the tang of lemon brightens everything up, leaving you feeling refreshed and delighted.
Gathering around the table with friends and family over a steaming bowl of this artichoke soup creates a beautiful moment, reminding us how food brings us together. And don’t worry — you don’t need any fancy culinary skills to make this dish shine! With a few simple ingredients and a bit of love, you’ll have a stunning centerpiece worthy of any dinner party or cozy family meal.
So, grab your apron, and let’s embark on this culinary adventure together! Trust me, once you try this soup, it’ll become a beloved staple in your kitchen.
Personal Story
This soup recipe takes me back to my childhood, where my grandmother would whip up her version of creamy soup during the colder months. She was a master at combining flavors, and her kitchen was the heart of the home. I remember sneaking in while she was fussing over the stove, the delightful smell wrapping around me like a warm hug.
One chilly autumn afternoon, I asked her how she made her soup so comforting. She simply smiled and whispered, "It’s all about the love and good ingredients, dear." Those words have stuck with me, and I try to infuse them into everything I create in the kitchen.
Fast forward to today, and I’ve taken inspiration from her comforting techniques and my love for Tuscan cuisine. This Creamy Lemony Tuscan Artichoke Soup is my tribute to her culinary wisdom. Each spoonful feels like a warm embrace, reminiscent of those simple moments spent in her kitchen. I hope it brings you as much joy as it continues to bring me when I serve it to friends and family!
Ingredients
Here’s what you’ll need to create this delightful soup:
-
2 tablespoons Extra-Virgin Olive Oil
A key player for its rich flavor, but feel free to swap it out with avocado oil if you prefer a neutral taste. -
1 large Yellow Onion, diced
Adds a sweet base flavor. If you want a milder profile, you can use shallots instead. -
2 stalks Celery, sliced
Provides a lovely crunch and freshness. If you’re not a fan of celery, feel free to substitute it with bell peppers for a sweet flavor! -
2 medium Carrots, peeled and sliced
They lend a subtle sweetness. Alternatively, feel free to experiment with parsnips for a slightly earthier taste. -
3 cloves Fresh Garlic, chopped
A must-have for that aromatic kick! Garlic powder works in a pinch, but nothing beats fresh garlic’s vibrant flavor. -
1/2 teaspoon Red Pepper Flakes
A little heat to elevate the flavors! Adjust it to your liking, or omit it if you’d prefer a milder soup. -
2 medium Potatoes, peeled and diced into 1/2-inch cubes
Yukon Gold gives a creamy texture, but sweet potatoes can add a unique sweetness if that’s more your style. -
1 can Artichoke Hearts, drained
These beauties add that distinct, tangy flavor. Frozen artichoke hearts are a great substitute if you can’t find canned. -
1/2 cup Sun-Dried Tomatoes, chopped
They bring an intense burst of flavor. In a pinch, you can also use tomato paste for simplicity. -
2 tablespoons Capers, drained
For a briny kick! If you’re looking for a subtler flavor, skip them altogether. -
4 cups Chicken Bone Broth
A rich base that adds depth. If you need a vegetarian option, vegetable broth works beautifully, too. -
1/2 cup Milk of Choice
Regular or plant-based milk works here. Coconut milk adds a delightful creaminess too if you want a tropical twist. -
2 tablespoons Arrowroot Powder
This acts as a thickening agent. Cornstarch is an effective alternative in most cases. -
1 tablespoon Fresh Lemon Juice
Brightens up the flavor! Lime juice can work as a lovely substitute if you’re feeling adventurous. -
1 teaspoon Lemon Zest
For that extra zing! Orange zest can be a nice alternative if you’re in the mood for something a bit different. -
to taste Sea Salt
Salt is essential for enhancing flavors, adjust based on your dietary needs. -
to taste Black Pepper
A little spice! Again, adjust this to your preference. -
1 cup Freshly Chopped Kale or Spinach
Tons of nutrients packed into this leafy goodness! If you aren’t a fan, Swiss chard can serve as a great alternative. -
1/4 cup Freshly grated Parmesan cheese
It’s the perfect finishing touch! For a dairy-free option, vegan cheese alternatives work great. -
1 whole Lemon wedges (for serving)
A zesty accent when it’s time to dig in! -
to taste Red pepper flakes (for added flavor and presentation)
Step-by-Step Instructions
Now that we have our ingredients prepped, it’s time to cook! Here’s how to create this creamy masterpiece step-by-step:
-
Sauté the Base
In a large pot, heat the olive oil over medium heat. Once it’s shimmering, add the onion and cook until it’s translucent, about 5 minutes. This will create a sweet aromatic base for your soup! You want to soften the onions beautifully without browning them. Stir occasionally, and let that aroma fill your kitchen! -
Add Aroma Builders
Toss in the celery, carrots, and garlic. Cook for an additional 5-7 minutes until the vegetables have softened, and your kitchen smells divine! Here’s a pro tip: when you add the garlic, stir continuously for about 1 minute. Garlic can burn quickly; we want that perfect fragrant golden hue. -
Spice It Up
Sprinkle in the red pepper flakes and stir for about 30 seconds — it’s just enough time for the spices to bloom and infuse their flavors into the veggies. Don’t shy away if you love heat; feel free to add a tad more! -
Include the Potatoes
Dump in your diced potatoes and give it a good stir. Let everything combine beautifully for a minute. This will help the potatoes soak up all those delightful flavors. -
Artichokes and Tomatoes, Oh My!
Next up, your artichoke hearts and sun-dried tomatoes! Stir them into the mixture and let them mingle for just a couple of minutes. They will add that essential Tuscan flair to the soup. -
Pour in the Broth
Now it’s time for the main liquid star — the chicken bone broth! Pour it in, turn the heat to high, and bring it to a gentle boil. Once boiling, reduce it to a simmer and cover the pot. Let that soup bubble away for about 15-20 minutes until the potatoes are tender. Here’s a little chef hack: poke a potato cube with a fork; if it slides off easily, it’s ready! -
Blend It Up
Once all the veggies are soft, remove the pot from the heat. If you want a creamy consistency, use an immersion blender directly in the pot to blend everything together until smooth. If you don’t have an immersion blender, carefully transfer the soup (in batches) to a regular blender. Just ensure you don’t fill it to the brim as it can get a little messy! Return it to the pot afterward. -
Finishing Touches
Stir in the milk of your choice, and let the soup heat over low heat for a few minutes while you whisk in the arrowroot powder mixed with a splash of water. This will help thicken the soup and give it that luxurious, creamy texture. Season with the lemon juice, lemon zest, sea salt, and black pepper to taste. Taste test — this is when you can adjust those flavor profiles; maybe you want it zippier with more lemon juice or saltier with a pinch more! -
Greens Galore
Finally, fold in the chopped kale or spinach until it wilts. It adds a lovely brightness to the soup, making it feel fresh and vibrant! -
Serve and Enjoy
Ladle the soup into bowls, sprinkle with Parmesan cheese, and add a squeeze of fresh lemon for that zesty punch. Finish it off with a sprinkle of red pepper flakes for extra flair. Voila! You have a warm bowl of creamy Tuscan artichoke soup that’s ready to impress.
Serving Suggestions
When it comes to plating your soup, simplicity is key! Serve it in colorful bowls that accentuate the beautiful creamy hue of the soup. You can add some crusty bread for dipping alongside it — think garlic bread or a freshly baked sourdough loaf. The contrast of the warm, crusty bread and the smooth soup makes for an unbeatable combo. Don’t forget the lemon wedges on the side for that extra zest when serving!
Recipe Variations
Want to mix things up a bit? Here are some creative twists on this classic recipe:
-
Spicy Spin
Add diced jalapeños or a few dashes of hot sauce in with the garlic for a spicy kick. -
Herbaceous Delight
Fresh herbs like rosemary or thyme can enhance the flavors beautifully. Toss in some chopped herbs towards the end of cooking for a burst of freshness. -
Proteins Galore
Want to make it heartier? Add shredded rotisserie chicken or white beans for added protein to make it even more filling. -
Dairy-Free Dreams
Substitute the milk with coconut milk for a richer flavor, perfect for tropical vibes. -
Cheesy Goodness
Stir in some cream cheese or a splash of heavy cream before blending for an extra creamy soup.
Chef’s Notes
As I’ve worked on perfecting this recipe, I’ve discovered it’s all about layering flavors and keeping it simple yet elegant. The first time I made this soup for a gathering, I was nervous about whether it would impress my guests. But watching them savor each bite and hearing the compliments was priceless! It’s that delightful feeling of knowing you’ve created something truly special from simple ingredients.
And hey, if you ever find yourself with extra soup, no worries! This soup freezes beautifully, so it’s a perfect meal prep option for hectic weeks. Just seal it in an airtight container, and you’ll have a comforting meal waiting for you.
FAQs and Troubleshooting
1. Can I make this soup ahead of time?
Absolutely! This soup tastes even better the next day after the flavors have had time to meld. Store it in an airtight container in the fridge for up to 4 days or freeze for longer storage.
2. What if my soup is too thick?
If you find your soup has thickened too much while storing or cooking, just add a bit of broth or water while reheating to reach your desired consistency!
3. Can I blend the soup if I like some texture?
Of course! If you prefer a chunky soup, blend only half of it and leave the other half intact. This way, you can enjoy both a creamy base and the texture of the veggies.
4. What can I serve alongside the soup?
You can pair this soup with a light salad, a simple cheese platter, or that glorious crusty bread we talked about. It’s versatile, satisfying, and oh-so-delicious!
Nutritional Info (Optional)
While nutritional values may vary based on ingredient choices, here’s a rough breakdown per serving of this delightful soup (based on six servings):
- Calories: 250
- Protein: 6g
- Carbohydrates: 34g
- Fat: 10g
- Fiber: 5g
Enjoying what’s good for you while also indulging in flavor? Now, that’s a win-win!
And there you have it — your ultimate guide to making a delicious Creamy Lemony Tuscan Artichoke Soup full of flavor and warmth. Grab that apron, summon your inner chef, and let’s create some culinary magic in the kitchen! Happy cooking!
PrintCreamy Lemony Tuscan Artichoke Soup

A warm and delicious creamy soup infused with the flavors of Tuscany and a hint of lemon, perfect for chilly evenings.
- Prep Time: 15 minutes
- Cook Time: 30 minutes
- Total Time: 45 minutes
- Yield: 6 servings 1x
- Category: Soup
- Method: Stovetop
- Cuisine: Italian
- Diet: Vegetarian
Ingredients
- 2 tablespoons Extra-Virgin Olive Oil
- 1 large Yellow Onion, diced
- 2 stalks Celery, sliced
- 2 medium Carrots, peeled and sliced
- 3 cloves Fresh Garlic, chopped
- 1/2 teaspoon Red Pepper Flakes
- 2 medium Potatoes, peeled and diced into 1/2-inch cubes
- 1 can Artichoke Hearts, drained
- 1/2 cup Sun-Dried Tomatoes, chopped
- 2 tablespoons Capers, drained
- 4 cups Chicken Bone Broth
- 1/2 cup Milk of Choice
- 2 tablespoons Arrowroot Powder
- 1 tablespoon Fresh Lemon Juice
- 1 teaspoon Lemon Zest
- to taste Sea Salt
- to taste Black Pepper
- 1 cup Freshly Chopped Kale or Spinach
- 1/4 cup Freshly grated Parmesan cheese
- 1 whole Lemon wedges (for serving)
- to taste Red pepper flakes (for added flavor and presentation)
Instructions
- Sauté the Base: In a large pot, heat the olive oil over medium heat. Add the onion and cook until it’s translucent, about 5 minutes.
- Add Aroma Builders: Toss in the celery, carrots, and garlic. Cook for an additional 5-7 minutes.
- Spice It Up: Sprinkle in the red pepper flakes and stir for about 30 seconds to bloom the spices.
- Include the Potatoes: Dump in your diced potatoes and stir well.
- Artichokes and Tomatoes: Stir in the artichoke hearts and sun-dried tomatoes, cooking for a couple of minutes.
- Pour in the Broth: Add the chicken bone broth and bring it to a gentle boil. Reduce to a simmer and cover, cooking for about 15-20 minutes until the potatoes are tender.
- Blend It Up: Remove from heat and blend until smooth using an immersion blender or regular blender.
- Finishing Touches: Stir in the milk and arrowroot powder mixed with water, season with lemon juice, lemon zest, salt, and black pepper.
- Greens Galore: Fold in the chopped kale or spinach until wilted.
- Serve and Enjoy: Ladle into bowls, sprinkle with Parmesan cheese, and add a squeeze of fresh lemon.
Notes
This soup freezes beautifully, making it a great meal prep option.
Nutrition
- Serving Size: 1 serving
- Calories: 250
- Sugar: 4g
- Sodium: 600mg
- Fat: 10g
- Saturated Fat: 2g
- Unsaturated Fat: 5g
- Trans Fat: 0g
- Carbohydrates: 34g
- Fiber: 5g
- Protein: 6g
- Cholesterol: 5mg
Keywords: artichoke soup, creamy soup, Italian soup, vegetarian, comfort food

Philly Cheesesteak Casserole
# Indulge in Comfort: Philly Cheesesteak Casserole Recipe

## Introduction

Hey there, kitchen explorer! Are you ready to dive into a dish that captures the heart and soul of classic comfort food? Today, we're bringing the iconic flavors of a Philly cheesesteak into one fantastic casserole that’s sure to become a family favorite! Imagine tender strips of steak mingling with vibrant vegetables, all intertwined in a melty, gooey layer of provolone cheese. It’s like a party on your plate!

The best part? This dish is not just about flavors; it’s also incredibly simple to make. We’re talking about a one-pan wonder that lets you enjoy all the richness of a cheesesteak without the fuss of traditional preparation. It’s perfect for busy weeknights or relaxed weekends when you want something warm and hearty without spending hours in the kitchen. So, grab your favorite apron, the one that makes you feel like a superstar, and let’s uncover how to create this delicious Philly Cheesesteak Casserole together!

Now, let me take you back a little. Picture a cozy kitchen filled with laughter, the aroma of sautéing veggies, and the excitement of family gathered around the table. This casserole has roots that run deep into those memories. My first taste of a Philly cheesesteak was during a summer visit to Philadelphia with friends—it was a whirlwind of flavors wrapped in a soft roll, dripping with cheese, and loaded with seasoned beef. That moment sparked an obsession with creating a version at home that not only brought the same joy but did so in a way that made it easy enough to enjoy on a regular weeknight.

Stick around; I can’t wait to share this warm, inviting recipe that blends nostalgia with practical cooking. Let’s turn our kitchens into a haven of deliciousness!

## Personal Story

Ah, the memories of my first Philly cheesesteak! It was a hot summer day in Philly, and I had just finished touring the Liberty Bell with friends. We had been chatting about the best local eats, and after much debate, we found ourselves in a crowded little spot famous for its cheesesteaks. I ordered my first, eager to join the ranks of those enchanted by this messy, cheesy masterpiece.

As I sank my teeth into that first bite, something magical happened—the soft, warm bread gave way to juicy steak, flavorful onions, and that unmistakable gooeyness of provolone cheese. I was hooked! Somehow, I felt that combination of flavors and textures was a warm hug on a plate. Right then and there, I dreamt of recreating that experience back home. That spirit of gathering friends, creating memories around the table, and sharing heartwarming dishes is precisely what inspired this casserole.

So here we are, years later, whipping up a similar vibe in the comfort of our own kitchens! Let’s do this together, bringing the flavors of Philly to our homes with a hands-on, one-pan adventure.

## Ingredients

To craft this savory Philly Cheesesteak Casserole, you’ll need the following ingredients:

- **1 pound steak (sirloin or flank steak), sliced thin:**
  - A lean cut that cooks quickly and absorbs flavor beautifully. If you want a more tender option, go for flank steak. Alternatively, you can swap for ground beef or chicken if you're looking for a different flavor profile.

- **1 bell pepper, sliced:**
  - Adds a sweetness and crunch. Use any color you like—red, yellow, or green will all work wonderfully here! If you’re in the mood for something spicier, try using a jalapeño or poblano.

- **1 onion, sliced:**
  - Sweet onions work best for caramelization. If you’re not a fan of onions, you can leave them out, or opt for leeks instead for a milder flavor.

- **2 cups mushrooms, sliced:**
  - They add an earthy flavor and meaty texture. If you don’t like mushrooms, consider zucchini or even a little chopped spinach instead.

- **1 cup shredded provolone cheese:**
  - Gives that classic cheesesteak gooeyness! If you can’t find provolone, mozzarella or Gruyère makes excellent substitutions.

- **2 tablespoons olive oil:**
  - Essential for sautéing the veggies and beef, helping to enhance those wonderful flavors. You can swap it out for vegetable oil or even butter if you'd like more richness.

- **1 teaspoon garlic powder:**
  - A staple for adding depth of flavor with ease! If you prefer fresh, use a clove of minced garlic instead.

- **Salt and pepper to taste:**
  - Essential for enhancing every ingredient's flavor. Don’t skimp here!

With these ingredients in hand, you're all set for a culinary adventure that takes your taste buds on a joyride straight to Philly. Ready to sauté?

## Step-by-Step Instructions

Let’s get cooking! Here’s how to put everything together for your fabulous Philly Cheesesteak Casserole:

1. **Preheat the Oven:**
   - Start by preheating your oven to 350°F (175°C). This ensures that the casserole comes out perfectly baked and bubbly.

2. **Sauté the Steak:**
   - In a large skillet, heat 1 tablespoon of olive oil over medium-high heat. Add the sliced steak to the pan, seasoning it with salt and pepper. You’ll want to cook it until it’s just browned—about 2-3 minutes. Don’t worry if it’s not fully cooked; it will finish cooking in the oven. This initial step locks in that delicious flavor.

3. **Add the Vegetables:**
   - Once the steak is browned, push it to one side of the pan and add the remaining tablespoon of olive oil. Toss in the bell pepper, onion, and mushrooms. Sauté these together, stirring occasionally until they are softened—about 5-7 minutes. That smell is heavenly, isn’t it? Cooking the veggies and steak together allows them to create a flavor-packed combo that’s out of this world!

4. **Season the Mix:**
   - Sprinkle the garlic powder over the steak and veggie mix, stirring until everything is coated evenly. This layer of flavor is going to make all the difference. Let it cook for another minute or two to release the aroma before removing from heat.

5. **Combine the Casserole:**
   - In a greased 9x13-inch baking dish, spread half of the beef and veggie mixture evenly. This helps with even cooking. Top it with half of the shredded provolone cheese. Then, layer the remaining beef and veggies on top, finishing with the rest of the cheese. Oh wow, it’s looking scrumptious!

6. **Bake Perfection:**
   - Pop the baking dish in the preheated oven for 20-25 minutes or until the cheese is melty and bubbly. You can even give it a few extra minutes under the broiler to achieve that beautiful golden crust—keep an eye on it so it doesn’t burn!

7. **Let it Rest:**
   - Once baked, take your casserole out of the oven and let it rest for about 5-10 minutes. This helps the layers settle and makes serving much easier. Now you can prepare yourself for the tastes of Philly!

### Chef's Tip:
When sautéing, always remember that a hot pan is your best friend! It helps achieve that gorgeous sear on the steak and tender veggies. Feel free to use a splash of beef broth for extra moisture if you feel the mixture getting too dry while cooking.

## Serving Suggestions

When it’s time to serve, scoop out generous portions of the casserole with a spatula, ensuring everyone gets a gooey bite loaded with steak and vegetables. Serve it hot, fresh from the oven, ideally alongside a crisp side salad or some warm, crusty bread for dipping. The combination of flavors and textures is such a crowd-pleaser!

## Recipe Variations

Want to mix things up? Here are some fun creative variations to try:

- **Spicy Kick:** Add some sliced jalapeños or a sprinkle of crushed red pepper flakes to turn up the heat.

- **Vegetarian Delight:** Swap the steak for sliced portobello mushrooms or a blend of your favorite roasted vegetables for a veggie-packed dish.

- **Cheesy Levels:** Play with a variety of cheeses! Try sharp cheddar, Monterey Jack, or even a sprinkle of blue cheese for an added zing.

- **Saucy Version:** Drizzle a bit of your favorite barbecue sauce over the finished casserole before serving for an extra layer of flavor.

## Chef's Notes

This Philly Cheesesteak Casserole has seen its fair share of family gatherings and friends' game nights in my kitchen. Over time, I’ve played with the ingredients and techniques to make it as easy and delicious as possible. I remember one chaotic Thanksgiving when I attempted to make an entire spread, and this casserole ended up being the star attraction! Guests were raving, and I couldn't help but chuckle—who knew a simple dish could steal the show? Food has a beautiful way of bringing people together, sharing love, and creating memories around the table.

## FAQs and Troubleshooting

**1. Can I use a different type of cheese?**
Absolutely! While provolone is traditional, feel free to experiment with mozzarella, gouda, or cheddar for interesting flavor profiles.

**2. What if my casserole is too dry?**
If it feels dry after baking, you might have cooked the beef for too long initially. For future batches, keep an eye on the cooking time, and you can always add a splash of broth during the cooking process to keep moisture.

**3. Can I prepare this ahead of time?**
Yes, you can prepare the casserole up to the baking step, cover it, and refrigerate it for up to a day ahead. Just pop it in the oven when you’re ready to bake—it might need a few extra minutes since it’ll be cold.

**4. What sides go well with this casserole?**
A fresh garden salad, coleslaw, or roasted veggies make fantastic companions. You could even serve it with some pickles for a contrast in crunch!

## Nutritional Info

*Note: Nutritional information is approximate and may vary based on ingredient choices.*

- **Serving Size:** 1/6 of the casserole
- **Calories:** Approximately 350
- **Fat:** 20g
- **Carbohydrates:** 10g
- **Protein:** 30g

---

And there you have it! A warm, comforting Philly Cheesesteak Casserole that combines nostalgia with effortless cooking. I hope this dish becomes as beloved in your home as it is in mine. Remember: cooking is a journey best undertaken with wonderful people by your side and a hint of creativity in your heart.

Now, tie on that apron and give this dish a try—I can’t wait to hear how it turns out! Happy cooking!
Philly Cheesesteak Casserole

Indulge in the rich flavors of classic Philly cheesesteak in a simple, one-pan casserole that’s perfect for busy weeknights.
- Prep Time: 15 minutes
- Cook Time: 30 minutes
- Total Time: 45 minutes
- Yield: 6 servings 1x
- Category: Main Course
- Method: Baking
- Cuisine: American
- Diet: None
Ingredients
- 1 pound steak (sirloin or flank steak), sliced thin
- 1 bell pepper, sliced
- 1 onion, sliced
- 2 cups mushrooms, sliced
- 1 cup shredded provolone cheese
- 2 tablespoons olive oil
- 1 teaspoon garlic powder
- Salt and pepper to taste
Instructions
- Preheat the oven to 350°F (175°C).
- Sauté the steak in a large skillet with 1 tablespoon of olive oil until browned, about 2-3 minutes.
- Add the bell pepper, onion, and mushrooms to the skillet, sautéing until softened, about 5-7 minutes.
- Season the mix with garlic powder, salt, and pepper, and cook for an additional 1-2 minutes.
- Combine half of the beef and veggie mixture in a greased 9×13-inch baking dish, topping with half of the provolone cheese. Add the remaining mixture and finish with the rest of the cheese.
- Bake for 20-25 minutes until the cheese is melted and bubbly.
- Let the casserole rest for 5-10 minutes before serving.
Notes
Feel free to swap the steak for ground beef or chicken, or use a mix of vegetables for a vegetarian version.
Nutrition
- Serving Size: 1 serving
- Calories: 350
- Sugar: 3g
- Sodium: 600mg
- Fat: 20g
- Saturated Fat: 8g
- Unsaturated Fat: 7g
- Trans Fat: 0g
- Carbohydrates: 10g
- Fiber: 2g
- Protein: 30g
- Cholesterol: 70mg
Keywords: Philly cheesesteak, casserole, comfort food, easy dinner, one-pan meal
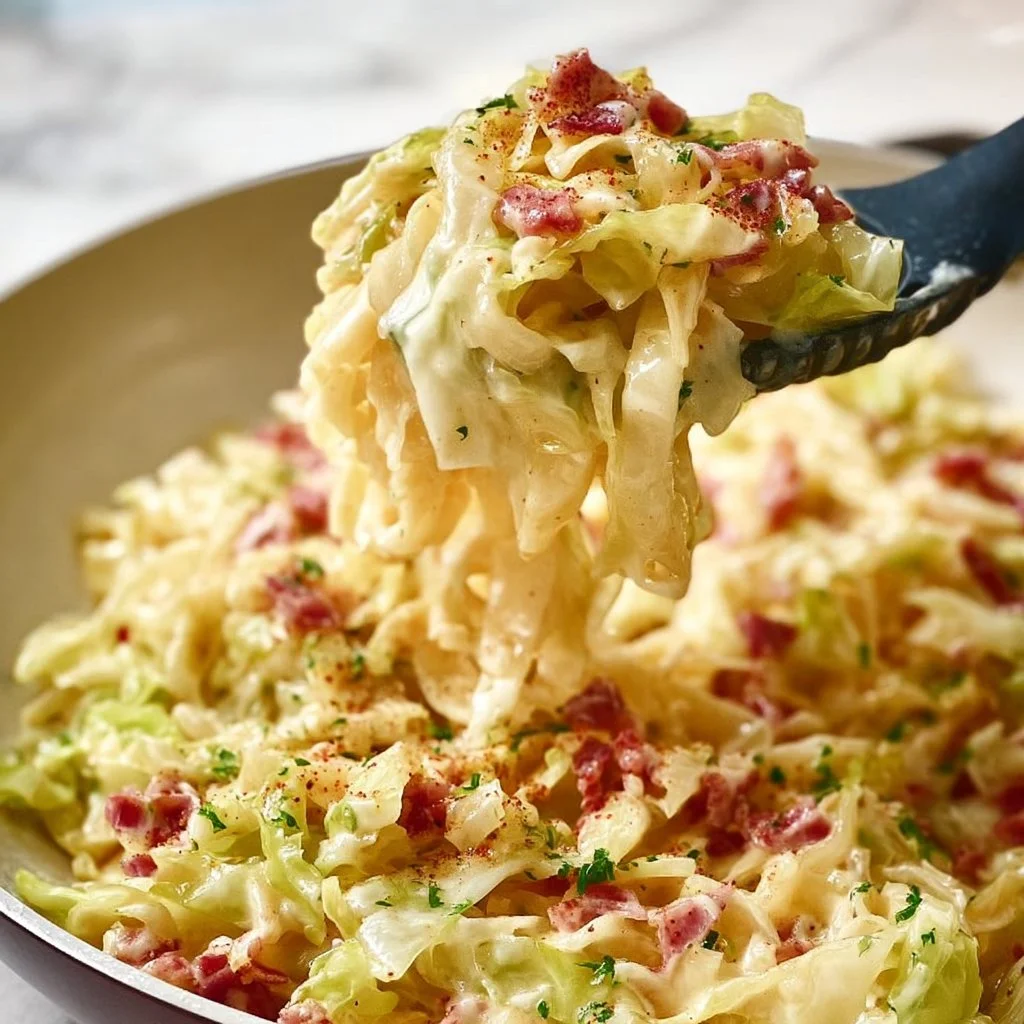
Creamy Cabbage Carbonara
# Creamy Cabbage Carbonara: A Twist on Tradition

**Introduction**

Hello, my lovely food enthusiasts! Today, I’m super excited to share a recipe that beautifully blends comfort with creativity: Creamy Cabbage Carbonara. If you've ever made a classic carbonara, you know just how luxurious that dish can be. But what if we could give it a little twist that brings a burst of freshness, and makes it even more approachable for weeknight dinners? Enter cabbage! It's often overlooked when crafting pasta dishes, but I promise, this leafy green packs a delicious punch, turning a traditional carbonara into something exciting and new!

Picture this: a creamy, hearty bowl of pasta brought to life with the subtle sweetness of sauteed cabbage and the savory goodness of crispy bacon. You get that rich, silky sauce coating every strand of pasta, while the cabbage adds a bit of crunch and flavor that's simply irresistible. It's one of those meals that will not only fill your belly but also warm your heart. Plus, it's a great way to sneak in some veggies without losing out on the comfort factor we all love in our pasta dishes!

As we delve into this delicious recipe, I've got some fun stories and tips to share that’ll make your cooking experience smooth and enjoyable. Whether you're hosting friends or just cooking for yourself, this dish is a perfect addition to your weeknight repertoire. So grab your apron, perhaps pour yourself a glass of something sparkling, and let’s dive into the world of Creamy Cabbage Carbonara!

---

**Personal Story**

I remember a time, not too long ago, when I had a few friends over for an impromptu dinner. The kind of gathering that happens spontaneously over a glass of wine. As we chatted and caught up, I realized I was missing a main course. Down to the kitchen I dashed, rifling through my cabinets. I had some spaghetti, bacon on hand, and a head of cabbage that had been sitting in the fridge quietly, hoping for its moment in the limelight.

With a sprinkle of this and a dash of that, I created a creamy pasta dish that, believe it or not, left everyone asking for the recipe. It was a hit! That lovely evening sparked the idea for this very dish. It’s amazing how the simplest ingredients can whip up an unforgettable meal and create lasting memories. Ever since, it’s been a staple in my kitchen, a trusty dish that never fails to impress!

---

**Ingredients**

Let’s gather our ingredients! You’ll need a few simple components for this delicious Creamy Cabbage Carbonara. Here’s what you’ll need:

- **1 small head of cabbage, chopped**
  Cabbage is the star of this dish! You can use green or savoy cabbage for a slightly different texture. If you're in a pinch, collard greens or kale can work too.

- **4 slices of bacon, diced**
  Bacon adds that delicious smoky flavor! If you're looking for a lighter option, turkey bacon or even crispy pancetta can be a great option.

- **1 cup grated Parmesan cheese**
  This cheesy goodness is what makes the sauce creamy and rich. Pecorino Romano is a fantastic substitute if you're after a sharper flavor.

- **2 eggs**
  The eggs give the carbonara its luscious creaminess. You can use just the yolks for a richer dish, or heavy cream for a different twist.

- **Salt and pepper to taste**
  Essential for seasoning. I recommend using sea salt and freshly ground black pepper for optimal flavor.

- **Olive oil**
  A good drizzle helps sauté the cabbage and bacon. For a change, you could use avocado oil or even a flavored olive oil for an added twist.

- **Garlic, minced (optional)**
  Garlic adds that beautiful aromatic touch. For a milder taste, consider using roasted garlic instead.

- **Red pepper flakes (optional)**
  If you like a bit of heat, throw in some red pepper flakes! This is entirely up to your spice preference.

---

**Step-by-Step Instructions**

Ready to whip up this delicious Creamy Cabbage Carbonara? Let’s get cooking! Follow these steps, and trust me, you’ll have a meal that’s not just pleasing to the eye but also to the palate.

1. **Cook the Bacon**:
   In a large skillet, heat a drizzle of olive oil over medium heat. Add the diced bacon and cook until crispy, about 5–7 minutes. Keep an eye on it; we want it crispy but not burnt! Once it’s done, use a slotted spoon to transfer the bacon to a plate lined with paper towels. This allows it to drain excess fat while maintaining its crispiness.

2. **Sauté Cabbage**:
   With the bacon fat still in the skillet for flavor, add your chopped cabbage to the pan. Stir it around, allowing the cabbage to cook for about 5–7 minutes until it softens and gets a lovely golden color. If you’re using garlic, toss that in during the last minute! The aroma will be divine!

3. **Cook the Pasta**:
   While the cabbage is cooking, bring a large pot of salted water to a boil. Add your pasta (spaghetti or fettuccine works beautifully here) and cook according to package instructions until al dente. Don’t forget to stir occasionally! Reserve about a cup of pasta water before draining—this liquid is liquid gold for your sauce.

4. **Prepare the Sauce**:
   In a mixing bowl, whisk together the eggs and Parmesan cheese until well combined. Now’s the time to season this mixture with salt and cracked black pepper. Remember, the cheese will add some saltiness, so go easy!

5. **Combine Everything**:
   Drain the pasta and return it to the pot (off the heat!). Quickly toss in the sautéed cabbage and crispy bacon. Pour in the egg and cheese mixture, using a pair of tongs or a fork to toss everything together swiftly. The residual heat from the pasta will cook the eggs, creating that creamy sauce we love! If it looks a bit too thick, gradually add the reserved pasta water until you reach your desired consistency.

6. **Final Touches**:
   Give everything another good mix. Taste for seasoning and adjust as needed, adding more cheese, cracked pepper, or red pepper flakes if you’re feeling adventurous!

---

**Serving Suggestions**

To plate your Creamy Cabbage Carbonara, simply twirl the pasta onto a beautiful plate or into pasta bowls. Top with a generous sprinkle of extra Parmesan and a crack of fresh pepper. For a pop of color, consider adding a sprig of fresh parsley or basil as a garnish. It’s all about making it look inviting and delicious!

---

**Recipe Variations**

1. **Vegetarian Delight**: Skip the bacon altogether and use sautéed mushrooms for an earthy taste. Simply use a splash of soy sauce to help deepen the flavor.

2. **Cheesy Twist**: Swap out some or all of the Parmesan for a mix of Gruyère or aged cheddar for a richer taste and an exquisite cheese pull.

3. **Spicy Kick**: Add in some diced jalapeños or a splash of hot sauce to the sauce while whisking for that added kick.

4. **Herb Infusion**: Toss in some fresh spinach or kale alongside the cabbage for a nutrient boost. Chopped fresh herbs like basil or parsley can enhance flavor too!

5. **Creamier Version**: For an ultra-creamy sauce, add a few tablespoons of heavy cream to the egg mixture before combining with the pasta.

---

**Chef’s Notes**

It’s funny how a dish can evolve over time. When I first made this Creamy Cabbage Carbonara, it was truly a “what-do-I-have-on-hand” secret. I remember being nervous letting my friends try it, thinking it wouldn’t hold up to the traditional version. But after their rave reviews, I realized cooking is all about being creative and using what you have.

Now, I often find myself gravitating toward seasonal ingredients, and cabbage fits the bill perfectly—available year-round and oh-so-versatile. I think we sometimes underestimate how lovely humble ingredients can be; they have a charm and story of their own.

---

**FAQs and Troubleshooting**

**1. Why did my sauce curdle?**
If your sauce curdles, it’s likely that the heat was too high when adding the egg mixture. Make sure to toss the pasta off the heat or very low heat as you integrate the eggs to achieve that creamy texture.

**2. How can I store leftovers?**
Store the leftover pasta in an airtight container in the fridge for up to 3 days. Reheat on the stove with a splash of water to avoid it drying out.

**3. Can I make this dish ahead of time?**
This dish is best enjoyed fresh, but you can prep the cabbage and bacon in advance. Just combine everything right before serving for best results.

**4. What can I substitute for pasta?**
You can use zoodles (zucchini noodles) or spaghetti squash for a low-carb alternative! Just adjust cooking times as needed.

---

**Nutritional Info (Optional)**

While I believe in enjoying every delicious bite, here’s a rough nutritional breakdown per serving (not including additional garnishes or variations):
- Calories: ~550
- Protein: ~20g
- Carbohydrates: ~46g
- Fat: ~30g

---

Thank you for joining me on this culinary adventure! I hope you feel inspired to try making this Creamy Cabbage Carbonara at home. Remember, cooking is about joy, creativity, and gathering around the table with loved ones. Can’t wait to hear how it turns out for you!
Creamy Cabbage Carbonara

A creative twist on traditional carbonara featuring sautéed cabbage, crispy bacon, and a rich creamy sauce.
- Prep Time: 15 minutes
- Cook Time: 30 minutes
- Total Time: 45 minutes
- Yield: 4 servings 1x
- Category: Main Course
- Method: Baking
- Cuisine: Italian
- Diet: Vegetarian option available
Ingredients
- 1 small head of cabbage, chopped
- 4 slices of bacon, diced
- 1 cup grated Parmesan cheese
- 2 eggs
- Salt and pepper to taste
- Olive oil
- Garlic, minced (optional)
- Red pepper flakes (optional)
Instructions
- Cook the bacon: In a large skillet, heat a drizzle of olive oil over medium heat. Add the diced bacon and cook until crispy, about 5–7 minutes. Transfer to a paper towel-lined plate.
- Sauté cabbage: With the bacon fat still in the skillet, add chopped cabbage and cook for about 5–7 minutes until softened and golden.
- Cook the pasta: In a large pot of salted boiling water, add pasta and cook until al dente. Reserve about a cup of pasta water before draining.
- Prepare the sauce: In a bowl, whisk together eggs and Parmesan cheese. Season with salt and pepper.
- Combine everything: Drain pasta, return it to the pot (off the heat), and toss in the sautéed cabbage and bacon. Pour in the egg mixture and toss quickly to create a creamy sauce.
- Final touches: Mix well, adjust seasoning if needed, and serve hot with extra cheese and pepper on top.
Notes
Store leftovers in an airtight container in the fridge for up to 3 days. Reheat with a splash of water to prevent drying.
Nutrition
- Serving Size: 1 serving
- Calories: 550
- Sugar: 3g
- Sodium: 800mg
- Fat: 30g
- Saturated Fat: 10g
- Unsaturated Fat: 15g
- Trans Fat: 0g
- Carbohydrates: 46g
- Fiber: 4g
- Protein: 20g
- Cholesterol: 150mg
Keywords: carbonara, creamy pasta, cabbage, bacon, weeknight dinner
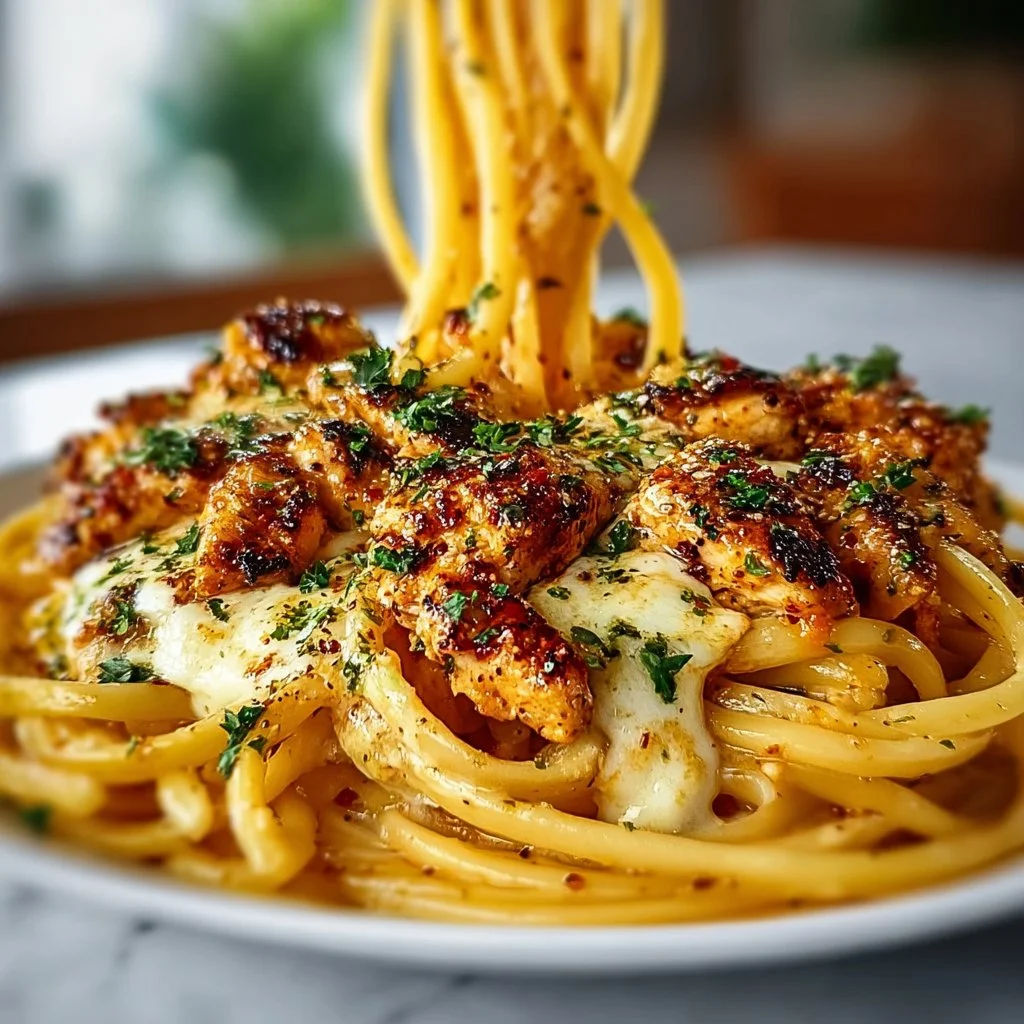
Rich Cajun Chicken Linguine With Mozzarella
Rich Cajun Chicken Linguine With Mozzarella
Hello, fellow food lovers! Today we’re diving into a dish that’s close to my heart and will surely add a dash of excitement to your dinner table: Rich Cajun Chicken Linguine with Mozzarella. Oh, the flavors in this recipe! Picture this: perfectly cooked linguine tossed in a creamy, dreamy sauce infused with bold Cajun spices and topped with gooey mozzarella. Can you already taste it?
Cajun cooking holds such a special place in my culinary journey. The vibrant spices, the warmth of the flavors, and the sense of comfort it brings are like a warm hug on a plate. Whenever I whip up this dish, it transports me back to those lively family gatherings where food was the star of the show. My kitchen would be filled with laughter as we gathered around the table, savoring every last bite.
Cooking is more than just preparing meals; it’s about creating cherished memories and bringing friends and family together. With Rich Cajun Chicken Linguine, you’re not just serving dinner; you’re presenting an experience that resonates with warmth, comfort, and a touch of elegance. So, grab that apron and let’s cook something truly special together!
Personal Story
One of my most cherished memories involves Cajun cooking and a lively family reunion in New Orleans. Picture this: the smell of smoky and spicy goodness wafting through the air, kids running around with laughter while adults immersed themselves in lively conversations. My uncle, the family’s unofficial chef, pulled everyone into the kitchen as he shared his signature Cajun chicken recipe.
That day, we not only learned how to balance spices, but we also mixed storytelling and culinary influence seamlessly. As we tossed the chicken with spices, we shared tales from our past, each story simmering in the pot. The laughter, the food, and the company left an imprint in my heart.
Fast forward to today, and that vibrant spirit inspires me to create dishes like this Rich Cajun Chicken Linguine. I aim to infuse every meal with that same joy and create memories around the table, just like my family did. So, let’s get cooking and bring a little piece of that festive Cajun spirit into our homes!
Ingredients
Before we roll up our sleeves, let’s take a peek at the star players for this dish:
-
8 oz linguine: A classic pasta choice that pairs beautifully with creamy sauces. You can easily swap it out for spaghetti or fettuccine if you’re feeling adventurous.
-
2 boneless, skinless chicken breasts: The protein that brings our dish to life. If you prefer, you can use shrimp or even a plant-based chicken alternative for a vegetarian option.
-
2 tbsp Cajun seasoning: This spice mix adds that signature kick! Feel free to adjust the quantity according to your heat tolerance or make your own blend with paprika, cayenne, and oregano.
-
2 tbsp olive oil: Perfect for sautéing and adds healthy fats. You can substitute coconut oil for a twist or even use butter for a richer flavor.
-
4 cloves garlic, minced: For that aromatic foundation, garlic brings life to any dish. If you’re a garlic lover, you might consider increasing this amount!
-
1 cup heavy cream: This is key for a rich, velvety texture. You can opt for coconut cream for a dairy-free version or use half-and-half for a lighter option.
-
1 cup mozzarella cheese, shredded: Melty and gooey, mozzarella brings comfort. If you want a sharper flavor, consider using provolone or a blend of Italian cheeses.
-
Salt and pepper, to taste: Essential for enhancing flavors. Remember, taste as you go!
-
Fresh parsley, chopped (for garnish): Adds a pop of color and freshness to your dish. You can swap it for basil or chives based on your preference.
Step-by-Step Instructions
Let’s jump into the cooking process! Join me as we bring this flavorful dish to life in just a few simple steps:
1. Cook the Linguine
Start by boiling a pot of salted water. Once it’s rolling, add your linguine and cook according to the package instructions until al dente. Reserve about 1 cup of the pasta water, then drain the rest. This starchy water is pure gold for making your sauce creamy later!
2. Sauté the Chicken
In a large skillet, heat the olive oil over medium heat. While it heats, season the chicken breasts on both sides with the Cajun seasoning, salt, and pepper. Add them to the skillet, cooking for about 6-7 minutes on each side until they’re golden brown and fully cooked through. Use a meat thermometer if you’re unsure; the internal temperature should be 165°F. Once done, remove from the skillet and let it rest for a few minutes before slicing into strips.
Chef’s Tip: Don’t overcrowd the skillet! Cook the chicken in batches if necessary. You want that nice sear that adds flavor!
3. Sauté the Garlic
With the same pan, toss in the minced garlic right after removing the chicken. Sauté for about 30 seconds until fragrant (but not burnt!). This step infuses the oil with all that delicious garlic goodness.
4. Make the Sauce
Next, pour in the heavy cream. Stir gently to combine everything, letting it simmer for about 2-3 minutes. You want the sauce to thicken just a bit. If it seems too thick, add a bit of that reserved pasta water!
5. Add the Cheese
Stir in the shredded mozzarella until completely melted and incorporated into the sauce—talk about comfort! Once everything is melted and creamy, add your slivered chicken back into the skillet. Toss in the cooked linguine and stir gently until all the pasta is beautifully coated with that luscious sauce.
Chef’s Insight: If the sauce seems too thick, don’t panic! Just whisk in a bit of reserved pasta water until you reach your desired consistency.
6. Taste and Adjust
Now’s the time to taste—add more salt, pepper, or Cajun seasoning if you fancy a bit more kick. Cooking is all about balance, so let your taste buds guide you!
Serving Suggestions
To plate your Rich Cajun Chicken Linguine, twirl a generous portion of the pasta onto a large plate or shallow bowl. Drizzle some of that creamy sauce over the top, and don’t forget to add extra shredded mozzarella while it’s still warm, allowing it to melt slightly. Finish with a sprinkle of fresh parsley for that pop of color, and maybe even a sprinkle of extra Cajun seasoning for a visual and flavor boost!
Recipe Variations
Feel like mixing it up a bit? Here are some fun variations to take your dish to the next level:
-
Seafood Twist: Swap the chicken for shrimp or scallops to create a delectable seafood version.
-
Veggie Delight: Add in some sautéed bell peppers, zucchini, or spinach for a burst of color and nutrition.
-
Spicy Kick: For those who love a good heat level, try adding sliced jalapeños or a dash of hot sauce while cooking the garlic.
-
Herbaceous Freshness: Swap out parsley for fresh basil or cilantro for a refreshing change.
-
Cheesy Explosion: Mix in some goat cheese or blue cheese for a bold flavor contrast.
Chef’s Notes
Ah, Rich Cajun Chicken Linguine—a dish that has evolved throughout my cooking journey. I remember the first time I made it, I followed a recipe to the letter and ended up with a good meal but nothing extraordinary. It was through experimenting, tasting, and embracing the spontaneity of cooking that I found my groove. Now, it’s become a staple in my home, and I love how it allows for creativity and personal touch.
Another funny story? The time I accidentally added cayenne pepper instead of paprika—wow, my taste buds were on fire! But it turned into a delightful spicy variation that my family still raves about. Embrace the mishaps, my friends; they might lead to your next favorite recipe!
FAQs and Troubleshooting
1. Why is my sauce too thin?
If your sauce is thinner than you’d like, simply mix in a bit of cornstarch mixed with water and let it simmer, or reduce the heat to thicken it up.
2. Can I make this ahead of time?
Absolutely! You can prepare the chicken and sauce ahead of time. When reheating, add a splash of cream or pasta water to help revive the dish and keep it creamy.
3. What if I don’t have Cajun seasoning?
No worries! You can create a substitute using smoked paprika, garlic powder, onion powder, dried oregano, and cayenne pepper—experiment to find your perfect blend.
4. Can I freeze this dish?
While it’s best fresh, you can freeze the sauce separately from the pasta. When ready to enjoy, simply thaw and reheat, adding fresh pasta.
Nutritional Info
Feel free to calculate the nutritional value based on the ingredients you use, but rest assured: this dish, made with love and quality ingredients, packs a comforting punch while allowing for healthy tweaks!
Cooking is a joyful art that should inspire creativity and connection, and I hope this Rich Cajun Chicken Linguine brings a little bit of that magic into your kitchen. Remember, the essence of good food isn’t just in the recipe; it’s in the moments you create around the table. Happy cooking, and don’t forget to share your delicious creations!
PrintRich Cajun Chicken Linguine With Mozzarella
Indulge in this rich and creamy Cajun Chicken Linguine, infused with bold spices and topped with gooey mozzarella for a comforting dining experience.
- Prep Time: 15 minutes
- Cook Time: 30 minutes
- Total Time: 45 minutes
- Yield: 4 servings 1x
- Category: Main Course
- Method: Sautéing
- Cuisine: Cajun
- Diet: Non-Vegetarian
Ingredients
- 8 oz linguine
- 2 boneless, skinless chicken breasts
- 2 tbsp Cajun seasoning
- 2 tbsp olive oil
- 4 cloves garlic, minced
- 1 cup heavy cream
- 1 cup mozzarella cheese, shredded
- Salt and pepper, to taste
- Fresh parsley, chopped (for garnish)
Instructions
- Cook the linguine in a pot of salted boiling water until al dente, reserving 1 cup of pasta water, then drain.
- Sauté the seasoned chicken breasts in olive oil over medium heat for 6-7 minutes per side until golden brown; let rest before slicing.
- Sauté the minced garlic in the same skillet for 30 seconds until fragrant.
- Add the heavy cream, stir, and let simmer for 2-3 minutes to thicken.
- Stir in the mozzarella until melted, then add the sliced chicken and cooked linguine, tossing to coat.
- Taste and adjust seasoning with salt, pepper, or Cajun seasoning as desired.
Notes
For variations, consider adding shrimp for a seafood twist or vegetables for added nutrition. Adjust Cajun seasoning to taste for desired spice level.
Nutrition
- Serving Size: 1 serving
- Calories: 450
- Sugar: 2g
- Sodium: 600mg
- Fat: 25g
- Saturated Fat: 12g
- Unsaturated Fat: 10g
- Trans Fat: 0g
- Carbohydrates: 40g
- Fiber: 2g
- Protein: 30g
- Cholesterol: 90mg
Keywords: Cajun, chicken, linguine, creamy pasta, comfort food

Nigerian Chicken Stew Recipe
# Savory Nigerian Chicken Stew: A Flavorful Journey to Your Dinner Table

Hello, my lovely foodies! I’m so excited to share one of my all-time favorite recipes that not only warms your soul but also fills your home with rich, aromatic flavors—Nigerian Chicken Stew. When it comes to comfort food, this dish is nothing short of a celebration, embodying the very essence of gathering around the table and sharing love through food. Whether you're a seasoned cook or just taking your first steps into the culinary world, this starter guide will walk you through the delightful process of crafting a dish that's bursting with life.

The best part? This recipe is not just about cooking; it's about creating treasured moments in your kitchen, infusing every step with love, laughter, and perhaps a splash of mischief! So roll up your sleeves, tie on your apron, and let’s embark on this flavorful journey together.

## A Personal Story

I can still remember the first time I tasted Nigerian Chicken Stew. I was a wide-eyed teenager sitting at my friend Ada’s kitchen table, the air thick with the gently simmering aromas of spices and pepper. Her grandmother, an extraordinary cook, stirred a bubbling pot while sharing stories of their family's traditions. As the sun set, casting a warm glow through the window, we gathered around the meal, savoring every bite. The chicken was tender, the sauce was rich, and the whole dish seemed to tell a story of warmth and love. It struck me then—food is more than sustenance; it’s a beautiful tapestry of memories waiting to be woven. Little did I know this dish would inspire my own culinary adventures, leading to the creation of Ivory Apron and the belief that every meal can be a masterpiece, no matter how simple.

## Ingredients

Let’s gather our ingredients for this delectable Nigerian Chicken Stew. Each component is an essential piece of the puzzle, creating a delicious harmony of flavors:

- **2.5 lbs bone-in chicken (thighs or drumsticks)**: Bone-in pieces add richer flavor and juiciness. If you prefer, skinless chicken can be used, but the taste may be slightly less robust.

- **1 teaspoon salt**: Balances the flavors and enhances the taste of each ingredient. You can adjust this according to your taste or if you’re watching your sodium intake.

- **1/2 teaspoon black pepper**: A friendly kick that complements the dish’s warmth. For a milder version, opt for white pepper.

- **1 teaspoon paprika**: This totally amps up the color while adding a mild sweetness. Smoked paprika is fab for a unique depth of flavor!

- **1 teaspoon curry powder**: Don’t be scared; this isn’t the overpowering type. It adds warmth and aroma. If you're feeling adventurous, try garam masala for a nuanced twist.

- **1 teaspoon thyme**: A subtle herbaceous note! You can substitute with oregano or rosemary if thyme is not on hand.

- **1 onion, chopped**: Onions are the base for almost all great stews! Use yellow onions for more sweetness or red for a slightly sharper taste.

- **1/4 cup vegetable oil**: Helps with sautéing and adds richness. If preferred, olive oil works too, though it may impart a different flavor profile.

- **4 large Roma tomatoes**: These add acidity and sweetness; their thick flesh makes for a nice base. If fresh tomatoes aren’t available, use canned tomatoes—but remember, there’s nothing like fresh!

- **1 large red bell pepper**: This adds sweetness and color. Yellow or orange bell peppers can be swapped in—think of it as personalizing your dish!

- **1 small red onion**: This intensifies the onion flavor. White onions can also work if you need a substitute.

- **2 scotch bonnet peppers (or 1 for less heat)**: They're the stars of the heat show! If you want to tame the spice, consider using jalapeños or even chili flakes.

- **2 tablespoons tomato paste**: This thickens the stew and enhances its richness. Homemade tomato paste is amazing, but go for a high-quality store-bought version if you're in a hurry.

- **1 teaspoon garlic powder**: A trusty spice that brings layers of flavor. Fresh minced garlic adds a lovely kick, too.

- **1 teaspoon ginger powder**: Its warming essence brightens the stew. Fresh ginger is a great alternative if you love that zesty bite!

- **1 bouillon cube**: This packs in a punch of umami flavor. If you’re avoiding MSG, opt for a natural version or vegetable stock.

- **Salt to taste**: This is the final tweak that'll elevate your dish. Always taste and adjust!

## Step-by-Step Instructions

Now that we have everything set, let’s get our hands dirty—let's cook up this fabulous stew!

1. **Prep the Chicken**:
   - Start by patting the chicken dry with a paper towel. This helps achieve a beautiful golden-brown sear. Sprinkle the salt, black pepper, paprika, curry powder, and thyme all over the chicken, rubbing it in nicely—that’s the love right there!

2. **Sauté the Onions**:
   - Heat the vegetable oil in a large pot over medium heat. Add the chopped onion and sauté until fragrant and translucent, about 5 minutes. Stir occasionally and let it dance gracefully in the pan.

3. **Brown the Chicken**:
   - Move that beautiful sautéed onion to the side and add the marinated chicken pieces skin-side down. Let them get a nice golden-brown sear, about 6-7 minutes on each side. We aren’t cooking them all the way through just yet; we just want to lock in those scrumptious flavors!

4. **Create the Stew Base**:
   - While the chicken’s resting, it’s time for the star players—our tomatoes and peppers! Toss in the chopped Roma tomatoes, red bell pepper, and small red onion. Mix everything well and let them soften in the residual heat of the pot for 4-5 minutes.

5. **Add Those Spices**:
   - Stir in the tomato paste, ginger powder, garlic powder, and crushed scotch bonnet peppers (keep those taste buds on alert). Let this simmer for another 2-3 minutes, allowing all those spices to mingle.

6. **Simmer, Simmer, Simmer**:
   - Place the browned chicken back into the pot, including any juices. Pour just enough water to cover the chicken (about 2 cups), and toss in the bouillon cube. Cover the pot, reduce the heat to low, and let it simmer gently for 30-45 minutes; this is when the magic happens! Stir occasionally and let the stew develop those savory flavors.

7. **Final Touches**:
   - After simmering, taste and adjust the seasoning. Add a dash more salt if needed. If the stew seems too thick, add a splash of water; if it’s thin, let it simmer uncovered for a few more minutes.

8. **Serve It Up**:
   - Once the chicken is tender and oh-so-flavorful, take it off the heat. At this point, you can remove the scotch bonnet peppers if you prefer less heat—unless you're feeling brave and want an extra kick!

## Serving Suggestions

To plate the stew, serve it with a joyous mound of steamed rice or pounded yam. Ladle a generous portion of the stew over the rice or serve it alongside for a delightful dip. Add a sprig of fresh parsley or cilantro for a pop of color. Don’t forget to have some crusty bread on the side to soak up all that luscious sauce!

## Recipe Variations

Feeling adventurous? Here are some fun twists to try with this recipe:

- **Vegetarian Delight**: Swap the chicken for firm tofu or chickpeas, adding them in the last 15 minutes of cooking time.
- **Spicy Extra**: Experiment by adding more scotch bonnet peppers or a splash of sriracha for a fiery kick.
- **Herb Swap**: Instead of thyme, you can use rosemary or even a bunch of fresh coriander for a different flavor profile.
- **Smoky Flavor**: Add a teaspoon of smoked paprika for that lovely smoky undertone that pairs beautifully.

## Chef’s Notes

Over the years, I’ve learned that this stew is forgiving—each time I make it, I tweak it depending on what’s in the fridge or the season. I once made this for a gathering, and in a hilarious twist, my friend Tim accidentally swapped the sugar for salt! After an initial moment of panic, we laughed it off and added a touch more tomato paste, turning that potential disaster into a delightful surprise!

The moral of the story? Cooking is about enjoying the process—and sometimes, the most unexpected changes lead to the happiest surprises!

## FAQs and Troubleshooting

1. **Why is my stew too greasy?**
   - If you find your stew too greasy, ensure to skim off the excess fat from the top before serving.

2. **The stew is too salty; what do I do?**
   - If your stew ended up too salty, add a few extra chopped tomatoes or a splash of water to balance the flavors.

3. **Can I make this stew in advance?**
   - Absolutely! In fact, it tastes even better the next day as the flavors deepen. Just store it in an airtight container in the fridge for up to 3 days.

4. **Can I freeze this stew?**
   - Yes! This stew freezes beautifully. Let it cool completely before portioning it into freezer-safe containers. It can freeze for up to 3 months—just don’t forget to label your creations!

## Nutritional Info (optional)

While I typically focus more on flavor than numbers, it’s good to keep in mind that this hearty chicken stew is a wonderful source of protein and healthy fats. Pair it with whole grain rice, and you have a balanced meal bursting with nutrients—all while making your belly happy!

---

And there you have it, my foodie friends—a radiant dish brimming with culture, flavor, and love. I can’t wait to hear how your Nigerian Chicken Stew turns out! Tag me in your photos, share your stories, and let’s keep this delicious circle of cooking going. Until next time, happy cooking!
Savory Nigerian Chicken Stew

A flavorful Nigerian chicken stew that brings warmth and comfort to your dinner table with rich, aromatic spices.
- Prep Time: 15 minutes
- Cook Time: 45 minutes
- Total Time: 60 minutes
- Yield: 4 servings 1x
- Category: Main Course
- Method: Cooking
- Cuisine: Nigerian
- Diet: Non-Vegetarian
Ingredients
- 2.5 lbs bone-in chicken (thighs or drumsticks)
- 1 teaspoon salt
- 1/2 teaspoon black pepper
- 1 teaspoon paprika
- 1 teaspoon curry powder
- 1 teaspoon thyme
- 1 onion, chopped
- 1/4 cup vegetable oil
- 4 large Roma tomatoes, chopped
- 1 large red bell pepper, chopped
- 1 small red onion, chopped
- 2 scotch bonnet peppers (or 1 for less heat)
- 2 tablespoons tomato paste
- 1 teaspoon garlic powder
- 1 teaspoon ginger powder
- 1 bouillon cube
- Salt to taste
Instructions
- Prep the chicken by patting it dry and seasoning it with salt, black pepper, paprika, curry powder, and thyme.
- Sauté the chopped onion in heated vegetable oil until fragrant and translucent, about 5 minutes.
- Brown the marinated chicken pieces in the pot, searing on each side for 6-7 minutes.
- Create the stew base by adding chopped tomatoes, red bell pepper, and small red onion, letting them soften for 4-5 minutes.
- Add tomato paste, ginger powder, garlic powder, and crushed scotch bonnet peppers, simmering for another 2-3 minutes.
- Simmer the chicken with enough water to cover, adding the bouillon cube, and let it simmer gently for 30-45 minutes.
- Final touches involve tasting and adjusting seasoning, then serving with your choice of rice or pounded yam.
Notes
This stew can be made in advance and tastes better the next day. It freezes well for up to 3 months.
Nutrition
- Serving Size: 1 serving
- Calories: 450
- Sugar: 6g
- Sodium: 600mg
- Fat: 18g
- Saturated Fat: 5g
- Unsaturated Fat: 10g
- Trans Fat: 0g
- Carbohydrates: 30g
- Fiber: 4g
- Protein: 30g
- Cholesterol: 110mg
Keywords: Nigerian chicken stew, comfort food, rich flavors, homemade stew
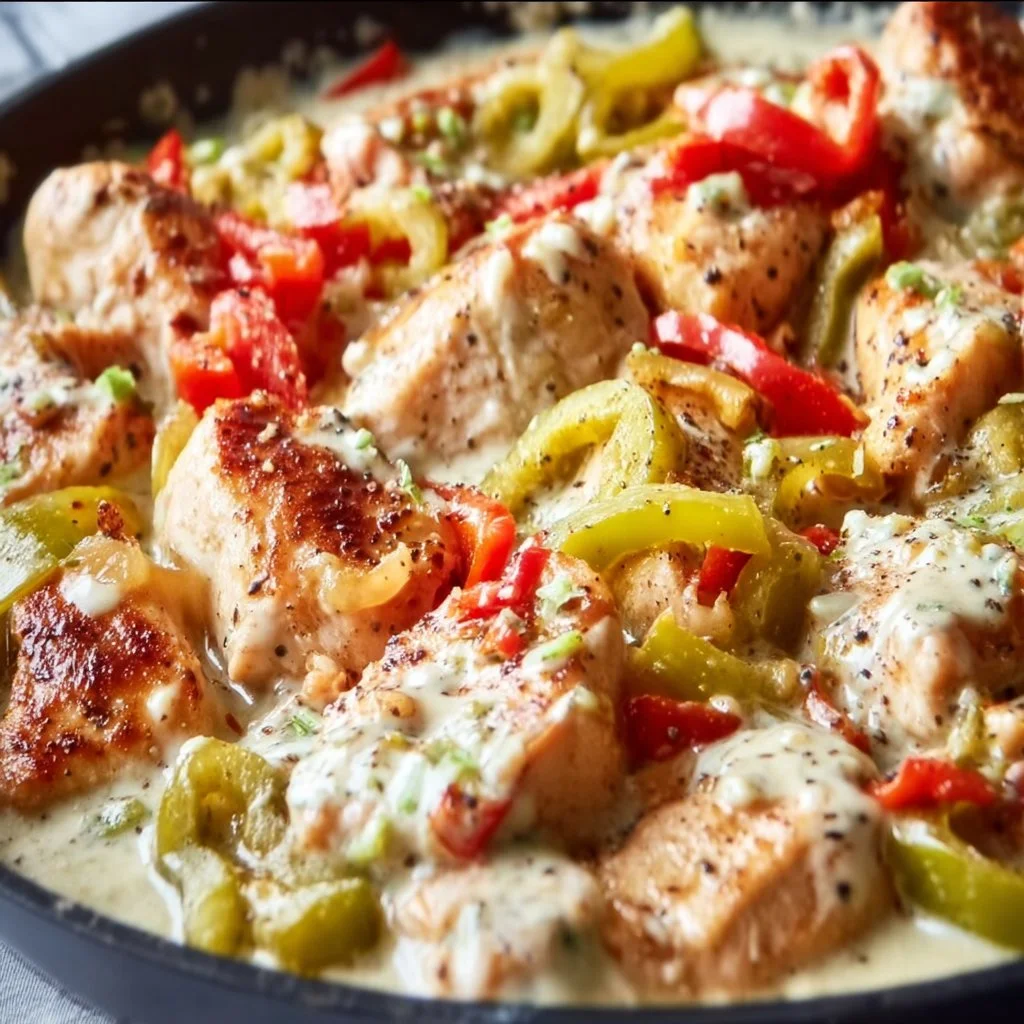
Creamy Banana Pepper Chicken Skillet
Creamy Banana Pepper Chicken Skillet: A Flavorful Journey
Welcome, food lovers! Today, I’m excited to take you on a culinary adventure with my creamy banana pepper chicken skillet. Picture this: succulent pieces of chicken, the zing of banana peppers, and a velvety sauce that dances on your taste buds. This dish is the epitome of comfort food, all cooked in one handy skillet. So, roll up your sleeves, tie on that ivory apron, and let’s elevate your weeknight dinner game!
A Taste of Nostalgia
Ah, banana peppers! Just the mention of them brings back fond memories of summer barbecues at my grandmother’s house. She was the queen of backyard gatherings, always blending flavors and colors in her dishes while effortlessly charming her guests. One particular dish that stands out is her creamy chicken sauté, infused with bright banana peppers. I remember sneaking bites when she wasn’t looking, the rich sauce coating my fingers as I’d lick them clean.
Fast forward to today, and I’ve recreated that gorgeous dish with my own twist! This creamy banana pepper chicken skillet is not just a meal; it’s a thread woven from cherished moments with family and friends, reminding us that good food is about connection, laughter, and, of course, flavor.
Ingredients
Here’s what you’ll need to bring this delectable dish to life:
-
1 pound chicken breast, cut into bite-sized pieces
Tender and juicy, chicken breast forms the hearty protein base for your dish. If you want to go for a lighter option, turkey breast works beautifully too. -
1 cup banana peppers, sliced
These vibrant peppers add a pop of heat and tang that elevates the creaminess of the sauce. Mild or hot, depending on your preference! If banana peppers aren’t available, try using sliced jalapeños or even bell peppers for a sweeter note. -
1 cup heavy cream
The magic ingredient! Heavy cream provides that luscious texture and rich flavor. If you’re looking for a lighter option, half-and-half works, but be mindful that it may not thicken quite as much. -
2 tablespoons olive oil
This will help cook the chicken, adding a hint of flavor. Feel free to substitute with butter for a richer taste or avocado oil if you prefer a higher smoke point. -
2 cloves garlic, minced
Garlic is a flavor powerhouse, bringing warmth and depth to the dish. Love garlic? Go ahead and add another clove! -
Salt and pepper to taste
Seasoning is crucial! Always taste as you go to find that perfect balance of flavors. -
Fresh parsley for garnish
A sprinkle of fresh parsley not only brightens up the dish visually but adds a subtle earthiness. You can also use basil or cilantro for a different twist!
Step-by-Step Instructions
Now, let’s get cooking! Follow these steps for a flawless creamy banana pepper chicken skillet experience.
Step 1: Sear the Chicken
-
Heat the olive oil in a large skillet over medium-high heat. Once shimmering, it’s time to add the chicken.
-
Season the chicken pieces with salt and pepper before tossing them into the hot skillet. This step is key to ensuring your chicken has flavor right from the start. Sear for about 6-8 minutes, or until the chicken is golden brown on all sides. Don’t overcrowd the pan; if you need to, work in batches.
Tip: If you want an extra crispiness, let the chicken sear without moving it for a few minutes before flipping!
Step 2: Add the Garlic and Peppers
-
When the chicken is cooked through (an internal temperature of 165°F), remove it from the skillet and set aside on a plate.
-
In the same skillet, add a little more olive oil if needed, then toss in the minced garlic and banana peppers—just a couple of minutes until fragrant. This is where your kitchen will start smelling incredible!
Chef Hack: For more intense flavor, let the garlic cook until it’s just golden—be careful not to burn it!
Step 3: Create the Cream Sauce
-
Pour in the heavy cream and stir gently to combine. Use a wooden spoon to scrape any tasty bits stuck at the bottom of the pan; these bits are packed with flavor!
-
Let the cream simmer for about 5 minutes, allowing it to thicken slightly. This is the perfect moment to taste and adjust your seasoning. Need a pinch more salt? Go for it!
Step 4: Combine Everything
- Add the cooked chicken back into the skillet, stirring well to coat it in that luscious cream sauce. Allow everything to simmer together for another 3-5 minutes. This is where the magic happens, as all those flavors meld together.
Pro Tip: If you like a little heat, try adding a pinch of red pepper flakes at this stage for an extra kick!
Step 5: Serve It Up
- Once everything is beautifully combined and warmed through, take your skillet off the heat. Garnish with fresh parsley before serving.
Presentation Tip: For a touch of elegance, spoon the dish into a shallow bowl and drizzle a little extra cream around the edge before placing the chicken in the center.
Serving Suggestions
I love serving this creamy banana pepper chicken skillet over a fluffy bed of rice, creamy polenta, or even with crusty bread for dipping. Pair it with a fresh green salad or some sautéed seasonal vegetables to round out the meal. And don’t forget a glass of something bubbly to toast your accomplishment!
Recipe Variations
Here are a few fun twists to make this dish your own:
- Spicy Creole Twist: Add in some diced Andouille sausage along with the chicken for a smoky, spicy version.
- Veggie Boost: Toss in some spinach or kale when adding the chicken back to the pan for a punch of color and nutrients.
- Swaps for Cream: For a lighter version, substitute half of the heavy cream with a creamy, low-fat yogurt stirred in at the end for brightness.
- Cheesy Goodness: Stir in a handful of grated Parmesan right at the end for a cheesy, umami-rich finish.
- Citrus Zing: A squeeze of lemon or lime juice at the end brightens the entire dish and cuts through the richness!
Chef’s Notes
Every time I whip up this creamy banana pepper chicken skillet, I think back to those days in Grandma’s kitchen. I’ve tweaked her original recipe over the years—using less cream, emphasizing fresh peppers, and adding my little kitchen hacks. It’s amazing how one dish can bring together generations of flavor and smiles.
I remember one time I invited friends over for dinner, and I was still fiddling with the prep when they arrived. Instead of panicking, I welcomed them in and made it a group effort. Everyone pitched in, and we laughed while cooking together, transforming an ordinary dinner into a memory we still talk about! Food truly has a way of connecting us.
FAQs and Troubleshooting
1. My sauce is too thin; how can I thicken it?
If your sauce isn’t thickening as desired, allow it to simmer a bit longer over low heat. Alternatively, mix a teaspoon of cornstarch with a tablespoon of cold water to form a slurry, adding it to the sauce and stirring well.
2. Can I use frozen chicken?
Absolutely! Just be sure to thaw it fully before cooking. If you’re short on time, you can also throw frozen chicken directly into the skillet, just extend cooking time to ensure it cooks through completely.
3. What can I do if my dish is too salty?
A pinch of sugar or a splash of vinegar can help cut the saltiness. You can also serve the chicken over more rice or noodles to balance the flavors.
4. How do I store leftovers?
Keep any leftovers in an airtight container in the fridge for up to 3 days. Reheat gently on the stove, adding a splash of water or cream to loosen up the sauce.
Nutritional Info (Optional)
While specific nutritional values can vary, here’s a rough estimate per serving (1/4 of the recipe):
- Calories: 450
- Protein: 35g
- Total Fat: 30g
- Carbohydrates: 10g
And that’s how you create a cozy, flavorful Creamy Banana Pepper Chicken Skillet! I hope it fills your kitchen with warmth and sparks joyful memories. Happy cooking, and don’t forget to share your creations with me—let’s keep the kitchen magic alive together!
PrintCreamy Banana Pepper Chicken Skillet

A delicious one-pan meal featuring chicken cooked in a creamy sauce with banana peppers, perfect for weeknight dinners.
- Prep Time: 15 minutes
- Cook Time: 30 minutes
- Total Time: 45 minutes
- Yield: 4 servings 1x
- Category: Main Course
- Method: Skillet Cooking
- Cuisine: American
- Diet: Gluten-Free
Ingredients
- 1 pound chicken breast, cut into bite-sized pieces
- 1 cup banana peppers, sliced
- 1 cup heavy cream
- 2 tablespoons olive oil
- 2 cloves garlic, minced
- Salt and pepper to taste
- Fresh parsley for garnish
Instructions
- Heat the olive oil in a large skillet over medium-high heat. Season the chicken pieces with salt and pepper before tossing them into the hot skillet. Sear for about 6-8 minutes, or until the chicken is golden brown on all sides.
- Add the minced garlic and banana peppers to the skillet and cook until fragrant.
- Pour in the heavy cream and stir to combine. Let the cream simmer for about 5 minutes to thicken.
- Combine the cooked chicken back into the skillet and allow it to simmer together for another 3-5 minutes.
- Serve the dish garnished with fresh parsley.
Notes
For a spicy twist, consider adding red pepper flakes or other peppers.
Nutrition
- Serving Size: 1 serving
- Calories: 450
- Sugar: 5g
- Sodium: 600mg
- Fat: 30g
- Saturated Fat: 15g
- Unsaturated Fat: 10g
- Trans Fat: 0g
- Carbohydrates: 10g
- Fiber: 2g
- Protein: 35g
- Cholesterol: 90mg
Keywords: chicken, creamy, banana peppers, skillet, easy dinner

Pesto Grilled Cheese
The Ultimate Pesto Grilled Cheese: Elevate Your Comfort Food Game
Hey there, fellow food lovers! Today, we’re diving into the world of elevated comfort food with a fabulous twist on a classic favorite: the Pesto Grilled Cheese. You may be wondering how a simple sandwich can be transformed into something extraordinary. Well, let me tell you—it’s all about the ingredients, the techniques, and, of course, a sprinkle of love.
Imagine sinking your teeth into golden-brown slices of bread stuffed with gooey, melted cheese, and a burst of aromatic pesto that dances on your taste buds. This isn’t just any grilled cheese; it’s a mash-up of childhood nostalgia and culinary creativity.
Whenever I whip up this delightful dish, it transports me back to my carefree days of summer, when friends would gather in my backyard for lazy afternoons filled with laughter and endless chatter. Grilled cheese sandwiches were a staple of those sunny days. But when I discovered pesto—oh, how it changed the game! It was like finding the missing piece to a puzzle I didn’t know needed solving.
So, grab your apron and let’s get cooking. With just a handful of ingredients and a few easy steps, you’ll be well on your way to impressing your friends, family, or even just yourself with this show-stopping Pesto Grilled Cheese. Whether you’re enjoying a cozy night in or entertaining guests, this sandwich will become your go-to recipe for those moments when you crave something comforting yet refined.
Personal Story
Growing up, my family wasn’t one to shy away from good food. My mom was always in the kitchen, experimenting with flavors and bringing us all together for dinner. But it was during those relaxed summer days at my grandparents’ house that I truly fell in love with cooking. My grandmother had a magical touch when it came to grilled cheese sandwiches. We would savor the simplicity of melted cheddar sandwiched between perfectly toasted bread — the smell of butter sizzling in the pan was irresistible.
One day, while rummaging through her fridge, I discovered a jar of homemade basil pesto. Intrigued, I decided to add a dollop to my sandwich. As the cheese melted, the pesto infused its vibrant flavor right into the creamy goodness, and my taste buds were awakened! It was a revelation. From that moment on, the classic grilled cheese would never be the same for me. It was the first time I realized how a simple ingredient could elevate everyday cooking to something magical, and that lesson stayed with me as I continued to explore the world of flavors.
Ingredients
Here’s what you’ll need for this delectable Pesto Grilled Cheese:
-
2 slices of bread
Use any bread you love, from rustic sourdough to hearty whole grain. Want a gluten-free option? Look for a good-quality gluten-free bread—just make sure it’s sturdy enough to hold the fillings! -
2 slices of cheese (e.g., cheddar, mozzarella)
Cheddar adds a sharpness that perfectly complements the pesto, while mozzarella offers a dreamy, stretchy texture. Don’t hesitate to mix cheeses for a more complex flavor! -
2 tablespoons of pesto
Use store-bought for convenience, or better yet, whip up a quick homemade version! Fresh basil, garlic, pine nuts, Parmesan, and olive oil come together beautifully. Have leftover pesto? It freezes well—perfect for future grilled cheese cravings! -
Butter or olive oil for grilling
Butter gives a rich flavor and decadent crispiness, while olive oil adds a lighter touch. Experiment! You can even blend them for the best of both worlds.
Step-by-Step Instructions
Ready to create your masterpiece? Let’s break it down step-by-step!
-
Prep Your Ingredients
Gather your ingredients and assemble everything on the countertop. This not only makes the cooking process smoother but also lets you admire the cheerful colors of the pesto, cheese, and bread! -
Butter Up
Begin by spreading a generous amount of butter on one side of each slice of bread. If you’re going for olive oil, drizzle it over the bread instead. Pro tip: using room temperature butter will make spreading it much easier, and you can layer on more if you like a crispier finish! -
Assemble the Sandwich
With the buttered sides facing down, place one slice of bread in a skillet over medium heat. Top it with one slice of cheese, followed by the pesto. Spoon the pesto on now to ensure it spreads evenly. Add the second slice of cheese on top, then crown it with the second slice of bread (buttered side up). -
Time to Grill
Allow the sandwich to cook slowly—about 3-4 minutes—then lift it gently with a spatula. Look for a lovely golden brown color. If it’s not there yet, be patient! Lower the heat if needed to ensure the cheese melts through without burning the bread. -
Flip and Finish
Carefully flip the sandwich to the other side and press it down slightly with the spatula. Cooking this side should take another 3-4 minutes. If you want to get fancy, add a weight on top—like another frying pan or a sandwich press—to create even more gooey goodness. -
Melty Goodness Alert!
Once you see that lovely golden-brown crust and smell the tantalizing aroma wafting through the air, it’s time to remove the sandwich from the pan. Let it rest for a minute—this ensures you don’t burn your mouth on molten cheese (trust me, I’ve been there!).
Serving Suggestions
To serve your Pesto Grilled Cheese in style, slice it diagonally for that classic, inviting presentation. You can arrange it on a wooden cutting board along with a small bowl of marinara sauce or extra pesto for dipping. A handful of mixed greens dressed lightly with olive oil and balsamic vinegar on the side adds a refreshing contrast. Voilà—you’re ready to impress!
Recipe Variations
Here are some creative twists to keep this dish exciting:
- Caprese Twist: Add sliced tomatoes and fresh mozzarella along with the pesto for a Caprese-inspired grilled cheese.
- Spicy Kick: Mix in some sliced jalapeños or a sprinkle of crushed red pepper flakes for a spicy version!
- Protein Boost: Layer in some cooked chicken, turkey, or crispy bacon for a hearty twist.
- Healthy Swap: Use whole grain or gluten-free bread for a more nutritious option, and opt for low-fat cheese to lighten it up.
- Herbaceous Flair: Mix finely chopped fresh herbs like basil, parsley, or arugula into the pesto for extra flavor!
Chef’s Notes
This Pesto Grilled Cheese has become a staple in my kitchen over the years, evolving from a childhood favorite to a dinner party hit. I can’t tell you how many times I’ve made this while hosting friends. It’s such a forgiving recipe—each time, it somehow turns out perfectly, no matter what tweaks I make. Sometimes, I like to add leftover roasted vegetables for an even heartier sandwich!
If you’re feeling extra adventurous, try experimenting with flavored oils. A drizzle of garlic-infused olive oil takes it to another level! And let’s be real—who doesn’t love the smell of garlic wafting through the kitchen?
FAQs and Troubleshooting
-
Why is my grilled cheese burnt on the outside but cold inside?
Make sure your heat is set to medium or medium-low. Cooking it too fast will brown the bread before the cheese melts. Patience is key! -
What if I don’t have pesto?
No pesto? No problem! You can use herbed cream cheese or a simple blend of olive oil, garlic, and fresh herbs as an alternative. -
Can I make this ahead of time?
While grilled cheese is best enjoyed fresh, you can assemble it ahead of time and grill it right before serving. Just wait to butter the outside until you’re ready to cook it! -
How can I keep it from getting soggy?
Be sure not to overdo the pesto; a little goes a long way! Additionally, using thicker bread can help absorb moisture better.
Nutritional Info (Optional)
Note: Nutritional info will vary based on ingredients and serving sizes. Here’s a rough estimate per sandwich:
- Calories: 450
- Protein: 18g
- Carbohydrates: 40g
- Fat: 25g
Now that you’ve infused your kitchen with the enticing aroma of Pesto Grilled Cheese, all that’s left is to gather your loved ones and indulge in this nostalgic dish. I hope you enjoy making this recipe as much as I have enjoyed sharing it with you. Happy cooking, and remember—every meal has the potential to create beautiful moments around your table. Cheers!
PrintPesto Grilled Cheese

A delicious twist on the classic grilled cheese sandwich, featuring gooey cheese and flavorful pesto for an elevated comfort food experience.
- Prep Time: 10 minutes
- Cook Time: 8 minutes
- Total Time: 18 minutes
- Yield: 1 serving 1x
- Category: Main Course
- Method: Grilling
- Cuisine: Italian
- Diet: Vegetarian
Ingredients
- 2 slices of bread
- 2 slices of cheese (e.g., cheddar, mozzarella)
- 2 tablespoons of pesto
- Butter or olive oil for grilling
Instructions
- Gather your ingredients and assemble everything on the countertop.
- Spread a generous amount of butter on one side of each slice of bread.
- Place one slice of bread in a skillet over medium heat.
- Top it with one slice of cheese, then the pesto, and another slice of cheese.
- Crown it with the second slice of bread (buttered side up).
- Cook slowly for about 3-4 minutes until golden brown.
- Flip the sandwich and press down slightly. Cook the other side for another 3-4 minutes.
- Remove the sandwich from the pan and let it rest for a minute before slicing.
Notes
For added flavor, experiment with different types of cheese and use fresh homemade pesto when possible.
Nutrition
- Serving Size: 1 serving
- Calories: 450
- Sugar: 2g
- Sodium: 600mg
- Fat: 25g
- Saturated Fat: 12g
- Unsaturated Fat: 10g
- Trans Fat: 0g
- Carbohydrates: 40g
- Fiber: 3g
- Protein: 18g
- Cholesterol: 45mg
Keywords: grilled cheese, pesto sandwich, comfort food

Egg and Cheese Toasts: Crispy, Cheesy, and Amazingly Quick
# Egg and Cheese Toasts: Crispy, Cheesy, and Amazingly Quick

## Introduction

Hey there, fellow food lovers! Today, we’re diving into one of my all-time favorite comfort foods: Egg and Cheese Toasts. Now, before you say, “Savannah, I can whip up a plain old egg and cheese sandwich in my sleep!”—let me tell you why this dish will elevate your brunch game and become a staple on your table.

Egg and Cheese Toasts are not just your average breakfast fare; they’re a delightful symphony of crispy, cheesy goodness perched atop a sturdy piece of bread. Imagine sinking your teeth into a perfectly fried egg, its yolk oozing subtly onto a layer of melted cheese, nestled on a crisp, toasty foundation. It’s quick to prepare, bursting with flavor, and oh-so-satisfying. Whether you’re having a lazy Sunday morning, entertaining guests for brunch, or simply need a quick meal that brings joy to your plate, these toasts will fit the bill!

The beauty of this dish is in its simplicity and versatility. You can customize it with your favorite cheeses, herbs, and seasonings. Plus, it comes together in just minutes, making it perfect for those hectic weekday mornings or spontaneous late-night cravings. Stick around, and I’ll share some delightful variations, tips, and anecdotes that will inspire you to make this dish yours.

So grab your apron, and let’s get cooking! Trust me, once you make these Egg and Cheese Toasts, you’ll keep coming back for more. Let’s whisk up something unforgettable together!

## Personal Story

First, let me take you back to my childhood kitchen. I remember Saturday mornings filled with laughter, the scent of brewing coffee, and the sound of sizzling eggs dancing in the pan. My mom had a knack for turning even the simplest meals into something special. One Saturday, she introduced me to her version of Egg and Cheese Toasts.

We had that hearty bread; you know, the kind that has a thick crust and can stand up to a little butter and some crispy edges? Mom would pan-fry the bread with just the right amount of heat, crack a sunny-side-up egg on top, and sprinkle a glorious mound of cheese—usually cheddar because, let’s be honest, it’s the king of comfort cheese! That first bite was pure bliss. The crispiness of the bread, the creamy cheese, and the rich yolk melting together created a heavenly combination.

I can still hear her encouraging me to experiment with toppings—fresh herbs, a dash of hot sauce, even slices of avocado! Those mornings linger in my heart and have inspired my love for cooking to this very day. With every Egg and Cheese Toast I prepare, I’m reminded of those warm, cozy moments shared at our kitchen table. Now, let's create some delicious memories of your own!

## Ingredients

Here’s what you’ll need to make these glorious Egg and Cheese Toasts, complete with some handy insights and substitution tips:

- **2 slices hearty sandwich bread (no large holes)**
  *Look for bread that’s sturdy enough to hold all the toppings without getting soggy. Sourdough, whole grain, or even brioche works beautifully! If gluten-free is your jam, swap it for a great gluten-free bread.*

- **1 large egg**
  *The star of the show! Feel free to use organic or free-range eggs for added flavor and nutritional value. If you’re vegan or have an egg allergy, consider using a flax egg (1 tablespoon ground flaxseed mixed with 2.5 tablespoons water) as a substitute, though the texture will differ.*

- **1/2 cup (2 ounces) grated cheese (cheddar, pepper jack, or gruyere)**
  *Cheddar is classic, but don’t be afraid to experiment! Pepper jack adds a kick, while Gruyère brings complex nutty flavors. For a dairy-free option, try cashew cheese or nutritional yeast.*

- **1 teaspoon finely chopped fresh herbs (thyme or rosemary)**
  *Herbs elevate the dish and add freshness. If you don’t have fresh herbs, 1/4 teaspoon of dried herbs will work too—just crush them a bit to release their flavor. You can also use parsley, chives, or basil for variety!*

- **Salt and black pepper to taste**
  *Essential for flavor! Always season your egg in the cooking stage for a better-tasting result. Feel free to experiment with flavored salts like smoked salt for an added twist.*

- **Pinch of cayenne (optional)**
  *This is entirely optional but recommended for a hint of spice! If you’re not into spicy, skip it or replace it with paprika for a mild smokiness.*

## Step-by-Step Instructions

Ready to bring your Egg and Cheese Toasts to life? Let’s do this! Here’s how to succeed step by step:

1. **Prep Your Ingredients**
   Start by gathering all your ingredients. It always helps to have everything within reach when you’re cooking. If you haven’t already, grate your cheese and chop your herbs. Prepping ahead saves time and keeps the flow smooth!

2. **Toast the Bread**
   In a non-stick skillet over medium heat, add a small knob of butter or a drizzle of olive oil. Once melted and bubbly, place your bread slices in the pan. Let them toast for about 2-3 minutes until they’re golden brown on one side. A little pro tip: press down gently on the bread with a spatula for even toasting.

3. **Flip the Bread**
   Once your first side is perfectly golden, flip each slice over. If you’d like to add additional oil or butter on this side, now’s the time! This side will be the platform for your lovely toppings.

4. **Add the Egg**
   Carefully crack your egg into the skillet (preferably on top of the toasted side of the bread). Reduce the heat to low to avoid overcooking the egg. If you prefer, you can also fry your egg separately and place it on the toast afterward. Cover the pan with a lid to create steam and heat, which helps cook the egg white evenly while keeping the yolk soft.

5. **Sprinkle on the Cheese**
   Just before your egg is finished cooking (the whites should be set but the yolk still runny), sprinkle the grated cheese generously over the egg. Cover the skillet again to allow the cheese to melt beautifully—this should take about 1-2 minutes. The cheese should be bubbly and soft when you lift the lid, and your egg should be cooked to your liking!

6. **Season to Taste**
   As the cheese melts, sprinkle salt, black pepper, and some cayenne (if using) on top. This is where your Egg and Cheese Toasts really get their flavor boost.

7. **Serve Immediately**
   Once your cheese is melty and delicious, carefully lift the toasts off the skillet with a spatula. Place them on plates, and if you’re feeling fancy, garnish with fresh herbs on top.

That’s it! In under 10 minutes, you’ve created an incredibly satisfying dish that’s sure to impress.

## Serving Suggestions

For serving your Egg and Cheese Toasts, let your creativity shine through! Plate them on a beautiful rustic wooden board or a vibrant plate to catch the eye. You can serve it alongside fresh fruit or a zingy side salad for a well-rounded meal. Drizzling a little sriracha or hot sauce on top elevates the experience, too. Serve with a steaming cup of coffee or a refreshing juice, and you’ve got yourself a feast!

## Recipe Variations

Here are some fun variations to mix things up:

- **Avocado Twist**: Mash half an avocado and spread it on the toast before adding the egg. The creaminess pairs wonderfully with the cheese!

- **Mediterranean Style**: Top with feta cheese, roasted red peppers, and a sprinkle of oregano. Finish with a drizzle of olive oil for an extra flavor punch.

- **Smoked Salmon**: Swap the egg for smoked salmon after cooking the toast, and add cream cheese and capers for a classic bagel-inspired toast.

- **Sunny Salsa**: Top your egg with a fresh salsa made of tomatoes, onions, cilantro, and lime juice for a vibrant, zesty kick!

- **Sweet & Savory**: Spread a bit of fig jam or honey on the toast before adding the cheese. It’s an unexpected yet delightful combination!

## Chef’s Notes

These Egg and Cheese Toasts are one of those recipes that I believe everyone should have in their culinary toolkit. I’ve made them for brunch parties and late-night snacks, and they never disappoint! Sometimes, in my experimental phase, I’ve even added crumbled bacon or leftover roasted vegetables, which gave the dish a delightful boost!

Cooking should feel effortless and fun! Don’t hesitate to adjust the recipe to suit your taste or even the ingredients you have on hand. I remember a friend who once used leftover mashed potatoes to create a base for the eggs—delicious, hearty, and resourceful!

## FAQs and Troubleshooting

**1. Why does my egg stick to the pan?**
Always ensure your skillet is adequately heated and your oil or butter is hot before adding the egg. A non-stick skillet works great for this recipe!

**2. What can I do if my yolk breaks?**
It happens to the best of us! If you break your yolk, simply turn the heat down and allow it to cook through before serving. You can always turn it into a rustic egg scramble on your toast!

**3. Can I prepare these in advance?**
While these are best enjoyed fresh, you can toast the bread ahead of time and store the components separately. When you’re ready to eat, just reheat the bread and cook the egg to order.

**4. How do I know when my egg is perfectly cooked?**
This is all about personal preference! If you like runny yolks, cook until the whites are set and remove from heat. For a firmer yolk, let it cook a bit longer—just keep an eye on it!

## Nutritional Info

For a delicious serving of Egg and Cheese Toasts, here’s a quick nutritional breakdown (estimate varies based on ingredients used):

- Calories: About 350-400
- Protein: 20g
- Carbohydrates: 30g
- Fat: 18g

Note that this can change depending on the type of bread and cheese you choose!

---

There you have it! A delightful and simple recipe for Egg and Cheese Toasts that not only satisfies hunger but also warms the heart. It’s a dish you can play with endlessly, and the best part is sharing it with the ones you love. So, let’s celebrate good food and good company—tie on your apron, and let’s keep cooking together!
Egg and Cheese Toasts

Quick and satisfying Egg and Cheese Toasts topped with a perfectly fried egg and melted cheese, ideal for breakfast or brunch.
- Prep Time: 5 minutes
- Cook Time: 5-7 minutes
- Total Time: 12 minutes
- Yield: 2 servings 1x
- Category: Breakfast
- Method: Frying
- Cuisine: American
- Diet: Vegetarian
Ingredients
- 2 slices hearty sandwich bread (no large holes)
- 1 large egg
- 1/2 cup (2 ounces) grated cheese (cheddar, pepper jack, or gruyere)
- 1 teaspoon finely chopped fresh herbs (thyme or rosemary)
- Salt and black pepper to taste
- Pinch of cayenne (optional)
Instructions
- Prep your ingredients by gathering everything you need.
- Toast the bread in a non-stick skillet over medium heat with a small knob of butter or drizzle of olive oil for 2-3 minutes until golden brown.
- Flip each slice of bread over and add additional oil or butter if desired.
- Add the egg carefully into the skillet, cover the pan to steam, and reduce the heat to low.
- Sprinkle the grated cheese over the egg just before it finishes cooking, covering again to melt the cheese.
- Season with salt, black pepper, and cayenne while the cheese is melting.
- Serve the toasts immediately, garnished with fresh herbs if desired.
Notes
Feel free to customize with toppings like avocado, feta, or salsa for added flavor.
Nutrition
- Serving Size: 1 toast
- Calories: 375
- Sugar: 2g
- Sodium: 450mg
- Fat: 27g
- Saturated Fat: 12g
- Unsaturated Fat: 10g
- Trans Fat: 0g
- Carbohydrates: 30g
- Fiber: 2g
- Protein: 20g
- Cholesterol: 180mg
Keywords: egg, cheese, toast, breakfast, quick meals, brunch
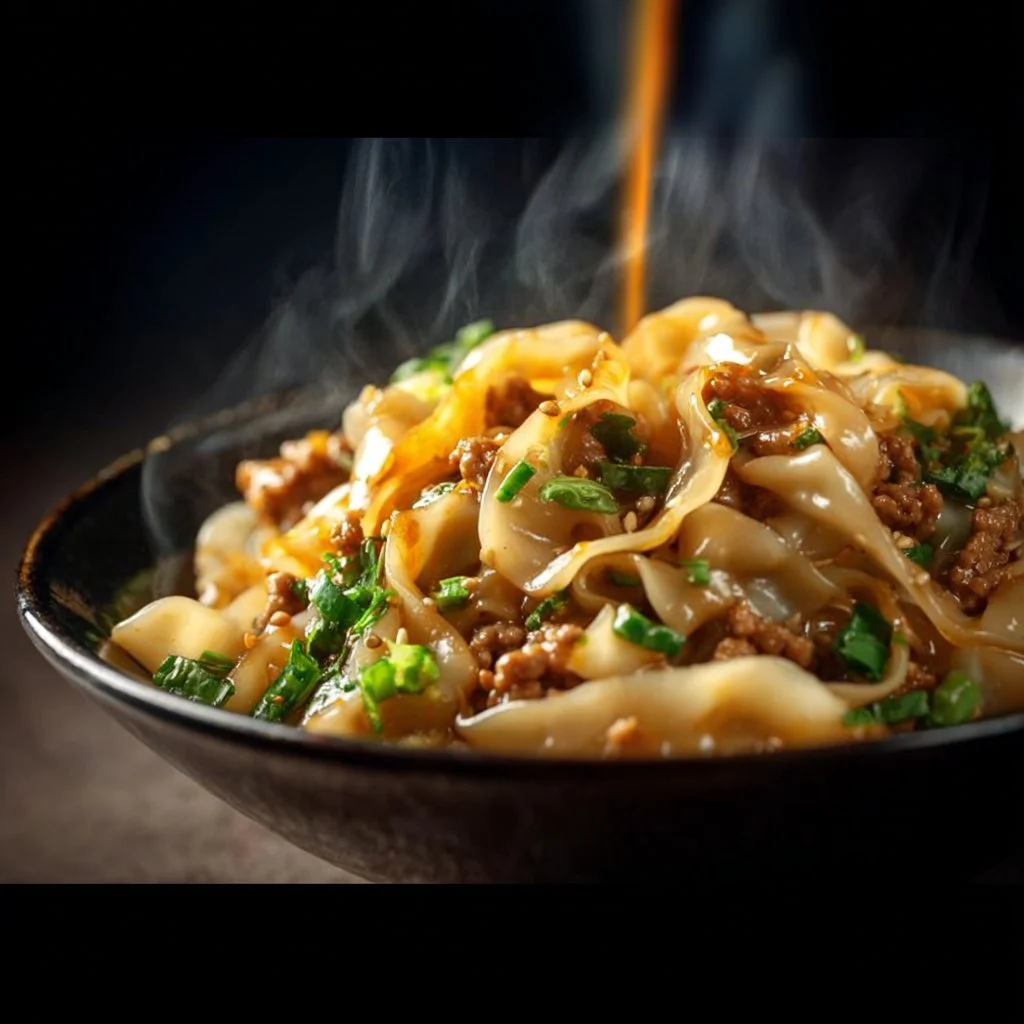
Potsticker Noodle Bowl
Potsticker Noodle Bowl: A Culinary Hug in a Bowl
Hey there, fellow kitchen adventurers! I’m so thrilled to whisk you away on another delicious journey, and today we’re diving into a cozy, comforting dish that’s as satisfying as your favorite blanket on a chilly night. Say hello to the Potsticker Noodle Bowl! This dish is a celebration of all things delicious—think of it as your beloved potstickers transformed into a hearty noodle bowl that makes weeknight dinners feel special without all the fuss.
What I adore about this recipe is its versatility. It’s perfect whether you’re hosting friends for a casual dining experience or simply craving something comforting on a Wednesday evening. With flavors that meld beautifully, a medley of textures, and just the right hint of spice, this noodle bowl is sure to become a favorite in your home. And let me tell you, once you get a taste of the savory blend of ground pork, juicy green onions, and the delightful crunch of coleslaw mix, you won’t want to stop at just one bowl!
So let’s roll up our sleeves, tie that apron around our waist, and get ready to create our very own potsticker noodle bowl. Trust me, you’ll impress yourself—and anyone lucky enough to share this meal with you!
Personal Story
Growing up, my family had this tradition every Friday night where we’d gather around the table for some DIY potsticker making. My mom was the master, expertly folding wonton wrappers into little pockets of joy, and I was her tiny sous-chef, anointed with a smudge of flour on my forehead. I’ll never forget the merriment surrounding those nights. The laughter, the occasional flour fight, and that delightful aroma wafting through the house made Fridays feel like a festival.
As the years went by, I found myself longing for that same heartwarming experience, but with a twist. Enter the Potsticker Noodle Bowl! It marries my love for those cherished family memories with an updated, convenient dish that still delivers on comfort. Every time I whip up this bowl, I’m transported back to those joyful Fridays filled with laughter and love. So grab your apron, and let’s get cooking; I promise this recipe has those same warm vibes!
Ingredients
Here’s what you’ll need to create your Potsticker Noodle Bowl. I’ll share a bit about each ingredient and some handy tips along the way!
-
8 oz wide Lo Mein noodles, cooked and rinsed
Lo Mein noodles are perfect for this dish because they soak up that delicious flavor while remaining delightfully chewy. You can substitute these with any wide noodle like fettuccine or even a gluten-free alternative if needed! -
1 tablespoon peanut oil
This oil has a lovely nutty flavor that enhances the pork wonderfully. If you’re sensitive to nuts, feel free to swap it out with vegetable or canola oil. -
1 pound ground pork
Juicy and flavorful, ground pork is the star of the show. If you’re looking for a healthier option, ground turkey or chicken works great too! -
1/4 cup + 2 tablespoons sliced green onions
Green onions add a refreshing crunch and flavor pop. You can also substitute with shallots or even regular onions if that’s what you have. -
1/2 cup low-sodium chicken broth
Broth adds depth to your dish. Using low-sodium ensures you have more control over the saltiness. Homemade broth is always a treat, but store-bought works in a pinch! -
3 tablespoons mirin
This sweet rice wine adds a lovely sweetness and depth that compliments the pork beautifully. If you don’t have mirin, you can use a mix of rice vinegar and sugar. -
2 tablespoons dark soy sauce
Dark soy sauce deepens the color and flavor of your dish. Regular soy sauce will do if that’s what you have on hand, but it will be lighter in flavor. -
1 tablespoon minced garlic
Garlic is a must for any comforting dish! Freshly minced is best, but jarred garlic can work if you’re in a hurry. -
2 teaspoons grated ginger
Ginger adds a zingy freshness—an essential component for flavor balance! You could also use powdered ginger, but the fresh stuff is unbeatable. -
1 teaspoon sesame oil
A little drizzle goes a long way here! It offers a lovely aroma and flavor. If you’re out, you can skip it, though you’ll miss that distinct taste! -
1/2 teaspoon sriracha
Spice up your bowl! Adjust to your taste; no judgment here if you want to crank up the heat! -
4 cups coleslaw mix
This blend of cabbage and carrots adds a delightful crunch and freshness to the bowl. Feel free to substitute with fresh cabbage or any crunchy veggies you have handy!
Step-by-Step Instructions
Let’s get to the cooking part! Follow my detailed steps, and I’ll sprinkle in some chef tips along the way.
-
Cook the Noodles:
Begin by bringing a pot of water to a rolling boil. Add the wide Lo Mein noodles and cook according to the package instructions until they’re al dente. Once cooked, drain the noodles in a colander and rinse them under cold water to stop the cooking process. This helps prevent them from becoming mushy. Remember, we want that beautiful sheen and structure! -
Sauté the Pork:
In a large pan or wok, heat the peanut oil over medium heat. Once hot (you want a shimmer!), add the ground pork. With a spatula, break the pork into small chunks. Cook for about 5-7 minutes, stirring occasionally until the pork is browned and no longer pink. This is where the magic happens; the aroma of cooking pork fills the kitchen! If you want to add a little more depth, season the meat with a pinch of salt and pepper. -
Add the Aromatics:
Now, it’s time to add that fragrant garlic and grated ginger. Toss them into the pan and stir for about 1-2 minutes until you can smell those delightful flavors—trust me, your kitchen will smell divine! -
Make the Sauce:
Pour in the low-sodium chicken broth, mirin, dark soy sauce, and sriracha to the pan with the pork mixture. Stir well to combine. Let this simmer for about 3-4 minutes so the flavors can mingle beautifully—you’re on your way to creating a luscious sauce! -
Incorporate Coleslaw Mix:
Add the coleslaw mix and half of the sliced green onions to the pan. Stir everything together and let it cook for an additional 3-5 minutes. The coleslaw adds a fresh crunch that elevates the dish. If you like it extra crunchy, toss the coleslaw in just before serving! -
Combine with Noodles:
Now, add in the already cooked Lo Mein noodles. Gently fold everything together to ensure the noodles soak up all those incredible flavors. If the dish feels a bit dry, feel free to splash in a little more chicken broth! -
Finish with Sesame Oil:
Drizzle the sesame oil over your noodle bowl mixture and give it one last toss. This final touch adds a vibrant flavor you won’t want to miss!
Serving Suggestions
Now that you’ve got your glorious Potsticker Noodle Bowl ready, it’s time to plate it up! Use deep bowls to showcase the vibrant colors and textures—think layers of noodles, the savory pork mix, and a sprinkle of fresh green onions on top. Maybe even toss on some chili flakes or extra sriracha for a pop of color and spice.
If you’re feeling extra fancy, pair the noodle bowl with some crispy wonton chips or your favorite spring rolls on the side! Trust me; they’ll make your dish look like it belongs in a fancy restaurant!
Recipe Variations
Feeling adventurous? Here are a few fun twists you can try:
-
Vegetarian/Vegan Option: Substitute the ground pork with a mix of sautéed mushrooms and tofu for a delicious vegetarian version that’s packed with flavor. You’ll still get that lovely texture!
-
Spicy Kick: Increase the sriracha or add in some diced fresh chili peppers for an extra layer of heat.
-
Crispy Topping: Top the bowl with crushed peanuts or sesame seeds for an added layer of crunch.
-
Different Noodles: Experiment with rice noodles or even zucchini noodles for a gluten-free option that’s lighter but still satisfying.
-
Add More Veggies: Throw in some snap peas, bok choy, or bell peppers into the mix for more color and nutrients!
Chef’s Notes
This recipe has become a staple in my kitchen over the years. I’ll let you in on a little secret: when I have friends over, I sometimes double the recipe and make a noodle bowl bar. Everyone loves customizing their own bowls, and it makes for such a fun, interactive dining experience!
And let’s not forget the inevitable kitchen mishaps! I once mistook a cup of sugar for my salt when making the sauce—let’s just say the noodle bowl ended up as a dessert rather than dinner! But in the spirit of cooking, that’s all part of the journey, right? Don’t be afraid to embrace the unexpected in your kitchen.
FAQs and Troubleshooting
1. My noodles turned out gummy; what went wrong?
This often happens when the noodles are overcooked or not rinsed properly. Always make sure to rinse them under cold water after cooking to stop the cooking process!
2. Can I use other meats in this dish?
Absolutely! Ground chicken, turkey, or even beef would work wonderfully. Just adjust the cooking time according to the meat you choose.
3. The sauce is too salty; what can I do?
If your sauce turns out saltier than desired, add a splash of vinegar or a bit of sugar to balance it out. That should help neutralize the saltiness!
4. How can I store leftovers?
Store any leftovers in an airtight container in the refrigerator for up to 3 days. Reheat gently in the microwave or on the stovetop with a splash of chicken broth to recover some moisture.
Nutritional Info
This Potsticker Noodle Bowl is not just delicious but also packed with protein and colorful veggies! If you’re tracking nutrition, here’s a rough estimate per serving:
- Calories: 450
- Protein: 28g
- Carbohydrates: 45g
- Fiber: 3g
- Fat: 20g
Of course, this can vary based on your specific ingredients, but it’s a pretty hearty and satisfying meal!
And there you have it—your very own Potsticker Noodle Bowl! I hope you enjoy making this comforting dish as much as I love sharing it with you. Remember, good food is about good company and heart, so gather your loved ones, serve up those bowls, and relish every bite. Happy cooking from my kitchen to yours at Ivory Apron! 🍜✨
PrintPotsticker Noodle Bowl
A cozy and comforting Potsticker Noodle Bowl, combining the flavors of potstickers with nourishing noodles and vegetables for a delightful weeknight meal.
- Prep Time: 15 minutes
- Cook Time: 25 minutes
- Total Time: 40 minutes
- Yield: 4 servings 1x
- Category: Main Course
- Method: Stir-Frying
- Cuisine: Asian
- Diet: Pork
Ingredients
- 8 oz wide Lo Mein noodles, cooked and rinsed
- 1 tablespoon peanut oil
- 1 pound ground pork
- 1/4 cup + 2 tablespoons sliced green onions
- 1/2 cup low-sodium chicken broth
- 3 tablespoons mirin
- 2 tablespoons dark soy sauce
- 1 tablespoon minced garlic
- 2 teaspoons grated ginger
- 1 teaspoon sesame oil
- 1/2 teaspoon sriracha
- 4 cups coleslaw mix
Instructions
- Cook the Noodles: Begin by bringing a pot of water to a rolling boil. Add the noodles and cook according to the package instructions until al dente. Drain and rinse under cold water.
- Sauté the Pork: Heat the peanut oil over medium heat in a large pan or wok. Add the ground pork and cook for about 5-7 minutes until browned.
- Add the Aromatics: Stir in the garlic and grated ginger, cooking for 1-2 minutes until fragrant.
- Make the Sauce: Pour in chicken broth, mirin, dark soy sauce, and sriracha. Stir and let simmer for 3-4 minutes.
- Incorporate Coleslaw Mix: Add the coleslaw mix and half of the green onions. Stir and cook for an additional 3-5 minutes.
- Combine with Noodles: Fold in the cooked Lo Mein noodles, mixing gently to allow flavors to blend.
- Finish with Sesame Oil: Drizzle sesame oil over the mixture and toss once more.
Notes
Feel free to make this dish vegetarian by substituting the pork with sautéed mushrooms and tofu.
Nutrition
- Serving Size: 1 serving
- Calories: 450
- Sugar: 8g
- Sodium: 800mg
- Fat: 20g
- Saturated Fat: 5g
- Unsaturated Fat: 10g
- Trans Fat: 0g
- Carbohydrates: 45g
- Fiber: 3g
- Protein: 28g
- Cholesterol: 70mg
Keywords: noodle bowl, potstickers, Asian cuisine, comforting recipes, weeknight dinners

Classic Breakfast Hashbrown Casserole
Classic Breakfast Hashbrown Casserole: A Comforting Start to Your Day
Hello, breakfast lovers! Are you ready to kick-start your day with a hearty, delicious meal? If you’re like me, you know that breakfast isn’t just the first meal of the day; it’s an experience, a ritual that sets the tone for everything that follows. Today, I’m excited to share a dish that has earned its rightful place in my breakfast repertoire: the Classic Breakfast Hashbrown Casserole.
Imagine waking up to the delightful aroma of hashbrowns sizzling in your oven, combined with the melty goodness of cheese and the creamy texture of sour cream. This hashbrown casserole is as comforting as a warm blanket on a chilly morning. It’s easy to prepare and is perfect for feeding a crowd, making it an ideal recipe for brunch gatherings, holiday breakfasts, or lazy Sunday mornings.
What I love most about this dish is its versatility. It’s packed with flavors and textures that will make your taste buds dance. Plus, it’s a recipe you can customize to your heart’s content. Whether you’re adding crispy bacon or a sprinkle of fresh herbs, every bite is sure to be a delight! So, let’s roll up our sleeves and start cooking—because good food is all about creating memories in the kitchen!
Personal Story
Let me take you back a few years to a bustling kitchen during a family gathering. It was one of those beautiful Sunday mornings when everyone is still lounging in their pajamas, sipping on coffee, and exchanging sleepy smiles. My grandma was at the helm of the kitchen, her apron tied snugly around her waist. She often made her famous breakfast casserole, but on this particular morning, I decided to try my hand at making it.
The smell of hashbrowns and cheese began to fill the house, and I could hear the rustling of family members shuffling in, drawn in by the irresistible scent. As I pulled the casserole out of the oven, I felt a rush of excitement and pride. We all gathered around the table, and as we dug in, laughter and compliments flowed as freely as the coffee. That morning solidified my love for this dish. It wasn’t just food; it was a gathering, a celebration of flavors and family. Since then, I’ve perfected my own version of that hashbrown casserole, and I can’t wait to share it with you all!
Ingredients
Here’s what you’ll need to create a delicious Classic Breakfast Hashbrown Casserole:
-
4 cups frozen hashbrowns: The base of our casserole! You can use fresh hashbrowns if you prefer; just make sure to wring out any excess moisture.
-
1 cup sour cream: Adds creaminess and a slight tang. For a lighter option, Greek yogurt can be used as a great substitute!
-
1 can cream of chicken soup: This contributes to the casserole’s richness and helps bind everything together. Feel free to swap it out for cream of mushroom soup or a homemade version if you’re feeling adventurous!
-
2 cups shredded cheese (cheddar or your choice): Cheddar is traditional, but I love mixing it up with Monterey Jack or a spicy Pepper Jack for an extra kick. Just remember to shred your own cheese for the best flavor!
-
1/2 cup chopped onions: These add a sweetness that complements the hashbrowns. Green onions make a great substitute if you prefer a milder flavor.
-
1/4 cup melted butter: This adds rich flavor. Watch out for substitutes like olive oil or coconut oil to keep things dairy-free!
-
Salt and pepper to taste: Essential for elevating all the flavors!
-
Optional: cooked sausage or bacon: For those looking to add some protein, these are fantastic additions. You could also use crumbled tofu for a vegetarian twist.
Step-by-Step Instructions
Alright, let’s get cooking! Grab your mixing bowl and preheat the oven; you’re about to whip up a casserole that will have everyone asking for seconds!
-
Preheat the Oven: Start by preheating your oven to 350°F (175°C). This ensures your casserole cooks evenly and comes out perfectly golden brown.
-
Combine Ingredients: In a large mixing bowl, combine the frozen hashbrowns, sour cream, cream of chicken soup, and melted butter. Mix until everything is well incorporated. You want those hashbrowns coated in creamy goodness!
-
Season It Up: Add the chopped onions, salt, and pepper to taste. This is where you can get creative! If you’re adding cooked sausage or bacon, fold it in now. The more flavors, the better!
-
Cheesy Goodness: Stir in 1 1/2 cups of your shredded cheese, reserving the other half for topping. This step is essential for that ooey-gooey texture we all love in a good casserole.
-
Prepare the Dish: Grease a 9×13-inch casserole dish with cooking spray or a bit of melted butter. Pour the hashbrown mixture into the dish, spreading it out evenly.
-
Top It Off: Sprinkle the reserved cheese on top of the casserole. This will create a lovely golden crust as it bakes!
-
Bake: Place your casserole in the preheated oven and bake for about 45-50 minutes, or until it’s bubbly and the top is golden brown. You might want to check it around the 30-minute mark—nobody wants burnt cheese!
-
Let It Rest: Once it’s out of the oven, let it sit for about 5-10 minutes. This helps it set up nicely, making it easier to serve.
-
Slice and Serve: Cut into squares and serve warm. Watch as everyone gathers around, eager to dig in!
Serving Suggestions
This casserole is as beautiful as it is delicious, and presentation matters! Serve it straight from the oven in your favorite dishware. Garnish with fresh herbs like chives or parsley for a pop of color. Pair your hashbrown casserole with fresh fruit or a light salad for a complete meal, and don’t forget the coffee!
Recipe Variations
Want to mix things up? Here are a few creative twists on this classic dish:
- Southwestern Style: Add diced jalapeños and a sprinkle of taco seasoning for a spicy kick!
- Veggie Delight: Mix in sautéed bell peppers, spinach, or mushrooms for a healthy boost.
- Breakfast Burrito Bake: Layer some tortillas at the bottom, top with the hashbrown mixture, and bake it as a burrito casserole!
- Cheesy Potato Skins: After baking, scoop out some of the casserole, refill the shells, top with cheese and bake until crispy.
- Gluten-Free Option: Use gluten-free cream of chicken soup and ensure your hashbrowns are certified gluten-free.
Chef’s Notes
Over the years, I’ve learned that this recipe is perfect for experimenting. One Christmas, I made my hashbrown casserole with leftover holiday ham, and it became an instant hit. Plus, every time I make this dish, I’m reminded of those cozy family mornings filled with laughter—food really has a magical way of bringing us together. If you ever find yourself with leftovers (though it’s rare!), this casserole reheats beautifully, making it the perfect meal prep option for the week!
FAQs and Troubleshooting
Q: Can I make this casserole ahead of time?
Absolutely! You can assemble the casserole a day ahead and refrigerate it. Just add a few extra minutes to the baking time if it’s coming straight from the fridge.
Q: What can I do if my casserole is too dry?
If your casserole seems dry after baking, consider adding a splash of chicken broth, cream, or even a drizzle of melted butter before serving.
Q: How do I prevent my cheese from burning?
If you notice the cheese is starting to brown too quickly, cover the casserole with foil halfway through baking. This will help retain moisture.
Q: Can I freeze the leftovers?
Yes! Just make sure to let it cool completely before freezing. You can store it in an airtight container for up to three months. Thaw in the fridge overnight and reheat in the oven.
Nutritional Info
Although I’m all about enjoying food, I understand the importance of knowing what we’re eating. Here’s a rough estimation of the nutritional breakdown for a serving of the casserole:
- Calories: Approximately 350
- Protein: 15g
- Fat: 25g
- Carbohydrates: 30g
- Fiber: 2g
- Sodium: 600mg
(Nutritional info can vary based on additions and specific brands of ingredients used.)
So there you have it! Your ticket to a delightful breakfast experience right at home. I hope this Classic Breakfast Hashbrown Casserole fills your mornings with warmth and joy. Tie on your apron, gather your favorite people, and enjoy every cheesy bite. Let’s continue to create beautiful moments around the table—one delectable dish at a time!
Happy cooking! 🥔🥘✨
PrintClassic Breakfast Hashbrown Casserole

A comforting hashbrown casserole that combines crispy hashbrowns, creamy sour cream, and melty cheese for an ideal breakfast dish.
- Prep Time: 15 minutes
- Cook Time: 50 minutes
- Total Time: 65 minutes
- Yield: 8 servings 1x
- Category: Breakfast
- Method: Baking
- Cuisine: American
- Diet: Vegetarian (optional with substitutions)
Ingredients
- 4 cups frozen hashbrowns
- 1 cup sour cream
- 1 can cream of chicken soup
- 2 cups shredded cheese (cheddar or your choice)
- 1/2 cup chopped onions
- 1/4 cup melted butter
- Salt and pepper to taste
- Optional: cooked sausage or bacon
Instructions
- Preheat the oven to 350°F (175°C).
- Combine the frozen hashbrowns, sour cream, cream of chicken soup, and melted butter in a large mixing bowl. Mix until well incorporated.
- Season it up with chopped onions, salt, and pepper. Fold in cooked sausage or bacon if desired.
- Stir in 1 1/2 cups of shredded cheese, reserving the other half for topping.
- Prepare a 9×13-inch casserole dish by greasing it with cooking spray or melted butter. Pour the mixture into the dish, spreading it evenly.
- Top with reserved cheese.
- Bake for 45-50 minutes or until bubbly and golden brown.
- Let it rest for 5-10 minutes before serving. Cut into squares and enjoy!
Notes
This casserole is great for experimenting with different ingredients like veggies or meats. Leftovers reheat beautifully!
Nutrition
- Serving Size: 1 serving
- Calories: 350
- Sugar: 3g
- Sodium: 600mg
- Fat: 25g
- Saturated Fat: 12g
- Unsaturated Fat: 8g
- Trans Fat: 0g
- Carbohydrates: 30g
- Fiber: 2g
- Protein: 15g
- Cholesterol: 30mg
Keywords: hashbrown casserole, breakfast casserole, cheesy breakfast, comfort food, brunch recipe