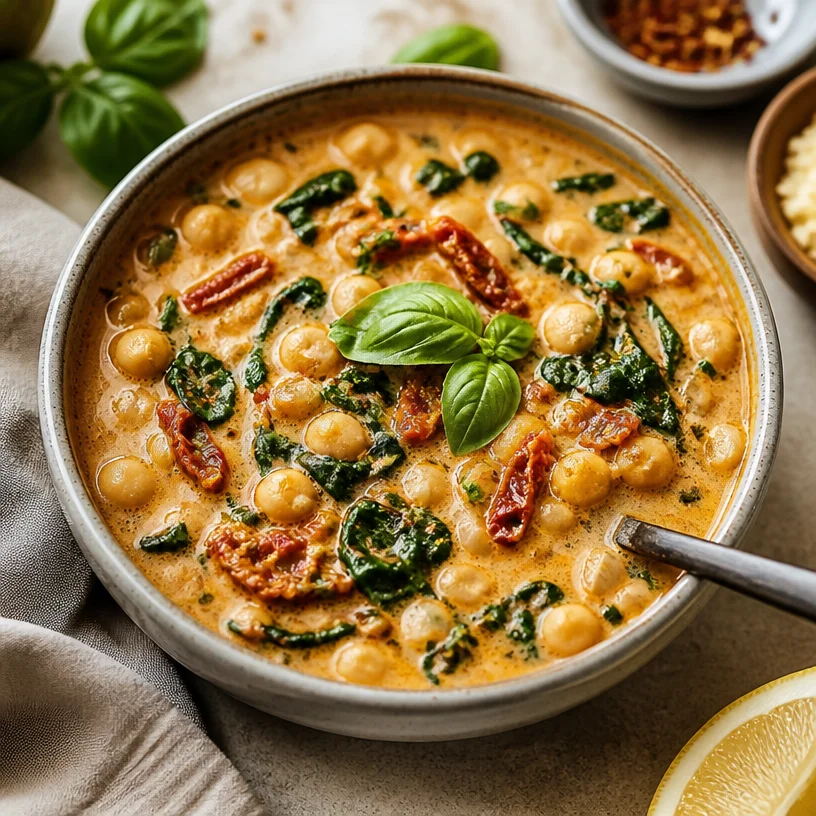
One-Pot Tuscan Chickpea Soup: Creamy Weeknight Comfort
Tuscan Garbanzo Bean Soup: A Cozy Hug in a Bowl
Hello, my lovely kitchen enthusiasts! If you’re anything like me, you find joy in crafting meals that wrap you like a warm hug on a chilly evening. Today, we’re diving into a comforting bowl of Tuscan Garbanzo Bean Soup — a dish that’s as nourishing for the soul as it is for the body.
Imagine this: You gather around your kitchen table with friends, the smell of savory herbs wafting through the air. Laughter dances as you share stories, and before you know it, your soup is the star of the show. Each spoonful is a testament to Italian warmth, rich in flavor and goodness. Let’s bring this experience to life together!
A Whiff of Nostalgia
I first fell in love with this Tuscan Garbanzo Bean Soup during a quaint little cooking class I attended while living in Italy. It was one of those sun-drenched afternoons in a rustic kitchen, where the clinks of ceramic pots perfectly complemented the lively chatter of aspiring cooks. Our instructor, a local chef with a flair for theatrical storytelling, shared tales of how this soup is a staple in his family’s kitchen — the kind of dish that comforts after a long day.
As we stirred the pot and blended flavors, I felt a sense of community and warmth. Each ingredient whispered a story, and that first taste? Pure bliss! It took me right back to the sun-drenched Tuscan hillsides, where food was a celebration of life itself. That day, I knew I had to recreate this magic for you, my dear friends, and make it as simple and approachable as possible.
Ingredients
Here’s what you’ll need for this delightful Tuscan Garbanzo Bean Soup. Each ingredient is a vital part of our culinary symphony:
- 1 tablespoon olive oil: A must-have for sautéing and bringing richness. Swaps: Avocado oil or grapeseed oil work great, too!
- 1/2 cup diced onion: Adds sweetness and depth.
- 2 cloves garlic (minced): Because garlic makes everything better! Pro tip: Fresh is ideal, but garlic powder can work in a pinch!
- 1 teaspoon dried oregano: A classic Italian herb that infuses amazing flavor. You can swap it with thyme or basil.
- 1/2 teaspoon red pepper flakes (adjust to taste): For a little kick! Feel free to omit it if you’re keeping it mild.
- 2 tablespoons tomato paste: The secret to umami goodness in this soup. If you’re in a hurry, feel free to use canned crushed tomatoes!
- 2 (15 oz) cans chickpeas (drained and rinsed): The main star, providing a healthy dose of protein and creaminess. You can substitute with white beans for a different texture.
- 3-4 cups low-sodium vegetable broth: The base of our soup. Use homemade if you can — it’s a game changer!
- 1/3 cup sundried tomatoes in oil (chopped): These contribute a tangy burst of flavor. Substitutions: Fresh tomatoes are a lighter option but lack the concentrated flavor.
- Juice of 1/2 lemon: Brightens everything up! Lime is an excellent replacement here.
- 1 cup full-fat coconut milk or 1/2 cup heavy cream: Creaminess is key! Feel free to use oat or almond milk for a dairy-free option.
- 2-3 cups fresh spinach: Adds color and nutrition. Swap with kale or Swiss chard if you prefer.
- Salt and black pepper to taste: Essential for that final seasoning touch.
- Fresh basil leaves (for garnish): A finishing touch! You can also use parsley if basil isn’t available.
Step-by-Step Instructions
Let’s get cooking! Follow these steps for a dreamy bowl of Tuscan Garbanzo Bean Soup.
-
Heat the olive oil: In a large pot over medium heat, pour in your tablespoon of olive oil. Let it warm up for about a minute until it glistens. This is the magic moment where flavors start to build!
-
Sauté the aromatics: Add the diced onion and stir for about 5 minutes until they’re soft and translucent. The kitchen should start smelling fantastic at this point. Next, toss in the minced garlic and cook for another minute. Remember, we’re concentrating flavors, so don’t let the garlic brown too much!
-
Introduce the spices: Stir in the dried oregano and red pepper flakes. Cooking the spices with the onions and garlic helps release their essential oils, enhancing the overall flavor. Cook for an additional minute, and don’t be afraid to inhale that aromatic goodness!
-
Add tomato paste: Time to add the tomato paste! Stir it into the onion mixture, allowing it to cook for 2–3 minutes. This step intensifies the flavor of the tomatoes!
-
Stir in the chickpeas: Toss in those beautifully drained and rinsed chickpeas. Use a wooden spoon to lightly mash some of the beans — this will create a creamy texture as they cook!
-
Pour in the broth: Now, add the vegetable broth gradually, stirring well to combine everything. Bring it to a gentle simmer. Let it bubble away happily for about 10-15 minutes. This is when our flavors meld together beautifully.
-
Sundried tomatoes and lemon juice: Add in the chopped sundried tomatoes and stir. Then, squeeze in the juice of half a lemon for that zesty brightness that makes everything sing!
-
Finish with coconut milk: Pour in the coconut milk (or heavy cream if you’re using that). Stir it well and bring the soup back to a gentle simmer, allowing it to heat up without boiling. Creamy perfection is just around the corner!
-
Add spinach: Finally, toss in the fresh spinach, stirring until just wilted. Season with salt and black pepper to taste. Taste, adjust, and make it just right for you! Don’t forget to take a moment to appreciate the delightful colors in your pot!
-
Serve it up: Serve the soup in bowls, garnished with fresh basil leaves. Take a moment to admire the dish you’ve created before devouring it.
Serving Suggestions
Plating is all about creating a visual feast! Ladle the Tuscan Garbanzo Bean Soup into shallow bowls. Swirl in a dollop of extra coconut milk or cream, and sprinkle with freshly chopped basil for that lovely pop of green. Feel free to serve with a side of crusty bread to soak up every drop of this wholesome goodness.
Recipe Variations
Feel like spicing things up a bit? Here are some fun twists to consider:
- Spicy Kick: Add more crushed red pepper flakes or a dash of hot sauce to heat things up!
- Herb Infusion: Use fresh herbs like thyme or rosemary for a fragrant twist.
- Creamy and Dreamy: Swap the coconut milk for cashew cream for a nutty flavor profile.
- Vegetable Boost: Add diced carrots or zucchini for extra freshness and texture.
- Protein Punch: Toss in diced chicken or sausage for a heartier version of this soup.
Chef’s Notes
Every recipe has its own journey, and this Tuscan Garbanzo Bean Soup is no exception. The overall feel of a meal can change based on small tweaks! One time, I was feeling extra adventurous and added saffron threads — let’s just say it elevated the dish to a whole new level of elegance! Cooking is all about exploration and making it your own.
FAQs and Troubleshooting
Here are a few questions that might come up while you embark on your soup-making journey:
1. My soup seems too thick; how can I fix it?
No worries! Simply add a bit more vegetable broth or water, stirring until you reach your desired consistency.
2. What if I don’t have chickpeas?
You can replace them with any white beans, like cannellini or navy beans. They’ll still provide great texture and flavor!
3. Can I make this soup ahead of time?
Absolutely! It actually tastes even better the next day. Store it in the fridge for up to three days or freeze for up to a month.
4. What if I don’t have sundried tomatoes?
Using fresh tomatoes is a fantastic alternative, though the flavor will differ slightly. You can also try sun-dried tomato pesto for that concentrated flavor.
Nutritional Info
Calorie count per serving varies based on ingredient choices but here’s a rough idea: approx. 250 calories, loaded with protein and fiber, and various vitamins from the veggies. A hearty meal indeed!
Now that you’ve created this beautiful, wholesome Tuscan Garbanzo Bean Soup, it’s time to gather your loved ones and serve up a bowl of comfort, love, and good company. Cooking is an art, and every meal is a masterpiece waiting to be shared. Happy cooking, friends!
PrintTuscan Garbanzo Bean Soup

A comforting bowl of Tuscan Garbanzo Bean Soup, rich in flavor and goodness, perfect for chilly evenings.
- Prep Time: 15 minutes
- Cook Time: 30 minutes
- Total Time: 45 minutes
- Yield: 4 servings 1x
- Category: Main Course
- Method: Stovetop
- Cuisine: Italian
- Diet: Vegetarian
Ingredients
- 1 tablespoon olive oil
- 1/2 cup diced onion
- 2 cloves garlic (minced)
- 1 teaspoon dried oregano
- 1/2 teaspoon red pepper flakes (adjust to taste)
- 2 tablespoons tomato paste
- 2 (15 oz) cans chickpeas (drained and rinsed)
- 3–4 cups low-sodium vegetable broth
- 1/3 cup sundried tomatoes in oil (chopped)
- Juice of 1/2 lemon
- 1 cup full-fat coconut milk or 1/2 cup heavy cream
- 2–3 cups fresh spinach
- Salt and black pepper to taste
- Fresh basil leaves (for garnish)
Instructions
- Heat the olive oil in a large pot over medium heat. Let it warm up for about a minute.
- Sauté the diced onion for about 5 minutes until they’re soft and translucent. Then add the minced garlic and cook for another minute.
- Introduce the dried oregano and red pepper flakes, cooking for an additional minute.
- Add the tomato paste and stir it into the onion mixture for 2–3 minutes.
- Stir in the chickpeas, lightly mashing some to create a creamy texture.
- Pour in the vegetable broth gradually and bring to a gentle simmer for about 10-15 minutes.
- Add the chopped sundried tomatoes and squeeze in the juice of half a lemon.
- Finish with coconut milk, stirring well and allowing it to heat back to a gentle simmer.
- Add the fresh spinach, stirring until just wilted. Season with salt and black pepper to taste.
- Serve the soup in bowls, garnished with fresh basil leaves.
Notes
You can add more spices for heat or throw in some fresh herbs to enhance flavor. This soup tastes even better the next day!
Nutrition
- Serving Size: 1 serving
- Calories: 250
- Sugar: 4g
- Sodium: 400mg
- Fat: 12g
- Saturated Fat: 6g
- Unsaturated Fat: 4g
- Trans Fat: 0g
- Carbohydrates: 30g
- Fiber: 10g
- Protein: 10g
- Cholesterol: 0mg
Keywords: chickpeas, Tuscan soup, vegetarian soup, healthy soup
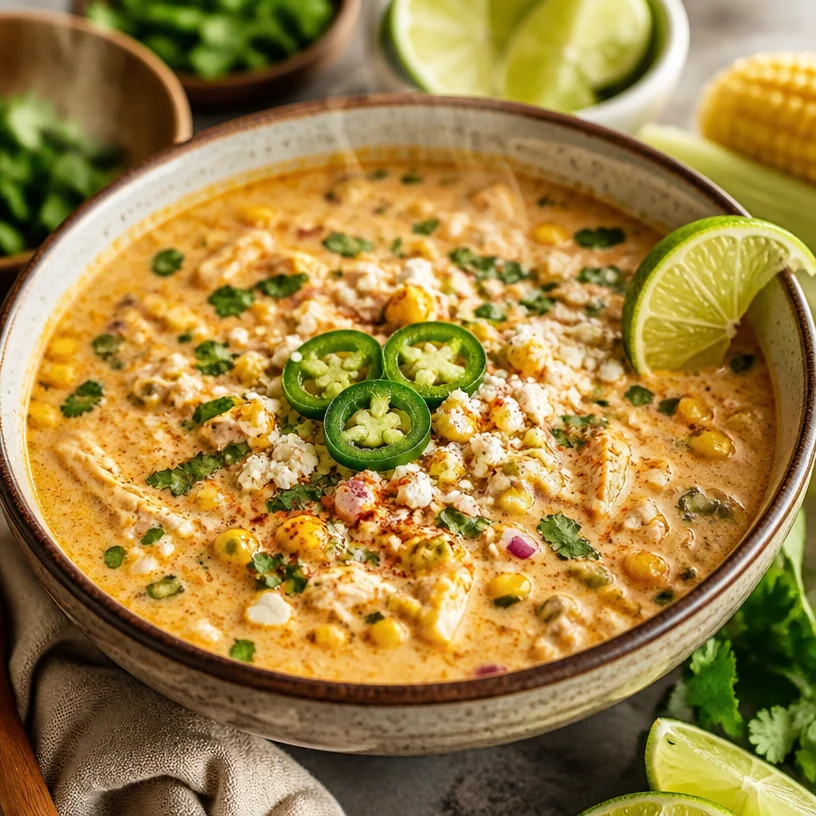
Creamy Mexican Street Corn Soup: 30-Minute Comfort Bowl
Warm Up Your Kitchen with Mexican Street Corn Soup
Hello, fellow foodies! Get ready to embark on a culinary adventure that combines the warmth of home cooking with the vibrant flavors of Mexican street food. Today, we’re diving into a delightfully creamy and comforting Mexican Street Corn Soup. It’s the kind of dish that wraps around you like a cozy blanket, perfect for any occasion — be it a chilly evening, a gathering with friends, or even just a little self-care while binging your favorite show.
As the aroma of sautéed onions and garlic fills your kitchen, your heart will skip a beat. This soup is like a warm hug on a rainy day — rich, comforting, and utterly delicious. Plus, it’s simple enough for weeknight dinners but elegant enough to impress guests. Let’s get cooking and elevate your meal game!
A Taste of Nostalgia
Let me take you back to one of my earliest cooking experiences, where my love for flavor and gathering people took root. Picture this: a sizzling summer day at a lively market in Mexico, the air thick with the scent of grilled corn being slathered with tangy lime, sprinkled with chili powder, and topped with crumbly cheese. I remember standing there, wide-eyed and mouth-watering, watching the vendor transform simple ingredients into pure magic.
That summer day inspired me to recreate that very essence of street food in my own kitchen, and Mexican Street Corn Soup was born! With every spoonful, I’m not just savoring the meal — I’m reliving those joyous memories and the vibrant culture that shaped my love for cooking. Now, let’s bring that same joy to your table.
Ingredients
Let’s gather our ingredients for this scrumptious bowl of Mexican Street Corn Soup. Each component plays a vital role in creating that mouthwatering flavor profile:
-
1 tbsp olive oil
A healthy fat that helps to enhance the flavors of your veggies as they sauté. Feel free to swap it out with any neutral oil, like avocado oil or canola. -
1 small red onion, diced
Red onions add a subtle sweetness and a beautiful pop of color. If you don’t have red onions on hand, yellow onions work perfectly, too! -
1 medium jalapeño, seeded and diced
This pepper brings just the right amount of heat. If you prefer a milder soup, skip it altogether or use a bell pepper instead. -
3 cloves garlic, minced
Fresh garlic adds depth and richness. In a pinch, garlic powder can work, but the fresh stuff is always better! -
2 (12 oz.) boneless, skinless chicken breasts
Chicken is the heart of this soup, creating a satisfying texture. You could also use cooked shredded chicken or even go meatless with chickpeas or tofu. -
1 (12 oz.) package fire-roasted frozen corn (or fresh corn)
Fire-roasted corn gives a smoky flavor that elevates this soup. If fresh corn is in season, don’t hesitate to use that instead! -
1 (4 oz.) can diced green chiles
These add a mild tang that rounds out the dish. Feel free to substitute with any mild salsa you have on hand. -
1 tbsp Tajín seasoning
This zesty Mexican seasoning brings a delightful kick. You can substitute with chili powder and lime zest if you can’t find Tajín. -
2 tsp ground cumin
A warm, earthy spice that forms the backbone of the flavor. Ground coriander can be used as an alternative. -
2 tsp chili powder
Adds a smoky depth to the soup. Again, if you’re out, use paprika with a sprinkle of cayenne for that kick. -
½ tsp table salt
It enhances all the flavors. Always taste and adjust according to your preferences! -
¼ tsp finely ground black pepper
A little bit of this will brighten up your dish. -
4 cups (32 oz.) chicken stock or low-sodium chicken broth
This serves as the soup base. For a lighter option, vegetable broth works beautifully! -
2 cups sour cream (full-fat) or Greek yogurt (full-fat)
This creamy component gives the soup an indulgent thickness. For a healthier twist, opt for low-fat options. -
½ cup shredded Monterey Jack cheese
It melts beautifully and adds a lovely creaminess. Cheddar is a tasty substitute! -
Juice of one lime
A splash of citrus elevates flavors and adds brightness. You could also use lemon juice—whatever you have on hand! -
¼ cup chopped cilantro
This fresh herb adds a burst of flavor. If you’re not a fan, parsley will work just fine! -
½ cup crumbled queso fresco
This crumbly cheese adds richness and a traditional touch. Feta cheese can be a suitable substitute!
Step-by-Step Instructions
Grab that apron, roll up your sleeves, and let’s turn those ingredients into magic! Follow these steps closely to whip up your own pot of goodness:
-
Sauté the Aromatics
In a large pot, heat the olive oil over medium heat. Once hot, toss in the diced red onion and cook until it’s translucent, around 5-7 minutes. The sizzling sound is music to any cook’s ears! Don’t rush this step, as developing those initial flavors lays the foundation for your soup. -
Add the Heat
Next, throw in the diced jalapeño and minced garlic. Sauté for about 2 minutes until fragrant—trust me, your kitchen is going to smell divine! -
Cook the Chicken
Increase the heat slightly and add the chicken breasts to the pot, searing them for a couple of minutes on each side. This creates that beautiful golden crust. You’re not fully cooking it here, just sealing in those juices. -
Incorporate Corn and Chiles
Add the frozen fire-roasted corn and canned green chiles. Stir to combine, letting the ingredients meld together for about 3 minutes. The colors are coming together wonderfully here! -
Bring on the Spices
Sprinkle in the Tajín, ground cumin, chili powder, salt, and black pepper. Stir for another minute to toast the spices and awaken their flavors. -
Pour in the Broth
Now it’s time to pour that lovely chicken broth into the pot, making sure everything is submerged. Bring it to a boil and then reduce to a gentle simmer. Let it cook for about 20-25 minutes until the chicken is fully cooked through. In the interim, don’t be afraid to sneak a taste! -
Shred the Chicken
Once cooked, remove the chicken breasts and shred them using two forks. This is where you can really get into the groove. Shredding it back into the pot ensures those flavors penetrate every piece—delicious! -
Add Creaminess
Stir in the sour cream (or Greek yogurt) and shredded cheese, mixing until everything is beautifully combined. The soup should now be luscious and creamy! -
Finish with Citrus
Squeeze in the juice of one lime and throw in the chopped cilantro. Stir to mix, letting that brightness shine through. Taste one more time; maybe a pinch more salt or pepper is needed! -
Serve It Up
Ladle the soup into bowls, topping each serving with a sprinkle of crumbled queso fresco. Add a few extra cilantro leaves for garnish and maybe a slice of lime on the side. You’ve just created something stunning!
Serving Suggestions
Serving this soup is all about presentation. Use rustic bowls that offer a warm, cozy feel. Pair your delicious Mexican Street Corn Soup with crunchy tortilla chips or a side salad to balance the creaminess. If you’re feeling fancy, you can even serve it with a drizzle of hot sauce or crema for that extra flair!
Recipe Variations
- Spicy Twist: Add diced red chili peppers for a spicier kick.
- Vegetarian Option: Replace the chicken with roasted butternut squash or black beans for a hearty alternative.
- Cheesy Delight: Mix in some cream cheese for an extra creamy consistency.
- Corn Duplication: Use fresh corn cut right off the cob in place of frozen for a seasonal treat.
- Herbal Infusion: Experiment with fresh herbs like basil or oregano for a flavored twist!
Chef’s Notes
What I love most about this recipe is that it allows for freestyling. It started as an ode to that market in Mexico but grew into a dish that constantly evolves in my kitchen! One time, I threw in some leftover grilled chicken and a bunch of fresh herbs — it turned out to be a crowd favorite! Who knew soup could be so versatile?
Cooking like this is all about experimentation, and I encourage you to think of this dish as a blank canvas.
FAQs and Troubleshooting
Why is my soup too thick?
If your soup is thicker than you’d like, simply add little bits of broth or water until you reach your desired consistency.
Can I make this ahead of time?
Absolutely! Just store it in an airtight container in the fridge for up to three days. It also freezes well! Before serving, just give it a good stir and add a bit more broth.
Is the soup too spicy?
If you find your soup has a bit too much heat, a dollop of sour cream or Greek yogurt helps tone it down beautifully.
How can I enhance leftovers?
Leftovers are a blank slate! Consider blending the soup for a creamier texture, or adding fresh herbs and a squeeze of lime for brightness when reheating.
Nutritional Info
While this article focuses on the joy of cooking and sharing meals, if you’re interested in the nutritional content, it’s always good practice to consider the balance of ingredients as you cook. Remember to enjoy in moderation!
So, gather your friends and family around, serve them a hearty bowl of this delicious Mexican Street Corn Soup, and watch the smiles spread across their faces. Because good food doesn’t just fill the belly; it warms the soul! Let’s keep the cooking spirit alive, and remember — great meals are made from great memories! Happy cooking!
PrintMexican Street Corn Soup

A creamy and comforting soup inspired by the vibrant flavors of Mexican street food, perfect for any occasion.
- Prep Time: 15 minutes
- Cook Time: 30 minutes
- Total Time: 45 minutes
- Yield: 4 servings 1x
- Category: Soup
- Method: Stovetop
- Cuisine: Mexican
- Diet: Omni
Ingredients
- 1 tbsp olive oil
- 1 small red onion, diced
- 1 medium jalapeño, seeded and diced
- 3 cloves garlic, minced
- 2 (12 oz.) boneless, skinless chicken breasts
- 1 (12 oz.) package fire-roasted frozen corn (or fresh corn)
- 1 (4 oz.) can diced green chiles
- 1 tbsp Tajín seasoning
- 2 tsp ground cumin
- 2 tsp chili powder
- ½ tsp table salt
- ¼ tsp finely ground black pepper
- 4 cups (32 oz.) chicken stock or low-sodium chicken broth
- 2 cups sour cream (full-fat) or Greek yogurt (full-fat)
- ½ cup shredded Monterey Jack cheese
- Juice of one lime
- ¼ cup chopped cilantro
- ½ cup crumbled queso fresco
Instructions
- Sauté the Aromatics: In a large pot, heat the olive oil over medium heat. Once hot, toss in the diced red onion and cook until translucent, around 5-7 minutes.
- Add the Heat: Next, throw in the diced jalapeño and minced garlic. Sauté for about 2 minutes until fragrant.
- Cook the Chicken: Increase the heat slightly and add the chicken breasts to the pot, searing them for a couple of minutes on each side.
- Incorporate Corn and Chiles: Add the frozen fire-roasted corn and canned green chiles. Stir to combine and let the ingredients meld together for about 3 minutes.
- Bring on the Spices: Sprinkle in the Tajín, ground cumin, chili powder, salt, and black pepper. Stir for another minute.
- Pour in the Broth: Pour the chicken stock into the pot, making sure everything is submerged. Bring it to a boil and then reduce to a gentle simmer. Let it cook for about 20-25 minutes.
- Shred the Chicken: Once cooked, remove the chicken breasts and shred them using two forks. Shred it back into the pot.
- Add Creaminess: Stir in the sour cream (or Greek yogurt) and shredded cheese until everything is combined.
- Finish with Citrus: Squeeze in the juice of one lime and add the chopped cilantro. Stir to mix.
- Serve It Up: Ladle the soup into bowls, topping each serving with crumbled queso fresco and extra cilantro leaves.
Notes
Adjust seasoning to taste. Can be made ahead of time and stored in the fridge.
Nutrition
- Serving Size: 1 serving
- Calories: 450
- Sugar: 6g
- Sodium: 800mg
- Fat: 24g
- Saturated Fat: 10g
- Unsaturated Fat: 10g
- Trans Fat: 0g
- Carbohydrates: 30g
- Fiber: 5g
- Protein: 20g
- Cholesterol: 75mg
Keywords: Mexican soup, street corn, comfort food, creamy soup, chicken soup
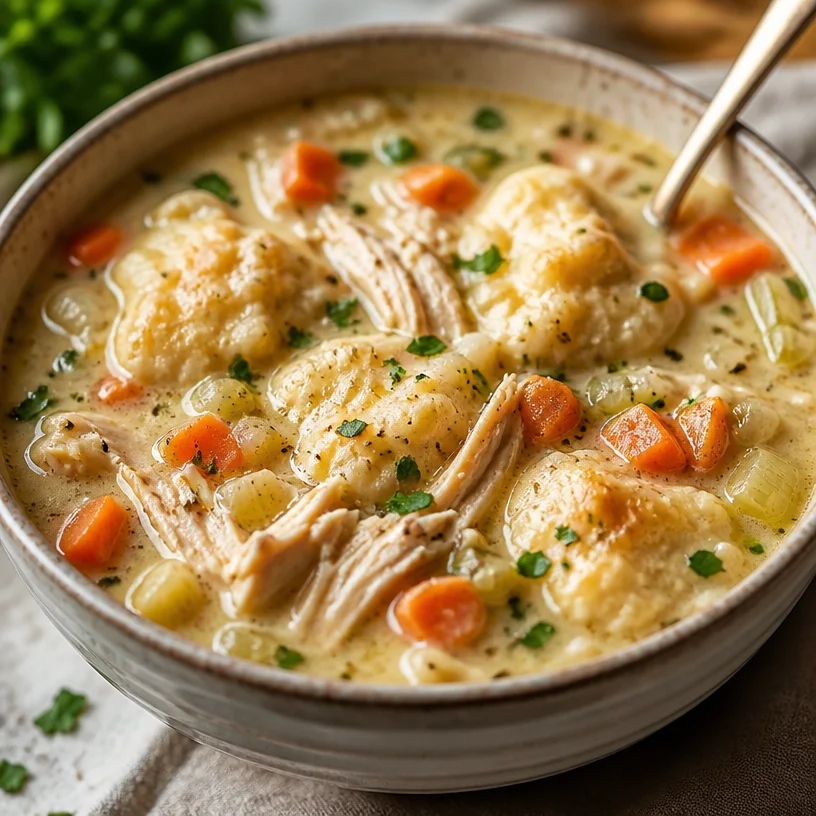
One-Pot Chicken Dumpling Soup in 30 Minutes (Weeknight)
The Comfort of Chicken Dumpling Soup: A Cozy Classic
Hello, fellow foodies! Grab your aprons and settle in, because today we’re diving into a bowl of comfort that’s sure to warm your heart and soul: Chicken Dumpling Soup! This dish embodies everything I love about cooking—it’s hearty, nourishing, and wrapped in nostalgia. Whether you’re facing a chilly evening or just craving something warm and fulfilling, Chicken Dumpling Soup is a classic that never disappoints.
There’s something magical about the way chicken broth envelops fluffy dumplings and tender vegetables, creating a symphony of flavors in every spoonful. And the best part? You don’t have to slave away in the kitchen for hours to create this delightful meal. With a few simple ingredients and a splash of love, you can whip up this comforting favorite in no time.
Picture this: The nostalgic smell of simmering broth, the soft chatter of family around the dining table, and that first, cozy sip of rich, savory goodness. That’s the essence of a home-cooked Chicken Dumpling Soup. But even beyond the dish itself, there’s a richness in the memories it creates. So, let’s gather our ingredients and get cooking—because this isn’t just about the meal; it’s about the stories we share and the moments we cherish around the table.
Personal Story
Ah, Chicken Dumpling Soup—there’s a whole world of memories wrapped in each bite, especially from my childhood. I remember a chilly Saturday afternoon when my grandmother decided it was the perfect day for her famous chicken soup. The air was crisp, and snowflakes were gently falling outside, but inside, the kitchen was warm and filled with the most inviting aroma.
Grandma would start with a whole chicken simmering away in a pot—the sound of bubbling broth was like music to my ears. As she prepped the vegetables, I’d nip in and out of the kitchen, stealing tiny tastes of carrots and sneaking bits of dumpling dough. The best part? When I had the honor of helping her roll out the dumplings. I remember giggling when our dough would stick to the counter and her gentle reminders to wipe my flour-covered hands.
Those moments spent together in the kitchen crafting something so comforting left a lasting imprint on my heart. Now, I get to recreate that cherished recipe for you, taking you back to those warm winter afternoons. Let’s gather our ingredients and start cooking—it’s time to bring a touch of nostalgia to your kitchen!
Ingredients
To create this irresistible Chicken Dumpling Soup, here’s what you’ll need:
-
1 rotisserie chicken, shredded
A cooked rotisserie chicken is a timesaver in the kitchen and adds amazing flavor. You can substitute it with any leftover chicken or poach your own for a fresh twist. -
1 can refrigerated biscuit dough
This is the star of our dumplings! If you prefer a healthier option, try using whole-grain biscuit dough or even homemade dumplings if you’re feeling adventurous. -
4 cups chicken broth
Use high-quality, low-sodium chicken broth for a wholesome base. Homemade broth works wonders, too—try simmering leftover chicken bones with aromatics! -
1 cup heavy cream
This ingredient brings a luxurious, creamy texture to the soup. For a lighter option, swap it with half-and-half or coconut milk for a dairy-free version. -
2 carrots, diced
Carrots add sweetness and color. Feel free to mix in any seasonal vegetables you love! Peas or corn work beautifully. -
2 celery stalks, diced
Celery adds crunch and depth to the flavor. If you’re out, fennel or green beans can also be great substitutes. -
1 onion, chopped
Onions are essential for that aromatic base. Shallots or leeks can serve as delightful alternatives if you want to switch up the flavor. -
1 teaspoon dried thyme
Thyme brings warmth to the soup. If you have fresh thyme, use it! About a tablespoon will add even more vibrant flavor. -
Salt and pepper to taste
Seasoning is key! Always adjust based on your personal taste—taste as you go! -
Fresh parsley, chopped for garnish
Garnishing with fresh herbs elevates the dish. If parsley isn’t available, try chives or even dill for a different flavor profile.
Step-by-Step Instructions
Ready to embark on this delightful cooking adventure? Let’s get started:
-
Prepare the Broth:
In a large pot over medium heat, pour in your chicken broth. If you’re using homemade broth, now’s the time to bring all those delicious flavors to life. For an even deeper flavor, add a bay leaf while it’s warming. -
Sauté the Aromatics:
Add the chopped onions, diced carrots, and celery to the broth. Sauté the vegetables for about 5-7 minutes until they start to soften, making your kitchen burst with tantalizing aromas. Stir them occasionally to prevent sticking—this base is crucial for flavor! -
Add the Shredded Chicken:
Toss in the shredded rotisserie chicken and let it mingle with the veggies for a couple of minutes. This allows all those savory juices to combine and enrich the soup. -
Stir in the Cream and Seasoning:
Pour in the heavy cream, ensuring you mix it well. This is where the soup gets its creamy richness. Then, add in your dried thyme, salt, and pepper to taste. Let it simmer for about 10 minutes, stirring occasionally. Lowering the heat also helps to keep that lovely cream from curdling—nobody wants that! -
Prepare the Dumplings:
While your soup is simmering away, it’s time to tackle the dumplings. Pop open your can of refrigerated biscuit dough and cut each biscuit into quarters. This way, they’ll be fluffy and bite-sized! -
Dumpling Time!
After the soup has simmered, gently drop the cut biscuit pieces into the soup one by one, making sure not to overcrowd. Allow the dumplings to cook for about 10-12 minutes, covered with a lid. They’ll puff up beautifully, soaking in all the savory goodness. -
Final Touches:
Once the dumplings are nice and fluffy, taste the soup one last time. Adjust seasonings if needed, then finish it off with a sprinkle of freshly chopped parsley. Voilà! Your Chicken Dumpling Soup is ready to be served.
Serving Suggestions
Presentation is key when serving this delightful soup! Ladle generous portions into deep bowls, allowing the fluffy dumplings to float on top. A sprinkle of fresh parsley not only adds color but also brings a burst of freshness. Serve alongside crusty bread or warm dinner rolls for an inviting meal that beckons your guests to dig in.
Recipe Variations
Feeling a bit adventurous? Here are some creative twists to make this Chicken Dumpling Soup uniquely yours:
- Spicy Kick: Add a pinch of red pepper flakes for a subtle heat or toss in some diced jalapeños for a more pronounced kick!
- Herbed Dumplings: Mix chopped fresh herbs (like dill or chives) into the biscuit dough before cooking—herbed dumplings are a delightful surprise!
- Add Greens: Toss in some fresh spinach or kale just before serving for added nutrients and a pop of color.
- Coconut Twist: Substitute the cream with coconut milk and add lime juice for a tropical spin that’s refreshing and delicious.
- Mushroom Medley: Introduce some sautéed mushrooms into the broth for a hearty umami depth that complements the chicken perfectly.
Chef’s Notes
Ah, this Chicken Dumpling Soup recipe has seen an evolution over time! I remember the first time I attempted to make it from scratch, and it turned into a giant dumpling disaster—let’s just say some were more doughy than delightful! A good friend suggested simplifying the process with biscuit dough, and that’s when I discovered the magic of quick, homemade comfort food.
The best part of creating this dish is the joy of sharing it. I often find that family and friends request it during cold seasons or when someone’s feeling under the weather. It’s become a comfort food icon in my circle, and I hope it can become one in yours too! Don’t be afraid to play around with it; cooking should be about creativity and enjoying the process.
FAQs and Troubleshooting
-
What if my dumplings aren’t cooking through?
Ensure your soup is simmering gently; if it’s boiling too vigorously, it can cause the dumplings to be doughy. Cover them well and give them the full recommended cooking time. -
Can I freeze the leftovers?
Yes, but keep in mind that the dumplings may become slightly soggy when reheated. It’s often best to freeze the soup without the dumplings and add fresh ones when you’re ready to enjoy it again. -
How do I make this soup gluten-free?
Swap the biscuit dough for gluten-free dumplings or make a quick dumpling mix using gluten-free flour. Just ensure your chicken broth is certified gluten-free! -
Can I use fresh chicken instead of rotisserie chicken?
Absolutely! Just make sure to poach it in the broth until fully cooked and then shred. This can enhance the flavor even further since all the juices will infuse the broth.
Nutritional Info
While this Chicken Dumpling Soup is comfort food at its finest, nutritional info can vary based on your specific ingredients. However, a typical serving (about 1.5 cups) offers around 400–500 calories, approximately 15–20 grams of protein, and a healthy dose of vitamins from the vegetables. For a more precise count, you can calculate the nutritional content based on the specific brands and ingredients you use.
And there you have it! A delicious Chicken Dumpling Soup that’s not just a meal, but a heartfelt experience waiting to happen. I’m so excited for you to try this recipe! So tie on your apron, pour a warm drink, and let’s create something comforting together. Happy cooking, my friends!
PrintChicken Dumpling Soup

A cozy and hearty soup featuring fluffy dumplings and tender vegetables in a rich chicken broth.
- Prep Time: 15
- Cook Time: 30
- Total Time: 45
- Yield: 4 servings 1x
- Category: Main Course
- Method: Simmering
- Cuisine: American
- Diet: N/A
Ingredients
- 1 rotisserie chicken, shredded
- 1 can refrigerated biscuit dough
- 4 cups chicken broth
- 1 cup heavy cream
- 2 carrots, diced
- 2 celery stalks, diced
- 1 onion, chopped
- 1 teaspoon dried thyme
- Salt and pepper to taste
- Fresh parsley, chopped for garnish
Instructions
- Prepare the broth: In a large pot over medium heat, pour in your chicken broth.
- Sauté the aromatics: Add the chopped onions, diced carrots, and celery to the broth.
- Add the shredded chicken: Toss in the shredded rotisserie chicken and let it mingle.
- Stir in the cream and seasoning: Pour in the heavy cream, mixing well.
- Prepare the dumplings: Cut the biscuit dough into quarters.
- Dumpling time! Gently drop the cut biscuit pieces into the soup.
- Final touches: Once the dumplings are fluffy, sprinkle with parsley and serve.
Notes
For a healthier option, use whole-grain biscuit dough. You can also substitute heavy cream with coconut milk for a dairy-free version.
Nutrition
- Serving Size: 1.5 cups
- Calories: 450
- Sugar: 5g
- Sodium: 800mg
- Fat: 24g
- Saturated Fat: 12g
- Unsaturated Fat: 8g
- Trans Fat: 0g
- Carbohydrates: 40g
- Fiber: 2g
- Protein: 20g
- Cholesterol: 80mg
Keywords: Chicken soup, dumplings, comfort food, cozy meal, winter recipe
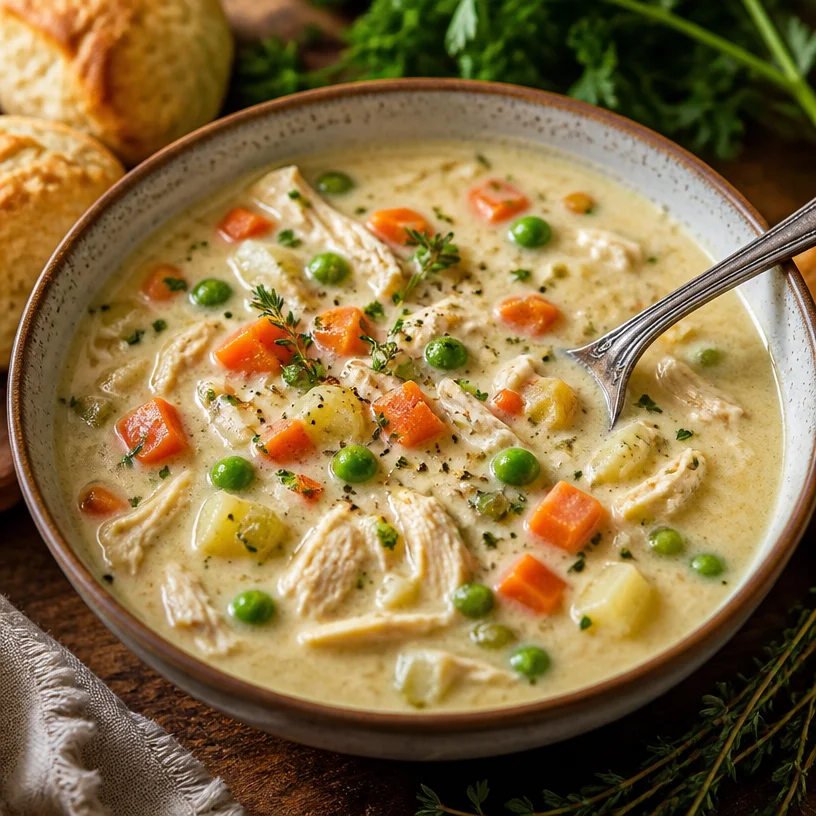
One-Pot Creamy Chicken Pot Pie Soup: Ready in 30 Minutes
Cozy Up with Chicken Pot Pie Soup: The Ultimate Comfort Food
Hello and welcome to a delightful corner of your kitchen! Today, we’re diving into the warming embrace of Chicken Pot Pie Soup. If you’re anything like me, the mere thought of a rich, creamy soup filled with tender chicken and fresh vegetables sends a little shiver of joy down your spine. It’s more than just a dish; it’s a hug in a bowl that brings forth memories of home, laughter, and cherished moments. Whether it’s a cool evening or simply a day that begs for comfort, this soup has your back!
A Taste of Nostalgia
Let me take you back to one of my favorite childhood memories: my mom, apron tied snugly around her waist, bustling around the kitchen on a Sunday afternoon. The scents of sautéing onions and garlic wafted through the house, mingling with laughter from the family room where we gathered, eager for the delicious feast that was on its way. Her famous Chicken Pot Pie was always the highlight, and I can almost hear her voice saying, “Good food brings people together.”
One chilly evening, she decided to shake things up and made a Chicken Pot Pie Soup instead. She had the same flavors but served them in this creamy broth. Everyone was smitten! Dipping warm crusty bread into that heavenly broth felt like the best of all worlds. In my adult years, I made it a point to recreate that feeling—and now, dear friends, I want to share that experience with you!
Ingredients to Gather
Let’s make sure we have everything you need to whip up this comforting bowl of goodness.
-
2 tablespoons olive oil: This not only serves to sauté our should-be-vegetables but also brings a lovely richness. If you’re out of olive oil, canola or sunflower oil work just as well.
-
1 cup onion, diced: Onions add a savory depth to any soup. If you prefer a milder flavor, go for shallots instead!
-
2 cloves garlic, minced: Garlic is a flavor powerhouse. If you find yourself without fresh garlic, a teaspoon of garlic powder can step in.
-
3 carrots, diced: Sweet, bright, and colorful—carrots offer a lovely sweetness. Feel free to swap in parsnips for a different flavor profile.
-
2 celery stalks, diced: This adds crunch and flavor. If you’re not a fan, omit it entirely or replace it with bell peppers.
-
2 cups potatoes, diced: Potatoes add heartiness. For a lighter option, swap in cauliflower for a lower-carb version!
-
4 cups chicken broth: The base of our soup! If you’re aiming for a vegetarian take, vegetable broth will work splendidly.
-
2 cups cooked chicken, shredded: Use rotisserie chicken for convenience! You can also substitute with chickpeas for a vegetarian option.
-
1 cup frozen peas: These pretty little gems add color and sweetness. Fresh peas can work too, but adjust cooking time accordingly.
-
1 teaspoon dried thyme: A must for that aromatic, herbal flavor. If you don’t have it on hand, dried oregano or basil could give a nice twist.
-
1 teaspoon dried rosemary: This adds a woody and pine-like flavor that pairs beautifully with chicken. Fresh rosemary is delightful if you have it.
-
1 cup heavy cream: Oh, the creaminess! For a lighter version, use half-and-half or coconut cream for a dairy-free option.
-
Salt and pepper to taste: Essential for rounding out flavors. Never skip the taste test!
-
Fresh parsley for garnish: This gives a pop of color and freshness! Chives or thyme would also do the trick if you’re out of parsley.
Step-by-Step Instructions
Are you ready to get cooking? Let’s roll up our sleeves, tie on those aprons, and dive into the steps for creating this comforting soup!
-
Sauté Your Aromatics:
In a large pot or Dutch oven, heat the olive oil over medium heat. Add the diced onions and sauté until translucent, about 5 minutes. Ah, the aroma is already perfuming your kitchen! Add the minced garlic and sauté for another minute—just long enough to release those glorious flavors. Don’t let the garlic brown; we want a gentle kiss of flavor here! -
Add Your Veggies:
Toss in the diced carrots and celery, stirring them around for another 5 minutes. You only need to soften them slightly; they’ll continue to cook in the broth. If you want an extra flavor boost, sprinkle in a pinch of salt at this point. Pro tip: Salting releases moisture and enhances flavor—scientifically satisfying! -
Incorporate the Potatoes:
Next, add in the diced potatoes and give everything a good stir to mix the flavors. This is where the magic starts to happen! Cook for an additional 3–4 minutes, just to warm everything through. -
Pour in the Broth:
Now it’s time for a hearty addition. Carefully pour in the chicken broth and stir it all together. Bring to a gentle boil, then reduce the heat and let it simmer for about 15 minutes, or until the potatoes are fork-tender. This is the perfect time to take a breath and enjoy the delicious aroma wafting through your kitchen! -
Shred That Chicken:
While that’s bubbling away, take a moment to shred your cooked chicken. Use two forks or your hands—whichever method feels right! Add the shredded chicken and frozen peas to the pot. These will warm through in just a few minutes. -
Add the Cream and Season:
Stir in the heavy cream, dried thyme, and dried rosemary. Allow it to simmer for another 5 minutes so the flavors meld beautifully. Taste the soup and season with salt and pepper according to your preference. Here’s a chef hack: If you taste and all you notice is the salty flavor, remember that cream can balance it out—try adding more cream for a richer taste! -
Final Touches:
Before serving, give everything a good stir and adjust the seasoning as needed. If the soup seems a bit thick, add a dash of chicken broth or water to reach your desired consistency. You want it creamy but not pudding-like!
Serving Suggestions
Now for the fun part—plating up this scrumptious soup! Use a deep bowl or a rustic bread bowl for a cozy feel. Ladle the soup into the bowls generously, allowing the colorful veggies and tender chicken to shine. Top with freshly chopped parsley for a burst of color and freshness. It’s the perfect invitation to dig in!
Recipe Variations
Feel like experimenting? Here are some tasty twists you can try:
- Herb Twist: Fresh herbs like dill or tarragon can be added for a refreshing change.
- Spicy Kick: Add a dash of red pepper flakes or a splash of hot sauce for a fiery finish!
- Veggie Delight: Boost the veggie content by adding in chopped green beans or corn.
- Grain Variation: For heartiness, you can add cooked rice or pasta to the pot!
- Dairy-Free Option: Swap the cream for coconut milk to give a delicious twist while keeping it dairy-free!
Chef’s Notes
This Chicken Pot Pie Soup has evolved from just a necessity to an experience. The joy of cooking with friends while perfecting it over the years made it a staple in my home! Sometimes, I even let the kids create their own variations—those evenings filled with laughter and creativity are my treasure trove of memories. Oh, and let me tell you about the time I accidentally grabbed chili powder instead of the thyme! Let’s just say the “spicy chicken stew” memories were abundant, and I’ll never live that down!
FAQs and Troubleshooting
Here are some common concerns folks may have about making Chicken Pot Pie Soup:
1. My soup is too thick; what can I do?
No worries! Simply add more broth or water until you reach your desired consistency. Don’t forget to taste and adjust seasoning again if needed!
2. Can I prepare this soup ahead of time?
Absolutely! It can be made in advance and stores well in the fridge for 3–4 days. Just keep in mind that the potatoes may absorb some broth, so you may need to add a splash before reheating.
3. How can I make this a vegetarian dish?
Swap the chicken for hearty mushrooms or chickpeas and use vegetable broth instead. You can still enjoy all the hearty flavors!
4. Can I freeze Chicken Pot Pie Soup?
The soup can be frozen for up to 3 months. Just leave out the cream until you reheat it—this ensures you won’t lose that luscious texture!
Nutritional Info
(This section is optional but quite helpful! Feel free to provide estimates based on typical serving sizes.)
- Calories: 450-500 per serving (based on 1 cup)
- Protein: Approximately 25g
- Fat: 30g
- Carbohydrates: 35g
And there you have it! Your own bowl of Chicken Pot Pie Soup, brimming with warmth and love. Cooking doesn’t just fill the belly; it nourishes the soul. So tie on that apron, gather your loved ones, and enjoy those small, beautiful moments around the table. I can’t wait to hear about your cozy cooking adventure!
PrintChicken Pot Pie Soup

Warm and comforting Chicken Pot Pie Soup with tender chicken and fresh vegetables, perfect for chilly evenings.
- Prep Time: 15 minutes
- Cook Time: 30 minutes
- Total Time: 45 minutes
- Yield: 4 servings 1x
- Category: Soup
- Method: Stovetop
- Cuisine: American
- Diet: Comfort Food
Ingredients
- 2 tablespoons olive oil
- 1 cup onion, diced
- 2 cloves garlic, minced
- 3 carrots, diced
- 2 celery stalks, diced
- 2 cups potatoes, diced
- 4 cups chicken broth
- 2 cups cooked chicken, shredded
- 1 cup frozen peas
- 1 teaspoon dried thyme
- 1 teaspoon dried rosemary
- 1 cup heavy cream
- Salt and pepper to taste
- Fresh parsley for garnish
Instructions
- Sauté the olive oil in a large pot over medium heat. Add the diced onions and sauté until translucent, about 5 minutes. Add the minced garlic and sauté for another minute.
- Add the diced carrots and celery, stirring for another 5 minutes.
- Incorporate the diced potatoes and stir to mix the flavors. Cook for an additional 3–4 minutes.
- Pour in the chicken broth and stir. Bring to a gentle boil, reduce heat, and let simmer for about 15 minutes, or until the potatoes are fork-tender.
- Shred the cooked chicken and add it along with the frozen peas to the pot.
- Add the heavy cream, dried thyme, and dried rosemary. Simmer for another 5 minutes, then season with salt and pepper to taste.
- Final touches: Stir, adjust seasoning if needed, and add broth or water for desired consistency before serving.
Notes
The soup can be made ahead and stored in the fridge for 3–4 days. It can also be frozen for up to 3 months without cream.
Nutrition
- Serving Size: 1 cup
- Calories: 450
- Sugar: 5g
- Sodium: 800mg
- Fat: 30g
- Saturated Fat: 15g
- Unsaturated Fat: 10g
- Trans Fat: 0g
- Carbohydrates: 35g
- Fiber: 4g
- Protein: 25g
- Cholesterol: 100mg
Keywords: Chicken Pot Pie Soup, Comfort Food, Soup Recipes

Minute One-Pan Cheesy Ground Beef and Rice Casserole
Cheesy Ground Beef and Rice Casserole: A Comforting Classic for Every Table
Hello, fellow food enthusiasts! Today, we’re diving into a dish that embodies cozy, intimate dinners and the comforting embrace of home-cooked meals. I’m excited to share my recipe for Cheesy Ground Beef and Rice Casserole, a classic that’s not only easy to whip up but also loaded with delicious flavors. So, grab your apron, and let’s get cooking!
Introduction: A Comfort Food Dream Come True
There’s something about casseroles that instantly brings a sense of nostalgia and warmth. For many of us, these one-pan wonders hold the essence of family dinners, lazy Sundays, and the simple joy of sharing a meal. The way a good casserole can fill a room with its rich aroma, and the way it brings loved ones together, is truly magical.
This Cheesy Ground Beef and Rice Casserole is one of those dishes that can turn any gathering from ordinary to extraordinary with minimal effort. Imagine a warm, cheesy layer of goodness topped with golden brown edges, enticing everyone at the table to dig in! It’s hearty, satisfying, and best of all—flexible! Whether you’re hosting a casual dinner party, feeding a hungry family, or just in need of some comfort food on a chilly evening, this casserole has got your back.
I remember the first time I made a version of this recipe for a big family dinner. I was a bit nervous—would everyone enjoy it? My heart raced as I pulled the bubbling casserole out of the oven, the mouthwatering scent enveloping the kitchen. But the moment I set it down on the table and watched everyone dive in, the joy on their faces washed over my nerves like the first sip of a smooth, velvety wine. They were loving it, reaching for seconds—or even thirds! That evening was more than just a meal; it was a reminder that good food has the power to create connections and evoke smiles.
Personal Story: A Family Tradition Reimagined
I want to take a moment to share a nostalgic memory tied to this comforting casserole. Growing up, my grandmother had a way of turning humble ingredients into something extraordinary. She often made her famous rice casserole, which inspired me to create my own version after her passing. I still remember sitting at her cozy kitchen table, surrounded by the laughter of family members, all thumbing through her well-worn recipe book as she recounted the stories behind each dish.
One particular evening, she let my siblings and me in on her secret: the key ingredient was love. And of course, plenty of cheese! I can still picture her laughing as she melted a hefty chunk of cheddar into her casserole, and how she would always say, “You can never have too much cheese!” Those lessons in patience, creativity, and cooking with intention have stuck with me ever since. This Cheesy Ground Beef and Rice Casserole serves as a delicious tribute to her infallible spirit and her extraordinary talent for bringing people together through food.
Ingredients: Gathering Your Essentials
Let’s get into the nitty-gritty of what you’ll need to create this culinary masterpiece! Below are the ingredients for our Cheesy Ground Beef and Rice Casserole, along with some chef insights and substitution tips to make your preparation a breeze.
-
1 lb lean ground beef: This is your protein of choice, but you can substitute it with ground turkey or chicken for a lighter version. If you’re looking to go meatless, try using a meat substitute like lentils or chickpeas!
-
1 small onion, diced: Onions add a foundational layer of flavor. If you’re not a fan, try shallots or green onions. You can even skip them entirely for a simpler taste!
-
2 cloves garlic, minced: Garlic infuses the dish with aromatic richness. If you’re in a pinch, garlic powder can work, but fresh is best!
-
2 cups cooked white rice: This is what binds everything together. Feel free to swap in brown rice or quinoa for a nutty flavor and higher fiber content.
-
1 can (10.5 oz) cream of mushroom soup (or cream of chicken): This creamy base brings everything together. You could also make a homemade version using heavy cream, chicken broth, and sautéed mushrooms for a fresh twist.
-
1/2 cup milk or beef broth: This adds moisture to the casserole. Use vegetable broth for a vegetarian version, or even almond milk for a dairy-free option.
-
2 cups shredded cheddar cheese (divided): Cheddar is a classic, but don’t hesitate to experiment! Gouda, pepper jack, or a blend of your favorites would bring stunning flavor.
-
1 tsp paprika: This adds a hint of smokiness. If you’re feeling adventurous, try smoked paprika for an extra layer of depth.
-
Salt and pepper to taste: Essential to elevate the flavors—don’t skip this step!
-
Optional: chopped parsley for garnish: A sprinkle of parsley adds a fresh touch and a pop of color to your beautifully layered casserole.
Step-by-Step Instructions: Crafting Your Casserole
Ready to get started? Let’s take it step-by-step to whip up this irresistible Cheesy Ground Beef and Rice Casserole. Trust me, it’s simpler than you might think!
-
Preheat your oven: Start by preheating your oven to 350°F (175°C). This step is crucial, as it ensures your casserole cooks evenly.
-
Brown the ground beef: In a large skillet over medium heat, add the lean ground beef, breaking it apart with a spatula. Cook until browned, which should take about 5-7 minutes. Drain excess fat if necessary. Pro tip: adding a pinch of salt while browning the meat helps bring out its flavor!
-
Sauté the vegetables: Add the diced onion and minced garlic to the skillet, stirring to combine with the beef. Cook for an additional 3-4 minutes until the onion becomes translucent and the garlic is fragrant. This is where you’re building layers of flavor!
-
Combine the creamy base: In a large bowl, mix together the cream of mushroom soup and milk (or broth) until smooth. This will be the luxurious glue that holds our casserole together!
-
Add the rice and seasonings: Stir in the cooked rice along with the paprika, salt, and pepper. Mix well to ensure all ingredients are fully combined. This dish is all about creating harmony in flavors!
-
Fold in the beef mixture: Incorporate the sautéed beef, onion, and garlic into the creamy rice mixture, ensuring an even distribution of all those delicious ingredients. This is where the casserole magic begins!
-
Layer with cheese: Divide the shredded cheddar cheese in half; add half of it into the mixture and stir to combine. Add the rest on top of the casserole for that glorious bubbling crust you desire!
-
Transfer to a casserole dish: Pour the entire mixture into a greased 9×13 inch baking dish, spreading it out evenly. I like to use a spatula to smooth the top for a beautiful presentation.
-
Bake to perfection: Cover your dish with aluminum foil and bake in the preheated oven for 20 minutes. Then, remove the foil and bake for another 15-20 minutes, or until the cheese is melted and bubbly, with golden edges. Keep an eye on it to prevent over-browning!
-
Garnish and enjoy: Once out of the oven, let your casserole rest for about 5 minutes, then sprinkle with chopped parsley before serving. And voilà! You’re ready to impress.
Serving Suggestions: Plate Up with Style
This Cheesy Ground Beef and Rice Casserole is spectacular on its own, but a little thoughtful presentation can take it to the next level. Serve it straight from the baking dish for that homey, inviting feel, or portion it onto plates for a more refined touch. A sprinkle of fresh parsley not only adds color but also a refreshing flavor burst that beautifully contrasts the richness of the dish. Pair it with a crisp green salad and some crusty bread for a complete meal that your guests (or family) will rave about!
Recipe Variations: Get Creative in the Kitchen!
Feeling inspired to take this casserole to new heights? Here are a few variations to get your creative juices flowing:
-
Tex-Mex Twist: Add some black beans, corn, and diced bell peppers for a Southwestern flair. Top with some jalapeños for a spicy kick!
-
Vegetarian Delight: Swap out the ground beef for sautéed mushrooms, zucchini, or your favorite veggie mix for a satisfying meatless meal.
-
Herbed Delight: Incorporate fresh herbs like thyme or rosemary into the rice mix for an aromatic touch. Trust me, this will elevate your casserole!
-
Spicy Kick: Mix in some hot sauce or diced green chiles for a little heat—perfect for those who crave a bit of spice in their meals!
-
Cheesy 3-Way: Use a combination of different cheeses (like mozzarella and pepper jack) for a flavor explosion! Experiment with what you have on hand!
Chef’s Notes: A Recipe Close to My Heart
This Cheesy Ground Beef and Rice Casserole has truly evolved through the years. What started as a well-loved family recipe has transformed into my personal celebration of flavors. The beauty of cooking is its adaptability! I often recall funny kitchen mishaps—like the time I mistakenly grabbed powdered sugar instead of salt and ended up with a slightly sweet (but still delicious) version of this casserole that had my family roaring with laughter! Embrace your kitchen journey—it’s all about experimenting and having fun!
FAQs and Troubleshooting: Let’s Clear Things Up
1. can I make this casserole ahead of time?
Absolutely! You can prepare the casserole up to the baking step. Just cover it tightly with plastic wrap or foil and store it in the refrigerator. When you’re ready to bake, allow it to come to room temperature and then follow the baking instructions.
2. why is my casserole too dry?
If your casserole comes out dry, it’s likely that the creamy mixture didn’t have enough moisture to begin with. Next time, add a bit more milk or broth or cover it with foil for a longer time to trap steam.
3. can I freeze leftovers?
Yes, this casserole freezes beautifully! Simply let it cool completely, then transfer it to an airtight container or freezer bag and label it. It should last up to three months—just reheat in the oven until warmed through!
4. how can I ensure golden cheese on top?
To achieve that perfect golden crust, broil your casserole on low for the last couple of minutes of baking. Just keep a close eye on it, as things can get toasty very quickly!
Nutritional Info
While I believe in enjoying good food without restraint, here’s a rough estimate of the nutritional info per serving for our Cheesy Ground Beef and Rice Casserole (say, based on 6 servings):
- Calories: 455
- Protein: 25g
- Carbohydrates: 42g
- Fat: 22g
- Fiber: 1g
This is a comfort dish, so the occasional indulgence is totally okay—especially when shared around the table with loved ones!
Conclusion
I hope you’ve enjoyed this journey into the creation of my Cheesy Ground Beef and Rice Casserole as much as I love sharing it with you. Remember, good cooking is about connection, creativity, and a generous sprinkle of laughter. So, lace up that apron, invite some friends over, and make it a special dinner to remember.
If you try this recipe, don’t forget to share your culinary creations with us at Ivory Apron. Let’s keep the spirit of beautiful, intentional cooking alive! Happy cooking, everyone!
PrintCheesy Ground Beef and Rice Casserole

A comforting and cheesy casserole perfect for family gatherings and cozy dinners.
- Prep Time: 15 minutes
- Cook Time: 35 minutes
- Total Time: 50 minutes
- Yield: 6 servings 1x
- Category: Main Course
- Method: Baking
- Cuisine: American
- Diet: None
Ingredients
- 1 lb lean ground beef
- 1 small onion, diced
- 2 cloves garlic, minced
- 2 cups cooked white rice
- 1 can (10.5 oz) cream of mushroom soup
- 1/2 cup milk or beef broth
- 2 cups shredded cheddar cheese (divided)
- 1 tsp paprika
- Salt and pepper to taste
- Optional: chopped parsley for garnish
Instructions
- Preheat your oven to 350°F (175°C).
- Brown the ground beef in a skillet over medium heat for 5-7 minutes; drain excess fat.
- Sauté the onion and garlic with the beef for 3-4 minutes until fragrant.
- Combine the cream of mushroom soup and milk (or broth) in a large bowl.
- Add the cooked rice, paprika, salt, and pepper, and mix well.
- Fold in the beef mixture, ensuring even distribution.
- Layer in half of the shredded cheese, then pour the mixture into a greased 9×13 inch baking dish.
- Bake covered for 20 minutes, then uncover and bake for an additional 15-20 minutes until cheese is bubbly.
- Garnish with parsley before serving.
Notes
Perfect for meal prep and can be frozen for later.
Nutrition
- Serving Size: 1 serving
- Calories: 455
- Sugar: 3g
- Sodium: 800mg
- Fat: 22g
- Saturated Fat: 10g
- Unsaturated Fat: 8g
- Trans Fat: 1g
- Carbohydrates: 42g
- Fiber: 1g
- Protein: 25g
- Cholesterol: 70mg
Keywords: casserole, comfort food, cheesy, ground beef, easy recipe
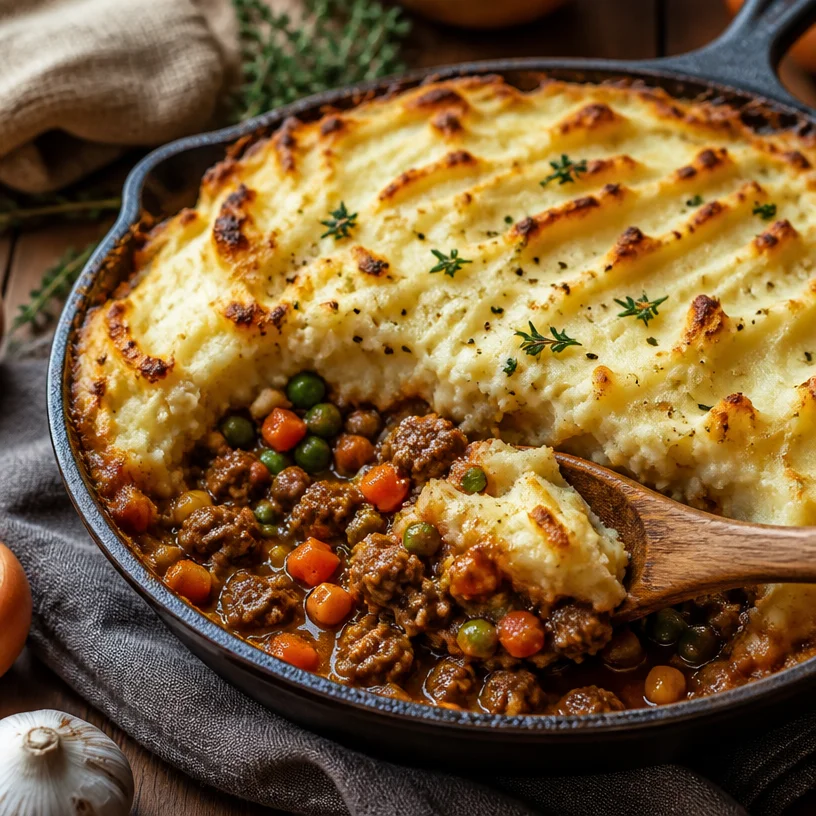
Minute One-Pan Shepherd’s Pie for Busy Weeknights
Easy Shepherd’s Pie: Comfort Food with a Twist
Hello, my lovely foodies! Today, I’m super excited to share with you a delightful recipe that’s truly close to my heart — Easy Shepherd’s Pie. This dish is the epitome of cozy comfort food, perfect for those chilly evenings when you want something hearty and delicious. The best part? It’s so simple to make! So let’s roll up our sleeves, gather our ingredients, and dive into the warmth of the kitchen together.
A Cozy Little Story
Growing up, my family had a tradition of gathering around the dinner table every Sunday. No matter how busy life got, Sunday dinners were sacred. My mom would whip up a big pot of Shepherd’s Pie because she knew it was a crowd-pleaser. I can still remember the aroma wafting through the house, making my stomach rumble before we even sat down.
I’d help her in the kitchen, peeling potatoes and stirring the filling. Those moments were about more than just food; they were about love, laughter, and bonding. As we’d dig into that savory pie, I’d watch my family’s eyes light up with each bite. It’s one of those meals that warms your heart and brings people together, and it’s a tradition I’m thrilled to carry forward.
So today, I invite you to share in that spirit of togetherness as we create our own Easy Shepherd’s Pie. Trust me, your family will cherish it just as much as mine did!
Ingredients
Here’s what you’ll need to make this comforting delight:
-
1 lb ground lamb or beef
You can choose between lamb for a more traditional taste, or beef for a heartier option. If you’re looking for a leaner choice, ground turkey works too! -
2 cups mixed vegetables (carrots, peas, corn)
Fresh or frozen, these veggies add color and nutrition. If you’re feeling adventurous, you can substitute with green beans or diced bell peppers. -
1 onion, chopped
Onions give the dish a fantastic depth of flavor. Yellow onions are great, but red onions can add a bit of sweetness. -
2 cloves garlic, minced
Garlic is a flavor powerhouse! Feel free to adjust the amount to suit your palate — more for garlic lovers! -
1 cup red wine
A splash of red wine enriches the sauce with complexity. If you prefer not to use alcohol, replace it with beef broth for a non-alchoholic version. -
2 cups mashed potatoes
Home-cooked is best! Or you can use store-bought for a quick shortcut. Any mashed potato recipe works, so feel free to add herbs or cheese. -
1 cup beef broth
This will keep your shepherd’s pie moist and flavorful. Chicken broth can also work if you’re using chicken. -
2 tablespoons Worcestershire sauce
This adds that umami kick we all love. For a vegetarian option, try soy sauce or a vegan Worcestershire sauce. -
Salt and pepper to taste
Always essential for bringing out flavors. Adjust according to your preference! -
Olive oil for cooking
A light drizzle of olive oil gives a wonderful flavor and helps in sautéing. You can opt for any cooking oil or butter if you prefer.
Step-by-Step Instructions
-
Prep your Ingredients:
Start by gathering all your ingredients on the counter. Pre-chop your vegetables, and have everything ready to go. This makes the cooking process smooth and fun! -
Cook the Meat:
In a large skillet or frying pan, heat a tablespoon of olive oil over medium heat. Add the chopped onion and minced garlic. Sauté them together until they’re soft and fragrant — about 3-5 minutes. Then, add the ground lamb or beef, breaking it up with a spatula. Cook until browned, about 7-10 minutes. This is where your kitchen starts to smell incredible! -
Add the Vegetables:
Toss in your mixed veggies. Stir well to combine everything while letting those flavors meld together for another 5 minutes. -
Pour in the Red Wine:
Now, here comes the fun part! Pour in the red wine and let it simmer for 5 minutes. You want to reduce the wine just a bit, concentrating those lovely flavors. If you prefer not using wine, add a splash of beef broth and let it steam off a little. -
Combine Broth & Season:
After the wine has reduced, add the beef broth and Worcestershire sauce. Season with salt and pepper. Let this simmer gently for about 10 minutes, allowing everything to get cozy. If the mixture seems too runny, you can thicken it with a bit of cornstarch mixed with water. -
Prepare the Mash:
While your meat and veggies are bubbling away, if you’re making homemade mashed potatoes, now’s the time to whip them up. You want them to be creamy and smooth. If you’re using store-bought, follow the package instructions to warm them up. -
Assemble the Pie:
Preheat your oven to 400°F (200°C). In a baking dish, spread the meat and vegetable mixture evenly at the bottom. Then, dollop the mashed potatoes on top, spreading them out gently to cover everything. Don’t worry about being perfect — rustic is beautiful! -
Bake to Perfection:
Pop the assembled shepherd’s pie into the oven and bake for about 25-30 minutes, or until the top is golden and the edges are bubbling. You can broil for an extra 2-3 minutes if you want that nice crusty top. -
Serve It Up:
Once done, take the pie out of the oven and let it rest for a few minutes. This helps all those delicious juices settle in. Then, use a large spoon to serve it up!
Serving Suggestions
When it comes to serving Shepherd’s Pie, I like to keep it simple. A hearty slice on a plate alongside a fresh green salad with a tangy vinaigrette makes for a beautiful balance. You can also serve it with a dollop of crème fraîche or a sprinkle of fresh herbs, like parsley or chives, to elevate the dish even further.
Recipe Variations
Here are a few fun twists you can try with your Shepherd’s Pie:
-
Vegetarian Version: Substitute the meat with lentils or diced mushrooms, and use vegetable broth instead of beef broth. You can also add more vegetables like zucchini or spinach.
-
Cheesy Mash: Mix some shredded cheese into your mashed potatoes for an indulgent creamy top.
-
Spicy Kick: Add a teaspoon of chili flakes or a dash of hot sauce to the meat mixture for a little heat!
-
Curry Twist: Mix in some curry powder with the vegetables for a unique flavor profile that adds warmth and spice.
-
Root Veggie Mash: Swap regular potatoes for sweet potatoes, parsnips, or a blend for added natural sweetness and nutrition.
Chef’s Notes
This recipe is one of those that has naturally evolved over time. I’ve tried countless variations, but my simple, cozy version always takes me back to my mom’s kitchen. I love how easy it is to modify depending on what’s in my fridge. Plus, it’s a fantastic way to use up leftover veggies!
One time, I had a mishap with some overly salty broth — yikes! It made me get creative by adding a bit of cream to the mash, which balanced everything beautifully. So, don’t be afraid to make adjustments based on your taste preferences or what you have available.
FAQs and Troubleshooting
-
Q: What if my meat is too dry?
A: If your meat filling becomes dry, add a little more beef broth or red wine to bring moisture back into the dish before topping it with the mash. -
Q: Can I freeze Shepherd’s Pie?
A: Absolutely! It’s great for meal prep. Assemble it, cover it tightly, and pop it in the freezer. Just adjust the baking time when you’re ready to cook it from frozen. -
Q: My potatoes are lumpy. What did I do wrong?
A: Lumpy mashed potatoes usually come from not mashing them enough or using cold butter. For the creamiest mash, use hot potatoes, and mash until smooth! -
Q: Can I make this in advance?
A: Yes! You can prepare the filling ahead of time and store it in the fridge. Just assemble and bake when you’re ready to serve.
Nutritional Info (Optional)
While I usually focus on the comfort of enjoying your food, a serving of this Easy Shepherd’s Pie contains roughly 450 calories, depending on the specific ingredients used. It’s a satisfying meal that provides a good mix of protein, carbs, and veggies!
So there you have it, my delightful food lovers! Easy Shepherd’s Pie is not just a recipe; it’s a way to create cherished moments around your table. I hope you enjoy making it as much as I do. Remember to have fun, and don’t stress about perfection — it’s all about feeling good and sharing those joyful flavors with your loved ones. Happy cooking, and let’s savor the warmth of togetherness through every delicious bite!
PrintEasy Shepherd’s Pie

A hearty and comforting shepherd’s pie made with your choice of ground lamb or beef, mixed vegetables, and topped with creamy mashed potatoes.
- Prep Time: 15 minutes
- Cook Time: 40 minutes
- Total Time: 55 minutes
- Yield: 4 servings 1x
- Category: Main Course
- Method: Baking
- Cuisine: British
- Diet: None
Ingredients
- 1 lb ground lamb or beef
- 2 cups mixed vegetables (carrots, peas, corn)
- 1 onion, chopped
- 2 cloves garlic, minced
- 1 cup red wine
- 2 cups mashed potatoes
- 1 cup beef broth
- 2 tablespoons Worcestershire sauce
- Salt and pepper to taste
- Olive oil for cooking
Instructions
- Prep your ingredients: Gather all your ingredients and pre-chop your vegetables.
- Cook the meat: Heat olive oil in a skillet, add onion and garlic, then cook until soft. Add ground meat and cook until browned.
- Add the vegetables: Stir in mixed veggies and cook for another 5 minutes.
- Pour in the red wine and let it simmer for 5 minutes to reduce.
- Combine broth and season: Add beef broth and Worcestershire sauce, season with salt and pepper, and simmer for 10 minutes.
- Prepare the mash: Make your mashed potatoes, aiming for a creamy texture.
- Assemble the pie: Spread the meat mixture in a baking dish, top with mashed potatoes.
- Bake to perfection: Bake at 400°F (200°C) for 25-30 minutes until golden.
- Serve it up: Let the pie rest for a few minutes before serving.
Notes
This recipe can be customized with various vegetables or by using a vegetarian option. It’s also great for meal prep and can be frozen.
Nutrition
- Serving Size: 1 serving
- Calories: 450
- Sugar: 5g
- Sodium: 600mg
- Fat: 20g
- Saturated Fat: 7g
- Unsaturated Fat: 10g
- Trans Fat: 0g
- Carbohydrates: 35g
- Fiber: 4g
- Protein: 25g
- Cholesterol: 70mg
Keywords: Shepherd's Pie, comfort food, hearty meal, family recipe

One-Pan Kielbasa Cheesy Potato Casserole for Busy Weeknights
Comfort Meets Elegance: Kielbasa Sausage Cheesy Potato Casserole
Welcome to Ivory Apron! Today, I’m thrilled to share one of my all-time favorite comfort foods – Kielbasa Sausage Cheesy Potato Casserole. This dish is not just a meal; it’s a hug in a casserole dish! Filled with smoky kielbasa, creamy potatoes, and melted cheese, this recipe has it all: flavor, warmth, and that nostalgic charm that makes every bite feel like home.
A Taste of Nostalgia
Growing up, family dinners were always an occasion, and my favorite part was the hearty meals my mom would whip up. One of the stars of those dinners was her cheesy potato casserole – a dish that married simplicity with irresistible flavor. Whenever I smelled that lovely aroma wafting through the kitchen, I knew that laughter, stories, and cherished memories were just around the corner.
I vividly remember the evenings spent around the dining table, with everyone served a generous helping of that cheesy goodness. We would talk, share stories, and maybe even squabble over the last crispy bits on the casserole. Now, every time I make this dish, I’m transported back to those lively family dinners, each bite echoing the love that was always present around our table.
Now, let’s roll up our sleeves and dive into making this delightful Kielbasa Sausage Cheesy Potato Casserole!
Ingredients
-
1 lb (450 g) smoked kielbasa sausage, sliced into ½-inch pieces
- A classic choice that adds a wonderfully smoky flavor to the dish. Can substitute with turkey kielbasa for a leaner option or any other smoked sausage you prefer.
-
1 bag (32 oz / 900 g) frozen diced hash brown potatoes, thawed
- These provide a great base for our casserole. If frozen potatoes aren’t available, you can use freshly diced potatoes—just remember to par-cook them first!
-
1 can (10.5 oz / 295 g) cream of chicken soup (or cream of mushroom)
- Cream of chicken soup adds richness and a bit of savory depth. If you’re looking for a vegetarian version, swap this out for cream of mushroom soup.
-
1 cup sour cream
- This ingredient complements the creaminess and balances the flavors. Greek yogurt can be a fantastic alternative; it offers a similar tang without compromising texture.
-
2 cups shredded cheddar cheese (divided)
- I prefer a sharp cheddar for its bold flavor! You can substitute with Monterey Jack for a milder taste or use a blend of cheeses for more complexity.
-
½ cup chopped green onions (or white onion sautéed)
- Green onions give a bright crunch, but sautéed onions work beautifully too, adding a sweet depth to the dish.
-
½ teaspoon garlic powder
- A must for that extra flavor kick. Fresh garlic can also be used, but be careful not to burn it when cooking!
-
½ teaspoon black pepper
- Freshly ground black pepper will enhance all the flavors without overpowering them.
-
½ teaspoon paprika
- This not only adds a lovely color but also a subtle smokiness that complements the kielbasa.
-
2 tablespoons butter (melted)
- We’ll use this to enhance flavor and create a lovely crispy topping if you decide to use cornflakes or crackers.
-
Optional: 1 cup crushed cornflakes or Ritz crackers for topping
- This is where the magic happens! The topping becomes delightful and crunchy, offering a wonderful contrast to the soft casserole underneath.
Step-by-Step Instructions
Step 1: Preheat the Oven
- Preheat your oven to 350°F (175°C). This is a great time to make sure your roasting dish is ready to go! I prefer a 9×13 inch dish for this casserole.
Step 2: Sauté the Base
- If you’re using white onion, let’s get it sautéing! Melt a tablespoon of butter over medium heat and add your chopped onions. Stir occasionally until they’re translucent and aromatic, about 5 minutes. A tip from the kitchen: Adding a pinch of salt helps them sweat and enhances their natural sweetness!
Step 3: Mix the Ingredients
- In a large bowl, combine the thawed diced hash browns, sliced kielbasa, cream of chicken (or mushroom) soup, sour cream, sautéed onions, 1 cup of shredded cheddar cheese, garlic powder, black pepper, and paprika. Use a spatula to mix together gently; you want everything to be well-coated without mashing the potatoes.
Step 4: Assemble the Casserole
- Transfer the mixture into your greased 9×13 inch dish, spreading it evenly. It’s all coming together now! If you’re feeling fancy, make little swirls with the spatula on top to create an appealing surface.
Step 5: Add Some Crunch (Optional)
- If you’re opting for that delicious topping, melt the remaining tablespoon of butter and mix it with the crushed cornflakes or crackers to coat them lightly. Sprinkle this mixture over the casserole for a fantastic crunchy finish.
Step 6: Bake Your Casserole
- Pop your casserole into the oven, uncovered, and bake for 45-50 minutes. Halfway through, take a peek! If the top is getting too brown, you can cover it lightly with foil.
Step 7: The Final Touch
- With about 10 minutes left of baking, sprinkle the remaining 1 cup of cheddar cheese on top. Return it to the oven until the cheese is melted and bubbly—this is where the excitement happens, and your kitchen will smell divine!
Serving Suggestions
Once your casserole is golden and bubbly, it’s time to serve! Allow it to rest for about 10 minutes before diving in. For a polished presentation, plate it with a sprinkle of fresh green onions for bright color and a touch of freshness. Pair it with a crisp side salad for a balanced meal or serve alongside some crusty bread for dipping!
Recipe Variations
- Vegetarian Twist: Swap out kielbasa for sautéed mushrooms or lentils for a hearty veggie version.
- Spicy Kick: Add diced jalapeños or a sprinkle of cayenne pepper to the mix for a tangy heat that will lift the flavors.
- Herb Infusion: Toss in fresh herbs like thyme or rosemary for an aromatic boost.
- Loaded Casserole: Stir in some crumbled bacon with the kielbasa for a smoky twist—and who could resist bacon?
Chef’s Notes
Over the years, my Kielbasa Sausage Cheesy Potato Casserole has evolved. I started with my mom’s classic recipe, of course, but I couldn’t resist making it my own. One of my favorite adaptations was when I accidentally used sweet potatoes instead of regular ones. The combination was surprisingly delightful, bringing an unexpected sweetness and vibrant color to the dish. Cherished memories always inspire kitchen creativity; don’t be afraid to make this recipe your own!
FAQs and Troubleshooting
1. Can I prepare this casserole ahead of time?
- Absolutely! You can assemble it a day in advance and refrigerate it. Just add an extra 10–15 minutes to the baking time if it’s coming straight from the fridge.
2. What if my casserole is too watery?
- If you find your mixture too liquidy before baking, you can add a handful of shredded cheese or a tablespoon of flour to help thicken it up.
3. How do I know when it’s done?
- Your casserole is ready when it’s bubbly and the cheese on top is melted and has started to brown slightly. The center should be hot when tested with a knife.
4. Can I freeze the leftovers?
- Yes! Let it cool completely before transferring it to an airtight container and freezing. Reheat in the oven, covered with foil, so it warms through without drying out.
Nutritional Info
While specific nutritional content might vary based on ingredient choices, here’s a rough estimate per serving (1/8 of casserole):
- Calories: 480
- Protein: 22g
- Carbohydrates: 40g
- Fat: 28g
I hope you enjoy making this Kielbasa Sausage Cheesy Potato Casserole as much as I do! Remember, cooking isn’t just about the food; it’s about creating memories and sharing love with those around you. So, tie on that apron and let’s get cooking!
PrintKielbasa Sausage Cheesy Potato Casserole

A comforting casserole filled with smoky kielbasa, creamy potatoes, and melted cheese, perfect for family gatherings.
- Prep Time: 15 minutes
- Cook Time: 50 minutes
- Total Time: 65 minutes
- Yield: 8 servings 1x
- Category: Main Course
- Method: Baking
- Cuisine: American
- Diet: Omnivore
Ingredients
- 1 lb (450 g) smoked kielbasa sausage, sliced into ½-inch pieces
- 1 bag (32 oz / 900 g) frozen diced hash brown potatoes, thawed
- 1 can (10.5 oz / 295 g) cream of chicken soup (or cream of mushroom)
- 1 cup sour cream
- 2 cups shredded cheddar cheese (divided)
- ½ cup chopped green onions (or white onion sautéed)
- ½ teaspoon garlic powder
- ½ teaspoon black pepper
- ½ teaspoon paprika
- 2 tablespoons butter (melted)
- Optional: 1 cup crushed cornflakes or Ritz crackers for topping
Instructions
- Preheat your oven to 350°F (175°C).
- Sauté the onions if using white onion with melted butter until translucent.
- Mix the hash browns, kielbasa, cream of chicken soup, sour cream, sautéed onions, 1 cup of cheddar cheese, garlic powder, black pepper, and paprika in a large bowl.
- Transfer the mixture into a greased 9×13 inch dish, spreading it evenly.
- Add the crushed cornflakes or crackers topping if desired and mix with melted butter.
- Bake uncovered for 45-50 minutes, check halfway and cover if browning too much.
- Sprinkle the remaining cheddar cheese on top in the last 10 minutes for melting.
Notes
Feel free to substitute kielbasa with sautéed mushrooms or lentils for a vegetarian version, or add jalapeños for a spicy kick.
Nutrition
- Serving Size: 1 serving
- Calories: 480
- Sugar: 4g
- Sodium: 900mg
- Fat: 28g
- Saturated Fat: 12g
- Unsaturated Fat: 10g
- Trans Fat: 0g
- Carbohydrates: 40g
- Fiber: 3g
- Protein: 22g
- Cholesterol: 85mg
Keywords: casserole, comfort food, kielbasa, cheesy, potatoes
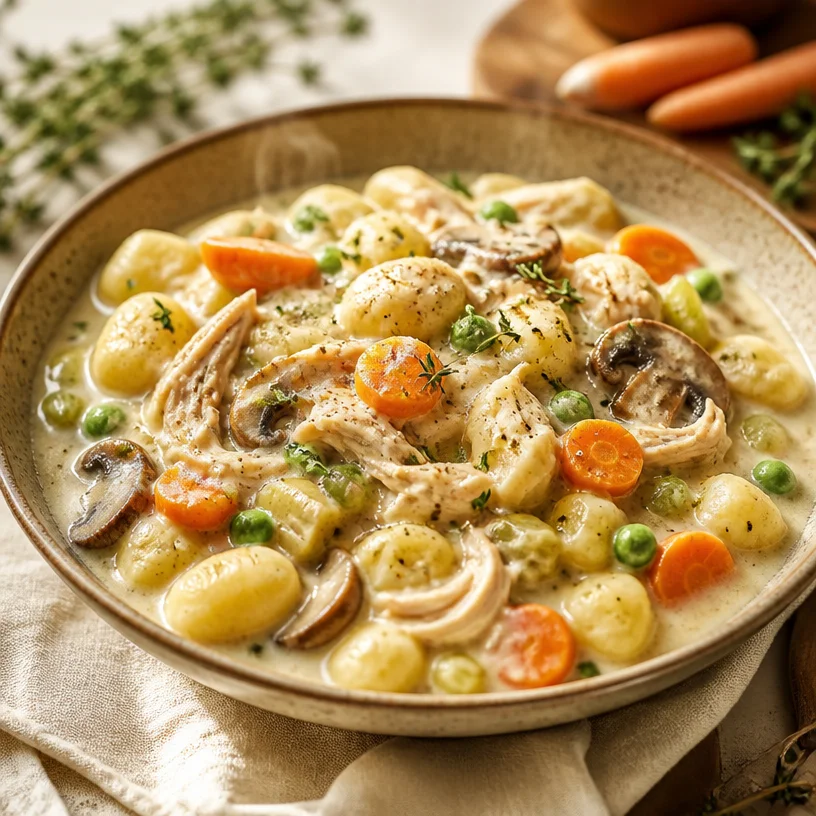
One-Pot Gnocchi Chicken Pot Pie: Creamy Weeknight Comfort
One-Pot Gnocchi Chicken Pot Pie: Cozy Comfort in Every Bite
Hello, fellow foodies! Today, we’re diving into one of my absolute favorite comfort foods that brings both warmth and nostalgia to the table—One-Pot Gnocchi Chicken Pot Pie! This dish is like a warm hug on a chilly day, a blend of creamy, flavorful goodness and nostalgic memories that make you feel right at home.
Introduction
Ah, the magic of a pot pie! It’s the ultimate in comfort food, and when you add gnocchi to the mix, it becomes something exceptionally special. Picture this: a hearty, creamy base filled with tender chicken, vibrant veggies, and pillowy gnocchi that soak up all those delicious flavors. And the best part? You only need one pot. Yes, please!
I remember the first time I made a pot pie from scratch. I was in college, trying to impress some friends during finals week with my culinary prowess. I had no idea what I was doing, but I threw together a mix of whatever ingredients I had on hand, hoping that the magic of cooking would come to my rescue. Spoiler alert: it did! The kitchen filled with a warm, inviting aroma, and I ended up serving up bowls of comfort that had my friends raving—so much so that we postponed our study session. That’s the beauty of food; it’s always more than just sustenance. It’s about connection, warmth, and shared moments around the table!
Let’s roll up our sleeves and dive into this one-pot wonder. Whether you’re hosting a dinner party or just looking for something cozy for the family, this One-Pot Gnocchi Chicken Pot Pie is sure to become a staple in your kitchen.
Personal Story
Years ago, I visited a quaint little restaurant in my hometown that served the most delightful chicken pot pie. It was bursting at the seams with tender chicken, vibrant vegetables, and a perfectly flaky crust. I remember savoring every spoonful, feeling a comforting wave wash over me. Fast forward to a sunny Saturday afternoon, and I decided to recreate that magic in my own kitchen. Armed with a handful of ingredients and a nostalgic heart, I experimented with flavors, discovering that the secret ingredient was always a pinch of love. My version evolved over time, embracing simplicity and comfort while swapping in gnocchi for that delightful twist. The smiles around my table when I served it were the ultimate reward!
Ingredients
Let’s gather our ingredients! Here’s what you’ll need for this comforting dish:
-
4 Tablespoons butter or vegan butter
This forms the base of your sauce. If you’re going dairy-free, vegan butter works beautifully! -
1 cup sliced carrots
Sweet and colorful, carrots add a lovely crunch. Substitute with peas or bell peppers if desired. -
4 oz mushrooms (sliced)
Mushrooms provide an earthy depth. If you’re not a fan, leave them out or substitute with zucchini. -
1 large or 2 small ribs celery (thinly sliced)
Celery adds a refreshing crunch. You could swap with parsnips for a sweeter flavor. -
1 large shallot or small onion (chopped)
For a bit of aromatic sweetness. If you prefer a stronger flavor, a red onion works too! -
Homemade seasoned salt and pepper
A dash of seasoning makes all the difference! You can use regular salt and pepper but try adding some smoked paprika for a unique twist. -
2 cloves garlic (pressed or minced)
Because garlic makes everything better, am I right? Use a pinch of garlic powder if fresh isn’t available. -
1 teaspoon poultry seasoning
This is my secret weapon for that classic pot pie flavor! -
Pinch dried thyme
A gentle herbal note. Fresh thyme works well too! -
3 Tablespoons gluten-free flour (or all-purpose flour if not GF)
This helps thicken our filling. Make sure to stir well to avoid clumping! -
2 cups chicken stock or broth
For a rich base; I love using homemade if I have it. Vegetable broth is a great alternative for a lighter option! -
1 cup milk (any kind, I use unsweetened almond milk)
This adds creaminess to our sauce. Any non-dairy milk should work fine! -
12 oz package gluten-free gnocchi
Yes, the star of the show! Feel free to use potato gnocchi or even homemade if you’re feeling adventurous. -
1-1/2 cups shredded chicken breast (~1/2 lb pre-cooked)
A great way to use leftovers! Rotisserie chicken is perfect here, too. -
1/2 cup frozen peas
A pop of color and sweetness. You can use fresh peas if you have them!
Step-by-Step Instructions
Alright, let’s get cooking! Follow these steps to create your One-Pot Gnocchi Chicken Pot Pie:
-
Melt the Butter
In a large pot over medium heat, melt the butter until bubbly. This is your flavor base! I love using a heavy-bottomed pot for even cooking. -
Sauté the Vegetables
Toss in the sliced carrots, mushrooms, celery, and shallots. Sauté for about 5-7 minutes until the shallots are translucent and the vegetables start to soften. This step is crucial; it’s where the flavor begins to develop. -
Add the Garlic and Seasonings
Stir in the minced garlic, poultry seasoning, thyme, salt, and pepper. Sauté for another 1-2 minutes until fragrant. Trust me, your kitchen will smell heavenly! -
Thicken the Mixture
Sprinkle in the gluten-free flour (or all-purpose) and stir well to coat the vegetables. This will help thicken our sauce. Cook for about a minute to get rid of that raw flour taste. -
Pour in the Broth and Milk
Gradually whisk in the chicken stock and milk, ensuring there are no lumps. Bring to a gentle simmer, stirring often. It’s okay if it looks a bit lumpy at first; just keep stirring! -
Add the Gnocchi and Chicken
Once your mixture is simmering, gently stir in the gnocchi and shredded chicken. Let it cook for about 3-5 minutes until the gnocchi float to the top, indicating they’re done! -
Finish with Peas
Stir in the frozen peas, let them warm through, and taste for seasoning. Add a pinch more salt or pepper if needed; your palate is the best judge!
Serving Suggestions
For a beautiful presentation, ladle the One-Pot Gnocchi Chicken Pot Pie into shallow bowls. Add a sprinkle of fresh herbs like parsley or thyme on top for a pop of color. Serve with crusty bread or a side salad for a full meal!
Recipe Variations
- Spicy Twist: Add a pinch of red pepper flakes or diced jalapeños for a spicy kick.
- Herb Infusion: Swap half of the chicken stock for white wine to deepen flavor and add a herby aroma.
- Vegetarian Delight: Omit the chicken and add chickpeas or diced tofu for protein.
- Cheesy Goodness: Stir in a handful of shredded cheese like cheddar or Gruyère just before serving for a creamy finish.
Chef’s Notes
Cooking is as much about the process as it is about the result. Over time, this recipe has evolved from classic chicken pot pie to a delightful gnocchi twist, combining textures and flavors that make every bite unique. I often find myself reminiscing about my early cooking attempts, from burnt sauces to over-seasoned meals—every mishap taught me a little more about what makes a dish truly special. And let’s be honest, sometimes the best part of cooking is laughing at the stories that come along with it!
FAQs and Troubleshooting
-
Why is my sauce too thick?
If your sauce becomes too thick, simply add a splash more broth or milk until you reach your desired consistency. -
Can I add other vegetables?
Absolutely! Feel free to incorporate your favorites—sweet corn, bell peppers, or even kale would work well. -
What if I don’t have gnocchi?
You can use small pasta shapes as a substitute! Just be sure to cook them according to package directions before adding them. -
Can I make this in advance?
Yes, you can! Simply store it in an airtight container in the fridge for up to 3 days. Reheat it gently on the stovetop, adding a little extra broth or milk to loosen it up.
Nutritional Info (if applicable)
While I won’t dive into specifics here, remember that balance is key. This One-Pot Gnocchi Chicken Pot Pie packs in protein, veggies, and comforting carbs. Remember to adapt the recipe according to your dietary needs!
So, there you have it! A warm, cozy, and delightful One-Pot Gnocchi Chicken Pot Pie that will surely be a hit around your table. Cooking is an adventure—let’s continue exploring flavors, sharing stories, and making memories together. Tie on that apron, pour a glass of something nice, and enjoy this beautiful dish. Happy cooking!
PrintOne-Pot Gnocchi Chicken Pot Pie

A cozy and comforting one-pot dish featuring creamy chicken, vibrant vegetables, and pillowy gnocchi.
- Prep Time: 15 minutes
- Cook Time: 30 minutes
- Total Time: 45 minutes
- Yield: 4 servings 1x
- Category: Main Course
- Method: Stovetop
- Cuisine: American
- Diet: Gluten-Free, Dairy-Free option available
Ingredients
- 4 Tablespoons butter or vegan butter
- 1 cup sliced carrots
- 4 oz mushrooms (sliced)
- 1 large or 2 small ribs celery (thinly sliced)
- 1 large shallot or small onion (chopped)
- Homemade seasoned salt and pepper
- 2 cloves garlic (pressed or minced)
- 1 teaspoon poultry seasoning
- Pinch dried thyme
- 3 Tablespoons gluten-free flour (or all-purpose flour if not GF)
- 2 cups chicken stock or broth
- 1 cup milk (any kind)
- 12 oz package gluten-free gnocchi
- 1–1/2 cups shredded chicken breast (~1/2 lb pre-cooked)
- 1/2 cup frozen peas
Instructions
- Melt the butter in a large pot over medium heat until bubbly.
- Toss in the sliced carrots, mushrooms, celery, and shallots. Sauté for 5-7 minutes until vegetables start to soften.
- Stir in the minced garlic, poultry seasoning, thyme, salt, and pepper; sauté for another 1-2 minutes until fragrant.
- Sprinkle in the gluten-free flour and stir well to coat the vegetables. Cook for about 1 minute.
- Pour in the chicken stock and milk, whisking to ensure no lumps. Bring to a gentle simmer, stirring often.
- Add the gnocchi and shredded chicken, cooking for 3-5 minutes until the gnocchi float to the top.
- Stir in the frozen peas and warm through. Adjust seasoning as needed.
Notes
For added richness, consider stirring in cheese just before serving. Store leftovers in an airtight container for up to 3 days.
Nutrition
- Serving Size: 1 serving
- Calories: 450
- Sugar: 6g
- Sodium: 600mg
- Fat: 18g
- Saturated Fat: 5g
- Unsaturated Fat: 10g
- Trans Fat: 0g
- Carbohydrates: 50g
- Fiber: 4g
- Protein: 22g
- Cholesterol: 60mg
Keywords: gnocchi, chicken pot pie, comfort food, one-pot meal, gluten-free
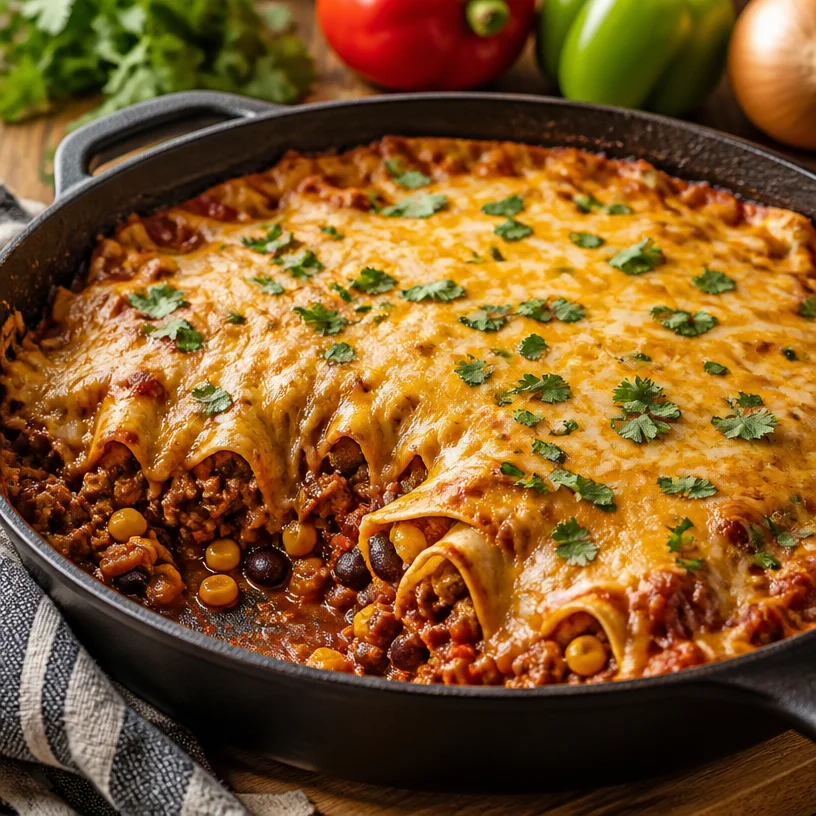
One-Pan Beef Enchiladas: 30-Min Weeknight Dinner for Busy Moms
One-Pan Beef Enchiladas: A Deliciously Simple Dish
Hello there, culinary adventurers! Today, I’m thrilled to share with you one of those magical recipes that makes dinner feel like a fiesta: One-Pan Beef Enchiladas! This dish wraps up comfort food and convenience, let’s dive into this colorful world of flavors together.
Introduction
Imagine this: It’s a busy weekday evening, the kind where everyone’s racing through the front door and the aroma of delicious food is always a welcome relief. You want to impress — maybe your family, maybe friends — but let’s be real; no one has the energy for a multi-course meal on a Wednesday night! Enter my One-Pan Beef Enchiladas: satisfying, packed with flavor, and requiring just one pan. No fussy cleanup, no stress!
This dish is the epitome of vibrant Mexican cuisine, and it’s incredibly easy to make. With layers of seasoned ground beef, fresh veggies, and ooey-gooey cheese all tucked lovingly inside tortillas and smothered in enchilada sauce, your dinner is sure to become an instant classic.
Plus, it embraces the need for ease while delivering gorgeous presentation and bold flavors. Let’s roll up our sleeves and get cooking together. Trust me, your taste buds will thank you!
Personal Story
One of my fondest memories entwined with enchiladas comes from my college days. Picture a cramped apartment with friends huddled around a rickety dining table, laundry piling in the corner. We had potluck-themed nights trying to discover new dishes and flavors. One evening, my buddy Maria decided to whip up her grandmother’s famous beef enchiladas. I swear, the entire apartment transformed into a restaurant. The lush aroma wafting from the oven had us gathering like moths to a flame.
We laughed, spilled salsa, and even argued about who could roll the perfect enchilada. By the end of the night, we were stuffed, happy, and fairly adept at the art of wrapping tortillas. It was a reminder that great food often means great memories — and those are the moments I love to recreate in my own kitchen.
Ingredients
Let’s gather our ingredients for this one-pan wonder:
-
1 lb lean ground beef: A classic base for the enchiladas, lean beef keeps it lighter without sacrificing flavor. If you’re feeling adventurous, swap it with ground turkey, chicken, or even a plant-based protein!
-
1 can black beans, drained and rinsed: Adds a hearty texture and a boost of fiber. If you don’t have black beans, pinto or kidney beans work just as well.
-
1 cup corn: Frozen or canned corn brightens the dish with sweet pop! If you can’t find corn, you can replace it with chopped zucchini or bell peppers for a different texture.
-
1 bell pepper, diced: Any color you love! Red, yellow, or green — all add that beautiful crunch. Can’t find bell peppers? Minced jalapeños provide a spicy twist!
-
1 onion, diced: A staple aromatics that makes everything taste better. If you’re onion-averse, give shallots a try; they have a milder flavor.
-
2 cups enchilada sauce: The lifeblood of this dish. You can make your own or grab a jar if you’re short on time. Trying a green sauce instead? That’s another delicious option!
-
2 cups shredded cheese (cheddar or Mexican blend): The more cheese, the merrier! I love a combo of Monterey Jack and cheddar for incredible meltiness.
-
8 small corn or flour tortillas: Opt for corn for a more authentic touch, but flour tortillas work wonderfully if you prefer a softer bite.
-
1 tsp cumin: This warm spice contributes a lovely depth and is a must for any Mexican-inspired dish!
-
1 tsp chili powder: Adds a hint of heat and spiciness. If ’spicy’ isn’t your favorite flavor, feel free to halve this amount.
-
Salt and pepper to taste: Simple but essential! Adjust according to personal preference for the tastiest experience.
-
Fresh cilantro for garnish (optional): A sprinkle of this fragrant herb adds freshness to finish your dish. If cilantro isn’t your jam, fresh parsley can work in a pinch!
Step-by-Step Instructions
Ready to bring the magic to life? Here we go!
-
Preheat your oven: Set your oven to 375°F (190°C). This is crucial to ensuring the enchiladas bubble away nicely when they go in, helping the cheese golden up beautifully.
-
Sauté the aromatics: In a large oven-safe skillet over medium heat, add a splash of oil and toss in the diced onions and bell pepper. Cook for 4-5 minutes until they are soft and fragrant. Here’s a tip: If you want extra depth, add a pinch of salt while sautéing; it will enhance the flavors!
-
Cook the beef: Increase the heat to medium-high, and add the ground beef to the pan. Break it up with a wooden spoon and season it with cumin and chili powder, salt, and pepper. Cook until fully browned, roughly 6-8 minutes. Make sure to let it get a good sear for that delicious, rich flavor.
-
Add the beans and corn: Stir in the drained black beans and corn, mixing everything until well combined. The colors will begin to brighten your day! Let it cook for an additional 2-3 minutes to heat through. Here’s the pro tip: if you want a bit of heat, toss in some diced jalapeños with the veggies!
-
Assemble the enchiladas: Now comes the fun part! Spread about ½ cup of enchilada sauce evenly across the bottom of the skillet. Take your tortillas and fill each one with about ⅓ cup of the beef mixture. Roll them tightly and place them seam-side down in the skillet. Repeat until you’ve made all the enchiladas and they are snug in the pan.
-
Top with sauce and cheese: Pour the remaining enchilada sauce over the rolled tortillas, covering them generously. Don’t skimp! Now, sprinkle that glorious shredded cheese evenly on top. This is where the magic happens — cheese melting and bubbling!
-
Bake to perfection: Slide your skillet into the preheated oven and bake for 20-25 minutes or until the cheese is fully melted and bubbly. Keep an eye on it towards the end! Those golden edges are where the best flavors flourish.
Serving Suggestions
Once out of the oven, let the enchiladas cool for a moment. To serve, dish up a portion onto each plate, draping with fresh cilantro and perhaps a dollop of sour cream to balance the flavors. Pair it with a simple side salad topped with a zingy lime vinaigrette, and you’ll feel like a culinary genius!
Recipe Variations
Want to switch things up a bit? Here are a few delicious ideas:
-
Vegetarian Enchiladas: Swap the ground beef for a mix of sautéed mushrooms, spinach, and zucchini. It’s a wholesome and delicious alternative!
-
Spicy Kick: Add diced green chilies or a few slices of jalapeño inside the enchiladas or on top before baking for an extra heat boost.
-
Baja Style: For a refreshing twist, top the baked enchiladas with shredded cabbage or a mango salsa for a fresh crunch!
-
Creamy Sauce: If you want something decadent, mix a bit of cream cheese or sour cream into the enchilada sauce before spreading it over the rolled tortillas.
-
Breakfast Enchiladas: Replace the beef with scrambled eggs, chorizo, or breakfast sausage for a fun brunch option!
Chef’s Notes
One of my favorite things about this dish is its evolution through family and friends. I’ve seen it transform from a simple weeknight meal into a centerpiece for larger gatherings. Just recently, I made it for a dinner party, adding a side of guacamole and margaritas — talk about elevating a weeknight to something special!
It’s the simplicity that makes it beautiful; it’s easy to invite more flavors, textures, or even switches as your comfort level grows in the kitchen. Every time I whip this up, it reminds me of those college nights filled with joy, fun experimentation, and, of course, lots of laughter.
FAQs and Troubleshooting
What if my tortillas tear when rolling?
Don’t fret! If your tortillas are a bit brittle, try warming them slightly in the microwave for about 15-20 seconds before filling. This little hack softens them for an easier roll.
Can I prepare these ahead of time?
Absolutely! You can assemble the enchiladas a day ahead and store them covered in the refrigerator. Just add a few extra minutes to the baking time if cooking from cold.
What can I replace the ground beef with?
You can use any ground meat of your choice or even shredded chicken. For a vegetarian version, beans or lentils work beautifully, giving a varied texture while remaining hearty.
How long do leftovers last?
The enchiladas can typically last about 3-4 days when stored in a covered container in the fridge — if they last that long, that is!
Nutritional Info (Optional)
While cooking is all about enjoyment, it’s good to have an idea of what we’re serving up! Here’s a quick breakdown per serving (based on standard ingredients):
- Calories: approximately 450
- Protein: 29g
- Carbohydrates: 40g
- Fat: 22g
- Fiber: 10g
- Sugar: 4g
And there you have it, my friends! A delicious one-pan meal that delights and comforts. So grab your apron, gather your ingredients, and let’s make some killer beef enchiladas together. Remember, good food is about coming together and creating beautiful memories. Happy cooking!
PrintOne-Pan Beef Enchiladas

A deliciously simple and satisfying One-Pan Beef Enchiladas packed with flavor and made for easy cleanup.
- Prep Time: 15 minutes
- Cook Time: 30 minutes
- Total Time: 45 minutes
- Yield: 4 servings 1x
- Category: Main Course
- Method: Baking
- Cuisine: Mexican
- Diet: None
Ingredients
- 1 lb lean ground beef
- 1 can black beans, drained and rinsed
- 1 cup corn
- 1 bell pepper, diced
- 1 onion, diced
- 2 cups enchilada sauce
- 2 cups shredded cheese (cheddar or Mexican blend)
- 8 small corn or flour tortillas
- 1 tsp cumin
- 1 tsp chili powder
- Salt and pepper to taste
- Fresh cilantro for garnish (optional)
Instructions
- Preheat your oven: Set your oven to 375°F (190°C).
- Sauté the aromatics: In a large oven-safe skillet over medium heat, add a splash of oil and toss in the diced onions and bell pepper. Cook for 4-5 minutes until they are soft and fragrant.
- Cook the beef: Increase the heat to medium-high, and add the ground beef to the pan. Cook until fully browned, roughly 6-8 minutes.
- Add the beans and corn: Stir in the drained black beans and corn, mixing everything until well combined. Let it cook for an additional 2-3 minutes.
- Assemble the enchiladas: Spread about ½ cup of enchilada sauce evenly across the bottom of the skillet. Fill each tortilla with about ⅓ cup of the beef mixture, roll, and place seam-side down in the skillet.
- Top with sauce and cheese: Pour the remaining enchilada sauce over the rolled tortillas and sprinkle shredded cheese on top.
- Bake to perfection: Slide your skillet into the preheated oven and bake for 20-25 minutes or until the cheese is fully melted and bubbly.
Notes
Feel free to substitute ground beef with ground turkey or a mix of sautéed vegetables for a vegetarian version.
Nutrition
- Serving Size: 1 serving
- Calories: 450
- Sugar: 4g
- Sodium: 500mg
- Fat: 22g
- Saturated Fat: 10g
- Unsaturated Fat: 12g
- Trans Fat: 0g
- Carbohydrates: 40g
- Fiber: 10g
- Protein: 29g
- Cholesterol: 70mg
Keywords: beef enchiladas, one-pan recipes, easy dinner

One-Pan Texas Roadhouse-Style Smothered Chicken Recipe
Discover the Comfort of Texas Roadhouse Smothered Chicken
Hello there, fellow food enthusiasts! If you’re anything like me, the moment you step into the kitchen, you feel a sense of magic in the air—an invitation to create something beautiful and delicious. Today, I’m thrilled to share with you a beloved recipe that makes my heart sing: Texas Roadhouse Smothered Chicken. This dish captures the spirit of comfort food, combining tender chicken breasts smothered in hearty sautéed mushrooms and onions, drenched in zesty BBQ sauce, and topped with gooey cheddar cheese. Imagine the aroma wafting through your kitchen—it’s pure bliss!
I stumbled upon this gem during a cozy dinner with friends one evening. We had finished our usual fare and started reminiscing about memorable meals, and someone brought up the irresistible flavors of Texas Roadhouse. The glow of the restaurant came alive in our minds—those fluffy rolls, the melted cinnamon butter, and of course, their fantastic Smothered Chicken. It became our mission to recreate this savory indulgence, and let me tell you, we succeeded beyond our wildest dreams!
In this blog post, I’ll guide you through my version of this dish, sprinkled with my personal kitchen insights and tips, so you can serve it at your next gathering—or simply for an incredible dinner at home. Let’s gather our ingredients, roll up our sleeves, and set the stage for a culinary adventure!
A Personal Story: Chicken Dreams
Let me take you back to a moment I’ll never forget. Picture this: A summer evening filled with laughter and clinking glasses as friends gathered in my backyard, the sun dipping low in the sky. I was fired up for a dinner party and decided to whip up my take on the Texas Roadhouse Smothered Chicken. With every dice of the onion and slice of mushroom, I felt the excitement build.
As the chicken sizzled on the skillet, the aromas danced around us, coaxing my guests closer to the kitchen. We shared stories, played games, and before long, the table was set, ready to embrace the deliciousness to come. When I finally plated the dishes, the blend of colors and textures made my heart swell with pride. Everyone took their first bites, and the delighted “Mmm’s” and “Wow’s” filled the air. That moment—a gathering woven together by good food and unforgettable company—reminded me why I love cooking so much.
Ingredients
Let’s dive into the key players of this recipe! Here’s what you’ll need:
-
4 boneless, skinless chicken breasts: The star of the show! They are lean, easy to work with, and soak up all the flavors beautifully. If you’re looking for a healthier option, you can substitute with turkey cutlets.
-
1 cup sliced mushrooms: These lend an earthy flavor and a lovely texture. If mushrooms aren’t your thing, try zucchini or bell peppers for a sweet crunch.
-
1 cup diced onions: Onions bring a foundation of flavor to the dish. They caramelize beautifully, adding a touch of sweetness. Green onions can be a lighter substitute if you prefer a milder taste.
-
1 cup shredded cheddar cheese: A must for that gooey, melty topping. Feel free to mix it up with your favorite cheese—Monterey Jack works fabulously here too!
-
1 cup BBQ sauce: This is where the magic happens! Use your favorite brand for a smoky, tangy flavor. You can also make your own if you’re feeling adventurous.
-
Salt and pepper to taste: Essential for enhancing the flavors of your dish. Experiment with sea salt or smoked salt for a twist.
-
2 tablespoons olive oil: Used for sautéing, olive oil brings a healthful fat to the mix while adding richness to the dish.
Step-by-Step Instructions
Alright, foodies, let’s get cooking! Follow these simple steps, and let’s bring this dish to life together.
-
Prep Your Chicken: Start by patting the chicken breasts dry with paper towels. This crucial step ensures they sear wonderfully and don’t steam in the pan. Season each breast generously with salt and pepper. Cooking is all about layers of flavor, and this is your first one!
-
Sear the Chicken: Heat 1 tablespoon of olive oil in a large skillet over medium-high heat. Once the oil is hot and shimmering, carefully add the seasoned chicken breasts to the pan. Sear them for about 5-7 minutes on each side until they’re beautifully golden brown. The goal here is to achieve a lovely crust while keeping the inside juicy! To avoid overcrowding, you may need to work in batches.
-
Cook the Onions and Mushrooms: Once the chicken is browned, remove it from the skillet and set aside. In the same pan, add the remaining tablespoon of olive oil. Toss in the diced onions and sliced mushrooms. Sauté for about 5 minutes or until they’re tender and the onions are translucent. This blend will bring a sweet, savory depth to our dish!
-
Mix in the BBQ Sauce: After the onions and mushrooms have cooked down, pour in the BBQ sauce right into the skillet. Stir well to combine and let it simmer for about 2 minutes. This step allows all those flavors to meld together and gives your sauce a chance to develop.
-
Return the Chicken to the Skillet: Nestle the chicken breasts back into the skillet, spooning some of that lovely sauce over the top. Let all the ingredients mingle over medium heat for another 5 minutes. The chicken will soak up all that BBQ goodness!
-
Time for Cheesy Goodness: Now, sprinkle the shredded cheddar cheese over the chicken and cover the skillet with a lid. This allows the cheese to melt beautifully, about 3-4 minutes will do the trick. The moment you lift that lid will be pure magic—the ooey-gooey sight is enough to make any foodie swoon.
-
Serve It Up: Once the cheese is melted and bubbly, your dish is ready to shine! Carefully transfer everything to a serving platter, and drizzle any remaining sauce from the skillet over the top to make it look even more delicious.
Serving Suggestions
To plate your Texas Roadhouse Smothered Chicken, I love serving it alongside creamy mashed potatoes or fluffy rice to soak up that divine sauce. A side of roasted vegetables adds color and nutrition, making your meal visually appealing. Remember, presentation matters! A sprinkle of fresh herbs, like parsley or chives, adds a pop of color and an aromatic finish.
Recipe Variations
Mix things up with these creative twists:
- Spicy Kick: Add sliced jalapeños or a dash of cayenne pepper to the BBQ sauce for a fiery version.
- Herb Infusion: Stir in fresh herbs like thyme or rosemary with the onions and mushrooms for an aromatic boost.
- Creamy Version: Add cream cheese (about 4 ounces) to the BBQ sauce for a richer, creamier texture.
- Flavor Swap: Try switching out BBQ sauce for a honey mustard or teriyaki sauce for a completely different flavor profile.
- Low-Carb Option: Substitute the chicken with cauliflower steaks for a vegetarian alternative that’s just as scrumptious.
Chef’s Notes
I’ve been making variations of this dish for years—my recipe has evolved from a simple BBQ chicken concept into a delightful smothered legend at my dinner parties! The most memorable moment? I once accidentally burned the BBQ sauce while distracted by a game of charades. To save face, I quickly created a new spicy version on the fly, and it was a hit! Don’t worry if something goes awry; sometimes those unplanned detours lead to the best culinary discoveries.
FAQs and Troubleshooting
Q: My chicken is dry; what did I do wrong?
A: Dry chicken often results from overcooking. To avoid this, always keep an eye on your cooking times and use a meat thermometer; chicken should reach an internal temperature of 165°F.
Q: Can I use frozen chicken?
A: Yes, but it’s best to thaw the chicken completely in the refrigerator before cooking for even results.
Q: What if I want to make this dish ahead of time?
A: You can prepare the dish up until the cheese melting step, then cover and refrigerate. When you’re ready to eat, simply finish by reheating in the oven until hot and adding cheese.
Q: Can I use a different sauce?
A: Absolutely! This dish is so versatile. Feel free to experiment with your favorite sauces or even a homemade sauce for a personal touch.
Nutritional Info
This dish averages about 380 calories per serving, depending on your ingredient choices and portion sizes. It’s packed with protein from the chicken and provides a good source of calcium from the cheese. To make it even healthier, consider serving with a lovely garden salad or some roasted veggies!
So, let’s tie on those aprons, gather your ingredients, and dive into this scrumptious journey. Cooking should be an enjoyable experience, filled with delightful aromas and, of course, great company. I hope you enjoy every bite of this Texas Roadhouse Smothered Chicken as much as I do! Happy cooking!
PrintTexas Roadhouse Smothered Chicken

Tender chicken breasts smothered in sautéed mushrooms and onions, drenched in zesty BBQ sauce, and topped with gooey cheddar cheese.
- Prep Time: 15 minutes
- Cook Time: 30 minutes
- Total Time: 45 minutes
- Yield: 4 servings 1x
- Category: Main Course
- Method: Sautéing
- Cuisine: American
- Diet: Omnivore
Ingredients
- 4 boneless, skinless chicken breasts
- 1 cup sliced mushrooms
- 1 cup diced onions
- 1 cup shredded cheddar cheese
- 1 cup BBQ sauce
- Salt and pepper to taste
- 2 tablespoons olive oil
Instructions
- Prep your chicken: Pat the chicken breasts dry and season with salt and pepper.
- Sear the chicken: Heat 1 tablespoon of olive oil in a skillet and sear the chicken for 5-7 minutes on each side.
- Cook the onions and mushrooms: Remove chicken, add remaining olive oil, sauté onions and mushrooms for 5 minutes.
- Mix in the BBQ sauce: Pour BBQ sauce into the skillet, stir, and let it simmer for 2 minutes.
- Return the chicken to the skillet: Nestle chicken back into sauce and cook for another 5 minutes.
- Time for cheesy goodness: Sprinkle cheddar cheese on top and cover until melted, about 3-4 minutes.
- Serve it up: Transfer to a serving platter and drizzle with remaining sauce.
Notes
Serve with creamy mashed potatoes or roasted vegetables for a complete meal.
Nutrition
- Serving Size: 1 serving
- Calories: 380
- Sugar: 10g
- Sodium: 800mg
- Fat: 15g
- Saturated Fat: 7g
- Unsaturated Fat: 6g
- Trans Fat: 0g
- Carbohydrates: 20g
- Fiber: 1g
- Protein: 35g
- Cholesterol: 85mg
Keywords: Texas Roadhouse, smothered chicken, comfort food, chicken recipe, BBQ chicken