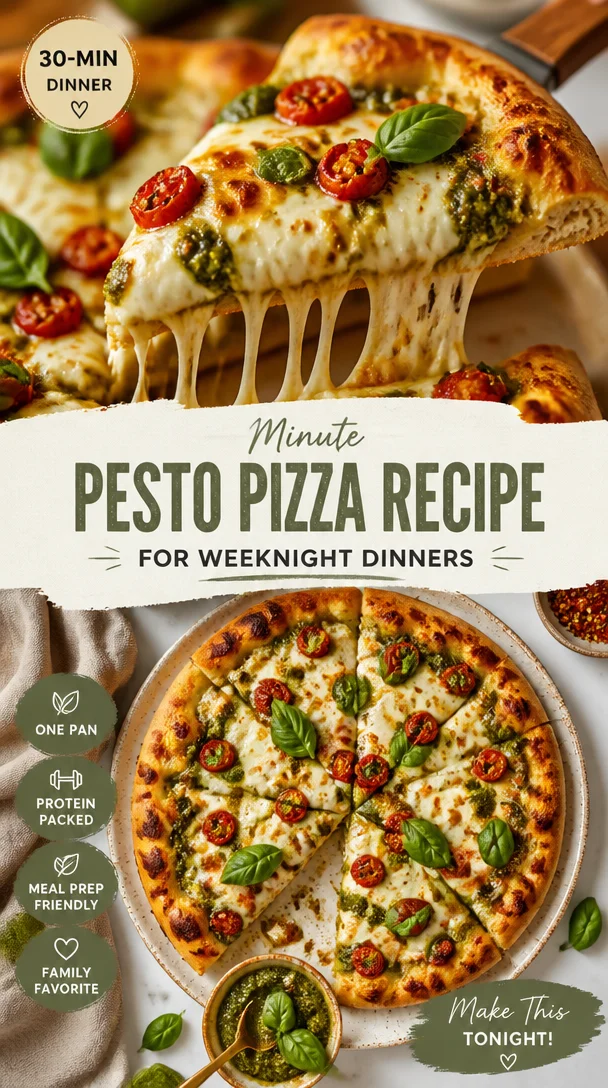
Minute Pesto Pizza Recipe for Weeknight Dinners
The Ultimate Pesto Pizza: A Flavorful Journey from Garden to Table
Hello there, pizza lovers! Are you ready to take your taste buds on an epic journey? Today, we’re diving into the world of homemade pesto pizza—a dish that brings together a vibrant sauce, fresh ingredients, and that satisfying crust we all crave. Not only is this pizza reminiscent of sun-drenched summer afternoons, but it also offers the thrill of crafting a gourmet meal right in your own kitchen. So, grab your apron, and let’s make something magical!
A Slice of Nostalgia
Let me share a special memory that always brings a smile to my face. I remember the first time I made pesto pizza for a friends’ gathering. It was a warm, sunny day, and I had just picked a bundle of basil from my garden. The aroma wafted through the air, intoxicating and fresh. I spent the afternoon in the kitchen, rhythmically chopping and blending my homemade pesto while listening to our favorite tunes—an essential ingredient to any kitchen adventure! When I finally whipped up that pizza and pulled it from the oven, the vibrant colors and scents had my friends flocking to the table. We devoured that pizza, each bite bursting with flavor, and the laughter flowed just as freely as the wine. It was a reminder that good food creates lasting memories, and I can’t wait for you to create some of your own!
Ingredients
Here’s what you’ll need to craft this delightful pesto pizza:
- Kosher Salt: Essential for enhancing flavors. Use coarse kosher salt for seasoning your dough and sauce.
- 1 Garlic Clove: Gives your pesto that iconic kick. If you’re not a fan of garlic, try using roasted garlic for a milder sweetness.
- 2 Cups Tightly Packed Basil Leaves (about 3 oz): The star of our pesto! Fresh basil adds brightness and a fragrant aroma. If you can’t find it, you can substitute with baby spinach or arugula for a different twist.
- 1/4 Cup Toasted Pine Nuts: Add richness and a subtle crunch. If pine nuts are out of budget or unavailable, try walnuts or sunflower seeds as alternatives.
- 1/4 Cup Olive Oil: This high-quality oil is crucial for a silky pesto. Replace it with avocado oil if you’d like a milder flavor.
- Freshly Ground Black Pepper: A must-have for seasoning. The fresher, the better!
- 1 oz Grated Parmesan (about 1/4 cup): Adds depth to your pesto. Pecorino Romano can also work wonderfully.
- 1/2 Recipe Artisan Pizza Dough (one 15 oz dough ball): The foundation of our pizza. You can make it from scratch, or take a shortcut with store-bought dough if you prefer.
- 1/4 Cup Pesto: You can use store-bought or the homemade pesto you just made.
- 1 1/2 oz Shredded Parmesan: For that wonderful cheesy layer.
- 3 oz Fresh Mozzarella, Torn into Small Pieces: The gooey, melty cheese we all adore! Feel free to use burrata for an even creamier option.
- 2 oz Fresh Goat Cheese: Adds a tangy bite and lovely creaminess. Substitute with feta if you want a sharper flavor or omit for a simpler cheese profile.
Step-by-Step Instructions
Now let’s get cooking! Follow these steps carefully to create a stunning pesto pizza.
-
Make Your Dough (if homemade):
- If you’re in the mood for a little kitchen workout, start by preparing your artisan pizza dough. Mix together flour, water, yeast, and salt, and let it rise until it’s doubled in size (usually about an hour to an hour and a half). If you’re using store-bought dough, simply let it sit at room temperature for about 30 minutes before using.
-
Prepare the Pesto:
- In a food processor, combine the garlic, basil leaves, toasted pine nuts, 1/4 cup of olive oil, freshly ground black pepper, and grated Parmesan. Pulse until smooth. You can add a little more oil if the mixture is too thick—adjust until you get a creamy consistency that you love!
-
Preheat Your Oven:
- Set your oven to its highest setting—typically around 475°F to 500°F. If you have a pizza stone, place it in the oven to preheat as well. A hot oven is key for crispy crust!
-
Shape the Pizza:
- On a floured surface, turn out your pizza dough. Gently stretch it into a circle or rectangle, depending on your preference. Aim for about 12 inches in diameter for a classic pizza shape. Make sure to create a slightly thicker edge for that perfect crust!
-
Add the Pesto:
- Spread 1/4 cup of your freshly made pesto over the stretched dough, leaving a little room at the edges for the crust. Don’t rush this part; a generous layer of pesto gets you that burst of flavor in every bite!
-
Layer the Cheeses:
- Sprinkle the shredded Parmesan evenly over the pesto. Next, arrange the torn mozzarella pieces across the top, followed by dollops of fresh goat cheese. The more cheese, the better!
-
Season to Taste:
- Add a little sprinkle of salt and freshly ground pepper over the top to enhance the flavors just before baking.
-
Bake the Pizza:
- Carefully transfer the pizza to the oven (or onto the preheated pizza stone). Bake for about 12-15 minutes, or until the cheeses are bubbling and the crust is golden brown. Keep an eye on it to avoid overcooking!
-
Finish and Serve:
- Once the pizza is out of the oven, let it cool for a minute, then slice and serve hot. You can drizzle a little more olive oil or some extra fresh basil for a lovely finish.
Serving Suggestions
Presentation can elevate your dining experience! For serving this gorgeous pesto pizza, I recommend placing it on a wooden cutting board for that rustic feel, and topping it with a sprinkle of fresh basil leaves. Add a side salad of mixed greens drizzled in lemon vinaigrette to contrast the rich flavors of the pizza. And don’t forget a chilled glass of white wine or a sparkling drink to bring it all together!
Recipe Variations
Feel free to play around with this basic structure! Here are a few fun twists:
- Veggie Lovers: Add seasonal vegetables like roasted zucchini, red peppers, or cherry tomatoes for an extra burst of flavor and nutrition.
- Meat Lovers: Top with slices of prosciutto or crumbled sausage for a savory addition.
- Spicy Kick: Add crushed red pepper flakes or a drizzle of chili oil to spice things up!
- Vegan Option: Substitute cheeses with a vegan cheese alternative and use nutritional yeast in your pesto for a cheesy flavor.
- Pesto Swaps: Try different greens in your pesto, like arugula or spinach, for a unique flavor profile each time.
Chef’s Notes
This pesto pizza recipe has evolved over the years, thanks to the feedback from my friends and family. At first, I even tried adding tomato sauce, but it diluted the wonderful pesto flavor! Now, I keep it simple and flavorful. One of my go-to tips is to always have a jar of pesto on hand—it makes a fantastic dipping sauce for bread or drizzled over grilled veggies too. Don’t shy away from sprinkling leftovers on soups or pasta dishes for that extra zing!
FAQs and Troubleshooting
1. My pizza dough didn’t rise. What went wrong?
- Double-check that your yeast is fresh. If it doesn’t foam in water with sugar, it’s likely expired. Ensure your dough is in a warm, draft-free environment while it proofs.
2. How can I prevent my pizza from getting soggy?
- Make sure to bake your pizza in a preheated oven, and avoid overloading the toppings. Also, pre-baking the crust for a few minutes before adding sauce and toppings helps create a barrier.
3. Can I freeze leftovers?
- Absolutely! Slice any uneaten pizza, wrap it tightly in plastic wrap, and then aluminum foil before freezing. When you’re ready to eat, just pop it in the oven at 375°F until warmed through.
4. How do I store leftover pesto?
- If you have pesto left over, pour it into an ice cube tray and freeze it! You’ll have single servings ready whenever you need a burst of flavor for another meal.
Nutritional Info
While specific nutritional information will vary based on your substitutions and portion sizes, a slice of this delightful pesto pizza is sure to be a hearty and wholesome treat packed with flavor.
So there you have it—a delicious pesto pizza recipe that invites you to gather around the table, share stories, and create new memories. I can’t wait to hear how your pizza turns out, so let’s get to it! Tie on that apron, roll up those sleeves, and let’s make this happen. Happy cooking!
PrintThe Ultimate Pesto Pizza

A delicious homemade pesto pizza featuring fresh basil, rich cheeses, and a crispy crust, perfect for any gathering.
- Prep Time: 20 minutes
- Cook Time: 15 minutes
- Total Time: 35 minutes
- Yield: 4 servings 1x
- Category: Main Course
- Method: Baking
- Cuisine: Italian
- Diet: Vegetarian
Ingredients
- Kosher Salt (for seasoning)
- 1 Garlic Clove
- 2 Cups Tightly Packed Basil Leaves (about 3 oz)
- 1/4 Cup Toasted Pine Nuts
- 1/4 Cup Olive Oil
- Freshly Ground Black Pepper
- 1 oz Grated Parmesan (about 1/4 cup)
- 1/2 Recipe Artisan Pizza Dough (one 15 oz dough ball)
- 1/4 Cup Pesto
- 1 1/2 oz Shredded Parmesan
- 3 oz Fresh Mozzarella, Torn into Small Pieces
- 2 oz Fresh Goat Cheese
Instructions
- Make your dough (if homemade): Mix together flour, water, yeast, and salt, and let it rise until doubled in size (about 60-90 minutes). If using store-bought dough, let it sit at room temp for 30 minutes.
- Prepare the pesto: In a food processor, combine garlic, basil leaves, pine nuts, olive oil, black pepper, and Parmesan. Pulse until smooth.
- Preheat your oven: Set to 475°F to 500°F. If using a pizza stone, place it in the oven to preheat.
- Shape the pizza: Turn out your dough onto a floured surface and stretch it to about 12 inches in diameter.
- Add the pesto: Spread 1/4 cup of pesto over the stretched dough, leaving room at the edges.
- Layer the cheeses: Sprinkle shredded Parmesan, arrange mozzarella pieces, and dollop fresh goat cheese.
- Season to taste: Add a sprinkle of salt and black pepper over the top.
- Bake the pizza: Transfer to the oven and bake for 12-15 minutes, until cheeses are bubbling and crust is golden.
- Finish and serve: Let cool for a minute, slice, and serve hot. Optionally drizzle with olive oil or garnish with fresh basil.
Notes
Experiment with toppings and feel free to make this recipe your own! Serve with a side salad and a chilled drink.
Nutrition
- Serving Size: 1 serving
- Calories: 400
- Sugar: 2g
- Sodium: 350mg
- Fat: 18g
- Saturated Fat: 7g
- Unsaturated Fat: 9g
- Trans Fat: 0g
- Carbohydrates: 48g
- Fiber: 3g
- Protein: 16g
- Cholesterol: 30mg
Keywords: pesto pizza, homemade pizza, Italian cuisine, vegetarian recipes, comfort food

Weeknight Garden Vegetable Lasagna: Simple, Veggie-Packed
Garden Vegetable Lasagna: A Harmonious Bounty of Flavor
Hello, dear foodies! Today, I’m excited to share with you one of my favorite recipes that blends the garden’s bounty with the cozy comfort of Italian cuisine: Garden Vegetable Lasagna. This dish is like a warm hug you can share around the dinner table, perfect for any season but especially delightful in the spring and summer when veggies are at their peak.
What I love about this lasagna is its incredible versatility — rich layers are packed with fresh vegetables, creamy ricotta, and gooey cheese. You’ll get the sumptuous taste of Italian classics while infusing them with wholesome goodness from your local farmer’s market or grocery store.
Whether you’re a seasoned chef or just starting your culinary journey, this lasagna is an approachable yet impressive dish that can elevate your weeknight dinners or wow your guests at a get-together. And don’t worry if you’ve never made lasagna before; I’ll guide you step-by-step through the process, sharing tips and kitchen secrets along the way. So roll up your sleeves, tie on that apron, and let’s get cooking!
Personal Story
I still remember the first time I made lasagna. I was a young cook, barely in my twenties, and I decided to host my friends for an extravagant Italian night filled with music, laughter, and, of course, food! Armed with my grandmother’s old recipe and the determination to impress, I set out to create an unforgettable experience.
The kitchen was a whirlwind of activity: the aroma of garlic sautéing, fresh basil tearing under my fingers, and the gentle bubbling of marinara sauce on the stove were enough to ignite my spirit. When it came time to serve, I unveiled my creation—a layered masterpiece of spontaneity and love.
To my delightful surprise, my friends not only enjoyed the lasagna, but they devoured it! That night became a cherished memory, a reminder that cooking brings people together in beautiful, personal ways. This Garden Vegetable Lasagna, inspired by that very first attempt, has become a tradition at my table—one that I hope will find its way to yours, too.
Ingredients
Here’s what you’re going to need for a mouthwatering Garden Vegetable Lasagna. Each ingredient adds its unique flair, and I’ve included a few pro tips along the way!
-
1 tablespoon olive oil
- A key player in bringing out flavors! You can substitute with avocado oil for a different taste.
-
1 small onion (finely chopped)
- Onions add a depth of flavor. If you’re sensitive to onions, shallots or leeks work beautifully too.
-
3 cloves garlic (minced)
- Garlic is a must for that aromatic punch! Feel free to use more or less, depending on your love for garlic.
-
1 medium zucchini (thinly sliced)
- Zucchini is tender and absorbs flavors well. For variation, eggplant makes a great substitute!
-
1 yellow squash (thinly sliced)
- Another squash that provides sweetness and color. You can use more zucchini in place of yellow squash, too.
-
1 red bell pepper (diced)
- For a pop of sweetness and crunch! Any color of bell pepper works here.
-
1 cup mushrooms (chopped)
- Mushrooms add earthiness; button or cremini mushrooms are excellent choices. For a gourmet touch, try shiitake mushrooms.
-
1½ cups fresh spinach
- Spinach wilts beautifully and boosts nutrients. Kale or Swiss chard can work as a hearty alternative.
-
3 cups marinara or tomato pasta sauce
- Use your favorite store-bought sauce or make a quick homemade one! A marinara with basil is my go-to.
-
½ teaspoon salt
- Enhances all flavors! Adjust based on your seasoning preferences and any added salt in the sauce.
-
½ teaspoon black pepper
- Adds warmth! White pepper is a fine substitute, especially for a milder flavor.
-
1 teaspoon Italian seasoning
- A blend of dried herbs like basil, oregano, and thyme brings authentic flavor. Fresh herbs work incredibly too.
-
1½ cups ricotta cheese
- Creamy ricotta is dreamy! Substitute with cottage cheese or a dairy-free alternative for a lighter option.
-
1 large egg
- Acts as a binder for the ricotta layer. For egg-free options, try ¼ cup of flaxseed meal mixed with water.
-
½ cup grated Parmesan cheese
- This cheesy goodness adds that coveted umami. Nutritional yeast can be a great vegan swap here.
-
1½ cups shredded mozzarella cheese
- Melty, gooey cheese is a must! Opt for low-fat mozzarella if you want a lighter dish.
-
9 lasagna noodles (cooked and drained)
- Use regular or whole wheat noodles; gluten-free varieties are available for dietary needs.
Step-by-Step Instructions
Now, let’s dive into the fun part: cooking! Here’s how to throw together this beautiful lasagna step-by-step.
-
Prep Your Ingredients: Start by washing and slicing your vegetables. The fresher, the better! This is an excellent time to put on some music and enjoy the moment in your kitchen. Let those chopping skills shine!
-
Sauté the Veggies: In a large skillet, heat the olive oil over medium heat. Add the chopped onions and sauté until translucent, about 3-4 minutes. Add the garlic and cook for another minute—this is when kitchen magic happens, and your house will smell divine! Toss in the zucchini, yellow squash, and red bell pepper, stirring for about 5-7 minutes until softened. Feel free to add a splash of water if they start to stick. Finally, throw in your mushrooms and spinach. Cook until the spinach wilts down. Season with salt, black pepper, and Italian seasoning. Set aside to cool slightly.
-
Mix the Cheeses: In a mixing bowl, combine the ricotta cheese, egg, and grated Parmesan. Stir until well blended. I love using a fork to mash the ricotta into a creamy mixture. It’s somewhat therapeutic, don’t you think? A bit more elbow grease never hurt anyone—almost like a mini workout!
-
Assemble the Lasagna: Preheat your oven to 375°F (190°C). In a 9×13-inch baking dish, spread a cup of marinara sauce on the bottom. This helps prevent the noodles from sticking. Layer 3 lasagna noodles over the sauce, followed by half of the ricotta mixture, half of the sautéed vegetable mixture, and a third of the shredded mozzarella. Repeat the layers: sauce, noodles, ricotta, veggies, mozzarella. Top it all off with the remaining noodles, sauce, and the rest of the mozzarella.
-
Cover and Bake: Cover your dish tightly with aluminum foil to prevent the top from burning. Bake in the preheated oven for 25-30 minutes. This helps the flavors meld together and makes for an incredibly moist lasagna.
-
Uncover and Broil: After your initial baking, remove the foil and switch your oven to the broil setting. Broil for an additional 3-5 minutes until the top is golden and bubbly. Keep a close eye during this step, as things can go from perfect to burnt very quickly!
-
Let it Rest: This is important! Allow the lasagna to sit for at least 10-15 minutes before slicing into it. This rest period helps the layers set and makes for easier serving. Plus, it gives you time to set the table—elegance without intimidation, right?
Serving Suggestions
When it’s time to serve, slice your lasagna into even squares and carefully lift them onto plates using a spatula. Garnish with fresh basil or parsley for a touch of vibrancy. Pair it with a light salad dressed with lemon vinaigrette—a perfect balance to the comforting richness of the lasagna. And don’t forget a glass of red wine; it’s a match made in culinary heaven!
Recipe Variations
Here are a few fun twists you can try:
- Add Protein: Layer in some cooked ground turkey, chicken, or beef for a heartier lasagna.
- Pesto Swirl: Mix in a few tablespoons of pesto with the ricotta for a vibrant flavor upgrade.
- Different Cheeses: Experiment with different cheeses like gouda or fontina for a unique melting experience.
- Grilled Veggies: Incorporate grilled vegetables for a smokier taste and excitement in each bite.
- Gluten-Free: Use gluten-free lasagna noodles or zucchini slices for a lighter option that’s just as delightful!
Chef’s Notes
This Garden Vegetable Lasagna has been through several iterations since that unforgettable night with my friends. Initially, it was quite straightforward, but over time, I found joy in layering flavors and cozy ingredients. Every time I make it, it feels like an adventure—a bit of improvisation here, a dash of creativity there.
One time, I used leftover roasted vegetables with some surprise artichokes! To my delight, they became a family favorite. Always remember: cooking is about joy and expression. Don’t stress about making it perfect. It’s about sharing the love, laughter, and warmth that only good food can bring.
FAQs and Troubleshooting
1. My lasagna turned out watery. What went wrong?
Using fresh veggies can release a lot of moisture. To avoid this, you can sauté your veggies a little longer or drain any excess liquid before assembling.
2. Is it necessary to cook the noodles first?
Pre-cooked noodles help ensure your lasagna doesn’t get too soggy. If you prefer, you can also use no-boil noodles, but you’ll need to increase the sauce quantity to ensure they cook properly.
3. Can I freeze lasagna?
Absolutely! Assemble the lasagna ahead of time and freeze it before baking. Just be sure to cover it tightly. When you’re ready, bake it from frozen and add an extra 15-20 minutes to the cooking time.
4. How can I make this vegan?
Substitute the ricotta with a mix of blended tofu, nutritional yeast, and a splash of lemon juice. For the mozzarella, there are many delicious vegan cheese options available on the market.
Nutritional Info (if applicable)
This lasagna slices up to be a pretty balanced meal, packed with vegetables, protein from the ricotta, and ample flavor. Although precise nutritional values can vary based on specific ingredients and portion sizes, a serving typically contains around:
- Calories: 320
- Protein: 18g
- Fat: 12g
- Carbohydrates: 40g
- Fiber: 4g
Feel free to adjust ingredients to suit your nutritional preferences!
There you have it, my friends! A delightful Garden Vegetable Lasagna that’s sure to impress everyone at your table. I can’t wait for you to try it out and savor every bite. Remember, it’s not just about the food—it’s about the love that goes into it. So, gather your loved ones, tie on your apron, and let the kitchen magic unfold! Enjoy!
PrintGarden Vegetable Lasagna

A delightful and hearty lasagna packed with fresh garden vegetables, creamy ricotta, and melty cheese, perfect for any dinner table.
- Prep Time: 15 minutes
- Cook Time: 40 minutes
- Total Time: 55 minutes
- Yield: 8 servings 1x
- Category: Main Course
- Method: Baking
- Cuisine: Italian
- Diet: Vegetarian
Ingredients
- 1 tablespoon olive oil
- 1 small onion (finely chopped)
- 3 cloves garlic (minced)
- 1 medium zucchini (thinly sliced)
- 1 yellow squash (thinly sliced)
- 1 red bell pepper (diced)
- 1 cup mushrooms (chopped)
- 1½ cups fresh spinach
- 3 cups marinara or tomato pasta sauce
- ½ teaspoon salt
- ½ teaspoon black pepper
- 1 teaspoon Italian seasoning
- 1½ cups ricotta cheese
- 1 large egg
- ½ cup grated Parmesan cheese
- 1½ cups shredded mozzarella cheese
- 9 lasagna noodles (cooked and drained)
Instructions
- Prep your ingredients: Start by washing and slicing your vegetables.
- Sauté the veggies: In a large skillet, heat the olive oil over medium heat. Add the chopped onions and sauté until translucent, about 3-4 minutes. Add the garlic and cook for another minute. Toss in the zucchini, yellow squash, and red bell pepper, stirring for about 5-7 minutes until softened. Add mushrooms and spinach, cooking until the spinach wilts down. Season with salt, black pepper, and Italian seasoning. Set aside to cool slightly.
- Mix the cheeses: In a mixing bowl, combine the ricotta cheese, egg, and grated Parmesan. Stir until well blended.
- Assemble the lasagna: Preheat your oven to 375°F (190°C). In a 9×13-inch baking dish, spread a cup of marinara sauce on the bottom. Layer 3 lasagna noodles over the sauce, followed by half of the ricotta mixture, half of the sautéed vegetable mixture, and a third of the shredded mozzarella. Repeat the layers: sauce, noodles, ricotta, veggies, mozzarella. Top with the remaining noodles, sauce, and mozzarella.
- Cover and bake: Cover your dish tightly with aluminum foil. Bake in the preheated oven for 25-30 minutes.
- Uncover and broil: After your initial baking, remove the foil and switch to the broil setting. Broil for an additional 3-5 minutes until the top is golden and bubbly.
- Let it rest: Allow the lasagna to sit for at least 10-15 minutes before slicing.
Notes
Letting the lasagna rest after baking helps the layers set and makes for easier serving.
Nutrition
- Serving Size: 1 serving
- Calories: 320
- Sugar: 5g
- Sodium: 500mg
- Fat: 12g
- Saturated Fat: 6g
- Unsaturated Fat: 4g
- Trans Fat: 0g
- Carbohydrates: 40g
- Fiber: 4g
- Protein: 18g
- Cholesterol: 65mg
Keywords: lasagna, vegetable lasagna, Italian, vegetarian, comfort food, baking
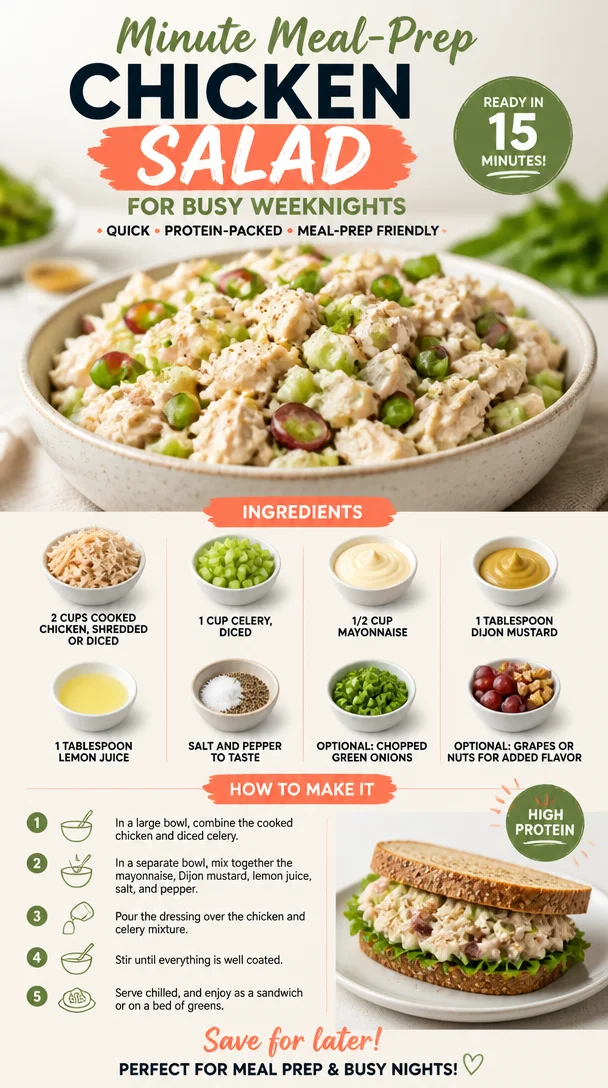
Minute Meal-Prep Chicken Salad for Busy Weeknights
The Ultimate Easy Chicken Salad: A Simple Classic for Every Occasion
Hello, lovely friends! Today, we’re diving into the world of one of my all-time favorite dishes: Easy Chicken Salad. Whether it’s a sunny picnic in the park or a cozy lunch at home, this dish is your go-to for something deliciously satisfying and fuss-free. The best part? You can whip it up in no time, with ingredients you probably already have at home!
Let me set the scene. Picture this: sunny afternoons, the scent of freshly cut grass wafting through the air, and laughter echoing from friends gathered around. Everyone is interested in two things: good company and delicious food! I remember one summer backyard barbecue when I decided to bring my version of chicken salad. Nothing fancy, just the classic goodness we’ve all come to love. But oh, how it stole the show!
By the end of the day, I had a circle of friends savoring every bite, sneaking spoonfuls straight from the bowl, and asking for the recipe. It was a reminder of how simple ingredients can create moments filled with joy and connection. Chicken salad became more than just a dish; it turned into a delightful memory that I cherish to this day.
So, gather ‘round because I can’t wait to share my easy chicken salad recipe with you — one that’s not just super tasty, but also gives you the chance to play around, customize, and make it your own!
Ingredients
Let’s take a look at what you’ll need to create this delightful chicken salad:
-
2 cups cooked chicken, shredded or diced: Use leftover rotisserie chicken for an effortless option, or simply boil some chicken breasts. You can even substitute with grilled or baked chicken for added flavor.
-
1 cup celery, diced: The crunchy texture adds a delightful contrast. If celery isn’t your jam, feel free to swap it out with diced bell peppers or cucumber.
-
1/2 cup mayonnaise: This creamy base is what holds it all together. For a healthier twist, use Greek yogurt or a dairy-free mayo alternative!
-
1 tablespoon Dijon mustard: It brings in a tangy zip! If you don’t have it on hand, regular mustard or even a splash of vinegar can work.
-
1 tablespoon lemon juice: This citrusy note brightens up the flavors. Lime juice can also be a delicious alternative!
-
Salt and pepper to taste: Don’t skimp on seasoning! Always make sure to taste and adjust as needed.
-
Optional: chopped green onions, grapes, or nuts: These goodies add extra flavor and texture! Think of toasted almonds for crunch or sweet grapes for a delightful twist!
Step-by-Step Instructions
Now, let’s get cooking! Here’s how to make your Easy Chicken Salad step-by-step:
-
Prepare Your Chicken: Start by shredding or dicing your cooked chicken into bite-sized pieces. If you haven’t cooked your chicken yet, no worries! Just boil some chicken breasts in salty water for about 15-20 minutes, or until they’re tender and cooked through. Remove from the pot, let them cool, and then shred!
-
Chop Your Veggies: Dice your celery finely. If you’re adding in any optional ingredients like green onions or grapes, now is the time! Remember, finesse in chopping adds to the texture and appeal of the salad, so take your time, and enjoy the prep.
-
Mix the Base: In a large bowl, combine the mayonnaise, Dijon mustard, and lemon juice. Stir them together thoroughly to create a creamy base. Here’s a little tip: if your mayo seems a bit thick, add a splash of water or more lemon juice until it reaches your desired consistency!
-
Combine It All: Add the shredded chicken and diced celery to the mayo mixture. Sprinkle with salt and pepper. Now comes the fun part — fold everything together gently. You want it well combined but still fluffy and light.
-
Taste Test Time: This is the moment of truth! Grab a spoon and taste your chicken salad. Adjust seasoning as needed, adding more salt, pepper, or even a touch more mustard if you’d like.
-
Chill Out: For the best flavors, cover the bowl and pop it in the fridge for at least 30 minutes before serving. This allows the flavors to meld beautifully together. Trust me, it makes a big difference!
Serving Suggestions
Ready to serve your chicken salad? Scoop generous portions onto a bed of mixed greens, or serve it in a fresh whole grain wrap. You could even stuff it into hollowed-out avocados for a stunning presentation! Drizzle with a little extra lemon juice before serving, and voila — a dish that’s as beautiful as it is delicious.
Recipe Variations
Feeling adventurous? Here are some creative twists you can try:
-
Mediterranean Chicken Salad: Add diced cucumber, olives, and crumbled feta cheese for a refreshing Mediterranean vibe!
-
Curry Chicken Salad: Incorporate curry powder and some chopped apples or raisins for a sweet and savory combo that’s sure to impress.
-
Southwestern Chicken Salad: Throw in black beans, corn, and diced jalapeños for a zesty kick.
-
Herbed Chicken Salad: Mix in fresh herbs like dill or parsley for an uplift in flavor that sings freshness.
-
Nuts & Fruits Delight: Add walnuts or pecans for crunch, along with dried cranberries or grapes for a sweet contrast.
Chef’s Notes
This chicken salad has been a staple in my kitchen for years, evolving with every gathering and celebration. I can’t begin to tell you how many variations I’ve tried — some that went hugely well and others that may have caused a tiny kitchen disaster (hey, we all have our off days!).
One particularly funny memory involved attempting to impress my friends by adding a splash of wine to the salad! Let’s just say, it wasn’t my finest hour — but we had a great laugh and finished every last bite anyway.
FAQs and Troubleshooting
1. Can I use canned chicken?
Absolutely! Canned chicken is a great shortcut. Just make sure to drain and rinse it for the best texture.
2. What can I use instead of mayonnaise?
If you’re looking for a healthier option, Greek yogurt or avocado mash are wonderful alternatives.
3. How long does chicken salad last in the fridge?
Properly stored in an airtight container, your chicken salad should be good for about 3-4 days. Just be sure to note any additions, as some ingredients might shorten the shelf life!
4. Help! My chicken salad is too dry!
No problem! Just add a bit more mayonnaise or some chicken broth to moisten it up. Mix thoroughly, and you’ll be back on track.
Nutritional Information (Optional)
Cooking chicken salad doesn’t have to come with a hefty calorie count! Each serving of this Easy Chicken Salad (assuming six servings) can contain approximately 250 calories, depending on how much mayonnaise you use.
Wrap Up
And there you have it, friends! A delightful, easy chicken salad that’s perfect for any occasion — picnics, potlucks, or even just an easy weeknight dinner. Remember, this dish is all about making beautiful moments around the table, no matter how simple or extravagant the meal may be.
I can’t wait for you to tie on your apron and give this recipe a try! Enjoy the process, make it uniquely yours, and most importantly, share it with the people you care about because good food truly is about showing up!
Happy cooking!
PrintUltimate Easy Chicken Salad
A simple and classic chicken salad perfect for any occasion, easy to prepare and customizable.
- Prep Time: 15 minutes
- Cook Time: 20 minutes
- Total Time: 35 minutes
- Yield: 6 servings 1x
- Category: Salad
- Method: Mixing
- Cuisine: American
- Diet: Gluten-Free
Ingredients
- 2 cups cooked chicken, shredded or diced
- 1 cup celery, diced
- 1/2 cup mayonnaise
- 1 tablespoon Dijon mustard
- 1 tablespoon lemon juice
- Salt and pepper to taste
- Optional: chopped green onions, grapes, or nuts
Instructions
- Prepare your chicken: Start by shredding or dicing your cooked chicken into bite-sized pieces.
- Chop your veggies: Dice your celery finely. Add any optional ingredients if desired.
- Mix the base: In a large bowl, combine the mayonnaise, Dijon mustard, and lemon juice.
- Combine it all: Add the shredded chicken and diced celery to the mayo mixture. Sprinkle with salt and pepper.
- Taste test time: Grab a spoon and taste your chicken salad. Adjust seasoning as needed.
- Chill out: Cover the bowl and refrigerate for at least 30 minutes before serving.
Notes
This chicken salad can last in the fridge for about 3-4 days when stored properly.
Nutrition
- Serving Size: 1 serving
- Calories: 250
- Sugar: 2g
- Sodium: 350mg
- Fat: 15g
- Saturated Fat: 2g
- Unsaturated Fat: 8g
- Trans Fat: 0g
- Carbohydrates: 5g
- Fiber: 1g
- Protein: 20g
- Cholesterol: 60mg
Keywords: chicken salad, easy recipe, picnic food, healthy salad, quick meal
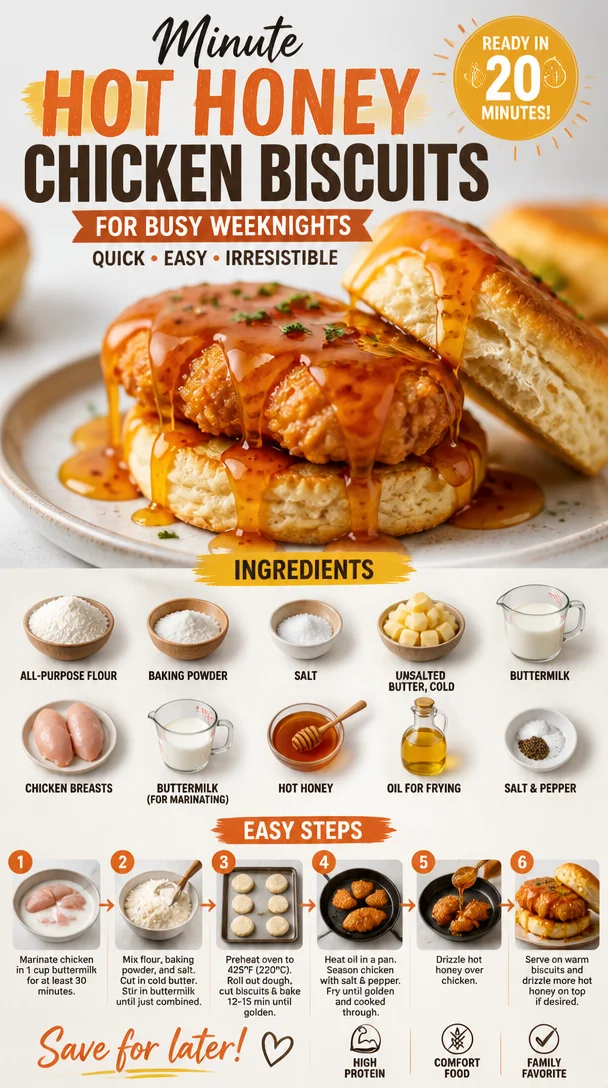
Minute Hot Honey Chicken Biscuits for Busy Weeknights
The Comfort of Home: Hot Honey Chicken Biscuits Recipe
Hello, fellow food lovers! Grab your apron and let’s dive into a kitchen adventure that’s all about warm flavors and comfort food. Today, I’m thrilled to share with you one of my ultimate favorites: Hot Honey Chicken Biscuits. This dish not only hits the spot but also carries a story of warmth, coziness, and a little bit of spice that I can’t wait to share!
Opening the Door to Nostalgia
You know those dishes that transport you back to a special moment in time? For me, that’s my Hot Honey Chicken Biscuits. Picture this: it’s a lazy Sunday afternoon, and the air is filled with a mix of sweet and spicy aromas wafting from the kitchen. I remember standing next to my grandmother as she stirred a pot of her renowned chicken marinade while the biscuits were perfectly rising in the oven. The combination of the crispy, flaky biscuits and the kick of heat in that honey sauce has always been a showstopper.
Back then, cooking wasn’t just about preparing meals; it was a way to gather our family around the table. The laughter, stories, and, of course, the delightful food. Those memories inspired me to develop this recipe that’s not only delicious but deeply meaningful. Every bite of these hot honey chicken biscuits is a comforting hug, reminiscent of cozy family gatherings and shared moments.
And the best part? You don’t need to be a seasoned chef to whip these up! Just a little love for cooking and an eagerness to create something special. So, let’s roll up our sleeves and embark on this culinary journey together!
Ingredients You’ll Need
Let’s gather our ingredients! Here’s what you’ll need to create these warm, scrumptious Hot Honey Chicken Biscuits:
- 2 cups all-purpose flour: The foundation for our biscuits. You can substitute with whole wheat flour for a nutty flavor or gluten-free blend for a gluten-free option.
- 1 tablespoon baking powder: This magical ingredient gives our biscuits that lovely lift! Baking soda can be a substitute—just remember to adjust the quantity.
- 1 teaspoon salt: It amplifies all the flavors. You can use kosher salt or sea salt if that’s what you have on hand.
- 1/4 cup unsalted butter, cold and cubed: For that flaky, tender texture. If you’re vegan or dairy-free, coconut oil or margarine works well.
- 3/4 cup buttermilk: This gives the biscuits richness and a tender crumb. If you don’t have buttermilk, mix 3/4 cup milk with 1 tablespoon of vinegar or lemon juice and let it sit for 5 minutes to sour.
- 2 chicken breasts, boneless and skinless: The star of our dish! Feel free to use chicken thighs for a juicier experience.
- 1 cup buttermilk (for marinating): Enhances the chicken’s flavor and tenderness. You can use plain yogurt if you’re out of buttermilk.
- 1 cup hot honey: This sweet and spicy mixture elevates the dish! You can create your own by mixing honey with chili flakes or use store-bought if it’s easier.
- Oil for frying: Choose a high smoke-point oil like canola or vegetable oil for frying.
- Salt and pepper to taste: Essential for seasoning to ensure every layer of flavor shines through!
Getting Cooking: Step-by-Step Instructions
Now that we have our ingredients all set, let’s get cooking! Here’s how to bring these delightful Hot Honey Chicken Biscuits to life.
-
Marinate the Chicken: Start by taking your beautifully trimmed chicken breasts and soaking them in 1 cup of buttermilk. This will help to tenderize the chicken and infuse it with flavor. Let it marinate for at least 30 minutes, but if you’re in the mood for marinading longer, go ahead and pop it in the fridge for a couple of hours. Trust me, your taste buds will thank you later!
-
Prepare the Biscuit Dough: In a large bowl, whisk together the all-purpose flour, baking powder, and salt. Ensure there are no lumps — we want a smooth dough, friends! Next, add the cold, cubed butter to the flour mixture. Use your fingers or a pastry cutter to blend until it resembles coarse crumbs – a little flakiness never hurt anyone!
-
Mix in the Buttermilk: Gradually add in the 3/4 cup of buttermilk and stir until just combined. Be careful not to overmix! We’re aiming for a dough that feels a little crumbly but comes together nicely. Turn it out onto a floured surface and pat it into a rectangle about 1-inch thick.
-
Cut the Biscuits: Using a biscuit cutter or a glass, cut out rounds from your dough. The key is to press straight down without twisting, which helps to maintain that lovely rise we want in our biscuits! Place the cut biscuits on a baking sheet lined with parchment paper. Don’t throw away the scraps—gather them and reform the dough to cut out more biscuits!
-
Fry the Chicken: While your biscuits are resting, it’s time to focus on that chicken! Take the marinated chicken from the buttermilk and season it with salt and pepper. Heat a skillet and pour in enough oil to cover the bottom. Fry the chicken for about 6-8 minutes on each side until golden brown and cooked through. The color should be inviting, and the aroma will be simply irresistible!
-
Glaze with Hot Honey: In a bowl, mix the hot honey with a touch of extra heat if you prefer—think chili flakes! Once the chicken is cooked, slather it all over with that glorious hot honey.
-
Bake the Biscuits: While you’re busy with the chicken, pop your biscuits into the oven at 425°F (220°C) and bake for about 12-15 minutes. You want them golden brown and just begging to be devoured!
Serving Suggestions
Now that we have an ensemble of warm, flaky biscuits and spicy honey-kissed chicken, it’s time to serve! I like to stack a biscuit high with a piece of the glazed chicken right on top. Drizzle a bit more hot honey over everything for that sweet, glossy finish. You can’t go wrong with adding a sprinkle of fresh herbs like parsley or chives for an extra pop of color and flavor. Serve alongside a simple green salad or some roasted vegetables, and you’ve got a meal fit for royalty!
Recipe Variations
Feeling adventurous? Here are a few fun twists and tweaks to make this recipe your own:
- Spicy Southern Style: Add cayenne pepper to your flour for that kick in the biscuits and use a spicy honey blend for the chicken for extra heat!
- Herbed Biscuits: Mix in fresh herbs like rosemary or thyme to the biscuit dough for an aromatic twist.
- Sweet and Savory: Use maple syrup instead of honey for a different sweet profile, and pair it with crispy bacon on the biscuit for that sweet-savory delight.
- Vegan Option: Substitute chicken with a vegan alternative, like crispy tofu or mushroom, and use almond milk with vinegar for the biscuit!
- BBQ Glaze: Swap out the hot honey for your favorite barbecue sauce for a smoky, sweet twist that pairs beautifully with the chicken!
Chef’s Notes
As with any cherished recipe, Hot Honey Chicken Biscuits holds a special place in my heart. This dish has evolved over time, especially thanks to different friends and family members who have inspired me along the way. I once hosted a dinner party where I forgot to marinate the chicken! I had to make do with an overnight marinade and was pleasantly surprised at how flavorful it turned out, proving sometimes happy accidents create the best dishes!
The beautiful thing about this recipe is its versatility — you can adjust it to suit your tastes or what’s in your pantry. So don’t stress too much about perfection. Let your instincts guide you, embrace those little quirks, and most importantly, have fun along the way!
FAQs and Troubleshooting
Here are some common questions you might have as you embark on this delicious cooking journey:
-
Why are my biscuits dense?
- This can happen if you overmix the dough or don’t use cold ingredients. Remember, a little lumpy is perfectly fine!
-
How do I keep the chicken from drying out?
- Marinating in buttermilk is key! Ensure your oil is hot enough for frying to keep it juicy. You can test it by dropping a small piece of dough into the oil—if it bubbles, you’re good to go!
-
Can I make the dough ahead of time?
- Absolutely! You can prepare the biscuit dough ahead and refrigerate it. Just be sure to roll and cut right before baking for maximum freshness!
-
What can I do with leftover biscuits?
- Those left-over biscuits can be stored in an airtight container for a day or two. Toast them up for breakfast the next day or turn them into a delightful biscuit sandwich!
Nutritional Info
If you’re curious, the nutritional information for a biscuit with chicken and hot honey roughly comes to about 600 calories per serving. Keep in mind; the exact numbers can change based on how much honey you use or if you choose to add extra toppings.
Now that you’ve got the full scoop on making Hot Honey Chicken Biscuits, I can’t wait for you to head into the kitchen and create this incredible dish. Remember, good food is all about making connections, both with the ingredients and the people around your table. So tie on that apron, pour yourself a drink, and let’s cook up some beautiful moments. Happy cooking, friends!
PrintHot Honey Chicken Biscuits

A comforting dish featuring flaky biscuits layered with marinated chicken glazed in a sweet and spicy hot honey sauce.
- Prep Time: 30 minutes
- Cook Time: 30 minutes
- Total Time: 60 minutes
- Yield: 4 servings 1x
- Category: Main Course
- Method: Frying and Baking
- Cuisine: American
- Diet: Non-Vegetarian
Ingredients
- 2 cups all-purpose flour
- 1 tablespoon baking powder
- 1 teaspoon salt
- 1/4 cup unsalted butter, cold and cubed
- 3/4 cup buttermilk
- 2 chicken breasts, boneless and skinless
- 1 cup buttermilk (for marinating)
- 1 cup hot honey
- Oil for frying
- Salt and pepper to taste
Instructions
- Marinate the chicken by soaking it in 1 cup of buttermilk for at least 30 minutes.
- Prepare the biscuit dough by whisking together flour, baking powder, and salt.
- Add cold cubed butter and blend until it resembles coarse crumbs.
- Mix in 3/4 cup of buttermilk until just combined and turn onto a floured surface.
- Cut out rounds from the dough using a biscuit cutter or glass.
- Fry the marinated chicken in oil for 6-8 minutes on each side until golden brown.
- Glaze the cooked chicken with hot honey.
- Bake the biscuits in a preheated oven at 425°F (220°C) for 12-15 minutes.
Notes
For extra flavor, consider adding herbs to the biscuit dough or using a spicy honey blend for glazing.
Nutrition
- Serving Size: 1 serving
- Calories: 600
- Sugar: 30g
- Sodium: 800mg
- Fat: 30g
- Saturated Fat: 10g
- Unsaturated Fat: 15g
- Trans Fat: 0g
- Carbohydrates: 45g
- Fiber: 2g
- Protein: 25g
- Cholesterol: 90mg
Keywords: chicken biscuits, hot honey, comfort food, fried chicken, easy recipe
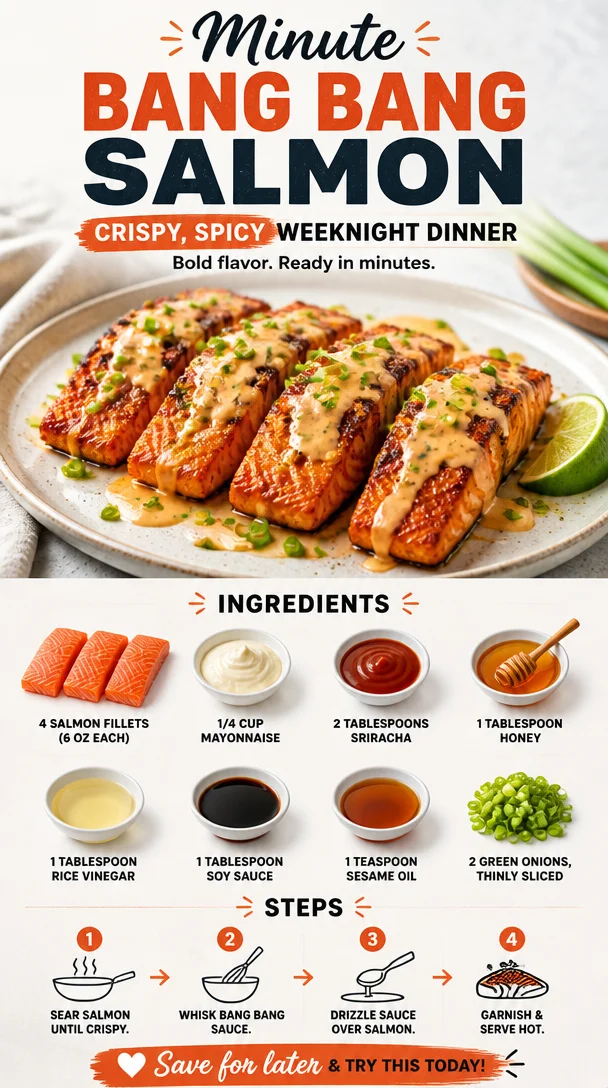
Minute Bang Bang Salmon: Crispy, Spicy Weeknight Dinner
Bang Bang Salmon: An Irresistibly Delicious Dish
Hello, fellow foodies! I’m thrilled to share a vibrant and delicious dish that’s sure to make your taste buds dance: Bang Bang Salmon. This dish is not just about the flavors; it’s about bringing people together around the table and creating memorable moments with simple, elegant cooking. Grab your apron and let’s dive into this flavorful journey!
A Whirlwind of Flavor
Bang Bang Salmon is a whimsical nod to the popularity of spicy seafood dishes often served in upscale eateries. Imagine crispy, succulent salmon fillets coated in a luscious, slightly spicy sauce that balances creamy and zesty elements beautifully. This dish is perfect for a casual weeknight dinner or an elegant dinner party—it truly shines no matter the occasion.
I love this dish not just because it’s packed with flavor but also for the vibrant energy it brings to my kitchen. The bright colors and aromas fill the air with anticipation, making cooking feel special. And let’s be honest: who doesn’t love a good excuse to make the kitchen smell incredible?
A Nostalgic Memory
Every time I make Bang Bang Salmon, I’m reminded of a long-ago summer evening spent at a charming little seaside restaurant. The sun was setting, painting the sky in shades of pink and orange, and the air was filled with laughter and the scent of fresh seafood. I was with my best friends, and we shared a platter of spicy fish tacos drizzled with a similar bang bang sauce. Those tacos were delightful, and we devoured them with gusto, our taste buds awakening to the bold flavors.
It’s funny how a memory tied to food can linger in our hearts, isn’t it? Each bite of Bang Bang Salmon takes me back to that carefree evening, reminding me of the power of good food and good company. So, let’s recreate that feeling at home!
Ingredients You’ll Need
Before we get into the cooking, let’s gather our ingredients. The beauty of this dish is that it’s made with accessible components that make it zing without overwhelming your pantry! Here’s what you’ll need:
- 4 salmon fillets (6 oz each): Fresh or thawed, salmon is rich in healthy fats and loaded with flavor. If you’re not a salmon fan, you can swap it with chicken breasts or tofu for a vegetarian option!
- 1/4 cup mayonnaise: This creamy base adds richness. You can use low-fat mayo or even Greek yogurt for a healthier twist.
- 2 tablespoons sriracha: This brings the heat! Don’t worry—it’s customizable; start with one tablespoon if you prefer a milder flavor.
- 1 tablespoon honey: This adds a touch of sweetness to balance the spice. Maple syrup or agave can work as substitutes if you want a vegan option.
- 1 tablespoon rice vinegar: This gives our sauce a tangy twist. Apple cider vinegar or white wine vinegar are suitable replacements.
- 1 tablespoon soy sauce: For that savory depth. You can use tamari or coconut aminos for a gluten-free alternative.
- 1 teaspoon sesame oil: This adds a nutty aroma. If you’re in a pinch, olive oil will work, though it has a different flavor profile.
- 2 green onions, thinly sliced: For garnish and a fresh zing! Feel free to use chives if that’s what you have on hand.
Step-by-Step Instructions
Now that we have our vibrant ingredients, let’s get cooking! Follow these detailed steps for a delightful Bang Bang Salmon experience:
-
Preheat Your Oven: Set your oven to 425°F (220°C). The high heat will give our salmon that perfect crispy exterior while keeping it moist inside.
-
Prepare the Sauce: In a mixing bowl, combine the mayonnaise, sriracha, honey, rice vinegar, soy sauce, and sesame oil. Stir until the sauce is smooth and well incorporated. You’ll want to taste it at this stage; if you prefer it spicier, add an extra drizzle of sriracha!
-
Prepare the Salmon: Line a baking sheet with parchment paper for easy cleanup. Place the salmon fillets skin-side down on the sheet and season with a sprinkle of salt and pepper. Drizzle a little olive oil on top if you like—it helps the skin crisp up beautifully.
-
Sauce It Up: Generously spread half of the bang bang sauce over the salmon fillets, ensuring they are well-coated. Reserve the other half for serving!
-
Bake the Salmon: Place the baking sheet in the preheated oven and let the salmon bake for about 12-15 minutes. You’ll know it’s done when the salmon flakes easily with a fork. The edges should be golden and slightly crispy.
-
Garnish and Serve: Once the salmon is out of the oven, sprinkle your thinly sliced green onions over the top. This adds a fresh crunch and vibrant color. Drizzle with the reserved bang bang sauce for that extra kick!
-
Plating Heroics: Don’t forget to make the presentation beautiful! Serve the salmon on a bed of fluffy rice, quinoa, or alongside roasted vegetables. A fresh squeeze of lime juice can elevate the flavors even more.
Serving Suggestions
To plate your Bang Bang Salmon beautifully, place a generous spoonful of jasmine rice next to the fillet, allowing the sauce to drizzle down the side. Add a handful of colorful, roasted vegetables, and finish with a sprinkle of additional green onions. Your guests (and you!) will be wowed by the dish’s visual appeal before the first bite!
Recipe Variations
Ready to mix things up? Here are a few creative twists you can incorporate into your Bang Bang Salmon:
- Crispy Tofu: For a vegetarian option, swap out the salmon with firm tofu, patted dry and cut into slices. Coat and bake them in the same way for a delightful plant-based alternative.
- Spicy Honey Garlic: Add minced garlic to your bang bang sauce for a punchy flavor and a touch more sweetness.
- Tropical Twist: Mix in a bit of pineapple juice into your sauce for a tropical vibe that pairs beautifully with salmon!
- Zoodles: Serve the salmon over zoodles (zucchini noodles) to lighten things up and add a fresh crunch to the dish.
Chef’s Notes
As with any recipe, don’t hesitate to make this your own! I’ve played around with the sauce over the years—adding in different spices, swapping out the sweetener, and adjusting the heat level. One time, I even added a hint of lime zest to the sauce, and it brought out a refreshing element that paired perfectly with the salmon. It’s all about experimenting, so have fun with it!
And let’s not forget: if you accidentally burn the edges (it happens to the best of us!), simply scrape off the burnt bits, drizzle on extra sauce, and no one will be the wiser!
FAQs and Troubleshooting
1. My salmon is overcooked and dry! What happened?
- It can happen! Salmon is best when cooked just until it’s flaky. Try reducing the cooking time next time, and use an instant-read thermometer; 125°F (52°C) for medium-rare and 145°F (63°C) for well-done is the sweet spot!
2. Can I make the sauce in advance?
- Absolutely! This sauce can be made up to two days ahead and stored in the fridge. Just give it a quick stir before using it.
3. How can I make this gluten-free?
- It’s really simple! Just swap regular soy sauce with tamari or coconut aminos, which are both gluten-free.
4. What can I serve with Bang Bang Salmon?
- Some great sides include steamed asparagus, quinoa, or a crunchy cabbage salad for a delightful contrast in texture.
Nutritional Info (Optional)
This dish is a powerhouse of nutrients! Salmon is a great source of omega-3 fatty acids, while the sauce is rich in flavor without being overly heavy. Depending on your side choices, a meal of Bang Bang Salmon can fit beautifully into a balanced diet.
So, what are you waiting for? Tie on that apron, pour yourself a refreshing beverage, and get that salmon sizzling! I have no doubt this Bang Bang Salmon will become a favorite at your table. Cheers to good food and great company!
PrintBang Bang Salmon
A vibrant and delicious dish featuring crispy salmon fillets coated in a slightly spicy, creamy sauce.
- Prep Time: 15 minutes
- Cook Time: 15 minutes
- Total Time: 30 minutes
- Yield: 4 servings 1x
- Category: Main Course
- Method: Baking
- Cuisine: American
- Diet: Pescatarian
Ingredients
- 4 salmon fillets (6 oz each)
- 1/4 cup mayonnaise
- 2 tablespoons sriracha
- 1 tablespoon honey
- 1 tablespoon rice vinegar
- 1 tablespoon soy sauce
- 1 teaspoon sesame oil
- 2 green onions, thinly sliced
Instructions
- Preheat your oven to 425°F (220°C).
- Prepare the sauce by combining mayonnaise, sriracha, honey, rice vinegar, soy sauce, and sesame oil in a bowl, stirring until smooth.
- Prepare a baking sheet with parchment paper and place the salmon fillets skin-side down, seasoning with salt and pepper.
- Sauce the salmon by spreading half of the bang bang sauce over the fillets.
- Bake the salmon in the oven for 12-15 minutes until it flakes easily and is slightly crispy at the edges.
- Garnish with green onions and drizzle with the reserved bang bang sauce before serving.
- Plate the salmon with rice, quinoa, or roasted vegetables for a beautiful presentation.
Notes
You can substitute salmon with chicken or tofu for a vegetarian option. Make sure to adjust cooking times accordingly.
Nutrition
- Serving Size: 1 serving
- Calories: 350
- Sugar: 6g
- Sodium: 600mg
- Fat: 20g
- Saturated Fat: 3g
- Unsaturated Fat: 15g
- Trans Fat: 0g
- Carbohydrates: 18g
- Fiber: 1g
- Protein: 30g
- Cholesterol: 80mg
Keywords: Bang Bang Salmon, easy salmon recipes, spicy seafood, dinner recipes

Minute Creamy Garlic-Lime Cilantro Sauce for Weeknights
Creamy Garlic Lime Cilantro Sauce: Elevate Your Dish with a Zesty Touch
Welcome, food lovers! Today, I’m excited to share a vibrant, zesty, and oh-so-creamy sauce that will become a staple in your kitchen: Creamy Garlic Lime Cilantro Sauce. This sauce brings a burst of flavor to anything you drizzle it on, making it a perfect addition to grilled meats, tacos, salads, or even as a dip for fresh veggies.
But before I dive into the details of this delightful recipe, let’s have a little chat about the heart of this dish and why it holds a special place in my culinary journey.
A Culinary Journey: My Love for Sauces
I still remember the first time I made this sauce. Picture this: a warm summer evening, the sun setting in a glorious burst of colors, and my friends gathered around my dining table. I had just grilled some chicken and needed a killer sauce to bring it all together. As I grabbed a bunch of fresh cilantro and those bright, zesty limes, I could feel the excitement bubbling inside me.
My kitchen quickly filled with the inviting aroma of garlic sizzling away. The clang of pots, laughter from friends, and clinking of glasses created an atmosphere of joy and warmth. Once I finished whipping up this creamy green concoction, I served it up, and the look of delight on my friends’ faces was priceless. As they dipped their forks into the sauce, they couldn’t get enough! It transformed the ordinary meal into something extraordinary.
That night not only solidified my love for cooking but also taught me the magic of a great sauce and its ability to pull everyone together. So, let’s get cooking and make your own unforgettable moments around the table with this Creamy Garlic Lime Cilantro Sauce!
Ingredients
For the Creamy Garlic Lime Cilantro Sauce, you’ll need:
-
1 bunch of Cilantro (stems and all)
Cilantro adds a fresh, herbal flavor that’s absolutely essential for this sauce. If you’re not a fan of cilantro, you can substitute it with parsley for a milder taste. -
1-2 Limes (juiced)
Lime juice gives the sauce its bright, tangy kick. Freshly squeezed is always best. If you don’t have limes, lemon juice works as a great substitute too! -
1-2 Jalapeños (stem removed)
These little green peppers pack a punch and add a subtle heat to the sauce. If you prefer less spice, you can opt for a single jalapeño or remove the seeds before mixing. -
5-10 cloves Garlic
Garlic is the backbone of this sauce, giving it that rich, savory flavor. Feel free to adjust the amount based on your garlic love (or tolerance!). Roasted garlic can be swapped for a more mellow flavor. -
2 cups Mayonnaise (Hellman’s or Duke’s preferred)
Mayonnaise creates a creamy base for the sauce and balances all the flavors beautifully. If you’re looking for a lighter option, Greek yogurt can be a wonderful substitute.
Step-by-Step Instructions
Now that we have our ingredients lined up and ready to go, let’s get started on making your own Creamy Garlic Lime Cilantro Sauce!
-
Prep Your Ingredients
Begin by washing the cilantro thoroughly to remove any dirt. Pat it dry with a kitchen towel or let it air-dry. Next, cut the limes in half and have your juicer ready. Slice the jalapeños in half and remove the seeds if you prefer milder heat. Lastly, peel your garlic cloves.Chef Tip: Always taste your jalapeños before adding them. The heat level can vary significantly from pepper to pepper!
-
Blend the Sauce
In a blender or food processor, combine the cilantro, lime juice, jalapeños, garlic, and mayonnaise. Secure the lid and blend on high until the mixture is smooth and creamy. Take a moment to admire that vibrant color you’re creating!Chef Insight: If the sauce feels too thick, add a teaspoon of water at a time until you reach your desired consistency. Just be cautious not to dilute the flavor!
-
Taste and Adjust
After blending, take a small spoonful and taste the sauce. Does it need a little more lime juice? A pinch of salt? This is the fun part! Adjust to your preference but remember, the flavors will intensify a bit when chilled.Fun Fact: For a twist, try adding a touch of honey or agave for a sweet contrast to the zesty lime!
-
Chill Out
Transfer the sauce into an airtight container and let it chill in the fridge for at least 30 minutes. This allows the flavors to meld beautifully. Plus, a chilled sauce is a refreshing surprise in warm weather! -
Serve and Enjoy
Once it’s time to serve, give the sauce a good stir. Drizzle it over your prepared dish, or serve it as a dipping option on the side. Trust me, this sauce never fails to impress!Serving Tip: Use a squeeze bottle for easy drizzling presentation. It looks fancy and is so much easier for your guests to use!
Serving Suggestions
Are you ready to plate this dreamy sauce? Here are some ideas to make your dishes shine:
- Over Grilled Chicken or Fish: Drizzle the sauce generously over your protein for a pop of flavor!
- In Tacos: Use it as a topping for tacos, adding a creamy layer that ties all the ingredients together beautifully.
- With Fresh Veggies: Serve it as a dip alongside an array of colorful veggies for a delightful appetizer.
- On Salads: Toss your greens with this sauce for an elevated salad dressing that packs a punch.
Recipe Variations
Want to switch things up a bit? Here are some fun variations you can try:
- Spicy Cilantro Lime Sauce: Add a couple of pinches of cayenne pepper for an extra kick!
- Creamy Avocado Twist: Blend in half an avocado for a richer, creamier texture.
- Ginger-Lime Sauce: Incorporate a small piece of fresh ginger for a hint of warmth and spice.
- Vegan Version: Swap out mayonnaise for vegan mayonnaise or silken tofu for a creamy but plant-based treat!
Chef’s Notes
Over the years, I’ve played around with this recipe to make it my own. There have been experiments with herbs, spices, and even yogurt alternatives! One fun memory is adding a hint of orange zest at a dinner party — it turned out to be a delightful surprise for my guests. The result? A deliciously fresh and zesty citrus twist that I still love to sprinkle in from time to time.
Cooking should always be an adventure, so don’t hesitate to experiment and make this sauce truly yours!
FAQs and Troubleshooting
Q1: Can I freeze this sauce?
Absolutely! You can freeze the sauce in an airtight container. When you’re ready to use it, just thaw in the fridge overnight and give it a good stir.
Q2: Why is my sauce too thick?
If your sauce turns out thicker than you’d like, add a bit of water or additional lime juice until you reach your desired consistency.
Q3: The sauce is too spicy for me—what should I do?
If you find your sauce has too much heat, consider mixing in additional mayonnaise or a dollop of sour cream to mellow it out.
Q4: Can I use dried herbs instead of fresh cilantro?
While fresh cilantro is recommended, if you’re in a pinch, you can swap with dried cilantro. Use about 1 tablespoon, but it won’t have that same vibrant flavor.
Nutritional Info
(optional)
While the details can vary based on your specific ingredients and portion sizes, a serving of this creamy sauce typically contains around 100 calories, with fats primarily from the mayonnaise, which also provides some protein.
So there you have it, my friends—a delightful recipe for Creamy Garlic Lime Cilantro Sauce that will elevate your meals and bring people together around the table. Remember, cooking is all about enjoyment and connection. I can’t wait to see how you make this recipe your own! Now, tie on that apron, grab your ingredients, and let’s create something special. Cheers!
PrintCreamy Garlic Lime Cilantro Sauce

A vibrant and zesty sauce that elevates grilled meats, tacos, salads, and veggies with its creamy garlic and lime flavors.
- Prep Time: 10 minutes
- Cook Time: 5 minutes
- Total Time: 45 minutes
- Yield: 4 servings 1x
- Category: Sauce
- Method: Blending
- Cuisine: Mexican
- Diet: Vegetarian
Ingredients
- 1 bunch of Cilantro (stems and all)
- 1–2 Limes (juiced)
- 1–2 Jalapeños (stem removed)
- 5–10 cloves Garlic
- 2 cups Mayonnaise (Hellman’s or Duke’s preferred)
Instructions
- Prep your ingredients by washing cilantro, juicing limes, and preparing jalapeños and garlic.
- Blend the cilantro, lime juice, jalapeños, garlic, and mayonnaise in a blender until smooth and creamy.
- Taste the sauce and adjust lime juice or salt as needed.
- Chill the sauce in an airtight container for at least 30 minutes.
- Serve by drizzling it over dishes or using it as a dip.
Notes
For a milder flavor, substitute cilantro with parsley and taste jalapeños before adding.
Nutrition
- Serving Size: 2 tablespoons
- Calories: 100
- Sugar: 1g
- Sodium: 200mg
- Fat: 10g
- Saturated Fat: 1g
- Unsaturated Fat: 9g
- Trans Fat: 0g
- Carbohydrates: 5g
- Fiber: 0g
- Protein: 1g
- Cholesterol: 10mg
Keywords: sauce, creamy, garlic, lime, cilantro, dip, taco, salad
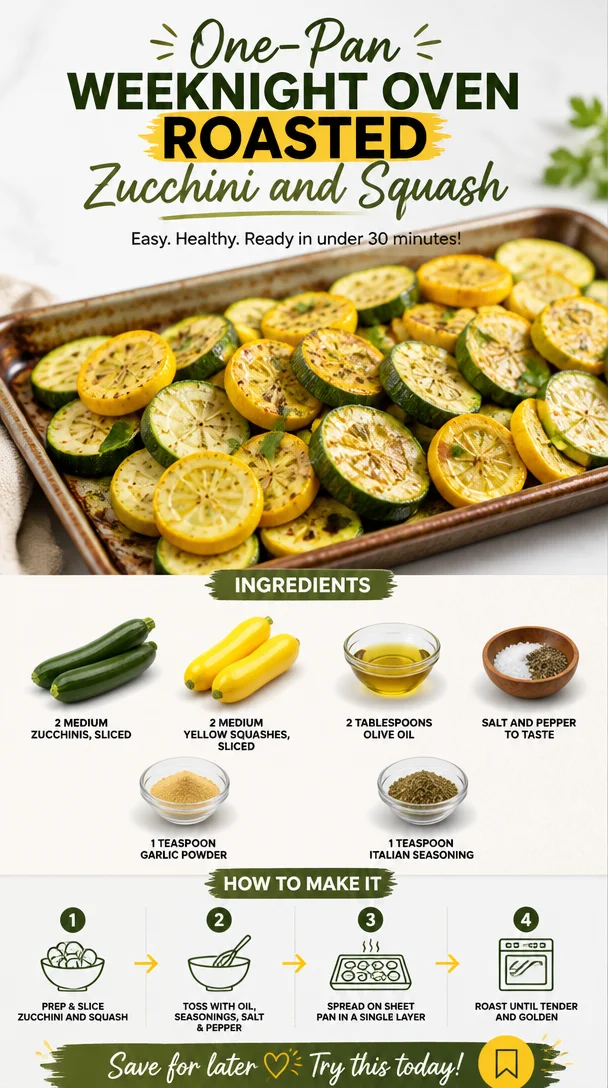
One-Pan Weeknight Oven Roasted Zucchini and Squash
Oven Roasted Zucchini and Squash: A Summer Classic
Hello, fellow foodies! Today, we’re diving into a delightful side dish that highlights the natural sweetness and creaminess of seasonal vegetables. I’m excited to share my recipe for Oven Roasted Zucchini and Squash! This dish is vibrant, flavorful, and pairs beautifully with practically any main course. Plus, it’s the perfect accompaniment for summer gatherings, backyard barbecues, or even a cozy weeknight dinner.
The Magic of Roasting
Roasting veggies is an absolute game changer! When you pop them into the oven, they caramelize beautifully, bringing out all those delicious flavors while adding a delightful texture. A sprinkle of olive oil, a dash of seasoning, and you’ve got yourself a dish that feels fancy yet is incredibly easy to prepare. Think of it as culinary alchemy—turning simple ingredients into pure gold!
So, let’s roll up those sleeves and unlock the full potential of zucchini and squash, two of summer’s unsung heroes.
My Personal Story: A Summer Family Gathering
One of my fondest food memories involves my grandmother’s garden. Every summer, I’d eagerly await the moment she announced it was time to pick fresh zucchinis and squash. Armed with a small basket, I’d head out to her vibrant garden, feeling the warmth of the sun on my back and the earthy scent of the soil underfoot.
After our harvest, we’d return to her kitchen, exchanging stories and laughter while my grandma washed and sliced the vegetables. I loved how she made the simplest ingredients feel special, often roasting them with her signature blend of herbs and spices. It wasn’t just about the food; it was about bringing the family together, sharing memories, and creating moments that would last a lifetime.
Those afternoons instilled in me a love for cooking and a desire to share the joy of delicious food with others. And now, I invite you to embrace that same warmth at your table with this scrumptious oven-roasted zucchini and squash recipe!
Ingredients
Here’s what you’ll need to create this vibrant side dish:
-
2 medium zucchinis, sliced
Zucchini is a versatile summer squash that adds moisture and a mild flavor to dishes. If you can’t find zucchini, yellow squash works just as well! -
2 medium yellow squashes, sliced
Yellow squash packs a slightly sweeter taste and adds a lovely color. Feel free to mix in any other summer squashes you have on hand. -
2 tablespoons olive oil
Olive oil not only helps the veggies crisp up beautifully but also adds rich flavor. For a twist, consider using flavored oils like garlic or herbed oil. -
Salt and pepper to taste
Basic seasonings that elevate the dish. Always start with less, as you can add more if needed later. -
1 teaspoon garlic powder
Garlic powder lends a warm, savory depth to the roasted vegetables. Fresh minced garlic is also a fantastic alternative if you want a punchier flavor. -
1 teaspoon Italian seasoning
A blend of herbs like oregano, basil, and thyme, this seasoning brings a beautiful, fragrant touch. You can easily swap it for fresh herbs, adjusting to your taste.
Step-by-Step Instructions
-
Preheat the Oven
Start by preheating your oven to 425°F (220°C). A hot oven is key to roasting vegetables perfectly and achieving that lovely caramelization we’re after. -
Prep the Veggies
Slice your zucchinis and yellow squashes into even rounds or half-moons (about ½ inch thick). Even size ensures they cook uniformly. If you’re feeling adventurous, try cutting them into fun shapes! -
Season the Veggies
In a large mixing bowl, toss the sliced zucchini and squash with olive oil, garlic powder, Italian seasoning, salt, and pepper. Make sure every slice is generously coated—I recommend using your hands for this step. It’s all about love and attention! -
Spread Evenly on a Baking Sheet
Line a baking sheet with parchment paper for easy cleanup. Spread the seasoned veggies in a single layer, ensuring they’re not overcrowded. If they’re piled on top of each other, they’ll steam rather than roast, so spread them out like you’re placing the perfect arrangement of flowers. -
Roast Away
Pop that baking sheet into your preheated oven and roast for about 20-25 minutes. Halfway through, take a fork and give the veggies a gentle toss to ensure even cooking. You want them to be tender with golden edges. -
Check for Doneness
Keep an eye on your zucchini and squash as they roast. Once they’re fork-tender and beautifully browned, take them out and let them cool slightly. -
Taste and Adjust
Give them a little taste! You can add more salt, pepper, or even a squeeze of lemon juice for brightness if you feel it needs a little extra zing.
Serving Suggestions
To plate your oven-roasted zucchini and squash, gather them in a pretty serving dish, allowing their vibrant colors to shine. For a touch of elegance, you can sprinkle some freshly grated Parmesan or crumbled feta cheese on top right before serving. Garnish with a few sprigs of fresh basil or parsley for a touch of green and extra flavor.
Recipe Variations
-
Mediterranean Twist
Add some sliced cherry tomatoes and Kalamata olives to the veggies before roasting. The tomatoes bring sweetness, and the olives offer a savory punch. -
Spicy Kick
Mix in some red pepper flakes for a bit of heat! Just a pinch can elevate the flavor profile and wake up your taste buds. -
Cheesy Goodness
Toss the veggies with shredded mozzarella or gouda before roasting, turning them into a delightfully cheesy dish. -
Herbed Lemon Roasted
Add lemon zest and fresh thyme or rosemary for a refreshing, herbaceous note that brightens up the dish. -
Balsamic Glaze Drizzle
After you’ve taken your roasted veggies out of the oven, drizzle them with balsamic glaze for a tangy-sweet finish.
Chef’s Notes
This oven-roasted zucchini and squash dish has become a staple in my kitchen, and I love how it can adapt to whatever I have on hand. I can remember once when I mistakenly dropped the entire baking sheet onto the floor—it was a disaster! However, my kitchen was filled with laughter as we scooped up the roasted goodness off the floor to salvage what we could. Cooking is about enjoying the process, and that little mishap became a cherished memory.
Over the years, this recipe has evolved—what started as just simple salt and pepper now showcases a list of lovely spices and twists. I encourage you to make this dish your own!
FAQs and Troubleshooting
Q: Why are my veggies mushy instead of crispy?
A: This could be due to overcrowding the baking sheet. Make sure the veggies are in a single layer and give them room to breathe—instead of steaming, they should roast for that delightful caramelization!
Q: Can I prepare this dish in advance?
A: While it’s best fresh, you can slice the veggies and toss them in oil/seasoning a few hours ahead. Just cover and refrigerate until you’re ready to roast.
Q: What can I do with leftovers?
A: These roasted veggies are perfect to toss into salads, pasta, or even stir-fries. They also make a fantastic omelet filling!
Q: Can I cook other vegetables this way?
A: Absolutely! Carrots, bell peppers, and eggplant can roast beautifully, providing you mix up the cooking times accordingly.
Nutritional Info
(Adjust based on actual recipe servings)
- Servings: 4
- Calories: Approximately 115 per serving
- Fat: 8g
- Carbohydrates: 10g
- Fiber: 3g
- Protein: 2g
So, there you have it—Oven Roasted Zucchini and Squash! I hope this recipe becomes a delightful addition to your dinner table, just as it has in mine. Tie on that apron, pour a drink for yourself, and let’s create some culinary magic together. Happy cooking!
PrintOven Roasted Zucchini and Squash
A vibrant and flavorful summer side dish that highlights the natural sweetness of zucchini and squash, perfect for gatherings or weeknight dinners.
- Prep Time: 10 minutes
- Cook Time: 25 minutes
- Total Time: 35 minutes
- Yield: 4 servings 1x
- Category: Side Dish
- Method: Roasting
- Cuisine: American
- Diet: Vegetarian
Ingredients
- 2 medium zucchinis, sliced
- 2 medium yellow squashes, sliced
- 2 tablespoons olive oil
- Salt and pepper to taste
- 1 teaspoon garlic powder
- 1 teaspoon Italian seasoning
Instructions
- Preheat the oven to 425°F (220°C).
- Slice the zucchinis and yellow squashes into even rounds or half-moons (about ½ inch thick).
- Toss the sliced zucchini and squash with olive oil, garlic powder, Italian seasoning, salt, and pepper in a large mixing bowl.
- Line a baking sheet with parchment paper and spread the seasoned veggies in a single layer.
- Roast in the preheated oven for about 20-25 minutes, tossing halfway through.
- Check the veggies for doneness; they should be fork-tender and browned.
- Taste and adjust seasoning if needed, possibly adding a squeeze of lemon juice.
Notes
Feel free to customize this dish with additional ingredients like cherry tomatoes, balsamic glaze, or cheese.
Nutrition
- Serving Size: 1 serving
- Calories: 115
- Sugar: 3g
- Sodium: 200mg
- Fat: 8g
- Saturated Fat: 1g
- Unsaturated Fat: 7g
- Trans Fat: 0g
- Carbohydrates: 10g
- Fiber: 3g
- Protein: 2g
- Cholesterol: 0mg
Keywords: zucchini, squash, roasted vegetables, summer side dish, vegetarian
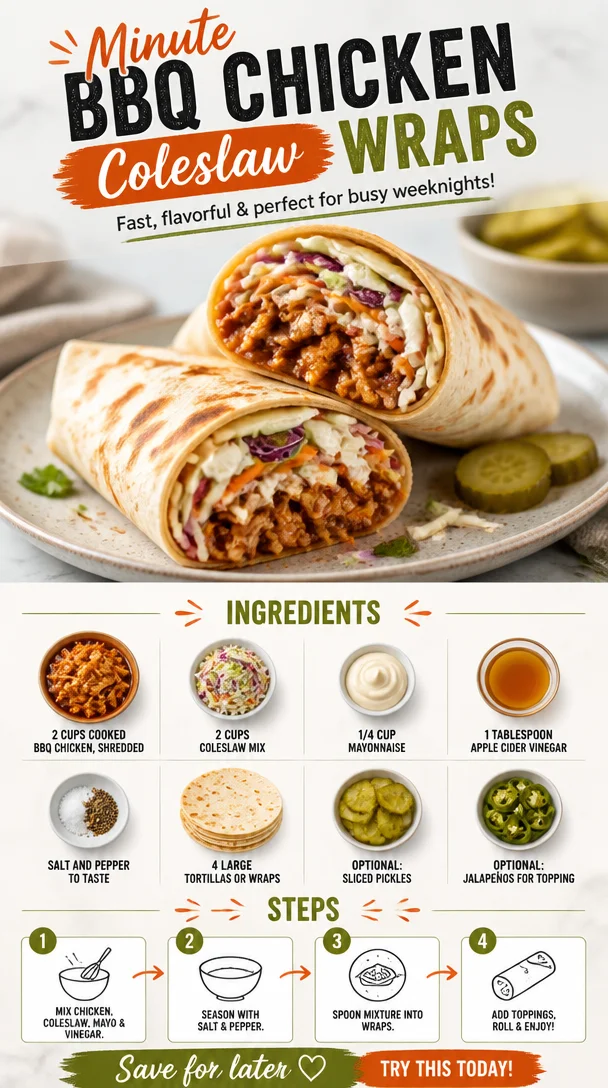
Minute BBQ Chicken Coleslaw Wraps for Busy Weeknights
BBQ Chicken Coleslaw Wraps: A Flavorful Journey
Welcome back, fellow food lovers! Today, I’m thrilled to share with you a dish that’s as vibrant and dynamic as the moments we create around our tables: BBQ Chicken Coleslaw Wraps. Picture this: tender, flavorful BBQ chicken nestled in a chilly, creamy coleslaw, all wrapped up in a warm tortilla. Sounds mouthwatering, right? Trust me, once you try these wraps, they will become a staple in your kitchen repertoire.
Now, let’s be real for a moment. Life can get busy, and sometimes, we need meals that are not only delicious but also quick and easy to prepare. These BBQ Chicken Coleslaw Wraps come together in a flash and are perfect for casual gatherings, fun weeknight dinners, or even a packed lunch. The sweet and tangy BBQ chicken pairs perfectly with the crunchy coleslaw, making each bite a delight.
So gather around, and let’s dive into the process of creating these flavorful wraps, along with a few fun stories and tips to elevate your cooking game. I promise by the end of this post, you’ll want to tie on that apron and give it a whirl!
My BBQ Chicken Memory
Whenever I think of BBQ chicken, I’m transported back to summer BBQs at my childhood home. My family was big on grilling, and my dad was the reigning BBQ champion. He had this sweet and smoky BBQ sauce that made everything it touched sing. I remember those lazy Sunday afternoons when the smell of chicken marinating in that sauce would waft through the air, tantalizing everyone nearby.
On one particularly sun-soaked day, my father decided to try a new recipe he’d found. He marinated the chicken with a hint of tangy apple cider vinegar, which made the flavor pop! As we gathered in the backyard, my siblings and I couldn’t wait for the first bite. Once the chicken was off the grill, we tore into it and, of course, made a huge mess—sauce everywhere! But those moments of laughter and messy fingers are what made those BBQs unforgettable. It is this joyous spirit of togetherness that inspires me to share my BBQ Chicken Coleslaw Wraps with you today.
Ingredients
Here’s what you’ll need to create these delightful wraps:
-
2 cups cooked BBQ chicken, shredded
This can be leftovers or rotisserie chicken for a quick fix! If you don’t have BBQ chicken, feel free to use grilled chicken or even shredded beef with BBQ sauce. -
2 cups coleslaw mix
A convenient pre-packaged mix of shredded cabbage and carrots will save you prep time. If you prefer, shred your own veggies for a fresher feel. You can also substitute with any crunchy veggies you love! -
1/4 cup mayonnaise
This gives the slaw its creaminess. You can replace it with Greek yogurt for a lighter twist or even a vegan mayo if you’re going plant-based. -
1 tablespoon apple cider vinegar
A splash of this tangy vinegar brightens the flavors. If you don’t have apple cider vinegar, white wine vinegar will work just as well. -
Salt and pepper to taste
Don’t skimp on seasoning! Always taste your slaw and adjust as needed for maximum flavor. -
4 large tortillas or wraps
Whole wheat, spinach, or herbed wraps are lovely alternatives. Feel free to use small tortillas for bite-sized appetizers! -
Optional: sliced pickles or jalapeños for topping
Adding pickles brings in a nice crunch, while jalapeños add a spicy kick. Customize the toppings to suit your taste!
Step-by-Step Instructions
Let’s get cooking! Here’s how to make your BBQ Chicken Coleslaw Wraps:
-
Shred or Prepare Chicken
If you’re using rotisserie chicken, shred it with two forks in a bowl. If you have leftover BBQ chicken, simply chop it into bite-sized pieces. For those who prefer to grill, marinate chicken breasts with your favorite BBQ sauce, grill them until fully cooked, and shred when cool. -
Mix the Coleslaw
In a large mixing bowl, combine the coleslaw mix, mayonnaise, apple cider vinegar, salt, and pepper. Mix it well until the veggies are coated evenly with the dressing. Here’s a little tip: taste your coleslaw! If you like it tangier, add a pinch more vinegar. If it’s too thick, consider a splash of water or an extra dollop of mayo. -
Combine Chicken and Slaw
Add the shredded BBQ chicken to the coleslaw mix and gently fold it together until everything is mixed well. This is where the magic happens! The warm chicken mingles beautifully with the cool, creamy slaw, creating a harmony of flavors. -
Warm the Tortillas
Heat your large tortillas in a dry skillet over medium heat for about 20-30 seconds on each side, just until they are pliable. This step is crucial because it ensures your wraps won’t crack or tear when you fill them. -
Wrap It Up!
Lay a warm tortilla on a flat surface, and spoon a generous amount of the BBQ chicken and coleslaw mixture in the center. If you’re feeling adventurous, add some sliced pickles or jalapeños. Fold in the sides of the tortilla and then roll it tightly from the bottom up. Voilà! You’ve created a wrap. -
Slice and Serve
Cut the wrap in half diagonally for a beautiful presentation. Arrange on a plate, and if you wish, serve them with extra BBQ sauce on the side for dipping.
Serving Suggestions
When it comes to serving these BBQ Chicken Coleslaw Wraps, presentation is key. Arrange them on a rustic wooden board or a colorful platter. Drizzle a little extra BBQ sauce on the side and sprinkle fresh herbs, like cilantro or parsley, for a pop of color. You can even add a small bowl of chips for that perfect crunch! These wraps are not just a meal; they’re an experience.
Recipe Variations
One of the best aspects of cooking is the ability to play around with flavors. Here are a few creative twists on the classic BBQ Chicken Coleslaw Wraps:
-
Asian-Inspired Wraps: Swap out BBQ sauce for teriyaki sauce and add sesame oil to the coleslaw for an Asian twist.
-
Spicy Buffalo Wraps: Use shredded buffalo chicken instead of BBQ, and incorporate blue cheese crumbles into the slaw.
-
Taco Variation: Add taco seasoning to the chicken and replace coleslaw with a fresh Pico de Gallo for a zesty taco flavor.
-
Vegetarian Option: Substitute the chicken for charred veggies like zucchini and bell peppers, and use black beans for a protein punch.
-
Fruit and Nut Twist: Toss in some chopped apples and walnuts in the coleslaw for a crunchy, sweet variation.
Chef’s Notes
As I reflect on this recipe, it’s fascinating how BBQ Chicken Coleslaw Wraps can adapt to seasons, occasions, and personal preferences. Over time, my family has turned to these wraps for everything from backyard gatherings to rainy movie nights. And trust me, every time we gather, laughter, stories, and a tiny bit of good-natured kitchen disaster follows! I remember one birthday party when someone forgot to seal the wrap properly, and let’s just say, the chicken got an unexpected adventure. But that’s part of the joy of cooking—embracing the messiness and making laughter a part of the meal.
FAQs and Troubleshooting
Q: Can I make the coleslaw in advance?
A: Absolutely! You can prepare the coleslaw a day ahead, but keep the chicken and coleslaw separate until you’re ready to make the wraps. This ensures your tortillas stay fresh and prevent sogginess.
Q: What if I don’t have BBQ chicken?
A: No worries! You can use any seasoned chicken or even pulled pork. If you want a quick change, roasted vegetables or tofu also work great with BBQ sauce!
Q: Can I freeze the wraps?
A: While these wraps are best enjoyed fresh, you can freeze the fillings separately. Just make sure to wrap them securely, and reheat them from frozen when you crave these beauties again.
Q: What are some good sides to serve with these wraps?
A: Fresh fruit salads, roasted sweet potatoes, or a refreshing cucumber salad make great accompaniments to these wraps!
Nutritional Info
(If you’re keen on tracking your macros or calories, here’s a rough idea per wrap, excluding additional toppings.)
- Calories: Approximately 400
- Protein: 30g
- Carbs: 45g
- Fat: 15g
And that’s a wrap—quite literally! I hope this recipe brings some joy to your kitchen and a burst of flavor to your table. Whether you’re making a casual dinner for two or hosting a backyard gathering, these BBQ Chicken Coleslaw Wraps are sure to impress!
So, grab your apron, pour a glass of something bubbly, and let’s bring a little bit of warmth and joy to your dining experience. Happy cooking, my friends!
PrintBBQ Chicken Coleslaw Wraps
Delicious BBQ Chicken Coleslaw Wraps combining shredded BBQ chicken with creamy coleslaw wrapped in warm tortillas.
- Prep Time: 15 minutes
- Cook Time: 30 minutes
- Total Time: 45 minutes
- Yield: 4 servings 1x
- Category: Main Course
- Method: Wrap
- Cuisine: American
- Diet: None
Ingredients
- 2 cups cooked BBQ chicken, shredded
- 2 cups coleslaw mix
- 1/4 cup mayonnaise
- 1 tablespoon apple cider vinegar
- Salt and pepper to taste
- 4 large tortillas or wraps
- Optional: sliced pickles or jalapeños for topping
Instructions
- Shred or prepare chicken.
- Mix the coleslaw in a large bowl with mayonnaise, apple cider vinegar, salt, and pepper.
- Combine shredded BBQ chicken with the coleslaw mix.
- Warm the tortillas in a skillet until pliable.
- Wrap the mixture in the tortillas, folding in the sides and rolling tightly.
- Slice the wrap in half diagonally and serve.
Notes
Customize your wraps with additional toppings like pickles or jalapeños for added flavor.
Nutrition
- Serving Size: 1 wrap
- Calories: 400
- Sugar: 4g
- Sodium: 600mg
- Fat: 15g
- Saturated Fat: 3g
- Unsaturated Fat: 7g
- Trans Fat: 0g
- Carbohydrates: 45g
- Fiber: 3g
- Protein: 30g
- Cholesterol: 60mg
Keywords: BBQ chicken, coleslaw, wraps, quick meals, easy dinner
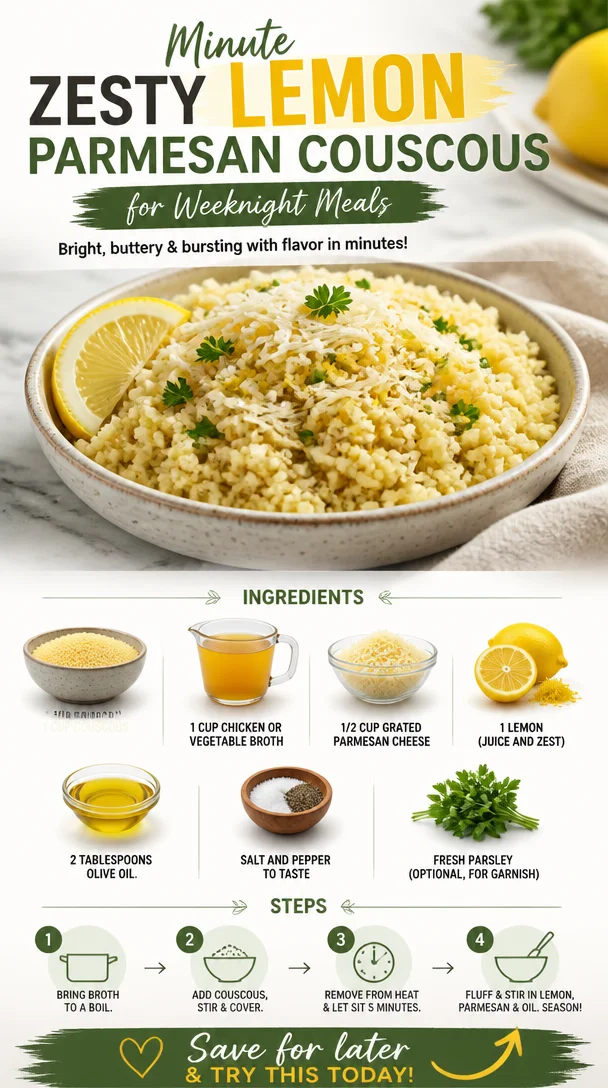
Minute Zesty Lemon Parmesan Couscous for Weeknight Meals
Zesty Lemon Parmesan Couscous: A Bright and Elegant Side Dish
Hello, food lovers! Today, we’re diving into a vibrant and simple side dish that brings a little sunshine to your table — Zesty Lemon Parmesan Couscous. This dish is not just easy to make; it’s a crowd-pleaser that pairs beautifully with just about everything. Whether you’re hosting an elegant dinner party or simply elevating a weeknight meal, this couscous is your new best friend in the kitchen.
A Taste of Nostalgia
Let me take you back to my childhood kitchen filled with the enticing aroma of fresh herbs and citrus. I can still picture my mom in her apron, zesting lemons with a cheerful determination. She’d often call us all to gather around as she prepared dinner — and one of my favorite memories is the day she introduced us to couscous for the first time. It was fluffy, bright, and packed with flavor, and I was smitten!
That evening, as we dug into our plates, she taught us the magic of cooking with intention — the importance of fresh ingredients, careful preparation, and making every meal a celebration. Now, when I make Zesty Lemon Parmesan Couscous, I’m instantly transported back to that vibrant kitchen. It’s a dish that’s all about sharing joy with loved ones, just like my mom did.
Ingredients
For our Zesty Lemon Parmesan Couscous, you’ll need the following delightful ingredients. Let’s break them down so you know exactly what you’re working with!
-
1 cup couscous: The star of our dish! Couscous is versatile and cooks quickly. If you’re in the mood for a different grain, try quinoa or orzo as a substitute.
-
1 cup chicken or vegetable broth: This adds depth and flavor. Homemade broth is ideal, but store-bought works just as well. For a vegetarian option, stick with vegetable broth.
-
1/2 cup grated Parmesan cheese: This brings a savory richness to the dish. If you’re looking for a dairy-free alternative, nutritional yeast can add a similar flavor profile.
-
1 lemon (juice and zest): This is where the zestiness comes from! The zest adds intense citrus flavor without the acidity. If you don’t have a lemon on hand, lime is a wonderful substitute that will add a different twist.
-
2 tablespoons olive oil: A good quality extra virgin olive oil enhances the flavor and adds healthy fats. You can replace it with melted butter for a richer taste.
-
Salt and pepper to taste: Essential for rounding out flavors. Always taste as you go!
-
Fresh parsley (optional, for garnish): Adds a pop of color and freshness. If parsley isn’t your thing, try fresh basil or chives.
Step-by-Step Instructions
Now that we’ve gathered our ingredients and are feeling excited, let’s dive into making this delicious dish!
-
Prepare the Broth: In a medium saucepan, bring 1 cup of chicken or vegetable broth to a boil over medium-high heat. If you’re feeling adventurous, you can throw in a garlic clove or some bay leaves for added flavor.
-
Add the Couscous: Once the broth is boiling, stir in 1 cup of couscous. Cover the pot with a lid and remove it from heat. Let it sit for about 5 minutes. This is when the couscous puffs up and absorbs all that flavorful broth. Trust me; it’s magical.
-
Fluff the Couscous: After 5 minutes, it’s time to unveil the couscous! Use a fork to fluff it up gently. This step is crucial to avoid clumping and to make every grain stand out. Imagine the fluffy clouds of couscous basking in the warm sun!
-
Zest and Juice Your Lemon: As your couscous cools, zest your lemon and then squeeze out its juice. Remember, we want the zest to be bright and colorful, so use a microplane or a fine grater to get the fine bits. You want about 2 tablespoons of juice.
-
Add the Good Stuff: Drizzle 2 tablespoons of olive oil over the fluffed couscous, followed by the grated Parmesan, lemon juice, and lemon zest. Use a spatula to gently fold everything together. This is the stage where flavor melds together into something beautiful. Don’t be afraid to add a pinch of salt and pepper here!
-
Adjust the Seasoning: Taste your creation and adjust the seasoning as needed. Maybe it needs a touch more salt or a bit of extra lemon juice to amp up the zesty flavor. Cooking is all about balance!
-
Garnish: If you’re using fresh parsley, chop it roughly and sprinkle it over your couscous before serving. It brightens the dish visually as well as in flavor.
Serving Suggestions
When it comes to serving Zesty Lemon Parmesan Couscous, presentation is key! Arrange the couscous in a beautiful bowl or platter. You can even sprinkle a little extra Parmesan on top for that lovely finishing touch. For an upscale feel, you could even squeeze a few lemon slices on the side — they look gorgeous and add a bright pop of color against the pale couscous.
Serve this stunning side with grilled chicken, roasted veggies, or a fresh salad. The zesty notes complement proteins beautifully while adding a refreshing element to your overall meal.
Recipe Variations
Here are a few fun twists on this basic recipe that can elevate your couscous experience:
-
Herbed Couscous: Stir in fresh herbs like dill, basil, or thyme for a fragrant twist. Each herb brings a unique flavor that can change the entire vibe of your dish!
-
Mediterranean Style: Add chopped tomatoes, cucumbers, olives, and feta cheese for a vibrant Mediterranean salad. It’s a great way to bring a taste of the Greek Isles to your table!
-
Nutty and Sweet: Toss in some toasted almonds or pine nuts, and add a spoonful of dried cranberries or raisins. It brings a delightful crunch and a touch of sweetness to your plate.
-
Spicy Couscous: For those who like a little kick, add red pepper flakes or toss in some sautéed bell peppers. This will wake up your palate and breathe a little heat into your dish!
-
Coconut Couscous: Swap chicken broth for coconut milk for a tropical twist. Add in a sprinkle of toasted coconut for extra flavor. This option brings a rich and creamy touch to your meal.
Chef’s Notes
This Zesty Lemon Parmesan Couscous recipe has been a staple in my kitchen for years. It’s versatile, quick, and impressively sophisticated without requiring hours in the kitchen. One time, I decided to make it for last-minute guests, and they couldn’t believe how simple it was! It’s those delightful surprises that make cooking so rewarding.
Here’s a little tip: always keep couscous and broth handy. You’ll find a million ways to dress it up and make it shine! Plus, cooking should be about more than just the end dish. It’s about the memories, the laughter, and those beautiful moments around the table.
FAQs and Troubleshooting
1. What if my couscous is clumpy?
If your couscous comes out clumpy, it might be because it didn’t fluff properly. Make sure to use a fork to gently separate the grains; sometimes a bit of olive oil will help.
2. Can I make this ahead of time?
Absolutely! Couscous can be made a day in advance. Just store it in an airtight container in the fridge. When you’re ready to serve, simply fluff and add a touch more lemon juice if needed.
3. What can I do if I don’t have any broth?
No broth? No problem! You can use boiling water, but the flavor will be less intense. If you have any herbs or spices, throw those in to enhance the taste.
4. How can I store leftovers?
Store any leftover couscous in an airtight container in the fridge for up to 3 days. It makes for a quick lunch option the next day — just toss it into a salad!
Nutritional Info
While I didn’t include specific nutritional info for this recipe, couscous is generally a low-calorie option that provides a good source of carbohydrates. The addition of lemon and cheese brings in vitamins and calcium, making it a balanced side.
So there you have it, my friends! Zesty Lemon Parmesan Couscous is not just a recipe; it’s a warm invitation to gather around the table, share stories, and create memories. Get that apron on, and let’s get cooking! I can’t wait for you to try this dish and share it with the people you love. Happy cooking!
PrintZesty Lemon Parmesan Couscous
A vibrant and simple side dish that brings sunshine to your table, perfect for any occasion.
- Prep Time: 5 minutes
- Cook Time: 10 minutes
- Total Time: 15 minutes
- Yield: 4 servings 1x
- Category: Side Dish
- Method: Stovetop
- Cuisine: Mediterranean
- Diet: Vegetarian
Ingredients
- 1 cup couscous
- 1 cup chicken or vegetable broth
- 1/2 cup grated Parmesan cheese
- 1 lemon (juice and zest)
- 2 tablespoons olive oil
- Salt and pepper to taste
- Fresh parsley (optional, for garnish)
Instructions
- Prepare the broth: In a medium saucepan, bring 1 cup of chicken or vegetable broth to a boil over medium-high heat.
- Add the couscous: Once the broth is boiling, stir in 1 cup of couscous, cover the pot, and remove it from heat. Let it sit for about 5 minutes.
- Fluff the couscous: Use a fork to fluff it up gently after sitting.
- Zest and juice your lemon: Zest your lemon and squeeze out its juice.
- Add the good stuff: Drizzle 2 tablespoons of olive oil over the fluffed couscous, followed by the grated Parmesan, lemon juice, and zest. Fold everything together.
- Adjust the seasoning: Taste and adjust with salt or lemon juice as needed.
- Garnish: If using, chop fresh parsley and sprinkle over the couscous before serving.
Notes
Couscous can be made a day in advance and stored in an airtight container. Fluff and add lemon juice when ready to serve.
Nutrition
- Serving Size: 1 serving
- Calories: 250
- Sugar: 1g
- Sodium: 600mg
- Fat: 10g
- Saturated Fat: 2g
- Unsaturated Fat: 7g
- Trans Fat: 0g
- Carbohydrates: 30g
- Fiber: 2g
- Protein: 8g
- Cholesterol: 5mg
Keywords: couscous, lemon, parmesan, side dish, vegetarian
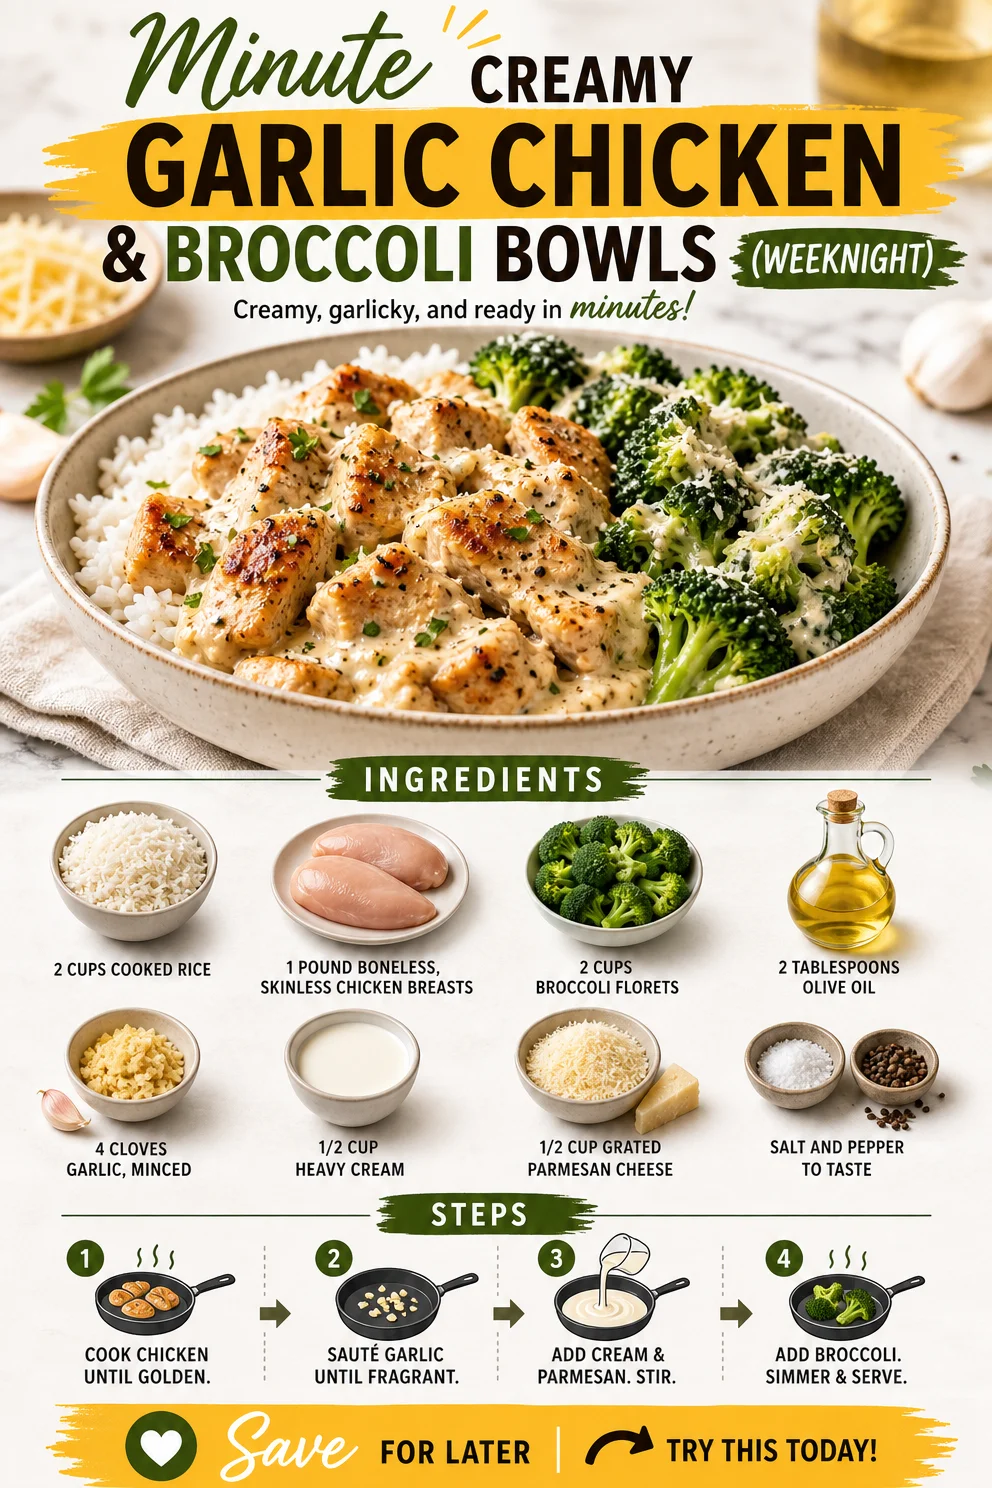
Minute Creamy Garlic Chicken & Broccoli Bowls (Weeknight)
Grilled Chicken Broccoli Bowls with Creamy Garlic Sauce: A Comforting Feast
Hello, fellow food lovers! Today, we’re diving into a dish that radiates warmth and comfort—Grilled Chicken Broccoli Bowls with Creamy Garlic Sauce. Trust me, you’re going to want to save this recipe for those weeknights when you crave something delicious yet easy to whip up. With a delightful combination of tender grilled chicken, vibrant broccoli, and a luscious creamy garlic sauce, this meal is bound to please everyone at your table.
A Taste of Nostalgia
I can still remember the first time I made a version of this dish for my closest friends during a cozy gathering. We were all excited as I pulled out my grilling pan and arranged everything to sizzle away. As the inviting aroma of garlic filled the air, laughter and stories flowed around the kitchen. We ended up enjoying our meal on the terrace, with twinkling lights overhead, sharing bites and moments that felt timeless. It wasn’t just the food that made that night special; it was the atmosphere, the connections, and the joy of creating something delicious together. This dish has since become a staple in my home, perfect for those evenings when you want to impress without stress!
Ingredients
To create these delicious Grilled Chicken Broccoli Bowls, gather the following ingredients:
- 2 cups cooked rice: This serves as the hearty base of our bowls. Use brown rice for a nuttier flavor or quinoa for a healthy twist.
- 1 pound boneless, skinless chicken breasts: Choose high-quality chicken for the best results. If you’re in a pinch, chicken thighs work wonderfully too.
- 2 cups broccoli florets: Fresh broccoli packs in vibrant green color and crunch. In a hurry? Frozen florets can be a great substitute.
- 2 tablespoons olive oil: A staple in any kitchen, olive oil adds richness and aids in grilling. Canola or avocado oil works as well.
- 4 cloves garlic, minced: Garlic is the star of our creamy sauce! Adjust to your taste – if you’re a garlic lover, feel free to add more or substitute with shallots for a milder flavor.
- 1/2 cup heavy cream: For that luscious creaminess, but if you want a lighter version, a mix of Greek yogurt and a splash of milk can be a fantastic alternative.
- 1/2 cup grated Parmesan cheese: This brings a savory depth to the sauce. Nutritional yeast is a great dairy-free substitute that still offers a cheesy flavor.
- Salt and pepper to taste: Always season your dishes to enhance the flavors. Fresh cracked pepper adds a nice kick!
Step-by-Step Instructions
Let’s roll up our sleeves and get cooking! Follow these easy steps to whip up your Grilled Chicken Broccoli Bowls with Creamy Garlic Sauce.
-
Prepare the Rice: If you haven’t cooked your rice yet, now’s the time! You can use a rice cooker or stovetop. Follow package instructions, adding a pinch of salt for flavor. This will take about 20 minutes, so you can multitask while this cooks!
-
Marinate the Chicken: In a bowl, drizzle the chicken breasts with 1 tablespoon of olive oil, salt, and pepper to taste. Give it a good rub so the seasoning penetrates the meat. Let it marinate while you prepare the other ingredients. A hint of lemon can brighten this up too if you have it on hand!
-
Prep the Broccoli: While the chicken marinates, wash and chop your broccoli into bite-sized florets. If you’re using frozen broccoli, simply measure out what you need and it’s ready to go!
-
Grill the Chicken: Heat your grill pan over medium-high heat. Once hot, carefully place the marinated chicken on the grill. Cook for about 6-7 minutes on each side, or until the internal temperature hits 165°F (75°C). The goal is to have nicely charred grill marks while ensuring the chicken stays juicy. Use a meat thermometer for the most accurate results!
-
Blanch the Broccoli: In a separate pot, bring water to a rolling boil and add a pinch of salt. Toss in the broccoli florets and blanch for about 2 minutes until vibrant green and slightly tender. Drain and rinse with cold water to stop the cooking.
-
Make the Creamy Garlic Sauce: In a saucepan over medium heat, add the remaining tablespoon of olive oil. Toss in the minced garlic, letting it sauté for about 1 minute until fragrant (but don’t let it brown!). Pour in the heavy cream, and stir well. Add the grated Parmesan cheese, then season with salt and pepper to your liking. Keep stirring until the cheese is melted and the sauce is silky. If you find it too thick, add a splash of chicken or vegetable broth.
-
Assemble the Bowls: Grab your favorite bowls—start with a generous scoop of rice, layer on the blanched broccoli, and slice the grilled chicken on top. Drizzle the creamy garlic sauce generously over everything. This is where the magic happens!
Serving Suggestions
For a lovely presentation, garnish your bowls with some freshly cracked black pepper and a sprinkle of Parmesan cheese. Fresh parsley or chives adds a pop of color and freshness! Enjoy these bowls warm, perhaps with a side of crusty bread to soak up any remaining creamy sauce—we can’t let any of that go to waste!
Recipe Variations
Want to mix things up? Here are a few creative twists you can try:
- Spicy Kick: Add a teaspoon of red pepper flakes or a dash of hot sauce into your creamy garlic sauce for an exciting kick.
- Veggie Boost: Toss in other vibrant veggies like bell peppers or carrots for extra color and crunch.
- Pasta Option: Swap rice for your favorite pasta to create a delightful creamy pasta dish.
- Herbaceous: Infuse your creamy garlic sauce with herbs such as basil or thyme for an aromatic twist.
- Gluten-Free: Use a gluten-free rice option like cauliflower rice for a lower-carb alternative.
Chef’s Notes
This recipe has been a hit in my kitchen for years, evolving every time I make it. One time, I accidentally dropped half a head of roasted garlic into the sauce—it turned out to be a happy mistake! Now, I sometimes roast garlic ahead of time for an intense, caramelized flavor. Cooking is all about experimenting, so don’t be afraid to make it your own. I encourage you to invite friends in for a cooking night—there’s something so magical about creating together!
FAQs and Troubleshooting
1. How can I ensure my chicken doesn’t dry out?
- The secret is to avoid overcooking! Use a meat thermometer to check for doneness at 165°F (75°C), and let the chicken rest for a few minutes before slicing.
2. Can I make this sauce ahead of time?
- Absolutely! You can make the creamy garlic sauce ahead of time and store it in the fridge. Just reheat it gently over low heat, stirring in a bit of cream if it thickens up too much.
3. What should I serve with these bowls?
- A colorful side salad or some garlic bread complements these bowls wonderfully. You could also add a light vinaigrette for a fresh contrast.
4. My sauce turned out too thick. What can I do?
- No worries! Simply stir in a little chicken broth or milk to loosen it up to your desired consistency.
Nutritional Info (if applicable)
While each serving may vary based on ingredients and portion sizes, here’s an approximate breakdown per serving:
- Calories: 500
- Protein: 37g
- Carbohydrates: 40g
- Fat: 22g
And there you have it! Whip up these Grilled Chicken Broccoli Bowls with Creamy Garlic Sauce and enjoy the charm of sharing a home-cooked meal, no culinary degree required. Remember, cooking should be fun, relaxed, and, most importantly, delicious. So, grab your apron and let’s make some delicious memories! Happy cooking!
PrintGrilled Chicken Broccoli Bowls with Creamy Garlic Sauce
A comforting dish featuring grilled chicken, broccoli, and a creamy garlic sauce, perfect for weeknight dinners.
- Prep Time: 20 minutes
- Cook Time: 30 minutes
- Total Time: 50 minutes
- Yield: 4 servings 1x
- Category: Main Course
- Method: Grilling
- Cuisine: American
- Diet: Gluten-Free
Ingredients
- 2 cups cooked rice
- 1 pound boneless, skinless chicken breasts
- 2 cups broccoli florets
- 2 tablespoons olive oil
- 4 cloves garlic, minced
- 1/2 cup heavy cream
- 1/2 cup grated Parmesan cheese
- Salt and pepper to taste
Instructions
- Prepare the Rice: If you haven’t cooked your rice yet, now’s the time! You can use a rice cooker or stovetop. Follow package instructions, adding a pinch of salt for flavor. This will take about 20 minutes, so you can multitask while this cooks!
- Marinate the Chicken: In a bowl, drizzle the chicken breasts with 1 tablespoon of olive oil, salt, and pepper to taste. Give it a good rub so the seasoning penetrates the meat. Let it marinate while you prepare the other ingredients. A hint of lemon can brighten this up too if you have it on hand!
- Prep the Broccoli: While the chicken marinates, wash and chop your broccoli into bite-sized florets. If you’re using frozen broccoli, simply measure out what you need and it’s ready to go!
- Grill the Chicken: Heat your grill pan over medium-high heat. Once hot, carefully place the marinated chicken on the grill. Cook for about 6-7 minutes on each side, or until the internal temperature hits 165°F (75°C). The goal is to have nicely charred grill marks while ensuring the chicken stays juicy. Use a meat thermometer for the most accurate results!
- Blanch the Broccoli: In a separate pot, bring water to a rolling boil and add a pinch of salt. Toss in the broccoli florets and blanch for about 2 minutes until vibrant green and slightly tender. Drain and rinse with cold water to stop the cooking.
- Make the Creamy Garlic Sauce: In a saucepan over medium heat, add the remaining tablespoon of olive oil. Toss in the minced garlic, letting it sauté for about 1 minute until fragrant (but don’t let it brown!). Pour in the heavy cream, and stir well. Add the grated Parmesan cheese, then season with salt and pepper to your liking. Keep stirring until the cheese is melted and the sauce is silky. If you find it too thick, add a splash of chicken or vegetable broth.
- Assemble the Bowls: Grab your favorite bowls—start with a generous scoop of rice, layer on the blanched broccoli, and slice the grilled chicken on top. Drizzle the creamy garlic sauce generously over everything. This is where the magic happens!
Notes
Garnish with freshly cracked black pepper and a sprinkle of Parmesan cheese for a lovely presentation.
Nutrition
- Serving Size: 1 bowl
- Calories: 500
- Sugar: 3g
- Sodium: 500mg
- Fat: 22g
- Saturated Fat: 10g
- Unsaturated Fat: 6g
- Trans Fat: 0g
- Carbohydrates: 40g
- Fiber: 3g
- Protein: 37g
- Cholesterol: 100mg
Keywords: grilled chicken, broccoli bowls, creamy garlic sauce, quick dinner recipe, comfort food