
One-Pan Lasagna: 30-Minute Weeknight Dinner for Families
Quick & Easy Lasagna That’ll Make You the Dinner Hero
Hello, my culinary comrades! If you’re looking for a dish that combines comfort with elegance and a sprinkle of nostalgia, you’ve landed in the right place. I’m excited to share my Quick & Easy Lasagna recipe with you — the kind of lasagna that feels like a warm hug from grandma while also being simple enough to whip up on a busy weeknight.
Imagine this: it’s a chilly evening, you’ve come home from a long day, and the kitchen is beckoning you to create something magical. Trust me; this lasagna is your ticket to becoming the dinner hero of the night! With layers of rich marinara, gooey cheese, and perfectly seasoned meat, it’s a crowd-pleaser that even the pickiest eaters will adore.
Personal Story
Let me take you back to my childhood. I remember those Sunday afternoons at my grandmother’s house—the tantalizing aroma of her famous lasagna wafting through the air, mingling with laughter and the clinking of forks on plates. The dining room table was an explosion of colors: vibrant salads, crusty bread, and that bubbling pan of lasagna at the center, a true showstopper.
Grandma would always say, “Food is love!” And the way she prepared lasagna was the epitome of that saying. It was a labor of love, a medley of flavors carefully layered to bring together friends and family. While I loved her version, I knew that not everyone has hours to create such a masterpiece. Thus, this Quick & Easy Lasagna was born! It retains the heart of grandma’s recipe but cuts down on the time and effort.
Ingredients
Here’s what you’ll need to make this lasagna shine:
-
12 ounces Lasagna Noodles
You can use regular or no-boil noodles. No-boil noodles are a time-saver, absorbing moisture from the sauce and creating perfect layers. -
1 pound Ground Beef
While I use ground beef, feel free to swap it with Italian sausage for a flavor boost! It adds a lovely depth and a bit of spice. -
24 ounces Marinara Sauce
Homemade sauce is fantastic, but a quality store-bought option works beautifully too. Look for one with minimal ingredients for the best flavor. -
1 tablespoon Italian Seasoning
This blend typically includes herbs like basil, oregano, and thyme. If you have fresh herbs on hand, use those for an even more vibrant flavor! -
15 ounces Ricotta Cheese
So creamy and delicious! If you prefer a lighter option, try cottage cheese—just be sure to drain it well. -
1 large Egg
This helps bind the ricotta but can be omitted if you prefer a firmer texture in your lasagna. -
1 teaspoon Salt
Essential for bringing all the flavors together. Adjust this based on the saltiness of your marinara sauce. -
1 dash Pepper
Just a pinch for balance; you can tweak this depending on your spice preference. -
2 cups Shredded Mozzarella Cheese
Because what’s lasagna without that glorious cheesy melt? You can get creative and use provolone or a blend of your favorites. -
1/4 cup Grated Parmesan Cheese
This adds a nice, nutty flavor and a bit of crunch on top. It’s the cherry on top of our lasagna sundae!
Step-by-Step Instructions
Now that we’ve gathered our ingredients, let’s dive into the cooking! Follow these simple steps for a lasagna that looks as good as it tastes.
-
Preheat the Oven
Preheat your oven to 375°F (190°C). A hot oven ensures optimal cooking for our layers, creating that beautiful crust on top! -
Cook the Lasagna Noodles
- For regular noodles: Boil a large pot of salted water. Add your lasagna noodles and cook according to the package instructions until al dente (usually around 8-10 minutes). Drain and lay them flat on a kitchen towel to prevent sticking.
- For no-boil noodles: You can skip this step! They’ll soak up moisture later.
-
Brown the Ground Beef
In a large skillet, heat a tablespoon of olive oil over medium heat. Add your ground beef and cook until browned, breaking it apart with a spatula (about 5-7 minutes). Once browned, drain excess fat if necessary. -
Mix in Marinara and Seasoning
To the skillet with the ground beef, stir in the marinara sauce and Italian seasoning. Let it simmer for about 5 minutes, allowing those flavors to marry beautifully. -
Prepare the Ricotta Filling
In a mixing bowl, combine the ricotta cheese, egg, salt, and a sprinkle of pepper. Mix until smooth and creamy. This filling is the heart of our lasagna—don’t skimp on this step! -
Assemble the Lasagna
In a 9×13-inch baking dish, start by spreading a thin layer of the meat sauce on the bottom (this prevents sticking). Follow with a layer of noodles, a generous spread of the ricotta mixture, another layer of meat sauce, and a sprinkle of mozzarella. Repeat this layering until all ingredients are used, finishing with a layer of noodles topped with remaining meat sauce and a mountain of mozzarella and parmesan cheese. -
Bake It
Cover the baking dish with aluminum foil (to prevent sticking, you can spray the foil with cooking spray). Bake for 25 minutes, then remove the foil and bake for an additional 15 minutes or until the cheese is golden and bubbly. The irresistible aroma will fill your kitchen and lead everyone to the dining table! -
Let it Rest
Once your lasagna is baked to bubbly perfection, let it sit for about 15 minutes. This helps the layers set, making serving a breeze.
Serving Suggestions
To plate this beauty, cut it into squares, and serve alongside a crisp green salad or some garlic bread. Don’t forget to garnish with fresh basil leaves or a sprinkle of extra parmesan for that wow factor!
Recipe Variations
Want to shake things up? Here are some creative twists on this classic lasagna:
-
Veggie Delight: Substitute half the ground beef with roasted vegetables like zucchini, bell peppers, and mushrooms for a flavorful vegetarian lasagna.
-
Pesto Twist: Mix some pesto into the ricotta for an herby, vibrant flavor that elevates your dish.
-
Spicy Kick: Add red pepper flakes to the ground beef for a hint of heat that’ll surprise your taste buds.
-
Cheesy Spinach: Mix sautéed spinach into the ricotta layer for added nutrition and a lovely green color.
-
Gluten-Free Swap: Use gluten-free lasagna noodles or zucchini slices in place of noodles for a lighter, keto-friendly version.
Chef’s Notes
Over the years, this lasagna has been a go-to recipe for me, especially during potlucks and family gatherings. Each time I prepare it, I’m reminded of those cozy Sunday afternoons at grandma’s. It’s funny how a simple dish can evoke such warmth, compassion, and community!
I’ve played around with variations, and I’m always amazed at how this remarkable recipe can adapt to different tastes and dietary needs. It’s a reflection of how cooking is about evolution, just like us!
FAQs and Troubleshooting
-
Why is my lasagna watery?
This can happen if the noodles are undercooked or if too much sauce is used. Make sure to cook your noodles al dente and use just the right amount of marinara—remember, balance is key! -
Can I make this ahead of time?
Absolutely! You can prepare the lasagna the day before and store it in the fridge. Just pop it in the oven when you’re ready to enjoy! -
What if I don’t have ricotta cheese?
No worries! Cottage cheese, as mentioned, is a perfect substitute. You can also blend in a bit of cream cheese for a richer flavor. -
How do I store leftovers?
Store any leftovers in an airtight container in the fridge for up to 3 days. Reheat it in the microwave or oven; it’s just as delightful on day two!
Nutritional Info
While I like to enjoy cooking my food without fixating on the numbers, here’s a rough estimate per serving:
- Calories: ~350
- Protein: ~20g
- Carbohydrates: ~30g
- Fat: ~15g
Note: Nutritional values may vary based on ingredient substitutions and brands used.
So there you have it—my Quick & Easy Lasagna that’s sure to make you the dinner hero! It’s simple, savory, and oh-so satisfying. Whether you’re cooking for a crowd or just for yourself, this dish invites love and warmth into your kitchen. Tie on that apron and let’s create some memories around your table! Bon appétit!
PrintQuick & Easy Lasagna

A comforting and elegant lasagna that is quick to prepare, perfect for a busy weeknight while still delivering rich flavors.
- Prep Time: 15 minutes
- Cook Time: 40 minutes
- Total Time: 55 minutes
- Yield: 8 servings 1x
- Category: Main Course
- Method: Baking
- Cuisine: Italian
- Diet: Meat
Ingredients
- 12 ounces Lasagna Noodles
- 1 pound Ground Beef
- 24 ounces Marinara Sauce
- 1 tablespoon Italian Seasoning
- 15 ounces Ricotta Cheese
- 1 large Egg
- 1 teaspoon Salt
- 1 dash Pepper
- 2 cups Shredded Mozzarella Cheese
- 1/4 cup Grated Parmesan Cheese
Instructions
- Preheat your oven to 375°F (190°C).
- Cook lasagna noodles in a large pot of salted water until al dente or skip if using no-boil noodles.
- Brown the ground beef in a skillet with olive oil, breaking it apart until browned.
- Mix in marinara sauce and Italian seasoning, letting it simmer for 5 minutes.
- Prepare the ricotta filling by combining ricotta cheese, egg, salt, and pepper until smooth.
- Assemble the lasagna in a 9×13-inch baking dish, layering ingredients as desired.
- Bake for 25 minutes covered with foil, then remove foil and bake for an additional 15 minutes until cheese is golden.
- Let the lasagna rest for about 15 minutes before serving.
Notes
Serve with a green salad or garlic bread, and consider garnishing with fresh basil or extra Parmesan.
Nutrition
- Serving Size: 1 serving
- Calories: 350
- Sugar: 6g
- Sodium: 600mg
- Fat: 15g
- Saturated Fat: 7g
- Unsaturated Fat: 6g
- Trans Fat: 0g
- Carbohydrates: 30g
- Fiber: 2g
- Protein: 20g
- Cholesterol: 50mg
Keywords: lasagna, quick dinner, comfort food, easy recipe, weeknight meal
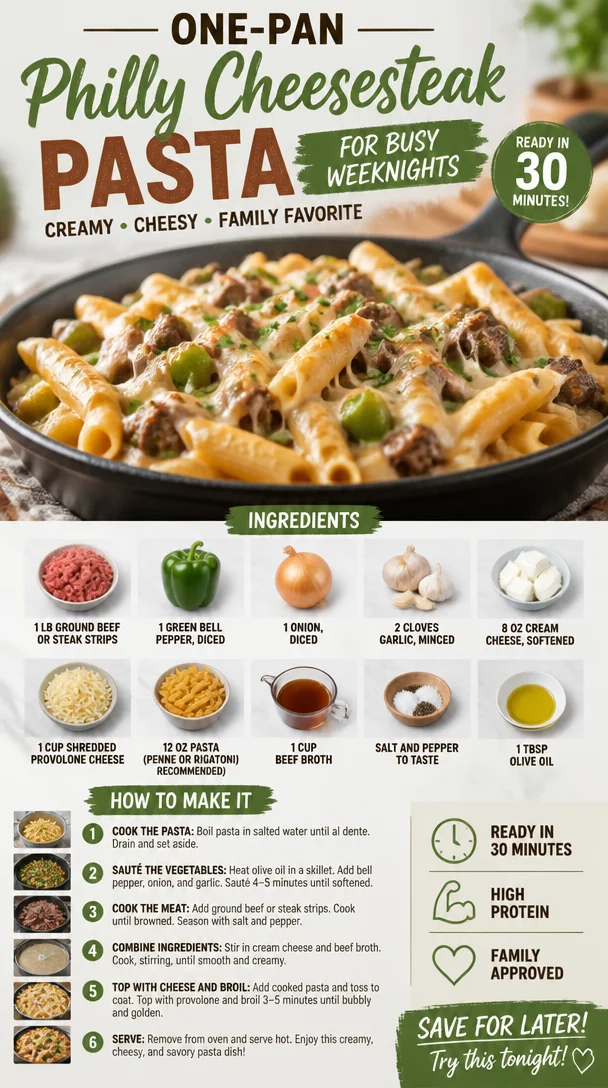
One-Pan Philly Cheesesteak Pasta for Busy Weeknights
Philly Cheesesteak Pasta: A Cozy Culinary Adventure
Hello, food lovers! Today, I’m thrilled to share a recipe that’s a delightful twist on two beloved classics: the Philly cheesesteak and creamy pasta. This dish is comfort in a bowl, combining savoriness with a touch of indulgence that makes it perfect for family dinners, gatherings, or even a cozy night in. Let’s dive in!
A Fond Culinary Memory
When I think of Philly cheesesteaks, I’m immediately transported to a bustling street food scene in Philadelphia. I remember my first trip to the City of Brotherly Love, where the air was thick with the smell of sizzling meat and melted cheese. I stood in line at a small sandwich shop, taking in the atmosphere, the clattering of pans, and the joyful chatter of fellow food enthusiasts. As I savored my first bite of that iconic sandwich, I realized what magic really tastes like: a combination of juicy beef, gooey cheese, and vibrant bell peppers, all wrapped in a soft hoagie roll.
Inspired by that experience, I wanted to capture the essence of a Philly cheesesteak in a way that feels homey and accessible—hence, Philly Cheesesteak Pasta was born! This dish combines the rich flavors of the cheesesteak with the heartiness of pasta, making it a truly memorable meal that evokes nostalgia and warmth.
Ingredients
Gather your ingredients for this fulfilling dish. Each component plays a unique role in creating that signature flavor profile you know and love!
-
1 lb ground beef or steak strips: The heart of this dish! Ground beef is deliciously convenient, while steak strips offer that authentic cheesesteak experience. If you’re looking for a leaner option, consider using ground turkey.
-
1 green bell pepper, diced: Adds a fresh crunch and sweetness. You can swap this for a red or yellow bell pepper for a different flavor profile.
-
1 onion, diced: A flavor powerhouse! Yellow onions add sweetness when cooked, but you could also use shallots for a milder aroma.
-
2 cloves garlic, minced: Elevates the dish with aromatic depth. Feel free to adjust the amount based on your love for garlic.
-
8 oz cream cheese, softened: This brings a wonderfully creamy texture to the sauce. For a lighter version, you can use Greek yogurt or part-skim ricotta.
-
1 cup shredded provolone cheese: The classic cheesesteak cheese! Mozzarella works as a great substitute if you prefer a milder flavor.
-
12 oz pasta (penne or rigatoni recommended): These sturdy pasta shapes capture the creamy sauce and meat beautifully. If you’re feeling adventurous, try whole wheat or gluten-free pasta!
-
1 cup beef broth: This adds richness and depth. Vegetable broth can be used for a lighter or vegetarian version.
-
Salt and pepper to taste: Essential for enhancing flavors. Don’t be shy—season to your personal preference!
-
1 tbsp olive oil: For sautéing those aromatic veggies. You can replace this with butter or avocado oil for a different taste.
Step-by-Step Instructions
Let’s roll up our sleeves and get cooking! Here’s how to create your own Philly Cheesesteak Pasta.
-
Cook the Pasta: Begin by boiling a large pot of salted water. Add the pasta and cook according to package instructions until al dente. This typically takes about 8-10 minutes. Chef tip: Reserve a cup of pasta water before draining—it’s liquid gold for adjusting sauce consistency!
-
Sauté the Veggies: In a large skillet, heat the olive oil over medium heat. Add the diced onion and sauté it until it becomes translucent (about 3-4 minutes). Next, add your diced green bell pepper and minced garlic; cook for another 2-3 minutes until fragrant and tender. Stir occasionally—you want those veggies to get a bit of color!
-
Brown the Meat: Push the veggies to the side of the skillet, add the ground beef or steak strips, and season with salt and pepper. Use a spatula to break apart the meat. Cook until it’s browned all over (around 5-7 minutes). If you’re using steak strips, cook until they’re just cooked through. Chef hack: Don’t overcrowd the pan; this allows for better browning.
-
Creamy Cheese Sauce: Lower the heat, and stir in the softened cream cheese until it starts to melt. Once incorporated, pour in the beef broth and mix until smooth.
-
Add the Cheesy Goodness: Sprinkle in the shredded provolone cheese a handful at a time, stirring continuously until it melts into that dreamy sauce. If the sauce is too thick, add a splash of the reserved pasta water until you reach the desired consistency.
-
Combine with Pasta: Add the cooked pasta to the skillet, tossing everything together to ensure the noodles are coated in that creamy, cheesy goodness. Taste and adjust seasoning with more salt and pepper if needed.
-
Final Touches: Let everything simmer together for a couple of minutes (about 2-3 minutes) to marry the flavors, and then remove it from the heat.
Serving Suggestions
Now that your Philly Cheesesteak Pasta is ready, it’s time to make it visually appealing! Serve this comforting dish in large bowls, and consider garnishing with freshly chopped parsley or extra cheese on top for an inviting presentation. You could even sprinkle some crushed red pepper flakes for a little kick.
Recipe Variations
Feeling adventurous? Here are some creative twists you can try with this recipe:
-
Veggie-Loaded Cheesesteak: Add mushrooms or spinach for an extra dose of vegetables while keeping the flavors balance intact.
-
Spicy Cheesesteak: Toss in some jalapeños or a dash of hot sauce for heat that brings a new level of excitement.
-
Italian-Inspired: Mix in some marinara sauce for an Italian twist that pairs beautifully with bell peppers and onions.
-
Cheesy Alfredo: Substitute cream cheese with alfredo sauce for a stronger creamy flavor that complements the meat nicely.
-
Zoodle Option: Swap out regular pasta for spiralized zucchini for a healthier, lower-carb alternative.
Chef’s Notes
This recipe has evolved over the years as I’ve experimented with different ingredients and techniques. The beauty lies in its versatility—whether it’s a weeknight dinner or a gathering with friends, it never disappoints! Once, during a dinner party, I stumbled upon a container of leftover meatballs in the fridge, and I tossed them in. To my surprise, the richness was incredible! That’s the beauty of cooking; you can always make it your own!
FAQs and Troubleshooting
-
Why is my sauce too thick?
If you find your sauce has become too thick, add a splash of the reserved pasta water a tablespoon at a time until it reaches your desired consistency. -
Can I make this dish vegan?
Absolutely! Substitute the beef with lentils or mushrooms and use plant-based cream cheese along with vegan cheese. -
What if my pasta is overcooked?
If you accidentally overcook your pasta, consider adding it directly to the sauce rather than the other way around. The sauce can help mask slight mushiness. -
How can I store leftovers?
Store any leftovers in an airtight container in the refrigerator for up to 3 days. Reheat gently on the stove or in the microwave, adding a splash of broth or water if needed to revive the creamy texture.
Nutritional Info
While comfort food should ideally be enjoyed without restraint, here’s a rough estimate of what a serving of Philly Cheesesteak Pasta (based on 6 servings) contains:
- Calories: Approximately 450-550 calories
- Protein: 25-30g
- Carbohydrates: 40-50g
- Fat: 20-25g
Remember that these values can vary based on specific ingredient brands and portions.
So there you have it! Your ultimate guide to creating Philly Cheesesteak Pasta, which serves as a reminder that delightful, restaurant-quality meals can be made in the comfort of your home without the fuss. I hope you enjoy crafting this dish as much as I do! Tie on your apron, gather around your table, and let the good times roll. Happy cooking!
PrintPhilly Cheesesteak Pasta
A delightful twist on Philly cheesesteak and creamy pasta, this dish combines savoriness with a touch of indulgence, perfect for family dinners or a cozy night in.
- Prep Time: 15 minutes
- Cook Time: 20 minutes
- Total Time: 35 minutes
- Yield: 6 servings 1x
- Category: Main Course
- Method: Stovetop
- Cuisine: American
- Diet: None
Ingredients
- 1 lb ground beef or steak strips
- 1 green bell pepper, diced
- 1 onion, diced
- 2 cloves garlic, minced
- 8 oz cream cheese, softened
- 1 cup shredded provolone cheese
- 12 oz pasta (penne or rigatoni recommended)
- 1 cup beef broth
- Salt and pepper to taste
- 1 tbsp olive oil
Instructions
- Cook the Pasta: Begin by boiling a large pot of salted water. Add the pasta and cook according to package instructions until al dente (8-10 minutes). Reserve a cup of pasta water before draining.
- Sauté the Veggies: In a large skillet, heat the olive oil over medium heat. Add the diced onion and sauté until translucent (about 3-4 minutes). Add the diced green bell pepper and minced garlic; cook for another 2-3 minutes.
- Brown the Meat: Push the veggies to the side, add the ground beef or steak strips, and season with salt and pepper. Cook until browned (around 5-7 minutes).
- Creamy Cheese Sauce: Lower the heat, stir in the softened cream cheese until it melts. Pour in the beef broth and mix until smooth.
- Add the Cheesy Goodness: Sprinkle in the shredded provolone cheese a handful at a time, stirring continuously until melted. Add reserved pasta water if needed for consistency.
- Combine with Pasta: Add the cooked pasta to the skillet, tossing together until coated in the creamy sauce. Adjust seasoning if needed.
- Final Touches: Let everything simmer for 2-3 minutes to marry the flavors, then remove from heat.
Notes
Serve in bowls garnished with parsley or extra cheese. For a kick, sprinkle with crushed red pepper flakes. Leftovers can be stored in an airtight container for up to 3 days.
Nutrition
- Serving Size: 1 serving
- Calories: 500
- Sugar: 3g
- Sodium: 600mg
- Fat: 25g
- Saturated Fat: 12g
- Unsaturated Fat: 8g
- Trans Fat: 0g
- Carbohydrates: 45g
- Fiber: 3g
- Protein: 30g
- Cholesterol: 80mg
Keywords: Philly cheesesteak pasta, creamy pasta, comfort food, American cuisine
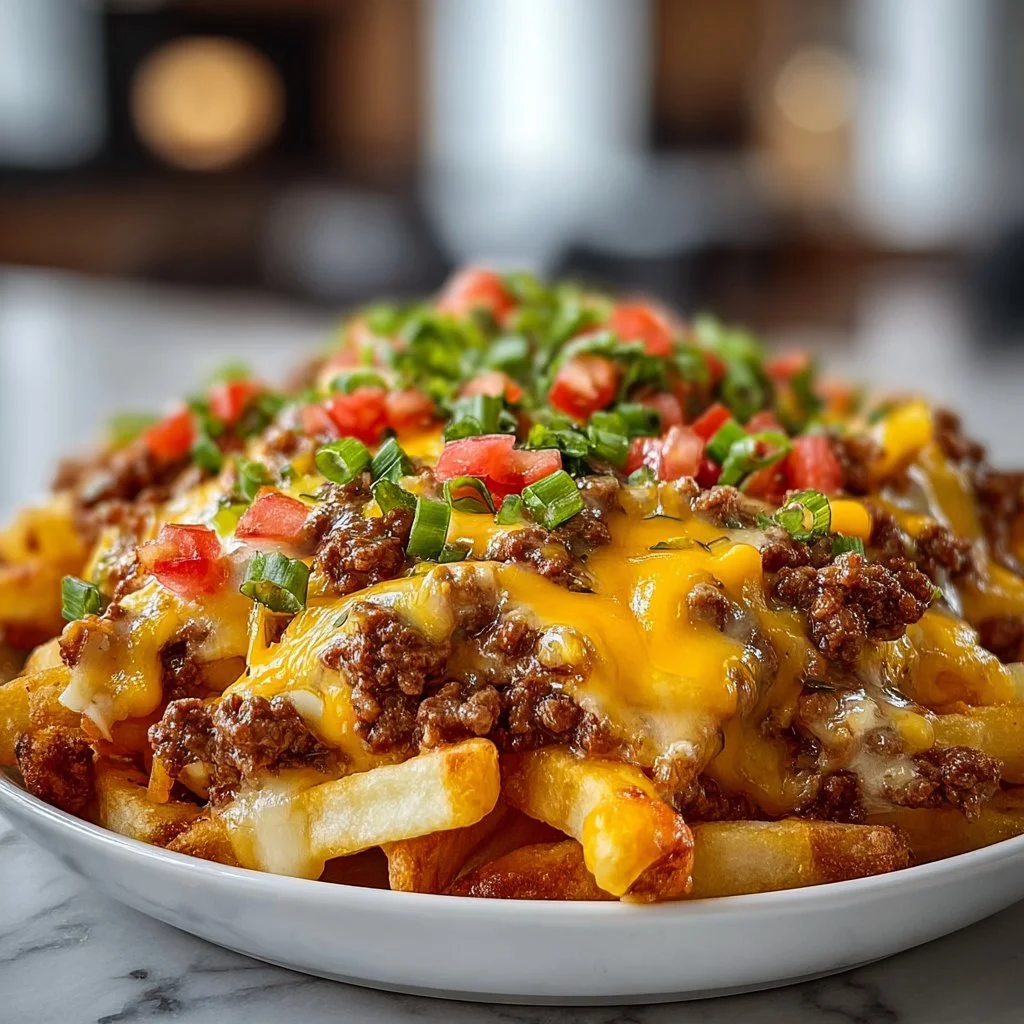
Cheeseburger French Fry Casserole
Cheeseburger French Fry Casserole: A Comfort Food Sensation
Welcome home, food lovers! Today, we’re diving into a dish that combines some of the best comfort foods out there: the Cheeseburger French Fry Casserole! If you’re looking for a hearty meal that’s easy to whip up and sure to please a crowd, you’ve hit the jackpot. Imagine biting into a savory blend of seasoned ground beef, crispy French fries, and ooey-gooey melted cheddar cheese—all baked into one glorious casserole! It’s like a hug in a dish and perfect for chilly evenings or weeknight meals that need to be on the table in a snap.
Now, I must share a little love story about this dish. The very first time I made this casserole, it was for my best friend’s birthday. After a long week filled with work pressures and adulting, we were craving a little nostalgia—and what could be better than classic cheeseburgers and fries? As I chopped the onions and sautéed the beef in my tiny kitchen, the scents transported me back to carefree summer barbecues from our childhood. That evening, as we huddled around the dinner table and dug into that cheesy casserole, let me tell you: laughter mingled with delight, and nostalgia swirled through every bite. Moments like these remind me why sharing a meal can be so meaningful.
So, let’s gather our ingredients and get to cooking this delicious casserole that will bring warmth to your table and a smile to your face!
Ingredients
Here’s what you’ll need for your Cheeseburger French Fry Casserole:
-
1 pound ground beef
A classic base for our casserole, the ground beef is seasoned to perfection. You can easily swap it for turkey or chicken if you prefer a leaner meat. If you’re craving a meatless option, try using lentils or a plant-based ground meat substitute! -
1 onion, chopped
The onion adds a sweet, aromatic flavor to our dish. If you’re sensitive to onions, feel free to swap in shallots, or omit them altogether. -
2 cups frozen French fries
Frozen French fries make this dish super easy! You can use crinkle-cut, straight-cut, or even sweet potato fries if you want a unique twist. Just keep in mind that cooking times may vary slightly! -
2 cups shredded cheddar cheese
Cheddar is a classic cheese choice, but feel free to mix it up! Pepper Jack adds a spicy kick, while mozzarella will give you that delightful stretch. -
1 can (10.5 oz) cream of mushroom soup
This ingredient adds creaminess and binds everything together. If you’re not a fan of mushrooms, you can use cream of chicken or even a homemade white sauce for a little twist. -
1/2 cup milk
A splash of milk will keep our casserole nice and creamy. Almond or oat milk can be great dairy-free alternatives. -
Salt and pepper to taste
These are essential for elevating the flavors in your dish. Don’t forget to adjust to your personal taste! -
Pickles and mustard (optional, for serving)
These are the finishing touches that bring out the classic cheeseburger vibe. I can’t resist a few dill pickle slices on mine!
Step-by-Step Instructions
Let’s get cooking this delicious casserole. Follow along, and remember: it’s all about having fun in the kitchen!
-
Preheat Your Oven
Preheat your oven to 350°F (175°C). A properly preheated oven ensures even cooking and that perfect cheese melt. -
Brown the Beef
In a large skillet over medium heat, add your ground beef and chopped onion. Cook until the beef is browned and the onions are translucent, about 5-7 minutes. Don’t forget to break the beef into small crumbles as it cooks—this helps distribute the flavor. If there’s excess grease (you usually don’t need it), drain it out before proceeding. -
Season It Up
Once your beef is browned, season the mixture generously with salt and pepper. Pro tip: Add a dash of garlic powder or paprika for an extra layer of flavor! -
Mix in the Soup and Milk
Lower the heat and stir in the can of cream of mushroom soup and the milk. Combine well until everything is nice and creamy. This mixture serves as the rich sauce that holds everything together. -
Layer It Up
In a greased 9×13 inch baking dish, spread half of the frozen French fries on the bottom. Pour the beef and soup mixture evenly over the fries, then sprinkle with a cup of cheddar cheese. Top it off with the remaining French fries and the rest of the cheese. Trust me, you want that cheesy goodness on top! -
Bake to Perfection
Place the casserole in the preheated oven and bake for about 30-35 minutes, or until the cheese is bubbly and golden brown, and the fries are starting to crisp up. Keep an eye on it to avoid over-browning! -
Cool and Serve
Once it’s baked, let the casserole cool for a few minutes. This time allows the flavors to meld together while you can decide whether to plate it (gorgeous presentation!) or serve family-style directly from the dish!
Serving Suggestions
To serve your Cheeseburger French Fry Casserole, consider garnishing it with a sprinkle of fresh parsley for a pop of color and freshness. If you’re feeling extra fancy, add a dollop of sour cream or some sliced green onions on top—these little extras take it to the next level! Of course, serve with your favorite pickle slices and a drizzle of mustard on the side for that authentic cheeseburger experience.
Recipe Variations
Don’t be afraid to get creative! Here are a few fun variations you can try:
-
BBQ Cheeseburger Version: Add a ¼ cup of your favorite BBQ sauce to the beef mixture for a delicious smoky flavor.
-
Ultimate Veggie Casserole: Swap the beef for sautéed bell peppers, zucchini, and mushrooms for a hearty vegetarian option.
-
Spicy Southwestern Twist: Mix in some diced jalapeños or green chilies to the beef for a kick, and try pepper jack cheese for that extra spice.
-
Loaded Nacho Casserole: Top the casserole with tortilla chips instead of fries and add some taco seasoning for a Tex-Mex vibe!
Chef’s Notes
This Cheeseburger French Fry Casserole has evolved in my kitchen over the years. Originally, I made it with leftover burger patties, which was delicious but often dry. So, I experimented with different ingredients until I found this delightful balance of creamy, cheesy, and crispy. Plus, it’s a fantastic way to make something that’s both nostalgic and comforting without breaking a sweat! I’ve served this up at gatherings, where it disappears faster than I can fill my plate.
Oh, and I must admit, I once had a minor mishap when I grabbed the wrong soup can and used cream of celery instead of mushroom. Surprisingly, it turned out delicious! So don’t be afraid to play with flavors—kitchen experiments can lead to delightful surprises!
FAQs and Troubleshooting
Q: My casserole turned out too dry. What happened?
A: This may have occurred if the meat mixture was overcooked or if you didn’t use enough moisture (like soup and milk). Always make sure your mixture is creamy before assembling!
Q: Can I freeze the leftovers?
A: Absolutely! This casserole freezes beautifully. Just let it cool, portion it into containers, and store in the freezer. When you’re ready to eat, defrost in the refrigerator overnight and reheat in the oven.
Q: What if I don’t have cream of mushroom soup?
A: No problem! You can use cream of chicken soup, or make a quick white sauce using butter, flour, and milk.
Q: How do I avoid soggy fries?
A: To ensure crispy fries, you can pre-bake the fries according to package instructions before layering them in the casserole. This way, they won’t absorb too much liquid!
Nutritional Info (Optional)
While I won’t get too hung up on specifics (because we all know comfort food is about enjoyment!), a typical serving of this Cheeseburger French Fry Casserole will have approximately 400-500 calories, depending on portion size and ingredient variations. It’s a filling dish with protein from the beef, and you’ll definitely feel like you’ve treated yourself with every cheesy bite!
There you have it! The ultimate Cheeseburger French Fry Casserole that brings joy, warmth, and laughter to every meal. So tie on your apron, roll up your sleeves, and let’s create some beautiful memories in your kitchen. Bon appétit!
PrintCheeseburger French Fry Casserole

A hearty casserole combining seasoned ground beef, crispy French fries, and melted cheddar cheese, perfect for weeknight meals.
- Prep Time: 15 minutes
- Cook Time: 35 minutes
- Total Time: 50 minutes
- Yield: 6 servings 1x
- Category: Main Course
- Method: Baking
- Cuisine: American
- Diet: Omnivore
Ingredients
- 1 pound ground beef
- 1 onion, chopped
- 2 cups frozen French fries
- 2 cups shredded cheddar cheese
- 1 can (10.5 oz) cream of mushroom soup
- 1/2 cup milk
- Salt and pepper to taste
- Pickles and mustard (optional, for serving)
Instructions
- Preheat your oven to 350°F (175°C).
- Brown the beef in a large skillet over medium heat, adding the chopped onion until browned and translucent (about 5-7 minutes).
- Season the mixture with salt and pepper to taste.
- Mix in the cream of mushroom soup and milk until combined.
- Layer half of the French fries in a greased baking dish, add the beef mixture, and top with a cup of cheddar cheese.
- Add the remaining French fries and the rest of the cheese on top.
- Bake for 30-35 minutes, until the cheese is bubbly and golden brown.
- Cool for a few minutes before serving.
Notes
Garnish with fresh parsley, sour cream, or green onions for an added touch. This casserole freezes well for leftovers.
Nutrition
- Serving Size: 1 serving
- Calories: 450
- Sugar: 2g
- Sodium: 600mg
- Fat: 24g
- Saturated Fat: 10g
- Unsaturated Fat: 10g
- Trans Fat: 1g
- Carbohydrates: 36g
- Fiber: 3g
- Protein: 22g
- Cholesterol: 70mg
Keywords: casserole, comfort food, cheeseburger, French fries, easy dinner
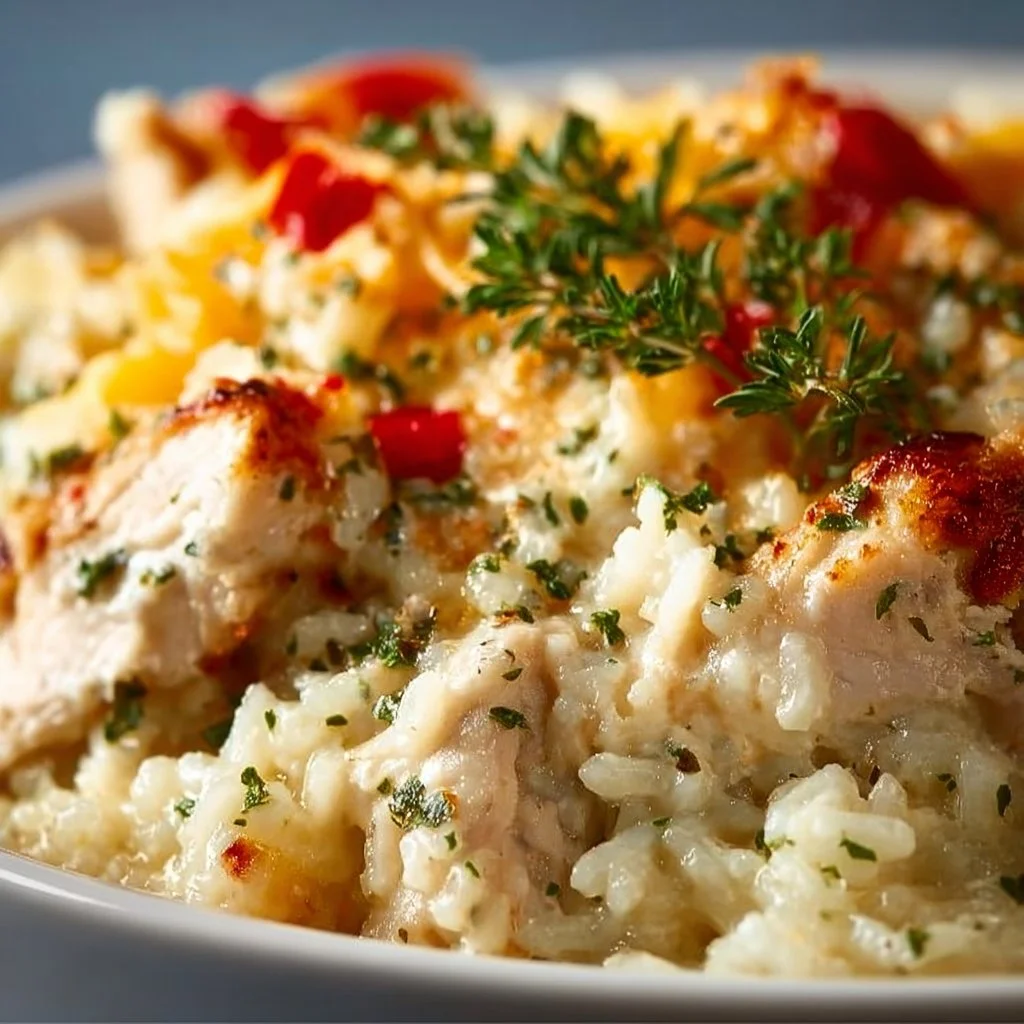
Angel Chicken and Rice Casserole
Angel Chicken and Rice Casserole: A Comforting Hug on a Plate
Hello, dear friends! Today, I am beyond excited to share a recipe that holds a special place in my heart and belly — Angel Chicken and Rice Casserole. This dish encapsulates everything I adore about cooking: it’s warm, comforting, and extremely easy to whip up. Whether you’re hosting a cozy dinner, preparing a meal for a busy weeknight, or simply looking to treat yourself, this casserole has got you covered.
Imagine this: it’s a chilly evening, and the aroma of something delicious wafts through the air as you pull this casserole from the oven, bubbling with flavor and love. It’s truly the culinary equivalent of a soft hug, enveloping you in its warmth and familiarity. So, let’s dive deeper into this magical dish and chat about my journey with it.
A Trip Down Memory Lane
One of my fondest memories of cooking this dish goes back to a rainy Saturday afternoon. I was in college, juggling a part-time job and schoolwork. My friends often dropped by, looking for comfort food after a long week. I wanted to make something quick but impressive, and that’s when I stumbled upon this Angel Chicken and Rice Casserole recipe in an old family cookbook.
I remember dashing to the grocery store, making sure to grab all the ingredients, and racing home. As I mixed everything together, my kitchen filled with laughter and chatter from my friends who, despite their busy lives, gathered around my small kitchen. By the time the casserole came out of the oven, our little apartment was filled with warmth, comfort, and gooey deliciousness. We dug in together, delighting in every cheesy bite while stories flowed and laughter echoed. This dish became our go-to comfort meal, and to this day, it’s one of my favorites.
Ingredients
Gathering the right ingredients is key to any fantastic dish. Let’s break down what you’ll need for this delightful casserole:
-
2 cups cooked chicken, shredded
- Feel free to use rotisserie chicken for convenience, or pull from your stash of leftovers!
-
1 cup uncooked rice
- While I love using long-grain white rice, brown rice or even jasmine rice can add an interesting twist. Just adjust the cooking time as needed!
-
1 can cream of chicken soup
- Creamy and comforting! If you’re feeling adventurous, homemade versions are fantastic too, or try swapping for cream of celery soup for a unique flair.
-
1 can cream of mushroom soup
- Another layer of creaminess! If you’re not a fan of mushrooms, opt for another cream soup like cream of onion or omit it altogether.
-
1 1/2 cups chicken broth
- Homemade broth is the best, but store-bought works perfectly in a pinch. Low-sodium options are a good choice for those watching their salt intake.
-
1 cup sour cream
- This ingredient adds richness! You can substitute with Greek yogurt for a healthier version, or even a dairy-free alternative if desired.
-
1/2 cup butter, melted
- Ah, butter — the key to flavor! If you’re watching your calories, try using olive oil for a healthier spin.
-
1 packet onion soup mix
- This is a flavor bomb! You can create a homemade mix by combining onion powder, garlic powder, and dried onion flakes if you’d like to avoid MSG.
-
Salt and pepper to taste
- Always essential, these simple seasonings can elevate your dish!
-
1 cup shredded cheese (optional)
- You can use any cheese you love — cheddar, mozzarella, or even a sprinkle of parmesan can take it to the next level.
Step-by-Step Instructions
Now that we’ve gathered our ingredients, it’s time to bring this dish to life! Follow along with these steps, sprinkled with a few chef tips to help you along.
-
Preheat the Oven:
- Preheat your oven to 350°F (175°C). This will set the stage for baking perfection, allowing the casserole to cook evenly.
-
Mix the Saucy Base:
- In a large mixing bowl, combine the cream of chicken soup, cream of mushroom soup, sour cream, melted butter, and onion soup mix.
- Chef Tip: Use a whisk for an even blend. It’ll help break up any lumps, creating a smooth, luscious sauce that hugs the chicken and rice beautifully.
-
Add the Chicken and Rice:
- Stir in the shredded chicken and uncooked rice until well coated. It’s all about layers of flavor!
- Chef Insight: The rice cooks while the casserole bakes, soaking up all those creamy, savory flavors.
-
Pour in the Broth:
- Gently mix in the chicken broth, ensuring everything is well incorporated.
- Pro Tip: If you’d like more flavor, try using broth instead of water when cooking your side dishes later — it’s a little chef secret!
-
Season to Taste:
- Don’t forget to add salt and pepper! This step is crucial, as seasoning can transform a good dish into a great one. Taste a small spoonful to see where you’re at.
-
Transfer to Baking Dish:
- Pour the mixture into a greased 9×13-inch baking dish. If you love a crispy top, get messy and sprinkle shredded cheese on top before it goes into the oven!
- Fun Fact: Using a glass baking dish can help you monitor the browning process without opening the oven.
-
Bake:
- Bake uncovered for about 45 to 50 minutes, or until bubbly and the rice has absorbed most of the broth. You want to see a nice golden crust on top!
- Chef’s Hint: If it’s browning too quickly, cover it loosely with foil to prevent burning while it finishes cooking.
-
Let it Rest:
- Once baked, let it sit for about 10-15 minutes before digging in. This helps the casserole set, making it easier to serve.
- Essential Tip: Use this wait time to whip up a simple salad or toast some crusty bread for a complete meal.
Serving Suggestions
To serve this delicious Angel Chicken and Rice Casserole, scoop hearty portions onto plates, allowing the creamy, cheesy goodness to cascade over the edges. A sprinkle of fresh parsley or chives on top adds a pop of color and freshness. Pair it with a zesty green salad or roasted vegetables to balance the richness of the dish. Don’t forget some crusty bread to soak up every last creamy bite!
Recipe Variations
Feeling adventurous? Here are a few ways to jazz up this classic casserole:
- Veggie Delight: Add in steamed broccoli or spinach for an extra layer of nutrition and flavor.
- Spicy Kick: A dash of red pepper flakes or diced jalapeños can bring some heat to the table.
- Herb Infusion: Fresh herbs such as thyme, rosemary, or basil can elevate the flavors. Add them during the mixing stage for a fragrant dish!
- Different Cheeses: Swap out the cheese for your favorite — pepper jack for a spicy touch, or feta for a Mediterranean vibe.
Chef’s Notes
This recipe is one I treasure, and it has evolved over the years. Initially, I made it exactly as written, but over time I’ve played with different herbs and spices, turning it into a versatile dish suitable for any palate. It’s a fantastic way to use leftover chicken, and I’ve even made it vegetarian by substituting beans or extra veggies. Whenever I whip it up, it always evokes memories of laughter and togetherness. It’s the kind of dish that fills the stomach and warms the heart!
FAQs and Troubleshooting
1. Can I use raw chicken in this recipe?
While the original recipe calls for cooked chicken, you can use raw chicken. Just ensure it’s chopped into small pieces and increase the baking time to about an hour to ensure it cooks thoroughly.
2. My rice is crunchy after baking. What went wrong?
This can happen if there isn’t enough liquid or if it doesn’t bake long enough. Make sure to measure your ingredients accurately, and if you need more time, cover it with foil and let it bake a bit longer.
3. Can I make this ahead of time?
Absolutely! You can prepare the casserole the night before and keep it in the fridge. Just be sure to add a few extra minutes to the baking time since it will be starting cold.
4. How do I store the leftovers?
Store any leftovers in an airtight container in the fridge for up to 3-4 days. You can reheat in the oven or microwave, but I recommend the oven for that crispy top!
Nutritional Info
While I won’t delve too deeply into nutritional info, it’s worth noting that this casserole is a hearty dish packed with protein from the chicken and sour cream, making it satisfying. For those keeping an eye on calories, consider using lower-fat substitutes for some of the creamy ingredients or adding in more vegetables to balance it out.
And there you have it — Angel Chicken and Rice Casserole in all its glory! I hope this dish brings you joy and warmth when you gather around your own table. Remember, my friends, cooking is about sharing love and creating memories. Grab your apron and let’s get cooking! 🍽️
PrintAngel Chicken and Rice Casserole

A warm and comforting casserole that combines shredded chicken, creamy soups, and rice for a delicious family meal.
- Prep Time: 15 minutes
- Cook Time: 50 minutes
- Total Time: 65 minutes
- Yield: 8 servings 1x
- Category: Main Course
- Method: Baking
- Cuisine: American
- Diet: Gluten-Free
Ingredients
- 2 cups cooked chicken, shredded
- 1 cup uncooked rice
- 1 can cream of chicken soup
- 1 can cream of mushroom soup
- 1 1/2 cups chicken broth
- 1 cup sour cream
- 1/2 cup butter, melted
- 1 packet onion soup mix
- Salt and pepper to taste
- 1 cup shredded cheese (optional)
Instructions
- Preheat the oven to 350°F (175°C).
- Mix together the cream of chicken soup, cream of mushroom soup, sour cream, melted butter, and onion soup mix in a large mixing bowl.
- Add the shredded chicken and uncooked rice, stirring until well coated.
- Pour in the chicken broth and mix until incorporated.
- Season with salt and pepper to taste.
- Transfer the mixture to a greased 9×13-inch baking dish and optionally sprinkle cheese on top.
- Bake uncovered for 45 to 50 minutes, or until bubbly and golden brown.
- Let the casserole rest for 10-15 minutes before serving.
Notes
Feel free to customize with your favorite veggies or spices for a unique twist!
Nutrition
- Serving Size: 1 serving
- Calories: 400
- Sugar: 4g
- Sodium: 600mg
- Fat: 22g
- Saturated Fat: 10g
- Unsaturated Fat: 8g
- Trans Fat: 0g
- Carbohydrates: 35g
- Fiber: 2g
- Protein: 19g
- Cholesterol: 70mg
Keywords: chicken casserole, comfort food, easy dinner, family meal

Easy Stromboli Dinner Recipe
Easy Stromboli Dinner Recipe: Your New Favorite Family Meal
Hello, my friends! Are you ready to roll up your sleeves and dive into a delightful dinner that’s not only easy to make but will also impress your family and friends? Today, I’m thrilled to share a scrumptious Easy Stromboli recipe that’s sure to become a staple in your kitchen. A delicious Italian favorite, Stromboli is a stuffed bread roll, perfect for any occasion—from cozy weeknight dinners to festive gatherings.
What I love most about Stromboli is its versatility. You can fill it with just about anything you have on hand, making it the perfect dish for using up leftovers or customizing to your taste. Imagine golden, flaky bread enfolding your favorite meats, cheeses, and veggies all melded together in a gooey, flavorful harmony. Plus, it’s a fun meal to make together with family or friends, turning cooking into a delightful experience rather than just a chore.
I remember the first time I made Stromboli—it was an impromptu dinner party for a few close friends. I had a houseful of giggles and stories, and I wanted to create something that felt festive yet easy. So, I rolled up some pizza dough with pepperoni, mozzarella, and a few hidden veggies, baked it until it was perfectly golden, and then allowed the delicious aromas to envelop us. The best part? Everyone got to enjoy tearing it apart and dipping it into marinara sauce as we shared stories around the table. Before I knew it, I was handed requests for the recipe and promises of Stromboli-themed dinner parties. And that, my friends, is how I knew I had struck gold.
Let’s bring that magic to your kitchen! Grab your apron, and let’s get ready to make your very own Easy Stromboli.
Personal Story
As a child, my family had a tradition of making homemade pizzas every Friday night. My mom would unwittingly become a kitchen magician, conjuring mouthwatering pies while dad handled the grill. I distinctly remember one Friday when we decided to mix things up and try making Stromboli instead. The kitchen was filled with laughter and the wafting smells of garlic and melting cheese. We set our toppings out like a mini buffet—pepperoni, green peppers, mushrooms, and yes, even some leftover meatball bits we couldn’t let go to waste!
As we rolled the dough, I marveled at how a simple mixture of ingredients could transform into something so delightful. Plus, I had the joy of creating my own masterpiece—one half with extra cheese, the other loaded with veggies. What I loved most was pulling it from the oven, the cheese bubbling with anticipation, and the satisfaction of breaking it apart for my siblings and friends. Those moments of warmth and connection around the dinner table stay with me to this day. Stromboli isn’t just food; it’s a way to bring people together—whatever the occasion may be!
Ingredients
Here’s what you’ll need to make your own Easy Stromboli:
-
Pizza Dough (1 pound)
The base of your Stromboli! You can use store-bought dough for convenience or make your own. If using pre-made dough, take it out of the fridge an hour before to come to room temperature. -
Mozzarella Cheese (1 cup, shredded)
The classic choice! Mozzarella melts beautifully, giving you that gooey texture we all crave. For a twist, you can substitute with provolone or a sharp cheddar. -
Pepperoni (1 cup, sliced)
A staple in many Stromboli recipes, but don’t feel limited! Swap it with some cooked Italian sausage, salami, or even turkey pepperoni if you’re aiming for a lighter option. -
Bell Peppers (1/2 cup, diced)
Sweet and colorful! Feel free to use any bell pepper variety—red, green, yellow, or orange. If you’re in the mood for something spicy, throw in some jalapeños! -
Onion (1/4 cup, diced)
For flavor depth, onions are fabulous. You could also caramelize them beforehand for an extra layer of sweetness or use scallions for a milder taste. -
Garlic (2 cloves, minced)
Because garlic makes everything better! If you’re feeling lazy, garlic powder can be a quick alternative. -
Olive Oil (1 tablespoon)
A splash of good-quality olive oil elevates the flavors. You might consider using infused oils like garlic or chili for a kick! -
Parmesan Cheese (1/4 cup, grated)
This isn’t crucial, but a sprinkle of Parmesan adds a lovely salty finish. If you’re out, any hard cheese can do! -
Italian Seasoning (1 teaspoon)
A mix of herbs like oregano, basil, and thyme. If you’re fresh out, feel free to use your favorite spice blend! -
Salt and Pepper (to taste)
Essential for balancing the flavors! Don’t skip adding them; flavor matters immensely.
Chef Insight:
Stromboli is remarkably forgiving! Feel free to experiment with your favorite ingredients or even change up the seasoning according to what you’re in the mood for. It’s all about making it delicious and your own!
Step-by-Step Instructions
Now, let’s dive into the fun part—making your Easy Stromboli! Follow these steps, and you’ll have a delicious dinner in no time:
Step 1: Preheat the Oven
First things first, preheat your oven to 400°F (200°C). This gives us a delightful, crispy crust, ensuring that all that gooey melted cheese is sealed beautifully inside.
Step 2: Prepare Your Dough
Roll out your pizza dough on a well-floured surface into a rectangle. Aim for about 12×15 inches or so, but don’t stress over this. You want it thin enough to hold the filling but thick enough to prevent it from tearing.
Step 3: Add Olive Oil and Seasoning
Brush your rolled-out dough with 1 tablespoon of olive oil. This isn’t just for flavor; it also helps in achieving that lovely golden color. Sprinkle your Italian seasoning, salt, and pepper evenly over the dough.
Step 4: Layer Your Ingredients
Now for the fun part! Start from one of the short ends of your rectangle. Layer on mozzarella cheese, followed by pepperoni, bell peppers, onions, and finally, sprinkle some minced garlic over the top. The key is to keep the fillings about an inch away from the edges to prevent any spillage when rolling!
Step 5: Roll it Up
Starting from the filled end, roll the dough tightly but gently. You want it snug, but don’t rush; being too forceful can cause the dough to tear. Once you reach the end, pinch the seams to seal it up. If you’ve got any edges hanging out, no worries—just fold those in like tucking a burrito.
Step 6: Bake the Stromboli
Place your Stromboli seam side down on a parchment-lined baking sheet. For extra flair (and flavor!), brush a little more olive oil on top and sprinkle with Parmesan cheese. Make a few small diagonal slashes on top with a sharp knife. This helps the steam escape and gives it those lovely golden stripes!
Step 7: Bake to Perfection
Pop your Stromboli into the oven and let it bake for 25-30 minutes, until golden brown and the cheese is gooey. Keep an eye on it in the last few minutes; ovens can vary!
Step 8: Cool and Slice
Once your Stromboli is golden, remove it from the oven and let it cool for about 5-10 minutes. This is crucial—cutting it too soon can unleash a cheesy eruption! Then, slice it into thick pieces and get ready for the feast.
Chef Tip:
To help the cheese stay within the Stromboli, you can add a thin layer of tomato sauce (cooled) before layering the cheese and toppings. Just be careful not to get too wild with the sauce to avoid soggy bread.
Serving Suggestions
When it comes to serving your Easy Stromboli, simplicity is key! Arrange the slices on a large platter, making them visually captivating. Pair it with a delightful marinara or a homemade garlic dipping sauce—both add a great touch. A fresh side salad or a simple arugula salad drizzled in olive oil and lemon juice balances the meal perfectly. Lay out some napkins and let everyone dive in!
Recipe Variations
Now, it’s time to get creative! Here are a few delicious twists you could explore with your Stromboli:
-
Veggie Lovers’ Delight: Load it up with all kinds of vegetables! Spinach, mushrooms, olives, and zucchini make for superb additions.
-
BBQ Chicken Stromboli: Start with shredded rotisserie chicken slathered in your favorite BBQ sauce, along with red onions and cheddar cheese.
-
Buffalo Chicken Style: Mix shredded chicken with buffalo sauce and top with blue cheese crumbles for a flavorful kick.
-
Caprese Style: Fill with fresh mozzarella, tomatoes, and basil, drizzling balsamic glaze before baking for an Italian classic twist.
-
Breakfast Stromboli: Swap traditional fillings with scrambled eggs, crumbled sausage, and cheddar cheese for a fun breakfast variant!
Chef’s Notes
I cherish how adaptable Stromboli is. Over the years, I’ve fueled my creativity here—from classic meats and cheeses to experimenting with global flavors. A notable story comes to mind: one evening, I tried a tropical island-inspired version, incorporating ham, pineapple, and a hint of teriyaki sauce! We laughed over our “Hawaiian Stromboli” and vowed to bring it back for a future dinner party.
Stromboli truly embodies the spirit of home cooking—always flexible, easily shared, and made with love. There’s something therapeutic about rolling dough, stuffing it full of ingredients, and watching it bake to golden perfection!
FAQs and Troubleshooting
Q1: Can I make Stromboli ahead of time?
A1: Absolutely! You can prepare the Stromboli and roll it up, cover it tightly with plastic wrap, and refrigerate for up to 24 hours before baking.
Q2: What should I do if my dough tears?
A2: Don’t panic! Simply patch it with a little extra dough or gently press it together. It won’t affect the flavor!
Q3: How do I freeze leftover Stromboli?
A3: Wrap it tightly in aluminum foil or plastic wrap after it’s cooled and freeze for up to three months. To reheat, unwrap, place in a preheated oven at 350°F (175°C), and heat until warmed through.
Q4: My Stromboli is soggy—what did I do wrong?
A4: This might be caused by too much filling or sauce. Make sure to adjust the amount of wet ingredients and let your fillings cool before assembling.
Nutritional Info
While the nutritional details may vary depending on the ingredients used, a serving of homemade Stromboli is typically around:
- Calories: 350-450 (varies based on fillings)
- Carbohydrates: 40g
- Protein: 15g
- Fat: 15-20g
- Fiber: 2g
Eating good food isn’t just about the calories; it’s about the experience and the joy it brings!
And there you have it! This Easy Stromboli recipe is your gateway to a world of culinary creativity and warm gatherings. Remember, it’s not just about feeding the stomach; it’s about filling hearts with love and laughter. Now, let’s get cooking!
PrintEasy Stromboli Dinner

A delicious Italian stuffed bread roll filled with pepperoni, mozzarella, and veggies, perfect for cozy dinners or festive gatherings.
- Prep Time: 15 minutes
- Cook Time: 30 minutes
- Total Time: 45 minutes
- Yield: 4 servings 1x
- Category: Main Course
- Method: Baking
- Cuisine: Italian
- Diet: Non-Vegetarian
Ingredients
- 1 pound Pizza Dough
- 1 cup Mozzarella Cheese, shredded
- 1 cup Pepperoni, sliced
- 1/2 cup Bell Peppers, diced
- 1/4 cup Onion, diced
- 2 cloves Garlic, minced
- 1 tablespoon Olive Oil
- 1/4 cup Parmesan Cheese, grated
- 1 teaspoon Italian Seasoning
- Salt and Pepper, to taste
Instructions
- Preheat the oven to 400°F (200°C).
- Roll out the pizza dough on a floured surface into a rectangle.
- Brush the dough with olive oil and sprinkle with Italian seasoning, salt, and pepper.
- Layer mozzarella cheese, pepperoni, bell peppers, onions, and garlic on the dough.
- Roll the dough tightly from the filled end and pinch the seams to seal.
- Place it seam side down on a parchment-lined baking sheet.
- Brush with olive oil, sprinkle with Parmesan, and make diagonal slashes on top.
- Bake for 25-30 minutes until golden brown and cheese is gooey.
- Cool for 5-10 minutes before slicing.
Notes
For a twist, mix up the fillings with your favorite ingredients or add a layer of cooled tomato sauce before the cheese.
Nutrition
- Serving Size: 1 serving
- Calories: 400
- Sugar: 2g
- Sodium: 800mg
- Fat: 20g
- Saturated Fat: 8g
- Unsaturated Fat: 10g
- Trans Fat: 0g
- Carbohydrates: 40g
- Fiber: 2g
- Protein: 20g
- Cholesterol: 50mg
Keywords: stromboli, easy dinner, Italian recipe, family meal, stuffed bread

15 Weeknight Dinners for When You’re Done Negotiating With Toddlers in 2026 | Fun Easy Recipes, Picky Eater Recipes, Cooking Recipes for Dinner
15 Weeknight Dinners for When You’re Done Negotiating With Toddlers in 2026
Hey there, fellow food lovers! If you’re anything like me, weeknight dinners can sometimes feel like a negotiation process worthy of a political summit. I mean, getting toddlers to eat something other than the five main food groups (chicken nuggets, mac and cheese, cereal, fruit snacks, and ice cream) can be an Olympic event of its own.
When I first embarked on my journey as a recipe creator at Ivory Apron, I was inspired not just by elegant dinners and sophisticated cuisine, but also by the experience of cooking for my little ones. It turns out the art of simplifying deliciousness while keeping it fun and inviting is a skill that serves us all, especially the parents among us. In this post, I’m thrilled to share 15 delightful weeknight dinner recipes that are simple, nourishing, and sure to please even the pickiest of eaters. These dishes will transform your dinner table into a delightful space—one that sparks joy instead of debates!
So grab your apron, and let’s dive into these weeknight wonders that will leave you and your little ones smiling—and maybe even negotiating for seconds instead of declines!
Personal Story
Speaking of negotiations, I vividly remember a particular dinner I hosted years ago. My son, then just a toddler, was determined to eat only “fun food.” He pointedly rejected my perfectly seasoned roasted veggies and opted for the brightly colored, cartoon-shaped pasta instead. That was the night I learned that presenting food in a whimsical way can be a game-changer! I vividly recall the moment I decided to up my game. I sautéed up some simple veggies but arranged them into a smiley face on his plate. Suddenly, the same food that had been “icky” just moments before transformed into an edible smile! It was a lightbulb moment—a reminder of the joy of creativity in the kitchen, especially when it comes to feeding our little ones.
With that inspiring episode in mind, I’ve crafted these recipes to be not only delicious but also visually appealing, making dinner time a time to look forward to, rather than dread. After all, who wouldn’t want to eat a “smiley face” stir-fry?
Ingredients
Here’s your shopping list (with a few helpful notes on each ingredient) for these easy weeknight dinners:
1. Protein (Chicken, Beef, Tofu, etc.)
- Tips: Choose a protein that your family loves—chicken breast or tights are great for chicken; if opting for tofu, get extra-firm for the best results.
- Substitution: Swap with legumes like chickpeas or lentils for a vegetarian option.
2. Fresh Vegetables (Carrots, Bell Peppers, Broccoli)
- Chef Insight: Colorful veggies not only make the plate pop but also provide essential vitamins. Don’t hesitate to get creative based on what’s in season!
- Substitution: Frozen veggies work in a pinch and save prep time.
3. Aromatics (Onions, Garlic)
- Tips: Fresh garlic and onions build a flavor foundation. If you’re short on time, pre-chopped or even garlic powder will do!
4. Spices & Herbs (Oregano, Basil, Paprika)
- Options: Use dried spices for convenience. Fresh herbs (like basil) are wonderful if you have them—they add an extra layer of flavor!
5. Sauce or Liquid (Soy Sauce, Stock, Tomato Sauce)
- Chef Insight: Sauces can really elevate a dish. A good stir-fry sauce or homemade marinara can change the game!
- Substitution: Vegetable or chicken stock can substitute for sauces if your kiddos prefer milder flavors.
6. Grains (Rice, Pasta, Quinoa)
- Tips: Whole grains (like quinoa) are great for nutrition. If using pasta, consider fun shapes to engage little eaters!
7. Cheese (Optional for Certain Recipes)
- Options: Cheese can transform a dish! Opt for shredded cheeses that melt easily for a smoother texture.
8. Nuts or Seeds (Optional)
- Note: Add these for crunch and nutrition, keeping in mind any nut allergies.
Step-by-Step Instructions
Let’s kick things off with our first night’s recipe: One-Pan Chicken and Veggie Bake.
-
Preheat the Oven: Set your oven to 400°F (200°C). If you want your chicken crispy, a preheated oven is key!
-
Prepare the Chicken: In a bowl, season the chicken breasts with olive oil, salt, and pepper. Here’s a pro tip: adding a squeeze of lemon will elevate the flavor!
-
Chop Your Veggies: While the chicken marinates, chop your favorite veggies into bite-sized pieces. I love using bell peppers and broccoli for vibrant color—plus they cook wonderfully together.
-
Combine on a Sheet Pan: Spread the chicken and veggies on a parchment-lined baking sheet. Make sure there’s enough space so they roast rather than steam (crowding is a no-no!).
-
Add Flavor: Sprinkle your choice of spices (oregano and paprika are favorites of mine) over everything. If your toddler loves garlic, throw in a few minced cloves!
-
Bake: Roast in the preheated oven for about 25-30 minutes, or until the chicken reaches an internal temperature of 165°F (74°C). Take a quick peek halfway through; feel free to stir!
-
Serve: Once done, let it rest for a few minutes before serving. This resting period allows the juices to redistribute, making the chicken moist and tender.
-
Enjoy: Plate it up! Serve with a side of whole grain rice or pasta, and voilà—you’ve got a family-friendly feast!
Chef Hacks: Always double up your chicken so you have leftovers for salads or wraps the next day. Bonus points for meal prep!
Serving Suggestions
Plating is key to making the dish appealing. For the One-Pan Chicken and Veggie Bake, stack the chicken on a plate, then nestle the colorful roasted veggies around it. For a touch of flair, garnish with fresh herbs or a sprinkle of cheese. Let your little ones sprinkle some parmesan on their plate; it might just seal the deal!
Recipe Variations
-
Mexican Night: Swap out chicken for seasoned ground beef or turkey and add corn. Serve with tortillas for a fun and interactive dinner!
-
Pasta Party: Instead of baking, toss everything with cooked pasta and a creamy sauce for a comforting pasta bake.
-
Veggie Delight: Go plant-based by using tofu instead of chicken and adding in mushrooms and zucchini for extra flair.
-
Herbed Chicken: Switch herbs based on your mood—rosemary and thyme make for a lovely roasted flavor.
-
Sweet and Savory: Throw a handful of dried cranberries on top before serving for a sweet burst that pairs beautifully with savory chicken.
Chef’s Notes
As I’ve refined this recipe over time, I’ve found how versatile it really is! I once added pineapple during the last five minutes of roasting, which brought a delightful sweetness that my kids adored. Remember, cooking is all about experimenting—don’t be afraid to try new things and iterate as you go. Each cooking session can yield something uniquely delightful!
FAQs and Troubleshooting
Q: My chicken came out dry. What happened?
A: Overcooking is usually the culprit! Always use a meat thermometer to check for doneness. Aim for about 165°F (74°C) for juicy chicken.
Q: Can I prep this dish ahead of time?
A: Absolutely! You can marinate the chicken and chop the veggies a day in advance. This makes weeknight dinners even easier!
Q: How do I make this healthier?
A: Opt for whole grains and load up on veggies. You can also use less oil and any low-sodium sauces.
Q: My kids refused to eat the veggies. Any tips?
A: Try making them fun shapes with cookie cutters or presenting them in a playful manner. Personalize their plates with veggie “art”!
Nutritional Info
(Per Serving approx.)
- Calories: 350
- Protein: 30g
- Carbohydrates: 40g
- Fat: 10g
- Fiber: 5g
And there you have it—15 delightful weeknight dinners that will bring joy to your table and make cooking a shared adventure with your little ones. Cook confidently, use those chef hacks, and remember that the best meals are served with a side of love and laughter. Happy cooking, and keep shining in that kitchen! Tie on your apron, pour something sparkling, and let’s create something timeless together!
PrintOne-Pan Chicken and Veggie Bake

A simple, flavorful, and visually appealing chicken and vegetable dish that’s perfect for busy weeknight dinners.
- Prep Time: 15 minutes
- Cook Time: 30 minutes
- Total Time: 45 minutes
- Yield: 4 servings 1x
- Category: Main Course
- Method: Baking
- Cuisine: American
- Diet: Gluten-Free, Dairy-Free
Ingredients
- 1 lb Chicken Breasts
- 2 tbsp Olive Oil
- Salt to taste
- Pepper to taste
- 1 Lemon (squeeze for flavor)
- 2 cups Fresh Vegetables (Carrots, Bell Peppers, Broccoli)
- 2 cloves Garlic (minced)
- 1 tsp Oregano
- 1 tsp Paprika
- 2 cups Whole Grain Rice or Pasta (for serving)
Instructions
- Preheat the oven to 400°F (200°C).
- Prepare the chicken by seasoning it with olive oil, salt, and pepper. Add a squeeze of lemon for extra flavor.
- Chop your chosen veggies into bite-sized pieces.
- Combine the chicken and veggies on a parchment-lined baking sheet, ensuring there’s enough space.
- Add spices like oregano and paprika, and minced garlic if desired.
- Bake for 25-30 minutes until the chicken reaches 165°F (74°C).
- Serve the dish with whole grain rice or pasta and enjoy!
Notes
Consider making the meal prep easier by chopping veggies and marinating chicken a day in advance.
Nutrition
- Serving Size: 1 serving
- Calories: 350
- Sugar: 3g
- Sodium: 300mg
- Fat: 10g
- Saturated Fat: 1.5g
- Unsaturated Fat: 8g
- Trans Fat: 0g
- Carbohydrates: 40g
- Fiber: 5g
- Protein: 30g
- Cholesterol: 70mg
Keywords: chicken, weeknight dinners, family-friendly, easy recipes, healthy meals
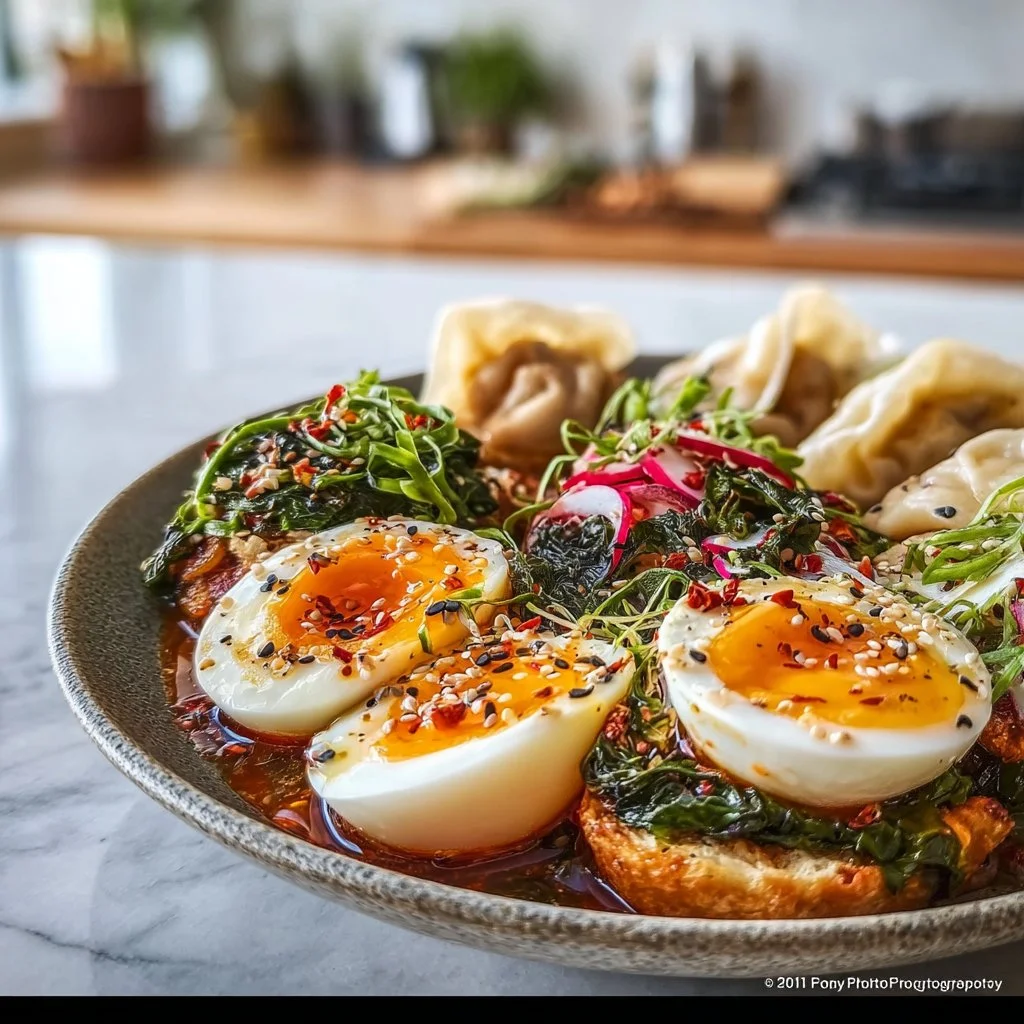
This meal feels like family
This Meal Feels Like Family: A Soulful Recipe for Gathering Around the Table
Hello, dear foodies! Gather round because today, we’re diving into a dish that transcends mere sustenance. It’s all about flavors that wrap you in warmth and memories that transport you back to the best times shared with loved ones. I’m talking about a comforting, home-cooked meal that feels like family, no matter who you’re with.
Picture this: the aroma of something delicious wafting through your home, the laughter of friends or family echoing off the walls, and a beautifully set table ready to welcome everyone in. Whether it’s a hearty casserole that brings everyone together or a pot of fragrant stew bubbling on the stove, this meal embodies the essence of gathering and sharing. Cooking isn’t just about putting food on the table; it’s about crafting experiences and creating memories—one bite at a time.
Today, I’ll be sharing a recipe that feels like a big, warm hug. It’s downright necessary for those cozy nights in, family gatherings, or just when you need a little comfort after a long day. This dish is packed with flavors that tell a story—a story of nourishment, love, and togetherness. So, let’s roll up our sleeves, tie on our aprons, and get cooking!
Personal Story
This dish brings back a flood of memories from my childhood—the kind where your nose is pressed up against the kitchen window, eagerly watching your parent or grandparent work their magic. I remember standing on a stool, arms akimbo, watching my grandmother stirring a big pot of her famous chicken and rice on chilly Sunday afternoons. It was a simple dish, but to me, it felt extravagant. The savory chicken melded beautifully with tender rice, infused with spices that transported me to a place of sheer happiness.
As she cooked, she would share stories from her own childhood, tales of family gatherings around the table where laughter and love flowed freely, just like the food. It was in those moments that I learned about the importance of creating a warm, inviting atmosphere around the dinner table. Every dish was not just a meal; it was a celebration of family and heritage. That simple chicken and rice recipe became a cherished tradition in our home, a meal that everyone looked forward to—filled with not just flavors, but love and connection.
Today, I’m excited to share my take on that timeless classic, where modern flavors meet nostalgic comfort. Let’s make this meal together!
Ingredients
Here’s what you’ll need to make a comforting Chicken and Rice that feels like family, along with some insights for each ingredient:
-
Bone-in Chicken Thighs (4-6, skin-on)
These add flavor and juiciness. Customize with boneless thighs or even chicken breasts if you prefer, but be mindful of cooking times! -
Long-Grain Rice (2 cups)
Opt for jasmine or basmati for a fragrant touch. If you want a healthier alternative, quinoa or brown rice would also work beautifully! -
Onion (1 large, diced)
The backbone of flavor. Shallots or leeks can be substituted for a sweeter profile. -
Garlic (4 cloves, minced)
Because garlic makes everything better! If you’re short on fresh garlic, garlic powder works too; just use about 1 teaspoon. -
Carrots (2 medium, diced)
Adds sweetness and color. Feel free to switch to parsnips or sweet potatoes for a different twist. -
Celery (2 stalks, diced)
Provides crunch and flavor depth. You can skip it if you must—just add more carrots or onions instead. -
Chicken Broth (4 cups)
Homemade is best if you have it, but store-bought works just fine! For vegetarians, vegetable broth is a great substitute. -
Fresh Herbs (1 cup, a mixture of parsley and thyme)
Freshly chopped herbs elevate the dish. If you don’t have fresh herbs, dried herbs can be used—start with 1 tablespoon each (but remember, dried are more potent!). -
Salt and Pepper (to taste)
Seasoning is key! Always taste as you go, and adjust to your liking! -
Olive Oil (2 tablespoons)
A splash for searing the chicken; avocado oil is an excellent, neutral substitute. -
Lemon Juice (from 1 lemon)
Adds brightness! Lime juice could also work if you’re feeling zesty.
The heart of this recipe is all about balance and using ingredients that represent your taste. Dive in and customize with what makes your spirit sing!
Step-by-Step Instructions
Alright, friends, it’s time to get cooking! Here’s how you bring this gathering of flavors together:
-
Prep Your Ingredients
Start by gathering all your ingredients and giving them a good wash and chop. Cooking is much easier when it’s organized! It also gives you a chance to check if you’re missing anything—no one wants to discover a missing ingredient halfway through cooking! -
Season the Chicken
Take those fabulous chicken thighs and season them generously with salt and pepper—don’t be shy! This step is crucial for flavorful meat. Heat up a large pot or Dutch oven over medium-high heat and add the olive oil. Once the oil is hot, carefully place the chicken skin-side down in the pot. Listen for that beautiful sizzle! -
Sear the Chicken
Let the chicken sear for about 5-7 minutes until the skin is deeply golden brown and crispy. This will lock in those amazing juices. Flip the chicken over and cook for an additional 5 minutes. Once done, remove the chicken from the pot and set aside. -
Sauté the Vegetables
In the same pot (don’t wash it—those brown bits are flavor!), add the onions, garlic, carrots, and celery. Sauté for about 5 minutes until softened. The goal here is to coax out all those delicious flavors. -
Add the Rice and Broth
Once your veg is fragrant and tender, stir in the rice, making sure to coat it well with the vegetables. This is the moment where things start to smell goooood! Pour in the chicken broth and bring the mixture to a gentle boil. -
Return the Chicken
Nestle those beautifully seared chicken thighs back into the pot, skin-side up, and squeeze in the lemon juice. The acidity of the lemon will brighten everything up and balance the rich flavors. Reduce the heat to low, cover the pot, and let it simmer gently for 30-35 minutes. Don’t lift the lid; that steam is cooking your meal to perfection! -
Fluff, Add Herbs, and Serve
After the time is up, take off the lid and marvel at the deliciousness you created! Remove the chicken thighs for a moment while you gently fluff the rice with a fork, incorporating the herbs. If the rice feels a little too al dente, just let it sit covered for a few more minutes. Finally, place the chicken back on top, sprinkle with extra herbs, and you’re ready to dig in!
Pro Tip:
While the dish is simmering away, set the table with your favorite plates and maybe a little candlelight. Creating a beautiful setting elevates the experience even more!
Serving Suggestions
To serve, dish up a generous portion of that mouthwatering chicken and rice on a lovely plate—don’t forget to include some veggies! It’s all about balance. A sprinkle of freshly chopped herbs on top adds a refreshing pop of color and aroma. Pair this meal with a crisp green salad and perhaps a glass of white wine for an extra touch of elegance. If you’re feeling it, add some warm crusty bread on the side to soak up all that delicious broth.
Recipe Variations
Feel free to customize to your heart’s content! Here are a few creative twists:
- Spicy Chicken and Rice: Add a teaspoon of red pepper flakes or diced jalapeños during the vegetable sauté for an added kick!
- Curry Chicken and Rice: Stir in a tablespoon of curry powder while sautéing the veggies for a fragrant, Indian-inspired twist.
- Creamy Chicken and Rice: Stir in a splash of heavy cream or coconut milk when fluffing the rice for a rich, comforting vibe.
- Vegetarian Option: Swap the chicken for chickpeas or your favorite hearty vegetables like cauliflower or mushrooms. Ensure you have enough vegetable broth to replace the chicken broth.
- One-Pot Lemon Herb Quinoa: Use quinoa instead of rice for a high-protein, gluten-free alternative; simply adjust cooking times as needed.
Chef’s Notes
Cooking is such a fluid experience—this meal has evolved countless times depending on the season and what I had on hand. I once had a complete disaster trying to use frozen chicken and neglected to adjust my cooking time. The chicken took twice as long to cook, resulting in a rice dish that nearly turned into a risotto! I embraced that “epic fail” and turned it into a creative cooking tutorial, reminding myself (and my audience) that we’re all learning and growing in the kitchen.
In the end, this dish is about enjoying the process of cooking and sharing meals with loved ones, even amidst imperfect moments. So, if things don’t go entirely according to plan, smile and adapt with grace!
FAQs and Troubleshooting
1. What if my chicken is dry?
If you find your chicken is dry, it could be due to overcooking. To avoid this, use a meat thermometer to check for doneness—160°F (70°C) is ideal for chicken.
2. What should I do if my rice is too soggy?
If your rice has turned out too soggy, it may have cooked too long or absorbed too much liquid. Try spreading it out on a baking sheet to cool and dry out a bit.
3. Can I freeze leftovers?
Absolutely! This meal freezes like a dream. Just make sure it cools completely before packing it in airtight containers. It can last up to 3 months in the freezer—perfect for when you’re short on time!
4. How can I make this dish ahead of time?
You can prep the vegetables and season the chicken ahead of time. Just keep everything stored separately in the fridge until you’re ready to cook. If all else fails, you can also cook it entirely in advance and simply reheat it gently on the stove when you’re ready to serve.
Nutritional Info (Optional)
This meal is packed with protein from chicken, fiber from veggies and rice, and essential vitamins and minerals. Each serving roughly contains:
- Calories: 420
- Protein: 30g
- Carbohydrates: 45g
- Fat: 15g
- Fiber: 3g
(Please note that these values can vary based on specific ingredients and serving sizes.)
So there you have it, a meal that feels like family! I hope you enjoy making and sharing this recipe as much as I do. Remember, the kitchen is a place of love and creativity—let your personality shine through, and don’t forget to invite those you love to join you. Happy cooking, my friends!
PrintComforting Chicken and Rice

A heartwarming chicken and rice recipe that brings families together, infused with flavors of love and nostalgia.
- Prep Time: 15 minutes
- Cook Time: 45 minutes
- Total Time: 60 minutes
- Yield: 4 servings 1x
- Category: Main Course
- Method: One-Pot Cooking
- Cuisine: Southern
- Diet: None
Ingredients
- 4–6 Bone-in Chicken Thighs (skin-on)
- 2 cups Long-Grain Rice (jasmine or basmati)
- 1 large Onion (diced)
- 4 cloves Garlic (minced)
- 2 medium Carrots (diced)
- 2 stalks Celery (diced)
- 4 cups Chicken Broth
- 1 cup Fresh Herbs (parsley and thyme)
- Salt and Pepper (to taste)
- 2 tablespoons Olive Oil
- Juice from 1 Lemon
Instructions
- Prep Your Ingredients: Gather and wash all ingredients.
- Season the Chicken: Season chicken thighs generously with salt and pepper and heat olive oil in a large pot.
- Sear the Chicken: Sear chicken skin-side down for 5-7 minutes until golden. Flip and cook for another 5 minutes, then remove.
- Sauté the Vegetables: In the same pot, add onions, garlic, carrots, and celery. Sauté for about 5 minutes.
- Add the Rice and Broth: Stir in rice, then add chicken broth and bring to a gentle boil.
- Return the Chicken: Nestle chicken back into the pot, add lemon juice, cover, and simmer for 30-35 minutes.
- Fluff, Add Herbs, and Serve: Fluff rice with a fork, mix in herbs, then place chicken back on top before serving.
Notes
Set the table beautifully to enhance the dining experience. Customize with your favorite ingredients as desired.
Nutrition
- Serving Size: 1 serving
- Calories: 420
- Sugar: 4g
- Sodium: 750mg
- Fat: 15g
- Saturated Fat: 4g
- Unsaturated Fat: 8g
- Trans Fat: 0g
- Carbohydrates: 45g
- Fiber: 3g
- Protein: 30g
- Cholesterol: 80mg
Keywords: chicken, rice, comforting recipes, family meals, one-pot dish
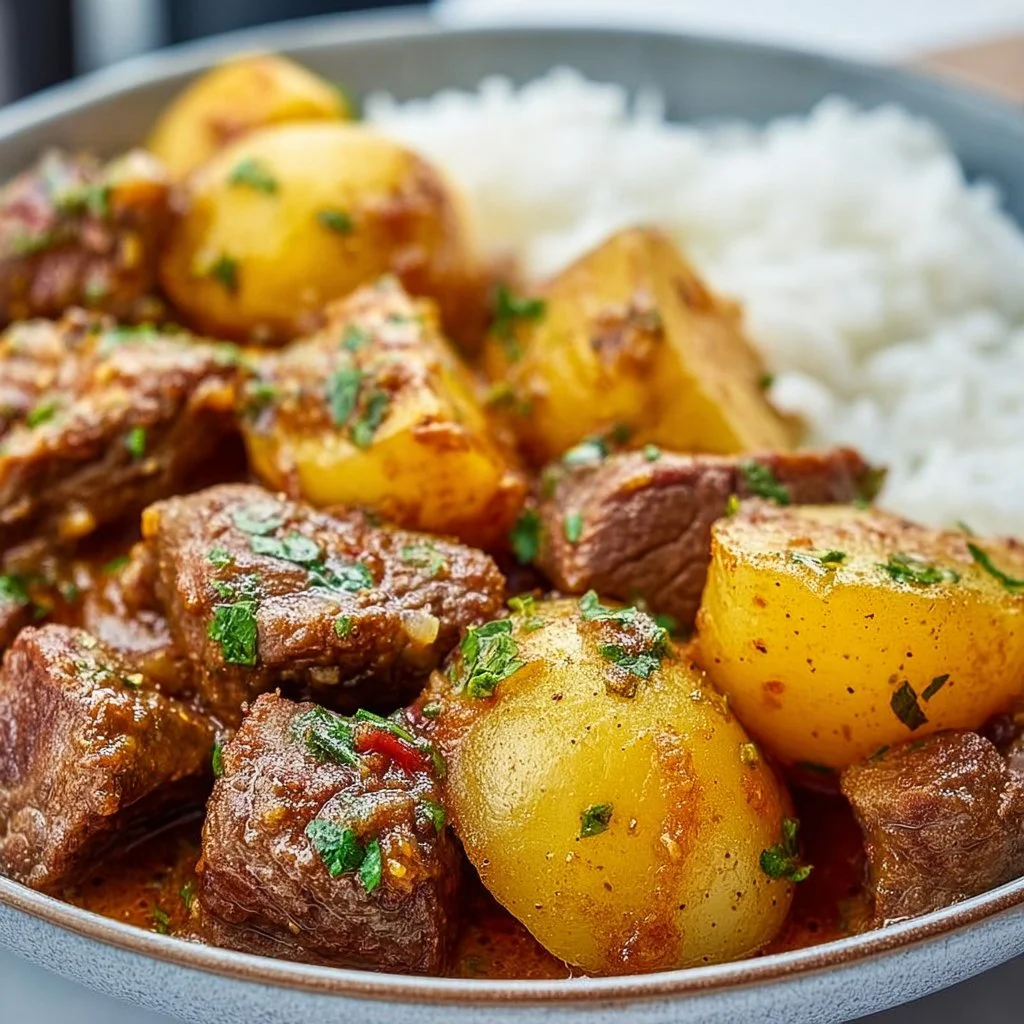
Meat with Potatoes
# A Stew for Every Occasion: Beef and Potatoes with a Dash of Love

## Introduction

Hello, fellow food lovers! It’s Savannah here, and today I’m incredibly excited to share a dish that always warms my heart and fills my home with delicious aromas—Beef Stew with Potatoes! As we dive into this classic comfort food, I want you to imagine that cozy evening when the savory scent of beef simmering with tender potatoes starts wafting through your kitchen. That’s the magic of good home cooking.

This recipe is not just about satisfying your hunger; it’s about making connections, sharing stories, and creating moments around the table. Whether it's a chilly evening where you want to gather the family after a long day or you’re simply looking to impress guests with an effortless yet beautiful meal, this beef stew will be the star of your table.

I believe that every great recipe begins with a purpose, a bit of love, and the right ingredients. Trust me; you don’t need a culinary degree to pull this off. Just a bit of intention, fresh ingredients, and a willingness to roll up your sleeves. So, pour your favorite drink, tie on your apron, and let’s get those taste buds dancing!

## Personal Story

Ah, beef stew! Growing up, it was the dish that graced our table nearly every Sunday. My mom would wake up early, letting the beef simmer all day while she danced around the kitchen, checking on it like a proud artist perfecting her masterpiece. It was an event: the family would gather in our small dining room, the warm light spilling out onto the porch. We’d share stories, laughter, and of course, bowls full of her fragrant stew.

Fast forward to today, and I still find solace in making this dish. Over the years, I’ve refined it, adding my own personal touches while drawing inspiration from those lovely Sundays with my family. The best part? It always reminds me of the love that goes into cooking and the joy of sharing food with those we hold dear. So sit back, and let’s recreate those fond memories in your own kitchen!

## Ingredients

Here’s what you’ll need to whip up this delightful beef stew:

- **1 lb beef stew meat**
  *Look for cuts like chuck or round; they’ll become incredibly tender with slow cooking. If you’re short on time, you can even use pre-cut stew meat from the store.*

- **4 potatoes, peeled and cubed**
  *I love using Yukon Gold for their creamy texture. However, Russets work beautifully too! If you’re low on potatoes, feel free to add carrots or parsnips for a touch of sweetness.*

- **1 can diced tomatoes**
  *These add a lovely acidity and depth. If you prefer fresh, you can substitute with 2 cups of chopped tomatoes—just be sure to adjust the seasoning.*

- **1 onion, chopped**
  *Onions bring a savory sweetness that’s hard to beat! Swap them for shallots for a milder flavor or even leeks for something a bit different.*

- **1 bell pepper, chopped**
  *Any color works here—green, red, yellow, or orange will all add a pop of flavor! Don’t have bell peppers? Try using a jalapeño for a spicy kick!*

- **2 cloves garlic, minced**
  *You can never go wrong with garlic. If you’re feeling lazy, pre-minced garlic works too, but fresh is always best!*

- **2 cups beef broth**
  *For a richer taste, homemade broth is divine. If you’re in a pinch, store-bought works just fine—look for low-sodium varieties to maintain control over the salt levels.*

- **1/2 cup fresh cilantro, chopped**
  *This herb adds a refreshing zing to the stew. If cilantro isn't your thing, try parsley or basil instead!*

- **Salt and pepper to taste**
  *Don’t shy away from seasoning! It’s the key to bringing all these flavors to life.*

- **Oil for cooking**
  *I prefer olive oil for its rich taste, but vegetable oil or even ghee will do the trick!*

## Step-by-Step Instructions

Now that we have our ingredients assembled, let’s get cooking! Follow these simple steps, and I promise you'll have a flavorful beef stew that will warm the heart.

1. **Brown the Beef**:
   - In a large pot or Dutch oven, heat about 2 tablespoons of oil over medium heat. Once the oil is hot, toss in the stew meat, ensuring that you give each piece a bit of space. You want a nice brown crust—this adds depth and flavor to your dish.
   - *Tip: Don't overcrowd the pot! If necessary, work in batches to avoid steaming.*

2. **Sauté the Aromatics**:
   - Once browned, remove the beef and set it aside. In the same pot, add a little more oil if needed (about 1 tablespoon). Toss in the chopped onion and bell pepper, cooking until softened (about 5 minutes). Then, add the minced garlic, stirring until fragrant (about 1 minute).
   - *Chef's Hack: Scrape the bottom of the pot as you stir. Those brown bits are pure flavor magic!*

3. **Embrace the Tomatoes**:
   - Now, back in with the beef! Pour in the can of diced tomatoes (juice and all) along with the beef broth. Bring everything to a simmer.
   - *Pro Tip: For added complexity, sprinkle in a teaspoon of dried oregano or thyme—these herbs marry beautifully with beef.*

4. **Add Potatoes and Seasoning**:
   - Toss in the cubed potatoes and make sure everything is well combined. Season generously with salt and pepper. Bring the pot back to a simmer, then lower the heat to medium-low, covering it with a lid.
   - *Note: Covering ensures the stew cooks evenly and stays moist. Just be sure to stir occasionally to prevent sticking!*

5. **Let It Simmer**:
   - Cook the stew for about 1.5 to 2 hours or until the beef is tender and the potatoes are fork-tender. Adjust seasoning as necessary before serving.
   - *Chef’s Tip: The longer the stew simmers, the better it gets! If you have time, let it cook even longer on low heat.*

6. **Finishing Touch**:
   - Once everything is tender and heavenly, sprinkle in the fresh cilantro and give it a gentle stir. This fresh herb will elevate your stew to another level.
   - *Don’t you just love that fresh smell?*

## Serving Suggestions

When it comes to serving this delightful stew, presentation is key! Ladle hearty portions into your favorite bowls, ensuring a generous amount of potatoes and beef in each. You can sprinkle a little more cilantro on top for a pop of color and freshness. If you’re in the mood for something extra special, pair this stew with crusty bread or buttery rolls for dipping. Trust me; it’s an experience your guests will savor!

## Recipe Variations

Feeling adventurous? Here are a few creative twists for you to try with this beef stew recipe:

1. **Spicy Kick**: Add a diced jalapeño to the aromatics to bring some heat to the party.
2. **Herb Garden**: Switch out the cilantro for dill for a fresh and unique flavor profile.
3. **Mushroom Lover**: Stir in some earthy mushrooms alongside the onions for a rich umami boost.
4. **Creamy Comfort**: Add a splash of heavy cream or a dollop of sour cream just before serving for that luscious, creamy texture.
5. **Vegetarian Delight**: Use a plant-based protein instead of beef and vegetable broth, and you’ll have a lovely hearty vegetarian stew!

## Chef’s Notes

As I reflect on this beef stew, one delightful memory stands out: my friend Claire’s first time making it for her family. She called me in a panic midway through, saying she forgot the garlic! I chuckled and told her to add it anyway at the end. The stew turned out delicious, and her family devoured it! Cooking is all about improvisation and learning as you go; every kitchen adventure teaches us something.

Over the years, I’ve seen this hearty dish evolve from my mother’s classic recipe to my personal masterpiece. I love exploring new flavors, ingredients, and techniques while still honoring the traditions and memories that come with cooking.

## FAQs and Troubleshooting

1. **Why isn’t my beef tender?**
   - If your beef isn’t tender, it likely needs more time. Low-and-slow is the name of the game with stews!

2. **How do I thicken my stew?**
   - For a thicker stew, you can mix a tablespoon of flour or cornstarch with water to create a slurry and stir it into your stew. Allow it to simmer for a few more minutes.

3. **Can I make this ahead of time?**
   - Absolutely! This stew gets better the longer it sits, making it perfect for meal prep. Just store it in the fridge for up to three days or freeze leftovers for future comfort food cravings.

4. **What can I use if I don’t have beef broth?**
   - Chicken or vegetable broth work in a pinch. Just remember to adjust your seasoning accordingly!

## Nutritional Info

For an average serving (1 bowl), you're looking at approximately:
- **Calories:** 450
- **Protein:** 35g
- **Carbohydrates:** 45g
- **Total Fat:** 15g
- **Fiber:** 5g

*Note: Nutrition may vary based on specific ingredients and portion sizes.*

---

There you have it! A complete guide to making a scrumptious beef stew with potatoes that brings loved ones together. Remember, the heart of this dish lies in your cooking with intention and joy. I can’t wait for you to try it out and create your own beautiful moments around the table. Happy cooking, and until next time, keep shining in the kitchen!
Beef Stew with Potatoes

A comforting and hearty beef stew with tender potatoes that warms the heart and home.
- Prep Time: 15 minutes
- Cook Time: 120 minutes
- Total Time: 135 minutes
- Yield: 4 servings 1x
- Category: Main Course
- Method: Braised
- Cuisine: American
- Diet: None
Ingredients
- 1 lb beef stew meat
- 4 potatoes, peeled and cubed
- 1 can diced tomatoes
- 1 onion, chopped
- 1 bell pepper, chopped
- 2 cloves garlic, minced
- 2 cups beef broth
- 1/2 cup fresh cilantro, chopped
- Salt and pepper to taste
- Oil for cooking
Instructions
- Brown the beef: In a large pot or Dutch oven, heat about 2 tablespoons of oil over medium heat. Once the oil is hot, toss in the stew meat.
- Sauté the aromatics: Remove the beef and set aside. Add onion and bell pepper, cooking until softened, then add minced garlic.
- Embrace the tomatoes: Return the beef and pour in the diced tomatoes, along with beef broth. Bring to a simmer.
- Add potatoes and seasoning: Toss in cubed potatoes and season with salt and pepper. Bring back to a simmer and cover.
- Let it simmer: Cook for about 1.5 to 2 hours until beef and potatoes are tender.
- Finishing touch: Once tender, sprinkle in fresh cilantro and stir gently.
Notes
Feel free to add other vegetables like carrots or parsnips for additional flavor and sweetness.
Nutrition
- Serving Size: 1 serving
- Calories: 450
- Sugar: 5g
- Sodium: 600mg
- Fat: 15g
- Saturated Fat: 5g
- Unsaturated Fat: 8g
- Trans Fat: 0g
- Carbohydrates: 45g
- Fiber: 5g
- Protein: 35g
- Cholesterol: 90mg
Keywords: beef stew, comfort food, hearty meals