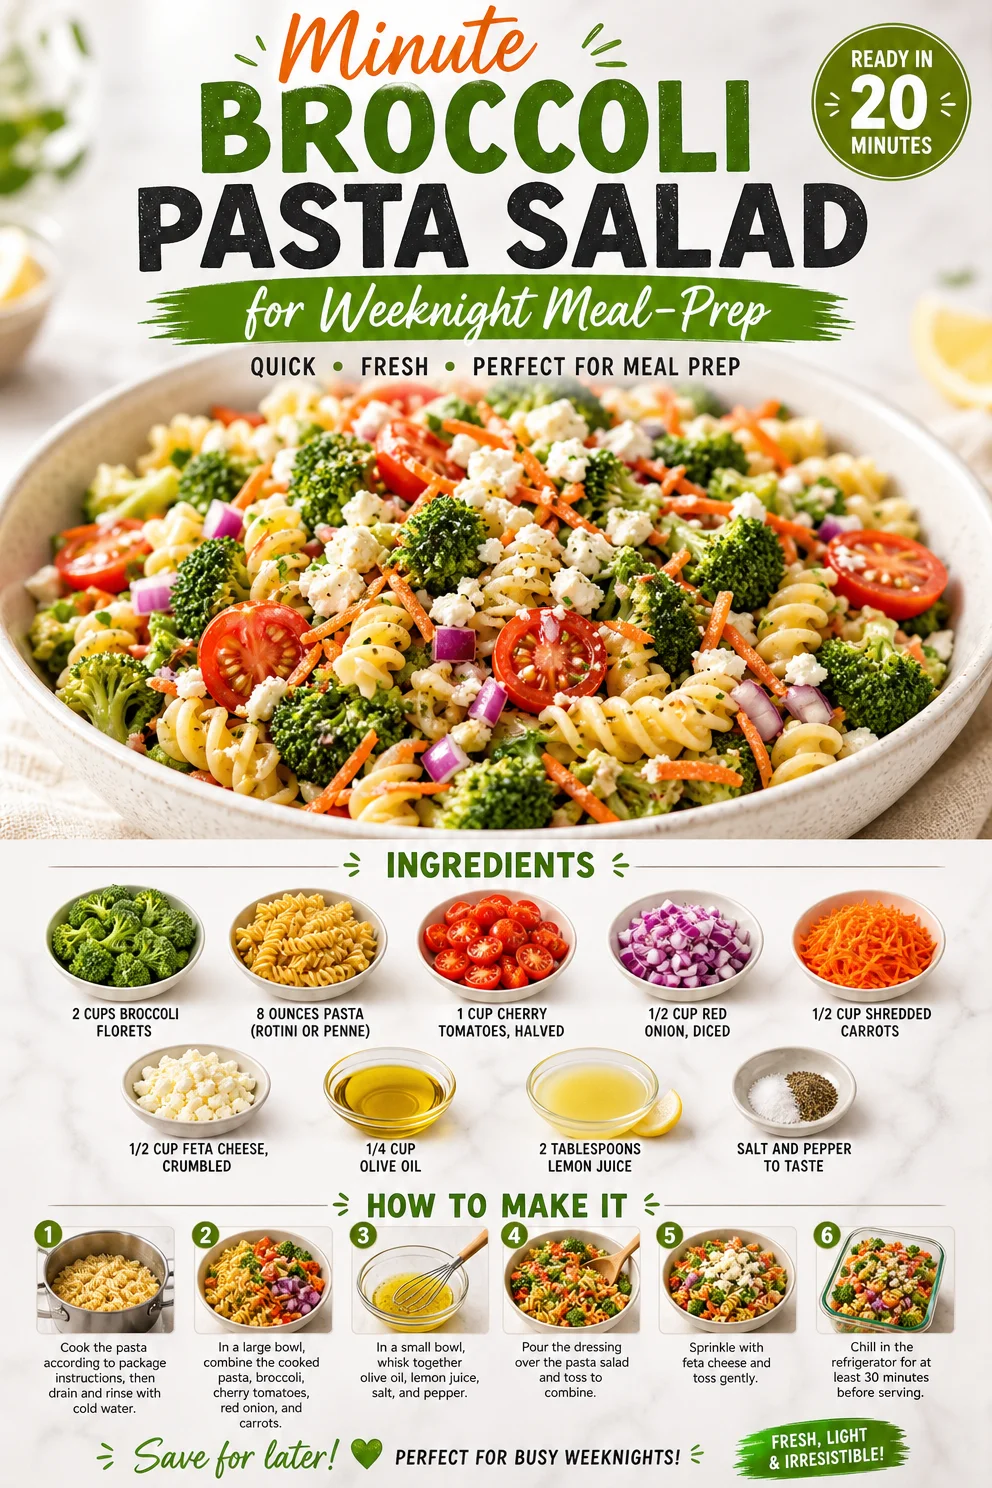
Minute Broccoli Pasta Salad for Weeknight Meal-Prep
The Best Broccoli Pasta Salad Recipe: A Vibrant Twist on a Classic Dish
Hello, fellow food enthusiasts! Today, I’m thrilled to share a gem from my kitchen: the Best Broccoli Pasta Salad. This dish is a show-stopper in its simplicity, bursting with flavors and colorful ingredients that make it perfect for summer gatherings or cozy weeknight meals. If you’re looking for a recipe that’s as easy to prepare as it is delightful to eat, you’ve hit the jackpot!
Why I Love This Broccoli Pasta Salad
Picture this: the sweet smell of fresh broccoli mingling with the nuttiness of pasta, bright cherry tomatoes, and the sprinkle of crumbled feta cheese. Each bite of this salad takes me back to sunny afternoons spent in my backyard garden, surrounded by friends and laughter. I remember the first time I whipped up this dish for a summer BBQ. My friends arrived with their usual favorites—burgers and hot dogs—but when they tasted my broccoli pasta salad, they were taken aback. “Wow, you need to keep this on rotation!” they said, and with that, a star was born!
This dish is not just a pasta salad; it’s a celebration of fresh ingredients that come together effortlessly. It’s packed with nutrients, flavor, and color, making it a feast for the eyes as much as for the tastebuds. Trust me, this is one recipe you’ll want to keep in your culinary arsenal!
Ingredients
Let’s dive into what you’ll need to whip up this delightful salad. Here’s the ingredient list, along with a few insights on each!
-
2 cups broccoli florets
Fresh broccoli adds a nice crunch and a bright green color. If you don’t have fresh, you can use frozen florets—but be sure to thaw and drain them! -
8 ounces pasta (e.g., rotini or penne)
Whole-grain pasta is a fantastic option if you’re looking for something healthier. Gluten-free pasta works too! -
1 cup cherry tomatoes, halved
These little gems add sweetness and juiciness. Feel free to use grape tomatoes or even diced regular tomatoes in a pinch. -
1/2 cup red onion, diced
Red onion offers a sharp, slightly sweet crunch. If you prefer something milder, sweet onions or green onions are great substitutes. -
1/2 cup shredded carrots
For a pop of color and a hint of sweetness, shredded carrots are just the ticket! If you’re short on time, pre-packaged shredded carrots work perfectly. -
1/2 cup feta cheese, crumbled
Feta’s tang complements the salad beautifully. If you want to make it dairy-free, you can substitute with a vegan cheese or simply leave it out. -
1/4 cup olive oil
Use high-quality extra virgin olive oil for the best flavor. Avocado oil is a wonderful alternative if you’re looking for something more neutral. -
2 tablespoons lemon juice
Freshly squeezed lemon juice brightens up the salad. For a zesty twist, try lime juice instead! -
Salt and pepper to taste
A must! Freshly cracked pepper adds a lovely kick. Don’t shy away from seasoning; it can transform your dish.
Step-by-Step Instructions
Now, let’s get cooking! Follow these detailed steps, and you’ll whip up this Broccoli Pasta Salad in no time.
-
Cook the Pasta
Start by bringing a large pot of salted water to a boil. Add your pasta and cook according to the package directions until al dente. This usually takes about 8–10 minutes. Remember, you want a little bite to your pasta, as it will absorb some of the dressing later. -
Blanch the Broccoli
While your pasta is cooking, grab a separate pot of boiling water and add the broccoli florets. Blanch them for about 2 minutes until they turn bright green. This keeps them crisp and vibrant! Remove the broccoli from the hot water and plunge it into an ice bath immediately to halt the cooking process. This trick will keep your broccoli crunchy. -
Prepare the Vegetables
In a large bowl, combine the halved cherry tomatoes, diced red onion, and shredded carrots. The combination of these fresh ingredients will create a beautiful rainbow effect within your salad. -
Mix the Dressing
In a small bowl, whisk together the olive oil and lemon juice. Season with salt and pepper to taste. I like to add a pinch of garlic powder for an extra flavor burst—totally optional, but delicious! Set the dressing aside for later. -
Combine It All
Drain your pasta and rinse it under cool water to stop the cooking. This helps to prevent the pasta from getting mushy. In your large bowl with the vegetables, add the cooked pasta and blanched broccoli. Gently toss everything together. -
Add Feta and Dressing
Now it’s time to bring everything together! Sprinkle the crumbled feta cheese on top, and drizzle your dressing over the mixture. Gently toss again until it’s all well combined. This is where the magic happens as the flavors mingle together! -
Taste and Adjust
Give it a taste and adjust the seasoning if needed. This salad is all about your preferences! You can add more lemon juice for tartness or more salt if you like it a little zingier.
Serving Suggestions
To serve your Broccoli Pasta Salad, try a beautiful large serving bowl to showcase its vibrant colors! I love to garnish it with extra feta and a sprinkle of fresh herbs like basil or parsley for that restaurant-style touch. This salad can be served chilled or at room temperature, making it a versatile option for any occasion. It pairs perfectly with grilled meats or as a standalone dish at a picnic!
Recipe Variations
Want to mix things up? Here are some fun variations to try with your Broccoli Pasta Salad:
- Add Protein: Toss in some grilled chicken, shrimp, or even chickpeas for a heartier meal.
- Swap the Cheese: Experiment with mozzarella pearls or grated Parmesan for a different flavor profile.
- Spice It Up: Add a pinch of red pepper flakes or diced jalapeño for a spicy kick!
- Herb It Up: Fresh dill or mint can add a refreshing twist to the flavor.
- Nutty Crunch: Sprinkle in some toasted walnuts or almonds to give an extra crunchy texture.
Chef’s Notes
This recipe has evolved over time from a simple idea to a colorful medley of my favorite summer ingredients. I even once made this salad while camping, improvising with canned vegetables and a squeeze of lemon from my cooler. It reminded me that cooking doesn’t need to be complicated to be delicious! The beauty of this dish is in its adaptability—if you have extra veggies in your fridge, throw them in!
FAQs and Troubleshooting
-
What if my pasta is overcooked?
If you accidentally overcook your pasta, don’t worry! Just add an extra splash of dressing to help rejuvenate it, and mix in plenty of crunchy veggies. -
How long can I store leftovers?
This salad keeps well in the fridge for about 3–4 days. Just keep in mind the broccoli can lose its crunch over time. -
Can I make this salad vegan?
Absolutely! Just omit the feta cheese or replace it with a dairy-free version. You can also amp up the flavors with nutritional yeast for a cheesy taste. -
How can I prevent my pasta from sticking?
Make sure to rinse the pasta under cold water before mixing it with the other ingredients, and toss it with a bit of olive oil after draining.
Nutritional Info
While calorie counts can differ based on specific ingredients, a generous serving of this Broccoli Pasta Salad typically contains about 350 calories. It’s a great source of fiber, vitamins, and healthy fats from the olive oil and veggies!
So there you have it, my lovely foodies! The Best Broccoli Pasta Salad is not just a dish; it’s a blend of memories, creativity, and comfort. Whether you’re hosting friends or simply enjoying a quiet evening at home, this salad is sure to impress. Tie on your apron, gather your ingredients, and let’s create something timeless together! Happy cooking!
PrintThe Best Broccoli Pasta Salad
A vibrant twist on a classic dish, this Broccoli Pasta Salad is bursting with flavors and colorful ingredients, perfect for summer gatherings or weeknight meals.
- Prep Time: 15 minutes
- Cook Time: 10 minutes
- Total Time: 25 minutes
- Yield: 4 servings 1x
- Category: Salad
- Method: Mixing
- Cuisine: American
- Diet: Vegetarian
Ingredients
- 2 cups broccoli florets
- 8 ounces pasta (e.g., rotini or penne)
- 1 cup cherry tomatoes, halved
- 1/2 cup red onion, diced
- 1/2 cup shredded carrots
- 1/2 cup feta cheese, crumbled
- 1/4 cup olive oil
- 2 tablespoons lemon juice
- Salt and pepper to taste
Instructions
- Cook the pasta by bringing a large pot of salted water to a boil, adding the pasta, and cooking according to package directions until al dente (about 8–10 minutes).
- Blanch the broccoli in a separate pot of boiling water for about 2 minutes, then plunge it into an ice bath to keep it crisp and vibrant.
- Prepare the vegetables by combining halved cherry tomatoes, diced red onion, and shredded carrots in a large bowl.
- Mix the dressing by whisking together olive oil and lemon juice, seasoning with salt and pepper to taste.
- Combine the cooked pasta and blanched broccoli with the vegetables in the large bowl and toss gently.
- Add the crumbled feta and drizzle the dressing over the mixture, tossing gently to combine.
- Taste and adjust seasoning as needed.
Notes
This salad can be served chilled or at room temperature, making it versatile for any occasion. Garnish with extra feta and fresh herbs for a restaurant-style touch.
Nutrition
- Serving Size: 1 serving
- Calories: 350
- Sugar: 5g
- Sodium: 400mg
- Fat: 12g
- Saturated Fat: 4g
- Unsaturated Fat: 6g
- Trans Fat: 0g
- Carbohydrates: 45g
- Fiber: 3g
- Protein: 15g
- Cholesterol: 30mg
Keywords: broccoli pasta salad, vegetarian salad, summer salad
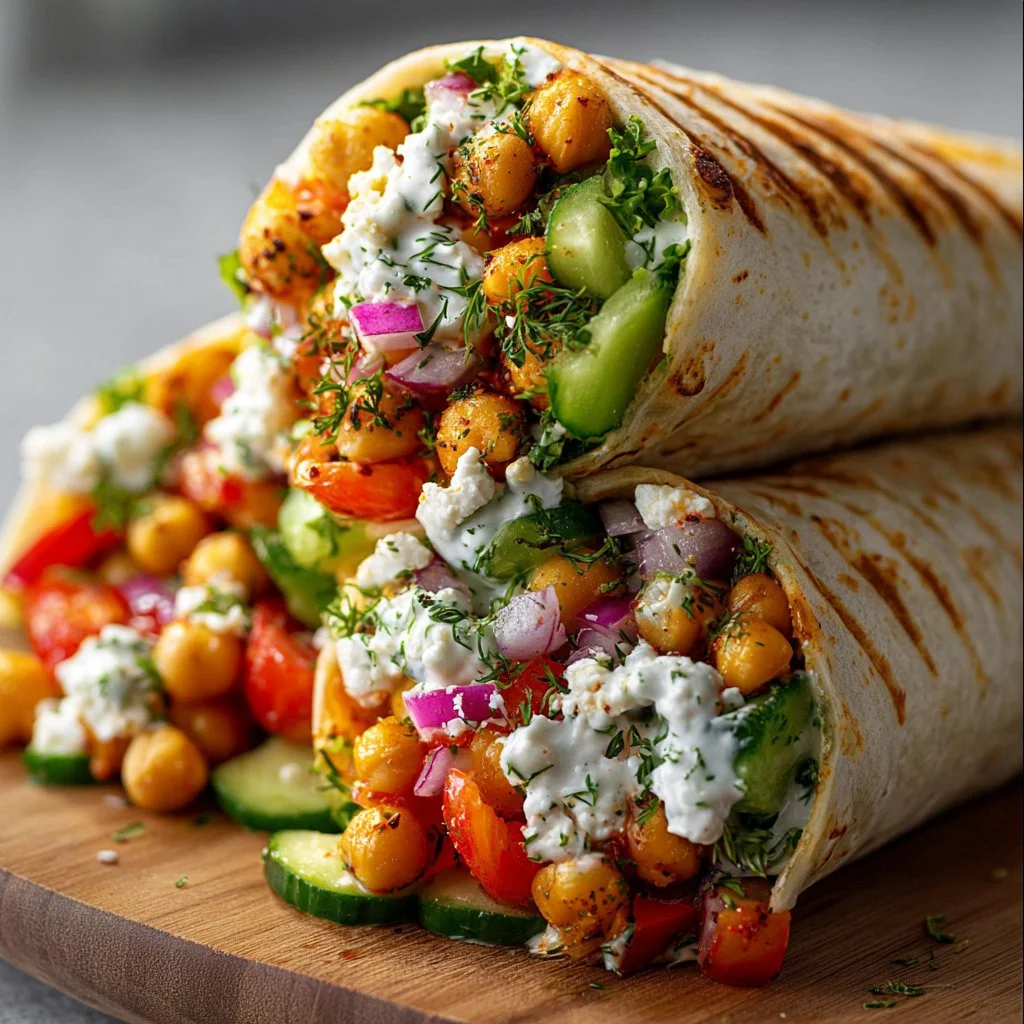
Quick Chickpea & Feta Wraps with Veggies & Yogurt Sauce (Meal Prep)
Chickpea & Feta Wrap with Veggies & Yogurt Sauce – 5 Quick Flavorful Ways!
Hello, fellow food lovers! Today we’re diving into a recipe that is not only bursting with flavor but also incredibly easy to whip up – the Chickpea & Feta Wrap with Veggies & Yogurt Sauce. This dish is perfect for those busy weeknights when you still crave something wholesome and tasty. The best part? It can be customized in so many delightful ways!
Introduction: A Flavorful Escape
Imagine this: the sun is shining bright, you’re soaking in some rays at your outdoor table, the gentle breeze rustles the leaves around you, and there you are, taking a generous bite of a wrap filled to the brim with creamy feta, vibrant veggies, and tangy yogurt sauce. Ah, bliss! That’s the magic of these wraps.
Cooking is not just about nourishment for me; it’s about creating moments, building memories, and sharing experiences with your loved ones. With this wrap recipe, you can kick-start your culinary adventure in the kitchen and impress your family or friends without breaking a sweat. Plus, you’ll have the opportunity to go wild with different flavors!
In this blog post, we’re going to explore one of my all-time favorite recipes that I often turn to when I want something fresh, healthy, and ridiculously satisfying. Who knew that chickpeas, some seasoning, and wholesome veggies could become your go-to dish?
Now, let me take you through the delightful journey of this wrap, complete with inspirations from my kitchen stories, handy tips, and exciting variations. So, are you ready? Let’s roll up those sleeves and get cooking!
Personal Story: A Trip Down Memory Lane
Growing up in a household where food was the center of all gatherings, I can’t help but recall the chaotic yet joyful nights we’d spend in the kitchen. I vividly remember my mom whipping up all sorts of dishes, ranging from hearty stews to refreshing salads, each infused with love and a pinch of creativity.
One particular summer evening stands out to me. My friends and I were munching on these homemade wraps my mom had concocted with whatever colorful veggies we had lurking in the refrigerator. I can see it now – us huddled together in the kitchen, a vibrant spread of chopped cucumbers, sun-ripened tomatoes, crumbled feta, and, of course, a jar of creamy yogurt sauce placed in the middle of the table.
At first, it was a simple meal, but the laughter and stories exchanged over those wraps made it an unforgettable feast. It was then that I realized that meal prep doesn’t have to be a chore; it can be a festive occasion. Meals become cherished moments when shared with love and creativity. That evening inspired my own cooking adventures and encouraged me to craft my own versions of those simple yet fulfilling wraps.
Ingredients
-
1 cup canned chickpeas, drained and rinsed: These little legumes are a protein powerhouse. If you’re out of chickpeas, feel free to swap them with black beans or even cooked quinoa for a different texture.
-
1 tbsp olive oil: This brings richness to your mix. No olive oil? Go for canola or avocado oil instead, as they both have lovely flavors too.
-
1/2 tsp paprika: This spice adds warmth and color to the dish. If you want more kick, smoked paprika offers a delightful smokiness, while cayenne pepper adds heat.
-
1/2 tsp ground cumin: For that earthy aroma! If you don’t have cumin on hand, coriander could serve as an interesting swap.
-
Salt and black pepper to taste: Essential for enhancing flavors. Adjust according to your taste preference!
-
1/2 cup crumbled feta cheese: This creamy cheese brings a tangy punch. If you want a dairy-free option, try crumbled tofu with a splash of lemon juice and nutritional yeast.
-
1 cup cucumber, diced: Cucumbers add a refreshing crunch. Swap out for bell peppers if you prefer a bit more sweetness.
-
1/2 cup cherry tomatoes, halved: Bursting with juice, these beauties are fantastic! Regular tomatoes can work too, just make sure to remove some of the excess moisture.
-
1/4 cup red onion, thinly sliced: These add a zesty bite. If you’re aiming for a milder flavor, opt for green onions instead.
-
4 large flour tortillas or wraps: Perfect for wrapping! Whole wheat or corn tortillas make excellent alternatives if you want a different flavor or texture profile.
-
1 cup plain yogurt: This is the base for our delightful sauce. If you’re dairy-free, coconut yogurt works wonderfully here!
-
1 tbsp lemon juice: A squeeze of citrus brightens everything up. In a pinch, lime juice could be a refreshing alternative.
-
1 clove garlic, minced: For that irresistible aromatic kick. Fresh garlic is best, but garlic powder can work in a pinch.
-
1 tbsp olive oil (for the sauce): Gives a smooth finish. Again, substitute with another oil if you wish.
-
Salt to taste: Just enough to tie all those fabulous flavors together!
Step-by-Step Instructions
-
Prep the Chickpeas:
- In a medium bowl, combine the drained chickpeas with 1 tablespoon of olive oil, paprika, cumin, salt, and black pepper. Toss them until they’re well coated. This step is essential to infuse the chickpeas with delicious flavor before we cook them.
-
Cook the Chickpeas:
- Heat a small skillet over medium heat. Once hot, add the seasoned chickpeas, sautéing them for about 5-7 minutes until they’re warmed through and slightly crispy on the outside. This step adds a lovely texture and makes the chickpeas even more inviting.
Chef Tip: If you want a bit of a crunch, feel free to let the chickpeas cook a minute longer until they’re golden!
-
Make the Yogurt Sauce:
- While the chickpeas are cooking, in another bowl, combine the yogurt, lemon juice, minced garlic, olive oil, and a pinch of salt. Stir well until it’s creamy and smooth! This sauce is the secret star of the dish, adding a refreshing zing that pairs beautifully with the warm chickpeas and crisp veggies.
Chef Hack: If you’re short on time, you can simply mix in a tablespoon of store-bought tzatziki to skip a step!
-
Prepare the Wraps:
- Take your tortillas or wraps, and place them on a clean surface. Begin layering with a generous spread of the yogurt sauce, adding the chickpeas next, then the fresh cucumber, cherry tomatoes, red onion, and last but not least, sprinkle on some crumbled feta.
-
Wrap It Up:
- Now, fold in the sides of the tortilla and roll it up tightly. Slice in half for easy eating and to show off that beautiful filling! This presentation makes your wrap not only tasty but visually appealing.
Bonus Tip: If you’re packing these for lunch, tightly wrap them in foil or parchment paper to keep everything snug.
Serving Suggestions
Plating these wraps is about celebrating fresh, colorful ingredients. Place them on a platter with extra lemon wedges, a small bowl of the yogurt sauce for dipping, and perhaps a sprinkle of fresh herbs like cilantro or parsley for a pop of color. You can even add a side of crispy sweet potato fries for that perfect lunch or light dinner combo!
Recipe Variations
-
Mediterranean Twist: Add olives and roasted red peppers for a more traditional Mediterranean flare. Serve with a side of tabbouleh for added freshness.
-
Spicy Kick: Mix in some chopped jalapeños or a dash of sriracha into your yogurt sauce for some heat!
-
Herbaceous Delight: Incorporate fresh herbs like dill or mint into your yogurt sauce for a refreshing flavor profile.
-
Whole Grain Goodness: Swap out traditional flour tortillas for whole grain or gluten-free wraps to suit any dietary needs.
-
Hearty Addition: Add some cooked quinoa or brown rice to the wraps for extra protein and texture!
Chef’s Notes
This recipe has traveled with me throughout my culinary journey and has evolved many times over, reflecting seasonal ingredients and global influences. I fondly recall a friend who travels often bringing exotic spices from around the world; we once made a Moroccan-inspired version by adding harissa to the chickpeas! I love how this dish welcomes creativity and experimentation, making it a perfect blank canvas.
FAQs and Troubleshooting
-
Can I make these wraps ahead of time?
- Absolutely! You can prepare the filling and sauce ahead of time. Just assemble the wraps when you’re ready to eat to keep everything fresh.
-
What if I don’t like chickpeas?
- No worries! Substitute them with black beans or cooked lentils for a different flavor and texture.
-
How can I make these wraps vegan?
- Simply swap out the yogurt for a plant-based alternative and leave out the feta or use a vegan feta version instead.
-
My wraps are falling apart; how do I fix this?
- Make sure to warm the tortillas slightly before wrapping to help them stay together better. Keeping the ingredients within the center without overstuffing can also help.
Nutritional Info
(You may want to add this section depending on if you’d like to provide it. Here’s an example):
- Calories: Approximately 400 per wrap (with yogurt sauce)
- Protein: 15g
- Carbohydrates: 50g
- Dietary Fiber: 10g
- Fats: 15g
Conclusion
There you have it – the chickpea & feta wrap that can easily become a staple in your kitchen! With countless ways to twist this recipe, you’ll never get bored and can cater to every taste bud. I hope you’re inspired to tie on that lovely apron of yours and play around with this delightful dish. Happy cooking, friends! Let’s gather around the table and share those beautiful moments, one wrap at a time!
PrintChickpea & Feta Wrap with Veggies & Yogurt Sauce
A quick and flavorful wrap filled with chickpeas, creamy feta, vibrant veggies, and a tangy yogurt sauce.
- Prep Time: 15 minutes
- Cook Time: 10 minutes
- Total Time: 25 minutes
- Yield: 4 servings 1x
- Category: Main Course
- Method: Wrapping
- Cuisine: Mediterranean
- Diet: Vegetarian
Ingredients
- 1 cup canned chickpeas, drained and rinsed
- 1 tbsp olive oil
- 1/2 tsp paprika
- 1/2 tsp ground cumin
- Salt and black pepper to taste
- 1/2 cup crumbled feta cheese
- 1 cup cucumber, diced
- 1/2 cup cherry tomatoes, halved
- 1/4 cup red onion, thinly sliced
- 4 large flour tortillas or wraps
- 1 cup plain yogurt
- 1 tbsp lemon juice
- 1 clove garlic, minced
- 1 tbsp olive oil (for the sauce)
- Salt to taste
Instructions
- Combine the drained chickpeas with olive oil, paprika, cumin, salt, and black pepper in a medium bowl. Toss until well coated.
- Heat a small skillet over medium heat and add the seasoned chickpeas. Sauté for about 5-7 minutes until warmed through and slightly crispy.
- Mix the yogurt, lemon juice, minced garlic, olive oil, and a pinch of salt in another bowl until creamy and smooth.
- Layer your tortillas with a generous spread of yogurt sauce, followed by the chickpeas, cucumber, cherry tomatoes, red onion, and crumbled feta.
- Fold in the sides of the tortilla and roll it up tightly. Slice in half to serve.
Notes
Feel free to customize the wraps with different vegetables or proteins. You can also prepare the filling and sauce ahead of time.
Nutrition
- Serving Size: 1 wrap
- Calories: 400
- Sugar: 5g
- Sodium: 300mg
- Fat: 15g
- Saturated Fat: 4g
- Unsaturated Fat: 8g
- Trans Fat: 0g
- Carbohydrates: 50g
- Fiber: 10g
- Protein: 15g
- Cholesterol: 30mg
Keywords: wraps, chickpea, feta, vegetarian, healthy, quick meal

Crispy Buffalo Chicken Taquitos (Perfect for Meal Prep)
Buffalo Chicken Taquitos: A Flavorful Twist on a Classic Favorite
Hello, dear foodies! Today, I’m thrilled to share a mouthwatering recipe that has quickly become a staple in my home: Buffalo Chicken Taquitos. If you’re someone who craves that spicy, tangy kick complemented by cheesy goodness, you’re in for a treat! These delightful rolled-up tortillas are perfect for game day snacking, casual gatherings, or even a cozy weeknight meal.
I’ve been in love with taquitos ever since I took my first bite of a crispy, golden one at a little Mexican joint back in college. The crunch, the taste, the sheer joy of dive-in-and-enjoy without a second thought—it was love at first bite! But as I grew a little older and kitchen-savvy, I started experimenting. What could I turn into a taquito? That’s when buffalo chicken entered the scene and changed everything. Let me tell you, these taquitos combine everything we love about buffalo chicken wings—spice, flavor, and some serious comfort food feels—into an easy, hand-held delight.
In this blog post, we’ll dive into the wonderful world of Buffalo Chicken Taquitos! You’ll get everything from a personal story related to this amazing dish, to detailed cooking instructions, serving suggestions, and variations to keep things exciting. So, grab your apron, and let’s turn your kitchen into a spicy haven!
A Taste of Nostalgia
Every dish has a memory tied to it, doesn’t it? For me, Buffalo Chicken Taquitos take me back to my college years. It was a chilly game day, and my friends and I gathered at my tiny apartment, bursting with excitement and a bit too much enthusiasm for our favorite team. We each brought something to share, and of course, I didn’t just want to stick to traditional snacks. I wanted something that would wow everyone without sending me into a cooking frenzy.
I decided to whip up these taquitos, inspired by my love for buffalo chicken wings. The aroma of shredded chicken mingled with the spicy buffalo sauce filled my kitchen, enticing my friends as they piled into my cozy space. Everyone crowded around the table, diving into the crispy taquitos, with blue cheese dressing drizzled on top. Laughter echoed as we cheered for our team, and in that moment, life felt perfectly complete.
That night wasn’t just about the food or the game; it was about connection. Those buffalo chicken taquitos became a hit and transformed into a regular fixture at our get-togethers. Today, they still hold that nostalgic joy while being an innovative twist on a classic favorite. Let me show you how to bring this recipe to life in your own kitchen!
Ingredients Gather Round
Now, let’s move on to the essentials! Here’s what you’ll need to make these delicious Buffalo Chicken Taquitos:
-
2 cups shredded cooked chicken: You can use rotisserie chicken for ease or boil and shred some chicken breasts. It’s one of those go-to ingredients that are versatile and saves a ton of prep time!
-
1/2 cup buffalo sauce: This is your key flavor player! Choose your favorite brand or make your own for a homemade touch. Feel free to adjust the spiciness to your liking; you can mix in a bit of honey if you prefer a milder flavor.
-
1 cup shredded cheese (cheddar or mozzarella): Cheese adds that creamy, indulgent element. Cheddar gives a sharper flavor while mozzarella provides that gooey melt. Choose your favorite, or even mix them up!
-
8 small flour tortillas: These are the perfect size for taquitos. If you want to add a touch of health, consider using whole wheat tortillas or corn tortillas for a gluten-free option.
-
Cooking spray: This helps achieve that golden, crispy finish without the need for excess oil. A light layer goes a long way!
-
Blue cheese or ranch dressing for dipping: No buffalo sauce dish is complete without a delicious dip on the side. Choose your favorite dressing, or make both for guests to sample!
Step-by-Step Instructions: Let’s Get Cooking
Now let’s get down to the nitty-gritty! Follow these easy steps to whip up crispy Buffalo Chicken Taquitos that will leave everyone coming back for more.
-
Preheat your Oven: Preheat your oven to 400°F (200°C). This is crucial for achieving that perfectly crispy taquito!
-
Prep the Filling: In a large mixing bowl, combine the shredded chicken and buffalo sauce. Mix until the chicken is evenly coated. This is your flavor base, where all that delicious spice comes together. Taste it here—if you’re feeling adventurous, sprinkle in a bit of garlic powder or onion powder for additional kick!
-
Add Cheese: Stir in the shredded cheese into the chicken mixture. This is where the magic happens—the cheese melts and binds, giving the taquitos that stretchy goodness we all love about cheesy dishes.
-
Assemble the Taquitos: Take a tortilla and lay it flat on a clean surface. Spoon about 2 tablespoons of the chicken mixture onto one end of the tortilla. Tightly roll the tortilla, enclosing the filling, and place it seam side down on a baking sheet. Repeat with the remaining tortillas. Pro tip: If you warm the tortillas slightly in the microwave (just a few seconds), they become more pliable and easier to roll without cracking.
-
Spray and Bake: Lightly spray each taquito with cooking spray to help them crisp up in the oven. Bake for about 20-25 minutes, until they are golden brown and crispy. Halfway through, feel free to flip them for an even crispier finish!
-
Serve and Enjoy: As soon as they come out of the oven, let them cool for a minute (or two!) and serve with your favorite dipping sauces. Prepare yourself for cheerful “oohs” and “aahs” when everyone digs in!
Serving Suggestions: Plating Perfection
Presentation matters, just like I mentioned in my introduction! To plate the taquitos, arrange them in a lovely circle on a platter, making them the star of the show. Drizzle a little extra buffalo sauce on top for flair, or sprinkle chopped green onions for a pop of color. A small bowl of blue cheese or ranch dressing should sit nearby for that essential dipping action. Remember, we eat with our eyes first!
Recipe Variations: Spice Things Up!
Ready to switch it up? Here are some creative variations for you to explore:
-
Spinach and Artichoke Taquitos: Mix in some sautéed spinach and artichoke hearts with your chicken, and consider using cream cheese instead of buffalo sauce for a creamy twist.
-
Barbecue Chicken Taquitos: Swap the buffalo sauce for your favorite barbecue sauce, and add some crispy bacon for a smoky flavor that’s absolutely addictive.
-
Cheesy Veggie Taquitos: Keep it vegetarian by using shredded zucchini, corn, and bell peppers as the filling along with cheese. It’ll be colorful and delicious!
-
Sweet and Spicy Taquitos: Mix honey into your buffalo sauce for a sweet-savory balance. This also makes it perfect for those with a less adventurous palate.
-
Spicy Black Bean Taquitos: For a vegan version, replace the chicken with mashed black beans and toss in chopped peppers and spices.
Chef’s Notes: Little Tidbits from My Kitchen
This recipe has an interesting journey. What started out as a game-day snack quickly turned into an irresistible fixture in my dinner rotations. They’re quick to make but feel like a special treat, which is why I love sharing them with friends and family.
One particular evening, I was pressed for time and tried using leftover Thanksgiving turkey instead of chicken. Guess what? They were a hit! If you ever find yourself with extra meats, know that you can adapt this recipe easily.
When your kitchen is filled with the spicy aroma of these taquitos baking away, trust me, it creates a cozy, irresistible atmosphere. You’ll definitely want to make these regularly!
FAQs and Troubleshooting
-
Q: My taquitos are coming out soggy. What am I doing wrong?
- A: Ensure you are using enough cooking spray and baking them at a high temperature. If you’re adding too much filling, that can also make them soggier, so stick to the recommended portion size!
-
Q: Can I make these ahead of time?
- A: Absolutely! You can freeze the uncooked taquitos on a baking sheet, then transfer them to a freezer bag. When you’re ready to eat, bake them straight from the freezer, adjusting the cooking time slightly longer.
-
Q: What’s the best way to reheat these?
- A: The oven is your best friend for reheating crispy food without making it soggy. Preheat the oven to 350°F (175°C) and heat for about 10-15 minutes until warmed through.
-
Q: Can I use gluten-free tortillas?
- A: Yes! There are plenty of gluten-free tortilla options available in stores now. They work just as well in this recipe!
Nutritional Info
While I aim to keep things light and fun, here’s a brief look at the nutritional aspect. For a serving of Buffalo Chicken Taquitos (2 taquitos), you can expect approximately:
- Calories: 250-300
- Protein: 15g
- Carbohydrates: 25g
- Fat: 12g
Remember that the nutrition facts may vary based on specific ingredients and cooking methods.
And there you have it—your complete guide to Buffalo Chicken Taquitos! I hope you feel inspired to gather some friends, roll up your sleeves, and savor these delightful bites. Cooking should never feel like a chore; it’s all about passion and connection. Enjoy the process, embrace the mess, and, most importantly, relish every bite. Happy cooking, friend!
PrintBuffalo Chicken Taquitos

Crispy Buffalo Chicken Taquitos filled with shredded chicken and spicy buffalo sauce, perfect for game day or casual gatherings.
- Prep Time: 10 minutes
- Cook Time: 25 minutes
- Total Time: 35 minutes
- Yield: 4 servings 1x
- Category: Snack
- Method: Baking
- Cuisine: American
- Diet: Gluten-Free Option
Ingredients
- 2 cups shredded cooked chicken
- 1/2 cup buffalo sauce
- 1 cup shredded cheese (cheddar or mozzarella)
- 8 small flour tortillas
- Cooking spray
- Blue cheese or ranch dressing for dipping
Instructions
- Preheat your oven to 400°F (200°C).
- Combine the shredded chicken and buffalo sauce in a large mixing bowl, mixing until evenly coated.
- Stir in the shredded cheese into the chicken mixture.
- Take a tortilla and lay it flat, spoon about 2 tablespoons of the chicken mixture onto one end, and roll tightly.
- Spray each taquito with cooking spray and place on a baking sheet.
- Bake for about 20-25 minutes until golden brown and crispy.
- Serve with your favorite dipping sauces.
Notes
For added flavor, consider mixing in a bit of garlic or onion powder into the chicken mixture. They can also be made ahead of time and frozen for later.
Nutrition
- Serving Size: 2 taquitos
- Calories: 300
- Sugar: 2g
- Sodium: 450mg
- Fat: 12g
- Saturated Fat: 6g
- Unsaturated Fat: 4g
- Trans Fat: 0g
- Carbohydrates: 25g
- Fiber: 1g
- Protein: 15g
- Cholesterol: 30mg
Keywords: Buffalo Chicken, Taquitos, Game Day Snacks, Spicy Snacks, Easy Recipes
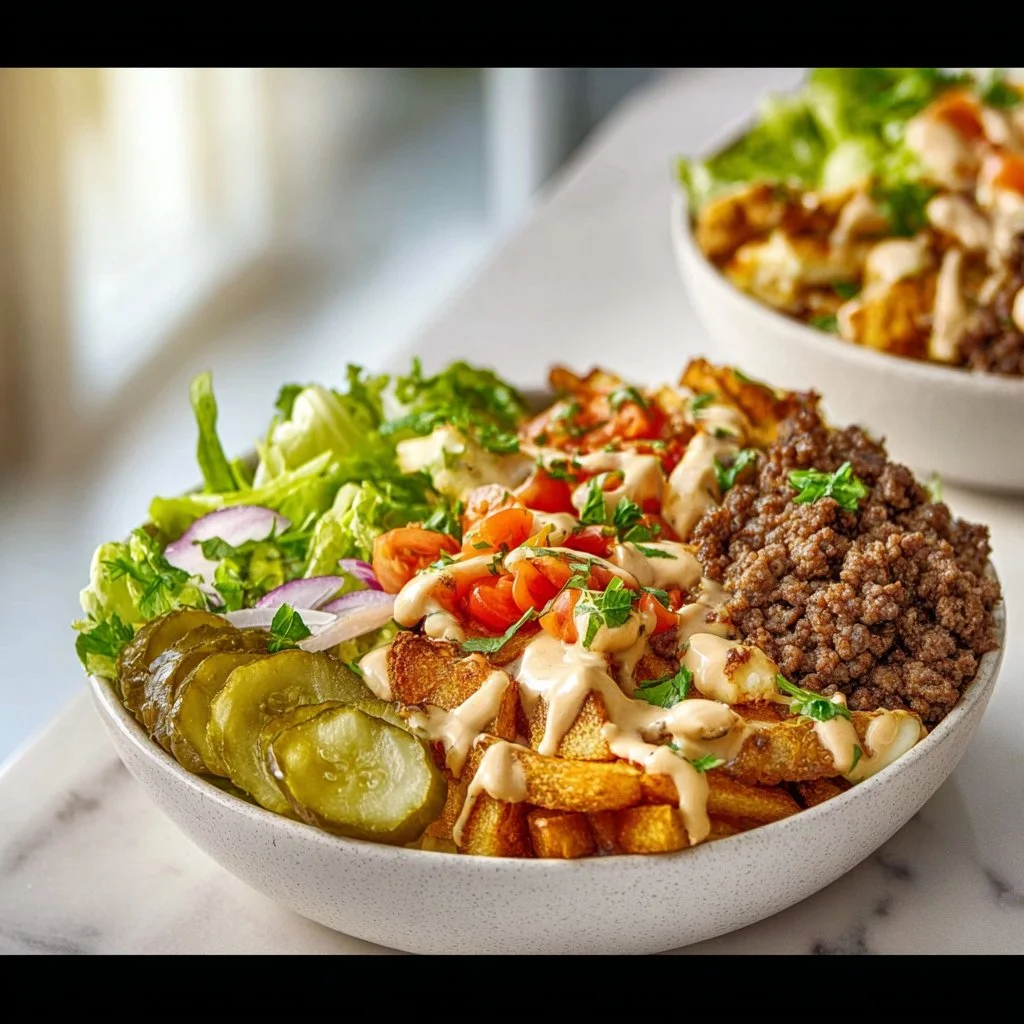
Burger Bowls
Burger Bowls: A Delectable Twist on Classic Burgers
If you’re anything like me, you love charming meals that pack flavor and fun without the fuss. Enter Burger Bowls — the delightful culmination of everything you love about a juicy burger, but without the bun mess. I can practically hear the happy voices echoing around your dinner table as everyone digs in. Picture this: a colorful bowl brimming with perfectly seasoned beef, golden crispy potatoes, and all of your favorite burger toppings. Who can resist that?
Today, I’m thrilled to share with you my beloved Burger Bowls recipe, which goes beyond the typical burger experience. It’s a wholesome meal that invites creativity and can even accommodate dietary preferences! The beauty of Burger Bowls is that they feel elegant while being incredibly simple to prepare. So grab your apron, pour something sparkling, and let’s get started!
Personal Story
My love affair with burgers dates back to summer barbecues at my grandparents’ house. I remember that mouthwatering scent wafting through the air as my grandfather fired up the grill, marinating and flipping patties with the kind of flair that only comes from years of practice. We kids would chase each other around, waiting impatiently for the first batch to come off the grill. My grandmother would stand ready with her homemade pickles, glistening under the golden afternoon sun, and heaps of freshly sliced tomatoes and crisp lettuce.
As I grew older, I realized my fondness for burgers went beyond the taste; it was about connection — the gathering of loved ones and shared laughter. So, when I created these Burger Bowls, I wanted to capture that spirit of joy and togetherness without losing the essence of flavor and satisfaction. Now, you can whip them up any night of the week or for elegant dinner parties, and still create that same warm atmosphere.
Ingredients
Here’s what you’ll need for these scrumptious Burger Bowls:
-
1 ½ teaspoons smoked paprika
A wonderful spice that adds warmth and a subtle smoky flavor. If you’re in a pinch, regular paprika works too! -
1 teaspoon garlic powder
Perfect for an easy burst of garlic flavor. Want to swap it out? Fresh minced garlic can add a delightful kick (just use about 2 cloves). -
1 teaspoon onion powder
This adds sweetness and earthiness. Can’t find it? Finely chopped fresh onions will do the trick! -
1 teaspoon dried oregano or mixed herbs
They brighten up the flavor like a sunny afternoon. Feel free to use Italian seasoning or even fresh herbs if you have them on hand. -
½ teaspoon salt
Enhances all your other flavors. Sea salt or kosher salt works best! -
¼ teaspoon black pepper
For an aromatic touch. Cracked black peppercorns will add even more depth. -
2-3 medium potatoes
These will transform into crispy, golden bites. Sweet potatoes also make a lovely swap for a sweeter, creamier base. -
2 tablespoons olive oil (divided)
This helps in achieving that crispy golden texture. Avocado oil can be a great alternative if you prefer it. -
500 grams lean beef mince
A classic choice for protein-packed goodness. If you’d like a leaner option, ground turkey works well too. -
Lettuce (shredded)
Offers freshness and crunch. I recommend romaine or iceberg, but mixed greens are delightful as well! -
Cheese (dairy-free or regular)
Adds a creamy, rich element. Feel free to experiment with cheese types — cheddar, mozzarella, or even vegan cheese — the sky’s the limit! -
Pickle slices
Essential for that tangy, crunchy finish. Any type of pickle will do, but dill adds a nice zest. -
4 tablespoons mayonnaise
For that irresistible creaminess. Consider swapping with Greek yogurt for a lighter option! -
1 tablespoon ketchup
A classic burger condiment. If you’re not a ketchup fan, look for spicy sauces for a zingy upgrade. -
1 teaspoon mustard (Dijon or yellow)
Adds a lovely sharpness. You could also try spicy mustard for extra bite! -
1 teaspoon pickle juice (from the jar of pickles)
A nifty way to infuse all that pickle flavor into your sauce. You can also use lemon juice for a zesty twist. -
½ teaspoon garlic powder
(for the dressing) — a double feature! Garlic lovers rejoice! -
½ teaspoon smoked paprika
A repeat here to keep the flavor consistent across the dish!
Step-by-Step Instructions
Let’s get cooking! You’ll find that the steps are straightforward and full of cooking tips to elevate your Burger Bowls to new heights.
-
Preheat Your Oven: Begin by preheating your oven to 425°F (220°C). A hot oven is key for crispy potatoes that rival any burger joint!
-
Prepare the Potatoes:
- Wash and cube the potatoes into bite-sized pieces. Uniform sizes ensure even cooking.
- In a bowl, drizzle 1 tablespoon of olive oil over your cubed potatoes. Sprinkle with smoked paprika, salt, and black pepper.
- Toss until evenly coated. This will give you that beautiful golden hue and flavor when roasted.
-
Roast the Potatoes:
- Spread the seasoned potato cubes onto a baking sheet lined with parchment paper. Make sure they have some space between them for optimal crisping.
- Roast in the oven for about 25-30 minutes, flipping them halfway through. Keep an eye out during the last few minutes to ensure they don’t burn!
-
Cook the Beef:
- While the potatoes are roasting, take a large skillet and heat the remaining tablespoon of olive oil over medium-high heat.
- Add the lean beef mince and sprinkle with garlic powder, onion powder, oregano, and salt.
- Break up the meat with a spatula as it cooks. Sauté until browned, about 7-10 minutes. I recommend using a meat thermometer to ensure it reaches an internal temperature of 160°F (71°C) for safety.
-
Make the Sauce:
- In a small bowl, mix together the mayonnaise, ketchup, mustard, pickle juice, ½ teaspoon garlic powder, and ½ teaspoon smoked paprika. Taste and adjust seasoning if necessary. This creamy sauce is what brings your Burger Bowl all together!
-
Assemble the Bowls:
- Grab your favorite bowl and start layering! Begin with a bed of shredded lettuce, followed by the cooked beef.
- Next, add a generous scoop of those crispy potatoes, some shredded cheese, and finish with pickle slices on top.
-
Drizzle & Enjoy:
- Finally, drizzle your sauce across the top of your masterpiece. Feel free to add any additional toppings or garnishes you love!
-
Take a Moment to Admire Your Work:
- Don’t forget to snap a picture! These bowls are not only incredibly tasty but stunning to look at.
Serving Suggestions
To plate these Burger Bowls beautifully, consider using clear or colorful bowls that highlight all of the vibrant ingredients. Drizzle the dressing generously on top, and for an extra touch, add a sprinkle of fresh herbs like parsley or chives.
If you want to take it a step further, serve with crispy onion rings on the side for that classic burger feel or even homemade fries for some extra carb love!
Recipe Variations
Here are some fun ways to customize your Burger Bowls:
-
Veggie Burger Bowls: Swap the beef for a plant-based protein (like lentils, chickpeas, or a premade veggie burger). It’s delicious and can accommodate your vegetarian friends!
-
Spicy Twist: Add minced jalapeños or a splash of hot sauce to your beef as it cooks for an added kick!
-
Bacon Lovers: Crumble some crispy bacon on top for an extra layer of flavor.
-
Keto-Friendly: Skip the potatoes and replace them with roasted cauliflower for a low-carb delight.
-
Buffalo Style: Toss your cooked beef in buffalo sauce before assembling your bowl for an extra spicy treat!
Chef’s Notes
These Burger Bowls have become a staple in my kitchen. I love how easily they adapt to whatever ingredients I have on hand! I often swap out toppings based on the season — for instance, during the summer, adding fresh tomatoes and grilled corn puts a vibrant twist on this dish.
And let’s chat about those crispy potatoes! One time, I didn’t cut them small enough, and it turned into a funny mishap in my kitchen. But those crispy chunks danced with flavor, and now I lean into them being a little thicker. Cooking is an adventure!
FAQs and Troubleshooting
-
What can I use instead of beef?
You can substitute it with ground turkey, chicken, or even crumbled tofu for a vegetarian option. -
How do I prevent my potatoes from getting soggy?
Be sure to spread them evenly on the baking sheet and avoid overcrowding. This ensures they roast rather than steam. -
How can I store leftovers?
Store the components separately in airtight containers in the fridge for up to three days. Reheat the beef and potatoes in the oven for optimum crispness. -
What should I do if my sauce is too thick?
You can thin it out with a splash of water or milk (dairy or plant-based depending on preference). Adjust seasonings afterward!
Nutritional Info
Approximate Per Serving:
- Calories: 450
- Protein: 28g
- Fat: 25g
- Carbohydrates: 35g
- Fiber: 4g
- Sugar: 3g
(Note: Adjust depending on specific ingredient brands and serving sizes.)
I hope you’re as excited as I am to make these Burger Bowls in your kitchen! Share your creations and tag me; I’d love to see how your dishes turn out. Sit back, enjoy the company, and as always, remember that good food is about bringing people together. Happy cooking! 🍔🥗
PrintBurger Bowls

A delightful twist on classic burgers that brings together juicy beef, crispy potatoes, and all your favorite toppings without the bun mess.
- Prep Time: 15 minutes
- Cook Time: 30 minutes
- Total Time: 45 minutes
- Yield: 4 servings 1x
- Category: Main Course
- Method: Baking
- Cuisine: American
- Diet: Gluten Free
Ingredients
- 1 ½ teaspoons smoked paprika
- 1 teaspoon garlic powder
- 1 teaspoon onion powder
- 1 teaspoon dried oregano or mixed herbs
- ½ teaspoon salt
- ¼ teaspoon black pepper
- 2–3 medium potatoes
- 2 tablespoons olive oil (divided)
- 500 grams lean beef mince
- Lettuce (shredded)
- Cheese (dairy-free or regular)
- Pickle slices
- 4 tablespoons mayonnaise
- 1 tablespoon ketchup
- 1 teaspoon mustard (Dijon or yellow)
- 1 teaspoon pickle juice
- ½ teaspoon garlic powder (for the dressing)
- ½ teaspoon smoked paprika (for the dressing)
Instructions
- Preheat your oven to 425°F (220°C).
- Wash and cube the potatoes into bite-sized pieces.
- Drizzle 1 tablespoon of olive oil over your cubed potatoes and sprinkle with smoked paprika, salt, and black pepper.
- Toss until evenly coated.
- Spread the seasoned potato cubes onto a baking sheet lined with parchment paper.
- Roast in the oven for about 25-30 minutes, flipping them halfway through.
- Heat the remaining tablespoon of olive oil in a large skillet over medium-high heat.
- Add the lean beef mince and sprinkle with garlic powder, onion powder, oregano, and salt.
- Break up the meat with a spatula and sauté until browned, about 7-10 minutes.
- Mix together the mayonnaise, ketchup, mustard, pickle juice, ½ teaspoon garlic powder, and ½ teaspoon smoked paprika in a small bowl.
- Grab your favorite bowl and layer with shredded lettuce, cooked beef, crispy potatoes, shredded cheese, and pickle slices on top.
- Drizzle your sauce across the top and enjoy!
- Snap a picture of your beautiful bowl!
Notes
These Burger Bowls can be customized to accommodate dietary preferences, making them versatile for any occasion.
Nutrition
- Serving Size: 1 serving
- Calories: 450
- Sugar: 3g
- Sodium: 500mg
- Fat: 25g
- Saturated Fat: 8g
- Unsaturated Fat: 12g
- Trans Fat: 0g
- Carbohydrates: 35g
- Fiber: 4g
- Protein: 28g
- Cholesterol: 70mg
Keywords: burger bowls, easy dinner, comfort food, family meal, customizable recipe

Deconstructed Healthy Hamburger Bowl
# Deconstructed Healthy Hamburger Bowl: A Flavorful Twist on a Classic

## Introduction

Hello, fellow food lovers! I’m so thrilled you’ve dropped by to explore one of my favorite go-to meals: the Deconstructed Healthy Hamburger Bowl. If you’re like me, you love the comforting taste of a juicy burger but are always in search of lighter, healthier options that don’t skimp on flavor. This vibrant bowl puts a delightful spin on the classic burger, transforming all your favorite ingredients into a fresh, colorful dish that’s not only satisfying but also packed with nutrients.

Picture this: it’s a sunny Saturday afternoon, and the smell of grilled burgers wafts through the air. You invite a few friends over for a casual cookout, where laughter and stories blend seamlessly with the sizzling from the grill. But the heavy feeling after devouring those burgers? Not so pleasant, right? That’s where the beauty of this Deconstructed Healthy Hamburger Bowl comes in — it captures all the flavors you love about a classic burger while making it a little more wholesome and colorful.

With simple ingredients like ground turkey or beef, fresh veggies, and creamy avocado, you’ll find that this bowl is not only a feast for the eyes but also a delightful experience for your taste buds. It’s a dish that embraces both elegance and approachability, just like the essence of Ivory Apron! So, whether you’re meal-prepping for the week or hosting friends for a laid-back dinner, this bowl is bound to impress.

Let’s dive into this delicious adventure as we cook together and create a memorable experience around your table.

## Personal Story

I’ll never forget my very first summer cookout. I was around ten years old, and my family gathered in the backyard, where my dad manned the grill. There was something magical about the way the burgers sizzled and the tantalizing aroma that filled the air. My father handed me a spatula and said, “You’re in charge of flipping!” The pride I felt at that moment, coupled with the joy of serving my family those perfectly charred patties, ignited a passion for cooking that’s only grown over the years.

Years later, I transformed those nostalgic flavors into a healthier rendition with this Deconstructed Hamburger Bowl. It’s a dish that reminds me of those carefree summer days spent outdoors, simplifying the process and maximizing the flavors. Each bite takes me back to that backyard where laughter reigned and delicious food was the star. I hope as you create your own version of this dish, you too will stir up fond memories while crafting something fresh and exciting.

## Ingredients

Let’s gather our ingredients! Here’s what you’ll need to create this mouthwatering Deconstructed Healthy Hamburger Bowl:

- **Ground Turkey or Beef**: The star protein! Ground turkey is leaner and lighter, making it an excellent alternative to beef. If you prefer beef, go for lean cuts to keep it healthier.

- **Cauliflower Rice**: A fantastic low-carb substitute for traditional rice. It adds volume and texture without the extra carbs. Frozen cauliflower rice is also convenient—just pop it in the microwave!

- **Cherry Tomatoes**: Sweet and juicy, cherry tomatoes pack a flavorful punch. You can use any color, including yellow or purple, for a vibrant look!

- **Lettuce**: Crisp and refreshing, lettuce adds crunch. Romaine or butter lettuce works wonderfully here. Feel free to use spinach for a twist!

- **Avocado**: Creamy and nutritious, avocado elevates the bowl with healthy fats. If you prefer a different flavor, you could use a dollop of Greek yogurt in its place.

- **Pickles**: Give that classic burger taste with zesty dill or bread-and-butter pickles. They lend a delicious crunch and brightness.

- **Onion**: Red onions are great for a sharp bite, while green onions provide a milder flavor. Use what you enjoy most!

- **Cheddar Cheese (optional)**: Add a little shredded cheese for that rich, melty goodness. Choose low-fat cheese for a healthier option.

- **Olive Oil**: A drizzle of this healthy fat adds moisture and flavor while sautéing the protein.

- **Salt and Pepper**: Essential seasonings that enhance all the flavors in the bowl.

- **Your Choice of Condiments**: Ketchup, mustard, and mayonnaise—add them according to your taste!

## Step-by-Step Instructions

Now that we have our ingredients ready, let’s roll up our sleeves and get cooking! Follow these steps for a delectable Deconstructed Healthy Hamburger Bowl:

1. **Prep the Cauliflower Rice:**
   - If you’re using frozen cauliflower rice, prepare it according to the package instructions. If you’re using fresh cauliflower, pulse florets in a food processor until rice-sized.
   - In a non-stick skillet, heat a drizzle of olive oil over medium heat. Add the cauliflower rice, season with a pinch of salt and pepper, and sauté for about 5-7 minutes until tender. Chef tip: If you want a nuttier flavor, try toasting the cauliflower rice until golden before sautéing!

2. **Cook the Ground Turkey or Beef:**
   - In the same skillet, push the cauliflower rice to one side and add more olive oil. If using beef, let it cook until browned, breaking it up with a spatula. If you're using turkey, it takes a bit longer to cook through.
   - Season the meat with salt and pepper. For a fun kick, toss in garlic powder or smoked paprika. Cook until everything is fully cooked (about 7-10 minutes).

3. **Prepare the Toppings:**
   - While the meat is cooking, chop your cherry tomatoes in half, slice the onions thinly, and wash your lettuce. Cut your avocado into wedges or cubes. Quick tip: To prevent browning, sprinkle a little lemon juice on any cut avocado!

4. **Assemble the Bowl:**
   - Once everything is cooked, it’s time to assemble! Start with a generous scoop of cauliflower rice at the base of your bowl. Add a big helping of your cooked protein (turkey or beef), followed by a colorful array of cherry tomatoes, sliced onions, lettuce, and avocado. Don’t forget the pickles!

5. **Add Finishing Touches:**
   - If you're feeling adventurous, sprinkle some shredded cheddar cheese on top (optional), and drizzle with your favorite condiments. I love a good swipe of ketchup and a dash of mustard—classic!

## Serving Suggestions

Time to enjoy! Serve your Deconstructed Hamburger Bowl in a beautiful, wide bowl to showcase the colorful layers. For an extra touch, add a sprig of fresh parsley or cilantro on top. Presenting your dish in a visually appealing manner elevates the dining experience, and trust me, it’ll impress your guests!

## Recipe Variations

Want to add your own flair? Here are some delicious twists to consider:

1. **Spicy Kick**: Add jalapeños or a drizzle of sriracha for some heat.

2. **Southwest Flair**: Incorporate black beans, corn, and a sprinkle of chili powder for a Tex-Mex vibe!

3. **Mediterranean Touch**: Include feta cheese, olives, and diced cucumbers, swapping out the ketchup for tzatziki sauce.

4. **Vegan/Vegetarian Option**: Swap the ground meat with lentils or a plant-based crumbles, and use vegan cheese!

5. **Grilled Flavor**: Fire up the grill and cook the turkey or beef patties separately. Serve them sliced over the other ingredients for that authentic burger taste.

## Chef’s Notes

One of the joys of cooking is how recipes can evolve over time. I started with a straightforward burger bowl; however, as I experimented, I discovered how vibrant and fresh ingredients could transform the dish into something beautiful and tasty. And let me tell you, the laughter and joy that fill my kitchen as I assemble these bowls with friends is an absolute treasure.

Whenever I make this, I remember my little backyard cookout, and it never fails to inspire me to gather loved ones around the table. Cooking is a love language, isn’t it? Each bowl in front of us is a celebration of flavors, memories, and connections.

## FAQs and Troubleshooting

**1. What if my cauliflower rice is too mushy?**
   - It often means it was cooked too long or at too high a heat. Try sautéing it on medium heat for less time, and ensure it’s not thawed too long beforehand to keep some of that crunch.

**2. How can I store leftovers?**
   - Store the components separately in airtight containers in the fridge for up to three days. This keeps everything fresh and helps maintain textures.

**3. Can I freeze this bowl?**
   - While cooked meat freezes well, I recommend avoiding freezing the salads or fresh toppings. They tend to lose their crunch once thawed. You can freeze just the cooked protein.

**4. What if I don’t have ground turkey or beef?**
   - Ground chicken, pork, or even canned beans or lentils are fantastic substitutes. Get creative with what you have on hand!

## Nutritional Info

*Nutritional info will vary based on your specific ingredients and serving size. This bowl is typically around 400 calories, packed with protein, healthy fats, and a bounty of vitamins from the fresh veggies!*

So, there you have it—your guide to creating a Deconstructed Healthy Hamburger Bowl that’s as incredible as it is nutritious! I hope you enjoy every moment spent in the kitchen, and remember: good food is about showing up, being present, and making memories. Happy cooking!
Deconstructed Healthy Hamburger Bowl

A vibrant and nutritious bowl that combines all the flavors of a classic hamburger in a lighter, healthier version.
- Prep Time: 15 minutes
- Cook Time: 20 minutes
- Total Time: 35 minutes
- Yield: 4 servings 1x
- Category: Main Course
- Method: Stovetop
- Cuisine: American
- Diet: Healthy
Ingredients
- 1 lb ground turkey or beef
- 2 cups cauliflower rice
- 1 cup cherry tomatoes, halved
- 2 cups lettuce, chopped
- 1 avocado, diced
- 1/2 cup pickles, sliced
- 1/2 onion, thinly sliced
- 1/2 cup cheddar cheese, shredded (optional)
- 2 tbsp olive oil
- Salt and pepper to taste
- Your choice of condiments (ketchup, mustard, mayonnaise)
Instructions
- Prep the cauliflower rice: If using frozen, prepare according to package instructions. If fresh, pulse florets until rice-sized. Heat olive oil in a skillet, add cauliflower rice, season with salt and pepper, and sauté for 5-7 minutes.
- Cook the ground turkey or beef: Push cauliflower rice to the side, add more oil, and cook the meat until browned, seasoning with salt and pepper; should take about 7-10 minutes.
- Prepare the toppings: Halve cherry tomatoes, slice onions, wash lettuce, and dice avocado, adding lemon juice to prevent browning.
- Assemble the bowl: Start with cauliflower rice, add cooked protein, then layer with tomatoes, onions, lettuce, avocado, and pickles.
- Add finishing touches: Top with cheddar cheese if desired and drizzle with condiments.
Notes
For a spicy kick, add jalapeños. To keep it vegan, substitute ground meat with lentils and use vegan cheese.
Nutrition
- Serving Size: 1 bowl
- Calories: 400
- Sugar: 6g
- Sodium: 500mg
- Fat: 18g
- Saturated Fat: 4g
- Unsaturated Fat: 8g
- Trans Fat: 0g
- Carbohydrates: 30g
- Fiber: 5g
- Protein: 30g
- Cholesterol: 80mg
Keywords: healthy burger bowl, deconstructed hamburger, low-carb meal, meal prep, nutritious dinner
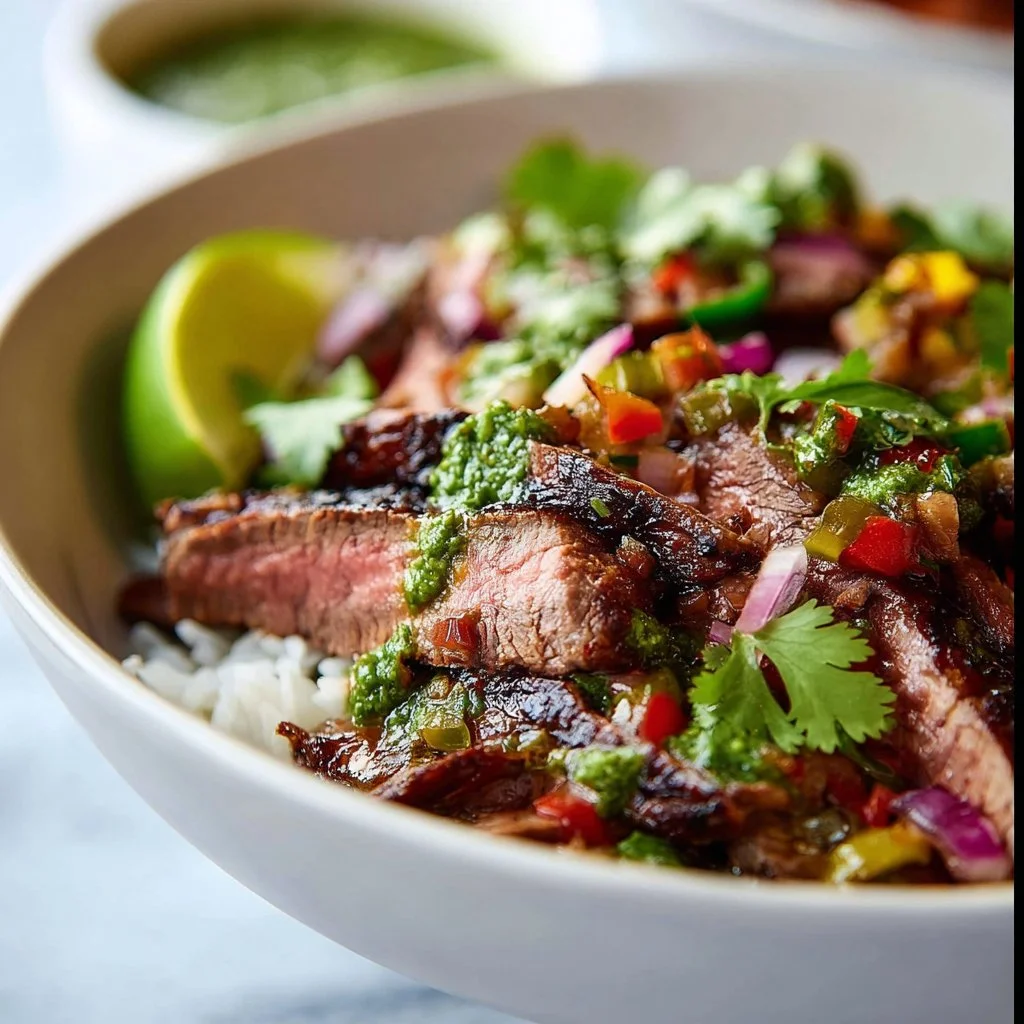
Flank Steak Bowl
Flank Steak Bowl: A Simplified Culinary Delight
Welcome to my kitchen, food lovers! Today, I’m thrilled to share with you one of my absolute favorite recipes — the vibrant, delicious, and oh-so-easy Flank Steak Bowl. Picture this: juicy, marinated flank steak, tender rice, hearty black beans, and a rainbow of fresh vegetables, all drizzled with zesty lime juice and sprinkled with feta cheese. Does it get any better than that? This recipe strikes the perfect balance between comfort and elegance, making it ideal for both casual weeknight dinners and gatherings with friends.
I remember the first time I ever made a steak bowl. It was one of those spontaneous nights where I had a little flank steak sitting in the fridge and a pantry filled with colorful veggies. I wanted something that was quick to whip up but also felt a bit fancy — just like my cooking philosophy of having elegance without intimidation. As I mixed and matched different ingredients, I realized how versatile and fun these bowls could be, showcasing seasonal produce and flavors. Each layer of the bowl is a tribute to my love for fresh ingredients and the joy of sharing meals that tell a story.
So grab your apron, roll up your sleeves, and let’s dive into creating a Flank Steak Bowl that’s packed with flavor, health, and a whole lot of love!
Personal Story
Flank steak has always held a special place in my heart (and stomach!). Growing up, my family often gathered around the dinner table for weekend barbecues, and the smell of a perfectly grilled flank steak would waft through our backyard. I remember watching my dad season the meat, chatting about his day while he flipped it on the grill, transforming it into a delicious centerpiece for our family meals. There was something magical about the anticipation while we waited for that first slice — the steak slightly pink in the middle and succulent with flavor.
One summer evening, I decided to recreate that memory and make my own version, and it just clicked. As I plated the rice, beans, and colorful vegetables, I felt my childhood memories blend with my present. I realized that cooking is so much more than just preparing meals; it’s about creating connections, sharing stories, and inviting loved ones to the table. And now, I love seeing the joy on my friends’ faces when they take their first bite of my Flank Steak Bowl. It’s truly a dish that brings everyone together, echoing a tradition that feels timeless yet personal.
Ingredients
Here’s what you’ll need to conjure up this delightful dish:
-
Flank Steak:
- A lean cut that packs a punch of flavor, perfect for grilling or pan-searing. If you’re looking for a substitution, sirloin or skirt steak can work well too. Just keep an eye on cooking time as these cuts can vary in tenderness.
-
Rice:
- Use your favorite variety — white, brown, or even quinoa for a twist! If you’re short on time, microwaveable rice packets can be your best friend. Otherwise, cook it on the stovetop for fluffy perfection.
-
Black Beans:
- Canned black beans are a convenient choice, packed with protein. If you prefer homemade, be sure to soak and cook them ahead of time. Canned kidney beans or chickpeas can also make a delightful replacement.
-
Corn:
- Fresh, frozen, or canned corn works wonders in this bowl. I love using grilled corn in the summer when it’s sweet and smoky. If you can find fresh corn on the cob, cut the kernels off and give them a quick char!
-
Fresh Vegetables (bell peppers, tomatoes, avocado):
- Add whatever’s in season or speak to your taste buds! Bell peppers (red, yellow, or green) are crunchy and sweet. Don’t forget avocados for that creamy, rich texture.
-
Feta Cheese (optional):
- Crumbled feta adds a tangy touch that elevates the dish. If you want a dairy-free alternative, try nutritional yeast for a cheesy flavor sans the cheese!
-
Olive Oil:
- Use high-quality extra virgin olive oil for marinating the steak and drizzling over your bowl for a robust flavor. Avocado oil is excellent if you prefer a higher smoke point.
-
Lime Juice:
- Fresh lime juice adds acidity and brightness. Lemon can work in a pinch, but lime gives that authentic sharp flavor that ties everything together.
-
Salt and Pepper:
- Simple seasonings elevate the flavor of your dish. Always use kosher salt for seasoning your meats; it helps in drawing out moisture while amplifying taste.
Step-by-Step Instructions
Let’s get cooking! Here’s how to create your irresistible Flank Steak Bowl, step by step.
-
Marinate the Flank Steak:
- Start by crafting a simple marinade. In a mixing bowl, combine ¼ cup of olive oil, the juice of 2 fresh limes, 2 teaspoons of salt, and a good pinch of freshly cracked pepper. Toss the flank steak in the marinade, ensuring every inch is coated. Let it marinate for at least 30 minutes (or up to overnight in the fridge if you have the time). This step is your golden ticket to elevate flavor!
-
Cook the Rice:
- While the steak is marinating, cook your rice according to the package instructions. Making homemade rice? Rinse it first to remove excess starch. Use a 2:1 water-to-rice ratio for fluffy outcomes. Adding a splash of olive oil and a pinch of salt in the cooking water can enhance the flavor instantly!
-
Prepare the Vegetables:
- While the rice cooks, chop your fresh vegetables. Dice the bell peppers, slice the tomatoes, and scoop out your avocado. Set them all aside in separate bowls. This not only keeps you organized but makes for a beautiful presentation when you assemble your bowl.
-
Cook the Flank Steak:
- After marinating, heat a skillet or grill over medium-high heat. If you’re grilling, sear the flank steak for 5-7 minutes on each side, depending on thickness and how well done you like it. Aim for medium-rare for the most tender result! If you’re using a skillet, add a little olive oil before placing the steak in — this prevents sticking and enhances browning.
-
Let It Rest:
- Once cooked, remove the steak from the heat and let it rest for about 10 minutes. This is a crucial step for juicy steak — it allows the juices to redistribute. While it rests, you can finish any remaining ingredients or condiments!
-
Assemble Your Bowls:
- Now for the fun part! In individual bowls, start layering your ingredients. Begin with a scoop of rice at the bottom. Next, add the black beans and corn, followed by the vibrant chopped veggies. Drizzle a little olive oil and fresh lime juice over everything for that zest!
-
Slice Your Steak:
- Thinly slice the flank steak against the grain for optimal tenderness. Don’t forget to let those beautiful juices flow; it’ll keep your bowl moist and delicious. Place slices of steak over the veggies.
-
Top It Off:
- Finish with crumbled feta cheese, a sprinkle of salt, and a final squeeze of lime juice. Voila! Your Flank Steak Bowl is ready to be devoured.
Serving Suggestions
When it comes to plating, remember that presentation is key! Use wide, shallow bowls to create an inviting visual. Start with a base of rice, layer on the beans and corn, artfully position your vibrant veggies, and finally, crown it with succulent steak slices. A sprinkle of fresh herbs like cilantro or parsley can add an extra pop of color. Serve with lime wedges on the side for guests to add brightness to their own bowls!
Recipe Variations
Feeling adventurous? Here are a few creative twists to make this dish yours:
-
Spicy Kick: Add diced jalapeños to your vegetables for an extra zing.
-
Taco Style: Swap the rice for crunchy tortilla chips and pile on toppings for a nacho-inspired bowl.
-
Cilantro Lime Rice: Mix fresh cilantro and lime juice into your cooked rice for a flavor boost.
-
Vegetarian Option: Substitute the flank steak with marinated grilled portobello mushrooms for a hearty veggie bowl.
-
Salsa Fiesta: Top with your favorite salsa instead of dressing for a fresh burst of flavor!
Chef’s Notes
One of my fondest experiences with this recipe happened when I invited friends over for a casual dinner. I had a mix-up in the freezer and ended up with an absurdly large flank steak! Instead of panicking, I decided to make a “Steak Bowl Bar.” Each guest was encouraged to build their own bowls, and it turned into a culinary adventure. Seeing everyone mix and match their ingredients and flavors was a beautiful reminder that cooking is all about sharing experiences. So don’t hesitate to make it your own and invite friends over for some delicious fun!
FAQs and Troubleshooting
1. What if my steak is tough?
- This could be due to overcooking, or if the meat wasn’t sliced against the grain. Always aim for medium-rare to medium for the most tender results.
2. Can I make this in advance?
- Absolutely! You can marinate the steak a day ahead and prep all your veggies, beans, and rice. Just assemble everything right before serving to keep it fresh.
3. What can I do if I don’t have a grill?
- A skillet or grill pan works perfectly! Just make sure your pan is hot enough to get a good sear.
4. How can I store leftovers?
- Store any leftovers in airtight containers in the fridge for up to 3 days. Keep ingredients separate if you want to maintain freshness, especially with avocado!
Nutritional Info
This Flank Steak Bowl is not only delicious but also incredibly nutritious! A serving can provide a balanced dose of protein (thanks to the flank steak and beans), healthy fats (from the avocado and olive oil), and a colorful array of vitamins (from the fresh vegetables).
So there you have it! A dish that’s not just a meal but an experience, full of heart and flavor. I hope you make it your own, celebrate beautiful moments around your table, and enjoy every flavorful bite. Happy cooking!
PrintFlank Steak Bowl
A vibrant and delicious Flank Steak Bowl featuring marinated flank steak, tender rice, hearty black beans, and fresh vegetables, all drizzled with zesty lime juice and sprinkled with feta cheese.
- Prep Time: 30 minutes
- Cook Time: 15 minutes
- Total Time: 45 minutes
- Yield: 4 servings 1x
- Category: Main Course
- Method: Grilling
- Cuisine: American
- Diet: Carnivore
Ingredients
- 1 lb flank steak
- 1 cup rice (white or brown)
- 1 can black beans, drained and rinsed
- 1 cup corn (fresh, frozen, or canned)
- 1 bell pepper, diced
- 1 tomato, sliced
- 1 avocado, sliced
- 1/2 cup crumbled feta cheese (optional)
- 1/4 cup olive oil
- Juice of 2 fresh limes
- 2 teaspoons kosher salt
- Freshly cracked pepper to taste
Instructions
- Marinate the flank steak by combining olive oil, lime juice, salt, and pepper in a bowl. Coat the steak and let it marinate for at least 30 minutes.
- Cook the rice according to package instructions.
- Prepare the fresh vegetables by chopping them and setting them aside.
- Cook the flank steak on a skillet or grill for 5-7 minutes per side for medium-rare.
- Let the steak rest for 10 minutes before slicing.
- Assemble the bowls starting with rice, then add black beans, corn, and vegetables.
- Slice the steak against the grain and place it on top of the bowl.
- Top with feta cheese, salt, and lime juice before serving.
Notes
Feel free to customize your bowl with seasonal vegetables and toppings. Great as a casual dinner or a gathering with friends!
Nutrition
- Serving Size: 1 serving
- Calories: 500
- Sugar: 5g
- Sodium: 800mg
- Fat: 20g
- Saturated Fat: 5g
- Unsaturated Fat: 10g
- Trans Fat: 0g
- Carbohydrates: 55g
- Fiber: 10g
- Protein: 35g
- Cholesterol: 60mg
Keywords: flank steak, steak bowl, healthy dinner, grilled steak, quick meal
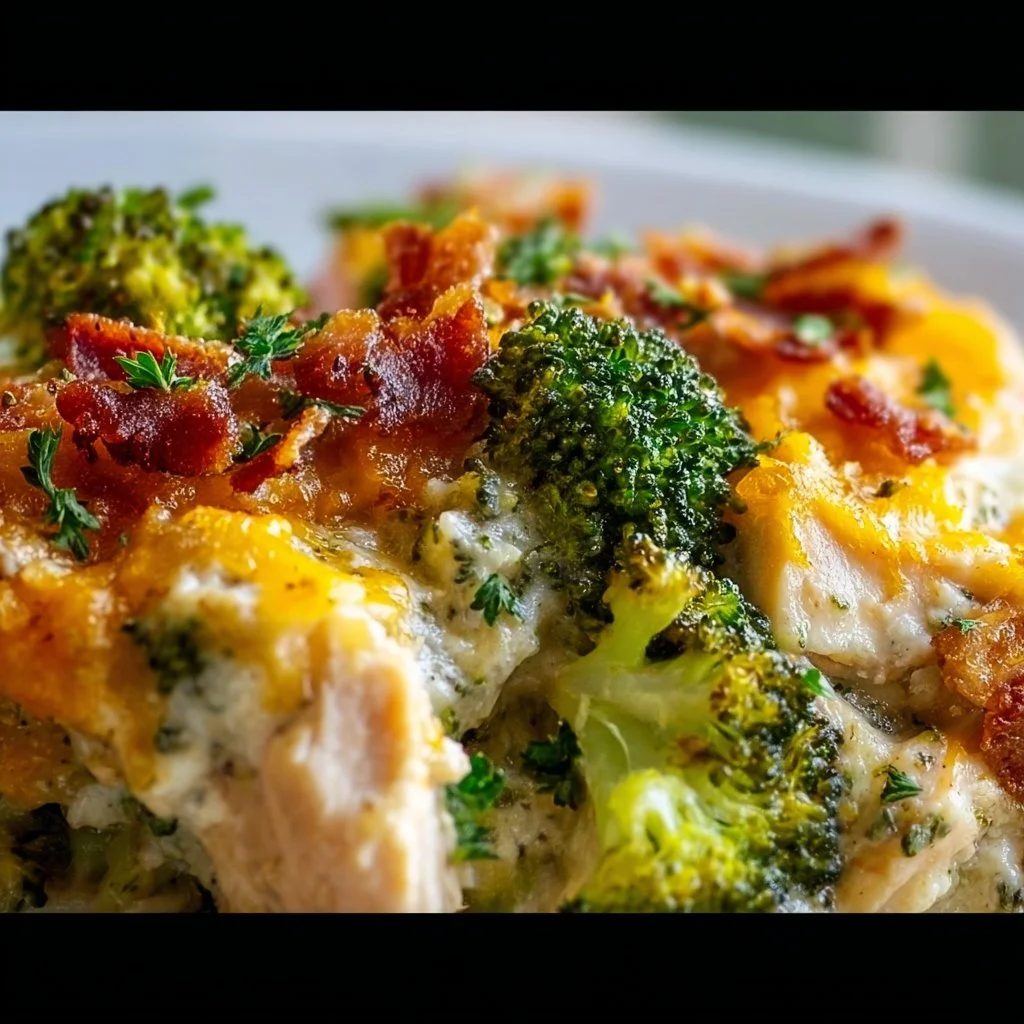
Healthy Low Carb Chicken Broccoli Casserole
# Healthy Low Carb Chicken Broccoli Casserole: A Comforting Classic with a Twist

## Introduction

Hello, lovely food lovers! Welcome to my kitchen, where the aroma of deliciously prepared meals fills the air and every dish tells a story. Today, I'm thrilled to share one of my all-time favorites: **Healthy Low Carb Chicken Broccoli Casserole**. This dish isn't just another casserole; it's an epitome of comfort food that celebrates nutrition without sacrificing flavor. Whether you’re on a low-carb diet, looking for a quick weeknight meal, or aiming to impress your guests, this casserole checks all the boxes!

Imagine a cozy evening spent with family or friends, laughter echoing around the dinner table while this creamy, cheesy goodness fills your plates. The combination of tender chicken, vibrant green broccoli, and a sprinkle of cheesy goodness creates not only a delightful dish but also a snapshot of cherished moments spent around the table.

At Ivory Apron, I believe that every meal is an opportunity to create memories, and this casserole is perfect for that! So, roll up those sleeves and dust off your apron—let's dive into the heart of this wholesome yet indulgent recipe!

## Personal Story

The first time I made chicken broccoli casserole was during a chilly fall evening in college. My best friend, Sarah, and I were crammed into our tiny apartment kitchen, determined to whip up something magical with the random ingredients we had on hand. With limited funds and even fewer cooking skills, we grabbed some rotisserie chicken, a bag of frozen broccoli, and a hodgepodge of spices from the cupboard.

As we mixed everything together, the kitchen filled with laughter and the occasional “oops!” as we tried to navigate our way around the recipe. When it finally came out of the oven, bubbling and golden, we served it up on mismatched plates while enjoying a glass of the cheapest wine we could find! That night, the casserole was more than just food; it represented friendship, creativity, and the magic that happens when you put love into cooking. I’ve since worked on perfecting the recipe, swapping out high-carb ingredients for healthier ones, making it not only delicious but good for you!

## Ingredients

Here’s what you’ll need to make this fabulous **Healthy Low Carb Chicken Broccoli Casserole**. Let’s break it down:

- **2 cups cooked chicken, shredded**: You can use leftover rotisserie chicken or poach your chicken breasts. Need a quick sub? Turkey works great as well!

- **2 cups broccoli florets, steamed**: Fresh or frozen broccoli will do the trick. If you're feeling adventurous, try swapping it out for cauliflower or asparagus for a different taste.

- **1 cup shredded cheese (like cheddar or mozzarella)**: Cheese adds creaminess and flavor. Prefer a lighter option? Use part-skim mozzarella or a dairy-free cheese for a vegan version.

- **1 cup sour cream or Greek yogurt**: This adds creaminess and tang. Greek yogurt is the healthier choice, packed with protein. You can also try cottage cheese blended until smooth for a similar texture.

- **1 teaspoon garlic powder**: A great way to introduce flavor without being overpowering. If you prefer fresh, minced garlic works too!

- **1 teaspoon onion powder**: Another essential flavor booster that makes the casserole sing.

- **Salt and pepper to taste**: Season to your preference. Remember, seasoning is key!

- **1/2 cup grated Parmesan cheese (optional)**: Adds a delish crust on top! If you’re looking for a gluten-free option, make sure to check your cheese label.

- **1 tablespoon olive oil or butter (for greasing the casserole dish)**: Olive oil is a heart-healthy choice, but if you want a richer flavor, butter is the way to go!

## Step-by-Step Instructions

Ready to get cooking? Here’s how to put together this yummy casserole, step-by-step:

### 1. Preheat the Oven

Preheat your oven to 350°F (175°C). This step is crucial for even cooking—no one likes a cold center in their casserole!

### 2. Prepare the Ingredients

While your oven is warming up, gather your ingredients and get everything ready. If your chicken isn't shredded yet, do that now! Use two forks or your hands to shred it into bite-sized pieces. Also, steam your broccoli florets until they are bright green and just tender—around 2-3 minutes if using the microwave (just don't overcook them).

### 3. Grease the Casserole Dish

Grab a 9x13-inch casserole dish and coat it with olive oil or butter to prevent sticking. A little grease goes a long way, ensuring that your creamy casserole comes out effortlessly.

### 4. Mix the Ingredients

In a large mixing bowl, combine the shredded chicken, steamed broccoli, shredded cheese, sour cream or Greek yogurt, garlic powder, onion powder, salt, and pepper. Stir until everything is well incorporated. Pro tip: Use a spatula to fold the mixture gently to avoid breaking the broccoli florets further—nobody wants a mushy casserole!

### 5. Transfer to Casserole Dish

Scoop the mixture into your greased casserole dish and spread it evenly. This is where you can get creative: smooth it out with your spatula for that lovely surface area that will get all toasty in the oven.

### 6. Top with Parmesan

If you're feeling cheesy (and who isn't?), sprinkle the grated Parmesan on top for a wonderful golden crust. It’s a showstopper and adds an extra layer of flavor!

### 7. Bake It Up

Slide your casserole into the preheated oven and let it bake for about 30-35 minutes or until it's bubbly and golden on top. You’ll know it’s ready when you see that lovely cheese crust. Keep an eye on it—your kitchen will smell divine, and you might just accidentally start drooling!

### 8. Let It Rest

Once out of the oven, let your casserole sit for about 5-10 minutes. I know it’s hard to resist the tantalizing aroma, but letting it rest will help it firm up a bit, making it easier to serve.

## Serving Suggestions

Now it's the moment of truth! Serve your casserole straight from the dish, and don't be shy with those portions. A sprinkle of fresh herbs, like parsley or basil, on top adds a beautiful pop of color and freshness. Pairing it with a light salad or some crusty low-carb bread makes for a satisfying meal. Bon appétit!

## Recipe Variations

Looking to spice things up? Here are some creative twists you can try:

- **Add Spices**: Toss in some red pepper flakes for a kick or smoked paprika for a warm undertone.
- **Vegetable Medley**: Incorporate other veggies like spinach, bell peppers, or mushrooms for added nutrients and flavors.
- **Different Proteins**: Swap chicken with cooked shrimp or ground turkey for a change of pace.
- **Cheese Swap**: Experiment with different cheeses like pepper jack for extra heat or Swiss for a milder flavor.
- **Low-Carb Crust**: For a crispy topping, mix crushed pork rinds or almond flour with cheese as a substitute for traditional breadcrumbs.

## Chef’s Notes

Ah, this casserole has a special place in my heart. It has evolved from a college concoction to something special I serve during gatherings with friends and family. Sometimes I swap the broccoli for seasonal vegetables, and it never fails to surprise and delight! Plus, I love that it’s a one-dish wonder, which means less cleanup—yay!

If you ever catch yourself with leftover casserole (not likely!), it reheats beautifully and can be frozen for a rainy day. Trust me, you'll want to keep this recipe in your arsenal!

## FAQs and Troubleshooting

**1. Can I use raw chicken in the casserole?**
While pre-cooked chicken gives the best results, you can use raw chicken. Just ensure to cook it for about 45-50 minutes in the oven at 350°F (175°C).

**2. What if my casserole is too watery?**
If your casserole comes out watery, it may be due to excess moisture in the broccoli. Ensure to fully steam and drain the broccoli before adding it to the mixture. You can also add a tablespoon of flour or cornstarch to help thicken it.

**3. How should I store leftovers?**
Store any leftovers in an airtight container in the fridge for up to 3-4 days. To reheat, simply pop it back in the oven or microwave until warmed through.

**4. Is this dish kid-friendly?**
Absolutely! The creamy cheese and chicken make it appealing to kids, and the broccoli adds a nutritious crunch. You might even want to swap the broccoli for their favorite vegetable!

## Nutritional Info

(If applicable, this section can be created based on standard nutritional guidelines for the recipe. Here is a simple example that can be expanded upon.)

- Calories: Approximately 350 per serving
- Protein: 30g
- Carbohydrates: 8g
- Fat: 20g
- Fiber: 3g

---

And there you have it—your delicious and healthy low carb chicken broccoli casserole, ready to impress! I hope you'll invite your loved ones to join you on this culinary journey. Let’s create beautiful memories together because every meal counts. Enjoy your cooking adventure!

Happy Feasting,
Savannah Pierce
Healthy Low Carb Chicken Broccoli Casserole

A delicious and nutritious low-carb chicken and broccoli casserole that is creamy and comforting.
- Prep Time: 15 minutes
- Cook Time: 35 minutes
- Total Time: 50 minutes
- Yield: 4 servings 1x
- Category: Main Course
- Method: Baking
- Cuisine: American
- Diet: Low Carb
Ingredients
- 2 cups cooked chicken, shredded
- 2 cups broccoli florets, steamed
- 1 cup shredded cheese (like cheddar or mozzarella)
- 1 cup sour cream or Greek yogurt
- 1 teaspoon garlic powder
- 1 teaspoon onion powder
- Salt and pepper to taste
- 1/2 cup grated Parmesan cheese (optional)
- 1 tablespoon olive oil or butter (for greasing the casserole dish)
Instructions
- Preheat your oven to 350°F (175°C).
- Prepare your ingredients by shredding the chicken and steaming the broccoli until bright green.
- Grease a 9×13-inch casserole dish with olive oil or butter.
- Mix the chicken, steamed broccoli, cheese, sour cream or Greek yogurt, garlic powder, onion powder, salt, and pepper in a large bowl.
- Transfer the mixture to the greased casserole dish and spread it evenly.
- Top with grated Parmesan cheese if desired.
- Bake for about 30-35 minutes or until bubbly and golden.
- Let the casserole sit for 5-10 minutes before serving.
Notes
Pair with a light salad or low-carb bread for a complete meal. This dish is kid-friendly and can be adapted with different veggies or proteins.
Nutrition
- Serving Size: 1 serving
- Calories: 350
- Sugar: 3g
- Sodium: 400mg
- Fat: 20g
- Saturated Fat: 10g
- Unsaturated Fat: 8g
- Trans Fat: 0g
- Carbohydrates: 8g
- Fiber: 3g
- Protein: 30g
- Cholesterol: 80mg
Keywords: chicken, broccoli, casserole, low carb, healthy, comfort food
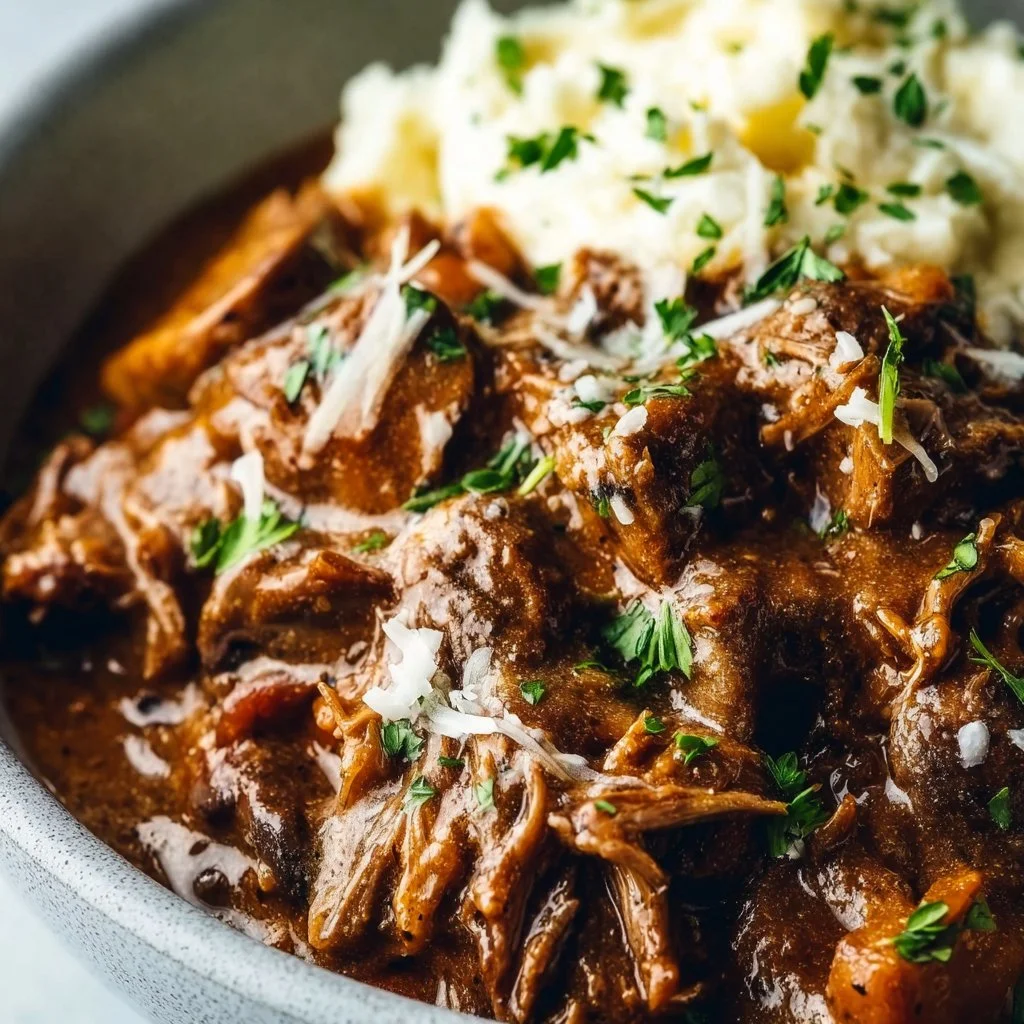
16 Easy Keto Crockpot Recipes You’ll Love
16 Easy Keto Crockpot Recipes You’ll Love
Hey there, fellow food lovers! I’m so excited to dive into the world of Keto cooking with you. Let’s fire up those crockpots and make magic happen! Cooking should be both fun and fulfilling, and with the right recipes, it can also be incredibly tasty, even when you’re sticking to those low-carb values!
If you’re anything like me, you might have felt the weight of culinary decisions during a busy week—turning to the same old takeout or quick microwave meals. Well, let me tell you, there’s a better way! That’s where the trusty crockpot comes in. It’s the unsung hero of the kitchen that marries convenience with delicious flavors. Perfect for those with a busy lifestyle, it allows you to toss in your ingredients, set it, and forget it—while enjoying the divine aromas wafting through your home.
Whether you’re busy taking care of a family, chasing work deadlines, or simply giving yourself the needed time for self-care, these 16 easy Keto crockpot recipes will keep you satisfied without sacrificing time or flavor. So grab your apron, lace up those cooking shoes, and let’s embark on a flavorful journey!
Let’s get ready to explore delightful comfort food that fits your Keto lifestyle. We’ll have cheesy casseroles, zesty soups, and even some finger-licking meats that will make your taste buds dance. Plus, I’ll sprinkle in some personal stories and cooking tips along the way. Are you ready? Let’s dig in!
Personal Story
I can still remember the first time I unboxed my crockpot. The sleek design and promise of slow-cooked goodness thrilled me. I was about to host my first dinner party, and I wanted everything to be perfect. After tinkering with a few recipes, I settled on a classic: a hearty beef stew. I tossed in chunks of tender beef, vibrant carrots, and fragrant herbs, with a hint of red wine for that touch of class.
As the stew simmered away, I was captivated by the aromas filling my home. My friends raved about the flavors, and I realized this was my moment—my culinary breakthrough! Everyone gathered around the table, savoring each bite and lingering over dessert. That night made me appreciate the beauty of meals prepared with love, and that’s what I want to share with you: connections made around the table, without the stress!
Fast forward to today, I’ve crafted numerous easy Keto crockpot recipes that continue to capture the essence of home-cooked comfort. Honestly, nothing beats the joy of coming home to a warm, hearty meal that you’ve prepped with ease earlier in the day. It’s the kind of magic that feels like an old tradition, remade for modern-day living.
Ingredients
Here’s a quick breakdown of the key ingredients you’ll often find in our Keto crockpot recipes. This list comes not only with basic necessities but also with some handy substitutions and chef insights!
Common Ingredients:
-
Chicken Thighs or Breasts
- A lean protein packed with flavor. Chicken thighs tend to be juicier than breasts, but both work beautifully. You can swap in turkey if you’re looking for something lighter.
-
Ground Beef or Turkey
- Perfect for meatballs or casseroles. Both deliver a hearty base for any good dish. If you want it leaner, opt for ground turkey, but make sure you add good spices to keep it flavorful!
-
Cauliflower
- A fabulous low-carb alternative to grains and starchy vegetables. You can make cauliflower rice or mash it just like potatoes! For a little color, consider using broccoli or zucchini.
-
Heavy Cream
- Adds richness and depth. If you’re watching calories, you can swap in coconut cream or sunflower cream for a dairy-free alternative!
-
Bone Broth
- Nutrient-dense and perfect for soups and stews. If you don’t have bone broth, chicken or vegetable broth works just as well, though you may miss that extra collagen boost.
-
Cheddar Cheese
- Because really, what’s comfort food without cheese? If you’re lactose intolerant, go with a hard-aged cheese like Gouda or a dairy-free cheese product.
-
Spices (like garlic, paprika, and cumin)
- Elevate the flavors of your dish! Don’t be shy—mix and match. Fresh herbs like rosemary or thyme can also brighten a recipe!
These ingredients are serving as the building blocks of our favorite crockpot creations. With a little imagination, you can combine them in countless ways to keep dinnertime exciting and Keto-friendly!
Step-by-Step Instructions
Now that we’ve covered the essential ingredients, let’s get into the cooking process! We’ve got deliciousness ahead of us with our Keto crockpot recipes, and I promise you—it’s as easy as 1-2-3!
Recipe #1: Keto Chicken and Mushroom Soup
-
Prep your ingredients.
- Start by chopping 1 onion, 2 carrots, and 2 cloves of garlic. Don’t stress about perfect cuts—rustic is beautiful!
-
Sear the chicken.
- Heat a tablespoon of olive oil in a skillet over medium heat. Add the chicken thighs and sear for 3-4 minutes on each side until golden brown. This step adds loads of flavor.
-
Combine in the crockpot.
- Toss the mushrooms, carrots, onions, and garlic into the crockpot. Add the seared chicken on top.
-
Add the liquid.
- Pour in 4 cups of chicken bone broth, a splash of heavy cream, and season with salt, pepper, thyme, and rosemary.
-
Set and forget.
- Cover and cook on low for 6-8 hours, or high for 3-4 hours. The smell in your kitchen will have you dreaming about a warm bowl of soup!
-
Finish with a flourish!
- About 15 minutes before serving, stir in a handful of fresh spinach. It’s the perfect touch of green, plus it wilts down beautifully.
Recipe #2: BBQ Pulled Pork
-
Gather your spices.
- Start by mixing together 2 tablespoons smoked paprika, 1 tablespoon garlic powder, 1 tablespoon onion powder, 2 teaspoons cayenne, salt, and pepper. Rub this glorious blend all over your pork roast.
-
Secure and sear!
- Place the pork in a hot skillet with olive oil. Sear it for about 2-3 minutes on each side until caramelized!
-
Place in the crockpot.
- Transfer the pork to your crockpot, and pour over 1 cup of sugar-free BBQ sauce. Give it a gentle toss to coat.
-
Let it slow cook.
- Cover and cook on low for 8-10 hours. Walk away and let the flavors meld!
-
Shred and serve!
- With two forks, shred that glorious pork and mix it back into the sauce. Serve on lettuce wraps or over cauliflower rice for a Keto-friendly delight!
Recipe #3: Beef and Broccoli Stir Fry
-
Prep that beef!
- Slice 1 lb. of flank steak against the grain into thin strips.
-
Toss in soy sauce.
- In a bowl, mix the beef with ⅓ cup of coconut aminos (a soy sauce alternative), 1 tablespoon of sesame oil, and some minced garlic. Let it marinate for 30 minutes—yum!
-
Crockpot magic:
- Pour the marinated beef into the crockpot. Add 2 cups of broccoli florets, and if you like a little heat, toss in some sliced jalapeños!
-
Cook and let it ride.
- Cover and cook on low for 4-5 hours. If you’re in a bit of a hurry, you can go high for around 2-3 hours.
-
Serve with style.
- Just before serving, drizzle with sesame oil and sprinkle with sesame seeds. A drizzle of lime juice adds a nice pop!
With just a little prep and time, you can have these delectable meals ready to go! Don’t be afraid to mix and match these instructions; cooking should be all about what speaks to your taste buds!
Serving Suggestions
Serving your wonderful canned creations is as important as the cooking itself. It’s about creating a meal that looks inviting, and nobody can resist!
For our Keto Chicken and Mushroom Soup, ladle it into colorful bowls and add a sprinkle of fresh parsley on top for garnish. Pair it with a side salad and call it a hearty meal.
With the BBQ Pulled Pork, consider building delicious little sandwiches with large romaine leaves as the bun and topping it with homemade coleslaw made with shredded cabbage and a pinch of apple cider vinegar. It’s a fresh touch that rounds out the smoky flavors.
For the Beef and Broccoli Stir Fry, please serve it over a bed of cauliflower rice and top with sliced green onions for a pop of color. Everything tastes better when it looks beautiful, right?
Recipe Variations
Now that we’ve gotten a taste of some classic recipes, here are a few fun variations to keep things interesting:
-
Italian Twist: Add marinara sauce, Italian seasoning, and olives to your chicken stew for a Mediterranean flair.
-
Spicy Option: For a kick, sprinkle in some red pepper flakes or sriracha into any of your dishes.
-
Cauliflower Versatility: Use cauliflower not just as rice or mashed chunks but also in gratins. Just mix steamed cauliflower with cheese, cream, and seasonings for a fabulous side!
-
Zesty Lemon Chicken: Splash some lemon juice or add slices of lemon into your chicken and mushroom soup for that refreshing zing.
-
Curry Flavor Explosion: Add coconut milk, curry paste, and veggies like bell peppers and spinach for an enticing curry dish.
Have fun with these ideas! Cooking is more than just following a recipe; it’s about expressing creativity!
Chef’s Notes
Over the years, I’ve learned that our favorite recipes might evolve. I started with basic Keto adaptations and have grown bolder with spices and flavors as I ventured into different cuisines. I often find myself browsing through family and friends’ cookbooks, drawing inspiration, and giving that classic recipe a Keto-friendly twist!
One “oops” moment in the kitchen was when I confused cayenne pepper for paprika while preparing spicy chicken. Let me tell you, that was memorable! But you know what? The guests loved it, and it became a new staple for dinner parties. Always be open to using what’s on hand and have fun with flavor—it can lead to delightful surprises!
FAQs and Troubleshooting
1. Why is my meat tough?
If your meat ends up tough, it may not have cooked long enough. Make sure you cook it on low for that tender melt-in-your-mouth goodness. Don’t rush the process!
2. Can I use frozen meat?
Absolutely! Just keep in mind that it may take a bit longer to cook. Make sure to adjust your timing accordingly.
3. Why are my vegetables mushy?
If you want them to retain their texture, add them later in the cooking process, especially if they are delicate vegetables like spinach or zucchini. You can add them in the last hour of cooking.
4. How do I store leftovers?
Let the food cool completely before transferring it to airtight containers. Most of these recipes can be stored in the fridge for up to 4 days, or you can freeze single portions for a quick meal whenever hunger strikes!
Nutritional Info
It’s essential to keep track, especially with a Keto lifestyle. Many of these recipes will be low in carbs, high in healthy fats, and packed with protein! Always refer to the specific ingredient amounts when calculating your complete dietary needs.
And there you have it—a collection of fabulous Keto crockpot recipes to enjoy! I hope you find joy in these meals, gathering loved ones around your table with ease and grace. Let’s keep those crockpots cooking, and remember, every meal is an opportunity to create memories.
Tie on your apron, pour something bubbly, and let’s whip up something scrumptious together. Happy cooking!
Print16 Easy Keto Crockpot Recipes You’ll Love
Explore easy and fulfilling Keto recipes perfect for your busy lifestyle, featuring comforting meals made in a crockpot.
- Prep Time: 15 minutes
- Cook Time: 480 minutes
- Total Time: 495 minutes
- Yield: 4 servings
- Category: Main Course
- Method: Crockpot
- Cuisine: Keto
- Diet: Keto
Ingredients
- Chicken Thighs or Breasts
- Ground Beef or Turkey
- Cauliflower
- Heavy Cream
- Bone Broth
- Cheddar Cheese
- Spices (like garlic, paprika, and cumin)
Instructions
- Prep your ingredients by chopping vegetables.
- Sear the chicken for added flavor.
- Combine all ingredients in the crockpot.
- Add liquid and seasonings.
- Set to low for 6-8 hours or high for 3-4 hours.
- Finish with fresh greens for garnish.
Notes
For a refreshing twist, add lemon juice or mix in various spices for flavor.
Nutrition
- Serving Size: 1 serving
- Calories: 450
- Sugar: 4g
- Sodium: 500mg
- Fat: 22g
- Saturated Fat: 8g
- Unsaturated Fat: 10g
- Trans Fat: 0g
- Carbohydrates: 10g
- Fiber: 2g
- Protein: 35g
- Cholesterol: 85mg
Keywords: Keto, Crockpot, Easy Recipes, Healthy Meals, Low-Carb
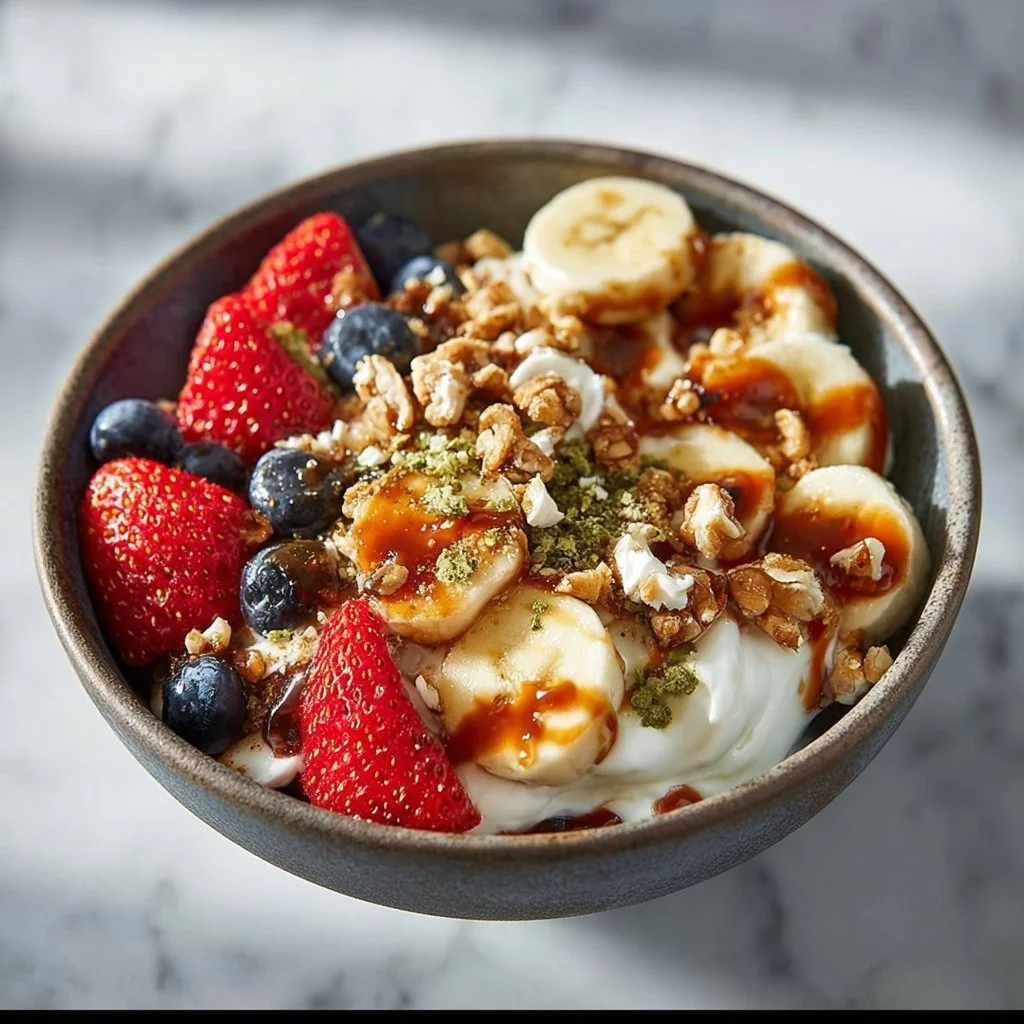
Hearty Breakfast Power Bowl
Hearty Breakfast Power Bowl: A Vibrant Start to Your Day!
Hey there! I’m so excited to share one of my favorite ways to kick off the day with you—a Hearty Breakfast Power Bowl! This isn’t just any breakfast; it’s a colorful, nutrient-packed mélange of flavors and textures that will fuel you for whatever the day throws at you. You know those mornings when you wake up feeling like you need something extra to jump-start your energy? Well, this bowl is my secret weapon.
Imagine starting your morning with a delightful blend of fluffy eggs, vibrant veggies, creamy Greek yogurt, and a medley of fresh berries. It’s like a party in a bowl! The beauty of this dish lies in its versatility—whether you’re whipping it up on a leisurely weekend or prepping it for a hectic weekday, it’s your canvas to create.
I also love that you can tailor this breakfast to suit your mood or whatever ingredients you have on hand. Are you craving a little crunch? Toss in some nuts! Want a hint of sweetness? Drizzle on some honey or maple syrup! This bowl screams “you” and is perfect for gathering around the table with loved ones or just treating yourself to a well-deserved breakfast.
So, grab your apron, and let’s dive into this wholesome journey. Trust me, once you try this Hearty Breakfast Power Bowl, you’ll want to bring it into your regular breakfast rotation!
Personal Story
I still remember the first time I crafted my ultimate breakfast bowl. It was a chilly Saturday morning, and my kitchen was filled with the warm, welcoming aromas of sautéed vegetables and eggs. I had a couple of friends over for a brunch gathering, and I wanted to create something that felt hearty yet colorful. I pulled out all my favorite ingredients: bright bell peppers, fresh spinach, and those sweet, succulent berries.
As I prepped everything, laughter and stories floated around the kitchen, and I felt a wave of contentment wash over me. When we finally sat down to dig in, it wasn’t just the food that was nourishing; it was the connection we shared. We piled our bowls high, adding dollops of Greek yogurt and a drizzle of honey, transforming each bite into a delightful explosion of flavor. It became a cherished ritual among my friends and me—this vibrant breakfast bowl became more than just a dish; it became a symbol of togetherness and those precious moments shared over good food. It’s a little tradition I look forward to every season, reminding me that the simplest ingredients can create beautiful memories.
Ingredients
Here’s what you’ll need to create your Hearty Breakfast Power Bowl:
-
Eggs (2 per serving)
Eggs are the stars of the show! Packed with protein and healthy fats, they keep you energized. If you prefer a plant-based option, you could whisk up a tofu scramble instead! -
Spinach (1 cup)
This leafy green adds a lovely earthy flavor and a punch of vitamins! If you don’t have spinach, kale or Swiss chard are great substitutes. -
Bell Peppers (1/2 cup, diced)
Bright and crunchy, bell peppers add a nice sweetness and pop of color. Feel free to mix colors like red, yellow, or orange for a rainbow effect! You could also swap these for zucchini or asparagus depending on what you have. -
Tomatoes (1/2 cup, diced)
Fresh and juicy tomatoes add a refreshing burst. You can use grape tomatoes or even sun-dried tomatoes if you want a deeper flavor. -
Greek Yogurt (1/4 cup)
This creamy addition not only balances the dish but also provides probiotics for gut health. If dairy-free, you can opt for coconut yogurt or almond-based yogurt. -
Berries (1/2 cup mixed)
Strawberries, blueberries, raspberries—these sweet gems bring a touch of indulgence! Frozen berries work well too if fresh isn’t available. -
Oats (1/2 cup) or Quinoa (1/2 cup cooked)
Both options serve as hearty bases for your bowl, providing fiber and whole grains. Quinoa is gluten-free and offers a nutty flavor, but feel free to use brown rice if you prefer that consistency. -
Nuts (1/4 cup, chopped)
Almonds and walnuts add crunch and healthy fats. You can substitute with seeds like sunflower or pumpkin seeds for extra variety! -
Honey or Maple Syrup (to taste)
A drizzle adds just the right amount of sweetness. If you’re on a sugar-free diet, consider using stevia or agave syrup instead. -
Salt and Pepper (to taste)
Essential for bringing out the flavors!
Step-by-Step Instructions
-
Prep Your Ingredients: Begin your power bowl adventure by washing and dicing your vegetables. Chop the spinach, bell peppers, and tomatoes into bite-sized pieces. This prep not only speeds up the cooking process but also makes your workspace look colorful and inviting!
-
Cook the Oats or Quinoa: In a medium saucepan, bring water to a boil. If you’re cooking oats, use a 2:1 water-to-oat ratio. For quinoa, the ratio is 2:1 as well. Add a pinch of salt for flavor, and cook until fluffy—about 5-10 minutes for oats or 15 minutes for quinoa. Fluff with a fork when done!
Chef Tip: Cooking in vegetable broth instead of water can elevate the flavor of the grains—trust me, it’s worth it!
-
Sauté the Vegetables: In a skillet, heat up a drizzle of olive oil over medium heat. Add the diced bell peppers and cook for 2-3 minutes until they start to soften. Next, toss in the spinach and tomatoes, cooking for an additional 2-3 minutes until the spinach wilts and everything combines nicely. Season with salt and pepper!
Chef Hack: Don’t toss the veggies around too much! Let them sit for a minute or two to get a nice char that enhances the flavor.
-
Cook the Eggs: In a bowl, whisk your eggs with a splash of milk (or water for fluffiness). Heat a non-stick skillet over medium-low, add butter or oil, and pour in the eggs, stirring gently until they’re just set to your liking. While I love them scrambled, you can also opt for poached eggs for a classy touch!
Chef’s Insight: Don’t overcook your eggs! They should be creamy and soft. If you prefer a breakfast with more texture, try making them into an omelet stuffed with veggies.
-
Assemble Your Power Bowl: Grab your favorite bowl (or try mixing and matching bowls for a fancy touch). Start by laying down a base of your cooked oats or quinoa, then layer on your sautéed veggies and the fluffy scrambled eggs.
-
Add the Finishing Touches: Spoon on your creamy Greek yogurt, scatter fresh berries, and sprinkle with chopped nuts. Drizzle with honey or maple syrup, adding an even sweeter touch!
-
Enjoy: Sit down at your table (or outside if the weather’s nice!), take a moment to appreciate your colorful creation, and dig in! Remember, food tastes best when enjoyed slowly and shared with friends or family.
Serving Suggestions
To plate your Hearty Breakfast Power Bowl, I love the idea of using a wide, shallow bowl to showcase the colorful layers. Arrange the sautéed vegetables and eggs so that they peek out invitingly, and create little piles of berries and nuts on top for added texture. You can even garnish the dish with a sprinkle of fresh herbs like basil or parsley for an extra pop!
Recipe Variations
-
Veggie Twist: Swap out the bell peppers and tomatoes for roasted sweet potatoes or seasonal veggies like butternut squash.
-
Global Flair: Add some chopped avocado and a sprinkle of feta cheese for a Mediterranean twist or top with a spicy salsa for a Southwestern flair.
-
Sweet Tooth Option: Use almond butter instead of Greek yogurt and mix in some banana slices for an indulgent yet healthy alternative.
-
Protein-Packed Swaps: Swap out the eggs for cooked chicken or turkey sausage to boost protein intake.
Chef’s Notes
Every time I make this breakfast bowl, it reminds me of my early cooking days when I experimented with various combinations in my tiny apartment kitchen. I’ll never forget the first time I made this for my family during a holiday gathering. My mom was skeptical, thinking breakfast should always be traditional, but as she took her first bite, her expression transformed—that warm, satisfied smile lets me know that I hit a home run. Now, it’s become a staple for our brunches! Over the years, I’ve added different ingredients based on seasonal produce, discovering unique flavors in every batch.
FAQs and Troubleshooting
How can I make this recipe ahead of time?
You can prep your ingredients the night before—chop veggies, cook grains, and even scramble your eggs. Store everything separately in the fridge, and simply heat it up together in the morning!
Can I use frozen vegetables or fruits?
Absolutely! Frozen veggies can be a great timesaver—just sauté them a little longer until they are heated through. For berries, let them thaw a bit before adding to your bowl for the best taste.
What if my eggs turn out rubbery?
This usually happens when eggs are cooked over too high a heat. Stick to medium-low heat, and stir gently for creamy, fluffy eggs.
How can I make this recipe vegetarian?
Simply skip the eggs for a more substantial portion of veggies, add plant-based protein sources like chickpeas, or increase the amount of nuts and seeds for added nutrition!
Nutritional Info
While specifics can vary based on your ingredient choices and portion sizes, a standard serving of this Hearty Breakfast Power Bowl is roughly:
- Calories: 400-500
- Protein: 20g
- Carbohydrates: 45g
- Fat: 15g
- Fiber: 10g
Whether you’re brunching with friends or making breakfast just for yourself, the Hearty Breakfast Power Bowl will always have a place on my table. Cheers to good food and the memories it creates! Enjoy every bite, and don’t forget to savor those little moments in the kitchen. Happy cooking!
PrintHearty Breakfast Power Bowl
A colorful, nutrient-packed breakfast bowl featuring fluffy eggs, vibrant veggies, creamy Greek yogurt, and fresh berries, perfect for jump-starting your day.
- Prep Time: 15 minutes
- Cook Time: 15 minutes
- Total Time: 30 minutes
- Yield: 1 serving 1x
- Category: Breakfast
- Method: Stovetop
- Cuisine: American
- Diet: Vegetarian
Ingredients
- 2 Eggs per serving
- 1 cup Spinach
- 1/2 cup Bell Peppers, diced
- 1/2 cup Tomatoes, diced
- 1/4 cup Greek Yogurt
- 1/2 cup mixed Berries
- 1/2 cup Oats or 1/2 cup Quinoa, cooked
- 1/4 cup Nuts, chopped
- Honey or Maple Syrup, to taste
- Salt and Pepper, to taste
Instructions
- Prep Your Ingredients: Wash and dice your vegetables, chopping the spinach, bell peppers, and tomatoes into bite-sized pieces.
- Cook the Oats or Quinoa: In a medium saucepan, bring water to a boil, add oats or quinoa with a pinch of salt, and cook until fluffy.
- Sauté the Vegetables: Heat olive oil in a skillet, add diced bell peppers, and cook for 2-3 minutes; then toss in spinach and tomatoes for another 2-3 minutes until wilted.
- Cook the Eggs: Whisk eggs with a splash of milk, heat a non-stick skillet, and scramble the eggs until just set.
- Assemble Your Power Bowl: Start with a base of cooked oats or quinoa, then layer sautéed veggies and scrambled eggs.
- Add the Finishing Touches: Spoon Greek yogurt on top, scatter berries, sprinkle nuts, and drizzle with honey or maple syrup.
- Enjoy: Sit down, appreciate your colorful creation, and dig in!
Notes
This power bowl is versatile; feel free to substitute ingredients based on your preferences and dietary needs.
Nutrition
- Serving Size: 1 serving
- Calories: 450
- Sugar: 10g
- Sodium: 300mg
- Fat: 15g
- Saturated Fat: 4g
- Unsaturated Fat: 8g
- Trans Fat: 0g
- Carbohydrates: 45g
- Fiber: 10g
- Protein: 20g
- Cholesterol: 186mg
Keywords: breakfast, power bowl, healthy, nutritious, vegetarian
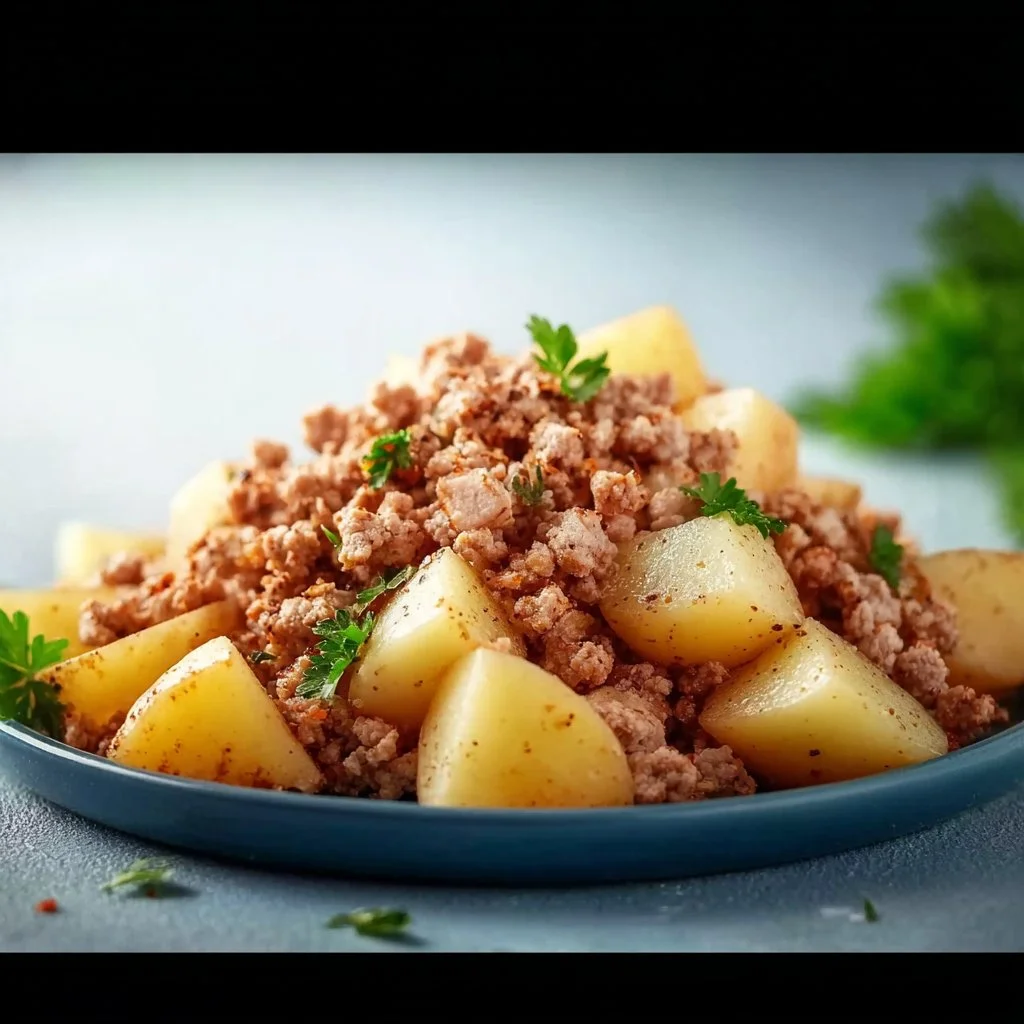
Ground Turkey with Potatoes
Wholesome Ground Turkey with Potatoes: A Comfort Meal With a Twist
Introduction
Hey there, fellow food enthusiasts! Welcome back to the kitchen with me, Savannah Pierce, where today we’re stepping into the realm of hearty, wholesome meals with a delightful simple dish: Ground Turkey with Potatoes. This recipe perfectly embodies my philosophy that cooking should be elegant yet approachable—making your weeknight dinners feel special without straining your sanity.
Picture this: it’s a cozy, chilly evening. The aroma of savory spices wafts through your home as you chop potatoes and sauté onions. Those simple actions aren’t just about feeding your belly; they’re about creating a little moment of warmth and connection. It’s a reminder that food can bring us together, encouraging us to share stories and laughter around the table.
What I love about this ground turkey dish is its flexibility and flavor. The pairing of tender potatoes with juicy turkey makes for a filling meal that’s packed with nutrition. Plus, it’s a great way to experiment with spices and seasonings, so feel free to get creative! Trust me; once you try this dish, you’ll want to put it into your regular rotation.
So, roll up those sleeves and dust off that apron! Let’s take a culinary journey that promises to tickle your taste buds and fill your kitchen with good vibes. Are you ready? Let’s dive into my personal story behind this delightful dish!
Personal Story
You know, some of my fondest childhood memories revolve around the kitchen with my family. One dish that stands out is a comforting potato and turkey skillet my mom would whip up on rainy days. I remember standing on a stool, peeking over the counter, eagerly watching as she transformed simple ingredients into an enchanting dinner. Every "sizzle" of the pan brought excitement, and that aromatic garlic and onion combo was nothing short of magic.
Fast-forward to my cooking adventures, and as soon as I put my own spin on my mom’s recipe, every bite felt like a warm hug. As everyone sat around our table, relishing the meal, I realized then that cooking was not just about satisfying hunger—it was about creating memories. It was the flavor of togetherness, nourished by love and a sprinkle of nostalgia. Now, I can’t wait for you to create your own versions of this classic dish!
Ingredients
Here’s what you’ll need for our Ground Turkey with Potatoes, along with some handy insights on each component:
-
1 lb ground turkey
A lean alternative to beef, ground turkey is packed with protein and absorbs flavors beautifully. If you want a richer taste, you can try substituting it with ground chicken or even lean beef. -
2 large potatoes, diced
Look for russet or Yukon gold potatoes; they hold their shape well when cooked. If you’re looking for a healthier twist, you can swap them for sweet potatoes for a boost of nutrients and a touch of sweetness. -
1 onion, chopped
Onions are the flavor base for many dishes. They caramelize beautifully, adding a sweet bite to your skillet. If you prefer a milder flavor, go with a shallot or green onion as a substitute. -
3 cloves garlic, minced
Garlic is the ultimate flavor enhancer! Fresh garlic is best, but jarred minced garlic can work in a pinch. Just remember, fresh garlic has a more robust flavor. -
1 tsp paprika
Paprika not only adds color but also a unique smokiness. You can use sweet or smoked paprika based on your preference. If you enjoy spice, a sprinkle of cayenne can amp up the heat! -
1 tsp salt
Essential for highlighting all the flavors! If you’re watching your sodium intake, feel free to lower the amount or use a salt substitute. -
1/2 tsp black pepper
It adds a mellow heat. For a kick, try using freshly cracked pepper instead of pre-ground for a bolder flavor. -
2 tbsp olive oil
This will help sauté our turkey and vegetables. You can easily substitute it with avocado oil for a high smoke point or coconut oil for a different flavor. -
1 cup chicken broth
It adds moisture and depth to our dish. Feel free to use homemade broth or a low-sodium store-bought version. Vegetable broth is a great substitute for a vegetarian option. -
Fresh parsley, for garnish
Nothing brightens a dish like fresh herbs! Chopped basil or cilantro can substitute parsley, or you can simply skip the garnish altogether if fresh herbs aren’t available.
Step-by-Step Instructions
-
Prepare Your Ingredients
First things first—let’s get all our ingredients prepped! Wash the potatoes (you can peel them if you prefer, but I love the added texture with the skin on). Dice them into even pieces for consistent cooking. Chop the onion, and mince the garlic. -
Heat the Pan
Grab a large skillet and pour in the olive oil. Heat it over medium heat until the oil glistens; this is when the magic starts! -
Sauté the Aromatics
Add your chopped onions first and let them dance in the pan for about 3-4 minutes until they become translucent. You’ll know it’s time to add in the garlic once you catch that heavenly aroma filling your kitchen—about 1 minute of cooking should do it! -
Cook the Ground Turkey
Next, crank up the heat a wee bit and add the ground turkey. Use a wooden spoon to break it apart as it cooks. Make sure to brown it evenly; this should take about 6-7 minutes. Stir occasionally to avoid any sticking. -
Season It Up
Once the turkey is browned, it’s time to season! Sprinkle in the paprika, salt, and pepper. Stir everything together so the spices coat the turkey evenly, embracing those lovely flavors. -
Add Potatoes and Broth
Now it’s time for the stars of our dish! Toss in the diced potatoes followed by the chicken broth. Give everything a gentle stir to combine and coat the potatoes. -
Simmer
Bring the mixture to a gentle boil, then lower the heat to a simmer. Cover the skillet and let it simmer away for 15-20 minutes, or until the potatoes are fork-tender and soak up all those delightful flavors. Keep an eye on it—give it a stir every now and then to keep things from sticking! -
Final Touch
When the potatoes are soft, taste it! Adjust seasoning if necessary, and garnish with fresh parsley just before serving.
Remember, cooking is all about feeling the flow. Don’t stress too much about perfect timing; cooking is an art! Enjoy the process and embrace those little chef hacks I just shared.
Serving Suggestions
To serve this hearty ground turkey dish, transfer it to a warm platter or let it remain in the skillet for that rustic vibe. You can serve it on a bed of steamed greens or alongside a light salad for a colorful presentation. A sprinkle of crushed red pepper flakes can give it an additional pop of color and spice!
Recipe Variations
If you’re looking to switch things up, here are a few creative variations:
- Italian Twist: Stir in a couple of tablespoons of marinara sauce and some Italian spices like oregano and thyme for an Italian spin.
- One-Pan Greek Delight: Add a handful of kalamata olives and crumbled feta cheese just before serving for a Mediterranean flair.
- Curry Flavor: For a touch of warmth, incorporate a tablespoon of curry powder into the turkey while sautéing.
- Veggie Boost: Toss in diced bell peppers, zucchini, or carrots when adding the potatoes for extra nutrition and color.
- Spicy Kick: Try incorporating jalapeños or diced chili peppers right at the start for a spicy kick!
Chef’s Notes
I can’t recall how many times this dish has saved me on busy weeknights! It evolved from a thrown-together meal into a beloved staple. I once experimented with a sweet and spicy glaze, incorporating honey and sriracha towards the end of cooking—a total game-changer!
And oh, the kitchen mishaps! One time, I accidentally used powdered sugar instead of salt due to some unorganized spice cabinet chaos. Let’s just say that was a memorable night filled with giggles!
FAQs and Troubleshooting
-
What if my potatoes aren’t tender after simmering?
If your potatoes are still hard after the suggested time, add a bit more broth, cover, and let them simmer for an additional 5-10 minutes. Patience is key! -
Can I make this in advance?
Absolutely! This dish stores well in the fridge for up to 3 days. Just reheat it on the stove, adding a splash of broth to loosen it up. -
What if I don’t have chicken broth?
No problem! You can use water, or even vegetable broth. You could also add a splash of white wine for additional flavor if you have it on hand. -
How can I make this dish vegetarian?
Swap the ground turkey for lentils, chickpeas, or your favorite plant-based ground meat. Use vegetable broth instead of chicken broth, and you have yourself a delicious vegetarian meal!
Nutritional Info (Optional)
While I won’t bog you down with the specifics today, a serving of this Ground Turkey with Potatoes is typically packed with protein, fiber, and key nutrients. It’s a wholesome option that fits seamlessly into a balanced diet.
There you have it! A delicious, straightforward Ground Turkey with Potatoes that embodies love and memories. Don’t forget to share your cooking adventure with me! Tag me on Instagram or drop a comment below with your photos and updates. Happy cooking, friends! 🍽️✨
PrintWholesome Ground Turkey with Potatoes

A hearty and wholesome meal featuring ground turkey and tender potatoes, perfect for cozy weeknight dinners.
- Prep Time: 15 minutes
- Cook Time: 30 minutes
- Total Time: 45 minutes
- Yield: 4 servings 1x
- Category: Main Course
- Method: Sautéing
- Cuisine: American
- Diet: Paleo
Ingredients
- 1 lb ground turkey
- 2 large potatoes, diced
- 1 onion, chopped
- 3 cloves garlic, minced
- 1 tsp paprika
- 1 tsp salt
- 1/2 tsp black pepper
- 2 tbsp olive oil
- 1 cup chicken broth
- Fresh parsley, for garnish
Instructions
- Prepare your ingredients: Wash and dice the potatoes, chop the onion, and mince the garlic.
- Heat the pan: Pour olive oil into a large skillet and heat over medium.
- Sauté the aromatics: Add onions to the pan and cook for 3-4 minutes, then add the garlic for 1 minute.
- Cook the ground turkey: Add turkey to the skillet, break it apart, and brown for 6-7 minutes.
- Season it up: Add paprika, salt, and pepper, stirring to combine.
- Add potatoes and broth: Toss in the potatoes and chicken broth, stirring gently.
- Simmer: Bring to a boil, then reduce heat and cover, simmering for 15-20 minutes until potatoes are fork-tender.
- Final touch: Taste and adjust seasoning, then garnish with fresh parsley before serving.
Notes
Feel free to experiment with spices or add vegetables like bell peppers or zucchini for extra nutrition.
Nutrition
- Serving Size: 1 serving
- Calories: 350
- Sugar: 2g
- Sodium: 400mg
- Fat: 10g
- Saturated Fat: 2g
- Unsaturated Fat: 6g
- Trans Fat: 0g
- Carbohydrates: 35g
- Fiber: 4g
- Protein: 25g
- Cholesterol: 70mg
Keywords: ground turkey, potatoes, comfort food, healthy dinner, easy recipe, weeknight meal