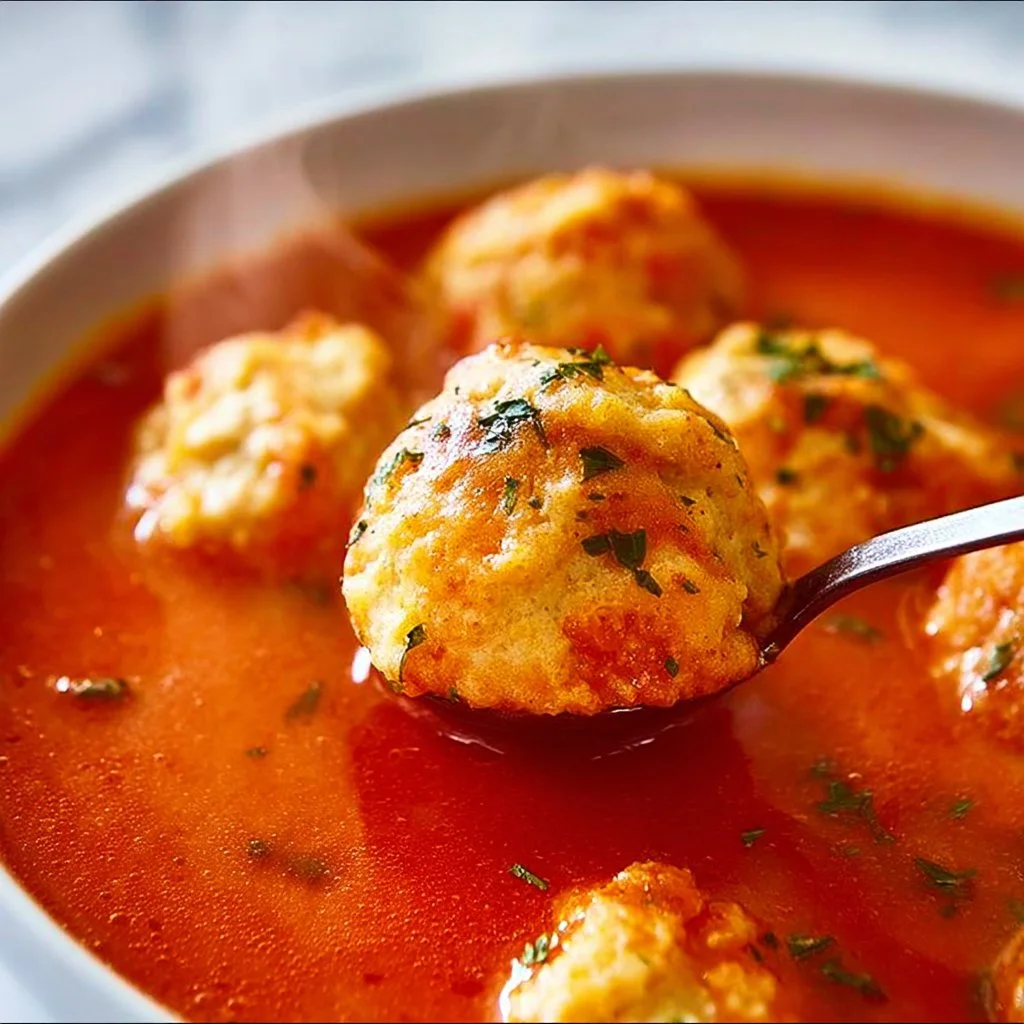
Wholesome Tomato Soup with Cheddar Bay Dumplings
Wholesome Tomato Soup with Cheddar Bay Dumplings
Hello, food lovers! Today, I’m excited to take you on a cozy culinary journey with a dish that warms the soul and brings back fond memories: Wholesome Tomato Soup with Cheddar Bay Dumplings. There’s something undeniably comforting about a bowl of smooth, rich tomato soup — especially when it’s accompanied by fluffy, cheesy dumplings that practically dance in the bowl.
Picture this: rain pattering against the window, a warm kitchen filled with the aroma of simmering tomatoes, and the first bite of that creamy soup perfectly complemented by the cheesy, herb-infused goodness of the dumplings. It’s pure happiness in a bowl!
Tomato soup has been a staple in households for generations, and every family has its unique spin. Some like it spicy, some prefer it sweet, and some even add a splash of cream for extra richness. My version? It’s all about balance — a blend of fresh tomatoes, a touch of sweetness, and just the right hint of herbaceous flavor, topped with irresistible cheddar bay dumplings.
There’s something nostalgic about making this soup; it reminds me of cold winter evenings curled up on the couch with my family, bowls in hand, and laughter filling the air. Whether you’re looking for a comforting meal after a busy day or a cozy dish to impress your guests, this recipe is a winner. Together, let’s create a soothing masterpiece that’s not just food; it’s a warm hug on a chilly day.
Grab your apron, and let’s dive into this delightful recipe!
Personal Story
As a child, I always looked forward to Sundays at my grandmother’s house. The moment we walked through the door, our senses were greeted by heartwarming aromas that signaled a feast was in the works. One of my all-time favorites was her tomato soup, rich and velvety with layers of flavor that danced on your palate.
She had a special way of making it; she’d roast the tomatoes until they were caramelized and bubbling, then blend everything into a silken puree that was like sunshine in a bowl. But what made it truly memorable were those homemade dumplings — oh, those dumplings! They’d puff up like little clouds, soft and cheesy, waiting to soak in every drop of the savory soup.
After many Sunday dinners spent savoring her cooking, I asked her for the secret to her incredible tomato soup. She chuckled and said, “It’s all about what you put in, dear. Love is the most important ingredient!” That simple reminder has stuck with me, and now, I infuse my cooking with that same love and passion. Cooking isn’t just about the ingredients; it’s about the connections we make at the table. So, let’s pour that love into our bowls as we make this wholesome soup together!
Ingredients
Here’s what you’ll need to whip up this dreamy tomato soup and cheddar bay dumplings:
Tomato Soup
-
Olive Oil (2 tablespoons): This is the perfect base to sauté your aromatics. You can substitute it with butter for a richer flavor, but olive oil keeps it light and fresh.
-
Yellow Onion (1 medium, chopped): Onions add a deep sweetness to the soup. A shallot works beautifully as a substitute if that’s what you have on hand.
-
Garlic (3 cloves, minced): Fresh garlic gives the soup vibrant flavor. Garlic powder can work in a pinch, but fresh is always best for that aromatic punch.
-
Carrot (1 medium, chopped): A little hint of sweetness; it adds a lovely color too! You can use sweet bell peppers if you prefer.
-
Canned Whole Tomatoes (28 oz can): Peak summer tomatoes in a can? Yes, please! If you’d rather use fresh, about 3-4 cups of chopped ripe tomatoes will do.
-
Vegetable or Chicken Broth (4 cups): This forms the soup’s body. Use homemade stock for depth, or store-bought if you’re short on time.
-
Dried Basil (1 teaspoon): Classic herb for tomato soup; feel free to swap it for oregano or thyme if you desire a different flavor.
-
Salt and Pepper: Season to taste; you want the flavors to shine through! Kosher salt is great, but table salt will also work.
-
Heavy Cream (1/2 cup): For a luxurious finish. Half-and-half can substitute for a lighter version, or you can skip it altogether for a vegan option.
Cheddar Bay Dumplings
-
All-Purpose Flour (2 cups): This forms the dough for your dumplings. Gluten-free flour can also be used if you’re avoiding gluten.
-
Baking Powder (1 tablespoon): The key leavening agent to make those dumplings fluffy!
-
Garlic Powder (1 teaspoon): This adds depth to the dumplings; you can increase it for extra flavor, or even use fresh minced garlic.
-
Dried Parsley (2 teaspoons): An herbaceous note that pairs beautifully with cheese; you can substitute with fresh, finely chopped parsley.
-
Sharp Cheddar Cheese (1 cup, shredded): The star of the dumplings! Feel free to use your favorite cheese blend; pepper jack can add a spicy kick.
-
Whole Milk (3/4 cup): This binds the dumpling batter together. Buttermilk can work for extra tang, or a non-dairy milk if you’re vegan.
Step-by-Step Instructions
Now that we have our ingredients ready, it’s time to get cooking! Follow these steps for a spoonful of delight:
-
Sautéing the Aromatics:
Start by heating the olive oil in a large pot over medium heat. Once the oil shimmers, toss in the chopped onion and let it sauté until translucent—about 5 minutes. This will build your flavor base. Add the minced garlic and carrot, stirring for another 2-3 minutes until the garlic is fragrant. Pro tip: Keep your heat moderate to avoid browning the garlic; burnt garlic can turn bitter! -
Add the Tomatoes and Broth:
Next, add the canned tomatoes (with their juices) to the pot. Break them up with a spoon for an even texture. Add in the broth and dried basil, then stir to combine. Bring everything to a gentle simmer. This is where the magic starts to happen! Let it simmer for about 20 minutes to allow the flavors to meld beautifully. -
Final Touch-Up:
After 20 minutes, you can either use an immersion blender directly in the pot, or transfer the soup in batches to a blender. Blend until smooth to your desired creaminess. Return the soup to the pot, then stir in the heavy cream. Taste and adjust salt and pepper as necessary. -
Making the Dumplings:
While the soup is simmering, let’s whip up those cheddar bay dumplings. In a medium bowl, whisk together the flour, baking powder, garlic powder, and dried parsley. In a separate bowl, combine the shredded cheddar and milk, then gently fold this mixture into the dry ingredients until just combined — but don’t overmix! -
Dumpling Time:
Once your soup is ready, drop spoonfuls of the dumpling dough onto the surface of the soup. Cover the pot with a lid and let them steam for about 15 minutes, or until the dumplings have puffed up and cooked through. The aroma wafting from your kitchen will have everyone asking, “What’s cooking?”
Serving Suggestions
Once your soup and dumplings are ready, ladle the steaming tomato soup into bowls and place a few dumplings atop each serving. For an extra touch of sweetness, garnish with a drizzle of high-quality olive oil or a sprinkle of fresh parsley. If you’re feeling fancy, a dollop of Greek yogurt or crème fraîche adds a lovely contrast to the warm soup. Serve with crusty bread to soak up every last drop – it’s a must!
Recipe Variations
Now, let’s get creative with a few twists on this classic dish!
-
Spicy Tomato Soup: Add a pinch of red pepper flakes during the sautéing stage to give a kick to your soup.
-
Herbed Dumplings: Mix in fresh herbs like thyme or chives into your dumpling dough for an aromatic upgrade.
-
Roasted Garlic Addition: Roast a head of garlic until tender and sweet, then squeeze it into the soup for an earthy, garlicky depth.
-
Cheesy Variation: Swap part of the cheddar for blue cheese in the dumplings for a deliciously funky flavor.
-
Vegan Twist: Substitute heavy cream with cashew cream and use plant-based milk and a vegan cheddar alternative for the dumplings.
Chef’s Notes
Cooking this recipe really feels like a nostalgic embrace. Over the years, I’ve refined it to capture the essence of that cozy Sunday at grandma’s. I remember a time when I tried to impress my friends with the soup, only to realize I forgot to blend it before adding the cream. The lumpiness made them laugh, but hey, sometimes the best moments happen in the messiness! And they still loved it.
Getting to share food is one of the best parts of cooking. This recipe has brought people together in my home, and I encourage you to do the same.
FAQs and Troubleshooting
-
What if my tomato soup is too acidic?
- If you find your soup is a bit too tangy, add a pinch of sugar to balance the acidity. Start small, and taste as you go.
-
Why are my dumplings heavy?
- Overmixing your dumpling batter can lead to dense dumplings. Mix just until combined for a light, fluffy texture.
-
Can I freeze the soup?
- Absolutely! This soup freezes beautifully. Just make sure to cool it completely before transferring to an airtight container. When ready to eat, reheat gently on the stove.
-
Can I make this soup in a slow cooker?
- Yes! Sauté the aromatics first, then transfer to the slow cooker along with the tomatoes and broth. Cook on low for 4-6 hours, then blend and add cream before serving.
Nutritional Info
Although specific nutritional information may vary based on ingredients used, this recipe is fundamentally wholesome, featuring plenty of vitamins from tomatoes and nutrients from herbs. Plus, the added protein from cheddar and the bulk from dumplings make it a balanced meal option.
So there you have it! A warm, inviting bowl of Wholesome Tomato Soup with Cheddar Bay Dumplings that not only satisfies the taste buds but also nourishes the spirit. Remember, good food isn’t just about the flavors; it’s about the love you pour into every step. Happy cooking, and here’s to many comforting bowls shared with your loved ones! 🥄❤️
PrintWholesome Tomato Soup with Cheddar Bay Dumplings

A cozy, comforting recipe featuring smooth tomato soup paired with fluffy cheddar bay dumplings for a heartwarming meal.
- Prep Time: 15 minutes
- Cook Time: 30 minutes
- Total Time: 45 minutes
- Yield: 4 servings 1x
- Category: Main Course
- Method: Cooking
- Cuisine: Italian
- Diet: Vegetarian
Ingredients
- 2 tablespoons Olive Oil
- 1 medium Yellow Onion, chopped
- 3 cloves Garlic, minced
- 1 medium Carrot, chopped
- 1 (28 oz) can Canned Whole Tomatoes
- 4 cups Vegetable or Chicken Broth
- 1 teaspoon Dried Basil
- Salt and Pepper, to taste
- 1/2 cup Heavy Cream
- 2 cups All-Purpose Flour
- 1 tablespoon Baking Powder
- 1 teaspoon Garlic Powder
- 2 teaspoons Dried Parsley
- 1 cup Sharp Cheddar Cheese, shredded
- 3/4 cup Whole Milk
Instructions
- Start by heating the olive oil in a large pot over medium heat. Add the chopped onion and sauté until translucent — about 5 minutes.
- Add the minced garlic and carrot; stir for another 2-3 minutes until fragrant.
- Next, add the canned tomatoes (with their juices) to the pot. Break them up with a spoon and add in the broth and dried basil. Stir to combine and bring to a gentle simmer for about 20 minutes.
- After 20 minutes, blend the soup until smooth to your desired creaminess and return it to the pot. Stir in the heavy cream and adjust salt and pepper to taste.
- While the soup simmers, whisk together the flour, baking powder, garlic powder, and dried parsley in a medium bowl.
- In another bowl, combine the shredded cheese and milk, then fold this mixture into the dry ingredients until just combined.
- Drop spoonfuls of the dumpling dough onto the surface of the soup and cover the pot with a lid. Steam the dumplings for about 15 minutes, or until cooked through.
- Serve the soup in bowls topped with dumplings and garnish as desired.
Notes
For a lighter version, you can substitute heavy cream with half-and-half or skip it for a vegan option using cashew cream and plant-based milk.
Nutrition
- Serving Size: 1 serving
- Calories: 350
- Sugar: 6g
- Sodium: 600mg
- Fat: 15g
- Saturated Fat: 8g
- Unsaturated Fat: 5g
- Trans Fat: 0g
- Carbohydrates: 45g
- Fiber: 5g
- Protein: 12g
- Cholesterol: 40mg
Keywords: tomato soup, dumplings, comfort food, cozy recipes, vegetarian
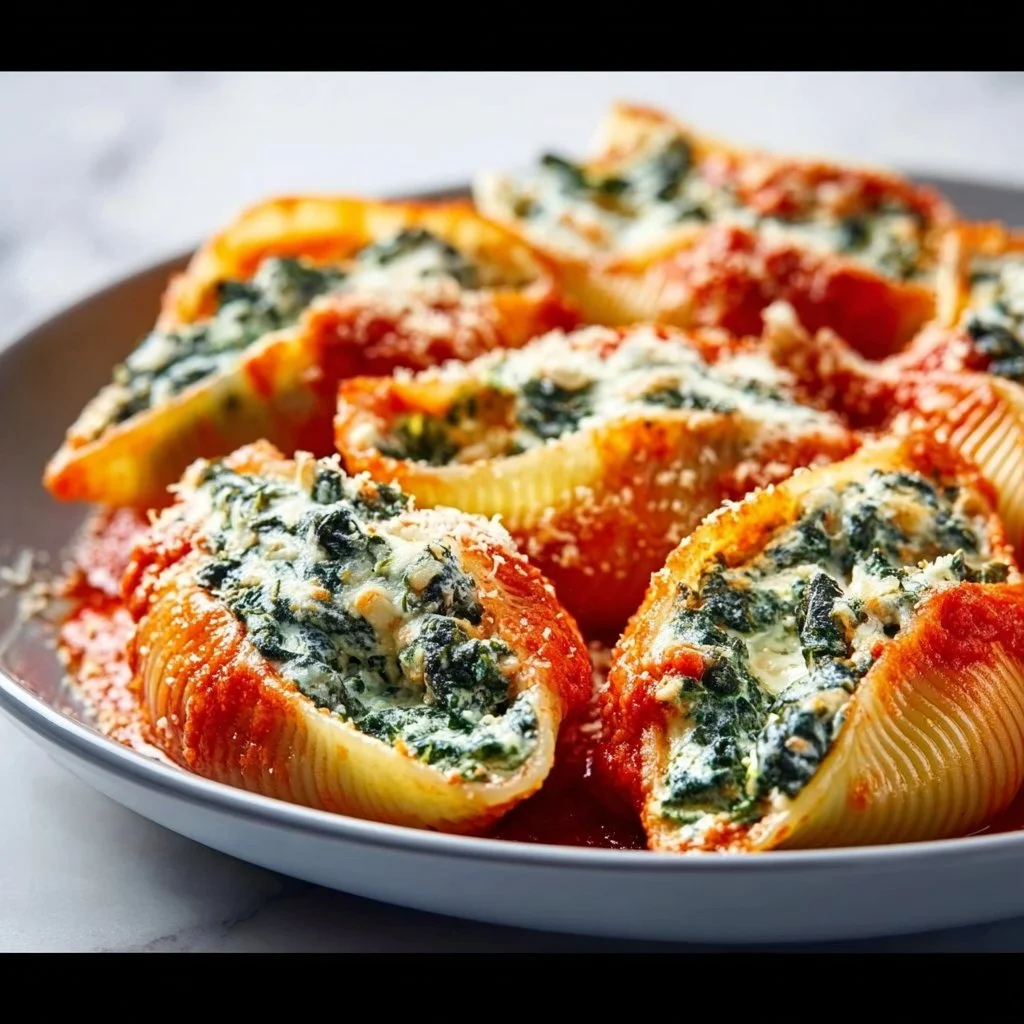
Spinach and Ricotta Stuffed Shells
Spinach and Ricotta Stuffed Shells: A Comforting Culinary Adventure
Hello, wonderful food lovers! Today, I’m incredibly excited to share one of my all-time favorite recipes with you: Spinach and Ricotta Stuffed Shells. This dish brings back such fond memories from my childhood, and I bet it will capture your heart, too.
Imagine the smell of marinara sauce bubbling away on the stove while a comforting warmth fills your kitchen. The soft, creamy ricotta mingles with vibrant, fresh spinach, all enveloped in tender pasta shells. It’s a dish that feels fancy enough for a special occasion, yet cozy enough for a weeknight family dinner. Plus, who doesn’t love a dish that can be made ahead and simply baked when it’s time to eat?
Stuffed shells are perfect for sharing. They invite everyone to gather around the table. As I’ve always said, good food isn’t just about the eating; it’s about the experience. Cooking is a way to show we care, and these stuffed shells are the ultimate expression. So, let’s roll up our sleeves, and dive into this culinary delight together!
Personal Story
I remember the first time I attempted to make stuffed shells. It was a chilly autumn evening, and my friends and I decided to host a dinner party to toast the changing season. While we planned an elaborate menu featuring everything from roasted vegetables to homemade tiramisu, the stuffed shells were the star of the show.
As we cracked jokes and sipped on a lovely red wine, we stuffed each shell together, laughter echoing through the kitchen. We created a makeshift assembly line, filling the shells like pros. I marveled at how something so simple could bring such joy, filling not just our bellies but our hearts as well. When we finally dug in, we congratulated ourselves – not just on the deliciousness of the meal but on the beautiful memories we created around the table that night.
Ever since, stuffed shells have become my go-to comfort food for gatherings. They remind me that the best moments in the kitchen are often those filled with friends, laughter, and a generous helping of love.
Ingredients
Here’s what you’ll need to create these delightful Spinach and Ricotta Stuffed Shells:
-
12 large pasta shells
These are the key to holding all that delicious filling! You can substitute with manicotti if you can’t find shells, but keep in mind they don’t hold quite as much filling! -
1 cup ricotta cheese
Creamy and delicious, ricotta adds a rich texture. If you’re looking for a lighter option, farmer’s cheese or cottage cheese will do in a pinch! -
2 cups fresh spinach
Spinach gives a lovely color and nutritional punch. Feel free to use frozen if that’s what you have, just make sure to thaw and squeeze out the moisture first! -
1 cup mozzarella cheese
Who can resist melting mozzarella? Use shredded mozzarella for easy melting, but you can also swap it for provolone for a slightly different flavor profile! -
1/2 cup grated Parmesan cheese
Adding a hint of nuttiness, it rounds out the cheese mixture perfectly. Pecorino Romano can be a nice alternative for a sharper taste! -
1 egg
This helps bind the filling together. If you’re looking for an egg-free option, a tablespoon of ground flaxseed mixed with three tablespoons of water can work nicely! -
2 cups marinara sauce
This is for layering at the bottom and draping over your stuffed shells. Homemade or store-bought, both can work, but a homemade sauce adds that extra touch of love! -
Salt and pepper to taste
Essential flavor enhancers! Feel free to add herbs like dried basil or oregano for an extra kick! -
Olive oil
A drizzle for the pan and perhaps a little for sautéing the spinach if you like it cooked. Just be careful – a little olive oil goes a long way!
Step-by-Step Instructions
Now that we’ve gathered our ingredients, let’s walk through the steps to create these heavenly Spinach and Ricotta Stuffed Shells.
Step 1: Preheat the Oven
Preheat your oven to 375°F (190°C). This will ensure it’s perfectly ready when your stuffed shells are ready to go in.
Step 2: Cook the Pasta
In a large pot, bring salted water to a boil. Tip: Salt the water generously! This is your one chance to season the shells as they cook. Gently add those large pasta shells and cook until al dente according to package instructions. Don’t worry if they feel a little firm; they’ll continue to cook in the oven! Drain and rinse them gently under cold water to stop the cooking process and make them easier to handle.
Step 3: Sauté the Spinach
While the pasta is cooking, it’s the perfect time to sauté the spinach if you like it wilted. In a skillet, heat a drizzle of olive oil over medium heat. Add the fresh spinach and a pinch of salt, cooking until it’s wilted and beautiful (around 2-3 minutes). Chef hack: You can skip this step if you want a fresher taste; just chop the raw spinach and mix it in with the ricotta!
Step 4: Prepare the Filling
In a large mixing bowl, combine the ricotta cheese, cooked spinach, mozzarella cheese, half of the grated Parmesan, the egg, salt, and pepper. Mix until well blended. This filling is creamy and bright! Extra tip: Taste a little of the mixture. If you feel it needs more seasoning, now’s the time to adjust!
Step 5: Stuff the Shells
Grab a spoon or a piping bag (if you want to feel fancy!) and start stuffing those shells with your delicious mixture. Don’t be shy; pack them in generously!
Step 6: Assemble the Dish
Spread a layer of marinara sauce on the bottom of a baking dish to prevent the shells from sticking. Place the stuffed shells in the dish, seam side up. Once they’re all nestled in, pour the remaining marinara sauce over the top. Sprinkle with the remaining Parmesan cheese for that golden, cheesy crust that everyone loves!
Step 7: Bake
Cover the dish with aluminum foil (to keep moisture in) and bake in your preheated oven for 25 minutes. After 25 minutes, remove the foil and bake for an additional 10-15 minutes or until bubbly and golden and the cheese is slightly browned.
Step 8: Serve
Once your stuffed shells are out of the oven, let them sit for about 5 minutes. This will help prevent any spilled cheese explosions when you start serving.
Serving Suggestions
To serve, scoop out a couple of stuffed shells onto a plate and drizzle with an extra spoonful of marinara sauce. Garnish with fresh basil or a sprinkle of red pepper flakes for a colorful and inviting presentation. Pair it with a simple side salad or some garlic bread, and you’ve got a meal that will impress anyone sitting at your table!
Recipe Variations
Want to switch things up? Here are a few ideas to make this dish uniquely yours:
-
Add Protein: Mix in cooked chicken, ground turkey, or even crumbled sausage to the cheese mixture for a heartier meal.
-
Go Vegan: Use cashew cheese or tofu instead of ricotta, and skip the egg or use a flaxseed substitute for a completely plant-based dish.
-
Herb Explosion: Experiment by incorporating fresh herbs like basil, oregano, or even a touch of dill into the cheese filling for an extra punch of flavor.
-
Spicy Kick: Add red pepper flakes or diced jalapeños if you’re in the mood for a little heat.
-
Different Cheeses: Mix in goat cheese for a tangy twist or swap mozzarella for a bit of Gruyere for a gourmet touch.
Chef’s Notes
Oh, the stories I could tell about my kitchen misadventures! The first time I made this dish, I was so caught up in the process that I accidentally grabbed a box of 12 small shells instead of the large ones. Let’s just say that was an interesting meal, with filling spilling out everywhere. But hey, no one was complaining!
Over the years, I’ve refined my technique, but the heart of the recipe remains the same. Cooking is a journey, and even the mishaps can lead to delightful surprises. Plus, stuffing shells has become a treasured tradition in my home, a way to invite friends and family to gather around the table.
FAQs and Troubleshooting
Q: How can I prevent the shells from sticking together?
A: To prevent sticking, be sure to rinse them in cold water after draining and add a touch of olive oil. Arranging them in a single layer also helps!
Q: Can I make stuffed shells ahead of time?
A: Absolutely! You can prepare the entire dish a day in advance. Just cover it well and keep it in the refrigerator. Bake it right before serving!
Q: What if I don’t have ricotta?
A: No worries! You can substitute cottage cheese or even cream cheese. Just remember to blend it for that creamy texture.
Q: How can I make my sauce more flavorful?
A: Try adding fresh garlic or onions to your sauce, or toss in some fresh herbs like basil or thyme for that homemade touch.
Nutritional Info
While the nutrition can vary based on the specific ingredients used, here’s a rough estimate per serving (based on 6 servings):
- Calories: 350
- Protein: 18g
- Fat: 18g
- Carbohydrates: 34g
- Fiber: 3g
So there you have it! Elegant yet approachable, fulfilling yet easy to make, Spinach and Ricotta Stuffed Shells are a true crowd-pleaser that will bring a little joy to your dining experience. Enjoy the adventure, and remember to savor every moment around your table. Happy cooking!
PrintSpinach and Ricotta Stuffed Shells

A comforting dish of pasta shells stuffed with a creamy filling of ricotta cheese and fresh spinach, beautifully baked with marinara sauce.
- Prep Time: 20 minutes
- Cook Time: 35 minutes
- Total Time: 55 minutes
- Yield: 4 servings 1x
- Category: Main Course
- Method: Baking
- Cuisine: Italian
- Diet: Vegetarian
Ingredients
- 12 large pasta shells
- 1 cup ricotta cheese
- 2 cups fresh spinach
- 1 cup mozzarella cheese
- 1/2 cup grated Parmesan cheese
- 1 egg
- 2 cups marinara sauce
- Salt and pepper to taste
- Olive oil
Instructions
- Preheat the oven to 375°F (190°C).
- Cook the pasta in salted boiling water until al dente, then drain and rinse.
- Sauté the spinach in olive oil until wilted (optional).
- Prepare the filling by mixing ricotta, spinach, mozzarella, half of the Parmesan, egg, salt, and pepper.
- Stuff the shells with the filling using a spoon or piping bag.
- Assemble the dish by spreading marinara sauce in a baking dish, placing the stuffed shells seam side up, and topping with remaining sauce and Parmesan.
- Bake for 25 minutes covered with foil, then remove the foil and bake for an additional 10-15 minutes until golden.
- Serve with extra marinara and garnish as desired.
Notes
These stuffed shells can be prepared in advance and baked right before serving. You can also experiment with different cheeses and add proteins if desired.
Nutrition
- Serving Size: 1 serving
- Calories: 350
- Sugar: 5g
- Sodium: 400mg
- Fat: 18g
- Saturated Fat: 8g
- Unsaturated Fat: 6g
- Trans Fat: 0g
- Carbohydrates: 34g
- Fiber: 3g
- Protein: 18g
- Cholesterol: 30mg
Keywords: stuffed shells, spinach ricotta, Italian recipe, comfort food

Hawaiian Turned Chicken Stack
Hawaiian Turned Chicken Stack: A Flavorful Journey to the Islands
Aloha, fellow food lovers! If you’re ready to take your taste buds on a tropical getaway, you’ve landed in the right place. I’m joyful to guide you through making a dish that’s not only bursting with flavors but also doubles as a warm hug on a plate—Hawaiian Turned Chicken Stack. Inspired by the sun-soaked islands, this recipe perfectly marries the tender juiciness of chicken thighs with the sweetness of pineapple and the vibrant crunch of fresh veggies.
Imagine yourself lounging on a Hawaiian beach, the gentle waves dancing at your feet while the scent of barbecue wafts through the air. Sounds dreamy, right? Well, you don’t need to strap on your flip-flops to enjoy this culinary escape. With just a few quality ingredients and a sprinkle of love, you can create an elegant dish that transports you right to those sandy shores without ever leaving your kitchen.
Whether you’re hosting a dinner party, prepping a family meal, or simply treating yourself to something special, this Hawaiian Turned Chicken Stack is sure to impress. With vibrant colors and punchy flavors that reflect the spirit of the islands, it’s perfect for any occasion. Are you excited? Let’s dive into this flavorful journey together!
Personal Story
One of my most cherished memories revolves around my aunt, who was a culinary wizard in our family. Every summer, she would host a luau in her backyard, transforming it into a slice of Hawaii with tiki torches, floral leis, and hula music. The highlight of those gatherings was always her Hawaiian chicken dish, grilled to perfection and drizzled with a sweet and tangy glaze. As a kid, I remember standing by the grill, my nose twitching with excitement as the savory aroma wrapped around me like a warm embrace.
One year, she decided to let me take the lead in the kitchen—an opportunity I grabbed with both hands! Armed with her recipes, I’m pretty sure I created a delightful disaster of flavors (let’s just say, there was more “ting” than “zing”). Still, she was incredibly supportive and showed me how to elevate my cooking without fear.
That summer ignited my passion for cooking, and I realized that food brings us not just sustenance but also stories—the laughter, the joy, the love. Presenting this Hawaiian Turned Chicken Stack is my way of keeping that magic alive and passing on the warmth I felt as a child.
Ingredients
Here’s what you’ll need to create this beautiful dish, along with some tips to make your cooking journey even smoother:
-
4 boneless, skinless chicken thighs
Tender and tasty, chicken thighs provide a juicy bite. If you’re looking for a lighter option, feel free to swap them out for boneless chicken breasts, but be mindful to avoid overcooking them. -
1/2 cup soy sauce
This becomes the base of your marinade, introducing a savory umami flavor. For a gluten-free alternative, use tamari instead! -
1/4 cup brown sugar
The sweetness balances the saltiness of the soy sauce. If you prefer, coconut sugar or agave syrup can offer a more complex flavor. -
1/4 cup pineapple juice
Adds that tropical zing! Fresh juice is ideal, but store-bought works just as well. -
2 tablespoons ketchup
Yep, it may seem unconventional, but it adds a delightful depth of flavor. Feel free to use a homemade version if you’re feeling adventurous! -
1 tablespoon rice vinegar
This rounds out the flavors, giving a pleasant acidity that brightens everything. Apple cider vinegar is a good substitute if you don’t have it on hand. -
2 cloves garlic, minced
Garlic adds complexity and aroma. Don’t feel shy to add an extra clove if you’re a garlic lover, like I am! -
1 teaspoon fresh ginger, grated
Ginger introduces a warm spice and freshness. If fresh isn’t available, a dash of ground ginger can work in a pinch! -
1 tablespoon vegetable oil
This is for cooking; it helps prevent sticking. You can use any neutral oil, like canola or avocado oil. -
2 cups cooked jasmine rice
This fluffy rice soaks up the delicious sauce wonderfully. Brown rice or quinoa can be fantastic substitutes for a healthy twist. -
1 cup fresh pineapple, diced
Fresh pineapple pieces add a burst of sweetness. If fresh isn’t available, use canned pineapple (drained) for ease. -
1 red bell pepper, diced
This adds a nice crunch and beautiful color. For a different sweetness, you can substitute it with orange or yellow bell peppers. -
1/2 cup green onions, sliced
These vibrant garnishes add a lovely bite. Chives can serve as an excellent alternative if green onions aren’t available. -
1 avocado, sliced
Creamy avocado complements the dish beautifully. If you’re feeling fancy, try a drizzle of chili oil for a spicy kick. -
Fresh cilantro, for garnish
Adds freshness and a pop of color. If cilantro’s not your thing, fresh parsley can be a beautiful alternative. -
Lime wedges, for serving
The squeeze of lime brightens and lifts every flavor—don’t skip it! Lemon can work as a substitute if that’s what you have.
Step-by-Step Instructions
Let’s roll up those sleeves, tie on that apron, and get cooking! Here’s how to create your Hawaiian Turned Chicken Stack:
Step 1: Marinating the Chicken
- In a mixing bowl, whisk together the soy sauce, brown sugar, pineapple juice, ketchup, rice vinegar, minced garlic, and grated ginger. This will be your marinade—sweet, tangy, and oh-so-delicious.
- Place the chicken thighs snugly in the bowl, ensuring they are thoroughly coated in the marinade. Cover, and let them soak in the flavors for at least 30 minutes (longer if you have the time—up to 2 hours in the fridge is best!). This step is crucial for infusing the chicken with that island magic.
Chef’s Tip: Don’t Have Time to Marinate?
No worries! If time’s short, simply brush the marinade over the chicken while cooking, ensuring it bakes in all those flavors.
Step 2: Cooking the Chicken
- Heat the vegetable oil in a large skillet over medium-high heat. When hot, add the marinated chicken thighs, saving that luscious marinade for later. Cook for about 5 minutes on each side until cooked through and golden brown. This step will create a beautiful crust!
Step 3: Making the Sauce
- Once the chicken is cooked, remove it from the skillet and set aside. In the same skillet, pour in the reserved marinade, bringing it to a simmer. Let it bubble away for 3–4 minutes until it thickens slightly. This will give you a glossy, flavorful glaze to drizzle over your chicken!
Step 4: Building Your Stack
- Time to layer it all together! Start with a base of fluffy jasmine rice on your plate. Next, place a beautifully cooked chicken thigh right on top. Then, it’s time to stack on the toppings: a handful of diced fresh pineapple, vibrant bell pepper, and the green onions.
- To finish, add a few slices of creamy avocado on top and drizzle a generous amount of that luscious glaze over everything. A sprinkle of fresh cilantro and a wedge of lime complete your masterpiece!
Chef’s Tip: Plate with Love
Presentation matters! Don’t just slap it on the plate. Take a moment to artfully arrange your ingredients, reflecting the dish’s tropical spirit. Remember, even humble meals shine with a little thoughtfulness!
Serving Suggestions
To serve this delightful dish, arrange the components on a large platter for family-style dining or plate individual servings. Drizzle extra glaze over the top for a mouthwatering finish, and don’t forget those lime wedges—after all, it’s all about that zesty pop! Add a refreshing side salad or some crispy slaw, and you’re set for a meal that feels both elegant and relaxed.
Recipe Variations
Let’s shake things up a bit! Here are a few creative twists to consider:
-
Teriyaki Chicken Stack: Swap out the soy sauce for a teriyaki sauce to shift the flavor profile while maintaining the Hawaiian vibes.
-
Grilled Chicken Skewers: Cut the chicken into bite-sized pieces and skewer them with bell pepper and pineapple before grilling. Perfect for a summer cookout!
-
Coconut Rice: Steam your jasmine rice with coconut milk instead of water for a creamier, more tropical flavor.
-
Spicy Heat: Add some diced jalapeños to the pineapple topping for a kick that contrasts nicely with the sweetness.
-
Vegan Delight: Swap chicken for firm tofu or tempeh, marinating and preparing it similarly for a delicious vegan option.
Chef’s Notes
This dish has evolved quite a bit over the years. The first time I made it, I remember being completely overwhelmed, trying to balance all the flavors. Now, I savor the process, knowing that cooking is about experimenting and learning. One funny kitchen disaster was when I accidentally grabbed brown sugar thinking it was flour—let me tell you, pineapple and sugar-coated chicken is not a flavor alignment made in heaven! But that’s what makes cooking fun—sometimes, the best recipes arise from our "oops" moments.
FAQs and Troubleshooting
Q1: My chicken turned out dry. What happened?
Ah, dry chicken is a common kitchen hiccup! Make sure you’re not overcooking them; chicken thighs are forgiving, but 6-7 minutes per side usually does the trick. Also, using a meat thermometer (aim for 165°F/74°C) can help ensure perfectly juicy results.
Q2: Can I prepare this dish ahead of time?
Absolutely! You can marinate the chicken earlier in the day and store it in the fridge. When you’re ready to cook, just follow the steps, and you’re good to go!
Q3: What if I don’t like pineapple?
No worries! While pineapple is a star here, feel free to replace it with your favorite fruit—mango or peaches could work wonders, too! The idea is to keep that fresh, fruity note.
Q4: Is this dish good for meal prepping?
Yes! The Hawaiian Turned Chicken Stack stores beautifully in the refrigerator. Just pack the components separately and combine them when you’re ready to dig in!
Nutritional Info
(Your nutritional values will vary based on serving size, so be sure to adjust based on your specific needs!)
Per Serving (estimated):
Calories: 450 | Protein: 28g | Carbs: 45g | Fat: 20g
Packed with flavor and nutrition, this dish provides a balanced meal without skimping on taste!
And there you have it—your ultimate guide to creating a delicious Hawaiian Turned Chicken Stack! Cooking is all about joy, creativity, and sharing; I hope this recipe encourages you to gather your loved ones around the table. Bon appétit, and until next time, keep those aprons tied and the laughter rolling! 🌺🍍🌿
PrintHawaiian Turned Chicken Stack

A vibrant dish marrying juicy chicken thighs, sweet pineapple, and fresh veggies for a tropical escape.
- Prep Time: 30 minutes
- Cook Time: 15 minutes
- Total Time: 45 minutes
- Yield: 4 servings 1x
- Category: Main Course
- Method: Stovetop
- Cuisine: Hawaiian
- Diet: Gluten-Free
Ingredients
- 4 boneless, skinless chicken thighs
- 1/2 cup soy sauce
- 1/4 cup brown sugar
- 1/4 cup pineapple juice
- 2 tablespoons ketchup
- 1 tablespoon rice vinegar
- 2 cloves garlic, minced
- 1 teaspoon fresh ginger, grated
- 1 tablespoon vegetable oil
- 2 cups cooked jasmine rice
- 1 cup fresh pineapple, diced
- 1 red bell pepper, diced
- 1/2 cup green onions, sliced
- 1 avocado, sliced
- Fresh cilantro, for garnish
- Lime wedges, for serving
Instructions
- Marinate the chicken by whisking together soy sauce, brown sugar, pineapple juice, ketchup, rice vinegar, minced garlic, and grated ginger. Coat the chicken thoroughly and let it soak for at least 30 minutes.
- Heat the vegetable oil in a skillet over medium-high heat. Add the marinated chicken thighs and cook for about 5 minutes on each side until cooked through and golden brown.
- Remove the chicken from the skillet, then pour in the reserved marinade. Bring to a simmer and cook for 3-4 minutes until it thickens slightly.
- Layer the dish by placing jasmine rice on a plate, topping it with a cooked chicken thigh, diced pineapple, bell pepper, green onions, avocado, and drizzling the sauce over everything.
Notes
For a lighter option, swap chicken thighs for boneless chicken breasts. Feel free to adjust the spice level and use any fruit you prefer.
Nutrition
- Serving Size: 1 serving
- Calories: 450
- Sugar: 14g
- Sodium: 800mg
- Fat: 20g
- Saturated Fat: 3g
- Unsaturated Fat: 15g
- Trans Fat: 0g
- Carbohydrates: 45g
- Fiber: 3g
- Protein: 28g
- Cholesterol: 75mg
Keywords: Hawaiian chicken, tropical recipe, chicken stack, rice bowl

The Best Tiramisu Chia Pudding Recipe (Vegan, High Protein, Keto) | Healthy Sweets Recipes, Healthy Chia Pudding Recipes, Healthy Sweets
The Best Tiramisu Chia Pudding Recipe: A Healthy Twist on a Classic Favorite
Hey there, fellow foodies! Welcome back to my cozy corner of the kitchen at Ivory Apron. Today, I’m thrilled to share one of my absolute favorite recipes that brings a delightful twist to a classic dessert: Tiramisu Chia Pudding. Imagine all the indulgent flavors of traditional tiramisu—coffee, cocoa, and creamy goodness— packed into a healthy, vegan-friendly, high-protein, keto dessert. Sounds too good to be true? I promise you, it’s not!
Chia pudding has become somewhat of a hero in the healthy dessert world, and I’ve got to say, it’s perfect for those moments when you crave something sweet but don’t want to compromise on health. This treat is rich in omega-3 fatty acids from the chia seeds, easily made with plant-based ingredients, and won’t have you feeling like you’ve just consumed a brick in your stomach.
I vividly remember the first time I tried making tiramisu back in college. It was a last-minute decision for a dinner party that I somehow agreed to host. My friends were excited, and I was terrified! Armed with a flimsy recipe from a random magazine, I managed to whip up a dessert that slightly resembled the Italian classic—but not without a few hiccups! The coffee was too strong, and the ladyfingers turned out a bit soggy. But you know what? Everyone devoured it! That night ignited my passion for creating desserts that are not just delicious but also fun to make, and ever since, I’ve been on a mission to elevate everyday sweets like this Tiramisu Chia Pudding.
So, let’s dive into this easy, elegant, and oh-so-satisfying dessert. You’ll see why this recipe became a staple in my kitchen!
Personal Story
Speaking of college, there’s a specific memory that sticks with me. I remember my best friend, Julia, rushing over after hearing I was brave enough to tackle tiramisu. She arrived just as I was furiously whisking the cream (and I may or may not have underestimated the power of heavy whipping cream!). With two spoons and one dessert plate, we dug into my suspiciously lumpy concoction right before my guests arrived. What happened next still makes me laugh: we both ended up with chocolate smudged on our faces as we declared, “Well, at least it’s edible!”
Later that night, despite my early culinary mishaps, everyone was sharing stories and savoring each bite of my chaotic creation. That night reminded me of the magic of cooking: it’s not just about the food; it’s about the laughter, the camaraderie, and the memories created around the table. Fast forward to today, and I’m thrilled to share this Tiramisu Chia Pudding that cuts the fuss and maximizes the joy. Get ready to make some beautiful memories of your own!
Ingredients
Let’s gather our ingredients, shall we? Here’s what you’ll need to whip up this delightful Tiramisu Chia Pudding:
-
Chia Seeds (1/4 cup)
These tiny powerhouses are rich in fiber and omega-3 fatty acids. They’re the star of the show in this pudding! If you’re fresh out, you could try ground flaxseeds, but the texture won’t be quite the same. -
Unsweetened Almond Milk (1 cup)
A creamy, plant-based milk that forms the base of your pudding. If you prefer, any nut or oat milk will work just as well. Just avoid sweetened versions to keep our healthy vibe going! -
Maple Syrup or Agave Nectar (2-3 tablespoons)
A natural sweetener to give your pudding that lovely sweetness. Honey could be a substitute if you’re not strictly vegan—just remember, it’s a bit more viscous, so you may need to adjust the quantity slightly. -
Vanilla Extract (2 teaspoons)
A few drops of this fragrant elixir will elevate your pudding and add that aromatic richness. Pure vanilla extract is always a winner, but imitation will work too in a pinch. -
Coffee or Espresso (1/2 cup)
The lifeblood of traditional tiramisu! If you’re avoiding caffeine, a decaf version or even a coffee substitute could work to maintain that rich flavor. -
Cocoa Powder (2 tablespoons)
For that touch of chocolatey goodness. Make sure you use unsweetened cocoa for the best depth of flavor, but you could switch to carob powder if you want to experiment with a different taste. -
Coconut Cream (1/4 cup)
Whip this silky goodness to top your pudding for an extra luxurious feel. If you don’t have coconut cream, you can use full-fat coconut milk but be sure to chill it first to allow the cream to separate.
Step-by-Step Instructions
Now that we have all our ingredients ready, let’s roll up our sleeves and dive into the recipe!
Step 1: Mix the Wet Ingredients
In a medium-sized bowl, combine the almond milk, maple syrup (or agave), vanilla extract, and coffee. Whisk these glorious ingredients together until fully combined. This will be the flavorful base of your pudding.
Chef Hack: If you’re short on time, you can blend these ingredients in a blender! It’s quicker and gives it a super smooth consistency.
Step 2: Add Chia Seeds
Next, add the chia seeds to your wet mixture. Stir well to ensure that the seeds are evenly distributed and not clumping together. Chia seeds love to stick, so give them a good whirl!
Tip: Let the mixture rest for about 5 minutes and then stir again. This process helps ensure a lump-free pudding!
Step 3: Let It Thicken
Cover the bowl with plastic wrap or a lid and pop it into the fridge. Let it chill for at least 3-4 hours or, better yet, overnight. During this time, the chia seeds will absorb the liquid and transform your mixture into a delightful, creamy pudding.
Chef Insight: Overnight chilling is not just for convenience; it allows the flavors to meld together beautifully.
Step 4: Whip the Coconut Cream
While your pudding thickens, let’s prepare the coconut cream. Chill a can of coconut milk overnight, then scoop out the thick cream that separates at the top. In a bowl, whip the coconut cream using a hand whisk or electric mixer until fluffy. Taste it and add a touch of sweetener if desired.
Step 5: Layer it Up!
Once your chia pudding is ready, it’s assembly time! Grab your serving glasses (I love using clear ones to show off those beautiful layers). Start with a generous layer of chia pudding, then add a dollop of whipped coconut cream on top.
Next, dust with cocoa powder for that authentic tiramisu touch. Repeat the layers until you reach the top!
Little Chef Tip: For a fun surprise, add a sprinkle of chocolate shavings or crushed walnuts in between layers for added texture!
Step 6: Chill Again (If You Can Wait)
If you have the willpower (it’s hard!), let your assembled tiramisu chia pudding chill in the fridge for at least 30 minutes before serving. This helps the layers meld together even more, creating a harmonious flavor experience that’s just divine.
Serving Suggestions
When you’re ready to serve, I recommend presenting your Tiramisu Chia Pudding in individual glasses or jars for a charming touch. Finish with an additional dollop of whipped coconut cream and a sprinkle of cocoa powder right before serving. A few coffee beans on top can add a lovely visual element as well!
Recipe Variations
Now that you’ve mastered the basic Tiramisu Chia Pudding, feel free to get creative! Here are a few fun twists you can try:
-
Mocha Delight: Add a spoonful of cocoa powder directly into the chia mix for a more intense chocolate flavor.
-
Nuts About You: Throw in some finely chopped hazelnuts or almonds if you want that extra crunch and a nutty flavor reminiscent of traditional tiramisu.
-
Fruit Fusion: Layer in some fresh berries or banana slices between the pudding layers for a refreshing burst of flavor.
-
Spiced Up: Want a little warmth in your dessert? Add a pinch of cinnamon or nutmeg to the chia pudding mixture.
-
Dairy-Free Whipped Topping: If you want to switch it up, blend soaked cashews in place of coconut cream for a different creamy topping.
Chef’s Notes
Throughout my years of experimenting with various dessert recipes, I’ve learned that the beauty often lies in simplicity. This Tiramisu Chia Pudding encapsulates that idea perfectly, offering a sophisticated dessert that’s both easy to make and nourishing. Additionally, chia pudding recipes have a delightful adaptability; you can swap out ingredients based on what you have on hand.
Oh, and I have to mention this funny story! The first time I decided to impress a date with a dessert, I did the classic Tiramisu, and it ended up more like “Tira-mistake.” The mascarpone curdled because I added the coffee too quickly—it was a disaster! Needless to say, I kept my culinary adventures since then much simpler. This chia pudding recipe? No risk involved—just delicious results!
FAQs and Troubleshooting
-
Why did my chia pudding not thicken?
Ensure you’re using enough chia seeds and letting it sit for the right amount of time. If the pudding still seems runny, it may need a bit longer to set. -
Can I make this recipe in advance?
Absolutely! You can prepare the chia pudding a couple of days ahead and store it in the fridge. Just layer the coconut cream right before serving for the freshest taste. -
Is this dessert keto-friendly?
Yes, this recipe fits perfectly into a keto lifestyle! You’ll get that sweetness from the chia with low sugar content, especially if you choose low-carb sweeteners. -
How do I store leftovers?
Keep any leftovers in an airtight container in the fridge for up to 3-5 days. Just be sure to mix it up before serving again!
Nutritional Info (Optional)
For those mindful of their intake, here’s a rough breakdown per serving (based on 4 servings):
- Calories: 180
- Protein: 6g
- Carbohydrates: 25g
- Fiber: 12g
- Sugars: 6g
- Fat: 8g
And there you have it—the ultimate Tiramisu Chia Pudding recipe that’s bound to impress at any gathering (or just satisfy those late-night cravings!). I hope you enjoy making this delicious treat as much as I do—remember, cooking should be fun and fulfilling. Don your apron, gather some loved ones, and share your delightful creation!
Happy cooking, everyone! 🍽️✨
PrintTiramisu Chia Pudding

A healthy, vegan-friendly twist on the classic tiramisu, packed with flavors of coffee, cocoa, and creamy goodness—all in a delicious chia pudding.
- Prep Time: 15 minutes
- Cook Time: 0 minutes
- Total Time: 240 minutes
- Yield: 4 servings 1x
- Category: Dessert
- Method: Chilling
- Cuisine: Italian
- Diet: Vegan
Ingredients
- 1/4 cup Chia Seeds
- 1 cup Unsweetened Almond Milk
- 2–3 tablespoons Maple Syrup or Agave Nectar
- 2 teaspoons Vanilla Extract
- 1/2 cup Coffee or Espresso
- 2 tablespoons Cocoa Powder
- 1/4 cup Coconut Cream
Instructions
- Mix the almond milk, maple syrup, vanilla extract, and coffee in a bowl.
- Add chia seeds to the wet mixture and stir well.
- Cover with plastic wrap and refrigerate for at least 3-4 hours or overnight.
- Whip the chilled coconut cream until fluffy.
- Layer the chia pudding and coconut cream in serving glasses, dust with cocoa between layers.
- Chill for another 30 minutes before serving if you can wait.
Notes
For added texture, consider including chocolate shavings or crushed walnuts between layers.
Nutrition
- Serving Size: 1 serving
- Calories: 180
- Sugar: 6g
- Sodium: 100mg
- Fat: 8g
- Saturated Fat: 7g
- Unsaturated Fat: 1g
- Trans Fat: 0g
- Carbohydrates: 25g
- Fiber: 12g
- Protein: 6g
- Cholesterol: 0mg
Keywords: tiramisu, chia pudding, healthy dessert, vegan dessert, keto dessert
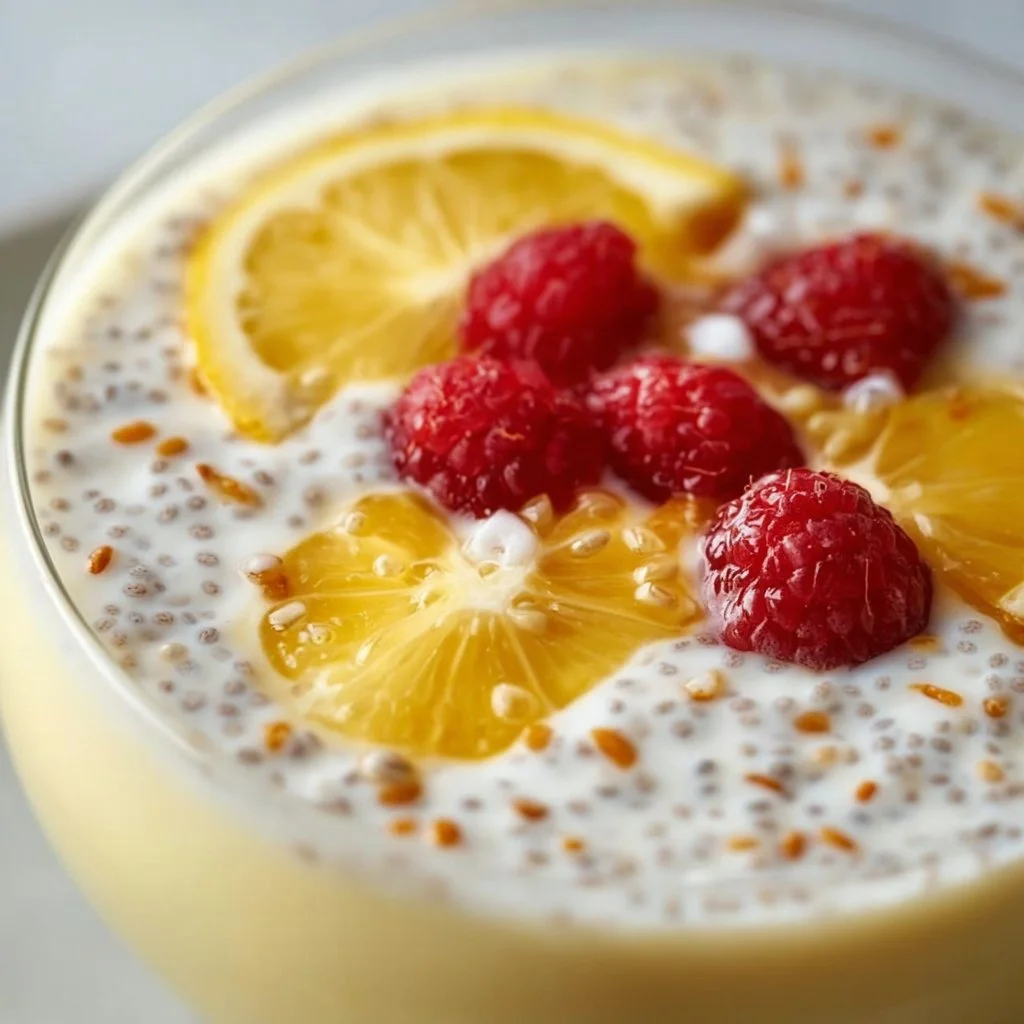
Yummy Lemon Cream Chia Pudding
Yummy Lemon Cream Chia Pudding: A Refreshing Treat for Any Occasion
Hello, my culinary comrades! 🍋 Today, we’re diving into a delightful treat that’s as refreshing as a summer breeze and as simple as can be—the Yummy Lemon Cream Chia Pudding! Now, I know what you might be thinking: “Chia pudding? Really?” But trust me, this dish is anything but ordinary. With its creamy texture, zesty lemon flavor, and eye-catching presentation, it’s sure to win hearts and taste buds alike.
Chia seeds have long been celebrated for their health benefits. They’re packed with omega-3 fatty acids, fiber, and antioxidants, making them a superfood that’s well-deserved of a place on your table. But here’s the best part: when combined with creamy yogurt or coconut milk and zesty lemon, chia seeds transform into a luscious treat that feels indulgent yet is totally good for you. Perfect for breakfast, a snack, or even a light dessert, this recipe is versatile and oh-so-satisfying.
As we whip up this lemon cream chia pudding, I want you to feel inspired and empowered in your kitchen. I’ll share my tips and tricks along the way, so you can create a dish that feels both elegant and approachable. So grab your apron (you know I love an ivory apron moment), and let’s get cooking!
Personal Story
I’ll never forget the first time I tasted chia pudding. It was at a cozy little café tucked away in the heart of the city, and I was on one of those brunch outings with friends that turned into a leisurely affair. As we chatted and sipped on our lattes, someone ordered the chia pudding, and I was immediately intrigued by the smooth, creamy layer topped with bright fruit. One bite, and I was hooked!
I can still picture sitting at that cafe, sunlight pouring through the windows, with the delicious tartness of lemon cutting through the creamy sweetness. After that day, I found myself wanting to recreate that feeling at home. I experimented with various flavors, but it was the zesty lemon that truly stole the show. That nostalgic café experience inspired this very recipe—a bit of sunshine that you can make in your own kitchen anytime you please!
Ingredients
Let’s gather our ingredients! Here’s what you’ll need to whip up this Yummy Lemon Cream Chia Pudding:
-
Chia Seeds (½ cup)
These little powerhouses are packed with fiber and omega-3s. If you’re in a pinch, you can swap them for ground flaxseed, but the texture will be different. -
Coconut Milk or Greek Yogurt (1 cup)
Either option brings a creamy richness to the pudding. Use coconut milk for a dairy-free option or Greek yogurt for a protein boost (plus creaminess!). -
Fresh Lemon Juice (¼ cup)
Freshly squeezed lemon juice is a game-changer! If you’re in a hurry and don’t have fresh lemons, bottled juice works, but the flavor won’t be as vibrant. -
Honey or Maple Syrup (2-3 tablespoons)
Sweeten to your liking! Feel free to adjust the sweetness. For a vegan option, stick with maple syrup. -
Vanilla Extract (1 teaspoon)
This adds a warm note to the pudding, making it feel extra special. If you’re out of vanilla extract, almond extract can be a lovely alternative. -
Pinch of Salt
A touch of salt enhances all the flavors, making the lemon pop! Don’t skip it.
Step-by-Step Instructions
Ready to make some magic? Let’s get cookin’!
-
Prepare the Base:
In a medium-sized bowl, combine the chia seeds, coconut milk (or Greek yogurt), lemon juice, and honey (or maple syrup). Whisk everything together until well blended. Don’t worry if it looks a bit separated at first; the chia seeds will work their magic soon!Tip: If using Greek yogurt, you may want to start with less and adjust the consistency to your liking—once soaked, chia seeds will expand and thicken the mixture!
-
Let It Set:
Cover the bowl with plastic wrap or a lid and let it sit in the refrigerator for at least 4 hours, or preferably overnight. The longer it sits, the creamier and more satisfying it becomes.Chef Hack: For a quick version, let it sit for 20-30 minutes while you clean up!
-
Give It a Stir:
Once set, take the pudding out and give it a good stir. You’ll notice the chia seeds have expanded and created a gel-like consistency. That’s what we want! If it’s too thick for your liking, simply stir in a little more coconut milk or yogurt until you reach your desired consistency. -
Add a Touch of Flavor:
Stir in the vanilla extract and a pinch of salt if you haven’t already. Trust me, it elevates the flavor profiles to a whole new level! -
Serve It Up:
Spoon the creamy pudding into your favorite bowls or glasses. I like using clear containers so you can see those beautiful layers.Presentation Tip: You can layer in some fresh berries or granola (more on that later!) for an eye-catching effect!
Serving Suggestions
Now that your silky pudding is ready, let’s talk presentation. I love layering the pudding in a parfait style. Start with a base of the lemon cream chia pudding, then alternate layers with fresh berries like blueberries or raspberries for a pop of color and flavor. Drizzle a bit of honey on top and sprinkle some toasted coconut flakes or granola for crunch. It’s not just delicious, it’s a feast for the eyes!
Recipe Variations
Feeling adventurous? Here are a few fun twists on this recipe to keep things interesting:
-
Berry Bliss: Add a handful of blended strawberries or raspberries to the pudding for a berry-infused lemon flavor.
-
Tropical Escape: Mix in some pineapple juice along with the lemon for a tropical vibe, or top with sliced kiwi for an exotic twist.
-
Matcha Magic: Add a teaspoon of matcha powder for a green, energizing boost.
-
Lavender Love: Infuse the pudding with a teaspoon of culinary lavender for a fragrant herbal note that complements the lemon beautifully.
-
Nutty Crunch: Top the pudding with roasted nuts or seeds for extra texture and nutrition.
Chef’s Notes
This lemon cream chia pudding has become a staple in my kitchen. It’s incredible how something so simple can evoke such joy! Each time I whip it up, I’m reminded of that sunny café day. I’ve even had friends who were initially hesitant about chia pudding give it a try—and watch their faces transform as they taste it for the first time!
It’s been through a few iterations, too. Initially, I made it with just coconut milk, but adding Greek yogurt took the creaminess over the top. Plus, the versatility of flavors means it never gets boring!
FAQs and Troubleshooting
-
Why is my chia pudding too thick?
This can happen if you let it sit too long or if you added too many chia seeds. If your pudding looks like concrete, just mix in some coconut milk or yogurt to loosen it up. -
Can I make it ahead of time?
Absolutely! This pudding is perfect for meal prepping. Just store it in an airtight container in the refrigerator, and it’ll last for about 3-5 days. -
What if I don’t like the texture of chia pudding?
If you’re not a fan of the texture, try blending the pudding after it’s set for a smoother consistency. -
Can I use other flavors besides lemon?
Yes! Feel free to substitute other fruit juices or purees. Just keep the ratios similar—if it’s a thicker puree, you may need to adjust the liquid.
Nutritional Info (if applicable)
(For a typical serving of this Yummy Lemon Cream Chia Pudding, the nutritional info might roughly look like this: Data will vary based on exact ingredients used)
- Calories: 215
- Protein: 5g
- Carbohydrates: 30g
- Fats: 10g
- Fiber: 12g
There you have it, my lovely foodies! A Yummy Lemon Cream Chia Pudding that’s not only delightful but also simple enough to make any day shine a little brighter. Whether you enjoy it for breakfast, a snack, or dessert, I hope it brings a bit of sunshine into your kitchen. Happy cooking, and remember—good food isn’t just about feeding the body; it’s about nourishing the soul. 💛
PrintYummy Lemon Cream Chia Pudding

A refreshing treat that’s creamy and zesty, perfect for breakfast or dessert.
- Prep Time: 10 minutes
- Cook Time: 0 minutes
- Total Time: 240 minutes
- Yield: 4 servings 1x
- Category: Dessert
- Method: Chilling
- Cuisine: American
- Diet: Vegan
Ingredients
- ½ cup Chia Seeds
- 1 cup Coconut Milk or Greek Yogurt
- ¼ cup Fresh Lemon Juice
- 2–3 tablespoons Honey or Maple Syrup
- 1 teaspoon Vanilla Extract
- Pinch of Salt
Instructions
- In a medium-sized bowl, combine the chia seeds, coconut milk (or Greek yogurt), lemon juice, and honey (or maple syrup). Whisk everything together until well blended.
- Cover the bowl with plastic wrap or a lid and let it sit in the refrigerator for at least 240 minutes, or preferably overnight.
- Once set, take the pudding out and give it a good stir.
- Stir in the vanilla extract and a pinch of salt.
- Spoon the creamy pudding into your favorite bowls or glasses.
Notes
For presentation, layer with fresh berries or granola.
Nutrition
- Serving Size: 1 serving
- Calories: 215
- Sugar: 10g
- Sodium: 25mg
- Fat: 10g
- Saturated Fat: 8g
- Unsaturated Fat: 2g
- Trans Fat: 0g
- Carbohydrates: 30g
- Fiber: 12g
- Protein: 5g
- Cholesterol: 0mg
Keywords: chia pudding, lemon pudding, healthy dessert, vegan dessert, easy recipe

Keto Brownie Truffles Recipe
Decadent Keto Brownie Truffles: A Guilt-Free Indulgence
Hello, fellow food lovers! If you’ve ever found yourself dreaming of that rich, chocolatey goodness without the guilt, I’ve got a treat for you today. Say hello to Keto Brownie Truffles! They are a low-carb delight that brings all the joys of brownies in a convenient truffle form—perfect for noshing after dinner or sharing at your next gathering (if you can bear to part with them).
When I started my journey into the world of low-carb baking, I was nervous. I mean, how can you replicate that fudgy texture and decadent flavor we all know and love? But once I discovered the magic of almond flour and Swerve sweetener, I was hooked! The first time I brought these truffles to a potluck, the compliments just kept rolling in. Friends were raving about them and asking for the recipe. And that’s how I knew I needed to share this simple yet delightful creation with all of you!
What I love most about these brownie truffles is not just their delectable taste but their versatility. You can easily customize them, add spices, and roll them in different coatings. Light, rich, and totally satisfying, making keto living enjoyable and deliciously sweet. Ready to roll up your sleeves and dive into the kitchen with me? Let’s get started!
Personal Story
Let me take you back to my childhood, where my grandmother’s kitchen was the heart of our home. The air was always filled with warm aromas of freshly baked brownies, and those moments spent with her were priceless. She taught me the value of simple ingredients and how a little creativity could turn them into something spectacular. We’d bake together on rainy afternoons, the sound of laughter filling the room as we fought over who got to lick the mixing bowl.
Now, while my grandma’s traditional brownies were divine, I often craved a healthier alternative. Fast forward to today, and I’m grateful that I can honor her recipes and bring my modern twist to the table with these Keto Brownie Truffles. They capture that nostalgic brownie flavor while allowing us to indulge without guilt. It’s my way of keeping our sweet memories alive while embracing a healthier lifestyle.
Ingredients
Let’s gather our magic potion! Here’s what you’ll need to whip up these keto brownie truffles:
-
1 1/4 cup almond flour
A low-carb hero with a slightly nutty flavor. If you don’t have almond flour, you can try coconut flour, but note that you’ll need less (about 1/3 cup) since it absorbs more moisture. -
1/2 cup powdered Swerve Sweetener
This erythritol-based sweetener mimics sugar’s sweetness without the carbs. If you prefer another powdered sweetener, make sure it’s keto-friendly and doesn’t have a funky aftertaste! -
1/4 cup cocoa powder
This is where we get that chocolate goodness! Choose unsweetened for a more concentrated chocolate flavor; you can substitute with carob powder if you’re avoiding chocolate. -
Pinch salt
Balancing the sweetness, a little salt enhances the chocolate flavor beautifully. If you like a bit more depth, feel free to use sea salt. -
1/2 cup butter (melted)
Rich and creamy, butter helps create that fudgy texture. If you want to use coconut oil for a dairy-free option, just make sure it’s melted. -
1 tsp vanilla extract
Vanilla is a classic that brightens up all the other flavors. Feel free to experiment with almond extract for a twist! -
Water if needed
Sometimes the mixture needs a splash of water to achieve the right consistency—don’t hesitate to add it slowly! -
3 ounces sugar-free dark chocolate (chopped)
This adds extra decadence. You can use any kind of sugar-free dark chocolate you enjoy. -
1/2 ounce cocoa butter (or 1 tbsp coconut oil)
Cocoa butter intensifies the chocolate flavor and adds a silky texture, but coconut oil works perfectly as a substitute if that’s what you have on hand!
Step-by-Step Instructions
Now that we have all our ingredients lined up, let’s get cooking!
-
Preheat Your Oven: Set your oven to 350°F (175°C). Preheating helps ensure even cooking. While that’s warming up, grab a mixing bowl!
-
Mix Dry Ingredients: In a medium bowl, combine the almond flour, powdered Swerve sweetener, cocoa powder, and a pinch of salt. Whisk them together until they’re evenly mixed. Here’s a little chef hack: sifting the cocoa powder before mixing can help break up clumps and enhance the texture of your truffles.
-
Incorporate Wet Ingredients: In a separate bowl, combine the melted butter, vanilla extract, and any water you might need. Gently stir until fully blended. You want smoothness here — the smoother, the creamier your truffles will be!
-
Combine the Mixtures: Pour the wet ingredients into the dry ingredients and stir until just combined. If the batter feels too crumbly, add a teaspoon of water at a time until you achieve a thick dough-like consistency.
-
Fold in Chocolate: Gently fold in the chopped sugar-free dark chocolate. This is the moment the decadence really comes together! Use a spatula to ensure the chocolate is evenly distributed.
-
Shape the Truffles: Using your hands, scoop out tablespoon-sized portions of the dough and roll them into balls. Don’t stress about being perfect; the slight imperfections add charm!
-
Chill: Place the truffle balls on a parchment-lined baking sheet and pop them in the fridge for about 30 minutes. Chilling helps them firm up nicely.
-
Melt Coating: While the truffles chill, melt the cocoa butter (or coconut oil) in a microwave-safe dish until completely liquid. Then, remove your truffles from the fridge.
-
Coat Your Truffles: Dip each truffle into the melted cocoa butter or coconut oil, then roll in additional cocoa powder (or crushed nuts if you prefer a crunchy coating). Place them back on the parchment to set.
-
Serve & Enjoy: Once set, they’re ready to enjoy or store in an airtight container in the fridge for up to a week. Trust me, they won’t last long—each bite is pure bliss!
Serving Suggestions
When it comes to plating these Keto Brownie Truffles, keep it simple and elegant. Arrange them on a beautiful platter, dust with cocoa powder, and maybe garnish with a few fresh mint leaves for a pop of color. You could even serve them alongside a dollop of whipped cream or a scoop of sugar-free vanilla ice cream for a scrumptious dessert.
Recipe Variations
Feel like mixing it up? Here are a few ideas to make these brownie truffles your own:
-
Nutty Delight: Roll your truffles in finely chopped nuts like pecans or walnuts for an added crunch.
-
Peppermint Twists: Add a few drops of peppermint extract to the batter for a refreshing holiday twist!
-
Spicy Kick: A pinch of cayenne or chili powder can elevate the chocolate flavor and give it an unexpected kick.
-
Mocha Magic: Mix in a tablespoon of instant coffee granules for a delightful mocha flavor.
-
Chewy Coconut: Incorporate unsweetened shredded coconut into the dough for a tropical twist!
Chef’s Notes
These Keto Brownie Truffles have quickly become a staple in my kitchen, a staple I love to whip up on weekends when friends come over for game night. They’re a great conversation starter, and watching faces light up after the first bite is the best reward!
One of the funny things about this recipe is how the smallest adjustments lead to deliciously different flavors. Once, I accidentally used baking soda instead of salt and ended up with a very interesting truffle. That’s the beauty of cooking—sometimes, “mistakes” lead to delightful surprises that elevate your culinary exploration!
FAQs and Troubleshooting
1. My mixture is too dry. What should I do?
No worries! Just add water or a little melted butter, one teaspoon at a time, until it reaches a thick but manageable consistency.
2. Can I use whole wheat flour instead of almond flour?
Whole wheat flour is not low-carb. Stick with almond flour or coconut flour for an optimal keto option.
3. How do I store these truffles?
Keep them in an airtight container in the fridge for up to a week. They also freeze well, so you can save some for a later treat!
4. What if I don’t have sugar-free dark chocolate?
You can substitute it with any other unsweetened chocolate, but remember to account for the sweetness in your truffle mixture!
Nutritional Info
(This is optional and could include details like calories, fat, protein, and carb counts based on serving sizes).
Per Truffle (Approx. 1 truffle):
- Calories: 90
- Fat: 8g
- Protein: 2g
- Carbs: 3g (Net Carbs: 1g)
- Fiber: 2g
So, there you have it, my wonderful foodies! These Keto Brownie Truffles are an easy and delicious way to satisfy your chocolate cravings while sticking to your healthy eating plans. I hope you enjoy making them as much as I do. Let’s tie on those aprons, and we’ll create some kitchen magic together! Happy cooking, everyone!
PrintDecadent Keto Brownie Truffles

Keto Brownie Truffles are a low-carb delight that offers the rich chocolate flavor of brownies in a convenient truffle form, perfect for guilt-free indulgence.
- Prep Time: 15 minutes
- Cook Time: 0 minutes
- Total Time: 45 minutes
- Yield: 12 servings 1x
- Category: Dessert
- Method: Chilling
- Cuisine: Keto
- Diet: Keto
Ingredients
- 1 1/4 cup almond flour
- 1/2 cup powdered Swerve Sweetener
- 1/4 cup cocoa powder
- Pinch salt
- 1/2 cup butter (melted)
- 1 tsp vanilla extract
- Water if needed
- 3 ounces sugar-free dark chocolate (chopped)
- 1/2 ounce cocoa butter (or 1 tbsp coconut oil)
Instructions
- Preheat your oven to 350°F (175°C).
- Mix the almond flour, powdered Swerve sweetener, cocoa powder, and a pinch of salt in a medium bowl.
- Incorporate the melted butter, vanilla extract, and any water in a separate bowl.
- Combine the wet ingredients with the dry ingredients until just mixed.
- Fold in the chopped sugar-free dark chocolate.
- Shape the dough into tablespoon-sized balls.
- Chill on a parchment-lined baking sheet for about 30 minutes.
- Melt the cocoa butter or coconut oil in a microwave-safe dish.
- Coat each truffle in the melted cocoa butter or coconut oil, then roll in cocoa powder.
- Serve and enjoy or store in an airtight container in the fridge.
Notes
These truffles can be customized with various coatings and flavors. They store well in the fridge for up to a week.
Nutrition
- Serving Size: 1 truffle
- Calories: 90
- Sugar: 1g
- Sodium: 50mg
- Fat: 8g
- Saturated Fat: 5g
- Unsaturated Fat: 3g
- Trans Fat: 0g
- Carbohydrates: 3g
- Fiber: 2g
- Protein: 2g
- Cholesterol: 30mg
Keywords: Keto, Brownies, Truffles, Low-Carb, Desserts
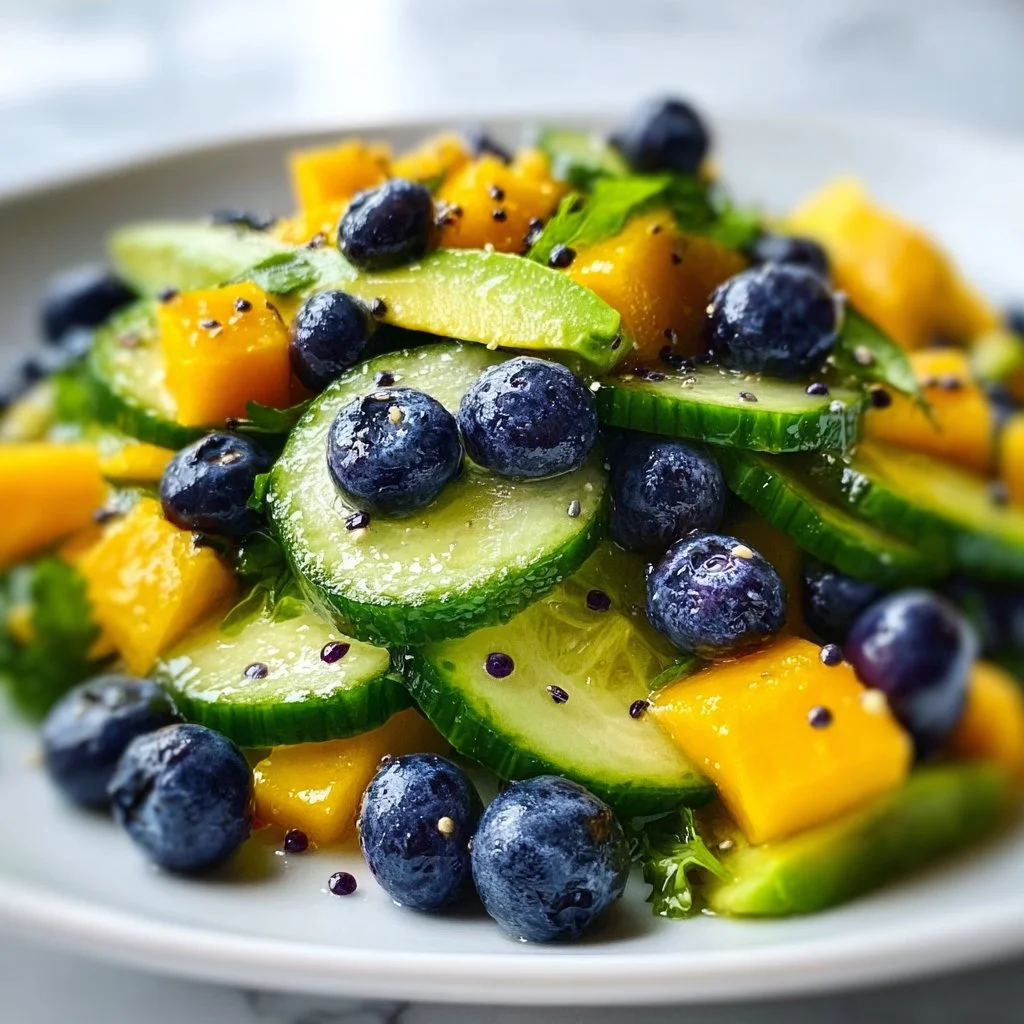
Mango Cucumber Salad with Blueberries and Avocado
# Refreshing Mango Cucumber Salad with Blueberries and Avocado

## Introduction

Hey there, fellow food lovers! 🌟 Today, we're diving into a vibrant, refreshing dish that's not only a feast for the eyes but also bursting with flavor — the Mango Cucumber Salad with Blueberries and Avocado. Whether you’re enjoying a sunlit afternoon or throwing a casual dinner gathering, this salad is the perfect companion for those moments when you want something light yet indulgent.

Imagine this: A hot summer day, the sun is high, and the smell of tropical fruit fills the air. You’re sipping on a cool drink, maybe some iced tea infused with mint, while the grill sizzles in the background. You decide to whip up this salad, and with just a few ingredients, you create something beautiful and delicious that will wow your taste buds and impress your guests.

The combination of juicy mango, refreshing cucumber, creamy avocado, and sweet blueberries is not just delicious; it’s also a vibrant celebration of summer all on your plate. Plus, with a squeeze of fresh lime juice, this dish becomes the ultimate palate cleanser!

As we stroll down memory lane, we'll make this salad together, so roll up those sleeves, grab your apron, and let’s get cooking! 🎉

## Personal Story

I remember the first time I made this salad. It was for a family barbecue, and I was determined to shake things up from the usual fare. My cousin, who always brought the same potato salad, was in attendance, and I just knew I had to wow everyone with something refreshing.

I can still visualize standing in my grandparents’ kitchen, surrounded by ripe mangoes and cucumbers ready for their makeover. My grandmother had this garden where cucumbers grew wildly, and every summer, it felt like magical treasure hunting as we searched for the biggest ones to harvest. That day, I diced the colorful mangoes, vibrant cucumbers, and bright blueberries while blasting some ’90s nostalgia on the radio. The sunny day and colorful produce created a lively atmosphere that drew everyone in.

Once my salad was tossed together, I felt a burst of pride as my family took their first bites. The coolness of the cucumbers, paired with the sweetness of the mango, left everyone smiling and reaching for seconds. That moment sealed the deal for me — I knew this dish was a keeper. It became a staple in my recipe repertoire, a party favorite, and a dish that holds more than just fantastic flavors — it’s tied to a special memory of family, laughter, and love.

## Ingredients

Let’s gather our stars for this irresistible salad!

- **2 ripe mangoes, diced**
  *Mangoes are the heart of this dish! Choose firm, slightly soft ones for the sweetest experience. If you can’t find mangoes, try swapping in peaches or nectarines for a similar sweetness.*

- **1 cucumber, diced**
  *Cucumbers add that refreshing crunch. Pick ones that are firm and smooth. Don’t have cucumber? Zucchini works in a pinch, or you could try jicama for a fun twist!*

- **1 avocado, diced**
  *Avocados provide that creamy texture that makes every bite a delight. Choose an avocado that yields slightly to pressure. The best substitutes? Try a bit of cottage cheese for creaminess or omit it entirely for a lighter feel!*

- **1 cup blueberries**
  *Blueberries are richly sweet and add a pop of color. Fresh is best, but if they’re out of season, frozen blueberries will work; just thaw and drain them before using!*

- **Juice of 1 lime**
  *Lime juice brightens up all the flavors. If you’re out of lime, you can use lemon juice, though it may change the flavor profile slightly.*

- **Salt, to taste**
  *A little pinch of salt will enhance the flavors. You can also use sea salt for a more sophisticated touch!*

- **Fresh mint leaves, for garnish (optional)**
  *Mint adds a lovely refreshing touch! If mint isn't your thing, cilantro could be a great substitute for a bolder flavor. Kids might enjoy basil for a sweet twist!*

## Step-by-Step Instructions

Now that we’ve got our ingredients ready, let’s jump into crafting this delightful Mango Cucumber Salad! 🥗

### Step 1: Prepare Your Ingredients
Start by giving your produce a good rinse under cold water — it’s essential for both freshness and cleanliness. Let’s set the tone for this beautiful salad right from the get-go!

### Step 2: Chop the Mangoes
Grab your favorite knife (please, a sharp one!) and carefully slice along the pit of each mango, separating the flesh from the stone. Cut it into cubes — make sure the mangoes are perfectly ripe for that sweet and juicy bite.

**Chef Hack:** If you have a hard time getting the mango off the pit, try using a spoon to scoop out the flesh after cutting around it!

### Step 3: Dice Your Cucumber
Next up, the cucumber! Cut off the ends, then slice it in half lengthwise and scoop out the seeds if they’re large (if you want it less watery). Dice it into bite-sized pieces.

**Chef Tip:** If you’re using a seedless cucumber, you can skip this step! Keeping the skin on adds more crunch and nutrients.

### Step 4: Slice the Avocado
Time for the avocado! Cut it in half, remove the pit, and using a knife, create a cross-hatch pattern in the flesh before scooping it out with a spoon. Add this creamy goodness to your bowl.

**Pro Tip:** To avoid browning, squeeze some lime juice directly onto your diced avocado. It keeps that beautiful green color longer!

### Step 5: Gather the Blueberries
Measure out your blueberries. If they’re large, give them a little press to release some of their juiciness as they mix with the other ingredients.

### Step 6: Mix it Up
In a large bowl, gently combine all your diced ingredients along with the blueberries. This is where the magic happens! The colors will be so vibrant, you’ll feel like a culinary artist.

### Step 7: Dress it Up
Squeeze the fresh lime juice over your salad, ensuring all components get a zesty kiss. Sprinkle salt to taste and gently toss everything together to ensure even seasoning.

**Final Chef Hack:** Use two forks to toss the salad gently; this helps preserve the structure of the delicate ingredients!

### Step 8: Serve and Garnish
Transfer your salad to a beautiful serving bowl or platter. If you went with mint for garnish, gently tear some fresh leaves and sprinkle them on top for that extra touch of elegance.

## Serving Suggestions

To serve this salad, I love plating it in a shallow bowl or on a wide, vibrant platter. Give it a slight toss right before serving, so all the fruits can shine together! If you’re feeling extra fancy, serve alongside grilled shrimp or chicken for a filling meal, or enjoy it as a side alongside tacos for an unexpected twist. Your guests will be lining up for more!

## Recipe Variations

Want to spice things up? Here are a few creative twists to personalize your Mango Cucumber Salad:

- **Add Protein:** Toss in some grilled chicken or shrimp for a heartier option, perfect for meal prep!

- **Nutty Flavor:** For added crunch, sprinkle in some toasted almonds or walnuts.

- **Zingy Kick:** If you love a bit of heat, chop some jalapeño or sprinkle red pepper flakes for a spicy twist!

- **Sweet Switch:** Swap blueberries for strawberries or raspberries based on what’s in season for a different flavor profile.

- **Vegan Twist:** Make it vegan by simply omitting the avocado for a lower-fat version or substituting with a plant-based dairy like cashew cream.

## Chef’s Notes

I’ve seen this salad transform over the years, evolving to fit every season and occasion. I remember making it one year for a friend’s wedding shower and adding in some crumbled feta cheese, which brought a whole new level of flavor.

Cooking is all about creativity and adapting to what’s available and what feels good to you. So don't be afraid to dance a little outside the lines with this salad! It’s been a joyful journey for me, continually experimenting and adjusting the ingredients.

One of my favorite moments was bringing this to a potluck. Everyone raved, and I left with an empty bowl and huge smiles all around. Moments like these remind me of why I love sharing food — it brings us together and creates cherished memories.

## FAQs and Troubleshooting

**1. My mango isn’t ripe enough! What can I do?**
If your mangoes are still hard, you can place them in a brown paper bag for a couple of days to speed up the ripening process. But if you’re in a rush, try a frozen mango — just thaw and use in the salad!

**2. Why does my avocado look brown?**
Browning occurs when the flesh is exposed to air. To avoid this, mix the diced avocado as soon as you chop it with lime juice. If it happens, don’t panic; it’s still edible!

**3. How do I keep this salad fresh for later?**
This salad is best enjoyed fresh due to the delicate nature of the avocado and berries. If you do have leftovers, keep the dressing separate and combine just before eating to preserve freshness!

**4. Can I make this salad in advance?**
You can prepare the diced mango, cucumber, and blueberries a few hours in advance and mix them just before serving. For the avocado, I recommend adding it last to keep it fresh!

## Nutritional Info (optional)

*Serving Size: 1 cup*
- Calories: 220
- Total Fat: 10g
- Saturated Fat: 1.5g
- Carbohydrates: 32g
- Fiber: 8g
- Sugars: 15g
- Protein: 3g

---

And there you have it! A delightful Mango Cucumber Salad that’s sure to become one of your go-to recipes this season. Whether it’s a warm day or a cozy night in, you can enjoy the goodness of fresh ingredients and create beautiful memories around your table. Happy cooking! 🍽️
Refreshing Mango Cucumber Salad with Blueberries and Avocado

A vibrant and refreshing Mango Cucumber Salad with juicy mango, crisp cucumber, creamy avocado, and sweet blueberries, dressed with fresh lime juice.
- Prep Time: 15 minutes
- Cook Time: 0 minutes
- Total Time: 15 minutes
- Yield: 4 servings 1x
- Category: Salad
- Method: Mixing
- Cuisine: Fusion
- Diet: Vegan
Ingredients
- 2 ripe mangoes, diced
- 1 cucumber, diced
- 1 avocado, diced
- 1 cup blueberries
- Juice of 1 lime
- Salt, to taste
- Fresh mint leaves, for garnish (optional)
Instructions
- Prepare your ingredients by rinsing the produce under cold water.
- Chop the mangoes into cubes, separating the flesh from the pit.
- Dice the cucumber into bite-sized pieces.
- Slice the avocado in half, remove the pit, and scoop out the flesh.
- Gather the blueberries and press them gently if large.
- Mix all the diced ingredients in a large bowl.
- Dress the salad with fresh lime juice and sprinkle with salt.
- Serve and garnish with fresh mint leaves, if desired.
Notes
This salad can be prepared a few hours in advance, but add avocado last to keep it fresh.
Nutrition
- Serving Size: 1 cup
- Calories: 220
- Sugar: 15g
- Sodium: 50mg
- Fat: 10g
- Saturated Fat: 1.5g
- Unsaturated Fat: 8.5g
- Trans Fat: 0g
- Carbohydrates: 32g
- Fiber: 8g
- Protein: 3g
- Cholesterol: 0mg
Keywords: Mango Salad, Cucumber Salad, Summer Salad, Vegan Salad, Fresh Ingredients

Skordalia
Skordalia: A Mediterranean Delight to Elevate Your Table
Hey there, food lovers! Today, we’re stepping into the vibrant and flavorful world of Mediterranean cuisine to whip up a timeless classic — Skordalia. If you’ve never encountered this delicious garlic and potato dip, you’re in for a treat! It’s creamy, tangy, and has just the right amount of garlic punch to liven up any meal. Skordalia is often served at Greek feasts and is perfect for spreading on warm bread, dolloping on roasted veggies, or even using as a zesty sauce for grilled meats. Trust me, it’s a crowd-pleaser!
When I first learned about Skordalia, my mind was blown. A blend of straightforward ingredients turns into something that feels truly luxurious. Plus, it’s a reminder that cooking doesn’t have to be complicated to be impressive. Growing up, family dinners were often about gathering around the table and sharing food that brought everyone together. Skordalia embodies that spirit — each scoop is a hug for your taste buds, a celebration of simple yet quality ingredients, and a testament to the beauty of sharing food with loved ones.
So, whether you’re planning an intimate dinner for two or a lively gathering with friends, this Skordalia recipe can take center stage on your table. Let’s roll up our sleeves, tie on our aprons, and get cooking together!
Personal Story
The first time I had Skordalia, it was at my friend Maria’s family gathering. I remember walking into her home, the air thick with laughter, warmth, and the irresistible aroma of garlicky goodness wafting through the kitchen. Maria’s grandmother was the culinary matriarch of the family, and boy, did she know how to entertain!
As dinner commenced, Maria’s family surrounded the table, and Skordalia was the first dish to grab my attention. Served in a beautiful bowl, drizzled with olive oil and topped with chopped parsley, it looked stunning. I took a scoop onto my plate and was instantly hooked. The texture was creamy, yet featherlight, and the garlic flavor was bold but balanced with a hint of lemon. That evening, I not only savored the food but also soaked in the essence of togetherness.
From that moment on, Skordalia became a staple in my cooking repertoire. It reminds me of that joyful evening filled with love, laughter, and a table full of cherished stories — and I can’t wait for you to experience that same connection with this dish!
Ingredients
To whip up your batch of Skordalia, here’s what you’ll need:
-
2 large potatoes, peeled and cubed
Potatoes give Skordalia its creamy texture. For a twist, you can use sweet potatoes for a natural sweetness or cauliflower for a lighter version. -
4-6 cloves of garlic, minced
Garlic is the star here! Adjust the quantity based on your personal taste. If you’re garlic-averse, try roasting the cloves first for a milder flavor. -
1/2 cup olive oil
Use high-quality extra virgin olive oil for rich flavor. If you prefer a lighter oil, avocado oil can be a great substitute. -
2 tablespoons lemon juice
Freshly squeezed lemon juice adds brightness and balances the dip. You can also experiment with white wine vinegar for a different tang. -
Salt to taste
Always taste as you go! Sea salt or flaky salt works best, giving your Skordalia that perfect savory edge.
With these pantry staples in hand, you’re ready to create something truly special!
Step-by-Step Instructions
Let’s jump into the kitchen! Here’s how you’ll prepare your Skordalia step by step:
-
Boil the Potatoes
Begin by placing your cubed potatoes in a large pot and covering them with cold water. Add a generous pinch of salt. Bring to a boil over medium-high heat. This step ensures that the potatoes cook evenly and get nice and tender. Once boiling, reduce the heat, and let them simmer for about 15 minutes or until easily pierced with a fork. -
Prep the Garlic
While the potatoes are cooking, finely mince your garlic. The smell of fresh garlic will fill your kitchen and get everyone excited! If you’re feeling adventurous, try slicing the garlic instead — it will give the dip a unique texture. -
Drain and Mash
Once your potatoes are tender, drain them well in a colander and return them to the pot. Let them steam for a minute or two to remove any excess moisture. You want them as dry as possible for a fluffier result. Use a potato masher or a fork to mash them into a smooth purée. -
Incorporate the Ingredients
To the mashed potatoes, add minced garlic, olive oil, and lemon juice. Using a spatula or a whisk, mix until velvety and seamless. The key is to add the olive oil gradually to achieve a creamy consistency. If it feels too thick, add a splash of warm water or more olive oil until you reach your desired thickness. -
Season to Taste
Once your Skordalia is well mixed, sprinkle in salt to taste. Give it a good stir and taste. This is your moment to adjust; feel free to add more garlic or lemon to suit your preferences! -
Serve with Style
Transfer your Skordalia to a serving bowl. Drizzle with a bit of extra olive oil on top and sprinkle with freshly chopped parsley or even a pinch of paprika for color. Serve it warm, at room temperature, or chilled — all options are delicious!
Remember, each step is an opportunity to infuse it with your personal touch. Don’t rush through; cooking is about enjoying the journey as much as the destination!
Serving Suggestions
Skordalia can be served in many fun and fabulous ways! Here are a few ideas:
-
With Warm Bread: Grab a loaf of crusty, warm bread, and let guests dip straight into the bowl. Think of it as a Mediterranean fondue!
-
As a Side Dish: Serve Skordalia alongside grilled meats, roasted veggies, or fish. It’s the perfect sauce that complements hearty flavors.
-
On Veggie Platters: Add it to your charcuterie board as a beautiful dip. Surround it with sliced cucumbers, bell peppers, and crunchy carrots for a colorful spread.
-
With Grains: Drizzle Skordalia over a bowl of quinoa or couscous for a delightful flavor boost.
No matter how you choose to serve it, Skordalia will surely be a hit at any gathering!
Recipe Variations
Feeling creative? Here are some fun variations on classic Skordalia:
-
Add Herbs: Mix in fresh herbs like dill, basil, or parsley for a fresh twist. They add an incredible aroma and depth of flavor.
-
Nuts and Seeds: Blend in walnuts or almonds for added crunch and nutrition. Toasting them a bit beforehand enhances their flavors too!
-
Roasted Garlic: Roast your garlic instead of using it raw for a mellower, sweeter flavor that blends beautifully with the potatoes.
-
Spices: Consider adding a hint of cumin or smoked paprika for a unique flavor profile. This can transport your Skordalia from Mediterranean to more exotic realms.
-
Dairy-Free: For a vegan option, you’re already there! Just ensure your olive oil is high quality to make up for any richness from butter.
Chef’s Notes
I must confess, the evolution of my Skordalia recipe has been a journey. When I first attempted it, I was terrified that I’d overpower the dish with too much garlic or not enough seasoning. It took me a few tries to find that perfect balance, but hey, what’s cooking without a few experiments along the way?
Sometimes, I even add a splash of soy sauce or tahini for an unexpected umami hit. It’s those quirky twists that can make a recipe uniquely your own! As a fun kitchen story, I remember one adventure where a family member got extra enthusiastic with the garlic (we’re talking a full head instead of a few cloves!). The results were potent but our laughter filled the kitchen that day — that’s what cooking is all about!
FAQs and Troubleshooting
Can I use different potatoes?
Absolutely! While russets or Yukon Golds are traditional, any variety will do. Just ensure they are starchy for that creamy texture.
My Skordalia is too runny. What can I do?
If your Skordalia ends up too watery, try adding more mashed potatoes to thicken it up. You can also give it a quick whip to incorporate air back into the mixture, making it lighter.
How do I store leftovers?
Store any leftover Skordalia in an airtight container in the refrigerator for up to 3 days. It can also be frozen, but the texture may change slightly upon thawing.
Can I make Skordalia in advance?
Yes! Skordalia actually tastes better the next day as the flavors meld together. Prepare it a day in advance, and let it chill in the fridge until you’re ready to serve!
Nutritional Info (Optional)
- Serving Size: 1/2 cup
- Calories: Approximately 200
- Fat: 10g
- Carbohydrates: 28g
- Protein: 3g
- Fiber: 3g
While this is a loved comfort dish, remember to enjoy it in moderation and incorporate it into a balanced diet!
So there you have it, friends! A delicious journey into the world of Skordalia. I hope you feel inspired to tie on your apron, gather your ingredients, and create your own memories around the dining table. Let’s continue to enjoy the beauty of good food — because at the end of the day, it’s all about connecting with one another through the joy of cooking. Happy cooking!
PrintSkordalia

A creamy, tangy garlic and potato dip from Mediterranean cuisine that elevates any meal.
- Prep Time: 15 minutes
- Cook Time: 15 minutes
- Total Time: 30 minutes
- Yield: 4 servings 1x
- Category: Appetizer
- Method: Boiling
- Cuisine: Mediterranean
- Diet: Vegetarian
Ingredients
- 2 large potatoes, peeled and cubed
- 4–6 cloves of garlic, minced
- 1/2 cup olive oil
- 2 tablespoons lemon juice
- Salt to taste
Instructions
- Boil the potatoes by placing them in a large pot, covering with cold water, and adding a pinch of salt. Bring to a boil and simmer for about 15 minutes or until tender.
- Prep the garlic by mincing it finely.
- Drain the tender potatoes in a colander, return to the pot, and mash them into a smooth purée.
- Incorporate the minced garlic, olive oil, and lemon juice into the mashed potatoes, mixing until smooth.
- Season to taste with salt, adjusting ingredients as desired.
- Serve in a bowl, drizzled with olive oil and garnished with parsley or paprika.
Notes
For creamier consistency, add warm water or more olive oil as necessary. Can be served warm, at room temperature, or chilled.
Nutrition
- Serving Size: 1/2 cup
- Calories: 200
- Sugar: 1g
- Sodium: 300mg
- Fat: 10g
- Saturated Fat: 1.5g
- Unsaturated Fat: 8.5g
- Trans Fat: 0g
- Carbohydrates: 28g
- Fiber: 3g
- Protein: 3g
- Cholesterol: 0mg
Keywords: skordalia, garlic dip, Mediterranean appetizer
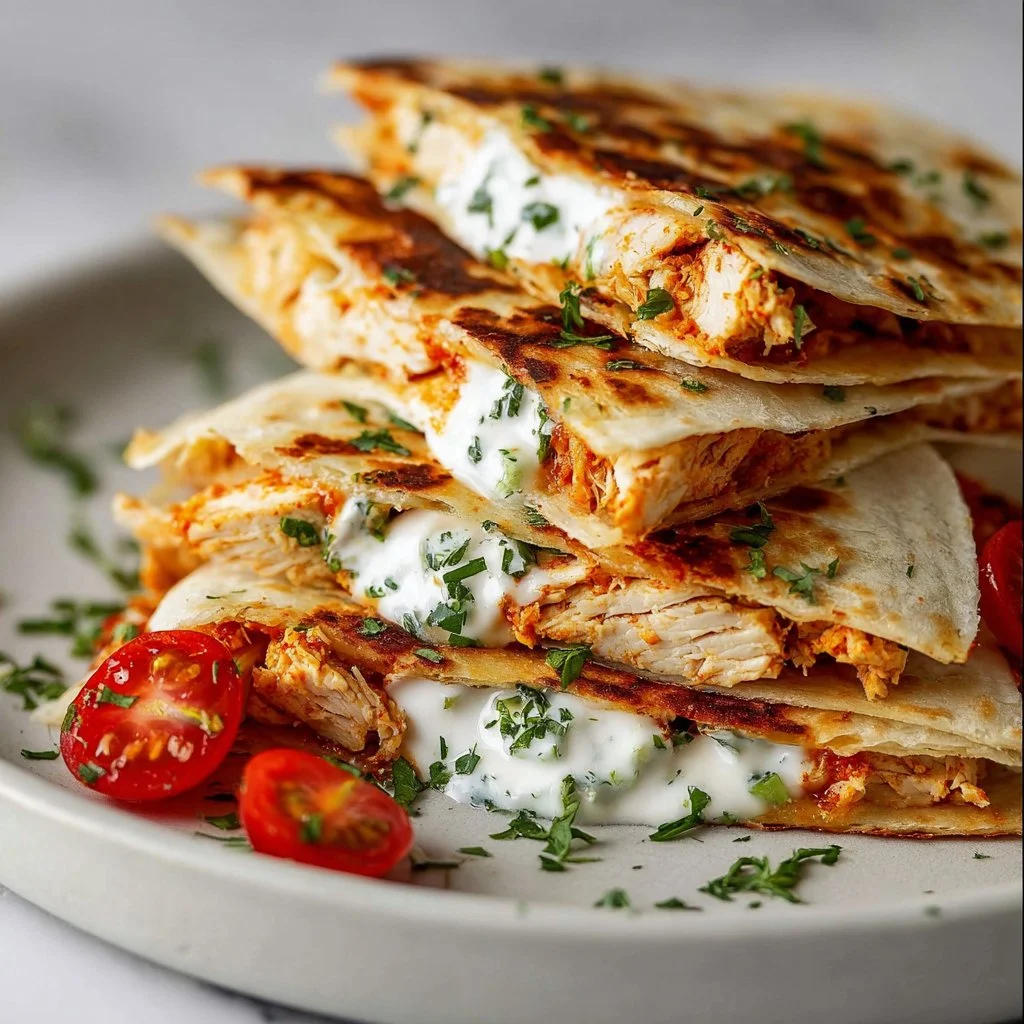
Keto Chicken Quesadilla Recipe
# Keto Chicken Quesadilla Recipe: A Delightful Twist on a Classic Dish

## Introduction

Hello, fellow foodies! Today, we’re diving into the delicious world of **Keto Chicken Quesadillas**. This dish offers all the flavor you love from traditional quesadillas but keeps it low-carb, making it a perfect choice for those following a ketogenic lifestyle or anyone simply looking to cut back on carbs without sacrificing taste.

Quesadillas are one of those magical meals that can be both casual and elegant, depending on how you serve them. They remind me of joyful gatherings, late-night snacks, and the comforting aroma that fills the kitchen as they cook up to golden perfection. Trust me when I say this recipe is not just about food; it’s about creating memories around your table!

Imagine this: You come home after a long day, and the thought of cooking feels overwhelming. Enter the keto chicken quesadilla—quick to make, satisfying to the craving, and perfect for serving to family or friends. Within minutes, you’ll have a dish that’s not just good for you, but good for the soul. So grab your apron—and let’s get this party started!

## Personal Story

As a kid, there was this little Mexican restaurant down the street where my family would frequent on Taco Tuesdays. I can still picture the colorful papel picado hanging from the ceiling, the spice-laden air, and the laughter of families sharing plates of delicious food.

But it was their chicken quesadillas that truly sealed the deal for me. The crisp, cheesy goodness wrapped around seasoned chicken was pure heaven. One of my fondest memories is when my dad challenged me to eat an entire quesadilla by myself. I remember proudly finishing it, only to feel like a stuffed burrito afterward! Fast forward to today, I still reminisce about that little restaurant and all its flavors.

That nostalgia inspires me to make these keto chicken quesadillas—a recipe that's not only delicious but connects me to those cherished moments of family time and joy. So, who is ready to step into the kitchen and whip up a hearty batch?

## Ingredients

Here’s what you’ll need to make our Keto Chicken Quesadillas:

- **3-4 boneless, skinless chicken breasts (about 1 pound)**
   *Fresh and lean chicken keeps things healthy. Feel free to substitute with cooked rotisserie chicken to save time!*

- **1 cup shredded cheddar cheese**
   *This cheese melts beautifully and adds that classic quesadilla flavor. You can use sharp cheddar for a bolder taste or a Mexican blend cheese for a kick!*

- **1 cup shredded mozzarella cheese**
   *Mozzarella gives those beautifully stretchy bites. Swap it out for Monterey Jack if you're looking for something different!*

- **1 cup chopped bell peppers (any color)**
   *Bell peppers bring sweetness and texture. Choose red, orange, yellow, or even green for a colorful presentation!*

- **1 small onion, diced**
   *Onions add a lovely layer of sweetness when sautéed. If you’re not a fan, you can skip them or use shallots for a milder flavor.*

- **2 tsp cumin**
   *Cumin provides a warm, earthy flavor that complements the chicken. If it’s not your fave, coriander is a nice alternative!*

- **2 tsp paprika**
   *This spice enhances color and flavor. Smoked paprika can add a delightful smokiness, too!*

- **1 tsp garlic powder**
   *Garlic powder is a pantry staple that adds depth. Fresh garlic is also a fantastic substitute if you’re in the mood!*

- **Salt and pepper to taste**
   *Essential for bringing out all the flavors! Adjust to your taste preference!*

- **4 low-carb tortillas**
   *The star of our quest for a low-carb dish! Look for tortillas made with almond flour or coconut flour for a keto-friendly option.*

- **2 tbsp olive oil**
   *This will keep everything moist and add healthy fats. Avocado oil is another great alternative!*

- **Sour cream (optional, for serving)**
   *A dollop of sour cream adds a creamy finish. Greek yogurt is a great low-carb substitute if you're looking for something lighter!*

## Step-by-Step Instructions

### 1. Prepare the Chicken
Start by preheating your skillet over medium heat. Season the boneless, skinless chicken breasts with cumin, paprika, garlic powder, salt, and pepper. This is where the magic begins—getting that flavor into the chicken! Cooking it in olive oil will help keep it juicy and delicious.

### 2. Cook the Chicken
Add 1 tablespoon of olive oil to the skillet and let it heat up. Once it’s shimmering, add the seasoned chicken. Sear the chicken for about 6-7 minutes on each side until it’s cooked through and golden brown. If you have a meat thermometer, aim for an internal temperature of 165°F (74°C). The smell will be divine!

### 3. Sauté the Vegetables
Remove the cooked chicken from the skillet and set it aside to rest. In the same skillet, add the remaining tablespoon of olive oil. Toss in the diced onions and chopped bell peppers. Sauté them for about 5 minutes until they’re tender and fragrant. This step brings freshness and color to your quesadillas!

### 4. Shred the Chicken
While the vegetables are cooking, shred the chicken with two forks or dice it into bite-sized pieces. This makes it easy to assemble those quesadillas later!

### 5. Assemble the Quesadillas
Now the fun part! On one half of a low-carb tortilla, sprinkle some shredded mozzarella cheese, then layer on the sautéed vegetables, shredded chicken, and finally top it with cheddar cheese. Fold the tortilla over like a taco, enclosing all that deliciousness.

### 6. Cook the Quesadillas
Return the skillet to medium heat. Place the quesadilla in the skillet and cook for about 3-4 minutes on each side, or until the tortilla is golden brown and the cheese has melted. You can gently press down with a spatula to help it cook evenly. Avoid flipping too soon—you want that beautiful crispy finish!

### 7. Slice and Serve
Once cooked, remove the quesadilla from the skillet, let it cool slightly, and then use a pizza cutter to slice it into wedges. Serve warm, perhaps with some sour cream on the side for dipping, and get ready for a flavor explosion!

## Serving Suggestions

For presentation, you can plate your quesadilla wedges with a sprinkle of fresh chopped cilantro or a drizzle of chipotle sauce for an added kick. Serve alongside a fresh green salad or some guacamole for a beautiful, balanced meal. Remember—great food is all about how you present it!

## Recipe Variations

- **Spicy Kick**: Add jalapeños or diced green chilies for some heat!

- **Veggie Delight**: Swap out the chicken for mushrooms, zucchini, or any favorite veggies for a delightful vegetarian version.

- **Cheesy Explosion**: Use different types of cheese like pepper jack or feta for a unique twist!

- **Herb-Infused**: Toss in fresh herbs like cilantro or parsley for a burst of freshness.

- **Crispy**: Cook the quesadillas in an air fryer for a healthier, ultra-crispy texture.

## Chef’s Notes

Over the years, I’ve evolved my quesadilla recipe based on what’s in season or what I have in my fridge. Sometimes I’ll throw in leftover roasted veggies or switch up the cheese combinations for a new twist. It’s all about creativity! I also learned the hard way—never rush the cooking process. Trust your instincts, take your time, and enjoy the aroma filling your kitchen!

## FAQs and Troubleshooting

**1. What if my quesadilla is too soggy?**
Be sure to cook the chicken and veggies properly and avoid overdoing any moisture. If you find the tortillas are getting soggy, try using less filling or cook them on a higher heat to create a crispy shell.

**2. Can I make these ahead of time?**
Absolutely! You can cook the chicken and veggies ahead of time, then assemble and cook the quesadillas when ready. Just keep the fillings in the fridge until you’re ready to use them.

**3. How do I keep the quesadillas warm?**
If you are preparing multiple quesadillas, keep them warm in a low oven (around 200°F or 93°C) on a baking sheet lined with parchment paper. Cover them with foil to keep them moist but note that too long in the oven can make them soft!

**4. Can I freeze these quesadillas?**
Yes! Assemble them without cooking, then freeze the quesadillas wrapped in plastic wrap and aluminum foil. When ready to enjoy, cook directly from frozen with a little longer cooking time.

## Nutritional Info

While specific nutritional data may vary depending on brands and substitutions, here’s an approximate breakdown per quesadilla:

- Calories: 400
- Protein: 34g
- Fat: 28g
- Carbohydrates: 10g
- Fiber: 5g
- Net Carbs: 5g

Feel free to adjust the ingredients and toppings to better suit your dietary preferences!

---

And there you have it—a Keto Chicken Quesadilla recipe that won’t let you miss those days of carb-heavy meals! Now, it's your turn. Tie on that apron and dive into deliciousness! Happy cooking!
Keto Chicken Quesadilla
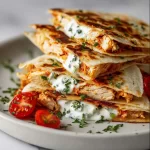
A low-carb twist on the classic quesadilla, packed with flavor and perfect for a keto diet.
- Prep Time: 15 minutes
- Cook Time: 20 minutes
- Total Time: 35 minutes
- Yield: 4 servings 1x
- Category: Main Course
- Method: Sautéing
- Cuisine: Mexican
- Diet: Keto
Ingredients
- 3–4 boneless, skinless chicken breasts (about 1 pound)
- 1 cup shredded cheddar cheese
- 1 cup shredded mozzarella cheese
- 1 cup chopped bell peppers (any color)
- 1 small onion, diced
- 2 tsp cumin
- 2 tsp paprika
- 1 tsp garlic powder
- Salt and pepper to taste
- 4 low-carb tortillas
- 2 tbsp olive oil
- Sour cream (optional, for serving)
Instructions
- Prepare the chicken by seasoning it with cumin, paprika, garlic powder, salt, and pepper.
- Cook the chicken in olive oil for about 6-7 minutes on each side until cooked through.
- Sauté the diced onions and chopped bell peppers in the same skillet for about 5 minutes until tender.
- Shred the cooked chicken into bite-sized pieces.
- Assemble the quesadilla with cheese, vegetables, and chicken on one half of the tortilla.
- Cook the quesadilla in the skillet for 3-4 minutes on each side until golden brown.
- Slice and serve warm, optionally with sour cream on the side.
Notes
Feel free to add jalapeños for spice or use different cheeses for unique flavors.
Nutrition
- Serving Size: 1 serving
- Calories: 400
- Sugar: 2g
- Sodium: 500mg
- Fat: 28g
- Saturated Fat: 10g
- Unsaturated Fat: 16g
- Trans Fat: 0g
- Carbohydrates: 10g
- Fiber: 5g
- Protein: 34g
- Cholesterol: 95mg
Keywords: Keto, Chicken, Quesadilla, Low-carb, Quick meal, Easy recipe
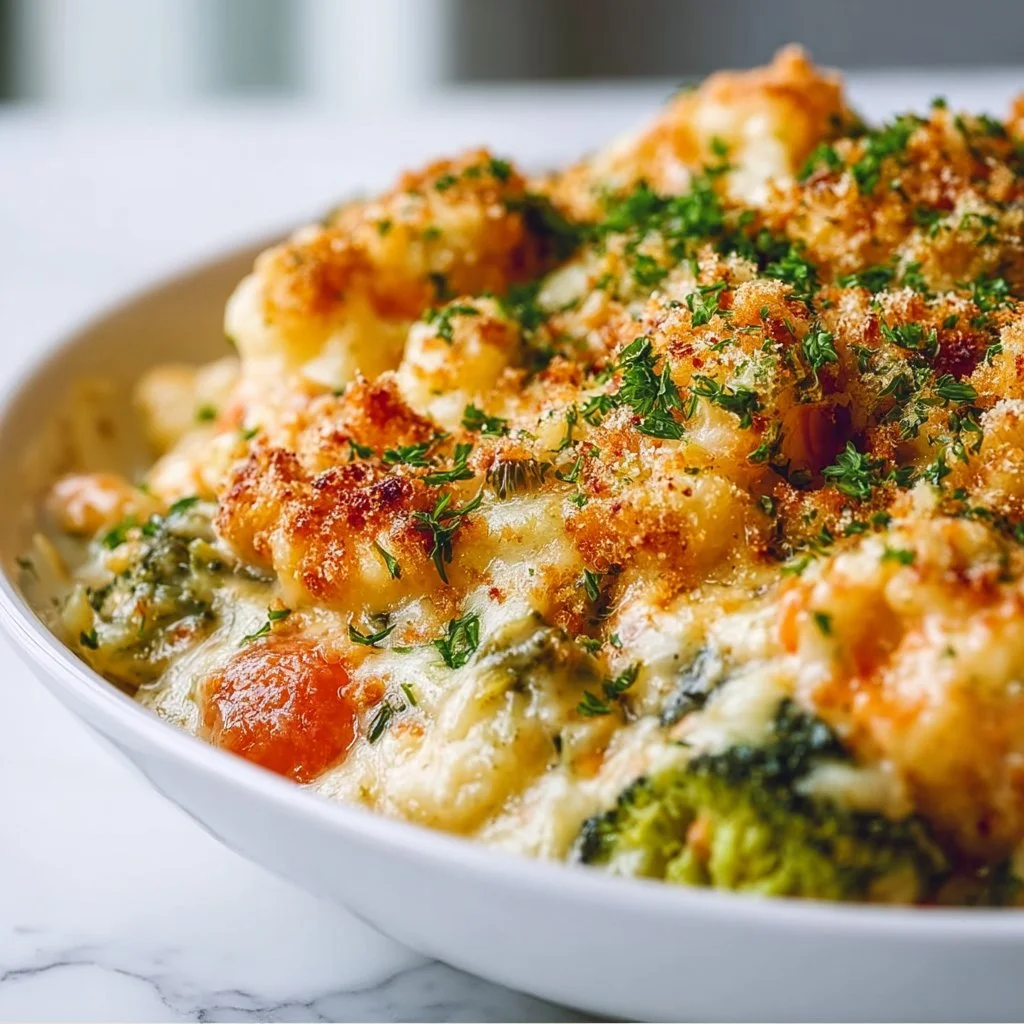
Creamy Winter Vegetable Casserole
Creamy Winter Vegetable Casserole: A Cozy Delight for Your Table
Hello, fellow food lovers! Today, we’re diving into a comforting dish that encapsulates all the joy of winter goodness wrapped up in one warm, inviting casserole: Creamy Winter Vegetable Casserole. Picture this: the chill of winter air biting at your cheeks, the soft glow of your kitchen lighting, and the smell of vegetables mingling with cheese wafting through your home. It’s a scene that brings warmth not just to your belly, but to your spirit as well.
This casserole isn’t just a pretty side dish; it’s a celebration of the hearty, nutritious vegetables that thrive in winter. Think cauliflower, broccoli, and carrots, all swimming in a luscious, creamy sauce that makes you feel like you’re being hugged by flavor. I believe that cooking during winter should be both nourishing and warming, and this recipe embodies that philosophy perfectly.
But what really makes this dish special? It’s the stories, the memories woven through every bite. Whether you’re making it for a cozy family dinner, a holiday gathering, or simply to indulge yourself on a chilly night, this casserole is bound to bring a smile. Ready to unravel the secrets of this delightful dish? Let’s make some culinary magic happen together!
Personal Story
I’ll never forget the very first time I made Creamy Winter Vegetable Casserole. It was during my college days, right around the holiday season. As the temperature dropped, I craved the comfort of home-cooked meals, but my kitchen skills were still, let’s say, a work in progress. Armed with a gnarly old cookbook and my best friend’s guidance over the phone, I decided to tackle this casserole recipe.
As I chopped the vegetables, my apartment was filled with laughter—my roommate was belting out holiday classics while I fumbled with butter and flour, trying to create a roux. When the casserole finally emerged from the oven, bubbling and golden, I was surprised at how delicious it was! We devoured it while wearing our coziest sweaters, and I still remember how good it felt to have a plate full of warmth and comfort on a cold winter’s night. To this day, I still make this casserole whenever I want to indulge in nostalgia and warmth, and I’m excited to share it with you!
Ingredients
Before we jump into the actual cooking, let’s gather our ingredients. Here’s what you’ll need:
-
2 cups cauliflower florets
- Chef Insight: Cauliflower is a winter staple—it’s crunchy, mild, and can absorb flavors beautifully. You can easily swap it out for Brussels sprouts if you’re feeling adventurous!
-
2 cups broccoli florets
- Substitution Tip: Broccoli adds vibrant color and nutrition. If you don’t have it on hand, green beans or asparagus would make a great alternative.
-
2 cups sliced carrots
- Quick Chef Insight: Carrots not only add sweetness but also a vibrant pop of color. Baby carrots can be used, just adjust the quantity accordingly.
-
2 tablespoons butter
- Swap Tip: For a healthier option, you can use olive oil or even coconut oil if you’re looking for a hint of sweetness.
-
2 tablespoons all-purpose flour
- Chef Insight: This is what thickens our creamy sauce. If you’re gluten-free, consider using almond flour or a gluten-free flour blend.
-
2 cups milk
- Substitution Tip: Whole milk gives the creamiest texture, but you can use almond milk or oat milk for a dairy-free version.
-
2 cups shredded cheese (e.g., cheddar or your choice)
- Chef Insight: Cheddar adds a sharp bite, but feel free to mix it up! mozzarella or fontina can give a lovely meltiness, while a bit of parmesan adds a lovely depth of flavor.
-
Salt and pepper to taste
- Pro Tip: Don’t skimp on the seasoning! It’s essential for bringing the flavors to life.
-
1/2 teaspoon garlic powder
- Chef Insight: Garlic powder brings a lovely dependability. Fresh minced garlic would also work beautifully!
-
1/2 teaspoon onion powder
- Quick Tip: Like garlic powder, onion powder adds a savory depth. Diced fresh onions can be sautéed for an even more robust flavor.
-
1/4 cup breadcrumbs (optional, for topping)
- Substitution Tip: For some crunch on top, panko breadcrumbs or crushed Ritz crackers can be a tasty alternative!
Gather these ingredients, and we’ll be on our way to creating a delicious winter masterpiece!
Step-by-Step Instructions
Ready to get cooking? Let’s dive into the process of making our Creamy Winter Vegetable Casserole!
Step 1: Preheat the Oven
First, crank up that oven to 375°F (190°C). Preheating ensures that your casserole cooks evenly and gets that beautiful golden top that we all so love.
Step 2: Prep the Vegetables
While the oven warms, wash and chop your vegetables. Slice your carrots if you haven’t already, and have your broccoli and cauliflower florets ready to go. I like to use a large cutting board for this task—more space means I can chop without making a mess!
A little Chef Hack: To save time, you can always buy pre-chopped veggies from the store. They’re just as good and super convenient!
Step 3: Sauté the Vegetables
In a large skillet over medium heat, melt 2 tablespoons of butter. Once melted, add the cauliflower, broccoli, and carrots. Sauté them for about 5-7 minutes, or until they start to become tender. Stirring occasionally helps everything cook evenly!
A quick tip: If you’re short on time, you can also steam the vegetables until they’re tender but still bright—this will help retain their flavor and nutrients.
Step 4: Make the Creamy Sauce
In the same skillet, after the veggies are removed, add 2 tablespoons of flour to the melted butter. Whisk it together for about a minute to create a roux. Gradually pour in the 2 cups of milk while continuously whisking to avoid lumps.
Watch as your sauce thickens beautifully! Toss in the garlic powder, onion powder, salt, and pepper. You’ll want this sauce to be rich and creamy—taste and adjust the seasoning as you go.
Step 5: Combine Everything
Once your sauce is ready, return your sautéed vegetables to the skillet. Stir in the 2 cups of shredded cheese until it melts and coats the vegetables in creamy goodness.
Chef’s tip: Don’t hold back on the cheese! For even more flavor, consider mixing in different cheeses or even a sprinkle of nutmeg for that extra warmth.
Step 6: Assemble the Casserole
Now it’s time to transfer the cheesy vegetable mixture to a greased baking dish. Spread it out evenly. If you’re feeling fancy, sprinkle the optional breadcrumbs on top for that crispy finish!
Step 7: Bake
Place your casserole in the preheated oven and bake for about 25-30 minutes, or until it’s bubbly and the top is golden. The aroma in your kitchen will be nothing short of heavenly!
A little secret: If you want an extra crispy topping, turn the broiler on for the last 2-3 minutes of baking. Just keep an eye on it!
Step 8: Let it Rest
Once it’s out of the oven, let it sit for about 5-10 minutes before digging in. This allows the casserole to set, making it easier to serve!
Serving Suggestions
For a beautifully plated presentation, scoop out a generous portion of your creamy casserole on a plate, allowing the rich sauce to pool just a bit around the edges. You can garnish it with a sprinkle of chopped fresh herbs—think parsley or chives—for an elevated touch. Serve it alongside a simple green salad or crusty bread for the perfect winter meal that warms both body and soul!
Recipe Variations
Now that you’ve mastered the classic Creamy Winter Vegetable Casserole, here are a few fun twists to keep things exciting:
-
Add Protein: Stir in cooked chicken or turkey for a heartier meal. It’s a fantastic way to use up leftovers!
-
Spice It Up: Add a pinch of red pepper flakes for a gentle kick that livens up the creamy flavor.
-
Herbed Up: Mix in fresh herbs like thyme or parsley for a touch of brightness.
-
Cheesy Meltdown: Motzarella and goat cheese can be combined to create a lovely tang!
-
Vegan Delight: Substitute with vegan cheese, nut milk, and olive oil for a dairy-free version without sacrificing creaminess.
Chef’s Notes
One of my favorite things about this casserole is its incredible versatility. Over the years, I’ve made it a million ways—sometimes tossing in leftover roasted veggies or whatever I have on hand. The joy of cooking is in improvisation! Just remember to keep that creamy sauce as the foundation, and you can add your spin! I once tried it with a dash of sriracha, thinking, "why not?" It turned out to be a big hit at a dinner party!
FAQs and Troubleshooting
1. What if my casserole isn’t bubbling?
- Make sure the oven is preheated, and allow enough baking time. You can also turn on the broiler for a few minutes to achieve that bubbly, golden finish.
2. Can I use frozen vegetables?
- Absolutely! Just make sure to thaw and drain any excess water to prevent the casserole from becoming watery.
3. The sauce is too thick! What can I do?
- Don’t worry! Simply whisk in a bit more milk until you reach your desired consistency.
4. My casserole came out too salty. How do I fix it?
- To balance excessive saltiness, you can add a pinch of sugar or additional vegetables to dilute the flavor.
Nutritional Info
(Optional for those interested)
- Serving Size: 1 cup
- Calories: Approx. 300
- Protein: 15g
- Fat: 20g
- Carbohydrates: 20g
- Fiber: 5g
And there you have it—a wonderfully cozy, creamy winter vegetable casserole that’s sure to become a staple in your kitchen! Gather your loved ones, set the table, and let this dish bring warmth and smiles to your gatherings. I can’t wait to hear how you make it your own. Happy cooking, friends!
PrintCreamy Winter Vegetable Casserole

A comforting dish that celebrates hearty winter vegetables in a luscious, creamy sauce.
- Prep Time: 15 minutes
- Cook Time: 30 minutes
- Total Time: 45 minutes
- Yield: 4 servings 1x
- Category: Main Course
- Method: Baking
- Cuisine: American
- Diet: Vegetarian
Ingredients
- 2 cups cauliflower florets
- 2 cups broccoli florets
- 2 cups sliced carrots
- 2 tablespoons butter
- 2 tablespoons all-purpose flour
- 2 cups milk
- 2 cups shredded cheese (e.g., cheddar or your choice)
- Salt and pepper to taste
- 1/2 teaspoon garlic powder
- 1/2 teaspoon onion powder
- 1/4 cup breadcrumbs (optional, for topping)
Instructions
- Preheat the oven to 375°F (190°C).
- Prep the vegetables by washing and chopping them.
- Sauté the vegetables in a skillet with butter for 5-7 minutes until tender.
- Make the creamy sauce by combining flour and milk in the skillet over medium heat.
- Combine the sautéed vegetables and shredded cheese into the creamy sauce.
- Assemble the casserole in a greased baking dish and sprinkle optional breadcrumbs on top.
- Bake for 25-30 minutes until bubbly and golden.
- Let it rest for 5-10 minutes before serving.
Notes
Feel free to customize the recipe with different vegetables or add proteins like chicken or turkey for a heartier meal.
Nutrition
- Serving Size: 1 cup
- Calories: 300
- Sugar: 5g
- Sodium: 350mg
- Fat: 20g
- Saturated Fat: 10g
- Unsaturated Fat: 8g
- Trans Fat: 0g
- Carbohydrates: 20g
- Fiber: 5g
- Protein: 15g
- Cholesterol: 30mg
Keywords: winter, casserole, creamy, vegetables, comfort food