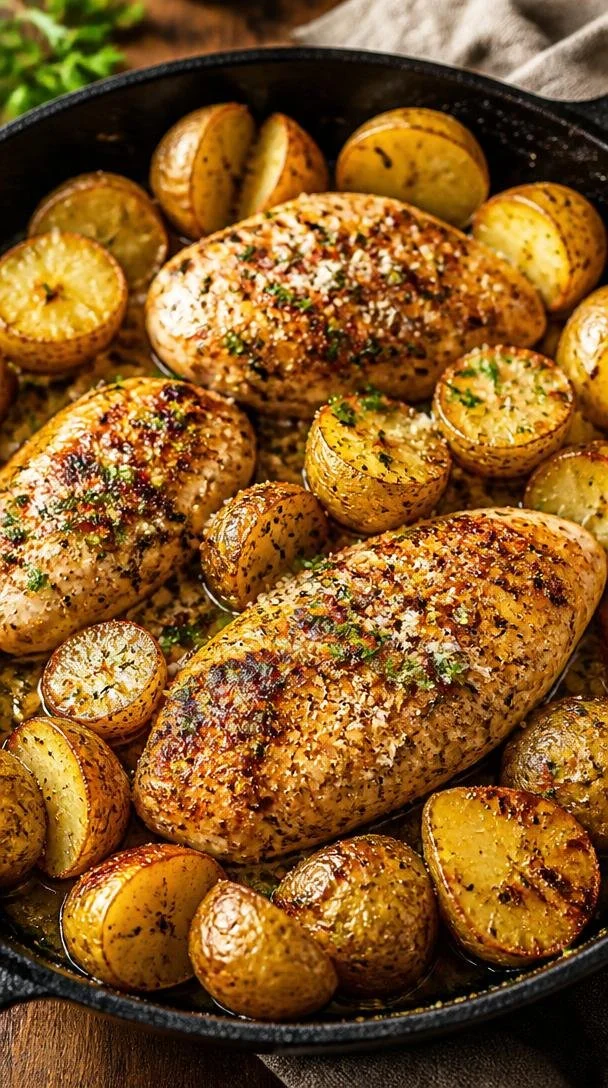
Garlic Parmesan Chicken and Potatoes
Garlic Parmesan Chicken and Potatoes: A Timeless Comfort
Hello, fellow food lovers! Today, I am beyond thrilled to share one of my all-time favorite comfort dishes: Garlic Parmesan Chicken and Potatoes. This dish is everything you crave—crispy, cheesy, and oh-so-satisfying. It’s the kind of meal that effortlessly brings warmth to the table, and it’s perfect for weeknights or special occasions alike. With just the right balance of garlic and creamy parmesan, this dish will have your loved ones asking for seconds!
There’s something really special about gathering around a warm meal with friends or family. It’s that magical moment where conversations flow, laughter fills the air, and everyone feels at home. Garlic Parmesan Chicken and Potatoes is one of those meals that never fails to spark joy. Just imagine the aroma wafting through your kitchen as the garlic and herbs dance together in harmony. Ah, bliss!
So grab your apron, and let’s dive into this delightful recipe that combines ease, elegance, and oh-so-delicious flavors. Whether you’re cooking for your family or impressing guests, this dish is sure to shine!
A Special Memory in the Kitchen
Looking back, I can’t help but smile at the memories I have of my grandmother bustling around her kitchen, filling the air with the rich aroma of garlic and rosemary. She had a knack for turning simple ingredients into something extraordinary. Garlic Parmesan Chicken and Potatoes reminds me of those cherished Sundays spent in her kitchen, where the whole family gathered around a big table, eagerly waiting for the feast to begin.
One particular Sunday, she decided to try her hand at turning her classic chicken dish into something special for a family gathering. With a few tweaks here and there—more garlic, an extra sprinkle of cheese, and her unparalleled love—the dish became an instant hit! Everyone raved about it, and the laughter that filled the room was the perfect accompaniment to that delicious meal. Now, any time I make Garlic Parmesan Chicken and Potatoes, I can’t help but feel like I’m channeling my grandmother’s spirit—it’s comfort food that tells a story.
Ingredients
Here’s what you’ll need for this delightful dish:
-
1 ½ lbs boneless (skinless) chicken breasts (about 3–4 pieces)
Juicy and lean, these chicken breasts are the perfect canvas for all the flavors to shine. If you’re looking for a heartier option, feel free to swap them out for skin-on chicken thighs—just be sure to adjust cooking time accordingly! -
1 ½ lbs baby potatoes (halved or quartered if large)
These little gems are just the right size for roasting and have a lovely creaminess. If you can’t find baby potatoes, regular potatoes will do just fine; just cut them into similar-sized pieces for even cooking. -
3 tbsp olive oil (divided)
A must-have in any kitchen! The olive oil not only helps to roast the chicken and potatoes but also provides a subtle flavor. If you prefer, avocado oil is an excellent alternative for its high smoke point. -
4 cloves garlic (minced)
Ah, garlic—the star of the show! It imparts a robust flavor that really elevates the dish. If you’re feeling adventurous, try roasting the garlic first for a sweeter, milder taste! -
1 tsp Italian seasoning
This delightful blend brings a bit of the Italian countryside right to your kitchen! If you don’t have Italian seasoning, a combination of dried oregano, basil, and thyme works beautifully too. -
½ tsp paprika
Paprika adds not just a hint of color, but also a warm, smoky flavor. For a spicier kick, don’t hesitate to use smoked paprika or add a pinch of cayenne pepper! -
½ tsp salt (more to taste)
Salt enhances every flavor; however, adjust to your preference, especially if you’re using parmesan cheese, which can already be salty. -
½ tsp black pepper
Freshly ground black pepper adds a lovely warmth to the dish. Don’t skimp on it! -
½ cup grated Parmesan cheese
This cheese brings that creamy, umami flavor that pairs so beautifully with the garlic and chicken. If you’re looking for a non-dairy version, consider nutritional yeast for a cheesy flavor without the dairy! -
2 tbsp fresh parsley (chopped, for garnish)
A sprinkle of fresh parsley adds a pop of color and freshness. You could also use fresh thyme or basil for a delightful twist in flavor! -
2 tbsp unsalted butter (melted)
Butter elevates the richness of the dish and helps the garlic and herbs cling beautifully to the chicken and potatoes. If you’re avoiding dairy, feel free to substitute with olive oil or a plant-based butter.
Step-by-Step Instructions
Now, let’s get our hands a little messy and cook up this wonderful dish together!
1. Preheat the Oven
Start by preheating your oven to 400°F (200°C). A hot oven not only helps to crisp up the chicken and potatoes but also seals in all those delicious flavors.
2. Prepare Your Baking Dish
Grab a large baking dish (or a sheet pan works great too!) and drizzle 1 tablespoon of olive oil across the bottom. This will create a non-stick base for your chicken and potatoes while adding extra flavor right from the start.
3. Season the Chicken
In a small bowl, whisk together the remaining olive oil, minced garlic, Italian seasoning, paprika, salt, and black pepper. This fragrant mixture will coat your chicken beautifully! Take your chicken breasts and season them generously with the marinade, making sure to coat all sides. If you have time, let them marinate for about 15–30 minutes to really enhance those flavors!
4. Prep the Potatoes
While your chicken is soaking up the flavors, it’s time to prep the baby potatoes! Halve or quarter them, depending on their size. Add the potatoes to the baking dish and pour the remaining marinade over them. Give everything a good toss until the potatoes are well-coated. You can use your hands for this—nothing beats the old-fashioned way of getting in there!
5. Add to the Oven
Place the chicken on top of the potatoes in the baking dish. This allows the chicken juices to drip down and flavor the potatoes as they cook. Slide the baking dish into the preheated oven and let it roast for about 30-35 minutes. The chicken should reach an internal temperature of 165°F (74°C), and the potatoes should be fork-tender and beautifully browned.
6. Cheese Time!
Once your chicken and potatoes are done roasting, pull them out of the oven and sprinkle the grated Parmesan cheese evenly over the chicken and potatoes. Switch your oven to broil and pop them back in for 2–3 more minutes, just until the cheese is golden and bubbly. Keep a close watch during this time so it doesn’t burn!
7. The Finishing Touch
Once the cheese is perfectly melted, drizzle the melted butter over the dish for that additional richness and shine. Finally, garnish with freshly chopped parsley for a burst of color and flavor. Step back and admire your creation—it’s about to impress everyone!
Serving Suggestions
To serve, dish out generous portions of the Garlic Parmesan Chicken alongside the potatoes, making sure to include that browned, cheesy goodness on top. For a lovely presentation, you can serve this dish on a large platter, atop a bed of fresh arugula or lemon-dressed greens for extra freshness. Pair with a light white wine, and you’re ready for a fabulous night in!
Recipe Variations
Feeling adventurous? Here are some fun twists you can put on this classic dish:
-
Add Veggies: Toss in seasonal vegetables like bell peppers, asparagus, or zucchini alongside the potatoes for a colorful medley.
-
Spicy Kick: Add a pinch of crushed red pepper flakes or a dash of hot sauce to the marinade for a bit of heat.
-
Herbed Butter: Mix fresh herbs into softened butter and baste the chicken with it before serving for an extra punch of flavor.
-
Creamy Spin: For an indulgent twist, add a splash of cream or a dollop of sour cream to the potatoes before serving.
-
Lemon Zest: Incorporate lemon zest in the marinade for a bright, fresh flavor that dances on the palate!
Chef’s Notes
Every time I make this dish, I’m reminded of how cooking can be both simple and sophisticated. It’s all about layering flavors and using quality ingredients. One of my favorite things about Garlic Parmesan Chicken and Potatoes is that it’s incredibly versatile—you can easily adapt it to suit any season or occasion!
I once had an unexpected kitchen mishap while preparing this dish, where I mistook paprika for cinnamon. The resulting flavor was…interesting, to say the least! Thankfully, my guests were kind and didn’t mention it, allowing me to laugh about it afterward and learn to always double-check my spices!
FAQs and Troubleshooting
1. What if my chicken isn’t cooking evenly?
Ensure your pieces are of similar size for even cooking. Using a meat thermometer will help you avoid undercooked chicken!
2. How can I make it ahead of time?
You can marinate the chicken and prepare the potatoes in advance. Just cover and refrigerate until you’re ready to bake—perfect for meal prep!
3. Why are my potatoes not getting crispy?
Make sure not to overcrowd the baking dish. If the potatoes are too close together, they’ll steam rather than roast. Ensure they get enough space to turn golden brown!
4. Can I freeze leftovers?
Absolutely! Store any leftovers in an airtight container. They can be frozen for up to two months. To reheat, simply bake in a preheated oven until heated through.
Nutritional Info
While I recommend enjoying this dish in moderation, here’s a quick glance at the estimated nutritional breakdown per serving (based on four servings):
- Calories: 450
- Protein: 42g
- Total Fat: 24g
- Saturated Fat: 6g
- Carbohydrates: 18g
- Dietary Fiber: 3g
- Sugars: 1g
There you have it! Your very own Garlic Parmesan Chicken and Potatoes is ready to impress. Remember, it’s not just about the food; it’s about the moments created around it. Enjoy cooking, and happy gathering! 🥂
PrintGarlic Parmesan Chicken and Potatoes

A comforting dish featuring crispy, cheesy garlic parmesan chicken served with tender baby potatoes.
- Prep Time: 15 minutes
- Cook Time: 35 minutes
- Total Time: 50 minutes
- Yield: 4 servings 1x
- Category: Main Course
- Method: Baking
- Cuisine: Italian
- Diet: None
Ingredients
- 1 ½ lbs boneless (skinless) chicken breasts (about 3–4 pieces)
- 1 ½ lbs baby potatoes (halved)
- 3 tbsp olive oil (divided)
- 4 cloves garlic (minced)
- 1 tsp Italian seasoning
- ½ tsp paprika
- ½ tsp salt (more to taste)
- ½ tsp black pepper
- ½ cup grated Parmesan cheese
- 2 tbsp fresh parsley (chopped, for garnish)
- 2 tbsp unsalted butter (melted)
Instructions
- Preheat the oven to 400°F (200°C).
- Prepare a large baking dish by drizzling 1 tablespoon of olive oil across the bottom.
- In a small bowl, whisk together the remaining olive oil, minced garlic, Italian seasoning, paprika, salt, and black pepper. Coat the chicken with this marinade.
- Halve or quarter the baby potatoes and add them to the baking dish. Pour the remaining marinade over them and toss well.
- Place the chicken on top of the potatoes, then roast in the oven for about 30-35 minutes.
- Once cooked, sprinkle grated Parmesan cheese over the chicken and potatoes and broil for 2-3 minutes until golden.
- Drizzle melted butter over the dish and garnish with fresh parsley.
Notes
For added flavor, consider including seasonal vegetables or spices. This dish can be prepared ahead of time by marinating the chicken and preparing the potatoes in advance.
Nutrition
- Serving Size: 1 serving
- Calories: 450
- Sugar: 1g
- Sodium: 500mg
- Fat: 24g
- Saturated Fat: 6g
- Unsaturated Fat: 14g
- Trans Fat: 0g
- Carbohydrates: 18g
- Fiber: 3g
- Protein: 42g
- Cholesterol: 90mg
Keywords: Garlic, Parmesan, Chicken, Potatoes, Comfort Food, Italian
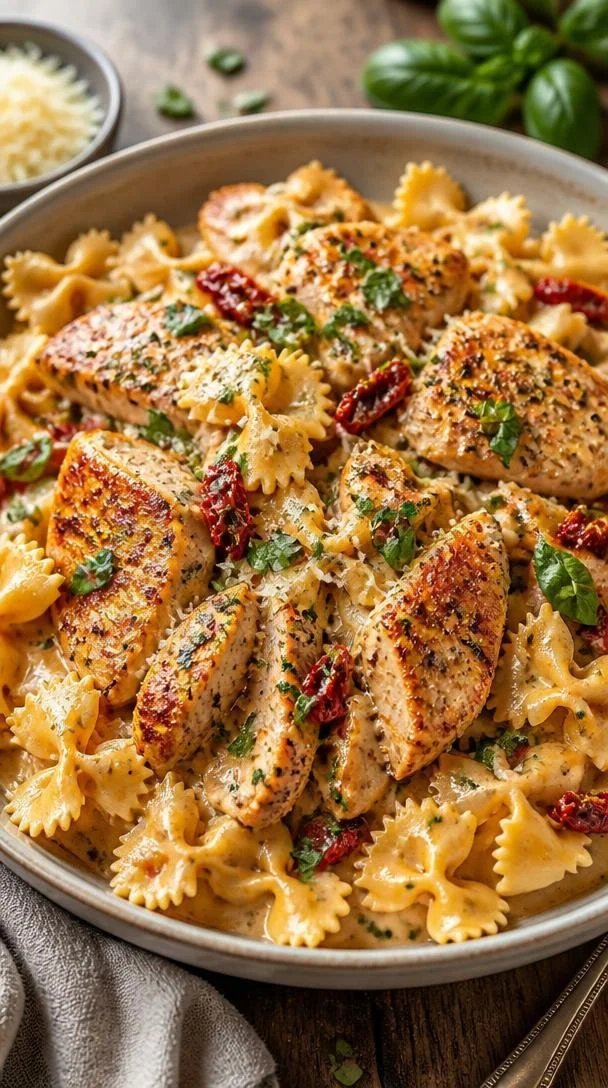
Creamy Marry-Me Chicken Bow Tie Pasta in 30 Minutes
Creamy Marry Me Chicken Bowtie Pasta: A Recipe Worth Proposing Over!
Hello, my lovely food enthusiasts! Today, I’m thrilled to share one of my absolute favorite recipes—Creamy Marry Me Chicken Bowtie Pasta. If you’re like me, the love language of cooking often speaks louder than words. And this dish? It has a way of making hearts flutter and stomachs rejoice. Whether you’re planning a romantic dinner or just looking to impress your friends and family, this meal is your ticket to culinary love!
A Love Served on a Plate
Picture this: candlelight flickering in the background, a glass of your favorite wine in hand, and the aroma of garlic wafting through the air. This recipe brings back fond memories of an intimate dinner I hosted for my partner one chilly autumn evening. The music played softly, and as I stirred the creamy sauce, I could feel the anticipation. Would he love it? Would he ask for seconds? I plated the dish, garnished it with fresh basil, and watched as he took the first bite. The look on his face said it all—pure delight.
That night became a special memory not just because of the food, but because of the love and warmth that filled our little space. From that moment onwards, Marry Me Chicken became our go-to dish—an affirmation that beautiful food has the power to cultivate meaningful connections. So, whether you’re cooking for your partner, family, or even just yourself, this pasta is bound to leave a lasting impression!
Ingredients
Let’s dive into what makes this dish so special! Here’s what you’ll need:
- 1 lb chicken breasts or thighs, thinly sliced: Chicken thighs will give you a juicier texture, but feel free to use breasts if that’s what you prefer.
- 12 oz bowtie (farfalle) pasta: Perfect for holding onto that creamy goodness! If you want a healthier option, consider whole wheat or gluten-free pasta.
- 3 cloves garlic, minced: Garlic is the heart of flavor! The more you use, the merrier—adjust based on your love for garlic.
- 1/2 cup sun-dried tomatoes, chopped, oil-packed, drained: These little gems add a burst of flavor! If you can’t find oil-packed, you can use the dry ones, just soak them in warm water for a bit before using.
- 1 cup chicken broth: Homemade or store-bought works wonders here! A good broth adds depth.
- 1 cup heavy cream: For that decadent, creamy sauce! You can use half-and-half for a lighter version, but the richness of heavy cream is hard to beat.
- 3/4 cup Parmesan cheese, grated: Freshly grated brings the best flavor! Don’t skip this; it’s the secret ingredient for that cheesy goodness.
- 2 tbsp olive oil or butter: Both add a beautiful richness; use what’s on hand!
- 1 tsp Italian seasoning: Perfectly blends herbs for that delightful Italian flair! Feel free to mix your favorite herbs if you want to customize it.
- 1/2 tsp red pepper flakes, optional: A sprinkle adds a delightful kick! Omit it if you prefer milder dishes.
- Salt and black pepper, to taste: Always season your food! It helps to elevate all the flavors.
- Fresh basil or parsley, chopped, for garnish: Fresh herbs add brightness, making your dish pop even more!
Step-by-Step Instructions
Now, let’s cook up something magical! Follow these detailed steps, and you’ll be a kitchen superstar in no time.
-
Cook the pasta: Start by boiling a large pot of salted water. Add in the bowtie pasta and cook according to package instructions until al dente. This usually takes about 10-12 minutes. Make sure to reserve about a cup of pasta water before draining. This starchy water will help thicken the sauce later!
-
Sauté the chicken: In a large skillet over medium-high heat, add olive oil or butter. Once hot, add the thinly sliced chicken. Season well with salt, black pepper, and Italian seasoning. Cook until golden brown and no longer pink, about 6-7 minutes. Don’t overcrowd the pan; you want that beautiful sear.
-
Add garlic and sun-dried tomatoes: Once your chicken is cooked, reduce heat to medium and add minced garlic. Sauté for about one minute until fragrant—watch it closely to prevent burning! Then toss in the sun-dried tomatoes, stirring to combine. This is where the aroma truly comes alive!
-
Create the creamy sauce: Pour in the chicken broth and bring it to a gentle simmer. Stir in the heavy cream and Parmesan cheese until melted and fully incorporated. The mixture will become rich and creamy. If it feels too thick, add a splash of that reserved pasta water to loosen it up. Keep tasting and adjusting seasoning if necessary!
-
Combine pasta and sauce: Once the sauce has reached the desired consistency, add the cooked pasta into the skillet, tossing everything together until well-coated. If you feel it needs more creaminess, don’t hesitate to add another splash of heavy cream.
-
Finish with freshness: Finally, stir in the chopped fresh basil or parsley just before serving for that beautiful pop of green and freshness!
Serving Suggestions
Presentation is key! Here’s how to plate this stunner: scoop a generous portion of the Creamy Marry Me Chicken Bowtie Pasta onto a large plate or bowl. Garnish with a sprinkle of Parmesan cheese, a few extra sun-dried tomatoes on top, and a flourish of fresh basil. Serve it up with a side of crusty garlic bread and a simple salad for a complete meal.
Recipe Variations
Let’s switch things up! Here are some fun variations you can try with this recipe:
- Add Veggies: Toss in some fresh spinach or steamed broccoli right before mixing in the pasta for a veggie kick.
- Lemon Zest: For a bright twist, add some lemon zest to the sauce—it’s a game-changer!
- Protein Swaps: Swap chicken for shrimp or scallops. Both work beautifully with this creamy sauce.
- Cheese Variations: Experiment with different cheeses like goat cheese or feta for a unique flavor profile.
- Spicy & Smoky: For a smoky flavor, add a dash of smoked paprika or even some diced chorizo that can cook alongside the chicken!
Chef’s Notes
Every recipe has its journey, and this one is no different! I stumbled upon the idea of marrying creamy chicken with pasta during one of those moments where I was trying to clean out my fridge. I had some sun-dried tomatoes sitting there, begging to be used, and the rest is history. I once had a cooking mishap where I forgot to add the cheese until the very end! Instead of being dismayed, I laughed it off and it turned into a fun lesson in improvisation. Now, whenever I serve this dish, it reminds me to embrace the unexpected in the kitchen.
FAQs and Troubleshooting
-
Q: My sauce turned out too thin! What did I do wrong?
A: This can happen if you don’t let it simmer long enough. If the cream isn’t thickening, try adding a cornstarch slurry (1 tablespoon cornstarch mixed with 2 tablespoons water) to thicken it up. -
Q: Can I use frozen chicken?
A: Absolutely! Just ensure it’s fully thawed before cooking for even cooking and reducing unwanted moisture. -
Q: What if I don’t have sun-dried tomatoes?
A: No worries! You can use fresh cherry tomatoes or even roasted red peppers as a substitution. -
Q: How can I make this dish vegetarian?
A: Simply replace the chicken with sautéed mushrooms or eggplant and use vegetable broth instead of chicken broth for a delicious, meatless meal!
Nutritional Info
Though I generally focus on the joy of cooking, I understand the importance of dietary mindfulness. A single serving of Creamy Marry Me Chicken Bowtie Pasta contains approximately:
- Calories: 700
- Fat: 36g
- Carbohydrates: 70g
- Protein: 40g
Note: These are estimates and can vary based on precise ingredients used.
So there you have it, friends! Your Ultimate Guide to Creamy Marry Me Chicken Bowtie Pasta, infused with my love for cooking and sharing heartfelt meals. Remember, good food is about connection—so gather your loved ones, tie on your apron, and let’s create delicious memories together! Till next time, happy cooking!
PrintCreamy Marry Me Chicken Bowtie Pasta

A delightful and creamy chicken pasta dish that will impress your loved ones at any dinner.
- Prep Time: 15 minutes
- Cook Time: 30 minutes
- Total Time: 45 minutes
- Yield: 4 servings 1x
- Category: Main Course
- Method: Baking
- Cuisine: Italian
- Diet: Poultry
Ingredients
- 1 lb chicken breasts or thighs, thinly sliced
- 12 oz bowtie (farfalle) pasta
- 3 cloves garlic, minced
- 1/2 cup sun-dried tomatoes, chopped, oil-packed, drained
- 1 cup chicken broth
- 1 cup heavy cream
- 3/4 cup Parmesan cheese, grated
- 2 tbsp olive oil or butter
- 1 tsp Italian seasoning
- 1/2 tsp red pepper flakes, optional
- Salt and black pepper, to taste
- Fresh basil or parsley, chopped, for garnish
Instructions
- Cook the pasta: Start by boiling a large pot of salted water. Add in the bowtie pasta and cook according to package instructions until al dente, about 10-12 minutes. Reserve about a cup of pasta water before draining.
- Sauté the chicken: In a large skillet over medium-high heat, add olive oil or butter. Once hot, add the thinly sliced chicken and season with salt, black pepper, and Italian seasoning. Cook until golden brown, about 6-7 minutes.
- Add garlic and sun-dried tomatoes: Reduce heat to medium and add minced garlic. Sauté for about one minute until fragrant, then toss in the sun-dried tomatoes.
- Create the creamy sauce: Pour in the chicken broth and bring to a simmer. Stir in the heavy cream and Parmesan cheese until melted and creamy. Adjust consistency with reserved pasta water if needed.
- Combine pasta and sauce: Once the sauce has reached the desired consistency, add the cooked pasta and toss together until well-coated.
- Finish with freshness: Stir in the chopped fresh basil or parsley just before serving.
Notes
Serve with a side of crusty garlic bread and a simple salad for a complete meal.
Nutrition
- Serving Size: 1 serving
- Calories: 700
- Sugar: 5g
- Sodium: 800mg
- Fat: 36g
- Saturated Fat: 18g
- Unsaturated Fat: 12g
- Trans Fat: 0g
- Carbohydrates: 70g
- Fiber: 3g
- Protein: 40g
- Cholesterol: 90mg
Keywords: chicken pasta, creamy pasta, romantic dinner

Weeknight Garden Vegetable Lasagna: Simple, Veggie-Packed
Garden Vegetable Lasagna: A Harmonious Bounty of Flavor
Hello, dear foodies! Today, I’m excited to share with you one of my favorite recipes that blends the garden’s bounty with the cozy comfort of Italian cuisine: Garden Vegetable Lasagna. This dish is like a warm hug you can share around the dinner table, perfect for any season but especially delightful in the spring and summer when veggies are at their peak.
What I love about this lasagna is its incredible versatility — rich layers are packed with fresh vegetables, creamy ricotta, and gooey cheese. You’ll get the sumptuous taste of Italian classics while infusing them with wholesome goodness from your local farmer’s market or grocery store.
Whether you’re a seasoned chef or just starting your culinary journey, this lasagna is an approachable yet impressive dish that can elevate your weeknight dinners or wow your guests at a get-together. And don’t worry if you’ve never made lasagna before; I’ll guide you step-by-step through the process, sharing tips and kitchen secrets along the way. So roll up your sleeves, tie on that apron, and let’s get cooking!
Personal Story
I still remember the first time I made lasagna. I was a young cook, barely in my twenties, and I decided to host my friends for an extravagant Italian night filled with music, laughter, and, of course, food! Armed with my grandmother’s old recipe and the determination to impress, I set out to create an unforgettable experience.
The kitchen was a whirlwind of activity: the aroma of garlic sautéing, fresh basil tearing under my fingers, and the gentle bubbling of marinara sauce on the stove were enough to ignite my spirit. When it came time to serve, I unveiled my creation—a layered masterpiece of spontaneity and love.
To my delightful surprise, my friends not only enjoyed the lasagna, but they devoured it! That night became a cherished memory, a reminder that cooking brings people together in beautiful, personal ways. This Garden Vegetable Lasagna, inspired by that very first attempt, has become a tradition at my table—one that I hope will find its way to yours, too.
Ingredients
Here’s what you’re going to need for a mouthwatering Garden Vegetable Lasagna. Each ingredient adds its unique flair, and I’ve included a few pro tips along the way!
-
1 tablespoon olive oil
- A key player in bringing out flavors! You can substitute with avocado oil for a different taste.
-
1 small onion (finely chopped)
- Onions add a depth of flavor. If you’re sensitive to onions, shallots or leeks work beautifully too.
-
3 cloves garlic (minced)
- Garlic is a must for that aromatic punch! Feel free to use more or less, depending on your love for garlic.
-
1 medium zucchini (thinly sliced)
- Zucchini is tender and absorbs flavors well. For variation, eggplant makes a great substitute!
-
1 yellow squash (thinly sliced)
- Another squash that provides sweetness and color. You can use more zucchini in place of yellow squash, too.
-
1 red bell pepper (diced)
- For a pop of sweetness and crunch! Any color of bell pepper works here.
-
1 cup mushrooms (chopped)
- Mushrooms add earthiness; button or cremini mushrooms are excellent choices. For a gourmet touch, try shiitake mushrooms.
-
1½ cups fresh spinach
- Spinach wilts beautifully and boosts nutrients. Kale or Swiss chard can work as a hearty alternative.
-
3 cups marinara or tomato pasta sauce
- Use your favorite store-bought sauce or make a quick homemade one! A marinara with basil is my go-to.
-
½ teaspoon salt
- Enhances all flavors! Adjust based on your seasoning preferences and any added salt in the sauce.
-
½ teaspoon black pepper
- Adds warmth! White pepper is a fine substitute, especially for a milder flavor.
-
1 teaspoon Italian seasoning
- A blend of dried herbs like basil, oregano, and thyme brings authentic flavor. Fresh herbs work incredibly too.
-
1½ cups ricotta cheese
- Creamy ricotta is dreamy! Substitute with cottage cheese or a dairy-free alternative for a lighter option.
-
1 large egg
- Acts as a binder for the ricotta layer. For egg-free options, try ¼ cup of flaxseed meal mixed with water.
-
½ cup grated Parmesan cheese
- This cheesy goodness adds that coveted umami. Nutritional yeast can be a great vegan swap here.
-
1½ cups shredded mozzarella cheese
- Melty, gooey cheese is a must! Opt for low-fat mozzarella if you want a lighter dish.
-
9 lasagna noodles (cooked and drained)
- Use regular or whole wheat noodles; gluten-free varieties are available for dietary needs.
Step-by-Step Instructions
Now, let’s dive into the fun part: cooking! Here’s how to throw together this beautiful lasagna step-by-step.
-
Prep Your Ingredients: Start by washing and slicing your vegetables. The fresher, the better! This is an excellent time to put on some music and enjoy the moment in your kitchen. Let those chopping skills shine!
-
Sauté the Veggies: In a large skillet, heat the olive oil over medium heat. Add the chopped onions and sauté until translucent, about 3-4 minutes. Add the garlic and cook for another minute—this is when kitchen magic happens, and your house will smell divine! Toss in the zucchini, yellow squash, and red bell pepper, stirring for about 5-7 minutes until softened. Feel free to add a splash of water if they start to stick. Finally, throw in your mushrooms and spinach. Cook until the spinach wilts down. Season with salt, black pepper, and Italian seasoning. Set aside to cool slightly.
-
Mix the Cheeses: In a mixing bowl, combine the ricotta cheese, egg, and grated Parmesan. Stir until well blended. I love using a fork to mash the ricotta into a creamy mixture. It’s somewhat therapeutic, don’t you think? A bit more elbow grease never hurt anyone—almost like a mini workout!
-
Assemble the Lasagna: Preheat your oven to 375°F (190°C). In a 9×13-inch baking dish, spread a cup of marinara sauce on the bottom. This helps prevent the noodles from sticking. Layer 3 lasagna noodles over the sauce, followed by half of the ricotta mixture, half of the sautéed vegetable mixture, and a third of the shredded mozzarella. Repeat the layers: sauce, noodles, ricotta, veggies, mozzarella. Top it all off with the remaining noodles, sauce, and the rest of the mozzarella.
-
Cover and Bake: Cover your dish tightly with aluminum foil to prevent the top from burning. Bake in the preheated oven for 25-30 minutes. This helps the flavors meld together and makes for an incredibly moist lasagna.
-
Uncover and Broil: After your initial baking, remove the foil and switch your oven to the broil setting. Broil for an additional 3-5 minutes until the top is golden and bubbly. Keep a close eye during this step, as things can go from perfect to burnt very quickly!
-
Let it Rest: This is important! Allow the lasagna to sit for at least 10-15 minutes before slicing into it. This rest period helps the layers set and makes for easier serving. Plus, it gives you time to set the table—elegance without intimidation, right?
Serving Suggestions
When it’s time to serve, slice your lasagna into even squares and carefully lift them onto plates using a spatula. Garnish with fresh basil or parsley for a touch of vibrancy. Pair it with a light salad dressed with lemon vinaigrette—a perfect balance to the comforting richness of the lasagna. And don’t forget a glass of red wine; it’s a match made in culinary heaven!
Recipe Variations
Here are a few fun twists you can try:
- Add Protein: Layer in some cooked ground turkey, chicken, or beef for a heartier lasagna.
- Pesto Swirl: Mix in a few tablespoons of pesto with the ricotta for a vibrant flavor upgrade.
- Different Cheeses: Experiment with different cheeses like gouda or fontina for a unique melting experience.
- Grilled Veggies: Incorporate grilled vegetables for a smokier taste and excitement in each bite.
- Gluten-Free: Use gluten-free lasagna noodles or zucchini slices for a lighter option that’s just as delightful!
Chef’s Notes
This Garden Vegetable Lasagna has been through several iterations since that unforgettable night with my friends. Initially, it was quite straightforward, but over time, I found joy in layering flavors and cozy ingredients. Every time I make it, it feels like an adventure—a bit of improvisation here, a dash of creativity there.
One time, I used leftover roasted vegetables with some surprise artichokes! To my delight, they became a family favorite. Always remember: cooking is about joy and expression. Don’t stress about making it perfect. It’s about sharing the love, laughter, and warmth that only good food can bring.
FAQs and Troubleshooting
1. My lasagna turned out watery. What went wrong?
Using fresh veggies can release a lot of moisture. To avoid this, you can sauté your veggies a little longer or drain any excess liquid before assembling.
2. Is it necessary to cook the noodles first?
Pre-cooked noodles help ensure your lasagna doesn’t get too soggy. If you prefer, you can also use no-boil noodles, but you’ll need to increase the sauce quantity to ensure they cook properly.
3. Can I freeze lasagna?
Absolutely! Assemble the lasagna ahead of time and freeze it before baking. Just be sure to cover it tightly. When you’re ready, bake it from frozen and add an extra 15-20 minutes to the cooking time.
4. How can I make this vegan?
Substitute the ricotta with a mix of blended tofu, nutritional yeast, and a splash of lemon juice. For the mozzarella, there are many delicious vegan cheese options available on the market.
Nutritional Info (if applicable)
This lasagna slices up to be a pretty balanced meal, packed with vegetables, protein from the ricotta, and ample flavor. Although precise nutritional values can vary based on specific ingredients and portion sizes, a serving typically contains around:
- Calories: 320
- Protein: 18g
- Fat: 12g
- Carbohydrates: 40g
- Fiber: 4g
Feel free to adjust ingredients to suit your nutritional preferences!
There you have it, my friends! A delightful Garden Vegetable Lasagna that’s sure to impress everyone at your table. I can’t wait for you to try it out and savor every bite. Remember, it’s not just about the food—it’s about the love that goes into it. So, gather your loved ones, tie on your apron, and let the kitchen magic unfold! Enjoy!
PrintGarden Vegetable Lasagna

A delightful and hearty lasagna packed with fresh garden vegetables, creamy ricotta, and melty cheese, perfect for any dinner table.
- Prep Time: 15 minutes
- Cook Time: 40 minutes
- Total Time: 55 minutes
- Yield: 8 servings 1x
- Category: Main Course
- Method: Baking
- Cuisine: Italian
- Diet: Vegetarian
Ingredients
- 1 tablespoon olive oil
- 1 small onion (finely chopped)
- 3 cloves garlic (minced)
- 1 medium zucchini (thinly sliced)
- 1 yellow squash (thinly sliced)
- 1 red bell pepper (diced)
- 1 cup mushrooms (chopped)
- 1½ cups fresh spinach
- 3 cups marinara or tomato pasta sauce
- ½ teaspoon salt
- ½ teaspoon black pepper
- 1 teaspoon Italian seasoning
- 1½ cups ricotta cheese
- 1 large egg
- ½ cup grated Parmesan cheese
- 1½ cups shredded mozzarella cheese
- 9 lasagna noodles (cooked and drained)
Instructions
- Prep your ingredients: Start by washing and slicing your vegetables.
- Sauté the veggies: In a large skillet, heat the olive oil over medium heat. Add the chopped onions and sauté until translucent, about 3-4 minutes. Add the garlic and cook for another minute. Toss in the zucchini, yellow squash, and red bell pepper, stirring for about 5-7 minutes until softened. Add mushrooms and spinach, cooking until the spinach wilts down. Season with salt, black pepper, and Italian seasoning. Set aside to cool slightly.
- Mix the cheeses: In a mixing bowl, combine the ricotta cheese, egg, and grated Parmesan. Stir until well blended.
- Assemble the lasagna: Preheat your oven to 375°F (190°C). In a 9×13-inch baking dish, spread a cup of marinara sauce on the bottom. Layer 3 lasagna noodles over the sauce, followed by half of the ricotta mixture, half of the sautéed vegetable mixture, and a third of the shredded mozzarella. Repeat the layers: sauce, noodles, ricotta, veggies, mozzarella. Top with the remaining noodles, sauce, and mozzarella.
- Cover and bake: Cover your dish tightly with aluminum foil. Bake in the preheated oven for 25-30 minutes.
- Uncover and broil: After your initial baking, remove the foil and switch to the broil setting. Broil for an additional 3-5 minutes until the top is golden and bubbly.
- Let it rest: Allow the lasagna to sit for at least 10-15 minutes before slicing.
Notes
Letting the lasagna rest after baking helps the layers set and makes for easier serving.
Nutrition
- Serving Size: 1 serving
- Calories: 320
- Sugar: 5g
- Sodium: 500mg
- Fat: 12g
- Saturated Fat: 6g
- Unsaturated Fat: 4g
- Trans Fat: 0g
- Carbohydrates: 40g
- Fiber: 4g
- Protein: 18g
- Cholesterol: 65mg
Keywords: lasagna, vegetable lasagna, Italian, vegetarian, comfort food, baking

Creamy Crack Chicken Pasta That’s Better Than Takeout
Creamy Crack Chicken Pasta That’s Better Than Takeout
Hello, fellow food lovers! Today, I’m thrilled to share with you a dish that embodies everything sumptuous and comforting about weeknight dinners—Creamy Crack Chicken Pasta. Not only is it better than takeout, but it’s also so straightforward that you’ll wonder why you ever considered ordering in again.
Introduction
Imagine this: it’s a chilly evening, the kind that makes you want to curl up with a cozy blanket and a show, but your stomach is growling for something hearty. Enter this Creamy Crack Chicken Pasta! It’s indulgent, creamy, and loaded with flavor, making every mouthful a little hug from the inside.
What’s even better? You probably have most of the ingredients in your kitchen already. This dish is a culmination of my favorite things—chicken, cheese, and a kick of ranch seasoning that takes the flavor profile to a delightful new level. With just a few pantry staples and some love, you’ll whip up a meal that will have your family flocking to the table. And if they start to linger just a little bit longer than usual, I won’t blame them!
The concept of “Crack Chicken”—a creamy, ranch-infused dish that’s been making waves on social media—gets a pasta twist here. Each bite is creamy and full of savory goodness, thanks to the cream cheese and cheddar, while the bacon adds that oh-so-delicious crunch. Perfect for a cozy night in or a casual gathering with friends, this dish is versatile, comforting, and unapologetically delicious. So, grab your apron, and let’s get cooking!
Personal Story
There’s something magical about the combination of chicken and cheese that always takes me back to family dinners growing up. I remember my mom making her infamous creamy chicken bake on special occasions, where chicken was cooked to juicy perfection and wrapped in a velvety cheese sauce. I would hover around the kitchen, impatiently waiting for her to serve it up. It became a signature dish that everyone anticipated, not just for its flavor, but also for the love and laughter that filled the room.
When I first tried a version of Crack Chicken on social media, I couldn’t help but feel nostalgic. As I experimented with its flavors, I realized I could elevate it with pasta! The idea of adding penne to this creamy concoction brought back fond memories and tied everything together. Now, every time I make this dish, I feel like I’m serving up a little slice of my childhood while simultaneously creating new memories with friends and family.
Ingredients
Here’s what you’ll need:
-
8 oz Penne Pasta
This is the star of the show! Short pasta shapes like penne hold onto the creamy sauce beautifully. You can easily substitute it with any short pasta, such as rigatoni or rotini, depending on what you have on hand. -
2 cups Chicken Broth
Using homemade chicken broth adds a depth of flavor, but store-bought works perfectly fine too! Look for low-sodium options to control the salt content. -
1 lb Chicken Breast
Chicken breast is lean and cooks quickly, but feel free to use darker cuts like thighs for a richer flavor. -
8 oz Cream Cheese
A key player in making the pasta oh-so-creamy! If you’re looking for a lighter option, Neufchâtel cheese or even Greek yogurt can work as substitutes without compromising the texture too much. -
1 pkg Ranch Seasoning
You can purchase this from the store, or if you’re feeling adventurous, whip up a homemade blend with dill, garlic, onion powder, and a pinch of salt. -
1 tsp Garlic Powder
If you prefer fresh flavors, one to two cloves of minced garlic will work wonders here. -
6 oz Bacon
Because bacon makes everything better! For a healthier twist, turkey bacon will still give you the crispy goodness without the added fat. -
1 cup Cheddar Cheese
Sharp cheddar works really well, but blending in some white cheddar or even pepper jack can add an exciting twist to the dish. -
1/4 cup Fresh Parsley
A sprinkle of fresh parsley not only adds color but also a refreshing brightness! Dried parsley is a fantastic substitute if fresh isn’t available.
Step-by-Step Instructions
Let’s roll up our sleeves and dive into this easy cooking process. Follow these steps for a creamy and delicious dish that you can whip up in no time:
-
Cook the Pasta:
Start by boiling a large pot of salted water. Once boiling, add the penne pasta and cook according to the package instructions until al dente. Remember, we’re going to combine it with the creamy sauce later, so it’s okay if it’s a tad undercooked. Drain the pasta and set it aside. -
Cook the Chicken:
In a large skillet, heat a drizzle of olive oil over medium heat. Season the chicken breast with salt and pepper, and add it to the skillet. Cook for about 6-7 minutes per side, or until the chicken reaches an internal temperature of 165°F. A quick tip: Let the chicken sit for a minute before slicing so that the juices redistribute and keep the meat moist. Once cooked, shred it with two forks (or go ahead and chop it for a chunkier style). -
Sauté the Bacon:
In the same skillet (because why dirty more dishes?), cook the bacon until crispy. This will allow the drippings to flavor the subsequent steps. Remove the bacon, crumble it, and set it aside. Don’t wipe the skillet clean; all those lovely bits will add flavor! -
Create the Sauce:
Now, in the same skillet, reduce the heat to low. Pour in the chicken broth, followed by the cream cheese, ranch seasoning, and garlic powder. Stir until the cream cheese is completely melted and everything is well-combined. This is where the magic happens, so take your time and appreciate the aromas! -
Combine Everything:
Add the shredded chicken and cooked pasta to the creamy sauce. Give a good stir until everything is beautifully coated in richness. If you find the mixture is too thick, don’t be shy to add a splash more chicken broth until you get your desired consistency! -
Cheesy Goodness:
Sprinkle in the cheddar cheese, stirring until it melts into the sauce. You’ll see it become gooey and irresistible. Don’t forget to taste it now—this is when you can adjust seasonings if you wish! -
Add the Bacon and Parsley:
Finally, fold in the crumbled bacon and chopped parsley. This adds that crunchy texture and fresh flavor we’re after!
Serving Suggestions
Plate your Creamy Crack Chicken Pasta with a generous sprinkle of fresh parsley on top. You can also add additional cheese or a sprinkle of crushed red pepper flakes for some extra heat. Serve it with a side of crusty garlic bread to scoop up every last bit of creamy goodness—trust me, you won’t want to waste any leftovers!
Recipe Variations
Feeling adventurous? Here are some creative twists you can try on this delicious dish:
- Vegetarian Version: Replace the chicken with sautéed mushrooms and spinach for a delicious veggie option.
- Spicy Kick: Add a teaspoon of crushed red pepper flakes or some chopped jalapeños for a zesty boost.
- Creamy One-Pot Dish: Skip the extra pot. Add the uncooked pasta directly to the skillet with the sauce ingredients, then stir in additional broth for cooking as needed.
- Herbaceous Touch: Experiment with dried herbs like thyme or rosemary for added depth in flavor.
- Cheesy Twist: Try blending in cream cheese flavored with herbs or spicy cheeses for a unique flavor profile.
Chef’s Notes
I’ll let you in on a fun kitchen story: The first time I ever attempted making a variation of this creamy dish, I miscalculated how much cream cheese I needed—not once, but twice! The first result turned out too thick, and the second too soupy! Eventually, I found that sweet spot that balanced creaminess perfectly. Now, it’s one of my go-to recipes, not just for its flavor, but for the laughs I’ve had in the kitchen while perfecting it. Cooking, after all, is a journey!
FAQs and Troubleshooting
-
Should I let the pasta cool down before mixing it with the sauce?
No need! Add the pasta directly after cooking as it helps the sauce cling beautifully and absorb flavor. -
What if my pasta gets too mushy?
Try cooking it for a minute or two less than the package instructs. It’ll soften more when mixed with the creamy sauce. -
Can I freeze the leftovers?
Yes, but note that the texture might change a bit when reheated. Just store it in an airtight container for up to 2 months and reheat slowly on the stove while adding a splash of chicken broth. -
What if I don’t have ranch seasoning?
No problem! You can whip up your own version by combining dried dill, garlic powder, onion powder, and salt.
Nutritional Info
For those curious about the nutritional breakdown, each serving (based on 4 servings per recipe) approximately contains:
- Calories: 540
- Protein: 35g
- Carbohydrates: 40g
- Fat: 28g
Remember that these values can vary based on ingredients used!
Conclusion
There you have it—Creamy Crack Chicken Pasta that’s bound to be a crowd-pleaser! It’s creamy, comforting, and packed with flavors that will make even the pickiest eaters feel right at home. Next time you’re torn between cooking at home or grabbing takeout, remember this delightful recipe!
So, tie on that apron, invite a few friends over (or keep it just for yourself), and enjoy this scrumptious dish that’s sure to become a household favorite. Happy cooking!
PrintCreamy Crack Chicken Pasta

Indulgent and creamy pasta dish with chicken, cheese, and ranch seasoning that’s better than takeout.
- Prep Time: 15 minutes
- Cook Time: 30 minutes
- Total Time: 45 minutes
- Yield: 4 servings 1x
- Category: Main Course
- Method: Stovetop
- Cuisine: American
- Diet: None
Ingredients
- 8 oz Penne Pasta
- 2 cups Chicken Broth
- 1 lb Chicken Breast
- 8 oz Cream Cheese
- 1 pkg Ranch Seasoning
- 1 tsp Garlic Powder
- 6 oz Bacon
- 1 cup Cheddar Cheese
- 1/4 cup Fresh Parsley
Instructions
- Cook the Pasta: Boil a large pot of salted water, add penne pasta, and cook until al dente. Drain and set aside.
- Cook the Chicken: Heat olive oil in a skillet over medium heat, season chicken breast, and cook until an internal temperature of 165°F. Shred the chicken.
- Sauté the Bacon: In the same skillet, cook the bacon until crispy, crumble it, and set aside.
- Create the Sauce: In the skillet, reduce heat to low, add chicken broth, cream cheese, ranch seasoning, and garlic powder. Stir until melted.
- Combine Everything: Add shredded chicken and cooked pasta to the sauce, stir to coat. Adjust consistency with additional broth if needed.
- Cheesy Goodness: Add cheddar cheese and stir until melted.
- Add the Bacon and Parsley: Fold in crumbled bacon and chopped parsley.
Notes
Serve with a sprinkle of parsley and additional cheese or red pepper flakes for extra flavor. Pair with garlic bread.
Nutrition
- Serving Size: 1 serving
- Calories: 540
- Sugar: 3g
- Sodium: 800mg
- Fat: 28g
- Saturated Fat: 12g
- Unsaturated Fat: 9g
- Trans Fat: 0g
- Carbohydrates: 40g
- Fiber: 2g
- Protein: 35g
- Cholesterol: 90mg
Keywords: pasta, chicken, creamy, comfort food, quick dinner, weeknight meal

Quick Dill Pickle Ranch Smash Chicken Tacos: Tangy Twist
Dill Pickle Ranch Smash Chicken Tacos: A Flavorful Twist
Hello, my fellow food enthusiasts! I’m excited to share a dynamite recipe that’s recently become a favorite in my home—Dill Pickle Ranch Smash Chicken Tacos. It’s not just a meal; it’s a flavorful experience that takes everyday ingredients and transforms them into something everyone will rave about. By combining the zesty tang of dill pickles with the creamy goodness of ranch, we’re creating not just tacos, but a culinary adventure that packs a punch.
A Flavorful Introduction
Imagine it’s a warm evening, the sun is setting, and the air is filled with the tantalizing aroma of taco night! You’re gathered around the kitchen table with friends or family, laughter bubbling over as you build your perfect taco. That’s the vibe these Dill Pickle Ranch Smash Chicken Tacos evoke, and trust me, once you give this recipe a try, you’ll want to make it a regular feature in your dinner repertoire.
Why “smash” chicken, you ask? Well, I’ve found that smashing your ground chicken in the skillet gives it a delightful crispy texture that’s simply irresistible. Combine that with the fresh flavors of dill pickles and the creamy ranch dressing, and you’ve got a taco filling that can’t be beat. It’s about bringing those simple ingredients together and letting them shine, creating a dinner that feels both elegant and homely.
Now, let’s embark on this delicious journey together. You’ll be thanking yourself for trying this recipe, so grab your apron, pour a glass of something refreshing, and let’s dive into the wonderful world of Dill Pickle Ranch Smash Chicken Tacos!
Personal Story
Funny enough, this dish was inspired by an unassuming trip to the local county fair. You know those spots that serve indulgent fair food? I found a taco truck that had a wild line of people keen to try their unique takes on classic tacos. Among them was a dill pickle-inspired creation. I took a chance, and boy, did it deliver! The tangy crunch combined with the warm, savory filling spoke to me on another level, and I was instantly transported back to my childhood, where my grandmother would whip up similar combinations using pickles from her garden.
Sweet and tangy memories of growing up filled my mind as I savored every bite. Naturally, I returned home determined to recreate that delightful flavor. Thus, Dill Pickle Ranch Smash Chicken Tacos were born! This recipe brings together the nostalgic flavors of my childhood and the enthusiasm I have for creatively enhancing our traditional taco nights.
Ingredients
Here’s what you’ll need to create these mouthwatering tacos:
-
1 pound Ground Chicken
A fantastic lean protein choice! If you’re looking for alternatives, ground turkey or even a plant-based option like crumbled tempeh or lentils works beautifully. -
1 teaspoon Garlic Powder
A flavor-packed seasoning that amps up the aroma. Feel free to adjust according to your taste—garlic lovers might want to add a pinch more! -
1 teaspoon Paprika
This gives a lovely warm notes to your filling. If you prefer a little spice, swap in chili powder for an extra kick! -
1 teaspoon Salt
Essential for elevating all the flavors in your taco filling—don’t skip it! -
1 teaspoon Black Pepper
Offers an excellent earthy balance. Use freshly cracked pepper if you can; it makes a difference. -
8 small Tortillas
Your base for the tacos. For a gluten-free option, try corn tortillas; they’re just as tasty! -
1 cup Shredded Mozzarella or Jack Cheese
A delicious, gooey melt is key here! Feel free to swap with your favorite melting cheese—cheddar is a great option too. -
1/2 cup Chopped Dill Pickles
The star of the show! If you’d like a sweet twist, consider using sweet pickles or even olives for a briny flavor profile. -
2 tablespoons Pickle Brine (Optional)
Adds an extra layer of flavor. Don’t throw out your pickle brine; it’s liquid gold! -
1 cup Shredded Cabbage
Adds a nice crunch and freshness. Any greens you love can work here—crunchy lettuce or even a slaw. -
1/2 cup Cottage Cheese
Blend this with ranch seasoning and a squeeze of lemon, and you’ve got a creamy dressing that brings everything together.
Step-by-Step Instructions
Now that we have our ingredients ready, let’s kick it into high gear!
-
Prepare Your Ingredients
Start off by getting all your ingredients ready. Chop the dill pickles, shred the cabbage, and measure everything out. Cooking is more fun when there’s less stress during the actual process! -
Cook the Ground Chicken
In a large skillet over medium heat, add a splash of olive oil. Once it’s nice and hot, add your ground chicken. Break it up with a spatula, and don’t forget to season with garlic powder, paprika, salt, and pepper. Cook until the chicken is golden and no longer pink—about 5-7 minutes. Here’s a tip: smashing the chicken down with your spatula while it cooks can lead to better browning and a fantastic texture! -
Add the Dill Pickles and Brine
When your chicken is nearly done, stir in the chopped dill pickles and pickle brine. Let it cook for an additional 2-3 minutes—this will allow the flavors to meld beautifully. The aroma will be heavenly! -
Warm the Tortillas
As your chicken is finishing up, warm your tortillas. You can do this in a dry pan for about 15-30 seconds on each side or wrap them in foil and pop them in the oven at low temperature. I prefer the skillet method—nothing beats that slight char! -
Make the Cottage Cheese Dressing
While everything else is cooking, blend your cottage cheese with ranch seasoning and a squeeze of lemon. This step is optional but oh-so-rewarding! The tanginess works perfectly with the savory chicken. -
Assemble the Tacos
Now comes the fun part—taco assembly! Take a warm tortilla, spoon a generous amount of your dill pickle ranch chicken filling, then sprinkle with shredded cheese and cabbage. Drizzle that delicious cottage cheese dressing on top for an indulgent finish.
Serving Suggestions
To elevate your taco night, try plating your tacos on a colorful platter with bowls of additional toppings—think fresh cilantro, avocado slices, or extra pickles for those who can’t get enough! Pair them with a side of tortilla chips and salsa for a complete feast, and don’t forget a refreshing beverage—perhaps a zesty homemade lemonade or your favorite cold brew!
Recipe Variations
-
Spicy Kick
Add chopped jalapeños or a sprinkle of crushed red pepper to the chicken mixture for a spicy version that brings the heat! -
Veggie Delight
Swap out half the ground chicken for black beans or roasted veggies for a delightful vegetarian option that still hits all the right flavor notes. -
Shrimp Tacos
Replace the chicken with some succulent shrimp for a seafood twist that’s just as delicious! -
BBQ Dill Pickle Chicken
Mix in some barbecue sauce with the chicken filling for a smoky spin that transforms these tacos into a whole new treat. -
Crave-Worthy Crunch
Top your tacos with crushed tortilla chips for an extra crunchy element that adds texture and makes your tacos even more fun to eat!
Chef’s Notes
This recipe has evolved over time; initially, I only used the ground chicken and classic toppings. As I experimented with flavors, I discovered that the mixture of dill pickle and ranch allows everyone to enjoy familiar tastes while embracing something exciting. Cooking is all about discovery and adaptation, so don’t hesitate to make this recipe your own—add your personal flair!
Remember, not every taco needs to be perfect. Embrace the messiness; that’s part of the fun! Find joy in cooking, and remember it’s all about gathering around the table and enjoying magnificent moments.
FAQs and Troubleshooting
-
What if my chicken is dry?
If your chicken is drying out, try cooking it over lower heat and be sure not to overcook it. Smash and stir, so it gets evenly cooked but doesn’t dry out! -
Can I use a different type of cheese?
Absolutely! Feel free to use any melting cheese you love. Pepper jack for a kick or a classic cheddar would work wonderfully! -
How can I make this dish healthier?
You can swap out ground chicken for leaner cuts or even go for a plant-based protein. Whole wheat or corn tortillas are also healthier options! -
What sides go with these tacos?
Guacamole and chips, a light corn salad, or even a simple black bean salad make excellent companions for these delightful tacos!
Nutritional Info (Optional)
While exact nutrition can vary depending on the ingredients used, here’s a rough estimate per serving (2 tacos):
- Calories: 350
- Protein: 25g
- Carbohydrates: 30g
- Fat: 14g
Conclusion
And there you have it: Dill Pickle Ranch Smash Chicken Tacos! I hope you’re feeling inspired to head into your kitchen and whip up this delightful meal that brings together flavors, textures, and some nostalgic warmth. Remember to enjoy the process and have fun with your food! Good cooking is all about experimentation, connection, and joy. Until next time, keep gathering, keep creating, and as always, happy cooking!
PrintDill Pickle Ranch Smash Chicken Tacos

A flavorful twist on tacos featuring zesty dill pickles and creamy ranch smashed chicken.
- Prep Time: 15 minutes
- Cook Time: 10 minutes
- Total Time: 25 minutes
- Yield: 4 servings 1x
- Category: Main Course
- Method: Stovetop
- Cuisine: Mexican
- Diet: None
Ingredients
- 1 pound Ground Chicken
- 1 teaspoon Garlic Powder
- 1 teaspoon Paprika
- 1 teaspoon Salt
- 1 teaspoon Black Pepper
- 8 small Tortillas
- 1 cup Shredded Mozzarella or Jack Cheese
- 1/2 cup Chopped Dill Pickles
- 2 tablespoons Pickle Brine (Optional)
- 1 cup Shredded Cabbage
- 1/2 cup Cottage Cheese
Instructions
- Prepare your ingredients. Chop the dill pickles, shred the cabbage, and measure everything out.
- Cook the ground chicken in a skillet over medium heat, seasoning with garlic powder, paprika, salt, and pepper until golden—about 5-7 minutes.
- Add the chopped dill pickles and pickle brine to the chicken, cooking for an additional 2-3 minutes.
- Warm your tortillas in a dry pan for about 15-30 seconds on each side.
- Make the cottage cheese dressing by blending with ranch seasoning and a squeeze of lemon.
- Assemble the tacos with the filling, shredded cheese, cabbage, and drizzle the cottage cheese dressing on top.
Notes
Feel free to experiment with additional toppings or switch ingredients for a personalized twist.
Nutrition
- Serving Size: 2 tacos
- Calories: 350
- Sugar: 2g
- Sodium: 400mg
- Fat: 14g
- Saturated Fat: 5g
- Unsaturated Fat: 7g
- Trans Fat: 0g
- Carbohydrates: 30g
- Fiber: 3g
- Protein: 25g
- Cholesterol: 70mg
Keywords: tacos, chicken, dill pickle, ranch, comfort food
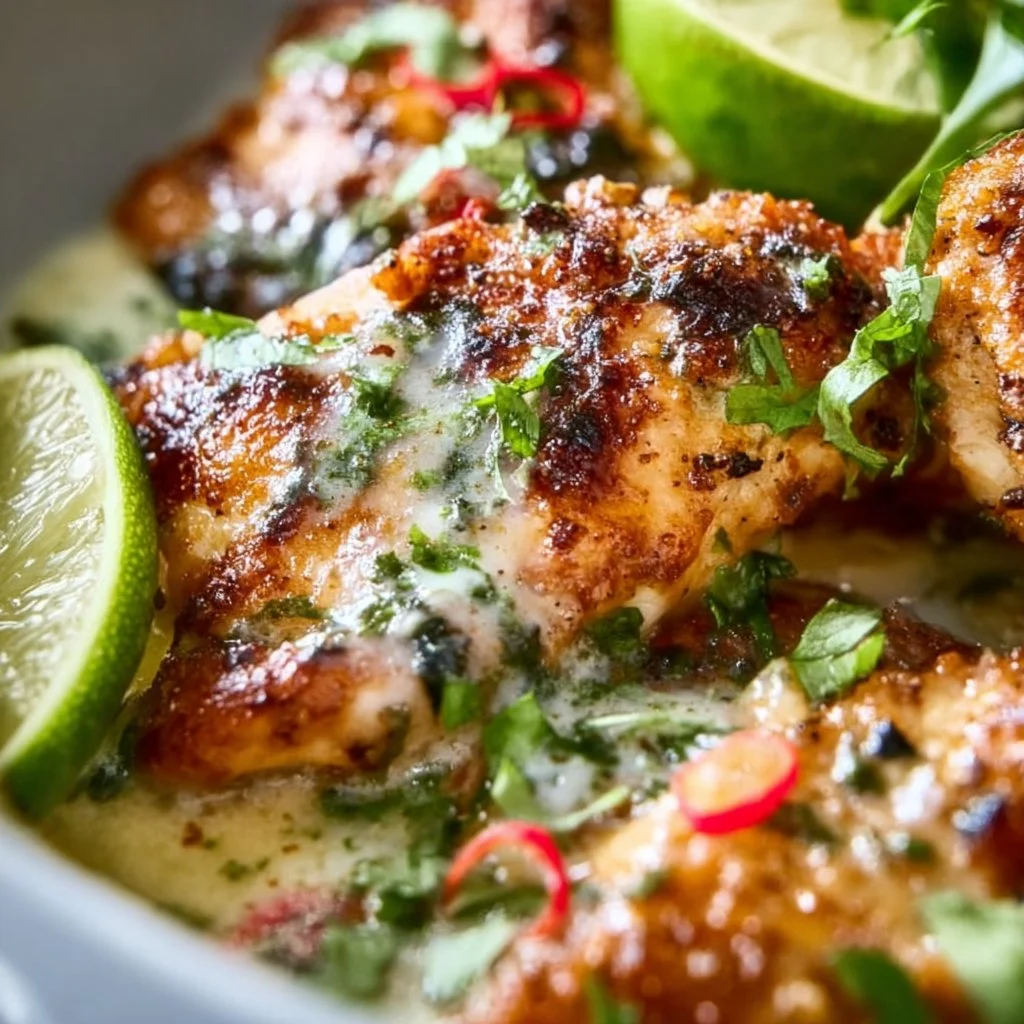
Coconut Lime Chicken
Coconut Lime Chicken: A Tropical Escape Right in Your Kitchen
Introduction
Hello, dear foodie friends! Savannah here from Ivory Apron, and today we’re diving into something truly special — Coconut Lime Chicken! This dish is not just a recipe; it’s an experience, a little piece of tropical paradise that you can create in your very own kitchen.
Picture this: It’s a balmy evening, the sun is setting, and you can almost hear the distant sound of waves crashing on a beach. While we may not all have access to a tropical paradise, we can certainly bring that flavor to our dinner tables. Coconut Lime Chicken combines the richness of coconut milk with the zesty brightness of lime, perfect for those who crave something light yet satisfying. It’s a dish that’s as comforting as it is refreshing, making it perfect for any occasion, whether it’s a weeknight dinner or a fabulous dinner party!
As a recipe creator, nothing makes me happier than sharing culinary adventures with you all. I believe cooking should feel elegant but not intimidating, and that’s what this Coconut Lime Chicken embodies. So, tie on your apron, grab some tropical music, and let’s get cooking!
Personal Story
I can’t help but smile whenever I think about the first time I made Coconut Lime Chicken. It was a sunny Saturday, and my close friends and I had gathered for our monthly potluck. The theme was “Tropical Escape,” and the minute I heard it, my mind raced with all the possible dishes. But one stood out like a beacon of warmth and comfort — Coconut Lime Chicken.
I still remember mingling in the kitchen, buzzing with excitement, as the chicken marinated in a fragrant coconut-lime bath. The scent of fresh cilantro and garlic filled the air, welcoming my friends as they arrived. We laughed, sipped on fruity cocktails, and reminisced about our last vacation together. When the chicken hit the grill, the chorus of sizzling sound transported us to a little beach hut, surrounded by palm trees and laughter.
That day wasn’t just about the food; it was about creating memories around the table, something I cherish deeply. I can’t wait for you to create your own beautiful moments with this recipe!
Ingredients
Let’s get into the delicious details! Here’s what we’ll need for this mouthwatering Coconut Lime Chicken:
-
4 Chicken Breasts
Thick, boneless chicken breasts work best for this recipe. If you’re feeling adventurous, you can substitute chicken thighs for a juicier option! -
1 Cup Coconut Milk
This creamy goodness is the star of the dish, lending a rich texture and tropical flavor. You can use light coconut milk if you’re looking to cut down on calories — but don’t forget that the creaminess contributes to the dish’s overall feel! -
1 Lime (Juiced)
Fresh lime juice adds a vibrant brightness to the dish. If you don’t have lime, lemon juice can be a great substitute, though it will offer a slightly different acidity. -
1/4 Cup Fresh Cilantro (Chopped)
This fresh herb brings a burst of flavor and a lively green color. If cilantro isn’t your thing (you’re not alone!), parsley can be used instead — it’s milder but still adds a lovely touch! -
2 Cloves Garlic (Minced)
Garlic is a must for flavor! If you’re feeling lazy, garlic powder will do in a pinch — just remember, fresh garlic has that unbeatable aromatic kick. -
1 Teaspoon Ginger (Grated)
A little ginger introduces warmth and depth. If you don’t have fresh ginger, ground ginger will work, just use half the amount as it’s more concentrated. -
Salt and Pepper to Taste
Don’t underestimate these staples! Adjust according to your preference, but definitely taste as you go. -
Olive Oil for Cooking
A drizzle of olive oil is all you need to get things sizzling. For grilling, you can use a neutral oil like canola or avocado oil to step up the heat tolerance.
Step-by-Step Instructions
Ready to create some magic? Let’s get down to business with these simple yet effective steps. Grab your apron and let’s cook!
-
Marinate the Chicken
In a bowl, combine the coconut milk, lime juice, chopped cilantro, minced garlic, grated ginger, salt, and pepper. For an extra flavor boost, feel free to add a pinch of red pepper flakes if you like a touch of heat! Place the chicken breasts in a resealable plastic bag or a shallow dish, pouring the marinade over them to coat thoroughly. Seal or cover and let it marinate in the fridge for at least 30 minutes — or up to 2 hours for more intense flavor.Chef Hack: If you’re in a hurry, you can marinate the chicken for just 15 minutes, but the longer it sits, the more the flavors penetrate the chicken.
-
Preheat Your Grill or Skillet
If grilling, preheat your grill to medium-high heat (about 375°F). If you’re using a skillet, place it over medium heat and drizzle with olive oil. -
Cook the Chicken
Once your grill or skillet is hot, remove the chicken from the marinade (letting the excess drip off) and place it on the grill or skillet. Cook for about 6-7 minutes on each side or until the chicken reaches an internal temperature of 165°F.Chef Tip: Resist the temptation to flip it too often! Let that lovely char develop for a few minutes on each side before flipping.
-
Rest the Chicken
Once cooked, transfer the chicken to a plate and cover it loosely with foil. Allow it to rest for about 5-10 minutes. This step is crucial! It helps the juices redistribute, ensuring your chicken is juicy and flavorful. -
Serve and Enjoy
Slice the chicken against the grain for beautiful presentation and serve it up with extra lime wedges and cilantro if desired. You can drizzle any leftover marinade over it for extra flavor!
Serving Suggestions
To plate your Coconut Lime Chicken, consider serving it on a bed of fluffy jasmine rice or alongside grilled vegetables for a beautiful contrast of colors. A light salad with mango and avocado can also complement the dish perfectly, creating a beautiful, refreshing meal that invites everyone to dive in. And don’t forget to garnish with a sprinkle of fresh cilantro on top — it adds that final pop of color and vibrancy that we all love!
Recipe Variations
Feeling inspired? Here are a few creative twists on this recipe:
-
Spicy Mango Salsa: Top your chicken with a fresh mango salsa made with diced mango, red onion, jalapeño, lime juice, and cilantro for a sweet and spicy kick.
-
Coconut Lime Shrimp: Swap chicken for shrimp! Adjust cooking time accordingly (about 2-3 minutes per side). It’s a quick and fabulous variation.
-
Grilled Pineapple: Add grilled pineapple slices on the side for a delightful sweetness and a taste of the tropics.
-
Vegan Delight: Replace chicken with tofu or tempeh for a plant-based version. Make sure to press out excess moisture before marinating to ensure flavor absorption.
-
Coconut Lime Quinoa Bowl: Serve the chicken over quinoa instead of rice, topped with diced cucumbers, avocado, and a drizzle of coconut sauce.
Chef’s Notes
This Coconut Lime Chicken has become a staple in my kitchen, evolving over the years as I’ve played with flavors and techniques. A fun memory I have is when I decided to grill it one summer evening, and I realized that even a simple family meal could turn into an event with just a little creativity and care. The rhapsody of flavors transported us to sunny shores without needing to leave home!
I often find that this recipe is a conversation starter, allowing everyone to share their own travel stories or culinary adventures. I hope, as you serve this dish, it opens up those beautiful moments for you and your loved ones, too.
FAQs and Troubleshooting
-
What if my chicken is dry?
Make sure you don’t overcook it. Use a meat thermometer to check for doneness. Remember, it should be at 165°F for juicy perfection! -
Can I marinate it overnight?
Absolutely! Marinating overnight enhances the flavors. Just be careful not to exceed that time too much to avoid texture issues. -
What if I don’t have coconut milk?
You can use low-sodium chicken broth or plain yogurt for a different creamy base. Just keep in mind it will change the flavor profile slightly. -
Can I grill this indoors?
Yes! If you have a grill pan, it works beautifully on the stovetop. Just monitor the heat to avoid smoking too much.
Nutritional Info (per serving) (optional)
- Calories: 350
- Protein: 37g
- Carbohydrates: 8g
- Fat: 18g
There you have it, friends! A delightful Coconut Lime Chicken recipe that’s sure to bring a touch of the tropics right to your table. I can’t wait to hear your stories and see your creations. Remember, good food isn’t just about the taste; it’s about the moments we create around it. Happy cooking and see you next time on Ivory Apron! 🍽️✨
PrintCoconut Lime Chicken

A light yet satisfying dish that combines the richness of coconut milk with the zesty brightness of lime, perfect for any occasion.
- Prep Time: 30 minutes
- Cook Time: 15 minutes
- Total Time: 45 minutes
- Yield: 4 servings 1x
- Category: Main Course
- Method: Grilling
- Cuisine: Tropical
- Diet: Gluten-Free
Ingredients
- 4 Chicken Breasts
- 1 Cup Coconut Milk
- 1 Lime (Juiced)
- 1/4 Cup Fresh Cilantro (Chopped)
- 2 Cloves Garlic (Minced)
- 1 Teaspoon Ginger (Grated)
- Salt and Pepper to Taste
- Olive Oil for Cooking
Instructions
- Marinate the Chicken: In a bowl, combine the coconut milk, lime juice, chopped cilantro, minced garlic, grated ginger, salt, and pepper. Place the chicken in a resealable bag or shallow dish, pour the marinade over, seal or cover, and let it marinate in the fridge for at least 30 minutes.
- Preheat Your Grill or Skillet: Preheat your grill to medium-high heat (about 375°F) or place a skillet over medium heat and drizzle with olive oil.
- Cook the Chicken: Remove the chicken from the marinade, letting excess drip off, and place it on the grill or skillet. Cook for about 6-7 minutes on each side until the chicken reaches an internal temperature of 165°F.
- Rest the Chicken: Transfer the chicken to a plate and cover loosely with foil. Allow it to rest for about 5-10 minutes.
- Serve and Enjoy: Slice the chicken against the grain, serve with extra lime wedges and cilantro, and drizzle any leftover marinade over it if desired.
Notes
For spicy flavor, add a pinch of red pepper flakes to the marinade. Serving suggestions include jasmine rice or grilled vegetables.
Nutrition
- Serving Size: 1 serving
- Calories: 350
- Sugar: 4g
- Sodium: 450mg
- Fat: 18g
- Saturated Fat: 15g
- Unsaturated Fat: 3g
- Trans Fat: 0g
- Carbohydrates: 8g
- Fiber: 1g
- Protein: 37g
- Cholesterol: 80mg
Keywords: Coconut Chicken, Lime Chicken, Tropical Recipe, Summer Grilling, Easy Chicken Dinner
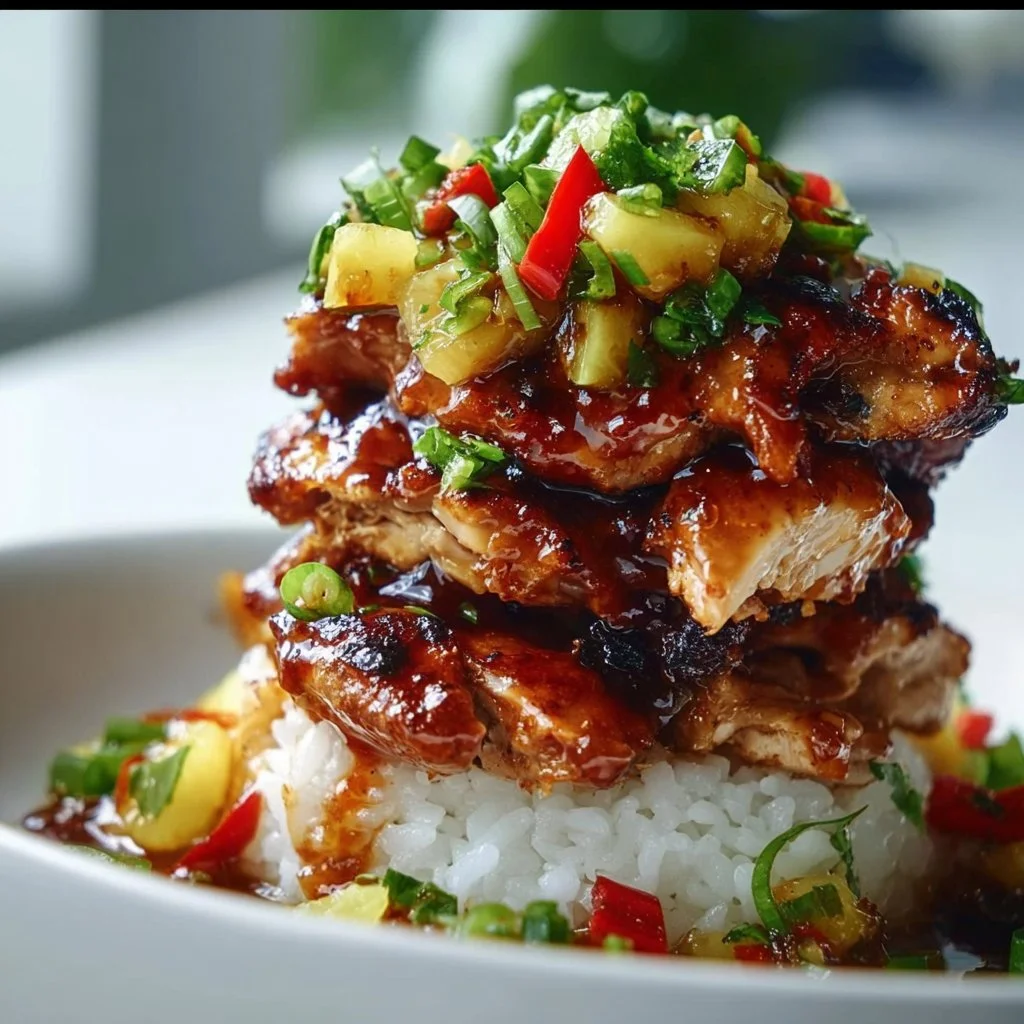
Hawaiian Turned Chicken Stack
Hawaiian Turned Chicken Stack: A Flavorful Journey to the Islands
Aloha, fellow food lovers! If you’re ready to take your taste buds on a tropical getaway, you’ve landed in the right place. I’m joyful to guide you through making a dish that’s not only bursting with flavors but also doubles as a warm hug on a plate—Hawaiian Turned Chicken Stack. Inspired by the sun-soaked islands, this recipe perfectly marries the tender juiciness of chicken thighs with the sweetness of pineapple and the vibrant crunch of fresh veggies.
Imagine yourself lounging on a Hawaiian beach, the gentle waves dancing at your feet while the scent of barbecue wafts through the air. Sounds dreamy, right? Well, you don’t need to strap on your flip-flops to enjoy this culinary escape. With just a few quality ingredients and a sprinkle of love, you can create an elegant dish that transports you right to those sandy shores without ever leaving your kitchen.
Whether you’re hosting a dinner party, prepping a family meal, or simply treating yourself to something special, this Hawaiian Turned Chicken Stack is sure to impress. With vibrant colors and punchy flavors that reflect the spirit of the islands, it’s perfect for any occasion. Are you excited? Let’s dive into this flavorful journey together!
Personal Story
One of my most cherished memories revolves around my aunt, who was a culinary wizard in our family. Every summer, she would host a luau in her backyard, transforming it into a slice of Hawaii with tiki torches, floral leis, and hula music. The highlight of those gatherings was always her Hawaiian chicken dish, grilled to perfection and drizzled with a sweet and tangy glaze. As a kid, I remember standing by the grill, my nose twitching with excitement as the savory aroma wrapped around me like a warm embrace.
One year, she decided to let me take the lead in the kitchen—an opportunity I grabbed with both hands! Armed with her recipes, I’m pretty sure I created a delightful disaster of flavors (let’s just say, there was more “ting” than “zing”). Still, she was incredibly supportive and showed me how to elevate my cooking without fear.
That summer ignited my passion for cooking, and I realized that food brings us not just sustenance but also stories—the laughter, the joy, the love. Presenting this Hawaiian Turned Chicken Stack is my way of keeping that magic alive and passing on the warmth I felt as a child.
Ingredients
Here’s what you’ll need to create this beautiful dish, along with some tips to make your cooking journey even smoother:
-
4 boneless, skinless chicken thighs
Tender and tasty, chicken thighs provide a juicy bite. If you’re looking for a lighter option, feel free to swap them out for boneless chicken breasts, but be mindful to avoid overcooking them. -
1/2 cup soy sauce
This becomes the base of your marinade, introducing a savory umami flavor. For a gluten-free alternative, use tamari instead! -
1/4 cup brown sugar
The sweetness balances the saltiness of the soy sauce. If you prefer, coconut sugar or agave syrup can offer a more complex flavor. -
1/4 cup pineapple juice
Adds that tropical zing! Fresh juice is ideal, but store-bought works just as well. -
2 tablespoons ketchup
Yep, it may seem unconventional, but it adds a delightful depth of flavor. Feel free to use a homemade version if you’re feeling adventurous! -
1 tablespoon rice vinegar
This rounds out the flavors, giving a pleasant acidity that brightens everything. Apple cider vinegar is a good substitute if you don’t have it on hand. -
2 cloves garlic, minced
Garlic adds complexity and aroma. Don’t feel shy to add an extra clove if you’re a garlic lover, like I am! -
1 teaspoon fresh ginger, grated
Ginger introduces a warm spice and freshness. If fresh isn’t available, a dash of ground ginger can work in a pinch! -
1 tablespoon vegetable oil
This is for cooking; it helps prevent sticking. You can use any neutral oil, like canola or avocado oil. -
2 cups cooked jasmine rice
This fluffy rice soaks up the delicious sauce wonderfully. Brown rice or quinoa can be fantastic substitutes for a healthy twist. -
1 cup fresh pineapple, diced
Fresh pineapple pieces add a burst of sweetness. If fresh isn’t available, use canned pineapple (drained) for ease. -
1 red bell pepper, diced
This adds a nice crunch and beautiful color. For a different sweetness, you can substitute it with orange or yellow bell peppers. -
1/2 cup green onions, sliced
These vibrant garnishes add a lovely bite. Chives can serve as an excellent alternative if green onions aren’t available. -
1 avocado, sliced
Creamy avocado complements the dish beautifully. If you’re feeling fancy, try a drizzle of chili oil for a spicy kick. -
Fresh cilantro, for garnish
Adds freshness and a pop of color. If cilantro’s not your thing, fresh parsley can be a beautiful alternative. -
Lime wedges, for serving
The squeeze of lime brightens and lifts every flavor—don’t skip it! Lemon can work as a substitute if that’s what you have.
Step-by-Step Instructions
Let’s roll up those sleeves, tie on that apron, and get cooking! Here’s how to create your Hawaiian Turned Chicken Stack:
Step 1: Marinating the Chicken
- In a mixing bowl, whisk together the soy sauce, brown sugar, pineapple juice, ketchup, rice vinegar, minced garlic, and grated ginger. This will be your marinade—sweet, tangy, and oh-so-delicious.
- Place the chicken thighs snugly in the bowl, ensuring they are thoroughly coated in the marinade. Cover, and let them soak in the flavors for at least 30 minutes (longer if you have the time—up to 2 hours in the fridge is best!). This step is crucial for infusing the chicken with that island magic.
Chef’s Tip: Don’t Have Time to Marinate?
No worries! If time’s short, simply brush the marinade over the chicken while cooking, ensuring it bakes in all those flavors.
Step 2: Cooking the Chicken
- Heat the vegetable oil in a large skillet over medium-high heat. When hot, add the marinated chicken thighs, saving that luscious marinade for later. Cook for about 5 minutes on each side until cooked through and golden brown. This step will create a beautiful crust!
Step 3: Making the Sauce
- Once the chicken is cooked, remove it from the skillet and set aside. In the same skillet, pour in the reserved marinade, bringing it to a simmer. Let it bubble away for 3–4 minutes until it thickens slightly. This will give you a glossy, flavorful glaze to drizzle over your chicken!
Step 4: Building Your Stack
- Time to layer it all together! Start with a base of fluffy jasmine rice on your plate. Next, place a beautifully cooked chicken thigh right on top. Then, it’s time to stack on the toppings: a handful of diced fresh pineapple, vibrant bell pepper, and the green onions.
- To finish, add a few slices of creamy avocado on top and drizzle a generous amount of that luscious glaze over everything. A sprinkle of fresh cilantro and a wedge of lime complete your masterpiece!
Chef’s Tip: Plate with Love
Presentation matters! Don’t just slap it on the plate. Take a moment to artfully arrange your ingredients, reflecting the dish’s tropical spirit. Remember, even humble meals shine with a little thoughtfulness!
Serving Suggestions
To serve this delightful dish, arrange the components on a large platter for family-style dining or plate individual servings. Drizzle extra glaze over the top for a mouthwatering finish, and don’t forget those lime wedges—after all, it’s all about that zesty pop! Add a refreshing side salad or some crispy slaw, and you’re set for a meal that feels both elegant and relaxed.
Recipe Variations
Let’s shake things up a bit! Here are a few creative twists to consider:
-
Teriyaki Chicken Stack: Swap out the soy sauce for a teriyaki sauce to shift the flavor profile while maintaining the Hawaiian vibes.
-
Grilled Chicken Skewers: Cut the chicken into bite-sized pieces and skewer them with bell pepper and pineapple before grilling. Perfect for a summer cookout!
-
Coconut Rice: Steam your jasmine rice with coconut milk instead of water for a creamier, more tropical flavor.
-
Spicy Heat: Add some diced jalapeños to the pineapple topping for a kick that contrasts nicely with the sweetness.
-
Vegan Delight: Swap chicken for firm tofu or tempeh, marinating and preparing it similarly for a delicious vegan option.
Chef’s Notes
This dish has evolved quite a bit over the years. The first time I made it, I remember being completely overwhelmed, trying to balance all the flavors. Now, I savor the process, knowing that cooking is about experimenting and learning. One funny kitchen disaster was when I accidentally grabbed brown sugar thinking it was flour—let me tell you, pineapple and sugar-coated chicken is not a flavor alignment made in heaven! But that’s what makes cooking fun—sometimes, the best recipes arise from our "oops" moments.
FAQs and Troubleshooting
Q1: My chicken turned out dry. What happened?
Ah, dry chicken is a common kitchen hiccup! Make sure you’re not overcooking them; chicken thighs are forgiving, but 6-7 minutes per side usually does the trick. Also, using a meat thermometer (aim for 165°F/74°C) can help ensure perfectly juicy results.
Q2: Can I prepare this dish ahead of time?
Absolutely! You can marinate the chicken earlier in the day and store it in the fridge. When you’re ready to cook, just follow the steps, and you’re good to go!
Q3: What if I don’t like pineapple?
No worries! While pineapple is a star here, feel free to replace it with your favorite fruit—mango or peaches could work wonders, too! The idea is to keep that fresh, fruity note.
Q4: Is this dish good for meal prepping?
Yes! The Hawaiian Turned Chicken Stack stores beautifully in the refrigerator. Just pack the components separately and combine them when you’re ready to dig in!
Nutritional Info
(Your nutritional values will vary based on serving size, so be sure to adjust based on your specific needs!)
Per Serving (estimated):
Calories: 450 | Protein: 28g | Carbs: 45g | Fat: 20g
Packed with flavor and nutrition, this dish provides a balanced meal without skimping on taste!
And there you have it—your ultimate guide to creating a delicious Hawaiian Turned Chicken Stack! Cooking is all about joy, creativity, and sharing; I hope this recipe encourages you to gather your loved ones around the table. Bon appétit, and until next time, keep those aprons tied and the laughter rolling! 🌺🍍🌿
PrintHawaiian Turned Chicken Stack

A vibrant dish marrying juicy chicken thighs, sweet pineapple, and fresh veggies for a tropical escape.
- Prep Time: 30 minutes
- Cook Time: 15 minutes
- Total Time: 45 minutes
- Yield: 4 servings 1x
- Category: Main Course
- Method: Stovetop
- Cuisine: Hawaiian
- Diet: Gluten-Free
Ingredients
- 4 boneless, skinless chicken thighs
- 1/2 cup soy sauce
- 1/4 cup brown sugar
- 1/4 cup pineapple juice
- 2 tablespoons ketchup
- 1 tablespoon rice vinegar
- 2 cloves garlic, minced
- 1 teaspoon fresh ginger, grated
- 1 tablespoon vegetable oil
- 2 cups cooked jasmine rice
- 1 cup fresh pineapple, diced
- 1 red bell pepper, diced
- 1/2 cup green onions, sliced
- 1 avocado, sliced
- Fresh cilantro, for garnish
- Lime wedges, for serving
Instructions
- Marinate the chicken by whisking together soy sauce, brown sugar, pineapple juice, ketchup, rice vinegar, minced garlic, and grated ginger. Coat the chicken thoroughly and let it soak for at least 30 minutes.
- Heat the vegetable oil in a skillet over medium-high heat. Add the marinated chicken thighs and cook for about 5 minutes on each side until cooked through and golden brown.
- Remove the chicken from the skillet, then pour in the reserved marinade. Bring to a simmer and cook for 3-4 minutes until it thickens slightly.
- Layer the dish by placing jasmine rice on a plate, topping it with a cooked chicken thigh, diced pineapple, bell pepper, green onions, avocado, and drizzling the sauce over everything.
Notes
For a lighter option, swap chicken thighs for boneless chicken breasts. Feel free to adjust the spice level and use any fruit you prefer.
Nutrition
- Serving Size: 1 serving
- Calories: 450
- Sugar: 14g
- Sodium: 800mg
- Fat: 20g
- Saturated Fat: 3g
- Unsaturated Fat: 15g
- Trans Fat: 0g
- Carbohydrates: 45g
- Fiber: 3g
- Protein: 28g
- Cholesterol: 75mg
Keywords: Hawaiian chicken, tropical recipe, chicken stack, rice bowl
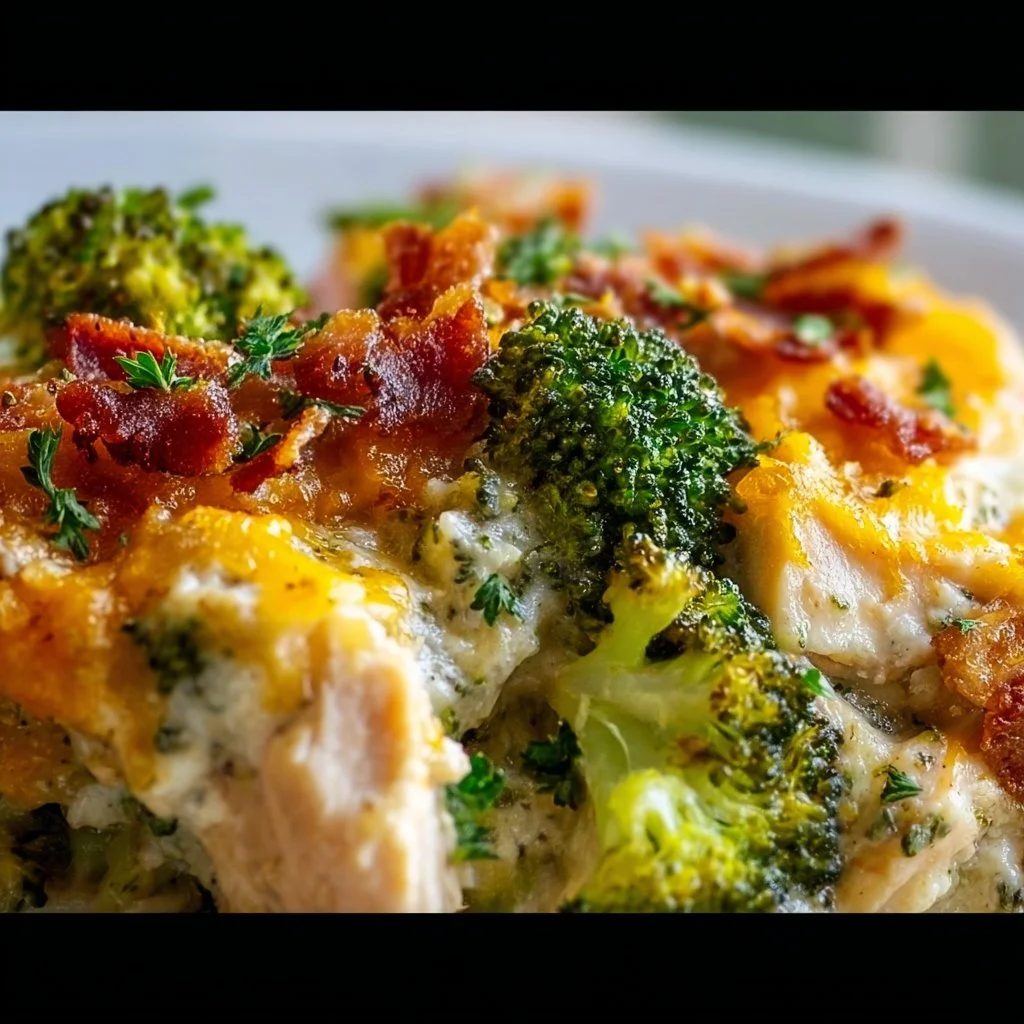
Healthy Low Carb Chicken Broccoli Casserole
# Healthy Low Carb Chicken Broccoli Casserole: A Comforting Classic with a Twist

## Introduction

Hello, lovely food lovers! Welcome to my kitchen, where the aroma of deliciously prepared meals fills the air and every dish tells a story. Today, I'm thrilled to share one of my all-time favorites: **Healthy Low Carb Chicken Broccoli Casserole**. This dish isn't just another casserole; it's an epitome of comfort food that celebrates nutrition without sacrificing flavor. Whether you’re on a low-carb diet, looking for a quick weeknight meal, or aiming to impress your guests, this casserole checks all the boxes!

Imagine a cozy evening spent with family or friends, laughter echoing around the dinner table while this creamy, cheesy goodness fills your plates. The combination of tender chicken, vibrant green broccoli, and a sprinkle of cheesy goodness creates not only a delightful dish but also a snapshot of cherished moments spent around the table.

At Ivory Apron, I believe that every meal is an opportunity to create memories, and this casserole is perfect for that! So, roll up those sleeves and dust off your apron—let's dive into the heart of this wholesome yet indulgent recipe!

## Personal Story

The first time I made chicken broccoli casserole was during a chilly fall evening in college. My best friend, Sarah, and I were crammed into our tiny apartment kitchen, determined to whip up something magical with the random ingredients we had on hand. With limited funds and even fewer cooking skills, we grabbed some rotisserie chicken, a bag of frozen broccoli, and a hodgepodge of spices from the cupboard.

As we mixed everything together, the kitchen filled with laughter and the occasional “oops!” as we tried to navigate our way around the recipe. When it finally came out of the oven, bubbling and golden, we served it up on mismatched plates while enjoying a glass of the cheapest wine we could find! That night, the casserole was more than just food; it represented friendship, creativity, and the magic that happens when you put love into cooking. I’ve since worked on perfecting the recipe, swapping out high-carb ingredients for healthier ones, making it not only delicious but good for you!

## Ingredients

Here’s what you’ll need to make this fabulous **Healthy Low Carb Chicken Broccoli Casserole**. Let’s break it down:

- **2 cups cooked chicken, shredded**: You can use leftover rotisserie chicken or poach your chicken breasts. Need a quick sub? Turkey works great as well!

- **2 cups broccoli florets, steamed**: Fresh or frozen broccoli will do the trick. If you're feeling adventurous, try swapping it out for cauliflower or asparagus for a different taste.

- **1 cup shredded cheese (like cheddar or mozzarella)**: Cheese adds creaminess and flavor. Prefer a lighter option? Use part-skim mozzarella or a dairy-free cheese for a vegan version.

- **1 cup sour cream or Greek yogurt**: This adds creaminess and tang. Greek yogurt is the healthier choice, packed with protein. You can also try cottage cheese blended until smooth for a similar texture.

- **1 teaspoon garlic powder**: A great way to introduce flavor without being overpowering. If you prefer fresh, minced garlic works too!

- **1 teaspoon onion powder**: Another essential flavor booster that makes the casserole sing.

- **Salt and pepper to taste**: Season to your preference. Remember, seasoning is key!

- **1/2 cup grated Parmesan cheese (optional)**: Adds a delish crust on top! If you’re looking for a gluten-free option, make sure to check your cheese label.

- **1 tablespoon olive oil or butter (for greasing the casserole dish)**: Olive oil is a heart-healthy choice, but if you want a richer flavor, butter is the way to go!

## Step-by-Step Instructions

Ready to get cooking? Here’s how to put together this yummy casserole, step-by-step:

### 1. Preheat the Oven

Preheat your oven to 350°F (175°C). This step is crucial for even cooking—no one likes a cold center in their casserole!

### 2. Prepare the Ingredients

While your oven is warming up, gather your ingredients and get everything ready. If your chicken isn't shredded yet, do that now! Use two forks or your hands to shred it into bite-sized pieces. Also, steam your broccoli florets until they are bright green and just tender—around 2-3 minutes if using the microwave (just don't overcook them).

### 3. Grease the Casserole Dish

Grab a 9x13-inch casserole dish and coat it with olive oil or butter to prevent sticking. A little grease goes a long way, ensuring that your creamy casserole comes out effortlessly.

### 4. Mix the Ingredients

In a large mixing bowl, combine the shredded chicken, steamed broccoli, shredded cheese, sour cream or Greek yogurt, garlic powder, onion powder, salt, and pepper. Stir until everything is well incorporated. Pro tip: Use a spatula to fold the mixture gently to avoid breaking the broccoli florets further—nobody wants a mushy casserole!

### 5. Transfer to Casserole Dish

Scoop the mixture into your greased casserole dish and spread it evenly. This is where you can get creative: smooth it out with your spatula for that lovely surface area that will get all toasty in the oven.

### 6. Top with Parmesan

If you're feeling cheesy (and who isn't?), sprinkle the grated Parmesan on top for a wonderful golden crust. It’s a showstopper and adds an extra layer of flavor!

### 7. Bake It Up

Slide your casserole into the preheated oven and let it bake for about 30-35 minutes or until it's bubbly and golden on top. You’ll know it’s ready when you see that lovely cheese crust. Keep an eye on it—your kitchen will smell divine, and you might just accidentally start drooling!

### 8. Let It Rest

Once out of the oven, let your casserole sit for about 5-10 minutes. I know it’s hard to resist the tantalizing aroma, but letting it rest will help it firm up a bit, making it easier to serve.

## Serving Suggestions

Now it's the moment of truth! Serve your casserole straight from the dish, and don't be shy with those portions. A sprinkle of fresh herbs, like parsley or basil, on top adds a beautiful pop of color and freshness. Pairing it with a light salad or some crusty low-carb bread makes for a satisfying meal. Bon appétit!

## Recipe Variations

Looking to spice things up? Here are some creative twists you can try:

- **Add Spices**: Toss in some red pepper flakes for a kick or smoked paprika for a warm undertone.
- **Vegetable Medley**: Incorporate other veggies like spinach, bell peppers, or mushrooms for added nutrients and flavors.
- **Different Proteins**: Swap chicken with cooked shrimp or ground turkey for a change of pace.
- **Cheese Swap**: Experiment with different cheeses like pepper jack for extra heat or Swiss for a milder flavor.
- **Low-Carb Crust**: For a crispy topping, mix crushed pork rinds or almond flour with cheese as a substitute for traditional breadcrumbs.

## Chef’s Notes

Ah, this casserole has a special place in my heart. It has evolved from a college concoction to something special I serve during gatherings with friends and family. Sometimes I swap the broccoli for seasonal vegetables, and it never fails to surprise and delight! Plus, I love that it’s a one-dish wonder, which means less cleanup—yay!

If you ever catch yourself with leftover casserole (not likely!), it reheats beautifully and can be frozen for a rainy day. Trust me, you'll want to keep this recipe in your arsenal!

## FAQs and Troubleshooting

**1. Can I use raw chicken in the casserole?**
While pre-cooked chicken gives the best results, you can use raw chicken. Just ensure to cook it for about 45-50 minutes in the oven at 350°F (175°C).

**2. What if my casserole is too watery?**
If your casserole comes out watery, it may be due to excess moisture in the broccoli. Ensure to fully steam and drain the broccoli before adding it to the mixture. You can also add a tablespoon of flour or cornstarch to help thicken it.

**3. How should I store leftovers?**
Store any leftovers in an airtight container in the fridge for up to 3-4 days. To reheat, simply pop it back in the oven or microwave until warmed through.

**4. Is this dish kid-friendly?**
Absolutely! The creamy cheese and chicken make it appealing to kids, and the broccoli adds a nutritious crunch. You might even want to swap the broccoli for their favorite vegetable!

## Nutritional Info

(If applicable, this section can be created based on standard nutritional guidelines for the recipe. Here is a simple example that can be expanded upon.)

- Calories: Approximately 350 per serving
- Protein: 30g
- Carbohydrates: 8g
- Fat: 20g
- Fiber: 3g

---

And there you have it—your delicious and healthy low carb chicken broccoli casserole, ready to impress! I hope you'll invite your loved ones to join you on this culinary journey. Let’s create beautiful memories together because every meal counts. Enjoy your cooking adventure!

Happy Feasting,
Savannah Pierce
Healthy Low Carb Chicken Broccoli Casserole

A delicious and nutritious low-carb chicken and broccoli casserole that is creamy and comforting.
- Prep Time: 15 minutes
- Cook Time: 35 minutes
- Total Time: 50 minutes
- Yield: 4 servings 1x
- Category: Main Course
- Method: Baking
- Cuisine: American
- Diet: Low Carb
Ingredients
- 2 cups cooked chicken, shredded
- 2 cups broccoli florets, steamed
- 1 cup shredded cheese (like cheddar or mozzarella)
- 1 cup sour cream or Greek yogurt
- 1 teaspoon garlic powder
- 1 teaspoon onion powder
- Salt and pepper to taste
- 1/2 cup grated Parmesan cheese (optional)
- 1 tablespoon olive oil or butter (for greasing the casserole dish)
Instructions
- Preheat your oven to 350°F (175°C).
- Prepare your ingredients by shredding the chicken and steaming the broccoli until bright green.
- Grease a 9×13-inch casserole dish with olive oil or butter.
- Mix the chicken, steamed broccoli, cheese, sour cream or Greek yogurt, garlic powder, onion powder, salt, and pepper in a large bowl.
- Transfer the mixture to the greased casserole dish and spread it evenly.
- Top with grated Parmesan cheese if desired.
- Bake for about 30-35 minutes or until bubbly and golden.
- Let the casserole sit for 5-10 minutes before serving.
Notes
Pair with a light salad or low-carb bread for a complete meal. This dish is kid-friendly and can be adapted with different veggies or proteins.
Nutrition
- Serving Size: 1 serving
- Calories: 350
- Sugar: 3g
- Sodium: 400mg
- Fat: 20g
- Saturated Fat: 10g
- Unsaturated Fat: 8g
- Trans Fat: 0g
- Carbohydrates: 8g
- Fiber: 3g
- Protein: 30g
- Cholesterol: 80mg
Keywords: chicken, broccoli, casserole, low carb, healthy, comfort food
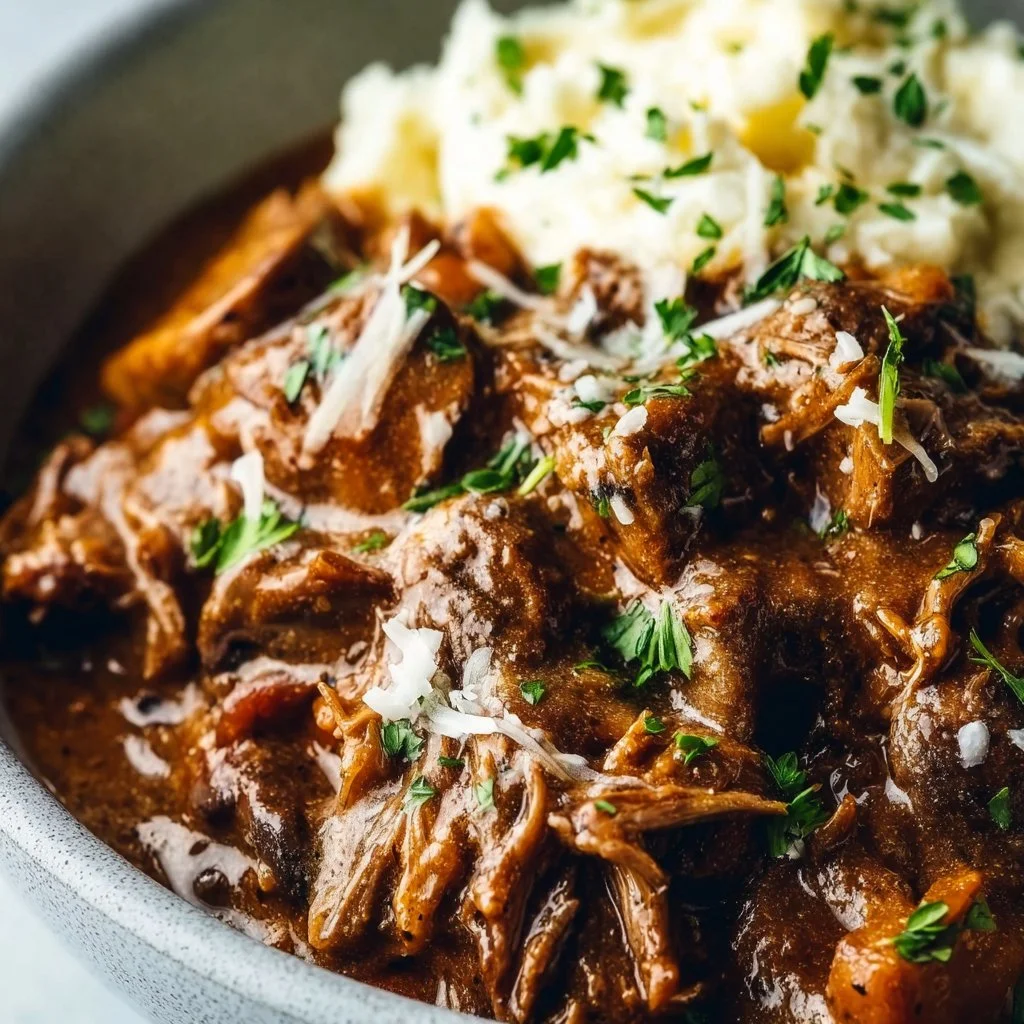
16 Easy Keto Crockpot Recipes You’ll Love
16 Easy Keto Crockpot Recipes You’ll Love
Hey there, fellow food lovers! I’m so excited to dive into the world of Keto cooking with you. Let’s fire up those crockpots and make magic happen! Cooking should be both fun and fulfilling, and with the right recipes, it can also be incredibly tasty, even when you’re sticking to those low-carb values!
If you’re anything like me, you might have felt the weight of culinary decisions during a busy week—turning to the same old takeout or quick microwave meals. Well, let me tell you, there’s a better way! That’s where the trusty crockpot comes in. It’s the unsung hero of the kitchen that marries convenience with delicious flavors. Perfect for those with a busy lifestyle, it allows you to toss in your ingredients, set it, and forget it—while enjoying the divine aromas wafting through your home.
Whether you’re busy taking care of a family, chasing work deadlines, or simply giving yourself the needed time for self-care, these 16 easy Keto crockpot recipes will keep you satisfied without sacrificing time or flavor. So grab your apron, lace up those cooking shoes, and let’s embark on a flavorful journey!
Let’s get ready to explore delightful comfort food that fits your Keto lifestyle. We’ll have cheesy casseroles, zesty soups, and even some finger-licking meats that will make your taste buds dance. Plus, I’ll sprinkle in some personal stories and cooking tips along the way. Are you ready? Let’s dig in!
Personal Story
I can still remember the first time I unboxed my crockpot. The sleek design and promise of slow-cooked goodness thrilled me. I was about to host my first dinner party, and I wanted everything to be perfect. After tinkering with a few recipes, I settled on a classic: a hearty beef stew. I tossed in chunks of tender beef, vibrant carrots, and fragrant herbs, with a hint of red wine for that touch of class.
As the stew simmered away, I was captivated by the aromas filling my home. My friends raved about the flavors, and I realized this was my moment—my culinary breakthrough! Everyone gathered around the table, savoring each bite and lingering over dessert. That night made me appreciate the beauty of meals prepared with love, and that’s what I want to share with you: connections made around the table, without the stress!
Fast forward to today, I’ve crafted numerous easy Keto crockpot recipes that continue to capture the essence of home-cooked comfort. Honestly, nothing beats the joy of coming home to a warm, hearty meal that you’ve prepped with ease earlier in the day. It’s the kind of magic that feels like an old tradition, remade for modern-day living.
Ingredients
Here’s a quick breakdown of the key ingredients you’ll often find in our Keto crockpot recipes. This list comes not only with basic necessities but also with some handy substitutions and chef insights!
Common Ingredients:
-
Chicken Thighs or Breasts
- A lean protein packed with flavor. Chicken thighs tend to be juicier than breasts, but both work beautifully. You can swap in turkey if you’re looking for something lighter.
-
Ground Beef or Turkey
- Perfect for meatballs or casseroles. Both deliver a hearty base for any good dish. If you want it leaner, opt for ground turkey, but make sure you add good spices to keep it flavorful!
-
Cauliflower
- A fabulous low-carb alternative to grains and starchy vegetables. You can make cauliflower rice or mash it just like potatoes! For a little color, consider using broccoli or zucchini.
-
Heavy Cream
- Adds richness and depth. If you’re watching calories, you can swap in coconut cream or sunflower cream for a dairy-free alternative!
-
Bone Broth
- Nutrient-dense and perfect for soups and stews. If you don’t have bone broth, chicken or vegetable broth works just as well, though you may miss that extra collagen boost.
-
Cheddar Cheese
- Because really, what’s comfort food without cheese? If you’re lactose intolerant, go with a hard-aged cheese like Gouda or a dairy-free cheese product.
-
Spices (like garlic, paprika, and cumin)
- Elevate the flavors of your dish! Don’t be shy—mix and match. Fresh herbs like rosemary or thyme can also brighten a recipe!
These ingredients are serving as the building blocks of our favorite crockpot creations. With a little imagination, you can combine them in countless ways to keep dinnertime exciting and Keto-friendly!
Step-by-Step Instructions
Now that we’ve covered the essential ingredients, let’s get into the cooking process! We’ve got deliciousness ahead of us with our Keto crockpot recipes, and I promise you—it’s as easy as 1-2-3!
Recipe #1: Keto Chicken and Mushroom Soup
-
Prep your ingredients.
- Start by chopping 1 onion, 2 carrots, and 2 cloves of garlic. Don’t stress about perfect cuts—rustic is beautiful!
-
Sear the chicken.
- Heat a tablespoon of olive oil in a skillet over medium heat. Add the chicken thighs and sear for 3-4 minutes on each side until golden brown. This step adds loads of flavor.
-
Combine in the crockpot.
- Toss the mushrooms, carrots, onions, and garlic into the crockpot. Add the seared chicken on top.
-
Add the liquid.
- Pour in 4 cups of chicken bone broth, a splash of heavy cream, and season with salt, pepper, thyme, and rosemary.
-
Set and forget.
- Cover and cook on low for 6-8 hours, or high for 3-4 hours. The smell in your kitchen will have you dreaming about a warm bowl of soup!
-
Finish with a flourish!
- About 15 minutes before serving, stir in a handful of fresh spinach. It’s the perfect touch of green, plus it wilts down beautifully.
Recipe #2: BBQ Pulled Pork
-
Gather your spices.
- Start by mixing together 2 tablespoons smoked paprika, 1 tablespoon garlic powder, 1 tablespoon onion powder, 2 teaspoons cayenne, salt, and pepper. Rub this glorious blend all over your pork roast.
-
Secure and sear!
- Place the pork in a hot skillet with olive oil. Sear it for about 2-3 minutes on each side until caramelized!
-
Place in the crockpot.
- Transfer the pork to your crockpot, and pour over 1 cup of sugar-free BBQ sauce. Give it a gentle toss to coat.
-
Let it slow cook.
- Cover and cook on low for 8-10 hours. Walk away and let the flavors meld!
-
Shred and serve!
- With two forks, shred that glorious pork and mix it back into the sauce. Serve on lettuce wraps or over cauliflower rice for a Keto-friendly delight!
Recipe #3: Beef and Broccoli Stir Fry
-
Prep that beef!
- Slice 1 lb. of flank steak against the grain into thin strips.
-
Toss in soy sauce.
- In a bowl, mix the beef with ⅓ cup of coconut aminos (a soy sauce alternative), 1 tablespoon of sesame oil, and some minced garlic. Let it marinate for 30 minutes—yum!
-
Crockpot magic:
- Pour the marinated beef into the crockpot. Add 2 cups of broccoli florets, and if you like a little heat, toss in some sliced jalapeños!
-
Cook and let it ride.
- Cover and cook on low for 4-5 hours. If you’re in a bit of a hurry, you can go high for around 2-3 hours.
-
Serve with style.
- Just before serving, drizzle with sesame oil and sprinkle with sesame seeds. A drizzle of lime juice adds a nice pop!
With just a little prep and time, you can have these delectable meals ready to go! Don’t be afraid to mix and match these instructions; cooking should be all about what speaks to your taste buds!
Serving Suggestions
Serving your wonderful canned creations is as important as the cooking itself. It’s about creating a meal that looks inviting, and nobody can resist!
For our Keto Chicken and Mushroom Soup, ladle it into colorful bowls and add a sprinkle of fresh parsley on top for garnish. Pair it with a side salad and call it a hearty meal.
With the BBQ Pulled Pork, consider building delicious little sandwiches with large romaine leaves as the bun and topping it with homemade coleslaw made with shredded cabbage and a pinch of apple cider vinegar. It’s a fresh touch that rounds out the smoky flavors.
For the Beef and Broccoli Stir Fry, please serve it over a bed of cauliflower rice and top with sliced green onions for a pop of color. Everything tastes better when it looks beautiful, right?
Recipe Variations
Now that we’ve gotten a taste of some classic recipes, here are a few fun variations to keep things interesting:
-
Italian Twist: Add marinara sauce, Italian seasoning, and olives to your chicken stew for a Mediterranean flair.
-
Spicy Option: For a kick, sprinkle in some red pepper flakes or sriracha into any of your dishes.
-
Cauliflower Versatility: Use cauliflower not just as rice or mashed chunks but also in gratins. Just mix steamed cauliflower with cheese, cream, and seasonings for a fabulous side!
-
Zesty Lemon Chicken: Splash some lemon juice or add slices of lemon into your chicken and mushroom soup for that refreshing zing.
-
Curry Flavor Explosion: Add coconut milk, curry paste, and veggies like bell peppers and spinach for an enticing curry dish.
Have fun with these ideas! Cooking is more than just following a recipe; it’s about expressing creativity!
Chef’s Notes
Over the years, I’ve learned that our favorite recipes might evolve. I started with basic Keto adaptations and have grown bolder with spices and flavors as I ventured into different cuisines. I often find myself browsing through family and friends’ cookbooks, drawing inspiration, and giving that classic recipe a Keto-friendly twist!
One “oops” moment in the kitchen was when I confused cayenne pepper for paprika while preparing spicy chicken. Let me tell you, that was memorable! But you know what? The guests loved it, and it became a new staple for dinner parties. Always be open to using what’s on hand and have fun with flavor—it can lead to delightful surprises!
FAQs and Troubleshooting
1. Why is my meat tough?
If your meat ends up tough, it may not have cooked long enough. Make sure you cook it on low for that tender melt-in-your-mouth goodness. Don’t rush the process!
2. Can I use frozen meat?
Absolutely! Just keep in mind that it may take a bit longer to cook. Make sure to adjust your timing accordingly.
3. Why are my vegetables mushy?
If you want them to retain their texture, add them later in the cooking process, especially if they are delicate vegetables like spinach or zucchini. You can add them in the last hour of cooking.
4. How do I store leftovers?
Let the food cool completely before transferring it to airtight containers. Most of these recipes can be stored in the fridge for up to 4 days, or you can freeze single portions for a quick meal whenever hunger strikes!
Nutritional Info
It’s essential to keep track, especially with a Keto lifestyle. Many of these recipes will be low in carbs, high in healthy fats, and packed with protein! Always refer to the specific ingredient amounts when calculating your complete dietary needs.
And there you have it—a collection of fabulous Keto crockpot recipes to enjoy! I hope you find joy in these meals, gathering loved ones around your table with ease and grace. Let’s keep those crockpots cooking, and remember, every meal is an opportunity to create memories.
Tie on your apron, pour something bubbly, and let’s whip up something scrumptious together. Happy cooking!
Print16 Easy Keto Crockpot Recipes You’ll Love
Explore easy and fulfilling Keto recipes perfect for your busy lifestyle, featuring comforting meals made in a crockpot.
- Prep Time: 15 minutes
- Cook Time: 480 minutes
- Total Time: 495 minutes
- Yield: 4 servings
- Category: Main Course
- Method: Crockpot
- Cuisine: Keto
- Diet: Keto
Ingredients
- Chicken Thighs or Breasts
- Ground Beef or Turkey
- Cauliflower
- Heavy Cream
- Bone Broth
- Cheddar Cheese
- Spices (like garlic, paprika, and cumin)
Instructions
- Prep your ingredients by chopping vegetables.
- Sear the chicken for added flavor.
- Combine all ingredients in the crockpot.
- Add liquid and seasonings.
- Set to low for 6-8 hours or high for 3-4 hours.
- Finish with fresh greens for garnish.
Notes
For a refreshing twist, add lemon juice or mix in various spices for flavor.
Nutrition
- Serving Size: 1 serving
- Calories: 450
- Sugar: 4g
- Sodium: 500mg
- Fat: 22g
- Saturated Fat: 8g
- Unsaturated Fat: 10g
- Trans Fat: 0g
- Carbohydrates: 10g
- Fiber: 2g
- Protein: 35g
- Cholesterol: 85mg
Keywords: Keto, Crockpot, Easy Recipes, Healthy Meals, Low-Carb
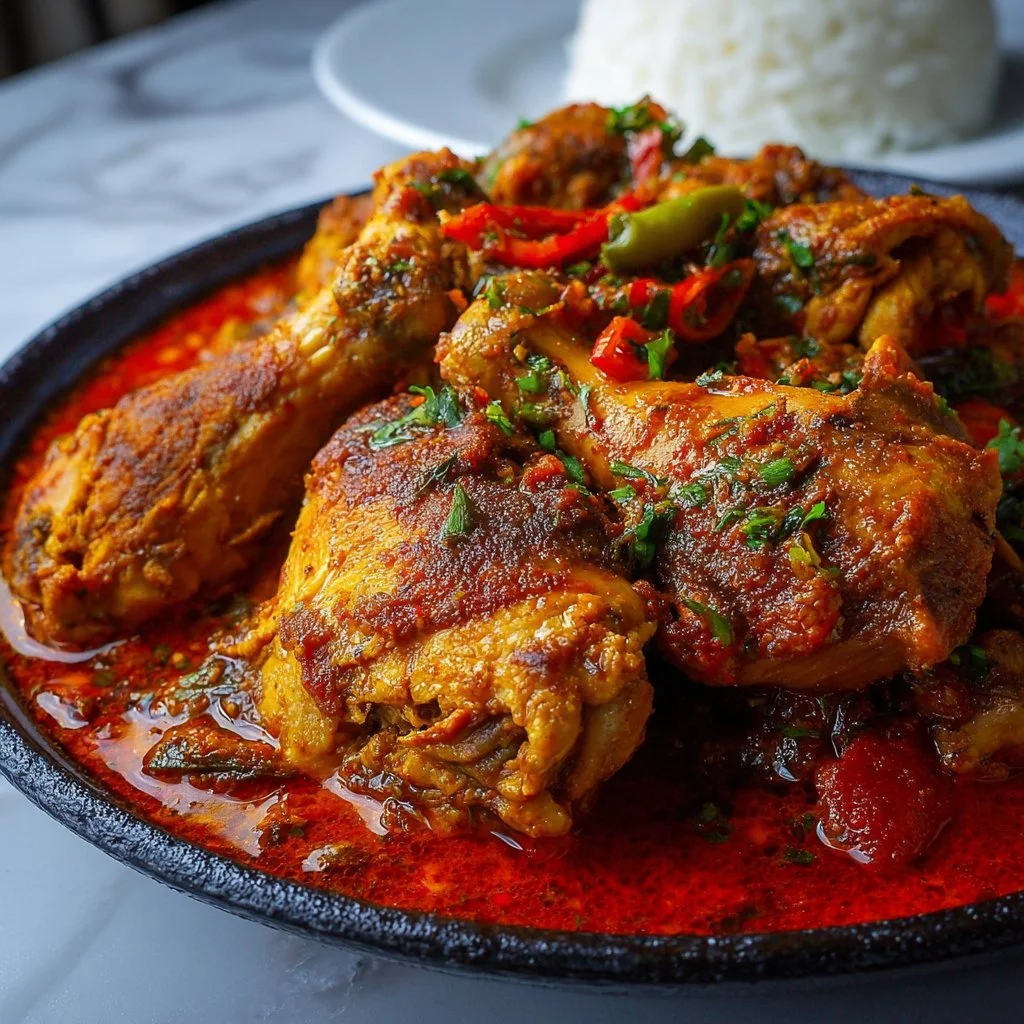
Nigerian Chicken Stew Recipe
# Savory Nigerian Chicken Stew: A Flavorful Journey to Your Dinner Table

Hello, my lovely foodies! I’m so excited to share one of my all-time favorite recipes that not only warms your soul but also fills your home with rich, aromatic flavors—Nigerian Chicken Stew. When it comes to comfort food, this dish is nothing short of a celebration, embodying the very essence of gathering around the table and sharing love through food. Whether you're a seasoned cook or just taking your first steps into the culinary world, this starter guide will walk you through the delightful process of crafting a dish that's bursting with life.

The best part? This recipe is not just about cooking; it's about creating treasured moments in your kitchen, infusing every step with love, laughter, and perhaps a splash of mischief! So roll up your sleeves, tie on your apron, and let’s embark on this flavorful journey together.

## A Personal Story

I can still remember the first time I tasted Nigerian Chicken Stew. I was a wide-eyed teenager sitting at my friend Ada’s kitchen table, the air thick with the gently simmering aromas of spices and pepper. Her grandmother, an extraordinary cook, stirred a bubbling pot while sharing stories of their family's traditions. As the sun set, casting a warm glow through the window, we gathered around the meal, savoring every bite. The chicken was tender, the sauce was rich, and the whole dish seemed to tell a story of warmth and love. It struck me then—food is more than sustenance; it’s a beautiful tapestry of memories waiting to be woven. Little did I know this dish would inspire my own culinary adventures, leading to the creation of Ivory Apron and the belief that every meal can be a masterpiece, no matter how simple.

## Ingredients

Let’s gather our ingredients for this delectable Nigerian Chicken Stew. Each component is an essential piece of the puzzle, creating a delicious harmony of flavors:

- **2.5 lbs bone-in chicken (thighs or drumsticks)**: Bone-in pieces add richer flavor and juiciness. If you prefer, skinless chicken can be used, but the taste may be slightly less robust.

- **1 teaspoon salt**: Balances the flavors and enhances the taste of each ingredient. You can adjust this according to your taste or if you’re watching your sodium intake.

- **1/2 teaspoon black pepper**: A friendly kick that complements the dish’s warmth. For a milder version, opt for white pepper.

- **1 teaspoon paprika**: This totally amps up the color while adding a mild sweetness. Smoked paprika is fab for a unique depth of flavor!

- **1 teaspoon curry powder**: Don’t be scared; this isn’t the overpowering type. It adds warmth and aroma. If you're feeling adventurous, try garam masala for a nuanced twist.

- **1 teaspoon thyme**: A subtle herbaceous note! You can substitute with oregano or rosemary if thyme is not on hand.

- **1 onion, chopped**: Onions are the base for almost all great stews! Use yellow onions for more sweetness or red for a slightly sharper taste.

- **1/4 cup vegetable oil**: Helps with sautéing and adds richness. If preferred, olive oil works too, though it may impart a different flavor profile.

- **4 large Roma tomatoes**: These add acidity and sweetness; their thick flesh makes for a nice base. If fresh tomatoes aren’t available, use canned tomatoes—but remember, there’s nothing like fresh!

- **1 large red bell pepper**: This adds sweetness and color. Yellow or orange bell peppers can be swapped in—think of it as personalizing your dish!

- **1 small red onion**: This intensifies the onion flavor. White onions can also work if you need a substitute.

- **2 scotch bonnet peppers (or 1 for less heat)**: They're the stars of the heat show! If you want to tame the spice, consider using jalapeños or even chili flakes.

- **2 tablespoons tomato paste**: This thickens the stew and enhances its richness. Homemade tomato paste is amazing, but go for a high-quality store-bought version if you're in a hurry.

- **1 teaspoon garlic powder**: A trusty spice that brings layers of flavor. Fresh minced garlic adds a lovely kick, too.

- **1 teaspoon ginger powder**: Its warming essence brightens the stew. Fresh ginger is a great alternative if you love that zesty bite!

- **1 bouillon cube**: This packs in a punch of umami flavor. If you’re avoiding MSG, opt for a natural version or vegetable stock.

- **Salt to taste**: This is the final tweak that'll elevate your dish. Always taste and adjust!

## Step-by-Step Instructions

Now that we have everything set, let’s get our hands dirty—let's cook up this fabulous stew!

1. **Prep the Chicken**:
   - Start by patting the chicken dry with a paper towel. This helps achieve a beautiful golden-brown sear. Sprinkle the salt, black pepper, paprika, curry powder, and thyme all over the chicken, rubbing it in nicely—that’s the love right there!

2. **Sauté the Onions**:
   - Heat the vegetable oil in a large pot over medium heat. Add the chopped onion and sauté until fragrant and translucent, about 5 minutes. Stir occasionally and let it dance gracefully in the pan.

3. **Brown the Chicken**:
   - Move that beautiful sautéed onion to the side and add the marinated chicken pieces skin-side down. Let them get a nice golden-brown sear, about 6-7 minutes on each side. We aren’t cooking them all the way through just yet; we just want to lock in those scrumptious flavors!

4. **Create the Stew Base**:
   - While the chicken’s resting, it’s time for the star players—our tomatoes and peppers! Toss in the chopped Roma tomatoes, red bell pepper, and small red onion. Mix everything well and let them soften in the residual heat of the pot for 4-5 minutes.

5. **Add Those Spices**:
   - Stir in the tomato paste, ginger powder, garlic powder, and crushed scotch bonnet peppers (keep those taste buds on alert). Let this simmer for another 2-3 minutes, allowing all those spices to mingle.

6. **Simmer, Simmer, Simmer**:
   - Place the browned chicken back into the pot, including any juices. Pour just enough water to cover the chicken (about 2 cups), and toss in the bouillon cube. Cover the pot, reduce the heat to low, and let it simmer gently for 30-45 minutes; this is when the magic happens! Stir occasionally and let the stew develop those savory flavors.

7. **Final Touches**:
   - After simmering, taste and adjust the seasoning. Add a dash more salt if needed. If the stew seems too thick, add a splash of water; if it’s thin, let it simmer uncovered for a few more minutes.

8. **Serve It Up**:
   - Once the chicken is tender and oh-so-flavorful, take it off the heat. At this point, you can remove the scotch bonnet peppers if you prefer less heat—unless you're feeling brave and want an extra kick!

## Serving Suggestions

To plate the stew, serve it with a joyous mound of steamed rice or pounded yam. Ladle a generous portion of the stew over the rice or serve it alongside for a delightful dip. Add a sprig of fresh parsley or cilantro for a pop of color. Don’t forget to have some crusty bread on the side to soak up all that luscious sauce!

## Recipe Variations

Feeling adventurous? Here are some fun twists to try with this recipe:

- **Vegetarian Delight**: Swap the chicken for firm tofu or chickpeas, adding them in the last 15 minutes of cooking time.
- **Spicy Extra**: Experiment by adding more scotch bonnet peppers or a splash of sriracha for a fiery kick.
- **Herb Swap**: Instead of thyme, you can use rosemary or even a bunch of fresh coriander for a different flavor profile.
- **Smoky Flavor**: Add a teaspoon of smoked paprika for that lovely smoky undertone that pairs beautifully.

## Chef’s Notes

Over the years, I’ve learned that this stew is forgiving—each time I make it, I tweak it depending on what’s in the fridge or the season. I once made this for a gathering, and in a hilarious twist, my friend Tim accidentally swapped the sugar for salt! After an initial moment of panic, we laughed it off and added a touch more tomato paste, turning that potential disaster into a delightful surprise!

The moral of the story? Cooking is about enjoying the process—and sometimes, the most unexpected changes lead to the happiest surprises!

## FAQs and Troubleshooting

1. **Why is my stew too greasy?**
   - If you find your stew too greasy, ensure to skim off the excess fat from the top before serving.

2. **The stew is too salty; what do I do?**
   - If your stew ended up too salty, add a few extra chopped tomatoes or a splash of water to balance the flavors.

3. **Can I make this stew in advance?**
   - Absolutely! In fact, it tastes even better the next day as the flavors deepen. Just store it in an airtight container in the fridge for up to 3 days.

4. **Can I freeze this stew?**
   - Yes! This stew freezes beautifully. Let it cool completely before portioning it into freezer-safe containers. It can freeze for up to 3 months—just don’t forget to label your creations!

## Nutritional Info (optional)

While I typically focus more on flavor than numbers, it’s good to keep in mind that this hearty chicken stew is a wonderful source of protein and healthy fats. Pair it with whole grain rice, and you have a balanced meal bursting with nutrients—all while making your belly happy!

---

And there you have it, my foodie friends—a radiant dish brimming with culture, flavor, and love. I can’t wait to hear how your Nigerian Chicken Stew turns out! Tag me in your photos, share your stories, and let’s keep this delicious circle of cooking going. Until next time, happy cooking!
Savory Nigerian Chicken Stew

A flavorful Nigerian chicken stew that brings warmth and comfort to your dinner table with rich, aromatic spices.
- Prep Time: 15 minutes
- Cook Time: 45 minutes
- Total Time: 60 minutes
- Yield: 4 servings 1x
- Category: Main Course
- Method: Cooking
- Cuisine: Nigerian
- Diet: Non-Vegetarian
Ingredients
- 2.5 lbs bone-in chicken (thighs or drumsticks)
- 1 teaspoon salt
- 1/2 teaspoon black pepper
- 1 teaspoon paprika
- 1 teaspoon curry powder
- 1 teaspoon thyme
- 1 onion, chopped
- 1/4 cup vegetable oil
- 4 large Roma tomatoes, chopped
- 1 large red bell pepper, chopped
- 1 small red onion, chopped
- 2 scotch bonnet peppers (or 1 for less heat)
- 2 tablespoons tomato paste
- 1 teaspoon garlic powder
- 1 teaspoon ginger powder
- 1 bouillon cube
- Salt to taste
Instructions
- Prep the chicken by patting it dry and seasoning it with salt, black pepper, paprika, curry powder, and thyme.
- Sauté the chopped onion in heated vegetable oil until fragrant and translucent, about 5 minutes.
- Brown the marinated chicken pieces in the pot, searing on each side for 6-7 minutes.
- Create the stew base by adding chopped tomatoes, red bell pepper, and small red onion, letting them soften for 4-5 minutes.
- Add tomato paste, ginger powder, garlic powder, and crushed scotch bonnet peppers, simmering for another 2-3 minutes.
- Simmer the chicken with enough water to cover, adding the bouillon cube, and let it simmer gently for 30-45 minutes.
- Final touches involve tasting and adjusting seasoning, then serving with your choice of rice or pounded yam.
Notes
This stew can be made in advance and tastes better the next day. It freezes well for up to 3 months.
Nutrition
- Serving Size: 1 serving
- Calories: 450
- Sugar: 6g
- Sodium: 600mg
- Fat: 18g
- Saturated Fat: 5g
- Unsaturated Fat: 10g
- Trans Fat: 0g
- Carbohydrates: 30g
- Fiber: 4g
- Protein: 30g
- Cholesterol: 110mg
Keywords: Nigerian chicken stew, comfort food, rich flavors, homemade stew