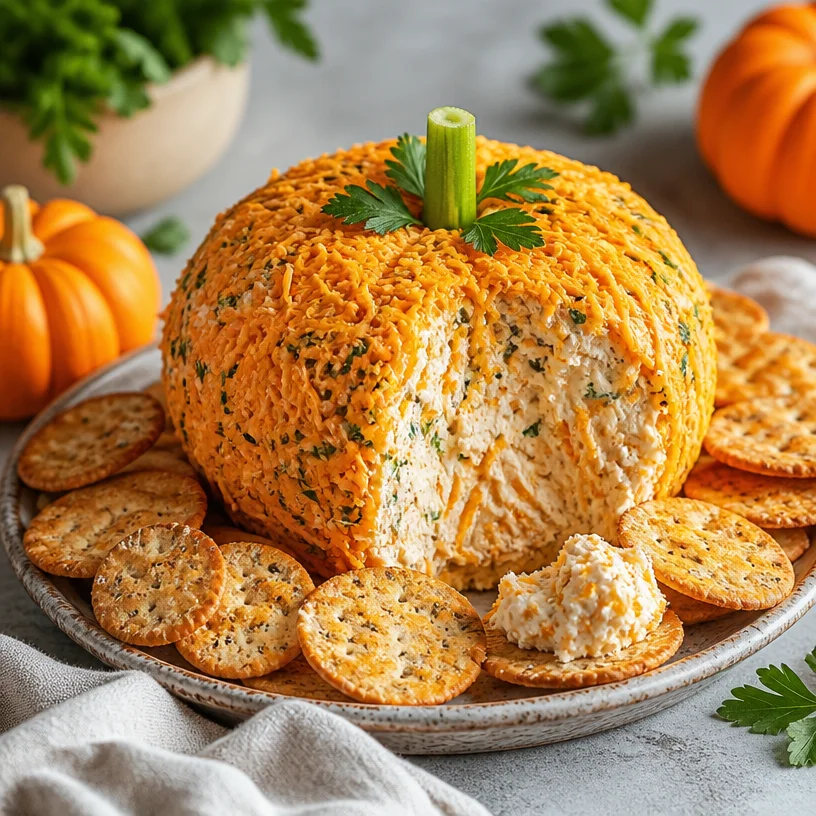
No-Bake Pumpkin Cheese Ball (4-Ingredient) for Fall Parties
The Ultimate Pumpkin Cheese Ball Recipe: A Fall Favorite
Hello, fellow food lovers! With fall in the air, there’s something magical about the sight of vivid orange pumpkins appearing everywhere. It’s that cozy time of year when we gather with friends and family, celebrating the beauty of the harvest season. One of my go-to recipes during this time is a delightful Pumpkin Cheese Ball—a fun, festive twist on the classic cheese ball that never fails to impress!
Imagine hosting a gathering, and as your guests enter, they’re greeted by a stunning Pumpkin Cheese Ball adorned with a sprinkle of fresh herbs or chopped nuts. It’s a conversation starter, a burst of flavor, and a visual piece of art all in one. Perfect for game nights, potlucks, or simply enjoying with your loved ones, this cheese ball brings warmth and cheer to any occasion.
Today, I want to share my simple, yet enchanting recipe for a Pumpkin Cheese Ball. This dish is rich, creamy, and brimming with flavor, creating moments of indulgence and joy around your table. Grab your apron, pour yourself a cup of cider or perhaps something sparkly, and let’s dive right into this delectable fall treat!
A Little Nostalgic Pumpkin Tale
As I think about pumpkins, I can’t help but recall my childhood years spent in the kitchen with my grandmother. Every fall, we would visit the local pumpkin patch, selecting the perfect pumpkins—ones that had just the right shape and color.
Once back in her warm kitchen, we would embark on a culinary adventure together. One particularly rainy afternoon, we decided to make a savory cheese ball. The kitchen filled with the comforting aroma of spices as we laughed, mixed, and rolled ingredients into a ball shape, all while stealing bites of deliciousness along the way.
That cheese ball became a staple at family gatherings, decorated with cheddar cheese and herbs, reminding us all of the love and creativity that food brings. Fast forward to today, and while the recipes and flavors have evolved a bit, the essence of togetherness and warmth remains the same. My Pumpkin Cheese Ball is a nod to those cherished memories, blending nostalgia with contemporary flair.
Ingredients You’ll Need
Here’s a simple list of ingredients you’ll need to create this delightful Pumpkin Cheese Ball, along with some tips to make the most of each one!
-
8 oz Cream Cheese: The base of our cheese ball, cream cheese provides the creamy texture. Make sure it’s softened for easy blending. If you’re looking for a lighter option, try using reduced-fat cream cheese.
-
1 cup Cheddar Cheese: Aged cheddar adds a rich, sharp flavor that pairs wonderfully with the creaminess of the cream cheese. You can swap it for gouda or pepper jack for a twist.
-
1 packet Ranch Seasoning Mix: This seasoning infuses the cheese ball with a burst of flavor. If you’re feeling adventurous, consider substituting homemade ranch seasoning using herbs like dill, parsley, and garlic powder.
-
1 tsp Fresh Parsley: For garnish and flavor! Parsley adds a refreshing touch on top. Feel free to get creative with toppings—chopped nuts, pumpkin seeds, or even bacon bits can add an interesting dimension.
-
Optional: A dash of paprika or cayenne: If you enjoy a bit of heat, a sprinkle of cayenne will warm it up beautifully.
Step-by-Step Instructions
Let’s get cooking! Follow these easy steps to whip up your Pumpkin Cheese Ball:
-
Prepare Your Ingredients:
- Start by gathering all your ingredients and letting the cream cheese sit out for about 30 minutes to soften. This will make mixing a snap.
-
Mix the Bases:
- In a mixing bowl, add the softened cream cheese and shredded cheddar cheese. Use your favorite spatula or fork to bring the ingredients together. Take your time—this is where the flavors start to dance!
-
Add Flavor:
- Throw in the packet of ranch seasoning. If you’re making your own homemade ranch seasoning, feel free to sprinkle in about 2 tablespoons. Use your spatula to combine it all thoroughly—this is where the magic happens! You’re looking for a smooth, creamy mixture with bits of cheese sprinkled throughout.
-
Shape the Ball:
- Once your mixture is well combined, it’s time to form it into a ball. With clean hands, scoop the cheese mixture, rolling it gently until you achieve a nice round shape. Feel free to make it as big or as small as you like!
-
Chill Time:
- Wrap the cheese ball tightly in plastic wrap and place it in the refrigerator for at least 2 hours. This chilling time allows the flavors to meld beautifully and makes it easier to handle.
-
Decorate:
- Once chilled, it’s time to make it look like a pumpkin! Roll the cheese ball in finely chopped nuts or fresh parsley to cover it entirely. For a more festive flair, use a small piece of fresh parsley for a “stem” effect.
-
Serve:
- Place your stunning Pumpkin Cheese Ball on a festive platter and surround it with an assortment of crackers, veggie sticks, or even apple slices.
Serving Suggestions
When it comes to serving, presentation is everything. I love using a rustic wooden board to display the Pumpkin Cheese Ball. Surround it with colorful accompaniments like sliced cucumbers, fresh carrot sticks, and an array of crunchy crackers. You can even add seasonal fruits like grapes and apple slices for that extra touch of fall flavor.
To elevate the experience, have some cheese knives available for easy scooping, and don’t forget to encourage your guests to experiment with different pairings!
Recipe Variations
Feeling adventurous? Here are some delightful variations to consider for your Pumpkin Cheese Ball:
-
Spicy Twist: Add a diced jalapeño or some crushed red pepper flakes for an extra kick.
-
Sweet and Savory: Mix in a few tablespoons of dried cranberries or chopped walnuts for a nutty sweetness.
-
Herb Infusion: Swap in different herbs and spices. You could try dill, chives, or even a touch of garlic powder for a different flavor profile.
-
Cheddar Alternative: Use crumbled feta cheese or goat cheese for a tangier taste.
-
Vegan Option: Substitute cream cheese with a vegan cream cheese alternative and nutritional yeast for a cheesy flavor.
Chef’s Notes
Food is all about stories, and I have a funny one to share! A few years back, at a friend’s potluck, I brought along my usual cheese ball. While it was destined to be a hit, things took a turn when I realized I didn’t have Ranch seasoning on hand. In a pinch, I grabbed a taco seasoning mix instead! To my surprise, it was a total hit—the cheese ball was devoured in minutes, and everyone was asking for the “secret ingredient.” From that day on, I realized that sometimes unanticipated kitchen mishaps can lead to delightful discoveries!
Frequently Asked Questions
1. Can I make this cheese ball ahead of time?
Absolutely! In fact, making it a day in advance enhances the flavors. Just keep it wrapped in plastic in the fridge until you’re ready to serve.
2. How long does the cheese ball last in the fridge?
Typically, it can last for about 3-4 days if stored properly. But trust me, it won’t last that long once your guests get a taste!
3. Can you freeze a cheese ball?
Yes, you can freeze it, but be mindful that the texture may change slightly when thawed. To freeze, wrap it tightly in plastic wrap and then aluminum foil for extra protection. Thaw it in the fridge before serving.
4. What can I serve with the cheese ball?
I recommend pairing it with a variety of options, like crackers, veggies, pretzels, or even slices of baguette. You could also serve alongside a nice charcuterie board to complement the flavors.
Nutritional Info
(Optional): This section can include calorie counts, sugar content, and other relevant nutritional facts if desired.
Final Thoughts
See—making a show-stopping Pumpkin Cheese Ball is not only easy but also a wonderful way to create cherished moments around your table! Whether it’s for a cozy get-together, a festive holiday party, or just because, this recipe is sure to bring smiles and satisfaction to your table.
So, what are you waiting for? Grab your ingredients and let’s get crafting this pumpkin delight—because good food is all about good company and unforgettable memories! Happy cooking!
PrintUltimate Pumpkin Cheese Ball

A delightful Pumpkin Cheese Ball—a fun, festive twist on the classic cheese ball that impresses at any gathering.
- Prep Time: 15 minutes
- Cook Time: 0 minutes
- Total Time: 135 minutes
- Yield: 8 servings 1x
- Category: Appetizer
- Method: Chilling
- Cuisine: American
- Diet: Vegetarian
Ingredients
- 8 oz Cream Cheese, softened
- 1 cup Cheddar Cheese, shredded
- 1 packet Ranch Seasoning Mix
- 1 tsp Fresh Parsley, for garnish
- Optional: A dash of paprika or cayenne
Instructions
- Prepare your ingredients by letting the cream cheese sit out for 30 minutes to soften.
- Mix the softened cream cheese and shredded cheddar cheese in a mixing bowl until combined.
- Add the packet of ranch seasoning or homemade ranch and mix until smooth and creamy.
- Shape the mixture into a ball using clean hands.
- Chill the cheese ball in plastic wrap for at least 120 minutes.
- Decorate the chilled cheese ball with chopped nuts or parsley for a pumpkin look.
- Serve on a platter accompanied by crackers, veggie sticks, or apple slices.
Notes
Make it a day in advance for enhanced flavors. Store wrapped in the fridge for 3-4 days.
Nutrition
- Serving Size: 1 serving
- Calories: 250
- Sugar: 2g
- Sodium: 350mg
- Fat: 18g
- Saturated Fat: 10g
- Unsaturated Fat: 6g
- Trans Fat: 0g
- Carbohydrates: 6g
- Fiber: 0g
- Protein: 6g
- Cholesterol: 30mg
Keywords: pumpkin cheese ball, fall appetizer, cheese ball recipe, festive cheese ball
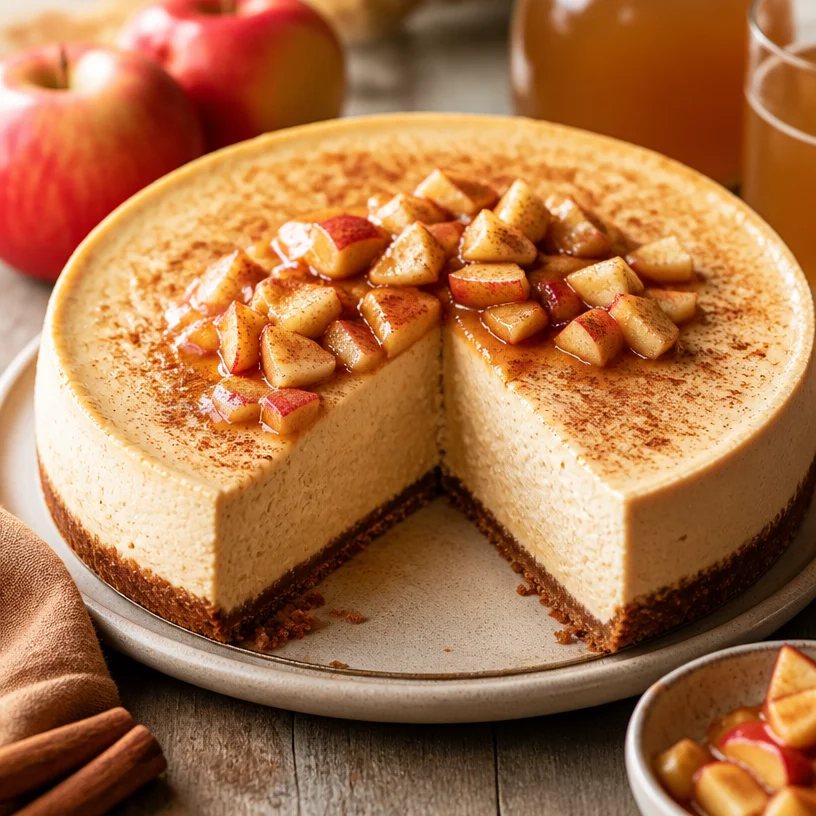
No-Bake Apple Cider Cheesecake: Quick Autumn Dessert
Apple Cider Cheesecake: A Sweet Fall Delight
Hello, lovely food lovers! Today, we’re diving into a dessert that perfectly captures the essence of fall—the delightful Apple Cider Cheesecake. Picture this: silky cream cheese blended with the rich flavors of reduced apple cider, creating a creamy, luscious filling that’s both comforting and exciting. This is a treat that not only surprises your taste buds but also feels like a warm hug on a crisp autumn day. Let’s roll up our sleeves, turn on our ovens, and embark on this culinary adventure together!
A Bite of Nostalgia
As I reflect on the magic of fall, I can’t help but recall a particular memory that brings forth a smile. Back in college, I decided to host my first “Friendsgiving.” It was an ambitious endeavor, and my dear friends were my taste testers and sous-chefs! Among the savory dishes, I wanted dessert to be a showstopper. Inspired by the bright colors of autumn, I experimented with flavors of crisp apples and warm spices.
The night was filled with laughter, the aroma of baking, and a touch of chaos. When I unveiled my Apple Cider Cheesecake, the room fell quiet. I watched in joy as my friends savored each bite, their eyes lighting up with delight. That moment—a sweet blend of friendship, food, and joyous experimentation—made me realize that cooking brings people together like nothing else. Since then, I’ve perfected this recipe and it has remained a beloved staple in my kitchen every fall. Let’s create that same magic in your home!
Ingredients
Here’s what you’ll need to create this captivating Apple Cider Cheesecake:
-
2 cups graham cracker crumbs
A classic base for any cheesecake. You can substitute with crushed cookies like Oreos or Nilla wafers for a unique twist! -
1/2 cup unsalted butter, melted
Buttery richness binds the crust together. If you prefer, coconut oil or a dairy-free butter can work well too! -
1/4 cup sugar
This adds sweetness to the crust. Feel free to use brown sugar for a deeper flavor. -
4 (8 oz) packages cream cheese, softened
The star of the show! Creamy and rich, but don’t skimp on the softness—it helps with a smooth filling. Neufchâtel cheese can be a lighter option. -
1 cup sugar
We need this for the filling. You can swap it with a natural sweetener like agave syrup, adjusting the liquid content accordingly. -
1 teaspoon vanilla extract
The secret to enhancing all that creamy flavor! Pure vanilla extract is best, but imitation will work in a pinch. -
4 large eggs
They provide structure. Room temperature eggs mix better, creating a creamier texture! -
1 cup reduced fresh apple cider
This is where the magic happens! Reduce fresh apple cider on the stovetop for a concentrated flavor. If you can’t find fresh cider, bottled will do, but look for varieties without added sugars or preservatives. -
1/2 teaspoon cinnamon
A must-have spice for that warm fall vibe. Try substituting it with pumpkin pie spice if you love a mix of flavors! -
1/4 teaspoon nutmeg
Adding depth and complexity. It’s powerful, so a little goes a long way! -
1/4 teaspoon salt
To balance the sweetness. Sea salt can elevate the flavor even more!
Step-by-Step Instructions
Alright, let’s get cooking! Here are the detailed steps to create your Apple Cider Cheesecake:
-
Preheat the Oven
Preheat your oven to 325°F (160°C). This is important for a smooth and creamy texture, so don’t skip this step! -
Prepare the Crust
In a mixing bowl, combine the graham cracker crumbs, melted butter, and 1/4 cup sugar. Mix until it resembles wet sand. If you want a touch of spice, you can add a pinch of cinnamon here!
Tip: Using a glass to press down the crumbs into your springform pan makes for a beautifully even crust! -
Assemble the Base
Firmly pack the crust mixture into the bottom of a 9-inch springform pan. Bake for about 10 minutes, then let it cool while you prepare the filling. -
Blend the Filling
In a large mixing bowl, beat the softened cream cheese with an electric mixer until smooth. Gradually add in 1 cup of sugar, followed by the vanilla extract. Scrape down the sides of the bowl to ensure all the cream cheese is incorporated.
Hack: Ensure your cream cheese is at room temperature for a smoother texture—no one likes lumps in their cheesecake! -
Add the Eggs
Briskly add the eggs, one at a time, mixing just until combined after each addition. Overmixing can lead to cracks in your cheesecake, so be gentle! -
Incorporate Apple Cider and Spices
Slowly mix in the reduced apple cider, cinnamon, nutmeg, and salt. Beat until just combined. This is where the magic of fall comes alive in your batter!
Chef insight: Make sure your reduced apple cider is cooled before adding it to the mixture to avoid cooking the eggs! -
Pour and Bake
Pour the cheesecake filling over the cooled crust in the springform pan. Gently tap the pan on the counter to remove any air bubbles. Bake in your preheated oven for 55-60 minutes, or until the edges are set but the center still has a slight jiggle. -
Cool and Chill
Turn off the oven and crack the door to let the cheesecake cool gradually for about an hour. This helps prevent cracking! Once completely cool, refrigerate for at least 4 hours, preferably overnight.
Funny note: Cooling cheesecakes in the fridge is like letting wine breathe—give it time to shine!
Serving Suggestions
To serve your gorgeous Apple Cider Cheesecake, carefully release it from the springform pan. Consider garnishing with a dollop of whipped cream, a sprinkle of cinnamon, or even some thinly sliced apples drizzled with caramel sauce for that extra “wow” factor!
Recipe Variations
Feeling adventurous? Here are some creative twists to elevate your cheesecake:
- Caramel Swirl: Gently fold in caramel sauce before pouring the filling into the crust.
- Nutty Crust: Add finely chopped pecans or walnuts to your graham cracker crust for extra crunch.
- Vegan Version: Substitute cream cheese for a plant-based alternative, use flax eggs, and coconut cream instead of dairy.
- Spiced Rum Flavor: Add a splash of spiced rum to the filling for a warm, holiday-inspired kick.
- Chocolate Drizzle: Merely drizzle melted chocolate over the chilled cheesecake for a sweet contrast!
Chef’s Notes
This Apple Cider Cheesecake has been a part of my fall celebration for years, evolving as I’ve experimented with flavors and techniques. One memorable baking disaster included using too much apple cider—let’s just say that resulted in a soggy cheesecake (delicious, but not exactly aesthetic). Every recipe comes with its trials, but that’s what makes it fun! I love sharing these stories because cooking is about learning—one cheesecake at a time!
FAQs and Troubleshooting
1. My cheesecake cracked! What went wrong?
Cracking usually occurs due to overmixing or baking at too high of a temperature. Make sure to remove it from the oven while the center is still slightly jiggly, and allow it to cool gradually.
2. Can I make this cheesecake ahead of time?
Absolutely! In fact, this cheesecake tastes even better the day after; flavors meld beautifully in the fridge.
3. How can I know when my cheesecake is done?
Check for doneness by gently shaking the pan; it should be set around the edges but slightly wobbly in the center.
4. What should I do if my cheesecake is too watery?
This can happen if the cider isn’t reduced enough. Make sure you simmer the cider until it thickens before adding it to the filling, creating that concentrated apple goodness!
Nutritional Info
While I believe in enjoying dessert without guilt, I understand that nutritional info can be helpful. Here’s an estimated nutritional breakdown per slice (assuming 12 slices):
- Calories: 350
- Protein: 6g
- Carbs: 30g
- Fat: 25g
- Sugar: 18g
Indulging in a slice of Apple Cider Cheesecake is truly an experience. It brings warmth, comfort, and a reminder that good food is about connection. So, grab your apron and embrace the flavors of fall, one cheesecake at a time. Until next time, happy baking!
PrintApple Cider Cheesecake
A delightful cheesecake capturing the essence of fall with creamy filling and reduced apple cider.
- Prep Time: 15 minutes
- Cook Time: 70 minutes
- Total Time: 85 minutes
- Yield: 12 servings 1x
- Category: Dessert
- Method: Baking
- Cuisine: American
- Diet: Vegetarian
Ingredients
- 2 cups graham cracker crumbs
- 1/2 cup unsalted butter, melted
- 1/4 cup sugar
- 4 (8 oz) packages cream cheese, softened
- 1 cup sugar
- 1 teaspoon vanilla extract
- 4 large eggs
- 1 cup reduced fresh apple cider
- 1/2 teaspoon cinnamon
- 1/4 teaspoon nutmeg
- 1/4 teaspoon salt
Instructions
- Preheat your oven to 325°F (160°C).
- In a mixing bowl, combine the graham cracker crumbs, melted butter, and 1/4 cup sugar. Mix until it resembles wet sand.
- Firmly pack the crust mixture into the bottom of a 9-inch springform pan. Bake for about 10 minutes, then let it cool.
- In a large mixing bowl, beat the softened cream cheese with an electric mixer until smooth. Gradually add in 1 cup of sugar, followed by the vanilla extract.
- Briskly add the eggs, one at a time, mixing just until combined after each addition.
- Slowly mix in the reduced apple cider, cinnamon, nutmeg, and salt.
- Pour the cheesecake filling over the cooled crust in the springform pan.
- Bake in your preheated oven for 55-60 minutes, or until the edges are set but the center still has a slight jiggle.
- Turn off the oven and crack the door to let the cheesecake cool gradually for about an hour. Once cool, refrigerate for at least 4 hours, preferably overnight.
Notes
Serve with a dollop of whipped cream, cinnamon, or thinly sliced apples drizzled with caramel sauce.
Nutrition
- Serving Size: 1 slice
- Calories: 350
- Sugar: 18g
- Sodium: 200mg
- Fat: 25g
- Saturated Fat: 15g
- Unsaturated Fat: 8g
- Trans Fat: 0g
- Carbohydrates: 30g
- Fiber: 1g
- Protein: 6g
- Cholesterol: 100mg
Keywords: cheesecake, apple cider, fall dessert, Thanksgiving, baking
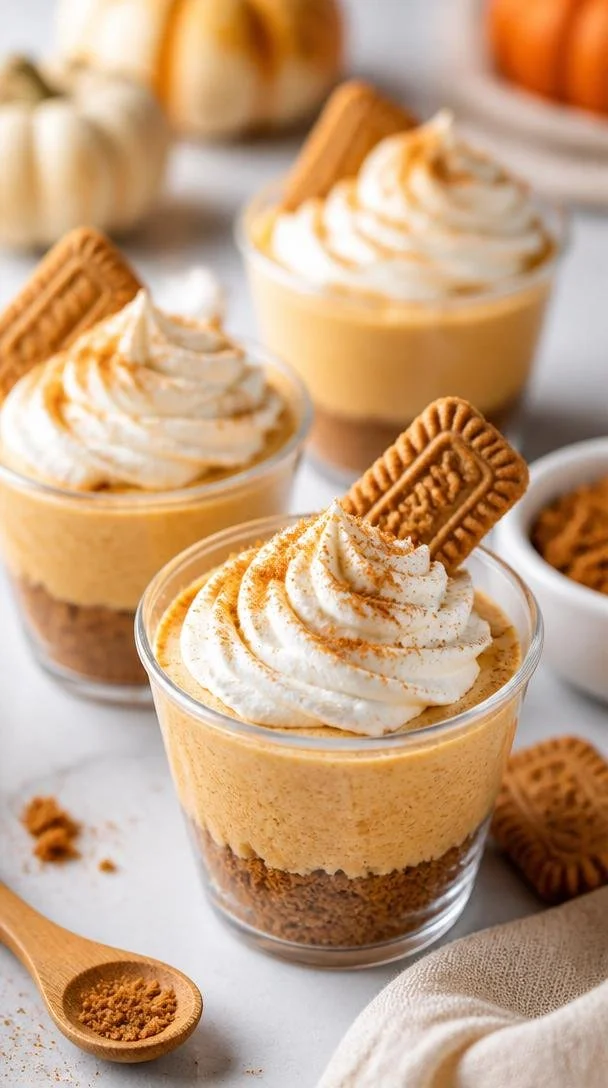
Minute No-Bake Pumpkin Pie Cup Dessert (Dairy-Free)
Pumpkin Pie in a Cup: A Delightful Autumn Treat
Fall is in the air! The leaves are changing, and the scent of pumpkin spice is wafting through the neighborhoods. This time of year is all about warm drinks, cozy sweaters, and of course, decadent desserts that bring people together. Today, I’m excited to share one of my favorite desserts: Pumpkin Pie in a Cup. It’s a playful twist on the classic pumpkin pie that captures all the comforting flavors we love—without the fuss of a traditional pie crust.
Imagine enjoying the smooth, creamy filling of pumpkin pie tucked right into a cup, topped with fluffy whipped cream and perhaps even a sprinkle of cinnamon or nutmeg. It’s the perfect dessert for gatherings with friends or a special treat to enjoy while curled up with a good book. Plus, it’s so easy to make that you’ll find yourself adding it to your go-to recipes for every autumn occasion.
My Pumpkin Pie Memories
Growing up, my family always celebrated the start of fall with a big Thanksgiving dinner. The centerpiece of that feast was my grandmother’s famous pumpkin pie. The aroma of spices gently wafting through the kitchen as she baked the pies was a smell I’ll never forget. I can picture my little self, tugging at her apron and stealing bites of the spiced pumpkin filling as she rolled the pie crust—it was a grand adventure of flavors and aromas. Each year, she would teach me a little more about the craft of baking, but I could never quite replicate her skill with a traditional pie.
So, one autumn evening, I decided to transform my memories into something simple yet equally satisfying. That led to the birth of the Pumpkin Pie in a Cup! It’s a dessert that captures the spirit of those cherished kitchen moments while allowing the flavors of pumpkin and spice to shine. I’m thrilled to share it with you now!
Ingredients
Let’s gather our ingredients. For Pumpkin Pie in a Cup, you’ll need:
-
2 cups Biscoff cookie crumbs (from about 30 cookies)
These delectable cookies bring a spiced, caramel-like flavor that pairs beautifully with pumpkin. You can substitute them with graham cracker crumbs or gingersnap cookies for different variations. -
6 Tablespoons unsalted butter (melted)
Butter adds richness and helps bind the cookie crust together. If you need a dairy-free option, coconut oil works fabulously here! -
8 ounces cream cheese (softened)
Cream cheese gives our filling that silky smooth texture. If you’re avoiding dairy, you could substitute with a vegan cream cheese alternative, but mind the consistency—it may differ slightly. -
1/2 cup granulated white sugar
This sweetens the filling beautifully. For a lower-calorie option, you can use coconut sugar or maple syrup instead. Just keep in mind that sweetness levels may vary! -
1 cup pumpkin puree (NOT pumpkin pie mix)
Pure pumpkin puree is key to achieving that rich pumpkin flavor. Avoid pumpkin pie filling as it contains extra sugars and spices that can throw off your dish. -
1 teaspoon pumpkin pie spice
This blend of cinnamon, nutmeg, ginger, and cloves is essential for that quintessential autumn flavor. You can also make your own blend or use cinnamon alone for a lighter spice profile. -
6 ounces frozen whipped topping (thawed)
This gives our filling an airy lightness. If you’re feeling fancy, you can whip up your own cream, but just make sure it’s fully whipped before folding it into the mixture. Extra whipped cream on top is highly recommended for serving!
Step-by-Step Instructions
Now, let’s get right into making this delightful Pumpkin Pie in a Cup.
-
Prepare Your Crust
Begin by preheating your oven to 350°F (175°C). In a large mixing bowl, combine the Biscoff cookie crumbs and melted butter. Mix until the crumbs are well-coated—think of it as making small sandy pebbles. You want it to hold together when pressed. -
Press and Bake the Crust
Take your mixture and evenly distribute it into the bottoms of your serving cups (about 6-8 cups, depending on size). Use the back of a spoon or your fingers to press down firmly. Bake the crusts for about 10 minutes, until they are golden and fragrant. Allow them to cool while you make the filling. -
Make the Filling
In another mixing bowl, beat the softened cream cheese with an electric mixer until it’s smooth and creamy. This will be the smooth base for our filling. Slowly add in the granulated sugar and continue mixing until well combined—this should take about 2 minutes. -
Add the Pumpkin and Spices
Now, add in the pumpkin puree and pumpkin pie spice. Mix on low speed until all ingredients are well-incorporated. You should notice that glorious orange hue! This is your pumpkin filling magic in the making. -
Fold in the Whipped Topping
Gently fold in the thawed whipped topping until it’s evenly distributed throughout the mixture. This step is critical for keeping the filling light and airy—think fluffy clouds of pumpkin! Don’t rush it; be gentle and ensure everything is combined. -
Assemble the Cups
With the crusts cooled and the filling ready, spoon the pumpkin mixture on top of the crusts in each cup. Don’t worry about getting it perfect—rustic is the name of the game here! Use a spatula to smooth the top if desired. -
Chill and Serve
Place the assembled cups in the refrigerator for at least 2-4 hours (or overnight if you want to get a head start!). This allows the filling to set perfectly. When you’re ready to serve, top each cup with a generous dollop of whipped cream and perhaps a dash of cinnamon for that extra autumn flair.
Serving Suggestions
These cups make for a lovely presentation at any gathering! You can serve them on a decorative tray, lined with autumn leaves or sprigs of rosemary for a stunning display. For that little extra touch, consider adding mini pumpkin decorations or serving with a side of caramel sauce for drizzling—because who can resist that combo?
Recipe Variations
Now, let’s talk creativity! Here are a few variations you can play with:
-
Maple Pumpkin Delight: Drizzle some maple syrup in the crust or mix it with the pumpkin filling for a sweeter take on autumn flavors.
-
Nutty Touch: Add finely chopped pecans or walnuts into the crust mixture for a delightful crunch.
-
Chai Spice Twist: Swap out pumpkin pie spice for chai spice to enhance the flavor palette with aromatic notes of cardamom and black pepper.
-
Vegan Version: Use a vegan cream cheese alternative, coconut whipped cream, and dairy-free cookie crumbs to create a plant-based version of this delight.
-
Chocolate Lover’s Dream: Fold in some mini chocolate chips into the pumpkin filling for a rich, chocolatey treat—after all, chocolate and pumpkin are a match made in heaven!
Chef’s Notes
As I’ve developed this recipe, it has become a staple in my gatherings—one of those delightful desserts that never fails to bring smiles. I fondly remember a particular Thanksgiving when I forgot to chill the filling overnight, so I served it warm. Surprisingly, everyone loved it just as much! That’s the beauty of this dessert—it’s flexible and always turns out delicious no matter how you prepare it. Just like my grandmother’s pie, it becomes less about the perfection and more about the moments we share.
FAQs and Troubleshooting
-
Can I use fresh pumpkin instead of canned?
Absolutely! Just make sure to cook and puree your pumpkin until it’s smooth. Fresh pumpkin may need to be drained a bit to avoid excess moisture. -
What if my crust crumbles?
If the crust doesn’t hold together, you may not have added enough butter or pressed it down hard enough. Try adding a touch more melted butter and ensure you’re compacting it into the cup evenly. -
How long can I store these cups?
They can be stored in the refrigerator for up to 3 days, though they’re best enjoyed within the first couple of days for freshness. -
I don’t have whipped topping. What can I use?
You can make your own whipped cream! Just whip heavy cream with a bit of sugar and vanilla until soft peaks form. It’s just as tasty and feels a little more homemade!
Nutritional Info
While I haven’t listed precise nutritional values, this dessert does have sweet notes of pumpkin and spiced goodness, making it a delightful treat to enjoy in moderation, especially during those cozy fall evenings!
Let’s embrace the season and share joyful moments around the table with this Pumpkin Pie in a Cup. It’s a recipe that invites laughter, cozy conversations, and all the warm feels autumn has to offer. Enjoy, and happy cooking! 🥳🍁
PrintPumpkin Pie in a Cup
A delightful twist on classic pumpkin pie served in a cup, featuring creamy pumpkin filling and a spiced cookie crust.
- Prep Time: 20 minutes
- Cook Time: 10 minutes
- Total Time: 240 minutes
- Yield: 6 servings 1x
- Category: Dessert
- Method: Baking
- Cuisine: American
- Diet: Vegetarian
Ingredients
- 2 cups Biscoff cookie crumbs
- 6 tablespoons unsalted butter (melted)
- 8 ounces cream cheese (softened)
- 1/2 cup granulated white sugar
- 1 cup pumpkin puree (NOT pumpkin pie mix)
- 1 teaspoon pumpkin pie spice
- 6 ounces frozen whipped topping (thawed)
Instructions
- Preheat your oven to 350°F (175°C).
- Combine the Biscoff cookie crumbs and melted butter in a large mixing bowl.
- Press the mixture into the bottoms of your serving cups, creating a crust.
- Bake the crusts for about 10 minutes, until golden and fragrant.
- Allow to cool while preparing the filling.
- Beat the softened cream cheese until smooth and creamy in another mixing bowl.
- Gradually add in the granulated sugar and mix for about 2 minutes.
- Add the pumpkin puree and pumpkin pie spice, mixing on low speed until well combined.
- Fold in the thawed whipped topping until evenly distributed.
- Spoon the pumpkin mixture on top of the cooled crusts in each cup.
- Chill the assembled cups in the refrigerator for at least 2-4 hours.
- Serve topped with whipped cream and a dash of cinnamon.
Notes
For variations, consider adding maple syrup, nuts, or chocolate chips to the filling.
Nutrition
- Serving Size: 1 cup
- Calories: 320
- Sugar: 18g
- Sodium: 350mg
- Fat: 18g
- Saturated Fat: 10g
- Unsaturated Fat: 6g
- Trans Fat: 0g
- Carbohydrates: 35g
- Fiber: 2g
- Protein: 4g
- Cholesterol: 40mg
Keywords: pumpkin pie, dessert, fall recipes, Thanksgiving, pumpkin spice
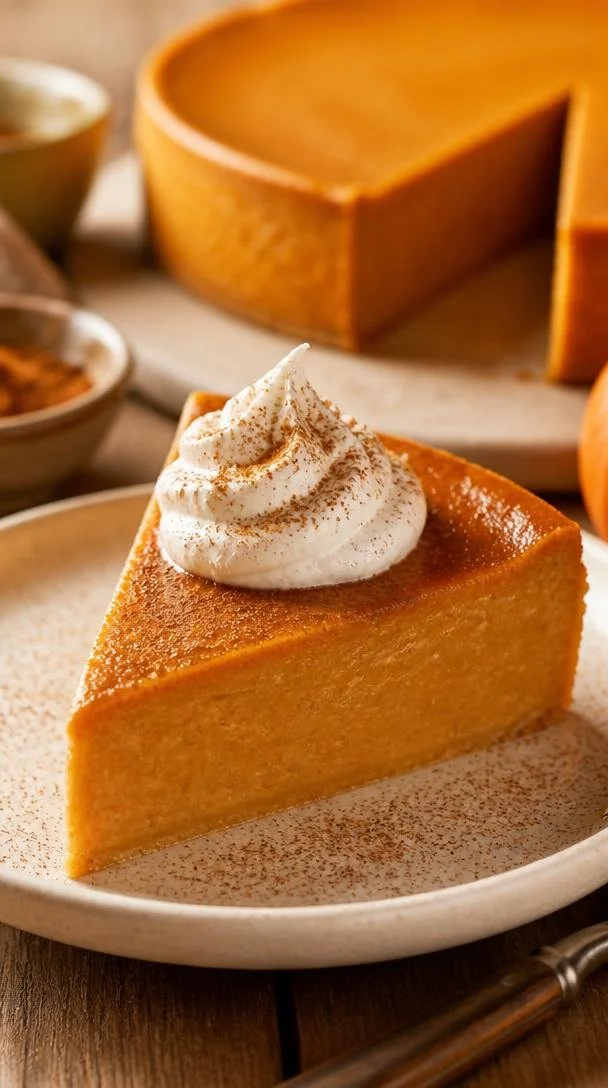
Ingredient No-Bake Crustless Pumpkin Pie (Seasonal)
Crustless Pumpkin Pie: A Celebration of Flavor and Simplicity
Hello, my lovely foodies! 🧡 If you’re anything like me, the fall season sparks an undeniable craving for warm, comforting flavors, and what embodies this cozy vibe better than pumpkin pie? Today, I’m thrilled to share my version of a crustless pumpkin pie that’s not only easy to make but also lets the delightful pumpkin flavor shine through without any fuss.
Now, don’t get me wrong—I love a good pie crust. But sometimes, life gets busy, and a crustless creation can save time without skimping on flavor. This recipe is perfect for those moments, reminding us that sometimes simplicity is the key to success.
A Slice of Nostalgia
As a kid, I can still picture my grandmother in her bright yellow kitchen, whipping up her signature pumpkin pie every Thanksgiving. The smell of spices wafting through the air was our invitation to gather around the table. I remember sneaking bites of the filling before it even hit the oven. It was creamy, sweet, and had just the right amount of spice—perfection in a bite!
I remember asking her how she made it, and she smiled, her eyes twinkling as she said, “It’s all about the pumpkins, darling.” That moment stuck with me, and it ignited my curiosity about cooking. Today, I hope to take you back to that feeling of warmth and nostalgia with this crustless version, where we focus on what matters most—the flavor!
Ingredients
Here’s what you’ll need to create this dreamy crustless pumpkin pie. Let’s take a closer look at our star players:
-
1 can (15 oz) pumpkin puree
Pumpkin puree is the heart of this dish. It brings that warm, earthy flavor we love. If you want to go fancy, you can roast and puree your own pumpkins, but canned works just as well—trust me! -
1 cup evaporated milk
This adds a creamy texture without the excess fat of heavy cream. Whole milk can be a substitute if necessary; just know you might lose a bit of that richness. -
3/4 cup sugar
Sweetness is essential, but feel free to reduce this a tad or use maple syrup or honey for a natural alternative! -
3 large eggs
Eggs help bind everything together and give the pie a fluffy texture. If you’re looking for an egg-free version, consider substituting with flax eggs (3 tablespoons water mixed with 1 tablespoon flaxseed meal = 1 egg). -
1 teaspoon vanilla extract
Vanilla enhances the overall flavor, making it even more delightful. If you’re feeling adventurous, try almond extract for a unique twist. -
1 teaspoon ground cinnamon
Cinnamon is the classic spice for pumpkin pie, adding warmth and sweetness. You can also use freshly grated nutmeg if you have it on hand for an extra kick! -
1/2 teaspoon ground ginger
Ginger offers a lovely warmth. If you prefer more zing, fresh ginger can also be an invigorating substitute—just grate a little in! -
1/4 teaspoon ground nutmeg
This spice truly elevates the flavor profile. Don’t skip it! If you’re a nutmeg lover, a bit more won’t hurt! -
1/2 teaspoon salt
Salt balances the sweetness and enhances the flavors. A touch of sea salt can add a delightful contrast!
Step-by-Step Instructions
Ready to create some kitchen magic? Let’s dive right into the step-by-step process of bringing this crustless pumpkin pie to life!
-
Preheat your oven: Start by preheating your oven to 350°F (175°C). This is crucial because a properly preheated oven ensures even baking. Nobody wants a soggy pie!
-
Mix the base ingredients: In a large mixing bowl, combine your canned pumpkin puree, evaporated milk, and sugar. Use a whisk to blend everything together until smooth. Pro tip: If you want a super creamy texture, you can use a hand mixer for this step!
-
Add the eggs: Crack in your three large eggs and whisk again until fully incorporated. Eggs are essential for giving your pie that fluffy, custard-like texture. If your batter seems a bit thick at this point, don’t worry—it’s supposed to be!
-
Spice it up: Time to incorporate those spices! Add in the vanilla extract, ground cinnamon, ground ginger, ground nutmeg, and salt. Whisk vigorously for about a minute to ensure that the spices are evenly distributed. Smelling that aromatic blend yet? I absolutely love this part!
-
Prepare the baking dish: Lightly grease a pie dish (or an 8-inch square baking dish, if you prefer). I often sprinkle a bit of cinnamon and sugar on the greased surface for an extra flavor boost and a delightful caramelization.
-
Pour the batter: Pour your pumpkin mixture into the prepared dish. Make sure to evenly distribute it; a well-centered pie will bake more evenly.
-
Bake it: Pop it in the preheated oven and bake for 45-50 minutes. You’ll know it’s ready when the edges are set and the center has a slight jiggle (think of it as the pie’s little dance!).
-
Let it cool: Once baked, let your pie cool at room temperature. This step is essential for it to set up properly. It’ll also allow all those beautiful flavors to meld together.
-
Chill it: After cooling on the counter for about an hour, place it in the refrigerator to chill. Serve it cold for that classic pie experience!
Serving Suggestions
When it comes to serving, a simple yet elegant presentation goes a long way! Slice your pie into generous wedges and serve it on a beautiful plate. A dollop of freshly whipped cream or a scoop of vanilla ice cream on top can add that finishing touch, making it feel extra special. Drizzle with caramel sauce or sprinkle some crushed pecans for an elegant twist—but let’s be real, that creamy pumpkin filling packs all the flavor you need!
Recipe Variations
If you’re feeling adventurous and want to jazz up this crustless pumpkin pie, here are a few variations to consider:
- Chocolate swirl: Add melted chocolate to half of the batter before pouring it into the dish for a rich twist.
- Maple pecan topping: Stir in chopped pecans and a little maple syrup into the mix for a nutty sweetness.
- Dairy-free: Substitute the evaporated milk with coconut milk for a tropical flair.
- Spiced chai: Add chai spice or more ginger and cinnamon for a warm, spiced flavor.
- Pumpkin spice latte: Incorporate some brewed coffee for an exciting coffee-flavored version!
Chef’s Notes
This crustless pumpkin pie has been a cherished recipe over the years, evolving with my tastes and cooking style. I’ve played with the spices, tried different type of sweeteners, and even experimented with various cooking methods. But the essence remains the same—creating something that warms the heart and invites others to gather.
Funny story—one Thanksgiving, I decided to impress my friends by making two versions: one traditional crust pie and this crustless beauty. Let’s just say the crustless pie vanished before the traditional one! It’s a testament that honesty in flavor doesn’t need an elaborate presentation.
FAQs and Troubleshooting
1. Why is my pie too watery?
If your pie has excess moisture, it might be due to the pumpkin puree. Make sure to use good-quality pumpkin puree that’s thick, or try draining it a bit before mixing.
2. How do I know when it’s done?
The center should be set, with a slight jiggle (not slump) when tapped. If it seems too wobbly, bake for a few more minutes.
3. Can I freeze this pie?
Absolutely! Allow the pie to cool completely and then wrap it tightly with plastic wrap, followed by aluminum foil. Thaw it in the refrigerator before serving.
4. Can I use fresh pumpkin instead of canned?
Yes! Just make sure to cook and puree the pumpkin first. This may require more effort, but fresh adds a lovely depth of flavor!
Nutritional Info
While I typically don’t dive deep into nutritional info here, a slice of this crustless pumpkin pie offers a comforting balance of flavors, making it a delightful treat without the heaviness of traditional pies.
Now, dear friends, it’s time to put on your aprons and whip up this delightful crustless pumpkin pie! I can’t wait to hear how it turns out for you! Remember, cooking is an adventure – enjoy every moment of it! 🧡
PrintCrustless Pumpkin Pie
A simple, yet delicious crustless pumpkin pie that highlights the warm flavors of fall.
- Prep Time: 15 minutes
- Cook Time: 50 minutes
- Total Time: 65 minutes
- Yield: 8 servings 1x
- Category: Dessert
- Method: Baking
- Cuisine: American
- Diet: Vegetarian
Ingredients
- 1 can (15 oz) pumpkin puree
- 1 cup evaporated milk
- 3/4 cup sugar
- 3 large eggs
- 1 teaspoon vanilla extract
- 1 teaspoon ground cinnamon
- 1/2 teaspoon ground ginger
- 1/4 teaspoon ground nutmeg
- 1/2 teaspoon salt
Instructions
- Preheat your oven to 350°F (175°C).
- Mix the canned pumpkin puree, evaporated milk, and sugar in a large mixing bowl until smooth.
- Add in the three large eggs and whisk until fully incorporated.
- Spice it up by incorporating the vanilla extract, ground cinnamon, ground ginger, ground nutmeg, and salt. Whisk vigorously.
- Prepare a pie dish by lightly greasing it.
- Pour the pumpkin mixture into the prepared dish.
- Bake for 45-50 minutes until the edges are set and the center jiggles slightly.
- Let it cool at room temperature before chilling it in the refrigerator.
Notes
Serve with whipped cream or ice cream on top for an extra special touch.
Nutrition
- Serving Size: 1 slice
- Calories: 300
- Sugar: 25g
- Sodium: 200mg
- Fat: 10g
- Saturated Fat: 4g
- Unsaturated Fat: 6g
- Trans Fat: 0g
- Carbohydrates: 40g
- Fiber: 2g
- Protein: 6g
- Cholesterol: 80mg
Keywords: pumpkin pie, crustless pie, fall dessert, Thanksgiving dessert
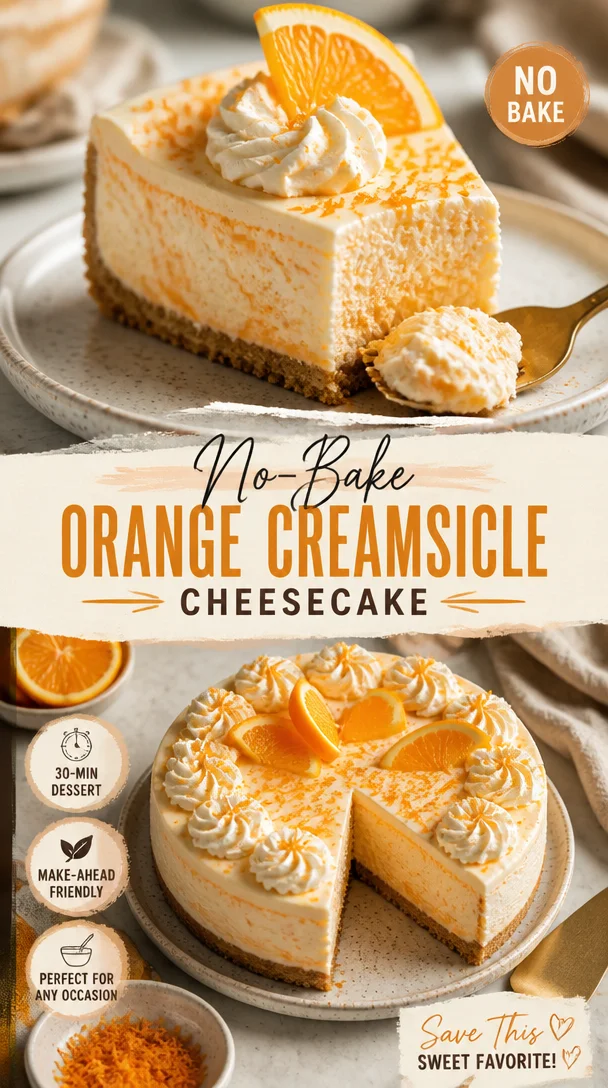
No-Bake Orange Creamsicle Cheesecake
No-Bake Orange Creamsicle Cheesecake: A Deliciously Nostalgic Treat
Hello, fellow food lovers! Today, we’re diving into the sunny world of desserts with a delightful No-Bake Orange Creamsicle Cheesecake. This sweet treat takes me back to lazy summer days filled with the joyful scents of citrus and the satisfying crunch of a graham cracker crust. If you’ve ever enjoyed the nostalgia of an ice cream truck rolling down your street on a hot summer day, this cheesecake might just be your new favorite dessert. So grab your apron, because we’re about to create something wonderfully refreshing and dreamy!
Personal Story
Growing up, my summers were always marked by the sound of the ice cream truck. Like most kids, I raced to the front yard, hoping to snag some pocket change from my parents to grab a cool treat. The creamsicle was a standout, with its bright orange exterior and creamy, dreamy center. It was a flavor that seemed to capture sunshine—totally irresistible! Fast forward to my kitchen adventures as an adult, I wanted to recreate that same joy, but with a twist. Thus, the No-Bake Orange Creamsicle Cheesecake was born! It’s an embodiment of those blissful days—the perfect refreshment for a summer gathering, or really any occasion that calls for a taste of nostalgia. Trust me, when you make this for your friends and family, you’ll not only fill their bellies, but you’ll also warm their hearts!
Ingredients
Here’s what you’ll need to whip up this beautiful cheesecake:
-
1 (3 ounce) box orange jello
The secret to that zesty orange flavor! If you don’t have jello on hand, a little orange juice concentrate can be a substitute. -
1 cup boiling water
This helps dissolve the jello easily. No boiling water? Hot tap water will work in a pinch, but it’s not quite as effective. -
2 cups Graham Cracker crumbs (about 14 sheets)
These form the crispy base of the cheesecake—a must-have! For a gluten-free option, use gluten-free graham crackers. -
6 tablespoons unsalted butter, melted
Butter brings richness and binds the crumbs together. Coconut oil can serve as a dairy-free alternative! -
Pinch of salt
A little pinch lifts the flavors and balances the sweetness. You could use a tiny bit of sea salt or even omit it if you prefer. -
2 (8 ounce) blocks cream cheese, softened
Bring this to room temperature for a creamy texture. Neufchâtel cheese can lighten up the recipe if you’d like! -
1 1/2 cups powdered sugar, divided
This sweetens the mixture—definitely a key ingredient! If you want a less sweet version, you can reduce this amount. -
2 cups heavy whipping cream
Whipping cream makes the cheesecake light and fluffy—so dreamy! If you want a non-dairy option, coconut cream works wonders. -
1/2 teaspoon vanilla extract
For that little extra depth of flavor! You can use almond extract for a unique twist. -
Zest of 1 orange (optional)
This adds an extra burst of orange flavor and color! Feel free to skip if you’re in a rush; this cheesecake is plenty delicious as is.
Step-by-Step Instructions
Let’s get into the heart of this recipe! Follow these steps for a perfectly creamy, light cheesecake that captures all that orange dreams are made of:
-
Dissolve the Jello
In a small mixing bowl, combine the orange jello powder with the boiling water. Stir until the mixture is fully dissolved. This will be your flavor powerhouse! Set it aside to cool slightly while we prepare the crust. -
Prepare the Crust
In a medium mixing bowl, combine the Graham cracker crumbs, melted butter, and a pinch of salt. Mix until the crumbs are fully coated and resemble wet sand. Transfer this mixture to a 9-inch springform pan. Press firmly into the bottom to create an even layer. Use the bottom of a measuring cup to help you get a sturdy crust! -
Beat the Cream Cheese
In a large mixing bowl, beat the softened cream cheese with an electric mixer on medium speed until smooth and creamy. This process is key—overlook it, and you might have lumps. Remember to scrape down the sides of the bowl periodically to ensure everything is evenly incorporated. -
Sweeten It Up
Gradually add in 1 cup of powdered sugar while continuing to mix. Beat until fully combined and creamy. Taste it here! You can adjust the sweetness if needed. -
Incorporate the Whipping Cream
In a separate bowl, whip the heavy cream until stiff peaks form—that’s your perfect whipped cream! Use a spatula to fold this into your cream cheese mixture gently; it will lighten up the texture beautifully. Aim for a light, airy mix, but be careful not to deflate it! -
Add the Jello Mixture
Now, gently fold in the cooled jello mixture and the vanilla extract. This step is where the magic happens! Combine thoroughly, but be gentle—this is what keeps your cheesecake fluffy. -
Zest it Up (Optional)
If you’re feeling adventurous, add the orange zest here for an extra citrusy kick. Fold it in carefully to maintain that lightness. -
Pour and Chill
Transfer the cheesecake mixture into the prepared crust, smoothing the top with a spatula. Cover it with plastic wrap and refrigerate for at least 4 hours, or ideally overnight. This will set it to perfection!
Serving Suggestions
When it’s time to unveil your masterpiece, carefully remove the springform pan. You can serve it as-is for a simple presentation, or dress it up a bit! Garnish slices with fresh orange slices, a dollop of whipped cream, or even a sprinkle of extra orange zest for a dazzling finish. You might even consider pairing this cheesecake with a refreshing herbal tea or a glass of sparkling water to balance the sweetness.
Recipe Variations
- Fruit Toppings: Top each slice with fresh berries or a citrus salad for a colorful burst of flavor.
- Chocolate Drizzle: For a fun twist, drizzle melted chocolate over the top before serving. Orange and chocolate are a match made in heaven!
- Coconut Cream: Replace half the cream cheese with coconut cream for a tropical vibe.
- Lower Sugar: Swap out the powdered sugar for a sugar substitute if you’re monitoring your sugar intake.
- Add Spice: Try adding a pinch of nutmeg or cinnamon to the cream cheese mixture for a different flavor profile that complements the orange beautifully!
Chef’s Notes
This No-Bake Orange Creamsicle Cheesecake is not only delicious but incredibly versatile! While I’ve used orange jello for that nostalgic flavor, experimenting with lemon or even cherry jello can yield fantastic results. It’s transformed at the drop of a hat, and I love introducing new flavors based on the season or my mood! One time, I used leftover summer fruit to make a layer on top, which turned out to be a delightful surprise for my dinner guests. Just remember, while this cheesecake looks elegant, the simplicity of making it is part of the charm. Enjoy the process as much as the result!
FAQs and Troubleshooting
1. Why is my cheesecake not setting?
If your cheesecake isn’t setting, it may need more time in the fridge. Make sure you let it chill for at least 4 hours, but overnight is best for ideal firmness.
2. Can I use a different type of crust?
Absolutely! You can use any cookie crust or even a nut crust. Just make sure to adjust the butter accordingly depending on your choice.
3. My cream cheese is lumpy; what did I do wrong?
To prevent lumpy cream cheese, make sure it’s at room temperature before beating. Cold cream cheese doesn’t blend well!
4. How long will this cheesecake last in the refrigerator?
The No-Bake Orange Creamsicle Cheesecake will keep well covered in the fridge for about 4-5 days—perfect for keepers of leftovers!
Nutritional Info
(Nutritional content will vary based on portion size and ingredient brands, so it’s always good to calculate it based on your specific ingredients.)
So, there you have it! A No-Bake Orange Creamsicle Cheesecake that’s as easy to make as it is joyful to eat. Invite your friends over, savor a slice, and relive the carefree delight of summer all year long. Happy baking, and remember: good food is best shared! Cheers!
PrintNo-Bake Orange Creamsicle Cheesecake

A delightful and nostalgic no-bake cheesecake that captures the refreshing flavors of orange creamsicles, perfect for summer gatherings.
- Prep Time: 20 minutes
- Cook Time: 0 minutes
- Total Time: 240 minutes
- Yield: 8 servings 1x
- Category: Dessert
- Method: No-Bake
- Cuisine: American
- Diet: Vegetarian
Ingredients
- 1 (3 ounce) box orange jello
- 1 cup boiling water
- 2 cups graham cracker crumbs (about 14 sheets)
- 6 tablespoons unsalted butter, melted
- Pinch of salt
- 2 (8 ounce) blocks cream cheese, softened
- 1 1/2 cups powdered sugar, divided
- 2 cups heavy whipping cream
- 1/2 teaspoon vanilla extract
- Zest of 1 orange (optional)
Instructions
- Dissolve the Jello: In a small mixing bowl, combine the orange jello powder with the boiling water. Stir until fully dissolved and set aside to cool.
- Prepare the Crust: In a medium mixing bowl, combine the graham cracker crumbs, melted butter, and a pinch of salt. Mix until the crumbs resemble wet sand, then press firmly into a 9-inch springform pan.
- Beat the Cream Cheese: In a large mixing bowl, beat the softened cream cheese until smooth. Scrape down the sides to ensure an even texture.
- Sweeten It Up: Gradually add 1 cup of powdered sugar and mix until fully combined and creamy. Adjust sweetness if necessary.
- Incorporate the Whipping Cream: In a separate bowl, whip the heavy cream until stiff peaks form. Gently fold into the cream cheese mixture.
- Add the Jello Mixture: Gently fold in the cooled jello mixture and vanilla extract, combining thoroughly yet gently.
- Zest it Up (Optional): Fold in orange zest for an extra burst of flavor, if using.
- Pour and Chill: Transfer the cheesecake mixture into the prepared crust, smoothing the top. Cover and refrigerate for at least 4 hours, preferably overnight.
Notes
Garnish slices with fresh orange slices or a dollop of whipped cream for extra flair. This cheesecake can also be varied with different jello flavors and toppings.
Nutrition
- Serving Size: 1 slice
- Calories: 400
- Sugar: 27g
- Sodium: 300mg
- Fat: 28g
- Saturated Fat: 16g
- Unsaturated Fat: 8g
- Trans Fat: 0g
- Carbohydrates: 38g
- Fiber: 1g
- Protein: 4g
- Cholesterol: 65mg
Keywords: cheesecake, no-bake, orange, dessert, summer, creamy, nostalgic

Minute No-Bake Strawberry Cheesecake (Creamy & Fresh)
A Slice of Heaven: Indulging in Homemade Strawberry Cheesecake
Hello, fellow foodies! Today, we’re diving into a dessert that speaks of summer days, sweetness, and pure bliss — Strawberry Cheesecake. Not only is this dessert a showstopper, but it’s also surprisingly simple to make! If you’ve ever been intimidated by cheesecakes, trust me, you’re in for a delightful surprise. This recipe is not only approachable but guaranteed to impress every guest at your table. So, grab your apron, and let’s get cooking!
Personal Story
Let me take you back to my childhood, where summer meant two things: endless sunshine and strawberry picking with my family. There was a quaint little farm just a short drive from our house, and every June, we’d pile into the car with baskets and high hopes. After an afternoon of picking, we would return home, our faces sticky with strawberry juice, ready to create something magical.
One particular summer, I remember deciding to surprise my mom with a homemade dessert. Inspired by our bounty, I attempted to craft my very first strawberry cheesecake. As the mixture baked, the sweet aroma wafted through our kitchen, coaxing my family into the dining room. When that cheesecake came out of the oven, I felt like a superstar! The best part? Watching my mom’s eyes light up as she took that first bite. That memory is what drives my passion today, and I can’t wait to share this piece of nostalgia with you!
Ingredients
For this heavenly Strawberry Cheesecake, let’s gather the following ingredients:
-
1 cup graham cracker crumbs
The backbone of our cheesecake crust! You can use store-bought crumbs or crush your own. Note: If you prefer a healthier option, try substituting with almond flour. -
2 ½ tablespoons butter (melted)
A little fat for flavor and binding! Unsalted is the best choice to control the saltiness. Shortcut: Use a spray butter if you’re in a pinch! -
1 ½ tablespoons sugar
A small amount adds just the right sweetness to the crust. You can swap this for coconut sugar if you’re looking for a less refined option. -
Pinch of salt
Enhances the sweetness in the crust and filling. Flaky sea salt works beautifully here! -
2 (8 oz) packages cream cheese (softened)
The creamy star of our show! Softening it ensures a smooth texture. Tip: Leave it out for about an hour before starting, or microwave it for 10-15 seconds if you’re rushed! -
2 eggs
Provide structure and help the cheesecake set. If you want a dairy-free option, consider using flax eggs (1 tablespoon ground flaxseed mixed with 2.5 tablespoons of water per egg). -
⅔ cup sugar
Sweetens the cream cheese mixture. You can use granulated, brown, or even honey, depending on your sugar preference. -
⅔ cup sour cream
Adds tanginess and richness. Tip: Greek yogurt can be used for a healthier twist! -
1 teaspoon vanilla extract
A staple for flavor enhancement! Homemade vanilla extract truly elevates this dish if you have it. -
¼ teaspoon salt
Balances the sweetness and adds depth to the cream cheese filling. -
1 ½ lbs strawberries
Fresh is best! Tip: If strawberries aren’t in season, you can use frozen berries — just thaw and drain them first! -
1 ½ teaspoons cornstarch
Helps thicken the strawberry topping. If you’re avoiding cornstarch, try arrowroot powder instead. -
3 to 6 tablespoons sugar (adjust as needed)
To sweeten the strawberry topping to your liking; taste as you go! -
1 ½ tablespoons lemon juice
Brings brightness to the strawberries and balances out the sweetness. Freshly squeezed is always the best!
Step-by-Step Instructions
Now that we have our ingredients prepped, let’s jump into the fun part — making the cheesecake!
-
Preheat Your Oven
Preheat your oven to 325°F (160°C). This step ensures an even bake, which is crucial for a perfect cheesecake. -
Prepare the Crust
In a mixing bowl, combine the graham cracker crumbs, melted butter, sugar, and a pinch of salt. Mix until the crumbs resemble wet sand. Chef tip: If you prefer a thicker crust, use a bit more crumbs and butter! -
Press Into the Pan
Firmly press the crumb mixture into the bottom of a 9-inch springform pan. Make sure it’s even and tightly packed. Pro tip: Use the bottom of a measuring cup to help with this! -
Bake the Crust
Place the pan in the preheated oven and bake for about 8-10 minutes until lightly golden. Let it cool while you make the filling. -
Mix the Cream Cheese Filling
In a large bowl, beat the softened cream cheese with an electric mixer until smooth and creamy. Add the sugar, sour cream, vanilla extract, and salt, mixing until combined. Then add the eggs one at a time, mixing just until incorporated. Note: Don’t overmix at this point; you want to maintain a fluffy texture! -
Pour Filling Into the Crust
Carefully pour the cream cheese mixture over your cooled crust, smoothing the top with a spatula. Fun fact: Using a water bath can help achieve a smoother top without cracks! -
Bake the Cheesecake
Bake for 50-60 minutes or until the edges are set, and the center still has a slight jiggle. It will firm up as it cools. Chef’s secret: Turn off the oven, crack the door, and let the cheesecake cool in there for about an hour. This helps prevent cracks! -
Cool Down
Remove the cheesecake from the oven and let it cool to room temperature. Then, refrigerate for at least four hours or overnight for the best results. -
Make the Strawberry Topping
While the cheesecake chills, wash and slice your strawberries. In a saucepan over medium heat, combine the strawberries, cornstarch, and sugar. Stir gently until the strawberries release their juices and the mixture thickens. Tip: Adjust the sweetness based on your taste! -
Chill the Strawberry Mix
Allow the strawberry mixture to cool completely before topping the cheesecake. -
Add Topping and Serve
Once your cheesecake is set, pour the cooled strawberry mixture over the top. Slice and serve chilled, garnished with extra strawberries or whipped cream if desired.
Serving Suggestions
For an elegant presentation, serve your cheesecake on a beautiful platter. Consider adding a dollop of whipped cream on the side or sprinkle fresh mint leaves for a pop of color. To really elevate the experience, pair each slice with a glass of sparkling wine — because dessert is always more fun with a little fizz!
Recipe Variations
- Berry Bliss: Mix in raspberries or blueberries with the strawberry topping for a colorful berry medley.
- Chocolate Swirl: Melt some dark chocolate and swirl it into the cheesecake batter for a chocolate-strawberry twist.
- Nutty Crust: Replace half of the graham cracker crumbs with crushed nuts like almonds or walnuts for added texture.
- Lemon Cheesecake: Add a few extra tablespoons of lemon juice into the cream cheese mixture for a refreshing citrus flavor.
- Vegan Version: Substitute the cream cheese with a plant-based alternative and use coconut cream in place of sour cream.
Chef’s Notes
As with any recipe, my strawberry cheesecake has seen its evolution over the years. In my early baking days, I struggled with the dreaded cracks on the surface. But through experimentation and patience, I learned the art of gentle mixing and proper cooling techniques. Every crack has a story, and now, I embrace those little imperfections! It reminds me that cooking, like life, is about the journey, not just the destination.
FAQs and Troubleshooting
Q1: Why did my cheesecake crack?
A: Cracking usually occurs due to overmixing or rapid temperature changes. Bake slowly and allow it to cool gradually in the oven with the door ajar.
Q2: How do I store leftover cheesecake?
A: Wrap the cheesecake tightly with plastic wrap or store it in an airtight container in the fridge. It should last for about 4-5 days.
Q3: Can I freeze the cheesecake?
A: Yes! You can freeze the cheesecake before adding the topping. Wrap it well and store it for about 2 months. Let it thaw in the fridge overnight before serving.
Q4: What if my cheesecake doesn’t set?
A: If your cheesecake isn’t setting, it may need more time in the oven. Remember, it should be slightly jiggly in the center when you take it out. If it’s too soft after chilling, it might need to be baked a bit longer next time.
Nutritional Info
While we’re focusing on enjoyment here, it’s good to know the nutrition behind this delightful dessert. A slice of strawberry cheesecake typically contains around 350 calories, depending on portion size and ingredients used. It’s a treat, so enjoy it in moderation!
And there you have it! A creamy, dreamy Strawberry Cheesecake that’s sure to become a regular on your dessert menu. Remember, cooking should be as delightful as the food itself, so embrace the process, share the love, and savor every delicious bite. Happy baking, friends! 🍓
PrintHomemade Strawberry Cheesecake

A creamy, dreamy strawberry cheesecake that’s perfect for summer gatherings and guaranteed to impress your guests.
- Prep Time: 15 minutes
- Cook Time: 60 minutes
- Total Time: 75 minutes
- Yield: 8 servings 1x
- Category: Dessert
- Method: Baking
- Cuisine: American
- Diet: Vegetarian
Ingredients
- 1 cup graham cracker crumbs
- 2 ½ tablespoons butter, melted
- 1 ½ tablespoons sugar
- Pinch of salt
- 2 (8 oz) packages cream cheese, softened
- 2 eggs
- ⅔ cup sugar
- ⅔ cup sour cream
- 1 teaspoon vanilla extract
- ¼ teaspoon salt
- 1 ½ lbs strawberries
- 1 ½ teaspoons cornstarch
- 3 to 6 tablespoons sugar (adjust as needed)
- 1 ½ tablespoons lemon juice
Instructions
- Preheat your oven to 325°F (160°C).
- Combine the graham cracker crumbs, melted butter, sugar, and a pinch of salt in a mixing bowl. Mix until the crumbs resemble wet sand.
- Press the crumb mixture into the bottom of a 9-inch springform pan.
- Bake the crust for about 8-10 minutes until lightly golden. Let it cool.
- Beat the softened cream cheese with an electric mixer until smooth and creamy. Add sugar, sour cream, vanilla extract, and salt; mix until combined. Then add eggs one at a time, mixing just until incorporated.
- Pour the cream cheese mixture over the cooled crust.
- Bake for 50-60 minutes or until the edges are set with a slightly jiggly center.
- Cool down by removing from the oven and letting it cool to room temperature, then refrigerate for at least four hours or overnight.
- Wash and slice strawberries. In a saucepan over medium heat, combine strawberries, cornstarch, and sugar, stirring until thickened.
- Allow the strawberry mixture to cool completely before topping the cheesecake.
- Add the cooled strawberry mixture over the cheesecake and serve chilled.
Notes
For a richer flavor, consider adding a dollop of whipped cream on the side.
Nutrition
- Serving Size: 1 slice
- Calories: 350
- Sugar: 25g
- Sodium: 400mg
- Fat: 20g
- Saturated Fat: 10g
- Unsaturated Fat: 8g
- Trans Fat: 0g
- Carbohydrates: 40g
- Fiber: 2g
- Protein: 5g
- Cholesterol: 80mg
Keywords: cheesecake, strawberry, dessert, summer, baking
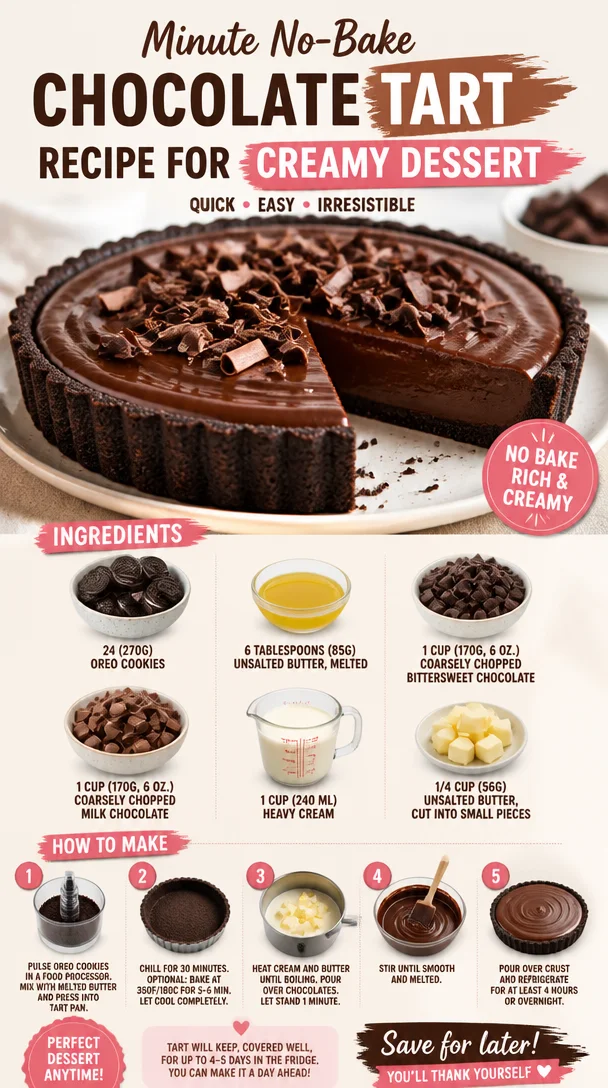
Minute No-Bake Chocolate Tart Recipe for Creamy Dessert
Indulge in Elegance: No-Bake Chocolate Tart
Hello, fellow foodies! Today, I’m thrilled to share a recipe that’s a surefire way to impress your guests without spending hours in the kitchen. I’m talking about the silky-smooth, decadently rich No-Bake Chocolate Tart. If you’ve ever thought that creating a dessert that looks elegant means dealing with complicated techniques, think again! This tart is not only distressingly easy to make, but it also tastes like it belongs in a fancy patisserie.
Picture this: a buttery, cookie crust cradling a luscious filling of bittersweet and milk chocolate, all topped off with lightly whipped cream. And the best part? You don’t have to turn on your oven! Whether it’s a dinner party, a special celebration, or just a cozy night at home, this tart fits beautifully into any occasion. So let’s dive in and create something delicious together!
A Sweet Memory
Before I get into the nitty-gritty of making this tart, let me share a little story that always brings a smile to my face. It was one hot summer evening, and I was tasked with preparing dessert for a family gathering. My grandma, a brilliant baker herself, had shown me the importance of balancing flavors and textures. I can still hear her soft voice guiding me.
I wanted to impress everyone and decided to whip up a no-bake chocolate tart! So there I was, smirking with confidence, when I discovered I’d accidentally used salted butter instead of unsalted in my crust. Instead of panicking, I laughed it off and thought, "Why not embrace the unexpected?" The result? An intriguing sweet-savory contrast that everyone adored. From then on, my family started asking for that "salted version" of the tart. That little mishap became a beautiful culinary story and a signature dish in our home. Let’s preserve that spirit of adventure as we make this tart today!
Ingredients
Before we begin rolling up our sleeves, let’s gather the stars of our show:
-
24 (270g) Oreo cookies: The base of our tart! These provide a perfect chocolatey flavor. Feel free to substitute with any chocolate cookie or even graham crackers if you’re feeling adventurous.
-
6 tablespoons (85g) unsalted butter, melted: This helps bind the crust together and gives it a rich flavor. If you want a dairy-free option, use coconut oil instead!
-
1 cup (170g, 6 oz.) coarsely chopped bittersweet chocolate: This chocolate adds that deep, intense chocolate flavor we all adore. You can swap it with dark chocolate if you prefer something even richer.
-
1 cup (170g, 6 oz.) coarsely chopped milk chocolate: For a sweeter note to balance the bittersweet chocolate. If you like it more intense, you can fully substitute it with dark chocolate.
-
1 cup (240 ml) heavy cream: The creaminess of the filling comes from this ingredient. If you need a lighter version, you can use half-and-half, but the texture will be less creamy.
-
1/4 cup (56g) unsalted butter, cut into small pieces: This adds a luscious finish to our chocolate filling and helps it set beautifully. Substitute with vegan butter for a dairy-free option.
Step-by-Step Instructions
Ready to get your hands chocolatey? Let’s get started on this delightful No-Bake Chocolate Tart!
Step 1: Prepare the Crust
-
Crush the Cookies: Place the Oreo cookies into a food processor and pulse them into fine crumbs. You can also seal them in a zip-top bag and crush them with a rolling pin if you don’t have a food processor—great way to let off some steam!
- Chef Tip: For a crunchy texture, leave a few larger pieces in the mix.
-
Mix with Melted Butter: In a mixing bowl, combine the cookie crumbs with the melted unsalted butter. Stir until the mixture resembles wet sand.
- Commentary: This step is super crucial as it binds the crust together.
-
Form the Crust: Press the mixture evenly into the bottom and up the sides of a tart pan. Make sure it’s compact so it holds together when we slice into it later.
- Little Hack: If you don’t have a tart pan, you can use a pie dish!
-
Chill: Pop the crust into the fridge for about 30 minutes to firm up. Trust me; this little patience pays off.
Step 2: Make the Filling
-
Prepare the Chocolate: In a medium bowl, combine the chopped bittersweet and milk chocolates. If you have a double boiler, that’s fabulous! If not, a heat-safe bowl over a pot of simmering water works well too—just ensure the bowl isn’t touching the water.
-
Heat the Cream: In a saucepan, gently heat the heavy cream over medium heat until it begins to simmer. Watch closely; you don’t want it to boil.
- Tip: Swirl the pan occasionally for even heating.
-
Combine: Pour the hot cream over the chopped chocolate. Let it sit for a minute or two, which allows the chocolate to melt.
- Chef Insight: This step is crucial for getting that silky texture!
-
Stir: Gently stir until the mixture is smooth and glossy. If using, add in the small pieces of butter and stir until fully melted in.
- Commentary: Look at that shine! If it’s not melting completely, you can return it to the heat for a few seconds.
Step 3: Assemble the Tart
-
Pour Filling into the Crust: Carefully pour the luscious chocolate mixture into the prepared crust.
- Tip: Use a spatula to spread it evenly for a smooth finish.
-
Chill Again: Return the tart to the fridge and allow it to set for at least two hours, or overnight if you can resist.
- Secret: The longer it sets, the better it tastes!
Step 4: Serve and Enjoy!
- Slice and Serve: When you’re ready to indulge, take the tart out of the fridge. Slice into generous wedges and serve as is, or add a dollop of whipped cream on top for that extra flair. Garnish with chocolate shavings or fresh berries to elevate your presentation.
- Plating Tip: Serve on a beautiful cake stand for a touch of elegance!
Recipe Variations
Feeling creative? Here are a few delicious variations you might enjoy:
- Mint Chocolate Tart: Add a few drops of peppermint extract to the chocolate filling for a refreshing twist.
- Nutty Delight: Incorporate crushed nuts like almonds or hazelnuts into the crust for added flavor and crunch.
- Fruit Infusion: Top with fresh raspberries or strawberries, or swirl in a raspberry puree before setting.
- Spiced Chocolate: Add a pinch of sea salt or a sprinkle of cayenne pepper to the filling for a subtle kick!
Chef’s Notes
This No-Bake Chocolate Tart has been a staple in my repertoire for years. Over time, I have experimented with various flavors and toppings, and each time it astonishes me how something so simple can impress on so many levels. I’ve had friends who were convinced they couldn’t cook make this tart with success! It’s become a culinary bridge for many, introducing them to the joys of dessert-making without the fuss.
There’s also something magical about watching the filling set—believe me when I say the wait is worth it! Everyone deserves a slice of indulgence, and this tart is just the ticket to create those joyful moments around the table.
FAQs and Troubleshooting
-
Why is my chocolate filling not smooth?
- If your filling has lumps, it may be that the chocolate didn’t melt completely. Be sure to stir thoroughly and return it to gentle heat to salvage the texture.
-
Can I freeze the tart?
- Yes! You can freeze the tart. Just wrap it well in plastic wrap. To serve, let it defrost in the fridge for several hours.
-
How do I store leftovers?
- Store any leftover tart in an airtight container in the fridge for up to 4-5 days. If you don’t lose your willpower, that is!
-
My crust is falling apart when I slice it!
- Ensure that you pressed the crust firmly into the pan. If it still crumbles, consider adding a little more melted butter next time to help bind it better.
Nutritional Info
Per slice (based on 12 servings): Approximately 320 calories, 22g fat, 34g carbs, 4g protein (note: values will vary depending on specific ingredients used).
Now that you have the recipe, I hope you feel inspired to make this No-Bake Chocolate Tart! Remember, good cooking is not just about the end result; it’s about the stories and experiences we create along the way. So tie on your apron, gather those ingredients, and let’s make something delectable together. Cheers to wonderful moments around your table!
PrintNo-Bake Chocolate Tart
Impress your guests with this easy and elegant No-Bake Chocolate Tart, featuring a cookie crust and a luscious chocolate filling.
- Prep Time: 15 minutes
- Cook Time: 0 minutes
- Total Time: 135 minutes
- Yield: 12 servings 1x
- Category: Dessert
- Method: No-Bake
- Cuisine: French
- Diet: Vegetarian
Ingredients
- 24 Oreo cookies (270g), crushed
- 6 tablespoons (85g) unsalted butter, melted
- 1 cup (170g) coarsely chopped bittersweet chocolate
- 1 cup (170g) coarsely chopped milk chocolate
- 1 cup (240ml) heavy cream
- 1/4 cup (56g) unsalted butter, cut into small pieces
Instructions
- Prepare the Crust
- Crush the cookies in a food processor or zip-top bag.
- Mix the cookie crumbs with melted butter until it resembles wet sand.
- Form the crust in a tart pan, pressing it evenly.
- Chill for about 30 minutes.
- Make the Filling
- Prepare the chocolate in a bowl over simmering water.
- Heat the cream in a saucepan until it simmers.
- Combine the hot cream with chocolate and let it sit.
- Stir until smooth and glossy, then add the butter.
- Assemble the Tart
- Pour the filling into the cooled crust.
- Chill for at least 2 hours.
- Serve by slicing and adding whipped cream on top if desired.
Notes
For a crunchy texture, leave some larger cookie pieces in the crust. Add variations like mint extract or fresh fruit toppings for extra flair.
Nutrition
- Serving Size: 1 slice
- Calories: 320
- Sugar: 20g
- Sodium: 130mg
- Fat: 22g
- Saturated Fat: 12g
- Unsaturated Fat: 8g
- Trans Fat: 0g
- Carbohydrates: 34g
- Fiber: 2g
- Protein: 4g
- Cholesterol: 30mg
Keywords: chocolate tart, no-bake dessert, easy dessert, elegant dessert
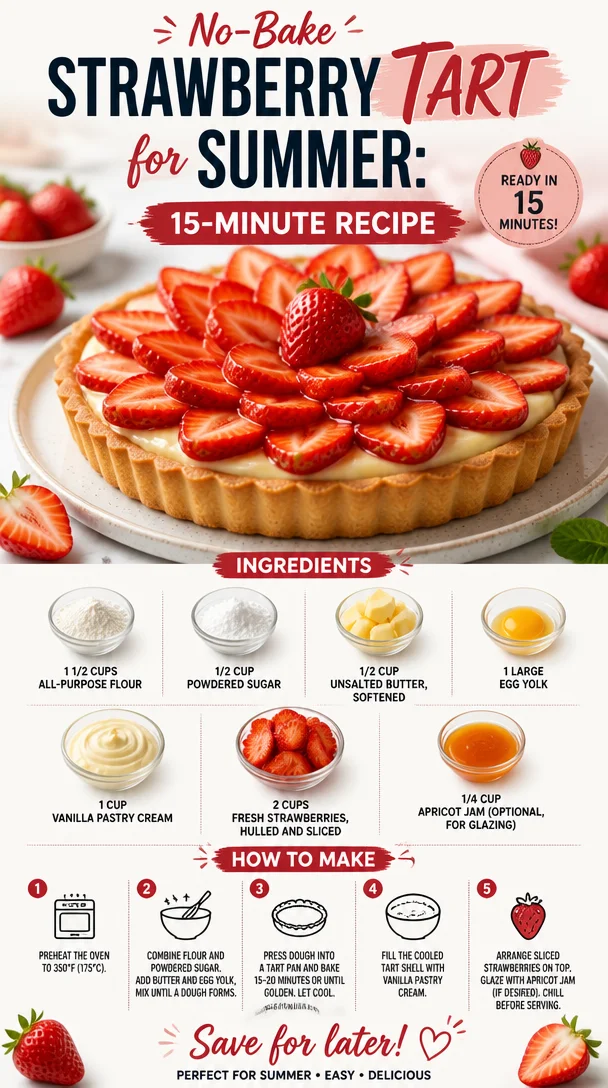
No-Bake Strawberry Tart for Summer: 15-Minute Recipe
A Love Letter to Tarte aux Fraises: The Quintessential Summer Dessert
Hello, fellow food lovers! Savannah here, and today, I’m excited to share with you a recipe that is as vibrant as a summer’s day – Tarte aux Fraises. If you’ve never tried this classic French strawberry tart, you’re in for a treat! This dessert isn’t just a feast for the eyes; it’s equally delightful for your taste buds. So, tie on your apron, and let’s dive into this elegant yet approachable recipe that is sure to impress anyone gathering around your table.
The Allure of Tarte aux Fraises
Growing up, I have vivid memories of summer days spent at my grandmother’s house. Her garden was a wonderland of vibrant colors, with strawberries spilling over the edges like little rubies beneath the sun. Every time those berries were ripe, so came the anticipation of my grandmother whipping up her famous Tarte aux Fraises. She would invite my cousins and me to help – washing strawberries, rolling out dough, and, of course, sneaking a few berries along the way. Sharing those moments, laughter ringing through the air as we worked together, is how I learned that food is more than just what’s on the plate; it’s about connection and joy.
Now, every time I make Tarte aux Fraises, I’m transported back to those sun-drenched afternoons. This recipe carries not just ingredients, but love, memories, and a bit of whimsy.
Ingredients
Let’s gather our supplies! Here’s what you’ll need for your Tarte aux Fraises:
-
1 1/2 cups all-purpose flour
The foundation of our tart crust. You can substitute with gluten-free flour for a gluten-free version, but ensure it’s a good blend that includes xanthan gum for proper texture. -
1/2 cup powdered sugar
Adds sweetness to our crust without the graininess. Don’t have any? Blend granulated sugar in a blender to make your own! -
1/2 cup unsalted butter, softened
The key player in bringing that rich flavor and tender texture to the crust. If you’re dairy-free, feel free to swap with coconut oil for a unique flavor that works surprisingly well! -
1 large egg yolk
This helps bind the dough together and adds richness. If you’re avoiding eggs, you can use a flax egg (1 tablespoon ground flaxseed mixed with 2.5 tablespoons water) as a substitute. -
1 cup vanilla pastry cream
The velvety filling that’s a real game changer for flavor! You can make your own or use a store-bought custard or pudding if you’re short on time. -
2 cups fresh strawberries, hulled and sliced
The star of our dessert! Fresh berries are essential, but frozen strawberries can work in a pinch—just thaw and drain excess liquid. -
1/4 cup apricot jam (optional, for glazing)
This adds a lovely shiny finish and extra flavor. If you prefer, try raspberry or strawberry jam for a different twist!
Step-by-Step Instructions
Now that we have our ingredients, let’s embark on creating this delightful Tarte aux Fraises. Don’t worry; I’ll guide you every step of the way!
-
Make the Tart Crust
In a mixing bowl, combine the all-purpose flour and powdered sugar. Mix well to incorporate them together. Now, add the softened butter. Use your fingers or a pastry cutter to rub the butter into the flour mixture until it resembles coarse crumbs. It’s okay to use a little muscle – channel your inner chef! -
Add the Egg Yolk
Next, add the egg yolk to the bowl. Stir until the mixture begins to clump together. Instead of kneading, lightly press it together into a ball. If it feels too dry, a teaspoon of ice water can push it into a knead-free dough. -
Chill the Dough
Wrap the dough in plastic wrap and refrigerate for at least 30 minutes. This step is crucial; it not only firms the dough but allows it to relax, which helps prevent shrinkage while baking. -
Preheat the Oven
Preheat your oven to 350°F (175°C) so it’s hot and ready for our tart. This helps create a lovely golden crust that’s both firm and flaky. -
Roll Out the Dough
Lightly flour your work surface and roll out the chilled dough to about 1/8 inch thick. Don’t stress about making it perfectly round – rustic charm is encouraged! Gently lift and place it into your tart pan. -
Blind Bake the Crust
Use a fork to prick holes in the bottom of the crust. This allows steam to escape, preventing puffing. Line the crust with parchment paper and fill with pie weights (or dried beans). Bake for 15 minutes, then remove the weights and bake for another 10-12 minutes or until lightly golden. Let it cool completely. -
Prepare the Vanilla Pastry Cream
While the crust cools, it’s time to make the pastry cream. If you’re going the homemade route, whisk together milk, sugar, and vanilla over medium heat until steaming. In a separate bowl, whisk egg yolks and cornstarch, then slowly add the warm milk mixture to temper the eggs. Return to the heat, cooking until thickened. Cool completely before assembling. -
Assemble the Tart
Once the crust and pastry cream are cooled, spread the cream evenly over the base. Arrange the sliced strawberries on top in an artful manner – this is your chance to showcase your creativity! -
Glaze with Apricot Jam
If you’re using apricot jam, warm it slightly in a saucepan until it becomes runny. Brush it generously over the strawberries for a shiny finish. -
Chill Before Serving
Allow your Tarte aux Fraises to chill in the refrigerator for about an hour. This helps set everything beautifully.
Serving Suggestions
When it’s time to serve, present your Tarte aux Fraises on a lovely cake stand. A light dusting of powdered sugar can add an elegant touch. Pair it with a dollop of whipped cream on the side for that extra indulgence. This dessert works wonderfully at dinner parties or summer gatherings, bringing smiles to the faces of everyone indulging in it.
Recipe Variations
Feeling adventurous? Here are some fun variations to mix things up:
- Berry Medley Tarte: Swap the strawberries for a mix of berries – blueberries, raspberries, and blackberries create a colorful twist.
- Chocolate Hazelnut Spread Base: Spread a thin layer of Nutella or chocolate ganache under the pastry cream for a decadent touch.
- Lemon Infusion: Add lemon zest to the pastry cream for a bright, zesty flavor that compliments the sweetness of the strawberries.
- Herbal Touch: Infuse fresh basil or mint into your pastry cream for an unexpected herbaceous note.
- Dairy-free Option: Use coconut cream instead of pastry cream for a delightful tropical twist.
Chef’s Notes
Tarte aux Fraises has evolved for me over the years. As my skills grew, so did my confidence in manipulating flavors and presentations. I remember my first attempt ended in a collapsed crust and a pastry cream that just refused to thicken. But that’s the beauty of cooking—the journey is part of the fun! I learned to embrace those kitchen mishaps as part of the learning process.
Now, my Tarte aux Fraises represents not just my culinary skills, but the warmth of those sun-soaked summers with my grandmother. It reminds me that cooking is ultimately about nurturing, both ourselves and those we love.
FAQs and Troubleshooting
-
Why did my crust shrink during baking?
Ensure your dough is well-chilled before baking, as warm dough tends to shrink. Always prick holes in the crust before baking! -
My pastry cream is too thin—what went wrong?
If the cream didn’t thicken, it may not have been heated long enough. Ensure to whisk continuously once you return it to the heat. -
Can I use frozen strawberries instead of fresh?
Yes, but be sure to thaw and drain them properly to prevent excess moisture. -
How do I store leftovers?
Tarte aux Fraises is best enjoyed fresh but can be stored in an airtight container in the fridge for up to two days. Just note the crust may lose some of its crisp texture.
Nutritional Info
While indulging in a slice of Tarte aux Fraises, consider that it’s packed with fresh strawberries, giving you a boost of vitamin C and antioxidants. Just remember to enjoy it in moderation as part of a well-balanced diet.
There you have it—my recipe for a stunning Tarte aux Fraises. May it become a staple in your kitchen, just as it has in mine. Here’s to cooking with intention, creating beautiful memories, and always remembering that good food is about showing up for one another. Happy baking, everyone!
PrintTarte aux Fraises
A classic French strawberry tart, perfect for summer gatherings, combining a crisp crust with vanilla pastry cream and fresh strawberries.
- Prep Time: 45 minutes
- Cook Time: 30 minutes
- Total Time: 75 minutes
- Yield: 8 servings 1x
- Category: Dessert
- Method: Baking
- Cuisine: French
- Diet: Vegetarian
Ingredients
- 1 1/2 cups all-purpose flour
- 1/2 cup powdered sugar
- 1/2 cup unsalted butter, softened
- 1 large egg yolk
- 1 cup vanilla pastry cream
- 2 cups fresh strawberries, hulled and sliced
- 1/4 cup apricot jam (optional, for glazing)
Instructions
- Make the Tart Crust: In a mixing bowl, combine the flour and powdered sugar. Mix well, then add the softened butter and rub it in until it resembles coarse crumbs.
- Add the Egg Yolk: Add the egg yolk and stir until the mixture clumps together. Press into a ball, adding ice water if too dry.
- Chill the Dough: Wrap in plastic wrap and refrigerate for at least 30 minutes.
- Preheat the Oven: Preheat your oven to 350°F (175°C).
- Roll Out the Dough: Lightly flour your surface and roll the dough to about 1/8 inch thick, then transfer it to the tart pan.
- Blind Bake the Crust: Prick holes in the crust, line with parchment and weights, and bake for 15 minutes. Remove weights and bake for an additional 10-12 minutes until golden.
- Prepare the Vanilla Pastry Cream: Whisk milk, sugar, and vanilla over medium heat until steaming. Temper egg yolks with cornstarch, then cook until thickened.
- Assemble the Tart: Spread pastry cream over the cooled crust and layer the strawberries on top.
- Glaze with Apricot Jam: Warm the jam and brush it over the strawberries.
- Chill Before Serving: Refrigerate for about an hour before serving.
Notes
Serve with a dusting of powdered sugar and a dollop of whipped cream.
Nutrition
- Serving Size: 1 slice
- Calories: 280
- Sugar: 15g
- Sodium: 200mg
- Fat: 16g
- Saturated Fat: 10g
- Unsaturated Fat: 4g
- Trans Fat: 0g
- Carbohydrates: 35g
- Fiber: 2g
- Protein: 3g
- Cholesterol: 40mg
Keywords: tarte aux fraises, strawberry tart, French dessert, summer dessert, classic recipes

Ingredient No-Bake Mango Cheesecake: Creamy Summer Dream
Indulge in Tropical Bliss: A Mango Cheesecake Recipe
Hello, fellow food enthusiasts! Today, we’re diving into a dessert that’s as vibrant as a tropical sunset: Mango Cheesecake. Picture this: a smooth, creamy cheesecake with the bright, fruity essence of mango. This delightful treat not only enchants the taste buds, but it also makes a stunning centerpiece for any gathering. Let me take you on a culinary journey where we’ll explore how to create this luscious dessert from scratch, complete with some personal anecdotes, tips, and plenty of kitchen wisdom. Let’s put on those aprons and get started!
A Mango Moment: My Love for Cheesecake
I’ve always loved desserts that tell a story, and for me, mango cheesecake has a special place in my heart. Growing up, my family had a tradition of visiting a small bakery nestled in our neighborhood. Every Saturday, we would stroll down with the sun warming our faces and anticipation bubbling in our bellies. One particular visit stands out in my memory: the first time I tasted mango cheesecake.
I remember the moment vividly—the aroma of fresh mangoes wafting through the air as I took the first bite. The creamy texture combined with the tropical sweetness transported me to a beachside paradise. From that day on, making mango cheesecake at home became my mission. This recipe isn’t just about food; it’s about creating memories, embracing the flavors of fun, and sharing that joy with loved ones. So let’s harness that inspiration and jump into a world of creamy deliciousness!
Ingredients: A Taste of Paradise
Here’s what you’ll need to whip up your very own mango cheesecake. Each ingredient plays an important role, so let’s explore them:
-
14-16 Graham crackers (or plain cookies): These create the perfect crunchy base. You can also use digestive biscuits, almond cookies, or even gluten-free options.
-
50 grams butter, melted: Butter binds your crust together and adds rich flavor. For a lighter option, try coconut oil for a tropical twist!
-
400 grams cream cheese (at room temperature): The heart of your cheesecake, cream cheese gives it that creamy, rich texture. You can substitute it with mascarpone or vegan cream cheese for a dairy-free option.
-
2 tablespoons cornstarch: This helps stabilize the cheesecake, ensuring it holds its shape. If you’re avoiding cornstarch, arrowroot powder works great too!
-
½ cup sugar: Sweetness is essential! You can swap this for coconut sugar or a sugar substitute like stevia if you prefer a low-calorie treat.
-
Pinch of sea salt/kosher salt: Just a hint of salt enhances the flavors in your cheesecake. Don’t skip this step—it’s like magic for taste!
-
2 ripe mangoes, peeled and chopped (or 1 cup store-bought mango puree): Fresh mangoes bring brightness and freshness. If mangoes aren’t in season, frozen mango works, too, just ensure it’s fully thawed and drained.
-
2 eggs (at room temperature): They add richness and help bind everything together. For a vegan option, you could use aquafaba (chickpea brine) or flax eggs.
-
Pinch of cardamom powder (optional): This adds a warm, aromatic twist. If you’re a fan of spice, go for it! Otherwise, feel free to leave it out.
Step-by-Step Instructions: Creating Your Masterpiece
Now that we have all our ingredients ready, let’s get our hands a little messy, shall we?
-
Preheat your oven: Preheat your oven to 325°F (160°C). This is an essential step to ensure your cheesecake bakes evenly.
-
Prepare the crust: In a food processor, blend the graham crackers until finely crushed. You can also place them in a zip-top bag and crush them with a rolling pin for some hands-on fun! Add in the melted butter and a sprinkle of salt, mixing until the crumbs resemble wet sand.
-
Shape the crust: Press this mixture firmly into the bottom of a springform pan. Use the back of a measuring cup to get an even layer—it makes a difference! Bake it in the preheated oven for about 8-10 minutes until it’s set and slightly golden. Let it cool while you prepare the filling.
-
Blend the cheesecake filling: In a large mixing bowl, beat the cream cheese until creamy and smooth—this usually takes about 2-3 minutes with a hand mixer on medium speed. Add in the sugar and cornstarch, mixing until thoroughly combined.
-
Incorporate the eggs and mango: One at a time, add the eggs to the mixture, blending well after each addition. Then, fold in the chopped mango or mango puree. (Fun tip: reserve a bit of mango for topping your cheesecake later!) If you’re using cardamom, add it in now for that extra aromatic touch.
-
Pour and bake: Pour the creamy filling over your cooled crust, smoothing it out gently with a spatula. Bake for 45-55 minutes, or until the edges are set and the center is slightly wobbly. Don’t be alarmed by the wobble! It will firm up as it cools—trust me!
-
Cool down: Once done, turn off the oven and crack the oven door open for the cheesecake to gently cool down. Let it cool in the oven for an hour to prevent cracking.
-
Chill: After it has cooled, refrigerate the cheesecake for at least 4 hours, or preferably overnight. This patient’s wait will reward you with a perfectly set cheesecake!
Serving Suggestions: Plating to Impress
When it’s finally time to serve your mango cheesecake, let’s make it visually stunning! Carefully run a knife around the edge of the springform pan before releasing the sides. Slice your cheesecake into wedges and arrange it on a beautiful plate. Drizzle with a mango puree or a sprinkle of fresh herbs like mint for contrast. The vibrant colors and smooth textures will dazzle your guests and make your cheesecake all the more inviting.
Recipe Variations: A Twist on Tradition
Feeling adventurous? Here are a few variations to give your mango cheesecake a personalized touch:
-
Coconut Mango Cheesecake: Keep the mango but add shredded coconut to the crust for an added tropical flair. You can also use coconut milk in the filling!
-
Chocolate Swirl: Add chocolate to the mix! Swirl in melted dark or milk chocolate into the mango filling before baking for a decadent chocolate-mango experience.
-
Berry Delight: Top your cheesecake with seasonal berries for a color burst and added freshness. Strawberries, raspberries, or blueberries pair beautifully!
-
Spiced Mango Cheesecake: Add a pinch of cinnamon along with the cardamom for a warm, spiced cheesecake experience—perfect for cozy gatherings.
-
Nutty Crust: Substitute some of the graham crackers with crushed nuts like pecans or walnuts for a different texture and flavor.
Chef’s Notes: A Touch of Personal Flavor
Over the years, I’ve tinkered with this recipe and found joy in sharing it with family and friends. Each time I make it, I feel like I’m not just creating a dessert, but a piece of love to share around the table. There was that one time I tried to impress my in-laws, and as I pulled the cheesecake from the refrigerator, it had magically transformed into this tall, creamy tower of perfection—only to have it topple over right before serving due to overzealous slicing! Laughter filled the kitchen, and I served the ‘deconstructed’ mango cheesecake instead. We all enjoyed it more than any picture-perfect slice; after all, sharing laughter over dessert is the true win!
FAQs and Troubleshooting: Your Cheesecake Questions Answered
-
Why does my cheesecake have cracks?
Cracks can form from sudden temperature changes or overbaking. To minimize this, cool your cheesecake gradually in the oven and avoid opening the door too soon. -
How can I tell if my cheesecake is done?
The cheesecake should be slightly wobbly in the center but set around the edges. It’ll firm up as it cools, so don’t worry if it jiggles a bit! -
Can I freeze this cheesecake?
Absolutely! Wrap individual slices tightly in plastic wrap, then in foil, and freeze for up to three months. Just thaw in the fridge before serving. -
What if I can’t find fresh mango?
No worries—canned or frozen mango is a great alternative! Just ensure it’s well-drained before using to prevent a soggy cheesecake.
Nutritional Info: Deliciously Indulgent
While indulgent desserts are meant to be enjoyed, it’s always nice to have a rough idea of the nutritional aspects. This mango cheesecake per slice (based on 12 slices) contains roughly:
- Calories: 350
- Total Fat: 22g
- Saturated Fat: 12g
- Cholesterol: 80mg
- Carbohydrates: 30g
- Sugars: 20g
- Protein: 6g
Conclusion: Let’s Celebrate with Mango Cheesecake!
And there you have it, my friends—a mango cheesecake that’s sure to impress and create beautiful memories around your table. Cooking is all about connecting with the ingredients and sharing love through food. I hope this recipe inspires you to sprinkle a bit of joy in your kitchen and share the sweet rewards with those you cherish.
So grab those ripe mangoes, tie on your apron, and let’s jump into a world of flavor! Happy baking!
PrintMango Cheesecake

A smooth, creamy cheesecake infused with the vibrant essence of mango, perfect for any gathering.
- Prep Time: 20 minutes
- Cook Time: 55 minutes
- Total Time: 4 hours 15 minutes
- Yield: 12 servings 1x
- Category: Dessert
- Method: Baking
- Cuisine: Tropical
- Diet: Vegetarian
Ingredients
- 14–16 Graham crackers (or plain cookies)
- 50 grams butter, melted
- 400 grams cream cheese, at room temperature
- 2 tablespoons cornstarch
- ½ cup sugar
- Pinch of sea salt/kosher salt
- 2 ripe mangoes, peeled and chopped (or 1 cup store-bought mango puree)
- 2 eggs, at room temperature
- Pinch of cardamom powder (optional)
Instructions
- Preheat your oven to 325°F (160°C).
- Blend the graham crackers until finely crushed in a food processor.
- Press the mixture into the bottom of a springform pan and bake for 8-10 minutes.
- Beat the cream cheese in a mixing bowl until creamy and smooth.
- Add the sugar and cornstarch, mixing until combined.
- Incorporate the eggs one at a time, blending well after each addition.
- Fold in the chopped mango or mango puree.
- Pour the filling over the cooled crust and smooth it out.
- Bake for 45-55 minutes or until the edges are set and the center is slightly wobbly.
- Cool in the oven with the door cracked open for an hour.
- Chill in the refrigerator for at least 4 hours before serving.
Notes
For a twist, consider adding shredded coconut to the crust or topping with seasonal berries.
Nutrition
- Serving Size: 1 slice
- Calories: 350
- Sugar: 20g
- Sodium: 250mg
- Fat: 22g
- Saturated Fat: 12g
- Unsaturated Fat: 8g
- Trans Fat: 0g
- Carbohydrates: 30g
- Fiber: 2g
- Protein: 6g
- Cholesterol: 80mg
Keywords: mango cheesecake, dessert, tropical dessert, cheesecake recipe, fruity cheesecake

No-Bake Coconut Orange Glow Dessert: Creamy Citrus Delight
Creamy Citrus Delight: Coconut Orange Glow Dessert Recipe
Hello there, wonderful food lovers! Today, we’re diving deep into a tropical escapade with a dessert that’s not just a treat for the taste buds but also a feast for the senses. Let me introduce you to the Coconut Orange Glow Dessert – a creamy citrus delight that will have you dreaming of sun-soaked beaches and balmy evenings.
Introduction
You know, sometimes life feels overwhelmingly busy, and what’s missing is that little bit of sweetness that brings joy back. This Coconut Orange Glow Dessert is just the thing to elevate your day, whether you’re celebrating a special moment or simply treating yourself after a long week. It’s creamy, light, and bursting with that vibrant citrus flavor that screams refreshment.
Imagine sitting outside on a warm day, the sun catching the bright orange hue of this dessert, while a gentle breeze dances with the sweet scent of coconut. Not to mention, it’s incredibly easy to whip up, making it a go-to recipe for both seasoned chefs and enthusiastic home cooks. Trust me, once you make it, you’ll be asked to share the recipe (and possibly to make it again and again). A sprinkle of toasted coconut on top adds a satisfying crunch, making it not only a delight for your palate but also a visual treat. Let’s dive in and uncover the magic of this little bowl of sunshine!
Personal Story
I still remember the first time I tasted a dessert like this one. It was at my dear friend Lily’s beach bonfire party. The sun was just setting, casting a golden glow over everything, and the sweet scent of tropical fruit filled the air. She served this velvety dessert, and I was transported straight to paradise with each spoonful. The combination of coconut and orange was so unexpected yet perfectly harmonious.
That night, I spent more time plotting how I would recreate that dessert in my kitchen than I did enjoying the bonfire! It wasn’t just about the taste but also about the memories and laughter that followed. This dessert became a symbol of good times, fresh starts, and the beauty found in simple pleasures. Now, I’m excited to bring a piece of that beachy memory into your home with this Coconut Orange Glow Dessert!
Ingredients
To create this tropical masterpiece, here’s what you’ll need:
-
2 cups full-fat coconut milk: The star of the show! Creamy and luscious, it gives the dessert a silky texture. If you’re looking for a lighter option, consider using light coconut milk, but be aware it might alter the creaminess.
-
1/3 cup granulated sugar: This sweetens things up beautifully. If you’re after a healthier alternative, feel free to swap in honey or maple syrup—just adjust for sweetness to your taste!
-
1/2 cup freshly squeezed orange juice: Fresh is key here! This will brighten the dish and enhance that tropical vibe. Bottled juice is okay in a pinch, but nothing beats the flavor of fresh oranges.
-
1 tsp vanilla extract: This adds a warm, aromatic twist. I always opt for pure vanilla extract; it gives a richer flavor than the imitation versions.
-
1 tsp lime zest: A touch of lime brings a sharpness that complements the sweetness perfectly. No lime? No problem! Lemon zest will add a delightful zing too.
-
1/2 cup whipped cream: For an airy finish. You can use store-bought whipped cream or whip your own. And if you prefer a dairy-free version, coconut whipped cream works wonderfully!
-
A pinch of toasted coconut flakes: For that lovely crunch and an extra hit of flavor. Toasting coconut ensures it brings out the nuttiness, elevating the entire dessert.
Step-by-Step Instructions
Now, let’s get cooking! Here’s how to create your Coconut Orange Glow Dessert step by step:
-
Gather Your Ingredients: Make sure you have everything ready to go. This makes the process smoother and ensures you don’t forget anything mid-recipe.
-
Combine the Coconut Milk and Sugar: In a saucepan over medium heat, whisk together the coconut milk and granulated sugar. Heat until warm (but not boiling), stirring occasionally. You want the sugar to dissolve completely, creating a sweet coconut syrup. This will take about 3-5 minutes.
Tip: If you’re feeling adventurous, try adding a pinch of salt— it really helps to balance out the sweetness!
-
Add Orange Juice and Zest: Remove the saucepan from heat and stir in the freshly squeezed orange juice, lime zest, and vanilla extract. This combination brings a bright, citrusy flavor and will make your kitchen smell like a tropical paradise.
Chef Hack: Taste and adjust! If you want more sweetness, now’s your chance to add a bit more sugar or honey—just dissolve it well before proceeding.
-
Cool and Thicken: Allow the mixture to cool for about 10-15 minutes. This will thicken slightly as it cools. If you’d like a creamier texture, you can also blend the mixture briefly with a hand blender to fluff it up a bit.
-
Fold in the Whipped Cream: Gently fold in the whipped cream until combined. This step gives the dessert that cloud-like texture, making it light and airy.
Tip: Be gentle and don’t over-mix— you want to retain all that lovely airiness!
-
Chill: Pour the mixture into serving dishes or glasses, and refrigerate for at least two hours. This chilling time allows the flavors to develop and solidifies the dessert.
Chef’s Insight: If you’re short on time, popping them in the freezer for 30 minutes can work too, but let them sit out for a few minutes before serving to soften.
-
Serve and Garnish: Before serving, sprinkle a pinch of toasted coconut flakes on top for that satisfying crunch and a pop of extra flavor.
Presentation Tip: Layered desserts in clear glasses look stunning, but don’t stress! Any cute bowl or ramekin works great too!
Serving Suggestions
When it’s time to serve your Coconut Orange Glow Dessert, consider pairing it with some fresh tropical fruit—like mango slices or berries—for an added pop of color and flavor. This makes for a beautiful presentation that your guests will swoon over. Grab a few mint leaves for garnish if you have them on hand; they’ll add a refreshing touch that complements the citrus beautifully.
Recipe Variations
Feel free to get creative with this dessert! Here are a few variations you might enjoy:
-
Mango Coconut Glow: Substitute half of the orange juice with fresh mango puree for a delightful twist.
-
Tropical Combo: Add a splash of pineapple juice or some crushed pineapple for an even more tropical vibe.
-
Chocolate Drizzle: For a decadent touch, drizzle some melted dark chocolate over the top right before serving. The flavor of chocolate paired with citrus is to die for!
-
Coconut Lime Delight: Increase the lime zest and juice for a sharper, more tangy taste—perfect for lime lovers!
-
Nutty Flavors: Consider adding a hint of almond extract or some finely chopped pistachios for a unique flavor profile.
Chef’s Notes
This recipe has evolved into the beautiful creation it is today through a bit of trial and error. I originally played around with variations that missed the mark—too sweet, too heavy, or too bland. The balance of flavors is crucial, and I’ve learned that taking the time to adjust is what makes a recipe truly shine.
I once experimented by adding too much lime juice, turning it into an unintentional lime sherbet! But, hey, kitchen mishaps often lead to delightful surprises. Through that, I embraced the concept of ‘happy accidents,’ learning to adapt and turn them into something delicious. So, next time you’re in the kitchen, don’t fear the mistakes—embrace them instead!
FAQs and Troubleshooting
Q: My mixture is too runny; what did I do wrong?
A: If you find your mixture is too runny after chilling, it might be because the coconut milk wasn’t thick enough or the whip cream wasn’t fully incorporated. Next time, consider adding a bit more cornstarch to thicken it up or leaving it in the fridge longer to firm up.
Q: How long does this dessert last?
A: Your Coconut Orange Glow Dessert can last in the refrigerator for up to 3 days. Just make sure to cover it with plastic wrap to prevent it from absorbing any odors!
Q: Can I make this vegan?
A: Absolutely! The recipe is already vegan if you stick with coconut cream and plant-based whipped cream. Just ensure the sugar is vegan, as some sugars are processed using bone char.
Q: How can I store leftovers?
A: Store any leftovers in an airtight container in the fridge. I recommend finishing it within three days for the best taste and texture!
Nutritional Info
This dessert is a great option if you’re looking for something refreshing that isn’t overly sugary. Here’s a rough nutritional breakdown (per serving):
- Calories: 200
- Total Fat: 15g
- Saturated Fat: 10g
- Carbohydrates: 16g
- Sugars: 13g
- Protein: 2g
Ultimately, numbers are just numbers—what matters most is the joy these flavors bring you and your loved ones!
So there you have it! The Coconut Orange Glow Dessert is not just a recipe; it’s a little piece of sunshine to brighten your days. I can’t wait for you to try this and to hear your kitchen tales. Happy cooking!
PrintCoconut Orange Glow Dessert

A creamy citrus delight that combines the refreshing flavors of coconut and orange, perfect for warm days and special occasions.
- Prep Time: 15 minutes
- Cook Time: 5 minutes
- Total Time: 120 minutes
- Yield: 4 servings 1x
- Category: Dessert
- Method: Refrigerating
- Cuisine: Tropical
- Diet: Vegan
Ingredients
- 2 cups full-fat coconut milk
- 1/3 cup granulated sugar
- 1/2 cup freshly squeezed orange juice
- 1 tsp vanilla extract
- 1 tsp lime zest
- 1/2 cup whipped cream
- A pinch of toasted coconut flakes
Instructions
- Gather your ingredients.
- Combine the coconut milk and sugar in a saucepan over medium heat; whisk until warm.
- Add the orange juice, lime zest, and vanilla extract; mix well.
- Cool for about 10-15 minutes to thicken.
- Fold in the whipped cream gently until combined.
- Chill in serving dishes for at least two hours.
- Serve and garnish with toasted coconut flakes.
Notes
For added flavor, consider pairing with fresh tropical fruits or a drizzle of chocolate.
Nutrition
- Serving Size: 1 serving
- Calories: 200
- Sugar: 13g
- Sodium: 50mg
- Fat: 15g
- Saturated Fat: 10g
- Unsaturated Fat: 3g
- Trans Fat: 0g
- Carbohydrates: 16g
- Fiber: 1g
- Protein: 2g
- Cholesterol: 0mg
Keywords: coconut dessert, orange dessert, vegan dessert, tropical dessert, creamy dessert