
Cheesy Taco Sticks
Cheesy Taco Sticks: An Easy, Fun, and Flavorful Snack
Hello, fellow food lovers! If you’re in the mood for a snack that’s equal parts cheesy, cozy, and downright delicious, then you’ve come to the right place. Today, we’re diving into a recipe for Cheesy Taco Sticks—a treat that will have everyone hovering around the kitchen like it’s a taco truck on wheels. Think of this as your invite to a gourmet fiesta, right in the comfort of your own home!
A Quick Taco Time Tale
Let me take you back to one of my favorite childhood memories. I was still in school, and my mom would surprise us with taco night every Friday. The aroma of seasoned beef sizzling on the stove, the crispness of fresh veggies, and the sight of gooey cheese melting over everything was enough to send my heart soaring. All week long, I dreamed about that glorious taco spread and the delicious chaos that followed—sour cream-covered faces, salsa splatters on the table, and laughter about who could stack the tallest taco tower.
One special night, while we were preparing our tacos, my mom had a fun twist up her sleeve. She rolled out some dough and stuffed it with all the taco goodness, transforming our weekly tradition into something new, exciting, and utterly delightful. There we were, biting into cheesy taco sticks, and I was hooked! From that moment on, I knew that anything smothered in cheese and seasoned beef deserved a spot in my kitchen. Now, I’m thrilled to pass this tradition on to you with my version of Cheesy Taco Sticks!
Ingredients
Here’s what you’ll need to bring this cheesy dream to life:
-
1 lb ground beef
A staple in any taco-inspired dish. If you prefer a lighter option, feel free to swap it with ground turkey or even black beans for a vegetarian twist. -
1 packet taco seasoning
This is your secret weapon for flavor! Taco seasoning blends spices like cumin, chili powder, and garlic for those authentic taco vibes. You can easily make your own with common spices at home! -
1 cup shredded cheese (cheddar or Mexican blend)
Cheese is essential for that melty goodness! Cheddar brings sharpness, while a Mexican blend adds complexity. If you’re feeling adventurous, try pepper jack for a kick! -
1 can refrigerated crescent dough
This crescent dough is a magic ingredient! It’s flaky, buttery, and extremely forgiving—ideal for creating the perfect cheesy stick. For a healthier route, look for whole wheat dough. -
Sour cream and salsa for dipping
Because what’s cheese without some zesty dipping? These pair perfectly, balancing the richness of the taco sticks. Feel free to swap salsa for guacamole if you’re team green!
Step-by-Step Instructions
Now, let’s roll up our sleeves and get cooking—these cheesy taco sticks are oh-so-easy to prepare!
-
Preheat Your Oven
Begin by preheating your oven to 375°F (190°C). This will ensure that our taco sticks get golden brown and crisp. -
Cook the Beef
In a skillet over medium heat, add your ground beef. Use a wooden spoon to break it up as it cooks. Cook until browned (approximately 6-8 minutes). Drain any excess fat if needed. Pro tip: Adding a splash of water while cooking helps keep the meat tender and juicy! -
Season the Beef
Sprinkle the taco seasoning over the beef. Add a splash of water (about ¼ cup) and stir to combine. Allow it to cook for a couple more minutes until the mixture is thick and fragrant. Don’t be afraid to taste it! Adjust seasoning if you like it zippier. -
Prepare the Dough
Roll out the refrigerated crescent dough on a clean surface. You can press the seams together to create a single sheet, which will make it easier to wrap the beef mixture. Chef’s tidbit: You can also slice the dough into squares for a more rustic look! -
Assembly Time!
Spoon a generous amount of the seasoned beef mixture onto one end of the dough. Top it with a sprinkle of shredded cheese. Roll the dough over the filling into a log shape and pinch the seams to seal. Place seam side down on a baking sheet lined with parchment paper. Tip: Brush a little melted butter on top for added golden richness! -
Bake to Perfection
Pop the baking sheet into your preheated oven and let those sticks bake for about 12-15 minutes, or until they are golden brown. The aroma wafting through your kitchen will be irresistible! -
Serve Warm
Once baked, remove the sticks from the oven and let them cool slightly. They are best served warm, right out of the oven! Remember to dive in with those dipping sauces—the creaminess of sour cream against the warmth of the sticks is heavenly!
Serving Suggestions
For presentation, slice the cheesy taco sticks into bite-sized pieces and arrange them on a platter. You can garnish with a sprinkle of chopped cilantro for color and freshness. Serve alongside a small bowl of salsa and sour cream for dipping goodness! It’s all about making your taco feast feel festive and inviting.
Recipe Variations
Here are a few creative flips you can try with this recipe:
- Chicken Taco Sticks: Substitute ground beef with shredded rotisserie chicken.
- Bean & Cheese Twist: For a vegetarian option, use refried beans and top with cheese.
- Spicy Taco Sticks: Add some diced jalapeños to the beef mixture for an extra kick.
- Loaded Taco Sticks: Mix in black olives, corn, or chopped bell peppers for added texture.
Chef’s Notes
Over the years, I’ve made Cheesy Taco Sticks countless times, tweaking and experimenting along the way. One of my funniest memories was when I decided to add too much cheese—let’s just say they were oozing and ended up looking more like a taco explosion! What a mess, but oh my, they tasted divine! This is one recipe that has truly evolved as I’ve shared it with friends and family, each one adding their secret ingredients or techniques. I love that cooking is not just about following directions but about sharing those funny moments and culinary adventures.
FAQs and Troubleshooting
1. My dough didn’t seal properly—what happened?
Sometimes, it can be tricky to seal the dough well, especially if it’s cold. Make sure to pinch the seams tightly and, if needed, use a bit of water to help stick them together.
2. Can I freeze the uncooked sticks?
Absolutely! You can assemble them ahead of time, wrap them well in plastic, and freeze. Bake straight from the freezer, but add a few extra minutes to the baking time.
3. How do I prevent sogginess?
To prevent sogginess, make sure to drain the beef mixture well after cooking. Also, avoid overloading the filling—keep it balanced for the best texture.
4. What can I do with leftover filling?
Fear not! You can use any leftover filling in salads, tacos, or nachos. It’s versatile and could make a fantastic lunch option!
Nutritional Info
For those interested in the numbers, each cheesy taco stick (if you cut them into six pieces) contains approximately:
- Calories: 210
- Protein: 10g
- Carbohydrates: 15g
- Fat: 12g
(Note: Nutritional values can vary based on specific brands and adjustments to the recipe.)
Cooking should be a celebration—a way to create beautiful, flavorful moments. I hope you enjoy making these Cheesy Taco Sticks as much as I have over the years. Gather your loved ones, unleash your inner foodie, and let’s keep this culinary tradition going! Whether for a cozy movie night, a party, or just a fun Friday treat, you can’t go wrong with these cheesy delights. So, tie on that apron, crank the oven, and let’s get cooking!
PrintCheesy Taco Sticks

An easy, fun, and flavorful snack that combines cheesy goodness with seasoned beef, all wrapped in flaky crescent dough.
- Prep Time: 15 minutes
- Cook Time: 15 minutes
- Total Time: 30 minutes
- Yield: 4 servings 1x
- Category: Snack
- Method: Baking
- Cuisine: Mexican
- Diet: Beef
Ingredients
- 1 lb ground beef
- 1 packet taco seasoning
- 1 cup shredded cheese (cheddar or Mexican blend)
- 1 can refrigerated crescent dough
- Sour cream and salsa for dipping
Instructions
- Preheat your oven to 375°F (190°C).
- Cook the ground beef in a skillet over medium heat, breaking it up until browned (about 6-8 minutes), and drain excess fat.
- Season the beef with taco seasoning and a splash of water, stirring to combine.
- Prepare the refrigerated crescent dough on a clean surface, pressing seams together.
- Spoon the beef mixture onto one end of the dough and top with cheese. Roll and seal.
- Place on a baking sheet lined with parchment paper and brush with melted butter.
- Bake for 12-15 minutes or until golden brown.
- Serve warm with sour cream and salsa.
Notes
Make sure to drain the beef well and avoid overloading the filling for the best texture.
Nutrition
- Serving Size: 1 serving
- Calories: 210
- Sugar: 1g
- Sodium: 500mg
- Fat: 12g
- Saturated Fat: 6g
- Unsaturated Fat: 4g
- Trans Fat: 0g
- Carbohydrates: 15g
- Fiber: 0g
- Protein: 10g
- Cholesterol: 50mg
Keywords: cheesy snacks, taco sticks, party food
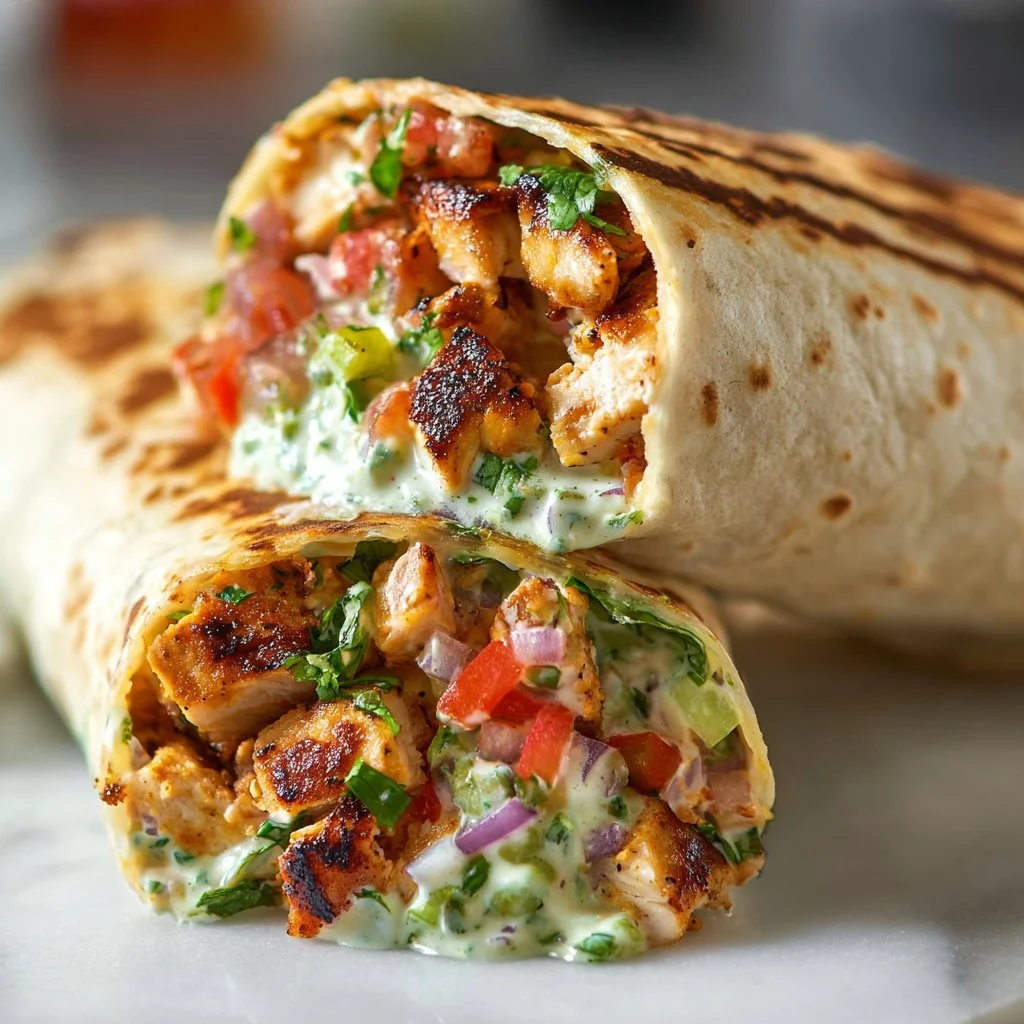
Chipotle Ranch Grilled Chicken Burrito
Chipotle Ranch Grilled Chicken Burrito: A Flavorful Adventure Awaits
Hello, food lovers! Today, I’m thrilled to share one of my all-time favorite crowd-pleasers: the Chipotle Ranch Grilled Chicken Burrito. This dish is like a fiesta in a tortilla that keeps everyone coming back for more. It’s packed with flavor, is incredibly satisfying, and can easily be whipped up in your own kitchen—no culinary degree necessary! So, whether you’re hosting a casual get-together or simply want to treat yourself to something delicious, this recipe is sure to impress.
The Story Behind the Burrito
Ah, burritos—they hold a special place in my heart (and stomach!). I vividly remember my early cooking adventures. Growing up, every Friday night was Taco Night in my house, and you could count on one hand how many times flurries of laughter came with bites of delicious food. My family loved to gather around the table, mixing and matching ingredients, all while engaging in playful banter and sharing stories from the week. It was during this time that I discovered the magic of combining flavors, especially when chicken was involved.
One evening, I decided to take our traditional tacos a step further by crafting a burrito filled with delectable, grilled chicken and my homemade chipotle ranch dressing. The combination was an instant hit! Friends and family eagerly lined up for seconds, wanting to know my secrets. That night was not just about the food; it was about the joy of coming together, and that’s something I cherish and strive for with every recipe I share. So, grab your apron, and let’s recreate that evening!
Ingredients
Before we roll up our sleeves and dive into the cooking process, let’s gather our ingredients. Here’s what you’ll need:
- 2 chicken breasts: Fresh or frozen, both work! Ensure they’re thoroughly defrosted if using frozen. For a lighter option, turkey breast can be substituted.
- 1 tablespoon chipotle seasoning: This adds a smoky, spicy kick. If you don’t have it, a mix of smoked paprika and cayenne can give you a similar flavor.
- 1 cup cooked rice: I love using jasmine or basmati for their fragrant qualities, but feel free to use brown rice or even quinoa for a nuttier texture.
- 1 cup black beans (drained and rinsed): Packed with protein and fiber! Chickpeas can work here if you’re looking for a different legume option.
- 1 cup diced tomatoes: Fresh is best, but canned tomatoes can work too—just drain some of the excess liquid.
- 1 cup shredded lettuce: Iceberg is crispy and refreshing, but romaine or mixed greens will also add great texture.
- 1/2 cup corn: Sweet corn balances flavors wonderfully, and you can use frozen corn if fresh isn’t available.
- 1/2 cup diced onion: Red onions bring a lovely bite, but yellow onions are milder and sweeter.
- 1/2 cup chipotle ranch dressing: You can purchase this store-bought or make your own—trust me, it’s worth the extra effort!
- 4 large tortillas: Flour tortillas are the traditional choice, but corn tortillas work, too, for a gluten-free option.
- Salt and pepper to taste: Simple, but crucial for enhancing all the flavors.
Step-By-Step Instructions
Now, let’s get cooking! Follow these steps to create your very own Chipotle Ranch Grilled Chicken Burrito:
-
Prepare the Chicken:
- Start by preheating your grill or a grill pan over medium-high heat.
- While that’s heating up, take your chicken breasts and sprinkle them with chipotle seasoning, ensuring they are well-coated on both sides. A light drizzle of olive oil can help the seasoning stick better.
- Season lightly with salt and pepper.
-
Grill the Chicken:
- Place the seasoned chicken on the grill. Let it cook undisturbed for about 6-7 minutes on one side, allowing it to develop those beautiful grill marks.
- Flip the chicken and cook for another 5-7 minutes, or until the internal temperature reaches 165°F (75°C). This is key to keep your burrito safe and delicious!
- Once done, remove the chicken from the grill and let it rest for about 5 minutes. This helps keep the juices in, making the chicken extra tender.
-
Chop & Mix Ingredients:
- While the chicken is resting, let’s focus on the filling. In a large bowl, combine the cooked rice, black beans, diced tomatoes, corn, diced onion, and shredded lettuce.
- Toss everything together, and don’t be shy—give it a taste! Feel free to adjust seasoning or add a splash of lime juice for some zest.
-
Shred the Chicken:
- Using two forks, shred the grilled chicken into bite-sized pieces. If you’d rather slice them, go for it! I love the texture of shredded chicken in a burrito, but do what feels right for you.
-
Assemble Your Burrito:
- Lay your tortilla flat on a clean surface. Spoon a generous amount of the rice and veggie mixture onto the center of the tortilla.
- Top it off with the shredded chicken and drizzle some chipotle ranch dressing over the top. Here’s a tip: don’t overfill; a burrito that’s too packed is a messy burrito!
- To fold, take the sides of the tortilla and fold them in, then roll from the bottom up, like a cozy package.
-
Final Cook:
- If you’d like a crispy exterior, return your filled burrito back to the grill for a minute on each side. This adds a lovely crunch and helps the tortilla seal better.
Serving Suggestions
When it comes to plating, I love to serve this Chipotle Ranch Grilled Chicken Burrito with a side of extra chipotle ranch dressing for dipping, some fresh salsa or pico de gallo, and maybe a sprinkle of crumbled queso fresco or feta cheese for added flavor. A colorful salad on the side will bring the plate to life!
Recipe Variations
Feel like switching it up? Here are a few creative twists:
- Vegetarian Option: Substitute chicken with grilled Portobello mushrooms or marinated tofu for a delicious plant-based version.
- Spicy Kick: Add sliced jalapeños to the filling for some extra heat or top with sriracha for an additional zing.
- Cheesy Goodness: Incorporate shredded cheese like Monterey Jack or cheddar into the burrito before rolling for a gooey surprise when you bite in.
- Breakfast Burrito: Swap the chicken for scrambled eggs and add in some diced bell peppers and breakfast sausage for a fantastic morning twist.
- Wrap It Up: Use a large lettuce leaf instead of a tortilla for low-carb burrito-style wraps.
Chef’s Notes
This Chipotle Ranch Grilled Chicken Burrito has evolved over time—a fusion of flavors that I love to share with friends and family. I’ve tested this recipe countless times, tweaking little things here and there until it became the go-to dish for gatherings. One of my favorite kitchen memories involved a burrito-off with a friend, each trying to impress the other with creative fillings. Spoiler alert: we were both winners! Remember, cooking is all about experimentation—don’t be afraid to play around with flavors and make this recipe your own!
FAQs and Troubleshooting
1. My burrito fell apart while assembling. What did I do wrong?
- This likely means the tortilla was too full! Be conservative with how much filling you add, and ensure your tortilla isn’t too dry. You can warm it slightly to make it more pliable.
2. How can I ensure my chicken stays juicy?
- Always let your chicken rest after grilling! This allows the juices to redistribute, keeping it moist and tender on the inside.
3. Can I prepare this in advance?
- Absolutely! Assemble the burritos and wrap them in foil or plastic wrap. Store them in the refrigerator for 1-2 days. They can be reheated on the grill or in a skillet.
4. What’s a good side to serve with these burritos?
- I suggest a fresh corn salad or tortilla chips with guacamole. Both pair beautifully with the bold flavors of the burrito!
Nutritional Info
While I haven’t included specific nutritional information here, feel free to enter the ingredients into your favorite nutrition calculator for a tailored breakdown.
And there you have it—the Chipotle Ranch Grilled Chicken Burrito, a delicious dish that’s sure to become a staple in your home! Cooking should be fun, approachable, and delicious, and this recipe embodies that spirit perfectly. I can’t wait for you to try it out! Tie on your apron, grab your favorite drink, and let’s get cooking!
PrintChipotle Ranch Grilled Chicken Burrito

A flavorful burrito packed with grilled chicken, rice, black beans, and a zesty chipotle ranch dressing.
- Prep Time: 15 minutes
- Cook Time: 15 minutes
- Total Time: 30 minutes
- Yield: 4 servings 1x
- Category: Main Course
- Method: Grilling
- Cuisine: Mexican
- Diet: None
Ingredients
- 2 chicken breasts
- 1 tablespoon chipotle seasoning
- 1 cup cooked rice
- 1 cup black beans (drained and rinsed)
- 1 cup diced tomatoes
- 1 cup shredded lettuce
- 1/2 cup corn
- 1/2 cup diced onion
- 1/2 cup chipotle ranch dressing
- 4 large tortillas
- Salt and pepper to taste
Instructions
- Start by preheating your grill or a grill pan over medium-high heat.
- Sprinkle the chicken breasts with chipotle seasoning, ensuring they are well-coated on both sides.
- Season lightly with salt and pepper.
- Place the seasoned chicken on the grill and cook for about 6-7 minutes on one side.
- Flip the chicken and cook for another 5-7 minutes, or until the internal temperature reaches 165°F (75°C).
- Remove the chicken from the grill and let it rest for about 5 minutes.
- Combine the cooked rice, black beans, diced tomatoes, corn, diced onion, and shredded lettuce in a large bowl.
- Toss everything together and adjust seasoning as needed.
- Shred the grilled chicken into bite-sized pieces.
- Lay your tortilla flat, spoon a generous amount of filling onto the center, and add the shredded chicken and a drizzle of chipotle ranch dressing.
- Fold the sides of the tortilla in and then roll from the bottom up.
- If desired, return the burrito back to the grill for a minute on each side for a crispy exterior.
Notes
Serve with extra chipotle ranch dressing, fresh salsa, or a colorful salad.
Nutrition
- Serving Size: 1 burrito
- Calories: 450
- Sugar: 5g
- Sodium: 600mg
- Fat: 15g
- Saturated Fat: 3g
- Unsaturated Fat: 10g
- Trans Fat: 0g
- Carbohydrates: 54g
- Fiber: 8g
- Protein: 30g
- Cholesterol: 75mg
Keywords: burrito, chicken, grilled, chipotle, ranch, Mexican, easy dinner
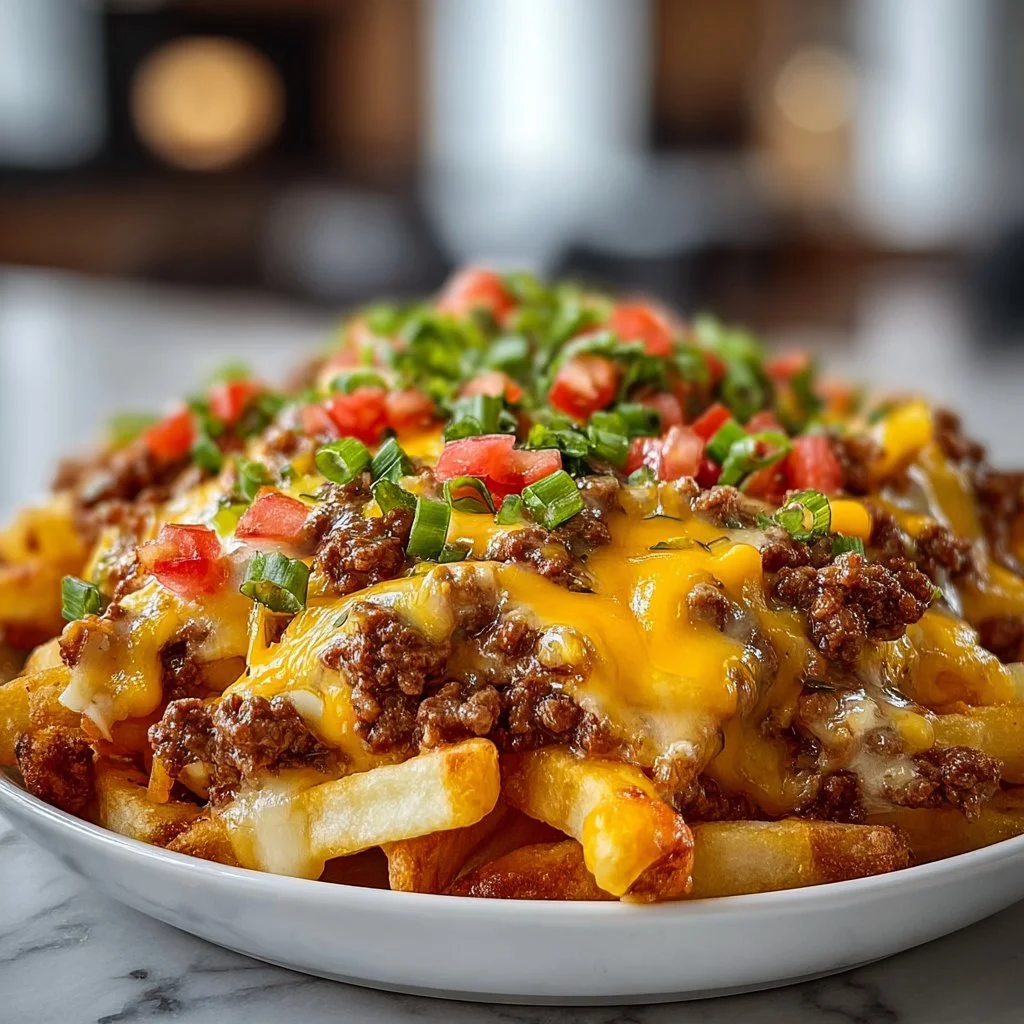
Cheeseburger French Fry Casserole
Cheeseburger French Fry Casserole: A Comfort Food Sensation
Welcome home, food lovers! Today, we’re diving into a dish that combines some of the best comfort foods out there: the Cheeseburger French Fry Casserole! If you’re looking for a hearty meal that’s easy to whip up and sure to please a crowd, you’ve hit the jackpot. Imagine biting into a savory blend of seasoned ground beef, crispy French fries, and ooey-gooey melted cheddar cheese—all baked into one glorious casserole! It’s like a hug in a dish and perfect for chilly evenings or weeknight meals that need to be on the table in a snap.
Now, I must share a little love story about this dish. The very first time I made this casserole, it was for my best friend’s birthday. After a long week filled with work pressures and adulting, we were craving a little nostalgia—and what could be better than classic cheeseburgers and fries? As I chopped the onions and sautéed the beef in my tiny kitchen, the scents transported me back to carefree summer barbecues from our childhood. That evening, as we huddled around the dinner table and dug into that cheesy casserole, let me tell you: laughter mingled with delight, and nostalgia swirled through every bite. Moments like these remind me why sharing a meal can be so meaningful.
So, let’s gather our ingredients and get to cooking this delicious casserole that will bring warmth to your table and a smile to your face!
Ingredients
Here’s what you’ll need for your Cheeseburger French Fry Casserole:
-
1 pound ground beef
A classic base for our casserole, the ground beef is seasoned to perfection. You can easily swap it for turkey or chicken if you prefer a leaner meat. If you’re craving a meatless option, try using lentils or a plant-based ground meat substitute! -
1 onion, chopped
The onion adds a sweet, aromatic flavor to our dish. If you’re sensitive to onions, feel free to swap in shallots, or omit them altogether. -
2 cups frozen French fries
Frozen French fries make this dish super easy! You can use crinkle-cut, straight-cut, or even sweet potato fries if you want a unique twist. Just keep in mind that cooking times may vary slightly! -
2 cups shredded cheddar cheese
Cheddar is a classic cheese choice, but feel free to mix it up! Pepper Jack adds a spicy kick, while mozzarella will give you that delightful stretch. -
1 can (10.5 oz) cream of mushroom soup
This ingredient adds creaminess and binds everything together. If you’re not a fan of mushrooms, you can use cream of chicken or even a homemade white sauce for a little twist. -
1/2 cup milk
A splash of milk will keep our casserole nice and creamy. Almond or oat milk can be great dairy-free alternatives. -
Salt and pepper to taste
These are essential for elevating the flavors in your dish. Don’t forget to adjust to your personal taste! -
Pickles and mustard (optional, for serving)
These are the finishing touches that bring out the classic cheeseburger vibe. I can’t resist a few dill pickle slices on mine!
Step-by-Step Instructions
Let’s get cooking this delicious casserole. Follow along, and remember: it’s all about having fun in the kitchen!
-
Preheat Your Oven
Preheat your oven to 350°F (175°C). A properly preheated oven ensures even cooking and that perfect cheese melt. -
Brown the Beef
In a large skillet over medium heat, add your ground beef and chopped onion. Cook until the beef is browned and the onions are translucent, about 5-7 minutes. Don’t forget to break the beef into small crumbles as it cooks—this helps distribute the flavor. If there’s excess grease (you usually don’t need it), drain it out before proceeding. -
Season It Up
Once your beef is browned, season the mixture generously with salt and pepper. Pro tip: Add a dash of garlic powder or paprika for an extra layer of flavor! -
Mix in the Soup and Milk
Lower the heat and stir in the can of cream of mushroom soup and the milk. Combine well until everything is nice and creamy. This mixture serves as the rich sauce that holds everything together. -
Layer It Up
In a greased 9×13 inch baking dish, spread half of the frozen French fries on the bottom. Pour the beef and soup mixture evenly over the fries, then sprinkle with a cup of cheddar cheese. Top it off with the remaining French fries and the rest of the cheese. Trust me, you want that cheesy goodness on top! -
Bake to Perfection
Place the casserole in the preheated oven and bake for about 30-35 minutes, or until the cheese is bubbly and golden brown, and the fries are starting to crisp up. Keep an eye on it to avoid over-browning! -
Cool and Serve
Once it’s baked, let the casserole cool for a few minutes. This time allows the flavors to meld together while you can decide whether to plate it (gorgeous presentation!) or serve family-style directly from the dish!
Serving Suggestions
To serve your Cheeseburger French Fry Casserole, consider garnishing it with a sprinkle of fresh parsley for a pop of color and freshness. If you’re feeling extra fancy, add a dollop of sour cream or some sliced green onions on top—these little extras take it to the next level! Of course, serve with your favorite pickle slices and a drizzle of mustard on the side for that authentic cheeseburger experience.
Recipe Variations
Don’t be afraid to get creative! Here are a few fun variations you can try:
-
BBQ Cheeseburger Version: Add a ¼ cup of your favorite BBQ sauce to the beef mixture for a delicious smoky flavor.
-
Ultimate Veggie Casserole: Swap the beef for sautéed bell peppers, zucchini, and mushrooms for a hearty vegetarian option.
-
Spicy Southwestern Twist: Mix in some diced jalapeños or green chilies to the beef for a kick, and try pepper jack cheese for that extra spice.
-
Loaded Nacho Casserole: Top the casserole with tortilla chips instead of fries and add some taco seasoning for a Tex-Mex vibe!
Chef’s Notes
This Cheeseburger French Fry Casserole has evolved in my kitchen over the years. Originally, I made it with leftover burger patties, which was delicious but often dry. So, I experimented with different ingredients until I found this delightful balance of creamy, cheesy, and crispy. Plus, it’s a fantastic way to make something that’s both nostalgic and comforting without breaking a sweat! I’ve served this up at gatherings, where it disappears faster than I can fill my plate.
Oh, and I must admit, I once had a minor mishap when I grabbed the wrong soup can and used cream of celery instead of mushroom. Surprisingly, it turned out delicious! So don’t be afraid to play with flavors—kitchen experiments can lead to delightful surprises!
FAQs and Troubleshooting
Q: My casserole turned out too dry. What happened?
A: This may have occurred if the meat mixture was overcooked or if you didn’t use enough moisture (like soup and milk). Always make sure your mixture is creamy before assembling!
Q: Can I freeze the leftovers?
A: Absolutely! This casserole freezes beautifully. Just let it cool, portion it into containers, and store in the freezer. When you’re ready to eat, defrost in the refrigerator overnight and reheat in the oven.
Q: What if I don’t have cream of mushroom soup?
A: No problem! You can use cream of chicken soup, or make a quick white sauce using butter, flour, and milk.
Q: How do I avoid soggy fries?
A: To ensure crispy fries, you can pre-bake the fries according to package instructions before layering them in the casserole. This way, they won’t absorb too much liquid!
Nutritional Info (Optional)
While I won’t get too hung up on specifics (because we all know comfort food is about enjoyment!), a typical serving of this Cheeseburger French Fry Casserole will have approximately 400-500 calories, depending on portion size and ingredient variations. It’s a filling dish with protein from the beef, and you’ll definitely feel like you’ve treated yourself with every cheesy bite!
There you have it! The ultimate Cheeseburger French Fry Casserole that brings joy, warmth, and laughter to every meal. So tie on your apron, roll up your sleeves, and let’s create some beautiful memories in your kitchen. Bon appétit!
PrintCheeseburger French Fry Casserole

A hearty casserole combining seasoned ground beef, crispy French fries, and melted cheddar cheese, perfect for weeknight meals.
- Prep Time: 15 minutes
- Cook Time: 35 minutes
- Total Time: 50 minutes
- Yield: 6 servings 1x
- Category: Main Course
- Method: Baking
- Cuisine: American
- Diet: Omnivore
Ingredients
- 1 pound ground beef
- 1 onion, chopped
- 2 cups frozen French fries
- 2 cups shredded cheddar cheese
- 1 can (10.5 oz) cream of mushroom soup
- 1/2 cup milk
- Salt and pepper to taste
- Pickles and mustard (optional, for serving)
Instructions
- Preheat your oven to 350°F (175°C).
- Brown the beef in a large skillet over medium heat, adding the chopped onion until browned and translucent (about 5-7 minutes).
- Season the mixture with salt and pepper to taste.
- Mix in the cream of mushroom soup and milk until combined.
- Layer half of the French fries in a greased baking dish, add the beef mixture, and top with a cup of cheddar cheese.
- Add the remaining French fries and the rest of the cheese on top.
- Bake for 30-35 minutes, until the cheese is bubbly and golden brown.
- Cool for a few minutes before serving.
Notes
Garnish with fresh parsley, sour cream, or green onions for an added touch. This casserole freezes well for leftovers.
Nutrition
- Serving Size: 1 serving
- Calories: 450
- Sugar: 2g
- Sodium: 600mg
- Fat: 24g
- Saturated Fat: 10g
- Unsaturated Fat: 10g
- Trans Fat: 1g
- Carbohydrates: 36g
- Fiber: 3g
- Protein: 22g
- Cholesterol: 70mg
Keywords: casserole, comfort food, cheeseburger, French fries, easy dinner
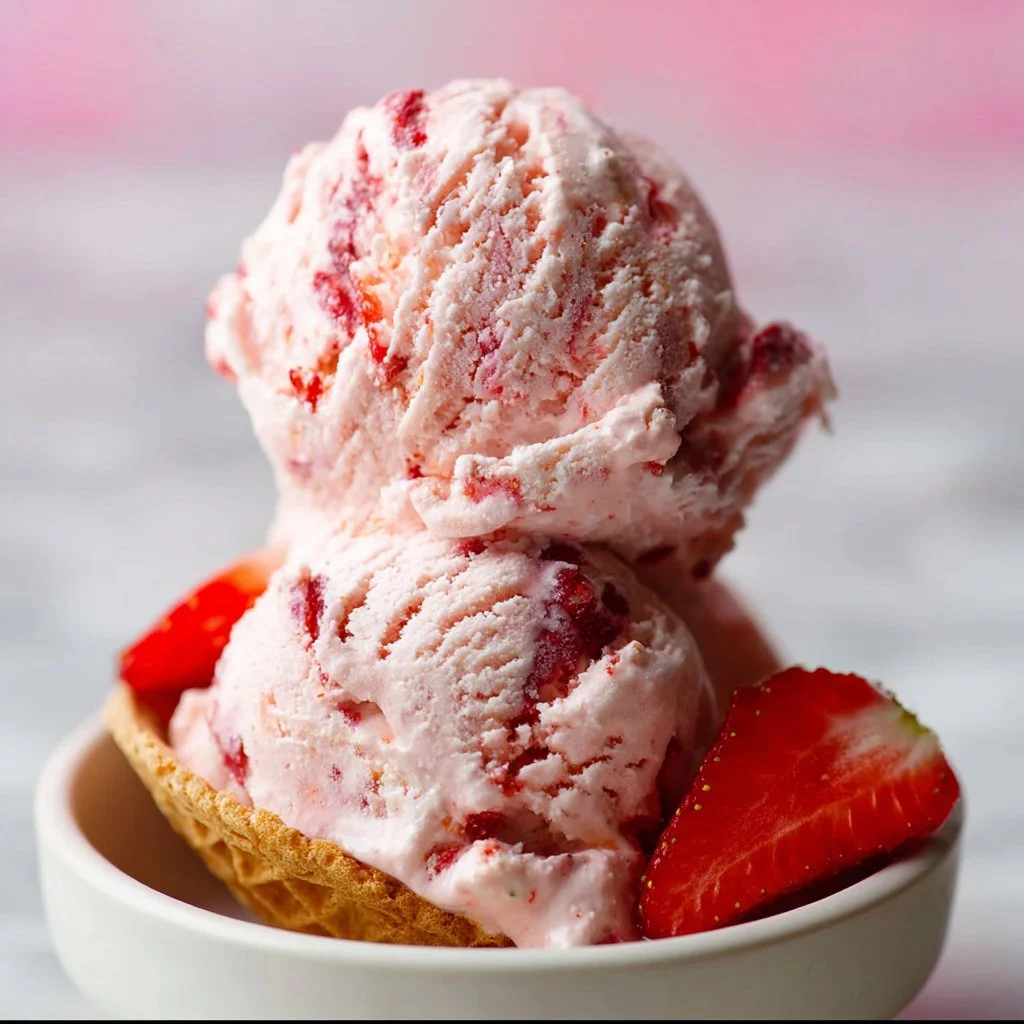
Fresh Strawberry Ice Cream – Vegan Recipe
Fresh Strawberry Ice Cream – Vegan Delight
Introduction
Hello, fellow food lovers! I’m so excited you’re joining me today as we dive into the delightful world of homemade ice cream. There’s something about ice cream that brings instant joy, isn’t there? The way it melts in your mouth, the burst of flavor—oh, it’s pure magic! Today, we’re making Fresh Strawberry Ice Cream, a vegan treat that’s not just delicious but also perfectly creamy. Plus, this recipe happens to be super simple and requires only a handful of fresh ingredients.
Growing up, summer days meant endless hours spent at the local strawberry farm. Picking ripe berries, getting a bit messy, and laughing with friends and family are some of my happiest memories. We’d come home with baskets brimming with strawberries, ready to create something delicious. One of my absolute favorite things to do was to whip up a batch of strawberry ice cream. But it wasn’t just any ice cream—it was a luscious, creamy concoction that felt indulgent yet was somehow still wholesome.
Fast forward to today, and I’m thrilled to share my vegan version with you. Trust me, whether you’re a full-time vegan or just dipping your toes into plant-based recipes, you’re going to love this! It’s creamy, refreshing, and the perfect way to cool off on a warm day. So grab your strawberries and let’s make some magic happen in the kitchen together!
Personal Story
I remember one summer afternoon, my friends and I decided to host an impromptu ice cream party. We had buckets of strawberries from our local farm and a brand-new ice cream maker that was just begging to be used. As we crushed the strawberries together, laughter filled the kitchen, and we each added our favorite ingredients to the mix. My go-to was always coconut milk for that rich, creamy texture. As we watched the ice cream churn and transform before our eyes, we squealed with delight! That day was all about connection—good friends and good food, topped off with a homemade strawberry ice cream that tasted like summer in a bowl.
Ever since then, I’ve been inspired to recreate that joy in the kitchen, and this vegan strawberry ice cream recipe brings me right back to those carefree days. I hope it does the same for you!
Ingredients
Let’s gather our ingredients! Here’s what you’ll need for your delicious vegan Fresh Strawberry Ice Cream:
-
2 cups fresh strawberries, hulled and sliced
Sweet, vibrant, and bursting with flavor! Fresh strawberries will yield the best results, but if you’re out of season, frozen strawberries can work in a pinch. Just let them thaw before you start. -
1 can (14 ounces) coconut milk, full fat
This is the secret to creamy, dreamy ice cream! Full-fat coconut milk gives the right texture and adds a subtle coconut flavor. If you’re not a fan of coconut, you can replace it with cashew milk or another creamy dairy-free milk, but adjust the consistency with a thickener like cashew butter. -
1/2 cup maple syrup or agave nectar
A natural sweetener that adds a delightful caramel-like flavor. If you’re looking for a different twist, consider subbing honey or brown sugar, although honey isn’t vegan. -
1 tablespoon lemon juice
Brightens the flavor of the strawberries, balancing the sweetness. Fresh lemon juice is best, but bottled will work too. -
1 teaspoon vanilla extract
Adds a wonderful depth of flavor. If you have vanilla bean paste or extract, go for it! -
Pinch of salt
Just a touch to enhance all the flavors. You won’t even taste it, but it makes a world of difference!
Step-by-Step Instructions
Now that we have our ingredients ready, let’s jump into the how-to! Following these simple steps will yield an ice cream that’s so good, you’ll want to make it again and again.
-
Prepare the Strawberries: Start by hulling and slicing your fresh strawberries. Toss them into a mixing bowl, and if you’d like, sprinkle a tablespoon of maple syrup over them. Let them sit for about 10-15 minutes. This allows the strawberries to macerate and release their juices, intensifying their sweetness. Simple, right?
-
Blend the Mixture: Once your strawberries are prepped, grab a blender or food processor. Add the macerated strawberries, along with the coconut milk, maple syrup (or agave), lemon juice, vanilla extract, and salt. Blend on high until everything is smooth and creamy. If you’re feeling adventurous, reserve a few strawberry slices to fold in later for extra texture.
-
Taste Test: Here’s the chef’s secret: always taste your mixture before it’s frozen! Adjust the sweetness or acidity to your liking by adding more maple syrup or lemon juice if needed. Remember, the mixture will taste less sweet once it’s frozen, so have fun with it!
-
Chill the Base: Pour the blended mixture into a bowl and cover it with plastic wrap. Let it chill in the refrigerator for about an hour. This step is crucial because it helps the ice cream develop a smooth texture later on.
-
Churn It Up: Once your base is chilled, it’s time to churn! Pour the mixture into your ice cream maker and churn according to the manufacturer’s instructions (usually about 20-25 minutes). If you don’t have an ice cream maker, no worries! Simply pour the mixture into a shallow container and freeze it. Every 30 minutes, stir vigorously with a fork to break up ice crystals until it reaches your desired consistency.
-
Transfer and Freeze: Once the mixture has thickened to a soft-serve consistency, transfer it to an airtight container. Smooth the top with a spatula, and cover it with plastic wrap before sealing the lid. Place it in the freezer for at least 4 hours, or until it’s firm.
-
Scoop and Enjoy: After the ice cream has set, it’s time for the best part—scooping it out! If it’s too hard to scoop, let it sit at room temperature for about 10 minutes to soften slightly. Then, dive right in!
Serving Suggestions
Serve your Fresh Strawberry Ice Cream in elegant bowls or whimsical waffle cones. For an extra touch, consider garnishing with fresh mint leaves or a drizzle of chocolate sauce for a sophisticated flair. You could even layer it with homemade granola for added crunch and texture—yum!
Recipe Variations
-
Berry Medley: Swap out some or all of the strawberries for mixed berries like blueberries, raspberries, or blackberries for a berry blast!
-
Coconut Crunch: Fold in some toasted coconut flakes at the end of churning for an added layer of decadent flavor and texture.
-
Chocolate Swirl: Drizzle some melted dark chocolate into the mixture before freezing for a strawberry chocolate swirl that’s pure indulgence.
-
Minty Fresh: Add a teaspoon of fresh mint extract for a refreshing twist, or toss in a handful of finely chopped fresh mint leaves into the mixture.
-
Creamy Banana: Substitute half of the strawberries with ripe bananas for a creamier, banana-strawberry version!
Chef’s Notes
This recipe has evolved beautifully over the years. Initially, I experimented with loads of additives, but I found that simple, high-quality ingredients truly shine. One time, I accidentally forgot the lemon juice, and while the ice cream was still good, it lacked that zesty brightness that ties everything together. I’ve learned that each element contributes to the final dish, so don’t skip the lemon juice, even if it seems small!
An unexpected kitchen mishap: once I got a bit too ambitious and decided to churn the mixture while chatting with a friend. Let’s just say the blend managed to splatter all over my kitchen—big lesson in multitasking!
FAQs and Troubleshooting
-
Why is my ice cream too hard or icy?
If your ice cream is hard, it may have frozen too long. To achieve a creamy texture, stir or churn every 30 minutes if you’re not using an ice cream maker. Also, adding a bit of vodka (a tablespoon) can help reduce iciness while retaining the flavors. -
Can I use other milk alternatives?
Absolutely! Feel free to use any dairy-free milk you love, just ensure it has a creamy consistency. Almond milk and soy milk can work, but coconut milk yields the best texture. -
How do I store leftovers?
Keep the ice cream in an airtight container in the freezer. It’s best consumed within a week or two, as homemade ice cream often doesn’t have preservatives, which help store-bought last longer. -
What can I do if I can’t find fresh strawberries?
Frozen strawberries can save the day! Just let them thaw and drain excess liquid before using, so you don’t wind up with a watery mixture.
Nutritional Info
While I usually skip the nutritional info, it’s good to know that per serving (based on approximately 8 servings), you’re looking at about:
- Calories: 160
- Total Fat: 7g
- Carbohydrates: 24g
- Sugars: 18g
- Protein: 1g
This delicious vegan treat is dairy-free, gluten-free, and made with wholesome ingredients that allow you to enjoy dessert without guilt!
Conclusion
And there you have it—your very own Fresh Strawberry Ice Cream recipe straight from my heart to your kitchen! I hope this sweet treat brings as much joy and nostalgia to your table as it does to mine. Remember, creating beautiful food doesn’t have to be complex or stressful; it’s all about enjoying the process and sharing those moments with the people you love. So get in there, tie your apron, and let’s make some ice cream magic happen! Cheers to beautiful flavors and sweet memories!
PrintFresh Strawberry Ice Cream – Vegan Delight

A delightful and creamy vegan strawberry ice cream made with fresh ingredients, perfect for summer days.
- Prep Time: 15 minutes
- Cook Time: 30 minutes
- Total Time: 45 minutes
- Yield: 8 servings 1x
- Category: Dessert
- Method: Churning
- Cuisine: Vegan
- Diet: Vegan
Ingredients
- 2 cups fresh strawberries, hulled and sliced
- 1 can (14 ounces) coconut milk, full fat
- 1/2 cup maple syrup or agave nectar
- 1 tablespoon lemon juice
- 1 teaspoon vanilla extract
- Pinch of salt
Instructions
- Prepare the strawberries: Hull and slice your fresh strawberries. Toss them into a mixing bowl, and if you’d like, sprinkle a tablespoon of maple syrup over them. Let sit for 10-15 minutes.
- Blend the mixture: Add the macerated strawberries, along with the coconut milk, maple syrup, lemon juice, vanilla extract, and salt into a blender. Blend on high until smooth and creamy.
- Taste test: Always taste your mixture before it’s frozen and adjust sweetness or acidity as needed.
- Chill the base: Pour the blended mixture into a bowl, cover with plastic wrap, and chill in the refrigerator for about 60 minutes.
- Churn it up: Pour the mixture into your ice cream maker and churn according to instructions (usually 20-25 minutes). If using a shallow container, freeze and stir every 30 minutes.
- Transfer and freeze: Transfer to an airtight container and freeze for at least 240 minutes, or until firm.
- Scoop and enjoy: Let the ice cream sit at room temperature for about 10 minutes before scooping, then serve as desired.
Notes
For added flavors, consider variations like berry medley, coconut crunch, or a chocolate swirl.
Nutrition
- Serving Size: 1 serving
- Calories: 160
- Sugar: 18g
- Sodium: 10mg
- Fat: 7g
- Saturated Fat: 5g
- Unsaturated Fat: 2g
- Trans Fat: 0g
- Carbohydrates: 24g
- Fiber: 1g
- Protein: 1g
- Cholesterol: 0mg
Keywords: strawberry ice cream, vegan ice cream, homemade dessert

Crispy Cheesy Roll Ups
Crispy Cheesy Roll Ups: A Nostalgic Treat That’s Sure to Delight!
Hello, my fellow food enthusiasts! Today, I’m thrilled to share with you a delightful dish that’s not only super easy to make but is also packed with nostalgia—Crispy Cheesy Roll Ups. This tempting treat is perfect for a cozy night in, a casual gathering, or even a gourmet spin on your weekday meals. Ready to take a trip down memory lane? Let’s dive right in!
Introduction
When I think of comfort food, my mind instantly drifts to those cherished childhood moments spent in the kitchen with my family, joyfully creating simple yet delicious snacks that made us all smile. One dish that stands out is the crispy cheesy roll up—a delightful fusion of crispy exteriors and gooey cheese that brings back so many warm memories. The beauty of these roll-ups lies in their versatility; they can be tailored to suit any palate and are equally great as an appetizer, snack, or even a light meal.
Imagine the sound of sizzling bread as it hits the hot pan, the aroma of melting cheese wafting through the air, and the satisfaction of dipping a perfectly crisp roll into a rich tomato soup or tangy marinara sauce. Does it get any better? Not to mention, these roll-ups require minimal prep but deliver maximum flavor! So grab your apron—let’s create something scrumptious!
Personal Story
I remember the very first time I made Crispy Cheesy Roll Ups. I was about ten years old, and my best friend invited me over for a sleepover. We decided to venture into the kitchen, fueled by late-night giggles and an insatiable craving for snacks. We scoured the pantry, realizing we had bread and an abundance of cheese. I recall my excitement as we rolled each slice and carefully watched them fry to golden perfection.
As we eagerly dipped our creations into warm tomato soup, I felt a surge of accomplishment; we had made our very own special dish! That night wasn’t just about satisfying our hunger—it was about creativity, camaraderie, and the sheer joy of being together. To this day, every bite of these roll-ups brings back a flood of sweet memories, and I can’t wait for you to share in this delicious experience.
Ingredients
-
Slices of Bread:
- Choose your favorite type—white, whole grain, or sourdough all work wonders! For a gluten-free option, simply swap in gluten-free bread.
-
Cheese (Cheddar, Mozzarella, or Your Favorite):
- Opt for a melty cheese like cheddar or mozzarella that provides that gooey goodness. Feel free to experiment with pepper jack or gouda for an extra kick!
-
Butter (for frying):
- Butter not only adds flavor but helps achieve that crispy golden crust. If you’re feeling adventurous, try using olive oil for a lighter twist.
-
Tomato Soup or Marinara Sauce (for dipping):
- These classic dips elevate the dish! You can easily swap in a creamy ranch dressing or a zesty aioli for added flair.
Step-by-Step Instructions
-
Prepare Your Ingredients:
- Gather your bread, cheese, and any dipping sauces you plan to use. Prepping everything beforehand ensures a smooth cooking experience.
-
Flatten the Bread:
- Using a rolling pin, gently flatten each slice of bread. This helps with rolling and achieving that crispy texture! If you don’t have a rolling pin, a glass or bottle works just fine.
-
Add the Cheese:
- Place a slice of your chosen cheese on the flattened bread. Be generous—this is where the magic happens! Remember, the more cheese, the gooier the roll-up.
-
Roll It Up:
- Starting at one end, carefully roll the bread tightly around the cheese. Use a bit of pressure to keep it together. For added security, you can gently pinch the ends to seal in the cheesy goodness.
-
Heat the Pan:
- In a skillet, add a generous amount of butter. Heat over medium until melted and bubbling. The sizzle is part of the fun!
-
Fry the Roll-Ups:
- Place the roll-ups seam side down in the hot butter. Fry for about 2-3 minutes on each side or until golden brown and crispy. Keep an eye on them—nobody likes burnt cheese!
-
Drain Excess Butter:
- Once they’re golden, transfer your roll-ups to a paper towel-lined plate to soak up any extra butter. This keeps them crispy and not soggy!
-
Serve with Your Dipping Sauce:
- Arrange the crispy roll-ups on a beautiful platter, surrounded by your chosen dipping sauce. This adds a touch of elegance to your comfort food!
Serving Suggestions
Plating is an art, and these roll-ups deserve a little love! Serve them on a rustic wooden board or a bright ceramic platter. Drizzle a bit of olive oil on the side and garnish with fresh herbs (like basil or parsley). Don’t forget warm dips are essential! Create a mini dipping station with bowls of tomato soup or marinara sauce to enhance the aesthetic and the experience. Your guests are going to love it!
Recipe Variations
-
Herbed Roll-Ups:
- Add fresh herbs like basil or parsley between the cheese and the bread for an aromatic twist.
-
Spicy Kick:
- Incorporate sliced jalapeños or sriracha-infused cheese for those who like a bit of spice.
-
Sweet Tooth:
- Swap the cheese for Nutella or peanut butter and serve with a sweet dip—think honey or chocolate sauce.
-
Veggie Boost:
- Toss in some thinly sliced spinach or tomatoes for an extra layer of flavor and nutrition.
-
Cheesy Combination:
- Experiment with mixed cheeses, like cheddar and gouda, for a deeper flavor profile.
Chef’s Notes
As a self-proclaimed cheese enthusiast, I can’t help but chuckle at the many mishaps in my kitchen over the years. I once accidentally used too much cheese in a batch and felt devastated as I watched it ooze everywhere! But you know what? Some of the best culinary moments come from those happy accidents. Now, every cheesy overflow reminds me of those playful experiments and the joy of creation. Each time I roll up some bread with cheese, I’m reminded that the kitchen is a space for memories, laughs, and admittedly, delicious messes!
FAQs and Troubleshooting
1. My roll-ups are bursting open while frying. What did I do wrong?
- This can happen if the bread isn’t rolled tightly enough or if you overloaded on cheese. Make sure to pinch the seams well and stick to a reasonable cheese amount.
2. How do I make these roll-ups extra crispy?
- Make sure your butter is hot enough before adding the roll-ups. Frying at medium-high heat will create that delightful crispy texture.
3. Can I prepare these in advance?
- Yes! You can roll them up and refrigerate them before frying. Just pop them in the pan right before serving for a hot, crispy snack!
4. What if I don’t have any dipping sauce?
- Don’t fret! Even on their own, these roll-ups are delicious. You can also drizzle them with honey or a balsamic reduction for a sweet twist!
Nutritional Info (optional)
While I believe in indulging in delicious treats like these roll-ups in moderation, I understand that knowledge is power! Here’s a rough estimate per roll-up if you use standard bread and cheddar cheese:
- Calories: ~150
- Fat: ~9g
- Carbohydrates: ~15g
- Protein: ~5g
Enjoy these crispy cheesy roll-ups as a delightful treat that will surely warm your heart and bring every mouthful you take back to those cherished moments in the kitchen. I’m so glad you’re here to share this culinary journey with me at Ivory Apron! So, tie on your apron and let’s create something timeless together! Happy cooking!
PrintCrispy Cheesy Roll Ups

A delightful fusion of crispy exteriors and gooey cheese, perfect as an appetizer, snack, or light meal.
- Prep Time: 10 minutes
- Cook Time: 10 minutes
- Total Time: 20 minutes
- Yield: 4 servings
- Category: Snack
- Method: Frying
- Cuisine: American
- Diet: Vegetarian
Ingredients
- Slices of Bread (white, whole grain, or sourdough)
- Cheese (Cheddar, Mozzarella, or your favorite)
- Butter (for frying)
- Tomato Soup or Marinara Sauce (for dipping)
Instructions
- Prepare your ingredients: Gather your bread, cheese, and any dipping sauces.
- Flatten the bread: Use a rolling pin to flatten each slice of bread.
- Add the cheese: Place a slice of cheese on the flattened bread.
- Roll it up: Roll the bread tightly around the cheese.
- Heat the pan: Add butter to a skillet and heat until melted.
- Fry the roll-ups: Fry seam side down for about 2-3 minutes on each side.
- Drain excess butter: Transfer to a paper towel-lined plate.
- Serve with your dipping sauce: Arrange on a platter with chosen sauce.
Notes
For an extra crispy texture, ensure the butter is hot before adding the roll-ups. You can refrigerate them before frying for a quick snack.
Nutrition
- Serving Size: 1 serving
- Calories: 150
- Sugar: 2g
- Sodium: 300mg
- Fat: 9g
- Saturated Fat: 5g
- Unsaturated Fat: 4g
- Trans Fat: 0g
- Carbohydrates: 15g
- Fiber: 1g
- Protein: 5g
- Cholesterol: 20mg
Keywords: Crispy Cheesy Roll Ups, comfort food, snacks, easy recipes

Classic Chicken Pot Pie Pasta
Comforting Classic Chicken Pot Pie Pasta: A Cozy Bowl of Happiness
Hello, fellow food lover! Today, I’m thrilled to share a delightful dish that combines the charm of a classic chicken pot pie with the ease of pasta. Imagine creamy, savory goodness coated around tender penne or rotini, all the flavors of your favorite pot pie transformed into a cozy bowl of pasta perfection—this is the magic of Classic Chicken Pot Pie Pasta! Perfect for weeknight dinners or impressing guests on a peaceful Sunday, this meal brings warmth and joy to the table.
Now, before we dive into the recipe, let me tell you a little story about my love for this dish.
Personal Story
Growing up, dinner time was sacred in our household. It was the one time of day when we all gathered, shared stories, and enjoyed the heartwarming aromas wafting from the kitchen. My mother would often make her beloved chicken pot pie, the ultimate comfort food—flaky golden crust, buttery chicken, and an array of colorful veggies peeking through. I always loved the anticipation as we would together peel back that crust to reveal the creamy filling beneath.
Fast forward to my own culinary adventures, and I wanted to recreate that nostalgia, but with a twist! One night, with a craving for both pasta and that warm feeling of home, I decided to marry the two. Thus, the Classic Chicken Pot Pie Pasta was born! It quickly became a favorite in my home, a recipe passed down through my heart instead of just my hands. I know you’ll find it as comforting as I do!
Ingredients
Here’s what you’ll need to whip up this amazing dish:
-
8 oz pasta (penne or rotini): The vehicle for all that creamy goodness! Both penne and rotini are great choices because their shapes hold onto the sauce beautifully. Feel free to swap with whole wheat or gluten-free pasta for a healthier option.
-
1 tablespoon olive oil: A smooth and flavorful base to sauté your onions and garlic. You can substitute with butter for that extra richness.
-
1 small onion, diced: Adds a sweet and savory depth to your dish. If you’re not a fan of onions, shallots or leeks can work well.
-
2 cloves garlic, minced: Ah, the magic of garlic! It infuses your dish with aromatic sweetness. If you’re in a pinch, garlic powder can be a quick substitute.
-
2 cups cooked chicken, shredded: A perfect way to use leftover rotisserie chicken or cooked chicken breasts. If you’re looking for a vegan option, roasted chickpeas or sautéed mushrooms are excellent!
-
1 cup frozen mixed vegetables (peas, carrots, corn): These add vibrant color and nutrition. You can use fresh vegetables, but be sure to chop them into bite-sized pieces.
-
2 cups chicken broth: This is the soul of the dish! You can use low-sodium broth or even veggie broth for a lighter twist.
-
1 cup heavy cream: Creaminess at its finest! You can substitute with half-and-half or a vegan cream alternative if you prefer.
-
1 teaspoon dried thyme: A classic herb used in pot pie; its essence is comforting. If you have fresh thyme, use 1-2 teaspoons instead for more robust flavor.
-
Salt and pepper to taste: Essential for seasoning! Remember to season as you go along for the best flavor.
-
1/2 cup grated Parmesan cheese: It adds a final touch of cheesy goodness. Nutritional yeast can be a great dairy-free alternative.
-
Fresh parsley for garnish: A sprinkle of green makes all the difference!
Step-by-Step Instructions
Now let’s get cooking! Follow these steps to create your Classic Chicken Pot Pie Pasta:
-
Cook the pasta: Start by bringing a large pot of salted water to a boil. Toss in 8 oz of your chosen pasta and cook according to package instructions until al dente. Remember to save a cup of pasta water before draining, just in case you need to loosen the sauce later!
Chef’s tip: Adding salt to the water enhances the pasta’s flavor, just like seasoning a dish!
-
Sauté the aromatics: While your pasta is cooking, heat 1 tablespoon of olive oil in a large skillet over medium heat. Once hot, add the diced onion and sauté for about 3-4 minutes until translucent. Next, stir in the minced garlic and cook for an additional minute until fragrant.
Little hack: Only add the garlic after the onion is starting to become translucent so it doesn’t burn!
-
Add the chicken and vegetables: Throw in your 2 cups of shredded chicken and 1 cup of frozen mixed vegetables into the skillet. Stir occasionally until everything is warmed through, roughly 3-5 minutes.
-
Pour in the liquids: Next, add 2 cups of chicken broth and bring the mixture to a gentle simmer. Let it bubble away for about 5 minutes.
-
Cream it up: Lower the heat and pour in your 1 cup of heavy cream, stirring to combine. Add in the dried thyme, and season with salt and pepper to taste. Let this cook for another 3-4 minutes until thickened slightly.
Chef Insight: If it looks a little too thick, that reserved pasta water will help achieve your desired consistency!
-
Combine with pasta: Once your sauce is ready, fold in the drained pasta and mix well to coat the noodles with that luxurious sauce.
-
Finish with cheese: Sprinkle in the 1/2 cup of grated Parmesan cheese and stir until it melts into the pasta, creating an even creamier texture!
-
Garnish and serve: Finally, remove the skillet from heat, plate your pasta, and garnish with fresh parsley.
Final tip: A squeeze of lemon over the top can brighten the flavors even more!
Serving Suggestions
Plating is a chance to show off your culinary creation! Serve your Classic Chicken Pot Pie Pasta in shallow bowls or wide pasta plates. A generous helping paired with a side of crusty bread for dipping is a surefire way to elevate the meal. Drizzle a bit of olive oil on top and sprinkle with extra Parmesan and parsley for that restaurant-worthy finish.
Recipe Variations
Here are some creative twists you can try to personalize your Chicken Pot Pie Pasta:
-
Add spices: For a kick, stir in some cayenne pepper or crushed red pepper flakes for a hint of heat!
-
Cheesy goodness: Swap in mozzarella or add a layer of cheesy baked crust on top for that pot pie crust experience.
-
Vegetable-loaded: Replace or supplement the frozen vegetables with fresh veggies like diced bell peppers, broccoli, or zucchini for added texture and nutrition.
-
Make it lighter: Use half-and-half instead of heavy cream, or swap the chicken for sautéed spinach and other seasonal spring greens for a light vegetarian version.
-
Mix up your pasta: Try with different shapes—farfalle, rotini, or even gluten-free pasta to make it your own!
Chef’s Notes
This Classic Chicken Pot Pie Pasta has truly evolved over time. I recall when I was first experimenting with it in my tiny apartment kitchen, the sauce was once too thick, and I ended up with more of a chicken casserole than a pasta dish! But through trial and error (and a bit too much pasta water at one point), I finally hit the sweet spot.
The best part is that everyone in my home loves it! They never quite know what to expect based on my ingredients since I love to switch it up, making it an exciting family favorite!
FAQs and Troubleshooting
1. My sauce is too thick; what do I do?
Don’t fret! Just add a splash of the reserved pasta water or more chicken broth until you reach your desired sauce consistency.
2. Can I use canned chicken?
Absolutely! It’s a great shortcut in a pinch. Just drain it well and add it during the step with the chicken and vegetables.
3. What if my pasta is overcooked?
If you’re ever stuck with overcooked pasta, try to use less broth or cream in your sauce to help salvage a bit of the texture.
4. Can I freeze this dish?
Yes! This pasta dish can be stored in an airtight container for up to 3 months. Just reheat it gently on the stove, adding a splash of water or broth to loosen it up.
Nutritional Info
While I typically encourage enjoying food in moderation and savoring every bite, if you’re curious, this dish is a fulfilling source of protein, fiber, and good fats! Homemade comfort food always feels better on the nutrition scale compared to takeout, wouldn’t you agree?
And there you have it! Your journey to classic comfort through my Classic Chicken Pot Pie Pasta has just begun. If you give this recipe a try, I can’t wait to hear how it turned out for you. Remember, good food isn’t about showing off; it’s about showing up! So, grab your apron, invite your loved ones, and let’s create unforgettable memories around your table! Happy cooking!
PrintClassic Chicken Pot Pie Pasta

A cozy bowl of happiness combining the charm of classic chicken pot pie with the ease of pasta.
- Prep Time: 15 minutes
- Cook Time: 30 minutes
- Total Time: 45 minutes
- Yield: 4 servings 1x
- Category: Main Course
- Method: Stovetop
- Cuisine: American
- Diet: Non-Vegetarian
Ingredients
- 8 oz pasta (penne or rotini)
- 1 tablespoon olive oil
- 1 small onion, diced
- 2 cloves garlic, minced
- 2 cups cooked chicken, shredded
- 1 cup frozen mixed vegetables (peas, carrots, corn)
- 2 cups chicken broth
- 1 cup heavy cream
- 1 teaspoon dried thyme
- Salt and pepper to taste
- 1/2 cup grated Parmesan cheese
- Fresh parsley for garnish
Instructions
- Cook the pasta: Start by bringing a large pot of salted water to a boil. Toss in 8 oz of your chosen pasta and cook according to package instructions until al dente, saving a cup of pasta water before draining.
- Sauté the aromatics: Heat 1 tablespoon of olive oil in a large skillet over medium heat. Add the diced onion and sauté for about 3-4 minutes until translucent, then stir in the minced garlic and cook for an additional minute.
- Add the chicken and vegetables: Throw in your 2 cups of shredded chicken and 1 cup of frozen mixed vegetables into the skillet, stirring occasionally until warmed through, about 3-5 minutes.
- Pour in the liquids: Add 2 cups of chicken broth and bring the mixture to a gentle simmer, letting it bubble for about 5 minutes.
- Cream it up: Lower the heat and pour in 1 cup of heavy cream, adding the dried thyme and seasoning with salt and pepper, cooking for another 3-4 minutes until slightly thickened.
- Combine with pasta: Fold in the drained pasta and mix well to coat with the sauce.
- Finish with cheese: Sprinkle in 1/2 cup of grated Parmesan cheese and stir until melted, creating a creamy texture.
- Garnish and serve: Plate the pasta, garnish with fresh parsley, and enjoy!
Notes
Add a squeeze of lemon to brighten the flavors. This dish can be stored in an airtight container for up to 3 months.
Nutrition
- Serving Size: 1 serving
- Calories: 500
- Sugar: 5g
- Sodium: 600mg
- Fat: 24g
- Saturated Fat: 12g
- Unsaturated Fat: 8g
- Trans Fat: 0g
- Carbohydrates: 45g
- Fiber: 3g
- Protein: 30g
- Cholesterol: 70mg
Keywords: chicken pasta, comfort food, easy dinner
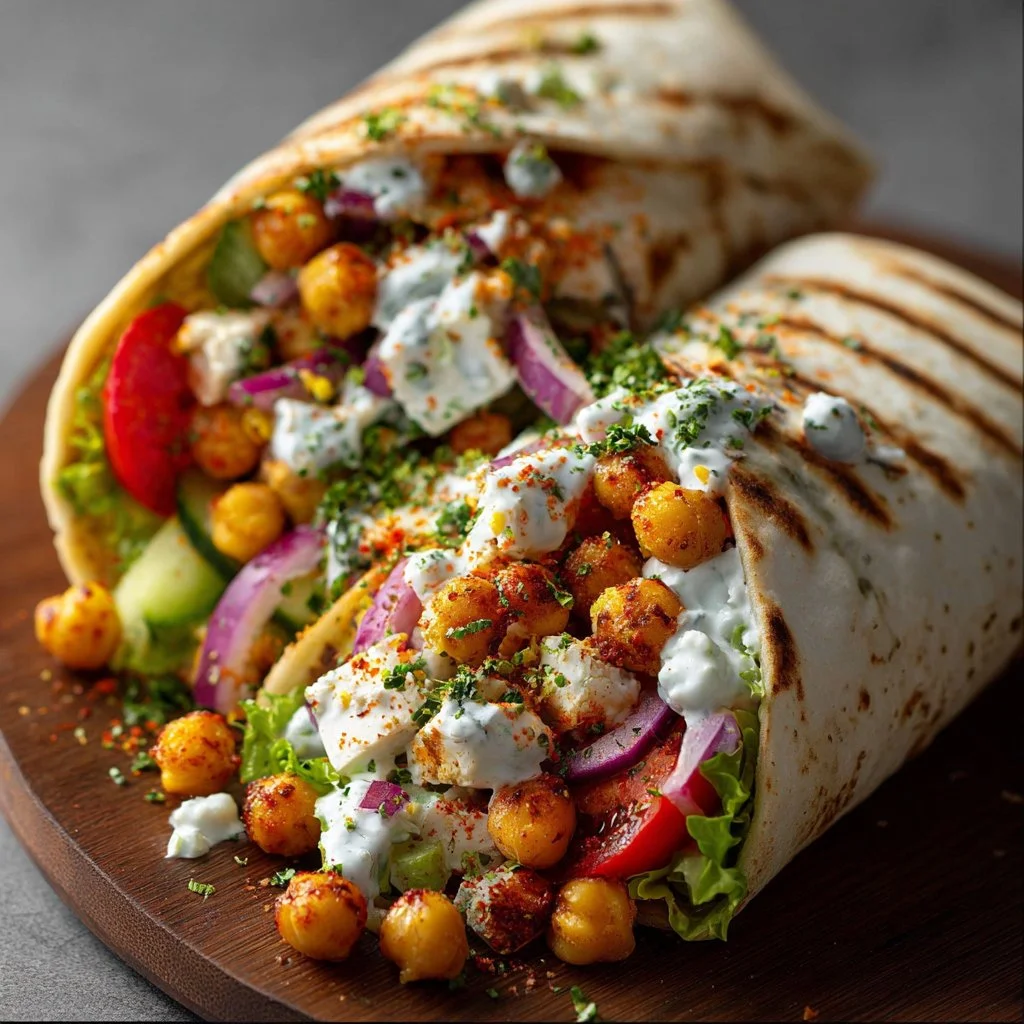
Chickpea & Feta Wrap with Veggies & Yogurt Sauce
Chickpea & Feta Wrap with Veggies & Yogurt Sauce – 5 Quick Flavorful Ways!
Hello, fellow food lovers! Welcome back to my kitchen. I’m so excited to share one of my all-time favorite recipes: the Chickpea & Feta Wrap with Veggies & Yogurt Sauce. This dish is not only vibrant and packed with flavor, but it’s also quick to put together, making it perfect for any day of the week. Trust me when I say, it’s a wrap you’ll want to make again and again!
A Taste of Nostalgia
Let me take you back for a moment. Picture this: it’s a bright summer afternoon, and I’m at my best friend’s house. We had just come back from a morning at the farmer’s market, our bags heavy with the freshest vegetables and herbs. Her mom, a phenomenal cook, was in the kitchen whipping up something delicious. Suddenly, she turned to us and proposed a challenge: “Let’s create our own wraps using what we bought!”
With giggles and a bit of friendly competition, we each grabbed ingredients and got to work. I remember wanting to impress with bold flavors, stuffing my wrap with a colorful array of veggies, chickpeas, and a sprinkle of feta cheese for that salty goodness. Drizzling a zesty yogurt sauce over it all, my creation was not only a feast for the eyes but a memory that sticks with me even today.
Now, every time I make these Chickpea & Feta Wraps, I’m reminded of that wonderful day filled with friendship, laughter, and good food. Are you ready to create your own delicious memories? Let’s dive into this quick and flavorful recipe that’s just begging to be made!
Ingredients
Here’s what you’ll need to create your Chickpea & Feta Wrap:
- 1 cup canned chickpeas, drained and rinsed
- Chickpeas are packed with protein and fiber. If you don’t have canned ones, you can use dried chickpeas that have been soaked and cooked.
- 1 tbsp olive oil
- A splash of good-quality olive oil brings a lovely richness. Avocado oil works as a great substitute too.
- 1/2 tsp paprika
- This spice adds a warm, smoky flavor. For a bit more heat, try using smoked paprika!
- 1/2 tsp ground cumin
- Cumin adds depth and earthiness. Feel free to substitute with coriander for a lighter flavor.
- Salt and black pepper to taste
- Essential for enhancing all the lovely flavors. Remember, it’s always easier to add than to take away!
- 1/2 cup crumbled feta cheese
- Feta brings a tangy bite to your wrap. If you’re feeling adventurous, goat cheese or even ricotta can be a delightful swap.
- 1 cup cucumber, diced
- Fresh cucumbers add a crisp texture. You can swap them for zucchini or even bell peppers for a crunch.
- 1/2 cup cherry tomatoes, halved
- Cherry tomatoes are sweet and juicy. If it’s not tomato season, try sun-dried tomatoes for a different twist.
- 1/4 cup red onion, thinly sliced
- Red onions add a bit of bite and color. Substitute with green onions or shallots if you prefer a milder flavor.
- 4 large flour tortillas or wraps
- Any tortillas will do! Whole wheat or gluten-free wraps are great alternatives if that suits your diet.
- 1 cup plain yogurt
- Yogurt adds creaminess and tang. You can use Greek yogurt for an extra protein boost or a dairy-free option for a vegan twist.
- 1 tbsp lemon juice
- Fresh lemon juice brightens up the sauce and wrap. Lime juice can be a zesty substitute!
- 1 clove garlic, minced
- Garlic gives an aromatic punch. If fresh garlic isn’t on hand, garlic powder will work too.
- 1 tbsp olive oil (for yogurt sauce)
- Extra virgin olive oil in the sauce adds creaminess. Feel free to skip it or use a drizzle of tahini for a nutty flavor.
- Salt to taste for yogurt sauce
- A pinch of salt will help balance the zingy flavors in the sauce.
Step-by-Step Instructions
Let’s roll up our sleeves and get cooking! Here’s how to make your Chickpea & Feta Wrap:
- Prepare the Chickpeas: In a medium bowl, combine the drained chickpeas, olive oil, paprika, cumin, salt, and black pepper. Mix well until the chickpeas are evenly coated. Here’s a pro tip: for extra crispy chickpeas, you can roast them in the oven at 400°F (200°C) for about 20 minutes!
- Make the Yogurt Sauce: In a small bowl, combine the yogurt, lemon juice, minced garlic, and olive oil. Stir until smooth and season it to taste with salt. This sauce is the star of the show – don’t skip it!
- Chop Your Veggies: While the chickpeas are marinating, dice your cucumber, halve the cherry tomatoes, and thinly slice the red onion. The goal here is a colorful mixture that looks fresh and inviting!
- Assemble Your Wraps: Lay out your tortillas or wraps on a clean surface. Start by placing a generous spoonful of the chickpea mixture in the center of each tortilla, followed by some diced cucumber, cherry tomatoes, sliced red onion, and a hearty sprinkle of crumbled feta cheese.
- Drizzle the Sauce: Top your veggie-filled wrap with a few dollops of the yogurt sauce. You can always add more depending on your taste!
- Wrap It Up: Carefully fold the sides of the tortilla over the filling, then roll it tightly from the bottom to the top. Voila! You have yourself a delicious wrap. If you’re traveling with these or making them ahead, you can wrap them in parchment paper for easy handling.
- Serve and Enjoy: Slice your wraps in half for a beautiful presentation, and there you have it—Chickpea & Feta Wraps ready to devour!
Serving Suggestions
To elevate your wrap serving game, consider plating with an extra drizzle of yogurt sauce on the side and a sprinkle of fresh herbs like cilantro or parsley. You can also serve these wraps with a refreshing side salad or some crispy roasted potatoes for a complete meal.
Recipe Variations
- Spicy Kick: Add a dash of hot sauce or a pinch of red pepper flakes to the chickpea mixture for some heat!
- Veggie Delight: Toss in roasted bell peppers, shredded carrots, or spinach for added nutrition and color.
- Mediterranean Twist: Swap the feta with olives and add artichoke hearts for a Mediterranean flair.
- Protein Boost: Consider adding grilled chicken or even a sprinkle of nuts for added crunch and protein.
- Vegan Friendly: Use avocado in place of feta for a creamy texture and store-bought vegan yogurt for the sauce.
Chef’s Notes
This recipe for Chickpea & Feta Wraps was born out of my love for vibrant meals that don’t take hours to prepare. It’s evolved over the years—where once I used different proteins, I’ve now embraced the incredible versatility of chickpeas. Plus, every time I make these wraps, I’m transported back to that sunny day with my friends, brainstorming new wraps and savoring laughter and good food.
FAQs and Troubleshooting
1. Can I prep these wraps ahead of time? Absolutely! You can assemble the wraps in advance, but I recommend adding the yogurt sauce right before serving to keep everything fresh.
2. What if I don’t have chickpeas? No worries! You can substitute them with black beans, quinoa, or even lentils for a different yet equally delicious base.
3. How can I make this gluten-free? Simply swap the flour tortillas for corn tortillas or use large lettuce leaves for a low-carb wrap.
4. What can I do if my wraps are too soggy? If you’re worried about sogginess, try to avoid overstuffing them and consider drying the veggies with a paper towel before adding them to your wrap.
Nutritional Info
This Chickpea & Feta Wrap is a great source of protein and fiber, making it a nourishing meal option. Each wrap contains approximately 350 calories, depending on the ingredients used and portion sizes.
So there you have it—a delicious, quick recipe for Chickpea & Feta Wraps that you can whip up for lunch or dinner any day of the week! I hope you enjoy making these as much as I do. Remember, cooking should be fun and creative, so feel free to experiment and make this dish your own.
Until next time, happy cooking!
PrintChickpea & Feta Wrap with Veggies & Yogurt Sauce

A quick and flavorful Chickpea & Feta Wrap, loaded with fresh veggies and a zesty yogurt sauce, perfect for any day of the week.
- Prep Time: 15 minutes
- Cook Time: 10 minutes
- Total Time: 25 minutes
- Yield: 4 servings 1x
- Category: Main Course
- Method: Wraping
- Cuisine: Mediterranean
- Diet: Vegetarian
Ingredients
- 1 cup canned chickpeas, drained and rinsed
- 1 tbsp olive oil
- 1/2 tsp paprika
- 1/2 tsp ground cumin
- Salt and black pepper to taste
- 1/2 cup crumbled feta cheese
- 1 cup cucumber, diced
- 1/2 cup cherry tomatoes, halved
- 1/4 cup red onion, thinly sliced
- 4 large flour tortillas or wraps
- 1 cup plain yogurt
- 1 tbsp lemon juice
- 1 clove garlic, minced
- 1 tbsp olive oil (for yogurt sauce)
- Salt to taste for yogurt sauce
Instructions
- Prepare the chickpeas: In a medium bowl, combine the drained chickpeas, olive oil, paprika, cumin, salt, and black pepper. Mix well until the chickpeas are evenly coated.
- Make the yogurt sauce: In a small bowl, combine the yogurt, lemon juice, minced garlic, and olive oil. Stir until smooth and season it to taste with salt.
- Chop your veggies: Dice your cucumber, halve the cherry tomatoes, and thinly slice the red onion.
- Assemble your wraps: Lay out your tortillas on a clean surface and place a generous spoonful of the chickpea mixture in the center, followed by the veggies and feta.
- Drizzle the sauce: Top your veggie-filled wrap with dollops of the yogurt sauce.
- Wrap it up: Fold the sides of the tortilla over the filling and roll it tightly.
- Serve and enjoy: Slice your wraps in half for a beautiful presentation.
Notes
Wraps can be prepped ahead of time; add yogurt sauce right before serving to keep everything fresh.
Nutrition
- Serving Size: 1 wrap
- Calories: 350
- Sugar: 5g
- Sodium: 400mg
- Fat: 12g
- Saturated Fat: 4g
- Unsaturated Fat: 6g
- Trans Fat: 0g
- Carbohydrates: 45g
- Fiber: 3g
- Protein: 15g
- Cholesterol: 30mg
Keywords: chickpea wrap, vegetarian wrap, Mediterranean wraps, quick meals, healthy recipes

Brew Bliss: Crafting Your Perfect Cup of Coffee and Tea at Home
Brew Bliss: Crafting Your Perfect Cup of Coffee and Tea at Home
Welcome to Ivory Apron! If you’re anything like me, mornings are made infinitely better with a delicious cup of coffee or tea in hand. Today, we’re diving into the wonderful world of homemade beverages that not only kick-start your day but can also transform any ordinary moment into something extraordinary. Trust me—this isn’t just about staying awake; it’s about savoring every sip and making your kitchen the centerpiece of warmth and joy.
A Sip Down Memory Lane
Let me take you back to when I first truly understood the magic of a well-crafted cup of coffee. I was in college, living with a couple of fabulous friends who adored the ritual of brewing our morning caffeine fix together. It wasn’t just about the caffeine—it was about the laughter echoing through our tiny kitchen, the cozy aroma wrapping around us like a soft blanket, and the animated conversations that often stretched well beyond our morning brew.
I remember one particularly early morning when we decided to experiment. We combined different beans and spices, getting ocassionally wild with cinnamon and nutmeg, even sneakily adding a bit of vanilla! That day, we created a recipe that quickly became our go-to which we dubbed our “Morning Magic” brew. It was tasty and delightful, but most importantly; it nurtured our bond as roommates and lifelong friends.
It’s moments like these that inspire me to reimagine and share wonderful recipes. Whether you’re crafting a latte to-go or steeping a comforting cup of herbal tea, let’s create something that warms your heart and brings loved ones together.
Ingredients
Here’s what you’ll need to make building your coffee and tea drinks a breeze!
For Coffee:
- Freshly Ground Coffee Beans
- Choose high-quality beans for the best flavor. Try medium roast for a balanced taste or dark roast for a bold cup. You can substitute with decaf if you’re sensitive to caffeine!
- Cold Brew or Hot Water
- You can use hot water to brew your coffee traditionally or cold brew for a smooth, less acidic flavor. If using cold brew concentrate, dilute with water.
- Milk or Milk Alternative
- Whole milk, oat milk, or almond milk adds creaminess. Go for a frothy plant-based milk for a vegan option!
- Sweeteners
- Use sugar, agave, or for something different, try a flavored syrup like hazelnut or caramel. Honey pairs wonderfully with herbal teas too!
For Tea:
- Tea Leaves or Bags
- Choose your favorite: black, green, herbal, or chai. Loose leaf tea brings an excellent depth of flavor; just remember to strain before serving!
- Water Temperature
- Different teas require specific water temperatures—boil for black tea and cool slightly for green or white teas.
- Citrus or Fresh Herbs
- A slice of lemon or sprigs of mint elevate your cup. Don’t skip this for teas; it’s a game-changer!
- Optional Spice Mix
- Ginger, cinnamon, or even a bit of turmeric can add health benefits and a delightful twist to your drink!
Step-by-Step Instructions
Coffee
- Brew the Coffee:
- If you’re using a drip coffee maker, add your ground coffee to the filter basket. Aim for one to two tablespoons for every six-ounce cup of water. If using cold brew, steep your coffee grounds in cold water for 12-24 hours, depending on desired strength.
- Heat the Milk:
- Pour the milk (or your preferred alternative) into a small saucepan and heat on low, whisking occasionally until warmed, but not boiling. For fancy froth, you can use a frother or a blender to aerate!
- Combine and Sweeten:
- Pour brewed coffee into your favorite mug, add the warm milk, and sweeten to taste. Stir gently, and if you’re feeling extra creative — sprinkle some cinnamon or cocoa powder on top!
- Serve and Savor:
- Enjoy immediately! Create a little coffee bar at home with various toppings and flavors – your guests will love being able to customize their cups.
Tea
- Boil Water:
- Start with fresh, filtered water and heat it in a kettle. Remember to monitor the temperature based on your chosen tea type!
- Steep the Tea:
- Place the tea leaves or bag in your cup and pour in the hot water. Let it steep for 3-5 minutes for the best flavor. Set a timer to avoid bitterness!
- Add Flavors:
- This is where you can get creative! Add in fresh herbs, a slice of lemon, or perhaps a drizzle of honey for sweetness. Stir gently to combine.
- Serve Warm:
- Pour into beautiful teacups for a touch of elegance! Always serve this with a side of biscuits or scones for that quintessential tea experience.
Serving Suggestions
Presentation enhances the enjoyment of your drinks. For coffee, consider using elegant mugs topped with freshly whipped cream and a dusting of cocoa or cinnamon. For tea, serve it in delicate teacups accompanied by a little plate of cookies or fresh fruit. Light a candle or play soft music to create a lovely ambiance; after all, it’s not just about drinking—it’s about cherishing those moments!
Recipe Variations
- Coffee Variations:
- Spiced Latte: Add a sprinkle of nutmeg and a dash of vanilla extract to the milk for a cozy autumn flavor.
- Iced Mocha: Blend chilled coffee with chocolate syrup and ice, then top with whipped cream for a refreshing dessert drink.
- Tea Twists:
- Chai Masala: Brew black tea with ground spices such as cardamom, ginger, and cinnamon for a warming spiced drink.
- Berry Infusion: Add mixed berries and a sprig of mint for a refreshing iced tea twist.
Chef’s Notes
Cooking (or brewing!) is all about evolution. I still remember those early experiments in my college kitchen, and how they sparked my love for flavor exploration. The recipes have grown with me—today’s brews can represent your personal taste just as much. Don’t be afraid to adjust measurements, play with flavors, or even mix other beverages in!
Remember, some of the best recipes sometimes originate from joyful accidents; my strangest concoctions usually end up being the most fun!
FAQs and Troubleshooting
Q: My coffee always tastes bitter. What can I do?
A: Bitter coffee usually results from over-extraction. Consider tweaking your brewing time or the grind of your coffee beans. Coarser grounds often reduce bitterness!
Q: How do I make a latte without a fancy machine?
A: No problem! Just heat your milk on the stove and use a whisk to froth it up—works like a charm and adds a bit of arm workout to your day!
Q: What if I don’t have loose leaves?
A: Use tea bags—they’re super convenient! Just follow the same steeping times and you’ll still enjoy the flavors you love!
Q: How much caffeine is in my homemade coffee vs. store-bought?
A: Generally, homemade coffee can be stronger because you can control the coffee-to-water ratio. Different beans also have varying caffeine levels!
Nutritional Info
While specific nutritional information can vary based on ingredients you choose, a typical cup of coffee with whole milk and minimal added sugar clocks in around 40-80 calories. Herbal teas often have zero calories, while sweeteners and flavored syrups can increase calorie counts.
So there you have it! From a morning coffee ritual to a cozy evening tea, brewing at home can be simple and satisfying. Let this recipe inspire you to experiment in your kitchen, gather some friends around, and create those magical moments that a good drink can offer. Here’s to tying on that ivory apron and bringing elegance to every sip. Cheers, my culinary friend!
PrintCrafting Your Perfect Cup of Coffee and Tea at Home

A delightful guide to brewing the perfect cup of coffee and tea at home, enhancing your mornings and bringing loved ones together.
- Prep Time: 15
- Cook Time: 25
- Total Time: 40
- Yield: 4 servings
- Category: Beverage
- Method: Brewing
- Cuisine: Global
- Diet: Vegetarian
Ingredients
- Freshly Ground Coffee Beans
- Cold Brew or Hot Water
- Milk or Milk Alternative
- Sweeteners (sugar, agave, flavored syrup)
- Tea Leaves or Bags
- Water Temperature
- Citrus or Fresh Herbs
- Optional Spice Mix (ginger, cinnamon, turmeric)
Instructions
- Brew the Coffee: If you’re using a drip coffee maker, add your ground coffee to the filter basket. Aim for one to two tablespoons for every six-ounce cup of water. If using cold brew, steep your coffee grounds in cold water for 12-24 hours, depending on desired strength.
- Heat the Milk: Pour the milk (or your preferred alternative) into a small saucepan and heat on low, whisking occasionally until warmed, but not boiling. For fancy froth, you can use a frother or a blender to aerate!
- Combine and Sweeten: Pour brewed coffee into your favorite mug, add the warm milk, and sweeten to taste. Stir gently, and if you’re feeling extra creative — sprinkle some cinnamon or cocoa powder on top!
- Serve and Savor: Enjoy immediately! Create a little coffee bar at home with various toppings and flavors – your guests will love being able to customize their cups.
- Boil Water for Tea: Start with fresh, filtered water and heat it in a kettle. Monitor the temperature based on your chosen tea type!
- Steep the Tea: Place the tea leaves or bag in your cup and pour in the hot water. Let it steep for 3-5 minutes for the best flavor. Set a timer to avoid bitterness!
- Add Flavors: Add in fresh herbs, a slice of lemon, or perhaps a drizzle of honey for sweetness. Stir gently to combine.
- Serve Warm: Pour into beautiful teacups for a touch of elegance! Always serve this with a side of biscuits or scones for that quintessential tea experience.
Notes
Experiment with variations like Spiced Latte or Chai Masala for exciting twists on these drinks.
Nutrition
- Serving Size: 1 cup
- Calories: 80
- Sugar: 10g
- Sodium: 100mg
- Fat: 3g
- Saturated Fat: 1g
- Unsaturated Fat: 2g
- Trans Fat: 0g
- Carbohydrates: 12g
- Fiber: 0g
- Protein: 2g
- Cholesterol: 5mg
Keywords: coffee, tea, home brewing, beverages, latte, herbal tea

Pin by Sarah Grimmer on Mamaste Zen Baby Shower | Drink recipes nonalcoholic, Lemonade recipes, Mocktail recipe
Refreshing Non-Alcoholic Lemonade Mocktail: Sip Into Summer
Welcome to the sweltering days of summer! There’s nothing quite like a tall glass of chilled lemonade to quench your thirst and brighten your day, am I right? It’s the quintessential drink of sunny afternoons, outdoor gatherings, and blissful memories. Today, I’m super excited to share with you my go-to recipe for a fabulous non-alcoholic lemonade mocktail that will not only be the star of your next baby shower (like the fabulous one pinned by Sarah Grimmer) but will also make any occasion feel like a celebration.
Picture this: teeming laughter, sparkling eyes, and delectable scents wafting through the air. The warmth of the sun mixed with the refreshing tang of citrus creates a magical atmosphere. This mocktail is more than just a drink; it’s an experience. And trust me, it’s so easy to make that you’ll want to whip it up for every gathering or just a cozy evening at home.
So, grab your favorite pitcher, roll up your sleeves, and let’s dive into the delightful world of homemade lemonade magic!
My Lemonade Love Story
Growing up, summer meant one thing: endless days at my grandmother’s house, where the kitchen was always buzzing with excitement, and the air was filled with the aroma of fresh fruits and baked goods. I fondly remember one summer’s afternoon when my cousins and I set out to make our version of Grandma’s famous lemonade. We squeezed lemons until our hands ached, created our colorful concoctions, and stirred in pinches of our secret ingredients (which we totally thought were magic).
But the grand finale was when we threw a lemonade stand in the front yard. We adorned a table with hand-drawn signs and a pitcher brimming with our newfound recipe, eagerly awaiting passersby to taste our creation. You can imagine the giggles, the clinking glasses, and the sweet compliments we collected.
That memorable day sparked my passion for making delicious drinks and sharing them with friends and family. And now, I’m thrilled to pass that joy (and recipe) on to you!
The Ingredients: What You’ll Need
Before we get blending, let’s chat about the ingredients you’ll require. Here’s the list for your refreshing non-alcoholic lemonade mocktail:
-
Fresh Lemons: The star of the show! Look for bright yellow lemons for that zesty flavor. Pro tip: Roll them on the counter before cutting to maximize juice extraction.
-
Granulated Sugar or Honey: To sweeten things up! Replace granulated sugar with honey for a lighter taste or use agave nectar for a vegan option.
-
Water: Essential for mixing up your lemonade. Use filtered water for the best taste, and consider using sparkling water for an extra bubbly experience!
-
Fresh Mint Leaves: These add an aromatic twist to the drink. If mint isn’t your thing, feel free to swap it out for basil or even rosemary for more depth.
-
Ice Cubes: To keep everything cool and refreshing. You can freeze small lemon slices in ice cubes for a fun, decorative touch!
-
Sliced Lemons and Berries: For garnish. Strawberries or raspberries complement the lemonade beautifully and will make your presentation pop!
Step-by-Step Instructions
Now, let’s get to mixing the goodness! Follow these detailed steps to create your lemonade mocktail:
-
Juice the Lemons:
- Begin by cutting the lemons in half and squeezing out all that lovely juice into a measuring cup. You can use a juicer, a fork, or just your hands (a little messy, but oh-so-fun!). Aim for about 1 cup of fresh lemon juice.
Chef’s Tip: Strain the juice through a fine mesh sieve to get rid of seeds and pulp for a smooth finish.
-
Make Your Simple Syrup:
- In a small saucepan, combine equal parts water and sugar (or honey) over medium heat. Stir until dissolved. This simple syrup helps sweeten your lemonade evenly!
Hack: You can add a few mint leaves during the heating process to infuse a minty flavor into your syrup.
-
Mix It All Together:
- In a large pitcher, combine the fresh lemon juice, your simple syrup (start with a small amount, taste, and add more to your liking), and about 4 cups of cold water.
Quick Chef Insight: Adjust the water depending on how strong or sweet you prefer your lemonade. Start light; you can always add more!
-
Garnish and Chill:
- Toss in some fresh mint leaves and stir gently. Let the mocktail chill in the refrigerator for at least 30 minutes.
Presentation Tip: For an extra touch, chill your glasses beforehand—nothing beats a frosty lemonade!
-
Serve It Up:
- Fill up your glasses with ice cubes and pour the chilled lemonade over. Garnish with lemon slices and berries. Voila!
Serving Suggestion: You can also top it with some club soda for added fizz. It’s like a lemonade party for your taste buds!
Recipe Variations
Why stick to just one recipe? Here are a few creative twists to make this drink your own:
-
Berry Lemonade: Add blended strawberries or raspberries to your lemonade for a fruity twist. This version makes for beautiful colors and is a hit at any gathering!
-
Cucumber Mint Lemonade: For a refreshing change, muddle slices of cucumber with mint before adding them to your lemonade mix. It’s hydrating and so rejuvenating!
-
Lavender Lemonade: Infuse your simple syrup with dried lavender for a floral twist that resembles a summer garden in a glass.
-
Spicy Ginger Lemonade: Add ginger syrup or fresh ginger slices to your mix for a kick that pairs beautifully with the tartness of the lemonade.
-
Herbal Infusions: Try different herbs such as thyme or basil; they’ll offer an unexpected yet delightful flavor experience.
Chef’s Notes
I’ll let you in on a little secret: this non-alcoholic lemonade mocktail has evolved over the years! I remember the first time I made a batch for a family gathering, and it ended up being way too sweet! Lesson learned—never skip the taste-testing! I love experimenting with new ingredients, and sharing those moments with loved ones always makes the process worthwhile.
And if you ever find yourself with leftover lemonade (which is rare in my house!), feel free to keep it in the fridge for a refreshing drink the next day or use it as a mixer for iced teas or smoothies!
FAQs and Troubleshooting
-
Why is my lemonade too sour?
- If your lemonade is more tart than you’d like, simply add more sweetener a little at a time. Taste as you go until you hit the perfect balance!
-
What if I don’t have fresh lemons?
- While fresh lemons are the best for flavor, you can use bottled lemon juice in a pinch. Just make sure it’s 100% pure without added sugars, and adjust to taste.
-
How can I make this sugar-free?
- You can swap granulated sugar for a sugar-free sweetener like stevia or erythritol. Keep in mind that these sweeteners can be quite potent, so start small!
-
What if it’s too sweet?
- The beauty of this mocktail is that you can adjust it; simply add more water and a touch of lemon juice to balance out the sweetness!
Nutritional Info
While I didn’t run the nutrition numbers for this recipe, the key ingredients are relatively healthy! Fresh lemon juice is a great source of vitamin C, and swapping sugar for natural sweeteners can significantly cut calories. For accurate nutritional info, consider using an online calorie calculator based on your specific substitutions.
With this cheerful and refreshing non-alcoholic lemonade mocktail, you’re all set to impress your friends and family this summer. Whether it’s at a baby shower, picnic, or even solo on your patio, this recipe is sure to bring a smile and some sips of joy. Let’s gather around the table, raise our glasses, and toast to good times, great company, and of course, delicious food!
Cheers to the simple pleasures of life! 🍋💛
PrintRefreshing Non-Alcoholic Lemonade Mocktail

A delightful and refreshing non-alcoholic lemonade mocktail, perfect for summer gatherings and outdoor fun.
- Prep Time: 10 minutes
- Cook Time: 10 minutes
- Total Time: 20 minutes
- Yield: 6 servings 1x
- Category: Beverage
- Method: Mixing
- Cuisine: American
- Diet: Vegan
Ingredients
- 1 cup Fresh Lemon Juice
- 1 cup Granulated Sugar or Honey
- 4 cups Water
- Fresh Mint Leaves
- Ice Cubes
- Sliced Lemons and Berries for garnish
Instructions
- Juice the lemons by cutting them in half and squeezing the juice into a measuring cup.
- Make your simple syrup by combining equal parts water and sugar in a small saucepan over medium heat until dissolved.
- Mix together the fresh lemon juice, simple syrup, and cold water in a large pitcher.
- Garnish with fresh mint leaves and chill in the refrigerator for at least 30 minutes.
- Serve the lemonade over ice and garnish with lemon slices and berries.
Notes
Feel free to experiment with different fruits and herbs to customize your lemonade.
Nutrition
- Serving Size: 1 serving
- Calories: 120
- Sugar: 25g
- Sodium: 5mg
- Fat: 0g
- Saturated Fat: 0g
- Unsaturated Fat: 0g
- Trans Fat: 0g
- Carbohydrates: 30g
- Fiber: 0g
- Protein: 0g
- Cholesterol: 0mg
Keywords: lemonade, mocktail, non-alcoholic, summer drinks, refreshing drinks

Fresh Vegetable Tortilla Roll Ups
Fresh Vegetable Tortilla Roll Ups: A Delightful Bite of Flavor
Hello, fellow foodies! Today, I’m thrilled to share a vibrant, fresh dish that’s not only a favorite for gatherings but also a wonderful addition to your weeknight meals: Fresh Vegetable Tortilla Roll Ups. These colorful bites are all about bringing together fresh ingredients, delightful flavors, and the joy of sharing with loved ones. Whether you’re hosting a party, preparing a healthy lunch, or simply looking to snack in style, these tortilla roll ups are here to impress!
A Bit of Nostalgia
Ah, the memories! I remember the first time I rolled up veggies in a tortilla. It was a sunny afternoon, and my best friend invited me over for a little gathering. She was always the creative one, and that day she presented us with these beautiful tortilla roll ups filled to the brim with crisp vegetables and creamy spread. I was amazed at how something so simple could be such a crowd-pleaser! We sat in her backyard, laughing and enjoying the burst of flavors, with our plates stacked high with these adorable roll ups. It was a carefree day filled with good food, laughter, and the undeniable magic of fresh ingredients coming together. That inspired me to bring my own twist to these fun bites, and I’m excited to pass them down to you!
So, let’s roll up our sleeves and get cooking, shall we?
Ingredients
Here’s a friendly little rundown of what you’ll need for these delightful Fresh Vegetable Tortilla Roll Ups:
-
Large Flour Tortillas (3-4 pieces)
- A blank canvas for all those fresh fillings. Feel free to substitute with whole wheat tortillas for a healthier option or spinach tortillas for an extra pop of color.
-
Cream Cheese (8 oz)
- This adds a creamy richness that binds everything together. Go for herb-flavored cream cheese for an extra kick or use Greek yogurt as a lighter alternative!
-
Bell Peppers (1 red, 1 yellow)
- Sweet and crunchy, bell peppers provide a vibrant color contrast. You can swap them for cucumbers if you prefer a more refreshing crunch.
-
Carrots (1-2 medium)
- Adding sweetness and crunch, carrots are a staple in these roll ups. You can also grate them instead of slicing for a different texture.
-
Cucumber (1 medium)
- Cool and refreshing, cucumbers balance out the creaminess. If you want a more robust flavor, try using zucchini!
-
Fresh Spinach (1 cup)
- For that green goodness! You could also use arugula for a peppery twist.
-
Avocado (1 ripe)
- Creamy and dreamy; you can’t go wrong here. If you’re out of avocados, a thin layer of guacamole would work well too.
-
Fresh Herbs (1/4 cup; dill, chives, or parsley)
- These add a burst of freshness and zest. Use whatever herbs you love or have on hand!
-
Salt and Pepper (to taste)
- Always essential! A pinch of garlic powder or cumin can amp up flavors if you’re feeling adventurous.
Step-by-Step Instructions
-
Prep Your Ingredients:
Start by washing all your vegetables thoroughly. Slice the bell peppers into thin strips, julienne the carrots, and slice the cucumber into thin sheets. If you want to make life easier, use a mandoline slicer for those veggies! -
Mix the Cream Cheese:
In a small bowl, whip the cream cheese until it’s soft and spreadable. You can add a pinch of salt and pepper and even a dash of lemon juice for a little extra zing! -
Assemble the Tortillas:
Lay a tortilla flat on a clean surface. Using a spatula or a butter knife, spread a generous layer of cream cheese evenly across the tortilla, leaving about an inch at the edges to avoid overflow. -
Layer Your Veggies:
Start layering your sliced veggies! Lay down the fresh spinach first, followed by the bell peppers, carrots, cucumbers, and avocado. Remember, you want balance and color here, so feel free to mix it up! -
Roll It Up:
Time to roll! Starting from one end, gently lift the edge of the tortilla over the filling and begin to roll tightly. Be sure not to overstuff, or it might burst out. Keep rolling until you reach the end, then give it a gentle press to seal. -
Slice and Serve:
With a sharp knife, slice the roll into bite-sized pieces—around 1-2 inches works nicely. Make sure to slice straight down to maintain that beautiful filling show-off! -
Plating:
Arrange the roll ups on a platter, and consider drizzling a little balsamic glaze or serving with a tangy dipping sauce on the side. A sprinkle of fresh herbs or edible flowers can elevate the presentation even more!
Serving Suggestions
These Fresh Vegetable Tortilla Roll Ups make a fantastic centerpiece for any platter. Serve them alongside some hummus or tzatziki for dipping, or pair with a refreshing salad to create a light meal. You could even stack them up like a tower for some added flair!
Recipe Variations
- Mediterranean Twist: Add some feta cheese and olives for a Greek-inspired version.
- Spicy Kick: Mix in a bit of chopped jalapeño or use a spicy herb cream cheese to add some heat.
- Sweet and Savory: Throw in some roasted red peppers and a hint of balsamic vinegar for unexpected sweetness.
- Vegan Option: Replace cream cheese with crushed avocado and use a vegan tortilla for a plant-based delight.
Chef’s Notes
When I first started making these roll ups, I made the mistake of overloading them—I can’t tell you how many times I had a filling explosion! So, when you’re rolling, remember that less is more. It’s all about balance! And don’t fret over other potential mishaps; cooking is all about learning and having fun. Over time, these roll ups have morphed from just a party snack into my go-to for light lunches, quick dinners, and even school lunches for my kids!
FAQs and Troubleshooting
Q: Can I prepare these roll ups in advance?
A: Absolutely! Just wrap them tightly in plastic wrap or foil to keep them fresh. I’d suggest not slicing them until you’re ready to serve; it helps maintain their shape.
Q: What if my tortillas are too dry?
A: If your tortillas are not pliable, try microwaving them for 10-15 seconds. This softens them up and makes rolling much easier!
Q: Can I freeze these roll ups?
A: Yes, but keep in mind that the texture might change once thawed. If you want to freeze them, I recommend freezing them uncut and without the avocado.
Q: I can’t find fresh herbs; can I use dried?
A: Sure! Dried herbs work, but you’ll want to use them sparingly as they’re more potent than fresh.
Nutritional Info
Though I don’t have specific numbers for you today, these roll ups are loaded with veggies, healthy fats from the avocado, and can easily fit into a healthy lifestyle depending on your ingredients. If you’re counting calories or macros, simply calculate based on your specific substitutions.
And there you have it, my dear friends! Fresh Vegetable Tortilla Roll Ups are not just a recipe; they’re a doorway into gathering, sharing, and enjoying the beauty of cooking. So let’s tie on our aprons, gather those lovely ingredients, and whip up something delicious together! Happy cooking!
PrintFresh Vegetable Tortilla Roll Ups

A vibrant and fresh dish featuring rolled tortillas filled with assorted vegetables and cream cheese. Perfect for gatherings or a nutritious snack.
- Prep Time: 15 minutes
- Cook Time: 0 minutes
- Total Time: 15 minutes
- Yield: 4 servings
- Category: Appetizer
- Method: No-Cook
- Cuisine: Mediterranean
- Diet: Vegetarian
Ingredients
- Large Flour Tortillas (3-4 pieces)
- Cream Cheese (8 oz)
- Bell Peppers (1 red, 1 yellow)
- Carrots (1-2 medium)
- Cucumber (1 medium)
- Fresh Spinach (1 cup)
- Avocado (1 ripe)
- Fresh Herbs (1/4 cup; dill, chives, or parsley)
- Salt and Pepper (to taste)
Instructions
- Prep Your Ingredients: Start by washing all your vegetables thoroughly. Slice the bell peppers into thin strips, julienne the carrots, and slice the cucumber into thin sheets. If you want to make life easier, use a mandoline slicer for those veggies!
- Mix the Cream Cheese: In a small bowl, whip the cream cheese until it’s soft and spreadable. You can add a pinch of salt and pepper and even a dash of lemon juice for a little extra zing!
- Assemble the Tortillas: Lay a tortilla flat on a clean surface. Using a spatula or a butter knife, spread a generous layer of cream cheese evenly across the tortilla, leaving about an inch at the edges to avoid overflow.
- Layer Your Veggies: Start layering your sliced veggies! Lay down the fresh spinach first, followed by the bell peppers, carrots, cucumbers, and avocado. Remember, you want balance and color here, so feel free to mix it up!
- Roll It Up: Time to roll! Starting from one end, gently lift the edge of the tortilla over the filling and begin to roll tightly. Be sure not to overstuff, or it might burst out. Keep rolling until you reach the end, then give it a gentle press to seal.
- Slice and Serve: With a sharp knife, slice the roll into bite-sized pieces—around 1-2 inches works nicely. Make sure to slice straight down to maintain that beautiful filling show-off!
- Plating: Arrange the roll ups on a platter, and consider drizzling a little balsamic glaze or serving with a tangy dipping sauce on the side. A sprinkle of fresh herbs or edible flowers can elevate the presentation even more!
Notes
Serve with hummus or tzatziki for dipping, or pair with a refreshing salad.
Nutrition
- Serving Size: 1 roll up (approximately 2 inches)
- Calories: 250
- Sugar: 3g
- Sodium: 300mg
- Fat: 15g
- Saturated Fat: 5g
- Unsaturated Fat: 8g
- Trans Fat: 0g
- Carbohydrates: 30g
- Fiber: 5g
- Protein: 6g
- Cholesterol: 20mg
Keywords: vegetable roll ups, tortilla roll ups, healthy snacks, appetizers, party food