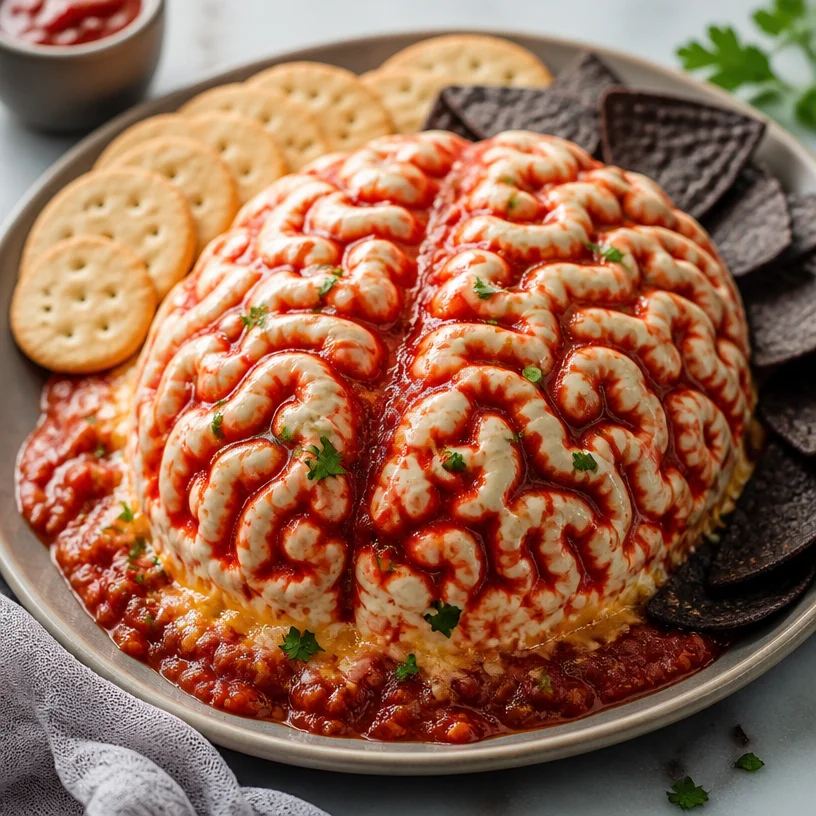
Spooky 15-Minute Halloween Zombie Brain Dip for Party Guests
Zombie Brain Dip: A Spooktacular Treat for Foodies
Hello, fellow food lovers! Today, we’re diving into a delightfully eerie dish: Zombie Brain Dip! Perfect for Halloween parties, themed gatherings, or just a fun night in with friends, this dip is both visually striking and utterly delicious. Who knew that a dish named “Zombie Brain” could become the star of your next get-together?
Picture this: a creamy, vibrant dip that looks like it came straight out of a cult classic horror film. But don’t worry; it’s not just a pretty face—it’s packed with flavor and just a little bit of whimsy. Let’s stir the pot and whip this up to impress your guests while also giving them something to talk about!
My Personal Story: A Haunted Kitchen Memory
Let me take you back to my first Halloween bash as an adult. There I was, an aspiring hostess with a flair for the dramatic, eager to impress my friends. I decided to make an entire spread of creepy Halloween-themed dishes, including my now-famous Zombie Brain Dip.
The day of the party, I cooked and danced around my kitchen, channeling my inner Julia Child while dressed in my finest witch costume, complete with a pointy hat. When I brought the dip to the table, everyone was captivated by its ghastly appearance. The ooohs and aaahs were priceless! As my friends dug in, their initial horror transformed into delight, bites of the creamy, tangy dip disappearing in no time. That moment sparked my love not just for cooking, but for creating experiences through food—bonding over laughter and tasty bites.
Ingredients
To recreate this spooky delight, let’s gather the following ingredients. Each one plays a vital role in building the flavor and texture of our Zombie Brain Dip.
-
Cream Cheese: The base of our dip, giving it that luscious texture. You can substitute with Greek yogurt for a lighter version, just know it’ll alter the flavor somewhat.
-
Salsa: Choose your favorite jarred salsa or make your own for a fresher taste. Salsa provides flavor and color but can be swapped with diced tomatoes or even a spicy pico de gallo if you want to rev up that heat.
-
Green Food Coloring (optional): For that ghoulish aesthetic! You can skip it if you prefer a more natural look or want to save time.
-
Tortilla Chips or Veggies: Ideal for serving! Use your favorite chip brand, or go for sliced cucumbers and bell peppers for a healthier option.
Step-by-Step Instructions
Ready to get cooking? Let’s get right to it! Follow these steps to create your jaw-dropping Zombie Brain Dip:
-
Prepare Your Ingredients: First things first, make sure your cream cheese is softened to room temperature. It’ll blend easier and result in a creamier dip. If you forget to leave it out, you can microwave it on low for about 15 seconds—just don’t let it melt.
-
Mix the Base: In a mixing bowl, combine 8 ounces of softened cream cheese with 1 cup of salsa. Using an electric mixer on medium speed, blend them together until smoothly integrated. This is the moment to channel your inner rock star—sing while mixing!
-
Add Color: Here comes the fun part! If you’re adding food coloring for that brainy look, now’s the time. Just a drop or two of green food coloring will do. Mix it in, and keep adding until you reach your desired shade—think slimy and spooky, but not too unappetizing!
-
Taste for Seasoning: Give your dip a taste. Want to make it hotter? Stir in a pinch of cayenne pepper or some chopped jalapeños. Feel free to add salt or pepper for extra seasoning, but remember, the salsa will have flavor as well!
-
Chilling Time: Once you’re satisfied with the taste, transfer the dip to a serving bowl. Cover it with plastic wrap and refrigerate for at least 30 minutes. This helps the flavors meld together and makes it easier to serve with a firm consistency.
-
Serve and Dazzle: Finally, when everyone’s arrived and the time is right, pull your dip from the fridge, and it’s showtime! Serve it alongside tortilla chips or sliced veggies for a color contrast that will wow your guests.
Serving Suggestions
Presentation is key! To make your Zombie Brain Dip really pop, consider shaping it into an actual brain. Use a rubber spatula to mold the dip, creating grooves on the surface to mimic brain folds. Serve it in a shallow dish. Surround it with chips and fresh veggie sticks. A sprinkle of fresh herbs or a drizzle of olive oil on top can add some visual appeal!
Recipe Variations
Want to mix things up a bit? Here are some fun twists you can try with this recipe:
-
Spicy Brain: Add some diced jalapeños or a few dashes of your favorite hot sauce to the cream cheese mixture for a fiery kick.
-
Tex-Mex Twist: Incorporate some black beans, corn, or diced avocado to the dip for a heartier option, and a hint of fresh lime juice for brightness.
-
Veggie-Loaded Dip: Sneak in some finely chopped bell peppers or scallions for a crunchy surprise while also enhancing the flavor profile.
-
Dairy-Free Option: Swap cream cheese with a dairy-free alternative like cashew cream or a nut-based cheese spread for your vegan friends.
Chef’s Notes
As I mentioned, this dip has become a staple in my entertaining arsenal. I remember one Halloween when I served this alongside a “witch’s brew” punch. The combination brought life to the party, and everyone had a blast. Over the years, I’ve simplified the recipe and found new ways to add seasonal elements, like stirring in roasted pumpkin for an autumnal feel. It evolves with me, just as every great recipe should!
FAQs and Troubleshooting
1. My dip is too runny! What can I do?
If your dip ended up too thin, try chilling it longer to allow it to firm up. Alternatively, mix in a few tablespoons of sour cream or Greek yogurt to thicken it up.
2. Can I make this dip ahead of time?
Absolutely! Prepare your Zombie Brain Dip a day in advance and store it in the refrigerator. Just be sure to add the food coloring before serving for maximum effect.
3. What if I can’t find cream cheese?
A solid alternative is to use ricotta cheese or herbed cheese spreads, which both bring a different flavor and texture but still yield delicious results.
4. How do I prevent the dip from turning brown?
Once made, cover the dip tightly with plastic wrap before refrigerating. You can also add a few drops of lemon juice to keep the freshness intact.
Nutritional Info
(Optional section for readers interested in nutritional details, particularly if you have a family or a special dietary focus.)
This Zombie Brain Dip is a fun dish, but like all creamy dips, it’s best enjoyed in moderation. A standard serving (1/4 cup) contains approximately 150 calories, with about 12g of fat and 5g of carbohydrates. Using lighter ingredients can help lower those numbers while still delivering that luscious, creamy feel!
Now that you’re ready to conjure up this spooky delight, let’s get cooking! Tie on your apron, gather your friends, and prepare for an unforgettable culinary adventure. Happy cooking, and may your Halloween be filled with laughter and delicious bites! 🍽️👻
PrintZombie Brain Dip
A creamy and vibrant dip that looks like a spooktacular brain, perfect for Halloween parties.
- Prep Time: 15 minutes
- Cook Time: 30 minutes
- Total Time: 45 minutes
- Yield: 4 servings 1x
- Category: Appetizer
- Method: Mixing and Chilling
- Cuisine: American
- Diet: Vegetarian
Ingredients
- 8 oz Cream Cheese
- 1 cup Salsa
- Green Food Coloring (optional)
- Tortilla Chips or Veggies (for serving)
Instructions
- Prepare your ingredients: Soften cream cheese to room temperature.
- Mix the base: Combine cream cheese and salsa in a mixing bowl and blend until smooth.
- Add color: Stir in green food coloring until you reach the desired shade.
- Taste for seasoning: Adjust with cayenne, jalapeños, salt, or pepper as desired.
- Chill the dip: Transfer to a bowl, cover, and refrigerate for at least 30 minutes.
- Serve and dazzle: Serve with tortilla chips or sliced veggies for a fun presentation.
Notes
For best presentation, shape the dip into a brain and mold grooves to mimic brain folds. Add herbs or olive oil for appeal.
Nutrition
- Serving Size: 1/4 cup
- Calories: 150
- Sugar: 2g
- Sodium: 250mg
- Fat: 12g
- Saturated Fat: 6g
- Unsaturated Fat: 4g
- Trans Fat: 0g
- Carbohydrates: 5g
- Fiber: 1g
- Protein: 2g
- Cholesterol: 30mg
Keywords: Halloween, dip, spooky, appetizer, party food
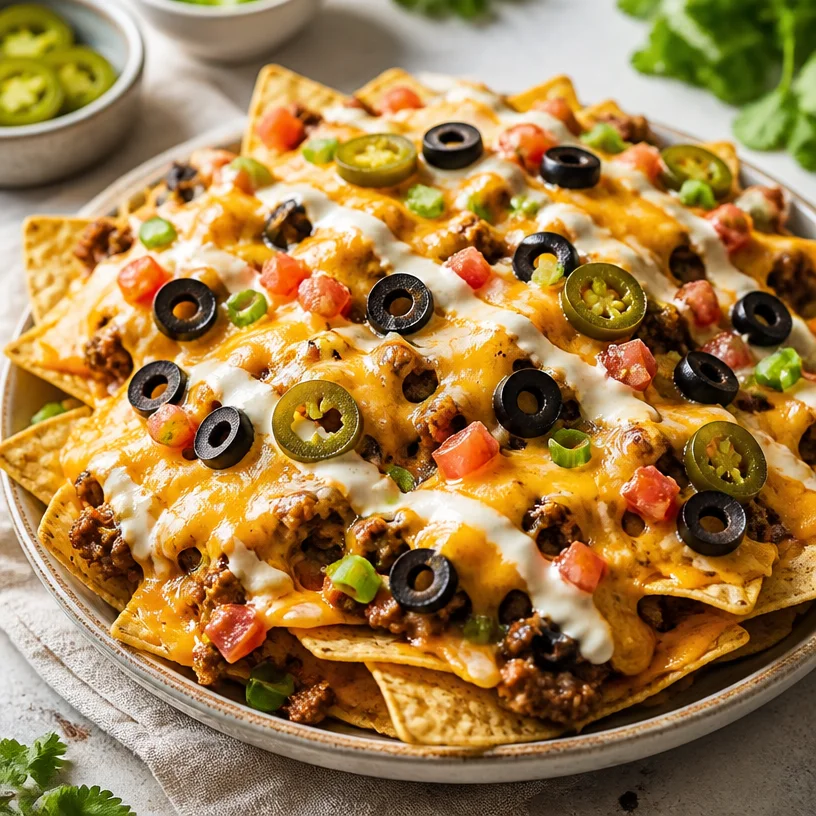
Monster Nachos
Introducing Monster Nachos: The Ultimate Comfort Food
Hello, nacho lovers! If you’re anything like me, no gathering is complete without a glorious platter of nachos, piled high with all the goodies. That crispy crunch paired with ooey-gooey cheese creates a symphony in your mouth that’s hard to resist! Today, we’re diving deep into the art of crafting Monster Nachos — a dish that’s perfect for game nights, casual hangouts, or simply elevating your Netflix-and-chill snacks.
Why are these nachos called "Monster"? Because we’re stacking them high, pushing the limits of what nachos can be! Grab your favorite blanket, pour yourself a drink, and let’s get ready to chip away at this deliciousness together.
Nachos hold a special place in my heart. They remind me of those carefree afternoons spent around the table with friends, plates overflowing with cheesy magic, laughter echoing, and the occasional heated debate over whether pineapple belongs on pizza (spoiler: it does!). There was one summer night when my friends and I decided to host an impromptu movie marathon. One of us whipped out a bag of tortilla chips and some leftover cheese, and before we knew it, our simple snack morphed into an elaborate nacho feast layered with varying flavors and textures. We got a little creative with toppings, and the result? A nacho creation that propelled our movie night to legendary status.
Speaking of legendary, let’s dive into the ingredients for these Monster Nachos!
Ingredients
To create your own mountain of nacho goodness, you’ll need the following ingredients:
-
Tortilla Chips: The foundation of your nachos! Opt for sturdy chips that can hold up the weight of all those toppings. If you want to make your own, simply cut corn tortillas into triangles and bake until crispy.
-
Cheese: A nacho classic! Use a mix of sharp cheddar for flavor and a bit of Monterey Jack for meltiness. Need a substitute? Try vegan cheese or a mix of nutritional yeast and cashew cream for a dairy-free option.
-
Olives: Black olives add a briny flavor that contrasts beautifully with the cheese. If you’re not an olive fan, try pickled jalapeños or banana peppers for a zesty kick.
-
Jalapeños: Fresh or pickled, they bring the heat! If you like it mild, remove the seeds and membranes. For more spice, keep them intact. Alternatively, you could use diced green chilis for a smoky touch.
These ingredients are just the beginning. The beauty of nachos is their versatility — you can dress them up or down based on what you love or have on hand.
Step-by-Step Instructions
Ready to craft your Monster Nachos? Let’s bring it all together. Follow these step-by-step instructions for a nacho experience that’ll have your friends begging for the recipe!
-
Preheat Your Oven: Start off by preheating your oven to 400°F (200°C). This is essential! You want your nachos to come out bubbly and golden.
-
Layer the Chips: On a large baking sheet, spread out a generous layer of tortilla chips. Make sure they’re overlapping a bit — this allows for even cheese distribution.
-
Add Cheese: Now, sprinkle a healthy layer of your cheese mix over the chips. Don’t hold back! This is where the magic really starts. The more cheese, the better, right?
-
Toppings Time!: Scatter the olives and jalapeños over the cheese. Get creative! You could also toss in some diced tomatoes, corn, or cooked ground beef for added protein.
-
Bake: Place the baking sheet in the preheated oven and bake for about 10-15 minutes, or until the cheese is bubbly and starting to brown. Keep a close eye so it doesn’t overcook!
-
Final Touches: Once baked, remove the nachos from the oven. Before serving, consider drizzling with fresh salsa or guacamole, and perhaps a sprinkle of fresh cilantro for an aromatic finish.
Chef Tip: When layering, think about contrast! Make sure chips are covered in cheese and toppings, or you’ll end up with some sad, naked chips at the end!
Serving Suggestions
Your Monster Nachos are looking gooey and gorgeous — now, how do you serve them? I love to transfer my nachos to a large, rustic wooden board for that communal feel. Use a large spoon to scoop up some toppings as you serve — no one wants to miss out on the cheese!
For a fun twist, place small bowls of toppings like guacamole, sour cream, and pico de gallo around your nacho platter. This way, your guests can customize their bites, making it a truly interactive experience.
Recipe Variations
Want to mix things up? Here are a few creative variations to take your Monster Nachos to the next level:
-
BBQ Chicken Nachos: Add shredded BBQ chicken for a smoky twist! Layer it underneath the cheese for ultimate flavor.
-
Mediterranean Nachos: Swap out traditional toppings for feta cheese, roasted red peppers, and a drizzle of tzatziki sauce — a fresh and tangy alternative.
-
Loaded Veggie Nachos: Load them up with black beans, corn, diced bell peppers, and avocado for a hearty meatless option.
-
Buffalo Chicken Nachos: Use shredded rotisserie chicken tossed in buffalo sauce. Top with blue cheese crumbles for a spicy flavor bomb.
-
Breakfast Nachos: Layer with scrambled eggs, cherry tomatoes, avocado, and a drizzle of hot sauce. Perfect for brunch!
Chef’s Notes
Over the years, my Monster Nachos recipe has gotten quite the makeover! Initially, I started with just cheese and jalapeños, but as my taste evolved, so did my nachos. I’ve added everything from savory meats to fresh herbs, and you can bet my nachos have become a crowd favorite at every party!
I once had a New Year’s Eve bash where someone mistakenly grabbed a handful of nachos thinking they were chips! Let’s just say, it made for a hilarious moment when the person realized it wasn’t just a chip. The laughter that ensued? Priceless!
FAQs and Troubleshooting
1. My cheese didn’t melt well! What went wrong?
Make sure you’re using cheese that’s known for melting well, like cheddar or Monterey Jack. If you’re shredding it yourself, avoid pre-shredded cheese, which often has anti-caking agents that can hinder meltiness.
2. How do I prevent soggy nachos?
To avoid soggy chips, ensure your toppings (like salsa or guacamole) are served on the side, or use them sparingly. Always layer cheese on top to create a protective layer for the chips.
3. Can I make these in advance?
Prepare your chips and toppings ahead of time, but assemble and bake right before serving. Nachos are best enjoyed fresh!
4. What if I don’t have an oven?
No worries! You can make these nachos in an air fryer or even on the stovetop. Just layer the ingredients in a pan and cover with a lid to melt the cheese.
Nutritional Info
Although nachos are meant to be a delicious indulgence, moderation is key! Depending on how many toppings you add, a serving of these Monster Nachos can range around 300-500 calories. But hey, it’s all about enjoyment and sharing good food!
In Conclusion
There you have it, friends! Your ultimate guide to Monster Nachos, where every bite is a celebration of flavor and creativity. Cooking should always feel approachable and fun, just like these nachos! So gather your ingredients, invite some friends over, and let the nacho magic unfold.
At the end of the day, it’s not just about the nachos; it’s about the memories you create around the table. Here’s to good food and even better company! Cheers!
PrintMonster Nachos: The Ultimate Comfort Food
A glorious platter of nachos piled high with toppings, perfect for gatherings and movie nights.
- Prep Time: 10 minutes
- Cook Time: 15 minutes
- Total Time: 25 minutes
- Yield: 6 servings
- Category: Appetizer
- Method: Baking
- Cuisine: Mexican
- Diet: Vegetarian
Ingredients
- Tortilla Chips
- Sharp Cheddar Cheese
- Monterey Jack Cheese
- Black Olives
- Jalapeños
Instructions
- Preheat your oven to 400°F (200°C).
- Layer the chips on a large baking sheet, overlapping them for even cheese distribution.
- Add a generous sprinkle of cheese mix over the chips.
- Scatter olives and jalapeños over the cheese, adding any additional toppings you like.
- Bake for about 10-15 minutes until the cheese is bubbly and golden.
- Remove from oven and drizzle with salsa or guacamole, garnishing with cilantro if desired.
Notes
Try variations like BBQ chicken, Mediterranean, or breakfast nachos!
Nutrition
- Serving Size: 1 serving
- Calories: 400
- Sugar: 1g
- Sodium: 500mg
- Fat: 24g
- Saturated Fat: 10g
- Unsaturated Fat: 12g
- Trans Fat: 0g
- Carbohydrates: 35g
- Fiber: 4g
- Protein: 12g
- Cholesterol: 30mg
Keywords: nachos, comfort food, appetizer, party food, cheese
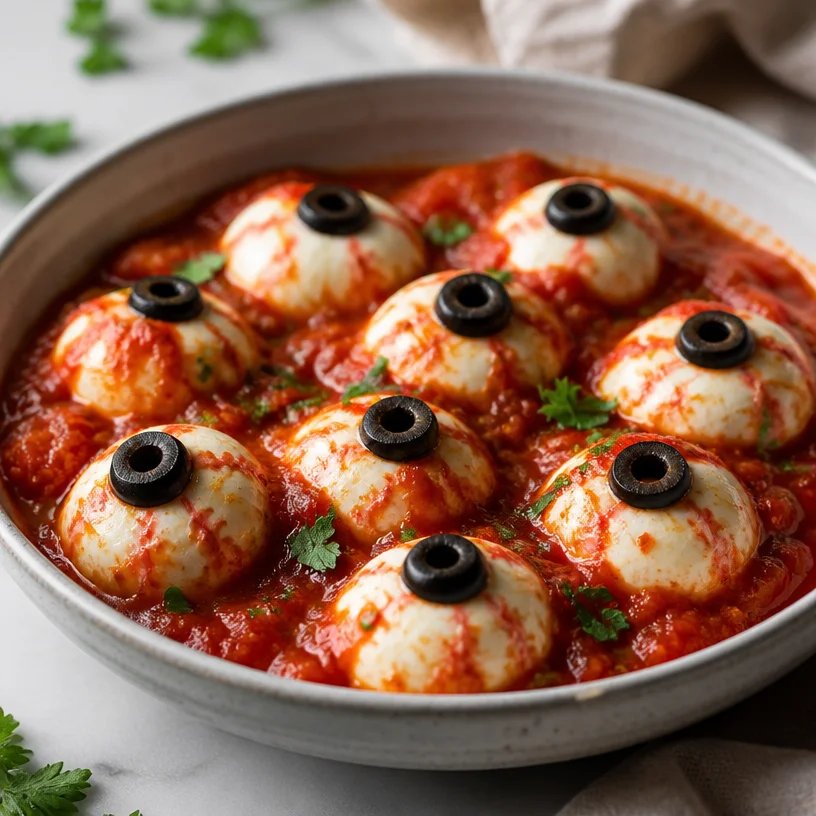
Bloody Mozzarella Eyeballs: Easy Halloween Party Snack
Bloody Mozzarella Eyeballs: A Spooky and Fun Treat
Hello, fellow foodies! If you’re looking for a fun, spooky dish that’s perfect for Halloween parties, movie nights, or any gathering that calls for a touch of the macabre, you’ve come to the right place. Today, we’re diving into the world of Bloody Mozzarella Eyeballs — a delightfully eerie appetizer that’s as simple to make as it is fun to eat. With just a few ingredients, you can transform everyday mozzarella balls into little “eyeballs” that will shock and delight your guests. So, grab your apron, and let’s get started!
Personal Story
Growing up, my family took Halloween quite seriously. Each year, my mom would whip up culinary creations that were both horrifying and delicious. One of my favorites was a spooky cheese platter adorned with grape “eyeballs” and macabre cheeses shaped like skulls. I still fondly remember the gasps and giggles from my friends when they took their first bites. My mom infused the kitchen with love and laughter, turning even the simplest dishes into a theatrical experience. This year, I wanted to bring back that nostalgia with my own twist: Bloody Mozzarella Eyeballs! They’re not just eye-catching but also a fantastic way to get everyone involved in the spooky spirit of the holiday.
Ingredients
Here’s what you will need to make these frightfully fun treats:
-
Fresh Mozzarella Balls: The stars of our dish! These soft, creamy balls will form the base of our eyeballs. Choose medium-sized balls for a more realistic look. If you can’t find fresh mozzarella, you can substitute with string cheese, but the texture won’t be as creamy.
-
Black Olives: These will serve as the “pupil” of our eyeballs. I prefer using pitted black olives to avoid any pit surprises! If you’re not a fan of olives, you can use cherry tomatoes or capers for an alternative look.
-
Marinara Sauce: Our “bloody” ingredient! A good quality marinara or even store-bought will work great. You could make your own to elevate the flavor, but honestly, this is about fun, so no pressure! For a twist, try using a spicy arrabbiata sauce for an extra kick.
Step-by-Step Instructions
Let’s dive into the delicious details of crafting our Bloody Mozzarella Eyeballs!
-
Prepare the Ingredients: Start by gathering all your ingredients. This is a fun, casual recipe, so set the mood with some eerie decorations or your favorite Halloween playlist. It’ll help get you in the spirit!
-
Drain the Mozzarella: If your mozzarella balls are packed in water, drain them well and pat them dry with a paper towel. This helps the marinara stick better later on. You want the mozzarella to be nice and firm, not soggy.
-
Slice the Olives: Using a sharp knife, slice the black olives into thin circles. You will want to keep them about a quarter of an inch thick. You can also cut a slice in half for smaller eyeballs. It’s fun to play around with the sizes!
-
Assemble the Eyeballs: Take a mozzarella ball and gently press an olive slice into the center for the pupil. Don’t worry about making it perfect; the more misaligned they are, the creepier they look, and we’re going for spooky, right?
-
Create the “Blood”: In a serving dish, pour enough marinara sauce to cover the bottom. Gently place your mozzarella eyeballs on top of the sauce. Feel free to drizzle a little more marinara over the mozzarella for a bloody effect. Create a design that oozes out for extra horror points!
-
Chill (Optional): If you have the time, cover and let the dish chill in the fridge for about 30 minutes. This helps the flavors meld, plus it makes for a refreshing chilled appetizer!
-
Serve: Once you’re ready to serve, garnish with fresh basil leaves if desired, and present your Bloody Mozzarella Eyeballs to your guests, watching their reactions as they dig in!
Serving Suggestions
Plating these eyeless wonders is simple yet effective. Use a shallow, wide dish for your marinara base to highlight the bloody effect. Place a handful of fresh basil around the edges to contrast with the red sauce and add a pop of color. You can also sprinkle some chili flakes on top for a spicy kick and an extra layer of creepiness. Serve with toothpicks or sturdy crackers to make them easy to grab — no one wants to fumble with a gooey eyeball!
Recipe Variations
Want to mix things up? Here are a few creative twists you can try:
- Spooky Stuffed Eyeballs: Fill the mozzarella balls with pesto before inserting the olive slice — it adds a herby twist!
- Cheesy Eyeballs: Add a small dollop of cream cheese or goat cheese into the mozzarella for a creamy center.
- Vegetarian Twist: Instead of olives, you can use colorful bell pepper rings for the pupils, creating a beautiful and vibrant dish!
- Spicy Eyeballs: Incorporate a finely diced jalapeño into the marinara sauce for a spicy kick that plays well with the creamy mozzarella.
- Herb-Infused Sauce: Stir in some fresh herbs, like basil or oregano, into your marinara sauce to elevate the flavor further!
Chef’s Notes
Ah, the joys of culinary creativity! This dish has evolved over the years, many a Halloween party transformed into a culinary showcase thanks to my love of spooky food. While Bloody Mozzarella Eyeballs may sound a little twisted, they’re all in good fun. I remember one party where we had rubber eyeballs scattered amongst the food, and guests couldn’t tell the little mozzarella treats from the decor! The laughter was contagious, proving that the kitchen is truly a place for joy, antics, and creating unforgettable memories.
FAQs and Troubleshooting
Q1: What if I can’t find fresh mozzarella?
A1: No problem! You can easily use string cheese or any small cheese ball, like burrata, for a similar effect. Just keep in mind that the flavor and texture might be slightly different.
Q2: How long can I keep these before serving?
A2: It’s best to serve them fresh or within a day. If you plan to make them ahead of time, store the ingredients separately and assemble them right before your gathering.
Q3: My marinara sauce is too thick; what can I do?
A3: You can thin out your marinara with a splash of water or stock until you reach your desired consistency. A dash of olive oil can also enrich the flavor!
Q4: What if I overdid it with the sauce?
A4: No worries! If you find the sauce too overpowering, serve the eyeballs on a separate platter and let guests dip them in the sauce as they please. You might even create a mini assembly line for added fun!
Nutritional Info
Because who doesn’t want to know a little about what they’re eating? Keep in mind that the nutritional values will vary based on portions and brands used, but here’s a ballpark estimate for a serving of Bloody Mozzarella Eyeballs (2):
- Calories: 150
- Protein: 8g
- Carbs: 10g
- Fat: 10g
So there you have it, my little culinary adventurers! Bloody Mozzarella Eyeballs are a delightful and effortless way to add a touch of spooky elegance to your next gathering. With just a handful of ingredients and a bit of creativity, you can impress your guests and create lasting memories around your table. As always, remember that cooking is all about enjoyment, so let your personality shine through and make it your own. Happy haunting!
PrintBloody Mozzarella Eyeballs

A spooky and fun appetizer featuring mozzarella balls transformed into creepy eyeballs, perfect for Halloween gatherings.
- Prep Time: 15 minutes
- Cook Time: 0 minutes
- Total Time: 15 minutes
- Yield: 4 servings
- Category: Appetizer
- Method: No Cooking
- Cuisine: Italian
- Diet: Vegetarian
Ingredients
- Fresh Mozzarella Balls
- Black Olives, sliced
- Marinara Sauce
Instructions
- Prepare the ingredients by gathering all items and setting a fun mood.
- Drain the mozzarella balls and pat them dry with a paper towel.
- Slice the black olives into thin circles.
- Assemble the eyeballs by pressing an olive slice into the center of a mozzarella ball.
- Create the “blood” by pouring marinara sauce in a serving dish and placing the mozzarella eyeballs on top.
- Chill in the fridge for about 30 minutes if desired.
- Serve the assembled dish with optional garnish of fresh basil leaves.
Notes
For a twist, try using spicy arrabbiata sauce or fill the mozzarella with pesto for a herby flavor.
Nutrition
- Serving Size: 2 eyeballs
- Calories: 150
- Sugar: 2g
- Sodium: 300mg
- Fat: 10g
- Saturated Fat: 2g
- Unsaturated Fat: 8g
- Trans Fat: 0g
- Carbohydrates: 10g
- Fiber: 1g
- Protein: 8g
- Cholesterol: 25mg
Keywords: Halloween, spooky appetizer, mozzarella, party food, easy recipes
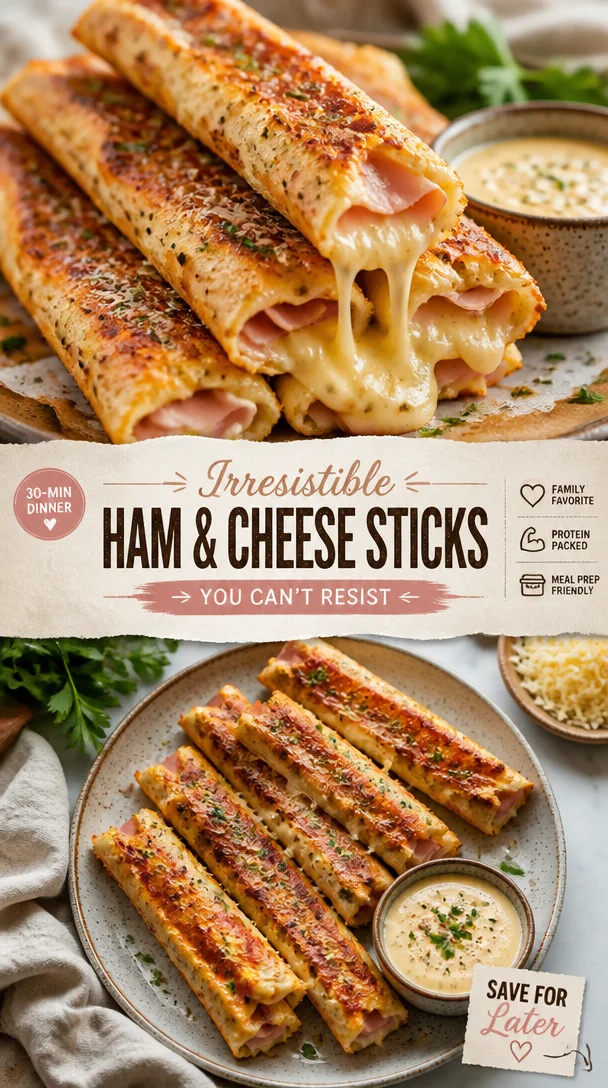
Irresistible Ham and Cheese Sticks You Can’t Resist
Irresistible Ham and Cheese Sticks You Can’t Resist
Welcome to my cozy corner of the culinary world! If you’re in search of a dish that hits all the right notes—savory, flaky, and utterly irresistible—then you’re in for a treat today. We’re diving into the delightful world of Ham and Cheese Sticks, a snack or appetizer that will leave everyone begging for more. Picture this: crispy, golden puff pastry wrapped around layers of delicious ham and melted cheese, brushed with a hint of mustard, and sprinkled with fresh parsley. What’s not to love?
It’s funny how some of the foods we cherish the most come wrapped in a little nostalgia. For me, the joy of Ham and Cheese Sticks stems from glorious afternoons spent in my grandmother’s kitchen, where the air was filled with the aroma of baking treats and laughter echoed off the walls. Every Sunday, she would whip up these delightful snacks for our family gathering. As a child, I was fascinated by the way those golden sticks would appear from the oven, a glorious triumph in both flavor and fun. It always felt like magic, and I knew I wanted to carry that tradition into my own kitchen.
So, whether you’re prepping for a family gathering, game night with friends, or just treating yourself, let’s embark on this culinary adventure together! Ready to tie on your apron and create something amazing? Let’s get cooking!
My Personal Story: The Sunday Staple
Memory is a powerful ingredient in cooking, don’t you think? I can still picture my grandmother’s hands—gentle yet skilled—rolling out the dough while we kids squealed in anticipation. The moment those Ham and Cheese Sticks came out of the oven, we’d crowd around the kitchen island, each hoping to snag the first bite. I remember how she always saved the last one just for me, a little secret between us as she winked and said, "You deserve it, darling."
Those sticks became a staple, a tradition that brought our family together every Sunday. Over time, I’ve made adjustments, trying out different cheeses and spices, but my love for this dish has remained constant. It represents not only comfort but also the joy of sharing moments with loved ones around the table.
Ingredients
Here’s what you’ll need to whip up these fabulous Ham and Cheese Sticks:
-
1 sheet thawed puff pastry
This flaky wonder serves as the perfect base to hold in all that savory goodness. If you don’t have puff pastry, you can swap it for phyllo dough, but remember, it will be flakier and might need careful handling. -
8 slices deli ham
Adds a salty, savory layer that pairs beautifully with the cheese. Feel free to use turkey or even plant-based deli slices for a lighter option. -
1 cup cheddar or mozzarella cheese
Choose your favorite cheese for a melty, rich filling that everyone will love! For a bolder flavor, consider sharp cheddar or pepper jack. -
1 large beaten egg
Provides a golden, shiny finish to your Ham and Cheese Sticks. If you’re vegan, a splash of non-dairy milk can work as an alternative glaze. -
1 tablespoon Dijon mustard
A tangy kick that elevates the flavor of the filling. You can also use whole grain mustard for a bit of texture or a touch of honey mustard for sweetness. -
2 tablespoons chopped fresh parsley (optional)
Adds freshness and color. You could substitute with fresh thyme or chives for a different herbal note. -
to taste salt
Essential for rounding out the flavors. Just a pinch will do, especially if your ham is salty. -
to taste pepper
Essential, too! Freshly cracked black pepper can enhance the overall seasoning of the dish.
Step-by-Step Instructions
Now, let’s dive into the kitchen. It’s time to create these irresistible Ham and Cheese Sticks!
-
Preheat Your Oven
Set your oven to 400°F (200°C). Preheating is essential for achieving that perfect flaky texture—trust me! -
Prepare the Pastry
Roll out your thawed puff pastry on a lightly floured surface. You want it to be as thin as possible without tearing. Think of it as a delicious canvas waiting for your masterpiece. -
Cut Your Pastry
Using a sharp knife or pizza cutter, slice the pastry into rectangles, roughly 3 inches by 5 inches. These will be your individual Ham and Cheese Sticks, so size them according to your appetite! -
Layer the Ingredients
Start with a slice of ham, laying it in the center of each pastry rectangle. Next, sprinkle a generous amount of cheese over the ham. Remember, the more cheese, the merrier! -
Add a Brush of Mustard
If you like a bit of tanginess, spread a tiny dollop of Dijon mustard on top of the cheese. It adds great depth and keeps everything deliciously moist. -
Fold and Seal
Fold the pastry over the filling to create a pocket, then pinch the edges together to seal them securely. This is where our flavors will cozy up during baking! -
Brush with Egg
Place the prepared sticks on a baking sheet lined with parchment paper. Brush the tops with the beaten egg for that golden sheen. Don’t be shy; it makes all the difference! -
Sprinkle with Seasoning
A light dusting of salt and pepper on top will elevate your Ham and Cheese Sticks. If you’re feeling fancy, throw on some sesame seeds or everything bagel seasoning for an extra pop of flavor. -
Bake
Slide your baking sheet into the preheated oven and bake for 15-20 minutes or until everything is puffed and gloriously golden brown. Keep an eye on them—no one likes a burnt stick! -
Cool & Serve
Once baked, let the sticks cool on a wire rack for a minute. This helps them retain their crispiness. But don’t wait too long; they’re best enjoyed warm!
Serving Suggestions
To plate these lovely Ham and Cheese Sticks, consider serving them on a beautiful wooden board. Pair with a small bowl of honey mustard or a tangy dip on the side for an extra zing! You can even garnish with a sprinkle of fresh parsley for a pop of color—as always, presentation is key!
Recipe Variations
Looking to mix things up? Here are some creative twists to consider:
- Spicy Kick: Add some sliced jalapeños or red pepper flakes to the filling for a spicy version.
- Herb Infusion: Experiment with fresh herbs, like thyme or rosemary, mixed in with your cheese for an aromatic lift.
- Veggie Delight: Toss in some diced bell peppers or spinach to the filling for added nutrition and flavor.
- Sweet Twist: Spread a thin layer of fig jam before layering ham and cheese for a sweet-savory combo.
- Cheesy Surprise: Mix a variety of cheeses, like brie and gouda, for a rich, decadent filling.
Chef’s Notes
As I’ve played with this recipe over the years, I’ve learned that the beauty lies in its adaptability. One day I might feel like making them spicy, while another might call for that classic sweet and savory flavor. And let me tell you, I’ve had my fair share of culinary missteps! I once forgot to seal the edges entirely, which sent melted cheese oozing out all over my baking sheet. The result? A mess—but also a new favorite dish inspired by the chaos!
Every burn, spill, and success in the kitchen shapes our cooking journey. So, embrace it all, and remember: cooking is about joy, not perfection.
FAQs and Troubleshooting
1. What do I do if my puff pastry is tearing?
If your pastry tears, don’t panic! You can easily patch it up with a bit of water to create a seal, or just use extra dough to cover the spot.
2. Can I make these ham and cheese sticks ahead of time?
Absolutely! You can prepare them a few hours in advance, cover them with plastic wrap, and pop them in the fridge until you’re ready to bake. Just be sure to brush them with the egg wash right before baking.
3. What can I serve alongside these sticks?
Pair these delightful bites with a fresh salad, a charcuterie board, or even a simple bowl of tomato soup for dipping!
4. Why are my Ham and Cheese Sticks not puffing up?
Ensure your oven is fully preheated before baking, and avoid overcrowding the baking sheet. Fresh puff pastry should give you that lovely rise. If in doubt, try chilling the pastry before baking to help with the puffing!
Nutritional Info
While I believe good food is about balance, here’s a quick nutritional overview per serving (based on one stick, for a batch of 8):
- Calories: 200
- Protein: 8g
- Carbohydrates: 15g
- Fat: 12g
So there you have it! From nostalgic memories to decadent flavors, these Ham and Cheese Sticks are sure to delight. I hope you find as much joy in making them as I do. Happy cooking, and remember—good food isn’t just about nourishment; it’s about connection. Tie on your apron and let’s keep spreading those culinary smiles!
PrintIrresistible Ham and Cheese Sticks

Delicious crispy puff pastry filled with savory ham and melted cheese, brushed with mustard and sprinkled with parsley.
- Prep Time: 15 minutes
- Cook Time: 20 minutes
- Total Time: 35 minutes
- Yield: 8 servings 1x
- Category: Appetizer
- Method: Baking
- Cuisine: American
- Diet: None
Ingredients
- 1 sheet thawed puff pastry
- 8 slices deli ham
- 1 cup cheddar or mozzarella cheese
- 1 large beaten egg
- 1 tablespoon Dijon mustard
- 2 tablespoons chopped fresh parsley (optional)
- to taste salt
- to taste pepper
Instructions
- Preheat your oven to 400°F (200°C).
- Prepare the puff pastry on a lightly floured surface.
- Cut the pastry into 3×5 inch rectangles.
- Layer the ham and cheese in the center of each rectangle.
- Add a tiny dollop of Dijon mustard on top of the cheese.
- Fold the pastry over the filling and pinch edges to seal.
- Brush the tops with the beaten egg.
- Sprinkle with salt and pepper.
- Bake for 15-20 minutes until golden brown.
- Cool on a wire rack before serving.
Notes
Serve warm with dipping sauce for extra flavor.
Nutrition
- Serving Size: 1 stick
- Calories: 200
- Sugar: 1g
- Sodium: 600mg
- Fat: 12g
- Saturated Fat: 4g
- Unsaturated Fat: 7g
- Trans Fat: 0g
- Carbohydrates: 15g
- Fiber: 1g
- Protein: 8g
- Cholesterol: 30mg
Keywords: ham, cheese, puff pastry, appetizer, snack, party food
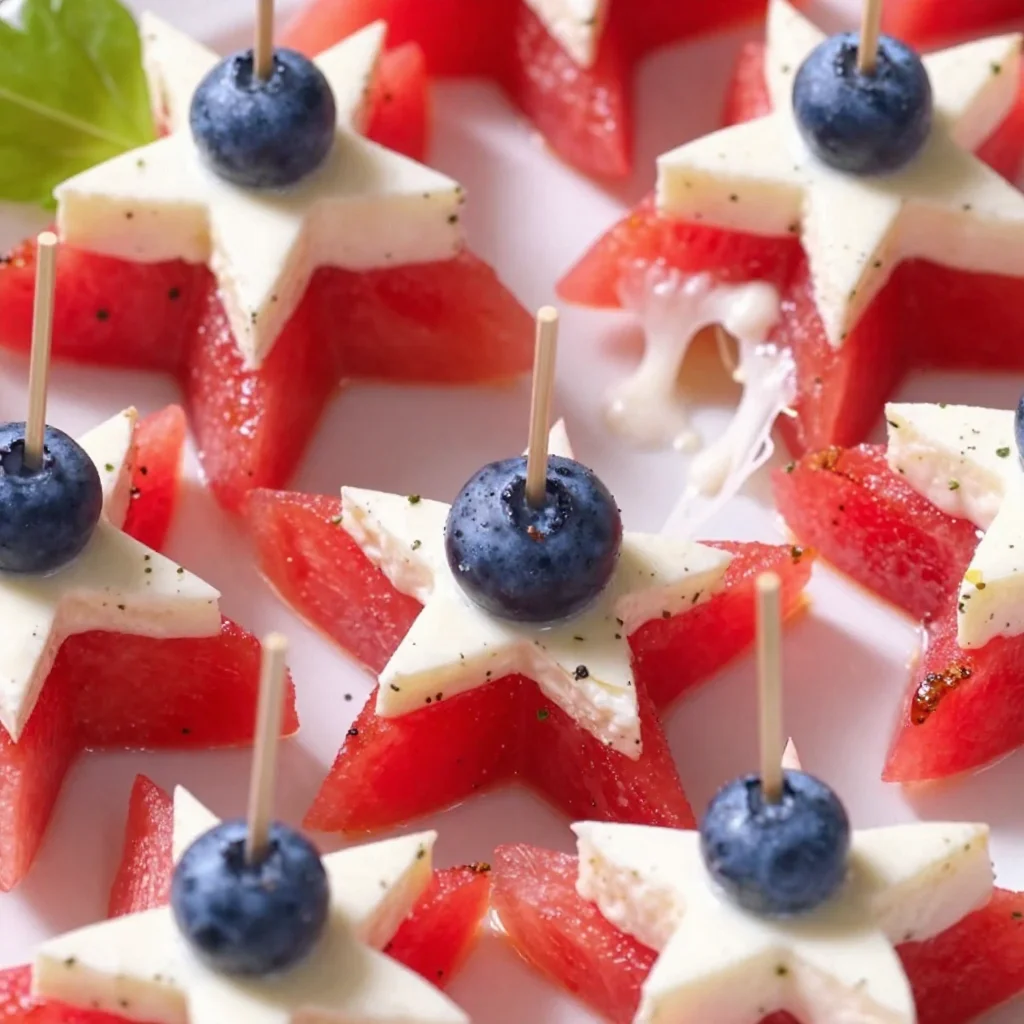
Minute Summer Watermelon Feta Skewers for BBQ Parties
A Fresh Take on Summer: Watermelon Feta Skewers
Welcome to today’s delicious adventure, foodies! I’m so excited to share with you a dish that perfectly captures the spirit of summer—Watermelon Feta Skewers. This delightful combination of sweet, juicy watermelon and creamy feta cheese is not only gorgeous to look at but also a treat for your taste buds. Whether you’re hosting a backyard barbecue or simply enjoying a sunny afternoon, these skewers are the ultimate no-fuss bites that strike the perfect balance between sweet and savory.
The best part? They come together in a snap! Simply assemble the ingredients on skewers, and you’ve got a refreshing appetizer that will impress all your guests. So, let’s dive into the world of these vibrant skewers—trust me, once you get started, you’ll find it hard to stop at just one!
Personal Story
I’ll never forget the first time I tried watermelon and feta together. It was a warm summer evening, and I was at a friend’s barbecue. As the sun began to set, the exciting smell of grilled veggies and sizzling burgers lingered in the air. Just when I thought the night couldn’t get any better, my friend handed me a plate filled with these colorful little skewers. One bite was all it took to fall head over heels—who knew such a simple combination could be so life-changing?
That day sparked a newfound adventure for me in the kitchen. I experimented with different ingredients, plating techniques, and flavor pairings. Each summer since, watermelon feta skewers have made their appearance at my gatherings, becoming a staple that always gets everyone talking. They remind me that sometimes, the simplest ingredients can create the most beautiful memories. So let’s keep that spirit alive and create some magic in our kitchens!
Ingredients
To make these refreshing Watermelon Feta Skewers, you’ll need just a few high-quality ingredients. Here’s what you’ll need:
-
Watermelon: Choose a ripe watermelon, preferably seedless. The sweetness and juiciness are what make these skewers sing! If you can’t find watermelon, try honeydew or cantaloupe for a twist.
-
Feta cheese: Use creamy feta for that rich, tangy flavor that pairs beautifully with watermelon. If you prefer a milder taste, goat cheese makes a great substitute that still offers creaminess.
-
Blueberries: These little gems add a pop of color and texture to the skewers. They’re also packed with antioxidants! No blueberries? Try strawberries or blackberries instead—they’ll add sweetness and a fabulous splash of color!
-
Skewers: Wooden or metal skewers both work well. If you’re using wooden ones, soak them in water for about 30 minutes before assembly to prevent burning when grilling.
Step-by-Step Instructions
1. Gather Your Ingredients
Start by pulling all your ingredients together. Having everything on hand will make the assembly process flow smoothly. Maybe pour yourself a refreshing drink while you’re at it—cooking should always feel enjoyable!
2. Prepare the Watermelon
Cut your watermelon into bite-sized cubes, roughly 1- to 1.5-inch squares. Make sure to slice off the green rind for a clean look. You can also use a cookie cutter to create fun shapes if you’re feeling artsy!
Chef Tip: When cutting watermelon, make sure your knife is sharp. A dull knife can slip and lead to uneven pieces—a safety hazard you want to avoid!
3. Crumble the Feta
Next up, take your feta cheese and crumble it into smaller pieces with your hands or a fork. This will allow you to get just the right amount on each skewer, and don’t worry about it being perfect—rustic is the way to go!
Chef Insight: If you’re using block feta cheese, cutting it into small cubes instead of crumbling is also perfectly fine. It adds structure and a different texture throughout!
4. Assemble the Skewers
Time to bring it all together! Take a skewer and start with a watermelon cube, followed by a piece of feta, then a blueberry. Repeat the process until you reach the end of the skewer. Each skewer should have about 2-3 watermelon cubes, 1-2 feta pieces, and a blueberry or two in between.
Chef Hack: Alternate your ingredients for visual appeal. The vibrant colors of the watermelon, creamy white of the feta, and deep blue of the blueberries will look eye-catching on your serving plate.
5. Drizzle and Serve
Once you’ve assembled all the skewers, drizzle them with some olive oil or balsamic reduction to take them over the top. Not too much, just enough to give a hint of flavor. Add a sprinkle of salt and pepper if you like!
6. Enjoy!
Serve these beauties immediately for the freshest flavor. If you need to prepare them in advance, feel free to cover and refrigerate until you’re ready to serve.
Serving Suggestions
For an eye-catching presentation, arrange the skewers on a beautiful platter, ensuring to alternate the colors for that stunning visual effect. To elevate your serving style, offer a small bowl with a homemade citrus vinaigrette or a herbed yogurt dip for an extra layer of flavor. Not only will your guests be dazzled, but they’ll also be thanking you for such a delightful treat!
Recipe Variations
- Herbed Feta: Mix some dried herbs like oregano or dill into your feta cheese for an additional flavor kick.
- Add Mint: Fresh mint leaves add a refreshing herbal note that complements the sweet watermelon beautifully.
- Spicy Twist: Drizzle your skewers with a bit of sriracha or chili flakes for a spicy touch.
- Melon Combo: Mix different melons for a colorful array—try using honeydew or cantaloupe alongside watermelon.
- Vegan Version: Swap feta with a cashew-based cheese for a vegan alternative that still hits the rich and creamy notes!
Chef’s Notes
Every recipe has a backstory, right? For me, these Watermelon Feta Skewers were born out of impatience—one summer afternoon, I was trying to impress a friend after a long day at work. I ran to the market and grabbed whatever looked fresh, tossing it onto skewers. What was meant to be a simple side dish captured everyone’s attention and quickly became a favorite!
Since then, I’ve tweaked the recipe here and there, trying new flavors and ingredients that surprise and delight. It’s an evolving dish that brings joy not just because of the taste, but the memories we create while making and sharing them.
FAQs and Troubleshooting
1. My watermelon is too watery; will it affect the dish?
Not at all! Just drain any excess liquid before assembling, and your skewers will still be delectable.
2. Can I make these skewers in advance?
Definitely! You can prepare them a few hours ahead of time. Just keep them covered in the fridge until you’re ready to serve.
3. What if I don’t have skewers?
No problem! You can serve the watermelon, feta, and blueberries deconstructed on a platter. Just drizzle and season as you would with skewers, and let guests dive in!
4. How can I ensure my feta doesn’t crumble too much?
Choose block feta instead of crumbled for a sturdier option. Also, try to handle it gently while assembling your skewers for less breakage.
Nutritional Info (Optional)
While I love focusing on flavor, here’s a little info for the health-conscious folks out there. Each skewer contains about 40 calories, with healthy fats from the feta and antioxidants from the blueberries, making this a guilt-free snack you can enjoy all summer long.
And there you have it—your guide to making memorable Watermelon Feta Skewers! I hope you’re as excited about these tasty bites as I am. So grab your apron, gather some friends or family, and let’s make some summer magic in the kitchen. Happy cooking!
PrintWatermelon Feta Skewers
A refreshing appetizer combining sweet watermelon and creamy feta cheese, perfect for summer gatherings.
- Prep Time: 15 minutes
- Cook Time: 0 minutes
- Total Time: 15 minutes
- Yield: 4 servings
- Category: Appetizer
- Method: No Cooking Required
- Cuisine: Mediterranean
- Diet: Vegetarian
Ingredients
- Watermelon: Choose a ripe, preferably seedless watermelon.
- Feta cheese: Use creamy feta for a rich flavor.
- Blueberries: Adds color and texture.
- Skewers: Wooden or metal, soak wooden skewers in water before using.
Instructions
- Gather your ingredients.
- Prepare the watermelon by cutting it into bite-sized cubes.
- Crumble the feta cheese into smaller pieces.
- Assemble the skewers starting with a watermelon cube, followed by feta, then a blueberry.
- Drizzle with olive oil or balsamic reduction.
- Enjoy immediately or refrigerate until ready to serve.
Notes
For a variation, try adding fresh mint or mixing in different melons.
Nutrition
- Serving Size: 1 skewer
- Calories: 40
- Sugar: 6g
- Sodium: 250mg
- Fat: 2g
- Saturated Fat: 1g
- Unsaturated Fat: 1g
- Trans Fat: 0g
- Carbohydrates: 8g
- Fiber: 1g
- Protein: 2g
- Cholesterol: 5mg
Keywords: watermelon, feta, skewers, summer appetizer, healthy snacks
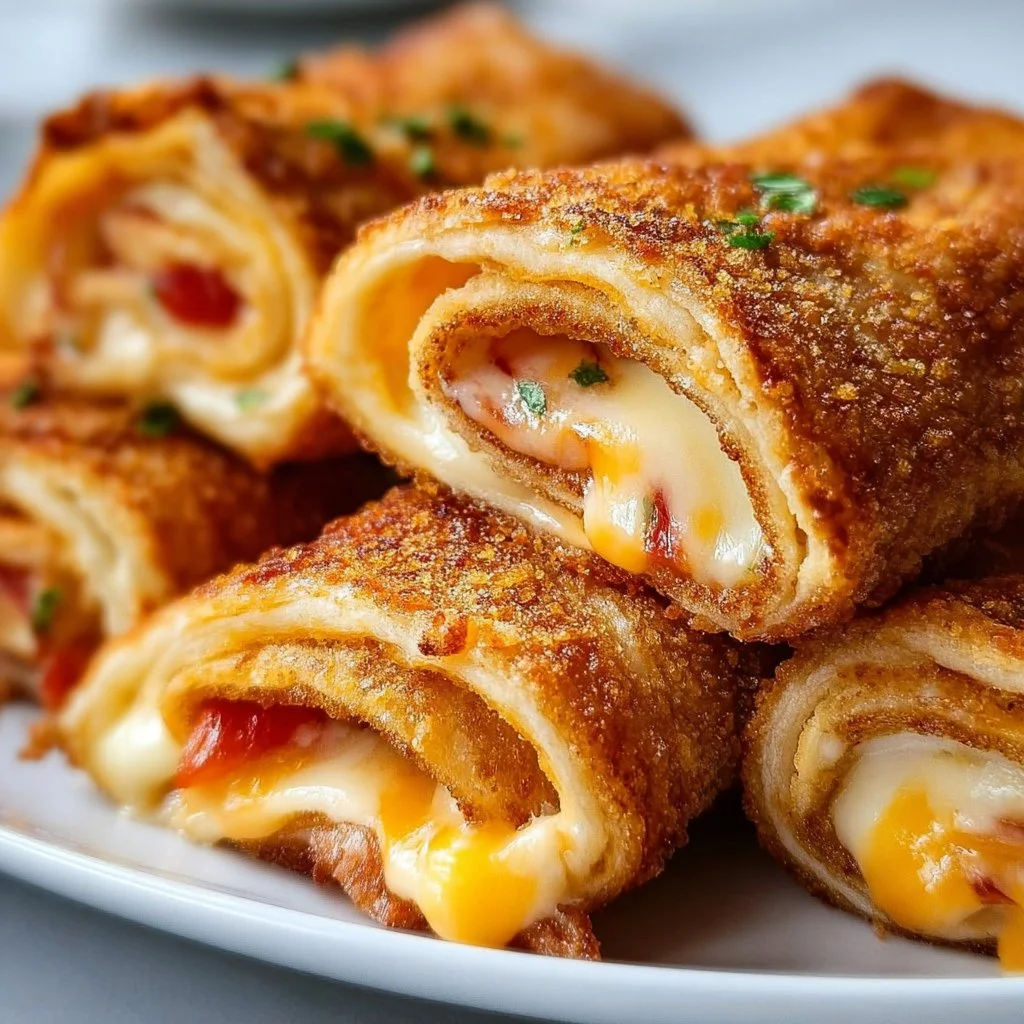
Crispy Cheesy Roll Ups
Crispy Cheesy Roll Ups: A Nostalgic Treat That’s Sure to Delight!
Hello, my fellow food enthusiasts! Today, I’m thrilled to share with you a delightful dish that’s not only super easy to make but is also packed with nostalgia—Crispy Cheesy Roll Ups. This tempting treat is perfect for a cozy night in, a casual gathering, or even a gourmet spin on your weekday meals. Ready to take a trip down memory lane? Let’s dive right in!
Introduction
When I think of comfort food, my mind instantly drifts to those cherished childhood moments spent in the kitchen with my family, joyfully creating simple yet delicious snacks that made us all smile. One dish that stands out is the crispy cheesy roll up—a delightful fusion of crispy exteriors and gooey cheese that brings back so many warm memories. The beauty of these roll-ups lies in their versatility; they can be tailored to suit any palate and are equally great as an appetizer, snack, or even a light meal.
Imagine the sound of sizzling bread as it hits the hot pan, the aroma of melting cheese wafting through the air, and the satisfaction of dipping a perfectly crisp roll into a rich tomato soup or tangy marinara sauce. Does it get any better? Not to mention, these roll-ups require minimal prep but deliver maximum flavor! So grab your apron—let’s create something scrumptious!
Personal Story
I remember the very first time I made Crispy Cheesy Roll Ups. I was about ten years old, and my best friend invited me over for a sleepover. We decided to venture into the kitchen, fueled by late-night giggles and an insatiable craving for snacks. We scoured the pantry, realizing we had bread and an abundance of cheese. I recall my excitement as we rolled each slice and carefully watched them fry to golden perfection.
As we eagerly dipped our creations into warm tomato soup, I felt a surge of accomplishment; we had made our very own special dish! That night wasn’t just about satisfying our hunger—it was about creativity, camaraderie, and the sheer joy of being together. To this day, every bite of these roll-ups brings back a flood of sweet memories, and I can’t wait for you to share in this delicious experience.
Ingredients
-
Slices of Bread:
- Choose your favorite type—white, whole grain, or sourdough all work wonders! For a gluten-free option, simply swap in gluten-free bread.
-
Cheese (Cheddar, Mozzarella, or Your Favorite):
- Opt for a melty cheese like cheddar or mozzarella that provides that gooey goodness. Feel free to experiment with pepper jack or gouda for an extra kick!
-
Butter (for frying):
- Butter not only adds flavor but helps achieve that crispy golden crust. If you’re feeling adventurous, try using olive oil for a lighter twist.
-
Tomato Soup or Marinara Sauce (for dipping):
- These classic dips elevate the dish! You can easily swap in a creamy ranch dressing or a zesty aioli for added flair.
Step-by-Step Instructions
-
Prepare Your Ingredients:
- Gather your bread, cheese, and any dipping sauces you plan to use. Prepping everything beforehand ensures a smooth cooking experience.
-
Flatten the Bread:
- Using a rolling pin, gently flatten each slice of bread. This helps with rolling and achieving that crispy texture! If you don’t have a rolling pin, a glass or bottle works just fine.
-
Add the Cheese:
- Place a slice of your chosen cheese on the flattened bread. Be generous—this is where the magic happens! Remember, the more cheese, the gooier the roll-up.
-
Roll It Up:
- Starting at one end, carefully roll the bread tightly around the cheese. Use a bit of pressure to keep it together. For added security, you can gently pinch the ends to seal in the cheesy goodness.
-
Heat the Pan:
- In a skillet, add a generous amount of butter. Heat over medium until melted and bubbling. The sizzle is part of the fun!
-
Fry the Roll-Ups:
- Place the roll-ups seam side down in the hot butter. Fry for about 2-3 minutes on each side or until golden brown and crispy. Keep an eye on them—nobody likes burnt cheese!
-
Drain Excess Butter:
- Once they’re golden, transfer your roll-ups to a paper towel-lined plate to soak up any extra butter. This keeps them crispy and not soggy!
-
Serve with Your Dipping Sauce:
- Arrange the crispy roll-ups on a beautiful platter, surrounded by your chosen dipping sauce. This adds a touch of elegance to your comfort food!
Serving Suggestions
Plating is an art, and these roll-ups deserve a little love! Serve them on a rustic wooden board or a bright ceramic platter. Drizzle a bit of olive oil on the side and garnish with fresh herbs (like basil or parsley). Don’t forget warm dips are essential! Create a mini dipping station with bowls of tomato soup or marinara sauce to enhance the aesthetic and the experience. Your guests are going to love it!
Recipe Variations
-
Herbed Roll-Ups:
- Add fresh herbs like basil or parsley between the cheese and the bread for an aromatic twist.
-
Spicy Kick:
- Incorporate sliced jalapeños or sriracha-infused cheese for those who like a bit of spice.
-
Sweet Tooth:
- Swap the cheese for Nutella or peanut butter and serve with a sweet dip—think honey or chocolate sauce.
-
Veggie Boost:
- Toss in some thinly sliced spinach or tomatoes for an extra layer of flavor and nutrition.
-
Cheesy Combination:
- Experiment with mixed cheeses, like cheddar and gouda, for a deeper flavor profile.
Chef’s Notes
As a self-proclaimed cheese enthusiast, I can’t help but chuckle at the many mishaps in my kitchen over the years. I once accidentally used too much cheese in a batch and felt devastated as I watched it ooze everywhere! But you know what? Some of the best culinary moments come from those happy accidents. Now, every cheesy overflow reminds me of those playful experiments and the joy of creation. Each time I roll up some bread with cheese, I’m reminded that the kitchen is a space for memories, laughs, and admittedly, delicious messes!
FAQs and Troubleshooting
1. My roll-ups are bursting open while frying. What did I do wrong?
- This can happen if the bread isn’t rolled tightly enough or if you overloaded on cheese. Make sure to pinch the seams well and stick to a reasonable cheese amount.
2. How do I make these roll-ups extra crispy?
- Make sure your butter is hot enough before adding the roll-ups. Frying at medium-high heat will create that delightful crispy texture.
3. Can I prepare these in advance?
- Yes! You can roll them up and refrigerate them before frying. Just pop them in the pan right before serving for a hot, crispy snack!
4. What if I don’t have any dipping sauce?
- Don’t fret! Even on their own, these roll-ups are delicious. You can also drizzle them with honey or a balsamic reduction for a sweet twist!
Nutritional Info (optional)
While I believe in indulging in delicious treats like these roll-ups in moderation, I understand that knowledge is power! Here’s a rough estimate per roll-up if you use standard bread and cheddar cheese:
- Calories: ~150
- Fat: ~9g
- Carbohydrates: ~15g
- Protein: ~5g
Enjoy these crispy cheesy roll-ups as a delightful treat that will surely warm your heart and bring every mouthful you take back to those cherished moments in the kitchen. I’m so glad you’re here to share this culinary journey with me at Ivory Apron! So, tie on your apron and let’s create something timeless together! Happy cooking!
PrintCrispy Cheesy Roll Ups

A delightful fusion of crispy exteriors and gooey cheese, perfect as an appetizer, snack, or light meal.
- Prep Time: 10 minutes
- Cook Time: 10 minutes
- Total Time: 20 minutes
- Yield: 4 servings
- Category: Snack
- Method: Frying
- Cuisine: American
- Diet: Vegetarian
Ingredients
- Slices of Bread (white, whole grain, or sourdough)
- Cheese (Cheddar, Mozzarella, or your favorite)
- Butter (for frying)
- Tomato Soup or Marinara Sauce (for dipping)
Instructions
- Prepare your ingredients: Gather your bread, cheese, and any dipping sauces.
- Flatten the bread: Use a rolling pin to flatten each slice of bread.
- Add the cheese: Place a slice of cheese on the flattened bread.
- Roll it up: Roll the bread tightly around the cheese.
- Heat the pan: Add butter to a skillet and heat until melted.
- Fry the roll-ups: Fry seam side down for about 2-3 minutes on each side.
- Drain excess butter: Transfer to a paper towel-lined plate.
- Serve with your dipping sauce: Arrange on a platter with chosen sauce.
Notes
For an extra crispy texture, ensure the butter is hot before adding the roll-ups. You can refrigerate them before frying for a quick snack.
Nutrition
- Serving Size: 1 serving
- Calories: 150
- Sugar: 2g
- Sodium: 300mg
- Fat: 9g
- Saturated Fat: 5g
- Unsaturated Fat: 4g
- Trans Fat: 0g
- Carbohydrates: 15g
- Fiber: 1g
- Protein: 5g
- Cholesterol: 20mg
Keywords: Crispy Cheesy Roll Ups, comfort food, snacks, easy recipes
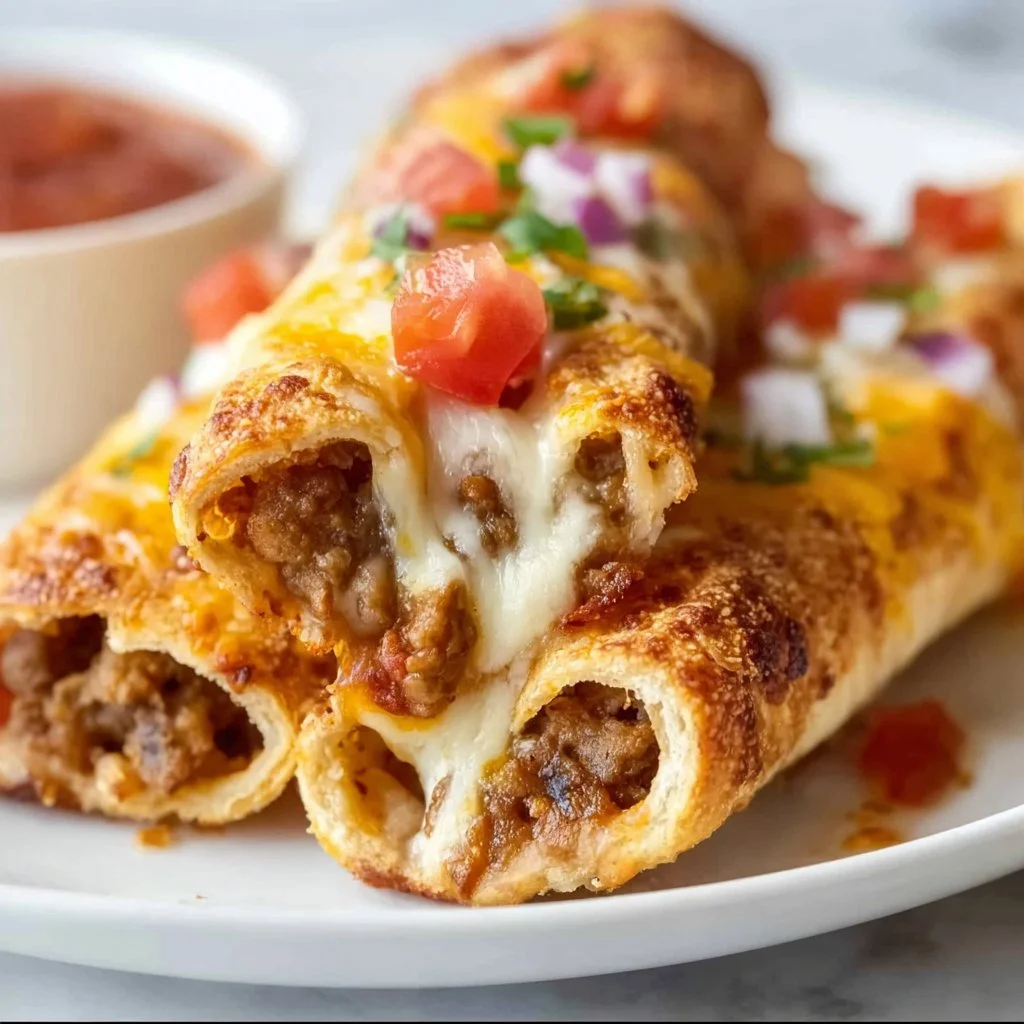
Cheesy Taco Sticks
Cheesy Taco Sticks: The Perfect Party Appetizer
Welcome to another delightful post from Ivory Apron! Today, we’re diving into the world of Cheesy Taco Sticks—a dish that perfectly combines bold flavors, gooey cheese, and a crispy texture that everyone will love. Whether it’s a casual weeknight dinner, a weekend gathering, or game day snacking, these cheesy delights will quickly become a family favorite. So, tie on your apron and let’s get started!
Personal Story
Picture this: a bustling kitchen filled with the sounds of laughter, sizzling pans, and the mouthwatering aroma of tacos. I remember one unforgettable taco night with my family when I was younger. My mom was busy whipping up her famous taco spread, and the excitement in the air was palpable. As she called us in, I spotted the melted cheese bubbling over the top of our ground beef tacos. This wasn’t just about the food; it was about the time spent together, the stories shared, and, of course, the fun of building our own taco creations.
Fast forward to today, and I’ve taken that nostalgic feeling and transformed it into something a little different—Cheesy Taco Sticks! They’re easy to make, fun to share, and bring back all those warm memories of family taco nights. So, whether you’re hosting a game night with friends or just looking for a cozy meal with loved ones, these cheesy treats will do the trick!
Ingredients
Let’s gather our ingredients! Here’s what you need for these Cheesy Taco Sticks:
-
1 package of flour tortillas
- These soft, chewy tortillas serve as the perfect vessel for all the delicious fillings. You can substitute with whole wheat or corn tortillas if you prefer a different flavor or texture!
-
1 cup shredded cheddar cheese
- Cheddar brings a tangy, bold flavor to our taco sticks. If you’re feeling adventurous, try a blend of cheeses like Monterey Jack or pepper jack for an extra kick!
-
1 cup cooked taco meat (beef or turkey)
- Ground beef is classic, but don’t shy away from ground turkey for a leaner option! Feel free to season your meat with your favorite spices to enhance the flavors.
-
1/2 cup salsa
- Salsa adds a vibrant kick! If you’re looking for a milder option, go with a chunky tomato salsa. For a spicy version, opt for a salsa verde or a roasted salsa to give it more depth and flavor.
-
1 tablespoon taco seasoning
- This is where the magic happens! You can use store-bought seasoning or mix your own with cumin, paprika, garlic powder, and a pinch of cayenne for some heat.
-
Cooking spray or olive oil for brushing
- A light brush of oil or spray helps the taco sticks become crispy and golden. You can use cooking spray for convenience or a drizzle of olive oil for a little extra flavor.
Step-by-Step Instructions
-
Preheat Your Oven:
Preheat your oven to 400°F (200°C). This ensures your Cheesy Taco Sticks will be perfectly crispy and golden brown when they come out of the oven. -
Prepare Your Taco Filling:
In a mixing bowl, combine the cooked taco meat, shredded cheddar cheese, salsa, and taco seasoning. Stir until well mixed. The cheese will act like a delicious glue that holds everything together, and the salsa will add moisture and flavor. Test it for seasoning—after all, a tasty filling is the heart of any good taco stick! -
Assemble the Taco Sticks:
Lay a flour tortilla on a clean surface. Spoon a generous amount of your taco filling onto one end of the tortilla. The key is not to overfill; less is often more here! Roll the tortilla tightly like a burrito, tucking in the ends as you go to secure the filling. Repeat this with the remaining tortillas. -
Brush and Bake:
Place the rolled taco sticks seam-side down on a baking sheet lined with parchment paper. Lightly spray or brush the tops with cooking spray or olive oil—this helps achieve that desirable golden crust. -
Bake Until Golden:
Bake them in your preheated oven for about 15-20 minutes until the tortillas are crisp and the cheese is melted and bubbly. Keep an eye on them to ensure they don’t brown too quickly! -
Slice and Serve:
Once out of the oven, allow them to cool for a few minutes before slicing them into bite-sized pieces. You can cut them diagonally for that trendy presentation or straight across for easy dipping.
Serving Suggestions
Serve your Cheesy Taco Sticks on a large platter with a selection of dipping sauces like sour cream, guacamole, or extra salsa. For flair, garnish with fresh cilantro or sliced green onions to make it visually stunning and appetizing. Whether it’s a party or a family dinner, these sticks are sure to be a hit!
Recipe Variations
Want to put a twist on these Cheesy Taco Sticks? Here are some fun ideas to experiment with:
-
Buffalo Chicken Taco Sticks: Use shredded buffalo chicken in place of taco meat and add a sprinkle of blue cheese for a spicy kick.
-
Vegetarian Delight: Substitute the meat with black beans or lentils. Throw in some corn and diced bell peppers for an added crunch.
-
Tex-Mex Twist: Mix in some chopped jalapeños or diced green chiles for a spicy touch.
-
Cheesy Veggie Option: Swap the beef for a melty cheese and spinach mixture for a delicious veggie option everyone can enjoy.
-
Breakfast Taco Sticks: Use scrambled eggs, breakfast sausage, and cheese wrapped in tortillas for a fun breakfast twist!
Chef’s Notes
Cooking is all about finding joy in the process, and these Cheesy Taco Sticks are no exception! I’ve had some hilarious mishaps while making these—like the time I accidentally added too much taco seasoning and turned our meal into a spicy adventure!
Over the years, this recipe has evolved from simple tacos to these trendy taco sticks that please both kids and adults alike. Remember, there are no hard and fast rules—keep experimenting and make it your own!
FAQs and Troubleshooting
1. What can I do if my taco sticks are soggy?
If you find your taco sticks are soggy, make sure to use a generous amount of cheese to bind the filling, and avoid adding too much liquid from the salsa. A sprinkle of additional cheese on top before baking can also help create a crispier texture.
2. Can I prepare these ahead of time?
Absolutely! You can assemble your taco sticks in advance and store them in the fridge. Just make sure to bake them fresh when you’re ready to serve so they maintain that delicious crunch.
3. How do I store leftovers?
If you have any leftovers (though they’re unlikely!), store them in an airtight container in the fridge. They can be reheated in the oven or air fryer for that crispy texture again.
4. Can I freeze these taco sticks?
Yes! These taco sticks freeze well. Just freeze them before baking, and when you’re ready to enjoy, bake from frozen—just add a few extra minutes to the cook time.
Nutritional Info
(If desired, please customize based on recipe specifics but here’s a general outline)
- Serving Size: 1 Stick
- Calories: Approx. 180
- Protein: 7g
- Fat: 8g
- Carbohydrates: 22g
There you have it! A delightful journey from the nostalgia of taco nights to creating your delicious Cheesy Taco Sticks. I hope you’re inspired to hop into your kitchen and make these for your next gathering. Remember, cooking is all about love and sharing, so gather your friends or family and enjoy the process. Happy cooking!
PrintCheesy Taco Sticks

Delicious Cheesy Taco Sticks combining bold flavors and gooey cheese, perfect for parties or family dinners.
- Prep Time: 15 minutes
- Cook Time: 20 minutes
- Total Time: 35 minutes
- Yield: 4 servings 1x
- Category: Appetizer
- Method: Baking
- Cuisine: Mexican
- Diet: Vegetarian option available
Ingredients
- 1 package of flour tortillas
- 1 cup shredded cheddar cheese
- 1 cup cooked taco meat (beef or turkey)
- 1/2 cup salsa
- 1 tablespoon taco seasoning
- Cooking spray or olive oil for brushing
Instructions
- Preheat your oven to 400°F (200°C).
- Combine the cooked taco meat, shredded cheddar cheese, salsa, and taco seasoning in a mixing bowl.
- Lay a flour tortilla on a clean surface and spoon a generous amount of filling onto one end.
- Roll the tortilla tightly like a burrito, tucking in the ends as you go.
- Place the rolled taco sticks seam-side down on a baking sheet lined with parchment paper.
- Brush the tops with cooking spray or olive oil.
- Bake for 15-20 minutes until the tortillas are crisp and the cheese is melted.
- Allow to cool for a few minutes before slicing into bite-sized pieces.
Notes
Serve with sour cream, guacamole, or extra salsa; garnish with fresh cilantro or sliced green onions.
Nutrition
- Serving Size: 1 stick
- Calories: 180
- Sugar: 2g
- Sodium: 500mg
- Fat: 8g
- Saturated Fat: 4g
- Unsaturated Fat: 3g
- Trans Fat: 0g
- Carbohydrates: 22g
- Fiber: 1g
- Protein: 7g
- Cholesterol: 30mg
Keywords: Cheesy Taco Sticks, Party Appetizer, Mexican Recipe
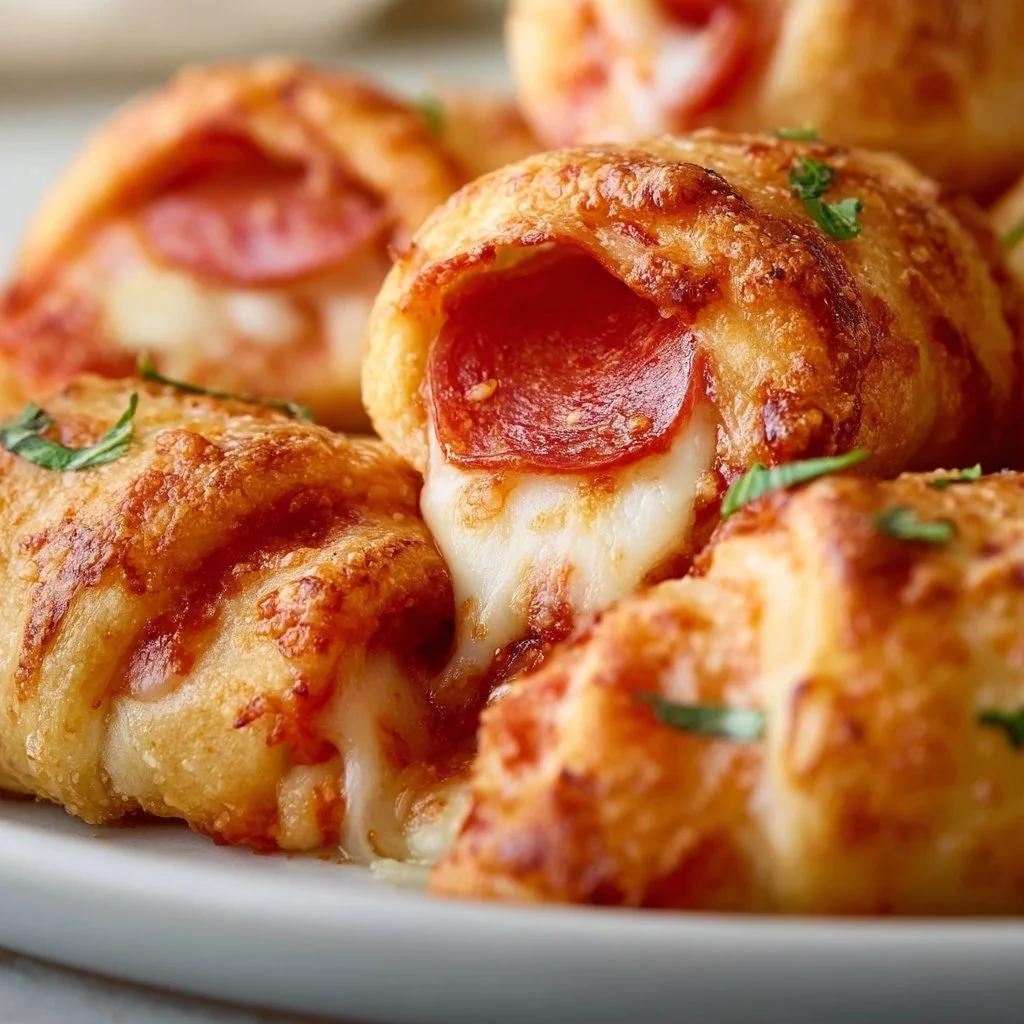
Pepperoni Pizza Crescent Rolls
Pepperoni Pizza Crescent Rolls: The Perfect Crowd-Pleaser
Hello, fellow food lovers! Today, we’re diving into a recipe that’s close to my heart and even closer to my stomach — Pepperoni Pizza Crescent Rolls! Perfect for game night, family gatherings, or just a cozy movie marathon at home, these little treats meld the gooey goodness of pizza with the buttery flakiness of crescent rolls. It’s like a pizza pocket but with that delightful pop-and-flake that only crescent dough can provide. Let’s roll up our sleeves and get cooking!
A Slice of Nostalgia
Growing up, pizza was more than just a meal; it was a family affair. I remember those Friday nights when my siblings and I would gather around the kitchen table with flour-dusted aprons, ready to make our own mini pizzas. We’d lay out various toppings, from gooey mozzarella to spicy pepperoni, and let our imaginations run wild. Each creation was a masterpiece, and everything was fair game, even the odd leftover broccoli that somehow made it onto the pizza.
But the real magic happened when my mom introduced us to crescent rolls. Oh, the joy of popping that can open! The crescents turned out to be a perfect vessel for pizza ingredients, transforming our casual Friday night into the aerial display of modern culinary gymnastics. Fast forward to today, and I can still taste that nostalgia in each flaky bite of these Pepperoni Pizza Crescent Rolls.
Ingredients
Let’s gather our ingredients for this super fun dish! Here’s what you’ll need:
-
1 can (8 oz) refrigerated crescent roll dough
The star of our show! For a healthier option, you can use whole wheat dough or a gluten-free version if you’re avoiding gluten. -
24 slices pepperoni
Classic, spicy, and oh-so-savory! If you prefer, switch it up with turkey pepperoni or even sliced salami for a gourmet twist. -
4 mozzarella string cheese sticks (cut in half lengthwise)
The gooey, melty cheese is what makes these rolls special. For a vegan version, use plant-based cheese sticks or chunks. -
2 tablespoons pizza sauce (optional, for rolling)
Dip, roll, or fill! Use homemade or store-bought. You can also use marinara or a spicy arrabbiata sauce for a kick. -
1 tablespoon butter (melted)
This will give your rolls a beautiful golden finish when baked. Feel free to substitute with olive oil or a dairy-free version for a lighter touch. -
½ teaspoon Italian seasoning
A sprinkle of this enhances the pizza flavor. If you don’t have it, try mixing dried basil, oregano, and thyme instead. -
¼ teaspoon garlic powder
For that extra flavor punch. Fresh minced garlic works beautifully here, too! -
Grated Parmesan cheese (optional, for topping)
Because everything’s better with cheese! Nutritional yeast can replace this if you’re keeping it vegan. -
Extra pizza or marinara sauce (for dipping)
You can never have too much sauce. Grab your favorite for that final touch.
Step-by-Step Instructions
Now that we’re all prepped, let’s dive into the cooking process. Follow along as we create those drool-worthy Pepperoni Pizza Crescent Rolls!
-
Preheat Your Oven:
Start by preheating your oven to 375°F (190°C). This ensures that our rolls bake evenly and get that enticing golden hue. Best way to preheat? Turn on the oven while you prepare the rest. This saves time! -
Prepare Your Baking Sheet:
Line a baking sheet with parchment paper or a silicone baking mat. Not only does this make clean-up easier, but it also helps the rolls crisp up perfectly on the bottom. -
Unroll the Crescent Dough:
Open that can of crescent dough — the pop is half the fun! Carefully unroll it on a clean surface to prevent tearing. You should see a triangle shape for each piece. -
Add the Sauce:
Grab the pizza sauce and use a small spoon to spread about half a teaspoon onto the wider end of each crescent triangle. This step is optional but adds an extra flavor layer. -
Layer the Toppings:
Place 3 slices of pepperoni on top of the sauce, followed by a half-piece of string cheese. The beauty here is the way the cheese melts into the pepperoni and creates that pizza magic we all adore. -
Roll It Up:
Starting from the wider end, gently roll the dough towards the tip. Tuck in the sides as you go to avoid the cheese peeking out. Place the rolls on the prepared baking sheet with the point side down to prevent them from opening up while baking. -
Brush with Butter:
In a small bowl, mix the melted butter with Italian seasoning and garlic powder. Brush the mixture generously over each roll for an added, buttery flavor and crispy finish. -
Sprinkle with Cheese:
If you’re feeling extra fancy, sprinkle a little grated Parmesan cheese over the top of each roll. This will lend a delightful nuttiness and make your rolls even more irresistible. -
Bake It Up:
Slide the baking sheet into the preheated oven and let them bake for about 12-15 minutes, or until the rolls are golden brown and the cheese is bubbly. Keep an eye out; everyone’s oven behaves a bit differently! -
Cool and Serve:
Once removed from the oven, allow the rolls to cool for a few minutes. This helps the cheese set a little and keeps you from burning your mouth — we want to savor, not scald!
Serving Suggestions
For that perfect presentation, plate these Pepperoni Pizza Crescent Rolls on a large wooden board or a stylish serving platter. Serve them alongside the extra pizza or marinara sauce for dipping. Feel free to sprinkle some fresh basil or parsley over the top for a pop of color. These rolls also look fabulous surrounded by a simple salad, creating a beautiful, inviting table!
Recipe Variations
-
Veggie Delight: Add chopped bell peppers, mushrooms, or olives for a veggie-packed version. Just be sure not to overstuff the rolls!
-
BBQ Chicken: Swap in shredded cooked chicken mixed with BBQ sauce instead of pepperoni for a great twist.
-
Buffalo Style: Use buffalo chicken and blue cheese for a spicy take. Your taste buds will thank you for the explosion of flavors!
-
Sweet N’ Savory: Try adding a hint of honey drizzled over the baked rolls for a delightful sweet contrast to the salty pepperoni.
Chef’s Notes
This recipe is one of those wonderful “kitchen-sink” creations. I love to experiment with whatever I have handy — I’ve even thrown in spinach or some sautéed veggies when I’m feeling a bit health-conscious! Also, if you have leftovers (which is rare but can happen), they make for an excellent lunch the next day — just pop them back in the oven to reheat for that freshly-baked taste. Trust me; they’ll be just as delicious!
FAQs and Troubleshooting
Can I use homemade dough instead of store-bought?
Absolutely! Just roll it out to the same thickness as crescent roll dough, and follow the same rolling and filling instructions.
What if my rolls burst open during baking?
Don’t fret! Sometimes the cheese may ooze out a bit, and that’s totally fine. If you want to prevent this, try to roll them tighter or use the point of the dough to seal everything in snugly.
How do I store leftovers?
Store them in an airtight container in the refrigerator for up to 2 days. Reheat in the oven for a few minutes to restore their flaky texture.
Can I freeze these rolls?
Yes! Assemble the rolls, but do not bake them. Freeze them on a baking sheet, then transfer them to a freezer-safe container. When you’re ready to enjoy, bake directly from frozen, adding a few extra minutes to the cooking time.
And there you have it: your complete guide to making delicious Pepperoni Pizza Crescent Rolls! They’re simple to whip up, packed with flavor, and truly the ultimate comfort food. So, what are you waiting for? Tie on that apron, gather your loved ones, and let’s make some memories in the kitchen. Happy cooking!
PrintPepperoni Pizza Crescent Rolls

Delicious crescent rolls filled with pepperoni and cheese, perfect for gatherings or movie nights.
- Prep Time: 15 minutes
- Cook Time: 15 minutes
- Total Time: 30 minutes
- Yield: 8 servings 1x
- Category: Appetizer
- Method: Baking
- Cuisine: Italian
- Diet: Vegetarian
Ingredients
- 1 can (8 oz) refrigerated crescent roll dough
- 24 slices pepperoni
- 4 mozzarella string cheese sticks (cut in half lengthwise)
- 2 tablespoons pizza sauce (optional, for rolling)
- 1 tablespoon butter (melted)
- ½ teaspoon Italian seasoning
- ¼ teaspoon garlic powder
- Grated Parmesan cheese (optional, for topping)
- Extra pizza or marinara sauce (for dipping)
Instructions
- Preheat your oven to 375°F (190°C).
- Prepare a baking sheet lined with parchment paper.
- Unroll the crescent dough on a clean surface.
- Add pizza sauce to the wider end of each crescent triangle.
- Layer 3 slices of pepperoni and half a piece of cheese on top of the sauce.
- Roll the dough gently from the wider end to the tip, tucking in the sides.
- Brush melted butter mixed with Italian seasoning and garlic powder over each roll.
- Sprinkle grated Parmesan cheese on top if desired.
- Bake for 12-15 minutes, or until golden brown.
- Cool for a few minutes before serving.
Notes
Feel free to experiment with different toppings or sauces. Leftovers can be reheated in the oven for freshness.
Nutrition
- Serving Size: 1 roll
- Calories: 250
- Sugar: 1g
- Sodium: 450mg
- Fat: 15g
- Saturated Fat: 7g
- Unsaturated Fat: 6g
- Trans Fat: 0g
- Carbohydrates: 25g
- Fiber: 1g
- Protein: 9g
- Cholesterol: 25mg
Keywords: pepperoni pizza rolls, crescent rolls, easy appetizers, game night snacks, vegetarian recipes
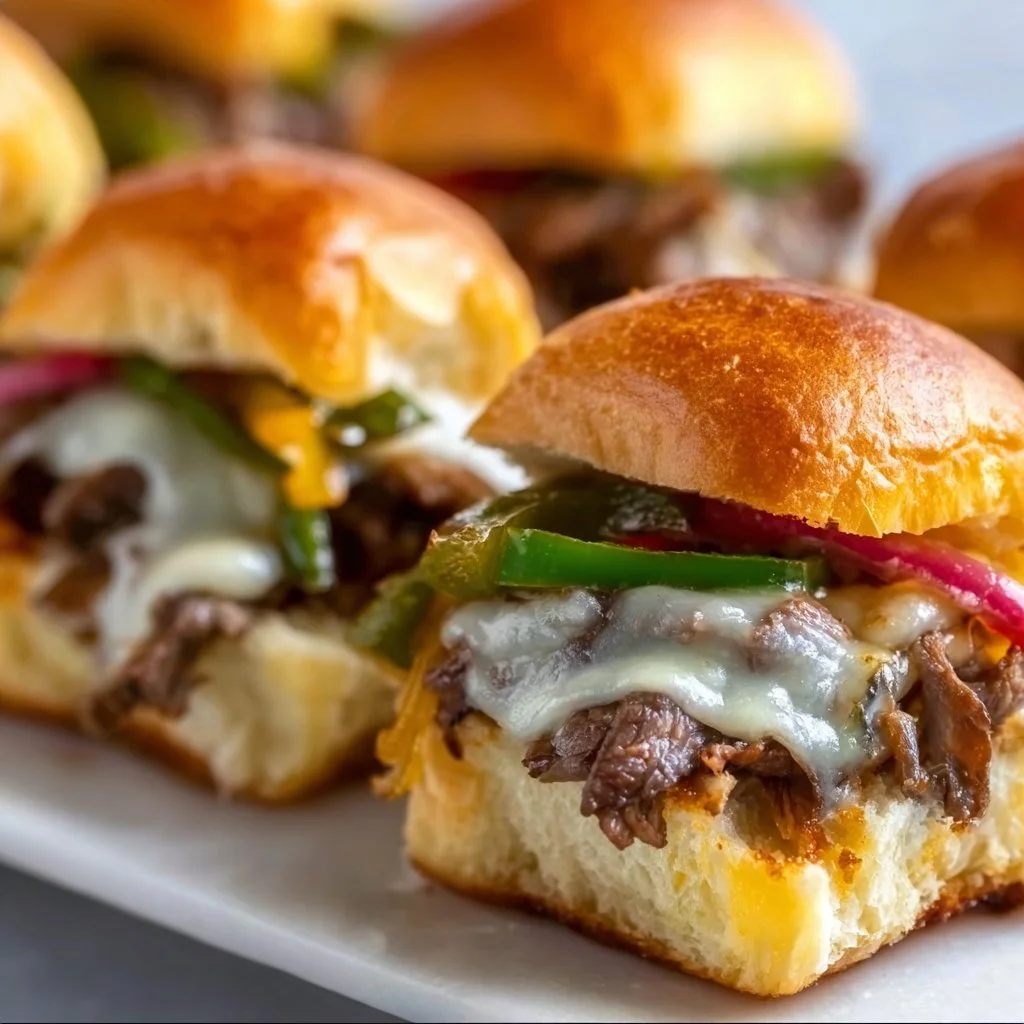
Philly Cheesesteak Sliders
Philly Cheesesteak Sliders: A Hearty Delight for Any Gathering
Hey there, food enthusiasts! Today, we’re diving into a scrumptious recipe that’s sure to be the star of your next gathering: Philly Cheesesteak Sliders! Imagine this: the aroma of sizzling beef, sweet caramelized onions, and vibrant green peppers wafting through your kitchen, inviting everyone to gather around for a bite of something truly delicious. Whether it’s game day, a casual get-together, or just a way to make a weeknight dinner feel a bit more special, these sliders are the ideal comfort food.
But what is it about a hot, melty cheesesteak that brings everyone together? In a world full of gourmet options, there’s something delightful about sinking your teeth into a modest slider that packs in layers of flavor, nostalgia, and loads of cheese. I’ll guide you through every step of this delicious journey, sharing tips and tricks that’ll make you feel like a pro in your own kitchen. So, roll up those sleeves, and let’s get to work on these iconic little bites that pack big flavor!
Personal Story
Ah, cheesesteaks – they remind me of my college days. I remember a late-night escapade with friends, the kind that started with laughter and ended with a quest for a bite to eat after too many hours in the library. We stumbled into a small, bustling diner where the sandwiches were crafted with love and more than a little elbow grease. I distinctly recall the moment I bit into my first cheesesteak. The rich beef, gooey cheese, and soft roll combined in a cheerful explosion of flavor, and I was instantly hooked! Fast forward many years, and I’ve taken that love and transformed it into these sliders. They capture all the essence of that unforgettable night, but in a size that’s perfect for sharing. Plus, they’re easy to make, meaning we can keep the party going without a fuss!
Ingredients
Let’s gather our ingredients! Each element plays a vital role in achieving that classic Philly cheesesteak flavor. Here’s what you’ll need:
-
1 lb ground beef
This is the heart of our sliders! You can substitute it with ground turkey or chicken for a lighter option, or use plant-based beef for a vegetarian twist. -
1 onion, chopped
Sweet or yellow onions are perfect for caramelizing. If you’re a fan of a bit more crunch and color, try adding red onions instead! -
1 green bell pepper, chopped
Provides that fresh crunch and vibrant color! Feeling adventurous? Swap it out for a red, yellow, or even a spicy pepper for a kick. -
8 oz provolone cheese, sliced
Melty, stretchy cheese is a must! You can use mozzarella or even a sharp cheddar for a different flavor profile. -
12 slider buns
Classic soft dinner rolls work beautifully, but you can use whole wheat or gluten-free buns as well. -
1/2 cup mayonnaise
This creamy base adds a delightful richness. For a zingy twist, mix in a touch of Dijon mustard! -
1 tablespoon Worcestershire sauce
Adds depth of flavor. If you’re avoiding soy, look for a soy-free alternative for a similar umami taste. -
Salt and pepper to taste
Essential seasonings that elevate every layer of flavor. -
Butter for greasing
For that beautiful golden finish on your buns!
Step-by-Step Instructions
Now that we’ve gathered everything, let’s get cooking! Here’s how to create these sliders from scratch:
-
Prep Your Ingredients: Start by chopping your onion and green bell pepper. Having everything ready to go is a game-changer, especially when you’re cooking with eager dinner guests waiting in the next room!
-
Sauté the Veggies: In a skillet over medium heat, melt some butter. Add the chopped onion and green bell pepper. Sauté for about 5-7 minutes until they are soft and caramelized. This step not only makes the onions sweet but helps develop flavors that will marry perfectly with the beef.
-
Brown the Beef: Add the ground beef to the skillet with the onion and pepper mixture. Cook until browned, breaking it apart with a wooden spoon as it cooks—approximately 8-10 minutes. Add Worcestershire sauce, salt, and pepper to taste. This is where the fun starts—watch as the flavors combine into a beautiful savory mix.
-
Assemble the Sliders: Preheat your oven to 350°F (175°C). Grease a baking dish with butter then slice the slider buns in half. Place the bottom halves in the dish. Layer your beef and veggie mixture generously on top, followed by slices of provolone cheese. You can’t have too much cheese, right? Top it off with the other half of the buns.
-
Add the Mayonnaise: Spread the mayonnaise on the top of the slider buns. This might seem unconventional, but it creates a creamy, decadent topping that takes these sliders to the next level.
-
Bake to Perfection: Brush the tops of the buns lightly with more melted butter, then pop them into the oven for about 15-20 minutes. You’re waiting for the cheese to become gooey, and the tops become golden brown. The smell alone will have everyone gathering in the kitchen!
-
Serve and Enjoy: Once out of the oven, let the sliders cool for a couple of minutes. They can be a bit messy when hot, but they are definitely worth the wait!
Each of these steps comes with its own little chef hacks. Don’t be shy to taste as you go—seasoning is key! And trust me, your kitchen will smell divine.
Serving Suggestions
To plate these glorious sliders, simply cut them apart and serve them on a festive platter. You can garnish them with fresh herbs like parsley or even some pickled jalapeños for an extra zing. Serve with a side of crispy potato chips or a fresh green salad for a complete meal. The combination of textures will leave everyone wanting more!
Recipe Variations
Now, let’s get a little creative! Here are a few twists to keep things exciting:
-
Mushroom and Swiss Sliders: Replace the beef with sautéed mushrooms and use Swiss cheese.
-
BBQ Cheesesteak: Mix in a bit of your favorite barbecue sauce for a sweet and smoky flavor profile.
-
Spicy Cheese Sauce: Add a jalapeño cheese sauce instead of provolone for a spicy kick!
-
Veggie Delight: Swap out the beef for lentils or chickpeas and add in your favorite veggies for a plant-based feast.
-
Mediterranean Twist: Use feta cheese, add olives, and replace the Worcestershire with a splash of lemon juice for a light, zesty option.
Chef’s Notes
I’ve made these sliders countless times, and they always bring back the warm feelings of gathering with friends and family. One time, I even made a giant version—a cheesesteak “cake” for a birthday party! It was as messy as it was delicious, and a huge hit. Just remember, these sliders are all about comfort and enjoyment—don’t stress too much about perfection. Remember, it’s all about the company and the memories you create around the table.
FAQs and Troubleshooting
-
Can I make the sliders ahead of time?
Absolutely! You can prepare the filling ahead and assemble them before baking. Just pop them in the oven when you’re ready to serve. -
What if my sliders are dry?
This can happen if the beef is overcooked. Always monitor it to retain moisture. Also, the mayo helps keep them juicy! -
Can I use different buns?
Yes, feel free to experiment with baguettes, pita bread, or even lettuce wraps for a low-carb option. -
How do I store leftovers?
Store any leftovers in an airtight container in the fridge. They’re great reheated in the oven or even the microwave for a quick snack!
Nutritional Info (Optional)
While I haven’t added nutritional info specifically, as a guideline, a typical Philly cheesesteak slider provides an excellent source of protein, fats from the cheese, and carbohydrates from the buns. For a healthier twist, consider the variations provided above!
Well, there you have it, my friends! A delicious guide to making scrumptious Philly Cheesesteak Sliders. They’re easy, fun, and sure to impress anyone who takes a bite. So, grab your apron and let’s create some unforgettable moments around the dinner table! Happy cooking! 🍽️
PrintPhilly Cheesesteak Sliders

Hearty Philly cheesesteak sliders packed with flavor and perfect for any gathering.
- Prep Time: 15 minutes
- Cook Time: 30 minutes
- Total Time: 45 minutes
- Yield: 6 servings 1x
- Category: Appetizer
- Method: Baking
- Cuisine: American
- Diet: None
Ingredients
- 1 lb ground beef
- 1 onion, chopped
- 1 green bell pepper, chopped
- 8 oz provolone cheese, sliced
- 12 slider buns
- 1/2 cup mayonnaise
- 1 tablespoon Worcestershire sauce
- Salt and pepper to taste
- Butter for greasing
Instructions
- Prep your ingredients: Start by chopping your onion and green bell pepper.
- Sauté the veggies: In a skillet over medium heat, melt some butter. Add the chopped onion and green bell pepper. Sauté for about 5-7 minutes.
- Brown the beef: Add the ground beef to the skillet with the onion and pepper mixture. Cook until browned, approximately 8-10 minutes.
- Assemble the sliders: Preheat your oven to 350°F (175°C). Grease a baking dish with butter then slice the slider buns in half.
- Add the mayonnaise: Spread the mayonnaise on the top of the slider buns.
- Bake to perfection: Brush the tops of the buns lightly with melted butter, then pop them into the oven for about 15-20 minutes.
- Serve and enjoy: Once out of the oven, let the sliders cool for a couple of minutes.
Notes
Feel free to experiment with different types of cheese or add spices to the beef for extra flavor.
Nutrition
- Serving Size: 1 slider
- Calories: 400
- Sugar: 3g
- Sodium: 500mg
- Fat: 18g
- Saturated Fat: 7g
- Unsaturated Fat: 9g
- Trans Fat: 1g
- Carbohydrates: 30g
- Fiber: 1g
- Protein: 20g
- Cholesterol: 50mg
Keywords: philly cheesesteak, sliders, comfort food, easy appetizer, party food