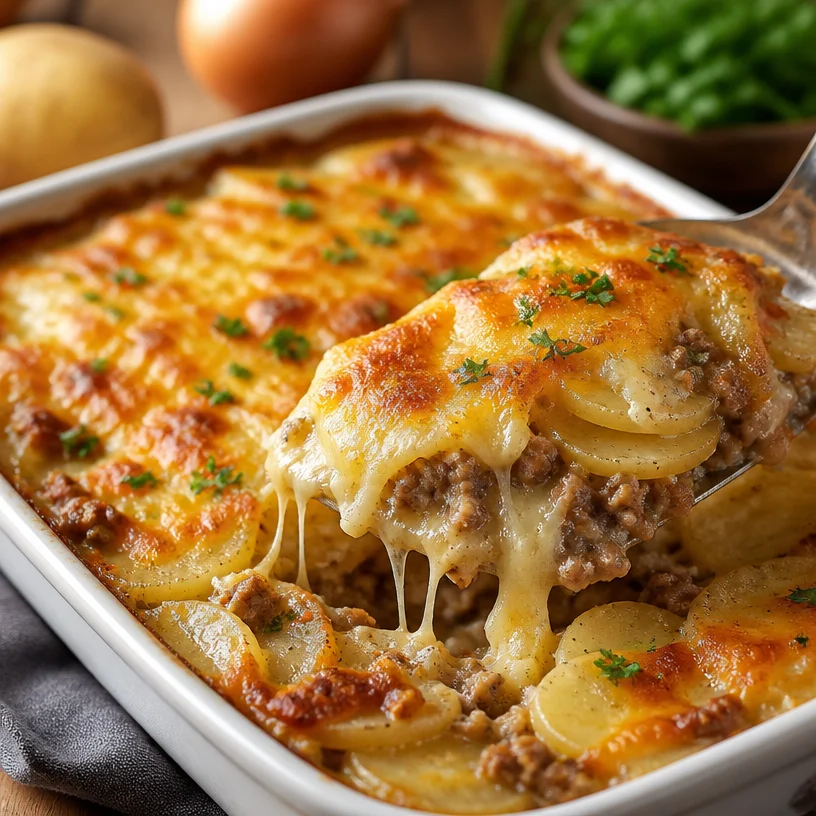
Easy Hamburger Potato Casserole for Busy Weeknights
A Heartfelt Hamburger Potato Casserole Recipe: Nostalgia on a Plate
Hello, dear friends! If you’re anything like me, the kitchen is where love comes alive. It’s that special place filled with the sounds of sizzling pans, the aromas of comfort food, and the joyful chatter of family and friends gathered around the table. Today, I’m thrilled to share with you one of my absolute favorite comfort food offerings: Hamburger Potato Casserole! This dish isn’t just a meal; it’s a bundle of memories, warm hugs, and laughter rolled into one.
Growing up, my mother made a version of this casserole that became a staple in our home. I can still hear the sound of the oven timer beeping as we all eagerly gathered around the kitchen island, plates in hand, waiting to dive into the cheesy, melty goodness that was about to grace our plates. The layers of tender potatoes, rich ground beef, and gooey cheese were more than just food; they were an experience—a delicious tradition that always brought us together, no matter how busy life got.
As we prepared to dive into this recipe, I want you to know that cooking should be a joyful affair. No need for master chef credentials here—just gather your ingredients, put on your apron, and let’s create a beautiful meal that will have you reminiscing and creating new memories with your loved ones.
So let’s dive into this nostalgic journey of flavors and textures!
A Personal Touch
One of my fondest memories related to Hamburger Potato Casserole took place during a chilly winter evening when I was in my early teens. I remember it vividly; the snow was falling outside, and the world looked like a sparkling wonderland. After a long day of sledding with friends, my siblings and I returned home, freezing and famished. The warmth and aroma wafting through the house welcomed us as we hurried to the kitchen.
My mother was pulling this casserole from the oven, the cheese bubbling blissfully. She served it in our favorite mismatched bowls, and as we dug in, the world outside faded away. It was pure comfort—each bite was a warm hug that made our worries disappear. To this day, whenever I make this casserole, I’m transported back to that moment—togetherness, warmth, and love shining brightly. Nostalgia is a powerful thing, wouldn’t you agree? Now, let’s create our own cozy memories in the kitchen!
Ingredients
Here’s what you’ll need to get started:
-
1 lb ground beef
A lean mix (85/15) is ideal for this recipe. It gives flavor without too much grease. If you’re looking for a healthier option, try ground turkey or chicken! -
4 medium potatoes
You can use russet or Yukon gold; just peel and slice them thin. Thin slices cook evenly and meld beautifully with the meat. If you’re looking for a twist, try sweet potatoes for a hint of sweetness. -
1 medium onion
Finely chopped to add a depth of flavor. If onions aren’t your thing, shallots or leeks are a great alternative. -
1 to 2 cups shredded cheese
I love using cheddar or mozzarella. Freshly shredded cheese is a game-changer—it melts better! If you’re feeling adventurous, a sprinkle of crumbled blue cheese can elevate the dish. -
½ cup milk
This adds creaminess and helps bind everything together. You can substitute with cream for a richer taste or unsweetened almond milk for a dairy-free option. -
2 tbsp butter (melted)
This enriches the dish and helps the milk soak into the potatoes. Don’t have butter? Olive oil works well too! -
Salt and pepper (to taste)
Always start light and adjust after baking. Freshly ground black pepper gives a fantastic aroma. -
Garlic powder (to taste)
This adds a subtle savory note without overpowering the dish. Want a more intense garlic flavor? Consider using fresh minced garlic!
Step-by-Step Instructions
Now that we’ve gathered our ingredients, let’s dive into the cooking process!
-
Preheat Your Oven
Start by preheating your oven to 350°F (175°C). This ensures even cooking and that perfect golden crust on top. -
Cook The Ground Beef
In a large skillet over medium-high heat, add the ground beef. Break it apart with a wooden spoon, cooking until it’s browned and no longer pink. This usually takes about 7-10 minutes. Make sure to drain any excess grease. I like to sprinkle a bit of salt and pepper over the beef as it cooks to enhance the flavor! -
Sauté The Onions
Add the finely chopped onion to the skillet with the beef (you can do this in the same pan!). Cook for an additional 3-4 minutes, until the onion is soft and translucent. This adds a lovely sweetness, balancing out the savory beef. If you enjoy a bit of sweetness, you can even toss in some bell peppers for a pop of color and flavor! -
Prep The Potatoes
While the beef and onions are cooking, peel and slice your potatoes thinly. Aim for about 1/8-inch thickness; this helps them cook through and meld beautifully. Toss them into a large mixing bowl and season with a pinch of salt, pepper, and garlic powder. This little seasoning step will give your casserole an extra flavor boost! -
Assemble The Casserole
In a large greased baking dish, layer half of the sliced potatoes on the bottom. Follow with your cooked ground beef and onion mixture. Pour in the milk and melted butter. Then layer the remaining potato slices on top. Don’t forget to sprinkle more garlic powder, salt, and pepper over the top! -
Top It Off
Finish by generously sprinkling your shredded cheese on top. Bake in your preheated oven for approximately 45 minutes, or until the potatoes are tender and the cheese is bubbling and golden. If you like a crunchy top, feel free to broil it for a few minutes at the end—just keep an eye on it! -
Let It Rest
Once out of the oven, let the casserole sit for about 10 minutes. This helps everything set up and makes serving much easier.
Serving Suggestions
When it’s finally time to serve your Hamburger Potato Casserole, it’s all about presentation! Use a large spoon to scoop out a generous portion for everyone. I love serving this dish alongside a fresh green salad dressed with a simple vinaigrette to cut through the richness. If you’re feeling adventurous, add a dollop of sour cream or a sprinkle of fresh herbs on top before serving for a pop of color and flavor!
Recipe Variations
Here are a few creative twists you might want to consider:
-
Tex-Mex Casserole: Add some diced tomatoes, black beans, and corn to the beef mixture. Top with pepper jack cheese for a spicy kick.
-
Italian Style: Add Italian herbs (like oregano and basil) to the beef and swap the cheddar for mozzarella and marinara sauce for a twist reminiscent of lasagna.
-
Vegetarian Version: Substitute the ground beef with lentils or a plant-based meat alternative and add an extra layer of your favorite veggies, like spinach or mushrooms.
-
Loaded Baked Potato Casserole: Top the entire dish with crispy bacon bits, green onions, and tangy ranch dressing for a fun loaded potato vibe.
Chef’s Notes
Cooking is truly a journey, and every recipe evolves over time. I remember when I first started making this Hamburger Potato Casserole. I would simply dump everything in without any thought. Now, I’ve learned that layering the ingredients and seasoning each layer makes all the difference in flavor. It’s like giving each bite a little extra love!
Oh, and I can’t help but chuckle at the time I accidentally added way too much garlic powder. Let’s just say it was a flavor adventure that led to a very garlicky love!
FAQs and Troubleshooting
1. Why did my casserole turn out watery?
This usually happens if the potatoes release too much moisture. Make sure to slice them thinly and season them before layering—they’ll absorb liquid better that way.
2. How do I know when the casserole is done?
You’re looking for tender potatoes and bubbling cheese. A fork should slide easily into the casserole, and the top should be golden and slightly crispy.
3. Can I make this casserole ahead of time?
Absolutely! Assemble the casserole, cover it, and keep it in the fridge for up to 24 hours. Just remember to add an extra 20 minutes to the baking time if you cook it directly from the fridge.
4. What if I don’t have an oven-safe dish?
No worries! You can cook it in a stovetop-safe skillet, covered with a lid, on low heat. Just ensure the heat is even to avoid burning!
Nutritional Info (optional)
While I won’t delve too deeply into numbers today, this casserole is a hearty meal that provides protein, carbohydrates, and essential nutrients, especially if you load it with fresh veggies. It’s all about enjoying balance and sharing love over food—don’t get too caught up in the numbers!
And there you have it, my dear friends! Making this Hamburger Potato Casserole isn’t just about feeding the body; it’s about nourishing the spirit. So gather your loved ones around the table, share stories, and create memories that will last a lifetime. Happy cooking, and remember—good food isn’t about showing off; it’s about showing up. Cheers to our kitchen adventures together! 🍽️❤️
PrintHeartfelt Hamburger Potato Casserole
A nostalgic and comforting Hamburger Potato Casserole filled with layers of tender potatoes, rich ground beef, and gooey cheese, perfect for creating memories around the dinner table.
- Prep Time: 15 minutes
- Cook Time: 45 minutes
- Total Time: 60 minutes
- Yield: 4 servings 1x
- Category: Main Course
- Method: Baking
- Cuisine: American
- Diet: Omnivore
Ingredients
- 1 lb ground beef
- 4 medium potatoes, peeled and sliced thin
- 1 medium onion, finely chopped
- 1 to 2 cups shredded cheese (cheddar or mozzarella)
- ½ cup milk
- 2 tbsp butter, melted
- Salt and pepper, to taste
- Garlic powder, to taste
Instructions
- Preheat your oven to 350°F (175°C).
- Cook the ground beef in a large skillet over medium-high heat until browned, about 7-10 minutes, and drain excess grease.
- Sauté the finely chopped onion with the beef for 3-4 minutes until soft.
- Prep the potatoes by slicing them thinly and seasoning with salt, pepper, and garlic powder.
- Assemble in a greased baking dish starting with half the potatoes, followed by the beef mixture, then milk and melted butter, and layer the remaining potatoes on top.
- Top with shredded cheese and bake for approximately 45 minutes or until potatoes are tender and cheese is golden.
- Let the casserole sit for 10 minutes before serving.
Notes
For a twist, try adding bell peppers or using sweet potatoes. Substitute ground beef with lentils for a vegetarian version.
Nutrition
- Serving Size: 1 serving
- Calories: 450
- Sugar: 4g
- Sodium: 600mg
- Fat: 24g
- Saturated Fat: 10g
- Unsaturated Fat: 12g
- Trans Fat: 0g
- Carbohydrates: 35g
- Fiber: 4g
- Protein: 25g
- Cholesterol: 70mg
Keywords: hamburger casserole, potato casserole, comfort food, family recipe, nostalgic meal
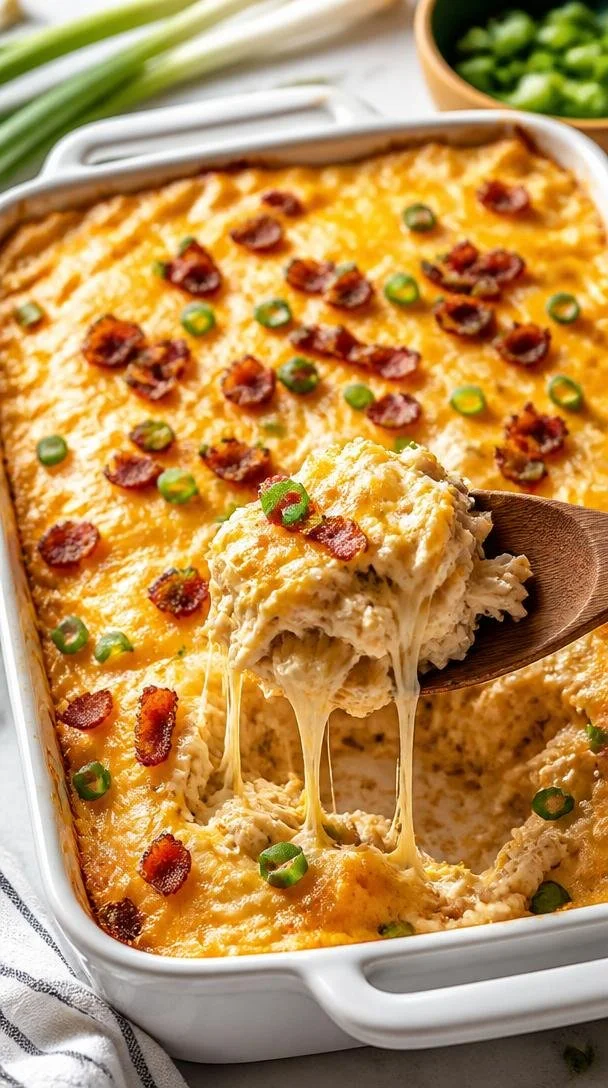
Creamy Crack Chicken Casserole: 30-Minute Meal Prep
Creamy Crack Chicken Casserole: A Comfort Food Delight
Hello, friends! Today, we’re diving into a dish that truly feels like a hug on a plate: Creamy Crack Chicken Casserole! If you’ve never had this dish before, prepare yourself for a symphony of flavors that’s both indulgent and comforting.
Introduction
As the seasons change and the crisp air rolls in, my thoughts turn to cozy nights, warm kitchens, and, of course, soul-satisfying meals. Nothing beats the feeling of gathering friends and family around a hearty dish that warms the heart and fills the belly. Creamy Crack Chicken Casserole does just that — it’s creamy, cheesy, and loaded with flavor.
Now, why call it “crack chicken”? The name comes from the irresistible nature of this dish; one bite and you’ll understand. The combination of shredded chicken, creamy cheese, savory bacon, and the tangy zest of ranch dressing create an explosion of flavors that no one can resist. Plus, it’s an absolute crowd-pleaser, making it perfect for dinner parties, potlucks, or just a cozy night in.
So, grab your apron, pour yourself a glass of something sparkly, and let’s get cooking together!
Personal Story
I remember the first time I made Creamy Crack Chicken Casserole. It was an impromptu gathering at my place, and I found myself with a fridge full of leftover rotisserie chicken. Thinking quickly, I melted the cream cheese and mixed in some ranch dressing, cheddar cheese, and bacon bits, hoping for the best. I layered it all up in a casserole dish and popped it in the oven, my heart racing with excitement.
When I pulled it out, the aroma enveloped the kitchen, drawing everyone to the table. As we dug in, laughter filled the room — that warm, inviting kind of laughter that makes memories. Each bite felt like a little celebration. From that day on, it became a staple in my dinner rotation. Now, it’s a dish that not only fills bellies but also brings people together, wrapping them in a blanket of comfort and joy. Every time I serve it, I’m reminded of that initial gathering, the unwavering bond of shared meals, and the unforgettable moments we create around the table.
Ingredients
Here’s what you’ll need to whip up this fantastic casserole:
-
3 cups cooked, shredded chicken breast: Rotisserie chicken works perfectly here. Not only does it save time, but the flavor is incredibly rich and savory. You can also use leftover chicken or cook your own if you prefer!
-
6 slices bacon, cooked and crumbled: I recommend using thick-cut bacon for maximum flavor. If you’re looking for a healthier option, turkey bacon is a great substitute. Just know that it might not crisp up quite the same way.
-
8 oz cream cheese, softened: This is the heart of your creamy sauce! Make sure to let it sit at room temperature for easier blending. For a lighter option, you could try Neufchâtel cheese instead.
-
½ cup ranch dressing: You can choose store-bought or whip up a homemade version. If you’re feeling adventurous, try a different dressing like blue cheese for some tang!
-
1½ cups shredded cheddar cheese (about 6 oz): Cheddar adds the gooey, cheesy goodness this dish craves. You can go for sharp for an extra punch or mild if you prefer something more subtle.
-
½ cup sour cream (optional but recommended): A dollop of sour cream elevates the creaminess factor. If you’re looking for a lighter option, Greek yogurt is an excellent substitute.
-
2 stalks green onions, thinly sliced: These give a crunchy texture and fresh flavor. You can switch with chives if you want something milder.
-
1 teaspoon garlic powder: This brings depth to the dish. If you have fresh garlic on hand, feel free to use that instead, roughly one clove should do.
-
Salt and pepper to taste: Always taste as you go! It’s the best way to personalize the dish to your liking.
Step-by-Step Instructions
Now that we’ve got our ingredients ready, let’s make some kitchen magic happen! Follow these easy steps for a deliciously creamy casserole:
-
Preheat the Oven: Start by preheating your oven to 350°F (175°C). This will ensure that your casserole bakes evenly and gets bubbly and golden on top.
-
Cook the Bacon: In a skillet over medium heat, cook your bacon until it’s nice and crispy, about 7-10 minutes. Tip: If you slice the bacon into pieces before cooking, it will crisp up faster and feel more integrated into the dish later. Once done, set the bacon aside on paper towels to drain and cool.
-
Mix the Base: In a large bowl, combine your softened cream cheese and ranch dressing. Use an electric mixer or a fork to blend until smooth and creamy. Pro Tip: If you forgot to take the cream cheese out before starting, microwave it for about 15-20 seconds to soften it quickly.
-
Shred that Chicken: If you haven’t already shredded your chicken, do it now. You want those delicious pieces to be bite-sized and ready to mingle with the sauce.
-
Combine Ingredients: In the same bowl, add the shredded chicken, crumbled bacon, half of the cheddar cheese (saving the other half for topping), sour cream, green onions, garlic powder, salt, and pepper. Gently fold everything together. Ensure that the chicken is evenly coated, and all ingredients are well-combined.
-
Transfer to Casserole Dish: Grease a 9×13-inch casserole dish with cooking spray or a bit of butter. Pour the chicken mixture into the dish, spreading it out evenly.
-
Top It Off: Sprinkle the remaining cheddar cheese over the top of the casserole. The cheese will melt into a lovely, golden layer as it bakes!
-
Bake: Place the casserole in the preheated oven and bake for 25-30 minutes, or until it’s hot and bubbly. You’ll know it’s done when the edges are slightly golden, and the center is warmed through.
-
Serve & Enjoy: Once it’s done, let the casserole cool for a few minutes. This will help everything set up nicely before serving. Garnish with extra green onions if you like, and watch everyone gather around the table in anticipation!
Serving Suggestions
To serve, plate generous portions on individual plates, or let everyone scoop their own from the casserole dish. I love adding a side salad for a burst of freshness or some buttery garlic bread for that perfect pairing. You could even throw together a quick veggie platter for some crunch on the side. The colors and textures will complement the creamy casserole beautifully!
Recipe Variations
Here are a few fun twists to make this dish your own:
-
Spicy Kick: Add some diced jalapeños or sliced banana peppers into the mixture for a spicy version that gives your taste buds a fun surprise!
-
Pasta Bake: Fold in some cooked pasta, like rotini or penne, to turn this into a hearty pasta bake.
-
Vegetarian Version: Swap out chicken for some sautéed mushrooms and spinach. You can also add in chopped bell peppers for extra texture and color.
-
Herb Infusion: Toss in some fresh herbs like thyme or parsley for an aromatic touch to brighten up the flavors.
-
Gluten-Free: This dish is naturally gluten-free as long as you ensure your ranch dressing and any other additions are labeled as such.
Chef’s Notes
You know, cooking is all about flexibility! When I first started experimenting with this recipe, I didn’t have a firm grasp on measurements; I was just playing with flavors. Each time I made it, it took on a new character based on what I had in my pantry or how I was feeling that day. That’s the beauty of cooking — it evolves alongside your creativity.
One of my funniest kitchen moments related to this casserole was when I accidentally mistook cinnamon for garlic powder. Let’s say it was a bold flavor, and not one I’ll ever replicate! But hey, if it taught me anything, it was to always label those jars clearly!
FAQs and Troubleshooting
1. Can I prepare this casserole ahead of time?
Absolutely! You can assemble the casserole the night before and store it in the fridge. Just be sure to let it sit at room temperature for about 30 minutes before baking it.
2. My casserole is too dry; how can I fix it?
If you find your casserole is drier than expected after baking, consider adding a drizzle of chicken broth or extra ranch dressing just before serving. It’ll help moisten things up without disrupting the flavors!
3. Can I freeze leftovers?
Yes, Creamy Crack Chicken Casserole freezes well! Just make sure it’s cooled completely before transferring it to an airtight container or freezer bag. It should keep well for about 3 months. Reheat it in the oven for the best results.
4. What if I don’t have enough chicken?
No worries! You can fill in with more veggies like zucchini or mushrooms, or add in a can of drained white beans or chickpeas to keep the casserole hearty and satisfying.
Nutritional Info
(As a reference, this is a very approximate nutritional breakdown based on the recipe when made as instructed):
- Calories: 450
- Protein: 30g
- Carbohydrates: 7g
- Fat: 35g
- Fiber: 1g
Final Thoughts
And there you have it! A delightful Creamy Crack Chicken Casserole ready to steal the show at your next meal. Remember, cooking is about embracing the process, enjoying the flavors, and creating beautiful moments around the table. As you experiment with this dish, I hope it brings you as much joy as it has brought me over the years.
So, let’s continue to celebrate good food and great company, one recipe at a time. Happy cooking, friends!
Thank you for joining me in my kitchen today. Don’t forget to tie on your ivory apron and create your own culinary memories. Until next time!
PrintCreamy Crack Chicken Casserole

A comforting, creamy casserole made with shredded chicken, savory bacon, and a tangy ranch dressing that brings everyone together.
- Prep Time: 20 minutes
- Cook Time: 30 minutes
- Total Time: 50 minutes
- Yield: 8 servings 1x
- Category: Main Course
- Method: Baking
- Cuisine: American
- Diet: None
Ingredients
- 3 cups cooked, shredded chicken breast
- 6 slices bacon, cooked and crumbled
- 8 oz cream cheese, softened
- ½ cup ranch dressing
- 1½ cups shredded cheddar cheese (about 6 oz)
- ½ cup sour cream (optional but recommended)
- 2 stalks green onions, thinly sliced
- 1 teaspoon garlic powder
- Salt and pepper to taste
Instructions
- Preheat the oven to 350°F (175°C).
- Cook the bacon in a skillet over medium heat for about 7-10 minutes until crispy.
- Mix the softened cream cheese and ranch dressing in a large bowl until smooth.
- Shred the cooked chicken into bite-sized pieces.
- Combine the shredded chicken, crumbled bacon, half of the cheddar cheese, sour cream, green onions, garlic powder, salt, and pepper in the bowl. Fold gently to mix.
- Transfer the mixture to a greased 9×13-inch casserole dish.
- Top with the remaining cheddar cheese.
- Bake for 25-30 minutes, or until hot and bubbly.
- Serve and enjoy with optional extra green onions on top.
Notes
This casserole can be prepared ahead of time and stored in the fridge. It also freezes well for about 3 months.
Nutrition
- Serving Size: 1 serving
- Calories: 450
- Sugar: 2g
- Sodium: 800mg
- Fat: 35g
- Saturated Fat: 15g
- Unsaturated Fat: 15g
- Trans Fat: 0g
- Carbohydrates: 7g
- Fiber: 1g
- Protein: 30g
- Cholesterol: 100mg
Keywords: creamy casserole, chicken casserole, comfort food, easy dinner

Minute One-Pan Chicken Fajitas Casserole for Weeknights
Chicken Fajitas Casserole: Easy and Cheesy!
Hello there, fellow food lovers! If you’re anything like me, you know there’s nothing quite like the hearty, comforting embrace of a delicious casserole. And when it comes to effortless meals that please a crowd, my Chicken Fajitas Casserole is a go-to. It’s cheesy, loaded with flavor, and takes the classic fajitas to a whole new level! So, grab your apron, and let’s dive into this journey of nostalgia and flavor.
A Flavorful Journey Down Memory Lane
I remember the first time I made chicken fajitas from scratch. I was in college, living in a tiny apartment with my friends. We would host these “Taco Tuesdays” that turned into a spectacular, flavor-filled fiesta. One week, I decided to experiment and turned everything into a casserole. I shoved all the vibrant bell peppers, tender chicken, and cheesy goodness into a single dish, baked it until it was bubbly golden, and lo and behold, a star was born! My friends couldn’t stop raving about it, and that night turned into a tradition.
It became our weekly ritual—gathering around that simple, cheesy casserole, reminiscing and making memories. There’s just something magical about sharing food that brings people together, right? So let’s get cooking and create your own memories with this easy Chicken Fajitas Casserole!
Ingredients
Here’s what you’ll need to make this delectable Chicken Fajitas Casserole:
-
1 tablespoon olive oil
A heart-healthy choice that brings flavor and moisture to the chicken. If you’re out of olive oil, feel free to use avocado oil or even melted butter. -
6 boneless skinless chicken thighs or breasts (4 to 6 ounces each, cut into bite-sized pieces)
Chicken thighs add tenderness and moisture, but you can swap them for chicken breasts or even cooked, shredded rotisserie chicken to save time! -
4 bell peppers (sliced; vary the colors for a vibrant presentation)
The more colors, the better! Red, yellow, green, and orange peppers add sweetness and a pop of color. Can’t find fresh peppers? Use frozen bell pepper strips instead. -
1 small onion (sliced)
An essential aromatic that adds depth to your casserole. You can also use shallots or green onions for a different flavor profile. -
1 recipe or package fajita seasoning mix
The key to delightful flavor! You can make your own spice mix with chili powder, cumin, paprika, garlic powder, and salt, or grab a pre-packaged version for convenience. -
1 cup sour cream
This adds creaminess and tang. Greek yogurt can be a lighter alternative if you prefer. -
4 ounces cream cheese (softened)
It contributes to that luscious texture. Neufchâtel cheese or even ricotta can be interesting substitutes! -
2 cups grated cheddar cheese
The ultimate melty topping! Feel free to mix it up with Monterey Jack, pepper jack, or even a Mexican blend for added flair. -
Optional for serving:
- Avocado
Creamy and nutritious, adds a stunning finish to the dish. - Guacamole
Easy and oh-so-yummy! - Additional sour cream
Because why not? - Salsa
Adds a zesty kick!
- Avocado
Step-by-Step Instructions
Now that you have your ingredients lined up, let’s embark on the cooking adventure!
-
Preheat Your Oven:
Start by preheating your oven to 375°F (190°C). This is essential for that perfect, golden-brown topping! -
Sauté the Chicken:
In a large skillet, heat the olive oil over medium heat. Once hot, toss in the bite-sized pieces of chicken. Season with half the fajita seasoning mix. Cook the chicken for about 5-7 minutes, stirring occasionally, until it’s browned and almost cooked through. Chef’s Tip: Don’t overcrowd the pan; you want each piece to get that lovely sear! -
Add the Veggies:
Toss in the sliced onion and colorful bell peppers. Cook for an additional 5 minutes, allowing the veggies to soften. They should just begin to wilt, keeping some crunch. Hacks: If you like a smoky flavor, add a sprinkle of smoked paprika at this point! -
Mix the Creamy Base:
In a bowl, combine the softened cream cheese and sour cream with the remaining fajita seasoning. Mix until smooth. This is where the magic happens—creating that creamy, cheesy layer. Tip: If you’re in a hurry, you can microwave the cream cheese for about 15-20 seconds to make it easier to mix. -
Combine Everything:
Once the chicken and veggies are ready, remove them from the heat. In a greased 9×13-inch baking dish, layer the chicken and veggies evenly. Spread the creamy mixture over the top, followed by the grated cheddar cheese. Pro Tip: Reserve a bit of cheddar cheese to sprinkle on top for an eye-catching finish! -
Bake to Perfection:
Cover the dish with foil and bake for 20 minutes. Remove the foil, sprinkle the remaining cheese on top, and bake for an additional 10-15 minutes until the cheese is bubbling and golden. The anticipation will be killer, but trust me; it’s worth the wait!
Serving Suggestions
When it’s finally out of the oven, let it cool for a few minutes—if you can resist! Garnish with freshly sliced avocado, a scoop of guacamole, or a dollop of sour cream. A sprinkling of chopped cilantro or parsley elevates it further both in taste and presentation. Serve it straight from the dish for a cozy, family-style vibe!
Recipe Variations
Want to mix it up? Here are some fun variations:
-
Tex-Mex Twist: Add black beans or corn for extra flavor and texture!
-
Spicy Kick: Toss in some sliced jalapeños or drizzle with hot sauce when serving.
-
Vegetarian Delight: Swap the chicken for chickpeas or additional colorful veggies like zucchini and mushrooms.
-
Gluten-Free Adaptation: Double-check your seasoning packet and use gluten-free wraps if serving with tortillas on the side.
-
Low-Carb Option: Make this casserole keto-friendly by using cauliflower rice instead of bell peppers.
Chef’s Notes
One of the things I love most about this Chicken Fajitas Casserole is how effortlessly it adapts over time. As you settle into your own cooking ways, you’ll find that this dish is perfect for using up leftovers—think of it as a "clean out the fridge" casserole!
Plus, every time I make it, I’m reminded of those carefree college days filled with laughter and good times. Cooking has this incredible way of transcending time, doesn’t it?
FAQs and Troubleshooting
-
Can I prep this casserole in advance?
Absolutely! Assemble the casserole a day ahead and refrigerate it. Just pop it in the oven when you’re ready to serve; you may need to add a few extra minutes to the baking time if it’s cold. -
What if my casserole ends up too dry?
If you find that your casserole is a bit dry, there are a couple of fixes. First, ensure you have enough cream cheese and sour cream, as they provide moisture. You can also drizzle a small amount of chicken broth over the dish before serving for extra moisture. -
Can I freeze leftovers?
Yes! This casserole freezes well. Just cool it completely, wrap it tightly in plastic wrap, and store it in a freezer-safe dish. When you’re ready to enjoy it, reheat it in the oven from frozen or thaw overnight in the fridge. -
Why doesn’t my chicken look browned?
Browning is all about technique! Ensure your pan is hot enough before adding the chicken pieces and avoid overcrowding the pan. This will give you that beautiful golden crust!
Nutritional Info (Optional)
Not including specifics here as it can vary based on ingredients; however, if you want to get a ballpark figure, consider a balanced approach with proteins, healthy fats, and colorful veggies to create a fulfilling meal.
The warmth of this Chicken Fajitas Casserole goes beyond just its cheesy goodness; it’s about the stories you create, the people you share it with, and the love that fills the room. So whip out those aprons, get cooking, invite your friends over, and let this dish be a centerpiece for laughter and joy! Happy cooking, my friends!
PrintChicken Fajitas Casserole

This Chicken Fajitas Casserole is cheesy, loaded with flavor, and elevates classic fajitas into a hearty comfort dish.
- Prep Time: 15 minutes
- Cook Time: 30 minutes
- Total Time: 45 minutes
- Yield: 4 servings 1x
- Category: Main Course
- Method: Baking
- Cuisine: Tex-Mex
- Diet: Gluten-Free
Ingredients
- 1 tablespoon olive oil
- 6 boneless skinless chicken thighs or breasts (cut into bite-sized pieces)
- 4 bell peppers (sliced)
- 1 small onion (sliced)
- 1 package fajita seasoning mix
- 1 cup sour cream
- 4 ounces cream cheese (softened)
- 2 cups grated cheddar cheese
Instructions
- Preheat your oven to 375°F (190°C).
- Sauté the chicken in a skillet with olive oil and half the fajita seasoning for about 5-7 minutes until browned.
- Add the sliced onion and bell peppers, cooking for an additional 5 minutes.
- Mix the softened cream cheese and sour cream with the remaining fajita seasoning in a bowl.
- Combine the chicken and veggies in a greased baking dish, layer the creamy mixture on top, and sprinkle with cheddar cheese.
- Bake covered with foil for 20 minutes, then remove the foil and bake for another 10-15 minutes until golden.
Notes
You can make this casserole in advance and store it in the fridge before baking. Add extras like black beans or jalapeños for a twist.
Nutrition
- Serving Size: 1 serving
- Calories: 400
- Sugar: 6g
- Sodium: 600mg
- Fat: 20g
- Saturated Fat: 10g
- Unsaturated Fat: 8g
- Trans Fat: 0g
- Carbohydrates: 30g
- Fiber: 4g
- Protein: 25g
- Cholesterol: 85mg
Keywords: casserole, chicken fajitas, easy recipes, comfort food
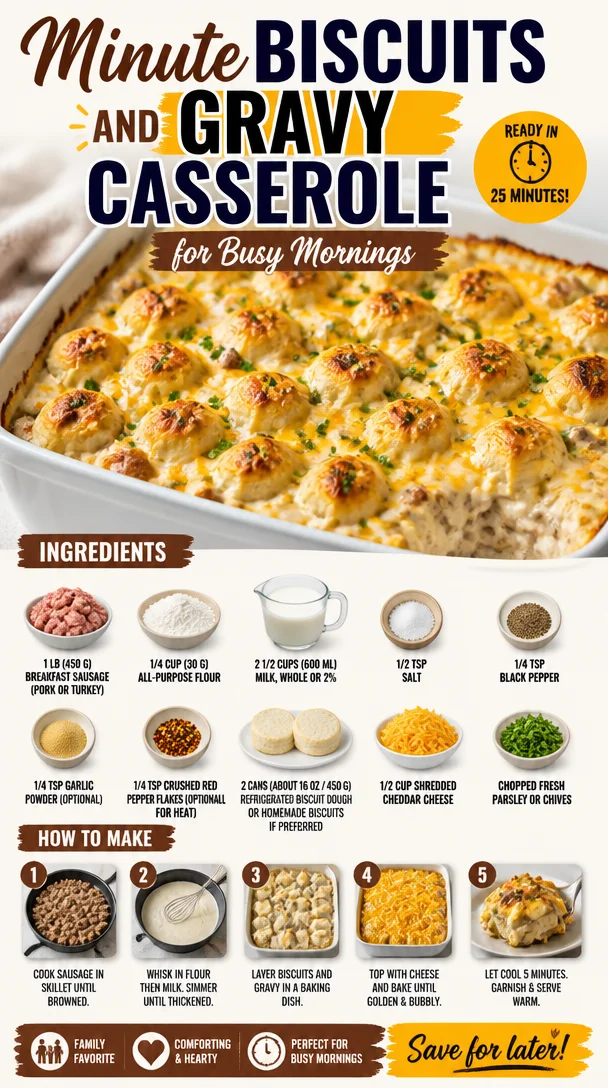
Minute Biscuits and Gravy Casserole for Busy Mornings
Biscuits and Gravy Casserole: The Ultimate Comfort Food
Hello, food lovers! If you’re looking for a hearty dish that encapsulates the warmth and comfort of home-cooked meals, you just hit the jackpot. Today, we’re diving into a delightful Biscuits and Gravy Casserole. Imagine soft, flaky biscuits drenched in creamy, savory sausage gravy—it’s like a warm hug on a plate! Perfect for brunch, family gatherings, or even a cozy weeknight dinner, this dish is sure to please everyone around your table. So, roll up your sleeves, tie on your apron, and let’s get started on this delicious journey!
A Heartwarming Memory
When I think of biscuits and gravy, memories of lazy Sunday mornings flood my mind. I remember gathering around the kitchen table with my family, the smell of freshly baked biscuits wafting through the air. My grandmother would be bustling around the kitchen, her laughter mingling with the sizzle of sausage on the stovetop. She had a knack for making everything feel special, and her biscuits were always the star of the show. I still can’t replicate that perfect flaky texture, but I’ve made it my mission to create dishes inspired by those cozy mornings we shared. This casserole captures that essence, combining the comforting elements of biscuits and gravy into a generous, shareable dish that’s just as warm and inviting as those Sunday breakfasts.
Ingredients
Here’s what you’ll need to whip up this Biscuits and Gravy Casserole:
-
1 lb (450 g) breakfast sausage (pork or turkey)
Use your favorite brand, or try a local butcher for a homemade experience! For a lighter option, turkey sausage works beautifully as a substitute. -
1/4 cup (30 g) all-purpose flour
This is the secret to thickening your gravy and giving it that luscious texture. If you’re gluten-free, a 1:1 gluten-free flour blend can do the trick! -
2 1/2 cups (600 ml) milk, whole or 2%
Whole milk adds richness, but 2% works just fine. For a dairy-free option, almond or oat milk can be good substitutes. -
1/2 tsp salt
Essential for enhancing flavors! Adjust as needed based on your sausage, as some brands can be saltier than others. -
1/4 tsp black pepper
Gives a nice subtle kick. If you’re a fan of spice, feel free to add more! -
1/4 tsp garlic powder (optional)
Garlic powder adds depth and flavor. Fresh garlic can substitute if you prefer! -
1/4 tsp crushed red pepper flakes (optional for heat)
Just a pinch can elevate your dish! Adjust based on your spice tolerance. -
2 cans (about 16 oz / 450 g) refrigerated biscuit dough
Store-bought biscuits are quick and convenient. If you’re feeling adventurous, homemade biscuits can take this casserole to the next level. -
1/2 cup shredded cheddar cheese
Cheddar cheese adds creaminess and flavor. Try pepper jack for a little extra kick, or a blend of your favorites! -
Chopped fresh parsley or chives
A sprinkle on top not only adds color but freshens the dish!
Step-by-Step Instructions
-
Preheat Your Oven
Begin by preheating your oven to 350°F (175°C). It’s essential to start with a hot oven for that perfect bake. -
Cook the Sausage
In a large skillet, heat the breakfast sausage over medium heat. Break it up with a spoon and cook until it’s browned and cooked through, about 5-7 minutes. Don’t forget to savor that amazing aroma! For a twist, consider adding diced onions or bell peppers to the sausage as it cooks. -
Make the Gravy
Once your sausage is beautifully browned, sprinkle in the flour directly into the skillet. Stir it for about a minute to cook out that raw flour taste. Gradually whisk in the milk, ensuring no lumps form. Bring the mixture to a simmer. Season with salt, pepper, garlic powder, and crushed red pepper flakes. Let it bubble for a few minutes until it thickens – this is your silky gravy! -
Prepare the Biscuits
While your gravy simmers, prepare the biscuit dough. If you’re using canned biscuits, simply cut each biscuit into quarters. Feel free to bake homemade biscuits concurrently if time permits! -
Combine in a Casserole Dish
Lightly grease a 9×13 inch casserole dish (or whatever you have on hand). Spread half of the biscuit pieces evenly on the bottom of the dish. Pour half of the savory sausage gravy over the biscuits, then layer the remaining biscuits and top with the rest of the gravy. -
Add Cheese
Sprinkle the shredded cheddar cheese liberally on top of the dish. Trust me; it’ll melt into gooey deliciousness! -
Bake
Pop your casserole in the preheated oven and bake for 25-30 minutes, or until it’s hot, bubbly, and the biscuits are cooked through. You want that golden brown color on top—almost as irresistible as it smells. -
Garnish and Serve
Once your gorgeous casserole is out of the oven, finish with a sprinkle of freshly chopped parsley or chives for that delightful pop of color and flavor.
Serving Suggestions
To serve this comforting dish, scoop generous portions into bowls or onto plates. For an extra special touch, accompany it with fresh fruit or a light garden salad to balance the richness of the casserole. A side of orange juice or your favorite morning beverage completes the experience beautifully!
Recipe Variations
Feeling adventurous? Here are a few delicious twists you can try:
-
Spicy Sausage: Use spicy breakfast sausage for an extra kick.
-
Veggie Delight: Add sautéed mushrooms, spinach, or bell peppers to the sausage for a veggie-rich casserole.
-
Cheese Galore: Mix different cheeses like Monterey Jack or Gouda for a layered flavor experience.
-
Herb Infusion: Try adding fresh rosemary or thyme into the gravy for a fragrant touch.
-
Gluten-Free: Substitute the all-purpose flour with a gluten-free flour mix and use gluten-free biscuit dough.
Chef’s Notes
This Biscuits and Gravy Casserole has evolved with each stirring and tasting session in my kitchen. I’ve played with different sausage types, milks, and cheese combinations, but at its core, it remains an ode to those cherished family breakfasts. One fun thing I’ve learned along the way? Always save a little bit of gravy to drizzle on top just before serving! Your guests will appreciate that extra flavor—trust me.
FAQs and Troubleshooting
1. My casserole turned out dry. What went wrong?
If your casserole results are dry, it may be due to overbaking or insufficient gravy. Ensure you’re using enough milk, and keep an eye on your baking time.
2. Can I make this dish ahead of time?
Absolutely! Assemble it the night before, cover it tightly, and refrigerate. Bake it in the morning, and you’ll have a delicious breakfast ready to go!
3. Can I freeze leftovers?
Yes, you can freeze portions of the casserole. Once cooled, cover it tightly and store it in the freezer for up to three months. Just remember to reheat thoroughly!
4. What can I serve with this casserole?
Pair it with a fresh fruit salad or a light green salad for a well-rounded meal. A side of freshly brewed coffee or mimosas is perfect for brunch!
Nutritional Info (Optional)
Per Serving (Based on 8 servings):
- Calories: 450
- Protein: 20g
- Carbohydrates: 30g
- Fat: 30g
- Fiber: 1g
- Sugars: 2g
There you have it! A Biscuits and Gravy Casserole that’s not only packed with flavor but also sprinkled with memories. I can’t wait for you to give this recipe a try. It’s all about creating those special moments around your table. So let your culinary creativity shine, and enjoy every bite! Happy cooking!
PrintBiscuits and Gravy Casserole
A hearty Biscuits and Gravy Casserole that combines soft, flaky biscuits with creamy, savory sausage gravy, perfect for brunch or family gatherings.
- Prep Time: 15 minutes
- Cook Time: 30 minutes
- Total Time: 45 minutes
- Yield: 8 servings 1x
- Category: Main Course
- Method: Baking
- Cuisine: American
- Diet: None
Ingredients
- 1 lb (450 g) breakfast sausage (pork or turkey)
- 1/4 cup (30 g) all-purpose flour
- 2 1/2 cups (600 ml) milk, whole or 2%
- 1/2 tsp salt
- 1/4 tsp black pepper
- 1/4 tsp garlic powder (optional)
- 1/4 tsp crushed red pepper flakes (optional for heat)
- 2 cans (about 16 oz / 450 g) refrigerated biscuit dough
- 1/2 cup shredded cheddar cheese
- Chopped fresh parsley or chives
Instructions
- Preheat your oven to 350°F (175°C).
- Cook the breakfast sausage in a large skillet over medium heat, breaking it up and cooking until browned, about 5-7 minutes.
- Make the gravy by sprinkling flour into the skillet, stirring for a minute, then gradually whisking in the milk and seasoning until thickened.
- Prepare the biscuit dough by cutting canned biscuits into quarters.
- Combine the biscuit pieces and gravy in a greased 9×13 inch casserole dish.
- Add cheese on top before baking.
- Bake for 25-30 minutes until hot, bubbly, and golden brown.
- Garnish with parsley or chives before serving.
Notes
For a lighter option, try turkey sausage. You can also use gluten-free substitutions if needed.
Nutrition
- Serving Size: 1 serving
- Calories: 450
- Sugar: 2g
- Sodium: 900mg
- Fat: 30g
- Saturated Fat: 12g
- Unsaturated Fat: 8g
- Trans Fat: 0g
- Carbohydrates: 30g
- Fiber: 1g
- Protein: 20g
- Cholesterol: 70mg
Keywords: biscuits, gravy, casserole, comfort food, brunch
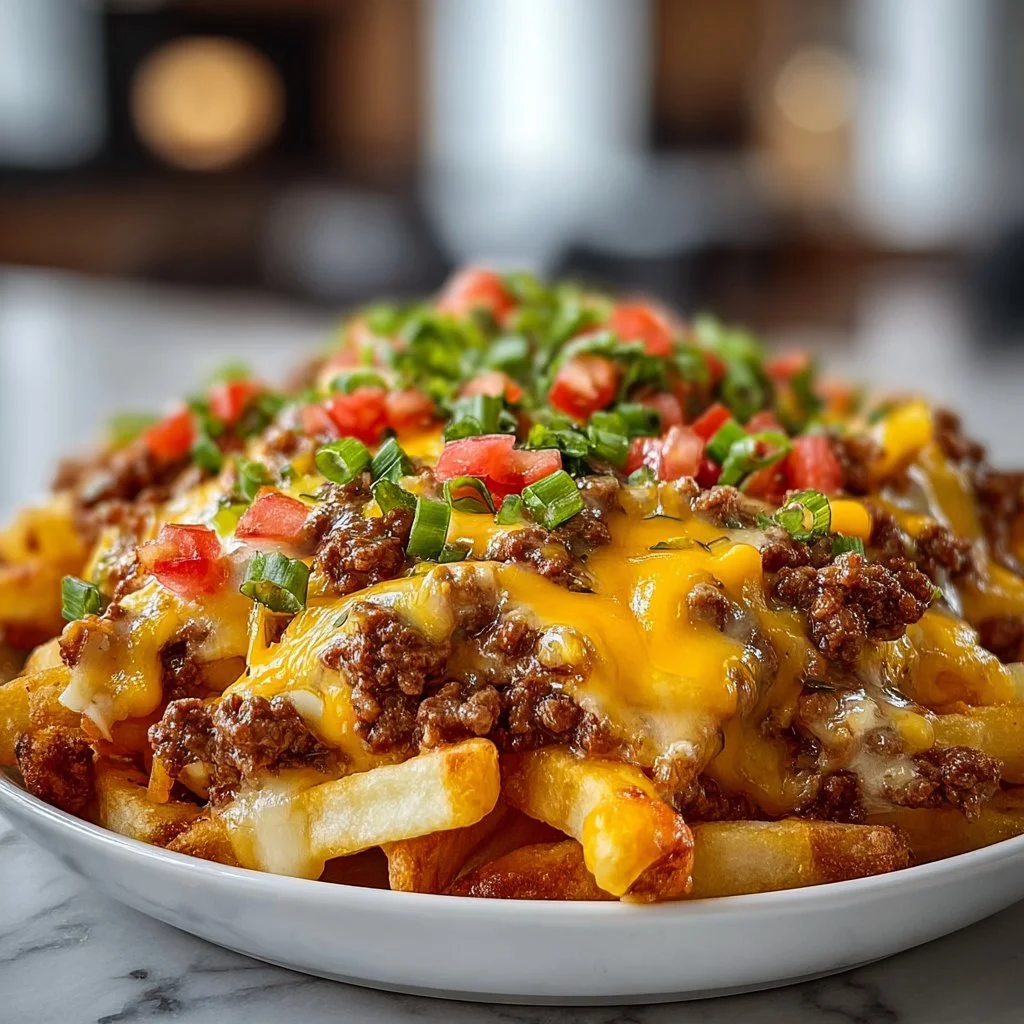
Cheeseburger French Fry Casserole
Cheeseburger French Fry Casserole: A Comfort Food Sensation
Welcome home, food lovers! Today, we’re diving into a dish that combines some of the best comfort foods out there: the Cheeseburger French Fry Casserole! If you’re looking for a hearty meal that’s easy to whip up and sure to please a crowd, you’ve hit the jackpot. Imagine biting into a savory blend of seasoned ground beef, crispy French fries, and ooey-gooey melted cheddar cheese—all baked into one glorious casserole! It’s like a hug in a dish and perfect for chilly evenings or weeknight meals that need to be on the table in a snap.
Now, I must share a little love story about this dish. The very first time I made this casserole, it was for my best friend’s birthday. After a long week filled with work pressures and adulting, we were craving a little nostalgia—and what could be better than classic cheeseburgers and fries? As I chopped the onions and sautéed the beef in my tiny kitchen, the scents transported me back to carefree summer barbecues from our childhood. That evening, as we huddled around the dinner table and dug into that cheesy casserole, let me tell you: laughter mingled with delight, and nostalgia swirled through every bite. Moments like these remind me why sharing a meal can be so meaningful.
So, let’s gather our ingredients and get to cooking this delicious casserole that will bring warmth to your table and a smile to your face!
Ingredients
Here’s what you’ll need for your Cheeseburger French Fry Casserole:
-
1 pound ground beef
A classic base for our casserole, the ground beef is seasoned to perfection. You can easily swap it for turkey or chicken if you prefer a leaner meat. If you’re craving a meatless option, try using lentils or a plant-based ground meat substitute! -
1 onion, chopped
The onion adds a sweet, aromatic flavor to our dish. If you’re sensitive to onions, feel free to swap in shallots, or omit them altogether. -
2 cups frozen French fries
Frozen French fries make this dish super easy! You can use crinkle-cut, straight-cut, or even sweet potato fries if you want a unique twist. Just keep in mind that cooking times may vary slightly! -
2 cups shredded cheddar cheese
Cheddar is a classic cheese choice, but feel free to mix it up! Pepper Jack adds a spicy kick, while mozzarella will give you that delightful stretch. -
1 can (10.5 oz) cream of mushroom soup
This ingredient adds creaminess and binds everything together. If you’re not a fan of mushrooms, you can use cream of chicken or even a homemade white sauce for a little twist. -
1/2 cup milk
A splash of milk will keep our casserole nice and creamy. Almond or oat milk can be great dairy-free alternatives. -
Salt and pepper to taste
These are essential for elevating the flavors in your dish. Don’t forget to adjust to your personal taste! -
Pickles and mustard (optional, for serving)
These are the finishing touches that bring out the classic cheeseburger vibe. I can’t resist a few dill pickle slices on mine!
Step-by-Step Instructions
Let’s get cooking this delicious casserole. Follow along, and remember: it’s all about having fun in the kitchen!
-
Preheat Your Oven
Preheat your oven to 350°F (175°C). A properly preheated oven ensures even cooking and that perfect cheese melt. -
Brown the Beef
In a large skillet over medium heat, add your ground beef and chopped onion. Cook until the beef is browned and the onions are translucent, about 5-7 minutes. Don’t forget to break the beef into small crumbles as it cooks—this helps distribute the flavor. If there’s excess grease (you usually don’t need it), drain it out before proceeding. -
Season It Up
Once your beef is browned, season the mixture generously with salt and pepper. Pro tip: Add a dash of garlic powder or paprika for an extra layer of flavor! -
Mix in the Soup and Milk
Lower the heat and stir in the can of cream of mushroom soup and the milk. Combine well until everything is nice and creamy. This mixture serves as the rich sauce that holds everything together. -
Layer It Up
In a greased 9×13 inch baking dish, spread half of the frozen French fries on the bottom. Pour the beef and soup mixture evenly over the fries, then sprinkle with a cup of cheddar cheese. Top it off with the remaining French fries and the rest of the cheese. Trust me, you want that cheesy goodness on top! -
Bake to Perfection
Place the casserole in the preheated oven and bake for about 30-35 minutes, or until the cheese is bubbly and golden brown, and the fries are starting to crisp up. Keep an eye on it to avoid over-browning! -
Cool and Serve
Once it’s baked, let the casserole cool for a few minutes. This time allows the flavors to meld together while you can decide whether to plate it (gorgeous presentation!) or serve family-style directly from the dish!
Serving Suggestions
To serve your Cheeseburger French Fry Casserole, consider garnishing it with a sprinkle of fresh parsley for a pop of color and freshness. If you’re feeling extra fancy, add a dollop of sour cream or some sliced green onions on top—these little extras take it to the next level! Of course, serve with your favorite pickle slices and a drizzle of mustard on the side for that authentic cheeseburger experience.
Recipe Variations
Don’t be afraid to get creative! Here are a few fun variations you can try:
-
BBQ Cheeseburger Version: Add a ¼ cup of your favorite BBQ sauce to the beef mixture for a delicious smoky flavor.
-
Ultimate Veggie Casserole: Swap the beef for sautéed bell peppers, zucchini, and mushrooms for a hearty vegetarian option.
-
Spicy Southwestern Twist: Mix in some diced jalapeños or green chilies to the beef for a kick, and try pepper jack cheese for that extra spice.
-
Loaded Nacho Casserole: Top the casserole with tortilla chips instead of fries and add some taco seasoning for a Tex-Mex vibe!
Chef’s Notes
This Cheeseburger French Fry Casserole has evolved in my kitchen over the years. Originally, I made it with leftover burger patties, which was delicious but often dry. So, I experimented with different ingredients until I found this delightful balance of creamy, cheesy, and crispy. Plus, it’s a fantastic way to make something that’s both nostalgic and comforting without breaking a sweat! I’ve served this up at gatherings, where it disappears faster than I can fill my plate.
Oh, and I must admit, I once had a minor mishap when I grabbed the wrong soup can and used cream of celery instead of mushroom. Surprisingly, it turned out delicious! So don’t be afraid to play with flavors—kitchen experiments can lead to delightful surprises!
FAQs and Troubleshooting
Q: My casserole turned out too dry. What happened?
A: This may have occurred if the meat mixture was overcooked or if you didn’t use enough moisture (like soup and milk). Always make sure your mixture is creamy before assembling!
Q: Can I freeze the leftovers?
A: Absolutely! This casserole freezes beautifully. Just let it cool, portion it into containers, and store in the freezer. When you’re ready to eat, defrost in the refrigerator overnight and reheat in the oven.
Q: What if I don’t have cream of mushroom soup?
A: No problem! You can use cream of chicken soup, or make a quick white sauce using butter, flour, and milk.
Q: How do I avoid soggy fries?
A: To ensure crispy fries, you can pre-bake the fries according to package instructions before layering them in the casserole. This way, they won’t absorb too much liquid!
Nutritional Info (Optional)
While I won’t get too hung up on specifics (because we all know comfort food is about enjoyment!), a typical serving of this Cheeseburger French Fry Casserole will have approximately 400-500 calories, depending on portion size and ingredient variations. It’s a filling dish with protein from the beef, and you’ll definitely feel like you’ve treated yourself with every cheesy bite!
There you have it! The ultimate Cheeseburger French Fry Casserole that brings joy, warmth, and laughter to every meal. So tie on your apron, roll up your sleeves, and let’s create some beautiful memories in your kitchen. Bon appétit!
PrintCheeseburger French Fry Casserole

A hearty casserole combining seasoned ground beef, crispy French fries, and melted cheddar cheese, perfect for weeknight meals.
- Prep Time: 15 minutes
- Cook Time: 35 minutes
- Total Time: 50 minutes
- Yield: 6 servings 1x
- Category: Main Course
- Method: Baking
- Cuisine: American
- Diet: Omnivore
Ingredients
- 1 pound ground beef
- 1 onion, chopped
- 2 cups frozen French fries
- 2 cups shredded cheddar cheese
- 1 can (10.5 oz) cream of mushroom soup
- 1/2 cup milk
- Salt and pepper to taste
- Pickles and mustard (optional, for serving)
Instructions
- Preheat your oven to 350°F (175°C).
- Brown the beef in a large skillet over medium heat, adding the chopped onion until browned and translucent (about 5-7 minutes).
- Season the mixture with salt and pepper to taste.
- Mix in the cream of mushroom soup and milk until combined.
- Layer half of the French fries in a greased baking dish, add the beef mixture, and top with a cup of cheddar cheese.
- Add the remaining French fries and the rest of the cheese on top.
- Bake for 30-35 minutes, until the cheese is bubbly and golden brown.
- Cool for a few minutes before serving.
Notes
Garnish with fresh parsley, sour cream, or green onions for an added touch. This casserole freezes well for leftovers.
Nutrition
- Serving Size: 1 serving
- Calories: 450
- Sugar: 2g
- Sodium: 600mg
- Fat: 24g
- Saturated Fat: 10g
- Unsaturated Fat: 10g
- Trans Fat: 1g
- Carbohydrates: 36g
- Fiber: 3g
- Protein: 22g
- Cholesterol: 70mg
Keywords: casserole, comfort food, cheeseburger, French fries, easy dinner