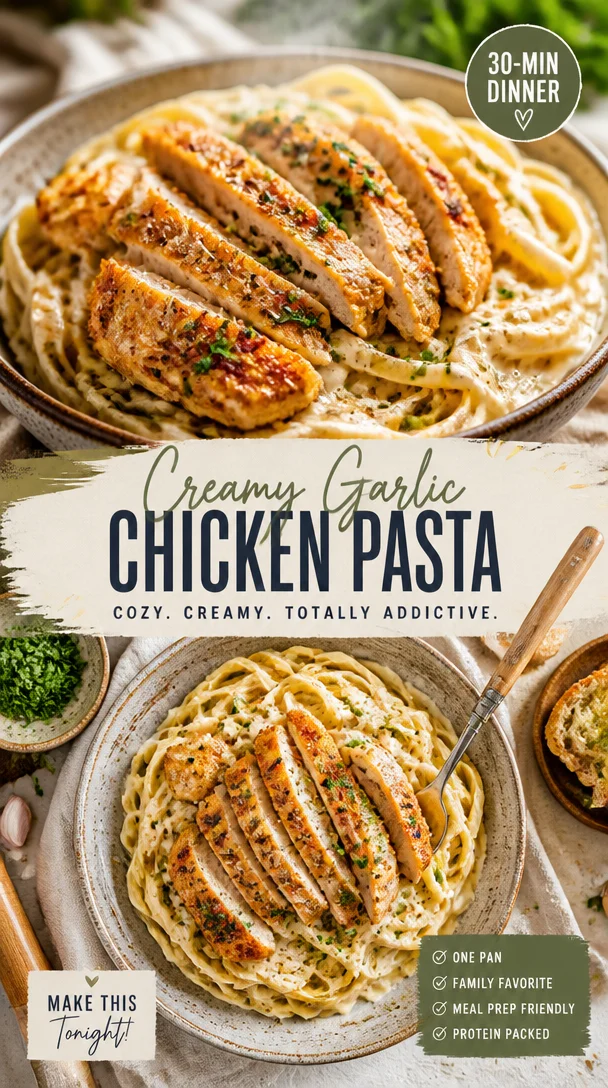
Minute Puff Pastry Donuts: Easy Cronuts for Busy Nights
Easy Puff Pastry Donuts: The Best Homemade Cronuts!
There’s something magical about a freshly made donut. The airy dough, the sweet glaze, and that first bite that takes you straight to pastry heaven! Today, I want to share a recipe that not only satisfies your sweet tooth but also brings a touch of elegance to your baking. Welcome to my kitchen, where we’re going to whip up the most delightful puff pastry donuts—aka cronuts! Perfect for breakfast, brunch, or any time you need a little indulgence.
Puff pastry donuts are the ultimate fusion of a croissant’s flaky goodness and a donut’s sweet charm. Imagine biting into a warm cronut, the outside crisp and golden, the inside soft and airy, and a luscious glaze that drips tantalizingly as you take another bite. Sounds divine, right? Trust me; once you make these beauties, they’ll become a staple in your treat rotation.
Now, don’t be intimidated by the idea of making donuts at home. With a little guidance and the magic of store-bought puff pastry, you can create these delightful treats with ease. Invite your friends over or treat yourself; either way, it’s time to roll up our sleeves and get cooking together!
My Puff Pastry Journey
Ah, puff pastry. The first time I tackled it was during a bustling holiday season when my ambition outpaced my experience. I decided I would make everything from scratch for a family gathering. I vividly remember the chaos in my kitchen: flour clouded the air, dough scattered on the countertops, and my loyal pup, Bella, hoping for a crumb. It was a mess, but my puff pastry turned out surprisingly well, and my family was impressed!
Fast forward to today, and I take the trusty shortcut of using pre-made puff pastry. The aroma of frying donuts always brings me back to that holiday gathering. It reminds me of the joy food brings us and how even amidst the hustle and bustle, we can create memories that linger just like the sweetness of warm donuts.
Now, let’s recreate that magic together in a much simpler way!
Ingredients
-
2 Sheets Puff Pastry, thawed
Puff pastry is the star of our show! Choose a high-quality brand for the best results. If you want a healthier option, look for whole wheat puff pastry. -
1 Egg, whisked
This is our egg wash; it gives our donuts that beautiful golden color. If you’re looking for an egg-free option, try using a bit of milk or plant-based milk blended with water instead. -
Vegetable Oil for Frying
Any neutral oil will do, like canola or sunflower. If you’re feeling adventurous, peanut oil adds a lovely flavor! -
Flour for Dusting
A little flour helps prevent sticking. Use all-purpose flour for the best results!
For the Glaze
-
2 cups Powdered Sugar
The base of a luscious glaze! If you’re watching your sugar intake, consider using monk fruit sweetener or a sugar-free powdered sugar alternative. -
1 1/2 tbsp. Milk
This helps loosen the glaze to the perfect drizzling consistency. You can also use almond or oat milk for a dairy-free version. -
1/2 tsp. Salt
A pinch of salt balances the sweetness beautifully. -
1 tsp. Vanilla Extract
This adds a warm, cozy flavor. Substitute with almond extract for a fun twist!
Step-by-Step Instructions
-
Roll Out the Puff Pastry
Begin by lightly dusting your work surface with flour. To ensure an even thickness, roll out each sheet of puff pastry gently. We’re aiming for about 1/8 inch thick. This step ensures that your donuts will rise beautifully! -
Cut into Shapes
Using a donut cutter or two different sizes of round cutters, cut out the donut shapes. The inner hole can be as large or small as you like; a smaller center hole will create a crisper donut. Gather the scraps and re-roll to cut more donuts—no waste here! -
Prepare the Frying Oil
In a deep skillet or a Dutch oven, pour enough vegetable oil to submerge the donuts—about 2 inches deep. Heat the oil over medium heat until it reaches 350°F (175°C). Tip: You can drop a small piece of dough into the oil to check if it’s ready. If it sizzles and rises, you’re good to go! -
Fry the Donuts
Carefully add the donuts to the hot oil in batches to avoid overcrowding. Fry for about 2-3 minutes on each side or until golden brown. Use a slotted spoon to flip them gently. Chef’s hack: If you notice any bubbles forming on the surface, it means the oil is hot enough for frying! -
Drain and Cool
Remove the donuts from the oil and place them on a paper towel-lined plate to drain excess oil. Let them cool for a few minutes; the glaze will stick better to warm donuts! -
Whip Up the Glaze
In a medium bowl, combine the powdered sugar, milk, salt, and vanilla extract. Whisk until smooth and glossy. If it’s too thick, add a splash more milk until you achieve the desired consistency. -
Glaze the Donuts
Dunk each warm donut into the glaze, rotating it gently to coat completely. Allow any excess glaze to drip off before placing it on a wire rack to set.
Serving Suggestions
Plate your puff pastry donuts on a beautiful cake stand or a simple plate to really elevate the presentation. Dust with a bit of extra powdered sugar for that picture-perfect touch, or garnishthem with fresh berries for a pop of color. Pairing them with a lovely cup of coffee or tea makes for an indulgent afternoon treat.
Recipe Variations
- Chocolate Glazed Cronuts: Mix melted chocolate with butter and dip your cooled donuts into this rich glaze for a decadent chocolate treat.
- Filled Cronuts: Before frying, use a piping bag to fill your pastry rings with pastry cream, whipped cream, or even jam for a surprise inside.
- Cinnamon Sugar Cronuts: After frying, roll the warm donuts in a mixture of cinnamon and sugar for a sweet, cozy flavor.
- Savory Cronuts: Add herbs and spices to your dough and fill them with creamy ricotta and spinach before frying for a savory twist!
- Vegan Cronuts: Substitute the egg wash with a plant-based egg replacement and use dairy-free milk and oil for frying.
Chef’s Notes
These easy puff pastry donuts are my go-to whenever I want to impress friends or just need a sweet escape. I’ve watched countless faces light up after one bite, and there’s nothing like it! Over the years, I’ve experimented with different fillings and glazes, and even though this basic recipe is perfection, I love how it allows for creativity.
Just the other day, I had an unexpected guest, and with nothing but a few pantry staples and these simple puff pastry donuts, we created an impromptu little dessert party! Laughter echoed in the kitchen as we shared stories and tried all the different glazes—those moments are what cooking is all about.
FAQs and Troubleshooting
1. Why did my donuts turn out greasy?
If your donuts feel greasy, your oil may not have been hot enough. Make sure to monitor the temperature closely and let the oil reach 350°F before frying.
2. Can I bake these instead of frying?
While frying gives cronuts their signature texture, you can bake them at 400°F for 12-15 minutes. Just remember they’ll have a different texture than their fried counterparts but will still be delicious!
3. How do I store leftovers?
Store your donuts in an airtight container at room temperature for up to two days. If they last longer than that (good luck!), keep them in the fridge. Just reheat them a bit to bring back the texture!
4. What can I do about the sogginess?
If your donuts seem soggy from the glaze, let them sit on a wire rack for a few minutes after glazing. This will help the glaze set and reduce the moisture.
Nutritional Info
Calories per donut (approx.): 200-250
Total Fat: 14g
Carbohydrates: 25g
Protein: 2g
Cooking is about experimenting and enjoying the process—so go ahead and personalize these lovely puff pastry donuts in your own style. So grab your apron, gather your ingredients, and let’s create sweet moments in the kitchen together. Happy cooking!
PrintEasy Puff Pastry Donuts: The Best Homemade Cronuts!

Indulge in these delightful puff pastry donuts, also known as cronuts, that fuse the flakiness of croissants with the sweetness of donuts, perfect for any occasion.
- Prep Time: 15 minutes
- Cook Time: 30 minutes
- Total Time: 45 minutes
- Yield: 12 servings 1x
- Category: Dessert
- Method: Frying
- Cuisine: American
- Diet: Vegetarian
Ingredients
- 2 Sheets Puff Pastry, thawed
- 1 Egg, whisked
- Vegetable Oil for Frying
- Flour for Dusting
- 2 cups Powdered Sugar
- 1 1/2 tbsp. Milk
- 1/2 tsp. Salt
- 1 tsp. Vanilla Extract
Instructions
- Roll Out the Puff Pastry: Lightly dust your work surface with flour and roll out each sheet of puff pastry to about 1/8 inch thickness.
- Cut into Shapes: Use a donut cutter to cut out donut shapes and gather scraps to re-roll.
- Prepare the Frying Oil: Heat vegetable oil in a deep skillet to 350°F (175°C).
- Fry the Donuts: Carefully add the donuts to the hot oil and fry for 2-3 minutes on each side until golden brown.
- Drain and Cool: Remove the donuts and place them on a paper towel-lined plate to drain excess oil.
- Whip Up the Glaze: Combine powdered sugar, milk, salt, and vanilla extract in a bowl and whisk until smooth.
- Glaze the Donuts: Dunk each warm donut in the glaze and let excess drip off before placing on a wire rack.
Notes
These cronuts can be customized with various fillings and glazes. Serve with coffee or tea for a delightful treat.
Nutrition
- Serving Size: 1 donut
- Calories: 225
- Sugar: 12g
- Sodium: 150mg
- Fat: 14g
- Saturated Fat: 4g
- Unsaturated Fat: 8g
- Trans Fat: 0g
- Carbohydrates: 25g
- Fiber: 1g
- Protein: 2g
- Cholesterol: 30mg
Keywords: puff pastry, cronuts, donuts, homemade, dessert
Ingredient Cinnamon Roll Bites: Quick Gooey Snack
Quick Cinnamon Roll Bites: A Deliciously Easy Treat
Hello, fellow food lovers! If you’re anything like me, there’s something simply magical about the aroma of cinnamon filling the kitchen. It evokes a sense of warmth and nostalgia that wraps around you like a cozy blanket on a chilly evening. Today, I’m excited to introduce you to one of my favorite cozy treats: Quick Cinnamon Roll Bites.
These delightful little morsels are perfect for breakfast, snacking, or even a sweet treat after dinner. They embody all the flavors of traditional cinnamon rolls but come together in a snap, making them a fantastic choice for busy days when you still want to serve something homemade. With hardly any fuss, these bites will transform your kitchen into a bakery filled with heavenly scents — and trust me, everyone will be asking for seconds!
A Sweet Memory to Share
I vividly remember my grandmother’s kitchen, where the delicious scent of cinnamon wafted through the air every Saturday morning. She’d gather us around the table as she rolled out dough and sprinkled it with your classic cinnamon-sugar mixture. It was less about the recipe and more about the experience — the laughter, the spilled flour, and those tiny little hands helping to knead the dough just a bit too hard.
One particular Saturday, I was tasked with mixing the filling. I added an extra pinch of cinnamon because, why not? I thought it was a genius move until I realized we couldn’t taste anything but spice! We all had a good laugh, and my grandma never let me live it down. She said, “You can’t overpower sweetness with spice, dear!” Since then, I learned how to strike that precious balance, and today, I promise you’ll find just that in these Quick Cinnamon Roll Bites. Let’s dive into making a batch that will create sweet memories of your own!
Ingredients You’ll Need
-
1 can refrigerated crescent dough: This handy ingredient makes everything super quick and easy! You can substitute with any flaky dough or puff pastry if you’re feeling adventurous. Just keep in mind that cooking times may vary slightly.
-
1/4 cup melted butter: This adds richness and helps the sugar stick. You can replace it with coconut oil for a dairy-free option.
-
1/2 cup brown sugar: This sweet ingredient melts beautifully while baking, creating a luscious caramel flavor. If you’re out of brown sugar, you can simply mix white sugar with a spoonful of molasses for a quick substitute.
-
1 tablespoon ground cinnamon: The star of the show! Cinnamon brings that warm, sweet flavor that’s essential for any cinnamon roll. If you’re looking for a twist, try cardamom or pumpkin spice for a unique flavor.
-
1/2 cup powdered sugar: This is for our quick glaze! It creates that sweet finish to our bites. You can use agave syrup or honey instead if you prefer something less processed.
-
1-2 tablespoons milk or cream: Just enough to thin out the glaze to your desired consistency. You can use any plant-based milk as an alternative!
-
1/2 teaspoon vanilla extract: A splash of vanilla adds depth to the glaze. Feel free to get creative here and swap it out with almond extract for a different dimension.
Step-by-Step Instructions
-
Preheat the Oven: Let’s get that oven heated to 375°F (190°C). This step is crucial for that perfectly golden pastry outcome. While the oven preheats, you’ll have time to prep everything!
-
Prep the Dough: Open the can of refrigerated crescent dough and unroll it on a clean surface. It can be a little tricky, but simply press together any perforations to create a single sheet. This will be your canvas for creativity!
-
Make the Filling: In a small bowl, mix together the melted butter, brown sugar, and cinnamon until well combined. This mixture will act as your sweet glue, so make sure everything is thoroughly mixed!
-
Spread the Filling: Use a spatula to spread the cinnamon-sugar mixture evenly over your crescent dough. Go all the way to the edges — you don’t want to miss any delicious bites!
-
Roll It Up: Starting from the widest end of the dough, roll it up tightly into a log. Feel free to channel your inner pastry chef here! Once rolled, cut it into bite-sized pieces — about 1 inch thick. You should get around 12-15 bites from this one roll.
-
Transfer to Baking Sheet: Line a baking sheet with parchment paper or a silicone mat for easy cleanup. Place your little bites on the sheet, giving them some space to spread out while baking.
-
Bake Them Up: Pop those adorable morsels in the preheated oven and bake for about 12-15 minutes, or until they turn golden brown and the kitchen starts smelling heavenly. Keep an eye on them! Since ovens vary, you don’t want to overdo it.
-
Make the Glaze: While they’re baking, whisk together your powdered sugar, milk (or cream), and vanilla extract until smooth. If it’s too thick, add a splash more milk until you achieve that drizzly consistency we love.
-
Glaze and Enjoy: As soon as the bites come out of the oven, give them a generous drizzle with your sweet glaze while they’re still warm. This step is crucial for maximum gooey goodness!
Serving Suggestions
To serve, simply arrange the Cinnamon Roll Bites on a beautiful cake stand or a rustic wooden platter. You could even sprinkle a pinch of cinnamon or extra powdered sugar on top for a touch of elegance! Let guests help themselves, and watch those bites disappear in no time.
Recipe Variations
-
Fruity Twist: Add sliced bananas or apples to the filling for a fruity kick.
-
Nutty Delight: Toss in some chopped pecans or walnuts into the cinnamon mixture for added crunch.
-
Pumpkin Spice: Trade out some of the cinnamon for pumpkin spice for an autumnal flair.
-
Chocolate Drizzle: Drizzle some melted chocolate over your glaze for an indulgent touch.
-
Cream Cheese Icing: Mix cream cheese with powdered sugar and a splash of milk for a richer topping instead of glaze.
Chef’s Notes
These Quick Cinnamon Roll Bites have become a go-to recipe in my kitchen — especially when unexpected guests drop by or when I need a sweet fix. They are forgiving, fun to make, and so versatile! Plus, they remind me of those kitchen adventures with my grandmother, where food was never just about the final dish but the joy in creating something special together.
One time, I hosted a brunch and made these bites with a variety of fillings, from whipped cream cheese with lemon zest to spiced apple butter. It was a hit! Guests loved choosing their own fillings and really made the experience enjoyable.
FAQs and Troubleshooting
1. Why did my cinnamon bites flatten out?
If your bites flatten out during baking, it might be due to using a soft dough or not wrapping them tightly enough. Make sure to roll them firmly and use cold dough for better shape retention.
2. Can I make these ahead?
Absolutely! You can prepare the rolls, cut them, and refrigerate them overnight. Just add a few extra minutes to the baking time.
3. How do I know when they’re done?
Your bites should be golden brown on top and firm to the touch. If they’re still doughy, give them a couple more minutes in the oven.
4. What do I do with leftovers?
They’re best eaten fresh, but if you have leftovers, store them in an airtight container in the refrigerator for up to 2 days. You can reheat them in the microwave or oven until warm.
Nutritional Info
(Optional, but here’s a rough estimate if you want to include it!)
- Serving Size: 1 bite
- Calories: ~150
- Total Fat: 7g
- Saturated Fat: 4g
- Carbohydrates: 22g
- Sugars: 10g
- Protein: 2g
And there you have it — a fabulous recipe for Quick Cinnamon Roll Bites that should take you right back to those cozy kitchen moments! I hope you enjoy making these as much as I do, and I can’t wait to hear your own stories as you gather friends and family around your table. Let’s keep the tradition of love and warmth alive through our kitchen creations! Happy baking!
PrintQuick Cinnamon Roll Bites
Easy and delightful cinnamon roll bites perfect for breakfast or snacking, embodying the flavors of traditional cinnamon rolls.
- Prep Time: 10 minutes
- Cook Time: 15 minutes
- Total Time: 25 minutes
- Yield: 12-15 servings 1x
- Category: Dessert
- Method: Baking
- Cuisine: American
- Diet: Vegetarian
Ingredients
- 1 can refrigerated crescent dough
- 1/4 cup melted butter
- 1/2 cup brown sugar
- 1 tablespoon ground cinnamon
- 1/2 cup powdered sugar
- 1–2 tablespoons milk or cream
- 1/2 teaspoon vanilla extract
Instructions
- Preheat the oven to 375°F (190°C).
- Open the can of refrigerated crescent dough and unroll it on a clean surface.
- Mix together the melted butter, brown sugar, and cinnamon in a small bowl.
- Spread the cinnamon-sugar mixture evenly over your crescent dough.
- Roll it up tightly from the widest end into a log and cut into bite-sized pieces (about 1 inch thick).
- Line a baking sheet with parchment paper and place the bites on it.
- Bake for 12-15 minutes or until golden brown.
- Whisk together powdered sugar, milk, and vanilla extract until smooth to make the glaze.
- Drizzle the glaze over the bites while they’re still warm.
Notes
These bites can be prepared in advance and refrigerated before baking. Customize with various fillings or toppings as desired!
Nutrition
- Serving Size: 1 bite
- Calories: 150
- Sugar: 10g
- Sodium: 200mg
- Fat: 7g
- Saturated Fat: 4g
- Unsaturated Fat: 2g
- Trans Fat: 0g
- Carbohydrates: 22g
- Fiber: 1g
- Protein: 2g
- Cholesterol: 20mg
Keywords: cinnamon rolls, quick dessert, easy recipe, baking, sweet snacks
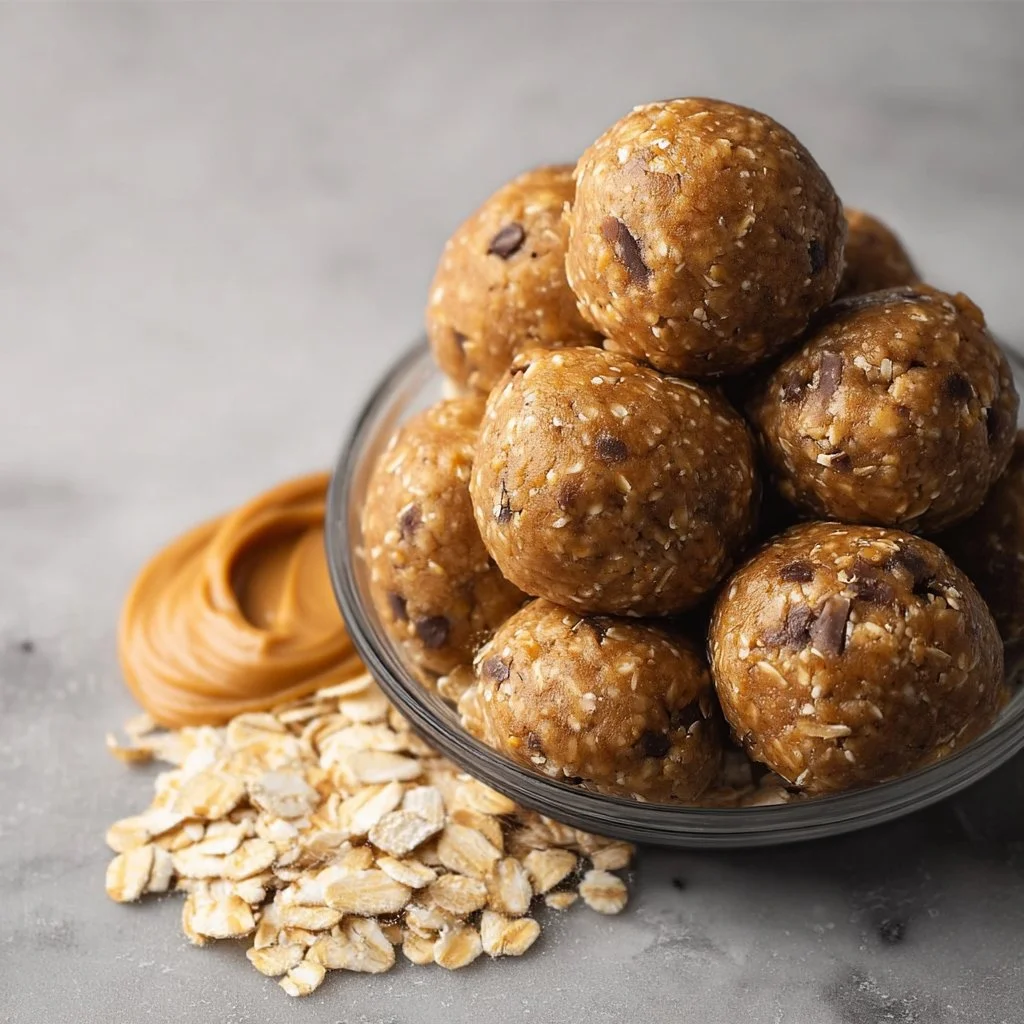
No-Bake Peanut Butter Energy Bites
# No-Bake Peanut Butter Energy Bites: A Delicious and Simple Treat

## Introduction

Hello, lovely foodies! Today, I'm thrilled to share a recipe that has honestly become one of my go-to snacks: No-Bake Peanut Butter Energy Bites. If you're like me and always looking for quick, nutritious, and downright delicious ways to satisfy your sweet tooth, then these babies are for you!

Picture this: a blissful afternoon spent in the kitchen, the sun streaming through the window, and the sound of a spoon gently scraping the sides of a mixing bowl. In just a few minutes, you've whisked together some pantry staples and crafted an energizing treat that’s perfect for those busy days when you need a little pick-me-up. Plus, these energy bites are entirely fuss-free—you don’t even need to turn on the oven!

Whether you're gearing up for a busy work week, packing snacks for the kids, or just craving a little indulgence, these No-Bake Peanut Butter Energy Bites score high on versatility. You can mix them up using different ingredients or just stick to the classic, like we will today. The best part? They’re incredibly forgiving! So grab your apron, and let’s dive into this delightful recipe that marries simplicity and flavor beautifully.

## Personal Story

I’ll never forget the first time I made these energy bites. It was one of those rainy afternoons where I just couldn’t muster the energy to bake anything fancy, but I craved something sweet. I rummaged through my pantry and found a few key ingredients: quick oats, peanut butter, and honey. The idea for No-Bake Peanut Butter Energy Bites popped up like a light bulb moment. As I combined everything, I felt a wave of nostalgia—the same warmth and love I felt when I watched my grandmother whip up her infamous no-bake cookies, which were always a hit among family and friends.

With a hint of excitement, I rolled the mixture into little balls, and as I did, I remembered all those cozy evenings spent with loved ones, sharing stories around the table, and sneaking bites of dessert before dinner was served. It's moments like those that remind me why I share recipes; they create connections and spark joy. So, let’s get back to this modern twist on my childhood delight: No-Bake Peanut Butter Energy Bites!

## Ingredients

To whip up these irresistible bites, you only need a handful of ingredients. Let’s take a look:

- **½ cup Quick Oats**
  Quick oats are a wonderful base for these energy bites, adding texture and heartiness. If you don’t have quick oats, rolled oats will work as well—just pulse them a bit in a blender or food processor to create a finer texture.

- **¼ cup Peanut Butter**
  The star ingredient! Creamy or crunchy, choose your favorite nut butter. For a nut-free version, sun butter or soy nut butter are excellent substitutes.

- **2 tablespoons Honey**
  This natural sweetener gives the bites a lovely stickiness and helps hold everything together. If you’re looking for a vegan option, feel free to swap it with maple syrup or agave nectar.

- **¼ cup Mini Chocolate Chips**
  Who says you can’t indulge a little? Mini chocolate chips add a delightful sweetness and fun texture. You can use dark chocolate for a richer flavor or leave them out altogether if you're feeling extra healthy!

## Step-by-Step Instructions

Alright, let’s get to the fun part! Here’s how to make these No-Bake Peanut Butter Energy Bites, step by step:

1. **Gather Your Ingredients**:
   Before you start, make sure to have all your ingredients on the counter. This way, you'll stay organized, and you'll streamline the whole process—no one wants to be rummaging around mid-recipe.

2. **Mixing Bowl Time**:
   In a mixing bowl, combine the **½ cup quick oats** and **¼ cup peanut butter**. Use a spatula or a wooden spoon to mix them together. You’ll want to get them nice and well combined. Don’t be afraid to use a bit of muscle—this is where the fun begins!

3. **Add the Honey**:
   Pour in the **2 tablespoons of honey** and mix everything until it’s nicely incorporated. The mixture will become sticky, but that’s exactly what we want! This sticky goodness will help in forming those perfect little bites.

4. **Chocolate Chips, Please**:
   Now, throw in the **¼ cup mini chocolate chips** and gently fold them into the mixture. Be generous! These little bites of chocolate bliss are what make these energy balls so special.

5. **Roll Into Bites**:
   Using your hands (don't forget to wash them first!), scoop out about a tablespoon of the mixture and roll it into a ball. Place it on a plate or parchment paper. Repeat until all the mixture is used up! Feel free to adjust the size based on your preferences—some days you just need a bigger bite, right?

6. **Chill Time**:
   Once you have all your energy bites rolled, pop them in the refrigerator for at least 30 minutes. This helps them firm up beautifully. If you’re running short on time, you can enjoy them right away, but they’re definitely better chilled!

7. **Enjoy**:
   After they’ve chilled, grab a few and enjoy them as a delightful snack, workout fuel, or even a sweet treat after dinner. They’re perfect for keeping your energy levels up throughout the day.

## Serving Suggestions

When it comes to serving these delicious bites, the simplest approach works best. Arrange them in a cute bowl or on a rustic wooden platter for a charming display. You can sprinkle a few extra mini chocolate chips on top to catch the eye, or you can even drizzle a bit of peanut butter over the top for that extra “wow” factor. They make for a fantastic snack option at parties or a surprise treat in a lunchbox!

## Recipe Variations

Want to mix it up a bit? Here are some fun variations to keep your energy bites exciting:

1. **Coconut Bliss**: Add shredded coconut to the mix for a tropical twist or roll the bites in coconut for an added fun texture!

2. **Nutty Buddy**: Incorporate some finely chopped nuts, like almonds or walnuts, for extra crunch.

3. **Swap the Nut Butter**: Try almond butter, cashew butter, or even tahini for a different flavor profile.

4. **Dried Fruit Delight**: Toss in some dried cranberries, raisins, or even chopped apricots for a sweet and chewy surprise.

5. **Spice It Up**: A pinch of cinnamon or a dash of vanilla extract can take the flavor to a whole new level!

## Chef’s Notes

These No-Bake Peanut Butter Energy Bites have evolved over the years in my kitchen. Originally, they started as a simple after-school snack for my kids. But I soon realized they were so delightful that I needed to share them with everyone! I’ve experimented with so many ingredients—from protein powders to flaxseeds, and let me tell you, you really can’t go wrong!

Sometimes, I find myself sneaking a few right after a workout or even mid-afternoon when the sweet cravings kick in. They’ve become my secret weapon in keeping energy levels up and maintaining a positive mood. Who knew that a little creation could bring so much joy?

## FAQs and Troubleshooting

**Q1: My energy bites are too sticky; how can I fix this?**
If your mixture is too sticky to roll, try adding a bit more oats or a sprinkle of powdered sugar to help firm things up.

**Q2: Can I freeze these energy bites?**
Absolutely! You can store them in an airtight container in the freezer for up to three months. Just thaw them for a bit before enjoying!

**Q3: How can I make these energy bites gluten-free?**
Make sure to use certified gluten-free oats to keep this recipe safe for everyone!

**Q4: What if I don’t like peanut butter?**
No worries! Any nut or seed butter will work perfectly in this recipe, so feel free to experiment with what you have on hand.

## Nutritional Info

While I won’t provide specific numbers (since they can vary based on brands and exact quantities), these No-Bake Peanut Butter Energy Bites pack a punch of healthy fats, fiber, and protein, making them an excellent choice for energy and satiation.

---

And there you have it, my fabulous foodies! Your very own No-Bake Peanut Butter Energy Bites, crafted with love and joy. Remember, cooking is all about having fun, sharing stories, and creating connections. I can’t wait to hear how they turn out for you—so gather your friends, roll up your sleeves, and create some culinary magic in your kitchen. Happy snacking!
No-Bake Peanut Butter Energy Bites
Easy and nutritious No-Bake Peanut Butter Energy Bites perfect for snacks or a quick energy boost.
- Prep Time: 15 minutes
- Cook Time: 0 minutes
- Total Time: 30 minutes
- Yield: 12 servings 1x
- Category: Snack
- Method: No-Bake
- Cuisine: American
- Diet: Vegetarian
Ingredients
- ½ cup Quick Oats
- ¼ cup Peanut Butter
- 2 tablespoons Honey
- ¼ cup Mini Chocolate Chips
Instructions
- Gather your ingredients.
- Mixing bowl time: Combine the oats and peanut butter.
- Add the honey and mix until incorporated.
- Throw in the mini chocolate chips and fold into the mixture.
- Roll into balls and place on a plate.
- Chill for at least 30 minutes in the refrigerator.
- Enjoy as a snack or energy boost!
Notes
Feel free to adjust the size of the energy bites. They can be frozen for up to three months.
Nutrition
- Serving Size: 1 bite
- Calories: 100
- Sugar: 6g
- Sodium: 50mg
- Fat: 5g
- Saturated Fat: 1g
- Unsaturated Fat: 4g
- Trans Fat: 0g
- Carbohydrates: 14g
- Fiber: 2g
- Protein: 3g
- Cholesterol: 0mg
Keywords: snacks, energy bites, no-bake, peanut butter, healthy treats