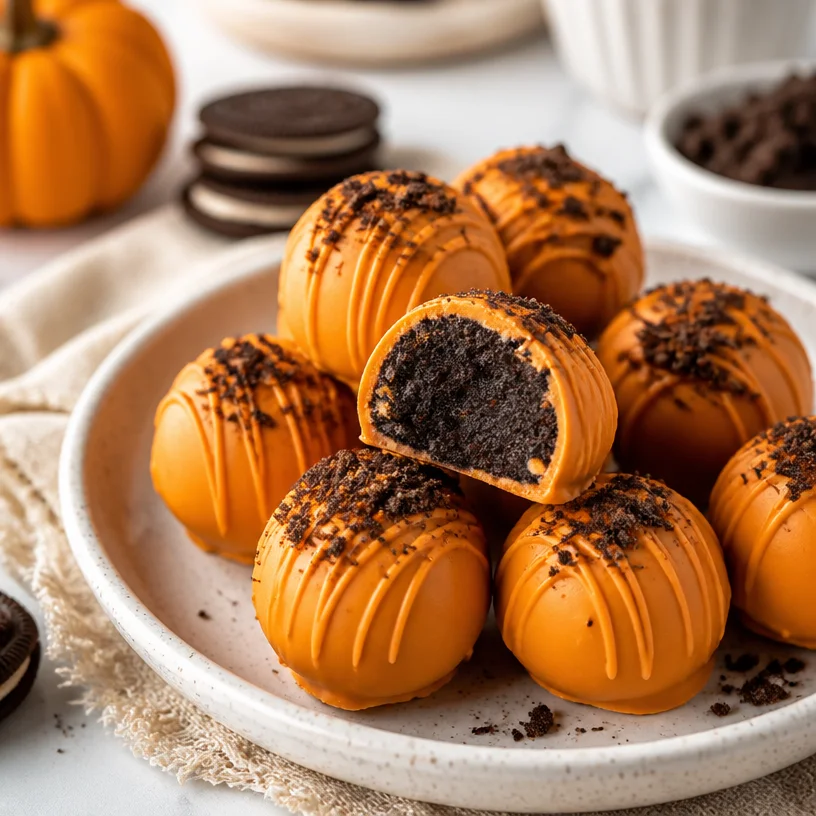
No-Bake Pumpkin Oreo Truffles: 4-Ingredient Treats
Indulge in Fall: Pumpkin Oreo Truffles
Hello, fellow food enthusiasts! It’s that magical time of year when the air starts to crisp, pumpkins adorn every porch, and cozy gatherings begin to fill our calendars. Today, I’m thrilled to share a delightful treat that captures the essence of autumn—Pumpkin Oreo Truffles! These little bite-sized wonders are not only dreamy in flavor but also easy to whip up. Get ready to gather your friends and family around the table, because these truffles are sure to impress without sending you into a baking frenzy.
A Sweet Memory: Pumpkin Patch Adventures
Let me take you down memory lane to one of my favorite autumn traditions—visiting the local pumpkin patch. The air is filled with the scent of spiced cider, and laughter echoes throughout the fields as families navigate through hay mazes and pick their perfect pumpkins. It’s more than just a fun outing; it’s a bonding experience.
I still remember one year, my friends and I decided to throw an impromptu pumpkin carving party. We had our pumpkins on the table, carving tools in hand, when the idea struck us! What if we could make something delicious with these pumpkins instead of just letting them sit on the porch? That evening, we concocted a simple pumpkin dessert with crushed Oreos, cream cheese, and a sprinkle of fall spices. Flash forward a few years later, and here we are with these incredible Pumpkin Oreo Truffles—a recipe inspired by that unforgettable night.
Ingredients
Just like my unforgettable memories, this recipe combines simple ingredients to create something truly special. Here’s what you’ll need:
-
Oreos: These crunchy chocolate cookies are the star of the show! Their rich flavor pairs perfectly with the pumpkin and cream cheese. If you want a gluten-free option, try using gluten-free chocolate sandwich cookies instead.
-
Cream Cheese: This brings a lovely creaminess to the truffles, binding everything together. For a lighter version, you can use reduced-fat cream cheese, although full-fat will give you the best flavor and texture.
-
Pumpkin Puree: Make sure to use 100% pure pumpkin puree (not pumpkin pie filling). If you want to switch it up, you can try using sweet potato puree for a different twist.
-
Orange Chocolate: This will serve as the delightful coating for our truffles. It adds both flavor and a sunny pop of color. If orange chocolate is hard to find, you can substitute it with white chocolate and add a bit of orange zest for that citrusy kick.
-
Spices (Cinnamon and Nutmeg): A dash of these will enhance the pumpkin flavor and give your truffles that warm, cozy feel. Feel free to experiment with other spices like ginger or allspice if you like a bit more warmth.
-
Sea Salt (Optional): A sprinkle of sea salt can elevate the sweetness and enhance the flavors. Trust me, it’s a game-changer!
Step-by-Step Instructions
Now that we have our ingredients lined up, let’s dive into making these delightful Pumpkin Oreo Truffles.
-
Prepare the Oreo Crumbs: Grab a blender or food processor and add about 15 Oreos. Pulse them until they are finely crushed.
Pro Tip: You can also put the Oreos in a zip-lock bag and crush them with a rolling pin! It’s a great way to relieve any stress while you’re at it.
-
Mix in the Cream Cheese and Pumpkin: In a large bowl, combine the crushed Oreos, 4 oz of cream cheese, and ½ cup of pumpkin puree. Mix with a spatula until everything is well combined—you want to achieve a thick, dough-like consistency.
Chef Insight: If the mixture seems too wet, add a few more crushed Oreos. If it’s too dry, a touch more pumpkin or cream cheese can bring it to the right texture.
-
Spice It Up: Add in ½ teaspoon of cinnamon, ¼ teaspoon of nutmeg, and a pinch of sea salt. This simple addition will make your truffles taste like fall in a bite!
-
Chill the Mixture: Cover the bowl with plastic wrap and refrigerate for about 30 minutes. This will help the mixture firm up, making it easier to roll into balls.
Insider Hack: While the mixture chills, clean up your kitchen! You’ll thank me later when it’s time to savor these truffles.
-
Form the Truffles: Once your mixture is chilled, use a small cookie scoop or your hands to form about 1-inch balls. Place them on a baking sheet lined with parchment paper.
Chef’s Note: Don’t worry about making them perfect—each truffle will have its own charm.
-
Melt the Orange Chocolate: In a microwave-safe bowl, melt the orange chocolate in 30-second intervals, stirring between each until smooth.
Chocolate Tip: If you find the chocolate too thick, add a teaspoon of coconut oil to thin it out a bit.
-
Coat the Truffles: Dip each truffle into the melted chocolate, using a fork to help coat it evenly. Let the excess drip off before placing them back onto the parchment-lined baking sheet.
Presentation Tip: For a festive touch, sprinkle some crushed Oreos or festive sprinkles on top right after coating while the chocolate is still wet.
-
Chill Again: Pop the truffles back into the fridge for about an hour to let the chocolate set.
-
Serve and Enjoy: Once the chocolate has hardened, transfer the truffles to a beautiful serving platter and get ready to impress your guests!
Serving Suggestions
To showcase these delightful Pumpkin Oreo Truffles, consider arranging them in a charming dessert stand, garnished with a sprinkle of crushed Oreos and a few autumn leaves for that extra seasonal flair. If you’re feeling festive, serve them alongside a warm cup of spiced cider or a creamy pumpkin spice latte!
Recipe Variations
These truffles are versatile! Here are a few twists you might enjoy:
-
Maple Syrup Drizzle: Swap the orange chocolate for a melted maple-flavored chocolate and drizzle with pure maple syrup for a delicious twist.
-
Nutty Crust: Incorporate finely chopped pecans or walnuts into your Oreo mixture for a delightful crunch.
-
Dairy-Free Delight: Use vegan cream cheese and dairy-free chocolate to cater to dairy-free friends!
-
Spiced Pumpkin Pie: Add a teaspoon of pumpkin pie spice to the mix to intensify that fall flavor!
Chef’s Notes
I have to admit, these Pumpkin Oreo Truffles have evolved over the years. Initially, I was hesitant about the idea of blending Oreos with pumpkin, fearing a flavor clash. But after that first batch, I realized the combination was a match made in heaven! As I continued to share these truffles with friends, tweaking and adjusting, they became a sought-after staple at my autumn gatherings.
And of course, there’s always room to experiment. I often encourage my guests to get creative—finding their favorite chocolate coatings or even rolling the truffles in crushed nuts or coconut.
FAQs and Troubleshooting
1. Can I use homemade pumpkin puree?
Absolutely! Just make sure it’s well-drained to avoid excess moisture that can affect the mixture’s consistency.
2. My chocolate coating turned out lumpy; what happened?
This often happens if the chocolate was overheated. Always melt it slowly and stir frequently for a smooth result. If it’s lumpy, a touch of coconut oil can help smooth it out.
3. How long will they last?
Properly stored in an airtight container in the fridge, these truffles can last about a week. But trust me, they won’t last that long once your friends get a taste!
4. Can I freeze these truffles?
Yes! Just place them in an airtight container with parchment paper between layers. They’ll stay fresh for about a month. Thaw them in the fridge for a few hours before serving.
Nutritional Info
While I always encourage savoring treats in moderation, here’s a little breakdown for you. Each pumpkin Oreo truffle has around 100 calories, 5 grams of fat, and 10 grams of carbohydrates. Not too bad for a delightful fall indulgence!
So there you have it, my lovely foodies! These Pumpkin Oreo Truffles are not just a treat; they’re a celebration of fall. Whether for a gathering or a cozy night in, I can’t wait for you to try this recipe and share it around your table. Let’s get cooking, and remember: with every bite, you’re not just enjoying a dessert; you’re creating sweet memories with every truffle! Happy cooking! 🍂🎃
PrintPumpkin Oreo Truffles

Delightful Pumpkin Oreo Truffles that capture the essence of autumn, combining the flavors of Oreo, pumpkin, and warm spices.
- Prep Time: 15 minutes
- Cook Time: 0 minutes
- Total Time: 45 minutes
- Yield: 24 truffles 1x
- Category: Dessert
- Method: Chilling and Coating
- Cuisine: American
- Diet: Vegetarian
Ingredients
- 15 Oreos, crushed
- 4 oz cream cheese
- ½ cup pumpkin puree
- ½ teaspoon cinnamon
- ¼ teaspoon nutmeg
- Optional: Sea salt
- Orange chocolate, for coating
Instructions
- Prepare the Oreo crumbs by crushing them finely in a blender or food processor.
- Mix together the crushed Oreos, cream cheese, and pumpkin until well combined.
- Spice it up by adding cinnamon, nutmeg, and sea salt.
- Chill the mixture in the refrigerator for 30 minutes to firm up.
- Form the mixture into 1-inch balls and place them on a lined baking sheet.
- Melt the orange chocolate in a microwave-safe bowl.
- Coat each truffle in melted chocolate and let the excess drip off.
- Chill the truffles in the fridge for an hour to set the chocolate.
- Serve and enjoy your delightful Pumpkin Oreo Truffles!
Notes
You can experiment with different chocolate coatings or add crushed nuts for a crunch.
Nutrition
- Serving Size: 1 truffle
- Calories: 100
- Sugar: 6g
- Sodium: 100mg
- Fat: 5g
- Saturated Fat: 2g
- Unsaturated Fat: 3g
- Trans Fat: 0g
- Carbohydrates: 10g
- Fiber: 1g
- Protein: 1g
- Cholesterol: 10mg
Keywords: pumpkin, truffles, dessert, fall, autumn, Oreo
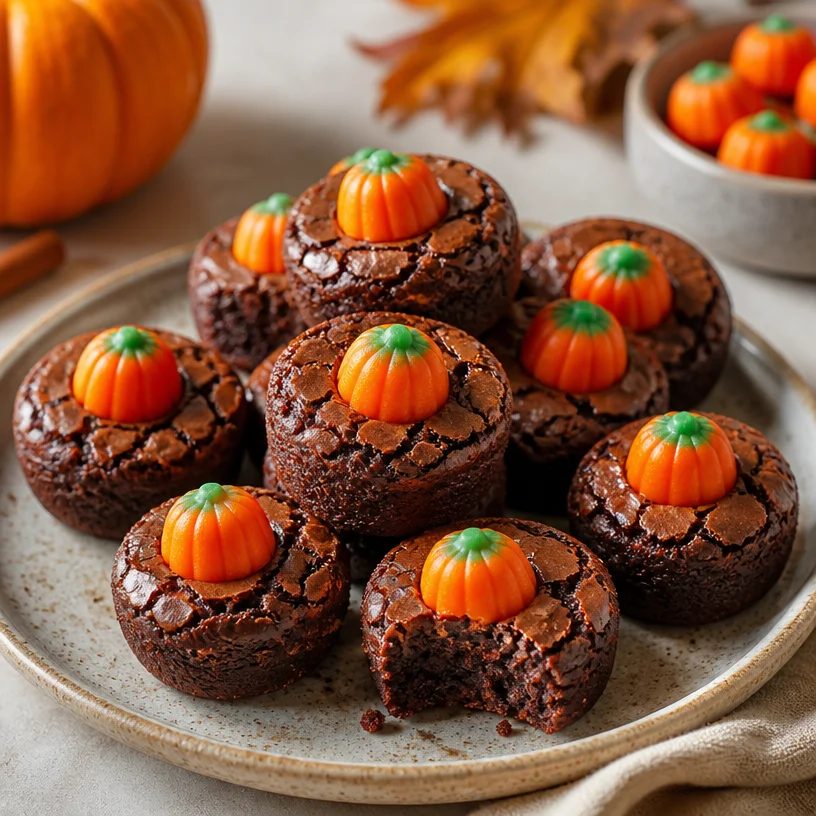
Pumpkin Brownie Bites: Quick Fall Treats for Busy Weeknights
Indulge in the Sweetness of Fall: Pumpkin Brownie Bites
Hello, fellow foodies! As the air turns crisp and the leaves begin to fall, there’s an undeniable shift that awakens my culinary curiosity. It’s the magical season of pumpkin spice, cozy sweaters, and heartwarming gatherings. Today, we’re diving into a delightful treat that brings together the rich, fudgy goodness of brownies with the festive charm of pumpkin: Pumpkin Brownie Bites.
Now, brownie lovers, get ready to elevate your dessert game! Picture this: fudgy brownie bites topped with adorable candy pumpkins, making them not just delicious but downright adorable. They’re perfect for autumn gatherings, Halloween parties, or just a cozy night in. Trust me, once you try these, you’ll want to make them a seasonal staple.
Let’s get started on this sweet adventure! Follow along as I guide you through my recipe, share some fun kitchen stories, and sprinkle in a few tips and tricks to ensure your pumpkin brownie bites come out perfectly every time.
A Slice of Nostalgia
I remember the first time I made brownies by myself. I must have been around 10 years old, pouring over my mom’s old recipe box, searching for the perfect dessert to surprise her after a long day. Little did I know I was setting the foundation for a lifelong love affair with chocolate!
As I mixed the ingredients together, there was something magical about watching that cocoa powder transform into a thick, velvety batter. The sweet aroma that filled the kitchen as they baked was pure heaven. Fast forward a few years to when the leaves turned golden and crisp—I discovered the intrigue of incorporating pumpkin into the mix. Even in the early days of my culinary journey, I understood the beauty of blending flavors and seasons.
Now, combining that childhood love of brownies with the creamy texture and warm spice of pumpkin feels like a celebration of all things cozy. With every bite, you’ll taste nostalgia, comfort, and a hint of seasonal magic. Let’s bring that feeling to life in your kitchen!
Ingredients
Here’s what you’ll need to whip up these delightful Pumpkin Brownie Bites:
-
1 cup unsweetened cocoa powder
A rich, dark cocoa powder yields the best flavor. If you’re in a pinch, you can substitute it with Dutch-process cocoa for a lighter touch. -
1 cup granulated sugar
This sweetens the brownies beautifully! For a twist, consider swapping half for brown sugar for a caramel-like complexity. -
1 cup all-purpose flour
Standard flour works best, but you can easily use a gluten-free mix if you’re accommodating those with dietary restrictions. Make sure it’s a blend specifically for baking. -
1/2 cup unsalted butter, melted
Butter adds a lovely richness to the brownies. You can substitute with coconut oil for a dairy-free option. -
3 large eggs
These give structure to your brownies. If vegan, consider using flax eggs (1 tablespoon ground flaxseed + 2.5 tablespoons water = 1 egg) instead. -
1 cup canned pumpkin puree
Look for pure pumpkin, not the spiced pie filling. This autumn staple adds moisture and flavor! -
1 teaspoon vanilla extract
Pure vanilla extract enhances all the flavors. For a fun twist, try using maple syrup instead. -
1 teaspoon baking powder
Ensures your brownies rise beautifully. If you’re out, baking soda can work as a substitute in half the amount. -
Pinch of salt
A little salt balances the sweetness. Trust me; it’s a game-changer! -
Candy pumpkins for decoration
These festive candies bring a pop of color and fun! Feel free to swap them with seasonal sprinkles or nuts for texture.
Step-by-Step Instructions
Now that we’ve gathered our ingredients, let’s bring these pumpkin brownie bites to life. Trust me, this process is just as enjoyable as the final product!
Step 1: Preheat and Prep
Preheat your oven to 350°F (175°C) and line a mini muffin tin with paper liners. If you don’t have liners, a quick spritz of non-stick spray will do the trick. This helps with easy removal later on!
Step 2: Mix Dry Ingredients
In a medium mixing bowl, whisk together the cocoa powder, granulated sugar, flour, baking powder, and salt. This step is crucial for ensuring that all the dry ingredients are well combined, promoting an even bake. Plus, it will smell heavenly!
Step 3: Blend Wet Ingredients
In another large bowl, combine your melted butter, eggs, pumpkin puree, and vanilla extract. Mix until everything is fully blended and looks smooth. This pumpkin mixture adds a warm, comforting element to your brownies.
Step 4: Combine
Pour the dry ingredients into the wet mixture and fold gently with a spatula. Be careful not to overmix; we just want everything to come together. If you see a few flour streaks—no worries! That little bit of flour will mix in when it bakes.
Step 5: Scoop and Fill
Using a small cookie scoop or spoon, fill each muffin tin cup about three-quarters of the way full. This way, they have room to rise while maintaining their bite-sized charm.
Step 6: Bake
Pop your tray into the preheated oven and bake for about 15 minutes. Keep an eye on them! You’ll know they’re ready when they puff slightly and a toothpick inserted comes out with a few moist crumbs—this will ensure that signature fudgy texture.
Step 7: Cool and Decorate
Let your brownie bites cool in the pan for 5-10 minutes before transferring them to a wire rack to cool completely. Once cooled, top each brownie with a candy pumpkin for that cute fall flair. Not only do they look great, but they add a sweet little crunch!
Serving Suggestions
To elevate your serving game, consider placing your pumpkin brownie bites on a beautiful platter adorned with autumn leaves or mini pumpkins. Drizzling a little chocolate ganache or a dusting of powdered sugar can add an extra touch of elegance. These treats can be a whimsical centerpiece at your next gathering, and trust me, they’ll disappear in a flash!
Recipe Variations
Don’t be afraid to experiment! Here are some fun twists to put your personal spin on these pumpkin brownie bites:
- Nutty Delight: Add chopped walnuts or pecans for a crunchy texture.
- Spiced Pumpkin: Mix in a teaspoon of pumpkin pie spice to intensify that fall flavor.
- Chocolate Chunk: Toss in some chocolate chips or chunks for a delightful melt-in-your-mouth experience.
- Frosted Bliss: Top them with a cream cheese frosting drizzle for a richer finish.
- Minty Fresh: Add a few drops of peppermint extract for a refreshing take when the holidays roll around.
Chef’s Notes
Every recipe tells a story, and this one is no exception! When I first combined pumpkin and brownie batter, it felt like magic in my kitchen. It’s incredible how two simple ingredients can create something so comforting and festive. Over the years, I’ve played around with spices and mix-ins, but the core joy of creating this treat has never changed. It’s like a hug in dessert form, and I can’t wait for you to experience that!
FAQs and Troubleshooting
Q1: My brownie bites are too dry. What happened?
A: This can happen if you overbake them. Be sure to check them a couple of minutes before the recommended time. The brownies will continue to set as they cool.
Q2: Can I use fresh pumpkin instead of canned?
A: Absolutely! Just make sure to cook and puree it, then drain out any excess moisture so your brownies don’t turn out soggy.
Q3: How do I ensure my brownie bites are fudgy?
A: Keep an eye on the baking time and don’t overmix the batter. Less mixing leads to a denser, fudgier texture!
Q4: Can I freeze these brownie bites?
A: Yes! They freeze wonderfully. Just ensure they’re in an airtight container, and they’ll keep for up to three months. Thaw them at room temperature before enjoying!
Nutritional Info
While I’m all about indulgence, I believe in balance too! These treats bring joy and are best enjoyed in moderation. A rough estimate is around 100 calories per brownie bite, depending on toppings and variations.
So there you have it! A fall-inspired treat that will bring warmth and joy to your gatherings and celebrations. I hope you feel inspired to tie on your apron and create these delightful Pumpkin Brownie Bites. Just remember, cooking should be fun, lighthearted, and always filled with love.
Let’s make something special together this season! Happy baking, and I can’t wait to hear how your pumpkin brownie bites turn out!
PrintPumpkin Brownie Bites
Delightfully fudgy brownie bites infused with pumpkin and topped with candy pumpkins, perfect for autumn gatherings.
- Prep Time: 15 minutes
- Cook Time: 15 minutes
- Total Time: 30 minutes
- Yield: 24 servings 1x
- Category: Dessert
- Method: Baking
- Cuisine: American
- Diet: Vegetarian
Ingredients
- 1 cup unsweetened cocoa powder
- 1 cup granulated sugar
- 1 cup all-purpose flour
- 1/2 cup unsalted butter, melted
- 3 large eggs
- 1 cup canned pumpkin puree
- 1 teaspoon vanilla extract
- 1 teaspoon baking powder
- Pinch of salt
- Candy pumpkins for decoration
Instructions
- Preheat your oven to 350°F (175°C) and line a mini muffin tin with paper liners.
- Mix together the cocoa powder, granulated sugar, flour, baking powder, and salt in a medium mixing bowl.
- Blend melted butter, eggs, pumpkin puree, and vanilla extract in another bowl until smooth.
- Combine the dry ingredients into the wet mixture and fold gently.
- Scoop and fill each muffin tin cup about three-quarters full.
- Bake in the preheated oven for about 15 minutes.
- Cool in the pan for 5-10 minutes before transferring to a wire rack and decorating with candy pumpkins.
Notes
For a vegan option, use flax eggs instead of regular eggs. You can also try using brown sugar for a caramel-like complexity.
Nutrition
- Serving Size: 1 brownie bite
- Calories: 100
- Sugar: 8g
- Sodium: 50mg
- Fat: 5g
- Saturated Fat: 2.5g
- Unsaturated Fat: 2.5g
- Trans Fat: 0g
- Carbohydrates: 13g
- Fiber: 1g
- Protein: 1g
- Cholesterol: 30mg
Keywords: pumpkin, brownies, fall dessert, Halloween treats, cozy baking
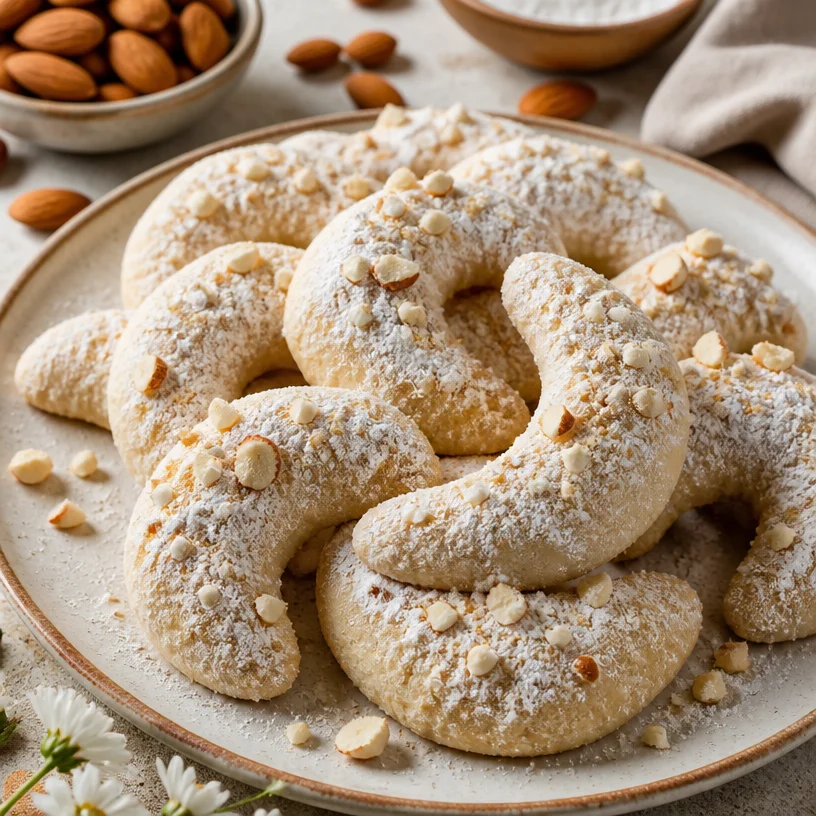
Almond Crescent Cookies: Easy, Crisp Tea-Time Treat
The Sweet Aroma of Nostalgia: Almond Crescent Cookies
Hello friends! Today, we’re diving into a delightful little corner of my kitchen to whip up a batch of Almond Crescent Cookies. These charming little treats have a special place in my heart, and I can’t wait to share the joy of creating them with you. Perfectly buttery, with a lovely hint of almond and a gentle sweetness, these cookies are not just a dessert – they’re a memory, a hug in cookie form.
A Walk Down Memory Lane
Let me take you back to a sunny afternoon in my childhood kitchen. The warm scent of freshly baked cookies dances through the air, blending with the laughter of friends and family. My grandmother, the heart of our home, would invite us into her kitchen, her bright blue apron swaying as she twirled around, mixing, rolling, and baking. It was a time when the world outside slowed down, and our only concern was the tantalizing cookies cooling on the counter.
Among her treasured recipes, the Almond Crescent Cookies stood out. She taught me the delicate process of shaping the dough into crescent moons, rolling them in a cloud of powdered sugar, and the way to savor the crisp edges with each bite. Now, every time I bake these cookies, I feel that same warmth, reliving those lovely moments. So, let’s create some delicious nostalgia together!
Ingredients You’ll Need
Here’s what you’ll need to gather for these wonderful cookies:
-
1 cup unsalted butter, softened
- This adds rich creaminess to the cookies. Make sure it’s at room temperature for easy mixing. If you’re in a pinch, you can substitute it with an equal amount of coconut oil for a dairy-free option.
-
1/2 cup powdered sugar
- This gives the cookies a light, sweet taste and a melt-in-your-mouth texture. For a healthier alternative, try using powdered erythritol or another sweetener of your choice.
-
1 teaspoon vanilla extract
- Adds a warm, aromatic flavor to balance the sweetness. If you want to experiment, a touch of bourbon or rum extract could add an interesting twist.
-
1 teaspoon almond extract
- The star of the show! It lends that classic, nostalgic flavor. You could use hazelnut extract for a different nutty flavor altogether if desired.
-
2 1/4 cups all-purpose flour
- This provides structure to our cookies. For a gluten-free version, you can use a gluten-free 1:1 baking blend with xanthan gum.
-
1/4 teaspoon salt
- A little pinch enhances the flavors and balances the sweetness. Using sea salt can give an extra dash of flavor!
-
1/2 cup chopped almonds
- These add a delightful crunch and flavor. Feel free to substitute with other nuts like walnuts or pistachios for a unique variation.
-
Additional powdered sugar for dusting
- This is what makes these cookies so visually appealing! You could infuse the sugar with a bit of cinnamon for an interesting flavor twist.
Step-by-Step Instructions
Now that we have our ingredients all prepped and ready, let’s get those elbows greased up and dive into the baking process!
-
Preheat Your Oven
- Start by preheating your oven to 350°F (175°C). This ensures that when we pop our cookies in, they’ll bake evenly right from the get-go!
-
Cream the Butter and Sugar
- In a large mixing bowl, combine the softened butter and powdered sugar. Using an electric mixer, beat them together on medium speed until the mixture is light and fluffy—this usually takes about 2-3 minutes. It’s crucial to incorporate air for those lovely, tender cookies!
-
Add the Flavorings
- Now, pour in the vanilla and almond extracts. Mix just until combined. Take a moment here to breathe in that intoxicating aroma; it’s the heart of our cookies!
-
Incorporate the Dry Ingredients
- In a separate bowl, whisk together the flour and salt. Gradually add the flour mixture to the butter mixture in about three additions, mixing on low speed until just combined. Be careful not to overmix; we want to keep those cookies light and flaky!
-
Fold in the Almonds
- Sprinkle in the chopped almonds and gently fold them into the dough with a spatula. This is where those delightful crunches come from! If you want to get a bit adventurous, you can lightly toast the almonds before adding them for an enhanced nutty flavor.
-
Shape the Cookies
- Using your hands, scoop about a tablespoon of dough and roll it into a crescent shape, or, if you’re feeling fun, you could create little balls and then shape them into crescents! Place them on a lined baking sheet, leaving some space in between for spreading.
-
Bake the Cookies
- Pop the sheets into your preheated oven and bake for 12-15 minutes, or until the edges are golden. Keep an eye on them, as they can turn from perfect to too crispy in the blink of an eye!
-
Dust with Powdered Sugar
- Allow the cookies to cool for about 5 minutes on the baking sheet before transferring them to a wire rack. While they’re still warm, gently sift powdered sugar over the top. This makes them look absolutely gorgeous and transforms them into a sprinkle of happiness!
Serving Suggestions
To serve these lovely Almond Crescent Cookies, I recommend placing them on a beautiful platter or in a delightful basket lined with a colorful cloth. Pair them with a steaming cup of tea or coffee, or for an extra treat, bring out some homemade hot cocoa. These cookies are perfect for gatherings, holiday celebrations, or simply enjoying with loved ones on a cozy afternoon.
Recipe Variations
-
Chocolate Dipped Almond Crescents: Melt some dark or white chocolate and dip half of each cooled cookie before they set on a wire rack for a decadent twist.
-
Cinnamon Almond Crescents: Add a teaspoon of ground cinnamon to the dough for a spice-infused treat that’s perfect for fall baking.
-
Orange Zest Addition: Incorporate a teaspoon of fresh orange zest to the mix for a lively citrus note.
-
Nut-Free Version: Simply omit the chopped almonds and replace them with miniature chocolate chips for a delightful sweetness.
-
Matcha Almond Cookies: Add a tablespoon of matcha powder for a unique and vibrant twist; think green and gorgeous!
Chef’s Notes
These Almond Crescent Cookies have quite the history in my kitchen. They started as a special holiday treat but have since become a staple of my baking repertoire. I often find new friends and family loving these cookies during festive gatherings or casual weekend afternoons. They’re enjoyed straight from the oven but even better when shared!
And here’s a little kitchen story—I once tried to multitask and ended up rolling my cookie dough too thin. Unfortunately, they flattened out instead of holding their crescent shape. Instead of tossing them, I embraced the mistake and dusted them with powdered sugar, presenting them as ‘Almond Dust Clouds’. Life’s too short not to laugh at your baking blunders, right?
FAQs and Troubleshooting
-
Why are my cookies flat?
- If your dough is too soft, it could be over-creamed or have too much butter. Make sure to chill the dough for 30 minutes before baking if this happens!
-
Can I freeze the dough?
- Absolutely! You can shape the cookies, freeze them on a baking sheet, and then transfer them to a freezer-safe bag. When you’re ready to bake, just pop them into the oven without thawing!
-
What’s the best way to store these cookies?
- Store them in an airtight container at room temperature for up to a week. If they last that long!
-
How can I tell if they’re done baking?
- Look for the edges to turn a light golden brown. The centers might seem soft, but they’ll firm up as they cool!
Nutritional Info (Optional)
- Serving Size: 1 cookie
- Calories: Approximately 95
- Total Fat: 6g (Saturated Fat: 4g)
- Carbohydrates: 10g (Sugars: 3g)
- Protein: 1g
These Almond Crescent Cookies are so much more than just a dessert; they’re a sprinkle of love that brings us together – a sweet reminder of cherished moments spent sharing food and laughter. I can’t wait for you to try this recipe, and I’d love to hear how they turn out! Let’s keep that kitchen bustling, tie on those aprons, and bake up some memories! Happy baking!
PrintAlmond Crescent Cookies
Deliciously buttery cookies with a hint of almond, perfect for cherishing memories and sharing with loved ones.
- Prep Time: 15 minutes
- Cook Time: 15 minutes
- Total Time: 30 minutes
- Yield: 24 cookies 1x
- Category: Dessert
- Method: Baking
- Cuisine: American
- Diet: Vegetarian
Ingredients
- 1 cup unsalted butter, softened
- 1/2 cup powdered sugar
- 1 teaspoon vanilla extract
- 1 teaspoon almond extract
- 2 1/4 cups all-purpose flour
- 1/4 teaspoon salt
- 1/2 cup chopped almonds
- Additional powdered sugar for dusting
Instructions
- Preheat your oven to 350°F (175°C).
- Cream the butter and powdered sugar until light and fluffy.
- Add the vanilla and almond extracts and mix until combined.
- Incorporate the flour and salt gradually into the butter mixture.
- Fold in the chopped almonds.
- Shape the dough into crescent shapes and place on a lined baking sheet.
- Bake for 12-15 minutes until golden on the edges.
- Dust with powdered sugar while warm.
Notes
For a different flavor twist, try adding chocolate, cinnamon, or orange zest.
Nutrition
- Serving Size: 1 cookie
- Calories: 95
- Sugar: 3g
- Sodium: 50mg
- Fat: 6g
- Saturated Fat: 4g
- Unsaturated Fat: 2g
- Trans Fat: 0g
- Carbohydrates: 10g
- Fiber: 0g
- Protein: 1g
- Cholesterol: 30mg
Keywords: cookies, almond, crescents, dessert, baking, nostalgic
Seasonal Apple Caramel Cheesecake Bars: Easy 30-Minute Treat
Indulge in the Sweetness: Caramel Apple Cheesecake Bars
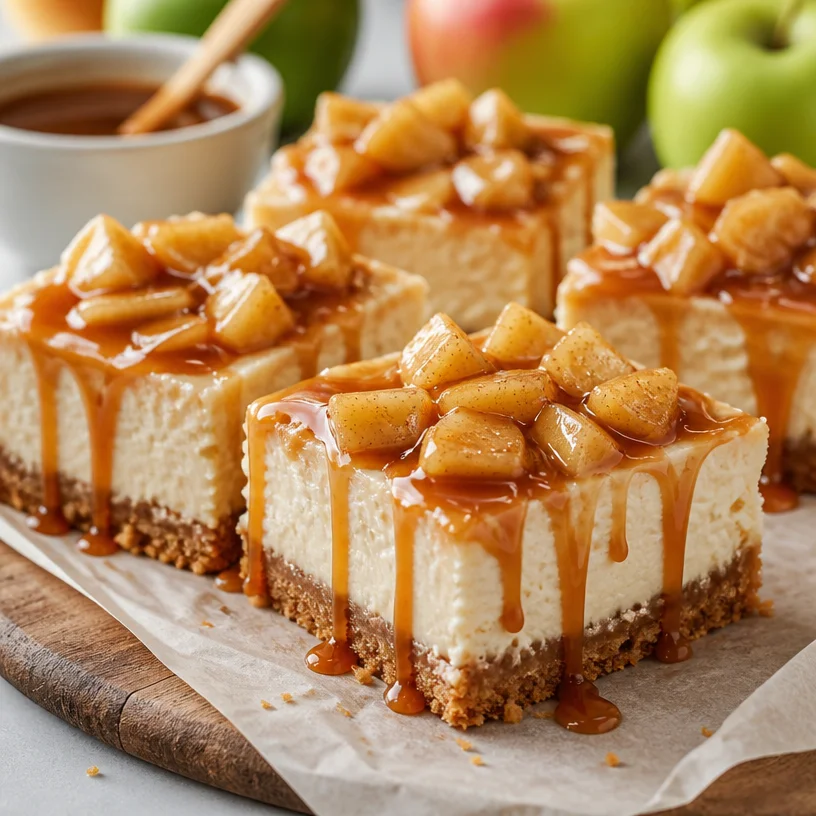
Hello there, fellow food lovers! Today, we’re diving into a delightful dessert that combines the best of two irresistible worlds: the creamy richness of cheesecake and the cozy, nostalgic flavors of caramel apples. Yes, you guessed it! We’re making Caramel Apple Cheesecake Bars, and I am thrilled to share this recipe with you.
Imagine this: You’re wrapping up a lively evening with friends, perhaps having just enjoyed some hearty entrees, and now it’s time for dessert. You pull out these luscious bars from the fridge, and as you slice into them, the sweet, caramel aroma wafts through the room. Your guests’ eyes light up, and in an instant, they know they’re in for a treat. What follows is a moment of bliss as they indulge in creamy cheesecake layered with tender apples and a drizzle of rich caramel. It’s the kind of dessert that transforms an ordinary day into a special occasion.
A Walk Down Memory Lane
Let me take you back a few years—yes, nostalgia is a big part of why I love cooking. Every autumn, my family would visit a local apple orchard, where the air was crisp and the trees were heavy with fruit. We’d pick crisp, juicy Granny Smith apples, and I’d always beg my mom to take home a jar of the homemade caramel they sold at the cider mill.
That magical combination of sweet, sticky caramel and tangy apples would inspire me to create different treats, but more than that, those moments spent together, laughing and tasting, were the highlight of every season. Fast forward to today, and I’ve turned that childhood love into a recipe that not only pays homage to those days but lets you recreate them in your own kitchen.
Ingredients
Here’s what you’ll need to bring these fabulous bars to life:
-
1 cup graham cracker crumbs: This will be the base of your crust. You can substitute with crushed digestive biscuits for a different flavor.
-
1/4 cup sugar: A bit of sweetness to bring out the flavor in the crust. Feel free to use coconut sugar for a charming twist.
-
1/2 cup unsalted butter, melted: This keeps the crust together. If you’re watching your dairy intake, try coconut oil as a replacement.
-
2 (8 oz) packages cream cheese, softened: The star of the show! Make sure it’s at room temperature for that creamy texture.
-
1 cup sugar: This sweetens the cheesecake layer. If you want a less sweet version, reduce the sugar to 3/4 cup without sacrificing flavor!
-
1 tsp vanilla extract: For that lovely aromatic note. Use pure vanilla extract for the best flavor, but imitation will work if that’s what you have.
-
2 large eggs: These help bind everything and give the cheesecake its structure. You can use flax eggs for a vegan option.
-
2 cups peeled and diced apples (such as Granny Smith): Fresh, juicy apples add a wonderful tartness and texture. If you want a sweeter touch, go for Honeycrisp or Fuji.
-
1 cup caramel sauce: This adds that sweet, luscious topping. Store-bought is fine, but if you’re feeling adventurous, try making your own!
-
1 tsp cinnamon: For warmth and spice. Opt for nutmeg if you’re looking for a change or want to switch up the flavor profile.
-
1/4 tsp nutmeg: This pairs beautifully with apples and adds another layer of flavor.
Step-by-Step Instructions
Now, let’s bring all these delightful ingredients together! Here’s how to make these Caramel Apple Cheesecake Bars step by step:
-
Preheat Your Oven: Start by preheating your oven to 325°F (160°C). A hot oven ensures that the cheesecake bakes evenly and sets properly.
-
Prepare the Crust:
- In a medium mixing bowl, combine the graham cracker crumbs, sugar, and melted butter.
- Mix until the crumbs are fully coated and the mixture resembles wet sand.
- Press this mixture firmly into the bottom of a greased 9×9-inch baking pan. You want a nice and even layer.
-
Bake the Crust:
- Place the pan in the preheated oven for about 8-10 minutes, or until it’s fragrant and just golden. This will give your crust a little crunch and set the foundation for the creamy cheesecake.
-
Make the Cheesecake Filling:
- In a large mixing bowl, beat the softened cream cheese with the sugar using a handheld mixer until it’s smooth and creamy. Don’t rush this step; take your time to combine the ingredients thoroughly.
- Add the vanilla extract and the eggs, one at a time, mixing well after each addition. You want to incorporate air into the mixture for a light texture, but be careful not to overmix.
-
Add the Apples:
- Gently fold in the diced apples, and sprinkle in that lovely cinnamon and nutmeg. The goal is to evenly distribute the apples throughout the cheesecake mix.
-
Pour and Swirl:
- Pour the cheesecake mixture over your pre-baked crust.
- Drizzle your caramel sauce on top—don’t skimp on this part! Then, use a knife to swirl it gently into the batter. This creates pretty patterns and ensures each bite is filled with sticky goodness.
-
Bake:
- Bake in the oven for 35-40 minutes, or until the edges are set, and the center still has a slight jiggle. Remember that it will firm up as it cools!
-
Cool Down:
- Once baked, turn off the oven and crack open the oven door—let the cheesecake cool inside for about an hour. This prevents cracking.
-
Chill in the Fridge:
- After it’s cooled to room temperature, refrigerate for at least 4 hours (or overnight, if you can resist!). This helps the flavors meld beautifully.
-
Slice & Serve:
- Once chilled, lift the bars out of the pan using the parchment paper for easy slicing. Cut into squares and drizzle with more caramel sauce before serving. Yum!
Serving Suggestions
For an eye-catching presentation, serve these bars on a beautiful platter topped with a sprinkle of cinnamon or a dollop of whipped cream. Add a few apple slices and a drizzle of caramel for that extra wow factor. Your guests will be impressed not just by the flavors, but also by the adorable presentation!
Recipe Variations
Want to mix things up? Here are a few fun ideas:
- Nutty Crunch: Stir in 1/2 cup of chopped walnuts or pecans into the crust for added crunch and flavor.
- Spice it Up: Switch out the cinnamon for pumpkin pie spice for a fall-inspired twist.
- Chocolate Lover?: Add chocolate chips to the cheesecake filling or melt some dark chocolate to drizzle on top before serving.
- Vegan Version: Use vegan cream cheese, flax eggs, and non-dairy butter for a plant-based version that doesn’t skimp on flavor.
Chef’s Notes
This recipe has become a staple in my kitchen! Initially, it started as a quick twist on traditional cheesecake, but as I experimented and refined it, I found the perfect balance between creamy and tangy. Plus, I’ve learned that if you leave a few extra caramel drizzles on the plate, it just makes everything a bit more inviting. There’s something about dessert that should feel communal—where everyone feels welcome to grab a slice and indulge.
FAQs and Troubleshooting
1. Why is my cheesecake cracking?
- Cracks often happen if the cheesecake bakes too long or if the oven temperature is too high. Cooling gradually in the oven with the door cracked can help.
2. Can I make these bars gluten-free?
- Absolutely! Just use gluten-free graham crackers or almond flour for the crust.
3. What can I do if my cheesecake is too soft?
- If it doesn’t set properly, it may need a bit longer in the fridge. If you find the filling not firm enough after chilling, you can mix in a tablespoon of cornstarch next time before baking.
4. How do I know when the cheesecake is done?
- The edges should look firm, and the center should have a slight jiggle—just like jello—it will firm up as it cools!
Nutritional Info
While I won’t dive too deep into the numbers, rest assured these bars are a balanced indulgence with the richness of cream cheese, along with the fiber and vitamins from apples. Perfect for a treat! Just remember, moderation is key.
Now that you’re armed with this delicious recipe, I hope you feel inspired to tie on your apron and create something truly special in your kitchen. Whether you’re celebrating a gathering or simply treating yourself, these Caramel Apple Cheesecake Bars are sure to become a beloved favorite. Happy cooking, and may your table always be set with love!
PrintCaramel Apple Cheesecake Bars
Delight in these creamy cheesecake bars infused with tender apples and rich caramel, perfect for any gathering.
- Prep Time: 20 minutes
- Cook Time: 50 minutes
- Total Time: 70 minutes
- Yield: 8 servings 1x
- Category: Dessert
- Method: Baking
- Cuisine: American
- Diet: Vegetarian
Ingredients
- 1 cup graham cracker crumbs
- 1/4 cup sugar
- 1/2 cup unsalted butter, melted
- 2 (8 oz) packages cream cheese, softened
- 1 cup sugar
- 1 tsp vanilla extract
- 2 large eggs
- 2 cups peeled and diced apples (such as Granny Smith)
- 1 cup caramel sauce
- 1 tsp cinnamon
- 1/4 tsp nutmeg
Instructions
- Preheat your oven to 325°F (160°C).
- In a medium mixing bowl, combine the graham cracker crumbs, sugar, and melted butter.
- Mix until the crumbs are fully coated and resemble wet sand.
- Press this mixture into the bottom of a greased 9×9-inch baking pan.
- Place the pan in the preheated oven for 8-10 minutes, or until fragrant and just golden.
- In a large mixing bowl, beat the softened cream cheese with the sugar until smooth and creamy.
- Add the vanilla extract and eggs, one at a time, mixing well after each.
- Gently fold in the diced apples with cinnamon and nutmeg.
- Pour the cheesecake mixture over your pre-baked crust.
- Drizzle the caramel sauce on top, then swirl it into the batter.
- Bake for 35-40 minutes, until the edges are set with a slight jiggle in the center.
- Once baked, turn off the oven and crack the door, letting the cheesecake cool inside for an hour.
- Refrigerate for at least 4 hours or overnight to set.
- Slice into squares and serve with more caramel sauce.
Notes
For a nutty crunch, stir in chopped walnuts or pecans; for a vegan version, use vegan cream cheese and flax eggs.
Nutrition
- Serving Size: 1 bar
- Calories: 300
- Sugar: 15g
- Sodium: 300mg
- Fat: 18g
- Saturated Fat: 10g
- Unsaturated Fat: 6g
- Trans Fat: 0g
- Carbohydrates: 34g
- Fiber: 2g
- Protein: 4g
- Cholesterol: 60mg
Keywords: cheesecake, caramel, apples, dessert, fall recipes
One-Bowl Pumpkin Coffee Cake: Easy Weeknight Treat
The Ultimate Pumpkin Coffee Cake: Cozy Up with a Slice of Autumn
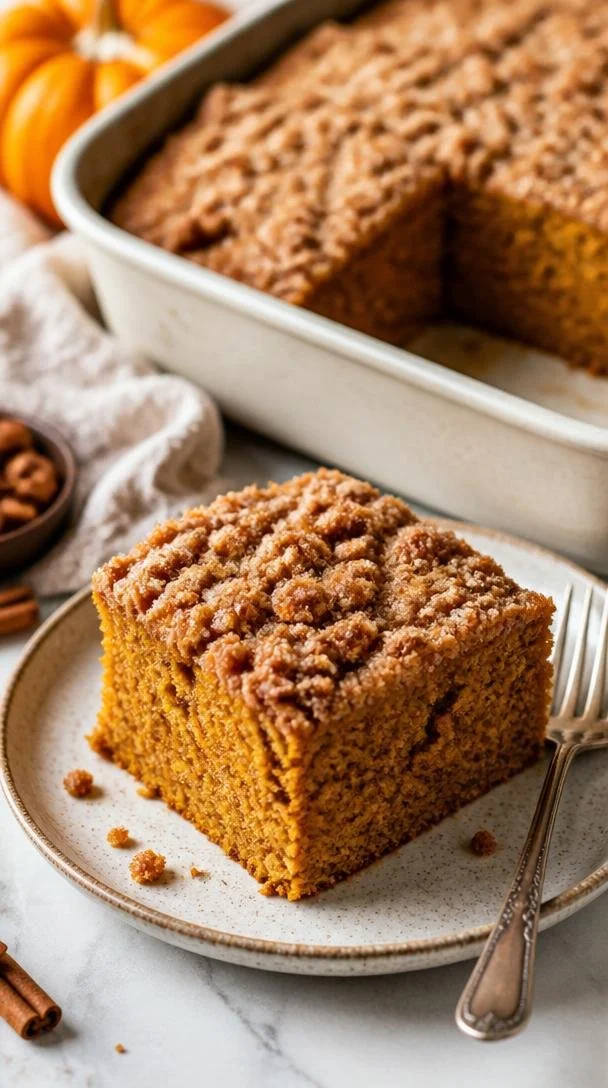
Hello, my lovely food friends! If there’s one thing that warms my heart more than a cozy sweater on a crisp autumn day, it’s the delightful aroma of a freshly baked pumpkin coffee cake wafting through my kitchen. This is not just any coffee cake; this is a celebration of fall flavors wrapped up in a soft, moist texture that makes you feel right at home. As the leaves change and pumpkin spice lattes hit the coffee shops, this recipe promises to be a crowd-pleaser at your next gathering—or a charming companion for your afternoon coffee ritual.
When I think about pumpkin coffee cake, I can’t help but travel back to my childhood. I remember my mom whipping up this delightful treat on chilly weekends, filling our home with warmth and sweet spices. It was our special ritual—Saturday morning breakfast with the cinnamon-sugar-studded cake cooling on the counter, hot coffee for her, chocolate milk for me, and countless tickles and hugs in between. There was something magical about sharing that ordinary yet extraordinary moment.
So, grab your apron, and let’s dive into an easy-to-follow recipe for this pumpkin coffee cake that not only tastes divine but will also fill your kitchen with heartwarming memories.
Personal Story: A Slice of Nostalgia
I can vividly recall a cozy autumn morning when the world outside seemed like a watercolor painting—the trees golden, the air crisp, and the sun peeking through the clouds just enough to offer warmth. My mom and I set out to bake our traditional pumpkin coffee cake. As we mixed ingredients, I remember the flour clouds and the inevitable giggles when a rogue pinch landed on my nose. It was a delightful mess!
We laughed and sang along to our favorite tunes, and when the cake came out of the oven, it felt like magic. The sweet aroma wrapped around us like a warm blanket. A formidable golden crust hugged the moist, spiced inside, and we savored every last crumb. To this day, every time I bake this pumpkin coffee cake, I’m transported back to that beautiful autumn morning—proof that the kitchen can be a portal to cherished memories.
Ingredients
Now that we’re all warmed up, let’s gather our luxurious ingredients! Here’s what you’ll need:
-
1 cup pumpkin puree: You can use canned pumpkin puree or make your own from fresh pumpkin. If you prefer a different flavor, try using sweet potato puree!
-
1 cup sugar: Granulated sugar is the standard, but you can substitute with brown sugar for a deeper molasses flavor.
-
1/2 cup vegetable oil: This adds moisture without overwhelming flavor. For a healthier option, substitute with applesauce or melted coconut oil.
-
2 large eggs: These help bind things together. For a vegan option, you can replace them with flax eggs (2 tablespoons flaxseed meal mixed with 6 tablespoons water, let it sit until thick).
-
1 teaspoon vanilla extract: Adds warmth and depth. You can even experiment with almond extract for a different nutty flavor!
-
2 cups all-purpose flour: Regular all-purpose flour works like a charm. For a gluten-free option, use a 1:1 gluten-free flour blend.
-
1 teaspoon baking powder: This gives the cake a nice rise. If you’re out, you can substitute with 1/4 teaspoon baking soda and 1/4 teaspoon cream of tartar.
-
1 teaspoon baking soda: Provides lift, especially with the acidity in the pumpkin puree.
-
1 teaspoon cinnamon: Bring on that warm spice! Feel free to up the ante by adding a pinch of cardamom or cloves for more complexity.
-
1/2 teaspoon nutmeg: This gives it that beloved, classic fall flavor. A touch of allspice can bring new life to this recipe!
-
1/2 teaspoon salt: Enhances all the flavors; don’t skip it!
-
1 cup streusel topping: Because what’s a coffee cake without a crunchy, sweet topping? You can easily prepare your own or use a store-bought mix!
Step-by-Step Instructions
Ready to bake? Let’s get started!
Step 1: Preheat your Oven
Preheat your oven to 350°F (175°C). This ensures that the cake bakes evenly and the spices release their lovely aromas as soon as it hits the heat.
Step 2: Prep the Pan
Grease a 9-inch round or square cake pan with non-stick spray or butter. Don’t skip this step! You want your beautiful cake to slide out effortlessly when it’s done.
Step 3: Mix the Wet Ingredients
In a large mixing bowl, whisk together the pumpkin puree, sugar, vegetable oil, eggs, and vanilla extract until the mixture is smooth and well combined. Take a moment to inhale that delightful pumpkin scent. Isn’t it invigorating? If you have time, let the mixture sit for 10 minutes; it helps blend the flavors.
Step 4: Combine Dry Ingredients
In a separate bowl, sift together the all-purpose flour, baking powder, baking soda, cinnamon, nutmeg, and salt. Sifting is just a way of introducing air, ensuring that your cake rises beautifully!
Step 5: Fold It All Together
Gradually add the dry ingredients to the wet ingredients, stirring gently. Overmixing can lead to a dense cake, so just combine until you see no more flour streaks. Pro tip: use a rubber spatula to fold them in—it gently incorporates without deflating the batter!
Step 6: Pour the Batter
Pour the batter into your prepared pan, smoothing the top with that rubber spatula (it’s a lifesaver!). Don’t fret if it’s not perfectly level; the batter will spread and rise in the oven.
Step 7: Add the Streusel
Now for the pièce de résistance—sprinkle that glorious streusel topping evenly over the batter. The key is to use your fingers to create clumps so that you get those delicious crispy bits when it bakes.
Step 8: Bake Away
Pop it in your preheated oven and let it bake for 30–35 minutes, or until a toothpick inserted in the center comes out clean. Try not to open the oven too often; we want to keep that heat locked in for a lovely rise!
Step 9: Cool and Enjoy!
Once it’s beautifully golden brown and baked through, remove it from the oven. Let it cool in the pan for about 10–15 minutes before transferring it to a wire rack (or just your lovely cutting board!). Don’t forget to give it a try while it’s still warm!
Serving Suggestions
When it comes to serving this pumpkin coffee cake, the options are endless! For a cozy touch, serve slices accompanied by whipped cream or a dollop of vanilla yogurt. Add a sprinkle of extra cinnamon on top for an inviting look. If you’re feeling indulgent, drizzle a simple glaze made from powdered sugar and a splash of milk. And of course, serve with your favorite hot beverage—whether that’s coffee, tea, or even a spiced apple cider, let those flavors pair beautifully!
Recipe Variations
-
Chocolate Swirl: Add a ribbon of chocolate hazelnut spread or a homemade cocoa swirl for a decadently rich version.
-
Nutty Delight: Fold in some chopped walnuts or pecans for added texture and flavor. A great way to give each bite an unexpected crunch!
-
Spiced Cranberry: Toss in some dried cranberries or raisins for a fruity twist that contrasts wonderfully with the pumpkin.
-
Maple Glaze: Top the cooled coffee cake with a maple glaze for an extra layer of flavor.
-
Vegan Pumpkin Cake: Use flax eggs, replace the sugar with coconut sugar, and use almond milk instead of oil for a dairy-free option.
Chef’s Notes
This pumpkin coffee cake recipe has evolved through the years in my kitchen and holds a special place in my heart. I’ve added spice, taken away a little sugar, and tried countless toppings! One funny memory: During a particularly ambitious baking weekend, I accidentally swapped the salt for sugar—instead of a sweet treat, we had a salty surprise! Lesson learned: always double-check your ingredients!
Over the years, I’ve seen this recipe become a family favorite for many, a go-to for gatherings, and a delightful pick-me-up on a lazy Sunday.
FAQs and Troubleshooting
1. My cake seems too dense; what did I do wrong?
You might have overmixed the batter or added too much flour. Remember to mix until just combined!
2. Can I freeze this coffee cake?
Absolutely! This cake freezes wonderfully. Just wrap it tightly in plastic wrap, then place it in an airtight container. It can be frozen for up to 3 months.
3. What’s the best way to store leftovers?
Store leftover coffee cake in an airtight container at room temperature for up to 3 days or in the refrigerator for up to a week.
4. Why did my streusel topping sink into the cake?
If the batter is too thin, this could happen. Make sure your batter is adequately thick before adding the streusel and spread it evenly on top.
Nutritional Info
This recipe is an indulgent treat, so enjoy it in moderation! A slice roughly contains:
- Calories: 250
- Total Fat: 12g
- Saturated Fat: 2g
- Carbohydrates: 35g
- Fiber: 1g
- Sugar: 18g
- Protein: 3g
Baking a pumpkin coffee cake is more than just cooking; it’s about creating a warm atmosphere in your home and nourishing the body and soul. I hope this recipe inspires you to bring a touch of autumn joy to your table! Don’t forget to tie on that apron and put on your favorite cozy playlist as you bake. Happy cooking, my friends!
PrintUltimate Pumpkin Coffee Cake
A warm and cozy pumpkin coffee cake that celebrates the flavors of autumn, perfect for gatherings or a sweet treat paired with coffee.
- Prep Time: 15 minutes
- Cook Time: 30 minutes
- Total Time: 45 minutes
- Yield: 8 servings 1x
- Category: Dessert
- Method: Baking
- Cuisine: American
- Diet: Vegetarian
Ingredients
- 1 cup pumpkin puree
- 1 cup sugar
- ½ cup vegetable oil
- 2 large eggs
- 1 teaspoon vanilla extract
- 2 cups all-purpose flour
- 1 teaspoon baking powder
- 1 teaspoon baking soda
- 1 teaspoon cinnamon
- ½ teaspoon nutmeg
- ½ teaspoon salt
- 1 cup streusel topping
Instructions
- Preheat your oven to 350°F (175°C).
- Grease a 9-inch round or square cake pan.
- Whisk together the pumpkin puree, sugar, vegetable oil, eggs, and vanilla extract until smooth.
- Sift together the flour, baking powder, baking soda, cinnamon, nutmeg, and salt in a separate bowl.
- Add the dry ingredients to the wet ingredients, combining until no more flour streaks remain.
- Pour the batter into the prepared pan, smoothing the top.
- Sprinkle the streusel topping over the batter.
- Bake for 30-35 minutes, or until a toothpick comes out clean.
- Cool in the pan for 10–15 minutes before transferring to a wire rack.
Notes
Serve slices with whipped cream or vanilla yogurt, and pair with your favorite hot beverage!
Nutrition
- Serving Size: 1 slice
- Calories: 250
- Sugar: 18g
- Sodium: 400mg
- Fat: 12g
- Saturated Fat: 2g
- Unsaturated Fat: 5g
- Trans Fat: 0g
- Carbohydrates: 35g
- Fiber: 1g
- Protein: 3g
- Cholesterol: 30mg
Keywords: pumpkin cake, coffee cake, autumn dessert, fall baking, cozy recipes
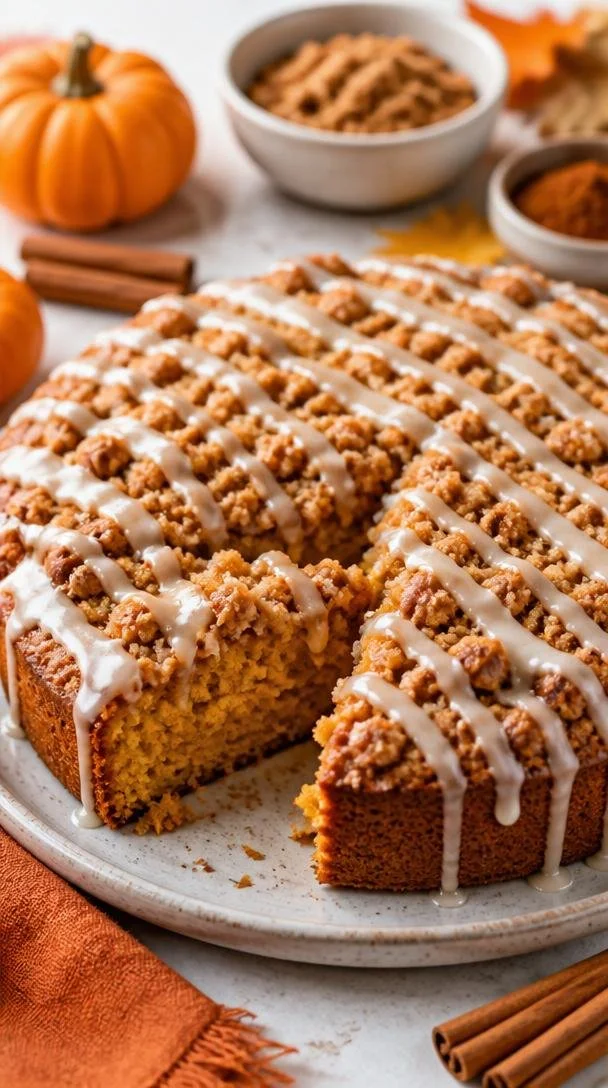
Minute Cinnamon Streusel Pumpkin Coffee Cake (Fall Recipe)
The Perfect Cinnamon Streusel Pumpkin Coffee Cake Recipe
Hello, lovely foodies! Welcome back to my kitchen! Today, I’m excited to share one of my all-time favorite recipes that perfectly marries fall flavors with that comforting, coffee shop vibe: Cinnamon Streusel Pumpkin Coffee Cake. Imagine the aroma of warm spices wafting through your home, wrapping you in a cozy hug while you enjoy a slice with your morning coffee or an afternoon tea. Sounds delightful, doesn’t it?
This cake is not only delicious but also so simple to make. It’s perfect for weekend brunches, holiday gatherings, or just because you’re craving something sweet and spicy. Trust me, this dreamy creation is going to be a staple in your recipe collection!
A Slice of Nostalgia
Let me take you back to my childhood for a moment—a lovely autumn day in my grandmother’s kitchen. I can still picture her standing at the counter, her hands dusted with flour, as she brought to life her famous pumpkin coffee cake. The aroma of cinnamon and nutmeg dancing in the air made the whole house feel like a warm embrace.
I remember sneaking spoonfuls of her special streusel topping, feeling like a little chef in training. We’d sit at her cozy kitchen table, mugs of hot apple cider beside us, and savor each slice of that fluffy cake topped with a crumbly, sweet topping. Those moments inspired my love of baking and cooking as an expression of love and connection, and they still resonate deeply with me today.
This Cinnamon Streusel Pumpkin Coffee Cake is a modernization of that cherished memory, adjusted with my little chef hacks to make it easy for you to recreate that same warmth and joy!
Ingredients
Here’s what you’ll need to whip up this heavenly cake:
-
2 cups all-purpose flour: This is the foundation of our cake. You can swap it for a gluten-free blend if you need a gluten-free alternative.
-
1 cup granulated sugar: For sweetness! You can reduce this to ¾ cup if you prefer a less sweet cake or use coconut sugar for a slightly different flavor.
-
½ cup brown sugar: Adds moisture and a hint of caramel flavor. Light or dark brown sugar works here—use dark for a deeper taste.
-
1 tablespoon baking powder: The magic that makes our cake rise and feel fluffy. Don’t skip this one!
-
½ teaspoon salt: Balances the sweetness. It’s a tiny but mighty ingredient.
-
1 teaspoon ground cinnamon: A warm spice that complements pumpkin wonderfully.
-
½ teaspoon pumpkin spice: This blend usually includes nutmeg and ginger, enhancing the fall flavors. If you don’t have it, a pinch more cinnamon can do the trick!
-
½ cup unsalted butter, softened: Adds richness to the cake. You can use vegan butter or applesauce for a lighter option.
-
1 cup canned pumpkin puree: Make sure it’s pure pumpkin and not pumpkin pie filling, which has added sugars and spices.
-
2 large eggs: Binds everything together and adds moisture.
-
1 teaspoon vanilla extract: Elevates the flavor.
-
½ cup milk: Use whole milk, almond milk, or any milk of your choice.
-
½ cup chopped nuts (optional): Pecans or walnuts add a lovely crunch if you like a bit of texture.
For the Streusel Topping:
-
½ cup flour: To give it a crumbly texture. Substitute with oats for a different twist!
-
½ cup brown sugar: Sweetens and enhances the streusel.
-
¼ cup unsalted butter: Rub into the dry ingredients for that perfect crumb.
-
1 teaspoon cinnamon: A dash of spice to tie it all together.
For the Icing:
-
Powdered sugar: To give your cake a sweet finish.
-
Milk (to desired consistency): Adjust the amount for your preferred thickness.
Step-by-Step Instructions
Alright, foodies, let’s dive into the cooking magic!
-
Preheat Your Oven: First, set your oven to 350°F (175°C) to get it nice and toasty while we mix our ingredients.
-
Grease Your Pan: Grab a 9×13-inch baking pan and grease it lightly with butter or non-stick spray. You want your cake to come out easily!
-
Mix the Dry Ingredients: In a large bowl, whisk together the flour, granulated sugar, brown sugar, baking powder, salt, cinnamon, and pumpkin spice. This ensures that everything is well-distributed and avoids clumps.
-
Cream the Butter: In another bowl, cream the softened butter until it’s light and fluffy. This usually takes about 2-3 minutes. It’s one of those tasks where patience pays off!
-
Incorporate the Wet Ingredients: Add the pumpkin puree, eggs, vanilla extract, and milk to the creamed butter. Mix well until everything is combined. The batter should be smooth and creamy—feel free to lick the spoon!
-
Combine the Mixtures: Gradually add the dry mixture to the wet mixture. Stir until just combined; don’t overmix! We want a soft batter that will produce a tender cake.
-
Prepare the Streusel: In a small bowl, combine flour, brown sugar, cinnamon, and cold butter. Use your fingers or a fork to mix until crumbly. This streusel topping is going to make our cake sing!
-
Pour the Batter into the Pan: Spread the batter evenly into the greased baking pan. It’s time for that gooey goodness!
-
Add the Streusel: Sprinkle the streusel mix generously over the top of the batter. Don’t be shy—this is where the magic happens!
-
Bake Away: Place your cake in the preheated oven and bake for 30-35 minutes. The cake is ready when a toothpick inserted into the center comes out clean. Your kitchen will smell divine, and you’ll be eagerly waiting!
-
Icing Time!: While the cake is cooling, make your icing by whisking together powdered sugar and milk until you reach your desired consistency. Drizzle it over the cooled cake for the final touch!
Serving Suggestions
When it comes to serving this beauty, cut it into squares and serve it warm with a dollop of whipped cream or a scoop of vanilla ice cream on the side. For an extra flair, I love garnishing it with a sprinkle of cinnamon or some edible flowers. Set it on a pretty cake stand, and you’ve got an Instagram-worthy dessert that will wow your guests!
Recipe Variations
-
Chocolate Chip Twist: Add ½ cup of chocolate chips to the batter for a decadent version that chocolate lovers will adore!
-
Apple-Pumpkin Fusion: Fold in some finely chopped apples along with the pumpkin for an extra layer of flavor and texture.
-
Gluten-Free Edition: Use a 1:1 gluten-free flour blend instead of all-purpose flour for a gluten-free version that’s just as delicious.
-
Dairy-Free Delight: Swap out the milk for almond or coconut milk, and use plant-based butter to create a completely dairy-free cake.
-
Nut-Free Option: Skip the nuts altogether or substitute with a seed like pumpkin seeds for that crunchy element without the allergens.
Chef’s Notes
Cooking and baking always come with a side of fun and sometimes mishaps! One time I forgot to add the baking powder, and while the cake was still edible, it turned out more like a flatbread. It’s a great reminder to read the recipe twice (or thrice!) before diving in! Over the years, I have tweaked this original recipe, ensuring it’s simple yet still delivers that “wow” factor. It’s truly a beautiful blend of nostalgia and creativity.
FAQs and Troubleshooting
-
Why is my cake dense?
- A common culprit can be overmixing the batter. Mix just until combined, and ensure your baking powder is fresh!
-
How do I store leftovers?
- This cake keeps well wrapped in foil at room temperature for up to 2-3 days, or you can refrigerate it for up to a week. Reheat in the microwave for a cozy treat!
-
Can I freeze the coffee cake?
- Absolutely! Wrap slices tightly in plastic wrap and foil before freezing. Thaw overnight in the refrigerator when you’re ready to enjoy!
-
What if I don’t have pumpkin puree?
- You can substitute with applesauce, or homemade puréed sweet potatoes can also work in a pinch.
Nutritional Info (Optional)
While I believe in enjoying all foods in moderation, here’s a breakdown of the estimated nutritional info per serving:
- Calories: 250
- Fat: 10g
- Carbohydrates: 38g
- Protein: 3g
- Fiber: 1g
- Sugar: 18g
With these numbers in mind, you can enjoy your slice guilt-free!
So there you have it! A warming, aromatic, and absolutely delicious recipe for Cinnamon Streusel Pumpkin Coffee Cake. Remember, the joy of cooking comes not just from eating but from sharing these moments with loved ones. I hope this recipe brings you as much joy as it does for me. Tie on that ivory apron, and let’s bake something timeless together! Happy cooking!
PrintCinnamon Streusel Pumpkin Coffee Cake

A delightful coffee cake that combines the flavors of pumpkin and cinnamon, topped with a crumbly streusel for a perfect treat.
- Prep Time: 15 minutes
- Cook Time: 35 minutes
- Total Time: 50 minutes
- Yield: 12 servings 1x
- Category: Dessert
- Method: Baking
- Cuisine: American
- Diet: Vegetarian
Ingredients
- 2 cups all-purpose flour
- 1 cup granulated sugar
- ½ cup brown sugar
- 1 tablespoon baking powder
- ½ teaspoon salt
- 1 teaspoon ground cinnamon
- ½ teaspoon pumpkin spice
- ½ cup unsalted butter, softened
- 1 cup canned pumpkin puree
- 2 large eggs
- 1 teaspoon vanilla extract
- ½ cup milk
- ½ cup chopped nuts (optional)
- For the Streusel Topping:
- ½ cup flour
- ½ cup brown sugar
- ¼ cup unsalted butter
- 1 teaspoon cinnamon
- For the Icing:
- Powdered sugar
- Milk (to desired consistency)
Instructions
- Preheat your oven to 350°F (175°C).
- Grease a 9×13-inch baking pan with butter or non-stick spray.
- Mix the dry ingredients in a large bowl: flour, granulated sugar, brown sugar, baking powder, salt, cinnamon, and pumpkin spice.
- Cream the softened butter in another bowl until light and fluffy.
- Incorporate the pumpkin puree, eggs, vanilla extract, and milk into the creamed butter, mixing until smooth.
- Combine the dry mixture with the wet mixture until just combined.
- Prepare the streusel by mixing flour, brown sugar, cinnamon, and cold butter until crumbly.
- Pour the batter into the greased pan and spread evenly.
- Add the streusel topping generously over the cake batter.
- Bake for 30-35 minutes or until a toothpick inserted comes out clean.
- Icing time: whisk powdered sugar and milk until desired consistency and drizzle over the cooled cake.
Notes
Serve warm with whipped cream or ice cream for an extra treat. Customize with chocolate chips or apples for variations.
Nutrition
- Serving Size: 1 slice
- Calories: 250
- Sugar: 18g
- Sodium: 200mg
- Fat: 10g
- Saturated Fat: 6g
- Unsaturated Fat: 3g
- Trans Fat: 0g
- Carbohydrates: 38g
- Fiber: 1g
- Protein: 3g
- Cholesterol: 40mg
Keywords: coffee cake, pumpkin, cinnamon, desserts, fall flavors
Beginner-Friendly German Chocolate Cheesecake: Coconut Swirl
Indulge in Classic Comfort: German Chocolate Cheesecake
Hello, friends! Today, I’m excited to share with you a recipe that has a special place in my heart and my kitchen: German Chocolate Cheesecake. If you’re anything like me, there’s just something so delightful about the combination of chocolate, creamy cheesecake, and the nutty sweetness of coconut and pecans. It’s a dessert that transforms any gathering into an instant celebration—whether it’s a cozy family dinner or a lavish holiday feast.
As I whisk together the ingredients for this decadent delight, I can’t help but remember the early days of my cooking adventures. You see, baking was never my strongest suit; I was always more of a savory chef, whipping up pasta, sauces, and hearty roasts. But then, one day, my best friend hosted a potluck. Her homemade German chocolate cake? It stole the show! As I savored each morsel, I knew I had to attempt to recreate that glorious flavor. Enter: German Chocolate Cheesecake. Inspired by my friend’s cake, I decided to put my spin on it and create a dessert that seamlessly blended the richness of cheesecake with that classic chocolate cake essence.
Let me take you on a journey of flavors and memories, as we dive into how to create this show-stopping dessert right at home!
A Kitchen Memory
Picture this: it was a sun-soaked afternoon, and my kitchen was alive with laughter and the rich aroma of baking chocolate. I had invited friends over for a casual get-together, and the pressure was on to impress. As I mixed the ingredients for my German Chocolate Cheesecake, the air was filled with playful banter and the enthusiastic recommendations for every new recipe I had concocted over the years.
As we gathered around the table, the centerpiece was, of course, my glorious cheesecake. I watched as my friends took their first bites, their faces lighting up in sheer bliss. It was a celebration of culinary triumph! That moment taught me that cooking is about sharing experiences, creating memories, and, of course, indulging in delicious flavors together. So let’s recreate that celebration and bring some joy to your kitchen!
Ingredients
Here’s what you’ll need to craft this beautiful German Chocolate Cheesecake:
-
1 1/2 cups graham cracker crumbs
The base of our cheesecake! You can substitute with crushed cookies such as Oreo or Digestive biscuits for a different flavor profile. -
1/2 cup unsalted butter, melted
This binds the crumbs together. Feel free to use coconut oil for a dairy-free twist—it adds richness and a hint of coconut flavor. -
4 packages (8 ounces each) cream cheese, softened
The star of the show! This creates that creamy, tangy base. For a healthier option, you can use Greek yogurt or vegan cream cheese. -
1 cup granulated sugar
Sugar adds sweetness and balances the flavors. If you’re looking for a lower-sugar option, try coconut sugar or a granulated sugar substitute. -
1 teaspoon vanilla extract
A must-have for any dessert, it enhances the flavors. Homemade vanilla extract is a wonderful addition if you have it on hand. -
4 large eggs
They help the cheesecake set properly. You can substitute with flax eggs (1 tablespoon ground flaxseed + 3 tablespoons water) if you prefer a vegan option. -
8 ounces semi-sweet chocolate, melted
This adds the rich chocolate flavor. Dark chocolate is a fantastic substitute for a more intense chocolate experience. -
1 cup sweetened shredded coconut
For that classic German chocolate cake profile! If you want a healthier version, consider using unsweetened coconut. -
1 cup pecans, chopped
These add a lovely crunch. Walnuts can be used as an alternative for a slightly different flavor.
Step-by-Step Instructions
Now that we have our ingredients ready, let’s dive into the steps for this delightful dessert.
Step 1: Prepare the Crust
-
Preheat your oven to 325°F (163°C). This gives the cheesecake plenty of time to bake evenly without cracking.
-
In a medium mixing bowl, combine graham cracker crumbs and melted butter. Mix until the crumbs are completely coated and resemble wet sand.
-
Press the mixture into the bottom of a 9-inch springform pan, using the back of a measuring cup to create a firm crust. You want a solid base that will hold up to the creamy filling!
-
Bake the crust for 10 minutes until it’s lightly golden and fragrant. This simple step adds that lovely crunch and depth of flavor to your dessert!
Step 2: Make the Cheesecake Filling
-
In a large mixing bowl, beat the softened cream cheese using an electric mixer on medium speed until smooth and creamy. Scrape down the sides to ensure no lumps remain.
-
Gradually add in the granulated sugar and continue mixing until well combined. This part is essential—your filling should be silky and luscious.
-
Add the vanilla extract and then mix in the eggs, one at a time, ensuring each egg is well incorporated before adding the next. Remember, don’t overmix! Just beat until combined to avoid adding too much air (which can cause cracks).
-
Melt your semi-sweet chocolate either in a microwave or over a double boiler, stirring often. Let it cool slightly before adding to the cream cheese mixture. Mix until fully incorporated and the batter is smooth.
Step 3: Assemble and Bake
-
Pour the cheesecake filling into the pre-baked crust, smoothing the top with a spatula. It’s looking beautiful already!
-
Bake for 55–60 minutes, or until the edges are set and the center has a slight jiggle. Note: your cheesecake will continue to firm up as it cools, so don’t worry if it looks a little soft!
-
Once baked, turn off the oven, crack the oven door open, and let your cheesecake cool inside for about an hour. This helps prevent cracking—yes, we want a flawless presentation!
-
After cooling, remove it from the oven and let it come to room temperature before refrigerating for at least 4 hours or overnight (if you can wait!).
Step 4: Add the Coconut-Pecan Topping
-
In a medium saucepan over medium heat, combine sweetened shredded coconut and chopped pecans with a bit of sugar and a splash of milk (or cream). Stir continuously for about 5 minutes until everything is toasted and deliciously fragrant. Let cool slightly.
-
Once your cheesecake has chilled, evenly spread the coconut-pecan mixture over the top. It not only looks inviting but adds that signature flavor we love in German chocolate cake!
Serving Suggestions
To plate this fabulous dessert, gently release the springform pan and slice the cheesecake into wedges. For an elevated presentation, serve each slice on a charming dessert plate garnished with a dollop of whipped cream and a sprinkle of toasted coconut. Fresh berries also make for a beautiful add-on!
Recipe Variations
Here are a few creative twists you can try with your German Chocolate Cheesecake:
- Flavor Infusion: Add a splash of espresso for a mocha version or a dash of cinnamon for a spicy warmth.
- Fruit Layer: Blend fresh raspberries or strawberries into the cheesecake batter for a fruity burst.
- Nut-Free Version: Replace pecans with crushed graham crackers or more coconut for those with nut allergies.
- Vegan Option: Use a nut-based cream cheese, coconut milk, and flaxseed eggs for a crowd-friendly dessert!
Chef’s Notes
This recipe has evolved quite a bit since those early kitchen experiments. I remember my first attempt: the cheesecake was not set, and the crust crumbled—what a mess! But with each try and the joy of sharing it with family and friends, I found the balance of flavors that brought the German chocolate cake inspiration to life.
One funny story—I once forgot to add the sugar entirely. Let’s just say that everyone enjoyed my “new recipe” called “Chocolate Brick”! But laughter filled the room, and after a few tweaks, we turned the night into a fun baking session. It’s all about those little kitchen blunders that turn into cherished memories, right?
FAQs and Troubleshooting
Q: My cheesecake cracked during baking. What did I do wrong?
A: Cracking can happen if the cheesecake bakes too quickly or if it has too much air incorporated. Always mix on low speed once eggs are added and let the cheesecake cool gradually in the oven.
Q: How do I know when my cheesecake is done?
A: The sides should be set, and the center will still have a slight jiggle like jelly. Remember, it will continue to firm up as it cools down!
Q: Can I freeze leftovers?
A: Absolutely! This cheesecake freezes beautifully. Just wrap it tightly in plastic wrap and aluminum foil. Thaw it in the refrigerator overnight when you’re ready to indulge again.
Q: What’s the best way to cut the cheesecake cleanly?
A: Use a sharp knife dipped in hot water—this technique helps create smooth, clean slices! Wipe the knife between cuts to keep the edges neat.
Nutritional Info (Optional)
Note: Nutritional info will vary based on ingredient brands and portion sizes. Here’s an approximate breakdown per serving (1 slice based on 12 servings):
- Calories: 480
- Protein: 8g
- Carbohydrates: 42g
- Dietary Fiber: 2g
- Sugars: 32g
- Fat: 34g
And there you have it! Your very own German Chocolate Cheesecake, perfected with love and laughter in your kitchen. Let’s get cooking, savor the moments, and fill your tables with joy—one delicious slice at a time! Cheers to unforgettable gatherings and culinary adventures!
PrintGerman Chocolate Cheesecake

A rich and creamy cheesecake inspired by classic German chocolate cake, featuring chocolate, coconut, and pecans.
- Prep Time: 20 minutes
- Cook Time: 70 minutes
- Total Time: 90 minutes
- Yield: 12 servings 1x
- Category: Dessert
- Method: Baking
- Cuisine: German
- Diet: Vegetarian
Ingredients
- 1 1/2 cups graham cracker crumbs
- 1/2 cup unsalted butter, melted
- 4 packages (8 ounces each) cream cheese, softened
- 1 cup granulated sugar
- 1 teaspoon vanilla extract
- 4 large eggs
- 8 ounces semi-sweet chocolate, melted
- 1 cup sweetened shredded coconut
- 1 cup pecans, chopped
Instructions
- Preheat your oven to 325°F (163°C).
- Combine graham cracker crumbs and melted butter in a medium mixing bowl.
- Press the mixture into the bottom of a 9-inch springform pan.
- Bake the crust for 10 minutes until lightly golden.
- Beat the cream cheese in a large mixing bowl until smooth.
- Add the granulated sugar and mix until well combined.
- Incorporate the vanilla and eggs, one at a time, mixing gently.
- Melt the semi-sweet chocolate and let cool slightly before adding to the mixture.
- Pour the cheesecake filling into the pre-baked crust.
- Bake for 55–60 minutes until set.
- Cool the cheesecake in the oven for 1 hour then refrigerate for at least 4 hours.
- Combine coconut and pecans in a saucepan with sugar and milk, and toast for 5 minutes.
- Spread the coconut-pecan mixture over the top of the cheesecake.
Notes
For a vegan option, use nut-based cream cheese and flaxseed eggs. Serve with whipped cream and fresh berries.
Nutrition
- Serving Size: 1 slice
- Calories: 480
- Sugar: 32g
- Sodium: 300mg
- Fat: 34g
- Saturated Fat: 19g
- Unsaturated Fat: 6g
- Trans Fat: 0g
- Carbohydrates: 42g
- Fiber: 2g
- Protein: 8g
- Cholesterol: 200mg
Keywords: cheesecake, German chocolate, dessert, baking, chocolate dessert
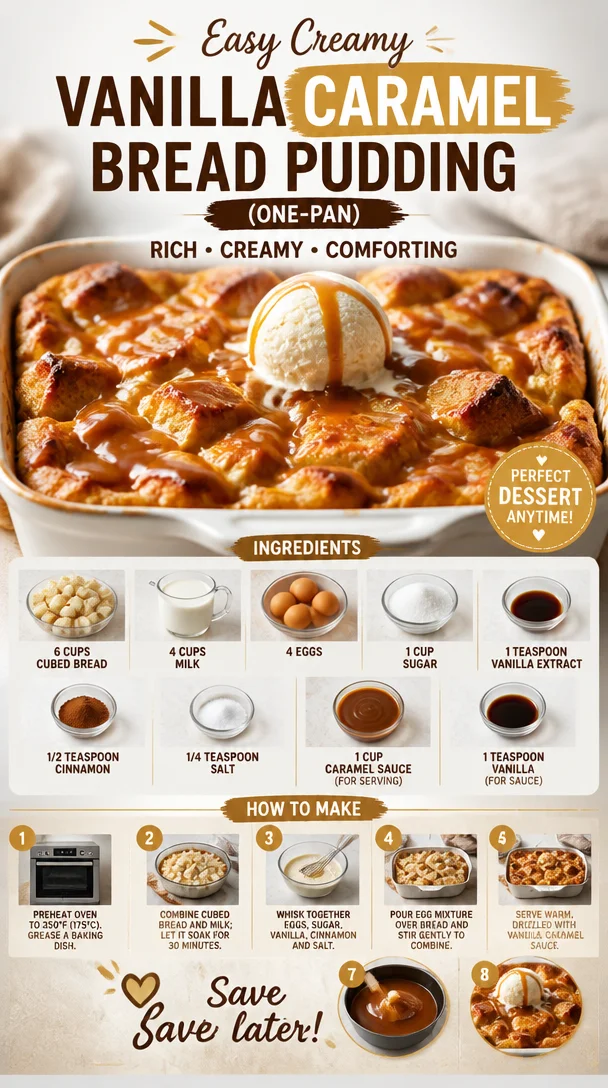
Easy Creamy Vanilla Caramel Bread Pudding (One-Pan)
Indulge in Comfort: Bread Pudding with Vanilla Caramel Sauce
Introduction
Hello, dear friends! If you’ve found yourself here, I’m guessing you’re in search of a sweet treat that warms your heart and satiates that cravings for comfort food. Well, you’re in for a delightful experience because we’re diving into the cozy world of bread pudding, paired with a delectable homemade vanilla caramel sauce.
Oh, bread pudding! It’s the quintessential dish that effortlessly marries nostalgia with indulgence. It’s a dessert that doesn’t need to be fancy; in fact, its beauty lies in its simplicity. The rich, custardy layers of bread soaked in creamy goodness, coupled with the sweet, luscious caramel sauce — it’s nothing short of celestial. Plus, it’s the perfect way to utilize that leftover bread that’s been sitting on your countertop, which, let’s be honest, we all have.
As we navigate through this recipe, imagine the aroma of cinnamon filling your kitchen and the joy of serving a warm dessert that makes everyone feel right at home. Gather around as we embark on a culinary adventure that promises warmth, love, and perhaps a little culinary magic. Tie on your apron, and let’s get started!
Personal Story
I can still remember the very first time I made bread pudding. It was a chilly autumn evening, and I had invited a few close friends over for a cozy dinner. I wanted to impress them, but I also yearned for that comforting embrace of home-cooked flavors. As I rummaged through my pantry, I stumbled upon a half-loaf of stale bread just begging to be transformed.
Armed with my grandmother’s well-loved recipe, which had been scribbled on a piece of paper stained with butter and love, I set out on a mission. I mixed together all the ingredients, and as the pudding baked, I felt the warmth that only home kitchens can offer. The smell wafted through the air, pulling my friends into the kitchen like a hypnotic love spell. When I served that golden-brown slice topped with a drizzle of caramel sauce, it was a hit! Each spoonful was filled with laughter and sweet memories, and I knew that bread pudding would forever hold a special place in my heart and kitchen.
Ingredients
To create this delightful dish, you’ll need the following:
-
6 cups cubed bread: Use day-old bread for the best results; it soaks up the custard beautifully. If you don’t have bread on hand, brioche or challah is a fantastic substitute.
-
4 cups milk: This is the foundation of the custard. Whole milk gives a rich flavor, but feel free to use 2% or even a plant-based milk, though it might slightly alter the taste.
-
4 eggs: Eggs act as the binding agent, giving that lovely custard texture. If you’re vegan, you can replace them with flax eggs (1 tablespoon flaxseed meal + 2.5 tablespoons water per egg).
-
1 cup sugar: This sweetens up the pudding. Brown sugar brings in more depth of flavor, while white sugar will give it a more straightforward sweetness.
-
1 teaspoon vanilla extract: Pure extracts elevate the flavor profile. If you’re in a pinch, imitation vanilla can work as well.
-
1/2 teaspoon cinnamon: This cozy spice adds warmth and a hint of nostalgia. You can swap it out for nutmeg or pumpkin spice for a different flavor twist.
-
1/4 teaspoon salt: Just a pinch to balance the sweetness.
-
1 cup caramel sauce (for serving): You can use store-bought or make your own for an extra special kick.
-
1 teaspoon vanilla (for sauce): Again, pure is always better, but use what you have!
Step-by-Step Instructions
-
Preheat Your Oven: Start by preheating your oven to 350°F (175°C). This ensures that your pudding bakes evenly and beautifully.
-
Prep the Bread: Cube your bread into bite-sized pieces. Now, you can use a serrated knife for ease! Place the cubed bread in a large mixing bowl. If you want a head start, you can toast the cubes in the oven for about 10 minutes to give them a slightly crispy exterior — this helps prevent them from becoming mushy later!
-
Mix the Custard: In a separate bowl, whisk together the milk, eggs, sugar, vanilla extract, cinnamon, and salt until well blended. This step is crucial as it creates the creamy custard that will soak into our beloved bread. Pro tip: whisking using a handheld mixer can give you a fluffier mix, but a good ol’ whisk will work just fine too!
-
Combine: Pour the custard mixture over the cubed bread, ensuring that every piece gets a good soaking. Gently fold the mixture with a spatula or your hands — be gentle though, we don’t want to mush the bread pieces!
-
Let it Soak: Allow the mixture to sit for about 15 minutes. This waiting game is essential. It gives the bread time to soak up all that delicious custard, leading to a more flavorful and moist pudding.
-
Transfer to Baking Dish: Grease a 9×13-inch baking dish (or any preferred large dish) with butter or a non-stick spray. Transfer the bread mixture into the dish, spreading it evenly.
-
Bake: Place the dish in the preheated oven and bake for about 45-55 minutes or until the top is golden and the custard is set. If you gently shake the dish, it should jiggle slightly in the center — that’s a good sign of creamy goodness!
-
Cool It Down: Once done, remove the dish from the oven and let it cool for about 10–15 minutes. This will help set the pudding a bit more, making it easier to slice.
-
Prepare the Caramel Sauce: While the pudding is cooling, you can prepare your caramel sauce. If you’re using store-bought, just warm it up slightly. For those feeling adventurous and wanting to make your own, melt 1 cup of sugar in a saucepan over medium heat, stirring constantly until it turns a beautiful amber color, then slowly add 1/2 cup of heavy cream (careful, it will bubble vigorously) along with the vanilla. Let it simmer for a minute, and voilà!
Serving Suggestions
This bread pudding is a showstopper, so when it comes to serving, simplicity is key. Cut it into generous squares, plate it nice and warm, and drizzle with that luscious caramel sauce. Sprinkle a little extra cinnamon or even some toasted nuts on top for that added crunch and elegance. Add a scoop of vanilla ice cream or a dollop of whipped cream if you want to elevate it even more; your guests will thank you!
Recipe Variations
-
Chocolate Chip Bread Pudding: Fold in 1 cup of semi-sweet chocolate chips for a rich twist that chocolate lovers will adore.
-
Fruit-Filled Delight: Toss in some fresh or dried fruits like raisins, cranberries, or diced apples right into the custard mix for a fruity burst.
-
Nutty Flavor: Add in 1/2 cup of chopped pecans or walnuts for that delightful crunch and added texture.
-
Spiced Up Version: Experiment with different spices such as cardamom or ginger for a warm, spiced profile that changes the entire mood of the dish.
-
Dairy-Free: Use almond or oat milk and flax eggs for an entirely plant-based version!
Chef’s Notes
This recipe has been my go-to for years, and what I adore about it is its flexibility. I have tried various breads, from rustic sourdough to even leftover brioche, and each offered its own unique charm. I’ve also experimented with various toppings; my family can never decide between caramel sauce or a scoop of ice cream — it’s a sweet dilemma!
Just remember, like any dish, bread pudding gets better with practice, and I encourage you to make it your own. You can amp up the flavors or stick to the classics, but as long as you’re cooking with intention and love, it will always shine through.
FAQs and Troubleshooting
-
Why is my bread pudding soggy?
- This usually happens if the bread wasn’t stale enough or it was oversoaked. Ensure you’re using older, denser bread and follow the soaking time as instructed.
-
Can I make this bread pudding ahead of time?
- Absolutely! You can assemble it a day in advance and store it in the fridge. Just bake it when you’re ready to serve!
-
What can I substitute for milk?
- Any non-dairy milk works, but avoid sweetened varieties for an optimal flavor balance.
-
How should I store leftovers?
- Store any leftovers in an airtight container in the fridge for up to 3 days. Reheat in the oven or microwave, and top with caramel sauce before serving!
Conclusion
There you have it, my wonderful food lovers! A comforting and elegant bread pudding made for any occasion, whether it’s a family gathering, a casual get-together, or a midnight snack. The warm, aromatic flavors of cinnamon and vanilla intertwined with the rich caramel make every bite a celebration of flavors.
Don’t forget to share your creations with me! I’d love to hear your little kitchen stories and see your beautiful bread puddings. Until next time, remember that the best ingredients are laughter, love, and a pinch of kindness. Now, go ahead and set that table — it’s time for dessert!
PrintBread Pudding with Vanilla Caramel Sauce
A comforting and simple bread pudding served with a rich homemade vanilla caramel sauce.
- Prep Time: 15 minutes
- Cook Time: 50 minutes
- Total Time: 65 minutes
- Yield: 8 servings 1x
- Category: Dessert
- Method: Baking
- Cuisine: American
- Diet: Vegetarian
Ingredients
- 6 cups cubed bread
- 4 cups milk
- 4 eggs
- 1 cup sugar
- 1 teaspoon vanilla extract
- 1/2 teaspoon cinnamon
- 1/4 teaspoon salt
- 1 cup caramel sauce (for serving)
- 1 teaspoon vanilla (for sauce)
Instructions
- Preheat your oven to 350°F (175°C).
- Cube your bread into bite-sized pieces and place them in a large mixing bowl.
- Whisk together the milk, eggs, sugar, vanilla extract, cinnamon, and salt until well blended.
- Pour the custard mixture over the cubed bread, ensuring every piece gets soaked.
- Let the mixture sit for about 15 minutes to soak up the custard.
- Grease a 9×13-inch baking dish and transfer the bread mixture into it.
- Bake for 45-55 minutes or until the top is golden and the custard is set.
- Cool for about 10–15 minutes before serving.
- Prepare the caramel sauce: Warm it if store-bought or make your own by melting sugar and adding cream and vanilla.
Notes
For best results, use day-old bread and consider experimenting with toppings and add-ins like chocolate chips or nuts.
Nutrition
- Serving Size: 1 serving
- Calories: 350
- Sugar: 20g
- Sodium: 300mg
- Fat: 10g
- Saturated Fat: 5g
- Unsaturated Fat: 3g
- Trans Fat: 0g
- Carbohydrates: 50g
- Fiber: 2g
- Protein: 8g
- Cholesterol: 150mg
Keywords: bread pudding, dessert, caramel sauce, comfort food
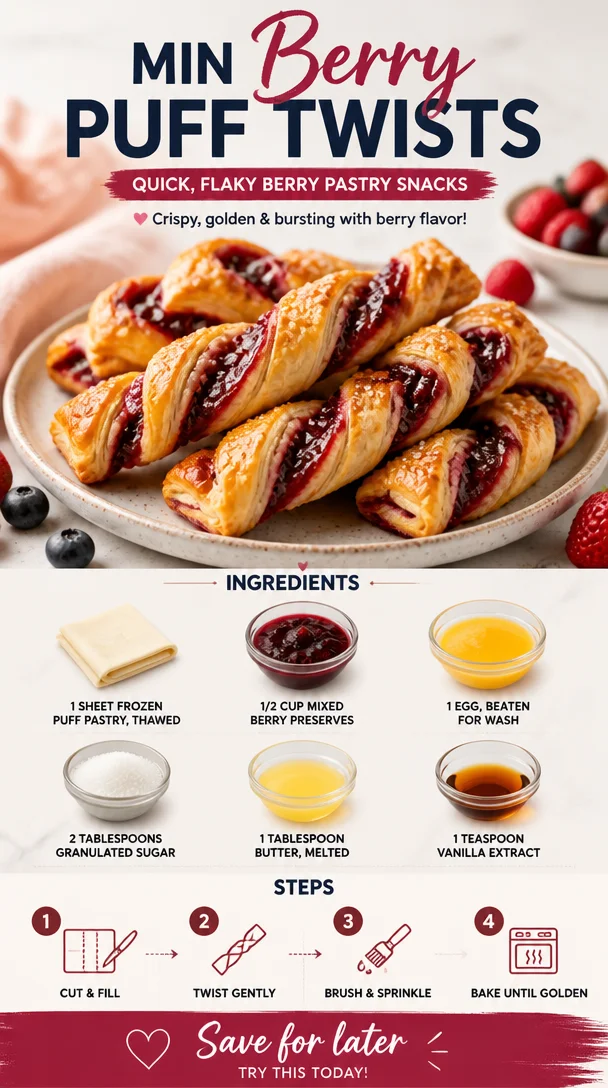
Min Berry Puff Twists: Quick, Flaky Berry Pastry Snacks
Indulge in Sweet Simplicity: Berry Puff Twists
Hello there, fellow foodies! Today, we’re diving into a delightful treat that perfectly balances simplicity with elegance. Imagine biting into a warm, flaky pastry filled with luscious, fruity goodness—the ultimate indulgence for both special occasions and a cozy night in. Say hello to my Berry Puff Twists! These adorable pastries are not just delicious, but they also offer that ‘wow’ factor that’s sure to impress your loved ones without sending you into a culinary panic. Let’s explore why this recipe is a staple in my kitchen and how you can master it effortlessly.
A Sweet Slice of Nostalgia
I still remember the first time I made puff pastry treats. It was a crisp autumn afternoon, and I had invited a few friends over for a casual gathering. Excited to showcase my culinary skills, I decided to fill the kitchen with the warm aroma of baking. Drawing inspiration from my childhood, I turned to my secret stash of berry preserves—a family heirloom passed down through my grandmother.
As we gathered around the table, the moment those golden puff pastry twists came out of the oven, their glossy tops shimmering, I could feel my heart race. With the first bite, a symphony of flavors unfolded—sweet, tangy berries enveloped in buttery, flaky pastry. The laughter and chatter as we devoured those treats made it one of those unforgettable memories. Fast-forward to today, and I still whip up these Berry Puff Twists whenever I want to create warm, cozy moments!
What You’ll Need
Here’s a quick look at the ingredients you’ll need to recreate this feast at home:
-
1 sheet frozen puff pastry, thawed
This is your foundation for easy, flaky layers. You can use homemade pastry if you’re feeling adventurous, but store-bought is a time-saver on busy days! -
1/2 cup mixed berry preserves
Bursting with flavor, berry preserves add sweetness and depth. Substitute with raspberry, strawberry, or even peach preserves for a unique twist. -
1 egg, beaten for wash
This egg wash gives your pastry that golden, glossy finish. If you’re vegan, a splash of almond or soy milk works too! -
2 tablespoons granulated sugar
A sprinkle of sugar elevates the sweetness and adds a delightful crunch. For a healthier alternative, you can substitute with coconut sugar. -
1 tablespoon butter, melted
Butter brings richness to the party! You can swap in vegan butter or even coconut oil for a dairy-free option. -
1 teaspoon vanilla extract
Vanilla enhances the flavor profile beautifully. Feel free to use almond extract for a fun flavor surprise!
Step-by-Step Instructions
Let’s get cooking! Follow these step-by-step directions, and you’ll have those delicious Berry Puff Twists on your table in no time!
-
Preheat Your Oven
Preheat your oven to 400°F (200°C). Ensuring your oven is hot enough is crucial to achieving that puff and flaky texture you crave. -
Prepare Your Puff Pastry
Once your puff pastry is thawed, roll it out on a lightly floured surface. You want to ensure it’s cold, so if it feels warm, pop it back in the fridge for a few moments. The colder, the better for maximum flakiness! -
Cut the Pastry
Using a sharp knife or pizza cutter, cut your pastry into strips—about 1 inch wide and 6 inches long. Don’t overthink it! Imperfections can make your dish feel homemade. -
Add the Berry Preserves
Spoon a small amount of mixed berry preserves onto the center of each strip. You want just enough to give flavor without making a mess. If you’re feeling generous, go wild—who doesn’t love extra sweetness? -
Twist the Pastry
Here comes the fun part! Fold the strips over the preserves, pinching the edges to seal them tightly. Then, twist each strip several times to create those adorable twists. Keep it loose! You want to let the filling peek through—trust me, it’s the prettiest part. -
Brush with Egg Wash
Place your twists on a parchment-lined baking sheet, leaving some space in between. Brush each one with the beaten egg wash for that sun-kissed glow when baked. -
Sprinkle with Sugar
Finally, here comes the sugar! Sprinkle granulated sugar over each twist. This step adds a delightful crunch, enhancing the overall texture. Who doesn’t love a bit of sparkle? -
Bake Until Golden
Pop your baking tray in the oven and let those beauties bake for about 15-20 minutes or until they’re golden brown and incredibly fragrant. The smell will drive you wild!
Serving Suggestions
Once your Berry Puff Twists are out of the oven and cooled slightly, it’s time to serve! Arrange them on a beautiful plate, perhaps garnishing with fresh mint leaves or a dusting of powdered sugar for that extra touch of elegance. These treats are perfect as an afternoon snack with tea, a festive addition to brunch, or as a dessert centerpiece for your next gathering.
Recipe Variations
Looking to switch things up? Here are a few creative twists on this classic recipe:
-
Nutty Decision: Add a sprinkle of chopped toasted almonds or hazelnuts with the preserves for extra crunch and flavor.
-
Chocolate Dream: Replace the berry preserves with chocolate hazelnut spread for a decadent dessert option. Who could resist that?
-
Seasonal Fruits: Experiment with seasonal fruit preserves like apricot or even fig for a gourmet twist.
-
Savory Surprise: Use savory fillings, such as cream cheese mixed with fresh herbs, for an irresistible appetizer option.
Chef’s Notes
Over the years, my Berry Puff Twists have morphed into a family favorite, adored by friends and relatives alike. They’ve traveled from cozy evenings at home to lively summer picnics and festive holiday gatherings. I once accidentally mixed up the egg wash with coffee creamer once (oops!), which led to some amusing reactions, but it resulted in a surprisingly delicious treat. These moments keep the journey alive and make cooking an adventure worth embarking on!
FAQs and Troubleshooting
1. My pastry didn’t puff up! What went wrong?
This could happen if your oven wasn’t hot enough or if the pastry was too warm before baking. Never underestimate the power of a preheated oven!
2. Can I make these a day ahead of time?
Absolutely! You can prepare the twists in advance and keep them in the fridge, covered with plastic wrap. Bake them fresh just before serving for that scrumptious aroma and crisp texture.
3. What can I use if I don’t have puff pastry?
You could try using phyllo dough, but keep in mind that the texture will be different. Alternatively, biscuit dough can offer a fun, fluffy base.
4. How can I store leftovers?
Store any uneaten twists in an airtight container at room temperature for up to 3 days. For longer storage, pop them in the freezer for up to a month. Just remember to warm them back up in the oven to regain that puffiness!
And there you have it—a delightful treat that tastes just as good as it looks! Your Berry Puff Twists are ready to shine, whether for a casual evening treat or a show-stopping dessert. I hope you enjoy every step of the process and feel inspired to create beautiful, tasty moments in your kitchen. Let’s cherish those little yet special gatherings around the table—because good food is all about connection, creativity, and love. Happy baking!
PrintBerry Puff Twists

Warm, flaky pastries filled with luscious berry preserves, perfect for any occasion.
- Prep Time: 15 minutes
- Cook Time: 20 minutes
- Total Time: 35 minutes
- Yield: 4 servings 1x
- Category: Dessert
- Method: Baking
- Cuisine: American
- Diet: Vegetarian
Ingredients
- 1 sheet frozen puff pastry, thawed
- 1/2 cup mixed berry preserves
- 1 egg, beaten for wash
- 2 tablespoons granulated sugar
- 1 tablespoon butter, melted
- 1 teaspoon vanilla extract
Instructions
- Preheat your oven to 400°F (200°C).
- Prepare your puff pastry by rolling it out on a lightly floured surface.
- Cut the pastry into strips—about 1 inch wide and 6 inches long.
- Add a small amount of mixed berry preserves onto the center of each strip.
- Twist the strips over the preserves, pinching the edges to seal.
- Brush each twist with the beaten egg wash.
- Sprinkle granulated sugar over each twist.
- Bake for about 15-20 minutes or until golden brown.
Notes
Serve warm, optionally garnished with fresh mint leaves or powdered sugar.
Nutrition
- Serving Size: 1 serving
- Calories: 250
- Sugar: 10g
- Sodium: 200mg
- Fat: 10g
- Saturated Fat: 5g
- Unsaturated Fat: 4g
- Trans Fat: 0g
- Carbohydrates: 30g
- Fiber: 1g
- Protein: 3g
- Cholesterol: 40mg
Keywords: berry pastry, puff pastry, dessert, baking, easy recipes
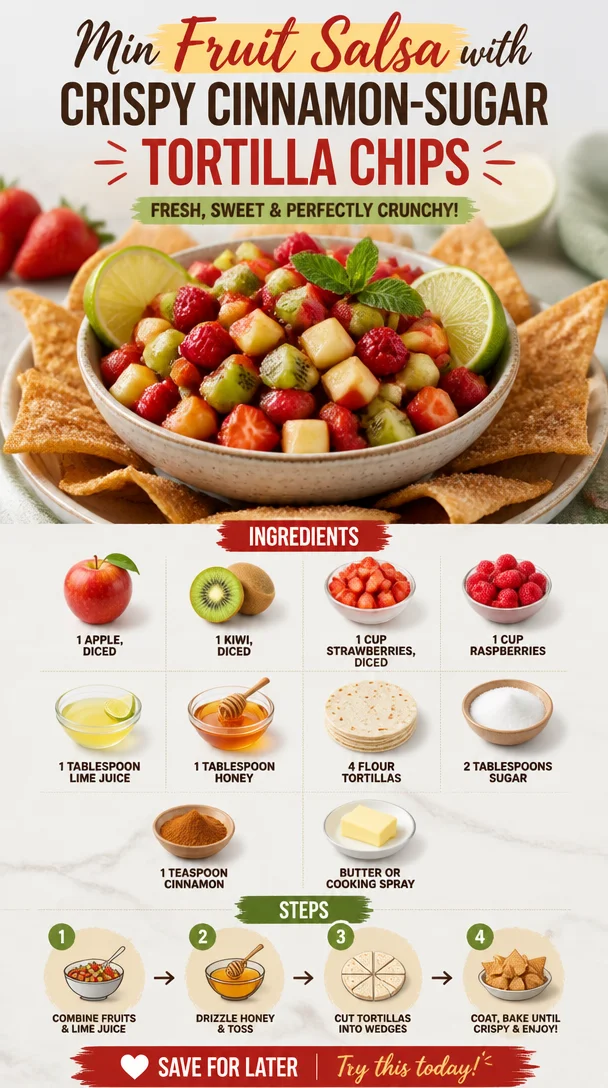
Min Fruit Salsa with Crispy Cinnamon-Sugar Tortilla Chips
Sweet Fruit Salsa with Cinnamon Sugar Tortilla Chips
Hello, lovely foodies! Today we’re diving into a vibrant and delightful treat that’s absolutely perfect for summer gatherings or cozy nights in—the Sweet Fruit Salsa with Cinnamon Sugar Tortilla Chips! This recipe will not only tickle your taste buds but also bring a smile to your face and a spark of joy to your table. So let’s get those aprons on, pour ourselves a refreshing drink, and create something truly delicious together!
A Flavorful Introduction
Picture this: the sun is shining, the birds are chirping, and you’re gathered with loved ones in the backyard. A light breeze sweeps across the table filled with laughter and lively conversation. Now, while there may be a grilled feast happening, there’s one dish that steals the show every time—the Sweet Fruit Salsa with Cinnamon Sugar Tortilla Chips. This isn’t just a dessert; it’s a celebration in a bowl!
This recipe holds a special place in my heart. It’s the perfect way to showcase fresh, seasonal fruits, and it embodies my love for putting a twist on the traditional. The sweet and zesty salsa paired with crunchy, cinnamon-sugar dusted chips creates a delightful contrast that pleases the palate and brings a smile to everyone’s face. Every time I whip this dish up, I’m reminded of my summer childhood escapades—picking fresh fruit with my family, giggling as we raced to see who could gather the most delicious gems from the orchard.
The best part? This recipe is as easy as it is impressive, making it perfect for both casual evenings at home and festive gatherings. You don’t need to be a gourmet chef to whip this up; I promise, even the kitchen novice will shine with this one!
My Sweet Inspiration
One of my fondest memories relates to this sweet treat, and it takes me back to warm summer evenings at my grandmother’s house. Every Sunday, she would host family gatherings, which always revolved around a big, hearty meal. But what I really looked forward to was her dessert table. Among an array of goodies, she’d often serve a simple fruit salsa that would shine like a jewel.
I was fascinated by the way she would casually combine the sweetest fruits with a bit of citrus and a drizzle of honey. It was fresh, fun, and always served with crispy tortilla chips on the side. In my mind, that was the epitome of summer! Watching her prepare it inspired me to create my own version, adding my signature cinnamon-sugar twist to those chips. And thus, the Sweet Fruit Salsa was born—a little homage to those cherished family moments while infusing my creative spark.
Ingredients
Now, let’s get into what you’ll need to make this delicious dish:
-
1 apple, diced
A sweet and crunchy fruit that adds texture. Granny Smith or Honeycrisp works beautifully! Looking for a swap? Any type of firm apple will do the trick. -
1 kiwi, diced
This adds a vibrant color and a hint of tanginess. If you’re not a fan of kiwi, try using a pear instead for a softer texture! -
1 cup strawberries, diced
Juicy and sweet, strawberries are essential in any fruit salsa. If they’re out of season, frozen strawberries can also work—just make sure to thaw and drain any excess moisture. -
1 cup raspberries
These little gems add a pop of color and a bit of tartness. Blueberries could be a great alternative if you’re looking for something different! -
1 tablespoon lime juice
This brightens up the flavors and prevents browning in your fruit. Should you want a twist, consider using lemon juice for a similar zing! -
1 tablespoon honey
A natural sweetener that binds the salsa together. If you prefer a vegan option, agave nectar will work just as well! -
4 flour tortillas
These will be transformed into your crispy chips. Corn tortillas can work too if you want that authentic crunch! -
2 tablespoons sugar
This is for sprinkling on your chips. You can substitute it with coconut sugar for a slight flavor twist! -
1 teaspoon cinnamon
Cinnamon brings warmth and a hint of spice. If you’re feeling adventurous, a dash of nutmeg can add an unexpected flavor note. -
Butter or cooking spray
We’ll use this to brush the tortillas for a lovely, golden finish. Olive oil spray is a great substitute for a lighter option.
Step-by-Step Instructions
Now that we’ve gathered all our colorful ingredients, it’s time to roll up our sleeves and get cooking! Follow these simple steps to create your Sweet Fruit Salsa with Cinnamon Sugar Tortilla Chips:
-
Prepare the Fruit
Start by rinsing all your fruits. Dice the apple, kiwi, strawberries, and raspberries into bite-sized pieces. You want all your fruits to be similar in size for an even distribution of flavors. Pro tip: cut the apples last to prevent browning! -
Mix It Up
In a medium bowl, combine the diced fruits. Drizzle the lime juice and honey over the mix. Using a gentle folding motion, stir to ensure everything is coated evenly. This is where the magic happens! The lime juice will help bring out the vibrant notes of each fruit. -
Chill It
Cover the bowl with plastic wrap and let the fruit salsa chill in the refrigerator for at least 30 minutes. This allows the flavors to meld and intensify, creating that scrumptious zing we love! -
Prep the Tortilla Chips
While your salsa is chilling, let’s work on those crunchy tortilla chips. Preheat your oven to 350°F (175°C). In a small bowl, combine the sugar and cinnamon. Brush both sides of each tortilla with butter or spray with cooking spray. -
Sprinkle Away
Generously sprinkle the cinnamon-sugar mixture over both sides of the tortillas. I like to press lightly to ensure the mixture adheres well—nobody likes a shy sprinkle! -
Cut and Bake
Using a pizza cutter or a sharp knife, slice the tortillas into wedges (like a pizza!). Spread them out in a single layer on a baking sheet. Bake for about 10-12 minutes or until they’re crispy and golden, flipping halfway through—don’t let them burn! You want to fish them out just before they get too brown; they’ll continue to crisp up once out of the oven. -
Serve and Enjoy
Once your tortilla chips are out and cooled off a bit, pile them high on a colorful platter alongside your refreshing fruit salsa. Don’t forget to snap a few photos before digging in—this dish is just too pretty not to share!
Serving Suggestions
For a visually stunning presentation, serve your Sweet Fruit Salsa in a clear glass bowl to show off all those vibrant colors. Pair it with a beautiful plate of chip triangles fanned out around the bowl for a delightful display. Sprinkle a bit of extra cinnamon-sugar on top for that added touch of elegance—because, why not?
Recipe Variations
- Berry Bliss: Swap the apple and kiwi for blackberries and chopped peaches for a summery twist.
- Coconut Crunch: Add a sprinkle of toasted coconut flakes to your salsa for an exotic flair.
- Spicy Kick: For those who crave a bit of heat, toss in a pinch of finely chopped jalapeño for a sweet and spicy combo.
- Nutty Addition: Drizzle in a tablespoon of almond butter into the mix for a creamy texture that’s absolutely to die for!
- Chocolate Drizzle: Drizzle some melted dark chocolate over the salsa for a decadent dessert spin.
Chef’s Notes
I can’t help but chuckle at how this recipe has evolved over time. Originally, I would just slice up fruit and serve it plain—can you believe that? But once I introduced the cinnamon sugar tortilla chips, it transformed into a showstopper! I remember one event where I had seamless flow until a cheeky guest exclaimed, “Savannah, you’ve outdone yourself!”
And honestly, it’s the simple recipes like this that remind me why I started cooking in the first place: to bring people together over good food. So grab your loved ones, share some laughs, and let the salsa create new memories around the table!
FAQs and Troubleshooting
1. Can I use frozen fruit?
Absolutely! If you’re out of fresh fruit or it’s not in season, thawed and drained frozen fruit can work just as well. Just keep in mind that the texture might be softer.
2. What can I do if my salsa is too sweet?
If your salsa turns out too sweet, add a little more lime juice or a pinch of salt to balance the flavors. Tasting as you go is key!
3. How long can I store leftovers?
You can keep any leftover salsa in the fridge for up to three days. However, the crackers may lose their crispiness, so I recommend preparing them fresh as needed.
4. How do I make this recipe gluten-free?
Swap out the flour tortillas for corn tortillas, which are naturally gluten-free. Just check labels to ensure there’s no gluten cross-contamination if you have a severe allergy.
Nutritional Info
This Sweet Fruit Salsa with Cinnamon Sugar Tortilla Chips comes in at approximately 200 calories per serving (including the chips). It’s loaded with vitamins from the fruits, providing a refreshing, sweet treat without being overly indulgent!
So there you have it, my sweet friends! Your guide to making a delightful Sweet Fruit Salsa with Cinnamon Sugar Tortilla Chips. With this recipe, you have everything you need to bring a little sparkle to your table and create cherished moments with those you love. Now, go out and get cooking—you’ve got this! Happy cooking! 🍓✨
PrintSweet Fruit Salsa with Cinnamon Sugar Tortilla Chips
A vibrant and delightful treat perfect for summer gatherings, combining fresh fruit salsa with cinnamon sugar tortilla chips.
- Prep Time: 15 minutes
- Cook Time: 12 minutes
- Total Time: 45 minutes
- Yield: 4 servings 1x
- Category: Dessert
- Method: Baking
- Cuisine: American
- Diet: Vegetarian
Ingredients
- 1 apple, diced
- 1 kiwi, diced
- 1 cup strawberries, diced
- 1 cup raspberries
- 1 tablespoon lime juice
- 1 tablespoon honey
- 4 flour tortillas
- 2 tablespoons sugar
- 1 teaspoon cinnamon
- Butter or cooking spray
Instructions
- Prepare the fruit by rinsing and dicing into bite-sized pieces.
- Mix the diced fruits in a medium bowl with lime juice and honey.
- Chill the salsa in the refrigerator for at least 30 minutes.
- Prep the tortilla chips by preheating your oven to 350°F (175°C).
- Sprinkle the cinnamon-sugar mixture over both sides of the tortillas.
- Cut the tortillas into wedges and bake for about 10-12 minutes.
- Serve the chips alongside the fruit salsa and enjoy!
Notes
For a visually stunning presentation, serve in a clear bowl with chips fanned around it. You can also customize the salsa with various fruits or toppings.
Nutrition
- Serving Size: 1 serving
- Calories: 200
- Sugar: 15g
- Sodium: 150mg
- Fat: 6g
- Saturated Fat: 2g
- Unsaturated Fat: 4g
- Trans Fat: 0g
- Carbohydrates: 35g
- Fiber: 3g
- Protein: 2g
- Cholesterol: 0mg
Keywords: fruit salsa, cinnamon sugar chips, summer dessert, easy recipe, healthy snack