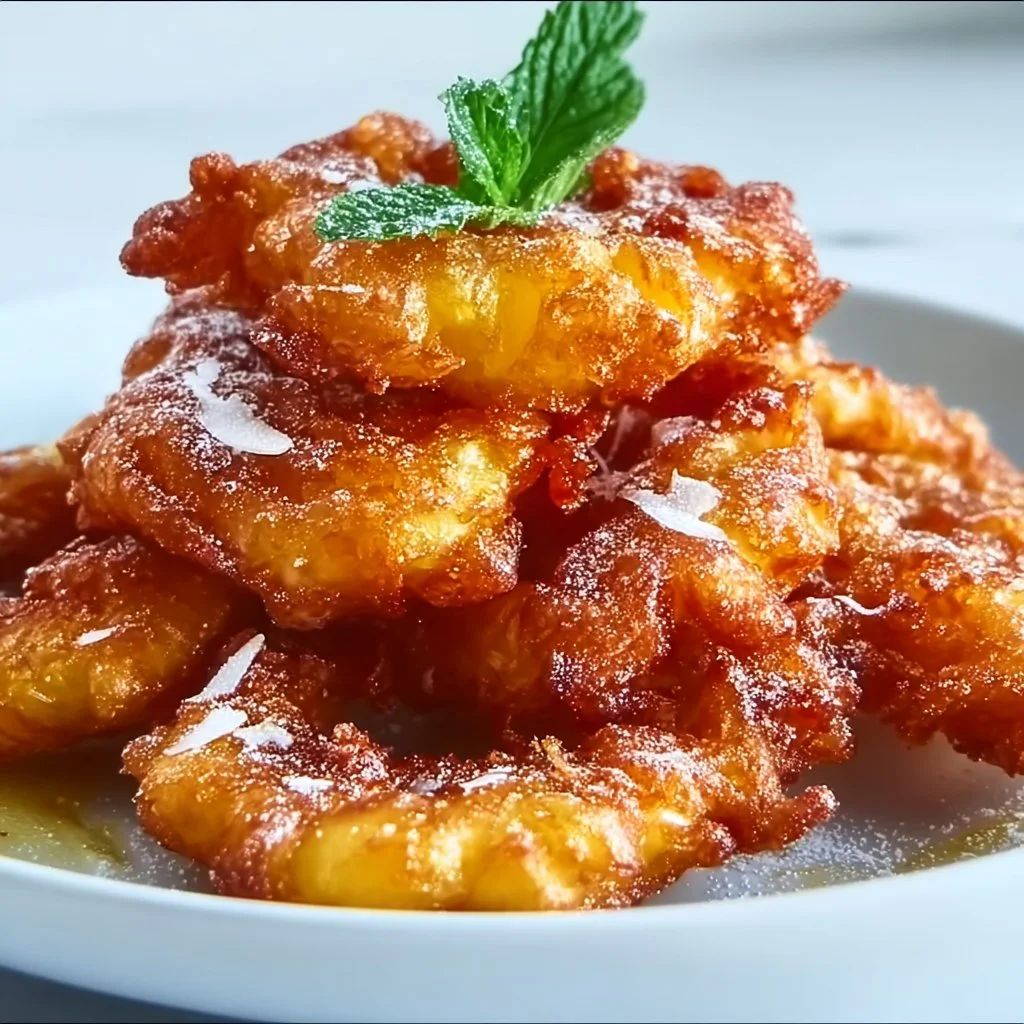
Heavenly Pineapple Fritters That Bring Tropical Joy
# Heavenly Pineapple Fritters That Bring Tropical Joy

## Introduction

Hello, my fellow food enthusiasts! Gather around because today we’re whisking you away to a sun-soaked paradise with one of my absolute favorite recipes — **Heavenly Pineapple Fritters**! These little bites of sweetness are not only a nod to tropical vibes but also remind us of carefree childhood days spent lounging by the pool, savoring each mouthful, and perhaps even a bit of sunshine on our skin.

Imagine it: the first bite of a warm, crispy fritter, giving way to the juicy sweetness of pineapple, all wrapped in a light, fluffy batter that's just the right amount of crispy. Does it get any better? I think not! Whether you're planning a tropical-themed brunch, looking for a delicious weekend treat, or just seeking a flavor explosion to brighten your day, these fritters are sure to bring a smile to your face.

They're incredibly easy to whip up and will fill your kitchen with a delightful aroma that mimics dining in a beachside café. Plus, you’ll love how versatile this recipe is — it welcomes both unique twists and dietary swaps effortlessly, making it a hit for everyone around the table. So, tie on your apron and get ready to dive into this tropical adventure!

## Personal Story

Let me take you back to a balmy summer afternoon when I was a child. My family and I hosted our annual summer gather where laughter floated effortlessly in the warm breeze and delicious aromas filled the air. We were in our backyard, surrounded by luscious greenery and colorful flowers, and, of course, a massive table laden with food.

That year, my aunt decided to showcase her newly discovered recipe for pineapple fritters. Much like a magician revealing a trick, she showed us how to perfectly batter and fry fresh pineapple rings until they were golden and crisp. That memory has since etched itself into my heart, from the way my cousins and I eagerly dipped the warm fritters into creamy coconut yogurt to the sheer delight everyone felt with each bite. **Those fritters were a highlight** of our gathering, and the joy they brought us reminded me of the magic food can create. Fast forward to today, and here I am, ready to share my twist on that beloved family recipe with you!

## Ingredients

To embark on this culinary adventure, you’ll need the following ingredients:

- **1 cup All-purpose flour**
  This serves as the base for the batter. If you’re looking for a gluten-free option, you can easily substitute it with a 1:1 gluten-free flour blend!

- **1/4 cup Granulated sugar**
  This adds just the right amount of sweetness. If you're feeling adventurous, try using coconut sugar instead for a touch of caramel flavor and a less refined option.

- **1 tablespoon Baking powder**
  This gives our fritters that airy fluffiness. Avoid substituting it with baking soda directly as it may lead to overly dense fritters.

- **1/4 teaspoon Salt**
  A pinch of salt enhances the flavors. Don’t skip it; even sweet recipes need that little kick!

- **1 teaspoon Ground cinnamon**
  For that warm, cozy flavor that feels like a hug in each bite. If you have it on hand, a dash of nutmeg can elevate the warm spices even more.

- **1 large Egg**
  This helps bind the mixture together. If you’re going for a vegan option, a flax egg will work perfectly!

- **1/2 cup Milk**
  It creates the desired consistency in the batter. Feel free to swap this out for dairy-free milk like almond or coconut milk if that suits your dietary needs.

- **1 whole Fresh pineapple**
  The star of the recipe! Sliced into rings, these juicy gems will offer bursts of flavor in every bite. If fresh pineapple isn’t available, canned pineapple (in juice, not syrup) may work as a last resort.

- **2 cups Vegetable oil**
  For frying; you can use canola or coconut oil, depending on your preference and what you have on hand. Coconut oil will give a slight tropical essence!

- **1 tablespoon Additional cinnamon and sugar**
  This is for dusting the finished fritters. Adjust to your liking, adding more or less according to your sweet tooth!

## Step-by-Step Instructions

Now, let’s get to the fun part — cooking these luscious fritters!

1. **Prep the Pineapple:**
   First, slice your fresh pineapple into rings, about 1/2 inch thick. If you have a core remover, this makes it breeze! If not, a knife will do just fine. And hey, no pressure! If some slices are not perfect circles, that's what makes home cooking homely!

2. **Make the Batter:**
   In a large mixing bowl, whisk together the all-purpose flour, granulated sugar, baking powder, salt, and ground cinnamon. Give it a little whirl until everything is nicely combined. This is where the magic begins!

3. **Incorporate Wet Ingredients:**
   In a separate bowl, beat the egg and then combine it with the milk. Pour this mixture into the dry ingredients, and stir until just incorporated. Do not overmix! It's okay if it’s a little lumpy — those lumps will dissolve while cooking, resulting in fluffy fritters.

4. **Heat the Oil:**
   In a deep skillet or heavy-bottomed pot, heat the vegetable oil over medium-high heat. You want enough oil to submerge at least half of the fritters. To test if the oil is ready, drop a small spoonful of batter into it. If it bubbles all around and rises to the surface, you’re good to go!

5. **Fry the Fritters:**
   Carefully dip each pineapple ring into the batter, allowing any excess to drip off, and gently place it into the hot oil. Don’t overcrowd the pan — work in batches if you need to! Fry each side for about 2-3 minutes until they turn golden brown.

6. **Drain and Dust:**
   Once fried, remove the fritters from the oil and place them on a paper towel-lined plate to absorb any excess oil. While they’re still warm, sprinkle them generously with your cinnamon and sugar mix. Watch how that sugar sparkles in the light — isn’t it beautiful?

And just like that, your heavenly pineapple fritters are ready to shine!

## Serving Suggestions

These fritters are best served warm, and the toppings are endless! I love plating them with a scoop of creamy coconut yogurt on the side for dipping or drizzling a little honey over them. If you’re feeling fancy, a dust of powdered sugar or even a sprinkle of toasted coconut can take the presentation up a notch. Serve them on a rustic wooden board or a beautiful platter, and let everyone dive in together!

## Recipe Variations

Feel free to have fun with these fritters! Here are some creative variations to keep things fresh:

1. **Coconut Fritters:** Mix shredded coconut into your batter for a tropical twist that'll send your tastebuds straight to a beach vacation!

2. **Chocolate-Dipped:** After frying, dip the fritters in melted dark chocolate and roll them in chopped nuts for an irresistible treat.

3. **Spiced Version:** Add a pinch of cayenne or chili powder to the batter for a sweet-savory experience that'll tickle your fancy. A little heat lifts the sweetness beautifully!

4. **Vegan Option:** Swap the egg for a flax egg and use unsweetened almond milk or coconut milk for a completely plant-based treat.

5. **Fruit Medley:** Mix in other fruits like banana or blueberries to the batter. The possibilities are endless — it’s all about what you love!

## Chef’s Notes

Oh, the stories these fritters have brought to my kitchen! I remember the very first time I made them for a brunch gathering. The moment I pulled the first batch out of the oil, a sense of anticipation filled the air, and you could hear the ooohs and aaahs as everyone bit into them. I even added a playful coconut sauce to the mix, which became an instant fan favorite!

Through experimentation, I learned that the key to perfect fritters is precision in the oil temperature; too cool, and they’ll be greasy, while too hot will burn them. It’s all about that magic sweet spot.

## FAQs and Troubleshooting

1. **Why are my fritters soggy?**
   This usually means your oil wasn’t hot enough. Make sure to keep the oil at a consistent temperature — a good thermometer can help here!

2. **Can I prepare the batter ahead of time?**
   It’s best served fresh, but you can prep the dry ingredients in advance. Just mix them with wet ingredients right before frying to maintain that fluffy texture.

3. **What if I don't have fresh pineapple?**
   Canned pineapple can work in a pinch! Just make sure to pat it dry to reduce excess moisture, which can make your batter soggy.

4. **How do I store leftover fritters?**
   Store them in an airtight container in the fridge for up to 2 days. Reheat them in the oven or an air fryer for that crispy finish!

## Nutritional Info

*Note: Nutritional values may vary based on specific ingredient brands and types used.*

- Calories per fritter (without additional toppings): approximately 150-200
- Total fat: 9g
- Saturated fat: 2g
- Carbohydrates: 18g
- Protein: 2g
- Fiber: 1g
- Sugar: 6g

There you have it, dear friends! **Heavenly Pineapple Fritters** that not only tantalize the tongue but also tug at the heartstrings, serving up nostalgia and flavor in every bite. Whether you're hosting friends or enjoying a little indulgence on your own, these fritters are sure to bring a slice of tropical joy to your kitchen. Happy cooking!
Heavenly Pineapple Fritters
Delicious, crispy fritters made with fresh pineapple, perfect for any tropical-themed brunch or treat.
- Prep Time: 15 minutes
- Cook Time: 15 minutes
- Total Time: 30 minutes
- Yield: 4 servings 1x
- Category: Dessert
- Method: Frying
- Cuisine: Tropical
- Diet: Vegetarian
Ingredients
- 1 cup All-purpose flour
- 1/4 cup Granulated sugar
- 1 tablespoon Baking powder
- 1/4 teaspoon Salt
- 1 teaspoon Ground cinnamon
- 1 large Egg
- 1/2 cup Milk
- 1 whole Fresh pineapple, sliced into rings
- 2 cups Vegetable oil, for frying
- 1 tablespoon Additional cinnamon and sugar for dusting
Instructions
- Prep the Pineapple: Slice your fresh pineapple into rings, about 1/2 inch thick.
- Make the Batter: In a large mixing bowl, whisk together the all-purpose flour, granulated sugar, baking powder, salt, and ground cinnamon.
- Incorporate Wet Ingredients: In a separate bowl, beat the egg and then combine it with the milk. Pour this mixture into the dry ingredients.
- Heat the Oil: In a deep skillet or heavy-bottomed pot, heat the vegetable oil over medium-high heat.
- Fry the Fritters: Carefully dip each pineapple ring into the batter and gently place it into the hot oil.
- Drain and Dust: Remove the fritters from the oil and place them on a paper towel-lined plate to absorb any excess oil, then sprinkle with cinnamon and sugar.
Notes
Serve warm with coconut yogurt or honey. Experiment with toppings like powdered sugar or toasted coconut for extra flair.
Nutrition
- Serving Size: 1 fritter
- Calories: 180
- Sugar: 6g
- Sodium: 150mg
- Fat: 9g
- Saturated Fat: 2g
- Unsaturated Fat: 5g
- Trans Fat: 0g
- Carbohydrates: 22g
- Fiber: 1g
- Protein: 2g
- Cholesterol: 30mg
Keywords: fritters, pineapple, dessert, tropical, brunch
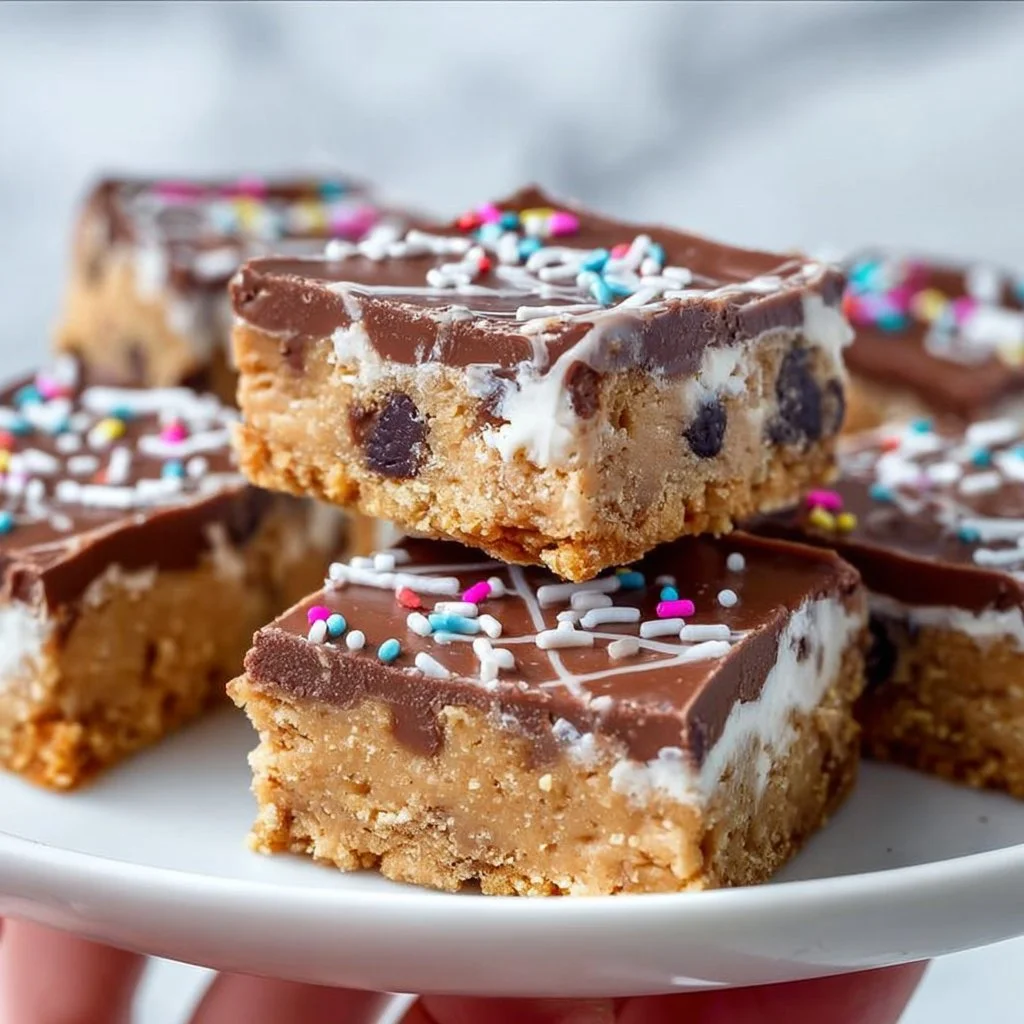
No Bake Cookie Dough Bars
Indulge in No-Bake Cookie Dough Bars: A Delicious Adventure in Your Kitchen
Hey there, fellow food lovers! If you’re anything like me, you’ve had that moment where you find yourself scrolling through endless recipes, craving something sweet, yet wanting it to be easy and fuss-free. Well, today is your lucky day! I’m excited to share with you my all-time favorite recipe for No-Bake Cookie Dough Bars. Picture this: bite-sized morsels of cookie dough goodness that you can whip up in minutes—no oven required. Perfect for a late-night snack, an impromptu gathering, or simply to satisfy those chocolate cravings (which we all know can be quite insatiable).
These bars embody what I love about cooking: they’re simple yet indulgent, and they’re a fun way to create a treat that feels homemade without putting yourself through the wringer in the kitchen. With just a handful of wholesome ingredients, you’ll be able to dig into a dessert that’s creamy, sweet, and oh-so-satisfying. So, tie on your apron and let’s get started on this sweet adventure!
Personal Story
The inspiration behind these No-Bake Cookie Dough Bars comes from my childhood. I remember spending weekends in the kitchen with my grandmother, who had an undeniable talent for whipping up desserts that felt like a warm hug. One afternoon, she introduced me to the joys of cookie dough—sneaking spoonfuls from the mixing bowl while she baked classic chocolate chip cookies. It was pure magic! I can still hear her laughter and the clattering of pots and pans as we made joyful messes together.
Fast forward to now, and I’ve taken that nostalgic memory and put a modern twist on it. These bars remind me of those carefree days, but they also align with my passion for creating approachable, elegant dishes. Whether you’re hosting a casual get-together or enjoying a cozy night in, these No-Bake Cookie Dough Bars bring a delightful taste of nostalgia into the present.
Ingredients
Here’s what you need to create these scrumptious bars:
-
1 cup almond flour
A versatile and gluten-free option that provides a lovely nutty flavor. If you need a substitute, you can use oat flour or all-purpose flour, but keep in mind that the texture may slightly change. -
1/2 cup maple syrup
This natural sweetener offers a rich flavor that balances perfectly with the other ingredients. You can swap it with agave nectar or honey if you prefer, but ensure you’re okay with the flavor variations. -
1/2 cup peanut butter or almond butter
This is where the creaminess comes from! I love the taste of peanut butter, but almond butter will give you a lighter flavor. For a nut-free option, sunflower seed butter works beautifully too. -
1/2 cup dark chocolate chips
Adds that heavenly burst of sweetness and richness! If you’re looking for a dairy-free version, make sure to use vegan chocolate chips. -
1 teaspoon vanilla extract
This ingredient elevates the overall flavor and adds a warm, aromatic essence. You can skip it if you’re in a pinch or substitute with almond extract for a different twist. -
Pinch of salt
A little salt helps balance the sweetness of the bars. Trust me; it makes a world of difference! If you’re avoiding sodium, you can omit it, but I wouldn’t recommend it.
Step-by-Step Instructions
Step 1: Gather Your Ingredients
First things first—before diving in, let’s make sure we have all these beautiful ingredients at hand! Set your workspace with everything ready so you can whip these bars up like a pro.
Step 2: Mix the Base
In a mixing bowl, combine the almond flour and salt. Make sure there are no clumps! The smoother the mixture, the better your bars will be. Add in the peanut butter and mix until you have a thick, paste-like consistency. This is where your fork or spatula becomes your best friend—don’t be shy!
Step 3: Sweeten the Mixture
Now it’s time to incorporate the maple syrup and vanilla extract. Pour them in and mix everything together until you achieve a well-combined dough. Remember, don’t rush this part; letting your ingredients really blend together makes all the difference!
Step 4: Fold in the Chocolate Chips
Once mixed, gently fold in the dark chocolate chips. Use your spatula to ensure an even distribution throughout your dough. This is where the indulgent magic happens—feel free to steal a few chocolate chips for yourself, I promise I won’t tell!
Step 5: Press the Dough into a Pan
Now, choose a square baking dish (about 8×8 inches works great) and line it with parchment paper for easy removal later. Pour your dough mixture into the dish and press it down firmly using your palms or a spatula. This step is essential, as it ensures your bars have a nice structure once they set.
Step 6: Chill
Pop your pan into the refrigerator and let it chill for at least an hour. This waiting can feel like the toughest part, but it’s essential for the bars to firm up and become sliceable.
Step 7: Slice and Serve
Once chilled, remove the bars from the fridge and lift them out using the parchment paper. Cut them into squares or bars, depending on your preference.
Step 8: Enjoy!
Now, it’s time to indulge! Serve these bars at room temperature, or even chilled for a refreshing twist.
Serving Suggestions
Place the bars on a lovely platter and sprinkle with a touch of sea salt to enhance their beauty and flavors. Pair with a dollop of whipped cream or a scoop of vanilla ice cream if you’re feeling extra indulgent. They also make for a fabulous addition to a charcuterie board!
Recipe Variations
- Nut-Free Delight: Replace peanut or almond butter with sunflower seed butter for a nut-free version.
- Protein Punch: Add a scoop of your favorite protein powder for an added health boost.
- Coconut Cream: Incorporate shredded coconut into the dough for a tropical twist.
- Spicy Kick: Add a tiny pinch of cayenne pepper for a surprising, spicy kick.
- Fruit Fusion: Mix in chopped dried fruits like cranberries or apricots for a chewy texture.
Chef’s Notes
I can’t tell you how many times I’ve made these bars with different flavors, simply because I love experimenting! One time, in the middle of summer, I added a handful of crushed graham crackers for a s’mores-inspired treat—let’s just say it was a hit! Remember, this recipe is your playground. Don’t hesitate to make it your own!
FAQs and Troubleshooting
Q: Why are my bars too crumbly?
A: If your bars are falling apart, they might need just a bit more moisture. Try adding a little more maple syrup or nut butter until the mixture sticks together better.
Q: Can I use a different sweetener?
A: Absolutely! You can use honey, agave, or even a sugar alternative like stevia or erythritol, keeping in mind that they may alter the final taste slightly.
Q: How should I store the bars?
A: Store these in an airtight container in the fridge for about a week or freeze them for longer-lasting treats. Just make sure to separate layers with parchment paper to keep them from sticking!
Q: Can I bake these bars instead of chilling them?
A: Though the magic of these bars lies in their no-bake nature, you could experiment with baking in a low oven (around 350°F for 10-15 minutes) for a slightly different texture. Keep an eye on them to prevent overcooking!
Nutritional Info
(Optional and can vary based on specific brands and ingredients used. A rough estimate per bar if cut into 12 servings)
- Calories: 130
- Protein: 4g
- Fat: 8g
- Carbohydrates: 12g
- Fiber: 2g
So, there you have it! Your ultimate guide to making No-Bake Cookie Dough Bars! With a dash of nostalgia and a sprinkle of creativity, I hope this recipe finds a special place in your kitchen. Remember, cooking should be a joyful experience—embrace the process, share the love, and most importantly, enjoy every sweet bite! Happy baking!
PrintNo-Bake Cookie Dough Bars
Indulge in these delicious No-Bake Cookie Dough Bars, a perfect treat that embodies simplicity and nostalgia.
- Prep Time: 15 minutes
- Cook Time: 0 minutes
- Total Time: 75 minutes
- Yield: 12 servings 1x
- Category: Dessert
- Method: No-Bake
- Cuisine: American
- Diet: Vegetarian
Ingredients
- 1 cup almond flour
- 1/2 cup maple syrup
- 1/2 cup peanut butter or almond butter
- 1/2 cup dark chocolate chips
- 1 teaspoon vanilla extract
- Pinch of salt
Instructions
- Gather Your Ingredients
- Mix the Base
- Sweeten the Mixture
- Fold in the Chocolate Chips
- Press the Dough into a Pan
- Chill
- Slice and Serve
- Enjoy!
Notes
For a nut-free version, use sunflower seed butter instead. Experiment with different flavors like coconut, protein powder, or dried fruits.
Nutrition
- Serving Size: 1 bar
- Calories: 130
- Sugar: 7g
- Sodium: 50mg
- Fat: 8g
- Saturated Fat: 1.5g
- Unsaturated Fat: 6g
- Trans Fat: 0g
- Carbohydrates: 12g
- Fiber: 2g
- Protein: 4g
- Cholesterol: 0mg
Keywords: no-bake, dessert, cookie dough, easy recipe, quick treat
Red Velvet Cinnamon Rolls
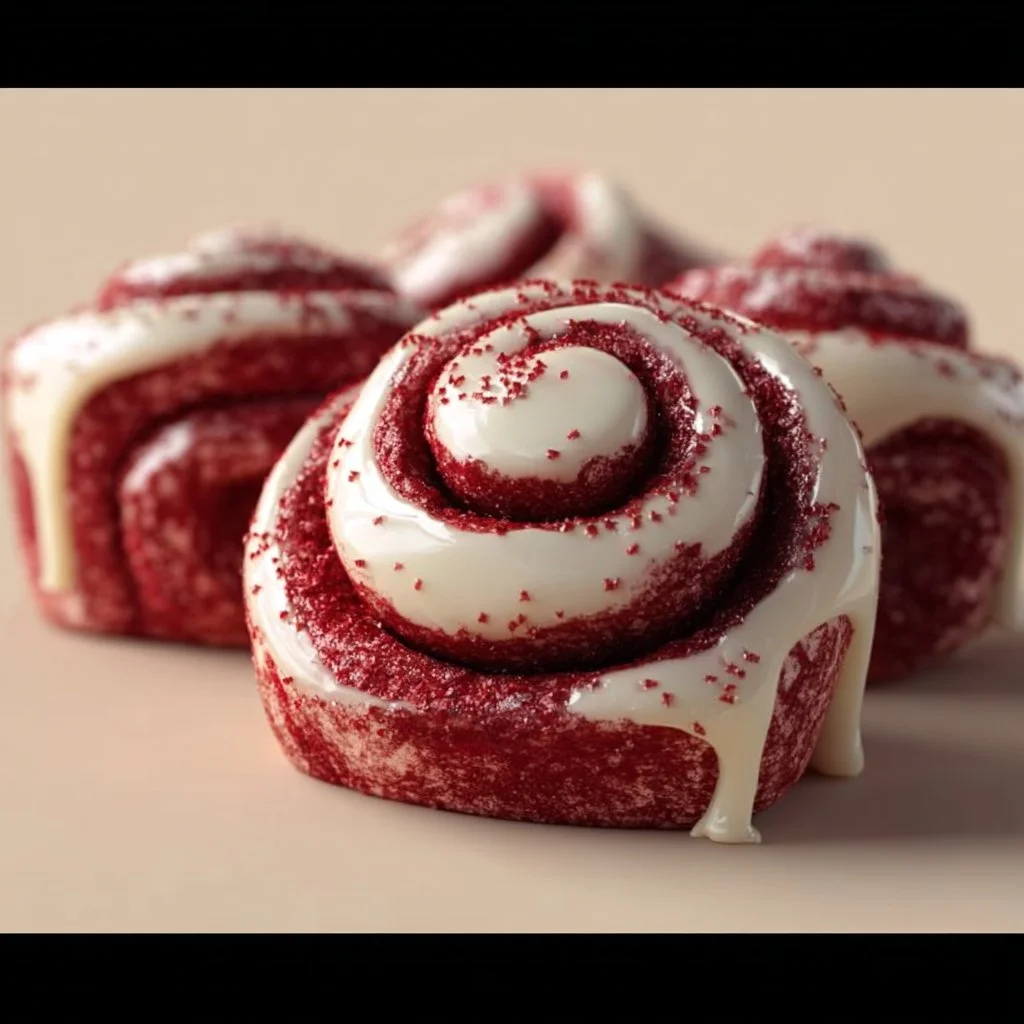
Red Velvet Cinnamon Rolls: A Taste of Comfort and Joy
Hello, food lovers! Today, I am bubbling with excitement to share with you a recipe that combines two of life’s greatest delights: the velvety richness of red velvet cake and the warm, comforting nature of cinnamon rolls. Yes, you guessed it—it’s time for Red Velvet Cinnamon Rolls!
These beauties are not just a treat for the taste buds but also a feast for the eyes. Their deep crimson hue, swirled with creamy tang and topped with luscious frosting, makes them a show-stopper no matter where they’re served. Whether you’re prepping for a cozy brunch with friends, surprising your loved ones on a lazy Sunday morning, or brightening a weekday afternoon, these cinnamon rolls are guaranteed to elevate your day.
I know what you might be thinking: “Savannah, isn’t making cinnamon rolls a daunting task?” Well, my friends, I’m happy to report that these rolls are surprisingly simple. With a few key ingredients and just a bit of love (and some dough kneading), you can have these delightful gems ready to impress in no time!
So, grab your apron, pour yourself a warm cup of coffee, and let’s dive into this delicious adventure together. I promise, you’ll be glad you did!
Personal Story
As a kid, I fondly remember baking with my grandma on those chilly winter afternoons. The air would be filled with the smells of spices and sweets, and I’d eagerly await our creations to emerge golden and warm from the oven. One of her favorite recipes was that of her famous cinnamon rolls—but we would always jazz them up with a festive twist around the holidays.
One snowy December, we decided to dabble in the vibrant world of food coloring, and red velvet became our muse. The beautiful, rich color of the dough captured my imagination. Watching my grandma expertly blend the ingredients and swirl the cinnamon mixture was pure magic. When we took our rolls out of the oven, I could hardly wait to slather them with the cream cheese frosting! That day, I learned that food is more than just sustenance; it’s a way to weave memories, share love, and bring people together. That’s the spirit I’ve poured into these Red Velvet Cinnamon Rolls—a dish that embodies warmth, love, and a sprinkle of nostalgia.
Ingredients
Let’s gather our ingredients! Here’s what you’ll need for this colorful treat:
Ingredients List
-
2 cups all-purpose flour
A staple ingredient for so many recipes—this is the base for your rolls. If you want a gluten-free version, feel free to substitute with a gluten-free 1-to-1 flour blend. -
1 cup sugar
This sweetness makes all the difference. For a less sugary twist, you can cut the sugar down to ¾ cup or use coconut sugar for a hint of caramel flavor. -
1 teaspoon baking powder
This helps the dough rise. A must-have for all baked goods! -
1 teaspoon baking soda
Another leavening agent that gives the rolls their fluffiness. They work hand in hand with the acidic components (like buttermilk) to create the perfect lift. -
1/2 teaspoon salt
Balances the sweetness and brings out the flavors. Don’t skip it! -
1/2 cup buttermilk
This adds moisture and tenderness. If you don’t have buttermilk, make a substitute by adding 1/2 tablespoon of vinegar or lemon juice to 1/2 cup of milk and let it sit for 5 minutes. -
1/4 cup unsalted butter, melted
Adds richness. Melted butter helps the rolls maintain their soft texture. For a dairy-free version, coconut oil works great here! -
1 large egg
Binds everything together and gives structure. You can use a flax egg (1 tablespoon ground flaxseed mixed with 2.5 tablespoons water) for a vegan alternative. -
2 tablespoons red food coloring
The star of the show! This gives the roll its iconic color. Use natural beet juice or powder as an alternative for a more natural dye option. -
1 teaspoon vanilla extract
Adds an aromatic depth of flavor. Trust me, it’s worth the splash! -
1 tablespoon ground cinnamon
Adds warmth and coziness! You can use pumpkin pie spice for a delicious twist. -
1/2 cup brown sugar
Sweet and granulated with caramel notes. To keep it lower in sugar, try reducing the amount to 1/3 cup or substituting with a granulated sugar alternative. -
1/2 cup cream cheese, softened
This creamy goodness is key for the filling. For a non-dairy version, use a vegan cream cheese alternative. -
1/4 cup powdered sugar
To sweeten the frosting. This creates a lovely consistency for drizzling. -
1 teaspoon vanilla extract (for frosting)
More vanilla for more flavor! You can leave it out if you want a more minimalist approach.
Step-by-Step Instructions
Alright, let’s get into the fun part—making your Red Velvet Cinnamon Rolls! Here’s how to whip these up:
Step 1: Prepare Your Dough
-
Mix Dry Ingredients
In a large mixing bowl, combine 2 cups of all-purpose flour, 1 cup of sugar, 1 teaspoon of baking powder, 1 teaspoon of baking soda, and ½ teaspoon of salt. Whisk them together until they’re all blended nicely. This ensures that the leaveners are evenly distributed—no one wants a lumpy roll! -
Combine Wet Ingredients
In another bowl, whisk together ½ cup of buttermilk, ¼ cup of melted unsalted butter, 1 large egg, 2 tablespoons of red food coloring, and 1 teaspoon of vanilla extract. Make sure the butter isn’t too hot, or it might cook the egg! -
Create the Dough
Slowly pour the wet mixture into the dry ingredients. Use a spatula to marry the two until no dry flour is visible. It’s okay if it’s a little sticky—this means it’s gonna be super soft!
Step 2: Knead and Rise
-
Knead the Dough
On a floured surface, knead your dough for about 3-5 minutes until it’s smooth and elastic. If it’s too sticky, sprinkle a little more flour while kneading. -
Let It Rest
Place your dough into a greased bowl, cover it with a kitchen towel, and let it rise in a warm place for about 1 hour or until it doubles in size. Grab a cup of coffee and relax—you deserve this!
Step 3: Create the Filling
- Make Your Cinnamon Mix
While your dough rises, let’s work on the filling. In a small bowl, mix together ½ cup of brown sugar, 1 tablespoon of ground cinnamon, and a dash of vanilla extract. This will create that warm, sweet filling we all love.
Step 4: Roll It Out
-
Flour Your Surface Again
After resting, punch down the dough and place it on a lightly floured surface. Roll it out into a rectangle about 1/4 inch thick. Keep it even so the rolls cook up uniformly. -
Spread the Filling
Using a spatula, spread the softened cream cheese (½ cup) over the dough, then top it with your cinnamon mixture. Just go wild and spread it all out to the edges!
Step 5: Form the Rolls
-
Rolling It Up
Starting from one of the long edges, carefully roll the dough into a tight log. The tighter you roll, the nicer your swirls will be! -
Slice and Dice
Using a sharp knife or kitchen string, slice the log into 12 equal pieces. Place them cut side up in a greased baking dish, and cover with a kitchen towel to rise again for about 30 minutes.
Step 6: Bake Away
-
Preheat Your Oven
Preheat your oven to 350°F (175°C). They’ll bake faster if the oven is ready when you are! -
Bake
Pop your rolls into the oven and bake for about 25-30 minutes until they’re nicely golden. You’re gonna want to keep an eye on them to prevent burning.
Step 7: Frost and Serve
-
Make the Frosting
While your rolls are baking, mix ½ cup of softened cream cheese, ¼ cup of powdered sugar, and 1 teaspoon of vanilla extract in a bowl until smooth and creamy. -
Glaze the Rolls
Once your rolls come out of the oven, resist the urge to dig in immediately! Let them cool for about 10 minutes—then spread the frosting generously on top.
Serving Suggestions
Presentation can elevate any dish! For these Red Velvet Cinnamon Rolls, serve them warm on a rustic wooden platter. Dust a touch of powdered sugar on top for that charming café vibe. Pair them with a hot cup of coffee or spiced chai, and don’t hesitate to add some fresh berries on the side for a pop of color and freshness. Your table will look stunning!
Recipe Variations
- Nutty Delight: Add chopped pecans or walnuts to the filling for a delightful crunch.
- Chocolate Lovers: Incorporate chocolate chips into the filling for a rich twist.
- Spiced Twist: Swap out the ground cinnamon for pumpkin pie spice for a seasonal flair.
- Vegan Version: Use almond milk, vegan butter, and a flax egg to make these plant-based!
- Cream Cheese Swirl: Instead of just spreading the cream cheese, swirl it into the rolls for a marbled effect.
Chef’s Notes
Ah, where do I begin! These Red Velvet Cinnamon Rolls are a new favorite in my kitchen. When I first tried this recipe, I accidentally added too much food coloring—let’s just say my kitchen looked like a Valentine’s Day card exploded! But what came out of that kitchen mishap was a lesson in being creative and experimental in the kitchen.
These rolls have evolved over time, reflecting my love for simple yet elegant food. And guess what? They freeze beautifully! So make a double batch, frost them before they’re completely cool, put them in an airtight container, and enjoy later.
FAQs and Troubleshooting
1. Why are my cinnamon rolls not rising?
Make sure your yeast (in the form of baking powder and soda) is fresh! It’s also vital to keep the dough in a warm, draft-free place while it rises.
2. How do I prevent my rolls from drying out?
Keep them covered with a kitchen towel while they rise and store leftover rolls in an airtight container once they’re cooled.
3. Can I make these a day in advance?
Absolutely! Prepare the rolls, place them in the baking dish, cover tightly with plastic wrap, and refrigerate overnight. Bake them in the morning straight from the fridge, just add a few extra minutes to the baking time.
4. How can I make them less sweet?
Feel free to reduce the sugar in both the dough and the filling. You can also omit the frosting for a more minimalist approach.
Nutritional Info
(Optional, could be based on preferences)
- Serving Size: 1 roll
- Calories: Approximately 320
- Fat: 12g
- Carbohydrates: 47g
- Protein: 4g
- Sugar: 20g
There you have it, friends! Your guide to making mouthwatering Red Velvet Cinnamon Rolls at home. I hope you enjoy making them as much as I do. Remember, the kitchen is all about experimenting, so let your creativity shine. Happy baking! Let’s gather around that table soon.
PrintRed Velvet Cinnamon Rolls

Delicious red velvet cinnamon rolls swirled with cream cheese filling and topped with luscious frosting, perfect for any occasion.
- Prep Time: 30 minutes
- Cook Time: 30 minutes
- Total Time: 60 minutes
- Yield: 12 servings 1x
- Category: Dessert
- Method: Baking
- Cuisine: American
- Diet: Vegetarian
Ingredients
- 2 cups all-purpose flour
- 1 cup sugar
- 1 teaspoon baking powder
- 1 teaspoon baking soda
- 1/2 teaspoon salt
- 1/2 cup buttermilk
- 1/4 cup unsalted butter, melted
- 1 large egg
- 2 tablespoons red food coloring
- 1 teaspoon vanilla extract
- 1 tablespoon ground cinnamon
- 1/2 cup brown sugar
- 1/2 cup cream cheese, softened
- 1/4 cup powdered sugar
- 1 teaspoon vanilla extract (for frosting)
Instructions
- Mix Dry Ingredients: In a large mixing bowl, combine flour, sugar, baking powder, baking soda, and salt. Whisk until blended.
- Combine Wet Ingredients: In another bowl, whisk together buttermilk, melted butter, egg, red food coloring, and vanilla extract.
- Create the Dough: Pour the wet mixture into the dry ingredients and combine until just mixed.
- Knead the Dough: On a floured surface, knead the dough for 3-5 minutes until smooth and elastic.
- Let It Rest: Place dough in a greased bowl, cover, and let rise for about 1 hour.
- Make Your Cinnamon Mix: Mix brown sugar, cinnamon, and a dash of vanilla in a small bowl.
- Flour Your Surface: Roll out the dough into a rectangle about 1/4 inch thick.
- Spread the Filling: Spread softened cream cheese over the dough and sprinkle with cinnamon mixture.
- Rolling It Up: Roll the dough from one edge into a tight log.
- Slice and Dice: Cut the log into 12 equal pieces and place in a greased baking dish.
- Preheat Your Oven: Preheat oven to 350°F (175°C).
- Bake: Bake for 25-30 minutes until golden.
- Make the Frosting: Mix cream cheese, powdered sugar, and vanilla until smooth.
- Glaze the Rolls: Spread frosting over rolls once they have cooled for about 10 minutes.
Notes
These cinnamon rolls freeze well, so make a double batch and enjoy later!
Nutrition
- Serving Size: 1 roll
- Calories: 320
- Sugar: 20g
- Sodium: 400mg
- Fat: 12g
- Saturated Fat: 6g
- Unsaturated Fat: 3g
- Trans Fat: 0g
- Carbohydrates: 47g
- Fiber: 1g
- Protein: 4g
- Cholesterol: 30mg
Keywords: cinnamon rolls, red velvet, dessert, sweet rolls, baking
Lemon Brownies
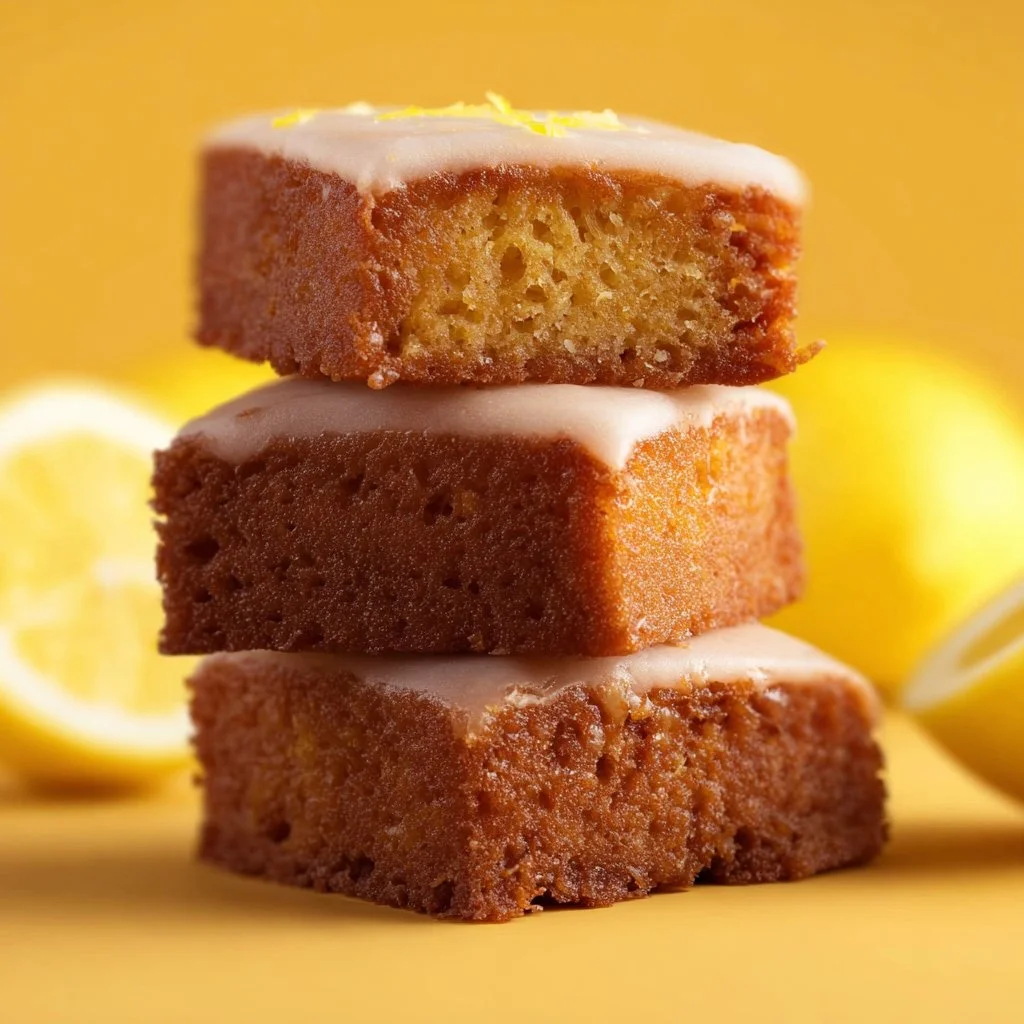
# The Zesty Magic of Lemon Brownies: A Slice of Sunshine

Hello, my fellow food enthusiasts! Today, we’re diving into the delightful, sunshiny world of Lemon Brownies. If you’ve never tasted these treats, you’re in for a real treat. Picture this: a dense, fudgy brownie meets the bright, zesty goodness of fresh lemons. Yes, my friends, these are not your typical brownies. They are a refreshing twist that’ll make your taste buds dance and your friends beg for the recipe.

So, why lemon brownies, you ask? Well, there’s something about the tangy sweetness of lemons that lifts the spirits and brightens any gathering. Plus, they’re versatile enough to be enjoyed year-round, whether you’re hosting a summer picnic, celebrating a birthday, or simply indulging your sweet tooth on a quiet evening at home.

Let’s set the table for a delicious adventure that’s effortless yet elegant. Grab your apron, and let’s get this fusion of richness and citrus going!

## My Lemon Brownie Story

Every time I make lemon brownies, I’m transported back to a sun-drenched afternoon in my grandmother's kitchen. She was the queen of desserts, and her approach was always simple: use the freshest ingredients, add a dash of love, and sprinkle in some joy. It was one such afternoon that she introduced me to her secret lemon brownie recipe, which she had perfected over the years.

Sitting on a stool, watching her work magic in the kitchen, my hands would impatiently lick the remnants of the bowl. The blend of sugar, butter, and lemon zest filled the air with a sweet citrus aroma that made my heart sing. After what felt like an eternity, she pulled a golden batch from the oven, the tops lightly glistening like little sunbursts. We sat at her kitchen table, devouring them warm, the bright lemon flavor brightening up the whole meal.

That memorable experience instilled in me not just a love for lemon desserts but also a passion for sharing food with family and friends, a tradition I carry on today with each bite of these delicious lemon brownies. Let’s recreate that magic in our kitchens!

## Ingredients

Let’s gather our star ingredients for these Lemon Brownies:

- **1 cup unsalted butter, melted**: The base of any good brownie! Unsalted butter allows you to control the saltiness of the recipe. If you're in a pinch, you can substitute with coconut oil or margarine for a dairy-free version.

- **2 cups granulated sugar**: This core ingredient gives the brownies their sweetness. You could use coconut sugar or honey for a slightly different flavor profile, but keep in mind that you may need to adjust the quantity.

- **4 large eggs**: Eggs bring richness and help bind everything together. For a vegan alternative, you can replace each egg with a flax egg (1 tablespoon ground flaxseed mixed with 2.5 tablespoons water).

- **1 tablespoon vanilla extract**: Vanilla is the unsung hero in many desserts, adding depth and warmth. Feel free to experiment with almond extract for a unique spin!

- **2 cups all-purpose flour**: This provides the structure we want in our brownies. If gluten is a concern, a 1:1 gluten-free flour blend will work well here.

- **1 teaspoon baking powder**: This helps the brownies rise slightly, creating a light texture. If you run out, you can use baking soda, but reduce the quantity to 1/3 teaspoon.

- **1/2 teaspoon salt**: A touch of salt enhances sweetness. If using salted butter, you can skip this!

- **1/4 cup lemon juice**: Bright, tart, and essential for flavor. Use fresh lemon juice for the best results; bottled does not compare.

- **Zest of 2 lemons**: The zest is where much of the lemon flavor resides; it brings vibrancy. If you're in a bind, lime zest can also provide a pleasant twist!

#### For the glaze:
- **1 cup powdered sugar**: This gives the glaze its sweetness and smooth texture. You can substitute with maple powder for a different flavor.

- **2 tablespoons lemon juice**: The key to achieving that tangy glaze!

- **Zest of 1 lemon**: Extra lemon goodness that deepens the flavor.

## Step-by-Step Instructions

Now that we have our ingredients ready, let’s embark on our baking adventure.

1. **Preheat Your Oven**: Start by preheating your oven to 350°F (175°C). This is crucial—it ensures even baking. While your oven warms up, you can prepare your pan!

2. **Prepare Your Pan**: Grease a 9x13-inch baking dish with a touch of butter or line it with parchment paper for easy removal. This little step ensures your glorious brownies won’t stick around after baking!

3. **Mix the Wet Ingredients**: In a large mixing bowl, whisk together the melted unsalted butter and granulated sugar until combined. It should be shiny and smooth. This is where flavor starts blossoming! Add in the eggs, one at a time, stirring well after each addition. Then, stir in the vanilla extract.

4. **Add the Dry Ingredients**: In a separate bowl, whisk together the flour, baking powder, and salt. This step is essential to evenly distribute the baking powder, ensuring our brownies rise perfectly. Gradually fold the dry ingredients into the butter mixture, being careful not to overmix; otherwise, they could be tough.

5. **Incorporate the Lemon**: Fold in the fresh lemon juice and lemon zest until just combined. The batter will be creamy and slightly thick, which is just what we want! Take a moment to appreciate that beautiful citrus aroma swirling around you.

6. **Pour into the Pan**: Spread the batter evenly into your prepared baking dish and smooth the top with a spatula. You can tap the pan gently to remove any air bubbles.

7. **Bake**: Slide your pan into the preheated oven and let those babies bake for about 25–30 minutes. Keep an eye on them; you want the edges to be set while the center remains slightly gooey.

8. **Cool and Glaze**: Once baked, allow the brownies to cool in the pan for about 10 minutes before transferring them to a wire rack to cool completely. Meanwhile, whisk together the powdered sugar, lemon juice, and lemon zest for the glaze. Once cooled, drizzle it over your brownies like a beautiful sunny glaze.

9. **Slice and Serve**: Use a sharp knife to cut the brownies into squares or rectangles. Feel free to dust with a sprinkle of extra powdered sugar for that extra touch of refinement.

## Serving Suggestions

For serving, I love to arrange the brownies on a beautiful platter, garnished with fresh mint leaves or thin lemon slices for an extra pop of color. You can serve them warm with a scoop of vanilla ice cream on the side for a delightful contrast or enjoy them chilled as a refreshing treat on a hot day. The presentation can be simple yet elegant, and don’t forget to add a cheerful napkin to complete the experience!

## Recipe Variations

Want to switch things up a bit? Here are some delightful variations for your lemon brownies:

1. **Blueberry Lemon Brownies**: Toss in a cup of fresh blueberries for a burst of color and flavor.

2. **Coconut Lemon Brownies**: Add shredded coconut to the batter for a tropical twist.

3. **Lemon Poppy Seed Brownies**: Incorporate a tablespoon of poppy seeds for an interesting texture.

4. **Cream Cheese Swirl**: Add dollops of cream cheese frosting to the batter before baking and swirl it in for added richness.

5. **Gluten-Free Option**: Use a gluten-free flour blend to make these delightful brownies accessible for everyone!

## Chef’s Notes

These Lemon Brownies are a recipe near and dear to my heart that has evolved over the years. I played around with the ratios, finding the perfect balance of sweet and tart. Originally, I used a simpler approach, but after experimenting, I realized that the layers of flavor truly shine with the addition of zest and vanilla. Every time I tweak it, I’m reminded of that sunny afternoon in Grandma's kitchen, which adds an extra layer of joy to each batch I make. Also, just a little heads-up—don't forget to save some lemon zest for garnishing. It’s the finishing touch that transforms your dessert from good to show-stopping!

## FAQs and Troubleshooting

### 1. **Why are my lemon brownies too dense?**
If your brownies are coming out dense, it could be due to over-mixing the batter or the flour being packed too tightly. Be gentle when folding in your dry ingredients!

### 2. **How do I tell when they are done baking?**
You’re looking for a light golden color on top! Insert a toothpick into the center; if it comes out clean or with a few moist crumbs, they’re ready!

### 3. **Can I make these in advance?**
Absolutely! These brownies actually taste better the next day once they get a chance to set. Store them in an airtight container in the fridge to keep them fresh.

### 4. **What if I don’t have fresh lemons?**
While fresh lemons yield the best flavor, if you must, bottled lemon juice can work in a pinch, but the zest will be missed!

## Nutritional Info (Optional)

*(This section can be tailored as you see fit.)*

Warm lemon brownies, a delightful mix of sweet and tart goodness, deliver a dessert experience like no other. With comforting fudginess and vibrant lemon flavor, they evoke joy, nostalgia, and a sense of togetherness. So, gather your loved ones, tie on your apron, and prepare to indulge in a treat that’s as refreshing as a bright summer day.

Cheers to good food and great company!
Lemon Brownies
Delicious lemon brownies that blend rich brownie texture with zesty lemon flavor, perfect for any gathering.
- Prep Time: 15 minutes
- Cook Time: 30 minutes
- Total Time: 45 minutes
- Yield: 12 servings 1x
- Category: Dessert
- Method: Baking
- Cuisine: American
- Diet: Vegetarian
Ingredients
- 1 cup unsalted butter, melted
- 2 cups granulated sugar
- 4 large eggs
- 1 tablespoon vanilla extract
- 2 cups all-purpose flour
- 1 teaspoon baking powder
- 1/2 teaspoon salt
- 1/4 cup lemon juice
- Zest of 2 lemons
- 1 cup powdered sugar (for glaze)
- 2 tablespoons lemon juice (for glaze)
- Zest of 1 lemon (for glaze)
Instructions
- Preheat your oven to 350°F (175°C).
- Prepare a 9×13-inch baking dish by greasing it or lining with parchment paper.
- Mix the melted unsalted butter and granulated sugar until shiny and smooth. Add in the eggs one at a time, stirring well after each.
- Add the flour, baking powder, and salt in a separate bowl, then fold into the butter mixture without overmixing.
- Incorporate the lemon juice and zest until just combined.
- Pour the batter into the prepared pan and smooth the top.
- Bake for about 25–30 minutes until edges are set and the center is slightly gooey.
- Cool in the pan for 10 minutes before transferring to a wire rack to cool completely.
- Whisk together powdered sugar, lemon juice, and zest for the glaze, then drizzle over the cooled brownies.
- Slice into squares and serve.
Notes
Serve warm with ice cream, or enjoy chilled. Garnish with fresh mint or lemon slices for a pop of color.
Nutrition
- Serving Size: 1 brownie
- Calories: 200
- Sugar: 18g
- Sodium: 150mg
- Fat: 8g
- Saturated Fat: 5g
- Unsaturated Fat: 2g
- Trans Fat: 0g
- Carbohydrates: 27g
- Fiber: 0g
- Protein: 2g
- Cholesterol: 45mg
Keywords: lemon brownies, dessert, sweet treat, summer dessert, lemon recipes
Caramel Apple Cheesecake Bars
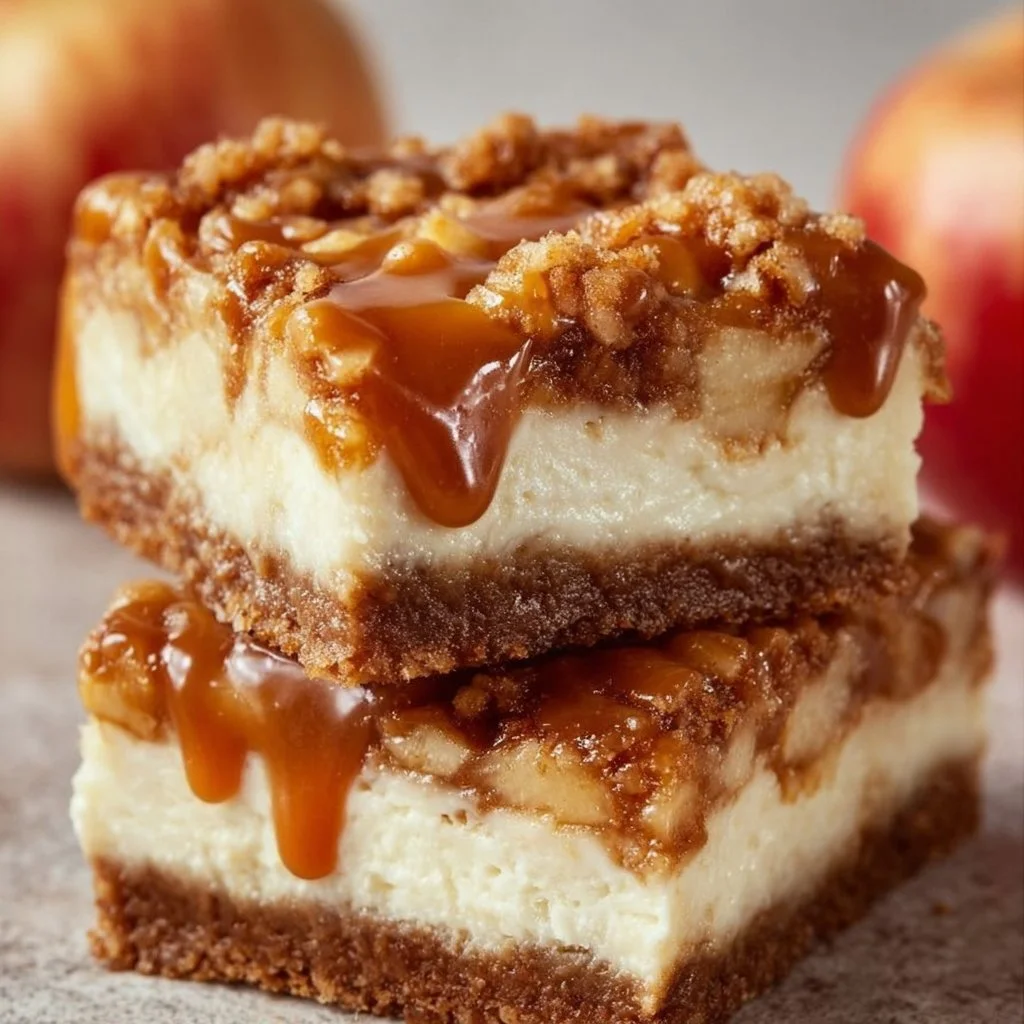
Caramel Apple Cheesecake Bars: A Sweet Slice of Nostalgia
Welcome to my kitchen, fellow foodies! Today, we’re diving into a recipe that perfectly captures the essence of cozy autumn afternoons, family gatherings, and sweet nostalgia—Caramel Apple Cheesecake Bars. If you’re anything like me, you appreciate a dessert that feels both indulgent and comforting, a slice of something exquisite that can brighten an ordinary day. Well, grab your aprons, because we’re about to whip up a delightful treat that’s bound to become a family favorite.
Imagine this: it’s a crisp fall day, the leaves are turning brilliant shades of gold and crimson, and the air is filled with the sweet scent of cinnamon and baked apples. That’s the moment I want to recreate with these cheesecake bars. As a child, I would often help my grandma in the kitchen, and one of the recipes that we made together was her famous apple pie. The combination of tart apples, warm spices, and silky creaminess of cheesecake always made my heart flutter. That special connection to my grandma and those priceless moments inspired me to create this recipe—merging that classic apple pie charm with the creamy comfort of cheesecake!
These Caramel Apple Cheesecake Bars are not only easy to make, but they also pack a flavor punch that will have your friends and family clamoring for seconds. Each bar features a buttery graham cracker crust topped with a smooth cream cheese mixture, fresh apples, a hint of cinnamon, and a luscious caramel drizzle. It’s the perfect balance of creamy, crunchy, sweet, and spiced—making it the ultimate crowd-pleaser for any occasion.
Let’s get cooking and create a dessert that you can serve proudly at your next gathering (or just enjoy all to yourself).
Personal Story
Growing up in a bustling household, our kitchen was always the heart of our home. My fondest memories revolve around baking with family, especially during the fall. One autumn, my grandmother decided to surprise us with an apple dessert that would leave a lasting imprint on my heart: her incredible apple cheesecake—much like what we are making today.
She passed down not just her recipe but also her incredible spirit of hospitality. I remember watching her dance around in the kitchen, the leaves fluttering outside the window as she hummed softly while she worked. The moment she pulled that creamy cheesecake out of the oven, the sweet aroma wafted through the house. We gathered around the table, beaming with delight and anticipation, ready to dive into a slice of warm comfort.
Those moments crafted not only delicious memories but also instilled in me a deep passion for creating meals that pull loved ones together. Now, every time I make these Caramel Apple Cheesecake Bars, I remember my grandma and the love she poured into her cooking. It’s not just about the food; it’s about nurturing connections and celebrating life’s sweet moments, one slice at a time.
Ingredients
Before we jump into the cooking, let’s gather our ingredients. Here’s what you’ll need:
-
2 cups of graham cracker crumbs
These crumbs form the sturdy base of our cheesecake bars. If you don’t have graham crackers, you can substitute with crushed vanilla wafers or even chocolate cookie crumbs for a unique twist! -
1/2 cup of unsalted butter, melted
The butter adds richness and helps bind the graham cracker crumbs together. Make sure it’s unsalted; otherwise, you might tip the flavor balance! -
1/4 cup of granulated sugar
Just a bit of sugar helps sweeten the crust. If you’d like an alternative, coconut sugar works nicely to retain that sweet element with a slight caramel flavor. -
2 (8-ounce) packages of cream cheese, softened
Cream cheese is the star of the cheesecake mix, giving it that rich, velvety texture. Soften it up by leaving it out for about an hour before you start. -
1/2 cup of granulated sugar
This sugar sweetens our filling. Again, if you’re watching your sugar intake, feel free to use a sugar substitute like erythritol. -
1 teaspoon of vanilla extract
Vanilla adds depth of flavor and enhances the sweetness. Always opt for pure vanilla extract if possible; it makes a world of difference! -
2 large eggs
The eggs provide structure to your cheesecake. If you are vegan or allergic, a substitute can include 1/4 cup of unsweetened applesauce per egg. -
2 cups of peeled, diced apples
Apples give this dessert its signature flavor! Granny Smith apples work great for their tartness, but feel free to mix and match your favorites. -
1 teaspoon of cinnamon
Cinnamon adds warmth and that cozy, fall-like essence. Ground nutmeg can make a delightful addition for extra spice! -
1/2 cup of caramel sauce
A decadent finish! You can purchase caramel sauce from the store or make your own if you’re feeling adventurous (it’s easier than it sounds!).
Step-by-Step Instructions
Ready to make some magic in the kitchen? Let’s roll up our sleeves and get started on these Caramel Apple Cheesecake Bars!
Step 1: Preheat the Oven
Preheat your oven to 325°F (163°C). This is an essential step so that your cheesecake will bake evenly and turn out just right—nothing worse than a soggy bottom!
Step 2: Prepare the Graham Cracker Crust
- In a mixing bowl, combine the graham cracker crumbs, melted butter, and 1/4 cup of sugar. Mix until the crumbs are well-coated and the mixture resembles wet sand.
- Chefs Tip: If the mixture feels too dry and crumbly, add a splash more melted butter. You want it to hold together when pressed!
Step 3: Press the Crust Into the Pan
- Grab a 9×13 inch baking dish and line it with parchment paper. This will help you remove the bars easily after they’re baked.
- Press the mixture evenly into the bottom of the prepared pan. Use the back of a measuring cup to pack it down firmly.
- Pop it in the oven for about 10 minutes. We want the crust to set and become a bit golden.
Step 4: Prepare the Cheesecake Filling
- While the crust is baking, let’s whip up that luscious filling! In a large mixing bowl, add the softened cream cheese and 1/2 cup of granulated sugar.
- Use an electric mixer on medium speed until it’s smooth and creamy. This is not the time for lumps!
- Next, add in the vanilla extract and eggs, one at a time, mixing after each addition until combined.
- Chefs Insight: Avoid overmixing the batter to keep your bars from cracking – we want a smooth finish, not an earthquake!
Step 5: Mix in the Apples and Cinnamon
- Add in the diced apples and cinnamon, stirring gently until everything is just combined. Your kitchen is going to start smelling divine right about now!
Step 6: Pour the Batter Over the Crust
- Once the crust is done par-baking, remove it from the oven and pour the cream cheese and apple mixture over the crust. Spread it evenly with a spatula.
- Chef Hack: Tap the pan on the counter a few times to release any air bubbles that might have formed!
Step 7: Bake the Cheesecake Bars
- Return the pan to the oven and bake for 30-35 minutes. The edges should look set, but the center will still have a slight jiggle (it will firm up as it cools!).
- Important Note: If you notice the tops browning too much, place a piece of foil gently over the top for the final few minutes of baking.
Step 8: Cool and Chill
- Remove the bars from the oven and let them cool at room temperature for about 30 minutes. Transfer them to the fridge for at least 2 hours (or overnight) to chill fully. Patience is key here!
Step 9: Drizzle with Caramel
- Once they’re set, take them out of the fridge and use the parchment paper to lift them out. Cut them into squares and drizzle with caramel sauce before serving.
- Serving Tip: You can warm up the caramel slightly for an ooey-gooey drizzle that everyone will love!
Serving Suggestions
To elevate your presentation, place the caramel apple cheesecake bars on a beautiful platter. You can garnish each square with extra diced apples, a sprinkle of cinnamon, or even some chopped nuts for texture. If you’re feeling extra fancy, serve them alongside a scoop of vanilla ice cream or a dollop of whipped cream! Trust me, this will make your dessert even more irresistible.
Recipe Variations
Looking to switch things up? Here are a few fun variations you can try with these Caramel Apple Cheesecake Bars:
- Nutty Pecan Crust: Replace graham cracker crumbs with ground pecans for a nutty twist.
- Mixed Fruit Filling: Substitute half of the apples with pears or pears for an interesting flavor profile.
- Caramel Swirl: Drizzle caramel sauce straight into the cheesecake batter before baking for a delightful caramel ribbon effect.
- Spiced Apples: Add a pinch of nutmeg or ginger to the apple mixture for an extra layer of warmth.
- Sugar-Free Option: Use a sugar substitute in the crust and filling to create a guilt-free treat!
Chef’s Notes
Every time I make these Caramel Apple Cheesecake Bars, I think about how food serves as a love language. It brings people together, creates memories, and nourishes our souls. Plus, I can’t help but laugh every time I remember my first attempt at making a cheesecake—it was a glorious failure! The crust crumbled, the opening was a disaster! But it taught me valuable lessons about patience and practice. So don’t worry if your first attempt isn’t perfect; just keep at it!
Over the years, this recipe has evolved from my grandma’s apple pie into these bars. I like to think she’d be proud of this scrumptious homage to our shared kitchen adventures.
FAQs and Troubleshooting
1. Why did my cheesecake bars crack?
Cracking can happen for a few reasons: overmixing the eggs or baking at too high a temperature. Always keep your mixer on medium speed and ensure you don’t bake them too long!
2. My crust is too crumbly; what should I do?
If your crust won’t hold together, it likely needs more butter. Add a tablespoon at a time until it reaches the right consistency.
3. Can I freeze these bars?
Absolutely! Cut them into squares and then freeze them in an airtight container for up to 2 months. Thaw in the fridge before serving.
4. What if I can’t find caramel sauce?
No problem! You can make your own caramel sauce by melting sugar over low heat until it’s golden, then whisking in heavy cream until smooth. It’s simpler than you think!
Nutritional Info (Optional)
A quick note for those interested in the nutritional aspect: Each serving of Caramel Apple Cheesecake Bars (based on 12 servings) contains approximately:
- Calories: 320
- Protein: 4g
- Carbohydrates: 34g
- Fat: 20g
- Sugar: 18g
(Note: These numbers can vary based on ingredient choices and portion size.)
There you have it, a delicious journey into the world of Caramel Apple Cheesecake Bars! I hope you’re inspired to create this warm, comforting dessert that spreads joy and connection. As you gather around the table with loved ones, sharing stories and laughter, remember that cooking is not just about the food itself; it’s the love and intention behind it that makes it truly special. Happy baking, and until next time—let’s keep the good food flowing!
PrintCaramel Apple Cheesecake Bars
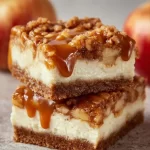
Indulge in these creamy Caramel Apple Cheesecake Bars, perfect for autumn gatherings, featuring a buttery graham cracker crust, smooth cream cheese filling, fresh apples, and a luscious caramel drizzle.
- Prep Time: 15 minutes
- Cook Time: 40 minutes
- Total Time: 55 minutes
- Yield: 12 servings 1x
- Category: Dessert
- Method: Baking
- Cuisine: American
- Diet: Vegetarian
Ingredients
- 2 cups of graham cracker crumbs
- 1/2 cup of unsalted butter, melted
- 1/4 cup of granulated sugar
- 2 (8-ounce) packages of cream cheese, softened
- 1/2 cup of granulated sugar
- 1 teaspoon of vanilla extract
- 2 large eggs
- 2 cups of peeled, diced apples
- 1 teaspoon of cinnamon
- 1/2 cup of caramel sauce
Instructions
- Preheat your oven to 325°F (163°C).
- Combine the graham cracker crumbs, melted butter, and sugar in a bowl.
- Press the mixture into a 9×13 inch baking dish and bake for 10 minutes.
- Add softened cream cheese and sugar in a bowl and mix until smooth.
- Add vanilla extract and eggs, mixing after each addition.
- Mix in diced apples and cinnamon gently.
- Pour the mixture over the crust and spread it evenly.
- Bake for 30-35 minutes until the edges are set.
- Cool at room temperature for 30 minutes, then refrigerate for at least 2 hours.
- Drizzle with caramel sauce before serving.
Notes
For added richness, you can warm the caramel slightly before drizzling. Try adding chopped nuts as a garnish for extra texture.
Nutrition
- Serving Size: 1 piece
- Calories: 320
- Sugar: 18g
- Sodium: 200mg
- Fat: 20g
- Saturated Fat: 12g
- Unsaturated Fat: 8g
- Trans Fat: 0g
- Carbohydrates: 34g
- Fiber: 1g
- Protein: 4g
- Cholesterol: 100mg
Keywords: cheesecake, apple dessert, caramel, fall recipes, autumn desserts, family gatherings