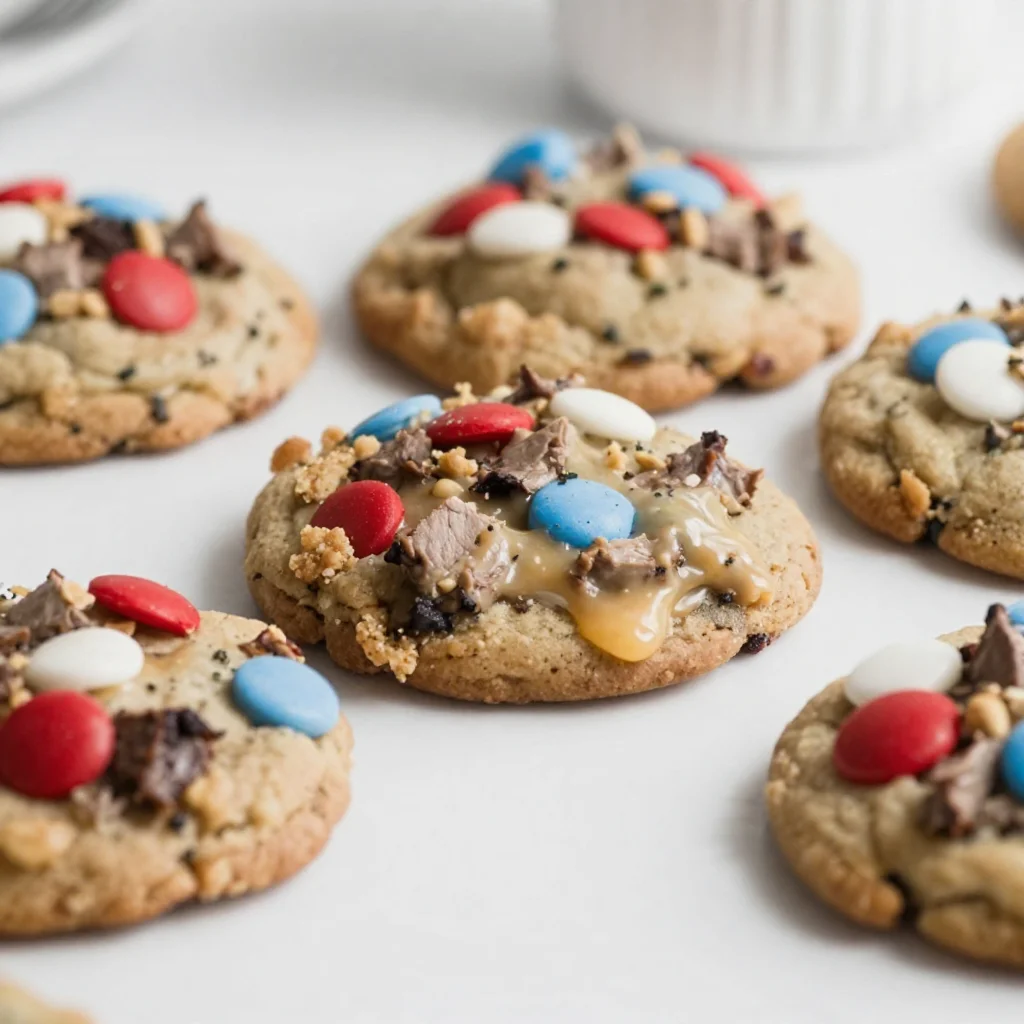
Patriotic 4th of July Monster Cookies: Quick Party Treat
Celebrate with 4th of July Monster Cookies: A Sweet, Festive Treat!
As the summer sun shines bright and the scent of barbecue fills the air, there’s one thing that truly captures the spirit of the 4th of July for me: baking up a storm in my kitchen! And what better way to celebrate America’s birthday than with a batch of vibrant, indulgent Monster Cookies? These spirited confections are the epitome of a festive treat—they’re chewy, chunky, and bursting with flavors that make your taste buds dance!
Picture this: friends and family gathered around, laughter echoing in the warm summer air, as you present a platter of these delightful cookies, each one a masterpiece of flavors and colors. What’s more? Monster Cookies are wonderfully forgiving, allowing even novice bakers to create a stunning dessert that impresses without the fuss. I’m excited to guide you through this family-friendly cookie adventure, so grab your apron, and let’s get baking!
A Cookie That Holds Memories
Let me take you on a little trip down memory lane. I remember the first time I ever made cookies for a party—ironically, it was another 4th of July gathering. Armed with just a worn-out cookbook and my mom’s old mixer, I whipped up a batch of chocolate chip cookies, thinking I could impress a few friends.
What I didn’t anticipate was how they would turn out! The cookies were a complete disaster; they spread too thin and ended up like puddles of goo on the baking sheet! But amidst the culinary chaos, I learned something invaluable: it’s not just about the cookies, but the joy of sharing, creating, and laughing together in the kitchen.
Fast forward a few years, and I’ve perfected my cookie game, adding colorful M&M’s to my classic recipe to create the ultimate Monster Cookies. Now, these festive favorites not only remind me of my early baking days but are also my go-to treat for any celebration—especially the 4th of July!
Ingredients
Here’s what you’ll need to make these festive 4th of July Monster Cookies:
-
1 cup browned butter
Browned butter adds a rich, nutty flavor that transforms basic cookies into something truly special. If you’re short on time, melted regular butter can work as a substitute, although you won’t get that toasty depth of flavor. -
1 cup brown sugar
This adds moisture and a hint of caramel sweetness. If you need a lighter option, you can use coconut sugar, though it may alter the taste slightly. -
1/2 cup granulated sugar
The granulated sugar balances the richness of the brown sugar and helps achieve the perfect chewy texture. You could substitute with a sugar alternative like agave syrup, but the amount will vary. -
2 large eggs
Eggs not only bind the ingredients together but also contribute to the cookies’ rise. For a vegan option, you can use flaxseed meal mixed with water as a substitute. -
1 teaspoon vanilla extract
Pure vanilla extract elevates the cookie’s flavor with a sweet aromatic essence. Try to use pure vanilla rather than imitation for best results. -
2 cups all-purpose flour
This creates the base of the cookie. You can use a gluten-free all-purpose flour blend if you’re looking for a gluten-free option. -
1 teaspoon baking soda
This is essential for leavening, giving your cookies that perfect soft-chewy texture. Don’t confuse it with baking powder; they are NOT interchangeable. -
1/2 teaspoon salt
A pinch of salt enhances the sweetness of your cookies and balances flavors. If you’re watching your sodium intake, feel free to reduce the amount, but don’t omit it altogether. -
1 cup chocolate chips
Semi-sweet chocolate chips are a classic choice, but feel free to mix things up with milk chocolate or dark chocolate, depending on your preference. -
1/2 cup M&M’s
These colorful candies are not only delicious, they also add a pop of fun and color, perfect for the 4th of July festivities! -
1/2 cup oats
Oats add chewiness to each cookie and a bit of heartiness. You can use quick-cooking oats in a pinch, but the texture will be slightly different.
Step-by-Step Instructions
Now that we have our ingredients gathered, let’s dive into the fun part—the baking!
-
Brown the Butter
Start by adding the butter to a saucepan over medium heat. Let it melt and continue cooking until it turns a lovely golden brown, with a nutty aroma wafting through your kitchen. Make sure to stir it occasionally to prevent burning. Once browned, remove from heat and let it cool for a few minutes. -
Combine Sugars
In a large mixing bowl, combine the cooled browned butter with brown sugar and granulated sugar. Using a hand mixer or a whisk, beat until the mixture is smooth and creamy—about 2-3 minutes. This fluffy mixture means we’re on the right track! -
Add Eggs and Vanilla
Next up, add in the eggs one at a time, mixing well after each addition. Then, pour in the vanilla extract, mixing until it’s well incorporated. This step will make your kitchen smell heavenly! -
Mix Dry Ingredients
In a separate bowl, whisk together the all-purpose flour, baking soda, and salt. Gradually add the dry mixture to the wet ingredients, mixing until just combined—overmixing can lead to tough cookies, and we don’t want that! -
Fold in Chocolate and M&M’s
Using a spatula, gently fold in the chocolate chips, M&M’s, and oats. The batter should look thick and luscious—just how cookie dough should be! -
Chill the Dough (Optional)
If you have time, it’s advantageous to chill the dough for at least 30 minutes. This helps to solidify the fats in the dough, leading to thicker cookies. It’s a small step that makes a big difference! -
Preheat the Oven
While the dough chills, preheat your oven to 350°F (175°C). Don’t skip this step; a well-preheated oven is key to even-baked cookies. -
Scoop and Bake
Line baking sheets with parchment paper. Use a cookie scoop (or two spoons) to drop generous mounds of dough onto the baking sheet, spacing them about 2 inches apart. Bake for 10-12 minutes or until the edges are lightly golden but the centers are still soft. Remember, they will continue to cook as they cool! -
Cool and Enjoy
Once baked, let the cookies cool on the baking sheet for a few minutes before transferring them to a wire rack. Warm cookies are the best, especially with a glass of milk!
Serving Suggestions
These beautiful Monster Cookies are perfect for sharing! You can plate them on a festive 4th of July-themed platter or create individual servings in colorful paper bags tied with ribbon for picnics and gatherings. A scoop of vanilla ice cream on the side wouldn’t hurt either—think cookie ice cream sandwiches or simply a delicious accompaniment.
Recipe Variations
Want to customize your Monster Cookies? Here are a few fun variations:
-
Add Nuts: Throw in chopped pecans or walnuts for an extra crunch.
-
Nut Butter Swirl: Mix in a spoonful of peanut butter or almond butter for a nutty twist.
-
Fruit Frenzy: Swap the M&M’s for dried fruits like cranberries or cherries for a chewy, fruity flavor.
-
Spice It Up: Add a dash of cinnamon or nutmeg for a warm, comforting undertone.
Chef’s Notes
I’d be remiss if I didn’t mention that these Monster Cookies have a little history of their own in my kitchen! The recipe has evolved over time based on what’s in the pantry or what I’m craving. Sometimes I experiment with different types of chocolate or even add a sprinkle of sea salt on top right before baking. Do you get the urge to take a bite of your freshly baked cookies while standing over the cooling rack? Guilty as charged! It’s all about the joy of indulging in the fruits of your labor.
FAQs and Troubleshooting
-
Why did my cookies spread too much?
This can happen if the butter is too warm or if you didn’t chill the dough. Make sure to let your cookies rest before baking! -
How do I know when my cookies are done?
Look for edges that are set and a slightly soft center. They’ll continue to firm up while cooling on the baking sheet. -
Can I freeze the cookie dough?
Absolutely! You can scoop the dough into balls and freeze them on a baking sheet. Once frozen, transfer them to a ziplock bag for later baking—great for last-minute cravings! -
What should I do if my cookies turn out too dry?
Overmixing can lead to dry cookies. Make sure to mix until just combined and not too much after adding the flour.
Nutritional Info
While I love indulging during festivities, moderation is key! Here’s a rough outline for one cookie (based on 24 servings):
- Calories: 180
- Total Fat: 9g
- Carbohydrates: 24g
- Protein: 2g
- Fiber: 1g
And there you have it! Your ultimate guide to creating delicious 4th of July Monster Cookies—made with love, laughter, and a pinch of nostalgia. So this holiday season, gather your loved ones, tie on an apron, and whip up a batch of these delightful cookies. Remember, it’s all about creating memories around your table while enjoying the sweet rewards of baking together. Happy 4th of July!
Print4th of July Monster Cookies
Celebrate America’s birthday with these vibrant, chewy Monster Cookies bursting with flavors and colors. Perfect for sharing at summer gatherings!
- Prep Time: 15 minutes
- Cook Time: 12 minutes
- Total Time: 45 minutes
- Yield: 24 servings 1x
- Category: Dessert
- Method: Baking
- Cuisine: American
- Diet: Vegetarian
Ingredients
- 1 cup browned butter
- 1 cup brown sugar
- 1/2 cup granulated sugar
- 2 large eggs
- 1 teaspoon vanilla extract
- 2 cups all-purpose flour
- 1 teaspoon baking soda
- 1/2 teaspoon salt
- 1 cup chocolate chips
- 1/2 cup M&M’s
- 1/2 cup oats
Instructions
- Brown the Butter: Add the butter to a saucepan over medium heat. Let it melt and continue cooking until it turns golden brown, stirring occasionally to prevent burning. Remove from heat and let it cool.
- Combine Sugars: In a large mixing bowl, combine the cooled browned butter with brown sugar and granulated sugar. Beat until smooth and creamy, about 2-3 minutes.
- Add Eggs and Vanilla: Add in the eggs one at a time, mixing well after each addition. Pour in the vanilla extract and mix until incorporated.
- Mix Dry Ingredients: In a separate bowl, whisk together flour, baking soda, and salt. Gradually add to the wet ingredients, mixing until just combined.
- Fold in Chocolate and M&M’s: Gently fold in the chocolate chips, M&M’s, and oats until the batter is thick.
- Chill the Dough (Optional): Chill the dough for at least 30 minutes for thicker cookies.
- Preheat the Oven: While the dough chills, preheat your oven to 350°F (175°C).
- Scoop and Bake: Line baking sheets with parchment paper. Scoop mounds of dough onto the sheets, spaced about 2 inches apart. Bake for 10-12 minutes or until edges are lightly golden.
- Cool and Enjoy: Let the cookies cool on the baking sheet for a few minutes before transferring them to a wire rack.
Notes
For a fun twist, consider adding nuts or a swirl of nut butter. These cookies can also be frozen for later enjoyment.
Nutrition
- Serving Size: 1 cookie
- Calories: 180
- Sugar: 10g
- Sodium: 150mg
- Fat: 9g
- Saturated Fat: 5g
- Unsaturated Fat: 3g
- Trans Fat: 0g
- Carbohydrates: 24g
- Fiber: 1g
- Protein: 2g
- Cholesterol: 30mg
Keywords: Monster Cookies, 4th of July, festive cookies, baking, summer desserts
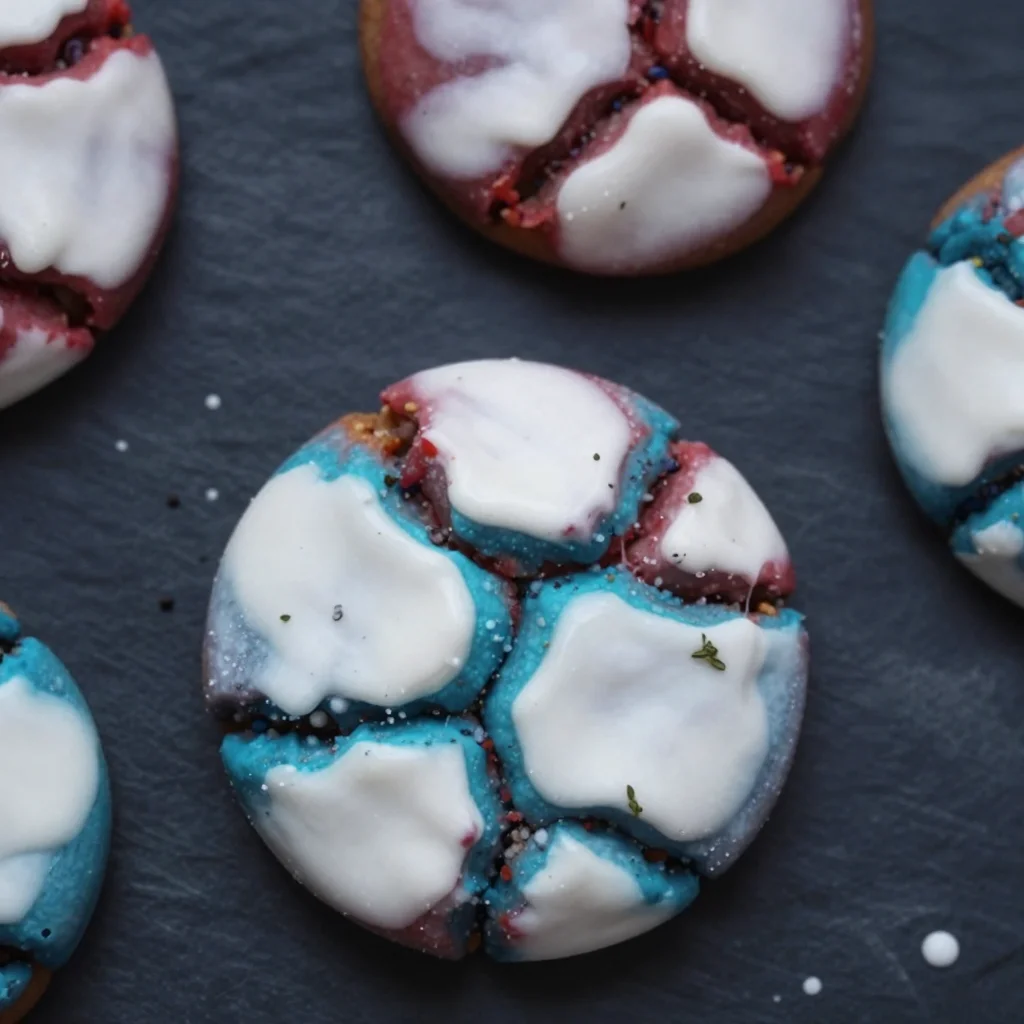
Patriotic Crinkle Cookies: 4th of July Treats in 30 Minutes
Patriotic Crinkle Cookies: A Celebration of Flavor and Fun!
Hello, fellow foodies! 🎉 Today, I’m super excited to share a delightful recipe that’s perfect for any festive gathering, especially those that celebrate our great nation! We’re diving into the world of Patriotic Crinkle Cookies — a whimsical treat that brings a splash of color and loads of flavor to your dessert table. These cookies are not just a feast for the eyes; they’re also incredibly easy to whip up and make a stunning statement at your next barbecue, picnic, or family gathering.
Introduction
Imagine a beautifully sunny day, the sound of laughter filling the air, and the aroma of grilling burgers wafting through the neighborhood. It’s a day to celebrate, to come together with friends and family, and what better way to do that than with some irresistible cookies? Patriotic Crinkle Cookies are not only deliciously chewy and soft but they come dressed up in vibrant red, white, and blue, making them the perfect sweet treat for holidays like the Fourth of July, Memorial Day, or Labor Day celebrations!
What’s great about crinkle cookies is their unique appearance — the way they crack and form lovely fissures as they bake. It’s like they’ve got a story to tell with every bite! They’re also incredibly versatile, allowing you to whip them up with kids or impress even the most discerning cookie lover at your gathering. Trust me when I say, you’ll have people asking for the recipe!
So, grab your apron, preheat that oven, and let’s get cooking! 🎉
Personal Story
As a child, I remember all the excitement that came with holiday celebrations. The sky filled with fireworks, the scent of delicious food wafting from the kitchen, and my mom bustling around, preparing everything to perfection. One of my fondest memories was the first time I helped her bake cookies for a Fourth of July barbecue. We made a simple sugar cookie dough, but with a twist of colors! That day was filled with laughter, flour fights, and the unmistakable joy of creating something scrumptious together.
I loved rolling the dough into balls and watching with glee as they baked, transforming into fluffy bites of happiness. Those cookies became the star of the dessert table, all colorful and crackly, just like our excitement. Fast forward to today, and I still savor that joy with each batch of Patriotic Crinkle Cookies I make, creating new memories while honoring those special times spent in the kitchen.
Ingredients
Let’s get everything you need to create these colorful cookies:
For the Dough:
- 2 cups (240g) all-purpose flour: The foundation of your cookies! All-purpose flour gives the right structure for that soft, chewy texture.
- 2 teaspoons baking powder: This helps your cookies rise and ensures they’re nice and fluffy.
- 1/2 teaspoon salt: Elevates the flavors and balances the sweetness.
- 1/2 cup (113g) unsalted butter, room temperature: Adds richness. If you don’t have unsalted butter, you can use salted butter; just cut back on the added salt.
- 1 cup (200g) granulated sugar: Sweetens the dough and gives that lovely crunch when you coat them in powdered sugar later.
- 2 large eggs, room temperature: Binds everything together. If you need an egg substitute, you can use flax eggs (1 tablespoon flaxseed meal + 2.5 tablespoons water = 1 egg).
- 2 teaspoons vanilla extract: A must for that warm, comforting flavor!
For the Coloring:
- Red gel food coloring: This is what gives our cookies their festive red hue. Gel food coloring is better than liquid because it won’t add extra moisture to the dough.
- Blue gel food coloring: Adds the patriotic pop of blue! Feel free to experiment with other colors for different themes.
For Coating:
- 1 cup (120g) powdered sugar: Creates that delightful, snowy coating that crinkles beautifully as the cookies bake.
Step-by-Step Instructions
Alright, let’s get to it! Here’s how to create these eye-catching cookies just like a pro.
-
Preheat the Oven and Prep: Preheat your oven to 350°F (175°C). Line two baking sheets with parchment paper. This ensures your cookies don’t stick and helps with even baking.
-
Combine the Dry Ingredients: In a medium bowl, whisk together the flour, baking powder, and salt. This combines the ingredients well and gets rid of any lumps. Set aside; we’ll come back to it shortly.
-
Cream the Butter and Sugar: In a large mixing bowl, using a hand mixer or a stand mixer fitted with a paddle attachment, beat the room temperature butter and granulated sugar until the mixture is light and fluffy, about 3-4 minutes. This step is crucial as it incorporates air into the batter, giving your cookies that perfect rise!
-
Add Eggs and Vanilla: Next, add the eggs one at a time, mixing well after each addition. Stir in the vanilla extract. This will create a creamy, smooth batter. A tip here: make sure your eggs are at room temperature for better emulsification!
-
Incorporate the Dry Mix: Slowly add your dry ingredient mixture to the butter mixture; mix until just combined. Overmixing will lead to dense cookies, so stop mixing as soon as you see no dry streaks.
-
Divide and Color: Now, here comes the fun part! Divide the dough equally into three bowls. In one bowl, add red gel food coloring until you reach your desired shade, in the second bowl, add blue gel color. Leave the third bowl plain. This is where the magic happens!
-
Form the Cookie Balls: Using a cookie scoop or your hands, form balls of dough, about 1 tablespoon each. Roll each ball in powdered sugar, ensuring they’re generously coated. This helps create that beautiful crinkled effect while baking.
-
Baking Time: Place the cookie balls onto your prepared baking sheets, arranging them a few inches apart to allow for spreading. Bake in the preheated oven for 10-12 minutes or until they are lightly golden around the edges. They may look underbaked, but they’ll continue to cook slightly on the baking sheet!
-
Cool Down: Allow the cookies to cool on the baking sheets for 5 minutes before transferring them to a wire rack to cool completely. Enjoy the aroma wafting through your kitchen; it’s heavenly!
Serving Suggestions
To serve your Patriotic Crinkle Cookies in style, stack them up on a joyful dessert platter or arrange them in a mason jar tied with a cute ribbon. Garnish with fresh berries or edible flowers for an extra touch of elegance. Pair them with a scoop of vanilla ice cream or serve with cold beverages like lemonade or iced tea for a delightful contrast of flavors.
Recipe Variations
Here are some fun variations to switch things up while keeping that patriotic spirit alive:
- Chocolate Chip Twist: Add a handful of semi-sweet chocolate chips to each dough color for an irresistible chocolatey burst!
- Nuts About It: Fold in chopped pecans or walnuts into the vanilla batter for an extra crunch.
- Sprinkled with Joy: Top each cookie ball with red, white, and blue sprinkles before baking for a festive touch!
- Vegan Option: Substitute butter with vegan butter and use flax eggs for a plant-based version.
- Gluten-Free Delight: Swap all-purpose flour for a 1:1 gluten-free baking blend to cater to gluten-free friends.
Chef’s Notes
Over the years, I’ve played with the original crinkle cookie recipe, experimenting with different flavors and colors. It’s incredible how a little twist can create something extraordinary! One of my favorite kitchen mishaps happened when I grabbed the wrong canister for flour — it was powdered sugar! Thanks to my curiosity, I made an accidental dessert that turned out to be surprisingly delightful! These memorable moments in the kitchen are what make cooking so much fun! It’s about experimenting, learning, and enjoying the process.
FAQs and Troubleshooting
Q1: My cookies turned out flat. What happened?
A1: Flat cookies can occur if your butter was too warm or melted before mixing. Make sure to use room temperature butter, not melted. Also, ensure you’re measuring the flour correctly (spoon and level method) to avoid using too little.
Q2: Can I freeze the dough for later use?
A2: Absolutely! You can freeze the dough balls before baking. Just wrap them tightly in plastic wrap and store in an airtight container for up to 3 months. Just add a couple of extra minutes to the baking time when you’re ready to bake them!
Q3: How can I store these cookies?
A3: Keep your cookies in an airtight container at room temperature for up to a week. If you want to keep them longer, consider freezing them in an airtight container or sealed plastic bag.
Q4: The coating is too thick. What can I do?
A4: If the powdered sugar coating seems excessive, try rolling the cookies a little less or simply brush off the excess sugar after coating. You want a dusting, not a thick layer.
Nutritional Info
(Per cookie, assuming 24 cookies):
- Calories: 110
- Carbs: 15g
- Protein: 1g
- Fat: 5g
- Sugar: 6g
Remember, these are just estimates; it’s always best to calculate your nutritional value based on specific brands and quantities!
And just like that, you’ve created delicious Patriotic Crinkle Cookies that are sure to steal the spotlight at your next gathering! Thanks for joining me in this culinary adventure. I can’t wait to hear how your cookies turn out! Happy baking and let’s keep celebrating with good food and great company! 🍪🎆
PrintPatriotic Crinkle Cookies
Delightful and colorful cookies perfect for celebrating patriotic holidays with a fun twist.
- Prep Time: 15 minutes
- Cook Time: 12 minutes
- Total Time: 27 minutes
- Yield: 24 cookies 1x
- Category: Dessert
- Method: Baking
- Cuisine: American
- Diet: Vegetarian
Ingredients
- 2 cups (240g) all-purpose flour
- 2 teaspoons baking powder
- 1/2 teaspoon salt
- 1/2 cup (113g) unsalted butter, room temperature
- 1 cup (200g) granulated sugar
- 2 large eggs, room temperature
- 2 teaspoons vanilla extract
- Red gel food coloring
- Blue gel food coloring
- 1 cup (120g) powdered sugar
Instructions
- Preheat the oven to 350°F (175°C) and line two baking sheets with parchment paper.
- Combine the flour, baking powder, and salt in a medium bowl and set aside.
- Cream the butter and sugar in a large mixing bowl until light and fluffy, about 3-4 minutes.
- Add the eggs one at a time, mixing well, then stir in the vanilla extract.
- Incorporate the dry mixture to the butter mixture until just combined.
- Divide the dough into three bowls, coloring one red, one blue, and leaving one plain.
- Form balls of dough, about 1 tablespoon each, and roll in powdered sugar.
- Bake for 10-12 minutes or until lightly golden around the edges.
- Cool on the baking sheets for 5 minutes before transferring to a wire rack to cool completely.
Notes
For variations, consider adding chocolate chips or nuts. The dough can be frozen for later use.
Nutrition
- Serving Size: 1 cookie
- Calories: 110
- Sugar: 6g
- Sodium: 50mg
- Fat: 5g
- Saturated Fat: 3g
- Unsaturated Fat: 2g
- Trans Fat: 0g
- Carbohydrates: 15g
- Fiber: 0g
- Protein: 1g
- Cholesterol: 20mg
Keywords: cookies, patriotic cookies, Fourth of July, dessert, baking
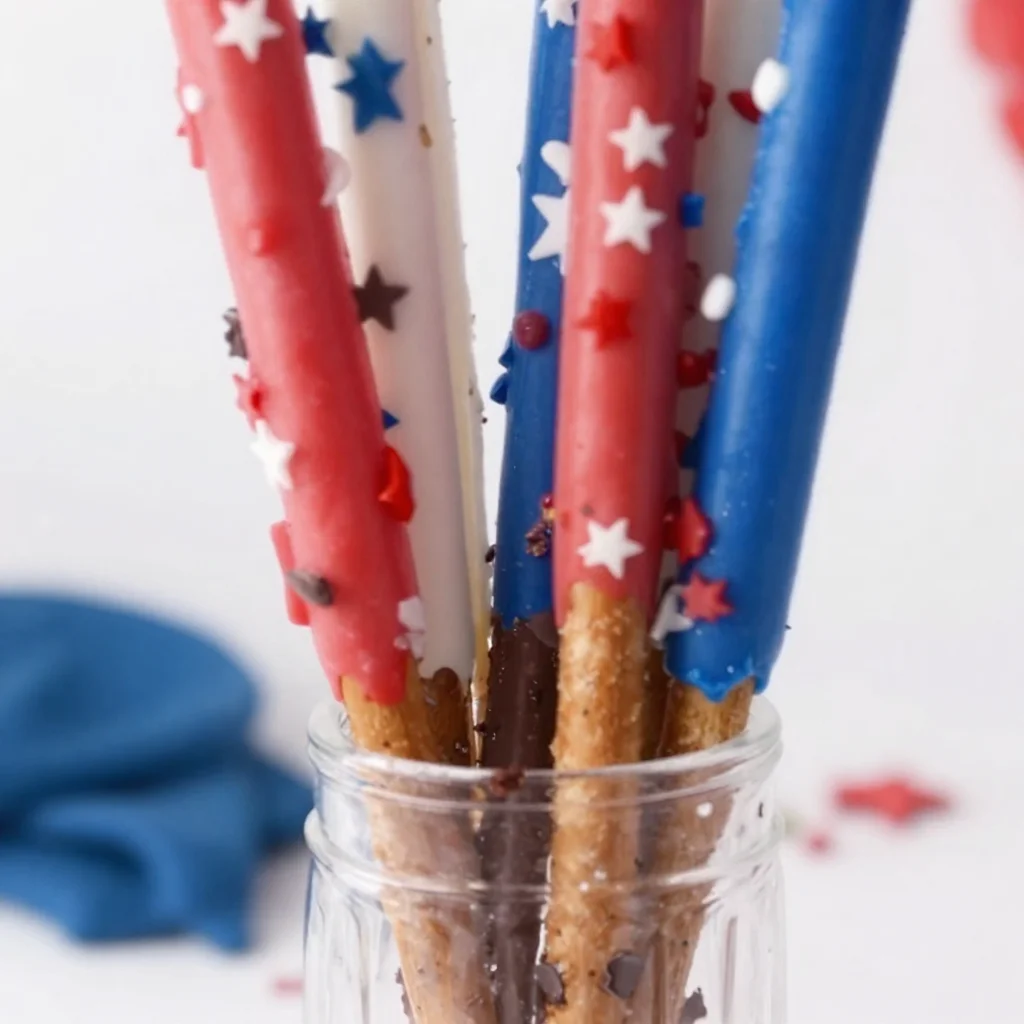
4th of July: No-Bake Patriotic Chocolate-Dipped Pretzel Rods
Patriotic Chocolate Dipped Pretzel Rods: A Festive and Fun Treat!
Ah, summer! The warm breeze, the sound of laughter echoing through backyards, and the joyful anticipation of holiday celebrations. One of my favorite summer holidays is the Fourth of July, filled with backyard barbecues, spectacular firework displays, and, of course, delicious food. This year, let’s add a touch of fun and flair to our festivities with a delightful and easy-to-make treat: Patriotic Chocolate Dipped Pretzel Rods!
These pretzel rods are the perfect blending of salty and sweet, providing the ideal crunch while being beautifully decorated in red, white, and blue. Not only are they festive and gorgeous to look at, but they’re also incredibly simple to whip up, making them an ideal project for little hands that want to help in the kitchen. Picture this: a mini kitchen assembly line filled with eager little chefs dipping pretzels, drizzling chocolate, and sprinkling star sprinkles. It’s a memory in the making!
As we dive into this recipe, I’ll share some personal stories, valuable tips, and everything you need to know to make these delightful treats. So gather around the kitchen, let’s create something beautiful and delicious to celebrate our great nation together!
A Nostalgic Bite
When I think of holiday treats that take me back in time, chocolate-covered pretzels instantly transport me to my childhood. Growing up, my mom would always involve us kids in the kitchen during holiday preparations. I remember a particular Fourth of July BBQ when we decided to create our own red, white, and blue snacks. Armed with pretzels, candy melts, and a little creativity, we made the messiest, most colorful chocolate-dipped pretzels.
The kitchen was filled with giggles as my siblings and I fought over who got to sprinkle the star decorations. In those moments, we didn’t just create delicious snacks; we built lasting memories. Today, I recreate that joyful chaos with my loved ones every year, and I hope these Patriotic Chocolate Dipped Pretzel Rods inspire you to do the same!
Ingredients
Here’s what you’ll need to create these festive snacks:
-
12 Pretzel Rods: You can find these in most grocery stores. They add a delightful crunch and salty balance to the sweetness of the chocolate. Plus, they’re the perfect size for little hands!
-
½ Cup Red Candy Melts: These are easy to find around holidays. If you can’t locate red, white, or blue melts, regular chocolate chips will work, but the vibrant colors of candy melts really make the presentation pop.
-
½ Cup Blue Candy Melts: Just like the red melts, feel free to substitute with other colors depending on the occasion. For instance, for a fall event, caramel or orange melts would be fantastic.
-
½ Cup White Candy Melts: White melts provide a beautiful contrast and a creamy sweetness. You could also use white chocolate chips if you prefer a real chocolate flavor, just melt them down carefully to avoid burning.
-
2 Tablespoons Patriotic Star Sprinkles: These charming little sprinkles add just the right touch of festivity. If you can’t find star sprinkles, go for any confetti or colored sprinkles! They’ll still add a playful flair.
Each ingredient carries a hint of tradition, a sprinkle of creativity, and a dash of nostalgia. Feel free to get creative as you prepare your pretzel rods!
Step-by-Step Instructions
Let’s dive into the fun part—preparing your Patriotic Chocolate Dipped Pretzel Rods!
-
Prepare Your Workspace: Grab a baking sheet and line it with parchment paper. This makes the cleanup easier and is crucial for letting your pretzel rods set without sticking.
-
Melt the Candy Melts: In microwave-safe bowls, place your red, white, and blue candy melts. Heat them in 30-second intervals, stirring in between, until they’re smooth and melted. Be cautious not to overheat—this can lead to a grainy texture. If you do, a splash of vegetable oil can help bring them back to a silky consistency!
-
Dip the Pretzel Rods: Once your melts are ready, it’s time for the fun part! Holding a pretzel rod, dip it into the colored candy melts about two-thirds of the way down. Allow any excess to drip off, and if you need a thicker coating, dip it again.
-
Sprinkle Away: Immediately after dipping, sprinkle the star sprinkles generously onto the wet chocolate. You’ll want to do this step quickly before the chocolate hardens, so enlist your little helpers here! Gently shake off any excess sprinkles if needed.
-
Set the Pretzel Rods: Place the decorated pretzel rod onto the lined baking sheet. Repeat this process with all your pretzel rods, mixing if you’d like to alternate colors.
-
Let Them Set: Once all your pretzel rods are dipped and decorated, let them sit at room temperature or pop them in the refrigerator for about 10-15 minutes to harden completely.
-
Pack Up and Enjoy: Once the chocolate has set, you can serve them immediately or package them nicely in cellophane bags tied with a ribbon for a delightful treat to share!
Cooking is all about taking your time and enjoying the process. Feel free to dance around your kitchen, sing a song, and soak in those memories while you create something delicious!
Serving Suggestions
To serve your Patriotic Chocolate Dipped Pretzel Rods, simply arrange them on a festive platter or into individual treat bags tied with red, white, and blue ribbons. You can even create a fun display by placing them in a decorative jar or a tall glass. Don’t forget to make some space for ice-cold lemonade or refreshing iced tea to complete the festive atmosphere.
Recipe Variations
Feel free to add your own twist with these variations:
-
Drizzle of Dark Chocolate: After dipping the pretzels in candy melts, drizzle some melted dark chocolate over the top for an extra chocolatey flavor.
-
Peanut Butter Twist: Dip your pretzels in melted peanut butter before covering them in candy melts for a deliciously nutty twist.
-
Texture Variety: Mix in crushed nuts or toffee bits with your sprinkles for added crunch and flavor dimension.
-
Seasonal Colors: Change the colors of the candy melts to fit different holidays. Green and red for Christmas, pastels for Easter—the possibilities are endless!
-
Dairy-Free Option: Use dairy-free chocolate chips or melts to make this recipe suitable for dairy allergies or preferences.
Chef’s Notes
Over the years, this recipe has evolved from simple, messy kitchen fun to a festive activity for friends and family. The smiles that come from dipping pretzels and the laughter that fills the room are priceless. I’ll never forget that one time we almost had a mini chocolate fight—let’s just say, chocolate makes everything more fun!
Each time I make these pretzel rods, I’m reminded of that nostalgia and how food binds us together. Whether you’re celebrating the Fourth of July, a birthday, or simply a sunny day, making these treats is about creating moments in the kitchen that you’ll cherish forever.
FAQs and Troubleshooting
Q1: My chocolate got hard before I dipped all the pretzels. What can I do?
A: No worries! You can reheat the chocolate in short intervals, stirring well between bursts. If it’s still too thick, add a teaspoon of vegetable oil to smooth it out!
Q2: Can I use regular chocolate chips instead of candy melts?
A: Absolutely! Just remember that chocolate chips won’t give you the vibrant colors you want. Make sure to melt them gently to avoid burning.
Q3: My pretzel rods broke during dipping! How can I prevent this?
A: Pretzel rods can be fragile. Make sure to dip them gently and not apply too much pressure. Dipping in small batches can also help.
Q4: How long can I store these pretzel rods?
A: These treats can last for about 1-2 weeks, stored in an airtight container at room temperature. If it’s really hot, consider refrigerating them to keep the chocolate firm!
Nutritional Info (optional)
For those counting calories or tracking nutrition, here’s a rough estimate per serving (1 pretzel rod):
- Calories: 120
- Total Fat: 7g
- Saturated Fat: 4g
- Carbohydrates: 14g
- Sugars: 9g
- Protein: 1g
These values can vary depending on the type of chocolate or substitutes you choose, so always check your specific ingredients for accurate info!
There you have it! Celebrate your next gathering with these fun and festive Patriotic Chocolate Dipped Pretzel Rods. They’re sure to be a hit, spark joy, and remind everyone to indulge in the simple pleasures of life and good food. Happy cooking!
PrintPatriotic Chocolate Dipped Pretzel Rods

These festive and easy-to-make pretzel rods are dipped in red, white, and blue chocolate, perfect for celebrating the Fourth of July.
- Prep Time: 15 minutes
- Cook Time: 10 minutes
- Total Time: 25 minutes
- Yield: 12 servings 1x
- Category: Dessert
- Method: Dipping
- Cuisine: American
- Diet: Vegetarian
Ingredients
- 12 Pretzel Rods
- ½ Cup Red Candy Melts
- ½ Cup Blue Candy Melts
- ½ Cup White Candy Melts
- 2 Tablespoons Patriotic Star Sprinkles
Instructions
- Prepare your workspace by lining a baking sheet with parchment paper.
- Melt the candy melts in microwave-safe bowls, heating in 30-second intervals until smooth.
- Dip each pretzel rod into the melted candy melts about two-thirds of the way down.
- Sprinkle star sprinkles onto the wet chocolate immediately after dipping.
- Set the decorated pretzel rods on the lined baking sheet.
- Let them sit at room temperature or refrigerate for about 10-15 minutes to harden completely.
- Pack up and enjoy your festive treats!
Notes
Feel free to get creative with colors and toppings to fit different holidays.
Nutrition
- Serving Size: 1 Pretzel Rod
- Calories: 120
- Sugar: 9g
- Sodium: 230mg
- Fat: 7g
- Saturated Fat: 4g
- Unsaturated Fat: 2g
- Trans Fat: 0g
- Carbohydrates: 14g
- Fiber: 1g
- Protein: 1g
- Cholesterol: 0mg
Keywords: patriotic treats, chocolate dipped pretzels, Fourth of July snacks, festive desserts