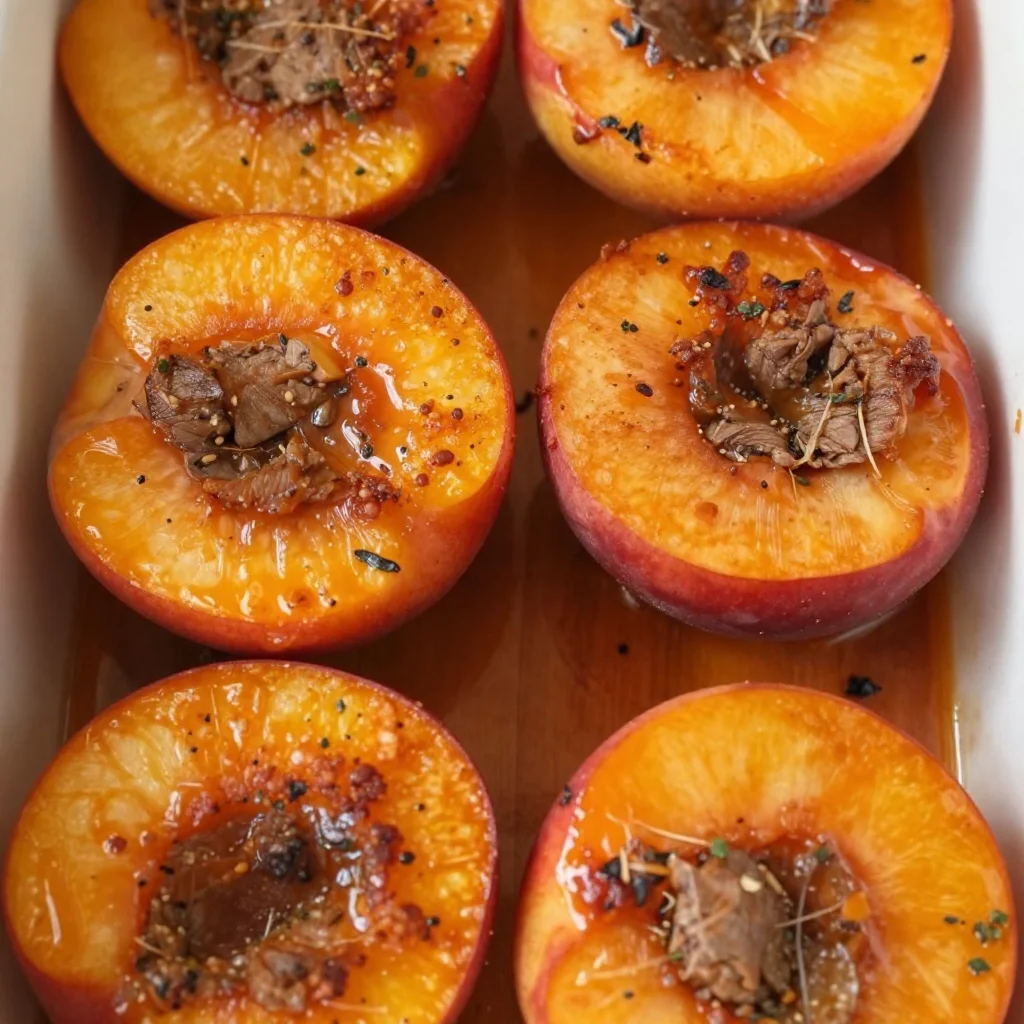
Summer-Ready Baked Nectarines with Vanilla Ice Cream
Baked Nectarines with Vanilla Ice Cream: A Summer Delight
Summer is the season that brings a wonderful cascade of vibrant fruits bursting with flavor—hydration, sweetness, and sunshine in every bite. Among those refreshing gifts of nature, nectarines hold a special place in my heart. Their delicate skin hides juicy, fragrant flesh that can transform effortlessly from a simple snack into an elegant dessert. Today, I’m thrilled to share my favorite recipe for Baked Nectarines with Vanilla Ice Cream that is sure to impress and delight your family and friends or serve as a special treat for yourself!
A Sweet Memory
I remember summer evenings at my grandmother’s house, where the air would be filled with the scent of freshly baked goods. Every Saturday, we’d gather in her kitchen, where we rolled up our sleeves and dug into batches of fruit crisps, pies, and all kinds of goodies. One summer, she introduced us to her baked nectarines, which she’d drizzle with honey and sprinkle with cinnamon—a combination that ignited my taste buds with joy.
Watching the nectarines caramelize in the oven made the anticipation even sweeter. And when she served them warm with a scoop of creamy vanilla ice cream, it was like magic on a spoon! Those cherished memories of laughter, learning, and indulging in summer’s bounty are why I adore this dessert. Today, I continue that tradition, making it for my family and friends, inviting them to create their own sweet memories around the table.
Ingredients
Here’s everything you’ll need for this delightful dish:
-
Nectarines: The stars of this dessert! Choose ripe, firm nectarines for the best flavor. If nectarines are hard to find, peaches make an excellent substitute.
-
Cinnamon: This warm spice adds a cozy, aromatic depth. If you’re not a fan, nutmeg or allspice are great alternatives.
-
Honey: A natural sweetener that enhances the nectarines’ flavor profile. You can swap it with maple syrup or agave nectar for a vegan option.
-
Vanilla Ice Cream: The rich creaminess balances out the warm, baked nectarines. For a dairy-free option, consider coconut or almond milk ice cream.
Step-by-Step Instructions
Now let’s get cooking! Follow these steps, and we’ll have those baked nectarines ready in no time!
-
Preheat Your Oven: Start by preheating your oven to 375°F (190°C). This will provide the perfect climate for our nectarines to become tender and caramelized.
-
Prepare the Nectarines: Wash your nectarines thoroughly and cut them in half. Remove the pit and place the halves cut side up in a baking dish. As you cut, let your knife glide through the flesh with ease, enjoying the vibrant juice that drips from each slice.
-
Sprinkle with Cinnamon: Generously sprinkle ground cinnamon over the nectarines. This spice not only enhances flavor but also creates a lovely aroma that will fill your kitchen. If you’re feeling adventurous, consider adding a tiny pinch of cayenne pepper for a surprising twist!
-
Drizzle with Honey: Now, take your honey and drizzle it all over the nectarines. Make sure to coat them generously, as it will create a delicious caramelization during baking. Remember, a little honey goes a long way in sweetening the dish, but feel free to adjust to taste.
-
Bake: Slide the baking dish into your preheated oven and bake for 20 to 25 minutes. Keep an eye on them; you want them to become soft and bubbly, with caramelizing edges—but not mushy! The nectarines are ready when they yield easily to a fork.
-
Serve: Remove the baking dish from the oven and let it cool for a few minutes. For the final touch, scoop a generous serving of vanilla ice cream on top of each warm nectarine half. The ice cream will melt into the warm fruit—pure bliss!
Serving Suggestions
To make this dish visually stunning, serve the baked nectarines on individual dessert plates. Don’t forget to drizzle some of the delicious syrup from the baking dish over the top and finish with a fresh mint leaf for a pop of color. It’s an elegant touch that elevates even the simplest dessert!
Recipe Variations
- Nutty Crumble: Add a sprinkle of granola or chopped nuts like almonds or pecans over the nectarines before baking for added crunch.
- Alcoholic Twist: Drizzle some bourbon over the nectarines before baking for an adult version that adds sophistication.
- Different Fruits: Feel free to mix it up! Try using plums, peaches, or even apples or pears for a delightful twist on this recipe.
- Herbal Infusion: Infuse your honey with fresh lavender or rosemary to add a unique herbal note!
- Vegan Delight: Swap the vanilla ice cream with a coconut or almond-based ice cream for a completely dairy-free treat.
Chef’s Notes
This isn’t just any ordinary dessert—it’s a canvas for creativity! Each time I make this recipe, I find myself experimenting with new combinations of spices and toppings. I’ve even served it with a splash of dessert wine for a fun weekend gathering. Plus, it’s super adaptable to whatever fruit is in season! So don’t hesitate to play and make this dessert your own.
FAQs and Troubleshooting
1. How ripe should my nectarines be?
You want them slightly firm but not hard—like with peaches, go for a little give when you gently squeeze them. Avoid completely squishy ones, as they’ll turn to mush in the oven.
2. Can I make this dish in advance?
While baked nectarines are best served fresh, you can prepare them up to the baking step and store them in the fridge. When you’re ready, just pop them in the oven!
3. My nectarines turned out mushy. What did I do wrong?
Overbaking can cause your nectarines to become mushy. Keep a close eye on them during the cooking process; once fork-tender and bubbly, it’s time to take them out!
4. Can I use frozen nectarines?
While fresh is ideal, you can indeed use frozen ones! Just be sure to thaw them and drain off excess liquid before proceeding with the recipe to avoid a soggy result.
Nutritional Info
This dessert is all about balance. Each serving offers a delightful combination of fresh fruit, natural sugars, and creamy goodness. While I won’t dive into specific nutritional values today, it’s safe to say that this sweet treat is a lovely way to indulge while enjoying the health benefits of fruit!
Conclusion
As summer reaches its peak, delight in the pleasures of simple, beautiful desserts that bring joy to your table. Baked Nectarines with Vanilla Ice Cream showcase the best of summer flavors while being easy enough for any culinary enthusiast! Remember, this recipe is all about the experience—so gather your loved ones, tie on your apron, and let the good times roll!
I can’t wait to hear your stories as you bring this recipe to life. Remember, cooking is about connection, sharing, and those beautiful moments that make life richer. Happy cooking!
PrintBaked Nectarines with Vanilla Ice Cream
A delicious dessert featuring juicy nectarines baked to perfection and served warm with creamy vanilla ice cream.
- Prep Time: 15 minutes
- Cook Time: 25 minutes
- Total Time: 40 minutes
- Yield: 4 servings 1x
- Category: Dessert
- Method: Baking
- Cuisine: American
- Diet: Vegetarian
Ingredients
- 4 ripe nectarines
- 1 tsp ground cinnamon
- 2 tbsp honey
- Vanilla ice cream for serving
Instructions
- Preheat your oven to 375°F (190°C).
- Prepare the nectarines by washing them and cutting them in half; remove the pit.
- Sprinkle ground cinnamon over the nectarines.
- Drizzle honey all over the nectarines.
- Bake for 20 to 25 minutes until soft and bubbly.
- Serve with a generous scoop of vanilla ice cream on top.
Notes
For a vegan option, substitute honey with maple syrup or agave nectar, and use dairy-free ice cream.
Nutrition
- Serving Size: 1 serving
- Calories: 280
- Sugar: 22g
- Sodium: 25mg
- Fat: 8g
- Saturated Fat: 4g
- Unsaturated Fat: 3g
- Trans Fat: 0g
- Carbohydrates: 49g
- Fiber: 3g
- Protein: 3g
- Cholesterol: 30mg
Keywords: baked nectarines, dessert, summer recipe, vanilla ice cream, easy dessert
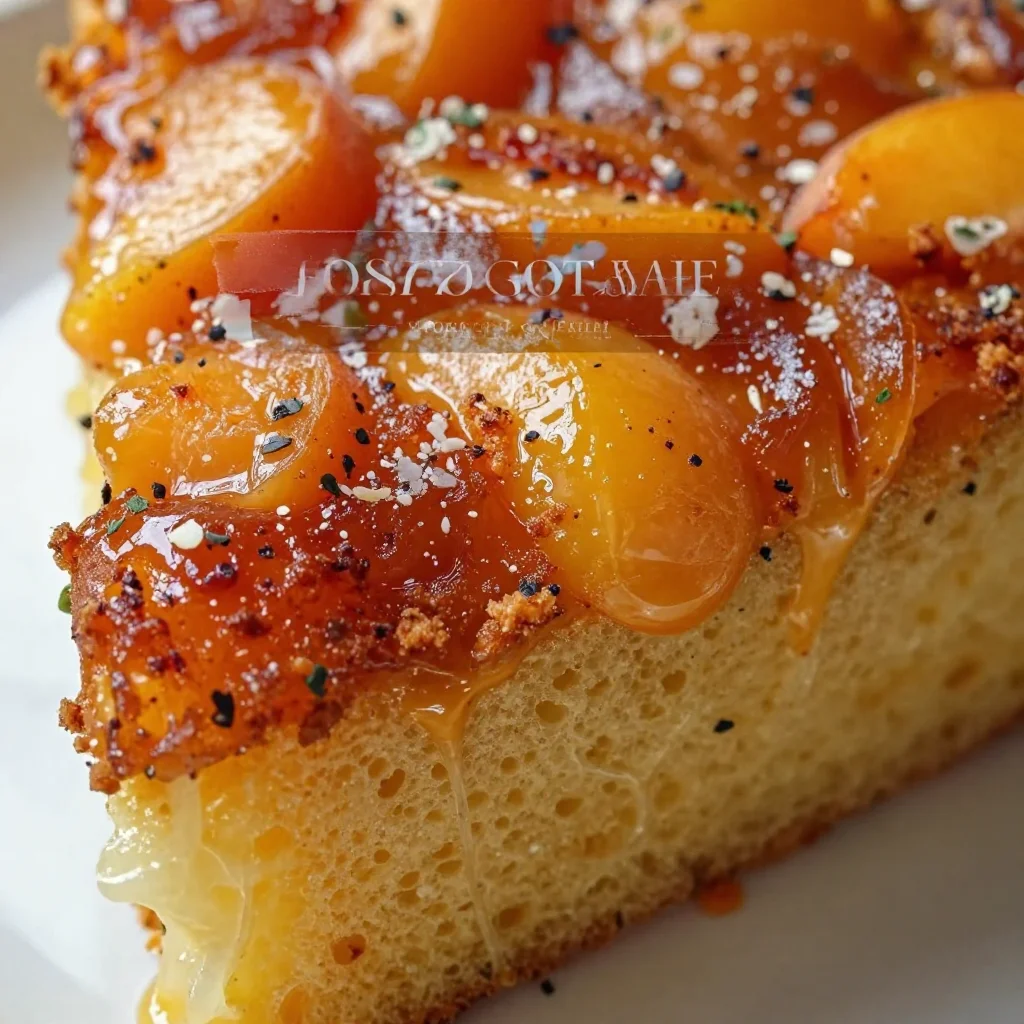
Minute Peach Upside-Down Cake for Summer Moments
Peach Upside Down Cake That Will Delight Your Taste Buds!
Hello, fellow food lovers! Today, I’m thrilled to share a recipe that’s not only a feast for the senses but also a nostalgic journey back to my childhood. Let’s dive into the world of Peach Upside Down Cake—a dessert that elegantly combines the luscious sweetness of ripe peaches with a moist and fluffy cake. If you’ve never tried making an upside-down cake before, don’t worry! I’ll guide you through it step-by-step, all with a sprinkle of joy and a dash of laughter.
A Slice of Nostalgia
Growing up in a household where culinary creativity was always encouraged, desserts were a cherished event in our family. I distinctly remember my grandmother’s kitchen, where the air was always rich with the scent of baked goods—especially when ripe peaches were in season. One particularly hot summer day, my grandmother decided to whip up her famous Peach Upside Down Cake. She’d sing while she mixed the batter, her sweet voice harmonizing with the sound of the oven timer.
As the cake baked, I ventured outside to pick fresh peaches from the tree in our backyard. I remember the sun shining down, making the peaches feel like little suns themselves—so juicy and sweet! When I returned, the kitchen was filled with this beautiful aroma that made my mouth water. The cake was golden brown, the peaches glistening like jewels atop a fluffy base. Sharing those sweet moments with my family ignited my passion for cooking and shaped my desire to create beautiful memories in the kitchen.
Let’s recreate that magic together!
Ingredients
Here’s what you’ll need to make this delightful Peach Upside Down Cake:
-
4 ripe peaches, sliced
- Look for peaches that yield slightly to pressure, indicating ripeness. You can substitute with nectarines or plums for a twist!
-
1/2 cup unsalted butter
- Unsalted butter gives you control over the saltiness. If you’re using salted butter, just reduce the added salt in the recipe by half.
-
1 cup brown sugar
- Brown sugar adds depth and a slight molasses flavor. Feel free to use coconut sugar for a healthier alternative.
-
1 1/2 cups all-purpose flour
- This is your base! If you need a gluten-free option, gluten-free all-purpose flour blends work well.
-
1 cup granulated sugar
- Granulated sugar ensures a light, fluffy cake texture. If you prefer less sweetness, you can reduce the amount by 1/4 cup.
-
3/4 cup milk
- Full-fat milk enhances creaminess, but you can substitute with almond milk or oat milk for a dairy-free version.
-
3 large eggs
- Eggs help with structure and moisture. For a vegan option, replace each egg with 1/4 cup unsweetened applesauce.
-
2 teaspoons baking powder
- This is the leavening agent that makes the cake rise. Ensure it’s fresh for optimal results!
-
1 teaspoon vanilla extract
- Vanilla extract adds warmth and richness. Feel free to use vanilla bean paste for a luxurious touch.
-
1/2 teaspoon salt
- A pinch of salt enhances all the flavors. It’s essential in sweet dishes!
Step-by-Step Instructions
-
Preheat the Oven:
Preheat your oven to 350°F (175°C). A hot oven is key to getting that perfect rise! -
Prepare the Pan:
In a 9-inch round cake pan, melt the unsalted butter over low heat on the stovetop or in the microwave. Once melted, sprinkle the brown sugar evenly over the butter. This serves as your caramel base. -
Arrange the Peaches:
Layer the sliced peaches on top of the brown sugar mixture—getting creative with your arrangement. This is where you can express yourself! Set aside the pan to cool slightly. -
Mix Dry Ingredients:
In a medium bowl, whisk together the all-purpose flour, baking powder, and salt. This helps distribute the leavening agent, ensuring an even rise. -
Cream Butter and Sugars:
In a large mixing bowl, beat the granulated sugar and half of the melted butter with an electric mixer until creamy. This should take about 2-3 minutes. -
Add Eggs and Vanilla:
Add the eggs, one at a time, beating well after each addition. Don’t forget to stir in the vanilla extract! -
Combine the Mixtures:
Gradually add the dry ingredients to the wet mixture alternately with milk. Start and end with the flour mixture, mixing just until combined—overmixing can lead to a dense cake. -
Pour Batter Into Pan:
Carefully pour the batter over the arranged peaches and spread it evenly using a rubber spatula. -
Bake:
Place the pan in the preheated oven and bake for about 45-50 minutes or until a toothpick inserted into the center comes out clean. The top should be a golden brown, and your kitchen will smell heavenly! -
Cool and Flip:
Allow the cake to cool in the pan for about 10-15 minutes. Then, carefully invert it onto a serving plate. If any peaches stick, simply replace them back on top—imperfections add character!
Serving Suggestions
To serve, dust the top of the cake with powdered sugar or a dollop of whipped cream for an extra touch of elegance. Pair it with a scoop of vanilla ice cream, and you have a dessert that’s worthy of any gathering or just a cozy night in!
Recipe Variations
Looking to mix things up? Here are a few tasty twists on this classic:
-
Spiced Peach Variation: Add a teaspoon of ground cinnamon and a pinch of nutmeg to the batter for a spiced version that will tear through cold winter nights.
-
Tropical Twist: Swap out the peaches for mango or pineapple for a refreshing tropical flair.
-
Nutty Crunch: Add chopped walnuts or pecans to the batter or sprinkle on top just before baking for a delightful crunch.
-
Berry Fusion: Incorporate blueberries or raspberries with the peaches for a mixed berry upside down cake that bursts with flavor.
-
Lemon Zest: Add the zest of one lemon to the batter for a bright, fresh flavor!
Chef’s Notes
This recipe has been a beloved staple in my kitchen for years, evolving as I’ve experimented with different fruits and flavor combinations. I once tried making this cake with apricots, which turned out beautifully! There’s something so comforting about a cake that feels both rustic and refined. And hey, a little mishap—like dropping a few peaches on the floor—can turn into laughter shared with loved ones.
FAQs and Troubleshooting
1. Why is my cake dense?
Overmixing can lead to a dense texture. Mixing just until combined is key to a light and fluffy cake!
2. Can I use frozen peaches?
Absolutely! Just make sure to thaw them and pat them dry to avoid excess moisture.
3. My peaches turned brown on top. What happened?
Peaches are prone to browning. Make sure they’re young and ripe—if they’re too soft, they’ll break down during baking.
4. How do I store leftovers?
Keep the cake covered at room temperature for a day or two, or refrigerate it in an airtight container to last up to a week.
Nutritional Info (optional)
Disclaimer: Nutritional values are estimates and may vary based on ingredients used.
- Serving Size: 1 slice (1/12 of recipe)
- Calories: Approximately 320
- Total Fat: 10g
- Saturated Fat: 5g
- Cholesterol: 75mg
- Sodium: 180mg
- Total Carbohydrates: 52g
- Dietary Fiber: 1g
- Sugars: 30g
- Protein: 4g
So there you have it, my delightful Peach Upside Down Cake! Tie on your apron, gather some friends, and let’s make memories that are as sweet as this wonderful dessert. Trust me, your taste buds will thank you! Happy baking!
PrintPeach Upside Down Cake
A delightful Peach Upside Down Cake that combines fresh peaches with a moist and fluffy cake for a nostalgic dessert experience.
- Prep Time: 15 minutes
- Cook Time: 50 minutes
- Total Time: 65 minutes
- Yield: 12 servings 1x
- Category: Dessert
- Method: Baking
- Cuisine: American
- Diet: Vegetarian
Ingredients
- 4 ripe peaches, sliced
- 1/2 cup unsalted butter
- 1 cup brown sugar
- 1 1/2 cups all-purpose flour
- 1 cup granulated sugar
- 3/4 cup milk
- 3 large eggs
- 2 teaspoons baking powder
- 1 teaspoon vanilla extract
- 1/2 teaspoon salt
Instructions
- Preheat your oven to 350°F (175°C).
- In a 9-inch round cake pan, melt the unsalted butter over low heat and sprinkle the brown sugar evenly over the butter.
- Layer the sliced peaches on top of the brown sugar mixture.
- In a medium bowl, whisk together the all-purpose flour, baking powder, and salt.
- Beat the granulated sugar and half of the melted butter until creamy.
- Add the eggs, one at a time, beating well after each addition, then stir in the vanilla extract.
- Gradually add the dry ingredients to the wet mixture alternately with milk.
- Carefully pour the batter over the arranged peaches.
- Place the pan in the preheated oven and bake for about 45-50 minutes.
- Allow the cake to cool in the pan for about 10-15 minutes before inverting it onto a serving plate.
Notes
For serving, dust with powdered sugar or top with whipped cream and a scoop of vanilla ice cream. Store leftovers covered at room temperature or in the refrigerator for up to a week.
Nutrition
- Serving Size: 1 slice
- Calories: 320
- Sugar: 30g
- Sodium: 180mg
- Fat: 10g
- Saturated Fat: 5g
- Unsaturated Fat: 4g
- Trans Fat: 0g
- Carbohydrates: 52g
- Fiber: 1g
- Protein: 4g
- Cholesterol: 75mg
Keywords: peach cake, upside down cake, summer dessert, easy cake recipe, nostalgic dessert
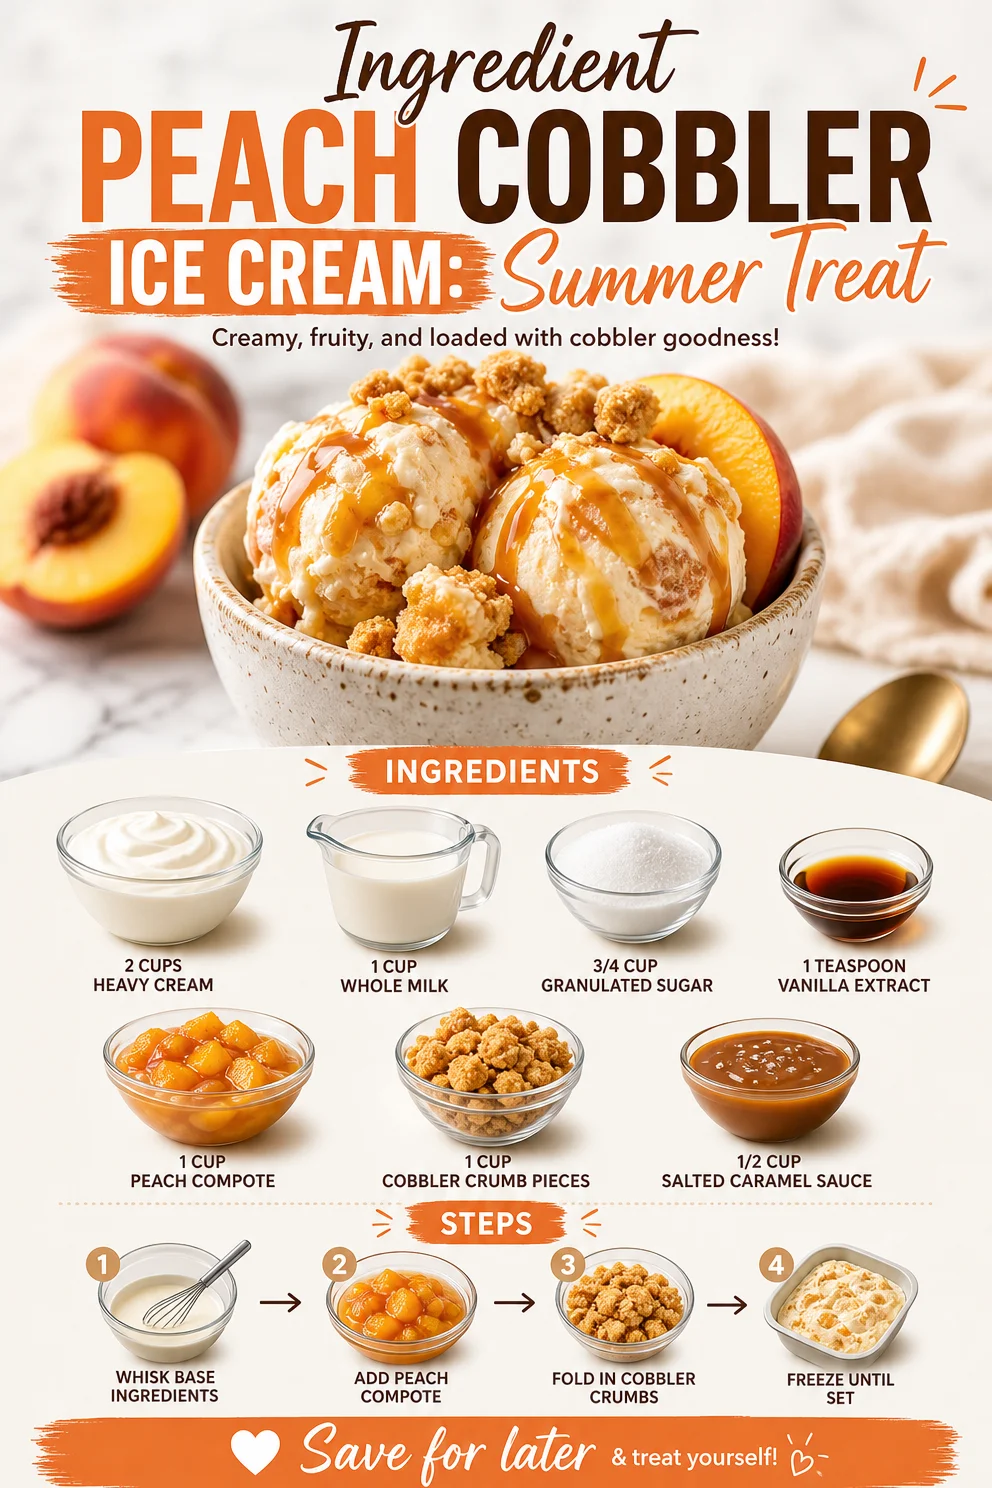
Ingredient Peach Cobbler Ice Cream: Summer Treat
Scoops of Summer: Peach Cobbler Ice Cream Bliss
Hello there, my fellow food enthusiasts! Today, I’m bringing you a delightful sweet treat that perfectly captures the essence of summer: Peach Cobbler Ice Cream. Picture this: warm, sunny days filled with laughter, friends gathered around, and you, the star of the show, serving up scoops of creamy goodness infused with the taste of sweet peaches and baked cobbler. Sounds dreamy, right?
Why Peach Cobbler Ice Cream?
Peaches are one of summer’s greatest gifts. Juicy, succulent, and bursting with flavor, they remind me of lazy afternoons spent in my grandmother’s backyard, where she’d serve us homemade peach cobbler fresh from the oven. That crispy, buttery crust paired with the warmth of vanilla ice cream made it an unbeatable summer dessert. As I grew older and started experimenting in my own kitchen, the idea popped into my head: why not merge those two summer staples into one heavenly dessert? Thus, Peach Cobbler Ice Cream was born—a treat that brings back those sweet memories while keeping things vibrant and fun.
You’ll appreciate how effortless this recipe is to whip up at home using simple ingredients that elevate a classic cobbler with velvety ice cream. And trust me, once you make this, you’ll find yourself indulging in it long after summer fades away.
The Ingredients You’ll Need
Let’s talk about the star players of this dessert. Each ingredient is chosen for its role in delivering that beloved peach cobbler flavor. Here’s what you’ll need:
-
2 cups heavy cream
- This is the base of your ice cream, giving it that rich, creamy texture. If you prefer a lighter option, you can substitute half of this with coconut cream!
-
1 cup whole milk
- Whole milk adds a perfect balance of creaminess without being overly rich. Feel free to use low-fat milk, but do note that the texture may be less creamy.
-
3/4 cup granulated sugar
- Sugar is essential for sweetness and to help prevent ice crystals from forming, giving a smoother texture. You can try using a sugar alternative like honey or agave if you’re looking to cut out refined sugar.
-
1 teaspoon vanilla extract
- Vanilla enhances the flavor of the ice cream, making it taste homemade and oh-so-delicious. High-quality pure vanilla extract yields the best results; it’s totally worth it!
-
1 cup peach compote
- This will be your rich, peachy layer. You can make your own compote with fresh peaches or buy a jar from your favorite store. Make sure it’s flavorful and sweet.
-
1 cup cobbler crumb pieces
- Nothing says cobbler like those little bits of buttery, crispy goodness. Use leftover cobbler, or crumble up your favorite biscuit recipe as a topping.
-
1/2 cup salted caramel sauce
- This is the pièce de résistance! It adds a luxe touch while balancing the sweetness of the peaches. Don’t skimp on this step; homemade or store-bought works fabulously.
Step-by-Step Instructions
Now, let’s dive into the magic of making this Peach Cobbler Ice Cream! The process is straightforward and will have your kitchen smelling divine.
-
Prepare the Peach Compote
If you’re starting from scratch, peel and chop about 4 ripe peaches and cook them over medium heat with a bit of sugar (about 2 tablespoons) until they break down and become syrupy (around 10-15 minutes). Allow it to cool. -
Mix the Base
In a large mixing bowl, combine the heavy cream, whole milk, and granulated sugar. Whisk until the sugar dissolves completely. It’s important to mix until you don’t see any granules of sugar; this ensures a silky ice cream. -
Add the Flavor
Stir in the vanilla extract and peach compote, mixing well. The vibrant orange-peach color is a sure sign that you’re headed in the right direction! To intensify the peach flavor, you can add an extra splash of peach nectar if you’d like. -
Chill the Mixture
Cover your bowl with plastic wrap and refrigerate the mixture for at least 2 hours (or even overnight!). This helps develop flavor and ensures your ice cream churns up nice and creamy. -
Churn the Ice Cream
Once chilled, pour the mixture into your ice cream maker. Follow your manufacturer’s instructions: typically, this takes about 20-30 minutes until it thickens. -
Incorporate Cobbler Crumbs
Near the end of churning, add the cobbler crumb pieces to the mix. These delicious bits will make your ice cream feel like a true cobbler experience. If you like a swirl instead, just fold them in gently after churning. -
Transfer to a Container
Scoop your ice cream into a lidded container, layering in additional cobbler crumbs as you go if you want extra crunch. Drizzle all that caramel sauce over the top like an artistic drizzle! This will ensure every scoop has that divine caramel flavor. -
Freeze Until Firm
Cover the container and pop it into the freezer for at least 4 hours, or until it’s firm enough to scoop. Patience is key here, but it’ll be so worth it when you dig in!
Serving Suggestions
When it comes time to serve your Peach Cobbler Ice Cream, a little presentation goes a long way. Serve in rustic bowls or elegant dessert cups, and don’t forget to drizzle a little extra salted caramel on top for that mouth-watering finish. Garnish with fresh peach slices and crushed cobbler crumbs for added flair. You can also add a sprig of mint for a pop of color!
Recipe Variations
Feeling adventurous? Here are some creative tweaks to customize your Peach Cobbler Ice Cream:
- Frozen Yogurt Twist: Swap half the heavy cream for Greek yogurt for a tangy and creamy texture.
- Berry Blend: Mix in some fresh or frozen berries (like blueberries or raspberries) with the peach compote for added color and flavor.
- Nutty Crunch: Throw in some chopped pecans or almonds during the churning process for an irresistible crunch.
- Pre-Made Mixes: Use store-bought seasonal fruit compotes instead of making your own. Set yourself up for easy and quick enjoyment!
- Tropical Vibe: Incorporate coconut flakes and perhaps a hint of lime juice for a tropical twist to your summer favorite.
Chef’s Notes
As a passionate home cook, I’ve seen my recipes evolve over the years. Peach Cobbler Ice Cream is a reflection of that growth—a recipe that started as simply a craving for summer comfort food but morphed into a beloved centerpiece at gatherings. The beauty of cooking is experimentation; don’t hesitate to tweak it until it feels just right for you! O, and children absolutely adore this; you’ll definitely get requests for seconds—and thirds, I promise you that!
FAQs and Troubleshooting
-
Why is my ice cream icy?
Ice crystals can form if not enough sugar is added. Ensure you’re mixing the sugar well and consider adding a bit more if your mixture doesn’t taste sweet enough. -
How do I get a smoother texture?
Ensure your base is chilled thoroughly and churn it until it thickens well. Over-churning can lead to icy textures; know when to stop! -
Can I make this without an ice cream maker?
Absolutely! After mixing everything, pour it into a container and freeze. Stir every 30 minutes for the first 2-3 hours to break up ice crystals and create a creamier texture. -
How long does this ice cream last?
Typically, it’ll last about 2 weeks in the freezer. But let’s be real—isn’t ice cream always better fresh?
Nutritional Info
For those keeping an eye on nutritional intake, here’s a rough estimate per serving (based on eight servings):
- Calories: 400
- Total Fat: 25g
- Saturated Fat: 15g
- Carbohydrates: 45g
- Sugars: 35g
- Protein: 3g
Now that you’re all set to make this Peach Cobbler Ice Cream, know that each scoop brings back memories and creates new ones. Whether it’s a summer gathering or cozy night at home, this dessert is sure to brighten your day. So, tie on that cute apron, grab some friends, and let’s create something timeless! Enjoy! 🍑🍦
PrintPeach Cobbler Ice Cream

A delightful summer treat that combines the flavors of peach cobbler and creamy ice cream.
- Prep Time: 15 minutes
- Cook Time: 15 minutes
- Total Time: 240 minutes
- Yield: 8 servings 1x
- Category: Dessert
- Method: Churning
- Cuisine: American
- Diet: Vegetarian
Ingredients
- 2 cups heavy cream
- 1 cup whole milk
- 3/4 cup granulated sugar
- 1 teaspoon vanilla extract
- 1 cup peach compote
- 1 cup cobbler crumb pieces
- 1/2 cup salted caramel sauce
Instructions
- Prepare the peach compote by peeling and chopping peaches, then cook with sugar until syrupy.
- Mix the heavy cream, whole milk, and sugar in a bowl until sugar dissolves.
- Add the vanilla extract and peach compote, stirring to combine.
- Chill the mixture in the refrigerator for at least 2 hours.
- Churn the mixture in an ice cream maker according to the manufacturer’s instructions.
- Incorporate the cobbler crumbs near the end of churning.
- Transfer the ice cream to a lidded container, layering in extra crumbs if desired.
- Freeze for at least 4 hours until firm.
Notes
Serve in rustic bowls garnished with fresh peach slices, crushed cobbler crumbs, and a drizzle of salted caramel.
Nutrition
- Serving Size: 1 serving
- Calories: 400
- Sugar: 35g
- Sodium: 100mg
- Fat: 25g
- Saturated Fat: 15g
- Unsaturated Fat: 5g
- Trans Fat: 0g
- Carbohydrates: 45g
- Fiber: 1g
- Protein: 3g
- Cholesterol: 80mg
Keywords: peach cobbler, ice cream, summer dessert, frozen treat, homemade dessert
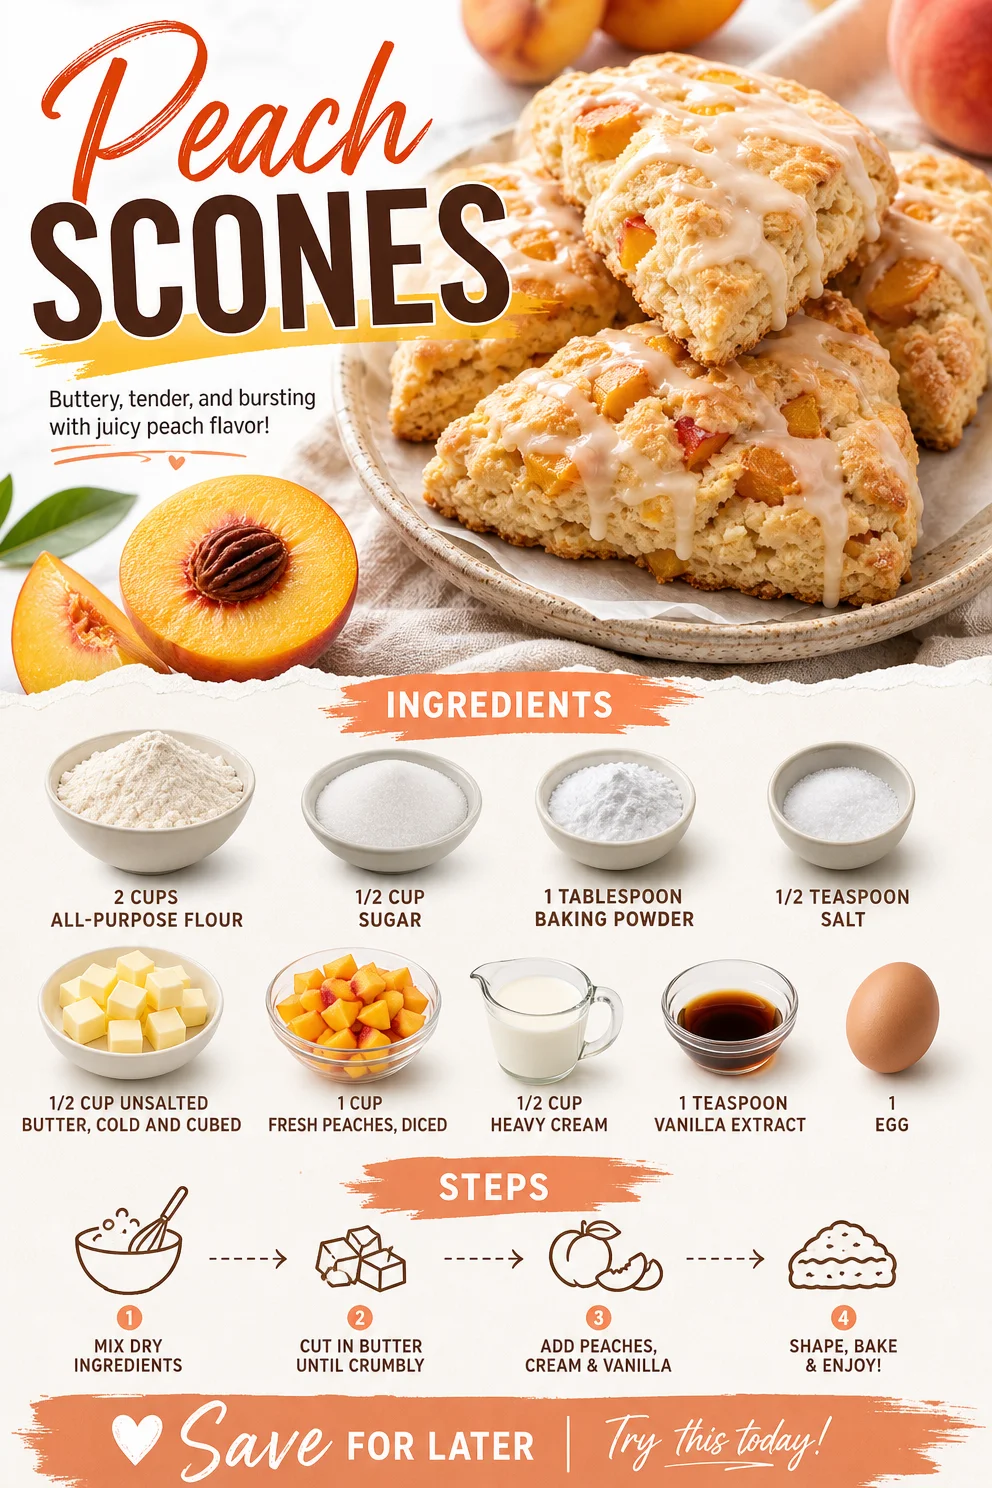
Peach Scones
The Sweetest Slice of Summer: Peach Scones
Welcome back to Ivory Apron, my cooking haven where elegance meets simplicity! Today, I’m thrilled to share one of my absolute favorite recipes: Peach Scones. There’s just something so heartwarming about biting into a warm scone, fresh out of the oven, especially when it’s bursting with juicy peach goodness. This recipe is perfect for a leisurely weekend brunch, a delightful afternoon tea, or even a special gathering with friends. So, let’s tie on our aprons and dive into this sweet adventure!
My Whimsical Peach Memory
Peaches have always held a special place in my heart. I fondly remember summer weekends at my grandparents’ house, where the air was filled with the sweet scent of ripe peaches from the tree in their backyard. My grandmother would gather us around the kitchen, and while we played underfoot, she’d whip up her irresistible peach cobbler. Oh, the joy of eating those juicy, sun-kissed peaches combined with the warmth of her laughter and the aromatic warmth of baked goods wafting through the kitchen!
Fast forward to today, and peaches still evoke that same nostalgia. They remind me that cooking is so much more than just following a recipe; it’s about creating memories and bringing loved ones together. This Peach Scone recipe draws inspiration from my grandmother’s kitchen, infusing it with a touch of elegance, proving that you don’t need a special occasion to indulge in deliciousness!
Ingredients
Let’s gather our ingredients for these delightful Peach Scones:
- 2 cups all-purpose flour: The backbone of any scone. You can substitute with whole wheat flour for a nuttier flavor or a gluten-free blend to suit different dietary needs.
- 1/2 cup sugar: This sweetens the dough just right. If you prefer a healthier option, consider natural sweeteners like honey or maple syrup; just adjust the liquid content accordingly.
- 1 tablespoon baking powder: This is our leavening agent, helping the scones rise. Make sure it’s fresh for optimal fluffiness; old baking powder can doom your scones to a flat fate.
- 1/2 teaspoon salt: A little bit of salt enhances all flavors, bringing the sweetness of the peaches forward.
- 1/2 cup unsalted butter, cold and cubed: Butter is essential for flakiness! If you’re in a pinch, coconut oil works well; just ensure it’s cold too.
- 1 cup fresh peaches, diced: Fresh peaches are essential! They add moisture and flavor, but you can swap them for nectarines or even mixed berries for a different twist.
- 1/2 cup heavy cream: This gives the scones a rich texture. Greek yogurt or a non-dairy cream can be used as alternatives.
- 1 teaspoon vanilla extract: Adds depth and warmth. Homemade vanilla extract can elevate the flavor even further.
- 1 egg: Used for richness and helping to bind everything together. If you’re vegan, a flax egg can work here (mix 1 tablespoon ground flaxseed with 2.5 tablespoons water)!
Step-by-Step Instructions
Alright, let’s get baking! Follow these detailed steps for perfectly golden peach scones.
-
Preheat the Oven: Preheat your oven to 400°F (200°C). This ensures your scones begin baking in the ideal hot environment, promoting a lovely rise!
-
Mix the Dry Ingredients: In a large mixing bowl, whisk together the flour, sugar, baking powder, and salt until they’re well combined. Chef Tip: Make sure to sift the flour to avoid clumps – this helps create a lighter texture.
-
Cut in the Butter: Add the cold, cubed butter to the flour mixture. Using a pastry cutter or your fingertips, quickly mix the butter into the flour until it resembles coarse crumbs. Little Hack: It’s key to keep the butter cold – this is what gives your scones their flaky layers, so try to work quickly!
-
Toss in the Peaches: Gently fold in the diced peaches. Commentary: The gesture of stirring should be gentle; you don’t want to bruise your lovely peaches too much.
-
Combine Wet Ingredients: In a separate bowl, whisk together the heavy cream, egg, and vanilla extract until smooth. Slowly pour this mixture into your dry ingredients, stirring until just combined. Tip: Do not overmix! The dough should be a tad sticky; that’s perfectly okay!
-
Shape the Dough: On a lightly floured surface, turn out the dough. Pat it into a circle about 1-inch thick; it doesn’t have to be perfect! Using a sharp knife or a bench scraper, cut the dough into 8 triangles. Chef Insight: If you prefer round scones, use a biscuit cutter instead!
-
Prepare for Baking: Place the scone triangles onto a parchment-lined baking sheet, leaving a bit of space between each. For a nice golden crust, brush the tops lightly with extra heavy cream. Bonus Trick: A sprinkle of sugar on top right before baking adds a delightful crunch!
-
Bake: Pop them in the oven and bake for about 15-20 minutes or until golden brown on top. Your kitchen will fill with that famous aroma – pure bliss!
-
Cool & Serve: Once baked, allow them to cool slightly on a wire rack. Serve warm, and prepare to be met with smiles and satisfied sighs!
Serving Suggestions
These scones are best enjoyed warm, straight from the oven! Serve them with a dollop of fresh whipped cream or a drizzle of honey. For an elegant twist, pair them with a chilled glass of lemonade or a steaming cup of tea. Presentation is key; arrange them on a beautiful cake stand or a rustic wooden platter. Trust me, your friends will feel pampered!
Recipe Variations
Here are some fun twists to try with your scones:
- Berry Peach Medley: Swap half of the peaches for raspberries or blueberries for a fruity explosion.
- Spiced Peach Scones: Add a pinch of cinnamon or nutmeg for a warm, cozy flavor.
- Savory Peach Scones: Mix in some crumbled cheese (like feta or cheddar) for a savory twist.
- Peach and Ginger: Add some finely chopped crystallized ginger for an unexpected zing!
Chef’s Notes
I can’t help but chuckle when reminiscing about my first batch of scones. You might say they were a bit of a disaster – I forgot to add the sugar! It was a lesson learned and a reminder of how essential every ingredient is to creating the dish’s harmony. Over the years, I’ve played with this recipe, adding a pinch of spice here and a new fruit there, but these classic peach scones always hold a special place in my heart. They never fail to spark a conversation or bring a smile!
FAQs and Troubleshooting
-
Why are my scones too dry?
If your scones end up dry, it might be due to overmixing the dough or measuring the flour incorrectly. Always spoon the flour into your measuring cup and level it off with a knife! -
Can I make the dough ahead of time?
Absolutely! You can prepare the dough, cut them into triangles, and refrigerate them. Just pop them in the oven when you’re ready, adding an extra 5 minutes to the baking time. -
What if my peaches are not ripe?
If your peaches are hard, try submerging them in warm water for 10 minutes to gently speed up the ripening process. Alternatively, you can sauté them in a bit of butter before adding them to the dough for enhanced flavor. -
How can I store leftovers?
Scones are best enjoyed fresh, but you can store leftovers in an airtight container at room temperature for up to two days. Reheat gently in the oven to bring back their warmth!
Nutritional Info
While these peach scones are not a health food, they’re a delightful indulgence! For those keeping an eye on nutrition, each scone (without any toppings) contains approximately:
- Calories: 250
- Fat: 10g
- Carbohydrates: 38g
- Protein: 3g
- Sugar: 7g
Remember, everything in moderation! Enjoy these beauties as part of a balanced diet.
I hope you feel inspired to try these Peach Scones in your own kitchen! With every bite, you’ll experience a little piece of nostalgia, a bit of elegance, and a whole lot of love. Happy baking, my friends! Don’t forget to share your creations and savor the moments around your table.
Let’s make every meal a beautiful memory!
PrintPeach Scones

Delightful peach scones, perfect for brunch or tea time, infused with nostalgia and flavor.
- Prep Time: 15 minutes
- Cook Time: 20 minutes
- Total Time: 35 minutes
- Yield: 8 scones 1x
- Category: Snack
- Method: Baking
- Cuisine: American
- Diet: Vegetarian
Ingredients
- 2 cups all-purpose flour
- 1/2 cup sugar
- 1 tablespoon baking powder
- 1/2 teaspoon salt
- 1/2 cup unsalted butter, cold and cubed
- 1 cup fresh peaches, diced
- 1/2 cup heavy cream
- 1 teaspoon vanilla extract
- 1 egg
Instructions
- Preheat your oven to 400°F (200°C).
- Mix together the flour, sugar, baking powder, and salt in a large mixing bowl.
- Cut in the cold, cubed butter until it resembles coarse crumbs.
- Toss in the diced peaches gently.
- Combine the heavy cream, egg, and vanilla extract in another bowl.
- Pour the wet mixture into the dry ingredients and stir until just combined.
- Shape the dough into a circle about 1-inch thick and cut into 8 triangles.
- Prepare a baking sheet with parchment paper and place the scone triangles on it.
- Bake for about 15-20 minutes or until golden brown.
- Cool on a wire rack and serve warm.
Notes
These scones are best enjoyed warm. Serve with whipped cream or honey for an extra treat.
Nutrition
- Serving Size: 1 scone
- Calories: 250
- Sugar: 7g
- Sodium: 150mg
- Fat: 10g
- Saturated Fat: 6g
- Unsaturated Fat: 4g
- Trans Fat: 0g
- Carbohydrates: 38g
- Fiber: 1g
- Protein: 3g
- Cholesterol: 30mg
Keywords: peach scones, breakfast, brunch, baking, summer treats