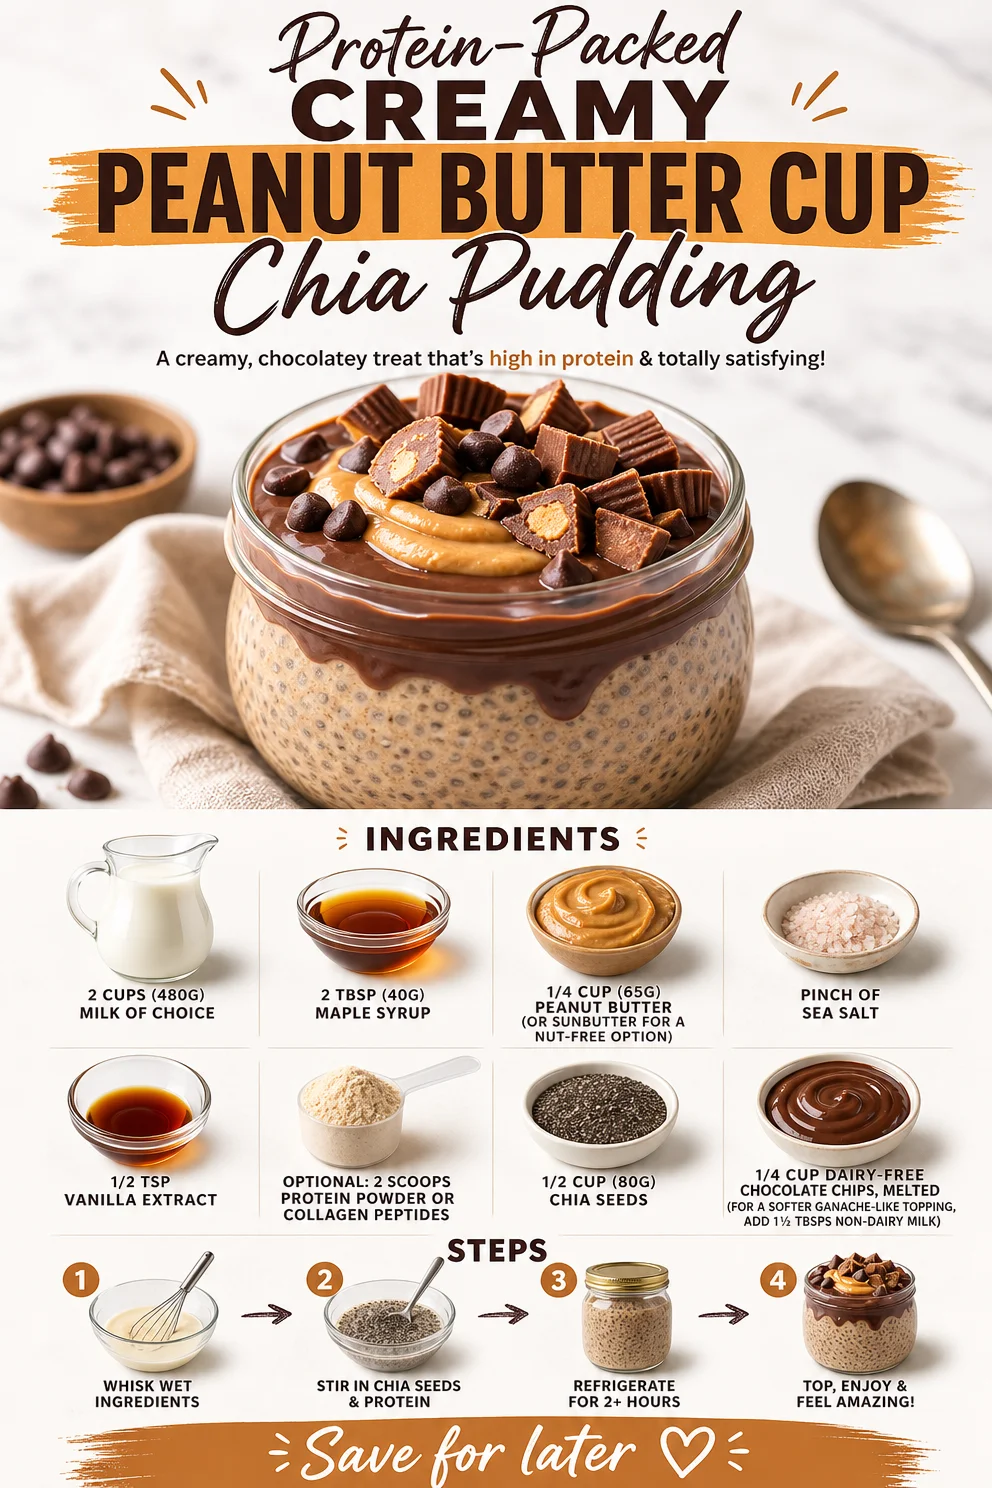
Protein-Packed Creamy Peanut Butter Cup Chia Pudding
Creamy Peanut Butter Cup Chia Pudding: A Decadent Delight
Imagine this: It’s a late afternoon, the sunlight is filtering through your kitchen window, and you can smell the rich aroma of peanut butter wafting through the air. You’re craving something sweet but want to keep it healthy, too. Enter Creamy Peanut Butter Cup Chia Pudding! It’s the perfect blend of indulgence and nourishment, with a nutty twist that satisfies your sweet tooth without the guilt.
This pudding is a fantastic option for breakfast, a snack, or even dessert. Packed with omega-3 fatty acids, protein, and healthy fats, it’s as delightful for your body as it is for your taste buds. Plus, it’ll impress anyone you serve it to with its creamy texture and rich flavor, making it a fantastic addition to your hosting repertoire.
Now, let’s dive into why this dish holds such a special place in my heart and my kitchen!
A Nostalgic Taste of Home
Growing up, peanut butter was a staple in our household. My siblings and I would slather it on everything from fresh bananas to those classic white bread sandwiches, eagerly anticipating our next sweet fix. One of my fondest memories is from a summer afternoon when we concocted our first peanut butter dessert with mom—a no-bake pie that included layers of rich chocolate and creamy peanut butter.
That day sparked a love affair with the pairing, and since then, I’ve dedicated myself to finding ways to incorporate the flavors I adored into healthier options. When I stumbled upon chia seeds, I knew I had to create a pudding that could capture the essence of that nostalgic dessert while packing in plenty of nourishment. And voilà! The Creamy Peanut Butter Cup Chia Pudding was born.
Ingredients
Let’s talk about what you’ll need for this delicious treat! Here’s your shopping list:
- 2 cups (480g) milk of choice: Use almond, coconut, soy, or dairy milk depending on your preference. Each will give a slightly different flavor and texture.
- 2 tbsp (40g) maple syrup: This adds a beautiful sweetness. If you’re looking for a lower-glycemic option, try using agave syrup or even stevia!
- 1/4 cup (65g) peanut butter: For the classic taste! If there are nut allergies or you prefer a different twist, feel free to use SunButter or almond butter.
- Pinch of sea salt: Enhances the flavor and balances the sweetness. Trust me; it makes a difference!
- 1/2 tsp vanilla extract: This adds warmth and depth to the pudding. For a different flavor profile, consider using almond extract.
- Optional: 2 scoops protein powder or collagen peptides: Perfect for adding an extra boost if you’re enjoying this as a post-workout treat.
- 1/2 cup (80g) chia seeds: Packed with fiber and omega-3s, these little guys are what give our pudding that delightful, creamy texture.
- 1/4 cup dairy-free chocolate chips, melted: For a chocolatey topping reminiscent of a peanut butter cup! For a softer consistency, add 1 ½ tbsp of non-dairy milk when melting.
Step-by-Step Instructions
Ready to make this decadent treat? Follow these easy steps to whip up your Creamy Peanut Butter Cup Chia Pudding.
-
Combine the Base Ingredients
In a medium bowl, combine your milk of choice, maple syrup, and peanut butter. Using a whisk, mix until the peanut butter is fully incorporated and there are no lumps. Pro tip: For easier mixing, you can warm the peanut butter slightly—this helps it blend smoothly! -
Add Flavor Enhancers
Sprinkle in the pinch of sea salt, vanilla extract, and protein powder (if using). Stir until everything is well combined. Taste! Adjust sweetness if needed by adding more maple syrup. -
Mix in the Chia Seeds
Add in those chia seeds! Stir well to ensure they’re evenly distributed throughout the mixture. Chia seeds are magical—they’ll swell and create that creamy pudding texture as they absorb the liquid. -
Let it Set
Cover the bowl with plastic wrap or a lid and place it in the fridge for at least 2 hours or overnight if you can wait. This is the patience-testing part, but trust me, it’s worth it! -
Melt the Chocolate
Once your pudding has set, it’s time to melt those chocolate chips. You can do this in a microwave-safe bowl in 30-second intervals, stirring in between, or use a double boiler. If you’re adding the option of non-dairy milk for a softer consistency, mix that in while you melt. -
Assemble and Serve
To serve, spoon the chia pudding into individual cups or small bowls. Drizzle the melted chocolate over the top like a beautiful finishing touch. You can even sprinkle a few extra chocolate chips for added indulgence!
Serving Suggestions
For an extra layer of delight, consider garnishing your pudding with a dollop of coconut whipped cream or a few slices of banana. Set it alongside a warm cup of coffee or tea, and you’ve created a lovely little indulgence that’s perfect for breakfast or dessert!
Recipe Variations
- Nut-Free Option: Swap peanut butter for sunflower seed butter (SunButter) to keep it nut-free.
- Chocolate Overload: Add cocoa powder to the base mix for a richer chocolate flavor.
- Fruity Twist: Mix in some mashed bananas or pureed berries to the base recipe for added sweetness and flavor.
- Spiced Up Pudding: Add a pinch of cinnamon or nutmeg to warm up the flavors.
- Vegan Delight: Ensure all ingredients are plant-based, like opting for coconut yogurt instead of milk.
Chef’s Notes
This recipe has evolved over time through experimentation! I’ve played around with different nut butters, variations of sweeteners, and even added mashed bananas for a fruitier take! The beauty of this pudding lies in its flexibility—it’s truly a canvas for your creativity. And if you’re anything like me, you may end up devouring a bowl (or two) before it even makes it to the fridge!
FAQs and Troubleshooting
-
Why did my chia pudding not thicken?
If your pudding didn’t thicken up, it could be that it didn’t have enough time to set. Chia seeds need enough time to absorb liquid (at least a couple of hours). If it’s too thin after setting, try mixing in a few more chia seeds and letting it sit longer. -
Can I use regular yogurt instead of milk?
Absolutely! You can replace milk with your favorite yogurt to create a thicker texture, but be aware that this may alter the pudding’s flavor slightly. -
What if the pudding is too sweet for me?
Each sweetener has a different level of intensity, so if you find it too sweet, cut back on the maple syrup, or add more milk and chia seeds to balance it out. -
How long will this pudding last?
Store the pudding in an airtight container in the refrigerator for up to 5 days. The flavors will continue to deepen and meld together as it sits!
Nutritional Info
This is an approximate estimate, varies by ingredient choices:
- Calories: 270
- Protein: 10g
- Carbs: 30g
- Fats: 15g
- Fiber: 10g
And there you have it! Your journey to making Creamy Peanut Butter Cup Chia Pudding is complete. This delectable dessert not only pleases the palate but allows you to reminisce about those simple joys of childhood. So, tie on that apron, gather your ingredients, and let’s create this timeless treat together! Enjoy every creamy, dreamy bite—because good food is all about the moments we share at the table. Happy cooking!
PrintCreamy Peanut Butter Cup Chia Pudding
A decadent yet healthy pudding combining peanut butter, chia seeds, and a touch of sweetness for a delightful treat.
- Prep Time: 10 minutes
- Cook Time: 0 minutes
- Total Time: 120 minutes
- Yield: 4 servings 1x
- Category: Dessert
- Method: Refrigeration
- Cuisine: American
- Diet: Vegetarian
Ingredients
- 2 cups (480g) milk of choice
- 2 tbsp (40g) maple syrup
- 1/4 cup (65g) peanut butter
- Pinch of sea salt
- 1/2 tsp vanilla extract
- Optional: 2 scoops protein powder or collagen peptides
- 1/2 cup (80g) chia seeds
- 1/4 cup dairy-free chocolate chips, melted
Instructions
- Combine the milk of choice, maple syrup, and peanut butter in a medium bowl. Whisk until smooth.
- Add the pinch of sea salt, vanilla extract, and protein powder (if using), and stir well.
- Mix in the chia seeds, ensuring they are evenly distributed throughout.
- Cover with plastic wrap and refrigerate for at least 2 hours or overnight.
- Melt the chocolate chips in a microwave or double boiler.
- Assemble by spooning the chia pudding into servings and drizzling melted chocolate over the top.
Notes
For a nut-free option, use sunflower seed butter instead of peanut butter. You can also add cocoa powder or fruits for variations.
Nutrition
- Serving Size: 1 serving
- Calories: 270
- Sugar: 8g
- Sodium: 170mg
- Fat: 15g
- Saturated Fat: 3g
- Unsaturated Fat: 10g
- Trans Fat: 0g
- Carbohydrates: 30g
- Fiber: 10g
- Protein: 10g
- Cholesterol: 0mg
Keywords: chia pudding, healthy dessert, peanut butter, vegan pudding
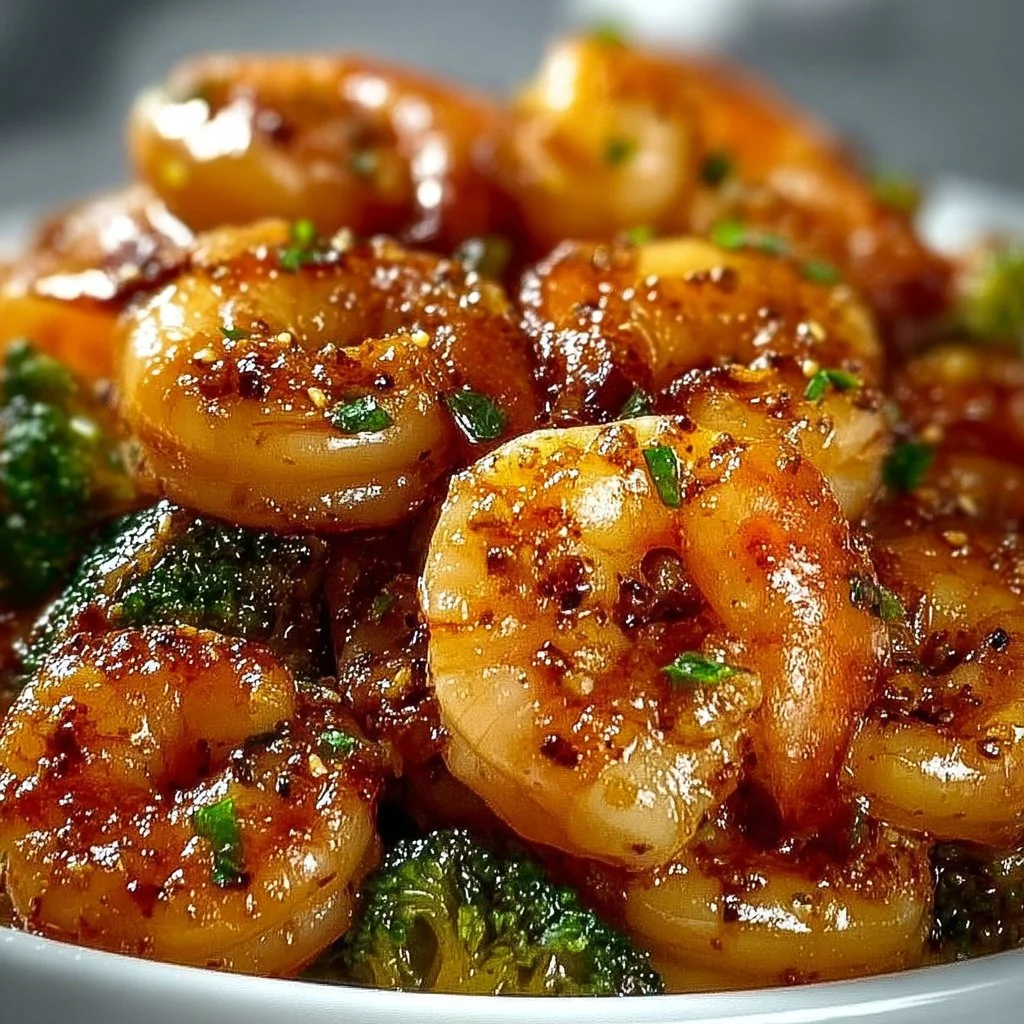
High-Protein Honey Garlic Shrimp
High-Protein Honey Garlic Shrimp: A Flavorful Delight
Hello, lovely foodies! Today, I’m thrilled to share with you a dish that’s close to my heart and packed with flavor: High-Protein Honey Garlic Shrimp. This recipe is not just a feast for the taste buds; it’s also a celebration of the joy of cooking and the beauty of gathering around the table with loved ones. Perfectly sweet, garlicky, and delightfully tender, this dish is sure to become a new favorite in your kitchen.
Let’s dive into the magic of these succulent shrimp. They’re not only high in protein—making them an excellent option for a healthy meal—but they’re also incredibly easy to whip up. Whether you’re looking to impress guests at a dinner party or simply trying to make weeknight dinners feel a bit more special, this recipe is a surefire hit. Ready to create something delicious? Let’s go!
A Taste of My Kitchen
Whenever I think of honey garlic shrimp, I’m instantly transported back to my childhood. I remember being in the kitchen with my grandma, who was such an inspiration in my early cooking adventures. One summer evening, we decided to whip up her famous garlic shrimp, a family staple that had everyone drooling. The aroma of sizzling garlic mingling with the sweet scent of honey was like a warm hug for the senses.
As we gathered around the table, my family eagerly awaited the moment where plates were filled with beautifully glazed shrimp, served atop a fluffy bed of jasmine rice. My grandpa would always say, "If you can make shrimp dance in a honey glaze, you can impress anyone!" It was this fun, whimsical spirit that fueled my passion for cooking and sharing food with others. Fast forward to today, and I’m excited to share this easy yet elegant dish that not only honors my grandma’s culinary flair but also showcases how simple it can be to create magic in the kitchen.
Ingredients You’ll Need
To make these lovely honey garlic shrimp, you’ll need the following ingredients:
-
1 pound shrimp, peeled and deveined: Look for large, fresh shrimp for the best texture and flavor. If you can’t find fresh, frozen shrimp will work beautifully—just make sure to thaw them properly before cooking.
-
1/4 cup honey: This sweet nectar is essential for our glaze! If you’re looking for a healthier alternative, you can use agave syrup or maple syrup for a unique flavor twist.
-
3 cloves garlic, minced: Fresh garlic is a must here; it adds depth and richness. If you’re in a pinch, pre-minced garlic can work, but be sure to adjust the amount, as it can be stronger in flavor.
-
2 tablespoons soy sauce: This adds a savory umami kick. For a gluten-free option, feel free to swap this with tamari or coconut aminos.
-
1 tablespoon olive oil: Use extra-virgin olive oil for the best flavor and health benefits. Canola or avocado oil are good substitutes if you’re looking for something lighter.
-
Salt and pepper to taste: Simple seasonings that elevate the flavors. Always taste your dish as you go to ensure it’s seasoned to your liking!
-
Steamed rice or vegetables for serving: Jasmine rice is fantastic with this dish, but feel free to serve it alongside broccoli, asparagus, or any of your favorite seasonal vegetables.
Step-by-Step Instructions
Let’s get cooking! Follow these simple steps to create your high-protein honey garlic shrimp masterpiece:
-
Prep your shrimp: If using frozen shrimp, make sure they’ve been thawed. Rinse them under cold water, pat dry with a paper towel, and set aside. This ensures that the shrimp will sear nicely and not steam in the pan.
-
Make the honey garlic sauce: In a medium bowl, whisk together the honey, minced garlic, and soy sauce until well combined. This will be the glaze that gives our shrimp their delightful flavor. Take a moment to inhale that sweet garlic goodness—it’s divine!
-
Heat your pan: In a large skillet, heat the olive oil over medium-high heat. Make sure it’s hot enough to sizzle when the shrimp hit the pan—that’s how we achieve a nice golden crust on our shrimp!
-
Cook the shrimp: Once the pan is hot, add the shrimp in a single layer. Let them cook undisturbed for about 2 minutes. You want them to develop a lovely golden color on one side before flipping. Flip the shrimp and cook for another 1-2 minutes until they’re opaque and cooked through.
-
Add the sauce: Reduce the heat to medium and pour the honey garlic sauce over the shrimp. Toss everything together to coat each shrimp evenly in that luscious glaze. Allow it to bubble for about a minute until slightly thickened. The smell will be irresistible!
-
Season to perfection: Taste the shrimp and add salt and pepper as needed. This is the moment where you can tailor the flavors to your liking—don’t be afraid to experiment!
-
Final touch: Once the sauce is shiny and the shrimp are well-coated, remove the pan from heat. You’re just a few moments from diving into this delightful dish!
Serving Suggestions
To plate this dish, spoon a generous serving of steamed rice onto a beautiful plate, then artfully arrange your honey garlic shrimp on top. Drizzle any extra sauce over the shrimp and garnish with freshly chopped herbs like green onions or parsley for a pop of color. Serve it with a side of vibrant, steamed vegetables for a complete, beautiful meal that’s sure to impress.
Recipe Variations
Looking to shake things up? Here are a few fun twists you can try with this high-protein shrimp dish:
-
Spicy kick: Add a pinch of red pepper flakes or a splash of Sriracha to the honey garlic sauce for a fiery twist.
-
Citrus burst: Squeeze in some fresh lime or lemon juice to the sauce for a zesty, bright flavor that complements the shrimp beautifully.
-
Tropical vibe: Stir in some diced pineapple or mango in the last minute of cooking for a sweet, fruity addition.
-
Herb-inspired: Swap out the garlic for fresh ginger and finish with a sprinkle of cilantro or basil for a fresh herby flair.
-
Cooking method: Grill the shrimp on skewers instead of pan-searing for a smoky charred flavor. Just adjust the cooking time for skewers on the grill!
Chef’s Notes
As a chef, I value the stories that recipes can tell. This honey garlic shrimp has evolved in my kitchen over the years. Initially, I would make it without much thought, but then I discovered the joy of adding layers of flavor—different herbs and spices, and even the knack for presentation! Every time I revisit this dish, it brings back not only the pleasure of cooking but also memories of loved ones gathered around the table, sharing stories and laughter.
A funny kitchen mishap I can’t forget is when I accidentally grabbed salt instead of sugar while preparing this recipe for a dinner party. Instead of panicking, I added a bit more honey and a splash of lemon juice to balance the flavors, and it turned out unexpectedly delicious! Cooking is all about improvisation and enjoying the process, so embrace those moments!
FAQs and Troubleshooting
Q: My shrimp turned out rubbery. What happened?
A: Overcooking shrimp is the main culprit for rubbery texture. Make sure to cook them just until they’re opaque and firm; they usually need only 2-3 minutes per side.
Q: Can I make this dish ahead of time?
A: While honey garlic shrimp taste best fresh, you can prepare the sauce ahead and store it in the fridge. Cook the shrimp just before serving for the best texture.
Q: What can I substitute for shrimp?
A: If you’re not fond of shrimp, this recipe works beautifully with chicken or tofu. Just adjust the cooking time until they are fully cooked.
Q: How do I store leftovers?
A: Store any leftovers in an airtight container in the refrigerator for up to 3 days. Reheat gently in a pan or microwave, but be careful not to overcook!
Nutritional Information
This honey garlic shrimp recipe serves approximately four people, making it an ideal meal for both family dinners and intimate gatherings. Each serving is not only delicious but a protein-packed option, making it great for a post-workout meal or a healthy dinner.
Approximate nutritional values per serving:
- Calories: 320
- Protein: 25g
- Carbohydrates: 30g
- Fat: 10g
Now that you have all the tools and knowledge to create this delightful high-protein honey garlic shrimp dish, it’s time to tie on your apron and gather your loved ones around the table. Cooking is about connection and joy, so I can’t wait for you to share this experience with friends and family. Happy cooking, and may your kitchen be filled with sweet aromas and laughter!
PrintHigh-Protein Honey Garlic Shrimp
A flavorful and easy dish featuring succulent shrimp coated in a sweet and garlicky honey glaze.
- Prep Time: 10 minutes
- Cook Time: 10 minutes
- Total Time: 20 minutes
- Yield: 4 servings 1x
- Category: Main Course
- Method: Sautéing
- Cuisine: Asian
- Diet: Gluten Free
Ingredients
- 1 pound shrimp, peeled and deveined
- 1/4 cup honey
- 3 cloves garlic, minced
- 2 tablespoons soy sauce
- 1 tablespoon olive oil
- Salt and pepper to taste
- Steamed rice or vegetables for serving
Instructions
- Prep your shrimp: If using frozen shrimp, make sure they’ve been thawed. Rinse them under cold water, pat dry with a paper towel, and set aside.
- Make the honey garlic sauce: In a medium bowl, whisk together the honey, minced garlic, and soy sauce until well combined.
- Heat your pan: In a large skillet, heat the olive oil over medium-high heat.
- Cook the shrimp: Add the shrimp in a single layer. Let them cook undisturbed for about 2 minutes. Flip the shrimp and cook for another 1-2 minutes until opaque.
- Add the sauce: Reduce the heat to medium and pour the honey garlic sauce over the shrimp. Toss to coat.
- Season to perfection: Taste the shrimp and add salt and pepper as needed.
- Final touch: Once the sauce is shiny and shrimp are well-coated, remove from heat.
Notes
Serve with steamed rice and garnish with fresh herbs. Experiment with flavors by adding spices or citrus.
Nutrition
- Serving Size: 1 serving
- Calories: 320
- Sugar: 28g
- Sodium: 500mg
- Fat: 10g
- Saturated Fat: 1g
- Unsaturated Fat: 9g
- Trans Fat: 0g
- Carbohydrates: 30g
- Fiber: 0g
- Protein: 25g
- Cholesterol: 200mg
Keywords: honey garlic shrimp, high protein shrimp, easy shrimp recipe
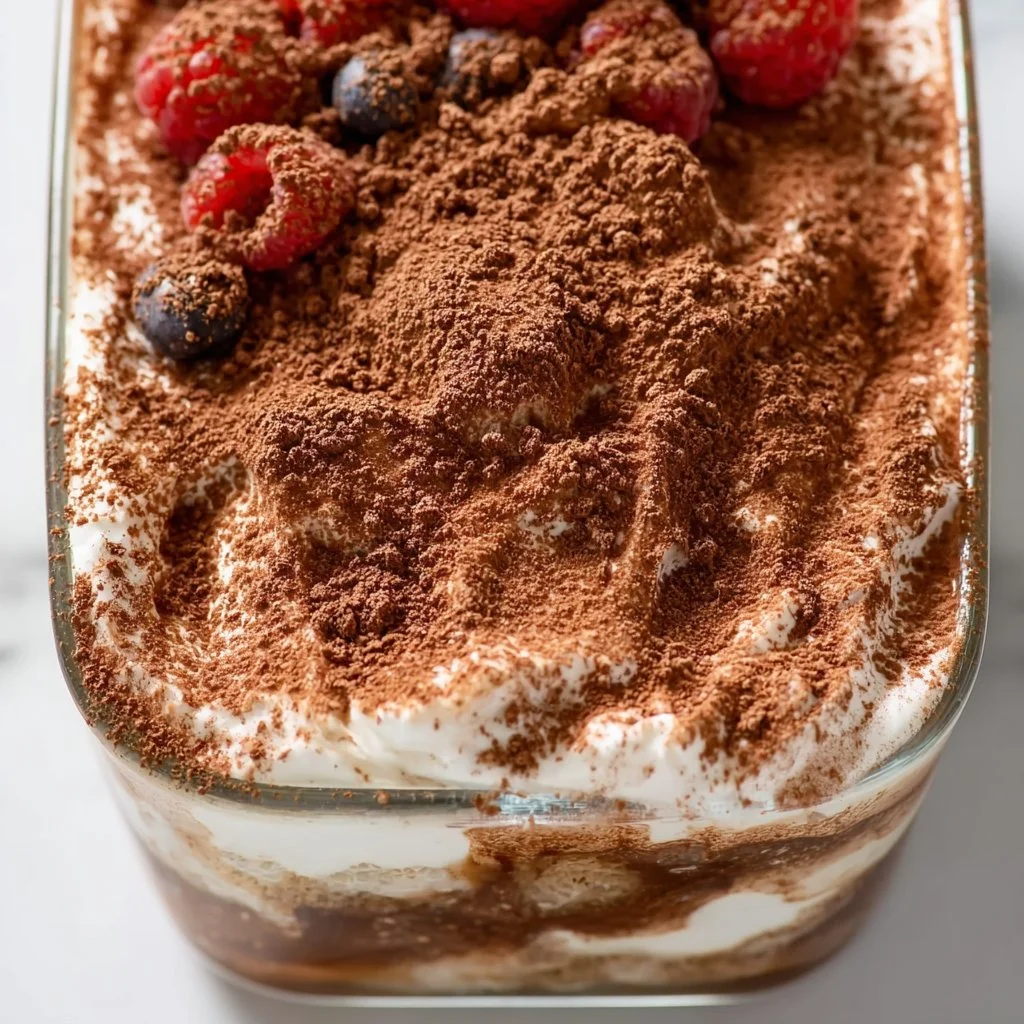
The Best Tiramisu Chia Pudding Recipe (Vegan, High Protein, Keto) | Healthy Sweets Recipes, Healthy Chia Pudding Recipes, Healthy Sweets
The Best Tiramisu Chia Pudding Recipe: A Healthy Twist on a Classic Favorite
Hey there, fellow foodies! Welcome back to my cozy corner of the kitchen at Ivory Apron. Today, I’m thrilled to share one of my absolute favorite recipes that brings a delightful twist to a classic dessert: Tiramisu Chia Pudding. Imagine all the indulgent flavors of traditional tiramisu—coffee, cocoa, and creamy goodness— packed into a healthy, vegan-friendly, high-protein, keto dessert. Sounds too good to be true? I promise you, it’s not!
Chia pudding has become somewhat of a hero in the healthy dessert world, and I’ve got to say, it’s perfect for those moments when you crave something sweet but don’t want to compromise on health. This treat is rich in omega-3 fatty acids from the chia seeds, easily made with plant-based ingredients, and won’t have you feeling like you’ve just consumed a brick in your stomach.
I vividly remember the first time I tried making tiramisu back in college. It was a last-minute decision for a dinner party that I somehow agreed to host. My friends were excited, and I was terrified! Armed with a flimsy recipe from a random magazine, I managed to whip up a dessert that slightly resembled the Italian classic—but not without a few hiccups! The coffee was too strong, and the ladyfingers turned out a bit soggy. But you know what? Everyone devoured it! That night ignited my passion for creating desserts that are not just delicious but also fun to make, and ever since, I’ve been on a mission to elevate everyday sweets like this Tiramisu Chia Pudding.
So, let’s dive into this easy, elegant, and oh-so-satisfying dessert. You’ll see why this recipe became a staple in my kitchen!
Personal Story
Speaking of college, there’s a specific memory that sticks with me. I remember my best friend, Julia, rushing over after hearing I was brave enough to tackle tiramisu. She arrived just as I was furiously whisking the cream (and I may or may not have underestimated the power of heavy whipping cream!). With two spoons and one dessert plate, we dug into my suspiciously lumpy concoction right before my guests arrived. What happened next still makes me laugh: we both ended up with chocolate smudged on our faces as we declared, “Well, at least it’s edible!”
Later that night, despite my early culinary mishaps, everyone was sharing stories and savoring each bite of my chaotic creation. That night reminded me of the magic of cooking: it’s not just about the food; it’s about the laughter, the camaraderie, and the memories created around the table. Fast forward to today, and I’m thrilled to share this Tiramisu Chia Pudding that cuts the fuss and maximizes the joy. Get ready to make some beautiful memories of your own!
Ingredients
Let’s gather our ingredients, shall we? Here’s what you’ll need to whip up this delightful Tiramisu Chia Pudding:
-
Chia Seeds (1/4 cup)
These tiny powerhouses are rich in fiber and omega-3 fatty acids. They’re the star of the show in this pudding! If you’re fresh out, you could try ground flaxseeds, but the texture won’t be quite the same. -
Unsweetened Almond Milk (1 cup)
A creamy, plant-based milk that forms the base of your pudding. If you prefer, any nut or oat milk will work just as well. Just avoid sweetened versions to keep our healthy vibe going! -
Maple Syrup or Agave Nectar (2-3 tablespoons)
A natural sweetener to give your pudding that lovely sweetness. Honey could be a substitute if you’re not strictly vegan—just remember, it’s a bit more viscous, so you may need to adjust the quantity slightly. -
Vanilla Extract (2 teaspoons)
A few drops of this fragrant elixir will elevate your pudding and add that aromatic richness. Pure vanilla extract is always a winner, but imitation will work too in a pinch. -
Coffee or Espresso (1/2 cup)
The lifeblood of traditional tiramisu! If you’re avoiding caffeine, a decaf version or even a coffee substitute could work to maintain that rich flavor. -
Cocoa Powder (2 tablespoons)
For that touch of chocolatey goodness. Make sure you use unsweetened cocoa for the best depth of flavor, but you could switch to carob powder if you want to experiment with a different taste. -
Coconut Cream (1/4 cup)
Whip this silky goodness to top your pudding for an extra luxurious feel. If you don’t have coconut cream, you can use full-fat coconut milk but be sure to chill it first to allow the cream to separate.
Step-by-Step Instructions
Now that we have all our ingredients ready, let’s roll up our sleeves and dive into the recipe!
Step 1: Mix the Wet Ingredients
In a medium-sized bowl, combine the almond milk, maple syrup (or agave), vanilla extract, and coffee. Whisk these glorious ingredients together until fully combined. This will be the flavorful base of your pudding.
Chef Hack: If you’re short on time, you can blend these ingredients in a blender! It’s quicker and gives it a super smooth consistency.
Step 2: Add Chia Seeds
Next, add the chia seeds to your wet mixture. Stir well to ensure that the seeds are evenly distributed and not clumping together. Chia seeds love to stick, so give them a good whirl!
Tip: Let the mixture rest for about 5 minutes and then stir again. This process helps ensure a lump-free pudding!
Step 3: Let It Thicken
Cover the bowl with plastic wrap or a lid and pop it into the fridge. Let it chill for at least 3-4 hours or, better yet, overnight. During this time, the chia seeds will absorb the liquid and transform your mixture into a delightful, creamy pudding.
Chef Insight: Overnight chilling is not just for convenience; it allows the flavors to meld together beautifully.
Step 4: Whip the Coconut Cream
While your pudding thickens, let’s prepare the coconut cream. Chill a can of coconut milk overnight, then scoop out the thick cream that separates at the top. In a bowl, whip the coconut cream using a hand whisk or electric mixer until fluffy. Taste it and add a touch of sweetener if desired.
Step 5: Layer it Up!
Once your chia pudding is ready, it’s assembly time! Grab your serving glasses (I love using clear ones to show off those beautiful layers). Start with a generous layer of chia pudding, then add a dollop of whipped coconut cream on top.
Next, dust with cocoa powder for that authentic tiramisu touch. Repeat the layers until you reach the top!
Little Chef Tip: For a fun surprise, add a sprinkle of chocolate shavings or crushed walnuts in between layers for added texture!
Step 6: Chill Again (If You Can Wait)
If you have the willpower (it’s hard!), let your assembled tiramisu chia pudding chill in the fridge for at least 30 minutes before serving. This helps the layers meld together even more, creating a harmonious flavor experience that’s just divine.
Serving Suggestions
When you’re ready to serve, I recommend presenting your Tiramisu Chia Pudding in individual glasses or jars for a charming touch. Finish with an additional dollop of whipped coconut cream and a sprinkle of cocoa powder right before serving. A few coffee beans on top can add a lovely visual element as well!
Recipe Variations
Now that you’ve mastered the basic Tiramisu Chia Pudding, feel free to get creative! Here are a few fun twists you can try:
-
Mocha Delight: Add a spoonful of cocoa powder directly into the chia mix for a more intense chocolate flavor.
-
Nuts About You: Throw in some finely chopped hazelnuts or almonds if you want that extra crunch and a nutty flavor reminiscent of traditional tiramisu.
-
Fruit Fusion: Layer in some fresh berries or banana slices between the pudding layers for a refreshing burst of flavor.
-
Spiced Up: Want a little warmth in your dessert? Add a pinch of cinnamon or nutmeg to the chia pudding mixture.
-
Dairy-Free Whipped Topping: If you want to switch it up, blend soaked cashews in place of coconut cream for a different creamy topping.
Chef’s Notes
Throughout my years of experimenting with various dessert recipes, I’ve learned that the beauty often lies in simplicity. This Tiramisu Chia Pudding encapsulates that idea perfectly, offering a sophisticated dessert that’s both easy to make and nourishing. Additionally, chia pudding recipes have a delightful adaptability; you can swap out ingredients based on what you have on hand.
Oh, and I have to mention this funny story! The first time I decided to impress a date with a dessert, I did the classic Tiramisu, and it ended up more like “Tira-mistake.” The mascarpone curdled because I added the coffee too quickly—it was a disaster! Needless to say, I kept my culinary adventures since then much simpler. This chia pudding recipe? No risk involved—just delicious results!
FAQs and Troubleshooting
-
Why did my chia pudding not thicken?
Ensure you’re using enough chia seeds and letting it sit for the right amount of time. If the pudding still seems runny, it may need a bit longer to set. -
Can I make this recipe in advance?
Absolutely! You can prepare the chia pudding a couple of days ahead and store it in the fridge. Just layer the coconut cream right before serving for the freshest taste. -
Is this dessert keto-friendly?
Yes, this recipe fits perfectly into a keto lifestyle! You’ll get that sweetness from the chia with low sugar content, especially if you choose low-carb sweeteners. -
How do I store leftovers?
Keep any leftovers in an airtight container in the fridge for up to 3-5 days. Just be sure to mix it up before serving again!
Nutritional Info (Optional)
For those mindful of their intake, here’s a rough breakdown per serving (based on 4 servings):
- Calories: 180
- Protein: 6g
- Carbohydrates: 25g
- Fiber: 12g
- Sugars: 6g
- Fat: 8g
And there you have it—the ultimate Tiramisu Chia Pudding recipe that’s bound to impress at any gathering (or just satisfy those late-night cravings!). I hope you enjoy making this delicious treat as much as I do—remember, cooking should be fun and fulfilling. Don your apron, gather some loved ones, and share your delightful creation!
Happy cooking, everyone! 🍽️✨
PrintTiramisu Chia Pudding
A healthy, vegan-friendly twist on the classic tiramisu, packed with flavors of coffee, cocoa, and creamy goodness—all in a delicious chia pudding.
- Prep Time: 15 minutes
- Cook Time: 0 minutes
- Total Time: 240 minutes
- Yield: 4 servings 1x
- Category: Dessert
- Method: Chilling
- Cuisine: Italian
- Diet: Vegan
Ingredients
- 1/4 cup Chia Seeds
- 1 cup Unsweetened Almond Milk
- 2–3 tablespoons Maple Syrup or Agave Nectar
- 2 teaspoons Vanilla Extract
- 1/2 cup Coffee or Espresso
- 2 tablespoons Cocoa Powder
- 1/4 cup Coconut Cream
Instructions
- Mix the almond milk, maple syrup, vanilla extract, and coffee in a bowl.
- Add chia seeds to the wet mixture and stir well.
- Cover with plastic wrap and refrigerate for at least 3-4 hours or overnight.
- Whip the chilled coconut cream until fluffy.
- Layer the chia pudding and coconut cream in serving glasses, dust with cocoa between layers.
- Chill for another 30 minutes before serving if you can wait.
Notes
For added texture, consider including chocolate shavings or crushed walnuts between layers.
Nutrition
- Serving Size: 1 serving
- Calories: 180
- Sugar: 6g
- Sodium: 100mg
- Fat: 8g
- Saturated Fat: 7g
- Unsaturated Fat: 1g
- Trans Fat: 0g
- Carbohydrates: 25g
- Fiber: 12g
- Protein: 6g
- Cholesterol: 0mg
Keywords: tiramisu, chia pudding, healthy dessert, vegan dessert, keto dessert
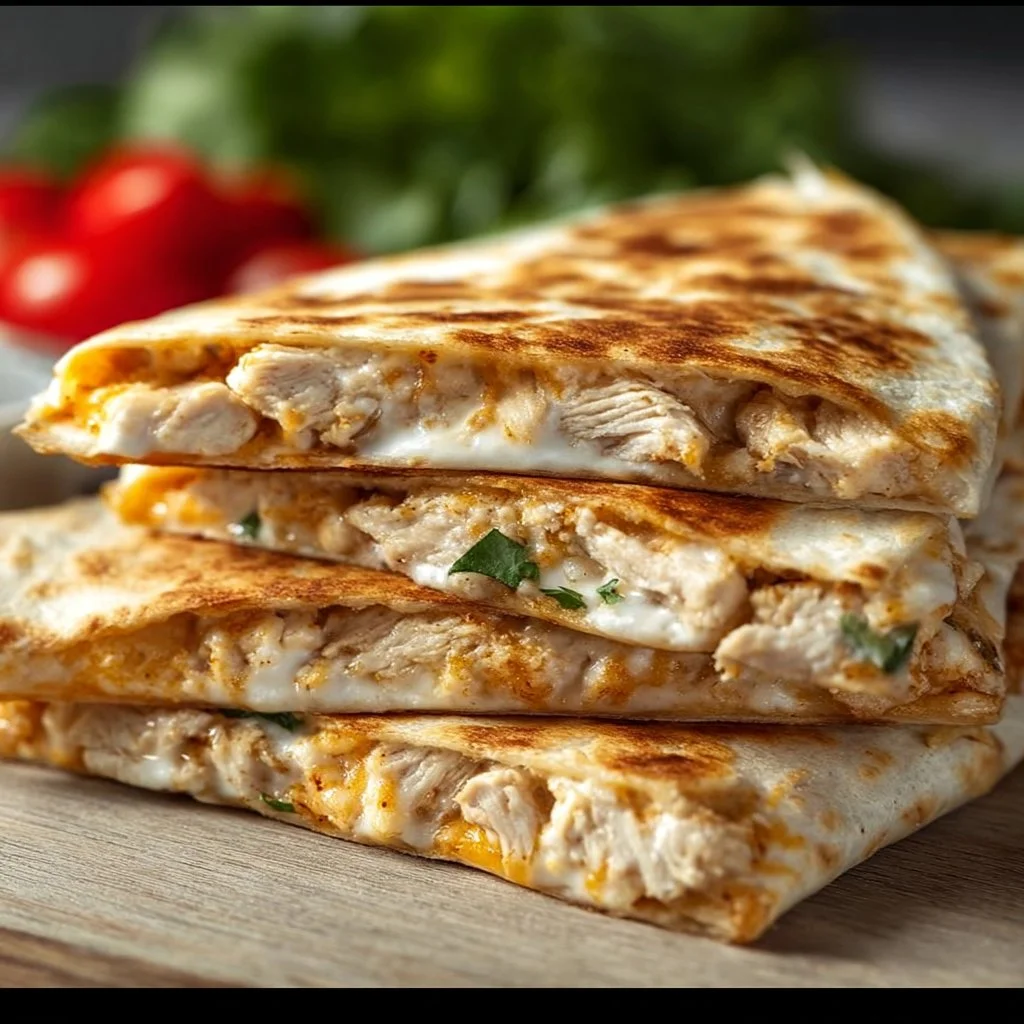
High-Protein Chicken Ranch Quesadilla
High-Protein Chicken Ranch Q quesadilla
Hello, fellow food enthusiasts! Today, I’m thrilled to share an absolutely delightful recipe that’s not only packed with protein but also bursting with flavor—the High-Protein Chicken Ranch Quesadilla! Whether you’re a seasoned chef or just starting out in the kitchen, this dish caters to everyone with its beautiful blend of taste and simplicity.
Picture this: it’s a busy weeknight, the kind where you feel like a juggler balancing work, family, and the occasional Netflix binge. You need a meal that doesn’t take hours to prepare but still feels gourmet and satisfying. That’s where my beloved quesadilla comes in. With a crispy, golden exterior and a luscious cheese-filled center, this dish transforms the ordinary into something extraordinary.
What makes this quesadilla even more appealing is its high protein content. It’s perfect for refueling after a workout or simply providing sustained energy throughout your day. And who can resist the creamy, tangy notes of ranch seasoning that make each bite feel like a warm hug? Trust me, once you try this High-Protein Chicken Ranch Quesadilla, it’s gonna be on your menu rotation for ages!
So, grab your apron, and let’s dive into this recipe that’s sure to impress while being super approachable. Because cooking should always be a joy, never intimidation!
Personal Story
Ah, quesadillas—a beloved staple from my childhood. I remember hosting little get-togethers with friends, and the sizzling sound of tortillas hitting the skillet was always the soundtrack to our laughter and stories. One evening, we decided to have a quesadilla-making contest. It was a delightful mess, flour on our cheeks and ingredients strewn across the table like a culinary battlefield.
I made my infamous “chicken ranch surprise,” which I thought was the pinnacle of creativity at the time. Friends would joke that I should start a food blog to share my culinary genius, and although I was skeptical back then, those playful comments stuck with me. Fast forward to today, here I am, sharing my kitchen adventures through Ivory Apron! I like to think that every time I make a quesadilla now, I’m channeling that youthful spirit of carefree cooking and boundless creativity.
Ingredients
Let’s take a look at what you’ll need to whip up this High-Protein Chicken Ranch Quesadilla:
-
1 low-carb tortilla
A fantastic option for keeping the carbs in check while still enjoying all the cheesy goodness. You can also use whole wheat or corn tortillas if you prefer more fiber. -
1/4 cup Greek yogurt
This adds a creamy texture and a protein punch! It’s a healthier alternative to sour cream. If you’re avoiding dairy, try using a dairy-free yogurt for a similar consistency. -
2 wedges of Laughing Cow cheese
These bring a unique creamy flavor and melt beautifully. If Laughing Cow isn’t available, any cream cheese or soft cheese will work wonders! -
1 cup cooked, shredded chicken
Leftover rotisserie chicken? Yes, please! It’s convenient and delicious. If you’re in a hurry, canned chicken or shredded turkey works as an excellent substitute. -
1 tablespoon ranch seasoning
My secret weapon! This adds a delicious savory and tangy flavor to our quesadilla. You can also make your own blend using dried herbs like dill, garlic powder, and onion powder if you prefer a homemade touch. -
Cooking spray or oil for frying
A light coat will help your quesadilla achieve that perfect golden-brown crust. Optionally, you can use butter for a richer flavor.
Step-by-Step Instructions
Now that we’ve got our ingredients ready, let’s cook up this delicious quesadilla! Here’s how you can make it step by step:
-
Prep Your Chicken
If you’re starting with raw chicken, season it with salt and pepper, and cook it until fully done. Shred it once it cools. If you’re using leftovers, simply shred the chicken and set it aside for later. -
Mix the Goodies
In a bowl, combine the shredded chicken, Greek yogurt, Laughing Cow cheese, and ranch seasoning. Make sure all those flavors meld together beautifully. This step creates the filling that will transform into pure comfort.Chef’s Tip: When mixing, taste the filling. Feel free to customize it by adding spices or extra herbs you enjoy!
-
Heat the Skillet
Coat a skillet with cooking spray or a drizzle of oil and heat over medium heat. You want your pan hot enough to get that lovely sizzle but not so hot that it’ll burn your tortilla.Little Hack: To test if the pan is ready, sprinkle a drop of water on it—if it dances, you’re ready to go!
-
Assemble the Quesadilla
Lay one low-carb tortilla in the skillet and spread half of your chicken filling over one half of the tortilla. Fold the other side over to create a half-moon shape. -
Cook to Perfection
Fry the quesadilla for about 3-4 minutes on each side, or until it becomes golden brown and the cheese is melty inside.Cooking Note: Gently press down on the quesadilla with a spatula while it cooks. This helps achieve that desirable crispy crust and ensures all the contents meld together.
-
Repeat
If you’re making multiple quesadillas, repeat the process! You can keep cooked quesadillas warm in a low oven until you’re ready to serve. -
Slice and Serve
Once golden and crispy, transfer your quesadilla to a cutting board. Let it rest for a minute before slicing it into wedges. This prevents the cheesy goodness from oozing out too much.
Serving Suggestions
When it comes to serving your High-Protein Chicken Ranch Quesadilla, think about vibrant accompaniments! I love to plate these wedges alongside a small bowl of salsa or guacamole for dipping. A fresh, tangy side salad with a light vinaigrette can also cut through the richness and provide a refreshing contrast. Don’t forget to sprinkle a dash of fresh herbs or a dollop of Greek yogurt on top for that beautiful finishing touch!
Recipe Variations
-
Vegetarian Twist: Swap out the chicken for sautéed mushrooms or black beans for a delicious vegetarian option packed with protein.
-
Spicy Kick: Add some diced jalapeños or a sprinkle of red pepper flakes into the filling for those who love a little heat!
-
Cheesy Option: Mix in some shredded mozzarella or cheddar cheese into the filling for an extra cheesy explosion!
-
Make It Supreme: Top your quesadilla with avocado slices or pico de gallo before serving for a fiesta flair!
-
Sweet & Savory: For a unique twist, add some caramelized onions or sweet bell peppers to the filling!
Chef’s Notes
Every time I make a quesadilla, I reminisce about those spontaneous kitchen gatherings with friends. The beauty of this dish is in its flexibility. Over the years, this recipe has evolved from my childhood creation into a wholesome, high-protein meal that I can enjoy guilt-free.
One time, a friend of mine brought over an outrageous amount of leftover chicken—they were doing some serious meal prepping! In a desperate attempt to use it all, we experimented and created a huge stack of quesadillas, each one more decadent than the last. I swear we could have started a “Quesadilla Feast” restaurant!
FAQs and Troubleshooting
1. My quesadilla turned out soggy; what did I do wrong?
A soggy quesadilla usually results from using too much filling or not allowing your pan to heat up properly. Make sure to spread the filling evenly and keep your skillet hot!
2. Can I make these ahead of time?
Absolutely! You can prep the filling and assemble the quesadillas ahead of time. Just store them in the fridge until you’re ready to cook them!
3. How can I get my quesadilla extra crispy?
A light-coated oil before frying creates that crunchy exterior. If you prefer baking, you can brush the quesadilla with a little oil and bake it in the oven at 400°F (200°C) for about 10-15 minutes, flipping halfway.
4. What’s a good dipping sauce for my quesadilla?
Ranch dressing is a classic, but salsa, guacamole, or even a tangy cilantro-lime sauce can bring your meal to the next level! Get creative and mix it up!
Nutritional Info (optional)
While not mandatory, including nutritional information for those mindful of their intake can be helpful. This High-Protein Chicken Ranch Quesadilla offers a nutritious balance perfect for meals on the go.
Each serving (1 quesadilla) contains approx:
- Calories: 320
- Protein: 36g
- Carbohydrates: 28g
- Fat: 12g
And there you have it! A delectable High-Protein Chicken Ranch Quesadilla that is satisfying and easy to prepare. I hope you enjoy making this dish as much as I do. Remember, it’s all about creating those small, beautiful moments around your table. Happy cooking!
PrintHigh-Protein Chicken Ranch Quesadilla

A delightful High-Protein Chicken Ranch Quesadilla that is not only packed with protein but also bursting with flavor.
- Prep Time: 10 minutes
- Cook Time: 10 minutes
- Total Time: 20 minutes
- Yield: 1 serving 1x
- Category: Main Course
- Method: Frying
- Cuisine: Mexican
- Diet: Protein-rich
Ingredients
- 1 low-carb tortilla
- 1/4 cup Greek yogurt
- 2 wedges of Laughing Cow cheese
- 1 cup cooked, shredded chicken
- 1 tablespoon ranch seasoning
- Cooking spray or oil for frying
Instructions
- Prep your chicken. Season and cook it until done, then shred.
- Mix the shredded chicken, Greek yogurt, Laughing Cow cheese, and ranch seasoning in a bowl until combined.
- Heat a skillet with cooking spray or oil over medium heat.
- Assemble the quesadilla by spreading the chicken filling over one half of the tortilla and folding it.
- Cook for 3-4 minutes on each side until golden brown and the cheese melts.
- Slice and serve with salsa or guacamole.
Notes
For variations, try swapping chicken for mushrooms, adding spicy jalapeños, or mixing in more cheese.
Nutrition
- Serving Size: 1 quesadilla
- Calories: 320
- Sugar: 5g
- Sodium: 500mg
- Fat: 12g
- Saturated Fat: 4g
- Unsaturated Fat: 6g
- Trans Fat: 0g
- Carbohydrates: 28g
- Fiber: 3g
- Protein: 36g
- Cholesterol: 30mg
Keywords: quesadilla, high-protein, chicken, ranch, easy, quick meal, comfort food
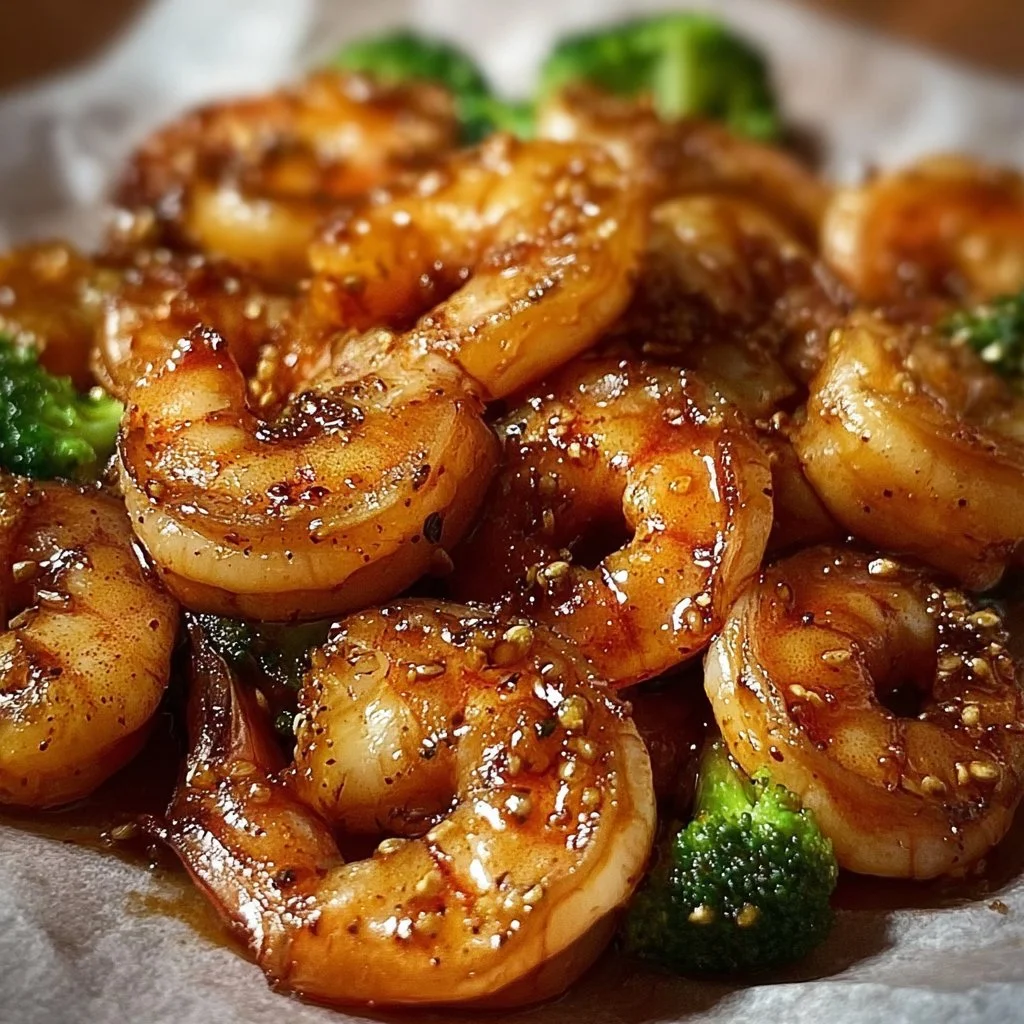
High-Protein Honey Garlic Shrimp
High-Protein Honey Garlic Shrimp: A Sweet Escape to Flavor Town!
Introduction
Hey there, fellow food lovers! I’m so excited to share a dazzling dish that’s bound to become your new favorite weeknight meal — High-Protein Honey Garlic Shrimp! This delightful concoction brings together succulent shrimp, rich honey, and the invigorating kick of garlic, creating a flavor explosion that’s both sweet and savory. As we gather around our tables, let’s embrace the joy of cooking and the warmth of sharing meals with loved ones.
Picture this — the aroma of garlic sizzling in olive oil, wafting through your kitchen. It’s almost as if the shrimp are dancing in anticipation of that sticky honey glaze that’s about to grace them. This dish is an easy crowd-pleaser, perfect for both casual dinners and special occasions, making it an exciting addition to your culinary repertoire. Cooking shouldn’t be intimidating — it should be fun, fragrant, and fulfilling. That’s what we’re aiming for with this recipe!
At Ivory Apron, I believe that beautifully plated food can warm hearts and create connections. Whether it’s a Tuesday night dinner or a casual gathering, this Honey Garlic Shrimp is not just a meal; it’s an experience. So, let’s roll up our sleeves, tie on our aprons, and dive into this succulent recipe that balances elegance and simplicity.
Personal Story
Every time I cook shrimp, I’m whisked back to my grandmother’s kitchen, where she would whip up her famous garlic shrimp accompanied by a flute of bubbly. I remember standing on a stool, peering over the counter, watching her deftly handle the fresh shrimp, her hands working magic as she transformed simple ingredients into a feast.
One sunny Saturday, she created a special honey garlic glaze that turned those plump shrimp into a sweet delight. The smiles around the table that evening were contagious, and I learned that food was more than just nourishment; it was a form of love and joy. To this day, I cherish that recipe, having added my little twists along the way—like this one featuring the high-protein goodness of shrimp combined with that irresistible honey-garlic sauce. So, let’s dive in and bring that nostalgia to your home!
Ingredients
Here’s what you’ll need to whip up this delightful dish:
-
1 pound shrimp, peeled and deveined
The star of our show! Fresh, large shrimp work beautifully, or you can use frozen shrimp. Just be sure to thaw them in advance. If you’re not a fan of shrimp, feel free to swap it out for chicken or tofu for a different protein! -
1/4 cup honey
This natural sweetener brings that luscious glaze to life! If you’re after a vegan version, maple syrup is a fantastic alternative. -
1/4 cup soy sauce
A classic flavor booster! Opt for low-sodium soy sauce if you want to cut back on salt. For a gluten-free option, coconut aminos works wonders too! -
3 cloves garlic, minced
Garlic adds that essential flavor kick. If you’re really into garlic (who isn’t?), feel free to add a clove or two more! -
2 tablespoons olive oil
This oil not only keeps things watching over our shrimp as they cook but also adds a light, fruity flavor. Avocado oil is a great substitute if you prefer! -
Salt and pepper to taste
Always season to your liking! Freshly cracked black pepper packs extra punch. -
1 teaspoon sesame seeds (optional)
For a delightful crunch and a pop of visual appeal, these little gems are excellent. Plus, they pair beautifully with the flavors! -
Steamed rice or vegetables for serving
Serve your honey garlic shrimp over steamed rice, or pair it with seasonal vegetables for added nutrients and color. Brown rice or cauliflower rice can be great alternatives, too!
Step-by-Step Instructions
Step 1: Prep Your Ingredients
Before we dive into cooking, let’s prep! Rinse your shrimp under cold water and pat them dry with a paper towel. This step ensures that the shrimp will sear beautifully rather than steam. Mince your garlic and have your honey and soy sauce at the ready.
Step 2: Heat the Pan
Grab a large skillet or wok and place it over medium-high heat. Add the olive oil and give it a moment to heat up — you want it to shimmer! This step is crucial; a hot pan allows the shrimp to cook quickly without becoming rubbery. (No one wants rubbery shrimp!)
Step 3: Cooking the Shrimp
Now, add the shrimp in a single layer, working in batches if necessary to avoid overcrowding. Cook for about 2-3 minutes on one side until they turn pink and opaque. Here’s a pro tip: Don’t move the shrimp around too much; let them get a beautiful sear before flipping them over!
Step 4: Add Garlic
Once the shrimp are halfway done, toss in the minced garlic. Stir gently — you’ll immediately smell that fragrant goodness! Garlic cooks quickly, so keep an eye on it to prevent burning. We want fragrant, not charred!
Step 5: Create the Sauce
After another minute, pour in the honey and soy sauce. Stir to coat the shrimp evenly. This is where the magic happens! As you stir, the sauce will start to thicken and cling to each shrimp, creating that sticky goodness we love. Cook for another 2-3 minutes, allowing the sauce to reduce slightly.
Step 6: Season to Taste
Finish with a sprinkle of salt and pepper. Taste it and adjust the seasonings. If you like a bit more sweetness, throw in a touch more honey!
Step 7: Garnish and Serve
Finally, remove the skillet from the heat and sprinkle with sesame seeds if using. Your gorgeous, golden Honey Garlic Shrimp are ready to be plated!
Serving Suggestions
Now that you’ve whipped up this fabulous dish, it’s time to serve! Place a generous scoop of steamed rice or your choice of vegetables on a plate, and then stack those mouthwatering shrimp on top. Drizzle any remaining honey-garlic sauce over everything for that extra oomph. Don’t forget to add a fresh sprig of parsley or a slice of lime for flavor and visual appeal!
Recipe Variations
-
Add Heat: Craving something spicy? A pinch of red pepper flakes or a drizzle of sriracha enhances the flavor profile beautifully while providing a pleasant kick!
-
Citrusy Twist: A splash of fresh lime or lemon juice at the end of cooking can brighten the flavors, giving your dish a refreshing zesty twist.
-
Vegetarian Delight: Swap shrimp for firm tofu or pan-fried tempeh. They soak up the sauce wonderfully and deliver a satisfying alternative for plant-based pals!
-
Coconut Creaminess: Add a splash of coconut milk to the sauce for a tropical twist. This will lend a creamy texture and enhance the overall richness.
-
Herbaceous Escape: Toss in some green onions or fresh cilantro right before serving for an aromatic herbaceous touch!
Chef’s Notes
Oh, how this recipe has evolved! When I first started experimenting with shrimp, I didn’t have that magical honey-garlic combo down quite yet. I remember my first attempt — the sauce was either way too sweet or far too salty. The beauty of cooking is the learning curve, and I can assure you that trial and error leads to delightful discoveries!
I’ve had some hilarious kitchen flubs, like the time I accidentally swapped sugar for salt in the sauce (oops!). But every flop taught me something. Now, I relish creating new flavor combinations — trust me, this Honey Garlic Shrimp is a recipe you’ll want to keep in your back pocket for those moments of hosting panic!
FAQs and Troubleshooting
-
What if my shrimp are tough?
If your shrimp turn out rubbery, they were likely overcooked. Keep an eye on them; they only need a few minutes until they turn opaque. -
Can I make this sauce in advance?
Absolutely! You can prepare the honey garlic mixture a day ahead — store it in the fridge and quickly toss it in the skillet when you’re ready to cook. -
Can I use frozen shrimp?
Yes! Just make sure they are fully thawed and patted dry before you begin cooking for the best texture. -
What sides pair well with this dish?
I highly recommend pairing it with steamed broccoli, snap peas, or even a simple side salad for a colorful, well-rounded meal.
Nutritional Info (Optional)
- Calories per serving (4 servings): Approximately 250 calories
- Protein: 20g
- Carbohydrates: 17g
- Fat: 12g
So there you have it, friends! Your very own High-Protein Honey Garlic Shrimp — a dish that’s sure to impress and please at any gathering. As you enjoy this heartwarming recipe, may it inspire you to create your own kitchen stories and memories to share around the table. Happy cooking, and don’t forget to tell me all about your adventures with this scrumptious meal! Let’s continue to celebrate the beauty of good food together! 🍤✨
PrintHigh-Protein Honey Garlic Shrimp
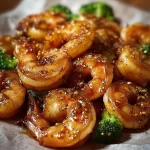
A delightful weeknight meal featuring succulent shrimp, rich honey, and invigorating garlic for a sweet and savory flavor explosion.
- Prep Time: 10 minutes
- Cook Time: 10 minutes
- Total Time: 20 minutes
- Yield: 4 servings 1x
- Category: Main Course
- Method: Stir-Frying
- Cuisine: Asian
- Diet: Non-Vegetarian
Ingredients
- 1 pound shrimp, peeled and deveined
- 1/4 cup honey
- 1/4 cup soy sauce
- 3 cloves garlic, minced
- 2 tablespoons olive oil
- Salt and pepper to taste
- 1 teaspoon sesame seeds (optional)
- Steamed rice or vegetables for serving
Instructions
- Prep your ingredients: Rinse shrimp, mince garlic, and have honey and soy sauce ready.
- Heat the pan: Place a large skillet over medium-high heat, add olive oil, and let it shimmer.
- Cooking the shrimp: Add shrimp in a single layer; cook for 2-3 minutes on one side until pink and opaque.
- Add garlic: Toss in minced garlic halfway through cooking the shrimp.
- Create the sauce: Pour honey and soy sauce, stirring to coat shrimp evenly; cook for another 2-3 minutes until sauce thickens.
- Season to taste: Add salt and pepper, adjusting seasonings as desired.
- Garnish and serve: Remove from heat, sprinkle with sesame seeds if using, and plate with steamed rice or vegetables.
Notes
For added heat, consider using red pepper flakes or sriracha. For a vegetarian option, substitute shrimp with firm tofu.
Nutrition
- Serving Size: 1 serving
- Calories: 250
- Sugar: 25g
- Sodium: 800mg
- Fat: 12g
- Saturated Fat: 2g
- Unsaturated Fat: 8g
- Trans Fat: 0g
- Carbohydrates: 17g
- Fiber: 0g
- Protein: 20g
- Cholesterol: 200mg
Keywords: shrimp, honey garlic, healthy recipe, protein, quick meal