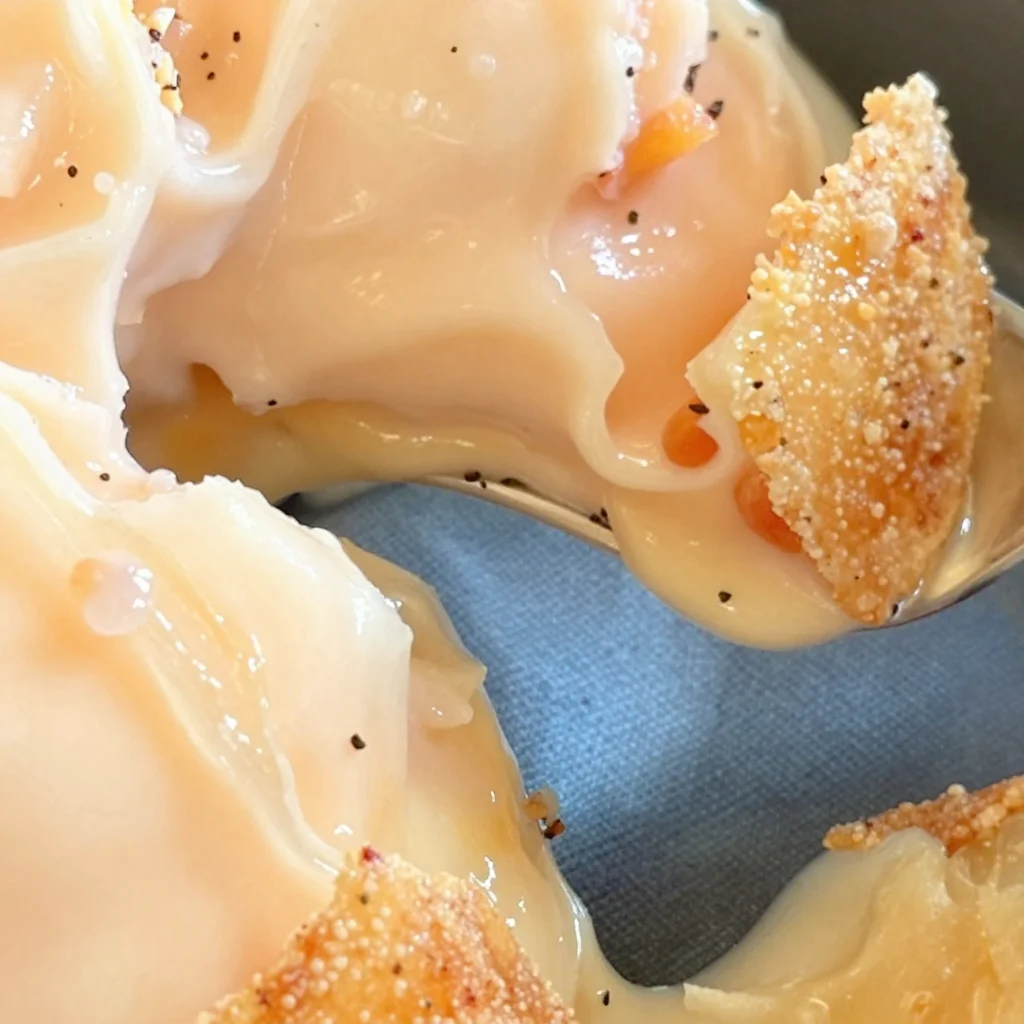
Summer Nectarine Frozen Yogurt: 5-Minute No-Churn Recipe
Whip Up a Delightful Nectarine Frozen Yogurt: A Sweet Summer Treat
Hello, friend! If you’re craving something cool, creamy, and absolutely delightful, then you’ve stumbled upon the right recipe! Today, we’re diving into the luscious world of Nectarine Frozen Yogurt, a treat that’s as refreshing as a summer breeze and just as bright in flavor. This isn’t just your everyday frozen dessert; it’s a vibrant showcase of fresh nectarines, tangy Greek yogurt, and a touch of sweetness—perfect to beat that summer heat!
Picture this: you’re lounging on your porch, basking in the golden sunshine, and you realize you need a sweet treat to cool you down. That’s where this easy, elegant recipe comes in. With only a handful of ingredients and a little bit of your precious time, you’ll create a frozen yogurt that’s bursting with juicy nectarines and creamy goodness. Trust me; it’s going to be a new favorite in your kitchen!
Time to Get Nostalgic
Let me take you back to a sun-soaked summer day in my childhood. My family had a lovely little orchard we frequented every July, where juicy nectarines hung from the branches like little golden gems waiting to be plucked. The excitement of wandering through those rows, sunlight filtering through the leaves, and tasting the sweet nectarines straight off the tree was indescribable.
One summer afternoon, my mom decided she wanted to try her hand at making a fruity frozen treat. We sliced those nectarines, mixed them with some yogurt, and poured everything into our old-fashioned ice cream maker. Oh, the pure joy of churning it by hand while eagerly anticipating that frozen delight! When we finally indulged, the creamy, fruity goodness melting on our tongues was sheer bliss. That simple, playful memory is the inspiration behind today’s Nectarine Frozen Yogurt.
Ingredients You’ll Need
Here’s what you’ll need for this refreshing treat:
-
Fresh Nectarines:
- The star of the show! Aim for ripe, sweet nectarines—perfectly aromatic and juicy. You can substitute them with peaches or plums if you’d like a little twist.
-
Greek Yogurt:
- For that creamy base! Choose plain, full-fat Greek yogurt for the best flavor and texture. If you prefer a dairy-free option, coconut yogurt works just as well.
-
Honey or Sugar (optional):
- This is to enhance the sweetness. Adjust based on the sweetness of your nectarines. Maple syrup is a great alternative if you want a different flavor profile.
-
Lemon Juice:
- A splash of acidity to balance the sweetness. Freshly squeezed is best. Feel free to use lime juice for a zesty kick!
Step-by-Step Instructions
So, how do we turn these simple ingredients into a creamy, dreamy frozen yogurt? Let’s break it down step by step:
-
Wash and Cut the Nectarines:
- Begin by giving your nectarines a good rinse under cool water. Slice them in half, removing the pit, and then chop them into chunks. The smaller the pieces, the easier they’ll blend up!
-
Blend the Nectarines:
- Toss those chunks into a blender or food processor. Add the lemon juice and, if you’re using it, honey or sugar. Blend until smooth! Don’t be afraid to scrape down the sides to ensure everything is well mixed.
Chef Tip: If your nectarines are a bit firm and not as juicy, try adding a splash of water to help with blending.
-
Incorporate the Greek Yogurt:
- Once your nectarines are pureed to perfection, add the Greek yogurt. Pulse a few times until everything is nicely combined. You want it to be light and fluffy, not over-blended.
-
Taste and Adjust:
- Here’s a chance to be the chef! Taste your mixture and see if it needs a pinch more sweetness. This varies based on how ripe your nectarines are.
-
Chill the Mixture:
- Transfer your mixture into an airtight container, and pop it in the freezer for about an hour. This helps it firm up a bit and makes it easier to churn later.
-
Churn the Frozen Yogurt:
- If you have an ice cream maker, this is where the magic happens! Churn the mixture according to the manufacturer’s instructions until it’s nice and fluffy. If you don’t have an ice cream maker, no worries! Just take the container out of the freezer every 30 minutes and stir vigorously with a fork until it’s smooth and creamy.
Chef Hack: If you skip the ice cream maker, aim to do this for about 2-3 hours to ensure the frozen yogurt stays creamy and doesn’t become a solid block.
-
Freeze until Firm:
- Once you’ve achieved that lovely, soft-serve-like consistency, transfer the yogurt back into your container. Freeze it for another 3-4 hours until it’s fully set.
Serving Suggestions
When you’re ready to serve your fresh Nectarine Frozen Yogurt, scoop it into chilled bowls. For a delightful presentation, you could drizzle a bit of honey on top, sprinkle some chopped nuts, or toss on fresh mint leaves. Pair it with a slice of almond torte or a shortbread cookie for a gourmet dessert experience.
Recipe Variations
Want to jazz things up? Here are some ideas!
- Berry Bliss: Mix in fresh blueberries or strawberries for a vibrant color and flavor change.
- Minty Fresh: Add a handful of fresh mint leaves while blending for an aromatic twist.
- Creamsicle Dream: Combine with a splash of orange juice for a refreshing citrus note.
- Nutty Crunch: Stir in some crushed nuts or granola just before serving for added texture.
Chef’s Notes
This recipe has become a staple in my kitchen, and it’s so versatile! I’ve played with various flavors—adding in spices like cinnamon or even a bit of vanilla always brings a new dimension. I once tried making it at a friend’s gathering, and it turned into a fun taste test with everyone contributing their favorite toppings.
One little story that cracks me up: the first time I made this without proper measuring, I tossed in extra nectarines that actually turned into a delightful nectar intake! Though it didn’t match my original plan, it taught me the beauty of experimenting in the kitchen—sometimes, you discover a gem you never thought you’d create.
FAQs and Troubleshooting
Can I use frozen nectarines instead of fresh?
Absolutely! Just remember to let them thaw a bit before blending for the best results.
My frozen yogurt is too hard; how can I fix it?
If your yogurt is too hard after freezing, let it sit at room temperature for about 10 minutes before scooping, or give it a good stir to break up any icy texture!
Can I make this dairy-free?
Yes! Substitute Greek yogurt with coconut yogurt or another plant-based yogurt. Adjust the sweetness as some plant-based yogurts can vary in taste.
How long does it keep in the freezer?
For optimal freshness, consume your Nectarine Frozen Yogurt within a week or two, but it can last longer in the freezer (though it may lose some creaminess).
Nutritional Info
If you’re counting calories or looking to maintain a healthy balance, this delightful frozen yogurt boasts a load of nutrients! Greek yogurt provides protein and probiotics, while nectarines are rich in vitamins A and C. You can tweak the sweetness depending on your diet—using less or no sweetener will keep it light and refreshing.
So there you have it! A beautiful, creamy bowl of Nectarine Frozen Yogurt, perfect for cooling down on a warm day or impressing friends at your next gathering. It’s simple, stunning, and packed with nostalgia. I can’t wait for you to give it a try. Tie on your apron, blend those flavors, and let’s create some delicious memories together! Enjoy every bite!
PrintNectarine Frozen Yogurt

Refreshing Nectarine Frozen Yogurt made with ripe nectarines and creamy Greek yogurt—a perfect summer treat!
- Prep Time: 15 minutes
- Cook Time: 120 minutes
- Total Time: 135 minutes
- Yield: 4 servings 1x
- Category: Dessert
- Method: Freezing
- Cuisine: American
- Diet: Vegetarian
Ingredients
- 4 ripe Fresh Nectarines
- 2 cups Greek Yogurt (plain, full-fat)
- 2 tablespoons Honey or Sugar (optional)
- 2 tablespoons Lemon Juice (freshly squeezed)
Instructions
- Wash and cut the nectarines into chunks.
- Blend the nectarines with lemon juice and honey or sugar until smooth.
- Incorporate Greek yogurt into the mixture and pulse until combined.
- Taste the mixture and adjust the sweetness if necessary.
- Chill the mixture in an airtight container for about 1 hour.
- Churn the mixture in an ice cream maker according to instructions or stir every 30 minutes if using a container.
- Freeze for another 3-4 hours until firm.
Notes
Drizzle with honey and top with nuts or mint leaves before serving. Various flavor additions like berries or spices can enhance it further.
Nutrition
- Serving Size: 1 serving
- Calories: 220
- Sugar: 12g
- Sodium: 40mg
- Fat: 8g
- Saturated Fat: 4g
- Unsaturated Fat: 4g
- Trans Fat: 0g
- Carbohydrates: 30g
- Fiber: 2g
- Protein: 8g
- Cholesterol: 20mg
Keywords: nectarine, frozen yogurt, summer dessert, healthy dessert, easy recipes
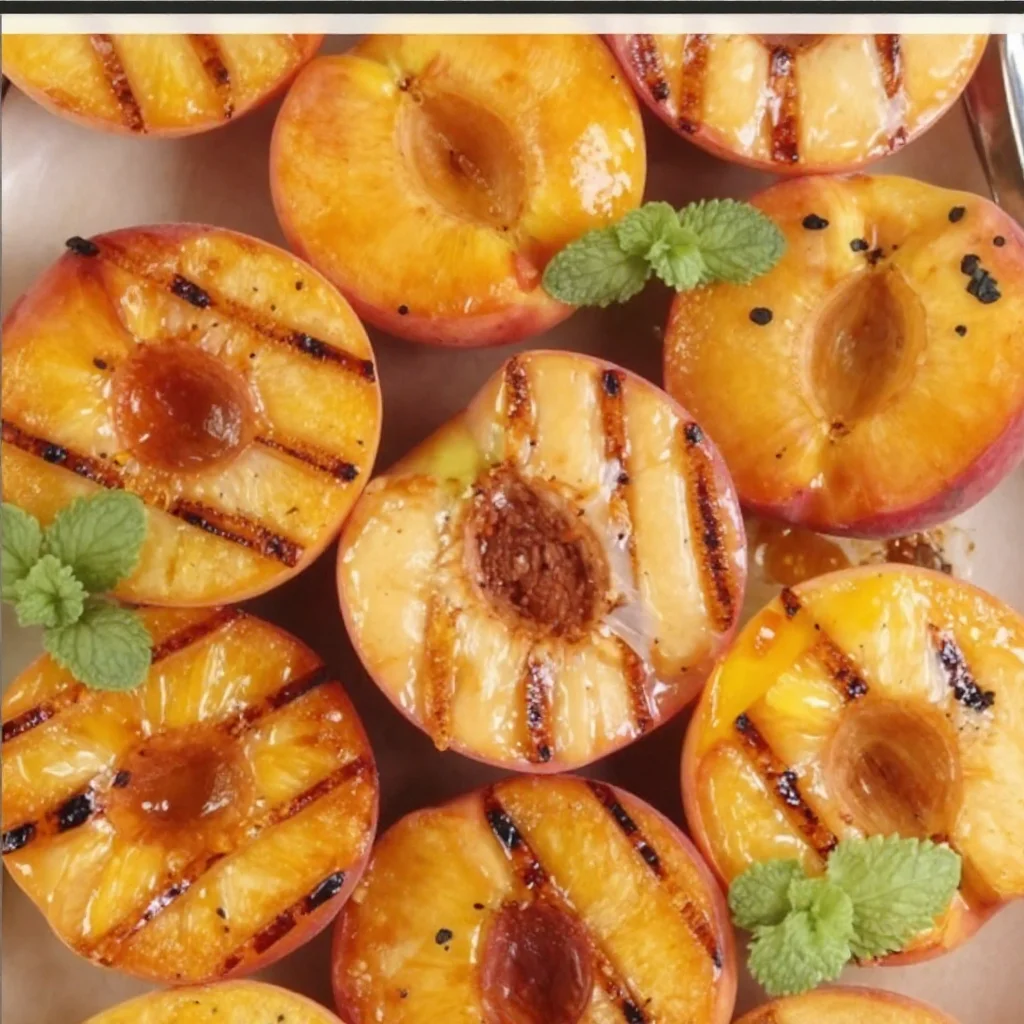
Minute Grilled Cinnamon Peaches: Quick Summer Treat
Grilled Peaches with Cinnamon: A Sweet Summer Delight
Hello and welcome back, foodie friends! Today, we’re stepping into a world of sweet indulgence with a delightful recipe that embodies the essence of summer: Grilled Peaches with Cinnamon. If you’re a fan of simple, delicious desserts that look like you’ve embraced your inner gourmet chef, you’re in for a treat!
Imagine this: the sun is shining, you’re outside enjoying a leisurely afternoon, and the smell of peaches caramelizing on the grill fills the air. This isn’t just a recipe; it’s a celebration of summer flavors that will transform how you enjoy one of nature’s sweetest offerings. Grilling brings out the natural sugars in the fruit, creating little bites of heaven that are juicy and tender, with a touch of warmth and spice from the cinnamon. A scoop of vanilla ice cream on top, or a drizzle of caramel sauce, takes this dish over the top!
Not only is this recipe incredibly easy to whip up, but it also allows you to share a beautiful dish that looks like you put in hours of effort — and trust me, nobody needs to know just how simple it really is! So grab your apron, and let’s get cooking!
A Memory of Peaches
Let me take you back to a summer evening spent at my grandparents’ house in the countryside. The air was fragrant with blooming jasmine, and the sun was dipping below the horizon, painting the sky in shades of pink and orange. My grandmother would gather all of us kids around her little charcoal grill in the backyard, and we’d line up as she skewered fresh fruits. That’s when I first tasted grilled peaches.
She would coat them lightly with olive oil and sprinkle on cinnamon, placing them directly on the hot grill. As the peaches cooked, we could hardly contain our anticipation, the sweet aroma wafting through the air, mingling with the sounds of laughter and summer insects. When those peaches came off the grill, they were soft and slightly charred, and we’d scoop them up with vanilla ice cream. Every bite was pure bliss, a moment of pure summer joy.
That memory has always stayed with me, a reminder that the simplest ingredients can create the most meaningful experiences. So, let’s recreate that magic and make our own grilled peach memories!
Ingredients
Here’s what you’ll need to bring this sweet summer creation to life:
-
4 ripe peaches
Choose peaches that give slightly when pressed; they should be ripe but not overly soft. If you can’t find peaches, nectarines make a great substitute too! -
2 tablespoons olive oil
A high-quality extra virgin olive oil adds richness and enhances the fruit’s natural sweetness. You can also use melted coconut oil for a unique flavor twist. -
1 teaspoon ground cinnamon
This spice adds warmth and a cozy aroma to your peaches. If you want to get adventurous, consider trying cardamom or nutmeg for a different flavor profile. -
2 tablespoons brown sugar
The brown sugar caramelizes beautifully on the grill, enhancing the sweetness of the peaches. If you’re looking for a lighter option, you can replace it with honey or maple syrup. -
Optional: ice cream or caramel sauce for serving
A scoop of creamy vanilla ice cream or a drizzle of rich caramel sauce elevates this dish to pure indulgence. Go for dairy-free ice cream if you want to keep it vegan!
Step-by-Step Instructions
Now, let’s dive into the cooking! Follow these steps for perfectly grilled peaches:
-
Prepare the Peaches
Start by washing the peaches under cold water. Dry them gently, then cut each peach in half, removing the pit. If you’re using particularly ripe peaches, be careful with your knife; they should yield easily but still hold their shape. -
Preheat the Grill
Heat your grill to medium-high heat. If you’re using a charcoal grill, let the coals settle until they’re glowing red-hot. A well-prepped grill is crucial for achieving those perfect grill marks and caramelized flavors. -
Create the Mixture
In a small bowl, whisk together the olive oil, cinnamon, and brown sugar. This mixture should form a paste that lightly coats the peach halves. It’s a flavor bomb and will enhance the caramelization process. -
Brush the Peaches
Take a pastry brush and generously brush the olive oil mixture onto the cut sides of each peach half. Make sure to coat them well, as this step is key to flavor and caramelization. -
Grill Time
Place the peaches cut side down on the grill. Grill for about 3-4 minutes until you see those lovely grill marks start to form. Keep an eye on them; you want them to soften without falling apart! -
Flip and Grill Again
Carefully flip the peaches over using tongs or a spatula. Grill for another 2-3 minutes. This allows the olive oil and sugar mixture to caramelize beautifully. You’ll know they’re ready when they’re fragrant and slightly soft to the touch. -
Remove and Let Cool
Once done, remove the peaches from the grill and place them on a plate. Give them a few moments to cool slightly; they’ll be steaming hot! -
Serve
If you’ve chosen to use ice cream or caramel sauce, go ahead and serve the grilled peaches warm alongside a scoop of ice cream or drizzle caramel over the top. You can also sprinkle some extra cinnamon if you feel like it.
Tip: Make sure to gather your friends or family around. This dish is all about sharing joy and creating memories!
Serving Suggestions
When it comes to plating, simplicity is key. You want to showcase the gorgeous golden-brown grill marks and the lusciousness of the peaches. Place the warm grilled halves on a vibrant plate, allowing the juices to pool slightly. Add a generous scoop of ice cream right in the center, and a drizzle of caramel sauce over it all. A sprig of mint or a dusting of additional cinnamon elevates the presentation, making it feel extra special — all without too much fuss.
Recipe Variations
Want to mix things up a bit? Here are some fun variations to try:
-
Balsamic Grilled Peaches: Drizzle some balsamic glaze over the peaches before grilling for a tangy contrast.
-
Spiced Pecans or Walnuts: Add chopped and toasted nuts on top for a delicious crunch. It adds texture and complements the sweetness beautifully.
-
Honey Drizzle: Replace sugar with a drizzle of honey if you want a more natural sweetener.
-
Minty Twist: Add finely chopped mint leaves as a topping for a refreshing flavor boost that brightens the dish.
-
Flavored Ice Cream: Experiment with different ice cream flavors like cinnamon, caramel, or coconut for a unique taste experience!
Chef’s Notes
This recipe is truly a reflection of the beauty of seasonal cooking. My own grilling adventure with peaches has evolved over the years, from just dessert to becoming a centerpiece at summer cookouts. I often find myself experimenting with spices and toppings, and it never ceases to amaze me how versatile grilled peaches can be.
I once made this dish for a backyard barbecue, and unexpectedly, a close friend ended up at the hospital that day! It was a wild adventure, and I ended up serving grilled peaches as a dessert to all our other friends while regularly checking my phone for updates about our friend. It brought laughter and lightness to the situation, reminding me that good food can create joy even in challenging moments.
FAQs and Troubleshooting
1. What’s the best way to tell if peaches are ripe?
Look for peaches that give slightly to pressure. They should be fragrant and have a nice golden hue. If they’re hard, let them sit at room temperature until they soften.
2. My peaches fell apart while grilling! Tips?
Overripe peaches can be tricky! Next time, choose slightly firmer peaches, and handle them gently when flipping to keep the halves intact.
3. Can I make this recipe ahead of time?
While grilled peaches are best served fresh, you can prep them ahead of time by cutting and coating them, then grilling just before serving.
4. How do I store leftovers?
If you have leftovers, store them in the refrigerator in an airtight container for up to 2 days. Gently reheat them in a microwave or on the grill to enjoy again!
Nutritional Info
While I don’t usually add nutritional info, here’s a little insight: Peaches are rich in vitamins A and C, and fiber, making them a healthy dessert option. Paired with ice cream, you get an indulgent treat, so enjoy every bite mindfully!
With every grilled peach you make, you’re not just serving dessert — you’re sharing a piece of summer and creating warm memories. Let’s gather around the table and make moments that matter, one delicious bite at a time. Happy grilling, friends! 🍑✨
PrintGrilled Peaches with Cinnamon

A simple and delicious dessert featuring grilled peaches caramelized with cinnamon and served warm, perfect for summer indulgence.
- Prep Time: 10 minutes
- Cook Time: 10 minutes
- Total Time: 20 minutes
- Yield: 4 servings 1x
- Category: Dessert
- Method: Grilling
- Cuisine: American
- Diet: Vegetarian
Ingredients
- 4 ripe peaches
- 2 tablespoons olive oil
- 1 teaspoon ground cinnamon
- 2 tablespoons brown sugar
- Optional: ice cream or caramel sauce for serving
Instructions
- Prepare the peaches by washing them and cutting in half, removing the pit.
- Preheat the grill to medium-high heat, ensuring coals are glowing if using charcoal.
- Create the mixture by whisking together olive oil, cinnamon, and brown sugar in a small bowl.
- Brush the mixture onto the cut sides of the peach halves with a pastry brush.
- Grill the peaches cut side down for about 3-4 minutes until grill marks form.
- Flip the peaches and grill for another 2-3 minutes until fragrant and soft.
- Remove the peaches from the grill and let cool slightly on a plate.
- Serve warm with ice cream or caramel sauce and enjoy!
Notes
Make sure to gather friends and family around to share this delightful dessert!
Nutrition
- Serving Size: 1 peach half
- Calories: 180
- Sugar: 15g
- Sodium: 0mg
- Fat: 8g
- Saturated Fat: 1g
- Unsaturated Fat: 7g
- Trans Fat: 0g
- Carbohydrates: 24g
- Fiber: 2g
- Protein: 2g
- Cholesterol: 0mg
Keywords: grilled peaches, summer dessert, cinnamon peaches, easy dessert