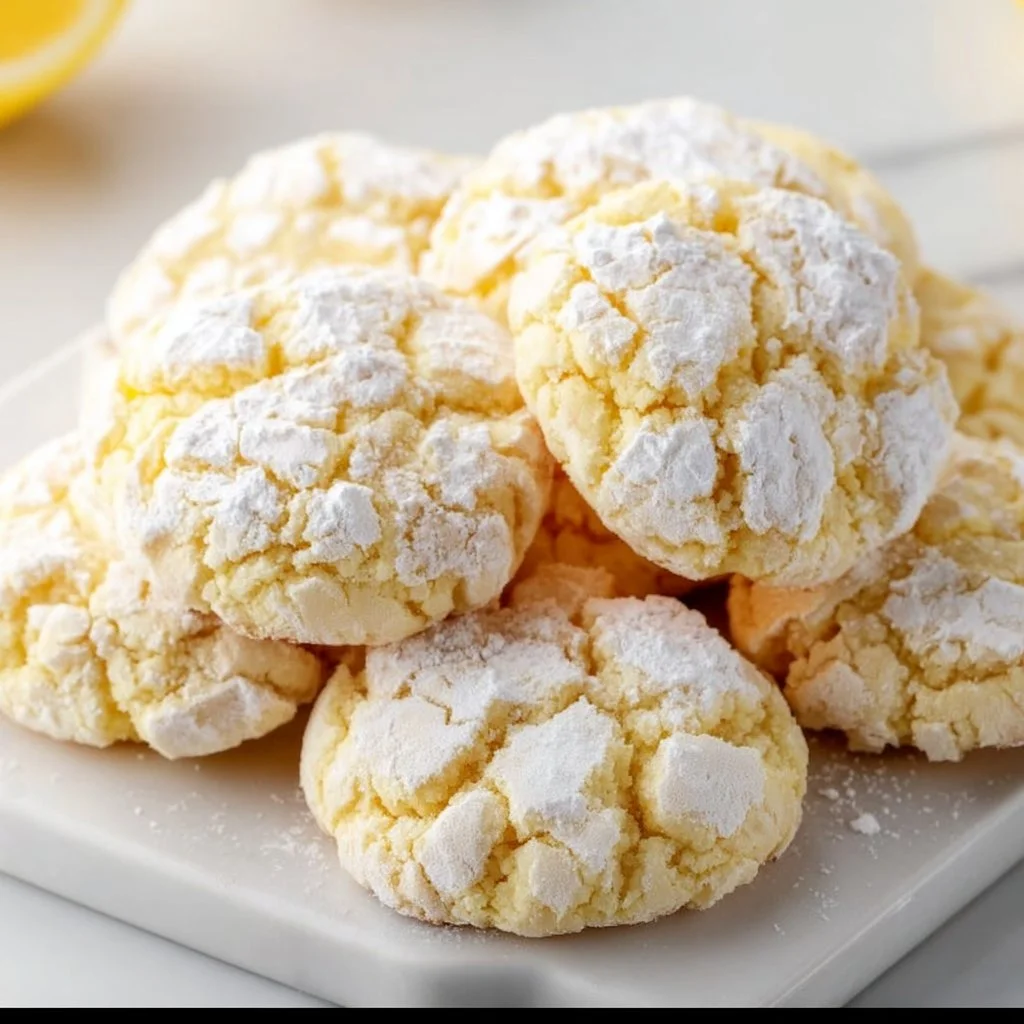
Lemon Crinkle Cookies
# Whisking Up Sunshine: Lemon Crinkle Cookies Recipe

## Introduction

Hello, cookie lovers! Today, we’re diving into a delightful and zesty treat that's sure to brighten up your day: Lemon Crinkle Cookies! Imagine biting into a soft, chewy cookie that bursts with bright lemon flavor and is adorned with a light dusting of powdered sugar. That’s the magic we’re creating here!

At Ivory Apron, I believe that cooking (and baking!) should be a joyful experience, filled with the aroma of fresh ingredients and a sprinkle of laughter. These Lemon Crinkle Cookies embody everything I love about baking: they’re sweet, a little tangy, and could not be more simple to prepare. You don’t need fancy equipment or complicated techniques—just a pinch of love, a step into the kitchen, and a whisk!

Whether you’re planning a picnic, looking for a delightful dessert to impress guests, or simply craving a little something sweet while lounging at home, these cookies are your answer. Lemon Crinkle Cookies are like a burst of sunshine on a cloudy day; they're light, refreshing, and provide that perfect contrast between sweetness and tartness. Plus, the crinkle texture gives you that delightful bite and a hint of excitement during every nibble.

So grab your apron, preheat the oven, and let’s make some Lemon Crinkle Cookies that will have everyone asking for the recipe!

## Personal Story

Growing up, my family had a special tradition during the summer months: we would gather at my grandmother's house for lemon-themed tea parties. My grandmother, an incredible baker, would whip up a storm in her cozy kitchen, filling the air with the irresistible scent of lemon. I remember the excitement as she pulled out her famous Lemon Crinkle Cookies, wearing that majestic golden hue and dusted with powdered sugar like fresh snow. They were sweet and tangy, with that crinkle that made them look as magical as they tasted.

What I cherish most about those sunny afternoons is the laughter that filled the air, the warm cups of tea, and the way we would all come together around the table with cookies in hand, sharing stories and making memories. It was in those moments I learned that baking isn't just about the final product—it’s about the experience and the love shared among family and friends.

Now, every time I bake these Lemon Crinkle Cookies, I’m reminded of those magical moments at my grandmother’s table, and I hope to create a similar joy for you and yours!

## Ingredients

Let’s gather the essentials for our Lemon Crinkle Cookies! Here’s what you’ll need:

- **1 cup granulated sugar**
  *Sweetness is essential! You can use coconut sugar for a slightly different flavor, but it may change the cookie's color.*

- **1/2 cup butter, softened**
  *Butter adds richness. If you're in a pinch, feel free to substitute with margarine. For a dairy-free option, try coconut oil!*

- **2 eggs**
  *Eggs contribute to the cookies’ texture. You can substitute with 1/4 cup of applesauce for a vegan version.*

- **1 cup all-purpose flour**
  *The backbone of the cookie! Whole wheat flour can be used for a heartier texture, but you might need a bit more liquid.*

- **1/4 teaspoon baking soda**
  *This is our leavening agent, ensuring the cookies don't end up flat. Baking powder can work in a pinch, but modify the amount slightly.*

- **1/4 teaspoon salt**
  *Salt enhances flavor, allowing the lemon to shine. Don’t skip it!*

- **1/2 teaspoon lemon zest**
  *Zest packs a punch! This is where the concentrated lemon flavor comes from. Use a microplane for the best results.*

- **1/4 cup fresh lemon juice**
  *The star ingredient! Fresh is best—bottled lemon juice doesn’t compare.*

- **Powdered sugar for dusting**
  *This adds a lovely sweetness and visual appeal. Sift it for an elegant touch!*

## Step-by-Step Instructions

Now that we have our ingredients ready, let’s roll up our sleeves and get baking! Follow these steps for the perfect Lemon Crinkle Cookies.

1. **Preheat Your Oven**
   Begin by preheating your oven to 350°F (175°C). This golden temperature is perfect for baking and ensures your cookies will be chewy with beautiful edges.

2. **Cream the Butter and Sugar**
   In a large mixing bowl, use a hand mixer or stand mixer to cream together the softened butter and granulated sugar until light and fluffy (about 2-3 minutes). This step is crucial—the air we whip into the mix helps create a nice rise in our cookies.

3. **Add the Eggs**
   Next, crack in the eggs, one at a time, mixing well after each addition. This helps to maintain that lovely fluffiness. Don’t forget to scrape down the sides of the bowl every so often—don’t let any of that buttery goodness get left behind!

4. **Incorporate Lemon Juice and Zest**
   Now, add in your fresh lemon juice and lemon zest. Oh, the aroma will be heavenly! Mix until just combined; we want all that citrus flavor to meld beautifully with the butter and sugar.

5. **Sift the Dry Ingredients**
   In a separate bowl, sift together the all-purpose flour, baking soda, and salt. Sifting not only reduces lumps but also adds more air into our dry mix, creating lighter cookies.

6. **Combine Wet and Dry Ingredients**
   Gradually add the flour mixture into the wet ingredients, mixing until just combined. Be careful not to overmix—this helps keep our cookies soft.

7. **Chill the Dough**
   For that ooey-gooey texture, cover the dough with plastic wrap and let it chill in the refrigerator for at least 30 minutes. Chilling helps prevent spreading and promotes that fabulous crinkle texture.

8. **Scoop and Roll**
   Once chilled, retrieve the dough and use a cookie scoop (or a tablespoon) to portion out the dough. Roll each piece into a ball, then roll it in powdered sugar until the cookies are fully coated. This is where the signature "crinkle" effect will come from when they bake!

9. **Bake**
   Place the cookies on a lined baking sheet, evenly spaced apart. Bake in your preheated oven for 10-12 minutes, or until the edges are just set and the tops are slightly cracked.

10. **Cool and Dust Again**
    After baking, allow the cookies to cool on the baking sheet for about 5 minutes before transferring them to a wire rack. Once cooled, feel free to dust them with a bit more powdered sugar for that restaurant-worthy look!

## Serving Suggestions

Plate your Lemon Crinkle Cookies on a lovely dessert stand or a colorful plate. They pair beautifully with a cup of tea or lemonade for that extra citrus zing. Consider garnishing the plate with additional lemon slices or fresh mint leaves to add a pop of color!

## Recipe Variations

Get creative with these Lemon Crinkle Cookies! Here are some fun twists to try:

- **Blueberry Lemon Crinkles**: Fold in a handful of fresh or freeze-dried blueberries for an added burst of flavor.
- **Lemon Lavender Crinkles**: Infuse the dough with 1/2 teaspoon of culinary lavender for a floral touch.
- **Gluten-Free Option**: Substitute all-purpose flour with a gluten-free blend made for baking to cater to dietary restrictions.

## Chef’s Notes

I’ve been making these Lemon Crinkle Cookies for years, and they never disappoint! One time, I accidentally added twice the amount of lemon zest—I thought I had ruined the cookies! Instead, they turned out to be an even brighter version than before! Now I love experimenting with how much brightness comes through in each batch. It’s a powerful reminder that sometimes, a happy accident leads to the best flavors.

## FAQs and Troubleshooting

### 1. *Why are my cookies flat?*

If your cookies spread too much, it could be due to the butter being too warm. Ensure your butter is softened, not melted. Chilling the dough is also key—don’t skip that step!

### 2. *Can I use bottled lemon juice?*

While you can use bottled lemon juice in a pinch, fresh lemon juice is recommended for the best flavor and aroma. Trust me; your cookies will taste so much better with the fresh stuff!

### 3. *How do I store the cookies?*

Keep your Lemon Crinkle Cookies in an airtight container at room temperature for up to a week. If they last that long! You can also freeze the unbaked dough for up to three months. Just roll the dough into balls, freeze them, and then bake them fresh whenever you need a treat!

### 4. *What if I want to reduce the sugar?*

If you’d like to cut back on sugar, you can reduce the granulated sugar by a quarter, but keep in mind that it may alter the texture slightly. The powdered sugar on top will still offer that sweet contrast.

## Nutritional Info

While I hesitate to focus too much on numbers (food should be about joy!), a single Lemon Crinkle Cookie has approximately 120 calories, depending on the size you make. They’re a sweet indulgence worth every bite!

---

And there you have it, my lovely foodies! These Lemon Crinkle Cookies are an incredible treat that can bring a touch of sunshine to any occasion. Remember, the kitchen is a place for relaxation and fun, so enjoy the process! Happy baking!
Lemon Crinkle Cookies
Delightful and zesty Lemon Crinkle Cookies that burst with bright lemon flavor and are dusted with powdered sugar.
- Prep Time: 15 minutes
- Cook Time: 12 minutes
- Total Time: 45 minutes
- Yield: 24 servings 1x
- Category: Dessert
- Method: Baking
- Cuisine: American
- Diet: Vegetarian
Ingredients
- 1 cup granulated sugar
- 1/2 cup butter, softened
- 2 eggs
- 1 cup all-purpose flour
- 1/4 teaspoon baking soda
- 1/4 teaspoon salt
- 1/2 teaspoon lemon zest
- 1/4 cup fresh lemon juice
- Powdered sugar for dusting
Instructions
- Preheat your oven to 350°F (175°C).
- Cream together the softened butter and granulated sugar until light and fluffy.
- Add the eggs, one at a time, mixing well after each addition.
- Incorporate the fresh lemon juice and lemon zest into the mixture.
- Sift together the all-purpose flour, baking soda, and salt in a separate bowl.
- Combine the wet and dry ingredients, mixing until just combined.
- Chill the dough in the refrigerator for at least 30 minutes.
- Scoop the dough into balls and roll them in powdered sugar.
- Bake in the preheated oven for 10-12 minutes.
- Cool on baking sheet for 5 minutes before transferring to a wire rack.
Notes
Chill the dough for a better texture. Use fresh lemon juice for the best flavor.
Nutrition
- Serving Size: 1 cookie
- Calories: 120
- Sugar: 9g
- Sodium: 80mg
- Fat: 7g
- Saturated Fat: 4g
- Unsaturated Fat: 3g
- Trans Fat: 0g
- Carbohydrates: 15g
- Fiber: 0g
- Protein: 1g
- Cholesterol: 25mg
Keywords: lemon cookies, crinkle cookies, dessert, baking
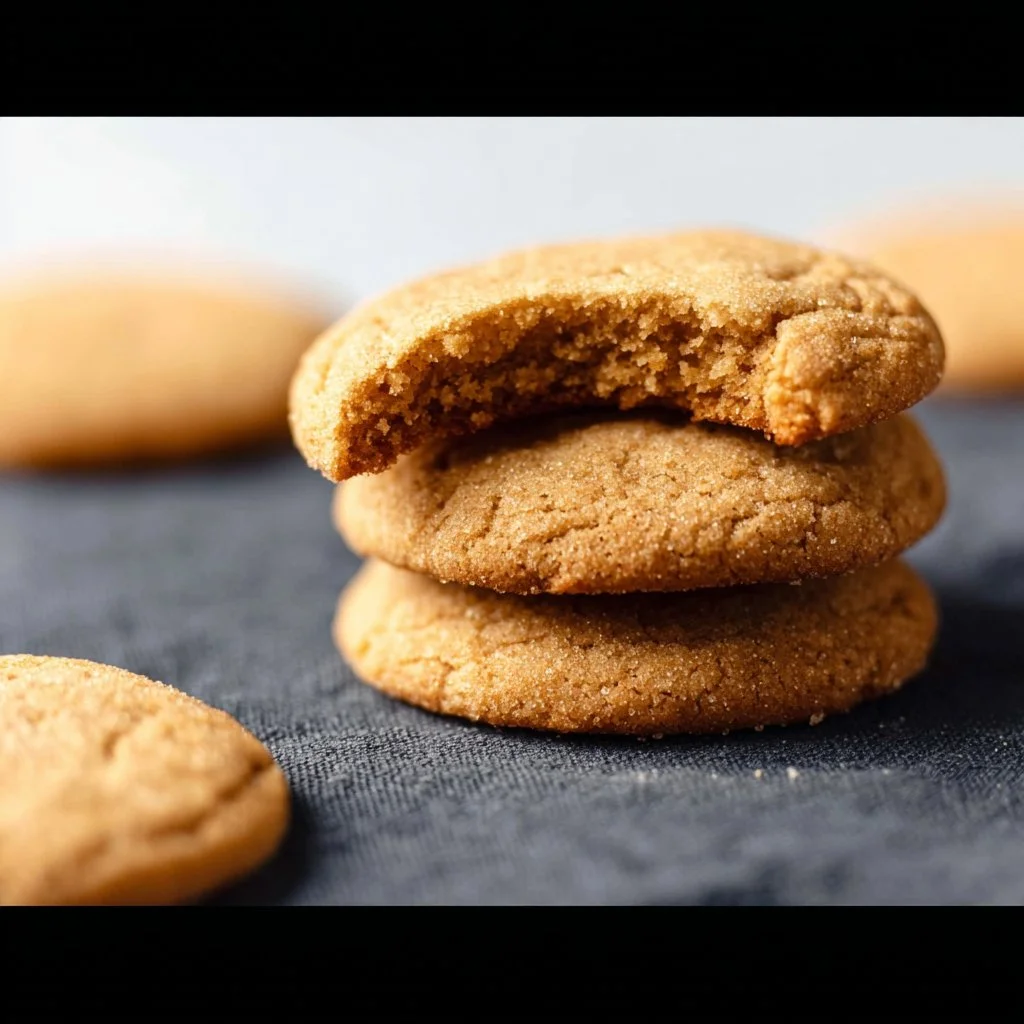
Easy 3 Ingredient Brown Sugar Cookies
Easy 3-Ingredient Brown Sugar Cookies: A Nostalgic Delight
Welcome, fellow food enthusiasts! Today, I’m thrilled to share one of my all-time favorite baked treats with you: 3-Ingredient Brown Sugar Cookies! These cookies are not just a sweet indulgence; they represent the simplicity and joy of baking that can transform an ordinary day into something a little more special.
Picture this: You arrive home after a long day, a little weary but ready to unwind. The comforting scent of baked goods wafts through the air, instantly wrapping you in warmth. That’s the magic of these brown sugar cookies! They’re soft, chewy, and utterly delightful, making them perfect for an afternoon treat or a cozy dessert after dinner.
What’s the best part? You don’t need a pantry full of ingredients to whip up these sweet delights! With just three simple ingredients, you’ll have a batch of cookies that will transport you back to the cozy afternoons of your childhood. They remind me of baking sessions with my grandmother, who often claimed that the best recipes are the simplest ones. We would giggle and create a delightful mess in the kitchen, the two of us crafting cookie dough that felt like magic between our hands.
Whether you’re an experienced baker or a newbie looking to delve into the world of cookies, these brown sugar cookies are foolproof and oh-so-satisfying. So, roll up those sleeves, tie on that ivory apron, and let’s get baking!
Personal Story
One of the sweetest memories I have involves my first solo cooking adventure. I was about eight years old, and my mom had left me with a small collection of ingredients and a dream to bake cookies. With the entire house to myself, I decided to try my hand at brown sugar cookies, inspired by the smell of freshly baked goodies from the kitchen.
I remember reaching for the brown sugar and thinking how magical it looked—golden and glistening in the light, just like a little treasure. I combined it with softened butter, mixed in the flour, and what emerged was a fantastic creation that instantly filled our home with an aroma I could barely describe. It felt as though my little hands had conjured something special from the pantry.
When my family came home, they were greeted with the warm scent of baking cookies. The smiles on their faces made all my efforts worthwhile. Those moments taught me that cooking isn’t just about the food; it’s about creating memories and sharing them with the people you love.
Ingredients
Here’s what you’ll need to create your scrumptious 3-Ingredient Brown Sugar Cookies:
-
½ cup salted butter (softened to room temperature – 1 stick)
Chef Insight: Using salted butter enhances the flavor and balances the sweetness of the cookies. If you only have unsalted butter on hand, just add a pinch of salt to your dough for a similar effect! -
½ cup brown sugar
Substitution Tips: Both light and dark brown sugar will work beautifully! Light brown sugar will give you a milder flavor, while dark brown sugar adds a richer, more caramelized taste. -
1 cup all-purpose flour
Quick Insight: Make sure to spoon and level the flour when measuring, which prevents your cookies from becoming dense. If you want to swap it out for a gluten-free option, a 1:1 gluten-free blend works like a charm!
Step-by-Step Instructions
Ready to bake? Let’s dive into the process! Here’s how to whip up these delightful cookies, step by step:
-
Preheat the Oven: Start by preheating your oven to 350°F (175°C). This is a crucial step, so don’t skip it! A properly preheated oven ensures that your cookies bake evenly and develop that lovely golden hue.
-
Cream the Butter and Brown Sugar: In a mixing bowl, add the softened salted butter and the brown sugar. Using a hand mixer or a wooden spoon, cream them together until the mixture is light and fluffy. This usually takes about 2-3 minutes. Chef Hack: Scrape down the sides of the bowl occasionally to make sure everything is well combined.
-
Add the Flour: Gradually fold in the all-purpose flour. Mix until the dough comes together—it should be soft and slightly sticky. Tip: Don’t overmix! Once you can see no more flour, you’re good to go!
-
Scoop the Dough: Using a tablespoon or a cookie scoop, portion out the dough onto a baking sheet lined with parchment paper, leaving some space in between each cookie for spreading. Chef’s Note: If you want your cookies to have a little extra pizzazz, roll the dough into balls and then roll them in a bit of extra brown sugar before placing them on the baking sheet.
-
Bake: Slide the baking sheet into your preheated oven and bake for about 10-12 minutes. The cookies are done when they are slightly golden on the edges but still soft in the center. Reminder: They will harden a bit as they cool, so don’t overbake!
-
Cool and Enjoy: Allow the cookies to cool on the baking sheet for about 5 minutes before transferring them to a wire rack to cool completely. They’re delicious warm, but they also taste delightful at room temperature!
Serving Suggestions
When it comes to plating your brown sugar cookies, the goal is to keep it simple yet inviting. Place a stack of warm cookies on a charming plate, perhaps alongside a small dish of milk or a scoop of your favorite ice cream for a delightful dessert experience. For a touch of elegance, garnish with a sprinkle of sea salt or a dusting of powdered sugar. Your friends and family will be saying, “Wow!” before they even take a bite!
Recipe Variations
Now that you’ve mastered the classic recipe, here are a few creative twists you might want to explore:
-
Chocolate Chip Delight: Add half a cup of chocolate chips to the dough for a delightful chocolatey twist.
-
Nutty Brown Sugars: Mix in half a cup of chopped nuts—walnuts, pecans, or even almonds—for a crunchy contrast to the soft cookie.
-
Cinnamon Spice: Add a teaspoon of cinnamon or pumpkin spice to the flour for a warm, cozy flavor.
-
Citrus Zest: Incorporate a teaspoon of lemon or orange zest to brighten the cookies and add a fresh aroma!
-
Dairy-Free Option: Swap the salted butter for ½ cup of coconut oil for a dairy-free alternative that still yields delicious results!
Chef’s Notes
Over the years, this recipe has become a staple in my kitchen. I love how versatile and forgiving it is—perfect for those last-minute cravings or when you need a sweet treat for unexpected guests. One of my funniest kitchen stories happened when I attempted to make these cookies while also juggling a phone call. Let’s just say I added brown sugar, thinking it was my measuring cup of flour! The resulting cookies were oddly sweet but still deliciously edible!
It’s these little mishaps that remind me of the joy in cooking and how it doesn’t always have to be perfect; it just has to be made with love.
FAQs and Troubleshooting
Here are a few common questions you might have about these cookies:
-
Why are my cookies spreading too much?
This could be due to the butter being too soft. Make sure to chill your dough for about 30 minutes before baking to help keep them from spreading. -
Can I store the dough?
Absolutely! You can refrigerate the dough wrapped in plastic wrap for up to a week or freeze it for up to three months. Just thaw in the fridge before using. -
How do I make the cookies chewier?
For chewier cookies, try slightly reducing the flour and increasing the butter. This adjustment helps them retain moisture. -
What if my cookies are too dry?
If the cookies turn out dry, you may have accidentally added too much flour. The next batch, be sure to spoon the flour into the measuring cup rather than scooping directly from the bag.
Nutritional Info
Optional but Helpful: While it’s hard to resist tracking down the numbers, a basic serving of one of these cookies contains approximately 120 calories, 6g of fat, 15g of carbs, and 1g of protein. Enjoy these cookies in moderation as part of a balanced diet!
So there you have it—the ultimate guide to crafting your delicious 3-Ingredient Brown Sugar Cookies! I hope this recipe brings you as much joy as it brings me. Now, tie on your apron, grab some brown sugar, and let’s whip up some sweet memories together! Happy baking!
PrintEasy 3-Ingredient Brown Sugar Cookies

Simple and delightful brown sugar cookies that require just three ingredients and bring back memories of cozy baking sessions.
- Prep Time: 15 minutes
- Cook Time: 12 minutes
- Total Time: 27 minutes
- Yield: 12 cookies 1x
- Category: Dessert
- Method: Baking
- Cuisine: American
- Diet: Vegetarian
Ingredients
- ½ cup salted butter (softened to room temperature – 1 stick)
- ½ cup brown sugar
- 1 cup all-purpose flour
Instructions
- Preheat the oven to 350°F (175°C).
- Cream the softened salted butter and brown sugar together until light and fluffy.
- Add the all-purpose flour and mix until the dough is soft and slightly sticky.
- Scoop the dough onto a baking sheet lined with parchment paper, leaving space between each cookie.
- Bake for 10-12 minutes until golden on the edges but soft in the center.
- Cool on the baking sheet for 5 minutes before transferring to a wire rack.
Notes
To enhance flavor, use salted butter. For variations, consider adding chocolate chips, nuts, or spices.
Nutrition
- Serving Size: 1 cookie
- Calories: 120
- Sugar: 9g
- Sodium: 80mg
- Fat: 6g
- Saturated Fat: 4g
- Unsaturated Fat: 2g
- Trans Fat: 0g
- Carbohydrates: 15g
- Fiber: 0g
- Protein: 1g
- Cholesterol: 30mg
Keywords: brown sugar cookies, easy cookies, 3-ingredient cookies, baking, dessert
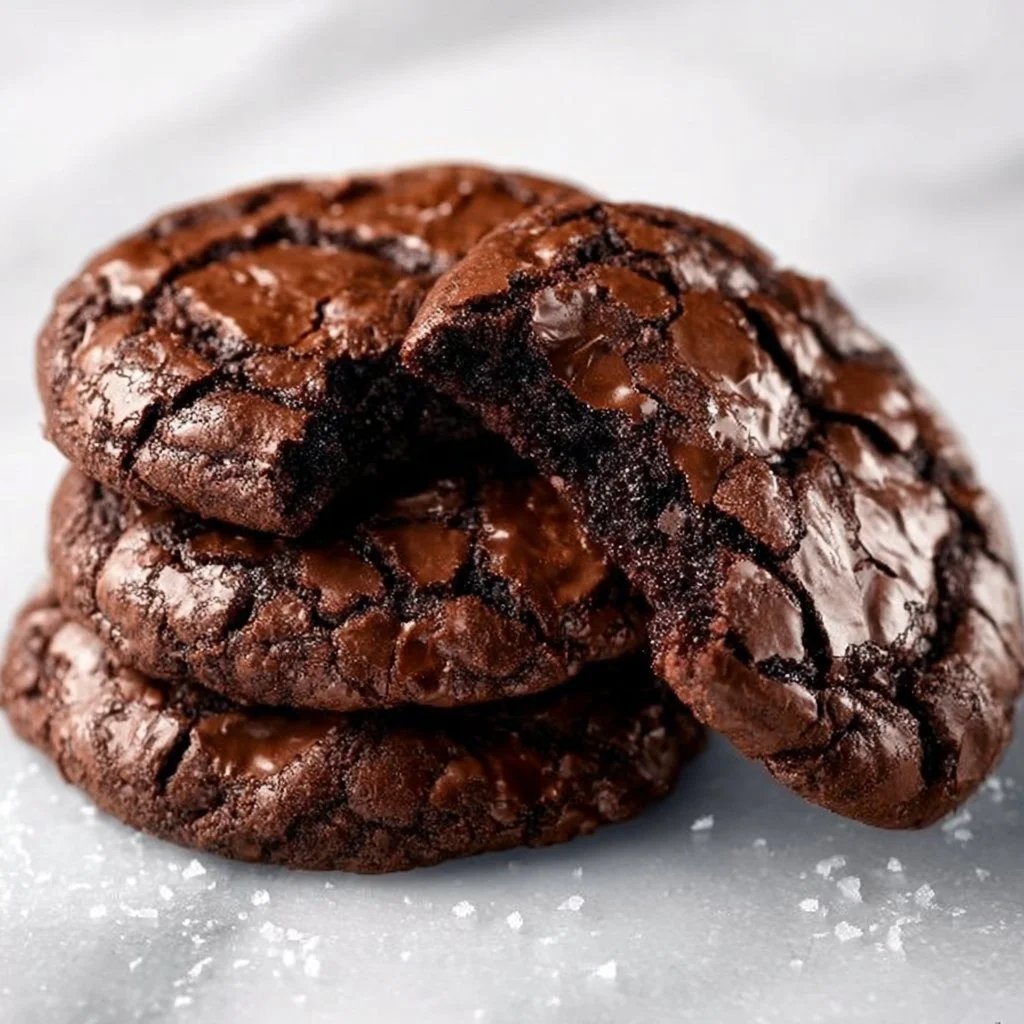
Gourmet Brownie Cookies
Gourmet Brownie Cookies: A Delicious Hybrid You’ll Love
Hello, my fellow food enthusiasts! I’m so excited to share my recipe for Gourmet Brownie Cookies with you today — perfect for any occasion or just when you need a little sweet pick-me-up. Picture this: a chewy, fudgy brownie meets the delightfully crisp edge of a cookie. Yes! It’s a match made in dessert heaven that brings the best of both worlds right to your table. These cookies are so indulgent that each bite feels like a little celebration.
Let me take you on a little journey into the world of cookies — the warm, chocolatey scent, the feeling of dough between your fingers, and the sounds of laughter in the kitchen. Cooking doesn’t just fill our bellies; it fills our hearts and creates memories. So, grab your apron, pull up a stool, and let’s create something scrumptious together!
I’ve always had a soft spot for brownies, but who doesn’t love a good cookie? That inspired me to create this recipe that captures the essence of both in one delightful package. What’s more, making these Gourmet Brownie Cookies is straightforward, and once you get the hang of it, you’ll want to whip them up for every occasion. Imagine surprising your friends at a gathering or cozying up on the couch with a plateful of these chocolatey delights — they’re sure to bring joy!
So, let’s get started, shall we? Gather up your ingredients, and I promise you’ll have a dessert that impresses without overwhelming!
Personal Story
I’ll never forget the first time I made these Gourmet Brownie Cookies. It was during a cozy winter evening when my friends came over for our traditional movie night. We were all stocked up on popcorn and hot chocolate, but I felt a craving for something more. I rummaged through my pantry and discovered a mix of chocolate chips, cocoa powder, and butter, and inspiration struck!
In just an hour, my kitchen filled with the heavenly aroma of freshly baked cookies. As my friends arrived, they were greeted by the scent of melting chocolate and laughter. One bite into these dreamy cookies had everyone grinning from ear to ear, and soon enough, they were begging for the recipe. That night turned into a cherished memory of warmth and friendship, and those Gourmet Brownie Cookies became a staple in my baking repertoire. It’s incredible how the right dessert can bring people together, isn’t it?
Ingredients
Here’s what you’ll need to create these delectably rich Gourmet Brownie Cookies:
-
1 cup unsalted butter, softened
(Make sure to let your butter sit at room temperature for at least an hour before mixing. If you’re in a hurry, you can microwave it in short bursts. Just be cautious; we want it soft, not melted!) -
1 cup granulated sugar
(This sugar sweetness balances the richness of the cocoa. For a different flavor profile, you can substitute part of this with coconut sugar!) -
1 cup brown sugar, packed
(Brown sugar helps create that delicious chewiness you expect in a brownie. If you’re low on brown sugar, you can easily make your own by mixing granulated sugar with a bit of molasses.) -
2 large eggs
(Room-temperature eggs incorporate more smoothly than cold ones, contributing to the cookie’s texture.) -
2 teaspoons vanilla extract
(Always opt for pure vanilla for the best flavor. You could also use almond extract for a twist!) -
1 cup all-purpose flour
(A little lift can come from this. Need it gluten-free? You can substitute with a 1:1 gluten-free blend.) -
1/2 cup cocoa powder
(Look for unsweetened cocoa powder to keep control over the sugar. A Dutch-processed cocoa will give a richer flavor!) -
1 teaspoon baking powder
(This helps the cookies risejust enough without losing their fudgy texture.) -
1/2 teaspoon salt
(Salt enhances flavors; it might seem small, but it’s essential so that the sweetness has depth.) -
1 cup chocolate chips
(Feel free to mix it up with dark chocolate or even white chocolate chips if you’re feeling adventurous!)
Step-by-Step Instructions
Now that you have your ingredients on hand, let’s dive into bringing these cookies to life!
-
Preheat Your Oven
Start by preheating your oven to 350°F (175°C). This ensures they bake evenly. While that’s happening, line a baking sheet with parchment paper. This makes for an easy cleanup and prevents your cookies from sticking. -
Mix the Butters and Sugars
In a large mixing bowl, cream together your softened unsalted butter, granulated sugar, and packed brown sugar. Use an electric mixer or a wooden spoon (if you’re feeling strong!). Mix this until it’s light and fluffy — about 2-3 minutes. This step is crucial as it creates air pockets that lead to a tender cookie. -
Add in the Eggs and Vanilla
Next, beat in the eggs one at a time, mixing well after each addition. Follow up with the vanilla extract, letting those flavors combine beautifully. You’ll sniff the sweet aroma wafting up, and it’ll be hard to resist a taste! -
Incorporate the Dry Ingredients
In a separate bowl, whisk together your all-purpose flour, cocoa powder, baking powder, and salt. Then, carefully fold this dry mixture into your wet mixture. This keeps things light and ensures you don’t overmix (which would lead to tough cookies!). -
Chocolate Chips, Please!
Now for the best part — gently fold in those chocolate chips until they’re evenly distributed throughout the dough. Try not to eat too many while you work; I know it’s hard! -
Scoop and Bake
Using a cookie scoop or two spoons, drop rounded tablespoons of batter onto your prepared baking sheet. Leave some space between each mound, as they will spread slightly during baking. -
Bake Away!
Bake for 10-12 minutes. You want the edges to look set but the centers to be slightly underbaked — trust me, they’ll continue cooking after you pull them out and cool down! -
Cool and Enjoy
Once done, let them cool on the baking sheet for about 5 minutes before transferring them to a wire rack. This helps them firm up while still being warm and chewy at the center.
With these steps, you’ve just whipped up a batch of Gourmet Brownie Cookies that will impress everyone who tries them.
Serving Suggestions
To serve these cookies, arrange them on a beautiful platter, maybe alongside a scoop of vanilla ice cream or a drizzle of chocolate sauce for that extra indulgence. Your guests will appreciate the thoughtful presentation! A sprinkle of sea salt on top enhances both visual appeal and flavor. Enjoy them warm or let them cool fully — they’re delightful either way!
Recipe Variations
Feeling creative? Here are a few variations to shake things up:
- Nutty Delight: Add 1/2 cup of chopped walnuts or pecans for some extra crunch and flavor.
- Minty Fresh: Swap chocolate chips for mint chocolate chips for a refreshing twist!
- Spicy Kick: Add a pinch of cayenne pepper or cinnamon to the dough for a warm, spiced version.
- Peanut Butter Swirl: Add dollops of peanut butter before baking for a deliciously nutty touch.
- Gluten-Free: Make them gluten-free by substituting all-purpose flour with a gluten-free blend.
Chef’s Notes
These Gourmet Brownie Cookies have gone through quite the evolution in my kitchen! Originally, I tried mixing various chocolate types, trying to find the perfect balance. I fondly remember one baking session when I accidentally added too much cocoa powder, resulting in an irresistibly rich batch that became a hit! It’s amazing how experimentation in the kitchen can lead to delightful surprises.
Remember, laughter and mishaps are all part of the cooking journey, and each recipe is an opportunity to discover something new!
FAQs and Troubleshooting
Q: Why are my cookies flat?
A: Flat cookies can often result from using melted (rather than softened) butter or overmixing the dough. Ensure that your butter is just softened and fold in your dry ingredients gently.
Q: Can I freeze the cookie dough?
A: Absolutely! Scoop the cookie dough onto a parchment-lined tray, freeze until firm, and transfer to a zip-top bag. They’ll keep well in the freezer for up to 3 months. Just add a minute or two to the baking time if baking from frozen.
Q: My cookies turned out too cakey. What happened?
A: This can happen if you added too much flour or overbaked them. Remember to measure your flour accurately and keep an eye on them while they’re baking.
Q: How should I store my cookies?
A: Freshly baked Gourmet Brownie Cookies can be stored in an airtight container at room temperature for about 3-5 days. For longer freshness, consider refrigerating them or freezing!
Enjoy your baking adventure, and I can’t wait to hear how your Gourmet Brownie Cookies turn out! Remember, it’s not just about creating something delicious but also about the memories you make along the way!
And there you have it — a delightful recipe that is sure to melt hearts (and taste buds!). Now, tie on that apron, grab your spoon, and let’s get to baking! 🍪✨
PrintGourmet Brownie Cookies

A delicious hybrid of chewy brownies and crisp cookies, these Gourmet Brownie Cookies are perfect for any occasion.
- Prep Time: 15 minutes
- Cook Time: 12 minutes
- Total Time: 27 minutes
- Yield: 24 cookies 1x
- Category: Dessert
- Method: Baking
- Cuisine: American
- Diet: Vegetarian
Ingredients
- 1 cup unsalted butter, softened
- 1 cup granulated sugar
- 1 cup brown sugar, packed
- 2 large eggs
- 2 teaspoons vanilla extract
- 1 cup all-purpose flour
- 1/2 cup cocoa powder
- 1 teaspoon baking powder
- 1/2 teaspoon salt
- 1 cup chocolate chips
Instructions
- Preheat your oven to 350°F (175°C) and line a baking sheet with parchment paper.
- Mix together your softened unsalted butter, granulated sugar, and packed brown sugar until light and fluffy, about 2-3 minutes.
- Add the eggs one at a time, mixing well after each, followed by the vanilla extract.
- Incorporate the whisked together all-purpose flour, cocoa powder, baking powder, and salt into your wet mixture.
- Fold in the chocolate chips until evenly distributed.
- Scoop rounded tablespoons of batter onto the prepared baking sheet, leaving space in between.
- Bake for 10-12 minutes, until edges look set but centers are slightly underbaked.
- Cool on the baking sheet for 5 minutes, then transfer to a wire rack.
Notes
Serve with vanilla ice cream or chocolate sauce. Enjoy them warm or cooled!
Nutrition
- Serving Size: 1 cookie
- Calories: 250
- Sugar: 20g
- Sodium: 150mg
- Fat: 12g
- Saturated Fat: 7g
- Unsaturated Fat: 4g
- Trans Fat: 0g
- Carbohydrates: 32g
- Fiber: 1g
- Protein: 3g
- Cholesterol: 30mg
Keywords: cookies, desserts, brownie cookies, chocolate, baking

Red Velvet Cinnamon Rolls
Red Velvet Cinnamon Rolls: A Taste of Comfort and Joy
Hello, food lovers! Today, I am bubbling with excitement to share with you a recipe that combines two of life’s greatest delights: the velvety richness of red velvet cake and the warm, comforting nature of cinnamon rolls. Yes, you guessed it—it’s time for Red Velvet Cinnamon Rolls!
These beauties are not just a treat for the taste buds but also a feast for the eyes. Their deep crimson hue, swirled with creamy tang and topped with luscious frosting, makes them a show-stopper no matter where they’re served. Whether you’re prepping for a cozy brunch with friends, surprising your loved ones on a lazy Sunday morning, or brightening a weekday afternoon, these cinnamon rolls are guaranteed to elevate your day.
I know what you might be thinking: “Savannah, isn’t making cinnamon rolls a daunting task?” Well, my friends, I’m happy to report that these rolls are surprisingly simple. With a few key ingredients and just a bit of love (and some dough kneading), you can have these delightful gems ready to impress in no time!
So, grab your apron, pour yourself a warm cup of coffee, and let’s dive into this delicious adventure together. I promise, you’ll be glad you did!
Personal Story
As a kid, I fondly remember baking with my grandma on those chilly winter afternoons. The air would be filled with the smells of spices and sweets, and I’d eagerly await our creations to emerge golden and warm from the oven. One of her favorite recipes was that of her famous cinnamon rolls—but we would always jazz them up with a festive twist around the holidays.
One snowy December, we decided to dabble in the vibrant world of food coloring, and red velvet became our muse. The beautiful, rich color of the dough captured my imagination. Watching my grandma expertly blend the ingredients and swirl the cinnamon mixture was pure magic. When we took our rolls out of the oven, I could hardly wait to slather them with the cream cheese frosting! That day, I learned that food is more than just sustenance; it’s a way to weave memories, share love, and bring people together. That’s the spirit I’ve poured into these Red Velvet Cinnamon Rolls—a dish that embodies warmth, love, and a sprinkle of nostalgia.
Ingredients
Let’s gather our ingredients! Here’s what you’ll need for this colorful treat:
Ingredients List
-
2 cups all-purpose flour
A staple ingredient for so many recipes—this is the base for your rolls. If you want a gluten-free version, feel free to substitute with a gluten-free 1-to-1 flour blend. -
1 cup sugar
This sweetness makes all the difference. For a less sugary twist, you can cut the sugar down to ¾ cup or use coconut sugar for a hint of caramel flavor. -
1 teaspoon baking powder
This helps the dough rise. A must-have for all baked goods! -
1 teaspoon baking soda
Another leavening agent that gives the rolls their fluffiness. They work hand in hand with the acidic components (like buttermilk) to create the perfect lift. -
1/2 teaspoon salt
Balances the sweetness and brings out the flavors. Don’t skip it! -
1/2 cup buttermilk
This adds moisture and tenderness. If you don’t have buttermilk, make a substitute by adding 1/2 tablespoon of vinegar or lemon juice to 1/2 cup of milk and let it sit for 5 minutes. -
1/4 cup unsalted butter, melted
Adds richness. Melted butter helps the rolls maintain their soft texture. For a dairy-free version, coconut oil works great here! -
1 large egg
Binds everything together and gives structure. You can use a flax egg (1 tablespoon ground flaxseed mixed with 2.5 tablespoons water) for a vegan alternative. -
2 tablespoons red food coloring
The star of the show! This gives the roll its iconic color. Use natural beet juice or powder as an alternative for a more natural dye option. -
1 teaspoon vanilla extract
Adds an aromatic depth of flavor. Trust me, it’s worth the splash! -
1 tablespoon ground cinnamon
Adds warmth and coziness! You can use pumpkin pie spice for a delicious twist. -
1/2 cup brown sugar
Sweet and granulated with caramel notes. To keep it lower in sugar, try reducing the amount to 1/3 cup or substituting with a granulated sugar alternative. -
1/2 cup cream cheese, softened
This creamy goodness is key for the filling. For a non-dairy version, use a vegan cream cheese alternative. -
1/4 cup powdered sugar
To sweeten the frosting. This creates a lovely consistency for drizzling. -
1 teaspoon vanilla extract (for frosting)
More vanilla for more flavor! You can leave it out if you want a more minimalist approach.
Step-by-Step Instructions
Alright, let’s get into the fun part—making your Red Velvet Cinnamon Rolls! Here’s how to whip these up:
Step 1: Prepare Your Dough
-
Mix Dry Ingredients
In a large mixing bowl, combine 2 cups of all-purpose flour, 1 cup of sugar, 1 teaspoon of baking powder, 1 teaspoon of baking soda, and ½ teaspoon of salt. Whisk them together until they’re all blended nicely. This ensures that the leaveners are evenly distributed—no one wants a lumpy roll! -
Combine Wet Ingredients
In another bowl, whisk together ½ cup of buttermilk, ¼ cup of melted unsalted butter, 1 large egg, 2 tablespoons of red food coloring, and 1 teaspoon of vanilla extract. Make sure the butter isn’t too hot, or it might cook the egg! -
Create the Dough
Slowly pour the wet mixture into the dry ingredients. Use a spatula to marry the two until no dry flour is visible. It’s okay if it’s a little sticky—this means it’s gonna be super soft!
Step 2: Knead and Rise
-
Knead the Dough
On a floured surface, knead your dough for about 3-5 minutes until it’s smooth and elastic. If it’s too sticky, sprinkle a little more flour while kneading. -
Let It Rest
Place your dough into a greased bowl, cover it with a kitchen towel, and let it rise in a warm place for about 1 hour or until it doubles in size. Grab a cup of coffee and relax—you deserve this!
Step 3: Create the Filling
- Make Your Cinnamon Mix
While your dough rises, let’s work on the filling. In a small bowl, mix together ½ cup of brown sugar, 1 tablespoon of ground cinnamon, and a dash of vanilla extract. This will create that warm, sweet filling we all love.
Step 4: Roll It Out
-
Flour Your Surface Again
After resting, punch down the dough and place it on a lightly floured surface. Roll it out into a rectangle about 1/4 inch thick. Keep it even so the rolls cook up uniformly. -
Spread the Filling
Using a spatula, spread the softened cream cheese (½ cup) over the dough, then top it with your cinnamon mixture. Just go wild and spread it all out to the edges!
Step 5: Form the Rolls
-
Rolling It Up
Starting from one of the long edges, carefully roll the dough into a tight log. The tighter you roll, the nicer your swirls will be! -
Slice and Dice
Using a sharp knife or kitchen string, slice the log into 12 equal pieces. Place them cut side up in a greased baking dish, and cover with a kitchen towel to rise again for about 30 minutes.
Step 6: Bake Away
-
Preheat Your Oven
Preheat your oven to 350°F (175°C). They’ll bake faster if the oven is ready when you are! -
Bake
Pop your rolls into the oven and bake for about 25-30 minutes until they’re nicely golden. You’re gonna want to keep an eye on them to prevent burning.
Step 7: Frost and Serve
-
Make the Frosting
While your rolls are baking, mix ½ cup of softened cream cheese, ¼ cup of powdered sugar, and 1 teaspoon of vanilla extract in a bowl until smooth and creamy. -
Glaze the Rolls
Once your rolls come out of the oven, resist the urge to dig in immediately! Let them cool for about 10 minutes—then spread the frosting generously on top.
Serving Suggestions
Presentation can elevate any dish! For these Red Velvet Cinnamon Rolls, serve them warm on a rustic wooden platter. Dust a touch of powdered sugar on top for that charming café vibe. Pair them with a hot cup of coffee or spiced chai, and don’t hesitate to add some fresh berries on the side for a pop of color and freshness. Your table will look stunning!
Recipe Variations
- Nutty Delight: Add chopped pecans or walnuts to the filling for a delightful crunch.
- Chocolate Lovers: Incorporate chocolate chips into the filling for a rich twist.
- Spiced Twist: Swap out the ground cinnamon for pumpkin pie spice for a seasonal flair.
- Vegan Version: Use almond milk, vegan butter, and a flax egg to make these plant-based!
- Cream Cheese Swirl: Instead of just spreading the cream cheese, swirl it into the rolls for a marbled effect.
Chef’s Notes
Ah, where do I begin! These Red Velvet Cinnamon Rolls are a new favorite in my kitchen. When I first tried this recipe, I accidentally added too much food coloring—let’s just say my kitchen looked like a Valentine’s Day card exploded! But what came out of that kitchen mishap was a lesson in being creative and experimental in the kitchen.
These rolls have evolved over time, reflecting my love for simple yet elegant food. And guess what? They freeze beautifully! So make a double batch, frost them before they’re completely cool, put them in an airtight container, and enjoy later.
FAQs and Troubleshooting
1. Why are my cinnamon rolls not rising?
Make sure your yeast (in the form of baking powder and soda) is fresh! It’s also vital to keep the dough in a warm, draft-free place while it rises.
2. How do I prevent my rolls from drying out?
Keep them covered with a kitchen towel while they rise and store leftover rolls in an airtight container once they’re cooled.
3. Can I make these a day in advance?
Absolutely! Prepare the rolls, place them in the baking dish, cover tightly with plastic wrap, and refrigerate overnight. Bake them in the morning straight from the fridge, just add a few extra minutes to the baking time.
4. How can I make them less sweet?
Feel free to reduce the sugar in both the dough and the filling. You can also omit the frosting for a more minimalist approach.
Nutritional Info
(Optional, could be based on preferences)
- Serving Size: 1 roll
- Calories: Approximately 320
- Fat: 12g
- Carbohydrates: 47g
- Protein: 4g
- Sugar: 20g
There you have it, friends! Your guide to making mouthwatering Red Velvet Cinnamon Rolls at home. I hope you enjoy making them as much as I do. Remember, the kitchen is all about experimenting, so let your creativity shine. Happy baking! Let’s gather around that table soon.
PrintRed Velvet Cinnamon Rolls

Delicious red velvet cinnamon rolls swirled with cream cheese filling and topped with luscious frosting, perfect for any occasion.
- Prep Time: 30 minutes
- Cook Time: 30 minutes
- Total Time: 60 minutes
- Yield: 12 servings 1x
- Category: Dessert
- Method: Baking
- Cuisine: American
- Diet: Vegetarian
Ingredients
- 2 cups all-purpose flour
- 1 cup sugar
- 1 teaspoon baking powder
- 1 teaspoon baking soda
- 1/2 teaspoon salt
- 1/2 cup buttermilk
- 1/4 cup unsalted butter, melted
- 1 large egg
- 2 tablespoons red food coloring
- 1 teaspoon vanilla extract
- 1 tablespoon ground cinnamon
- 1/2 cup brown sugar
- 1/2 cup cream cheese, softened
- 1/4 cup powdered sugar
- 1 teaspoon vanilla extract (for frosting)
Instructions
- Mix Dry Ingredients: In a large mixing bowl, combine flour, sugar, baking powder, baking soda, and salt. Whisk until blended.
- Combine Wet Ingredients: In another bowl, whisk together buttermilk, melted butter, egg, red food coloring, and vanilla extract.
- Create the Dough: Pour the wet mixture into the dry ingredients and combine until just mixed.
- Knead the Dough: On a floured surface, knead the dough for 3-5 minutes until smooth and elastic.
- Let It Rest: Place dough in a greased bowl, cover, and let rise for about 1 hour.
- Make Your Cinnamon Mix: Mix brown sugar, cinnamon, and a dash of vanilla in a small bowl.
- Flour Your Surface: Roll out the dough into a rectangle about 1/4 inch thick.
- Spread the Filling: Spread softened cream cheese over the dough and sprinkle with cinnamon mixture.
- Rolling It Up: Roll the dough from one edge into a tight log.
- Slice and Dice: Cut the log into 12 equal pieces and place in a greased baking dish.
- Preheat Your Oven: Preheat oven to 350°F (175°C).
- Bake: Bake for 25-30 minutes until golden.
- Make the Frosting: Mix cream cheese, powdered sugar, and vanilla until smooth.
- Glaze the Rolls: Spread frosting over rolls once they have cooled for about 10 minutes.
Notes
These cinnamon rolls freeze well, so make a double batch and enjoy later!
Nutrition
- Serving Size: 1 roll
- Calories: 320
- Sugar: 20g
- Sodium: 400mg
- Fat: 12g
- Saturated Fat: 6g
- Unsaturated Fat: 3g
- Trans Fat: 0g
- Carbohydrates: 47g
- Fiber: 1g
- Protein: 4g
- Cholesterol: 30mg
Keywords: cinnamon rolls, red velvet, dessert, sweet rolls, baking