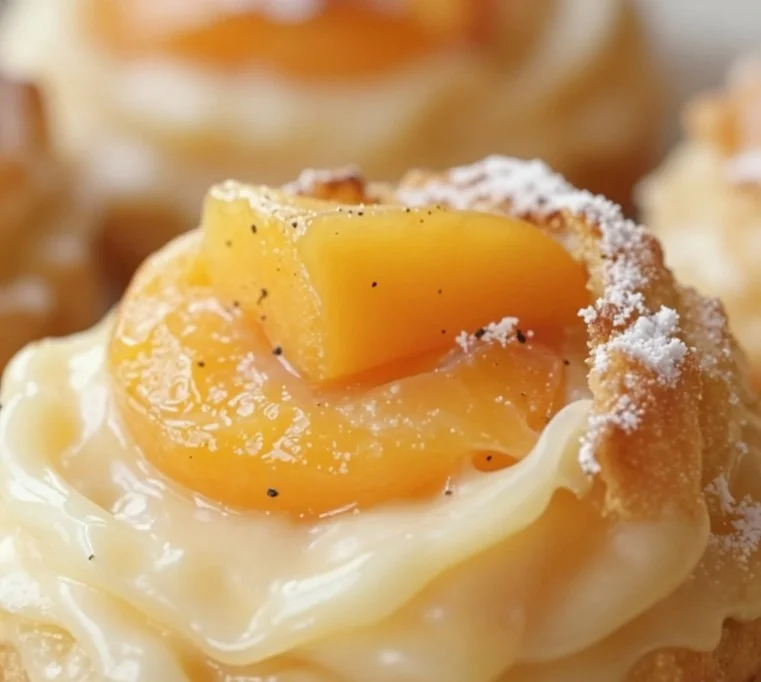
Peach Pie Cruffins: Flaky, Gooey Summer Breakfast Treat
Peach Pie Cruffins: A Delightful Twist on a Classic Treat
Welcome, baking enthusiasts! Today, we’re embarking on a delicious journey to create something that’s bound to impress: Peach Pie Cruffins! Now, you might be wondering, what’s a cruffin? Well, my friends, it’s the delightful lovechild of a croissant and a muffin, filled with sweet peach pie filling and baked to golden perfection. This recipe is all about indulgence without the intimidation. So, grab your apron and let’s get baking!
A Whiff of Nostalgia
Let me take you back to my childhood. Growing up, my Grandma used to make the most delectable peach pie every summer when the fruit was at its peak. The aroma would fill her cozy kitchen, mingling with the sound of laughter and the clinking of dishes. Those pies became a tradition—not just a dessert, but a celebration of family and the joys of sharing a table.
When it came to summer gatherings, nothing could compare to the golden crust, sweet and spiced peach filling, and the whipped cream dolloped generously on top. But as I grew older, I started to think about how I could put a twist on that beloved classic. That’s when the cruffin idea hit me! Combining the flaky, layered texture of a croissant with the fruity memories of my grandma’s pie? Absolute genius!
That’s the beauty of cooking, isn’t it? It allows us to honor our past while exploring new flavors and techniques. So, let’s dive in and create something that not only tastes divine but also tells a story of summer sweetness.
Ingredients
Here’s what you’ll need to create these scrumptious Peach Pie Cruffins:
-
1 package puff pastry sheets (thawed)
The star of our show! Puff pastry gives these cruffins their signature flaky layers and airy texture. If you don’t have puff pastry, you can try using crescent roll dough, but the texture will be different. -
1 can (15 oz peach pie filling)
Easy and sweet! This convenient filling simplifies the process. If you’re feeling adventurous, you can make your own filling from fresh peaches—just cook them down with some sugar, cinnamon, and a squeeze of lemon juice. -
2 tablespoons granulated sugar (optional)
This is for those who love it a little sweeter. You can adjust this depending on your taste or omit it entirely if you prefer a more natural flavor. -
1 teaspoon ground cinnamon
Cinnamon adds a warm, comforting flavor that perfectly complements the peaches. Use freshly ground cinnamon for the best flavor, or try pumpkin spice for a fun twist! -
1 egg (for egg wash)
This will give your cruffins that beautiful golden-brown finish. If you’re vegan, you can use a bit of non-dairy milk or aquafaba for a similar effect. -
1 tablespoon water
Simply mixed with the egg for our wash. You can swap this for milk for a richer finish. -
½ cup powdered sugar
We’ll whip this into a glaze for the final touch. If you’re watching your sugar, coconut sugar can work in a pinch, though it will alter the color. -
1 tablespoon milk or cream (for glaze)
This will help you achieve that silky glaze. Feel free to use your plant-based milk options for a dairy-free version!
Step-by-Step Instructions
Now, let’s get our hands floury and bring these cruffins to life!
-
Prep Work
Preheat your oven to 400°F (200°C). Line a muffin tin with paper liners or grease it lightly to prevent sticking. This is key for our cruffins to have that perfect shape! -
Roll Out the Puff Pastry
Take your thawed puff pastry sheets out and roll them out lightly on a floured surface. We want to stretch them just a bit to ensure they’re ready for layers. You’ll want to roll them out to about 12×12 inches. If they’re slightly uneven, don’t worry—this adds character! -
Apply the Sugar and Cinnamon
In a small bowl, mix your granulated sugar and cinnamon together. Sprinkle this mixture evenly over the rolled-out pastry. This is the magic layer that transforms our cruffins into something truly special! -
Add the Peach Filling
Spread the peach pie filling over the cinnamon-sugar layer. Use a spatula to ensure an even spread, leaving about half an inch of pastry around the edges. Don’t go overboard—too much filling might cause spillage but, hey, if that happens, consider it a rustic touch! -
Shape the Cruffins
Starting from one edge, carefully roll the pastry up like a jelly roll or cinnamon roll, ensuring it stays tight. Once rolled, slice the log into about 6-8 equal pieces. This is where the beautiful layers come together! -
Position in the Muffin Tin
Place each rolled piece (cut side up) into the muffin tin. Make sure to give them a little space; they will puff up and spread as they bake! -
Egg Wash
In a small bowl, whisk together the egg and water. Brush this mixture gently over the tops of your cruffins to give them that irresistible golden sheen. (Remember, don’t get it on the edges; we want those to puff up nicely!) -
Bake
Pop those beauties in the preheated oven and bake for 20-25 minutes, or until they’re golden brown and flaky. Your kitchen is about to smell like summer! -
Prepare the Glaze
While the cruffins are baking, mix your powdered sugar and milk/cream until smooth to create the glaze. If you allow it to sit, it will thicken a bit, making it easier to drizzle. -
Finish and Serve
Once the cruffins are done baking, let them cool for a few minutes in the tin, then transfer them to a wire rack. Drizzle the glaze over the still-warm cruffins and watch it melt into all those flaky layers!
Serving Suggestions
To elevate the experience, serve these cruffins alongside a scoop of vanilla ice cream or a dollop of whipped cream. You could even add fresh peach slices for a lovely garnish that screams summertime. A hint of mint on top will give it that pop of color and freshness!
Recipe Variations
Feeling creative? Here are a few ideas to switch up this delightful treat:
-
Berry Medley: Swap the peach pie filling for a mixture of your favorite berries. Blueberries and raspberries are a delicious combo!
-
Savory Spin: Try a savory version with spinach, feta, and sun-dried tomatoes for a brunch twist!
-
Nutty Add-In: Stir in some crushed pecans or walnuts with the peach filling for extra crunch and flavor.
-
Spiced Twist: Add a dash of nutmeg or cloves to your cinnamon-sugar mix for a seasonal twist.
Chef’s Notes
These Peach Pie Cruffins have become a staple in my kitchen. Over the years, I’ve experimented with different fillings and even tried making my own puff pastry (talk about a labor of love!). Each attempt has brought its own delightful results, but there’s something comforting about the simplicity of using store-bought pastry and canned filling.
Whenever I serve these at gatherings, they spark joy and nostalgia. They remind me of my grandma’s kitchen, where love was always the main ingredient. Plus, they’re always a hit—I’ve yet to see one survive the first round!
FAQs and Troubleshooting
Q: My cruffins didn’t rise as much as I hoped. What went wrong?
A: This can happen if your puff pastry was overworked or if the oven temperature was too low. Ensure your pastry is kept cool until you’re ready to bake, and make sure your oven is thoroughly preheated.
Q: Can I use fresh peaches instead of canned filling?
A: Absolutely! Just cook down the fresh peaches with sugar, a bit of cinnamon, and a little cornstarch to thicken it up before spreading it on the pastry.
Q: How do I store leftovers?
A: Keep them in an airtight container at room temperature for up to 2 days. You can also refrigerate them for a few more days but reheat them slightly to regain some of that flakiness.
Q: Can I freeze these cruffins?
A: Yes! You can freeze them before baking or after. Just make sure they’re completely cool, then wrap them well in plastic wrap. Bake them straight from the freezer; just add a few extra minutes to the cooking time!
Nutritional Info (Optional)
While this recipe is all about indulgence, a serving contains approximately:
- Calories: 250
- Total Fat: 12g
- Carbohydrates: 32g
- Sugars: 10g
- Protein: 3g
These values can vary based on portions and specific ingredients used.
And there you have it—a delightful Peach Pie Cruffin that melds together the best of flavors, memories, and rich textures. Thank you for joining me on this culinary adventure! I can’t wait to see how yours turn out. Don’t forget to tie on your apron and bring a bit of love to your table—the world could always use a little more of that! Happy baking!
PrintPeach Pie Cruffins

A delightful twist on a classic peach pie, these Peach Pie Cruffins combine flaky croissant-like pastry with sweet peach filling.
- Prep Time: 15 minutes
- Cook Time: 25 minutes
- Total Time: 40 minutes
- Yield: 6-8 servings 1x
- Category: Dessert
- Method: Baking
- Cuisine: American
- Diet: Vegetarian
Ingredients
- 1 package puff pastry sheets (thawed)
- 1 can (15 oz) peach pie filling
- 2 tablespoons granulated sugar (optional)
- 1 teaspoon ground cinnamon
- 1 egg (for egg wash)
- 1 tablespoon water
- ½ cup powdered sugar
- 1 tablespoon milk or cream (for glaze)
Instructions
- Preheat your oven to 400°F (200°C). Line a muffin tin with paper liners or grease it lightly.
- Roll out the thawed puff pastry sheets onto a floured surface to about 12×12 inches.
- Mix the granulated sugar and cinnamon in a small bowl, then sprinkle over the rolled-out pastry.
- Spread the peach pie filling evenly over the cinnamon-sugar layer.
- Roll the pastry up tightly and slice into 6-8 equal pieces.
- Place each piece cut side up into the muffin tin.
- Whisk together the egg and water for the egg wash, then brush over the tops of the cruffins.
- Bake for 20-25 minutes until golden brown and flaky.
- Mix the powdered sugar and milk/cream to create the glaze.
- Let the cruffins cool for a few minutes, then drizzle with glaze.
Notes
Serve warm with a scoop of vanilla ice cream or a dollop of whipped cream for an extra treat.
Nutrition
- Serving Size: 1 cruffin
- Calories: 250
- Sugar: 10g
- Sodium: 100mg
- Fat: 12g
- Saturated Fat: 6g
- Unsaturated Fat: 4g
- Trans Fat: 0g
- Carbohydrates: 32g
- Fiber: 1g
- Protein: 3g
- Cholesterol: 30mg
Keywords: peach pie, cruffins, dessert, summer baking, croissant, cozy dessert
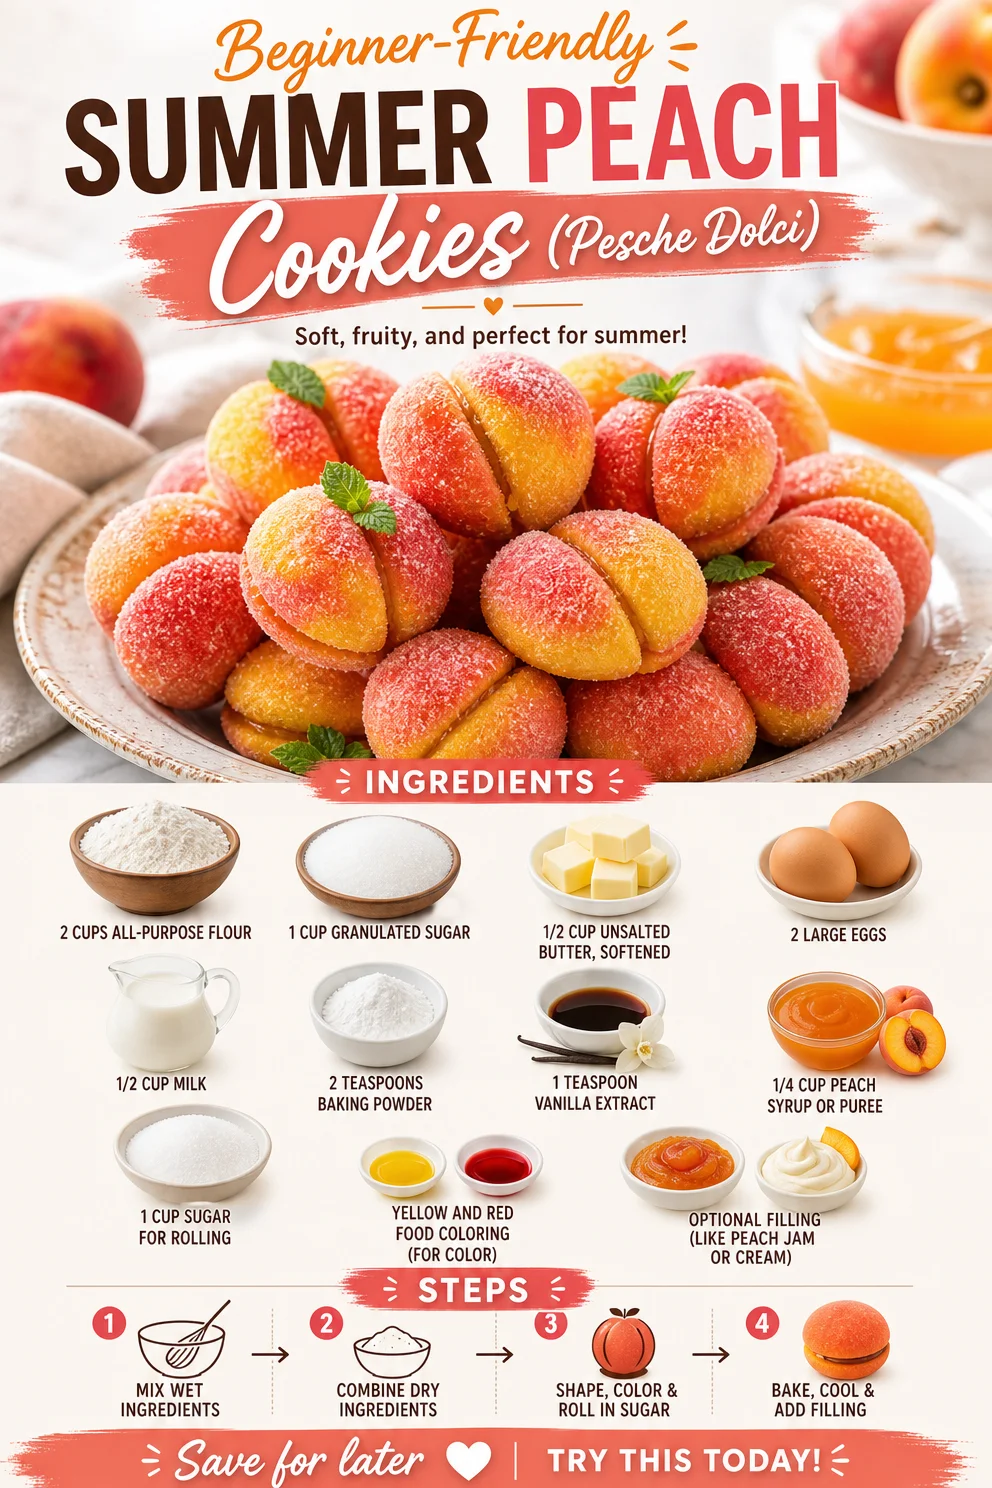
Beginner-Friendly Summer Peach Cookies (Pesche Dolci)
Italian Peach Summer Cookies (Pesche Dolci): A Sweet Slice of Nostalgia
Hello, fellow foodies! Today, I’m excited to take you on a flavorful journey into the heart of Italian summer traditions with a delightful recipe for Italian Peach Summer Cookies, or as they call them, Pesche Dolci. These charming treats are not just cookies; they’re tiny, delectable memories that transport you straight to sun-kissed summer days filled with laughter, love, and of course, irresistible flavors. As we dive into this sweet adventure, get ready to channel your inner pastry chef because we’re about to whip up something special!
A Personal Story: The Family Gatherings
Let me take you back to a sun-drenched afternoon in my grandmother’s kitchen. The aroma of fresh peaches blended with the comforting scent of baked goodies filled the air as the whole family gathered for our yearly summer reunion. My grandmother, with her twinkling eyes and flour-dusted apron, would greet each of us with warmth and love. One of her most beloved recipes was for Pesche Dolci, the Italian peach cookies that everyone eagerly awaited each summer.
As we rolled out the dough and shaped those petite peach-like cookies, she would share stories of her childhood in Sicily. Between giggles and the occasional flour fight, the kitchen came alive with joy. Once cooled, we would fill these golden delights with homemade peach jam, dust them with sugar, and adorn them with vibrant colors that mirrored the beautiful summer sunsets. Each bite was a reminder of the laughter and love that filled our gatherings, making these cookies not just a dessert, but a sweet memory stitched into the fabric of our family history.
Ingredients You’ll Need
Now that you’re feeling the love, let’s gather the ingredients for these delightful cookies. Here’s what you’ll need:
-
2 cups all-purpose flour
The base of our cookies. For a gluten-free option, substitute with a 1:1 gluten-free baking flour. -
1 cup granulated sugar
Sweetness is essential! You can use coconut sugar for a healthier twist, but keep in mind it may offer a different flavor profile. -
1/2 cup unsalted butter, softened
This adds richness to the dough. If you prefer a dairy-free version, coconut oil works nicely. -
2 large eggs
Essential for binding the dough. For an egg-free alternative, you can use flax eggs (1 tablespoon of ground flaxseed mixed with 2.5 tablespoons of water for each egg). -
1/2 cup milk
Use whole milk for creaminess, or substitute with almond milk for a dairy-free option. -
2 teaspoons baking powder
This is our leavening agent, giving the cookies a puff and light texture. -
1 teaspoon vanilla extract
Because every great recipe needs a touch of vanilla magic. -
1/4 cup peach syrup or puree
The star ingredient! Fresh peach puree adds flavor and moistness. Canned peach syrup works well, too. -
1 cup sugar for rolling
This creates a shimmering sweetness on the outside. -
Yellow and red food coloring (for color)
To achieve that perfect peach hue. You can skip this if you’d like a more natural look, using food-safe pigments instead. -
Optional filling (like peach jam or cream)
The surprise inside! You can use your favorite jam or even a creamy filling if you’re feeling decadent.
Step-by-Step Instructions: Let’s Bake!
Ready to hit the kitchen? Let’s transform these ingredients into sweet summer joy!
-
Preheat Your Oven
Start by preheating your oven to 350°F (175°C). This step is crucial—don’t skip it! A properly heated oven ensures even baking. -
Mix the Dry Ingredients
In a large bowl, combine the flour and baking powder. Whisk them together to break up any lumps. This creates a smooth base for our cookies. -
Cream the Butter and Sugar
In another bowl, beat the softened butter and granulated sugar together until light and fluffy—about 3 to 5 minutes. This step introduces air, giving your cookies a lovely texture. A hand mixer works wonders here! -
Add the Eggs and Vanilla
Beat in the eggs one at a time, ensuring each egg is fully incorporated before adding the next. This keeps the mixture smooth. Add the vanilla extract—trust me, your kitchen will smell divine! -
Combine Wet and Dry Ingredients
Gradually add the flour mixture to your butter-sugar-egg blend. Alternate with the milk, starting and ending with the flour. This helps prevent lumps and creates a silky dough. -
Fold in the Peach Puree
Now, gently mix in the peach syrup or puree—this is where the magic happens! Aim for a cohesive dough without overmixing. -
Color the Dough
Divide the dough into two separate bowls. Add a few drops of yellow food coloring to one bowl and red to the other, mixing until you reach that beautiful peach hue. If you’re opting for natural color, beet juice for red and turmeric for yellow can add color without synthetic dyes. -
Chill the Dough
Wrap each portion in plastic wrap and chill in the fridge for at least 30 minutes. This makes rolling easier and prevents cookies from spreading too much in the oven. -
Shape the Cookies
After the dough is chilled, take small portions (about 1 tablespoon each) and roll them into balls. Aim for a slight oval shape to mimic peaches. -
Bake
Place the cookies on a baking sheet lined with parchment paper about 2 inches apart. Bake for 12-15 minutes or until the edges are lightly golden. Don’t worry if they look a bit soft; they’ll firm up as they cool! -
Cool
Let them cool on the baking sheet for a few minutes before transferring them to a wire rack. This helps them set. -
Roll in Sugar
Once completely cooled, roll each cookie in sugar. You can also mix in a bit of cinnamon for an extra flavor kick! -
Fill
If you’re using a filling, gently scoop a small amount out of each cookie’s center and replace it with your jam or cream. Your guests will be pleasantly surprised!
Serving Suggestions: Let’s Make It Beautiful
Now that your Pesche Dolci are baked and ready, it’s time to present them beautifully! Arrange these peachy delights on a vibrant platter, perhaps garnished with a few fresh mint leaves or edible flowers for that touch of elegance. A light dusting of powdered sugar adds a lovely contrast and enhances the visual appeal. Serve alongside a cup of espresso or a refreshing peach iced tea for a delightful summer pairing.
Recipe Variations: Get Creative!
While the traditional filling and flavor are utterly delicious, here are some fun twists you can explore:
- Berry Bliss: Swap the peach filling for raspberry or blueberry jam for a delightful tartness.
- Nutty Addition: Mix in some chopped nuts like almonds or walnuts into the dough for an unexpected crunch.
- Cinnamon Roll Style: Add a sprinkle of cinnamon and nutmeg to the dough for a warm, cozy flavor.
- Chocolate Lovers: Fill the cookies with chocolate ganache or spread some Nutella instead of peach filling for a decadent treat.
- Vegan Version: Substitute with flax eggs and coconut oil, and use plant-based milk and cream to create a delightful vegan treat.
Chef’s Notes: A Dash of Reflection
Throughout the years, my Pesche Dolci recipe has evolved, adapting to new ingredients, dietary preferences, and creative whims. What started as a simple family treat has become a cherished recipe I share with friends and loved ones. I remember the first time I introduced an egg-free version at a summer gathering—everyone loved them just as much!
Cooking is often about the stories and experiences we create together, and I believe these cookies harness that spirit beautifully. So, whether you’re making them for a big gathering or a quiet evening at home, each bite should remind you of the love and tradition that inspired them.
FAQs and Troubleshooting: Let’s Clear It Up
-
My cookies spread too much—what happened?
This can happen if the dough isn’t chilled enough. Ensure you give it that necessary 30 minutes in the fridge. Also, keep an eye on the baking time; overbaking can lead to extra spreading. -
Can I freeze these cookies?
Absolutely! Ensure they are completely cooled, then place them in an airtight container. They can be frozen for up to 3 months. Just thaw them at room temperature before serving. -
What can I do if my dough is too sticky?
If it feels overly tacky, adding a bit more flour (a tablespoon at a time) can help. Remember not to over-flour; you want a manageable dough, not a dry one! -
How do I know when my cookies are done?
Look for a light golden brown color around the edges. They will firm up as they cool, so don’t worry if they seem a little soft right when they come out of the oven.
Nutritional Info
While I don’t focus heavily on nutritional stats, I do believe in enjoying treats in moderation. Each cookie is a delightful indulgence packed with flavors and memories—you can’t put a price on that!
I hope you enjoyed our little culinary adventure and feel inspired to create your own batch of Italian Peach Summer Cookies! Remember, cooking is all about love and creativity, so let your personality shine through in the kitchen. Happy baking! 🍑✨
PrintItalian Peach Summer Cookies (Pesche Dolci)

A delightful recipe for Italian Peach Summer Cookies that brings nostalgia and vibrant flavors of summer to your kitchen.
- Prep Time: 15 minutes
- Cook Time: 15 minutes
- Total Time: 30 minutes
- Yield: 24 servings 1x
- Category: Dessert
- Method: Baking
- Cuisine: Italian
- Diet: Vegetarian
Ingredients
- 2 cups all-purpose flour
- 1 cup granulated sugar
- 1/2 cup unsalted butter, softened
- 2 large eggs
- 1/2 cup milk
- 2 teaspoons baking powder
- 1 teaspoon vanilla extract
- 1/4 cup peach syrup or puree
- 1 cup sugar for rolling
- Yellow and red food coloring (for color)
- Optional filling (like peach jam or cream)
Instructions
- Preheat your oven to 350°F (175°C).
- Mix the dry ingredients: In a large bowl, combine flour and baking powder.
- Cream the butter and sugar in another bowl until light and fluffy.
- Add the eggs one at a time, incorporating each fully before the next.
- Combine the wet and dry ingredients gradually, alternating with milk.
- Fold in the peach puree.
- Color the dough by dividing it and adding food coloring.
- Chill the dough in plastic wrap for at least 30 minutes.
- Shape the cookies into small oval balls.
- Bake for 12-15 minutes or until edges are lightly golden.
- Cool on a wire rack.
- Roll each cookie in sugar when cool.
- Fill with jam or cream if desired.
Notes
You can substitute ingredients to cater to gluten-free or vegan diets. Ensure dough is chilled to prevent spreading.
Nutrition
- Serving Size: 1 cookie
- Calories: 150
- Sugar: 10g
- Sodium: 80mg
- Fat: 6g
- Saturated Fat: 3g
- Unsaturated Fat: 2g
- Trans Fat: 0g
- Carbohydrates: 22g
- Fiber: 1g
- Protein: 2g
- Cholesterol: 20mg
Keywords: Italian dessert, peach cookies, summer recipes, Pesche Dolci, nostalgic cookies
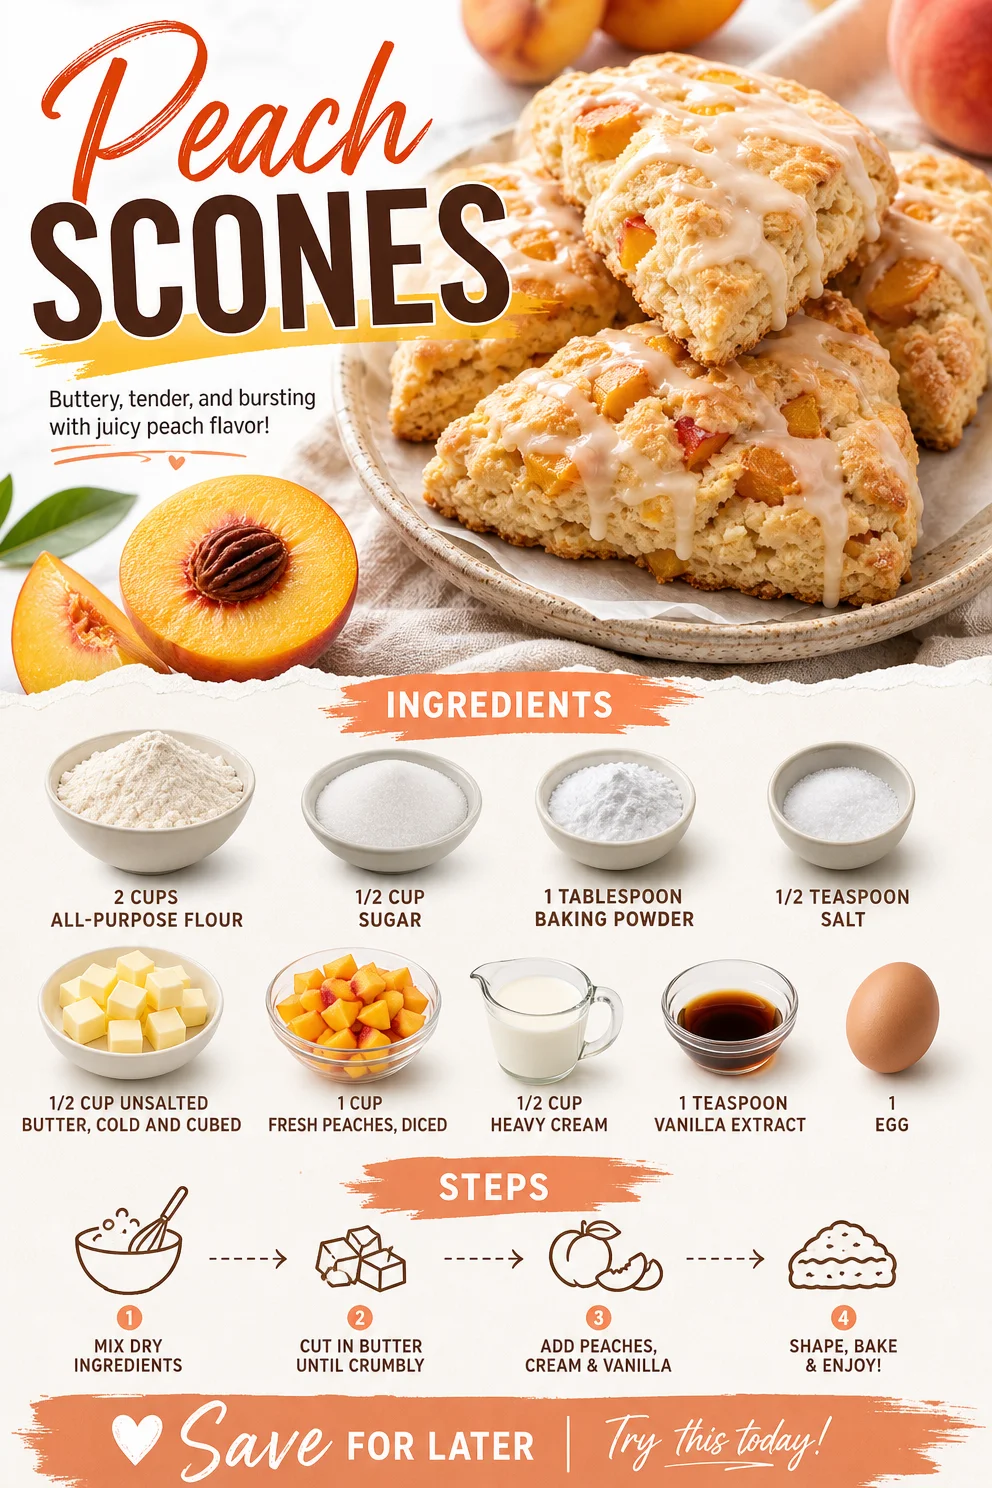
Peach Scones
The Sweetest Slice of Summer: Peach Scones
Welcome back to Ivory Apron, my cooking haven where elegance meets simplicity! Today, I’m thrilled to share one of my absolute favorite recipes: Peach Scones. There’s just something so heartwarming about biting into a warm scone, fresh out of the oven, especially when it’s bursting with juicy peach goodness. This recipe is perfect for a leisurely weekend brunch, a delightful afternoon tea, or even a special gathering with friends. So, let’s tie on our aprons and dive into this sweet adventure!
My Whimsical Peach Memory
Peaches have always held a special place in my heart. I fondly remember summer weekends at my grandparents’ house, where the air was filled with the sweet scent of ripe peaches from the tree in their backyard. My grandmother would gather us around the kitchen, and while we played underfoot, she’d whip up her irresistible peach cobbler. Oh, the joy of eating those juicy, sun-kissed peaches combined with the warmth of her laughter and the aromatic warmth of baked goods wafting through the kitchen!
Fast forward to today, and peaches still evoke that same nostalgia. They remind me that cooking is so much more than just following a recipe; it’s about creating memories and bringing loved ones together. This Peach Scone recipe draws inspiration from my grandmother’s kitchen, infusing it with a touch of elegance, proving that you don’t need a special occasion to indulge in deliciousness!
Ingredients
Let’s gather our ingredients for these delightful Peach Scones:
- 2 cups all-purpose flour: The backbone of any scone. You can substitute with whole wheat flour for a nuttier flavor or a gluten-free blend to suit different dietary needs.
- 1/2 cup sugar: This sweetens the dough just right. If you prefer a healthier option, consider natural sweeteners like honey or maple syrup; just adjust the liquid content accordingly.
- 1 tablespoon baking powder: This is our leavening agent, helping the scones rise. Make sure it’s fresh for optimal fluffiness; old baking powder can doom your scones to a flat fate.
- 1/2 teaspoon salt: A little bit of salt enhances all flavors, bringing the sweetness of the peaches forward.
- 1/2 cup unsalted butter, cold and cubed: Butter is essential for flakiness! If you’re in a pinch, coconut oil works well; just ensure it’s cold too.
- 1 cup fresh peaches, diced: Fresh peaches are essential! They add moisture and flavor, but you can swap them for nectarines or even mixed berries for a different twist.
- 1/2 cup heavy cream: This gives the scones a rich texture. Greek yogurt or a non-dairy cream can be used as alternatives.
- 1 teaspoon vanilla extract: Adds depth and warmth. Homemade vanilla extract can elevate the flavor even further.
- 1 egg: Used for richness and helping to bind everything together. If you’re vegan, a flax egg can work here (mix 1 tablespoon ground flaxseed with 2.5 tablespoons water)!
Step-by-Step Instructions
Alright, let’s get baking! Follow these detailed steps for perfectly golden peach scones.
-
Preheat the Oven: Preheat your oven to 400°F (200°C). This ensures your scones begin baking in the ideal hot environment, promoting a lovely rise!
-
Mix the Dry Ingredients: In a large mixing bowl, whisk together the flour, sugar, baking powder, and salt until they’re well combined. Chef Tip: Make sure to sift the flour to avoid clumps – this helps create a lighter texture.
-
Cut in the Butter: Add the cold, cubed butter to the flour mixture. Using a pastry cutter or your fingertips, quickly mix the butter into the flour until it resembles coarse crumbs. Little Hack: It’s key to keep the butter cold – this is what gives your scones their flaky layers, so try to work quickly!
-
Toss in the Peaches: Gently fold in the diced peaches. Commentary: The gesture of stirring should be gentle; you don’t want to bruise your lovely peaches too much.
-
Combine Wet Ingredients: In a separate bowl, whisk together the heavy cream, egg, and vanilla extract until smooth. Slowly pour this mixture into your dry ingredients, stirring until just combined. Tip: Do not overmix! The dough should be a tad sticky; that’s perfectly okay!
-
Shape the Dough: On a lightly floured surface, turn out the dough. Pat it into a circle about 1-inch thick; it doesn’t have to be perfect! Using a sharp knife or a bench scraper, cut the dough into 8 triangles. Chef Insight: If you prefer round scones, use a biscuit cutter instead!
-
Prepare for Baking: Place the scone triangles onto a parchment-lined baking sheet, leaving a bit of space between each. For a nice golden crust, brush the tops lightly with extra heavy cream. Bonus Trick: A sprinkle of sugar on top right before baking adds a delightful crunch!
-
Bake: Pop them in the oven and bake for about 15-20 minutes or until golden brown on top. Your kitchen will fill with that famous aroma – pure bliss!
-
Cool & Serve: Once baked, allow them to cool slightly on a wire rack. Serve warm, and prepare to be met with smiles and satisfied sighs!
Serving Suggestions
These scones are best enjoyed warm, straight from the oven! Serve them with a dollop of fresh whipped cream or a drizzle of honey. For an elegant twist, pair them with a chilled glass of lemonade or a steaming cup of tea. Presentation is key; arrange them on a beautiful cake stand or a rustic wooden platter. Trust me, your friends will feel pampered!
Recipe Variations
Here are some fun twists to try with your scones:
- Berry Peach Medley: Swap half of the peaches for raspberries or blueberries for a fruity explosion.
- Spiced Peach Scones: Add a pinch of cinnamon or nutmeg for a warm, cozy flavor.
- Savory Peach Scones: Mix in some crumbled cheese (like feta or cheddar) for a savory twist.
- Peach and Ginger: Add some finely chopped crystallized ginger for an unexpected zing!
Chef’s Notes
I can’t help but chuckle when reminiscing about my first batch of scones. You might say they were a bit of a disaster – I forgot to add the sugar! It was a lesson learned and a reminder of how essential every ingredient is to creating the dish’s harmony. Over the years, I’ve played with this recipe, adding a pinch of spice here and a new fruit there, but these classic peach scones always hold a special place in my heart. They never fail to spark a conversation or bring a smile!
FAQs and Troubleshooting
-
Why are my scones too dry?
If your scones end up dry, it might be due to overmixing the dough or measuring the flour incorrectly. Always spoon the flour into your measuring cup and level it off with a knife! -
Can I make the dough ahead of time?
Absolutely! You can prepare the dough, cut them into triangles, and refrigerate them. Just pop them in the oven when you’re ready, adding an extra 5 minutes to the baking time. -
What if my peaches are not ripe?
If your peaches are hard, try submerging them in warm water for 10 minutes to gently speed up the ripening process. Alternatively, you can sauté them in a bit of butter before adding them to the dough for enhanced flavor. -
How can I store leftovers?
Scones are best enjoyed fresh, but you can store leftovers in an airtight container at room temperature for up to two days. Reheat gently in the oven to bring back their warmth!
Nutritional Info
While these peach scones are not a health food, they’re a delightful indulgence! For those keeping an eye on nutrition, each scone (without any toppings) contains approximately:
- Calories: 250
- Fat: 10g
- Carbohydrates: 38g
- Protein: 3g
- Sugar: 7g
Remember, everything in moderation! Enjoy these beauties as part of a balanced diet.
I hope you feel inspired to try these Peach Scones in your own kitchen! With every bite, you’ll experience a little piece of nostalgia, a bit of elegance, and a whole lot of love. Happy baking, my friends! Don’t forget to share your creations and savor the moments around your table.
Let’s make every meal a beautiful memory!
PrintPeach Scones

Delightful peach scones, perfect for brunch or tea time, infused with nostalgia and flavor.
- Prep Time: 15 minutes
- Cook Time: 20 minutes
- Total Time: 35 minutes
- Yield: 8 scones 1x
- Category: Snack
- Method: Baking
- Cuisine: American
- Diet: Vegetarian
Ingredients
- 2 cups all-purpose flour
- 1/2 cup sugar
- 1 tablespoon baking powder
- 1/2 teaspoon salt
- 1/2 cup unsalted butter, cold and cubed
- 1 cup fresh peaches, diced
- 1/2 cup heavy cream
- 1 teaspoon vanilla extract
- 1 egg
Instructions
- Preheat your oven to 400°F (200°C).
- Mix together the flour, sugar, baking powder, and salt in a large mixing bowl.
- Cut in the cold, cubed butter until it resembles coarse crumbs.
- Toss in the diced peaches gently.
- Combine the heavy cream, egg, and vanilla extract in another bowl.
- Pour the wet mixture into the dry ingredients and stir until just combined.
- Shape the dough into a circle about 1-inch thick and cut into 8 triangles.
- Prepare a baking sheet with parchment paper and place the scone triangles on it.
- Bake for about 15-20 minutes or until golden brown.
- Cool on a wire rack and serve warm.
Notes
These scones are best enjoyed warm. Serve with whipped cream or honey for an extra treat.
Nutrition
- Serving Size: 1 scone
- Calories: 250
- Sugar: 7g
- Sodium: 150mg
- Fat: 10g
- Saturated Fat: 6g
- Unsaturated Fat: 4g
- Trans Fat: 0g
- Carbohydrates: 38g
- Fiber: 1g
- Protein: 3g
- Cholesterol: 30mg
Keywords: peach scones, breakfast, brunch, baking, summer treats
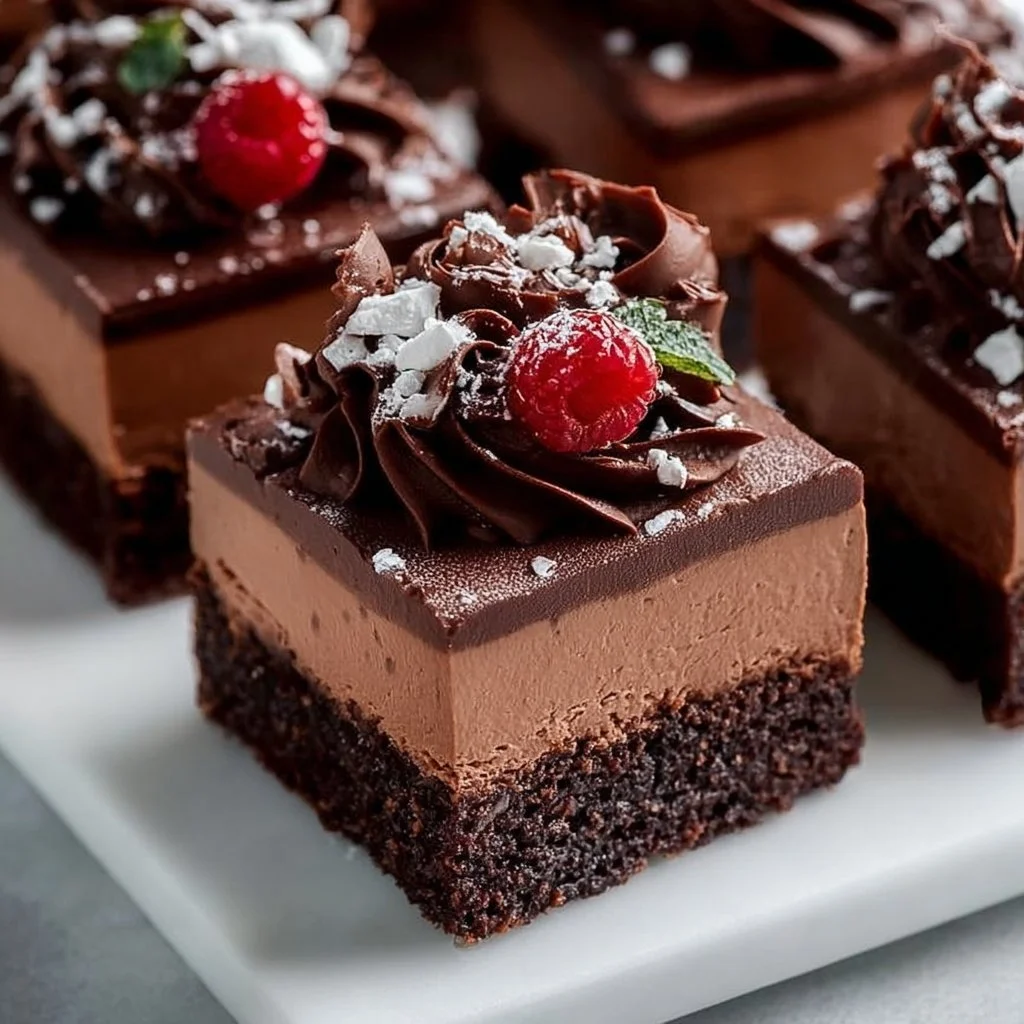
Chocolate Mousse Brownies
Indulge in Decadence: Chocolate Mousse Brownies Recipe
Welcome, fellow food lovers! Today, we’re diving into one of life’s simplest pleasures: chocolate. More specifically, we’re bringing together two crowd-pleasers in a luscious combination that will leave you weak in the knees—because nothing makes a bad day better than a rich, fudgy chocolate mousse brownie. Trust me; the only thing more tempting than the idea of these brownies is the act of making them.
When we think chocolate, we often imagine the sweet, silky taste melting in our mouths. But have you ever considered the magic of pairing rich brownies with an airy chocolate mousse? It’s pure alchemy in the kitchen, one that I fell in love with at a young age.
Let me take you on a little journey through my life: picture me as a young girl, smeared in flour and cocoa powder, bouncing around the kitchen as I tried to recreate my grandmother’s brownie recipe. As I stirred and combined, I’d sneak in bites of the mousse I had whipped up, only to find that blending the two could create something extraordinary! I remember the joy of serving my family these decadent treats and their wide-eyed amazement as they took their first bite. The laughter and smiles that surrounded the table are memories I cherish deeply, and are the essence behind why I share my recipes with you today.
Ingredients
Let’s gather our ingredients to create this chocolatey delight! Each one plays an essential role in crafting your perfect brownies:
-
1 cup unsweetened cocoa powder: This will be the base of our chocolate flavor. Opt for Dutch-processed cocoa for a richer taste, or substitute with an equal amount of carob powder for a caffeine-free version.
-
1 cup all-purpose flour: This provides structure. You can replace it with gluten-free flour to keep things friendly for those with dietary needs.
-
1 cup granulated sugar: For sweetness! Brown sugar can be used for a deeper flavor, but note that it may change the texture slightly.
-
1/2 cup unsalted butter, melted: This adds richness and moisture; coconut oil is a great dairy-free substitute.
-
3 large eggs: They bind everything together and contribute to the chewy texture. For a vegan option, use flax eggs (1 tablespoon ground flaxseed + 2.5 tablespoons water = 1 egg).
-
1 teaspoon vanilla extract: A must for elevating the overall flavor. If you’re out, almond extract makes a wonderful substitute.
-
1/2 cup heavy cream: This is for the mousse layer. If you need dairy-free, coconut cream works beautifully.
-
4 ounces semisweet chocolate, chopped: The star of the mousse! You can use dark chocolate if you prefer a more intense flavor, or swap with a flavored chocolate for a fun twist.
-
1/2 cup powdered sugar: To sweeten the mousse. For a lower sugar option, consider using stevia or another sugar substitute.
-
1/2 teaspoon salt: Salt enhances the sweetness of chocolate — trust me on this one! If you’re watching your sodium intake, a pinch of sea salt will do nicely.
Step-by-Step Instructions
Now, let’s get to the fun part: making our chocolate mousse brownies! Follow these steps for brownie bliss:
-
Preheat Your Oven: Preheat your oven to 350°F (175°C). This is the best way to ensure your brownies bake evenly and come out perfectly chewy. Don’t forget to line an 8×8-inch baking pan with parchment paper for easy removal!
-
Mix the Wet Ingredients: In a mixing bowl, whisk together the melted butter, granulated sugar, and vanilla extract until well combined. The mixture should look smooth and glossy. Make sure your butter isn’t too hot; warm is perfect but avoid cooking the eggs when you add them next.
-
Add the Eggs: Crack in the three large eggs and whisk until fully incorporated. You want the mixture to become a light, shiny batter. I have a little trick: after adding the eggs, whisk until the batter lightens a couple of shades to bring air into the mixture—this will result in a fluffier brownie.
-
Combine the Dry Ingredients: In another bowl, sift together the cocoa powder, flour, and salt. Sifting helps aerate the cocoa and flour, taking away any lumps for a smooth brownie. Gradually fold the dry ingredients into the wet mixture using a rubber spatula. Be gentle! Overmixing can create tough brownies. Stop when you no longer see dry flour.
-
Bake the Brownies: Pour your brownie batter into the prepared pan, smoothing it out with your spatula. Bake for 25-30 minutes, or until a toothpick inserted into the center comes out with moist crumbs (not wet batter). Ovens can vary, so keep an eye on them past the 25-minute mark.
-
Prepare the Chocolate Mousse: While the brownies are baking, it’s mousse time! Heat the heavy cream in a small saucepan over medium heat until just simmering. Pour it over the chopped semisweet chocolate in a mixing bowl and let stand for 5 minutes. This allows the chocolate to melt evenly.
-
Whisk Together: After 5 minutes, whisk the chocolate and cream together until smooth. Then beat in the powdered sugar until it’s creamy and luscious. This is where you can taste-test — quality control is crucial, my friends!
-
Chill the Mousse: Once mixed, refrigerate the mousse for about 30 minutes. It helps to thicken and sets up beautifully.
-
Assemble the Treat: Once the brownies are cool, spread the chocolate mousse evenly on top. You can get creative here; consider using a piping bag for a beautiful presentation!
-
Chill Again: This sweet delight benefits from a little more chilling. Place the brownies back in the fridge for at least an hour to set the mousse nicely before slicing.
Serving Suggestions
Now that you’ve created these divine chocolate mousse brownies, it’s time to serve them up right! Slice them into generous squares and serve them on a beautiful platter. For an elegant touch, dust with a bit of powdered sugar and a sprig of fresh mint. I also love pairing them with a scoop of vanilla ice cream or whipped cream—because, let’s be honest, chocolate deserves a companion!
Recipe Variations
Get creative with these brownies! Here’s how to put your spin on them:
-
Nutty Brownies: Fold in chopped nuts like walnuts or pecans into the brownie batter for added crunch.
-
Mint Chocolate Mousse: Add a few drops of peppermint extract to the mousse for a refreshing mint flavor that pairs perfectly with chocolate.
-
Fruit Topper: Fresh raspberries or strawberries on top of the mousse add a gorgeous pop of color and a little acidity to balance the richness.
-
Spicy Chocolate: Add a pinch of cayenne or chili powder to the brownie mix for a surprising kick that married beautifully with chocolate.
-
Vegan Delight: Follow earlier substitutions for a fully vegan recipe while adding silken tofu blended into the mousse for a creamy texture.
Chef’s Notes
This recipe has followed me through the years and has definitely evolved. I started with instant chocolate pudding mixed into the brownie batter (hey, we all have to learn somewhere!). But over time, I honed my skills and discovered that from-scratch mousse makes all the difference in flavor and texture!
If you ever find you’ve made a mess of the kitchen while creating (and believe me, I have!), just remember this: the messy ones often produce the most delicious results. And when all else fails, know that you can throw on a bit of powdered sugar for "decoration."
FAQs and Troubleshooting
1. My brownies came out cakey! What did I do wrong?
Overmixing can introduce too much air into the batter, leading to a cakey texture. Or, you may have baked them too long. Keep an eye on them after 25 minutes!
2. My mousse is too runny; how can I fix this?
This could be due to not letting the chocolate cool enough before mixing in the cream. Chill the mousse for a bit longer, and it’ll firm up beautifully.
3. The brownies stuck to the pan! Help!
Make sure you’ve lined your pan with parchment paper, and don’t skip the butter or oil to help them release easily.
4. Can I make the mousse ahead of time?
Absolutely! You can prepare the mousse a day in advance and store it in the fridge. Just give it a quick stir before spreading it on the brownies.
Nutritional Info
If you’re wondering about the nutritional value of these luscious brownies, here’s a quick breakdown (per serving, based on 16 servings):
- Calories: 300
- Total Fat: 18g
- Saturated Fat: 10g
- Cholesterol: 75mg
- Total Carbohydrates: 35g
- Dietary Fiber: 2g
- Sugars: 24g
- Protein: 4g
And there you have it! Chocolate mousse brownies that hit the sweet spot in every way. Whether you’re enjoying them at a dinner party, date night, or just a cozy evening at home, these brownies will surely impress. So, tie on your apron, friends, and dive into this sweet adventure — because life is too short for anything less than phenomenal desserts. Happy baking!
PrintChocolate Mousse Brownies
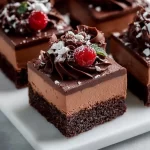
Indulge in the decadent combination of rich brownies topped with airy chocolate mousse for a delicious dessert.
- Prep Time: 15 minutes
- Cook Time: 30 minutes
- Total Time: 45 minutes
- Yield: 16 servings 1x
- Category: Dessert
- Method: Baking
- Cuisine: American
- Diet: Vegetarian
Ingredients
- 1 cup unsweetened cocoa powder
- 1 cup all-purpose flour
- 1 cup granulated sugar
- 1/2 cup unsalted butter, melted
- 3 large eggs
- 1 teaspoon vanilla extract
- 1/2 cup heavy cream
- 4 ounces semisweet chocolate, chopped
- 1/2 cup powdered sugar
- 1/2 teaspoon salt
Instructions
- Preheat your oven to 350°F (175°C).
- Mix the melted butter, granulated sugar, and vanilla extract until smooth.
- Add the eggs and whisk until fully incorporated.
- Combine the cocoa powder, flour, and salt in another bowl.
- Fold the dry ingredients into the wet mixture using a rubber spatula.
- Bake the brownie batter in the prepared pan for 25-30 minutes.
- Prepare the mousse by heating heavy cream until simmering, then pour over chopped chocolate.
- Whisk the chocolate and cream until smooth, then stir in powdered sugar.
- Chill the mousse for about 30 minutes.
- Assemble the mousse layer on top of the cooled brownies and chill again for at least an hour.
Notes
For variations, consider adding nuts, mint extract, or fruit on top.
Nutrition
- Serving Size: 1 brownie
- Calories: 300
- Sugar: 24g
- Sodium: 200mg
- Fat: 18g
- Saturated Fat: 10g
- Unsaturated Fat: 8g
- Trans Fat: 0g
- Carbohydrates: 35g
- Fiber: 2g
- Protein: 4g
- Cholesterol: 75mg
Keywords: brownies, chocolate mousse, dessert, baking, sweets
Classic Rhubarb Custard Bars
Classic Rhubarb Custard Bars: A Sweet and Tangy Treat
Hello, fellow foodies! Today, I’m absolutely thrilled to welcome you into my kitchen as we whip up something sensational: Classic Rhubarb Custard Bars. If you’ve never tasted the delightful tanginess of rhubarb paired with the rich sweetness of custard, you are in for a treat that will become a staple in your dessert repertoire. Think of these bars as the perfect blend of summer sunshine and cozy gatherings—ideal for picnics, potlucks, or simply enjoying at home with a cup of tea.
Rhubarb is one of those ingredients that brings a nostalgic feeling right alongside it. I vividly remember when my grandma used to send me out to the garden with a basket, asking me to pick the brightest, freshest stalks of rhubarb. The garden was brimming with vibrant greens and colorful blooms, but my eyes were always drawn to the ruby-red rhubarb. Little did I know then that my childhood explorations would lead to my lifelong love for cooking and creating beautiful foods to share with loved ones.
As I began to experiment in the kitchen, those same rhubarb stalks inspired so many recipes, but these custard bars hold a special place in my heart. They are deceptively simple to make yet offer a layered experience of flavors and textures. The rhubarb brings a tartness that balances beautifully with the sweetness of the custard, while the buttery crust provides that comforting crunch.
Let’s dive into making these Classic Rhubarb Custard Bars together! I’ll walk you through every step and share tips along the way. Get ready to tie on that apron, and let’s get cooking!
Personal Story
Every time I make these Classic Rhubarb Custard Bars, I’m transported back to those carefree summer days in Grandma’s kitchen. One particular afternoon stands out in my memory: a hot day with a gentle breeze and the unmistakable smell of rhubarb pies baking in the oven. My grandmother let me help, and I remember the joy of sprinkling a bit of flour and sugar on the countertop, feeling all-important as we rolled out the dough together.
The rhubarb was always the star of our baking sessions, its bright color catching our eyes and its tangy flavor igniting our taste buds. I can still hear Grandma humming softly as she prepared the filling, adding just the right touch of sugar to balance the sour. As those bars baked, our home was filled with the most heavenly aroma—sweet and tangy with a hint of nostalgia, welcoming everyone to linger at the table.
Even now, years later, I recreate those moments in my own kitchen with friends who gather around, and the stories and laughter echo just like they did back then. These bars are more than just a dessert; they’re a warm reminder of love, family, and shared memories.
Ingredients
Here’s what you’ll need to create these delectable Classic Rhubarb Custard Bars:
-
2 cups rhubarb, chopped
Fresh is best! If you can’t find rhubarb, you can substitute with strawberries for a sweeter flavor twist or blueberries for a more subtle sweetness. -
1 cup granulated sugar
This is crucial for balancing the tartness of the rhubarb. You could swap in coconut sugar or honey for a nuttier flavor. Just keep in mind that honey is sweeter, so you might want to adjust the quantity! -
1/4 cup all-purpose flour
This helps to create the custard filling’s structure. For a gluten-free version, try using a gluten-free all-purpose blend. -
1/4 teaspoon salt
A little salt enhances all the flavors, so don’t skip it! -
2 large eggs
These add richness and help bind the custard. In a vegan version, you could use flax eggs—mix 1 tablespoon of ground flaxseed with 2.5 tablespoons of water per egg and let it sit till it thickens. -
1 teaspoon vanilla extract
For that warm hint of sweetness that elevates the entire dish. Feel free to use almond extract for a lovely alternative flavor profile. -
1/2 cup butter, melted
This will create a lovely rich flavor in the crust! If you prefer a dairy-free option, melted coconut oil works well, too. -
1 1/2 cups all-purpose flour
Used for the crust, this provides the base for your bars. Again, gluten-free options are available! -
1/2 cup powdered sugar
Added for the crust, it makes the texture so nice and crumbly. You can substitute this with granulated sugar if you’re in a pinch, though it may alter the final texture slightly. -
1/2 teaspoon baking powder
This helps the crust rise a bit for a lighter texture. If baking soda is all you have, you can use that, but be mindful of the acid balance! -
1/4 teaspoon salt
Another pinch of salt in the crust to balance out the sweet flavors. -
1/2 cup butter, softened
For the crust. Again, coconut oil is an easy substitute if you’re leaning dairy-free.
Collect these ingredients, and let’s get cooking!
Step-by-Step Instructions
Alright, let’s dive into making those bars! Here’s a step-by-step guide to ensure your rhubarb custard bars not only look fantastic but taste even better.
Step 1: Preheat Your Oven
First things first: preheat your oven to 350°F (175°C). This ensures that your bars cook evenly and perfectly. While your oven is warming up, we’ll get all our ingredients ready—let’s make it efficient!
Step 2: Prepare the Baking Dish
Grab an 8×8-inch square baking dish (or a similar size). I love to line mine with parchment paper, leaving some overhang on the sides for easy lifting later. This little trick makes it super easy to cut and serve without sticking.
Step 3: Make the Crust
In a medium bowl, combine 1 1/2 cups of all-purpose flour, 1/2 cup powdered sugar, 1/2 teaspoon baking powder, and 1/4 teaspoon salt. Whisk those dry ingredients together until they’re well blended.
Then, pour in 1/2 cup softened butter and mix until crumbly. You can use a pastry cutter, a fork, or just your hands (my favorite method!). Press the mixture firmly into the bottom of the prepared baking dish to form an even crust layer.
Pop that crust in the preheated oven for about 15 minutes, until it’s set and slightly golden.
Step 4: Prepare the Rhubarb Filling
While the crust is baking, it’s time for the star of the show! In a separate bowl, combine the 2 cups of chopped rhubarb with 1 cup of granulated sugar, 1/4 cup of flour, and a pinch of salt. Toss them to make sure the rhubarb is well coated, which helps it release its juices and flavors as it bakes.
Step 5: Make the Custard
In another bowl, whisk together 2 large eggs, 1 teaspoon vanilla extract, and 1/2 cup melted butter. Mix well! Then, fold in the rhubarb mixture until everything is nicely combined. This filling is going to be liquidy, and that’s okay—it will set beautifully as it bakes!
Step 6: Assemble and Bake
Once your crust has precooked, take it out of the oven and pour the rhubarb custard filling over the crust, spreading it evenly. Return the baking dish to the oven and bake for another 30-35 minutes, or until the custard is set and a little jiggly in the center. This is the perfect time to clean up and get excited for the delightful aroma wafting through your home!
Step 7: Cool and Serve
Once done, remove the bars from the oven and let them cool in the pan for about 10 minutes. Then, using those handy parchment paper overhangs, lift them out and let them cool on a wire rack. The cooling process is just as important—it helps the custard set up nicely!
Once completely cooled, you can slice them into squares. Dust with a sprinkle of powdered sugar for a lovely finishing touch before serving!
Serving Suggestions
When it’s time to serve these Rhubarb Custard Bars, try plating them on a pretty dessert platter. A dollop of fresh whipped cream or a scoop of vanilla ice cream on the side adds an extra touch of indulgence. You could even garnish with a sprinkle of fresh mint or edible flowers for that inviting, elegant feel.
Recipe Variations
Want to get creative? Here are a few fun variations you can try with these Classic Rhubarb Custard Bars:
-
Strawberry-Rhubarb Twist: Mix in some fresh strawberries with the rhubarb for a delightful burst of sweetness.
-
Ginger Spice: Add a teaspoon of ground ginger or 1 tablespoon of freshly grated ginger to the filling for a warm, spicy kick.
-
Crust Variations: Swap out half the all-purpose flour with almond flour for a nutty, gluten-free crust.
-
Zesty Lemon: Squeeze in some lemon juice or zest to the custard for a tangy citrus twist that complements the rhubarb.
-
Chocolate Drizzle: Drizzle melted dark chocolate over the bars once they’ve cooled for a decadent finish!
Chef’s Notes
I remember once trying to be too clever and added too much flour to the custard—let’s just say the result was far from what I anticipated! Every kitchen adventure brings a lesson, right? Over time, I learned to embrace simplicity and focus on the ingredients’ natural flavors.
These bars have evolved to be a family favorite, not just for their flavor but as a centerpiece for gatherings and celebrations—creating more memories just like the ones with Grandma. And just like us, they become better with every batch made and each story shared around the table.
FAQs and Troubleshooting
1. Why did my custard not set?
Ensure that you baked it long enough! The custard should be set around the edges but still slightly jiggly in the center when you take it out. It will firm up as it cools.
2. Can I use frozen rhubarb?
Absolutely! Just make sure to thaw and drain off excess moisture before using it in the recipe.
3. How can I tell if my bars are done?
Look for a slight wobble in the center that gently jiggles. It should be set on the edges. When you insert a knife, it should come out clean.
4. Can I make these bars ahead of time?
Yes! These bars are fantastic for making ahead. They can be refrigerated for several days or frozen for longer storage—just thaw in the fridge overnight before serving.
Nutritional Info
While I love keeping things delicious, I also know many of you want to know the nutrition facts! A standard serving of rhubarb custard bars typically contains approximately:
- Calories: 200
- Carbohydrates: 30g
- Fat: 10g
- Protein: 3g
Bear in mind that these values can vary based on substitutions and portion sizes.
So there you have it! Classic Rhubarb Custard Bars, a delightful and nostalgic treat ready to be shared and enjoyed. Remember, cooking is all about enjoyment and connecting with those you love. I hope this recipe inspires you to gather around your table, create beautiful moments, and perhaps even generate some new memories of your own. Happy cooking!
PrintClassic Rhubarb Custard Bars
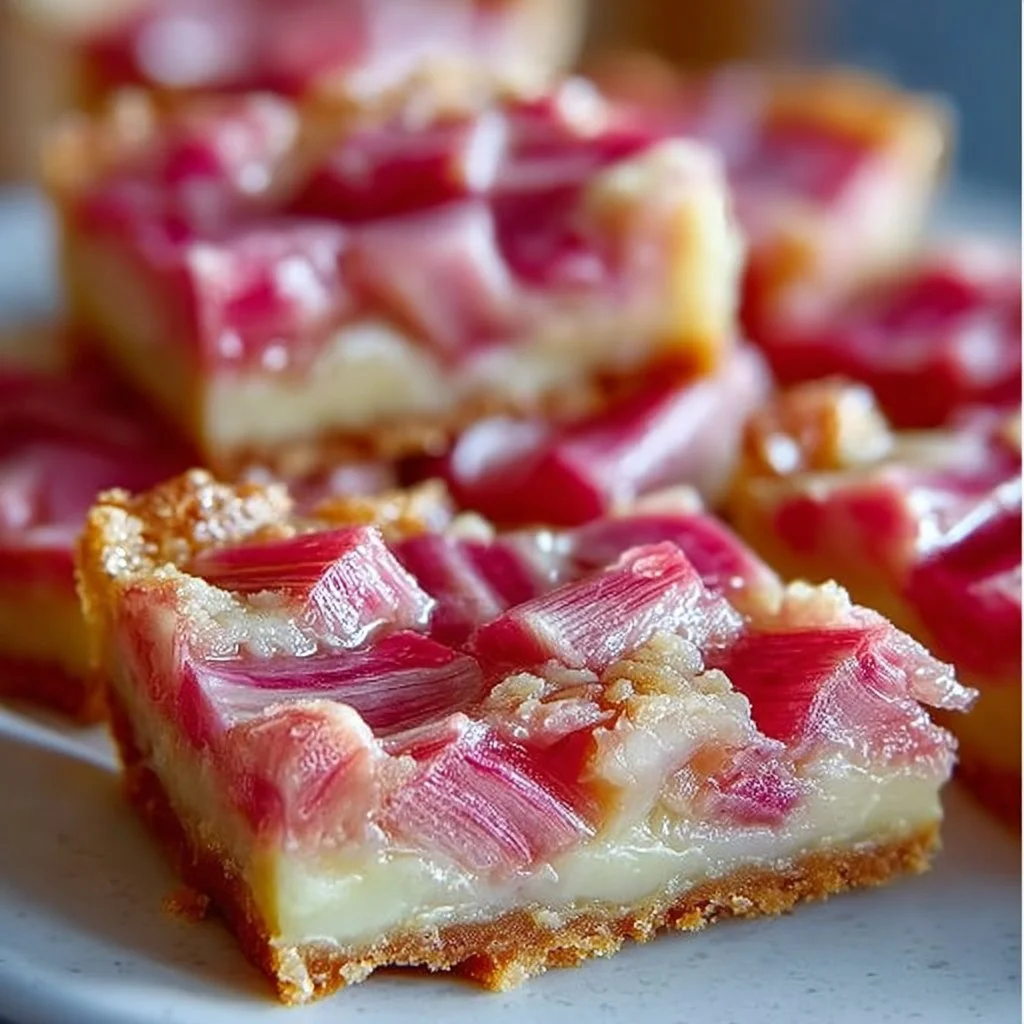
Delicious rhubarb custard bars that balance sweet and tangy flavors with a buttery crust, perfect for desserts or gatherings.
- Prep Time: 15 minutes
- Cook Time: 45 minutes
- Total Time: 60 minutes
- Yield: 9 servings 1x
- Category: Dessert
- Method: Baking
- Cuisine: American
- Diet: Vegetarian
Ingredients
- 2 cups rhubarb, chopped
- 1 cup granulated sugar
- 1/4 cup all-purpose flour
- 1/4 teaspoon salt
- 2 large eggs
- 1 teaspoon vanilla extract
- 1/2 cup butter, melted
- 1 1/2 cups all-purpose flour (for crust)
- 1/2 cup powdered sugar
- 1/2 teaspoon baking powder
- 1/4 teaspoon salt (for crust)
- 1/2 cup butter, softened (for crust)
Instructions
- Preheat your oven to 350°F (175°C).
- Prepare an 8×8-inch square baking dish lined with parchment paper.
- Make the crust by combining 1 1/2 cups all-purpose flour, 1/2 cup powdered sugar, 1/2 teaspoon baking powder, and 1/4 teaspoon salt. Add 1/2 cup softened butter and mix until crumbly, then press into the bottom of the dish.
- Bake the crust for about 15 minutes until set and slightly golden.
- Combine the rhubarb, 1 cup granulated sugar, 1/4 cup flour, and a pinch of salt in a bowl.
- Whisk together the eggs, vanilla extract, and 1/2 cup melted butter in another bowl. Fold in the rhubarb mixture.
- Pour the custard filling over the baked crust and spread evenly.
- Bake for another 30-35 minutes until set but slightly jiggly in the center.
- Cool in the pan for 10 minutes, then transfer to a wire rack to cool completely. Slice and serve.
Notes
Enjoy these bars with whipped cream or a scoop of ice cream for an extra indulgent treat.
Nutrition
- Serving Size: 1 serving
- Calories: 200
- Sugar: 15g
- Sodium: 180mg
- Fat: 10g
- Saturated Fat: 6g
- Unsaturated Fat: 4g
- Trans Fat: 0g
- Carbohydrates: 30g
- Fiber: 1g
- Protein: 3g
- Cholesterol: 85mg
Keywords: rhubarb, custard bars, dessert, summer treat, baking
Lemon Coconut Cheesecake Cookies
# Lemon Coconut Cheesecake Cookies: A Sweet Slice of Sunshine

Hello, dear foodies! Today, I’m bubbling over with excitement to share with you a recipe that feels like a little sun-kissed getaway – Lemon Coconut Cheesecake Cookies! These delightful bites are more than just sweets; they carry a memory that is as rich in flavor as it is in sentiment. Picture yourself on a warm afternoon, the sun flickering through the trees, the tantalizing smell of citrus wafting through the kitchen, and a plate of cookies waiting to be savored. Let’s dive in, because these cookies are about to take your taste buds on a joyful ride!

## A Sunny Kitchen Memory

Growing up, my family had an unspoken tradition every summer: the “Baking Day.” We’d gather in the kitchen, flour dusting the countertops and laughter filling the air. My job was always to zest the lemons – a job I took so seriously. I loved watching the bright yellow zest spark against the white of the sugar, and the tantalizing aroma that filled the room was something else. On one particular Baking Day, we decided to experiment, throwing together a blend of our favorite flavors: lemon, cream cheese, and coconut. As the cookies baked, we sprawled on the floor, flipping through magazines, excitedly brainstorming names for our creation. “Lemon Coconut Cheesecake Cookies!” I shouted, and from that moment on, they earned a special place in our home. To this day, every bite of these cookies takes me back to those golden afternoons, overflowing with joy and sweetness.

## Ingredients

To embark on this delightful baking journey, gather the following ingredients:

- **1 cup all-purpose flour**
  The backbone of our cookies, providing structure. If you're gluten-free, swap it with a mix of almond flour and coconut flour for a soft, chewy texture.

- **1/2 cup unsweetened shredded coconut**
  This adds a tropical twist! You can use sweetened if you prefer a sweeter cookie, but adjust the sugar accordingly.

- **1/4 cup granulated sugar**
  Sweetness is key! For a healthier option, you can replace this with coconut sugar – it has a lovely caramel flavor.

- **1/2 cup cream cheese, softened**
  Cream cheese gives our cookies that cheesecake-like richness. Make sure it’s room temperature for smooth mixing, or use mascarpone for a slightly different flavor!

- **1/4 cup butter, softened**
  Butter brings moisture and flavor. If you need a dairy-free version, coconut oil works wonderfully!

- **1 large egg**
  This binds our ingredients together. If you’re vegan, a flaxseed or chia seed egg (1 tablespoon ground seeds mixed with 3 tablespoons water) will do the trick.

- **1 tablespoon lemon zest**
  This brightens the flavor profile! Don’t skip it; the zest is where all the lemony magic happens.

- **1 teaspoon vanilla extract**
  A classic flavor booster! If you’re feeling adventurous, try using almond extract for a different twist.

- **1/2 teaspoon baking powder**
  This helps the cookies rise nicely, making them tender and fluffy.

- **1/4 teaspoon salt**
  A pinch of salt enhances all the flavors beautifully!

## Step-by-Step Instructions

Now that we have our ingredients on hand, let’s jump into the fun part – baking these heavenly cookies!

### Step 1: Preheat Your Oven
Preheat your oven to 350°F (175°C). This little step helps your cookies bake evenly right from the start!

### Step 2: Prep Your Baking Sheet
Line a baking sheet with parchment paper. This ensures our cookies don’t stick and makes cleanup a breeze. Plus, a lined sheet gives you perfectly rounded edges every time!

### Step 3: Mix the Wet Ingredients
In a large mixing bowl, cream together the softened butter and cream cheese until the mixture is light and fluffy. This usually takes about 2-3 minutes of good mixing! Add in the granulated sugar, lemon zest, and vanilla extract, and beat until combined. You’ll know you’re there when the mixture is smooth and smells divine!

### Step 4: Add the Egg
Crack that large egg into the mix, and stir until fully incorporated. It’ll help bring all these fabulous flavors together.

### Step 5: Combine the Dry Ingredients
In a separate bowl, whisk together the all-purpose flour, shredded coconut, baking powder, and salt. Mixing your dry ingredients ensures they distribute evenly throughout the dough.

### Step 6: Bring It All Together
Gradually add your dry mixture to the wet ingredients, folding gently until you can no longer see any flour. Try not to overmix; we want our cookies to stay tender and oh-so-chewy.

### Step 7: Scoop and Bake
Use a cookie scoop or a tablespoon to drop dollops of dough onto your prepared baking sheet, spacing them about 2 inches apart. The cookies will spread slightly, so give them a little room to breathe! Bake them in your preheated oven for about 12-15 minutes, or until they’re golden brown on the edges and slightly soft in the center.

### Step 8: Cool Your Cookies
Once they’re out of the oven, let them cool on the baking sheet for about 5 minutes before transferring them to a wire rack to cool completely. This part is key – it allows them to set while still being delightfully warm!

## Serving Suggestions

To serve these lovely cookies, arrange them on a beautiful platter, perhaps with a sprig of fresh mint or a dusting of powdered sugar on top for that extra elegant touch. They pair wonderfully with a cup of tea or lemonade, making them perfect for summer gatherings or cozy evenings at home.

## Recipe Variations

1. **Add a Chocolate Twist:** Fold in some white chocolate chips for a creamy, decadent variation that perfectly complements the lemon and coconut.

2. **Coconut Lime Cookies:** Replace the lemon zest with lime zest for a refreshing twist, perfect if you’re feeling adventurous!

3. **Nutty additions:** Mix in chopped macadamia nuts or pecans for a satisfying crunch.

4. **Frosted Delight:** Top your cooled cookies with a light lemon glaze or cream cheese frosting for a truly extravagant treat.

5. **Spiced Version:** Add a pinch of nutmeg or even ginger for a warm, spiced cookie that’s perfect for fall.

## Chef's Notes

As with many recipes, these cookies have evolved over time in my kitchen. Initially, they were a simple lemon drop cookie, but after years of experimenting (and tasting!), they grew into these Lemon Coconut Cheesecake delights. I love how baking can turn a simple idea into something extraordinary – it’s all about experimentation and, of course, love. One of my fondest memories was baking several batches for a wedding; when I finally saw the dessert table brimming with cookies, my heart swelled with pride.

## FAQs and Troubleshooting

1. **Why are my cookies spreading too much?**
   This usually happens if your butter is too warm or the dough isn’t chilled. Make sure your butter is just softened and consider chilling your dough for about 30 minutes before baking.

2. **What if my cookies are too dry?**
   This can happen if there was too much flour added. Always spoon your flour into the measuring cup instead of scooping directly from the bag. For a super moist cookie, ensure your butter and cream cheese are at room temperature.

3. **Can I freeze the dough?**
   Absolutely! Just scoop the dough onto a baking sheet and freeze until solid. Then, transfer them to a freezer-safe bag. Bake from frozen, just adding a couple of minutes to your baking time.

4. **How can I tell when cookies are done?**
   Look for edges that are set and slightly browned. Remember, they’ll continue to firm as they cool on the baking sheet!

## Nutritional Info

To be mindful of your delicious indulgence, each cookie has approximately:
- **Calories:** 120
- **Fat:** 6g
- **Carbohydrates:** 15g
- **Protein:** 1g
- **Sugar:** 5g

---

There you have it! A delectable batch of Lemon Coconut Cheesecake Cookies that are sure to become a dear staple in your baking repertoire. Whether you’re sharing them with friends, family, or simply savoring them on your own, these cookies embody everything I love about cooking – joy, connection, and warmth. So, tie on that apron, channel your inner sunny chef, and let’s create something some sweet together!
Lemon Coconut Cheesecake Cookies

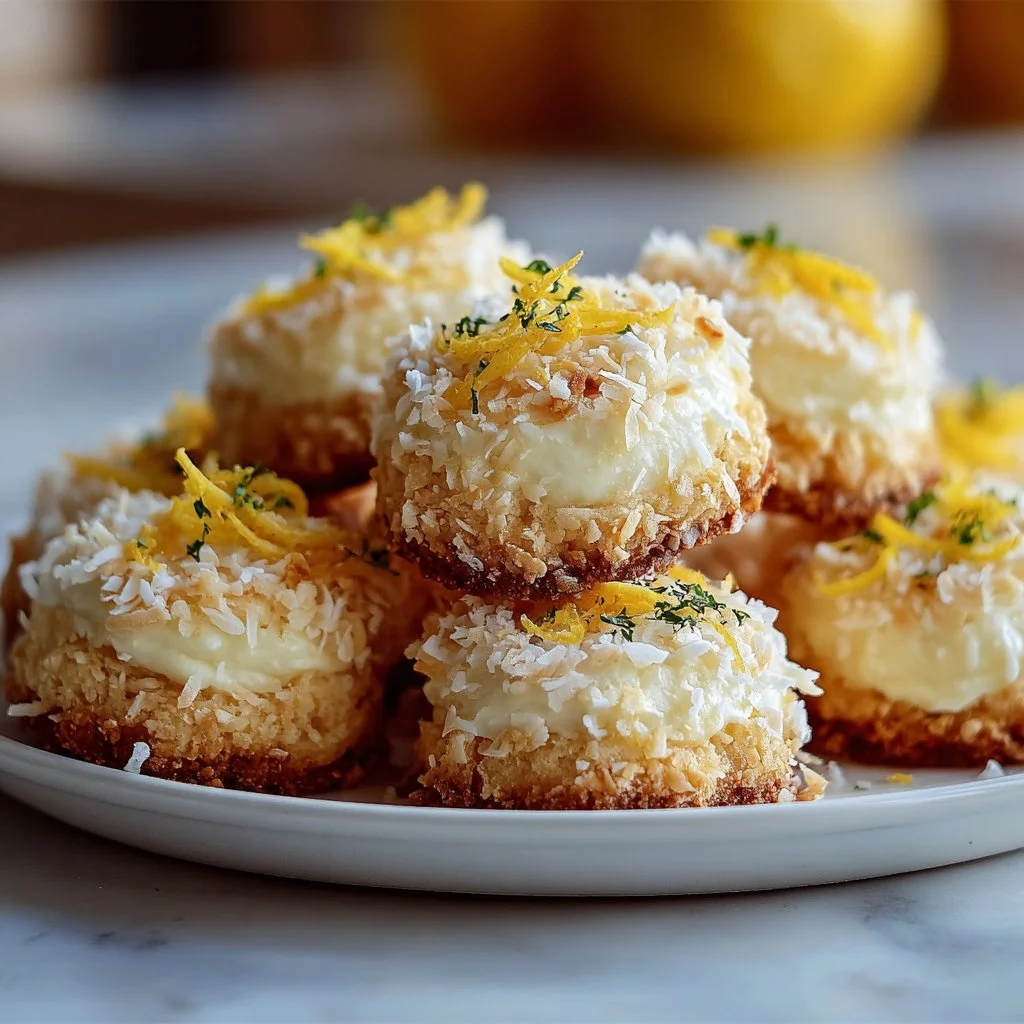
Delightful lemon coconut cheesecake cookies that embody the essence of summer with their bright flavors and soft texture.
- Prep Time: 15 minutes
- Cook Time: 15 minutes
- Total Time: 30 minutes
- Yield: 24 cookies 1x
- Category: Dessert
- Method: Baking
- Cuisine: American
- Diet: Vegetarian
Ingredients
- 1 cup all-purpose flour
- 1/2 cup unsweetened shredded coconut
- 1/4 cup granulated sugar
- 1/2 cup cream cheese, softened
- 1/4 cup butter, softened
- 1 large egg
- 1 tablespoon lemon zest
- 1 teaspoon vanilla extract
- 1/2 teaspoon baking powder
- 1/4 teaspoon salt
Instructions
- Preheat your oven to 350°F (175°C).
- Line a baking sheet with parchment paper.
- In a large mixing bowl, cream together the softened butter and cream cheese until light and fluffy.
- Add in the granulated sugar, lemon zest, and vanilla extract, and beat until combined.
- Crack the large egg into the mix, and stir until fully incorporated.
- Whisk together the all-purpose flour, shredded coconut, baking powder, and salt in a separate bowl.
- Gradually add the dry mixture to the wet ingredients, folding gently until no flour is visible.
- Scoop dollops of dough onto your prepared baking sheet, spacing them about 2 inches apart.
- Bake for about 12-15 minutes, or until golden brown on the edges and slightly soft in the center.
- Let them cool on the baking sheet for 5 minutes before transferring to a wire rack.
Notes
For a gluten-free option, use almond flour and coconut flour. Adjust sugar when using sweetened coconut. Can freeze cookie dough for later use.
Nutrition
- Serving Size: 1 cookie
- Calories: 120
- Sugar: 5g
- Sodium: 50mg
- Fat: 6g
- Saturated Fat: 4g
- Unsaturated Fat: 2g
- Trans Fat: 0g
- Carbohydrates: 15g
- Fiber: 1g
- Protein: 1g
- Cholesterol: 30mg
Keywords: cookies, desserts, lemon, coconut, cheesecake
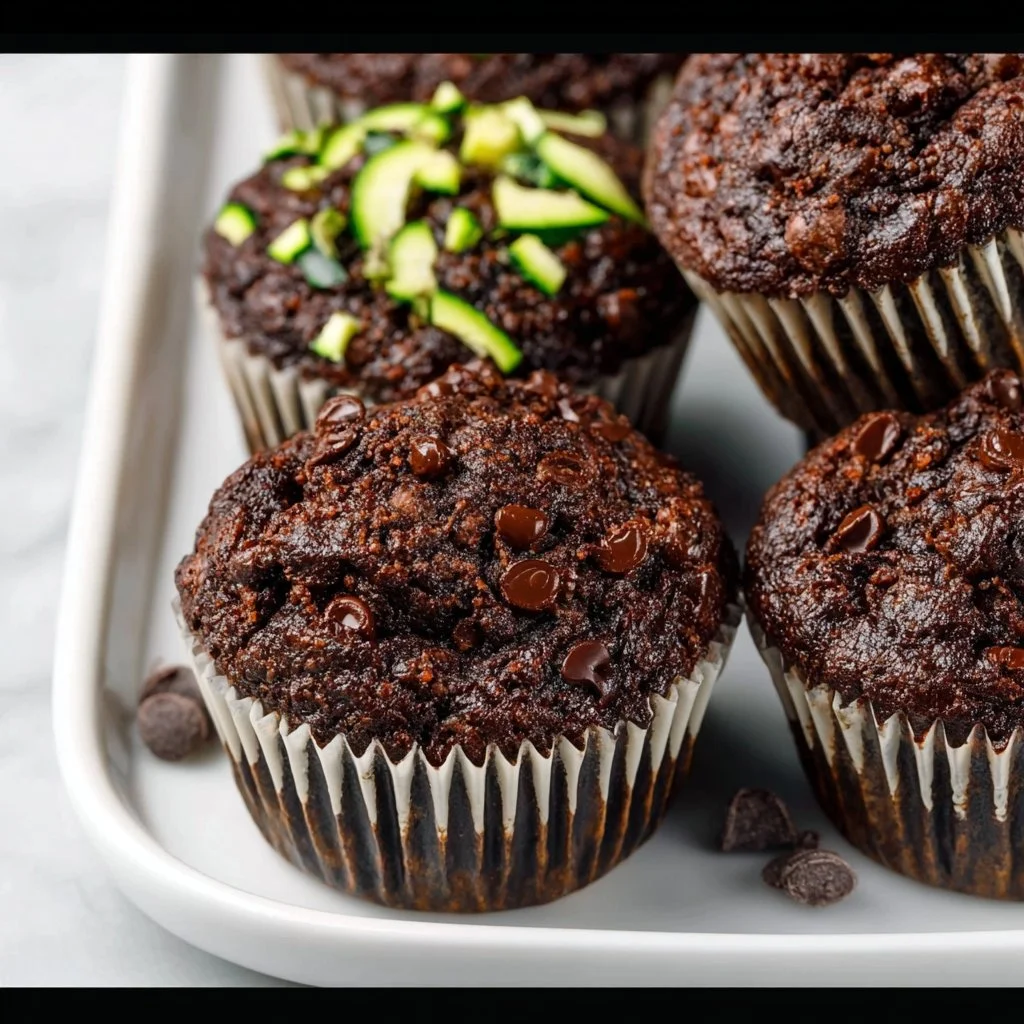
Healthy & Moist Chocolate Zucchini Muffins
Moist Chocolate Zucchini Muffins: A Healthier Indulgence
Hello, fellow food lovers! Today, I am thrilled to share one of my absolute favorite recipes that perfectly embodies my philosophy of cooking—it’s elegant yet never intimidating. If you’re like me, always on the lookout for ways to sneak more veggies into your diet without sacrificing flavor, then you’ll absolutely adore these Healthy & Moist Chocolate Zucchini Muffins.
Imagine a muffin that’s not only delicious and satisfying but also invites a bit of garden goodness right into your breakfast or snack time. These muffins are rich, chocolatey, and incredibly moist, thanks to our secret star ingredient: grated zucchini! The beauty of this recipe lies in its simplicity and versatility—you can whip them up for a quick breakfast, an afternoon snack, or even a delightful addition to your next brunch gathering.
Now, let me take you on a little stroll down memory lane. I’ll never forget the first time I discovered the magic of pairing chocolate and zucchini. It was during my college days, and I had a dear friend who was a baking aficionado. One rainy afternoon, we had a spontaneous baking session, and she introduced me to her family’s famous chocolate zucchini bread. The first bite was like a hug in muffin form! Ever since that day, I’ve been enamored with the idea of creating my version that embodies health, indulgence, and, of course, fun!
So grab your apron, set that oven to preheat, and let’s indulge in a chocolatey creation that feels decadent but offers a nourishing twist.
Personal Story
As I mentioned before, my love affair with chocolate zucchini treats began in college, but the true heart of the story lies with my little sister, Emma. Growing up, she was notoriously picky—veggies were the enemy, and desserts were her best friend. One summer, while visiting our family cabin, I decided it was time to change her mind (and her palate!). Armed with fresh zucchini from a neighbor’s garden and a trusty old cookbook, I concocted a batch of chocolate zucchini muffins.
As I folded in the ingredients, I could hear Emma in the background questioning my sanity. “Zucchini in muffins? Gross!” But knowing her penchant for all things chocolate, I smiled and assured her that she wouldn’t taste a thing! The moment those muffins emerged from the oven, the entire cabin was filled with an irresistible fragrance. When I finally convinced Emma to take a bite, her face was priceless. She took a second bite, then a third—and just like that, I had turned her into a zucchini fan!
Now, every year, we make our muffins together, reminiscing about that fateful summer. It’s become a tradition that brings us joy and laughter, and I’m thrilled to share this recipe with you all—because who doesn’t want to spread a little love in the kitchen?
Ingredients
Let’s gather our ingredients and channel our inner bakers! Here’s what you’ll need for the Moist Chocolate Zucchini Muffins:
-
1½ cups grated zucchini
- Tip: Measure the zucchini before squeezing out the moisture to ensure accurate portions! If you don’t have zucchini, you can swap it out for grated carrots or even apples for a fruity twist.
-
2 large eggs
- Substitution: For a vegan option, try using flax eggs (1 tablespoon ground flaxseed mixed with 2.5 tablespoons water per egg, let it sit for 5 minutes to thicken).
-
¼ cup avocado oil (or olive oil)
- Chef Insight: Avocado oil is mild and buttery, perfect for baked goods, but you can use olive oil for a more robust flavor.
-
⅓ cup maple syrup
- Substitution: Honey or agave syrup would work wonderfully in place of maple syrup, adding a hint of sweetness.
-
2 teaspoons vanilla extract
- Quick Tip: Always use pure vanilla extract for the best flavor—trust me, it makes a difference!
-
⅔ cup unsweetened applesauce
- Why it Works: This ingredient not only adds moistness but also a subtle sweetness. Unsweetened is key here to keep sugar levels balanced.
-
1¼ cups whole wheat flour
- Substitution: You can use a gluten-free all-purpose blend for a gluten-free muffin that still delivers on texture.
-
¼ cup unsweetened cocoa powder
- Chef Hack: Sift it before adding to eliminate lumps and ensure even mixing. You can chocolate-ify these muffins even more with dark chocolate cocoa powder!
-
½ teaspoon baking soda
- Tip: Make sure it’s fresh! Baking soda can lose its potency over time, so always check the expiration date.
-
1 teaspoon baking powder
- Why Both?: The combination of soda and powder gives our muffins the perfect rise.
-
1 teaspoon cinnamon
- Chef’s Secret: Cinnamon adds warmth and depth to the chocolate flavor. Don’t skip it!
-
½ teaspoon salt
- Why Salt?: Salt enhances the sweetness and balances the flavors of the muffins—just a pinch is all you need.
-
⅓ cup chocolate chips (plus extra for topping)
- Customization Tip: Use dark, semi-sweet, or even white chocolate chips based on your preference!
Ready to bake? Let’s do it!
Step-by-Step Instructions
-
Preheat Your Oven: Start by preheating your oven to 350°F (175°C). This step is key to fluffy muffins; you want the oven to be hot when they enter!
-
Prep Your Muffin Tin: Line a muffin tin with paper liners or generously grease them with non-stick spray. This makes for an easy release when you enjoy your muffins later.
-
Grate the Zucchini: Grate the zucchini on a box grater or use a food processor. Remember to measure it first before squeezing out excess moisture with a clean kitchen towel. This helps keep our muffins moist without being soggy!
-
Mix Wet Ingredients: In a large mixing bowl, whisk together the eggs, avocado oil, maple syrup, vanilla extract, and unsweetened applesauce. Keep whisking until fully combined—this mixture is the heart of our muffins!
-
Combine Dry Ingredients: In another bowl, whisk together the whole wheat flour, cocoa powder, baking soda, baking powder, cinnamon, and salt until uniform. This is where your muffins will get that chocolatey goodness.
-
Combine Wet and Dry: Gradually add the dry ingredients to the wet mixture. Stir gently until just combined—overmixing can create dense muffins, and nobody wants that!
-
Fold in Zucchini and Chocolate Chips: Gently fold in the grated zucchini and chocolate chips. It will look like a chocolatey, lush batter—what could be better? Reserve a few chocolate chips for topping later!
-
Fill Muffin Tins: Using a spoon or ice cream scoop, fill each muffin tin about ¾ full—this ensures they rise beautifully without overflowing.
-
Top with Extra Chips: Add those reserved chocolate chips on top for a little extra flair.
-
Bake Time: Place the muffin tin in your preheated oven and bake for 18-20 minutes. They’re ready when a toothpick inserted comes out clean (though a few chocolate streaks are okay).
-
Cool and Enjoy: Once baked, let them cool in the tin for about 5 minutes before transferring them to a wire rack. And remember, patience is not just a virtue—it allows those flavors to deepen!
Serving Suggestions
These muffins are perfect fresh out of the oven—serve them warm with a drizzle of nut butter or a dollop of yogurt. For an extra touch of elegance, try dusting them with a light sprinkle of powdered sugar or cacao powder. You can even serve them alongside fresh fruit, or break them apart and indulge with a rich cup of coffee or tea. It’s all about creating a lovely moment at your table!
Recipe Variations
Ready to get creative? Here are a few fun twists:
- Nutty Delight: Add ½ cup of chopped walnuts or pecans to the batter for crunch.
- Spicy Kick: Mix in a pinch of cayenne pepper for a surprise warm flavor!
- Fruity Zing: Incorporate some blueberries or raspberries for a burst of freshness.
- Double Chocolate: Use chocolate protein powder instead of some flour for an extra chocolatey muffin.
- Gluten-Free Option: Swap whole wheat flour for a gluten-free blend, and enjoy the same moist muffins!
Always taste as you go, and remember: cooking is all about making it your own!
Chef’s Notes
Every time I bake these muffins, I’m reminded of how adaptable they are—you really can’t go wrong! When experimenting, I once tried adding banana to the batter. While the result was tasty, it turned the muffins a bit too sweet for my liking. I learned that balance is key, and sometimes keeping it simple yields the best results. I love how these muffins can spark creativity in the kitchen!
FAQs and Troubleshooting
Why are my muffins too dense?
- It may be due to overmixing the batter. Mix until just combined, and check that you’re using fresh baking soda and powder!
Can I freeze these muffins?
- Absolutely! Let them cool completely, then store them in an airtight container or freezer bag. They’ll stay fresh for up to 3 months!
How do I know when my muffins are done?
- Stick a toothpick in the center; it should come out clean or with a few moist crumbs attached. If wet batter sticks, give them a few more minutes.
What if I don’t have maple syrup?
- You can substitute with honey, agave, or coconut sugar dissolved in warm water for similar sweetness.
Nutritional Info (Optional)
For those curious about the numbers, here’s a rough breakdown per muffin (assuming you make 12 muffins):
- Calories: 160
- Protein: 4g
- Carbohydrates: 26g
- Fat: 6g
- Fiber: 2g
- Sugar: 5g
Conclusion
There you have it—Healthy & Moist Chocolate Zucchini Muffins that are not only scrumptious but also a delightful way to incorporate wholesome ingredients into your day! Whether you’re snuggling up with a cup of coffee or hosting a brunch with friends, these muffins bring the joy and charm of homemade goodness right to your table. Remember, cooking is all about sharing—and I hope you enjoy these muffins as much as I do.
So go ahead, tie on your apron, and let’s get baking! Cheers to beautiful moments in the kitchen! 🍫🥒💖
PrintMoist Chocolate Zucchini Muffins
Delicious and moist chocolate muffins featuring grated zucchini for a healthier treat.
- Prep Time: 15 minutes
- Cook Time: 20 minutes
- Total Time: 35 minutes
- Yield: 12 muffins 1x
- Category: Baked Goods
- Method: Baking
- Cuisine: American
- Diet: Vegetarian
Ingredients
- 1½ cups grated zucchini
- 2 large eggs
- ¼ cup avocado oil (or olive oil)
- ⅓ cup maple syrup
- 2 teaspoons vanilla extract
- ⅔ cup unsweetened applesauce
- 1¼ cups whole wheat flour
- ¼ cup unsweetened cocoa powder
- ½ teaspoon baking soda
- 1 teaspoon baking powder
- 1 teaspoon cinnamon
- ½ teaspoon salt
- ⅓ cup chocolate chips (plus extra for topping)
Instructions
- Preheat your oven to 350°F (175°C).
- Prep your muffin tin by lining it with paper liners or greasing it.
- Grate the zucchini and squeeze out excess moisture.
- Mix the wet ingredients in a large bowl: eggs, oil, syrup, vanilla, and applesauce.
- Combine the dry ingredients in another bowl: flour, cocoa, baking soda, baking powder, cinnamon, and salt.
- Combine the wet and dry ingredients, stirring gently.
- Fold in the grated zucchini and chocolate chips.
- Fill muffin tins about ¾ full.
- Top with reserved chocolate chips.
- Bake for 18-20 minutes.
- Cool for 5 minutes before transferring to a wire rack.
Notes
These muffins can be stored in an airtight container or frozen for up to 3 months.
Nutrition
- Serving Size: 1 muffin
- Calories: 160
- Sugar: 5g
- Sodium: 200mg
- Fat: 6g
- Saturated Fat: 1g
- Unsaturated Fat: 5g
- Trans Fat: 0g
- Carbohydrates: 26g
- Fiber: 2g
- Protein: 4g
- Cholesterol: 30mg
Keywords: chocolate muffins, zucchini muffins, healthy baking
Double Chocolate Easter Egg Brownie Cookies
# Double Chocolate Easter Egg Brownie Cookies: A Sweet Celebration

## Introduction

Hey there, fellow foodies! Welcome back to my kitchen! Today, I’m bringing you a delightful treat that’s perfect for celebrating that special time of year when joy fills the air and chocolate is abundant—Easter! Picture this: soft, fudgy brownies turned into cookies, generously studded with mini chocolate eggs. Yes, you heard me right! I’m excited to share my **Double Chocolate Easter Egg Brownie Cookies** with you, a treat that balances indulgence with nostalgia.

Baking these brownies is like taking a trip down memory lane. I remember trailing behind my mom as she baked her famous brownies. She treated every holiday like a grand affair, and Easter was no exception—just like a magic show with eggs popping out of all corners. The kitchen was always warm and inviting, laughter sprinkled along with the flour, and chocolate chips were always mysteriously disappearing. It was in these moments that my love for creating in the kitchen was born. Now, as I share this recipe, I invite you into that sweet moment of joy, where scents waft through your home, and happiness is just a bite away.

These cookies are not only rich in flavor, but they also capture the fun spirit of the holiday! If you need a treat to take to your next gathering or simply want to indulge in something incredibly delicious, these cookies are the answer! So, roll up your sleeves, tie on your apron, and let’s get baking!

## Personal Story

One of my fondest Easter memories revolves around the yearly family gathering at my aunt's house. She had this amazing knack for turning ordinary days into extraordinary events. Every holiday was an occasion filled with delicious foods, laughter, and warmth—especially Easter. I vividly remember one Easter Sunday when my cousins and I decorated eggs, while the adults were knee-deep in brown sugar and chocolate, creating rich, fudgy brownies.

As we painted the eggs with bright colors, the scent of chocolate wafted through the open kitchen door, promising something special was on the horizon. After our egg decorating was complete, we all rushed to the kitchen, anticipating a taste of those heavenly brownies. But, my aunt decided to surprise everyone with something new—cookies!

These weren't just any cookies; they were thick, chewy brownie cookies that melted in your mouth, bursting with chocolate flavor at every turn. Inspired by this cherished memory, I took it upon myself to create my own version of these beloved treats, adding in festive mini chocolate eggs to make them Easter-ready! Every bite of these cookies transports me back to that vibrant Easter Sunday, reminding me of the joy of gathering around a table laden with delicious food and even better company.

## Ingredients

To create these **Double Chocolate Easter Egg Brownie Cookies**, gather the following ingredients:

- **1 cup unsalted butter**: This is your rich base! If you’d like a nuttier flavor, try using browned butter. You can substitute with coconut oil for a dairy-free option!

- **2 cups granulated sugar**: This adds sweetness and helps achieve that shiny top. You can use brown sugar for a richer flavor, or even coconut sugar for a healthier twist.

- **4 large eggs**: These provide structure and moisture. If you want an egg-free version, you can use flax eggs (1 tablespoon ground flaxseed mixed with 2.5 tablespoons water per egg, let sit for 5 minutes).

- **2 teaspoons vanilla extract**: Adds a warm depth to your cookies. Feel free to substitute with almond extract for an unexpected twist!

- **1 cup all-purpose flour**: Flour gives the cookies their structure. Gluten-free flour blends will work as a substitute for a gluten-free version.

- **1 cup cocoa powder**: This is where the chocolate magic happens! Opt for Dutch-processed cocoa for a deeper flavor or raw cacao powder for a healthier option.

- **1 teaspoon baking powder**: This helps the cookies rise just enough for that perfect chew. Don’t skip it—it’s essential for texture!

- **1/2 teaspoon salt**: A pinch of salt enhances the chocolate flavor. Sea salt or Himalayan salt both work wonderfully here.

- **1 cup chocolate chips**: Because there’s no such thing as too much chocolate! You can use dark, semi-sweet, or even white chocolate chips for a fun twist.

- **1 cup mini chocolate eggs (or Easter egg candies)**: The playful touch that makes these cookies festive and fun! You can substitute with regular chocolate candies for any occasion.

## Step-by-Step Instructions

Let’s get into the baking action! Follow these detailed steps to create your delightful cookies:

1. **Preheat Your Oven**: Start by preheating your oven to 350°F (175°C). This step is crucial as it ensures your cookies bake evenly and achieve that perfect fudgy texture.

2. **Melt the Butter**: In a medium saucepan over low heat, melt the unsalted butter. If you’re going for the browned butter option, swirl it in the pan until it turns golden brown and has a nutty aroma. Take it off the heat and let it cool slightly.

3. **Mix Sugar and Butter**: In a large bowl, combine the melted butter and granulated sugar. Use a whisk to mix until it’s smooth and glossy, about 1-2 minutes. The sugar should feel well-combined and slightly dissolved.

4. **Add Eggs and Vanilla**: Crack in the eggs one by one, followed by the vanilla extract. Whisk until everything is smoothly incorporated—this might take a couple of minutes, but it’s worth it for that lovely texture!

5. **Combine Dry Ingredients**: In a separate bowl, whisk together the flour, cocoa powder, baking powder, and salt. This helps distribute the dry ingredients evenly, ensuring no chocolate lumps later!

6. **Incorporate Dry into Wet**: Gradually add the dry mixture to the wet mixture, using a spatula or wooden spoon to fold it all together. Do this gently—overmixing can lead to dense cookies instead of the light, chewy ones we want!

7. **Add Chocolate Chips**: Once the dough has formed, fold in the chocolate chips, making sure they’re distributed evenly throughout.

8. **Mix in Mini Chocolate Eggs**: Now comes the fun part! Gently fold in the mini chocolate eggs. I love using these because they give that festive flair.

9. **Scoop the Dough**: Using a cookie scoop or two tablespoons, drop generous portions of dough onto a baking sheet lined with parchment paper. Leave enough space between each cookie, about 2 inches, as they will spread a little while baking.

10. **Bake to Perfection**: Place the baking sheet in the preheated oven and bake for 12-15 minutes. When they are finished, the edges should be set, and the centers may look slightly underbaked—that’s perfect! Let them cool on the baking sheet for about 5 minutes before transferring them to a wire rack.

11. **Enjoy the Wow Factor**: Once cooled, serve them warm with a glass of milk or coffee. You can even sprinkle a little sea salt on top of the cookies for a deliciously sophisticated touch!

## Serving Suggestions

When it comes to serving these delightful cookies, presentation is key! Stack a few on a beautiful platter, or arrange them in a basket lined with a pastel-colored napkin to evoke that lovely Easter vibe. You can also dust them lightly with powdered sugar for an elegant touch or even drizzle with a bit of melted chocolate for that extra indulgent flair.

## Recipe Variations

Feeling adventurous? Here are some fun twists you can try with this recipe:

1. **Nutty Delight**: Throw in some chopped nuts, such as walnuts or pecans, for added texture and flavor.

2. **Minty Fresh**: Add a teaspoon of peppermint extract for a festive minty chocolate surprise! Perfect for those mint chocolate lovers out there.

3. **Dried Fruit Fusion**: Incorporate dried cherries or cranberries for a sweet-tart contrast against the rich chocolate. It adds an unexpected burst of flavor.

4. **Spiced Sensation**: Add a dash of espresso powder and a sprinkle of cinnamon for a mocha-flavored cookie. It adds a lovely depth that’s irresistible!

5. **Gluten-Free Option**: Use a 1-to-1 gluten-free flour blend in place of all-purpose flour to make your cookies suitable for gluten-sensitive guests.

## Chef’s Notes

Baking is such a personal experience, and I love how recipes evolve over time. This double chocolate cookie recipe originally came about when I was seeking a way to make my aunt's brownie recipe a little more dynamic. The addition of mini chocolate eggs just made sense for Easter—my way of merging two favorite memories into a beautiful creation.

And trust me! These cookies have gone through a few iterations in my kitchen, and each time they come out even more delectable and nostalgic. One time, my niece and I switched the chocolate eggs for pastel M&M’s, and it created a beautiful color pop that we just adored!

## FAQs and Troubleshooting

**1. Why are my cookies not spreading?**
If your cookies are not spreading in the oven, it might be due to overmixing the dough. Make sure to mix just until ingredients are combined and keep an eye on the baking time—you may need to adjust based on your oven!

**2. Can I freeze these cookies?**
Absolutely! To freeze, arrange the uncooked cookie dough balls on a baking sheet and freeze until solid. Then transfer them to a zip-top bag. You can bake them directly from the freezer; just add a couple of minutes to the baking time.

**3. How can I tell when the cookies are done?**
Look for the edges to be set while the center appears slightly underbaked. They will continue to cook once removed from the oven.

**4. Why are my cookies too cakey?**
If your cookies ended up cakey, it may be a sign of overmixing or too much flour. For that ultimate fudgy texture, ensure you're measuring accurately and folding the ingredients gently.

## Nutritional Info (optional)

- **Serving Size**: 1 cookie
- **Calories**: Approximately 180
- **Total Fat**: 8g
- **Saturated Fat**: 5g
- **Cholesterol**: 42mg
- **Sodium**: 80mg
- **Total Carbohydrates**: 25g
- **Dietary Fiber**: 1g
- **Sugars**: 15g
- **Protein**: 2g

## Conclusion

There you have it, foodies! A delightful recipe for **Double Chocolate Easter Egg Brownie Cookies** that’s sure to ignite joy in your kitchen and on your table. As you whip these up this Easter (or any time of year, because why not?), remember that each cookie is a small piece of love shared with others. Let these cookies be a sweet reminder to gather, celebrate, and simply enjoy the moments that matter.

Now get out there and bake some magic! Tie on that apron, pour something delightful, and let’s celebrate with these delicious cookies that are sure to spark joy this season. Happy baking, friends!
Double Chocolate Easter Egg Brownie Cookies

Delightful brownie cookies packed with chocolate and festive mini chocolate eggs, perfect for Easter celebrations!
- Prep Time: 15 minutes
- Cook Time: 15 minutes
- Total Time: 30 minutes
- Yield: 24 cookies 1x
- Category: Dessert
- Method: Baking
- Cuisine: American
- Diet: Vegetarian
Ingredients
- 1 cup unsalted butter
- 2 cups granulated sugar
- 4 large eggs
- 2 teaspoons vanilla extract
- 1 cup all-purpose flour
- 1 cup cocoa powder
- 1 teaspoon baking powder
- 1/2 teaspoon salt
- 1 cup chocolate chips
- 1 cup mini chocolate eggs (or Easter egg candies)
Instructions
- Preheat your oven to 350°F (175°C).
- Melt the unsalted butter in a medium saucepan over low heat.
- Combine melted butter and granulated sugar in a large bowl, whisking until smooth and glossy.
- Add the eggs one by one, followed by the vanilla extract, whisking until fully incorporated.
- Whisk together the flour, cocoa powder, baking powder, and salt in a separate bowl.
- Gradually add the dry mixture to the wet mixture, folding gently to combine.
- Fold in the chocolate chips until evenly distributed.
- Gently mix in the mini chocolate eggs.
- Scoop generous portions of dough onto a baking sheet lined with parchment paper.
- Bake for 12-15 minutes, then cool on the baking sheet for 5 minutes before transferring to a wire rack.
- Serve warm with milk or coffee.
Notes
These cookies can be frozen; bake from frozen adding a couple of minutes to the baking time.
Nutrition
- Serving Size: 1 cookie
- Calories: 180
- Sugar: 15g
- Sodium: 80mg
- Fat: 8g
- Saturated Fat: 5g
- Unsaturated Fat: 3g
- Trans Fat: 0g
- Carbohydrates: 25g
- Fiber: 1g
- Protein: 2g
- Cholesterol: 42mg
Keywords: Easter, cookies, chocolate, brownie, dessert
Orange Ginger Honey Cake
Unforgettable Orange Ginger Honey Cake: A Slice of Sunshine in Every Bite
Introduction
Hello, baking enthusiasts and fellow food lovers! Today, I’m absolutely thrilled to share a recipe that holds a special place in my heart: the Orange Ginger Honey Cake. This delightful dessert not only brightens up your kitchen with its incredible aroma but also serves as a sweet reminder of the beautiful moments shared around the table.
Imagine walking into a warm kitchen where the scent of freshly grated ginger intertwines with the vibrant essence of oranges. It’s a nose-tingling experience that instantly transports you to those cozy family gatherings, where laughter spills as freely as the syrup on your pancakes. That’s the magic of this cake!
What I adore about this cake is not just its glorious flavor but the story behind it. A few years back, I decided to experiment with citrus and spices after a friend gifted me a box of fresh oranges from his backyard tree. Armed with my trusty apron and a sense of adventure, I set out to craft a dessert that encapsulated the warmth of friendship and community. After a couple of batches, the Orange Ginger Honey Cake was born!
This cake is a perfect blend of sweet and spice, enhanced by the natural sweetness of honey and the zest of oranges. You can enjoy it as an afternoon treat with a steaming cup of tea or as a standout finale to a dinner party. So, let’s roll up our sleeves and dive into this delicious recipe that brings both comfort and celebration into your home!
Personal Story
Thinking back on the first time I baked this cake always brings a smile to my face. It was a gloomy September afternoon, and the rain was pouring down outside. My friends and I had gathered for what we called a “baking therapy” day, where we’d try out new recipes while enjoying some delightful nibbles and a bit of bubbly. As we rummaged through the pantry, I remembered the gift of oranges from my friend.
With a spark of inspiration igniting my creativity, I whipped out my mixing bowls and set to work on what would become our dessert centerpiece. The vibrant orange juice, aromatic ginger, and golden honey soon filled the kitchen with such mouthwatering scents that we couldn’t help but sneak bites of the batter (don’t tell anyone!).
When the cake finally emerged from the oven, we were practically dancing with joy. We garnished it with a honey-orange glaze and served it warm. One bite was all it took – the sweet, zesty taste coupled with a hint of spice made everyone’s faces light up! We ended up making this cake our go-to recipe for all our future gatherings, and it quickly became a cherished tradition that warmed our hearts, regardless of the weather outside.
Ingredients
To bring this delightful Orange Ginger Honey Cake to life, you’ll need the following ingredients:
Dry Ingredients:
-
2 cups all-purpose flour: This is the backbone of your cake. You can substitute with whole wheat flour for a nuttier flavor, but you may need to adjust the liquid slightly.
-
1 tsp baking soda: Helps your cake rise and gives it a fluffy texture.
-
1 tsp ground ginger: Deepens the flavor profile. If you don’t have ground ginger, freshly grated ginger works too!
-
½ tsp cinnamon: Adds warmth. For a twist, try cardamom or allspice.
-
¼ tsp nutmeg: This spice adds an extra depth of flavor. Use freshly grated for the best taste!
-
Pinch of salt: Enhances all the flavors.
Wet Ingredients:
-
½ cup unsalted butter (melted): This adds richness. You can swap it with coconut oil for a dairy-free version.
-
¾ cup raw honey: Sweetness with a touch of floral flavor. Maple syrup is a great substitute, but it will alter the flavor slightly.
-
2 large eggs: Bind everything together. For a vegan alternative, replace with ½ cup unsweetened applesauce or flax eggs.
-
1 cup fresh orange juice: Adds moisture and brightness. If you want to change things up, use tangerine or grapefruit juice.
-
Zest of 2 oranges: Packs a punch of orange flavor! Don’t skip this step!
-
1 tbsp grated fresh ginger: For an added zing! Ground ginger is fine but fresh gives that vibrant kick.
Optional Glaze:
-
2 tbsp honey: Adds sweetness and shine.
-
2 tbsp orange juice: Brightens up the glaze and ties back to the cake’s flavor.
Step-by-Step Instructions
Now that you’ve gathered your ingredients, let’s get baking! Here’s how to make this spectacular Orange Ginger Honey Cake step-by-step:
-
Preheat Your Oven: Preheat your oven to 350°F (175°C) and grease a 9-inch round cake pan with butter or cooking spray. This will prevent any sticky situations later on!
-
Mix Dry Ingredients: In a large mixing bowl, whisk together your all-purpose flour, baking soda, ground ginger, cinnamon, nutmeg, and salt until well combined. This not only blends the ingredients but also aerates the flour, giving your cake a light texture.
-
Combine Wet Ingredients: In another bowl, combine the melted butter, raw honey, eggs, fresh orange juice, orange zest, and grated ginger. Whisk the mixture vigorously until everything is smoothly incorporated. The blending process will loosen the honey, allowing it to mix seamlessly into the batter.
-
Combine Wet and Dry Mixtures: Pour the wet mixture into the bowl with the dry ingredients. Using a spatula or wooden spoon, stir until just combined—avoid overmixing! A few lumps are perfectly fine; they’ll bake out in the oven.
-
Pour the Batter: Transfer the batter into your prepared cake pan, smoothing the top with a spatula. Don’t be shy about tasting the batter, either—it’s delicious!
-
Bake: Place the cake in the preheated oven and bake for 25-30 minutes or until a toothpick inserted into the center comes out clean.
-
Cool Down: Once done, remove the cake from the oven and let it cool in the pan for about 10 minutes. Then transfer it to a wire rack to cool completely.
-
Prepare the Glaze (Optional): In a small bowl, whisk together the honey and orange juice for the glaze. Once your cake is cool, drizzle it generously over the top for an extra touch of sweetness.
-
Slice and Serve: Serve your cake as is, or pair it with a dollop of whipped cream or a scoop of vanilla ice cream for an indulgent treat!
Serving Suggestions
To make your presentation as delightful as your cake, consider plating it on a beautiful cake stand. A sprinkle of powdered sugar or additional orange zest on top adds a classy touch while enhancing the visual appeal. Pair each slice with a cup of fresh herbal tea or a fun sparkling drink to elevate the experience!
Recipe Variations
Looking to switch things up? Here are a few ideas to put your spin on the Orange Ginger Honey Cake:
-
Nutty Addition: Stir in ½ cup of chopped walnuts or pecans for some crunchy texture.
-
Fruit Twist: Toss in some fresh blueberries or cranberries for a pop of color and tartness.
-
Frosting Switch-Up: Swap the honey-orange glaze for a cream cheese frosting or a citrus buttercream for something extra sweet.
-
Gluten-Free Option: Substitute all-purpose flour with a gluten-free blend. Just make sure it’s a 1:1 ratio to ensure success!
-
Spiced Rum: Add a tablespoon of spiced rum to the wet ingredients for a cozy flavor enhancement.
Chef’s Notes
Every recipe tells a story, and this cake is no exception! Over the years, I’ve adapted it based on feedback and my own culinary explorations. I remember once deciding to bake it in cupcake form for a brunch gathering—let’s just say they disappeared faster than I could decorate them!
This cake has transformed into a versatile dessert that’s become a canvas for my creativity. From festive gatherings around the holidays to quiet weeknight dinners, there’s a piece of joy in every bite. I hope you create your own sweet memories with this recipe, too!
FAQs and Troubleshooting
1. My cake didn’t rise enough. What did I do wrong?
This might be due to improper measuring of the flour or expired baking soda. Make sure you spoon flour into your measuring cup rather than scooping, and check the expiration date of your baking soda for optimal rising!
2. Can I make this cake ahead of time?
Absolutely! This cake stores well in an airtight container for up to 3 days at room temperature, or you can refrigerate it for up to a week. The flavor tends to deepen and develop even more over time!
3. Can I freeze this cake?
Yes! Wrap the cooled cake tightly in plastic wrap and then foil before freezing. It can be stored in the freezer for up to three months. Just let it thaw in the fridge overnight when you’re ready to enjoy.
4. How can I make this cake non-dairy?
Replace the unsalted butter with coconut oil or a vegan butter alternative, and make sure your honey is from a vegan source or substitute it with agave syrup.
Nutritional Info
(For one slice when divided into 12 servings)
- Calories: 190
- Total Fat: 8g
- Saturated Fat: 4.5g
- Cholesterol: 44mg
- Sodium: 88mg
- Total Carbohydrates: 28g
- Dietary Fiber: 1g
- Sugars: 10g
- Protein: 3g
There you have it, my friends – an Orange Ginger Honey Cake that’s not only a treat for your taste buds but also a celebration of shared moments in the kitchen. I can’t wait for you to give it a try! Remember, the heart of good cooking is love, intention, and a little bit of adventure. So, tie on that apron, get baking, and enjoy every delicious moment! 🍊✨
PrintUnforgettable Orange Ginger Honey Cake
A delightful cake blending orange and ginger for a perfect balance of sweet and spice, enhanced with honey.
- Prep Time: 20 minutes
- Cook Time: 30 minutes
- Total Time: 50 minutes
- Yield: 12 servings 1x
- Category: Dessert
- Method: Baking
- Cuisine: American
- Diet: Vegetarian
Ingredients
- 2 cups all-purpose flour
- 1 tsp baking soda
- 1 tsp ground ginger
- ½ tsp cinnamon
- ¼ tsp nutmeg
- Pinch of salt
- ½ cup unsalted butter (melted)
- ¾ cup raw honey
- 2 large eggs
- 1 cup fresh orange juice
- Zest of 2 oranges
- 1 tbsp grated fresh ginger
- 2 tbsp honey (for glaze)
- 2 tbsp orange juice (for glaze)
Instructions
- Preheat your oven to 350°F (175°C) and grease a 9-inch round cake pan.
- Mix dry ingredients: In a large mixing bowl, whisk together flour, baking soda, ground ginger, cinnamon, nutmeg, and salt until well combined.
- Combine wet ingredients: In another bowl, whisk together melted butter, raw honey, eggs, fresh orange juice, orange zest, and grated ginger.
- Combine wet and dry mixtures: Pour wet mixture into dry ingredients and stir until just combined.
- Pour the batter into the prepared cake pan.
- Bake for 25-30 minutes or until a toothpick inserted into the center comes out clean.
- Cool the cake in the pan for about 10 minutes, then transfer to a wire rack to cool completely.
- Prepare the glaze by whisking together honey and orange juice, then drizzle over the cooled cake.
- Slice and serve, optionally with whipped cream or vanilla ice cream.
Notes
Can be made in advance and stores well at room temperature for up to 3 days.
Nutrition
- Serving Size: 1 slice
- Calories: 190
- Sugar: 10g
- Sodium: 88mg
- Fat: 8g
- Saturated Fat: 4.5g
- Unsaturated Fat: 2g
- Trans Fat: 0g
- Carbohydrates: 28g
- Fiber: 1g
- Protein: 3g
- Cholesterol: 44mg
Keywords: cake, orange, ginger, honey, dessert, baking
Moist Lemon Cupcakes with Raspberry Filling
# Moist Lemon Cupcakes with Raspberry Filling: A Delightfully Tangy Treat

## Introduction

Hello, lovely foodies! Today, I'm thrilled to share a recipe that embodies both elegance and comfort: **Moist Lemon Cupcakes with Raspberry Filling**. Imagine sinking your teeth into a soft, lemon-kissed cupcake bursting with a sweet and tangy raspberry surprise at its center. These cupcakes are perfect for every occasion—whether it’s a sunny afternoon tea, a joyful birthday bash, or simply a treat to brighten your everyday.

Lemon and raspberry are a classic pairing, each complementing the other perfectly. The brightness of the lemon cuts through the sweetness of the cake while the raspberry adds a delightful fruity twist. This recipe has become a staple in my kitchen over the years, and I can’t wait to share the joy of baking them with you!

Baking has always been a comforting ritual for me. It’s a delightful alchemy of ingredients transforming into something delicious. I love how it brings people together, creating sweet memories that linger long after the last bite. One whiff of these cupcakes baking, and the aroma instantly lifts the spirits—it's like a hug from the oven! So, preheat your oven, tie on that apron, and let’s embark on a baking adventure together!

## Personal Story

I have a particularly special memory connected to lemon cupcakes. A few summers ago, I hosted a garden party to celebrate the arrival of a dear friend from college. As I ambled through the local farmer’s market, I discovered the most beautiful raspberries—plump, juicy, and rich in color. I knew they’d be the perfect filling for some zesty lemon cupcakes I had been dreaming about.

After a day of baking and creating vibrant decorations with fresh flowers, we gathered under a big old tree in my backyard. The sun peeked through the leaves, creating a magical atmosphere. Those lemon cupcakes with raspberry filling were not just a hit; they stole the show! Everyone couldn’t help but come back for seconds. It was such a beautiful reminder of how food creates connections and cherished memories.

Let’s capture that essence together as we whip up these cupcakes!

## Ingredients

Here’s what you’ll need to create these delightful cupcakes:

### For the Cupcakes:
- **3/4 cup granulated sugar**
  *Sweetens the cupcakes, making them irresistible. You could substitute with coconut sugar for a slightly different flavor.*

- **1 tablespoon lemon zest (packed)**
  *This gives the cupcakes a vibrant lemon flavor. Make sure you use fresh lemons! You can substitute lime zest for a twist.*

- **1 1/2 cups cake flour**
  *Cake flour creates a tender crumb. If you don’t have any, you can make your own by mixing all-purpose flour with cornstarch.*

- **1/3 cup finely chopped pistachios**
  *These provide a lovely crunch and nutty flavor. Almonds or walnuts could be great alternatives if you have a nut allergy.*

- **2 teaspoons baking powder**
  *A crucial leavening agent that gives the cupcakes their fluffy texture. Make sure it’s fresh for best results!*

- **1/2 teaspoon fine sea salt**
  *Enhances flavors. Feel free to use kosher salt if that’s what you have on hand!*

- **6 tablespoons cubed unsalted butter (room temperature)**
  *Adds richness to the cupcakes. If you need dairy-free, use coconut oil or a vegan butter alternative.*

- **1/2 cup sour cream (room temperature)**
  *Keeps the cupcakes moist and adds a bit of tanginess. Greek yogurt can be a great substitute!*

- **1/2 cup whole milk (room temperature)**
  *Balances the batter's consistency. If you prefer non-dairy, almond or oat milk works well too.*

- **1/3 cup vegetable oil**
  *Helps keep the cupcakes moist; you can substitute with melted coconut oil if desired.*

- **1 large egg (room temperature)**
  *Binds the ingredients together. For a vegan option, you could use a flaxseed egg (1 tablespoon flaxseed meal + 2.5 tablespoons water).*

- **2 tablespoons fresh lemon juice**
  *Adds brightness to the cupcakes and balances the sweetness.*

- **1 teaspoon vanilla extract**
  *Enhances all the flavors. Feel free to use almond extract for a fun twist!*

### For the Raspberry Filling:
- **3 cups fresh or frozen raspberries**
  *Bursting with flavor! If you’re using frozen, no need to thaw—just toss them directly into the pot.*

- **1/4 cup granulated sugar**
  *Sweetens the filling to match the tartness of the raspberries.*

- **2 teaspoons fresh lemon juice**
  *Brightens the raspberry flavor.*

- **1 tablespoon + 1 teaspoon cornstarch**
  *Thickens the filling, creating a spreadable consistency.*

- **1 tablespoon water**
  *Helps the cornstarch dissolve smoothly when cooking the filling.*

### For the Lemon Buttercream Frosting:
- **1 1/2 cups unsalted butter (room temperature)**
  *Creates a silky-smooth frosting. If you're looking for a dairy-free option, there are great vegan butter alternatives.*

- **2 cups powdered sugar**
  *Sweetens the frosting while keeping its fluffy texture. You can adjust the sweetness by adding less or more!*

- **3 tablespoons heavy cream**
  *Adds a lovely creaminess. If you want a dairy-free version, use coconut cream instead.*

- **1 tablespoon fresh lemon juice**
  *Ensures the frosting has that delightful tang, perfectly complementing the lemon cupcakes.*

- **2 teaspoons lemon zest**
  *Adds an extra punch of flavor; always fresh is best!*

### For Decorating:
- **Chopped pistachios**
  *For a crunchy, colorful sprinkle on top!*

- **Fresh raspberries**
  *To make your cupcakes stunningly beautiful and fresh!*

## Step-by-Step Instructions

### Step 1: Preheat and Prepare
First things first: preheat your oven to 350°F (175°C). Prepare a cupcake tin by lining it with cupcake liners. This will keep them from sticking and adds a pop of color!

### Step 2: Mix the Dry Ingredients
In a medium bowl, whisk together the cake flour, baking powder, salt, and chopped pistachios. This not only combines everything but also incorporates air, leading to lighter cupcakes.

### Step 3: Cream the Butter and Sugar
In a large mixing bowl, beat the room-temperature butter and granulated sugar until it’s light and fluffy—about 3-5 minutes. This is where you get that lovely airy texture! Don’t rush this step; it’s key!

### Step 4: Add the Wet Ingredients
Now, reduce the mixer speed and add in the egg, sour cream, vegetable oil, milk, lemon juice, and vanilla extract. Beat until combined, scraping down the sides as necessary. Say hello to richness and flavor!

### Step 5: Combine All Ingredients
Gradually add the dry mixture to the wet ingredients, mixing until just combined. Be careful not to over-mix; that’ll lead to tough cupcakes, and we want them tender and fluffy.

### Step 6: Fill the Cupcake Liners
Using a scoop or spoon, fill each liner about two-thirds full with the batter. This gives them room to rise without overflowing.

### Step 7: Bake!
Pop them into your preheated oven and bake for about 15-18 minutes, or until a toothpick inserted into the center comes out clean. The kitchen will smell heavenly!

### Step 8: Make the Raspberry Filling
While the cupcakes bake, let’s prepare the raspberry filling. In a saucepan over medium heat, combine the raspberries, sugar, lemon juice, cornstarch, and water. Cook for about 5-7 minutes, stirring gently until the mixture thickens. Remove from heat and let cool.

### Step 9: Prepare the Lemon Frosting
In another bowl, beat the room-temperature butter until it’s light and creamy. Gradually add powdered sugar, heavy cream, lemon juice, and lemon zest, beating until fluffy. This frosting is creamy and loaded with zesty flavor!

### Step 10: Fill and Frost the Cupcakes
Once cupcakes have cooled completely, scoop a small portion of the center out (think of a small cone shape) to create room for the raspberry filling. Fill each cupcake with the raspberry mixture and crown it with a swirl of lemon frosting.

### Step 11: Finish with Love
Top each cupcake with chopped pistachios and a fresh raspberry to make them look as delightful as they taste!

## Serving Suggestions

To serve, arrange the cupcakes on a beautiful platter. You could add a sprinkle of additional pistachios around them for a luxurious touch. Make sure to have some sparkling lemonade or iced tea on the side for a refreshing pairing. Your guests won’t be able to resist coming back for another!

## Recipe Variations

Feeling adventurous? Here are some fun twists you can try:
1. **Blueberry Lemon Cupcakes**: Swap the raspberries for fresh blueberries for a different berry surprise.
2. **Lavender Lemon Cupcakes**: Add culinary lavender to the batter for a fragrant, floral hint.
3. **Chocolate Lemon Cupcakes**: Incorporate cocoa powder into the batter for a chocolate-lemon twist!
4. **Vegan Version**: Substitue each egg with a flaxseed egg and the butter with vegan butter to make these delightful cupcakes dairy-free.
5. **Lemon Curd Filling**: Use luscious homemade lemon curd instead of raspberry filling for an extra burst of lemony goodness!

## Chef’s Notes

Each time I make these cupcakes, I think back to that garden party and the joy they brought to my friends. Over the years, I’ve made countless variations, adapting the recipe to suit different seasons and occasions. One particularly hilarious kitchen story comes to mind: One time, I accidentally swapped salt for sugar and ended up with lemon cupcakes that tasted like the ocean—definitely not the intended flavor! It’s those little mishaps that make cooking such a joyful experience.

## FAQs and Troubleshooting

**1. Why are my cupcakes dense?**
   - **Overmixing**: Mixing the batter too much can lead to dense cupcakes. Mix just until combined.

**2. How do I store leftovers?**
   - **Storage**: These cupcakes are best kept in an airtight container in the fridge for up to 3 days. You can let them sit at room temperature for about an hour before serving for the best taste!

**3. Can I make these cupcakes ahead of time?**
   - **Yes!** You can bake the cupcakes a day ahead and frost them the next day. Just wait until they are fully cooled.

**4. Can I freeze these cupcakes?**
   - Absolutely! Just freeze them un-frosted. Once they’re fully cool, wrap them in plastic wrap and store them in a freezer bag for up to 3 months.

## Nutritional Info

*(Per Cupcake, Approximately)*
- Calories: 300
- Protein: 3g
- Carbohydrates: 40g
- Fat: 15g
- Sugar: 20g

So there you have it! A scrumptious recipe for **Moist Lemon Cupcakes with Raspberry Filling** that’s sure to wow your family and friends. Remember, cooking should be a joyful experience—so embrace the mess, enjoy the process, and let your kitchen be filled with laughter and love. Happy baking, and let’s get those cupcakes in the oven!
Moist Lemon Cupcakes with Raspberry Filling

Delightful lemon cupcakes with a tangy raspberry filling, perfect for any occasion.
- Prep Time: 20 minutes
- Cook Time: 20 minutes
- Total Time: 40 minutes
- Yield: 12 servings 1x
- Category: Dessert
- Method: Baking
- Cuisine: American
- Diet: Vegetarian
Ingredients
- 3/4 cup granulated sugar
- 1 tablespoon lemon zest (packed)
- 1 1/2 cups cake flour
- 1/3 cup finely chopped pistachios
- 2 teaspoons baking powder
- 1/2 teaspoon fine sea salt
- 6 tablespoons cubed unsalted butter (room temperature)
- 1/2 cup sour cream (room temperature)
- 1/2 cup whole milk (room temperature)
- 1/3 cup vegetable oil
- 1 large egg (room temperature)
- 2 tablespoons fresh lemon juice
- 1 teaspoon vanilla extract
- 3 cups fresh or frozen raspberries
- 1/4 cup granulated sugar (for filling)
- 2 teaspoons fresh lemon juice (for filling)
- 1 tablespoon + 1 teaspoon cornstarch
- 1 tablespoon water
- 1 1/2 cups unsalted butter (room temperature, for frosting)
- 2 cups powdered sugar
- 3 tablespoons heavy cream
- 1 tablespoon fresh lemon juice (for frosting)
- 2 teaspoons lemon zest (for frosting)
- Chopped pistachios (for decorating)
- Fresh raspberries (for decorating)
Instructions
- Preheat your oven to 350°F (175°C) and prepare a cupcake tin with liners.
- Mix the cake flour, baking powder, salt, and chopped pistachios in a medium bowl.
- Cream the room-temperature butter and granulated sugar until light and fluffy.
- Add the egg, sour cream, vegetable oil, milk, lemon juice, and vanilla extract, beating until well combined.
- Combine the dry mixture gradually with the wet ingredients until just mixed.
- Fill each cupcake liner about two-thirds full with batter.
- Bake for 15-18 minutes or until a toothpick comes out clean.
- Make the raspberry filling by cooking raspberries, sugar, lemon juice, cornstarch, and water over medium heat until thickened.
- Prepare the lemon frosting by beating room-temperature butter and gradually adding powdered sugar, heavy cream, lemon juice, and zest until fluffy.
- Fill each cooled cupcake with raspberry filling and top with lemon frosting.
- Finish with chopped pistachios and fresh raspberries.
Notes
Store leftovers in an airtight container in the fridge for up to 3 days.
Nutrition
- Serving Size: 1 cupcake
- Calories: 300
- Sugar: 20g
- Sodium: 200mg
- Fat: 15g
- Saturated Fat: 8g
- Unsaturated Fat: 5g
- Trans Fat: 0g
- Carbohydrates: 40g
- Fiber: 1g
- Protein: 3g
- Cholesterol: 30mg
Keywords: lemon cupcakes, raspberry filling, dessert, baking, sweet treats