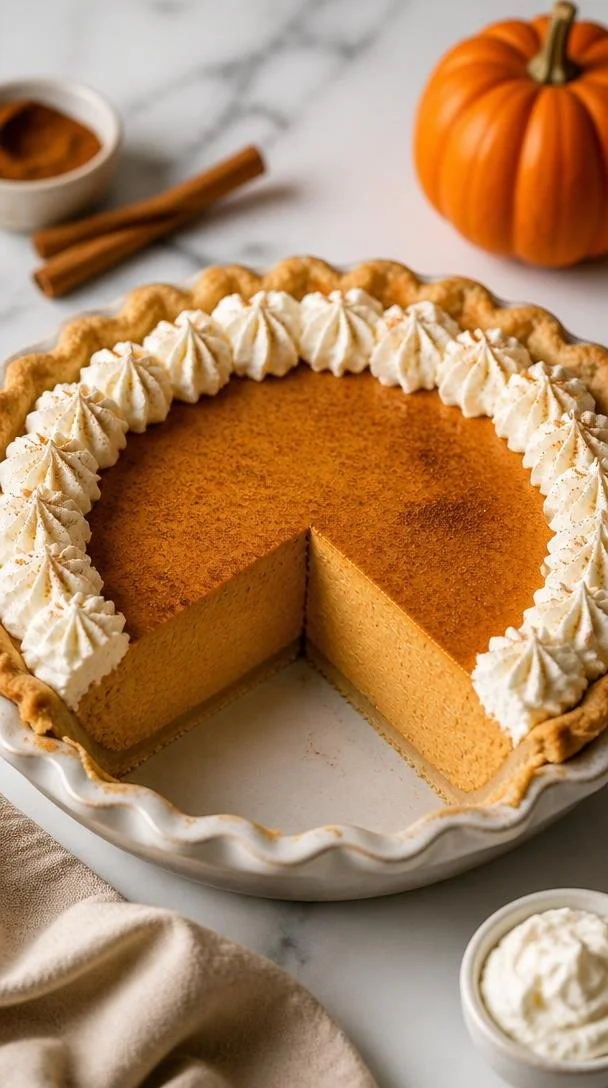
Beginner-Friendly Pumpkin Chiffon Pie: Fluffy & Creamy
The Irresistible Charm of Pumpkin Chiffon Pie
Hello pumpkin lovers! Today, we’re diving into a dessert that beautifully captures the essence of fall—Pumpkin Chiffon Pie. If you’re looking to impress guests or simply want a slice of nostalgia, this light and airy dessert is a must-try!
A Slice of Nostalgia
Growing up, Thanksgiving was the backdrop for a treasure trove of flavors. Mounds of mashed potatoes, succulent turkey, and the pièce de résistance—pumpkin pie. But I’ll never forget the first time I tasted a pumpkin chiffon pie. It was at my Aunt Muriel’s, where the air was filled with laughter and the scent of spices mingling with freshly baked goods.
I can still picture her kitchen, fragrant with the aroma of cinnamon and nutmeg, as I walked through the door, eye level with a table full of pies. She pointed me to a slice of pumpkin chiffon pie and urged me to dig in. The moment my fork glided through the fluffy filling and crisp crust, I was hooked! Light as a feather yet packed with rich flavors, that pie was an unforgettable revelation—one that has become a holiday tradition in my own home. Now, I’d love to share this delightful recipe with you!
Ingredients
Here’s what you’ll need to make a heavenly Pumpkin Chiffon Pie that not only tastes divine but also looks the part:
-
1 ½ cups pumpkin puree
Opt for the good stuff—canned pumpkin puree works well and saves time! If you’re feeling adventurous, you can roast your own pumpkin. Just peel, deseed, roast, and blend until smooth. -
1 cup heavy cream
This adds that luscious creaminess. If you’re looking for a lighter version, you can use whipped coconut cream or Greek yogurt. -
½ cup sugar
Regular granulated sugar is perfect, but feel free to use brown sugar for a deeper flavor. Honey or maple syrup can also be delicious alternatives—just adjust for sweetness. -
2 tsp gelatin
This helps give the pie its light, airy texture. If you need a vegetarian option, try using agar-agar instead, but follow the packaging instructions for the correct amount. -
1 tsp ground cinnamon
The spice of the season! Use fresh cinnamon for the best flavor. -
½ tsp ground ginger
A little zing goes a long way! Ground ginger lends a warm, spicy touch. Fresh ginger can be used as well; just grate a teaspoon. -
¼ tsp ground nutmeg
Nutmeg adds a lovely fragrance. Be sure to use freshly grated nutmeg if possible—it’s a game changer! -
¼ tsp salt
A pinch of salt enhances the flavors beautifully. -
1 tsp vanilla extract
Vanilla awakens the other flavors and provides a warm undertone. -
1 pre-baked pie crust
You can use store-bought or make your own. A graham cracker crust works wonderfully for this recipe, adding extra flavor and texture.
Step-by-Step Instructions
Are you ready to make pie magic? Let’s get started!
-
Prepare the Gelatin:
In a small bowl, sprinkle the gelatin over 2 tablespoons of cold water. It should bloom and absorb the water. Let it sit for about 5 minutes until it thickens. This step is essential for that fluffy texture! -
Heat the Pumpkin Mixture:
In a saucepan, combine the pumpkin puree, sugar, cinnamon, ginger, nutmeg, and salt. Add ½ cup of water and whisk everything together over medium heat. Cook for about 5 minutes, allowing the mixture to bubble lightly. This melds the flavors beautifully! -
Add the Gelatin:
Once heated, remove the pumpkin mixture from the heat. Add the bloomed gelatin and stir until fully dissolved. This gives your pie that incredible, fluffy texture. -
Cool the Mixture:
Allow the pumpkin mixture to cool for about 10-15 minutes. We don’t want to scramble the eggs in the next step, so make sure it’s just warm, not hot! -
Whip the Cream:
In a mixing bowl, whip the heavy cream to stiff peaks while keeping your eye on it! We want it fluffy, not whipped butter. Reserve about a quarter of the whipped cream for topping later. -
Fold in the Cream:
Once the pumpkin mixture is cooled, gently fold in the whipped cream until there’s no streakiness. This is where the magic happens—the mixture should be airy and light! -
Transfer to the Crust:
Spoon the airy mixture into your pre-baked pie crust, spreading it evenly. You can use a spatula to make it look pretty on top. -
Chill:
Cover the pie with plastic wrap and refrigerate for at least 4 hours, preferably overnight. This allows the flavors to deepen, and sets the filling to perfection! -
Serve and Enjoy:
When you’re ready to serve, pull out the reserved whipped cream, dollop it on each slice, and perhaps sprinkle a little extra cinnamon or nutmeg on top for that Instagram-worthy look!
Serving Suggestions
When serving Pumpkin Chiffon Pie, a dollop of fresh whipped cream is non-negotiable. Consider adding a sprinkle of crushed gingersnaps or pecans on top for some crunch and to add a little flair to your presentation. You can slice the pie into wedges and lightly drizzle with caramel sauce for an exquisite touch. Remember, we want it to look enticing yet effortless!
Recipe Variations
-
Chocolate Pumpkin Chiffon:
Add 2-3 tablespoons of unsweetened cocoa powder to the pumpkin mixture for a decadent chocolate twist. -
Maple Pumpkin Chiffon:
Substitute half of the sugar with pure maple syrup for a delightful maple flavor. -
Nutty Crust:
Use crushed pecans or walnuts combined with graham crackers for the crust to add extra flavor and texture. -
Spiced Rum:
Add 1 tablespoon of spiced rum to the filling for an adult twist! -
Dairy-Free Version:
Use coconut cream instead of heavy cream and a dairy-free alternative for the pie crust.
Chef’s Notes
This recipe has been in my collection for years, and it holds a special place in my heart. I love how it’s easy enough for weeknight adventures and elegant enough for special gatherings. I still chuckle at the time I mistook “tablespoons” for “teaspoons” and ended up with an extra-sweet pie! Lesson learned: always read the recipe twice!
Making this pie is a delightful process, so don’t shy away from letting your personality shine through your cooking. Remember, it’s about creating beautiful moments around your table—and nothing brings people together like pie!
FAQs and Troubleshooting
1. Can I make this pie ahead of time?
Absolutely! This pie tastes best after chilling for several hours or overnight, making it perfect for parties or holidays.
2. What should I do if my pie filling is too runny?
If your filling doesn’t set, it may be due to not heating the gelatin enough. Make sure to dissolve it completely in the warm pumpkin mixture. If you’re in a hurry, you can add a bit more gelatin.
3. I don’t have pumpkin puree. Can I use fresh pumpkin?
Yes, you can! Just roast and puree your pumpkin until smooth. Ensure to drain excess moisture to avoid a soggy pie.
4. Can I use a different type of crust?
Definitely! Feel free to swap the traditional crust for a graham cracker or even an almond flour crust—your choice will bring different flavors and textures to the table!
Nutritional Info
While I believe in enjoying every bite guilt-free, if you’re curious, a slice of this delectable Pumpkin Chiffon Pie typically contains around 250-300 calories, depending on the crust and whipped cream you use.
Now that you’ve got the inside scoop on this fantastic dessert, it’s time to tie on that apron, take a deep breath, and create some pumpkin-flavored magic in your kitchen. Celebrate the joy of cooking! I can’t wait to hear how your Pumpkin Chiffon Pie turns out! Happy baking!
PrintPumpkin Chiffon Pie
A light and airy pumpkin chiffon pie that’s perfect for fall gatherings, filled with rich flavors and nostalgic memories.
- Prep Time: 20 minutes
- Cook Time: 5 minutes
- Total Time: 245 minutes
- Yield: 8 servings 1x
- Category: Dessert
- Method: Chilling
- Cuisine: American
- Diet: Vegetarian
Ingredients
- 1 ½ cups pumpkin puree
- 1 cup heavy cream
- ½ cup sugar
- 2 tsp gelatin
- 1 tsp ground cinnamon
- ½ tsp ground ginger
- ¼ tsp ground nutmeg
- ¼ tsp salt
- 1 tsp vanilla extract
- 1 pre-baked pie crust
Instructions
- Prepare the gelatin: In a small bowl, sprinkle the gelatin over 2 tablespoons of cold water. Let it sit for about 5 minutes until it thickens.
- Heat the pumpkin mixture: In a saucepan, combine the pumpkin puree, sugar, cinnamon, ginger, nutmeg, and salt with ½ cup of water. Cook for about 5 minutes over medium heat.
- Add the gelatin: Remove the pumpkin mixture from heat. Add the bloomed gelatin and stir until fully dissolved.
- Cool the mixture: Allow the pumpkin mixture to cool for about 10-15 minutes.
- Whip the cream: In a mixing bowl, whip the heavy cream to stiff peaks, reserving a quarter for topping.
- Fold in the cream: Gently fold in the whipped cream into the cooled pumpkin mixture.
- Transfer to the crust: Spoon the airy mixture into the pre-baked pie crust.
- Chill: Cover and refrigerate for at least 4 hours, preferably overnight.
- Serve and enjoy: Top each slice with reserved whipped cream and a sprinkle of cinnamon or nutmeg.
Notes
Serve with a dollop of whipped cream and consider adding crushed gingersnaps or pecans for garnish.
Nutrition
- Serving Size: 1 slice
- Calories: 275
- Sugar: 25g
- Sodium: 150mg
- Fat: 18g
- Saturated Fat: 10g
- Unsaturated Fat: 8g
- Trans Fat: 0g
- Carbohydrates: 30g
- Fiber: 2g
- Protein: 3g
- Cholesterol: 70mg
Keywords: pumpkin pie, dessert, fall recipes, chiffon pie, holiday baking
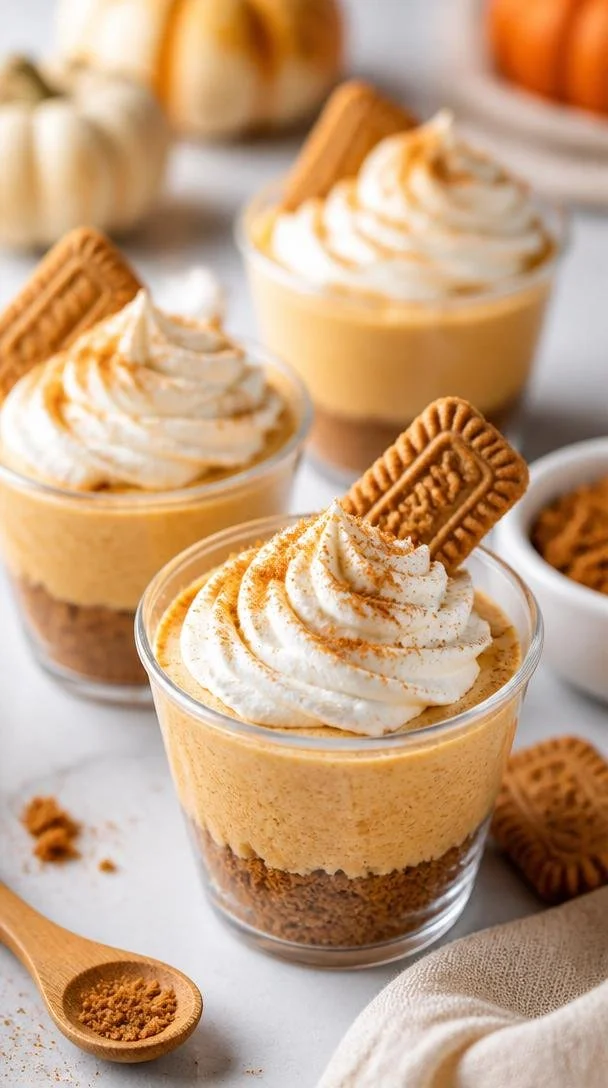
Minute No-Bake Pumpkin Pie Cup Dessert (Dairy-Free)
Pumpkin Pie in a Cup: A Delightful Autumn Treat
Fall is in the air! The leaves are changing, and the scent of pumpkin spice is wafting through the neighborhoods. This time of year is all about warm drinks, cozy sweaters, and of course, decadent desserts that bring people together. Today, I’m excited to share one of my favorite desserts: Pumpkin Pie in a Cup. It’s a playful twist on the classic pumpkin pie that captures all the comforting flavors we love—without the fuss of a traditional pie crust.
Imagine enjoying the smooth, creamy filling of pumpkin pie tucked right into a cup, topped with fluffy whipped cream and perhaps even a sprinkle of cinnamon or nutmeg. It’s the perfect dessert for gatherings with friends or a special treat to enjoy while curled up with a good book. Plus, it’s so easy to make that you’ll find yourself adding it to your go-to recipes for every autumn occasion.
My Pumpkin Pie Memories
Growing up, my family always celebrated the start of fall with a big Thanksgiving dinner. The centerpiece of that feast was my grandmother’s famous pumpkin pie. The aroma of spices gently wafting through the kitchen as she baked the pies was a smell I’ll never forget. I can picture my little self, tugging at her apron and stealing bites of the spiced pumpkin filling as she rolled the pie crust—it was a grand adventure of flavors and aromas. Each year, she would teach me a little more about the craft of baking, but I could never quite replicate her skill with a traditional pie.
So, one autumn evening, I decided to transform my memories into something simple yet equally satisfying. That led to the birth of the Pumpkin Pie in a Cup! It’s a dessert that captures the spirit of those cherished kitchen moments while allowing the flavors of pumpkin and spice to shine. I’m thrilled to share it with you now!
Ingredients
Let’s gather our ingredients. For Pumpkin Pie in a Cup, you’ll need:
-
2 cups Biscoff cookie crumbs (from about 30 cookies)
These delectable cookies bring a spiced, caramel-like flavor that pairs beautifully with pumpkin. You can substitute them with graham cracker crumbs or gingersnap cookies for different variations. -
6 Tablespoons unsalted butter (melted)
Butter adds richness and helps bind the cookie crust together. If you need a dairy-free option, coconut oil works fabulously here! -
8 ounces cream cheese (softened)
Cream cheese gives our filling that silky smooth texture. If you’re avoiding dairy, you could substitute with a vegan cream cheese alternative, but mind the consistency—it may differ slightly. -
1/2 cup granulated white sugar
This sweetens the filling beautifully. For a lower-calorie option, you can use coconut sugar or maple syrup instead. Just keep in mind that sweetness levels may vary! -
1 cup pumpkin puree (NOT pumpkin pie mix)
Pure pumpkin puree is key to achieving that rich pumpkin flavor. Avoid pumpkin pie filling as it contains extra sugars and spices that can throw off your dish. -
1 teaspoon pumpkin pie spice
This blend of cinnamon, nutmeg, ginger, and cloves is essential for that quintessential autumn flavor. You can also make your own blend or use cinnamon alone for a lighter spice profile. -
6 ounces frozen whipped topping (thawed)
This gives our filling an airy lightness. If you’re feeling fancy, you can whip up your own cream, but just make sure it’s fully whipped before folding it into the mixture. Extra whipped cream on top is highly recommended for serving!
Step-by-Step Instructions
Now, let’s get right into making this delightful Pumpkin Pie in a Cup.
-
Prepare Your Crust
Begin by preheating your oven to 350°F (175°C). In a large mixing bowl, combine the Biscoff cookie crumbs and melted butter. Mix until the crumbs are well-coated—think of it as making small sandy pebbles. You want it to hold together when pressed. -
Press and Bake the Crust
Take your mixture and evenly distribute it into the bottoms of your serving cups (about 6-8 cups, depending on size). Use the back of a spoon or your fingers to press down firmly. Bake the crusts for about 10 minutes, until they are golden and fragrant. Allow them to cool while you make the filling. -
Make the Filling
In another mixing bowl, beat the softened cream cheese with an electric mixer until it’s smooth and creamy. This will be the smooth base for our filling. Slowly add in the granulated sugar and continue mixing until well combined—this should take about 2 minutes. -
Add the Pumpkin and Spices
Now, add in the pumpkin puree and pumpkin pie spice. Mix on low speed until all ingredients are well-incorporated. You should notice that glorious orange hue! This is your pumpkin filling magic in the making. -
Fold in the Whipped Topping
Gently fold in the thawed whipped topping until it’s evenly distributed throughout the mixture. This step is critical for keeping the filling light and airy—think fluffy clouds of pumpkin! Don’t rush it; be gentle and ensure everything is combined. -
Assemble the Cups
With the crusts cooled and the filling ready, spoon the pumpkin mixture on top of the crusts in each cup. Don’t worry about getting it perfect—rustic is the name of the game here! Use a spatula to smooth the top if desired. -
Chill and Serve
Place the assembled cups in the refrigerator for at least 2-4 hours (or overnight if you want to get a head start!). This allows the filling to set perfectly. When you’re ready to serve, top each cup with a generous dollop of whipped cream and perhaps a dash of cinnamon for that extra autumn flair.
Serving Suggestions
These cups make for a lovely presentation at any gathering! You can serve them on a decorative tray, lined with autumn leaves or sprigs of rosemary for a stunning display. For that little extra touch, consider adding mini pumpkin decorations or serving with a side of caramel sauce for drizzling—because who can resist that combo?
Recipe Variations
Now, let’s talk creativity! Here are a few variations you can play with:
-
Maple Pumpkin Delight: Drizzle some maple syrup in the crust or mix it with the pumpkin filling for a sweeter take on autumn flavors.
-
Nutty Touch: Add finely chopped pecans or walnuts into the crust mixture for a delightful crunch.
-
Chai Spice Twist: Swap out pumpkin pie spice for chai spice to enhance the flavor palette with aromatic notes of cardamom and black pepper.
-
Vegan Version: Use a vegan cream cheese alternative, coconut whipped cream, and dairy-free cookie crumbs to create a plant-based version of this delight.
-
Chocolate Lover’s Dream: Fold in some mini chocolate chips into the pumpkin filling for a rich, chocolatey treat—after all, chocolate and pumpkin are a match made in heaven!
Chef’s Notes
As I’ve developed this recipe, it has become a staple in my gatherings—one of those delightful desserts that never fails to bring smiles. I fondly remember a particular Thanksgiving when I forgot to chill the filling overnight, so I served it warm. Surprisingly, everyone loved it just as much! That’s the beauty of this dessert—it’s flexible and always turns out delicious no matter how you prepare it. Just like my grandmother’s pie, it becomes less about the perfection and more about the moments we share.
FAQs and Troubleshooting
-
Can I use fresh pumpkin instead of canned?
Absolutely! Just make sure to cook and puree your pumpkin until it’s smooth. Fresh pumpkin may need to be drained a bit to avoid excess moisture. -
What if my crust crumbles?
If the crust doesn’t hold together, you may not have added enough butter or pressed it down hard enough. Try adding a touch more melted butter and ensure you’re compacting it into the cup evenly. -
How long can I store these cups?
They can be stored in the refrigerator for up to 3 days, though they’re best enjoyed within the first couple of days for freshness. -
I don’t have whipped topping. What can I use?
You can make your own whipped cream! Just whip heavy cream with a bit of sugar and vanilla until soft peaks form. It’s just as tasty and feels a little more homemade!
Nutritional Info
While I haven’t listed precise nutritional values, this dessert does have sweet notes of pumpkin and spiced goodness, making it a delightful treat to enjoy in moderation, especially during those cozy fall evenings!
Let’s embrace the season and share joyful moments around the table with this Pumpkin Pie in a Cup. It’s a recipe that invites laughter, cozy conversations, and all the warm feels autumn has to offer. Enjoy, and happy cooking! 🥳🍁
PrintPumpkin Pie in a Cup
A delightful twist on classic pumpkin pie served in a cup, featuring creamy pumpkin filling and a spiced cookie crust.
- Prep Time: 20 minutes
- Cook Time: 10 minutes
- Total Time: 240 minutes
- Yield: 6 servings 1x
- Category: Dessert
- Method: Baking
- Cuisine: American
- Diet: Vegetarian
Ingredients
- 2 cups Biscoff cookie crumbs
- 6 tablespoons unsalted butter (melted)
- 8 ounces cream cheese (softened)
- 1/2 cup granulated white sugar
- 1 cup pumpkin puree (NOT pumpkin pie mix)
- 1 teaspoon pumpkin pie spice
- 6 ounces frozen whipped topping (thawed)
Instructions
- Preheat your oven to 350°F (175°C).
- Combine the Biscoff cookie crumbs and melted butter in a large mixing bowl.
- Press the mixture into the bottoms of your serving cups, creating a crust.
- Bake the crusts for about 10 minutes, until golden and fragrant.
- Allow to cool while preparing the filling.
- Beat the softened cream cheese until smooth and creamy in another mixing bowl.
- Gradually add in the granulated sugar and mix for about 2 minutes.
- Add the pumpkin puree and pumpkin pie spice, mixing on low speed until well combined.
- Fold in the thawed whipped topping until evenly distributed.
- Spoon the pumpkin mixture on top of the cooled crusts in each cup.
- Chill the assembled cups in the refrigerator for at least 2-4 hours.
- Serve topped with whipped cream and a dash of cinnamon.
Notes
For variations, consider adding maple syrup, nuts, or chocolate chips to the filling.
Nutrition
- Serving Size: 1 cup
- Calories: 320
- Sugar: 18g
- Sodium: 350mg
- Fat: 18g
- Saturated Fat: 10g
- Unsaturated Fat: 6g
- Trans Fat: 0g
- Carbohydrates: 35g
- Fiber: 2g
- Protein: 4g
- Cholesterol: 40mg
Keywords: pumpkin pie, dessert, fall recipes, Thanksgiving, pumpkin spice
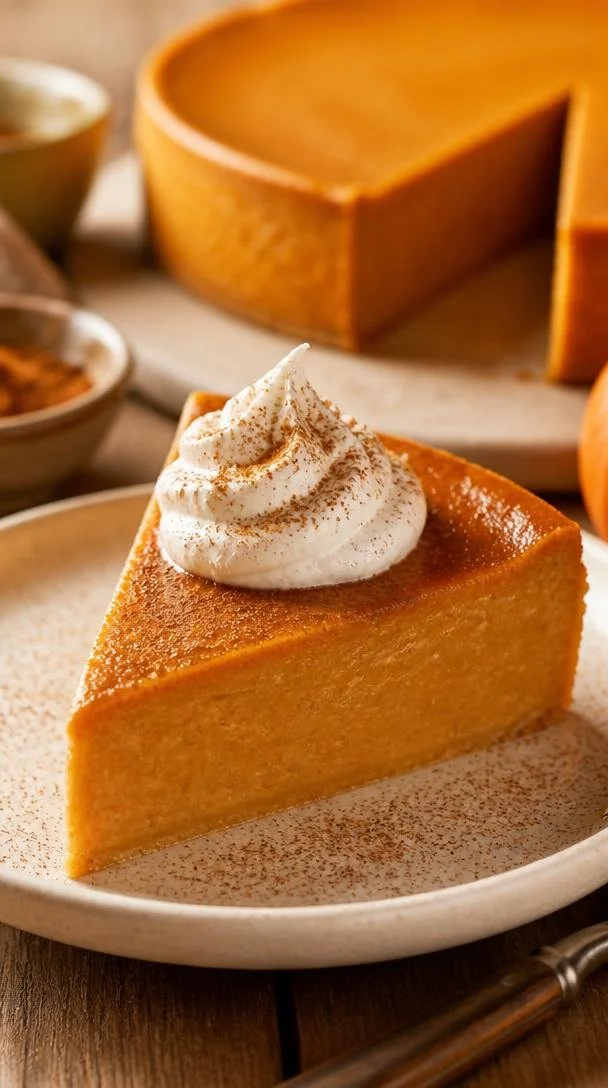
Ingredient No-Bake Crustless Pumpkin Pie (Seasonal)
Crustless Pumpkin Pie: A Celebration of Flavor and Simplicity
Hello, my lovely foodies! 🧡 If you’re anything like me, the fall season sparks an undeniable craving for warm, comforting flavors, and what embodies this cozy vibe better than pumpkin pie? Today, I’m thrilled to share my version of a crustless pumpkin pie that’s not only easy to make but also lets the delightful pumpkin flavor shine through without any fuss.
Now, don’t get me wrong—I love a good pie crust. But sometimes, life gets busy, and a crustless creation can save time without skimping on flavor. This recipe is perfect for those moments, reminding us that sometimes simplicity is the key to success.
A Slice of Nostalgia
As a kid, I can still picture my grandmother in her bright yellow kitchen, whipping up her signature pumpkin pie every Thanksgiving. The smell of spices wafting through the air was our invitation to gather around the table. I remember sneaking bites of the filling before it even hit the oven. It was creamy, sweet, and had just the right amount of spice—perfection in a bite!
I remember asking her how she made it, and she smiled, her eyes twinkling as she said, “It’s all about the pumpkins, darling.” That moment stuck with me, and it ignited my curiosity about cooking. Today, I hope to take you back to that feeling of warmth and nostalgia with this crustless version, where we focus on what matters most—the flavor!
Ingredients
Here’s what you’ll need to create this dreamy crustless pumpkin pie. Let’s take a closer look at our star players:
-
1 can (15 oz) pumpkin puree
Pumpkin puree is the heart of this dish. It brings that warm, earthy flavor we love. If you want to go fancy, you can roast and puree your own pumpkins, but canned works just as well—trust me! -
1 cup evaporated milk
This adds a creamy texture without the excess fat of heavy cream. Whole milk can be a substitute if necessary; just know you might lose a bit of that richness. -
3/4 cup sugar
Sweetness is essential, but feel free to reduce this a tad or use maple syrup or honey for a natural alternative! -
3 large eggs
Eggs help bind everything together and give the pie a fluffy texture. If you’re looking for an egg-free version, consider substituting with flax eggs (3 tablespoons water mixed with 1 tablespoon flaxseed meal = 1 egg). -
1 teaspoon vanilla extract
Vanilla enhances the overall flavor, making it even more delightful. If you’re feeling adventurous, try almond extract for a unique twist. -
1 teaspoon ground cinnamon
Cinnamon is the classic spice for pumpkin pie, adding warmth and sweetness. You can also use freshly grated nutmeg if you have it on hand for an extra kick! -
1/2 teaspoon ground ginger
Ginger offers a lovely warmth. If you prefer more zing, fresh ginger can also be an invigorating substitute—just grate a little in! -
1/4 teaspoon ground nutmeg
This spice truly elevates the flavor profile. Don’t skip it! If you’re a nutmeg lover, a bit more won’t hurt! -
1/2 teaspoon salt
Salt balances the sweetness and enhances the flavors. A touch of sea salt can add a delightful contrast!
Step-by-Step Instructions
Ready to create some kitchen magic? Let’s dive right into the step-by-step process of bringing this crustless pumpkin pie to life!
-
Preheat your oven: Start by preheating your oven to 350°F (175°C). This is crucial because a properly preheated oven ensures even baking. Nobody wants a soggy pie!
-
Mix the base ingredients: In a large mixing bowl, combine your canned pumpkin puree, evaporated milk, and sugar. Use a whisk to blend everything together until smooth. Pro tip: If you want a super creamy texture, you can use a hand mixer for this step!
-
Add the eggs: Crack in your three large eggs and whisk again until fully incorporated. Eggs are essential for giving your pie that fluffy, custard-like texture. If your batter seems a bit thick at this point, don’t worry—it’s supposed to be!
-
Spice it up: Time to incorporate those spices! Add in the vanilla extract, ground cinnamon, ground ginger, ground nutmeg, and salt. Whisk vigorously for about a minute to ensure that the spices are evenly distributed. Smelling that aromatic blend yet? I absolutely love this part!
-
Prepare the baking dish: Lightly grease a pie dish (or an 8-inch square baking dish, if you prefer). I often sprinkle a bit of cinnamon and sugar on the greased surface for an extra flavor boost and a delightful caramelization.
-
Pour the batter: Pour your pumpkin mixture into the prepared dish. Make sure to evenly distribute it; a well-centered pie will bake more evenly.
-
Bake it: Pop it in the preheated oven and bake for 45-50 minutes. You’ll know it’s ready when the edges are set and the center has a slight jiggle (think of it as the pie’s little dance!).
-
Let it cool: Once baked, let your pie cool at room temperature. This step is essential for it to set up properly. It’ll also allow all those beautiful flavors to meld together.
-
Chill it: After cooling on the counter for about an hour, place it in the refrigerator to chill. Serve it cold for that classic pie experience!
Serving Suggestions
When it comes to serving, a simple yet elegant presentation goes a long way! Slice your pie into generous wedges and serve it on a beautiful plate. A dollop of freshly whipped cream or a scoop of vanilla ice cream on top can add that finishing touch, making it feel extra special. Drizzle with caramel sauce or sprinkle some crushed pecans for an elegant twist—but let’s be real, that creamy pumpkin filling packs all the flavor you need!
Recipe Variations
If you’re feeling adventurous and want to jazz up this crustless pumpkin pie, here are a few variations to consider:
- Chocolate swirl: Add melted chocolate to half of the batter before pouring it into the dish for a rich twist.
- Maple pecan topping: Stir in chopped pecans and a little maple syrup into the mix for a nutty sweetness.
- Dairy-free: Substitute the evaporated milk with coconut milk for a tropical flair.
- Spiced chai: Add chai spice or more ginger and cinnamon for a warm, spiced flavor.
- Pumpkin spice latte: Incorporate some brewed coffee for an exciting coffee-flavored version!
Chef’s Notes
This crustless pumpkin pie has been a cherished recipe over the years, evolving with my tastes and cooking style. I’ve played with the spices, tried different type of sweeteners, and even experimented with various cooking methods. But the essence remains the same—creating something that warms the heart and invites others to gather.
Funny story—one Thanksgiving, I decided to impress my friends by making two versions: one traditional crust pie and this crustless beauty. Let’s just say the crustless pie vanished before the traditional one! It’s a testament that honesty in flavor doesn’t need an elaborate presentation.
FAQs and Troubleshooting
1. Why is my pie too watery?
If your pie has excess moisture, it might be due to the pumpkin puree. Make sure to use good-quality pumpkin puree that’s thick, or try draining it a bit before mixing.
2. How do I know when it’s done?
The center should be set, with a slight jiggle (not slump) when tapped. If it seems too wobbly, bake for a few more minutes.
3. Can I freeze this pie?
Absolutely! Allow the pie to cool completely and then wrap it tightly with plastic wrap, followed by aluminum foil. Thaw it in the refrigerator before serving.
4. Can I use fresh pumpkin instead of canned?
Yes! Just make sure to cook and puree the pumpkin first. This may require more effort, but fresh adds a lovely depth of flavor!
Nutritional Info
While I typically don’t dive deep into nutritional info here, a slice of this crustless pumpkin pie offers a comforting balance of flavors, making it a delightful treat without the heaviness of traditional pies.
Now, dear friends, it’s time to put on your aprons and whip up this delightful crustless pumpkin pie! I can’t wait to hear how it turns out for you! Remember, cooking is an adventure – enjoy every moment of it! 🧡
PrintCrustless Pumpkin Pie
A simple, yet delicious crustless pumpkin pie that highlights the warm flavors of fall.
- Prep Time: 15 minutes
- Cook Time: 50 minutes
- Total Time: 65 minutes
- Yield: 8 servings 1x
- Category: Dessert
- Method: Baking
- Cuisine: American
- Diet: Vegetarian
Ingredients
- 1 can (15 oz) pumpkin puree
- 1 cup evaporated milk
- 3/4 cup sugar
- 3 large eggs
- 1 teaspoon vanilla extract
- 1 teaspoon ground cinnamon
- 1/2 teaspoon ground ginger
- 1/4 teaspoon ground nutmeg
- 1/2 teaspoon salt
Instructions
- Preheat your oven to 350°F (175°C).
- Mix the canned pumpkin puree, evaporated milk, and sugar in a large mixing bowl until smooth.
- Add in the three large eggs and whisk until fully incorporated.
- Spice it up by incorporating the vanilla extract, ground cinnamon, ground ginger, ground nutmeg, and salt. Whisk vigorously.
- Prepare a pie dish by lightly greasing it.
- Pour the pumpkin mixture into the prepared dish.
- Bake for 45-50 minutes until the edges are set and the center jiggles slightly.
- Let it cool at room temperature before chilling it in the refrigerator.
Notes
Serve with whipped cream or ice cream on top for an extra special touch.
Nutrition
- Serving Size: 1 slice
- Calories: 300
- Sugar: 25g
- Sodium: 200mg
- Fat: 10g
- Saturated Fat: 4g
- Unsaturated Fat: 6g
- Trans Fat: 0g
- Carbohydrates: 40g
- Fiber: 2g
- Protein: 6g
- Cholesterol: 80mg
Keywords: pumpkin pie, crustless pie, fall dessert, Thanksgiving dessert