
One-Pot Pumpkin Sausage Soup: Creamy, Cozy Weeknight Meal
Cozy Up with Pumpkin Sausage Soup: A Heartwarming Classic
As the leaves begin to change and a crispness fills the air, there’s something undeniably comforting about a warm bowl of soup. One of my absolute favorites is Pumpkin Sausage Soup, a dish that perfectly marries the earthy sweetness of pumpkin with the savory notes of Italian sausage. It’s like a warm hug on a chilly day—a dish that makes you want to gather around the table with good friends and family, share stories, and relish in the moment.
When I think about this soup, I’m instantly transported back to a golden autumn afternoon spent in my kitchen, experimenting with flavors and textures. The air was filled with tantalizing aromas, and my kitchen became my sanctuary. With a wooden spoon in one hand and a steaming ladle in the other, I played with different herbs and spices, bringing each element together in what would become a cherished recipe. My friends who visited that day couldn’t get enough, and they insisted I share it with all of you.
So, pull up a chair and join me on this culinary journey as we concoct a heartwarming pot of Pumpkin Sausage Soup together. I promise you’ll want to make this over and over again!
A Heartfelt Memory
I remember the first time I decided to whip up this soup for an autumn gathering. The smell of roasting garlic and onions wafted through the house, and my friends started filtering in, lured in by the aroma. We had gathered not just to eat but to celebrate the changing seasons and the warmth of friendship. As I served the soup, I could see the anticipation on their faces. With the first sip, there were gasps of delight followed by rounds of “Mmm!” It was as if each bowl contained a sprinkle of love and nostalgia. That magical evening taught me the joy of sharing food—a beautiful reminder that when we combine good ingredients with a little bit of love, we can create something truly special.
Ingredients
Now, let’s dive into what you’ll need for this delightful Pumpkin Sausage Soup. Here’s your shopping list:
-
Italian Sausage: The star of our show! Use sweet or spicy, depending on your preference. For a healthier option, turkey or chicken sausage is a great substitute.
-
Pumpkin Puree: Canned pumpkin puree works beautifully here—it’s convenient and packed with flavor! If you’re feeling adventurous, you can roast a fresh pumpkin and puree it yourself for a more intense flavor.
-
Fresh Sage: This herb adds an aromatic earthiness that complements the pumpkin perfectly. If you can’t find fresh, dried sage works just as well—just remember to use less, as dried herbs are more potent.
-
Broth: A good-quality chicken or vegetable broth brings everything together. Homemade is always a winner, but store-bought is totally acceptable! If you’re vegetarian, opt for vegetable broth.
-
Onion & Garlic: These two are your aromatic partners-in-crime that set the flavor foundation for our soup. Sweet onions give a lovely depth, while garlic enhances the savory profile.
-
Heavy Cream: Just a splash at the end for a creamy finish! You can substitute with coconut milk for a dairy-free alternative, providing a unique twist.
Step-by-Step Instructions
Step 1: Sauté the Aromatics
In a large pot, heat a drizzle of olive oil over medium-high heat. Toss in your chopped onions and minced garlic. Sauté until the onions are soft and translucent, about 3-5 minutes. These little buddies are what will make your soup aromatic and flavorful!
Step 2: Brown the Sausage
Next, add the Italian sausage to the pot. Break it up with your wooden spoon as it cooks. We want it nice and brown to infuse the soup with its rich flavors. Cook for about 5-7 minutes until no longer pink. The fat from the sausage will mingle beautifully with the onions and garlic, creating a mouthwatering base.
Step 3: Add Pumpkin and Broth
Once the sausage is browned, stir in the pumpkin puree, mixing it well with the sausage and onions. Then pour in your broth, stir, and bring the mixture to a simmer. This is where the magic begins!
Step 4: Infuse with Sage
Add in your fresh sage at this stage. If using dried, sprinkle it in gradually. Allow the soup to simmer for about 15-20 minutes to let the flavors unite and meld into something incredible.
Step 5: Finishing Touches
For that creamy finish, stir in a splash of heavy cream (or coconut milk). Taste and adjust seasoning—maybe a pinch of salt or a dash of pepper—to make the flavors pop.
Step 6: Serve It Up
Spoon the soup into bowls and serve warm. Consider adding a sprinkle of fresh sage or a drizzle of olive oil for presentation. Your heart is about to be warmed, and believe me, your tastebuds will celebrate with every spoonful!
Serving Suggestions
Absolutely serve your Pumpkin Sausage Soup hot! Pair it with crusty bread or a simple salad to make it a hearty meal. When plating, I like to add a sprinkle of crispy fried sage leaves or a dash of chili flakes on top to elevate the experience. Trust me, it looks as good as it tastes and gives it that extra flair!
Recipe Variations
-
Spicy Twist: Add a pinch of red pepper flakes while sautéing the onions if you love a bit of heat!
-
Vegetarian Option: Swap out the sausage for sautéed mushrooms or a plant-based sausage alternative for a delicious vegetarian soup.
-
Add Greens: Stir in some spinach or kale at the end for a pop of color and added nutrients.
-
Creamy Delight: Swap the heavy cream for cream cheese or Greek yogurt for a tangy twist.
Chef’s Notes
This recipe has evolved over the years, influenced by kitchen experiments and feedback from friends. It started as a simple idea but has grown into a beloved dish that I’m proud to share. I often get creative with the toppings—sometimes adding toasted pumpkin seeds for crunch or even a hint of nutmeg for warmth. I also remember this one time I accidentally added too much sage, and rather than ruining the soup, my friends dubbed it “Herbaceous Bliss." It was a happy mistake that turned into a favorite!
FAQs and Troubleshooting
Q: Can I make this soup ahead of time?
A: Absolutely! This soup stores well in the refrigerator for up to three days. You can also freeze it for up to three months—just remember to leave out the cream until you’re ready to reheat!
Q: Why is my soup too thick?
A: If your soup thickens more than you’d like, simply add more broth until it reaches your desired consistency. Remember, it’s always easier to add liquid than to take it away!
Q: What can I add to enhance the flavor?
A: Consider adding a splash of apple cider vinegar or a squeeze of lemon right before serving to brighten the flavors!
Q: Can I substitute anything for the pumpkin puree?
A: Yes! You can use butternut squash puree or even sweet potato puree if pumpkin isn’t your thing.
Nutritional Info
While I don’t list exact nutritional info, this soup is a great source of vitamins A and C, thanks to the pumpkin, and protein from the sausage. It’s cozy comfort food that brings nourishment along with happiness.
So there you have it! Your delightful Pumpkin Sausage Soup is ready to become a cherished recipe in your kitchen. Enjoy sharing it with loved ones, and remember, the best ingredient in any dish is the love and care you add to it. Happy cooking!
PrintPumpkin Sausage Soup

A heartwarming Pumpkin Sausage Soup that combines the earthy sweetness of pumpkin with savory Italian sausage, perfect for cozy autumn days.
- Prep Time: 15 minutes
- Cook Time: 30 minutes
- Total Time: 45 minutes
- Yield: 4 servings
- Category: Soup
- Method: Stovetop
- Cuisine: Italian
- Diet: Non-Vegetarian
Ingredients
- Italian Sausage
- Pumpkin Puree
- Fresh Sage
- Broth (chicken or vegetable)
- Onion
- Garlic
- Heavy Cream (or coconut milk)
Instructions
- Sauté the aromatics by heating olive oil in a pot and adding chopped onions and minced garlic. Cook until onions are soft, about 3-5 minutes.
- Brown the sausage by adding it to the pot and breaking it up as it cooks for 5-7 minutes until no longer pink.
- Add pumpkin puree and broth, stirring to combine. Bring to a simmer.
- Infuse with sage and let the soup simmer for 15-20 minutes.
- Finishing touches: stir in heavy cream (or coconut milk) and adjust seasoning.
- Serve hot, garnished with fresh sage or olive oil.
Notes
For a spicy twist, add red pepper flakes. For a vegetarian option, substitute sausage with sautéed mushrooms.
Nutrition
- Serving Size: 1 serving
- Calories: 350
- Sugar: 6g
- Sodium: 800mg
- Fat: 20g
- Saturated Fat: 8g
- Unsaturated Fat: 10g
- Trans Fat: 0g
- Carbohydrates: 30g
- Fiber: 5g
- Protein: 15g
- Cholesterol: 50mg
Keywords: pumpkin soup, sausage soup, autumn recipe, comfort food
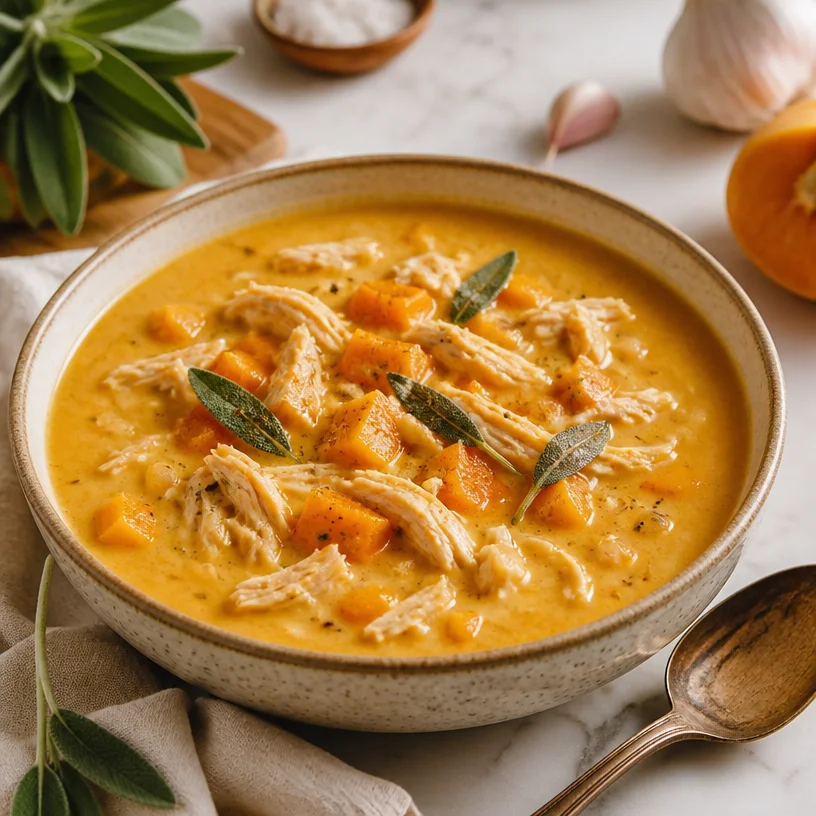
One-Pot Creamy Pumpkin-Chicken Soup for Weeknights (30m)
Cozy Up with a Bowl of Pumpkin Chicken Soup
Hello, fellow food lovers! Today, I’m thrilled to guide you through making one of my all-time favorite comfort dishes—Pumpkin Chicken Soup. As the leaves start to turn and the air grows crisp, there’s nothing quite like curling up with a warm bowl of this rich, velvety soup. It’s not just about the flavors; it’s about the memories, the love, and the laughter that comes with every spoonful. So, let’s tie on our aprons and dive into this beautiful creation together!
A Memory Steeped in Comfort
When I think of pumpkin chicken soup, I can’t help but reminisce about the early autumn afternoons spent in my grandmother’s kitchen. She had this magical way of transforming simple ingredients into something extraordinary. I remember walking into her home, greeted by the warm, welcoming aroma of roasting garlic mixed with the earthy scent of pumpkin—an irresistible invitation to gather.
We would stand around the stove, her stirring the pot while I eagerly awaited my turn to help. She’d hand me a spoon and show me how to taste and adjust the seasoning, all while sharing stories of family gatherings and the importance of food in our lives. Those moments taught me that cooking is so much more than just following a recipe; it’s about connection, joy, and creativity.
And that’s exactly what I want to share with you today: a soup that not only nourishes the body but also warms the heart. Let’s create new memories in our kitchens that will last a lifetime!
Ingredients
Here’s what you’ll need to get started on your comforting bowl of Pumpkin Chicken Soup:
-
Chicken: You can use boneless, skinless chicken breasts or thighs. Thighs add a richer flavor; however, breasts are easier for shredding. If you’re in a pinch, rotisserie chicken is a fantastic shortcut!
-
Pumpkin Puree: Make sure to use pure pumpkin puree (not pumpkin pie filling). You can also roast fresh pumpkin if you’re feeling adventurous; it adds a lovely depth of flavor.
-
Onion: A sweet onion or yellow onion works perfectly here. Onions add a wonderful base flavor and sweetness to the soup. If you’re not a fan of onion, you can skip it or use leeks for a subtler taste.
-
Garlic: Fresh garlic cloves are essential! They add a lovely aroma and depth. If you’re short on time, you can use garlic powder—1/4 teaspoon equals about one clove.
-
Cream: This soup gets its dreamy texture from heavy cream. If you’d like a lighter version, whole milk or coconut milk also works beautifully, although the flavor will differ a bit.
-
Sage: Fresh sage adds a wonderful, herby note that pairs beautifully with pumpkin and chicken. Dried sage will also do in a pinch; just use about half the amount.
Step-by-Step Instructions
Now that we have our ingredients lined up, it’s time to get cooking! Follow these steps, and let’s create something scrumptious:
-
Prep the Chicken: Start by seasoning your chicken with salt and pepper. This step is essential; it adds flavor right from the get-go! In a large pot or Dutch oven, heat a splash of olive oil over medium heat. Add the seasoned chicken and cook for about 5-7 minutes per side, until golden brown. Remove it from the pot and set aside. Chef hack: If your chicken has skin, leave it on while cooking for more flavor, but remove it before shredding.
-
Sauté the Aromatics: In the same pot, add a bit more olive oil if needed, then toss in the diced onion and minced garlic. Sauté them for about 3-4 minutes until the onion is soft and translucent. Oh, that smell! It’s the beginning of something beautiful. Tip: Be sure to scrape up any brown bits left from the chicken—they’re packed with flavor!
-
Add the Pumpkin: Time for the star of the show! Stir in the pumpkin puree, mixing it well with the onions and garlic. Cook for a couple of minutes, letting the flavors meld together. It’s okay if the mixture looks a little thick; that just means we’re building flavor!
-
Create the Soup Base: Pour in about 4 cups of chicken stock (or broth!). If you like a thicker soup, use less. Bring the mixture to a gentle simmer. As it bubbles, return the chicken to the pot, along with any juices that have accumulated. Chef tip: If you want a more intense flavor, feel free to add a splash of white wine at this stage!
-
Let It Simmer: Allow the soup to simmer for about 20-25 minutes until the chicken is fully cooked through and tender. This will give the flavors ample time to blend.
-
Shred the Chicken: Once cooked, remove the chicken and shred it with two forks or chop it into bite-sized pieces. Return it to the pot. Chef insight: By shredding the chicken, it absorbs more of the creamy goodness of the soup!
-
Finish with Cream and Sage: Stir in the heavy cream and chopped fresh sage. Let it simmer for another 5-10 minutes, just until everything is heated through. Taste and adjust the seasoning with salt and pepper as needed. Note: If you prefer a smoother texture, you can blend the soup with an immersion blender before adding the cream—just be cautious not to over-blend!
Serving Suggestions
When it comes to serving your pumpkin chicken soup, pretty plating makes a world of difference! Ladle the soup into warm bowls and garnish with a swirl of cream, a sprinkle of fresh sage, and perhaps a few toasted pumpkin seeds for crunch. Serve it with some crusty bread or a simple green salad to round out the meal. Your guests (or family) will be delighted and itching to dig in!
Recipe Variations
Feel free to mix things up with these creative twists:
-
Spicy Kick: Add a pinch of crushed red pepper flakes to the pot for a spicy version that warms you from the inside out.
-
Add Some Greens: Toss in a handful of spinach or kale just before serving for a nutrient boost and vibrant color.
-
Different Proteins: Swap out chicken for turkey or even chickpeas for a plant-based option.
-
Herb Options: Try using thyme or rosemary instead of sage for a different flavor profile that pairs beautifully with the pumpkin.
-
Nutty Garnish: Top with a sprinkle of toasted pine nuts or sunflower seeds for added texture and nutrition.
Chef’s Notes
Throughout the years, this recipe has transformed into a staple at my dinner table. It started as a simple dish to warm my family’s hearts and has now become a canvas for creativity. I love that it’s one of those recipes where you can add whatever is left in the fridge—maybe some carrots or potatoes—and it will still shine!
I remember one time, I accidentally added too much cream, and instead of being upset, I embraced it. The result? An even cozier, velvety soup that left everyone smiling and asking for seconds. So, don’t stress the little things—cooking should always be about joy and experimentation!
FAQs and Troubleshooting
Q: Can I make this soup in advance?
Absolutely! This soup keeps well in the fridge for 3-4 days. Just reheat gently on the stove, adding a splash of broth if it thickens up too much.
Q: How can I thicken the soup?
If you prefer a thicker soup, you can blend a portion of it and return it to the pot. Alternatively, you can stir in a bit of cornstarch mixed with water to thicken it up.
Q: What if I’m not a fan of pumpkin?
No problem! You can substitute butternut squash or sweet potatoes for a similar texture and sweetness.
Q: The soup tastes bland; what can I do?
Ensure you’re seasoning at each step! If it seems bland, boost the flavors with a little more salt, pepper, or even a splash of vinegar for brightness.
Nutritional Info (optional)
If you’re curious about the nutritional breakdown, here’s a general idea per serving (based on a 6-serving batch):
- Calories: 300
- Protein: 20g
- Carbs: 28g
- Fat: 15g
- Fiber: 3g
So there you have it—a warm, delightful bowl of Pumpkin Chicken Soup that’s not just about satisfying hunger but also about sparking joy and connection in your kitchen. So grab your apron, invite a friend or two over, and enjoy the magic of cooking together. Happy cooking!
PrintPumpkin Chicken Soup

A comforting bowl of rich and velvety pumpkin chicken soup, perfect for autumn.
- Prep Time: 15 minutes
- Cook Time: 30 minutes
- Total Time: 45 minutes
- Yield: 4 servings 1x
- Category: Soup
- Method: Simmering
- Cuisine: American
- Diet: Gluten-Free
Ingredients
- 1 lb boneless, skinless chicken breasts or thighs
- 1 cup pumpkin puree
- 1 sweet or yellow onion, diced
- 3 cloves fresh garlic, minced
- 1 cup heavy cream
- 1 tablespoon fresh sage, chopped
- Salt and pepper, to taste
- Olive oil, for cooking
- 4 cups chicken stock
Instructions
- Prep the chicken: Season with salt and pepper, then cook in olive oil until golden brown.
- Sauté the onion and garlic in the same pot until soft.
- Add the pumpkin puree and mix well.
- Create the soup base by adding chicken stock and returning the chicken to the pot.
- Let it simmer for about 20-25 minutes.
- Shred the chicken and return it to the pot.
- Finish by stirring in the heavy cream and sage, and adjust seasoning.
Notes
This soup is versatile; feel free to add greens or switch proteins as desired.
Nutrition
- Serving Size: 1 bowl
- Calories: 300
- Sugar: 5g
- Sodium: 500mg
- Fat: 15g
- Saturated Fat: 8g
- Unsaturated Fat: 5g
- Trans Fat: 0g
- Carbohydrates: 28g
- Fiber: 3g
- Protein: 20g
- Cholesterol: 70mg
Keywords: pumpkin soup, chicken soup, comfort food, autumn recipes
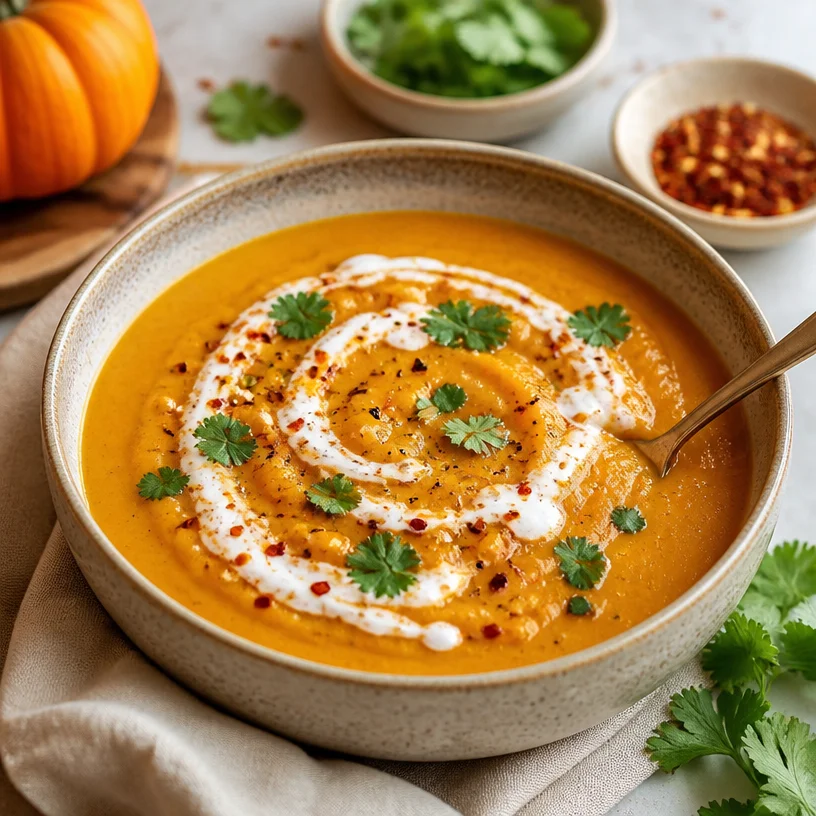
Minute Creamy Pumpkin Curry Soup for Weeknight Dinners
Whip Up Warmth: Savory Pumpkin Curry Soup
Hello, food lovers and fellow home chefs! Today, I’m excited to share a recipe that warms the heart and invigorates the senses: Pumpkin Curry Soup. It’s the kind of dish that brings together the creaminess of coconut milk, the earthy sweetness of pumpkin, and a hint of spice, creating a delightful symphony for your taste buds. So, let’s grab our aprons and dive in!
Introduction
When I think of autumn, I think of a cozy kitchen filled with the inviting aromas of pumpkin spice and comforting soups. As the weather cools, there’s nothing quite like curling up with a bowl of something delicious and soothing. This Pumpkin Curry Soup is not only a celebration of seasonal produce but also a showcase of how simple flavors can create truly magnificent dishes.
Incorporating pumpkin into your cooking can transform an ordinary day into something special. With its vibrant hue and nutritional bounty, pumpkin is a superstar in the kitchen. Plus, when you add coconut milk and curry paste, you get an irresistible blend that’s not just good for the soul — it’s great for those chilly evenings when you want something warming and satisfying.
This recipe is a perfect invitation for you to gather friends or family around the table, share stories, and enjoy a meal that feels both elegant and comforting. Let’s sprinkle the kitchen with love and make something beautiful together!
Personal Story
I have a special memory tied to pumpkin soup that always makes me smile. One chilly October evening, I threw a small gathering at my home, and I decided to try my hand at a new pumpkin curry soup recipe. My kitchen was bustling with laughter and chatter, and I vividly remember the moment when I was ready to taste-test. As I dipped the spoon into the steaming pot and took that first bite, a warmth spread through me like the cozy glow of candlelight. The soup was a hit!
Everyone chattered excitedly about the flavors, and that evening turned into an impromptu feast. It wasn’t just about the soup; it was about the connections and shared moments. Years later, I still cherish that night — every time I make this soup, it brings me back to that gathering, reminding me just how powerful a delicious meal can be in bringing people together.
Ingredients
Here’s what you’ll need to create this dreamy Pumpkin Curry Soup:
-
Pumpkin Puree:
- Why: The star of our show! You can use canned puree for convenience or roast fresh pumpkins for a more intense flavor.
- Substitution Tip: If you can’t find pumpkin, butternut squash works wonderfully as well!
-
Coconut Milk:
- Why: This adds a rich, creamy texture that balances the spices beautifully.
- Substitution Tip: For a lighter version, use light coconut milk or even unsweetened almond milk, but keep in mind it will alter the depth of flavor slightly.
-
Curry Paste:
- Why: The magic-maker! It brings warmth and spice to the soup.
- Chef Insight: Red curry paste gives a bolder flavor, while yellow curry paste offers a milder, more aromatic experience. Adjust according to your spice preference!
-
Vegetable Broth:
- Why: For cooking the soup and adding depth, use broth instead of water for richer flavors.
- Substitution Tip: Chicken broth works too, if you’re not concerned about keeping it vegetarian.
-
Onion and Garlic:
- Why: These aromatics lay the foundation for flavor. They add sweetness and depth.
- Chef Insight: Sauté them until they’re translucent for maximum flavor!
-
Ginger:
- Why: Fresh ginger adds a zesty bite that complements the sweetness of the pumpkin.
- Substitution Tip: Ground ginger can be used in a pinch, but fresh is always best!
-
Lime Juice:
- Why: A splash of lime adds brightness and balances the richness of the soup.
- Substitution Tip: Lemon juice can also work, but lime offers that authentic twist!
Step-by-Step Instructions
-
Sauté Aromatics:
- In a large pot, heat a drizzle of oil over medium heat. Add chopped onions, minced garlic, and freshly grated ginger. Sauté for about 5 minutes until the onions are translucent and fragrant. This is where the magic begins!
-
Add Curry Paste:
- Now, it’s time to stir in the curry paste. Let it cook with the aromatics for 1-2 minutes, allowing the spices to bloom. Trust me, your kitchen will smell divine at this point.
-
Incorporate Pumpkin Puree:
- Add in the pumpkin puree and vegetable broth. Stir everything together, ensuring the paste is well incorporated. What you have now is a vibrant orange mixture that’s begging to be tasted!
-
Simmer and Stir:
- Bring the mixture to a gentle simmer and let it cook for about 10-15 minutes. This allows the flavors to meld beautifully. Stir occasionally, so nothing sticks to the bottom!
-
Cream it Up:
- Pour in the coconut milk, stirring until it’s fully combined. Let the soup warm through for another 5 minutes. The coconut will add that luscious creaminess. At this point, you can opt to blend the soup for a smooth texture using an immersion blender or countertop blender — just be careful with hot liquids!
-
Finishing Touches:
- Remove the pot from heat and stir in a generous squeeze of lime juice. Taste and adjust seasoning as needed. If you like it spicy, consider adding a pinch of red pepper flakes or a dash of hot sauce!
-
Plate and Serve:
- Ladle the soup into bowls, and here comes the fun part — garnishing! Top with fresh herbs like cilantro or basil, a swirl of coconut milk, or even a sprinkle of roasted pumpkin seeds for extra texture.
Serving Suggestions
Serve this Pumpkin Curry Soup warm alongside crusty bread rolls or a simple green salad. Pop some warm naan bread on the side for dipping, and don’t forget to drizzle a little extra coconut milk or yogurt on top for that gourmet touch!
Recipe Variations
Feeling a touch adventurous? Here are some delicious twists to try:
- Add Greens: Stir in a handful of fresh spinach just before serving for a pop of color and nutrients.
- Swap Spices: Experiment with adding ground cumin or coriander for a different flavor profile.
- Protein Boost: Throw in some shredded chicken or chickpeas for added protein.
- Get Nutty: Top with toasted coconut flakes for a lovely crunch.
- Heat it Up: For a spicy version, include diced jalapeños or a dash of cayenne pepper.
Chef’s Notes
The beauty of this recipe is its adaptability! I originally stumbled upon a simple pumpkin soup, but over the years, I’ve made this version a staple. Once, during a dinner party, I accidentally grabbed the yellow curry paste instead of red, and it turned out to be a delightful mistake! It taught me that there’s beauty in experimentation in the kitchen. Don’t be afraid to make it your own!
FAQs and Troubleshooting
-
What if my soup is too thick?
- Simply add a bit more vegetable broth or coconut milk to reach your desired consistency.
-
How can I make it spicier?
- Add more curry paste or mix in red pepper flakes while sautéing the garlic and onions — it’s all about that kick!
-
Can I freeze this soup?
- Absolutely! The soup can be stored in an airtight container in the freezer for up to three months. Just thaw and reheat when you’re ready to enjoy.
-
What do I do if I don’t like coconut milk?
- You can substitute it with almond milk or heavy cream, though the flavor will shift slightly.
Nutritional Info
This creamy soup is not only delicious but also packed with nutrients! Using pumpkin gives you a healthy dose of vitamins A and C, while coconut milk offers healthy fats.
As we wrap up this savory adventure in the kitchen, I hope you feel inspired to create your own cherished memories around the table. This Pumpkin Curry Soup is perfect for sharing with loved ones or enjoying all by yourself — it’s just that good! So tie on your apron, gather your ingredients, and let’s celebrate the season with every comforting spoonful. Happy cooking!
PrintSavory Pumpkin Curry Soup

A cozy Pumpkin Curry Soup that blends creamy coconut milk, earthy pumpkin, and aromatic spices for a delightful warm dish.
- Prep Time: 10 minutes
- Cook Time: 30 minutes
- Total Time: 40 minutes
- Yield: 4 servings 1x
- Category: Soup
- Method: Stovetop
- Cuisine: Fusion
- Diet: Vegetarian
Ingredients
- 2 cups pumpkin puree
- 1 can coconut milk
- 2 tablespoons curry paste
- 4 cups vegetable broth
- 1 onion, chopped
- 3 cloves garlic, minced
- 1 tablespoon fresh ginger, grated
- 2 tablespoons lime juice
Instructions
- Sauté the onions, garlic, and ginger in oil until translucent.
- Add the curry paste and cook for 1-2 minutes.
- Incorporate the pumpkin puree and vegetable broth, mixing well.
- Simmer for 10-15 minutes, stirring occasionally.
- Cream the soup by adding coconut milk and heat through.
- Finish with lime juice, adjusting seasoning as needed.
- Plate and serve, garnished with fresh herbs and coconut milk.
Notes
Feel free to experiment with spices or add greens for extra nutrition.
Nutrition
- Serving Size: 1 bowl
- Calories: 320
- Sugar: 6g
- Sodium: 300mg
- Fat: 20g
- Saturated Fat: 10g
- Unsaturated Fat: 8g
- Trans Fat: 0g
- Carbohydrates: 35g
- Fiber: 4g
- Protein: 5g
- Cholesterol: 0mg
Keywords: pumpkin soup, curry soup, vegetarian soup, comfort food, fall recipes
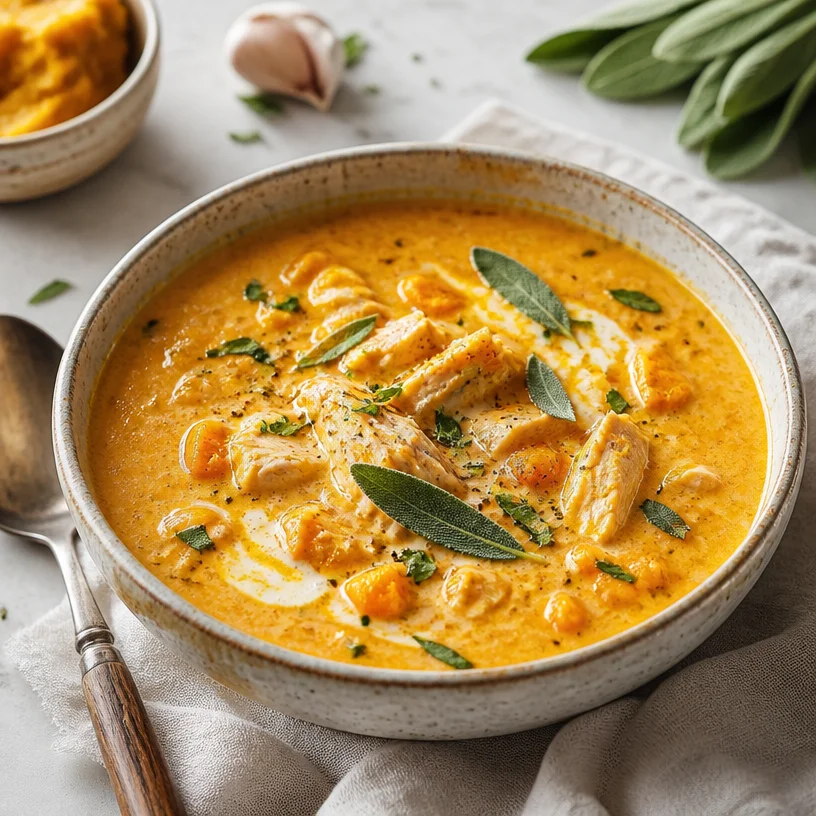
Weeknight Creamy Pumpkin Chicken Soup in 25 Minutes
Warm Up with Pumpkin Chicken Soup: A Cozy Delight
Hello friends! I’m Savannah Pierce, your guide on this culinary journey where we blend elegance with everyday cooking. Today, I’m thrilled to share a recipe that is perfect for those cool autumn evenings or when you just need a little comfort in a bowl: Pumpkin Chicken Soup.
Imagine yourself wrapped in a soft blanket, the scents of roast pumpkin and savory chicken wafting through the air as you sip a steaming bowl of this delightful creation. It’s not just food; it’s a warm hug that invites you to slow down, breathe, and savor the moment. The beauty of this dish lies in its simplicity—ideal for both a quick weeknight dinner or an elegant gathering.
Now, let’s dive into how to create a soup that will warm your heart and impress your guests. Get ready to gather some fresh ingredients and a splash of love, because we’re about to embark on an adventure in flavors!
A Nostalgic Taste of Fall
When I was a child, fall meant visiting my grandma’s house where the scent of roasted pumpkin would dance around the kitchen. She had this incredible knack for making the cozy season come to life, and her pumpkin soup was the star of every family gathering. We’d all gather around the table, bowls in hand, mommies and daddies sharing their stories, the laughter ringing, and my grandma flourishing in her element.
One year, she invited me to help her in the kitchen. I was in awe as she chopped onions and garlic, explaining how they form the flavor base for many great soups. I remember her saying, “Savannah, cooking is about creating memories, and this soup will remind us of each other long after it’s gone.” That day, I learned the importance of not just the ingredients, but incorporating love and memories into a dish. It’s that spirit of hospitality and warmth that I strive to infuse into every recipe I create.
Ingredients
To recreate this beautiful soup, you will need the following ingredients:
-
Chicken (boneless, skinless)
- Look for organic or free-range chicken if possible. You can substitute with cooked shredded turkey or rotisserie chicken for a quicker option.
-
Pumpkin puree
- Canned pumpkin puree makes this soup super easy, but if you want to roast your own pumpkin, that brings a delightful depth of flavor. (Pro tip: Choose small sugar pumpkins for the best taste!)
-
Onion (yellow or white)
- Sweet onions will add a nice layer of sweetness, but any onion will do in a pinch. Leeks can make a fine substitute for a more delicate flavor.
-
Garlic (fresh)
- Always opt for fresh! It really elevates the dish. In a hurry? Garlic powder works in a pinch but use sparingly as it’s more concentrated.
-
Heavy cream
- This adds a luxurious creaminess. For a lighter option, coconut milk can be a great alternative.
-
Sage (fresh or dried)
- Sage is the herb that captures the essence of fall. If you can’t find fresh, use dried but reduce the quantity since dried herbs are stronger.
Step-by-Step Instructions
-
Prep Your Ingredients
- Start by chopping the onion and mincing the garlic. If you’re using a whole chicken breast, cut it into cubes for even cooking. Ready to roll? Let’s do this!
-
Sauté the Aromatics
- In a large pot over medium heat, add a splash of olive oil. Once it’s shimmering, toss in your onions and sauté until they become translucent (about 5 minutes). It’s during this step that your kitchen starts to fill with deliciousness!
-
Add the Garlic
- Toss in the minced garlic and sauté for another 1-2 minutes until fragrant, but be careful not to burn it—that can make your soup taste bitter.
-
Sear the Chicken
- Add the cubed chicken to the pot, seasoning it lightly with salt and pepper. Sear it for about 5-7 minutes, allowing it to get golden brown. This extra step maximizes flavor!
-
Pour in the Pumpkin Puree
- Once your chicken is looking good, mix in the pumpkin puree. Stir well to coat everything. This is the moment where the magic starts—it smells heavenly already!
-
Add Liquid & Simmer
- Pour in about 4 cups of chicken broth, stirring to combine. Bring it to a simmer and lower the heat. Let it bubble gently for about 20 minutes; this allows all those flavors to meld beautifully.
-
Finalize with Cream & Sage
- Once your soup is ready, stir in the heavy cream and sage. For a touch of elegance, reserve a few sage leaves for garnish. Allow the soup to warm through, but avoid boiling now that the cream is in.
-
Blend (Optional)
- For a silkier texture, use an immersion blender to purée the soup to your desired consistency. Or leave it chunky for a hearty feel. Taste and adjust seasoning as needed.
Serving Suggestions
When it comes to plating, consider serving the soup in rustic bowls topped with a drizzle of cream and a sage leaf for that extra touch of elegance. Pair it with crusty bread or fresh salad for a complete experience. I suggest gathering around the table with good friends or family to enjoy the moments just like my grandma taught me.
Recipe Variations
-
Spicy Kick: Stir in a pinch of cayenne pepper or diced jalapeños for a spicy twist!
-
Herb Swaps: Try incorporating thyme or rosemary instead of sage for different flavor profiles. Fresh herbs are always a game-changer.
-
Vegetarian Delight: Replace chicken with hearty veggies like mushrooms or chickpeas for a plant-based version.
-
Nutty Twist: Add roasted pumpkin seeds as a crunchy topping—great for texture and taste!
-
Creamy Alternatives: Swap heavy cream with Greek yogurt for a tangy finish without the guilt.
Chef’s Notes
This pumpkin chicken soup has become a staple in my home, evolving slightly with time and taste preferences. There was a time when I thought of it as just a fall recipe, but I’ve discovered that it’s perfect for any time of the year—just switch up the seasonings and accompaniments!
One time, I added too much garlic—the whole house smelled like an Italian restaurant! The soup was still delicious, but I learned that moderation goes a long way. Cooking is all about experimenting, so don’t be afraid to make this dish your own!
FAQs and Troubleshooting
1. My soup is too thick; how can I fix it?
- Simply add more broth until it reaches your desired consistency!
2. Can I use leftover chicken?
- Absolutely! Just add it during the simmering phase to heat through.
3. What if I don’t have fresh herbs?
- Dried herbs work as well! Just remember that dried herbs are more potent, so use about a third of the amount.
4. My soup is too salty. What should I do?
- Add a splash of cream, some sugar, or even a diced potato to help balance the flavors.
Nutritional Info
While this recipe is all about comfort, it’s also packed with protein from chicken and vitamins from pumpkin. Each serving (approximately 1.5 cups) contains around 350 calories, 25g protein, and 15g fat, making it a balanced meal option.
There you have it—my take on Pumpkin Chicken Soup that not only warms the stomach but also warms our hearts! Let’s create those cozy memories together. Grab your apron, pour a glass of something nice, and enjoy the deliciousness you’ve crafted! Happy cooking!
PrintPumpkin Chicken Soup

A cozy and comforting pumpkin chicken soup perfect for autumn evenings.
- Prep Time: 15 minutes
- Cook Time: 30 minutes
- Total Time: 45 minutes
- Yield: 4 servings 1x
- Category: Soup
- Method: Cooking
- Cuisine: American
- Diet: Non-Vegetarian
Ingredients
- 1 pound Chicken (boneless, skinless)
- 2 cups Pumpkin puree
- 1 Onion (yellow or white)
- 3 cloves Garlic (fresh)
- 1 cup Heavy cream
- 2 teaspoons Sage (fresh or dried)
- 4 cups Chicken broth
- Olive oil (for sautéing)
- Salt and pepper (to taste)
Instructions
- Prep your ingredients by chopping the onion and mincing the garlic.
- In a large pot over medium heat, add olive oil and sauté the onions until translucent.
- Then, add the minced garlic and sauté for another 1-2 minutes.
- Next, add cubed chicken, seasoning lightly with salt and pepper, and sear for 5-7 minutes.
- Mix in the pumpkin puree, stirring to coat all ingredients.
- Pour in chicken broth, bring to a simmer, and let bubble gently for 20 minutes.
- Finally, stir in heavy cream and sage, warming through without boiling.
- Optionally, blend for a silkier texture or leave it chunky.
Notes
Serve topped with a drizzle of cream and a sage leaf. Pair with crusty bread or salad.
Nutrition
- Serving Size: 1 serving
- Calories: 350
- Sugar: 5g
- Sodium: 400mg
- Fat: 15g
- Saturated Fat: 8g
- Unsaturated Fat: 5g
- Trans Fat: 0g
- Carbohydrates: 35g
- Fiber: 3g
- Protein: 25g
- Cholesterol: 70mg
Keywords: pumpkin soup, chicken soup, comfort food, autumn recipes, cozy dinner
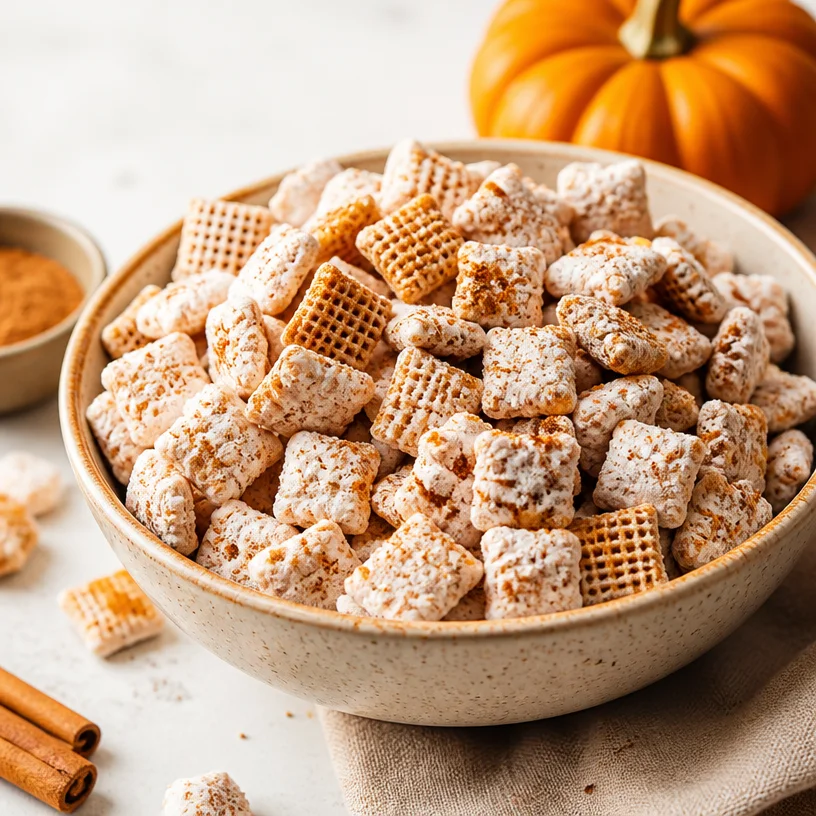
Fall Pumpkin Spice Puppy Chow: 15-Minute No-Bake Treat
Embrace the Cozy Vibes with Pumpkin Spice Puppy Chow
Hello, fellow food lovers! If you’re anything like me, the onset of autumn sparks a joyful transition in the kitchen. Leaves begin to change, the air gets crisper, and suddenly, every recipe calls for pumpkin spice. Today, I’m sharing a delightful treat that captures all of those cozy flavors in a fun and sweet way: Pumpkin Spice Puppy Chow!
Imagine a blend of crunchy Chex cereal coated in creamy white chocolate with the warm, inviting essence of pumpkin spice. It’s a snack that is perfect for those cozy nights in, festive gatherings, or even just as a little treat for yourself while you cuddle under a blanket with your favorite book. Puppy Chow, also known as Muddy Buddies, has long been a staple in my treat repertoire, and adding that pumpkin spice twist takes it to a whole new level of deliciousness!
So grab your apron and let’s dive into this easy and fun fall recipe, designed to impress everyone from family to friends—yes, even that neighbor you keep meaning to invite over for coffee!
My Pumpkin Spice Story
Back in college, I hosted a pumpkin-themed dinner party every year when the leaves began to turn. I’d invite friends over, and we’d share everything from pumpkin soup to pumpkin pie, creating an evening of warmth and laughter. One year, after making a more traditional dessert, I had a sudden urge to try something different. That’s when I whipped up a batch of Puppy Chow and tossed in some pumpkin spice just for fun.
As my friends gathered around the table, they couldn’t get enough of this sweet, crunchy, and subtly spiced snack. The laughter, delicious bites, and cozy atmosphere made it a memory I cherish to this day. The simplicity of Puppy Chow mixed with the lovely warmth of the season was a hit! I like to think of that night as my jump into culinary creativity, where all it took was a little imagination—and a sprinkle of pumpkin spice—to delight everyone.
Let’s create some of that magic in your kitchen!
Ingredients
Gathering quality ingredients is key to making this recipe truly shine.
-
Chex Cereal:
- Use the original rice or corn Chex for that perfect crunch. These cereals are gluten-free, making them an excellent choice for anyone with dietary restrictions. Feel free to swap with any crunchy cereal you love!
-
White Chocolate Chips:
- A rich and creamy base for your Puppy Chow. Look for quality white chocolate for the best flavor. If you’re feeling adventurous, you can swap with dark chocolate or even caramel chips for a different twist!
-
Pumpkin Spice:
- This magical blend typically includes cinnamon, nutmeg, ginger, and allspice. You can make your own at home or buy a pre-made mix. If you want to get creative, consider a blend of your own favorite spices like cardamom or all spice!
-
Powdered Sugar:
- This serves as the “snow” coating for your puppy chow. It gives that sweet touch and helps to seal in the flavor. No substitutions for this one—powdered sugar is key!
-
Vanilla Extract:
- Just a splash elevates the flavor profile, rounding out the sweetness. Homemade vanilla extract works wonders, or use a good quality store-bought option.
-
Sea Salt (Optional):
- Just a sprinkle at the end can enhance the sweetness and create a wonderful contrast in flavors. It’s not necessary, but I personally love the balance it brings!
Step-by-Step Instructions
Now that we have our ingredients ready, let’s get to the good stuff—the cooking!
-
Prep Your Workspace:
- First, clear some counter space and gather all your tools: a microwave-safe bowl, a large mixing bowl, a spatula, and a baking sheet lined with parchment paper.
-
Melt the White Chocolate:
- In a microwave-safe bowl, add the white chocolate chips. Microwave them on high power for 30-second intervals, stirring well between each, until they’re completely melted and smooth. Keep an eye on it; you don’t want to overheat the chocolate!
-
Add Pumpkin Spice and Vanilla:
- Once melted, stir in the pumpkin spice and vanilla extract until fully combined. This is where the magic happens! The warm aroma is sure to get your taste buds tingling.
-
Coat the Chex Cereal:
- Place your Chex cereal in a large mixing bowl. Pour the melted white chocolate mixture over the cereal. Using a spatula, gently fold the cereal until it’s evenly coated. Be careful not to crush the cereal; you want those lovely little squares to stay intact!
-
Add the Powdered Sugar:
- Transfer the coated Chex to a large plastic bag (or sprinkle directly into the mixing bowl if you prefer). Add the powdered sugar and seal the bag, shaking gently until all the cereal pieces are coated. If you used a mixing bowl, sprinkle the sugar generously over the mixture and fold until well-coated.
-
Spread and Cool:
- Pour the Puppy Chow mixture onto your lined baking sheet in an even layer to cool. This step helps to prevent clumping.
-
Let it Set:
- Allow it to sit for about 30 minutes. The coating will firm up, making it delightfully crispy and crunchy!
-
Serve and Enjoy:
- Once it’s ready, feel free to serve right away or store it in an airtight container for up to a week. Just don’t be surprised if your friends and family devour it all in one night!
Serving Suggestions
To make your Pumpkin Spice Puppy Chow truly festive, consider serving it in small clear bags tied with twine or in decorative bowls at a gathering. For an extra touch, sprinkle a little sea salt on top before serving or dust with extra powdered sugar to give it that lovely snowy effect. It makes a gorgeous centerpiece for any fall-themed table!
Recipe Variations
Feeling adventurous? Here are a few delightful twists to try with your Puppy Chow:
- Nutty Addition: Toss in some chopped pecans or walnuts for a crunchy element that pairs perfectly with the pumpkin spice.
- Chocolate Drizzle: After coating, drizzle some melted dark or milk chocolate over the finished product for a richer taste.
- Dried Fruit: Mix in some dried cranberries or raisins for a chewy texture and a hint of tartness to balance the sweetness.
- Different Spices: Swap the pumpkin spice for chai spice or cinnamon sugar for a different flavor profile that still embraces warmth!
- Vegan Option: Use dairy-free chocolate chips and plant-based butter to create a vegan-friendly version without losing any deliciousness!
Chef’s Notes
Creating Puppy Chow has always been a light-hearted joy for me. I remember one particular holiday season when I tried to make a double batch for a gathering but accidentally doubled the pumpkin spice instead of the chocolate! The result was a wonderfully strong flavor that—surprisingly—everyone loved! It had a kick to it that made it unique and memorable.
From that point on, I embraced the idea of experimenting and letting a bit of joy and whimsy enter my recipes. The kitchen is all about exploration, and it’s okay to have a few happy accidents along the way.
FAQs and Troubleshooting
1. Why did my Puppy Chow clump together?
If you find your Puppy Chow has clumped together, it might be because the chocolate wasn’t cooled enough when mixed or wasn’t evenly coated. Be sure to cool it slightly before mixing and ensure the powdered sugar fully coats the cereal!
2. Can I make this ahead of time?
Absolutely! Puppy Chow can be made up to a week in advance. Just store it in an airtight container at room temperature, and it’ll stay fresh and delicious!
3. What can I use if I don’t have powdered sugar?
You can make your own powdered sugar by blending regular granulated sugar in a blender or food processor until it’s super fine. It will work just as well!
4. Can I use different types of cereal?
Definitely! While Chex is traditional, you could use any similar crisp cereal, like Crispix, or even granola for a fun texture. Just keep in mind that different cereals absorb chocolate differently, so you might need to adjust the quantities a bit.
Nutritional Info
Per serving (about 1/4 cup):
- Calories: 190
- Total Fat: 9g
- Saturated Fat: 5g
- Carbohydrates: 28g
- Sugars: 12g
- Protein: 1g
So there you have it! A simple and fun recipe for Pumpkin Spice Puppy Chow that’s perfect for bringing warmth and joy into your autumn gatherings. Grab your apron, embrace those cozy vibes, and let’s create some delightful memories together in the kitchen. Happy snacking!
PrintPumpkin Spice Puppy Chow
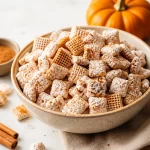
A cozy and delightful twist on the classic Puppy Chow, combining crunchy cereal with creamy white chocolate and warm pumpkin spice for a perfect autumn treat.
- Prep Time: 10 minutes
- Cook Time: 5 minutes
- Total Time: 45 minutes
- Yield: 8 servings 1x
- Category: Snack
- Method: No-Cook
- Cuisine: American
- Diet: Vegetarian
Ingredients
- 4 cups Chex cereal (rice or corn)
- 2 cups white chocolate chips
- 2 teaspoons pumpkin spice
- 1 cup powdered sugar
- 1 teaspoon vanilla extract
- Sea salt (optional)
Instructions
- Prep your workspace by gathering all your tools: a microwave-safe bowl, a large mixing bowl, a spatula, and a baking sheet lined with parchment paper.
- Melt the white chocolate chips in a microwave-safe bowl, using high power for 30-second intervals, stirring between each, until completely melted and smooth.
- Add the pumpkin spice and vanilla extract to the melted chocolate and stir until fully combined.
- Coat the Chex cereal in a large mixing bowl by pouring the melted white chocolate over it, gently folding until evenly coated.
- Add the powdered sugar to the coated cereal, sealing it in a large plastic bag and shaking gently until all pieces are coated, or sprinkle directly in the mixing bowl.
- Spread the Puppy Chow mixture onto your lined baking sheet in an even layer to cool.
- Let it sit for about 30 minutes until the coating firms up.
- Serve and enjoy immediately or store in an airtight container for up to a week.
Notes
Consider packaging in small clear bags for gifting or serving in decorative bowls at gatherings. Top with a sprinkle of sea salt for added flavor.
Nutrition
- Serving Size: 1/4 cup
- Calories: 190
- Sugar: 12g
- Sodium: 50mg
- Fat: 9g
- Saturated Fat: 5g
- Unsaturated Fat: 4g
- Trans Fat: 0g
- Carbohydrates: 28g
- Fiber: 1g
- Protein: 1g
- Cholesterol: 0mg
Keywords: Pumpkin Spice, Puppy Chow, Snack, Autumn Treat, Easy Recipe
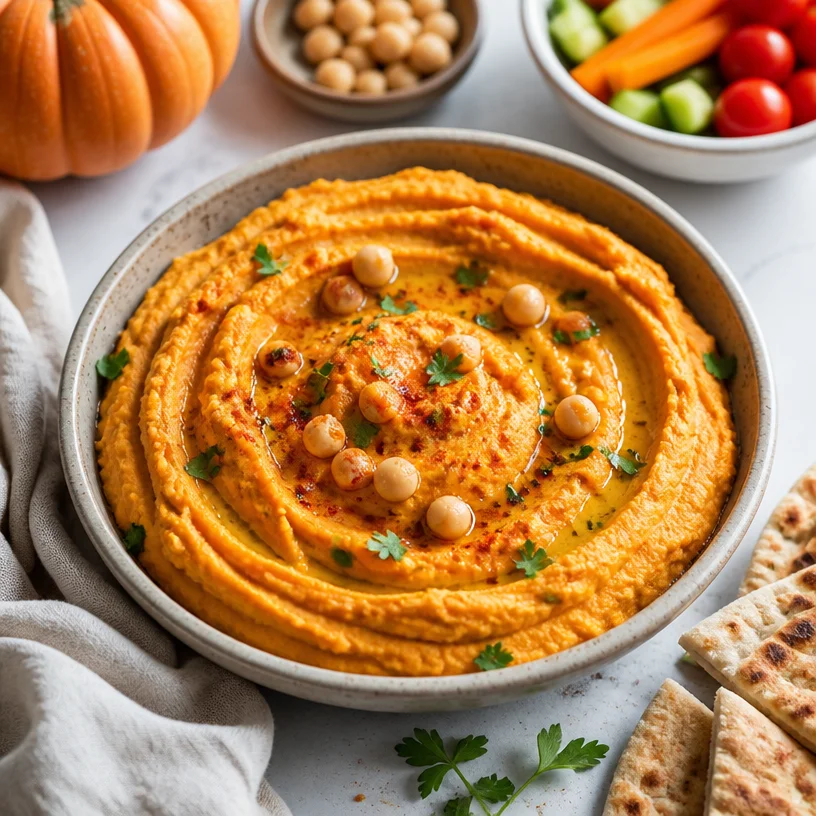
Pumpkin Hummus
Pumpkin Hummus: A Fall Favorite
Hello, fellow food lovers! Today, I’m excited to share with you one of my favorite fall recipes: pumpkin hummus. Trust me, this delightful twist on traditional hummus is not only a crowd-pleaser but also perfect for cozy gatherings, harvest dinners, or even a simple snack at home. With its creamy texture and subtle sweetness, pumpkin hummus will elevate your spread and warm your spirit.
Embracing Pumpkin’s Warmth
Growing up, autumn meant one thing for our family: pumpkin everything! From pancakes drizzled with maple syrup to the perfectly spiced pumpkin pie, the rich, warm flavors of pumpkin were synonymous with family gathering and cozy nights. One particular memory stands out: our annual fall harvest gathering. The table was a feast of flavors, and I vividly remember my grandmother serving her famous pumpkin dip with an array of fresh veggies and crunchy pita chips. Everyone clamored around, laughter echoing through the room.
That moment inspired my journey of creating this pumpkin hummus—a dish that encapsulates all those heartwarming memories while remaining easy and approachable. It feels like a big hug for your taste buds!
Ingredients
Here’s what you’ll need for this deliciously creamy pumpkin hummus:
-
1 can (15 oz) of chickpeas
Chickpeas are the base of any hummus, offering a creamy texture and protein boost. Drain and rinse for a cleaner taste! -
1 cup of pumpkin puree
Pumpkin puree adds a sweet, earthy flavor and vibrant color. You can use canned puree or roast your own pumpkin for a fresh twist. -
3 tablespoons tahini
This sesame paste lends a nutty richness to the dip. If you’re nut-free, sunflower seed butter makes a great alternative! -
2 tablespoons olive oil
Olive oil brings richness and helps with blending. For a different flavor, use walnut oil or avocado oil. -
2 tablespoons lemon juice
Fresh lemon juice brightens up the flavors. If you’re in a pinch, bottled lemon juice works too. -
1 teaspoon garlic powder
Garlic powder provides a mellow garlicky kick. If you enjoy fresh flavors, feel free to use one clove of minced garlic instead. -
1 teaspoon ground cumin
This adds an earthy depth to the hummus. Smoked paprika would also add a delicious twist. -
Salt and pepper to taste
Seasoning is essential. Adjust according to your preference, and remember to taste as you go! -
Paprika (for garnish)
A sprinkle of paprika adds a pop of color and a smoky finish. -
Veggies or pita chips for dipping
Think crunchy carrots, bell peppers, cucumber slices, or toasted pita chips. You can’t go wrong!
Step-by-Step Instructions
Let’s dive into the kitchen and whip up this creamy pumpkin goodness!
-
Prepare Your Chickpeas
Start with the chickpeas: drain and rinse one can, and set them aside. This step is crucial because it removes excess sodium and any canning juices, ensuring your hummus has a clean flavor. -
Combine Ingredients in a Food Processor
In a food processor, combine the chickpeas, pumpkin puree, tahini, olive oil, lemon juice, garlic powder, ground cumin, and a sprinkle of salt and pepper.Chef Tip: If your food processor struggles to blend, add a bit of water, a tablespoon at a time, until it’s smooth. You want that silky consistency!
-
Pulse and Scrape
Pulse the mixture on high until it’s well-blended. Stop the processor occasionally to scrape down the sides with a spatula—this ensures everything blends evenly.Chef Hack: If you don’t have a spatula handy, use the back of a spoon!
-
Taste and Adjust
Here comes the fun part: taste your hummus! Adjust the flavors by adding more salt, lemon juice, or spices until it’s just how you like it. Don’t be shy—seasoning is key! -
Plate It Beautifully
Once you’ve reached hummus perfection, transfer it to a serving bowl. This is where presentation comes into play! Use the back of a spoon to create a swirl in the middle. -
Drizzle and Garnish
Drizzle a little olive oil on top and sprinkle with paprika. This not only makes it look stunning but also adds that little extra oomph of flavor. -
Serve with Style
Arrange your veggies and pita chips around the hummus, and don’t forget to set out some extra olive oil and paprika for guests to enjoy.
Serving Suggestions
To serve, place the pumpkin hummus at the center of your table. Surround it with colorful veggie sticks—think vibrant carrots, crisp cucumbers, and sweet bell peppers. Add pita chips for that perfect crunch! This spread not only looks inviting but also offers something for everyone to enjoy.
Recipe Variations
Now, let’s get a little creative! Here are some fun ways to switch things up with your pumpkin hummus:
-
Spiced Pumpkin Hummus: Add a pinch of cinnamon or nutmeg for a more festive, spiced flavor.
-
Maple Pumpkin Hummus: Incorporate a drizzle of maple syrup for added sweetness—perfect for a holiday gathering!
-
Savory Pumpkin Hummus: Stir in some finely chopped roasted garlic or fresh herbs like rosemary or thyme for an herbaceous kick.
-
Nutty Pumpkin Hummus: Fold in some crushed nuts like pecans or walnuts for added texture and flavor.
-
Roasted Red Pepper Pumpkin Hummus: Blend in roasted red peppers for some smokiness and depth.
Chef’s Notes
As I reflect on how this recipe has evolved, I’m reminded of the first time I made pumpkin hummus—it was a happy accident! I had leftover pumpkin puree after baking a pie and thought, “Why not make hummus?” It turned into a delightful dip that my friends devoured. Over the years, I’ve played around with flavors, and it has become a staple at my gatherings.
Another fun kitchen story: I once served this at a potluck, and a friend tried to guess the secret ingredient! When I finally revealed it was pumpkin, there was a delightful mix of surprise and glee. It’s moments like these that remind me how food brings us together in unexpected and beautiful ways.
FAQs and Troubleshooting
1. Can I use fresh pumpkin instead of canned?
Absolutely! Roasting your own pumpkin adds a wonderful freshness and depth of flavor. Just make sure to puree it well.
2. My hummus is too thick. What should I do?
No worries! Simply add a tablespoon of cold water or olive oil and blend again until you reach your desired consistency.
3. How long does this hummus last in the fridge?
Stored in an airtight container, it should last up to a week. Just give it a little stir before serving again!
4. What can I do with leftover hummus?
It’s versatile! Use it as a spread on sandwiches, a salad dressing base, or even as a topping for roasted chicken or fish.
Nutritional Info (Optional)
While the nutritional content will vary based on specific brands and ingredients you use, this pumpkin hummus is generally low in calories and high in fiber, thanks to the chickpeas and pumpkin. It’s a great source of protein and healthy fats, making it a guilt-free indulgence!
So there you have it—my go-to recipe for pumpkin hummus! It’s perfect for holiday gatherings or simply a cozy night at home on the couch. I hope this dip brings as much joy to your table as it has to mine. Don your apron, grab your favorite veggies, and let’s savor the flavors of fall together! Happy cooking!
PrintPumpkin Hummus
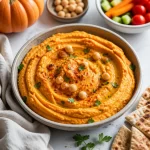
A delightful twist on traditional hummus, creamy pumpkin hummus is perfect for cozy gatherings or a simple snack.
- Prep Time: 10 minutes
- Cook Time: 0 minutes
- Total Time: 10 minutes
- Yield: 4 servings 1x
- Category: Appetizer
- Method: Blending
- Cuisine: Mediterranean
- Diet: Vegetarian
Ingredients
- 1 can (15 oz) of chickpeas, drained and rinsed
- 1 cup pumpkin puree
- 3 tablespoons tahini
- 2 tablespoons olive oil
- 2 tablespoons lemon juice
- 1 teaspoon garlic powder
- 1 teaspoon ground cumin
- Salt and pepper to taste
- Paprika (for garnish)
- Veggies or pita chips for dipping
Instructions
- Prepare your chickpeas: Drain and rinse one can, and set them aside.
- Combine ingredients in a food processor: In a food processor, combine the chickpeas, pumpkin puree, tahini, olive oil, lemon juice, garlic powder, ground cumin, and sprinkle of salt and pepper.
- Taste and adjust the flavors by adding more salt, lemon juice, or spices until it’s just how you like it.
- Plate it beautifully: Transfer to a serving bowl.
- Drizzle and garnish: Drizzle with olive oil and sprinkle with paprika.
- Serve with style: Arrange veggies and pita chips around the hummus.
Notes
Feel free to experiment with flavors like adding cinnamon for a spiced version or maple syrup for sweetness.
Nutrition
- Serving Size: 1 serving
- Calories: 200
- Sugar: 4g
- Sodium: 300mg
- Fat: 10g
- Saturated Fat: 1g
- Unsaturated Fat: 9g
- Trans Fat: 0g
- Carbohydrates: 25g
- Fiber: 6g
- Protein: 8g
- Cholesterol: 0mg
Keywords: pumpkin hummus, fall appetizer, vegetarian dip, healthy snack, chickpea dip
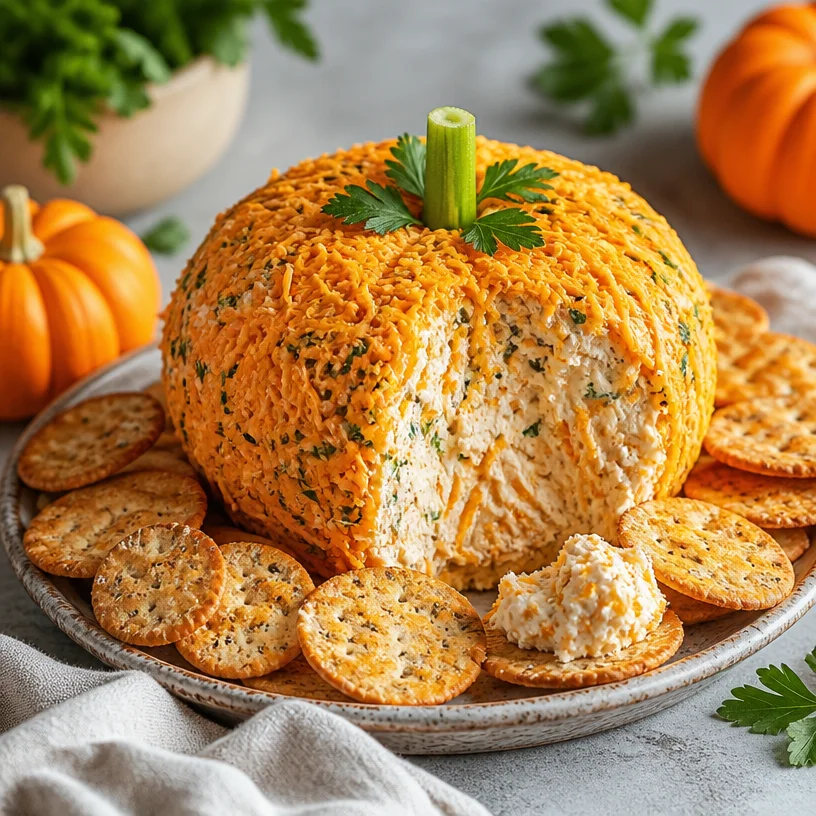
No-Bake Pumpkin Cheese Ball (4-Ingredient) for Fall Parties
The Ultimate Pumpkin Cheese Ball Recipe: A Fall Favorite
Hello, fellow food lovers! With fall in the air, there’s something magical about the sight of vivid orange pumpkins appearing everywhere. It’s that cozy time of year when we gather with friends and family, celebrating the beauty of the harvest season. One of my go-to recipes during this time is a delightful Pumpkin Cheese Ball—a fun, festive twist on the classic cheese ball that never fails to impress!
Imagine hosting a gathering, and as your guests enter, they’re greeted by a stunning Pumpkin Cheese Ball adorned with a sprinkle of fresh herbs or chopped nuts. It’s a conversation starter, a burst of flavor, and a visual piece of art all in one. Perfect for game nights, potlucks, or simply enjoying with your loved ones, this cheese ball brings warmth and cheer to any occasion.
Today, I want to share my simple, yet enchanting recipe for a Pumpkin Cheese Ball. This dish is rich, creamy, and brimming with flavor, creating moments of indulgence and joy around your table. Grab your apron, pour yourself a cup of cider or perhaps something sparkly, and let’s dive right into this delectable fall treat!
A Little Nostalgic Pumpkin Tale
As I think about pumpkins, I can’t help but recall my childhood years spent in the kitchen with my grandmother. Every fall, we would visit the local pumpkin patch, selecting the perfect pumpkins—ones that had just the right shape and color.
Once back in her warm kitchen, we would embark on a culinary adventure together. One particularly rainy afternoon, we decided to make a savory cheese ball. The kitchen filled with the comforting aroma of spices as we laughed, mixed, and rolled ingredients into a ball shape, all while stealing bites of deliciousness along the way.
That cheese ball became a staple at family gatherings, decorated with cheddar cheese and herbs, reminding us all of the love and creativity that food brings. Fast forward to today, and while the recipes and flavors have evolved a bit, the essence of togetherness and warmth remains the same. My Pumpkin Cheese Ball is a nod to those cherished memories, blending nostalgia with contemporary flair.
Ingredients You’ll Need
Here’s a simple list of ingredients you’ll need to create this delightful Pumpkin Cheese Ball, along with some tips to make the most of each one!
-
8 oz Cream Cheese: The base of our cheese ball, cream cheese provides the creamy texture. Make sure it’s softened for easy blending. If you’re looking for a lighter option, try using reduced-fat cream cheese.
-
1 cup Cheddar Cheese: Aged cheddar adds a rich, sharp flavor that pairs wonderfully with the creaminess of the cream cheese. You can swap it for gouda or pepper jack for a twist.
-
1 packet Ranch Seasoning Mix: This seasoning infuses the cheese ball with a burst of flavor. If you’re feeling adventurous, consider substituting homemade ranch seasoning using herbs like dill, parsley, and garlic powder.
-
1 tsp Fresh Parsley: For garnish and flavor! Parsley adds a refreshing touch on top. Feel free to get creative with toppings—chopped nuts, pumpkin seeds, or even bacon bits can add an interesting dimension.
-
Optional: A dash of paprika or cayenne: If you enjoy a bit of heat, a sprinkle of cayenne will warm it up beautifully.
Step-by-Step Instructions
Let’s get cooking! Follow these easy steps to whip up your Pumpkin Cheese Ball:
-
Prepare Your Ingredients:
- Start by gathering all your ingredients and letting the cream cheese sit out for about 30 minutes to soften. This will make mixing a snap.
-
Mix the Bases:
- In a mixing bowl, add the softened cream cheese and shredded cheddar cheese. Use your favorite spatula or fork to bring the ingredients together. Take your time—this is where the flavors start to dance!
-
Add Flavor:
- Throw in the packet of ranch seasoning. If you’re making your own homemade ranch seasoning, feel free to sprinkle in about 2 tablespoons. Use your spatula to combine it all thoroughly—this is where the magic happens! You’re looking for a smooth, creamy mixture with bits of cheese sprinkled throughout.
-
Shape the Ball:
- Once your mixture is well combined, it’s time to form it into a ball. With clean hands, scoop the cheese mixture, rolling it gently until you achieve a nice round shape. Feel free to make it as big or as small as you like!
-
Chill Time:
- Wrap the cheese ball tightly in plastic wrap and place it in the refrigerator for at least 2 hours. This chilling time allows the flavors to meld beautifully and makes it easier to handle.
-
Decorate:
- Once chilled, it’s time to make it look like a pumpkin! Roll the cheese ball in finely chopped nuts or fresh parsley to cover it entirely. For a more festive flair, use a small piece of fresh parsley for a “stem” effect.
-
Serve:
- Place your stunning Pumpkin Cheese Ball on a festive platter and surround it with an assortment of crackers, veggie sticks, or even apple slices.
Serving Suggestions
When it comes to serving, presentation is everything. I love using a rustic wooden board to display the Pumpkin Cheese Ball. Surround it with colorful accompaniments like sliced cucumbers, fresh carrot sticks, and an array of crunchy crackers. You can even add seasonal fruits like grapes and apple slices for that extra touch of fall flavor.
To elevate the experience, have some cheese knives available for easy scooping, and don’t forget to encourage your guests to experiment with different pairings!
Recipe Variations
Feeling adventurous? Here are some delightful variations to consider for your Pumpkin Cheese Ball:
-
Spicy Twist: Add a diced jalapeño or some crushed red pepper flakes for an extra kick.
-
Sweet and Savory: Mix in a few tablespoons of dried cranberries or chopped walnuts for a nutty sweetness.
-
Herb Infusion: Swap in different herbs and spices. You could try dill, chives, or even a touch of garlic powder for a different flavor profile.
-
Cheddar Alternative: Use crumbled feta cheese or goat cheese for a tangier taste.
-
Vegan Option: Substitute cream cheese with a vegan cream cheese alternative and nutritional yeast for a cheesy flavor.
Chef’s Notes
Food is all about stories, and I have a funny one to share! A few years back, at a friend’s potluck, I brought along my usual cheese ball. While it was destined to be a hit, things took a turn when I realized I didn’t have Ranch seasoning on hand. In a pinch, I grabbed a taco seasoning mix instead! To my surprise, it was a total hit—the cheese ball was devoured in minutes, and everyone was asking for the “secret ingredient.” From that day on, I realized that sometimes unanticipated kitchen mishaps can lead to delightful discoveries!
Frequently Asked Questions
1. Can I make this cheese ball ahead of time?
Absolutely! In fact, making it a day in advance enhances the flavors. Just keep it wrapped in plastic in the fridge until you’re ready to serve.
2. How long does the cheese ball last in the fridge?
Typically, it can last for about 3-4 days if stored properly. But trust me, it won’t last that long once your guests get a taste!
3. Can you freeze a cheese ball?
Yes, you can freeze it, but be mindful that the texture may change slightly when thawed. To freeze, wrap it tightly in plastic wrap and then aluminum foil for extra protection. Thaw it in the fridge before serving.
4. What can I serve with the cheese ball?
I recommend pairing it with a variety of options, like crackers, veggies, pretzels, or even slices of baguette. You could also serve alongside a nice charcuterie board to complement the flavors.
Nutritional Info
(Optional): This section can include calorie counts, sugar content, and other relevant nutritional facts if desired.
Final Thoughts
See—making a show-stopping Pumpkin Cheese Ball is not only easy but also a wonderful way to create cherished moments around your table! Whether it’s for a cozy get-together, a festive holiday party, or just because, this recipe is sure to bring smiles and satisfaction to your table.
So, what are you waiting for? Grab your ingredients and let’s get crafting this pumpkin delight—because good food is all about good company and unforgettable memories! Happy cooking!
PrintUltimate Pumpkin Cheese Ball

A delightful Pumpkin Cheese Ball—a fun, festive twist on the classic cheese ball that impresses at any gathering.
- Prep Time: 15 minutes
- Cook Time: 0 minutes
- Total Time: 135 minutes
- Yield: 8 servings 1x
- Category: Appetizer
- Method: Chilling
- Cuisine: American
- Diet: Vegetarian
Ingredients
- 8 oz Cream Cheese, softened
- 1 cup Cheddar Cheese, shredded
- 1 packet Ranch Seasoning Mix
- 1 tsp Fresh Parsley, for garnish
- Optional: A dash of paprika or cayenne
Instructions
- Prepare your ingredients by letting the cream cheese sit out for 30 minutes to soften.
- Mix the softened cream cheese and shredded cheddar cheese in a mixing bowl until combined.
- Add the packet of ranch seasoning or homemade ranch and mix until smooth and creamy.
- Shape the mixture into a ball using clean hands.
- Chill the cheese ball in plastic wrap for at least 120 minutes.
- Decorate the chilled cheese ball with chopped nuts or parsley for a pumpkin look.
- Serve on a platter accompanied by crackers, veggie sticks, or apple slices.
Notes
Make it a day in advance for enhanced flavors. Store wrapped in the fridge for 3-4 days.
Nutrition
- Serving Size: 1 serving
- Calories: 250
- Sugar: 2g
- Sodium: 350mg
- Fat: 18g
- Saturated Fat: 10g
- Unsaturated Fat: 6g
- Trans Fat: 0g
- Carbohydrates: 6g
- Fiber: 0g
- Protein: 6g
- Cholesterol: 30mg
Keywords: pumpkin cheese ball, fall appetizer, cheese ball recipe, festive cheese ball
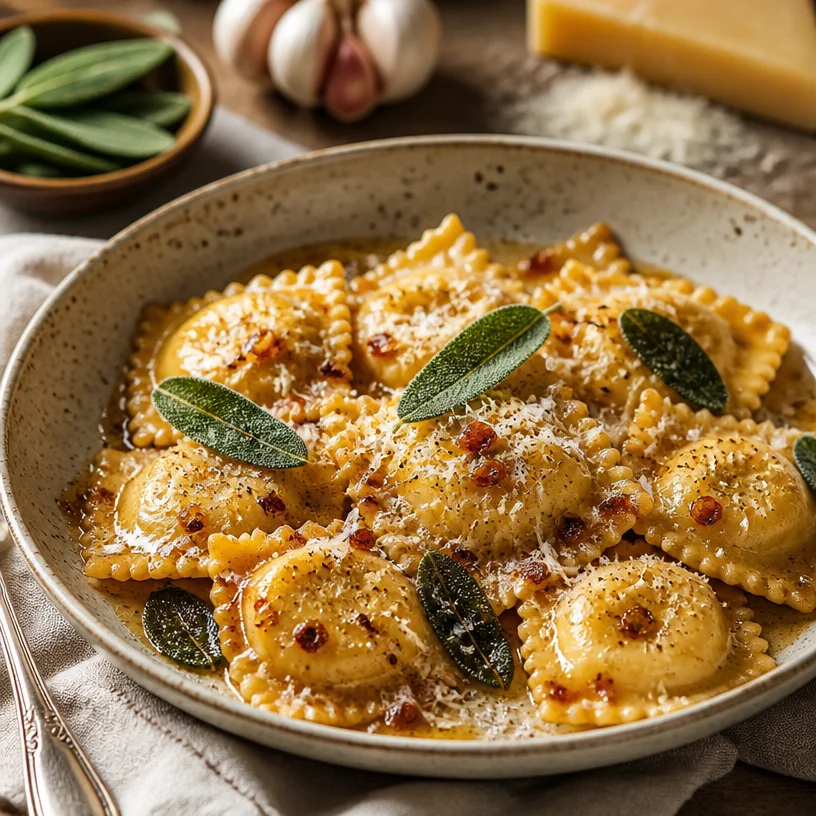
Weeknight Pumpkin Ravioli with Garlic Brown Butter Sauce
Homemade Pumpkin Ravioli with Garlic Brown Butter
Introduction
Hello, fellow food lovers! Today, I’m thrilled to take you on a delightful culinary journey as we whip up a dish that’s perfect for those cozy fall evenings — Homemade Pumpkin Ravioli with Garlic Brown Butter. Imagine the aroma of nutmeg and garlic wafting through your kitchen, the golden filling of pumpkin mingling with creamy ricotta, all lovingly enveloped in tender pasta. This dish is not just a meal; it’s a celebration of warmth, togetherness, and the simple pleasure of creating something special from scratch.
In my kitchen at Ivory Apron, I’ve come to love experimenting with seasonal ingredients, and pumpkin is a true star of the fall harvest. Its creamy texture and naturally sweet flavor make it the perfect filling for ravioli. Not to mention, pairing it with a luscious garlic brown butter sauce elevates the dish to new heights! Trust me, this recipe is as much about the joy of cooking as it is about the end result.
Whether you’re looking to impress at your next dinner party or just delighting in a quiet evening at home, making your own ravioli can feel elegant and satisfying. Don’t worry if you’ve never made pasta before — I’m here to guide you every step of the way. So, roll up your sleeves, tie on that ivory apron, and let’s dive into this delightful dish together!
Personal Story
Ah, the nostalgia of homemade ravioli! I still remember the first time I tried my hand at making pasta. I was a young chef-in-training, deeply inspired by my grandmother’s kitchen. One autumn afternoon, she invited me to join her in crafting ravioli filled with her famous ricotta and spinach. Watching her hands deftly work the dough was mesmerizing — it was like she was dancing with the pasta.
We filled those little pillows of joy with love and laughter, and when they hit the boiling water, I was mesmerized watching them float to the surface! The meal that followed was filled with delightful stories and cozy warmth. As I took my first bite of that homemade ravioli, I knew in that moment that the kitchen would always be my happy place.
Years later, I’ve taken that memory, along with my love for pumpkin, to create this uniquely seasonal twist. This pumpkin ravioli pays homage to those cherished moments while introducing the delightful flavors of fall. Ready to make your own memories? Let’s begin!
Ingredients
Here’s what you’ll need to make your homemade pumpkin ravioli:
-
2 cups all-purpose flour: This serves as your pasta base. Use “00” flour for an even silkier texture if you have it but good old all-purpose works just as well.
-
3 large eggs: These are essential for creating a rich and elastic pasta dough. If you’re short on eggs, you can substitute one egg with two egg yolks for a more indulgent dough.
-
1 cup pumpkin puree: Make sure to use pure pumpkin puree, not the sweetened pie filling. You can roast your own pumpkin or use store-bought — either works beautifully.
-
1/2 cup ricotta cheese: This adds creaminess and balances the pumpkin’s sweetness. If you want a lighter option, try using cottage cheese, blended until smooth.
-
1/4 cup grated Parmesan cheese: A sprinkle of nutty, salty Parmesan elevates the filling. For a dairy-free version, try nutritional yeast for a cheesy flavor.
-
1/2 teaspoon salt: A good pinch of salt enhances all the flavors. Adjustable to your preference, of course!
-
1/2 teaspoon nutmeg: This spice adds warmth and depth to the filling; fresh grated nutmeg can really take it to another level.
-
1/4 teaspoon black pepper: A touch of heat that complements the pumpkin perfectly.
-
1/2 cup unsalted butter: Essential for the brown butter sauce which brings everything together. If you need a substitute, olive oil can work, but you’ll lose that distinct nutty flavor.
-
3 cloves garlic, minced: Garlic adds a fragrant kick to the sauce. Feel free to add more if you’re a garlic lover like me!
-
Fresh sage leaves (for garnish): The earthy flavor of sage pairs beautifully with the pumpkin. You can also use other herbs like thyme or rosemary if you prefer.
Step-by-Step Instructions
Step 1: Make the Pasta Dough
-
Flour Mountain:
Create a mound with the flour on a clean surface or in a bowl, forming a well in the center. This is where your eggs will go! -
Add Eggs:
Crack the eggs into the well and sprinkle in that half teaspoon of salt. Using a fork, gently beat the eggs, gradually incorporating the flour from the edges of the well. -
Knead it Good:
Once the mixture is too stiff to mix with a fork, use your hands! Knead the dough for about 8-10 minutes until it’s smooth and elastic. Don’t hesitate to sprinkle a bit of flour if it gets too sticky. -
Rest Time:
Wrap your dough in plastic wrap and let it rest for at least 30 minutes at room temperature. Trust me, this step helps to relax the gluten and makes rolling out the dough a breeze!
Step 2: Prepare the Filling
-
Combine Ingredients:
In a mixing bowl, combine the pumpkin puree, ricotta cheese, Parmesan cheese, nutmeg, and black pepper. Adjust seasoning to your taste and make sure it’s well mixed. -
Taste Test:
This is the fun part! Sneak a spoonful to ensure the flavors are just right — and make sure to save some for your ravioli!
Step 3: Roll Out the Pasta
-
Divide and Conquer:
Cut the rested dough into four pieces. Work with one piece at a time while keeping the others covered to prevent them from drying out. -
Flatten and Roll:
Lightly flour your surface and use a rolling pin or pasta machine to roll your dough to about 1/16-inch thickness. Aim for transparency but take your time — it’s okay if it’s a touch thicker! -
Trim and Cut:
Cut the pasta into long strips, about 3 inches wide. (If you’re feeling lazy, you can also use store-bought pasta sheets for an even quicker dish!)
Step 4: Fill and Shape the Ravioli
-
Egg Wash:
Beat one egg and brush a thin layer around the edges of the pasta strips. This will help seal the ravioli closed. -
Fill ‘Em Up:
Place about a tablespoon of filling spaced about 2 inches apart on one of the pasta strips. Feel free to use a piping bag for easier filling! -
Seal the Deal:
Fold the pasta over the filling to create a pocket, gently pressing to eliminate air bubbles. Press around the edges to seal and use a fork to crimp the edges for a pretty design. -
Repeat:
Continue with the rest of the dough and filling until all are made. Flour them lightly to prevent sticking!
Step 5: Cook the Ravioli
-
Boil, Baby, Boil:
Bring a large pot of salted water to a boil. Once boiling, add the ravioli gently and cook for about 4-5 minutes or until they float to the surface. -
Drain Carefully:
Use a slotted spoon to carefully remove the ravioli, and let them rest on a kitchen towel while you make the sauce.
Step 6: Make the Garlic Brown Butter Sauce
-
Brown the Butter:
In a skillet, melt the unsalted butter over medium heat. Add the minced garlic as the butter begins to foam. -
Watch it Carefully:
Stir frequently to ensure the butter doesn’t burn. Keep cooking until it turns a lovely golden brown and has a nutty aroma — about 4-5 minutes. -
Add Some Sage:
Toss in fresh sage leaves and let them fry briefly in the browned butter for flavor. Your kitchen will smell divine!
Step 7: Combine and Serve
-
Toss the Ravioli:
Gently add the cooked ravioli to the skillet with the garlic brown butter sauce. Toss carefully to coat them without breaking them. -
Plating Perfection:
Serve in a warm bowl, drizzling extra brown butter over the top. Garnish with crispy sage leaves and a sprinkle of Parmesan for an elegant finish.
Serving Suggestions
To serve, place your pumpkin ravioli in shallow bowls, ensuring they have a good layer of the garlic brown butter sauce. Add a sprinkle of fresh Parmesan, and if you’re feeling fancy, try a touch of freshly cracked black pepper or a drizzle of balsamic glaze for added flair. This dish is visually stunning and will have your guests raving before they even take a bite!
Recipe Variations
-
Add Protein: Mix in some cooked pancetta or browned sausage with the filling for a hearty option.
-
Go Vegan: Swap the egg in the pasta for aquafaba (chickpea water) and use a dairy-free ricotta paired with nutritional yeast.
-
Herb-Infused: Try adding chopped spinach or fresh herbs like basil or thyme to the filling for extra flavor and nutrition.
-
Cheesy Twist: Add a bit of goat cheese or feta for an added tangy element to the filling.
-
Sauce Variations: Experiment with other sauces like a sage cream sauce or a light marinara for a different flavor profile.
Chef’s Notes
As I’ve developed this recipe over the years, I’ve found joy in experimenting with flavors and techniques. One funny story? The first time I made these wasn’t as pretty as I envisioned — my ravioli burst open in the pot, filling the water with pumpkin goodness! But even during those moments, laughter ensued, and I learned that cooking is all about the process, not just the perfect end result.
This recipe has evolved from traditional family favorites to something uniquely my own. I love sharing it with friends, and I hope it inspires you to create your own kitchen memories!
FAQs and Troubleshooting
1. My pasta dough is too sticky. What should I do?
If your dough is sticky, sprinkle in a bit more flour as you knead until it reaches a soft, manageable consistency. But remember, don’t overdo it — you want that nice elasticity!
2. How can I ensure my ravioli don’t burst while cooking?
Make sure to press out all the air when sealing the ravioli. A good egg wash around the edges will also create a stronger seal.
3. Can I freeze the ravioli?
Absolutely! Place them in a single layer on a baking sheet until frozen, then transfer to a freezer bag. Cook them straight from frozen for about 6-8 minutes.
4. What’s the best way to reheat leftover ravioli?
Gently reheat in a skillet with a splash of water or some melted butter over low heat to retain the texture without overcooking.
Nutritional Info
While I won’t focus too much on the numbers because cooking should be about enjoyment, it’s good to know that an average serving of these delightful pumpkin raviolis (without excessive butter) can offer a decent balance of protein, healthy fats, and carbs, packed with vitamins and minerals from the pumpkin.
Now that you have your recipe, gathering your loved ones around the table to enjoy the fruits of your labor will make all that effort worthwhile. I can’t wait to hear how it goes! Enjoy this process—it’s all about creating beautiful meals and memories. Happy cooking!
PrintHomemade Pumpkin Ravioli with Garlic Brown Butter

Delight in the warmth of homemade pumpkin ravioli enveloped in a creamy ricotta filling and topped with a luscious garlic brown butter sauce.
- Prep Time: 15 minutes
- Cook Time: 30 minutes
- Total Time: 45 minutes
- Yield: 4 servings 1x
- Category: Main Course
- Method: Baking
- Cuisine: Italian
- Diet: Vegetarian
Ingredients
- 2 cups all-purpose flour
- 3 large eggs
- 1 cup pumpkin puree
- 1/2 cup ricotta cheese
- 1/4 cup grated Parmesan cheese
- 1/2 teaspoon salt
- 1/2 teaspoon nutmeg
- 1/4 teaspoon black pepper
- 1/2 cup unsalted butter
- 3 cloves garlic, minced
- Fresh sage leaves (for garnish)
Instructions
- Create a mound with the flour on a clean surface and form a well in the center for the eggs.
- Crack the eggs into the well and sprinkle in salt. Beat the eggs, gradually incorporating the flour.
- Knead the dough for about 8-10 minutes until it’s smooth and elastic.
- Wrap the dough in plastic wrap and let it rest for at least 30 minutes.
- In a mixing bowl, combine the pumpkin puree, ricotta cheese, Parmesan cheese, nutmeg, and black pepper for the filling.
- Cut the rested dough into four pieces, working with one piece at a time while keeping the others covered.
- Roll the dough to about 1/16-inch thickness, and cut into strips about 3 inches wide.
- Beat one egg and brush a thin layer around the edges of the pasta strips.
- Place about a tablespoon of filling spaced about 2 inches apart on one of the pasta strips.
- Fold the pasta over the filling, gently pressing to eliminate air bubbles. Seal and crimp the edges with a fork.
- Bring a large pot of salted water to a boil and cook the ravioli for about 4-5 minutes or until they float.
- Melt the unsalted butter in a skillet over medium heat and add the minced garlic.
- Stir frequently until the butter turns golden brown, about 4-5 minutes, then add sage leaves.
- Add the cooked ravioli to the skillet and gently toss to coat.
- Serve in warm bowls, drizzling extra brown butter and garnishing with sage and Parmesan.
Notes
For vegan options, substitute egg in the pasta with aquafaba and use dairy-free cheese. Freezing ravioli is possible; just ensure they are well sealed before cooking.
Nutrition
- Serving Size: 1 serving
- Calories: 350
- Sugar: 5g
- Sodium: 400mg
- Fat: 12g
- Saturated Fat: 4g
- Unsaturated Fat: 6g
- Trans Fat: 0g
- Carbohydrates: 45g
- Fiber: 3g
- Protein: 15g
- Cholesterol: 30mg
Keywords: pumpkin ravioli, homemade pasta, fall recipe, garlic brown butter
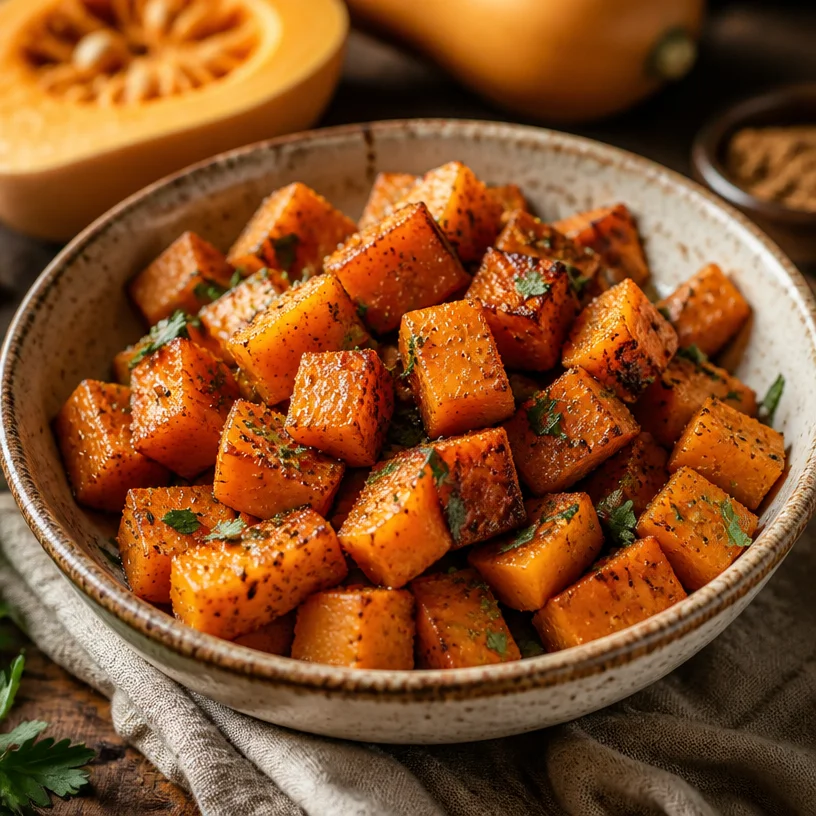
Brown Sugar Roasted Butternut Squash for Cozy Fall Dining
Brown Sugar Roasted Butternut Squash for Cozy Fall Dining
As the crispness of autumn sweeps in, there’s a magical transformation that happens in kitchens everywhere. The leaves turn vibrant shades of orange and yellow, and the scent of warm spices begins to linger in the air. This is the season that invites us back to our kitchens, turning up the warmth and coziness of home. One of my absolute favorite fall recipes is the Brown Sugar Roasted Butternut Squash, a dish that’s not only delicious but also embodies everything I love about fall cooking—simplicity, warmth, and a touch of sweetness.
Roasting brings out the butternut squash’s natural sweetness, enhanced beautifully by brown sugar and warm spices. This dish is a visual delight, just like a colorful autumn landscape. Each golden bite is both comforting and sophisticated, making it perfect for everything from casual weeknight dinners to festive gatherings. Just imagine walking into a home filled with that irresistible aroma of buttery, caramelized squash. It’s like a big hug in food form!
In this blog post, I’ll not only guide you through the steps to create this scrumptious dish but also share a piece of my personal cooking journey, highlight key ingredients, offer handy tips, and sprinkle in a few variations to inspire your creativity! So, grab your apron and let’s stir up some fall magic!
A Personal Story: Fall Memories and Sweet Squash
Growing up, autumn was always a special time in my household. My mom would transform our kitchen into the coziest spot, filled with the warmth of roasted vegetables, hearty soups, and baking treats. One of my earliest cooking memories is actually of us preparing butternut squash together. I remember the anticipation of carving that incredibly tough outer skin, which felt like a rite of passage, and then realizing that the magic awaited within. As we cubed the squash, my mom would always mention how the sweetness would surface once it met the heat of the oven.
One fall evening, we decided to host a dinner party for some close friends. I took charge of the butternut squash dish, and to add a special touch, I drizzled it with brown sugar and cinnamon, secrets I had learned from my mom. The compliments flowed like the wine, and my heart swelled; it felt great to share a dish that carried so many fond memories. That evening sparked an understanding of how food brings us together, wrapped in love and laughter, which ultimately inspired me to share those experiences through my cooking at Ivory Apron.
Ingredients
Let’s talk about what you’ll need to create this delicious Brown Sugar Roasted Butternut Squash.
-
1 Medium Butternut Squash (cubed): The star of our dish! Look for one that feels heavy for its size. If butternut squash isn’t in season, acorn or pumpkin will also work beautifully.
-
2 Tablespoons Olive Oil (or canola oil): A splash of oil helps in roasting, giving the squash a lovely golden color. For a lighter touch, feel free to swap in a little coconut oil for a hint of tropical flavor.
-
3 Tablespoons Brown Sugar: The sweet touch! Light brown sugar will give a milder flavor, while dark brown sugar will bring a deeper, richer caramel note. You can also substitute it with maple syrup if you’re looking for a unique twist.
-
2 Tablespoons Unsalted Butter (or vegan butter): Adds a creamy richness to the dish. If you’re dairy-free or vegan, plant-based butter works wonders.
-
1 Teaspoon Ground Cinnamon: A warm spice that amplifies that cozy fall vibe. If you’re feeling adventurous, you can substitute this with allspice or nutmeg for a slightly different flavor profile.
-
1 Teaspoon Salt: A vital component that helps balance the sweetness. You can reduce the salt for a low-sodium option.
-
1 Teaspoon Ground Black Pepper (or white pepper): A subtle hint of spice. Use white pepper if you’re aiming for a more refined look.
-
2 Tablespoons Fresh Parsley (optional, chopped): A fresh herb to sprinkle over the top for color and a burst of freshness! Chives or thyme could also create delightful variations.
Step-by-Step Instructions
Ready to create some fall goodness? Here’s how to make your Brown Sugar Roasted Butternut Squash in a few simple steps:
-
Preheat the Oven:
Preheat your oven to 400°F (200°C). A hot oven is essential for proper caramelization! -
Prepare the Butternut Squash:
Carefully peel the butternut squash using a sharp vegetable peeler, then cut it in half lengthwise. Scoop out the seeds with a spoon and discard them. Then, chop the squash into ½-inch cubes. Try to cut them uniformly to ensure even cooking; this also makes for a beautiful presentation! -
Toss with Olive Oil:
In a large bowl, add the cubed squash. Drizzle with two tablespoons of olive oil and toss until everything is evenly coated. Here’s a chef hack: Use your hands! Getting a bit messy brings a personal touch to cooking. -
Season:
Sprinkle the brown sugar, ground cinnamon, salt, and black pepper over the squash cubes. Now, mix it all together once more until the squash is fully coated with the delicious seasonings. Do a taste check here; if you love a bit of sweetness, feel free to add a tad more brown sugar! -
Lay it Out:
Line a baking sheet with parchment paper for easier cleanup. Spread the squash in a single layer on the sheet—avoid overcrowding! The squash needs space to roast properly and develop that lovely caramelized exterior. -
Roast:
Place the baking sheet in your preheated oven and roast for about 25-30 minutes. Give it a stir halfway through to ensure even browning. The magic happens here as the sugars caramelize, transforming the squash into a tender, golden delight. -
Add Butter:
After 25 minutes, pull the baking sheet from the oven and carefully dot the roasted squash with small pieces of butter. This step is optional, but it adds a lovely creaminess that takes the dish to the next level. Return it to the oven for another 5 minutes. -
Finishing Touches:
Once you notice those golden edges and the squash is fork-tender, it’s ready! You can sprinkle it with fresh chopped parsley for a pop of color before serving.
Serving Suggestions
To serve your Brown Sugar Roasted Butternut Squash, style it beautifully on a large platter, allowing the golden pieces to shine. Drizzle with a little balsamic glaze for a gourmet touch or a sprinkle of toasted pumpkin seeds for added crunch. This dish pairs wonderfully with roast chicken or hearty grains like quinoa or farro. It’s equally delightful as a stand-alone dish for a cozy night in!
Recipe Variations
Add your own twist with these creative ideas:
- Maple Glaze: Swap brown sugar for maple syrup for a pure maple flavor.
- Spicy Kick: Add a pinch of cayenne pepper or chili flakes for a warming heat.
- Fall Medley: Combine the butternut squash with other veggies, like Brussels sprouts or carrots, for a colorful fall medley.
- Nutty Flavor: Toss in some chopped pecans or walnuts before roasting for a delicious crunch.
- Sweet Potato Swap: Use sweet potatoes instead of butternut squash for a different, but equally delightful flavor.
Chef’s Notes
When I first made roasted butternut squash, it was purely by accident. I had some squash leftover from a farmers’ market visit, and I thought it would simply roast up nicely. Little did I know the amazing potential hidden inside that vibrant veggie! Over time, I’ve added my flair with brown sugar and spices, turning what was once a humble side into the star of the show.
I still giggle when I recall that first attempt; we ended up with more squash than we could eat, leading to impromptu butternut squash soup for days! But that’s the beauty of cooking—it teaches us to improvise, share, and, most importantly, enjoy those kitchen moments with loved ones.
FAQs and Troubleshooting
-
Why is my butternut squash tough to peel?
Butternut squash can be tricky! Make sure to use a sharp peeler, and if it’s too tough, you could microwave it for a minute to soften it up before peeling. -
What if my squash isn’t tender after 30 minutes?
Oven temperatures can vary, so check for doneness with a fork. If they need more time, pop them back in the oven and keep an eye on it! -
Can I make this ahead of time?
Absolutely! Roast the squash beforehand, cool it, and store it in the fridge. Just reheat it in the oven at 350°F (175°C) when you’re ready to serve. -
What do I do with leftovers?
Leftover butternut squash can be used in salads, stirred into soups, or blended into a creamy pasta sauce. Trust me, the possibilities are endless!
Nutritional Info
While I won’t dwell too much on calories (after all, we’re here for the love of food!), you can expect a good dose of vitamins A and C with a side of healthy fats, thanks to the olive oil and butter—perfect for that cozy autumn warmth.
There you have it! A heartwarming recipe for Brown Sugar Roasted Butternut Squash that not only fills your belly but also nourishes your soul. After all, cooking is all about connecting—first with our ingredients and then with the people we love. So, tie on that apron, savor every moment, and let’s create lasting memories around your table. Happy cooking!
PrintBrown Sugar Roasted Butternut Squash

A warm and cozy fall dish featuring sweet roasted butternut squash enhanced with brown sugar and spices, perfect for autumn dining.
- Prep Time: 15 minutes
- Cook Time: 30 minutes
- Total Time: 45 minutes
- Yield: 4 servings 1x
- Category: Side Dish
- Method: Roasting
- Cuisine: American
- Diet: Vegetarian
Ingredients
- 1 Medium Butternut Squash (cubed)
- 2 Tablespoons Olive Oil (or canola oil)
- 3 Tablespoons Brown Sugar
- 2 Tablespoons Unsalted Butter (or vegan butter)
- 1 Teaspoon Ground Cinnamon
- 1 Teaspoon Salt
- 1 Teaspoon Ground Black Pepper (or white pepper)
- 2 Tablespoons Fresh Parsley (optional, chopped)
Instructions
- Preheat your oven to 400°F (200°C).
- Prepare the butternut squash by peeling, halving, and cubing it into ½-inch pieces.
- Toss the cubed squash with olive oil until evenly coated.
- Season the squash with brown sugar, cinnamon, salt, and black pepper, then mix well.
- Lay the squash on a lined baking sheet in a single layer.
- Roast for 25-30 minutes, stirring halfway through for even browning.
- Add butter to the squash after 25 minutes and return to the oven for 5 more minutes.
- Finish with chopped parsley before serving.
Notes
For a different flavor, try substituting brown sugar with maple syrup or adding other veggies like Brussels sprouts.
Nutrition
- Serving Size: 1 serving
- Calories: 220
- Sugar: 10g
- Sodium: 250mg
- Fat: 10g
- Saturated Fat: 4g
- Unsaturated Fat: 5g
- Trans Fat: 0g
- Carbohydrates: 30g
- Fiber: 4g
- Protein: 2g
- Cholesterol: 15mg
Keywords: butternut squash, roasted vegetables, fall recipes, autumn cooking
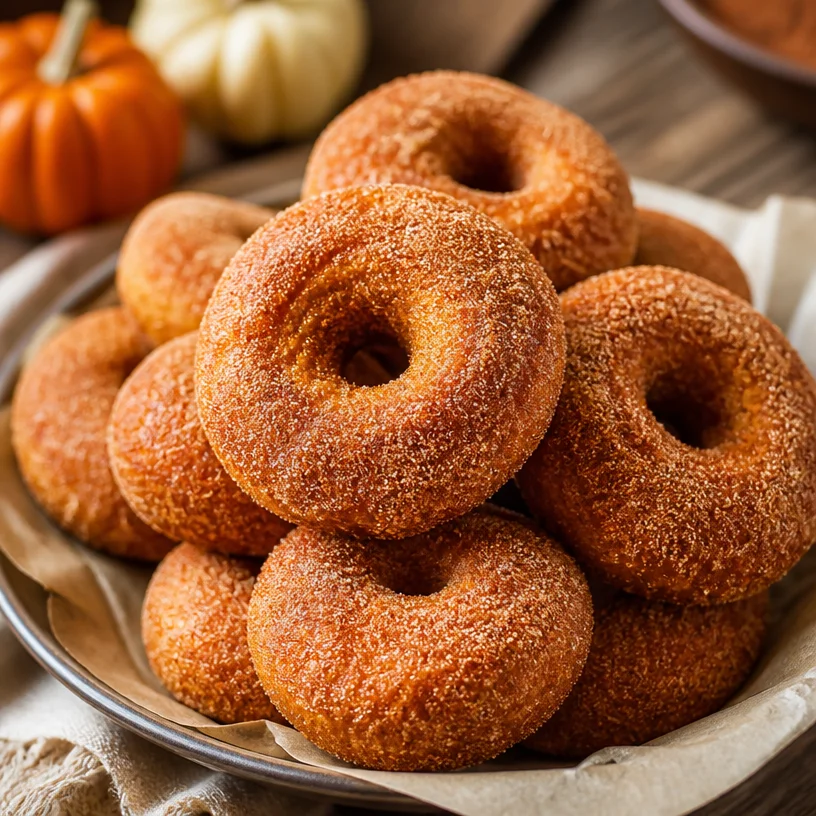
Min Gluten-Free Baked Pumpkin Donuts for Fall Harvest
Baked Pumpkin Donuts: A Slice of Autumn Happiness
Hello, fellow food lovers! I’m so thrilled to share this delightful autumn recipe that’s sure to warm your heart and home—Baked Pumpkin Donuts! There’s something truly special about the aroma of spices wafting through your kitchen, especially as the leaves turn and the air gets crisp. Whether it’s a chilly morning, a festive gathering, or just a cozy afternoon, these gluten-free donuts will be the perfect sweet treat to make you smile.
Now, you might be wondering why I chose to whip up donuts instead of something traditional like cookies or cake. Well, donuts hold a special place in my heart, transporting me back to my childhood when my family would take Sunday morning trips to the local bakery. The sights, sounds, and smells were always so magical. Everyone would be buzzing with excitement, eagerly waiting to pick out their favorite flavors, and I could never resist the spiced pumpkin options!
Fast forward to today, and I’ve developed my own spin on those nostalgic treats. My Baked Pumpkin Donuts are an elevated yet approachable version that’s incredibly straightforward to make. With just the right amount of sweetness, a hint of spice, and that lovely pumpkin flavor, these donuts are soft, moist, and downright delightful—perfect for sharing!
Personal Story
One of my fondest memories involving donuts is pulling them out of the oven on a crisp fall morning, the whole house filling with that cozy scent of pumpkin and warm spices. I remember the first time I made these baked wonders. It was a rainy Saturday, and I was craving something special but didn’t want to brave the storm to hit up the bakery. I gathered the ingredients and set to work, and as I poured the batter into the donut pan, I remembered those Sunday mornings from my childhood—something about that batter reminded me of the unpredictable joy of still-warm donuts with a hot cup of cider.
When those donuts emerged from the oven, golden and fluffy, I knew I had captured that magical moment once again—one bite was all it took to rekindle all those warm feelings. Whether dressed in a simple sprinkle of cinnamon sugar or a drizzle of glaze, these donuts are perfect for enjoying with friends or savoring in solitude with your favorite book. Now, let’s get to creating this delightful treat together!
Ingredients
Here’s what you’ll need to whip up a batch of these scrumptious Baked Pumpkin Donuts:
- 1.5 cups canned pumpkin puree: Make sure you choose pure pumpkin puree, not the sweetened pie filling. This will give you that rich, authentic pumpkin flavor without the extra sugar.
- 4 large eggs (at room temperature): Ensure your eggs are at room temperature for easy mixing and better incorporation into the batter.
- 1/4 cup melted coconut oil: This adds richness and moistness! If you prefer, you can substitute with melted butter or even your favorite neutral oil.
- 1.5 cups granulated sugar: Perfectly sweetens the donuts. You can try coconut sugar for a healthier twist, but it may alter the overall color.
- 1.5 teaspoons baking powder: This helps your donuts rise beautifully. Make sure it’s fresh for the best results!
- 1.5 teaspoons pumpkin pie spice: A vital player in the flavor department! You can make your own blend or sub in cinnamon if needed.
- 1/2 teaspoon ground cinnamon: Because who doesn’t love a little extra warmth?
- 1/4 teaspoon ground nutmeg: This spice adds depth and a comforting warmth that’s quintessentially fall!
- 1/4 teaspoon salt: A little salt enhances all those sweet flavors perfectly.
- 1 + 3/4 cup gluten-free all-purpose flour: Ensures that everyone can enjoy these donuts! Opt for a blend with xanthan gum for the best texture.
- 1/2 teaspoon cornstarch: This helps to create a lighter crumb. You can swap it for arrowroot powder if needed.
- 1 cup granulated sugar (for coating): To roll the donuts in after baking for that extra sweetness.
- 1/4 cup ground cinnamon (for coating): Mix this with the sugar for a classic touch! You’ll feel like a kid again with each bite.
- Melted butter (optional): For brushing the donuts before rolling in the sugar-cinnamon mixture, this adds extra indulgence and helps the coating stick.
Let’s dive into the cooking process, shall we?
Step-by-Step Instructions
1. Preheat and Prepare
Start by preheating your oven to 350°F (175°C). Grease your donut pan with a little coconut oil or non-stick cooking spray. This is key to ensuring your donuts come out perfectly without sticking—nobody likes a donut that won’t release!
2. Mix the Wet Ingredients
In a large mixing bowl, combine the canned pumpkin puree, eggs, and melted coconut oil. Whisk them together until smooth, creating a lovely, creamy base. Tip: I love using a handheld whisk here—it’s quick and gets the job done!
3. Add the Sugars
Next, add in the granulated sugar and mix until combined. The mixture should start to feel slightly thick and luscious. That’s what we want—this is going to lead to moist donuts!
4. Combine the Dry Ingredients
In a separate bowl, whisk together the gluten-free all-purpose flour, baking powder, pumpkin pie spice, ground cinnamon, ground nutmeg, cornstarch, and salt. Mixing these dry ingredients first helps to evenly distribute the baking powder and spices, ensuring uniform flavor throughout.
5. Bring It All Together
Now, gradually add the dry mixture to the wet ingredients, stirring just until combined. Be careful not to overmix here! A few lumps are perfectly fine. You want a soft, thick batter that holds its shape.
6. Fill the Donut Pan
Using a piping bag or a spoon, fill each cavity in the donut pan about 3/4 of the way full. This is where the magic happens, so don’t skimp on the batter!
7. Bake Away!
Place the pan in your preheated oven and bake for 15-18 minutes, or until a toothpick inserted into the center comes out clean. The sweet aroma will start to fill your kitchen, luring everyone in!
8. Cool and Coat
Once they’re out of the oven, let the donuts cool in the pan for about 5 minutes before transferring them to a wire rack. This is important to avoid soggy bottoms! While they’re still warm, brush them lightly with melted butter (if using) and roll them in the sugar-cinnamon mixture.
Serving Suggestions
These gorgeous donuts are best enjoyed fresh! Serve them warm, dusted with cinnamon sugar, along with a hot cup of coffee or a cozy mug of apple cider. Feel free to arrange them on a beautiful cake stand for a lovely presentation at your next brunch, or simply enjoy them as a sweet little pick-me-up during the day!
Recipe Variations
Looking to shake things up? Here are a few creative twists you might enjoy:
- Maple Glaze: Instead of cinnamon sugar, drizzle with a warm maple glaze made from powdered sugar and maple syrup for an extra touch of sweetness.
- Chocolate Drizzle: Top with melted dark chocolate for a decadent twist on your pumpkin delights.
- Nutty Crunch: Add chopped pecans or walnuts to the batter for a lovely crunch and nutty flavor.
- Fillings: Pipe in some cream cheese frosting or a spiced apple filling for a delightful surprise in each donut.
- Dairy-Free: Keep it dairy-free by substituting the butter and eggs for vegan alternatives like aquafaba and plant-based butter.
Chef’s Notes
Pumpkin donuts have come a long way for me! I experimented with various recipes, swapping this and that, before landing on this delightfully gluten-free version. The first time I baked these, I thought I’d lost them to the dark abyss of the oven—half of them stuck to the pan! A quick fix with a little more greasing and the right flour made a world of difference. Now, they pop right out, and every bite takes me back to those cherished bakery memories.
FAQs and Troubleshooting
1. Can I use fresh pumpkin instead of canned?
Absolutely! Just make sure to puree it until smooth and slightly reduce the liquid to avoid a watery batter.
2. Why are my donuts dense?
Overmixing or not using fresh baking powder can lead to dense donuts. Be gentle when combining the wet and dry ingredients.
3. Do I have to use a donut pan?
If you don’t have one, you can use a muffin tin! Just adjust the baking time a bit—muffins may take a few more minutes.
4. Can I freeze these donuts?
Yes! After they’ve cooled, wrap them tightly and store them in the freezer. Thaw at room temperature when you’re ready to enjoy again!
Nutritional Info
While I typically focus on flavorful recipes, I know nutritional value is important too! These baked pumpkin donuts are:
- Gluten-Free: Perfect for those with gluten sensitivities.
- Rich in Fiber: Thanks to the pumpkin, they offer a healthy dose of fiber.
- Low in Fat: With our baked method versus frying, you’re treating yourself to a lighter donut.
So, there you have it! My beloved Baked Pumpkin Donuts are not just a recipe but a heartfelt way to connect with joyful memories and those you love. I hope you enjoy making them as much as I do—so tie on that apron and let the baking begin!
PrintBaked Pumpkin Donuts

Delightful gluten-free baked pumpkin donuts that capture the essence of autumn with spices and pumpkin flavor.
- Prep Time: 15 minutes
- Cook Time: 18 minutes
- Total Time: 33 minutes
- Yield: 12 servings 1x
- Category: Dessert
- Method: Baking
- Cuisine: American
- Diet: Gluten-Free
Ingredients
- 1.5 cups canned pumpkin puree
- 4 large eggs (at room temperature)
- 1/4 cup melted coconut oil
- 1.5 cups granulated sugar
- 1.5 teaspoons baking powder
- 1.5 teaspoons pumpkin pie spice
- 1/2 teaspoon ground cinnamon
- 1/4 teaspoon ground nutmeg
- 1/4 teaspoon salt
- 1 + 3/4 cup gluten-free all-purpose flour
- 1/2 teaspoon cornstarch
- 1 cup granulated sugar (for coating)
- 1/4 cup ground cinnamon (for coating)
- Melted butter (optional)
Instructions
- Preheat your oven to 350°F (175°C) and grease your donut pan.
- Combine the pumpkin puree, eggs, and melted coconut oil in a large mixing bowl and whisk until smooth.
- Add in the granulated sugar and mix until combined.
- Whisk together the gluten-free flour, baking powder, pumpkin pie spice, ground cinnamon, ground nutmeg, cornstarch, and salt in a separate bowl.
- Gradually add the dry mixture to the wet ingredients, stirring just until combined.
- Fill each cavity of the donut pan about 3/4 of the way full with batter.
- Bake for 15-18 minutes or until a toothpick comes out clean.
- Cool in the pan for 5 minutes before transferring to a wire rack and roll in the sugar-cinnamon mixture while warm.
Notes
These donuts are best enjoyed fresh, served warm with a sprinkle of cinnamon sugar.
Nutrition
- Serving Size: 1 donut
- Calories: 180
- Sugar: 20g
- Sodium: 200mg
- Fat: 7g
- Saturated Fat: 4g
- Unsaturated Fat: 3g
- Trans Fat: 0g
- Carbohydrates: 26g
- Fiber: 2g
- Protein: 3g
- Cholesterol: 50mg
Keywords: pumpkin donuts, gluten-free donuts, autumn recipes, baked donuts, fall desserts