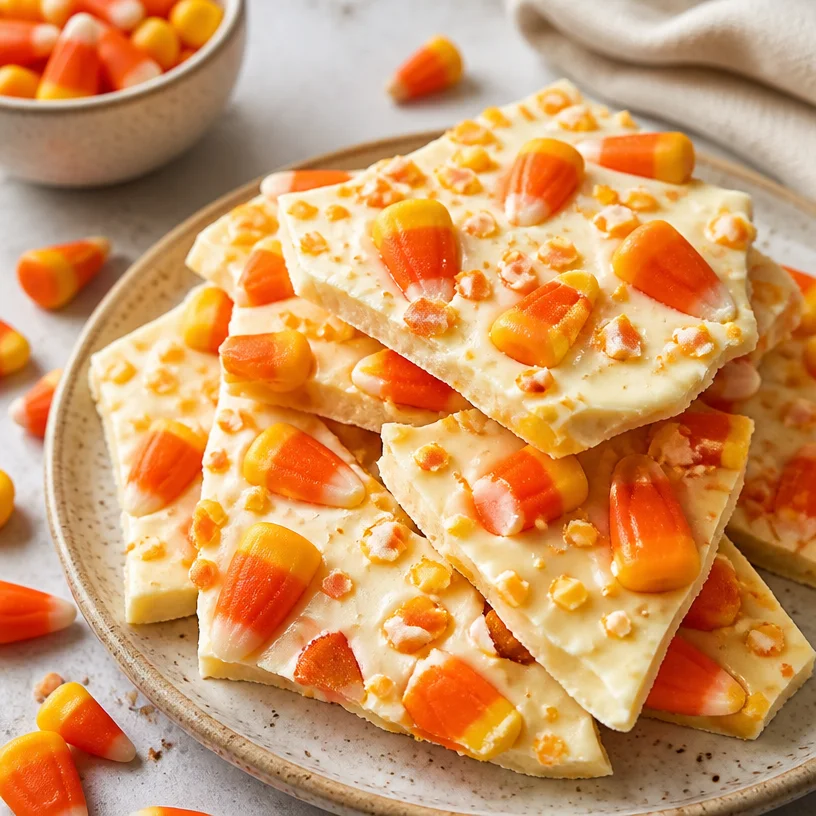
Candy Corn Bark
Sweeten Your Celebrations: The Ultimate Candy Corn Bark Recipe
Hello, my lovely food enthusiasts! Fall is in the air, and that means a host of seasonal delights, spooky decorations, and most importantly, a cornucopia of flavors to whip up in your kitchen. One treat that never fails to make me feel nostalgic and festive is Candy Corn Bark. It’s a delightful, easy-to-make treat that’s perfect for sharing with friends, family, or even just indulging during those cozy movie nights.
In today’s blog post, I’m going to walk you through my fun take on Candy Corn Bark, sharing not just the recipe, but also some heartwarming memories and helpful tips to ensure your bark turns out perfectly every time. So, grab your apron, and let’s create some sweet moments together!
A Sweet Memory: The First Batch of Candy Corn Bark
I still remember the first time I made Candy Corn Bark—talk about a fun culinary adventure! It was a crisp October afternoon, and the leaves outside my kitchen window were dancing like they knew a party was about to happen. I was in college, trying to impress my friends for a Halloween gathering. Having no formal baking education, I turned to my trusty recipe books and decided on this festive, no-bake treat.
As I melted the white chocolate and mixed in the bright orange and yellow candy corn, I couldn’t help but feel like a little kid again. The bright colors reminded me of the joyous anticipation of Halloween and the endless candy trips to the neighborhood. My friends arrived, and as soon as they tasted the bark, their faces lit up. There’s something undeniably magical about seeing others enjoy the fruits of your labor, and that day ignited my passion for sharing simple yet delightful recipes. Now, years later, this candy corn bark has become a staple in my kitchen every fall!
Ingredients
Here’s what you’ll need to create your very own Candy Corn Bark:
-
White Chocolate
- Look for good-quality white chocolate chips or a bar. I recommend pure chocolate over candy melts for a creamier texture and better flavor.
- Substitution Tip: Dark chocolate can be used for a delightful contrast.
-
Candy Corn
- Gotta have this seasonal favorite! Make sure you choose a fresh bag, as stale candy can ruin the texture and taste.
- Substitution Tip: Try swapping some of it out for festive sprinkles for an added crunch and color!
-
Optional Toppings (Feel free to get creative!)
- Nuts: Chopped pecans or almonds can add a nice crunch.
- Dried Fruit: Consider adding cranberries for a tart yet sweet bite.
- Sea Salt: A light sprinkle can enhance all the flavors and balance the sweetness.
Getting familiar with these ingredients will not only streamline your bark-making process but also inspire you to put your unique spin on it!
Step-by-Step Instructions
Let’s dive into the fun part—making the Candy Corn Bark!
Step 1: Prepare Your Workspace
Before you jump in, make sure your workspace is clean and organized. You’ll need a baking sheet lined with parchment paper, a microwave-safe bowl, and a spatula. Trust me, you’ll thank yourself later!
Step 2: Melt the White Chocolate
Place the white chocolate in the microwave-safe bowl. Heat it in 30-second intervals, stirring in between until it’s smooth and fully melted. The key here is to be patient! Chocolate can scorch quickly, and nobody wants burnt chocolate on their bark.
Chef Tip: If you prefer to melt chocolate on the stovetop, use a double boiler. This method ensures even melting without the risk of burning.
Step 3: Pour and Spread
Once melted, pour the white chocolate onto the prepared baking sheet. Use your spatula to spread it out evenly, about 1/4-inch thick.
Step 4: Add the Candy Corn
While the chocolate is still warm, sprinkle the candy corn generously over the top. You want to tuck them in slightly, so they adhere well to the chocolate.
Step 5: Add Optional Toppings
Now’s the time to get creative! If you’re using nuts or dried fruits, sprinkle them over the candy corn. For a touch of sophistication, add a light sprinkle of sea salt.
Step 6: Chill and Set
Place your bark in the refrigerator for about 1 hour, or until it’s completely set. This helps the chocolate firm up and makes it easier to break into pieces later.
Step 7: Break and Enjoy
Once firm, remove the bark from the fridge. Use your hands to break it into irregular pieces—this gives it that rustic, homemade charm.
Chef Hack: If you want uniform pieces, you can score the chocolate with a knife before chilling.
Serving Suggestions
To serve your Candy Corn Bark, place the broken pieces into a decorative bowl, and maybe even add a cute label like "Spooky Snacks" to really get everyone in the Halloween spirit! Pair this treat with warm cider or pumpkin spice lattes for an extra cozy touch.
Recipe Variations
Feeling adventurous? Here are some fun twists you can add to your Candy Corn Bark:
- Add Peanut Butter: Swirl in some creamy peanut butter with the melted chocolate before adding the candy for a sweet and salty surprise.
- Spicy Kick: For those who love a spicy twist, add a sprinkle of cayenne pepper or crushed red pepper flakes for heat!
- Chocolate Drizzle: Once the bark sets, drizzle melted dark chocolate on top for a bit of elegance and additional flavor.
- Nut-Free: Instead of nuts, use toasted coconut for that extra texture without allergens.
Chef’s Notes
Over the years, I’ve experimented with so many variations of Candy Corn Bark. From adding seasonal spices like nutmeg to even trying out different candies for the topping, every batch brings back those fond memories of simplicity and joy. Sometimes it’s the simplest recipes that leave the most lasting impressions!
I also remember one Halloween, my friend accidentally brought candy corn that was leftover from last year! Let’s just say, it was a learning moment about checking expiration dates. Now, that’s a memory that still makes me giggle.
FAQs and Troubleshooting
Q: Why did my chocolate seize up?
- A: Chocolate seizes when it’s exposed to moisture. Always ensure your bowls and utensils are completely dry before melting.
Q: Can I use other types of chocolate?
- A: Absolutely! Milk chocolate or dark chocolate can provide a different taste profile, just keep in mind that the sweetness will change.
Q: How long will the bark last?
- A: If stored properly in an airtight container, your Candy Corn Bark should last about 1-2 weeks—if it lasts that long!
Q: Can I freeze Candy Corn Bark?
- A: Yes, you can freeze it! Just make sure it’s well-wrapped to prevent freezer burn. When you’re ready to enjoy, let it thaw at room temperature.
Nutritional Info
(If applicable, consider inserting generalized information regarding calories, fat content, etc. based on the ingredients you choose.)
So there you have it—your guide to making delightful Candy Corn Bark! Whether you’re planning a Halloween bash, hosting a cozy gathering, or simply indulging in some festive treats, remember that food is all about connection, joy, and creating lasting memories. Thank you for joining me in this sweet adventure; I can’t wait to hear about your candy corn creations!
Now, tie on that apron, get your kitchen filled with the delightful aroma of melted chocolate, and let’s bring some sweet cheer to this season! Happy baking! 🍬✨
PrintCandy Corn Bark

A nostalgic and festive treat perfect for Halloween gatherings, made with white chocolate and candy corn.
- Prep Time: 15 minutes
- Cook Time: 10 minutes
- Total Time: 25 minutes
- Yield: 8 servings 1x
- Category: Dessert
- Method: No-Bake
- Cuisine: American
- Diet: Vegetarian
Ingredients
- 2 cups White Chocolate Chips
- 2 cups Candy Corn
- Optional Toppings:
- Nuts (chopped pecans or almonds)
- Dried Fruit (cranberries)
- Sea Salt
Instructions
- Prepare your workspace by cleaning and organizing the area, ensuring you have a baking sheet lined with parchment paper, a microwave-safe bowl, and a spatula.
- Melt the white chocolate in the microwave-safe bowl in 30-second intervals, stirring in between until smooth and fully melted.
- Pour the melted white chocolate onto the prepared baking sheet and use a spatula to spread it out evenly, about 1/4-inch thick.
- Add the candy corn while the chocolate is still warm, tucking them in slightly to adhere to the chocolate.
- Add optional toppings like nuts, dried fruits, or a sprinkle of sea salt for added flavor.
- Chill the bark in the refrigerator for about 60 minutes until set.
- Break the chilled bark into irregular pieces and enjoy!
Notes
For uniform pieces, consider scoring the chocolate with a knife before chilling. Store in an airtight container for 1-2 weeks.
Nutrition
- Serving Size: 1 piece
- Calories: 250
- Sugar: 30g
- Sodium: 50mg
- Fat: 12g
- Saturated Fat: 7g
- Unsaturated Fat: 4g
- Trans Fat: 0g
- Carbohydrates: 35g
- Fiber: 0g
- Protein: 2g
- Cholesterol: 10mg
Keywords: Candy Corn, Halloween Treats, No-Bake Recipes
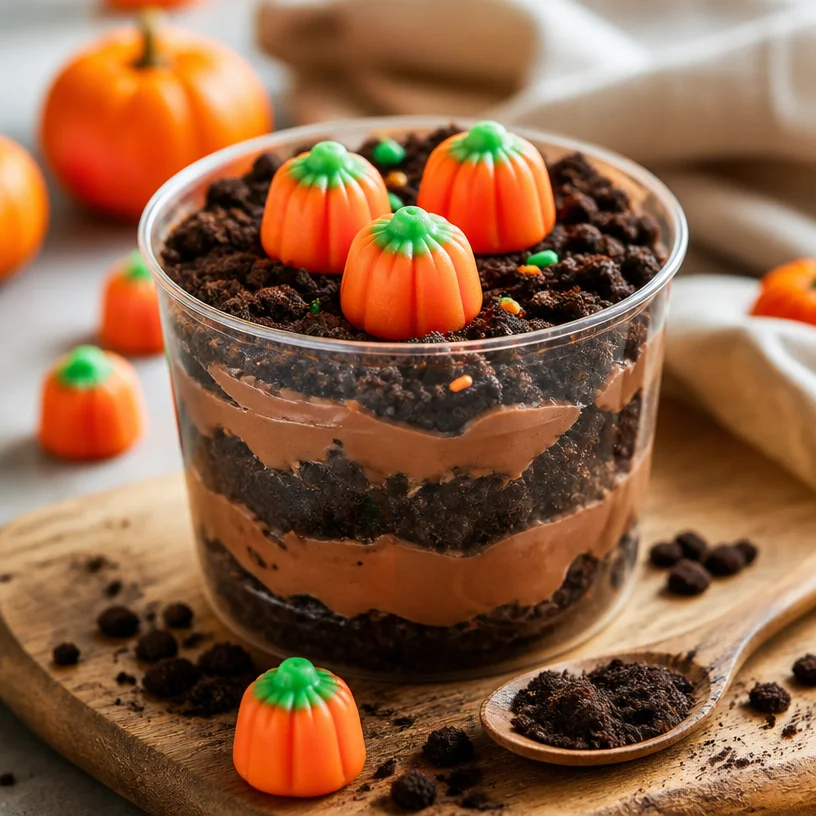
No-Bake Pumpkin Patch Dirt Cups for Easy Fall Treats
Pumpkin Patch Dirt Cups: A Sweet Autumn Treat
Hello, fellow food lovers! As the leaves start to turn and the air takes on that crisp, cozy vibe, there’s nothing quite like indulging in seasonal treats that capture the essence of fall. Today, I’m diving into a nostalgic dessert that whisked me back to my childhood: Pumpkin Patch Dirt Cups. These delightful little cups are a playful twist on traditional dirt cups, perfect for themed parties, Halloween gatherings, or just a sweet afternoon snack.
Imagine mini chocolate pudding cups topped with crumbled cookies, adorned with adorable candy pumpkins. It’s like a little piece of autumn served right in your hands! The balance of creamy chocolate with the crunch of cookie crumbs is an adventure for your taste buds. Plus, it’s hard not to smile when you see the vibrant candy pumpkins peeking out from the “dirt”! Let’s get our aprons on and jump into this fun recipe that’s as easy to make as it is delicious.
A Fond Memory: The Sweetness of Autumn
I have such a fond memory tied to these Pumpkin Patch Dirt Cups! The first time I made them was at a friend’s fall festival years ago. It was a crisp October afternoon, and the air was filled with the fragrant scent of cinnamon and nutmeg. We gathered in her kitchen, laughter echoing while we prepped for the festivities ahead. I vividly remember the vibrant autumn decorations, the hay bales stacked outside, and the anticipation of the spooky-themed party later that evening.
We took a break from carving pumpkins to whip up these adorable cups together, chatting about everything from our favorite seasonal flavors to our childhood Halloween memories. I can still recall the joy on everyone’s faces when they took their first spoonful, eyes lighting up like little pumpkins! It was more than just a dessert; it was a shared experience, a moment of creativity that brought us closer and celebrated the essence of fall. And now, I’m thrilled to share this recipe with you, so you can create those same joyful moments in your own kitchen!
Ingredients
Here’s what you’ll need to create your very own Pumpkin Patch Dirt Cups:
-
Chocolate Pudding
- This creamy delight serves as the base of our dirt cups. You can use store-bought pudding for convenience or make a homemade version for an extra touch of love!
-
Chocolate Cookie Crumbs
- Crushed chocolate sandwich cookies (like Oreos) provide that irresistible "dirt" texture. If you prefer a slightly different flavor, graham cracker crumbs can be a fantastic alternative for an earthy base.
-
Candy Pumpkins
- These adorable little candies are the cutest part of this dish! They add a pop of color and a playful touch. If candy pumpkins aren’t available, you could substitute with gummy worms or edible flowers for a unique twist.
-
Whipped Cream (optional)
- Adding a dollop of whipped cream on top brings a light, airy texture that complements the dense chocolate pudding perfectly. You can use store-bought or homemade whipped cream, just like Grandma used to make.
A Chef’s Tip:
Feel free to get creative with the toppings! Crushed nuts, sprinkles, or even caramel drizzle can add that extra flair to your pumpkin patch dirt cups.
Step-by-Step Instructions
Now, let’s get cooking! Follow these steps to create your own Pumpkin Patch Dirt Cups:
-
Prepare the Pudding
- If you’re going the homemade route, start by making your chocolate pudding according to your recipe. This usually involves mixing cocoa powder, sugar, milk, and cornstarch over medium heat until it thickens. If using a store-bought version, simply follow the instructions on the package.
-
Chill the Pudding
- Once your pudding is ready, transfer it into a bowl, cover it with plastic wrap, and pop it in the refrigerator. This step is essential for achieving that smooth, cool texture—about 30 minutes should do the trick!
-
Crush the Cookies
- While the pudding is chilling, grab your chocolate sandwich cookies and crush them into fine crumbs. You can do this by placing them in a zip-top bag and using a rolling pin or just pulsing them in a food processor. Don’t worry about making perfect crumbs; a bit of texture adds charm!
-
Assemble the Cups
- Once your pudding is chilled, it’s time to fill your cups. Start by adding a generous layer of chocolate pudding to the bottom of each cup. Use a small spoon or a piping bag for easy filling!
-
Add Cookie Crumbs
- Next, sprinkle a layer of crushed chocolate cookies on top of the pudding. The key here is to create nice layers, just like a mini parfait!
-
Repeat the Layers
- Add another layer of pudding followed by more cookie crumbs. You can keep layering until you reach the top of your cups, leaving just enough space to add those cute candy pumpkins!
-
Finish with Whipped Cream
- If you’re using whipped cream, add a little dollop on the very top of your pumpkin patch dirt cups. This will give it a wonderful fluffy finish and makes it even more inviting.
-
Decorate with Candy Pumpkins
- Finally, crown your creation with candy pumpkins, placing them right on top of the whipped cream. Feel free to arrange them however you like—it’s all about the presentation and having fun!
-
Chill Again (if desired)
- For the best flavor and texture, let your dirt cups sit in the fridge for a bit before serving. This allows the flavors to meld beautifully together.
-
Serve and Enjoy!
- When you’re ready to serve, bring your delightful pumpkin patch dirt cups to the table. Watch as faces light up when they see these cute treats—it’s heartwarming!
Serving Suggestions
To serve your Pumpkin Patch Dirt Cups, place them on a decorative platter or inside an autumn-themed basket for a charming presentation. You can nestle them in a bed of hay or faux leaves to enhance the “pumpkin patch” feel. Provide small spoons for your guests and let the digging in begin! You might also consider pairing this dessert with hot apple cider or a sweet, spiced chai—perfect for enhancing the fall-themed experience.
Recipe Variations
Here are a few fun twists to try with your Pumpkin Patch Dirt Cups:
- Pumpkin Spice Pudding: Add a teaspoon of pumpkin spice to your chocolate pudding for a delightful flavor twist.
- Nutty Delight: Mix in some chopped nuts (like pecans or walnuts) into the cookie crumb layer for added texture and flavor.
- Guilty Pleasure: Drizzle a little melted chocolate or caramel over the top for an extra sweet touch.
- Seasonal Swaps: Instead of candy pumpkins, use mini ghost-shaped candies for a Halloween spin or chocolate-covered raisins for an earthy look.
Chef’s Notes
These Pumpkin Patch Dirt Cups have evolved over time; I’ve played with different layers and toppings to find the perfect combination that delights both kids and adults alike. One time, I had a little mishap when I accidentally grabbed the cayenne pepper instead of the cocoa powder for a batch—let’s just say it wasn’t our most successful dessert! But that’s the beauty of cooking: sometimes the best memories come from unexpected moments.
I’ve found that these cups are not just a dessert; they become an experience! The joy of creating and sharing something playful keeps everyone smiling, and I adore how they spark conversations and laughter.
FAQs and Troubleshooting
Q: Can I make this recipe ahead of time?
Absolutely! These dirt cups can be prepared a day in advance. Just keep them covered in the fridge, and they’ll still taste fabulous the next day.
Q: My pudding isn’t thickening; what went wrong?
If your pudding isn’t thickening, it likely needs more time on the heat, or the cornstarch might not have been fully incorporated. Make sure to stir continuously and keep an eye on it.
Q: What if I can’t find candy pumpkins?
No worries! You can substitute them with gummy worms, chocolate fingers, or even sprigs of mint for a fresh touch. The important thing is to keep it fun!
Q: Can I use dairy-free alternatives?
Absolutely! You can use non-dairy milk and whipped cream to make this a dairy-free dessert. Look for dairy-free chocolate pudding for the best results.
Nutritional Info
While indulgent treats like these aren’t usually considered "health food," moderation is the key!
- Serving Size: 1 cup
- Calories: Approx. 250
- Total Fat: 12 g
- Saturated Fat: 6 g
- Carbohydrates: 37 g
- Sugars: 24 g
- Protein: 3 g
As you savor these delicious Pumpkin Patch Dirt Cups, remember that the joy of cooking and sharing treats is what matters most! So, tie on that apron, gather your loved ones, and let’s create beautiful moments around the table. Happy cooking!
PrintPumpkin Patch Dirt Cups
Delightful mini chocolate pudding cups topped with cookie crumbs and candy pumpkins, perfect for Halloween gatherings and fall celebrations.
- Prep Time: 15 minutes
- Cook Time: 10 minutes
- Total Time: 45 minutes
- Yield: 4 servings 1x
- Category: Dessert
- Method: Chilling
- Cuisine: American
- Diet: Vegetarian
Ingredients
- 2 cups Chocolate Pudding
- 1 cup Chocolate Cookie Crumbs (like Oreos)
- 1 cup Candy Pumpkins
- 1 cup Whipped Cream (optional)
Instructions
- Prepare the pudding by mixing cocoa powder, sugar, milk, and cornstarch over medium heat until thickened.
- Chill the pudding in the refrigerator for about 30 minutes.
- Crush the chocolate sandwich cookies into fine crumbs.
- Assemble the cups by adding layers of chocolate pudding and cookie crumbs in serving cups.
- Add a layer of whipped cream on top if desired.
- Decorate with candy pumpkins on top of the whipped cream.
- Chill again if desired to meld flavors.
- Serve and enjoy!
Notes
Feel free to customize toppings with nuts, sprinkles, or caramel drizzle. Perfect for themed parties and gatherings.
Nutrition
- Serving Size: 1 cup
- Calories: 250
- Sugar: 24g
- Sodium: 200mg
- Fat: 12g
- Saturated Fat: 6g
- Unsaturated Fat: 4g
- Trans Fat: 0g
- Carbohydrates: 37g
- Fiber: 2g
- Protein: 3g
- Cholesterol: 15mg
Keywords: pumpkin treats, Halloween dessert, nostalgic dessert, fall snacks
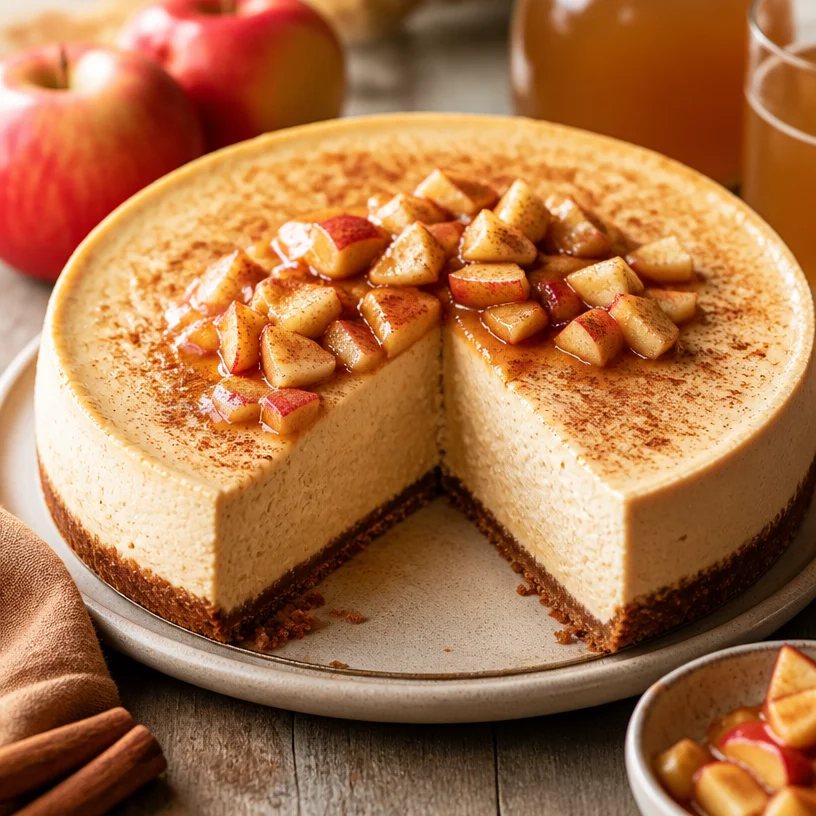
No-Bake Apple Cider Cheesecake: Quick Autumn Dessert
Apple Cider Cheesecake: A Sweet Fall Delight
Hello, lovely food lovers! Today, we’re diving into a dessert that perfectly captures the essence of fall—the delightful Apple Cider Cheesecake. Picture this: silky cream cheese blended with the rich flavors of reduced apple cider, creating a creamy, luscious filling that’s both comforting and exciting. This is a treat that not only surprises your taste buds but also feels like a warm hug on a crisp autumn day. Let’s roll up our sleeves, turn on our ovens, and embark on this culinary adventure together!
A Bite of Nostalgia
As I reflect on the magic of fall, I can’t help but recall a particular memory that brings forth a smile. Back in college, I decided to host my first “Friendsgiving.” It was an ambitious endeavor, and my dear friends were my taste testers and sous-chefs! Among the savory dishes, I wanted dessert to be a showstopper. Inspired by the bright colors of autumn, I experimented with flavors of crisp apples and warm spices.
The night was filled with laughter, the aroma of baking, and a touch of chaos. When I unveiled my Apple Cider Cheesecake, the room fell quiet. I watched in joy as my friends savored each bite, their eyes lighting up with delight. That moment—a sweet blend of friendship, food, and joyous experimentation—made me realize that cooking brings people together like nothing else. Since then, I’ve perfected this recipe and it has remained a beloved staple in my kitchen every fall. Let’s create that same magic in your home!
Ingredients
Here’s what you’ll need to create this captivating Apple Cider Cheesecake:
-
2 cups graham cracker crumbs
A classic base for any cheesecake. You can substitute with crushed cookies like Oreos or Nilla wafers for a unique twist! -
1/2 cup unsalted butter, melted
Buttery richness binds the crust together. If you prefer, coconut oil or a dairy-free butter can work well too! -
1/4 cup sugar
This adds sweetness to the crust. Feel free to use brown sugar for a deeper flavor. -
4 (8 oz) packages cream cheese, softened
The star of the show! Creamy and rich, but don’t skimp on the softness—it helps with a smooth filling. Neufchâtel cheese can be a lighter option. -
1 cup sugar
We need this for the filling. You can swap it with a natural sweetener like agave syrup, adjusting the liquid content accordingly. -
1 teaspoon vanilla extract
The secret to enhancing all that creamy flavor! Pure vanilla extract is best, but imitation will work in a pinch. -
4 large eggs
They provide structure. Room temperature eggs mix better, creating a creamier texture! -
1 cup reduced fresh apple cider
This is where the magic happens! Reduce fresh apple cider on the stovetop for a concentrated flavor. If you can’t find fresh cider, bottled will do, but look for varieties without added sugars or preservatives. -
1/2 teaspoon cinnamon
A must-have spice for that warm fall vibe. Try substituting it with pumpkin pie spice if you love a mix of flavors! -
1/4 teaspoon nutmeg
Adding depth and complexity. It’s powerful, so a little goes a long way! -
1/4 teaspoon salt
To balance the sweetness. Sea salt can elevate the flavor even more!
Step-by-Step Instructions
Alright, let’s get cooking! Here are the detailed steps to create your Apple Cider Cheesecake:
-
Preheat the Oven
Preheat your oven to 325°F (160°C). This is important for a smooth and creamy texture, so don’t skip this step! -
Prepare the Crust
In a mixing bowl, combine the graham cracker crumbs, melted butter, and 1/4 cup sugar. Mix until it resembles wet sand. If you want a touch of spice, you can add a pinch of cinnamon here!
Tip: Using a glass to press down the crumbs into your springform pan makes for a beautifully even crust! -
Assemble the Base
Firmly pack the crust mixture into the bottom of a 9-inch springform pan. Bake for about 10 minutes, then let it cool while you prepare the filling. -
Blend the Filling
In a large mixing bowl, beat the softened cream cheese with an electric mixer until smooth. Gradually add in 1 cup of sugar, followed by the vanilla extract. Scrape down the sides of the bowl to ensure all the cream cheese is incorporated.
Hack: Ensure your cream cheese is at room temperature for a smoother texture—no one likes lumps in their cheesecake! -
Add the Eggs
Briskly add the eggs, one at a time, mixing just until combined after each addition. Overmixing can lead to cracks in your cheesecake, so be gentle! -
Incorporate Apple Cider and Spices
Slowly mix in the reduced apple cider, cinnamon, nutmeg, and salt. Beat until just combined. This is where the magic of fall comes alive in your batter!
Chef insight: Make sure your reduced apple cider is cooled before adding it to the mixture to avoid cooking the eggs! -
Pour and Bake
Pour the cheesecake filling over the cooled crust in the springform pan. Gently tap the pan on the counter to remove any air bubbles. Bake in your preheated oven for 55-60 minutes, or until the edges are set but the center still has a slight jiggle. -
Cool and Chill
Turn off the oven and crack the door to let the cheesecake cool gradually for about an hour. This helps prevent cracking! Once completely cool, refrigerate for at least 4 hours, preferably overnight.
Funny note: Cooling cheesecakes in the fridge is like letting wine breathe—give it time to shine!
Serving Suggestions
To serve your gorgeous Apple Cider Cheesecake, carefully release it from the springform pan. Consider garnishing with a dollop of whipped cream, a sprinkle of cinnamon, or even some thinly sliced apples drizzled with caramel sauce for that extra “wow” factor!
Recipe Variations
Feeling adventurous? Here are some creative twists to elevate your cheesecake:
- Caramel Swirl: Gently fold in caramel sauce before pouring the filling into the crust.
- Nutty Crust: Add finely chopped pecans or walnuts to your graham cracker crust for extra crunch.
- Vegan Version: Substitute cream cheese for a plant-based alternative, use flax eggs, and coconut cream instead of dairy.
- Spiced Rum Flavor: Add a splash of spiced rum to the filling for a warm, holiday-inspired kick.
- Chocolate Drizzle: Merely drizzle melted chocolate over the chilled cheesecake for a sweet contrast!
Chef’s Notes
This Apple Cider Cheesecake has been a part of my fall celebration for years, evolving as I’ve experimented with flavors and techniques. One memorable baking disaster included using too much apple cider—let’s just say that resulted in a soggy cheesecake (delicious, but not exactly aesthetic). Every recipe comes with its trials, but that’s what makes it fun! I love sharing these stories because cooking is about learning—one cheesecake at a time!
FAQs and Troubleshooting
1. My cheesecake cracked! What went wrong?
Cracking usually occurs due to overmixing or baking at too high of a temperature. Make sure to remove it from the oven while the center is still slightly jiggly, and allow it to cool gradually.
2. Can I make this cheesecake ahead of time?
Absolutely! In fact, this cheesecake tastes even better the day after; flavors meld beautifully in the fridge.
3. How can I know when my cheesecake is done?
Check for doneness by gently shaking the pan; it should be set around the edges but slightly wobbly in the center.
4. What should I do if my cheesecake is too watery?
This can happen if the cider isn’t reduced enough. Make sure you simmer the cider until it thickens before adding it to the filling, creating that concentrated apple goodness!
Nutritional Info
While I believe in enjoying dessert without guilt, I understand that nutritional info can be helpful. Here’s an estimated nutritional breakdown per slice (assuming 12 slices):
- Calories: 350
- Protein: 6g
- Carbs: 30g
- Fat: 25g
- Sugar: 18g
Indulging in a slice of Apple Cider Cheesecake is truly an experience. It brings warmth, comfort, and a reminder that good food is about connection. So, grab your apron and embrace the flavors of fall, one cheesecake at a time. Until next time, happy baking!
PrintApple Cider Cheesecake
A delightful cheesecake capturing the essence of fall with creamy filling and reduced apple cider.
- Prep Time: 15 minutes
- Cook Time: 70 minutes
- Total Time: 85 minutes
- Yield: 12 servings 1x
- Category: Dessert
- Method: Baking
- Cuisine: American
- Diet: Vegetarian
Ingredients
- 2 cups graham cracker crumbs
- 1/2 cup unsalted butter, melted
- 1/4 cup sugar
- 4 (8 oz) packages cream cheese, softened
- 1 cup sugar
- 1 teaspoon vanilla extract
- 4 large eggs
- 1 cup reduced fresh apple cider
- 1/2 teaspoon cinnamon
- 1/4 teaspoon nutmeg
- 1/4 teaspoon salt
Instructions
- Preheat your oven to 325°F (160°C).
- In a mixing bowl, combine the graham cracker crumbs, melted butter, and 1/4 cup sugar. Mix until it resembles wet sand.
- Firmly pack the crust mixture into the bottom of a 9-inch springform pan. Bake for about 10 minutes, then let it cool.
- In a large mixing bowl, beat the softened cream cheese with an electric mixer until smooth. Gradually add in 1 cup of sugar, followed by the vanilla extract.
- Briskly add the eggs, one at a time, mixing just until combined after each addition.
- Slowly mix in the reduced apple cider, cinnamon, nutmeg, and salt.
- Pour the cheesecake filling over the cooled crust in the springform pan.
- Bake in your preheated oven for 55-60 minutes, or until the edges are set but the center still has a slight jiggle.
- Turn off the oven and crack the door to let the cheesecake cool gradually for about an hour. Once cool, refrigerate for at least 4 hours, preferably overnight.
Notes
Serve with a dollop of whipped cream, cinnamon, or thinly sliced apples drizzled with caramel sauce.
Nutrition
- Serving Size: 1 slice
- Calories: 350
- Sugar: 18g
- Sodium: 200mg
- Fat: 25g
- Saturated Fat: 15g
- Unsaturated Fat: 8g
- Trans Fat: 0g
- Carbohydrates: 30g
- Fiber: 1g
- Protein: 6g
- Cholesterol: 100mg
Keywords: cheesecake, apple cider, fall dessert, Thanksgiving, baking
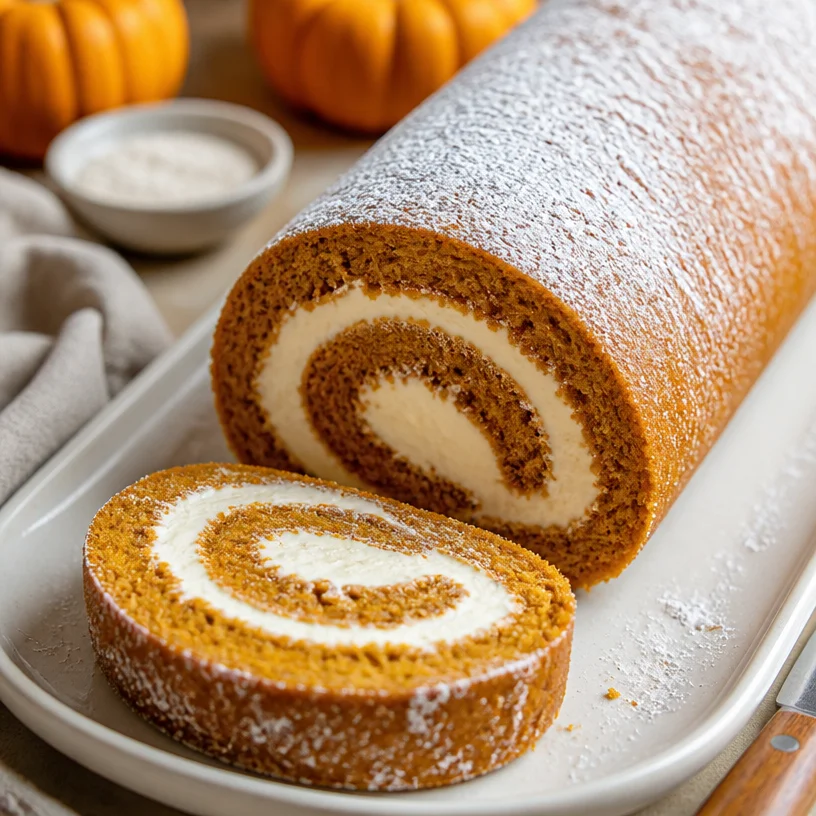
Ingredient Pumpkin Roll with Cream Cheese Filling
The Easy Pumpkin Roll: A Slice of Autumn Heaven
Hello, fellow food lovers! As the leaves start to turn and the air gets that lovely crispness, there’s something truly special about embracing the fall season with rich flavors, warm spices, and cozy treats. Today, I want to share with you one of my all-time favorite desserts: the Easy Pumpkin Roll! This delectable creation is not just a treat; it’s a celebration of autumn that brings back sweet memories and invites friends to gather around the table.
A Slice of Nostalgia
One of my most cherished memories surrounding the pumpkin roll goes back to my childhood. Every autumn, my grandmother would pull out her trusty old recipe book, the kind with smudged pages and handwritten notes. It was filled with her best-kept secrets, and on rainy afternoons, we’d huddle in the kitchen, the warm smell of cinnamon and nutmeg wrapping around us like a soft blanket.
We’d spend hours together, laughing as we whisked, folded, and rolled, all while she shared stories about how she learned to bake from her own grandmother. The pumpkin roll was always a highlight — not only for its indulgent flavors but for the laughter and love that went into crafting it. There’s nothing quite like sharing a slice with family and friends, knowing that each bite carries with it a piece of history and tradition.
So, let’s ditch any doubts you might have about baking and dive into this joyful adventure. Trust me; you’re going to love this delightful pumpkin roll!
Ingredients
To make the magic happen, gather these ingredients:
-
1 cup pumpkin puree
Use canned for convenience or make your own by roasting and pureeing fresh pumpkin. It adds a lovely depth of flavor! -
3/4 cup all-purpose flour
For a gluten-free option, substitute with a 1:1 gluten-free flour blend. Just be mindful to check the blend’s rising agents. -
1 teaspoon baking powder
This little guy is essential for leavening, giving your roll a nice rise. Make sure it’s fresh for best results! -
1 teaspoon baking soda
Works hand-in-hand with the pumpkin to lighten the batter and help it rise perfectly — no dense rolls here! -
1/2 teaspoon salt
Don’t skip this one! Salt enhances flavors and balances the sweetness beautifully. -
1 teaspoon ground cinnamon
Warm and comforting, it’s the quintessential fall spice. Feel free to up the ante a bit if you’re a cinnamon lover! -
1/2 teaspoon ground nutmeg
A pinch of nutmeg adds depth to the spice profile. Freshly grated nutmeg offers an unbeatable flavor if you have it on hand! -
3 large eggs
These help with binding the ingredients together. Ensure they are room temperature to encourage even mixing. -
1 cup granulated sugar
This creates a sweet, tender cake. For a little twist, you can substitute half of it with brown sugar for a deeper flavor. -
1 teaspoon vanilla extract
Vanilla enhances the overall flavor — pure vanilla extract is the way to go for the best taste! -
1 cup cream cheese
Rich and delicious, the cream cheese filling is a game changer! Soften it at room temperature for easy mixing. -
1/2 cup powdered sugar
This sweetens the cream cheese filling perfectly and gives it a smooth texture. -
1/4 cup unsalted butter
Softer than room temperature will help your filling blend easily — and butter makes everything better! -
1 teaspoon vanilla extract (for filling)
Adding a second splash of vanilla to the filling keeps things cohesive and adds extra yum!
Step-by-Step Instructions
Now that we’ve rounded up our ingredients, it’s time to get our bake on! Follow these easy steps for your new favorite dessert:
-
Preheat the Oven
Preheat your oven to 375°F (190°C). Don’t skip this step; a hot oven ensures a quick rise for your roll. -
Prepare the Pan
Grease a 15×10-inch jelly roll pan (or a rimmed baking sheet) and line it with parchment paper. A light spray of non-stick cooking spray on the parchment will help the pumpkin roll slide right out later, making your life easier! -
Mix the Batter
In a large bowl, whisk together the pumpkin puree, eggs, sugar, and vanilla extract until smooth. This is where the magic begins! The vibrant color of the pumpkin will brighten your bowl, making it hard to resist tasting. -
Combine the Dry Ingredients
In a separate bowl, whisk together the flour, baking powder, baking soda, salt, cinnamon, and nutmeg. This step ensures those dry ingredients are evenly distributed before mixing in! -
Combine Wet and Dry Chunks
Gradually add the dry mixture to the pumpkin mix, carefully folding until just combined. Avoid overmixing, or your roll may end up a bit dense! -
Spread Evenly in the Pan
Pour the batter into the prepared jelly roll pan, using a spatula to spread it into an even layer. This will help ensure an even bake. -
Bake to Perfection
Slide the pan into your preheated oven and bake for 15–20 minutes, or until the cake springs back when lightly touched. Keep an eye on it — you want it just set but not overbaked. -
Roll it Up!
As soon as the cake comes out, sprinkle powdered sugar over a clean kitchen towel laid out on a flat surface. This prevents sticking and adds a lovely sweetness. Invert the hot cake onto the towel, gently peeling off the parchment. Starting at one short end, tightly roll the cake up with the towel inside. This step is crucial for shaping your roll. -
Cool it Down
Allow the rolled cake to cool completely in the towel. This usually takes about 30 minutes — use this time to prepare your filling. -
Whip up the Filling
In a medium bowl, mix together the softened cream cheese, powdered sugar, butter, and vanilla extract until creamy and smooth. Take a moment to savor this delicious filling — you might be tempted to taste test! -
Unroll and Fill
Once the cake has cooled, carefully unroll it from the towel. Spread the cream cheese filling evenly over the surface of the cake, leaving a small border. Roll the cake back up (without the towel) and wrap it in plastic wrap. -
Chill to Set
Refrigerate the pumpkin roll for at least an hour before slicing. This helps the filling set and makes serving easier!
Serving Suggestions
To serve your beautiful pumpkin roll, slice it into thick rounds and arrange it on a radiant platter. Dust a little powdered sugar on top for an elegant finish. You could also drizzle some caramel sauce or chocolate on top for an added flair. Pair it with a warm drink like spiced chai or cozy hot chocolate, and you’ll have a perfect fall treat!
Recipe Variations
- Chocolate Pumpkin Roll: Swirl in some cocoa powder for a chocolatey twist on this classic recipe.
- Nutty Crunch: Add chopped walnuts or pecans into the filling for a delightful crunch that complements the creamy texture.
- Dairy-Free Option: Substitute the cream cheese with dairy-free cream cheese and use coconut cream instead of butter for a tasty vegan version.
- Gluten-Free Delight: Use a gluten-free flour blend and ensure all other ingredients are gluten-free for a safe treat for everyone.
- Spiced Up: Add an extra pinch of cloves or ginger for a more intense autumn flavor — perfect for those who adore warm spices!
Chef’s Notes
Baking this pumpkin roll has brought me so much joy over the years. It started as an annual autumn ritual with my grandmother, and now it’s a tradition I cherish with my friends and family. Slicing into this roll and watching the filling peek out brings back fond memories every time. And did I mention how versatile it is? You can tweak it to perfection, depending on what you have in your pantry or the vibe you’re going for!
FAQs and Troubleshooting
1. Why did my pumpkin roll crack?
Cracks often occur if the cake is overbaked or rolled too tightly. To prevent cracks, keep an eye on your baking time and maintain a gentle roll when shaping.
2. Can I make this ahead of time?
Absolutely! The pumpkin roll can be made a day in advance. Just ensure to wrap it well in plastic to prevent drying out.
3. How do I store leftovers?
Store any leftover pumpkin roll in the refrigerator wrapped tightly in plastic wrap. It should be fine for up to a week.
4. What if my roll won’t unroll?
If your roll feels too stubborn, it might not have cooled properly before you attempt to unroll it. Just be gentle with it, and don’t force it.
Nutritional Info
While I don’t provide detailed nutritional breakdowns, I encourage balance. Enjoy this treat mindfully and pair it with seasonal fruits or a scoop of ice cream!
What are you waiting for? Grab your apron, channel that autumn spirit, and get ready to impress your loved ones with this joyful, easy pumpkin roll that’s perfect for any occasion. Let’s make some delicious memories together!
PrintEasy Pumpkin Roll
A delightful autumn dessert featuring a pumpkin-spiced cake rolled with a creamy filling, perfect for gatherings.
- Prep Time: 15 minutes
- Cook Time: 20 minutes
- Total Time: 35 minutes
- Yield: 8 servings 1x
- Category: Dessert
- Method: Baking
- Cuisine: American
- Diet: Vegetarian
Ingredients
- 1 cup pumpkin puree
- 3/4 cup all-purpose flour
- 1 teaspoon baking powder
- 1 teaspoon baking soda
- 1/2 teaspoon salt
- 1 teaspoon ground cinnamon
- 1/2 teaspoon ground nutmeg
- 3 large eggs
- 1 cup granulated sugar
- 1 teaspoon vanilla extract
- 1 cup cream cheese
- 1/2 cup powdered sugar
- 1/4 cup unsalted butter
- 1 teaspoon vanilla extract (for filling)
Instructions
- Preheat your oven to 375°F (190°C).
- Grease a 15×10-inch jelly roll pan and line it with parchment paper.
- Whisk together the pumpkin puree, eggs, sugar, and vanilla extract until smooth.
- In a separate bowl, whisk together the flour, baking powder, baking soda, salt, cinnamon, and nutmeg.
- Gradually add the dry mixture to the pumpkin mix, folding until just combined.
- Pour the batter into the prepared jelly roll pan, spreading it into an even layer.
- Bake for 15–20 minutes, or until the cake springs back when lightly touched.
- Sprinkle powdered sugar over a clean kitchen towel and invert the hot cake onto the towel.
- Roll the cake up with the towel inside, starting from one short end.
- Cool the rolled cake completely in the towel for about 30 minutes.
- Mix the softened cream cheese, powdered sugar, butter, and vanilla extract until creamy.
- Unroll the cake from the towel, spread the cream cheese filling evenly, and then roll it back up without the towel.
- Refrigerate for at least an hour before slicing.
Notes
Serve with a dusting of powdered sugar, caramel drizzle, or chocolate sauce.
Nutrition
- Serving Size: 1 slice
- Calories: 300
- Sugar: 20g
- Sodium: 300mg
- Fat: 10g
- Saturated Fat: 4g
- Unsaturated Fat: 6g
- Trans Fat: 0g
- Carbohydrates: 45g
- Fiber: 2g
- Protein: 5g
- Cholesterol: 80mg
Keywords: pumpkin roll, autumn dessert, fall baking, easy recipes
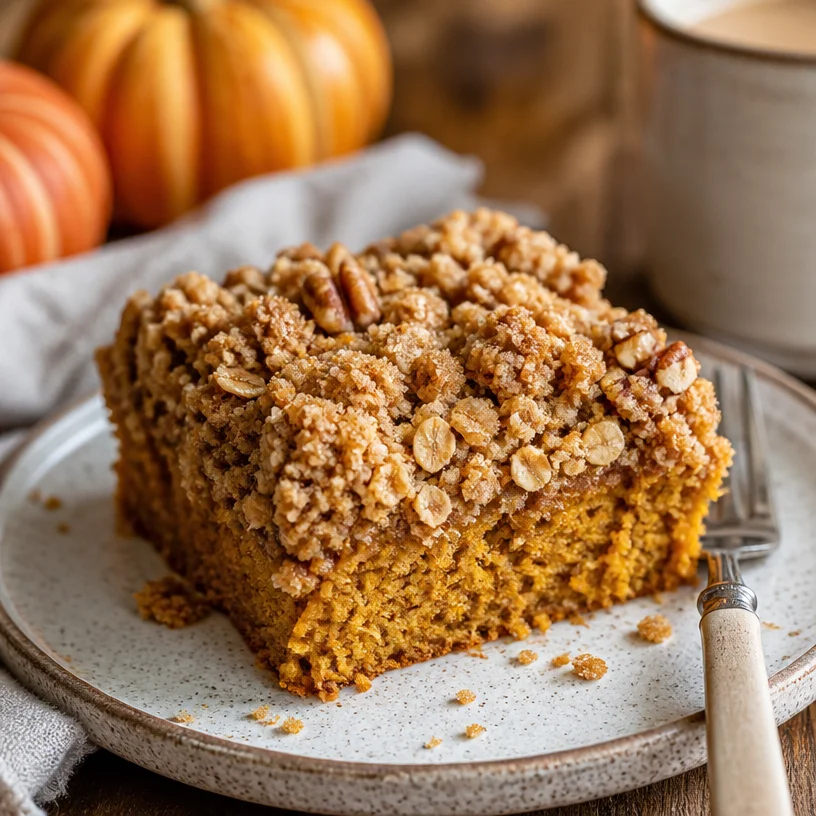
Pumpkin Crumb Cake
Pumpkin Crumb Cake: A Cozy Delight for Every Occasion
Hello, fellow food enthusiasts! Gather ‘round because today, we’re diving into a recipe that captures the essence of autumn and all its cozy vibes — Pumpkin Crumb Cake. Imagine a warm slice of cake, topped with a crunchy, buttery crumb, and infused with warm spices that remind you of crisp leaves and a hint of nostalgia; that’s precisely what this cake serves up!
Why Pumpkin Crumb Cake?
I don’t know about you, but for me, pumpkin-flavored treats conjure up memories of cooler days and family gatherings. The aroma of spices wafting through the kitchen while the cake bakes is enough to make anyone feel at home. This delightful crumb cake is the perfect combination of moist cake and sweet, crunchy topping — a true crowd-pleaser for any gathering, from casual weeknight dinners to festive fall celebrations.
When I first experimented with this recipe, I remember hosting a small get-together for a few friends. The kitchen was filled with laughter as I whipped up the batter, and when I pulled the cake from the oven, I couldn’t help but feel a burst of pride. I served everyone warm slices alongside mugs of spiced cider. The smiles and satisfied sighs said it all — there’s something magical about good food shared with great company.
Let’s roll up our sleeves and get into this scrumptious recipe!
Ingredients You’ll Need
So, here’s what you’ll need to whip up this delightfully moist pumpkin crumb cake:
-
1 ½ cups all-purpose flour: This forms the base of our cake. Can’t find all-purpose? Substitute with a 1:1 gluten-free flour blend for a gluten-free option!
-
1 cup sugar: It sweetens the cake beautifully. If you want a healthier alternative, try using coconut sugar or a sugar substitute that measures 1:1.
-
1 teaspoon baking powder: Helps the cake rise perfectly, giving it that lovely fluffy texture.
-
½ teaspoon baking soda: Works in tandem with the baking powder to create a light and airy cake.
-
½ teaspoon salt: Balances the sweetness and enhances the flavors. Don’t skip it!
-
1 teaspoon ground cinnamon: A warm spice that truly shines in this recipe. If you’re feeling adventurous, try adding a touch of cardamom or mixed spice blend!
-
½ teaspoon ground nutmeg: This adds a lovely depth of flavor. A little nutmeg goes a long way, so remember to keep it mild!
-
½ cup unsalted butter, melted: This adds richness to the cake. You can use coconut oil for a dairy-free version, giving a slight coconut essence.
-
1 cup pumpkin puree: Pure pumpkin brings moisture and richness to the cake. Canned works perfectly fine; just ensure it’s pure pumpkin, not pumpkin pie filling.
-
2 large eggs: They help bind everything together. If you need an egg-free option, try using flax eggs (1 tablespoon ground flaxseed mixed with 2.5 tablespoons water per egg).
-
1 teaspoon vanilla extract: This adds a lovely aroma and flavor to the cake. Substitute with almond extract for a different twist!
-
½ cup brown sugar: This gives the crumb topping a nice depth and chewiness.
-
½ cup rolled oats: These provide texture and a hint of chewiness to the crumb — a delicious surprise!
-
¼ cup chopped pecans or walnuts: Adds a delightful crunch on top. You can also leave them out if you’re nut-free or swap for pumpkin seeds!
Step-by-Step Instructions
-
Preheat Your Oven: Set your oven to preheat at 350°F (175°C). This helps the cake bake evenly.
-
Prepare Your Pan: Grease a 9×9 inch baking pan (or line it with parchment paper). This ensures easy removal once it’s baked — trust me, nobody wants to lose their precious cake to the pan!
-
Mix the Dry Ingredients: In a large mixing bowl, whisk together the all-purpose flour, sugar, baking powder, baking soda, salt, cinnamon, and nutmeg until well combined. This simple step helps evenly distribute the leavening agents and spices.
-
Combine Wet Ingredients: In another bowl, combine the melted butter, pumpkin puree, eggs, and vanilla extract. Whisk until smooth. Pro tip: Let the butter cool slightly before mixing to avoid scrambling the eggs!
-
Mix Wet and Dry Together: Pour the wet ingredients into the dry ingredients, and gently mix until just combined. Be careful not to overmix; a few lumps are perfectly fine!
-
Prepare the Crumb Topping: In a smaller bowl, mix together the brown sugar, rolled oats, and chopped nuts. Then, drizzle in a little melted butter (about 2 tablespoons). This mixture should be crumbly but stick together when pressed.
-
Layer and Bake: Pour the cake batter into your prepared pan, and evenly spread the crumb topping over it. Bake for 30-35 minutes or until a toothpick inserted into the center comes out clean (with just a few crumbs). Keep an eye on it during the last few minutes to avoid overbaking!
-
Cool and Serve: Once baked, allow the cake to cool in the pan for about 15 minutes before transferring it to a wire rack. This cooling period ensures the cake doesn’t fall apart while you’re trying to plate it. Slice it warm, and serve it with a dusting of powdered sugar for a lovely finish!
Serving Suggestions
Serving this Pumpkin Crumb Cake is all about making it special! Dust each slice with a sprinkle of powdered sugar for a touch of elegance. Pair it with a dollop of whipped cream or a scoop of vanilla ice cream, basking in the harmonious flavors of pumpkin and spice. If you want to elevate the experience, serve it alongside a warm spiced latte or a glass of apple cider. Your guests will be singing your praises!
Recipe Variations
-
Chocolate Chip Pumpkin Crumb Cake: Toss in ½ cup of semi-sweet or dark chocolate chips for an indulgent twist!
-
Spiked with Bourbon: Add a splash of bourbon to the batter for a warm, flavorful kick; just a tablespoon will do!
-
Gluten-Free Twist: Swap the all-purpose flour for a gluten-free blend and check that your oats are certified gluten-free for a celiac-safe treat.
-
Vegan Version: Substitute the eggs with flax eggs and use non-dairy butter. Your friends won’t even know it’s dairy-free!
-
Add Zest: For a lighter tone, try adding a teaspoon of orange or lemon zest to the batter for a fresh, vibrant flavor.
Chef’s Notes
This pumpkin crumb cake is one of those recipes that has transformed over time. When I first made it, the crumb topping was a last-minute addition. I had some leftover oats, and they ended up stealing the show! I encourage you to experiment. The cake itself is like a blank canvas, inviting you to color it with your own creative touches! One warning — be prepared for the cake to disappear quickly; it’s a guaranteed hit!
FAQs and Troubleshooting
Q: Can I use fresh pumpkin puree instead of canned?
A: Absolutely! Just make sure it’s well-drained and not too watery. Roast or steam your pumpkin, scoop out the flesh, and mash until smooth.
Q: My cake turned out too dense. What went wrong?
A: Overmixing can cause a dense cake. Aim to mix until just combined, and ensure your leavening agents are fresh and active.
Q: How do I know when the cake is done?
A: Insert a toothpick into the center. If it comes out clean or with just a few moist crumbs, it’s ready!
Q: Can I store leftovers?
A: Yes! Store cut pieces in an airtight container at room temperature for up to three days. You can also freeze slices for up to two months. Wrap them well and thaw as needed!
Nutritional Info
While I usually focus on the joy of sharing food, I understand the importance of nutrition. Each slice of this cake (based on 12 servings) contains approximately:
- Calories: 220
- Protein: 3g
- Carbohydrates: 30g
- Dietary Fiber: 1g
- Total Fat: 10g
Remember to enjoy in moderation, savoring each delightful bite!
Thank you for joining me today in creating this warm, comforting Pumpkin Crumb Cake! It’s more than a recipe; it’s an invitation to gather around the table with loved ones. Let’s keep the kitchen alive with stories and laughter because food truly brings us together. Happy baking, friends!
PrintPumpkin Crumb Cake
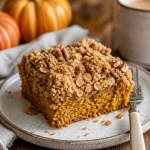
A cozy pumpkin crumb cake topped with a crunchy, buttery crumb and infused with warm spices, perfect for autumn gatherings.
- Prep Time: 15 minutes
- Cook Time: 35 minutes
- Total Time: 50 minutes
- Yield: 12 servings 1x
- Category: Dessert
- Method: Baking
- Cuisine: American
- Diet: Vegetarian
Ingredients
- 1 ½ cups all-purpose flour
- 1 cup sugar
- 1 teaspoon baking powder
- ½ teaspoon baking soda
- ½ teaspoon salt
- 1 teaspoon ground cinnamon
- ½ teaspoon ground nutmeg
- ½ cup unsalted butter, melted
- 1 cup pumpkin puree
- 2 large eggs
- 1 teaspoon vanilla extract
- ½ cup brown sugar
- ½ cup rolled oats
- ¼ cup chopped pecans or walnuts
Instructions
- Preheat your oven to 350°F (175°C).
- Prepare a 9×9 inch baking pan by greasing it or lining it with parchment paper.
- Mix the dry ingredients: whisk together the flour, sugar, baking powder, baking soda, salt, cinnamon, and nutmeg.
- Combine the wet ingredients in another bowl: mix together melted butter, pumpkin puree, eggs, and vanilla extract.
- Mix the wet ingredients into the dry ingredients until just combined, being careful not to overmix.
- Prepare the crumb topping by mixing brown sugar, rolled oats, and chopped nuts in a smaller bowl, then drizzle in some melted butter.
- Layer the cake batter into the prepared pan, spreading the crumb topping evenly over the batter.
- Bake for 30-35 minutes or until a toothpick comes out clean with just a few crumbs.
- Cool in the pan for about 15 minutes before transferring to a wire rack, then slice and serve.
Notes
Dust slices with powdered sugar, and serve with whipped cream or ice cream for extra indulgence.
Nutrition
- Serving Size: 1 slice
- Calories: 220
- Sugar: 15g
- Sodium: 220mg
- Fat: 10g
- Saturated Fat: 6g
- Unsaturated Fat: 4g
- Trans Fat: 0g
- Carbohydrates: 30g
- Fiber: 1g
- Protein: 3g
- Cholesterol: 40mg
Keywords: pumpkin, cake, crumb cake, fall dessert, autumn recipes
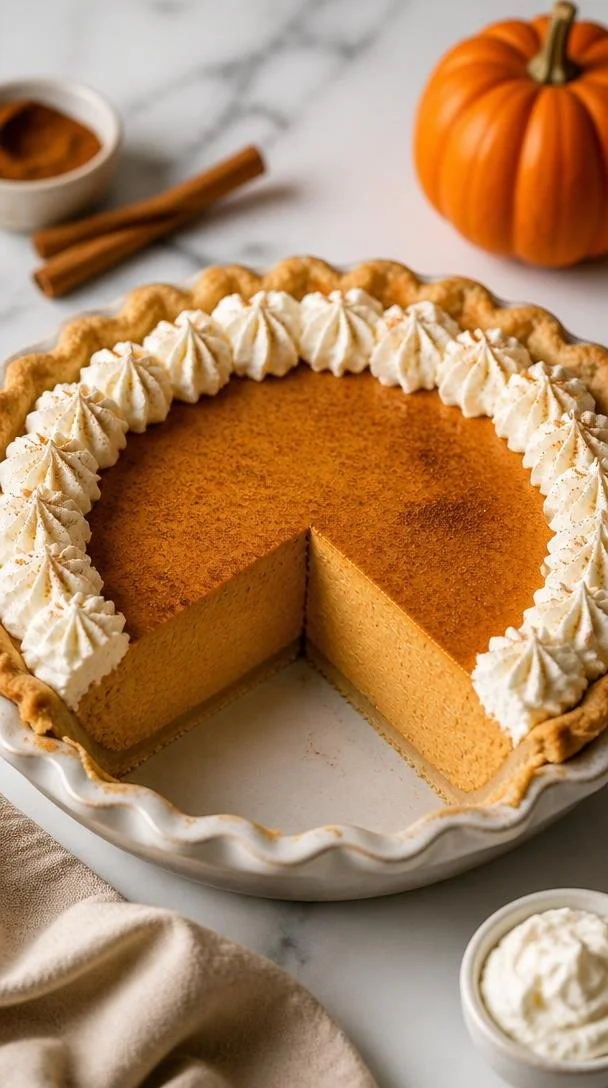
Beginner-Friendly Pumpkin Chiffon Pie: Fluffy & Creamy
The Irresistible Charm of Pumpkin Chiffon Pie
Hello pumpkin lovers! Today, we’re diving into a dessert that beautifully captures the essence of fall—Pumpkin Chiffon Pie. If you’re looking to impress guests or simply want a slice of nostalgia, this light and airy dessert is a must-try!
A Slice of Nostalgia
Growing up, Thanksgiving was the backdrop for a treasure trove of flavors. Mounds of mashed potatoes, succulent turkey, and the pièce de résistance—pumpkin pie. But I’ll never forget the first time I tasted a pumpkin chiffon pie. It was at my Aunt Muriel’s, where the air was filled with laughter and the scent of spices mingling with freshly baked goods.
I can still picture her kitchen, fragrant with the aroma of cinnamon and nutmeg, as I walked through the door, eye level with a table full of pies. She pointed me to a slice of pumpkin chiffon pie and urged me to dig in. The moment my fork glided through the fluffy filling and crisp crust, I was hooked! Light as a feather yet packed with rich flavors, that pie was an unforgettable revelation—one that has become a holiday tradition in my own home. Now, I’d love to share this delightful recipe with you!
Ingredients
Here’s what you’ll need to make a heavenly Pumpkin Chiffon Pie that not only tastes divine but also looks the part:
-
1 ½ cups pumpkin puree
Opt for the good stuff—canned pumpkin puree works well and saves time! If you’re feeling adventurous, you can roast your own pumpkin. Just peel, deseed, roast, and blend until smooth. -
1 cup heavy cream
This adds that luscious creaminess. If you’re looking for a lighter version, you can use whipped coconut cream or Greek yogurt. -
½ cup sugar
Regular granulated sugar is perfect, but feel free to use brown sugar for a deeper flavor. Honey or maple syrup can also be delicious alternatives—just adjust for sweetness. -
2 tsp gelatin
This helps give the pie its light, airy texture. If you need a vegetarian option, try using agar-agar instead, but follow the packaging instructions for the correct amount. -
1 tsp ground cinnamon
The spice of the season! Use fresh cinnamon for the best flavor. -
½ tsp ground ginger
A little zing goes a long way! Ground ginger lends a warm, spicy touch. Fresh ginger can be used as well; just grate a teaspoon. -
¼ tsp ground nutmeg
Nutmeg adds a lovely fragrance. Be sure to use freshly grated nutmeg if possible—it’s a game changer! -
¼ tsp salt
A pinch of salt enhances the flavors beautifully. -
1 tsp vanilla extract
Vanilla awakens the other flavors and provides a warm undertone. -
1 pre-baked pie crust
You can use store-bought or make your own. A graham cracker crust works wonderfully for this recipe, adding extra flavor and texture.
Step-by-Step Instructions
Are you ready to make pie magic? Let’s get started!
-
Prepare the Gelatin:
In a small bowl, sprinkle the gelatin over 2 tablespoons of cold water. It should bloom and absorb the water. Let it sit for about 5 minutes until it thickens. This step is essential for that fluffy texture! -
Heat the Pumpkin Mixture:
In a saucepan, combine the pumpkin puree, sugar, cinnamon, ginger, nutmeg, and salt. Add ½ cup of water and whisk everything together over medium heat. Cook for about 5 minutes, allowing the mixture to bubble lightly. This melds the flavors beautifully! -
Add the Gelatin:
Once heated, remove the pumpkin mixture from the heat. Add the bloomed gelatin and stir until fully dissolved. This gives your pie that incredible, fluffy texture. -
Cool the Mixture:
Allow the pumpkin mixture to cool for about 10-15 minutes. We don’t want to scramble the eggs in the next step, so make sure it’s just warm, not hot! -
Whip the Cream:
In a mixing bowl, whip the heavy cream to stiff peaks while keeping your eye on it! We want it fluffy, not whipped butter. Reserve about a quarter of the whipped cream for topping later. -
Fold in the Cream:
Once the pumpkin mixture is cooled, gently fold in the whipped cream until there’s no streakiness. This is where the magic happens—the mixture should be airy and light! -
Transfer to the Crust:
Spoon the airy mixture into your pre-baked pie crust, spreading it evenly. You can use a spatula to make it look pretty on top. -
Chill:
Cover the pie with plastic wrap and refrigerate for at least 4 hours, preferably overnight. This allows the flavors to deepen, and sets the filling to perfection! -
Serve and Enjoy:
When you’re ready to serve, pull out the reserved whipped cream, dollop it on each slice, and perhaps sprinkle a little extra cinnamon or nutmeg on top for that Instagram-worthy look!
Serving Suggestions
When serving Pumpkin Chiffon Pie, a dollop of fresh whipped cream is non-negotiable. Consider adding a sprinkle of crushed gingersnaps or pecans on top for some crunch and to add a little flair to your presentation. You can slice the pie into wedges and lightly drizzle with caramel sauce for an exquisite touch. Remember, we want it to look enticing yet effortless!
Recipe Variations
-
Chocolate Pumpkin Chiffon:
Add 2-3 tablespoons of unsweetened cocoa powder to the pumpkin mixture for a decadent chocolate twist. -
Maple Pumpkin Chiffon:
Substitute half of the sugar with pure maple syrup for a delightful maple flavor. -
Nutty Crust:
Use crushed pecans or walnuts combined with graham crackers for the crust to add extra flavor and texture. -
Spiced Rum:
Add 1 tablespoon of spiced rum to the filling for an adult twist! -
Dairy-Free Version:
Use coconut cream instead of heavy cream and a dairy-free alternative for the pie crust.
Chef’s Notes
This recipe has been in my collection for years, and it holds a special place in my heart. I love how it’s easy enough for weeknight adventures and elegant enough for special gatherings. I still chuckle at the time I mistook “tablespoons” for “teaspoons” and ended up with an extra-sweet pie! Lesson learned: always read the recipe twice!
Making this pie is a delightful process, so don’t shy away from letting your personality shine through your cooking. Remember, it’s about creating beautiful moments around your table—and nothing brings people together like pie!
FAQs and Troubleshooting
1. Can I make this pie ahead of time?
Absolutely! This pie tastes best after chilling for several hours or overnight, making it perfect for parties or holidays.
2. What should I do if my pie filling is too runny?
If your filling doesn’t set, it may be due to not heating the gelatin enough. Make sure to dissolve it completely in the warm pumpkin mixture. If you’re in a hurry, you can add a bit more gelatin.
3. I don’t have pumpkin puree. Can I use fresh pumpkin?
Yes, you can! Just roast and puree your pumpkin until smooth. Ensure to drain excess moisture to avoid a soggy pie.
4. Can I use a different type of crust?
Definitely! Feel free to swap the traditional crust for a graham cracker or even an almond flour crust—your choice will bring different flavors and textures to the table!
Nutritional Info
While I believe in enjoying every bite guilt-free, if you’re curious, a slice of this delectable Pumpkin Chiffon Pie typically contains around 250-300 calories, depending on the crust and whipped cream you use.
Now that you’ve got the inside scoop on this fantastic dessert, it’s time to tie on that apron, take a deep breath, and create some pumpkin-flavored magic in your kitchen. Celebrate the joy of cooking! I can’t wait to hear how your Pumpkin Chiffon Pie turns out! Happy baking!
PrintPumpkin Chiffon Pie
A light and airy pumpkin chiffon pie that’s perfect for fall gatherings, filled with rich flavors and nostalgic memories.
- Prep Time: 20 minutes
- Cook Time: 5 minutes
- Total Time: 245 minutes
- Yield: 8 servings 1x
- Category: Dessert
- Method: Chilling
- Cuisine: American
- Diet: Vegetarian
Ingredients
- 1 ½ cups pumpkin puree
- 1 cup heavy cream
- ½ cup sugar
- 2 tsp gelatin
- 1 tsp ground cinnamon
- ½ tsp ground ginger
- ¼ tsp ground nutmeg
- ¼ tsp salt
- 1 tsp vanilla extract
- 1 pre-baked pie crust
Instructions
- Prepare the gelatin: In a small bowl, sprinkle the gelatin over 2 tablespoons of cold water. Let it sit for about 5 minutes until it thickens.
- Heat the pumpkin mixture: In a saucepan, combine the pumpkin puree, sugar, cinnamon, ginger, nutmeg, and salt with ½ cup of water. Cook for about 5 minutes over medium heat.
- Add the gelatin: Remove the pumpkin mixture from heat. Add the bloomed gelatin and stir until fully dissolved.
- Cool the mixture: Allow the pumpkin mixture to cool for about 10-15 minutes.
- Whip the cream: In a mixing bowl, whip the heavy cream to stiff peaks, reserving a quarter for topping.
- Fold in the cream: Gently fold in the whipped cream into the cooled pumpkin mixture.
- Transfer to the crust: Spoon the airy mixture into the pre-baked pie crust.
- Chill: Cover and refrigerate for at least 4 hours, preferably overnight.
- Serve and enjoy: Top each slice with reserved whipped cream and a sprinkle of cinnamon or nutmeg.
Notes
Serve with a dollop of whipped cream and consider adding crushed gingersnaps or pecans for garnish.
Nutrition
- Serving Size: 1 slice
- Calories: 275
- Sugar: 25g
- Sodium: 150mg
- Fat: 18g
- Saturated Fat: 10g
- Unsaturated Fat: 8g
- Trans Fat: 0g
- Carbohydrates: 30g
- Fiber: 2g
- Protein: 3g
- Cholesterol: 70mg
Keywords: pumpkin pie, dessert, fall recipes, chiffon pie, holiday baking
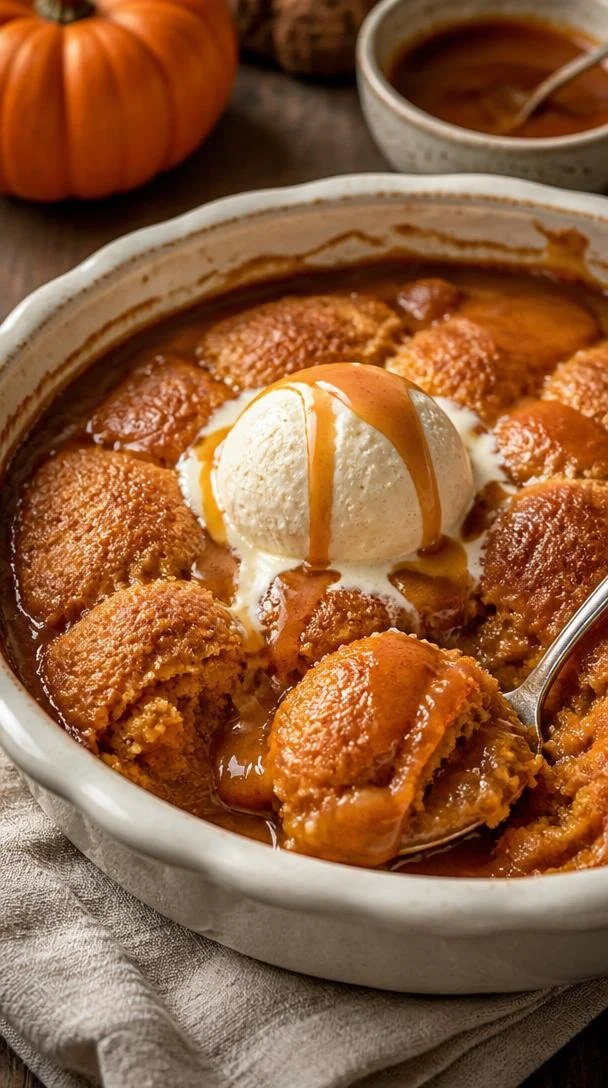
Pumpkin Cobbler
The Comforting Embrace of Pumpkin Cobbler
As the air turns crisp and the world around us begins to wear its autumn attire, there’s something incredibly comforting about embracing the flavors of the season. One of my all-time favorite desserts to whip up during this time is Pumpkin Cobbler. It’s like a warm hug that brings you back to cozy family gatherings, maybe even with a hint of spice in the air. Imagine walking into a kitchen filled with the aroma of warm spices mingling with sweet pumpkin and decadent caramel. It’s not just a dish; it’s a delicious memory waiting to unfold.
I still remember the first time I made Pumpkin Cobbler in my tiny studio apartment. It was a chilly October afternoon, and I had invited over a pair of friends for a casual fall get-together. I wanted to impress them with something a little different from the usual pumpkin pies, so I decided to venture into the realm of cobblers. As I mixed the rich pumpkin puree with warm spices, the kitchen glowed with a soft golden hue from the late afternoon sun filtering through the window. The laughter and chatter filled the air, punctuated by the anticipation of a sweet treat to come.
The best part? The moment I pulled that cobbler out of the oven. The buttery smell enveloped us, and as I spooned generous portions into bowls, topped with a drizzle of caramel sauce, I knew I had created something magical. We sat around the coffee table, savoring each velvety bite and sharing stories that lingered long into the night. It’s moments like these that remind me why food is so special — it’s all about the connections we build and the memories we cherish.
So, gather your loved ones, put on your favorite apron, and let’s dive into the delightful world of Pumpkin Cobbler!
Ingredients
Before we dive into the baking magic, let’s gather our ingredients. Trust me, every element plays a role in making this dish as divine as it is!
-
1 cup pumpkin puree: The star of the dish, lending natural sweetness and a velvety texture. Feel free to substitute with sweet potato puree for a different twist!
-
1 cup granulated sugar: This adds sweetness to balance the earthy pumpkin. If you prefer a healthier option, coconut sugar can work as a substitute.
-
1 cup all-purpose flour: The backbone of your cobbler. For a gluten-free version, check out almond or oat flour, but be mindful of moisture adjustments!
-
1 teaspoon baking powder: A crucial component that makes your cobbler rise and gives it that delightful texture.
-
1/2 teaspoon salt: Just a pinch to enhance the flavors! Sea salt is a great substitute.
-
1 teaspoon cinnamon: The warm hug of fall spices! If you love a deeper flavor, consider adding a dash of allspice.
-
1/2 teaspoon nutmeg: Another fantastic spice that complements the pumpkin beautifully. Ground ginger can provide a lovely twist in its place.
-
1/2 cup milk: Helps bind everything together and creates creaminess. Use almond milk or oat milk for dairy-free options.
-
1/2 cup butter, melted: Adds richness — because why not? For a lighter option, use oil or vegan butter.
-
1 cup brown sugar: This gives the cobbler that delicious caramel flavor as it bakes. Maple syrup is a lovely alternative!
-
1 cup boiling water: This may seem odd, but it creates a beautiful sauce at the base of the cobbler while it bakes.
-
1 cup caramel sauce: Drizzle it on top for an indulgent finish. You can also make your own if you’re feeling adventurous!
Step-by-Step Instructions
Ready to make some magic happen in the kitchen? These steps will guide you to a Pumpkin Cobbler that will have everyone raving!
-
Preheat Your Oven: Preheat your oven to 350°F (175°C). This step is crucial for even baking! It gives the cobbler that perfect golden crust.
-
Mix the Dry Ingredients: In a medium bowl, whisk together the flour, granulated sugar, baking powder, salt, cinnamon, and nutmeg. Set this aside; it’s the foundation of our cobbler. You know you’re on the right track when you can smell those warm spices!
-
Combine the Wet Ingredients: In another bowl, mix the pumpkin puree, milk, and melted butter until smooth. This mixture will offer that luscious texture you’re looking for!
-
Combine the Mixtures: Pour the wet ingredients into the dry mixture and stir until just combined. Be careful not to overmix; we want a tender cobbler, not a tough one. A few lumps are perfectly fine!
-
Prepare for the Oven: Pour this delightful batter into a greased baking dish (9×9 works beautifully).
-
Brown Sugar Magic: In a small bowl, mix the brown sugar with boiling water until blended. Carefully pour this over the top of your batter. It may look strange now, but trust me — this creates a dreamy, gooey layer!
-
Bake It Up: Pop your baking dish into the preheated oven and let it bake for about 45–50 minutes. The cobbler will rise beautifully, and you’ll know it’s ready when the top has a lovely golden hue, and a toothpick emerges clean without sticky batter.
-
Add the Caramel Sauce: Once out of the oven, drizzle caramel sauce generously over the top while it’s still warm. Let it soak in – oh, that aroma!
-
Let It Cool: Allow the cobbler to sit for about 10-15 minutes before serving. This helps it set a little more and makes it easier to scoop.
Chef Tip: While the cobbler is cooling, why not whip up some homemade whipped cream or vanilla ice cream to serve alongside? Trust me, it’s a game-changer!
Serving Suggestions
When it comes to plating your Pumpkin Cobbler, keep it simple but elegant! Serve it warm in shallow bowls since the gooey topping often creates a delightful sauce at the bottom. A generous scoop of ice cream or dollop of whipped cream on top enhances the experience, adding a creamy richness that beautifully contrasts with the warm spices. For an extra touch, sprinkle a pinch of cinnamon or crushed pecans on top right before serving — a small detail that packs a visual punch!
Recipe Variations
Feeling a little adventurous? Here are some fun variations and twists you might consider trying:
- Spice It Up: Add a teaspoon of ginger for a spicier kick!
- Nutty Addition: Fold in chopped pecans or walnuts for some crunch.
- Healthy Swaps: Replace half the all-purpose flour with whole wheat flour for a heartier cobbler.
- Fruity Twist: Toss in a handful of cranberries or apples for a delightful fruity contrast.
- Choco-Delight: Add chocolate chips to the batter for an extra indulgent treat.
Chef’s Notes
Pumpkin Cobbler has been a staple in my kitchen for so long that I’ve lost count of how many times I’ve made it! Each time feels like a cozy reunion with a dear friend. I sometimes think back to that first gathering in my apartment; I laugh at how nervous I was about impressing my friends with this unfamiliar dessert. It’s funny how things unfold, isn’t it? Now I find joy in sharing it with anyone who steps into my kitchen. I’ve also played with different kinds of caramel sauces; some days, I go for a classic, while on others, I indulge in sea salt caramel goodness!
FAQs and Troubleshooting
Can I use fresh pumpkin instead of canned puree?
Absolutely! Just make sure to cook and puree the pumpkin until it’s smooth and remove excess moisture. This will give you the best results.
What if my cobbler is too dry?
Ensure you are measuring the flour accurately. Overmeasuring can lead to dryness. If it’s already baked, serving it with warm caramel sauce can help add moisture back in!
What can I do with leftovers?
Store your cobbler in an airtight container in the fridge for up to 3 days. Reheat it in the oven or microwave before serving.
Can this recipe be doubled?
Yes, it can! Just use a larger baking dish, and remember to adjust the baking time slightly.
So there you have it – a cozy recipe for Pumpkin Cobbler filled with stories, tips, and delightful ways to elevate your cooking experience. I can’t wait for you to try this recipe and create your own cherished memories around the table. Remember, every spoonful is a step into a delicious adventure. Happy baking, and let’s keep those ovens warm!
PrintPumpkin Cobbler

A cozy and delicious Pumpkin Cobbler that brings warmth and sweetness to your autumn gatherings.
- Prep Time: 15
- Cook Time: 50
- Total Time: 65
- Yield: 8 servings 1x
- Category: Dessert
- Method: Baking
- Cuisine: American
- Diet: Vegetarian
Ingredients
- 1 cup pumpkin puree
- 1 cup granulated sugar
- 1 cup all-purpose flour
- 1 teaspoon baking powder
- 1/2 teaspoon salt
- 1 teaspoon cinnamon
- 1/2 teaspoon nutmeg
- 1/2 cup milk
- 1/2 cup butter, melted
- 1 cup brown sugar
- 1 cup boiling water
- 1 cup caramel sauce
Instructions
- Preheat your oven to 350°F (175°C).
- Mix the dry ingredients: In a medium bowl, whisk together the flour, granulated sugar, baking powder, salt, cinnamon, and nutmeg. Set this aside.
- Combine the wet ingredients: In another bowl, mix the pumpkin puree, milk, and melted butter until smooth.
- Combine the mixtures: Pour the wet ingredients into the dry mixture and stir until just combined.
- Prepare for the oven: Pour this delightful batter into a greased baking dish (9×9).
- Brown sugar magic: In a small bowl, mix the brown sugar with boiling water until blended and pour it over the batter.
- Bake it up: Pop the baking dish into the preheated oven and let it bake for about 45-50 minutes.
- Add the caramel sauce: Drizzle caramel sauce generously over the top while it’s still warm.
- Let it cool: Allow the cobbler to sit for about 10-15 minutes before serving.
Notes
Serve warm with ice cream or whipped cream for added richness.
Nutrition
- Serving Size: 1 serving
- Calories: 350
- Sugar: 30g
- Sodium: 222mg
- Fat: 18g
- Saturated Fat: 11g
- Unsaturated Fat: 5g
- Trans Fat: 0g
- Carbohydrates: 45g
- Fiber: 3g
- Protein: 6g
- Cholesterol: 50mg
Keywords: pumpkin, cobbler, dessert, autumn, fall, comforting, sweet
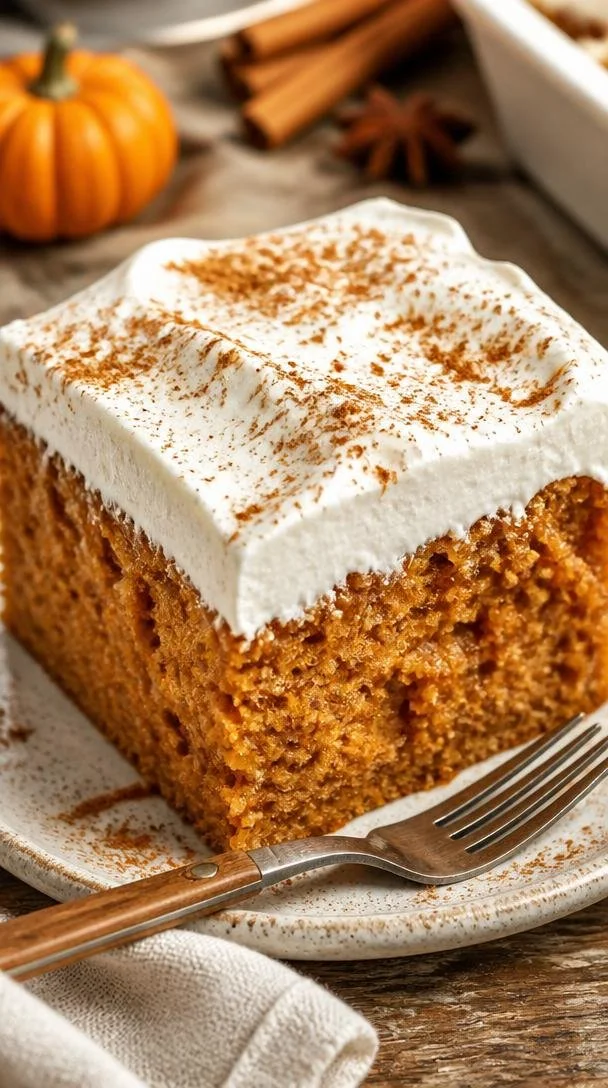
Minute Pumpkin Spice Poke Cake: Cozy Fall Dessert
Pumpkin Spice Poke Cake – Easy and Delicious Recipe
Introduction
Hello, my lovely foodies! With the air becoming crisp and cozy sweaters making their much-awaited appearance, it’s officially fall—a season that stirs up warm memories and a craving for everything pumpkin. You might have guessed it already; today, we are diving into the world of delightful desserts with my favorite Pumpkin Spice Poke Cake! This recipe combines all the warm, inviting flavors of pumpkin spice with a moist, decadent cake that literally begs to be slathered with cream cheese frosting.
Now, let me start by telling you why this cake holds a special place in my heart. Imagine a bustling kitchen filled with laughter, the sweet scent of cinnamon wafting through the air, and the excitement of a family gathering for the first autumn dinner. That’s how I discovered the glory that is the Pumpkin Spice Poke Cake! This cake not only dazzles the taste buds but also serves as a delicious centerpiece for any fall gathering. It’s big, it’s bold, and it’s begging to be devoured!
What I love about this poke cake is how easy it is to make, yet it feels fancy enough to serve at a holiday gathering or a cozy dinner party. Picture yourself tieing on that ivory apron, pouring a little something sparkling for your guests, and lifting the mood with this delicious delight. Are you ready? Let’s roll up our sleeves and get started on this fabulous fall dessert!
Personal Story
Ah, the memories attached to this beautiful cake are quite sweet. I recall one particular fall evening when I decided to host an impromptu dinner party for my friends. The leaves outside were a vibrant tapestry of orange, red, and yellow, and as I polished the dining table, my mind was racing with ideas. What dish could reflect the essence of fall?
After a brief moment of pondering the traditional pumpkin pie, an idea struck me—why not create a cake that embodies all that warm, spiced goodness but with a twist? That’s when the Pumpkin Spice Poke Cake was born! I whipped up the batter, plunged holes into the warm cake, and let the luscious cream soak in like a warm hug. As I served the cake, I watched as my friends’ faces lit up with joy. That moment was the perfect reminder of how food has the power to bring people together and create memories, one delicious bite at a time.
Ingredients
Here’s what you’ll need to create this scrumptious Pumpkin Spice Poke Cake:
-
1 box spice cake mix (or homemade spice cake)
Spice cake mix is packed with the warm flavors of cinnamon, nutmeg, and allspice. If you’re feeling adventurous, you can make your own spice cake from scratch! -
1 can (15 oz) pumpkin puree
Pumpkin puree gives the cake a rich flavor and moist texture. Be sure to avoid pumpkin pie filling, as it contains added sugars and spices. -
1 cup water
Water helps create the perfect batter consistency. You can substitute it with milk for an even richer flavor. -
1/2 cup vegetable oil
This ingredient adds moisture. You can use melted coconut oil or melted butter as a substitution for added flavor. -
4 large eggs
Eggs provide structure and help bind the ingredients together. For an egg-free option, try using unsweetened applesauce (1/4 cup per egg). -
1 cup sweetened condensed milk
This is what makes this cake a poke cake! This milk adds sweetness and richness. If you’re looking for a lighter option, you can try evaporated milk, but the texture may vary slightly. -
1 ½ cups cream cheese frosting
Cream cheese frosting is the crowning glory of this cake. You can use store-bought or whip up your favorite homemade version! -
1 tsp cinnamon (for garnish)
To sprinkle on top for a lovely finishing touch. You can also use pumpkin pie spice for an extra flavor boost.
Step-by-Step Instructions
Now, let’s get into the nitty-gritty of making this delightful dessert! Follow along with these steps, and I promise you’ll be a pumpkin spice pro in no time!
-
Preheat Your Oven
Start by preheating your oven to 350°F (175°C). This step is crucial for baking perfection because a hot oven helps the cake rise beautifully. -
Prepare Your Pan
Grease and flour a 9×13-inch baking dish. You want your cake to slide out easily when it’s time to serve. You can also line with parchment paper for easy removal. -
Mix Your Ingredients
In a large mixing bowl, combine the spice cake mix, pumpkin puree, water, vegetable oil, and eggs. Gently blend until moistened; then mix on medium speed for about 2 minutes. Pro tip: making sure not to over mix will help keep your cake light and fluffy! -
Pour the Batter
Pour the batter into your prepared baking dish, spreading it evenly with a spatula. Pop it into the preheated oven and bake for 25-30 minutes. You’ll notice that delicious aroma filling your kitchen in no time! -
Check for Doneness
To ensure your cake is perfectly baked, insert a toothpick into the center. If it comes out clean or with just a few moist crumbs, your dessert is ready to be pulled from the oven! -
Poke It
Once your cake has cooled for about 10-15 minutes, take a wooden skewer or the handle of a wooden spoon, and poke holes all over the cake. This is where the magic happens—the holes will allow the sweetened condensed milk to seep beautifully into the cake. -
Pour the Sweetened Condensed Milk
Drizzle the sweetened condensed milk evenly over the cake. Don’t be shy here! Allow it to soak in for at least 30 minutes. This soaking time is what makes this poke cake so uniquely moist and flavorful. -
Frosting Time
After the cake has soaked up all that condensed milk goodness, it’s time to frost! Spread the cream cheese frosting over the top evenly. You can use a knife or a spatula for this step. I like to add a little swirl for visual flair! -
Garnish Your Creation
Finish things off with a light sprinkle of cinnamon on top of the frosting. Just enough to dazzle! -
Chill Out
For an even more heavenly experience, place your cake in the fridge for an hour before serving. This gives the frosting a chance to firm up and the flavors to meld.
Congratulations, you’ve created a Pumpkin Spice Poke Cake that’s as stunning as it is scrumptious!
Serving Suggestions
When it comes to serving this delightful treat, simplicity is key. I love to present slices on rustic wooden platters with a sprinkle of cinnamon around the edges for an elegant touch. A dollop of whipped cream alongside each slice, or an optional drizzle of caramel sauce, will add an extra layer of indulgence. This cake is best enjoyed with a cup of hot coffee or spiced cider, bringing a cozy and inviting vibe to your table.
Recipe Variations
Feeling adventurous? Here are a few alternatives to shake things up!
- Add Chocolate Chips: Fold in 1 cup of mini chocolate chips into the batter for a decadent surprise.
- Nutty Crunch: Include ½ cup chopped walnuts or pecans in the frosting for added texture and flavor.
- Maple Syrup: Swap the sweetened condensed milk for maple syrup for a delightful twist on sweetness.
- Gluten-Free Option: Use a gluten-free spice cake mix for a gluten-free version of this delicious dessert!
- Dairy-Free Delight: Use coconut cream for the frosting and almond milk in the cake mix for a delightful dairy-free alternative.
Chef’s Notes
Over the years, this Pumpkin Spice Poke Cake has become a staple at my fall gatherings, and it never fails to impress! I initially started experimenting with different ingredients and techniques, and what I love is how easily this recipe evolves. Sometimes I play around with frosting flavors, like adding orange zest or spices to enhance that fall vibe. The best part is that no matter how you tweak it, the essence of this cake—the warm spices and luscious texture—remains delightful.
And let me tell you about the time I forgot to poke holes in the cake. Oh boy! It was like serving a beautiful, but dry cake! Don’t make the same mistake! Remember, poking those holes is what makes this cake a showstopper.
FAQs and Troubleshooting
Q: My cake came out dry. What did I do wrong?
A: Overbaking is usually the culprit. Make sure to check for doneness with a toothpick a few minutes before the timer goes off.
Q: Can I use a different frosting?
A: Absolutely! While cream cheese frosting pairs beautifully with pumpkin spice, you could try whipped cream, chocolate frosting, or even a simple glaze. Just keep that flavor balance in mind!
Q: How do I store leftovers?
A: If there are any leftovers, store them in an airtight container in the fridge for up to 4 days. You can serve it chilled straight from the fridge, or warm it up for a few seconds in the microwave.
Q: Can I freeze this cake?
A: Yes, you can freeze the unfrosted cake for up to 3 months. Just make sure to wrap it tightly in plastic wrap.
Nutritional Info (optional)
For those of you who like to keep track, the estimated nutritional information per serving (1 slice) is approximately:
- Calories: 350
- Total Fat: 16g
- Saturated Fat: 6g
- Cholesterol: 70mg
- Sodium: 300mg
- Carbohydrates: 49g
- Fiber: 1.5g
- Sugars: 30g
- Protein: 4g
Let’s embrace the warmth of fall together through this delicious Pumpkin Spice Poke Cake! I can’t wait for you to try it, share your experiences, and create new memories around your own beautiful table. Remember, cooking is all about intention and love, so don’t shy away from making every moment special. Happy baking!
PrintPumpkin Spice Poke Cake
A moist and decadent pumpkin spice poke cake soaked in sweetened condensed milk and topped with cream cheese frosting, perfect for fall gatherings.
- Prep Time: 15 minutes
- Cook Time: 30 minutes
- Total Time: 45 minutes
- Yield: 12 servings 1x
- Category: Dessert
- Method: Baking
- Cuisine: American
- Diet: Vegetarian
Ingredients
- 1 box spice cake mix
- 1 can (15 oz) pumpkin puree
- 1 cup water
- 1/2 cup vegetable oil
- 4 large eggs
- 1 cup sweetened condensed milk
- 1 ½ cups cream cheese frosting
- 1 tsp cinnamon (for garnish)
Instructions
- Preheat your oven to 350°F (175°C).
- Prepare a 9×13-inch baking dish by greasing and flouring it.
- Mix the spice cake mix, pumpkin puree, water, vegetable oil, and eggs in a large mixing bowl until moistened; then mix on medium speed for about 2 minutes.
- Pour the batter into your prepared baking dish, spreading it evenly.
- Bake for 25-30 minutes until a toothpick comes out clean.
- Poke holes in the cake with a wooden skewer after cooling for 10-15 minutes.
- Pour sweetened condensed milk evenly over the cake and let it soak for at least 30 minutes.
- Frost the top with cream cheese frosting.
- Garnish with a sprinkle of cinnamon.
- Chill in the fridge for an hour before serving.
Notes
For a lighter option, consider using evaporated milk. Variations include adding chocolate chips or swapping sweetened condensed milk for maple syrup.
Nutrition
- Serving Size: 1 slice
- Calories: 350
- Sugar: 30g
- Sodium: 300mg
- Fat: 16g
- Saturated Fat: 6g
- Unsaturated Fat: 8g
- Trans Fat: 0g
- Carbohydrates: 49g
- Fiber: 1.5g
- Protein: 4g
- Cholesterol: 70mg
Keywords: pumpkin spice, poke cake, fall dessert, cream cheese frosting, autumn recipe
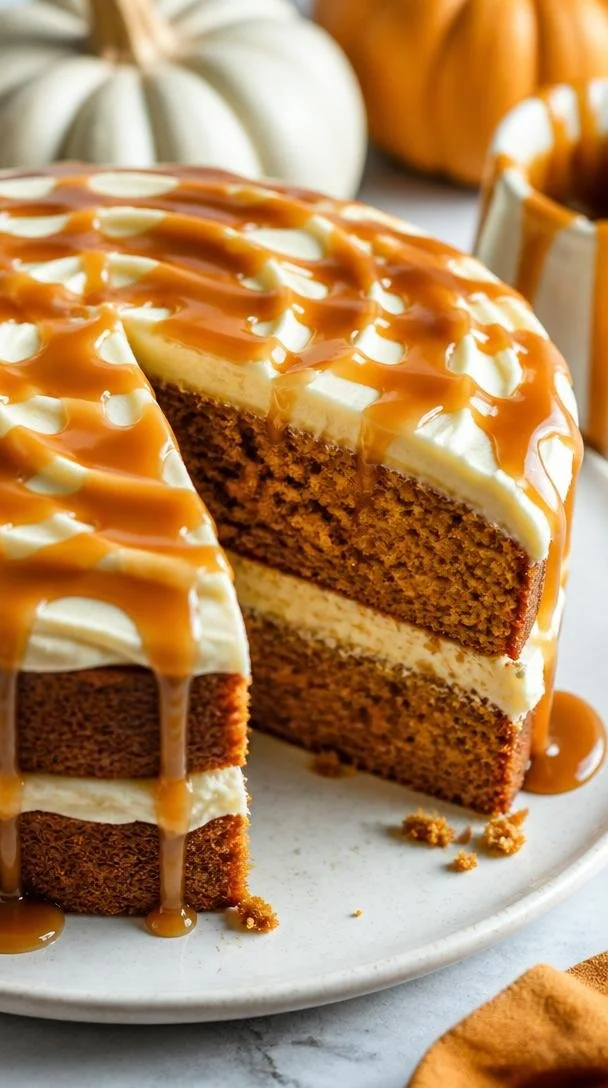
Pumpkin Cake with Caramel Cream Cheese Frosting
Fall in Love with Pumpkin Cake: A Sweet Slice of Heaven
Hello fellow food enthusiasts! There’s something undeniably magical about the fall season, especially when it comes to cozy baking. And what better way to embrace those autumn vibes than with a slice of warm, spiced pumpkin cake topped with luscious caramel cream cheese frosting? Whether you’re gathering around the table with friends or simply indulging in a sweet moment with a good book, this cake brings a delightful warmth to your home.
Pumpkin desserts hold a special place in my heart. They remind me of golden afternoons spent in the kitchen with my grandmother, who had a way of turning simple ingredients into beloved treats. I can still hear her laughter echoing as she would mix the dough, teaching me the art of patience while waiting for the cakes to bake. That intoxicating aroma of spices wafting through the house is something I never want to forget—a memory beautifully encapsulated in this pumpkin cake recipe.
I love sharing this treat during family gatherings, where the cake often takes center stage, adorned with its creamy frosting that glimmers with sweet caramel drizzle. It’s a crowd-pleaser, and I promise it will become a staple in your home too. So, grab that apron and let’s create something incredibly delicious together!
A Sweet Memory
As a child, I would often help my grandmother prepare for the holiday dinners. She had an entire ritual: selecting the freshest ingredients at the market, setting them out on her kitchen counter, and inviting me to join her. One year, she decided to experiment with pumpkin, inspired by a recent trip to a local pumpkin patch. I still remember how we giggled as we scooped out the pumpkin puree, our hands messily covered in orange goodness.
That year, her pumpkin cake stole the show. Family members would rave about it for weeks, and I found joy not just in eating the cake but in the smiles it created. Those exhilarating moments in the kitchen ignited my passion for cooking—a passion that has only grown over time. Now, I want to inspire you to create your own joyful memories with this scrumptious pumpkin cake recipe!
Ingredients
Gather these fabulous ingredients to make your pumpkin cake truly delicious:
- 2 cups all-purpose flour: The backbone of your cake. For a gluten-free option, substitute with a 1:1 gluten-free flour blend.
- 2 cups sugar: Sweetness personified! You can use brown sugar for deeper flavor or coconut sugar for a healthier alternative.
- 1 cup vegetable oil: Makes your cake moist and fluffy. If you prefer, you can substitute with melted coconut oil or applesauce for a lighter option.
- 4 large eggs: Provide structure and richness. For an egg-free version, try using flax eggs (1 tbsp flaxseed meal + 2.5 tbsp water per egg).
- 1 can (15 oz) pumpkin puree: The star of the show! Make sure it’s pure pumpkin and not pumpkin pie filling, which has added sugar and spices.
- 1 tsp baking powder: Helps the cake rise. You can use baking soda (1/4 tsp more) if that’s all you have.
- 1 tsp baking soda: A leavening agent that works wonders in achieving that light texture.
- 1 tsp cinnamon: Such a warm spice that gives this cake its lovely aroma! Feel free to toss in some pumpkin pie spice if you have it on hand.
- 1/2 tsp nutmeg: Adds a warm, nutty flavor; fresh nutmeg is always a fantastic choice if you have it.
- 1/2 tsp salt: Balances the sweetness and enhances all the flavors.
- 1/2 cup cream cheese, softened: The creamy base for our frosting. Neufchâtel cheese is a lighter alternative.
- 1/2 cup salted caramel sauce: This adds richness and sweetness to the frosting. You can make your own or purchase it from the store.
- 2 cups powdered sugar: Sweetness overload! You can reduce this if you’d like a less sweet frosting.
- 1 tsp vanilla extract: Brings everything together harmoniously. Use pure vanilla for a richer flavor.
Step-by-Step Instructions
Now, let’s dive into the glorious world of baking this pumpkin cake!
-
Preheat Your Oven: Begin by throwing your oven into action and preheating it to 350°F (175°C). This ensures that your cake starts to bake evenly right from the moment you pour in the batter.
-
Prepare Your Pans: Lightly grease and flour two 9-inch round cake pans. You can also line the bottoms with parchment paper if you want an extra smooth release. Trust me, you don’t want to lose any of this scrumptious cake!
-
Mix the Dry Ingredients: In a medium bowl, whisk together your flour, baking powder, baking soda, cinnamon, nutmeg, and salt. This step is essential for ensuring that your leavening agents are evenly distributed— a little chef hack to avoid any surprises later on!
-
Whisk the Wet Ingredients: In a large mixing bowl, combine the sugar and vegetable oil, and whisk until they become cohesive and slightly lightened in color. Next, add in the eggs, one at a time, beating well after each addition for that extra fluff!
-
Pumpkin Time: Stir in the pumpkin puree and vanilla extract, combining them gently until you have a smooth mixture. It’s like a warm hug in a bowl!
-
Combine the Mixtures: Gradually fold the dry ingredients into the wet mixture, being careful not to overmix. You want to be gentle here! Overmixing can lead to a dense cake, and nobody wants that.
-
Pour and Bake: Pour your batter evenly into your prepared pans, spreading it out to ensure that it bakes uniformly. Pop them in the oven and let them bake for about 25 to 30 minutes, or until a toothpick inserted in the center comes out clean. That aroma will start dancing around your kitchen in no time!
-
Cool the Cakes: Once baked, remove them from the oven and let them cool in the pans for about 10 minutes. Then, take them out and let them cool completely on a wire rack. Patience is key!
-
Whip Up the Frosting: In a mixing bowl, beat together the softened cream cheese, salted caramel sauce, and vanilla extract until it’s smooth and creamy. Gradually add the powdered sugar, mixing well until fluffy and dreamy.
-
Frost the Cake: Once your cakes are completely cool, place one layer on a serving platter. Spread a generous amount of frosting on top before adding the second layer. Finish with more frosting on top and let it drizzle down the sides. Trust me; it’s a sight to behold!
Serving Suggestions
For a beautiful presentation, serve the cake with a drizzle of leftover caramel sauce and a sprinkle of cinnamon on top. You can place a few pecans or walnuts around the base of the cake for added flavor and style. And don’t forget to brew a pot of warm spiced tea or coffee to accompany this delightful treat. Your guests will feel like royalty!
Recipe Variations
Feeling adventurous? Here are a few fun twists you can try:
- Spiced Nut Pumpkin Cake: Add chopped pecans or walnuts into the batter for an extra crunch.
- Chocolate Chip Version: Fold in a cup of semi-sweet chocolate chips for that luscious chocolate-pumpkin combo!
- Gluten-Free: Use a gluten-free flour blend to make this cake suitable for gluten-sensitive friends.
- Vegan Alteration: Substituting flax eggs and non-dairy cream cheese can easily make this a vegan dessert.
- Ginger Snap Kick: Pre-add minced crystallized ginger into the batter for a zesty kick!
Chef’s Notes
This pumpkin cake recipe has gone through some lovely transformations over the years. Originally, I used a boxed cake mix when I first started baking, but as my cooking journey flourished, I felt compelled to create something from scratch that connected with the warmth from my childhood.
One day, I decided to add caramel to the frosting—a kiss of sweetness that completed the cake perfectly! Funny enough, I once got a bit too generous with the frosting and ended up with a “caramel waterfall.” It’s one of my favorite kitchen mishaps and a reminder that perfection isn’t the goal—deliciousness is!
FAQs and Troubleshooting
1. My cake is too dense. What did I do wrong?
- This usually happens from overmixing the batter. Be gentle when folding the dry ingredients into the wet ingredients!
2. Can I use fresh pumpkin instead of canned?
- Absolutely! Just make sure to cook and puree it until smooth. It may require slightly more attention to achieve the right consistency compared to canned.
3. Why did my frosting turn out runny?
- If your frosting is too thin, try adding more powdered sugar to reach your desired consistency. You want it spreadable but not dripping off the cake.
4. How can I make this cake ahead of time?
- You can bake the cake layers ahead and freeze them. Just wrap them tightly in plastic wrap and store them in the freezer. Thaw them out and frost on the day you plan to serve.
Nutritional Info
While I don’t often focus heavily on nutritional content, this cake does yield about 12 servings with around 350 calories each, depending on generous frosting application. It’s all about balance, right? Enjoy a slice as a treat and savor the flavors!
So there you have it! A delectable pumpkin cake with caramel cream cheese frosting that promises not only to taste divine but to create lasting memories around your table. Remember, cooking is all about joy and connection—so let’s get baking and share those delicious moments! Happy baking, my friends!
PrintPumpkin Cake with Caramel Cream Cheese Frosting
Delightful pumpkin cake with spiced flavors, topped with rich caramel cream cheese frosting.
- Prep Time: 20 minutes
- Cook Time: 30 minutes
- Total Time: 50 minutes
- Yield: 12 servings 1x
- Category: Dessert
- Method: Baking
- Cuisine: American
- Diet: Vegetarian
Ingredients
- 2 cups all-purpose flour
- 2 cups sugar
- 1 cup vegetable oil
- 4 large eggs
- 1 can (15 oz) pumpkin puree
- 1 tsp baking powder
- 1 tsp baking soda
- 1 tsp cinnamon
- 1/2 tsp nutmeg
- 1/2 tsp salt
- 1/2 cup cream cheese, softened
- 1/2 cup salted caramel sauce
- 2 cups powdered sugar
- 1 tsp vanilla extract
Instructions
- Preheat your oven to 350°F (175°C).
- Prepare your pans by greasing and flouring two 9-inch round cake pans.
- Mix the dry ingredients: whisk together flour, baking powder, baking soda, cinnamon, nutmeg, and salt.
- Whisk the wet ingredients: combine sugar and vegetable oil, then add in the eggs, beating well.
- Stir in the pumpkin puree and vanilla extract until smooth.
- Combine the dry ingredients into the wet mixture, folding gently.
- Pour the batter into prepared pans and bake for 25 to 30 minutes.
- Cool the cakes in the pans for 10 minutes, then transfer to a wire rack.
- Whip up the frosting: beat cream cheese, salted caramel, and vanilla until smooth, then gradually add powdered sugar.
- Frost the cooled cakes, layering generously with frosting between and on top.
Notes
For best results, be gentle when mixing to avoid a dense cake. Feel free to add nuts or chocolate chips for variations.
Nutrition
- Serving Size: 1 slice
- Calories: 350
- Sugar: 35g
- Sodium: 450mg
- Fat: 15g
- Saturated Fat: 5g
- Unsaturated Fat: 8g
- Trans Fat: 0g
- Carbohydrates: 52g
- Fiber: 2g
- Protein: 5g
- Cholesterol: 30mg
Keywords: pumpkin cake, autumn dessert, caramel frosting
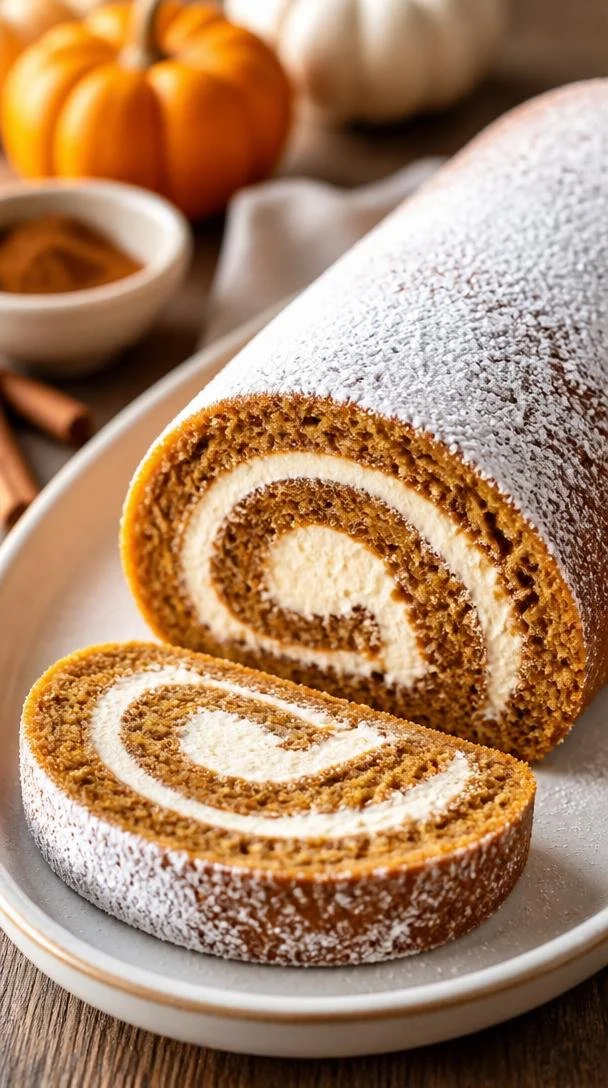
Beginner-Friendly From-Scratch Autumn Pumpkin Roll Recipe
The Classic Pumpkin Roll: A Slice of Fall Perfection
Hello and welcome back, my fellow food enthusiasts! As the leaves turn golden and a hint of chill fills the air, it’s time to whip up something truly special—a classic pumpkin roll! There’s something magical about the way pumpkin brings warmth and comfort to any gathering. If you’ve never made a pumpkin roll before, don’t worry! I’m here to guide you through this delightful treat that impresses without overwhelming.
Imagine serving a moist, spiced pumpkin cake, beautifully rolled with a creamy, tangy filling. It’s like autumn on a plate! This elegant dessert is perfect for everything from casual family dinners to festive holiday gatherings. No culinary degree? No problem! With just a little intention and great ingredients, you’ll soon have your own stunning pumpkin roll ready to impress your friends and family.
A Slice of Nostalgia
Before I dive into the nitty-gritty of this delicious recipe, let me take you back to one of my fondest memories associated with pumpkin rolls. It was a crisp November afternoon, and I had decided to host my first Thanksgiving dinner. The air was filled with the aroma of roasting turkey, stuffing, and simmering cranberry sauce.
But the real star of the show? The pumpkin roll, of course! My mom had gifted me her cherished recipe, wrapped in a handwritten note, adorned with flour smudges and scribbled tips. I remember nervously rolling the cake for the first time, worrying it would crack. To my surprise, it turned out beautifully! Everyone at the table was almost as impressed with my baking skills as they were with the flavor. As we savored each slice, laughter and warmth filled the room. That day solidified my love for baking and sparked my journey toward creating memorable meals for loved ones.
Now, I want to share this joy with you! So let’s roll up our sleeves and dive into the heart of this recipe.
Ingredients
Here’s what you’ll need to create your delicious pumpkin roll:
-
4 tablespoons powdered sugar
This sweetness will help prevent sticking and adds to the lovely finish! -
3/4 cup all-purpose flour (115g)
The foundation of our cake! If you’re gluten-free, feel free to use a gluten-free flour blend that measures cup-for-cup. -
1/2 teaspoon baking powder
This will give our pumpkin roll a little lift! -
1/2 teaspoon baking soda
Works in tandem with the baking powder for that perfect fluffy texture. -
1/2 teaspoon ground cinnamon
Cinnamon adds warmth and a touch of spice. -
1/2 teaspoon ground cloves
For a richer flavor profile—cloves bring that unmistakable fall essence. -
1/4 teaspoon salt
Just a pinch to balance out the sweetness. -
3 large eggs (room temperature)
Helps in creating the desired structure and moisture! -
1 cup granulated sugar (225g)
The primary source of sweetness in our cake! -
2/3 cup canned pumpkin (175g)
The star of the show! You can use homemade pumpkin puree if you have some on hand. -
8 ounces cream cheese (softened, 227g)
For that creamy filling that makes this roll simply irresistible. -
1 cup powdered sugar (125g)
Sweetness for the filling; it also blends nicely with cream cheese. -
6 tablespoons butter (softened, 84g)
Adds richness to the filling. -
1 teaspoon vanilla extract
Enhances all the flavors beautifully. -
2 tablespoons powdered sugar (for garnish, if desired)
Just a sprinkle for that elegant finish!
Step-by-Step Instructions
Ready to get baking? Let’s break it down step by step!
-
Preheat Your Oven
Preheat your oven to 375°F (190°C). Give your baking pan a little TLC by lining it with parchment paper, leaving an overhang to help you with the roll later on. It’ll make for easy lifting. -
Mix Dry Ingredients
In a medium bowl, whisk together the flour, baking powder, baking soda, ground cinnamon, ground cloves, and salt. This will ensure that everything is evenly distributed for a perfect bake! -
Beat Eggs and Sugar
In a large bowl, beat the eggs and granulated sugar together until it’s light and fluffy. This usually takes about 2-3 minutes either with a hand whisk or an electric mixer. The air you incorporate here will help the cake rise! -
Add Pumpkin
Stir in the canned pumpkin and mix gently. There’s something so satisfying about the vibrant color of pumpkin, isn’t there? -
Combine Dry and Wet Ingredients
Gradually add the dry ingredients into the wet mixture, folding them together until just combined. Be careful not to over-mix! You want to keep that beautiful light texture. -
Spread and Bake
Pour your batter onto the prepared baking pan, spreading it evenly. Bake for 13-15 minutes or until a toothpick inserted into the center comes out clean. Trust me, your kitchen will smell heavenly! -
Prepare for Rolling
When the cake is baked, remove it from the oven and let it cool for a couple of minutes. While it’s still warm, sprinkle a clean kitchen towel with powdered sugar and gently flip the cake onto it. Remove the parchment paper carefully. -
Roll it Up
Starting from one end, roll the cake (with the towel with it) tightly. This is important to help the cake hold its shape. Let it cool to room temperature in this rolled-up form—this is where the magic happens, my friends! -
Make the Cream Cheese Filling
In a bowl, beat together the softened cream cheese, butter, powdered sugar, and vanilla extract until it’s smooth and creamy. Taking a moment to taste this filling is totally acceptable! -
Unroll and Fill
Once the cake is cool, carefully unroll it. Spread the cream cheese mixture evenly over the cake, leaving a little room at the edges. It’ll feel indulgent, I promise! -
Roll it Back Up
Roll it back up, this time without the towel, and wrap it tightly in plastic wrap. Chill in the fridge for at least one hour—like a mini spa treatment for your pumpkin roll! -
Serve and Enjoy
When you’re ready to serve, dust the top with additional powdered sugar for a lovely finish. Slice it up, and watch those smiles bloom!
Serving Suggestions
When it comes to plating your pumpkin roll, simplicity is key. Place one beautiful slice on a plate, perhaps alongside a dollop of whipped cream or a scoop of vanilla ice cream. Drizzle with caramel sauce or sprinkle with crushed nuts for a little extra crunch. Feel free to get creative—after all, presentation matters!
Recipe Variations
Here are a few fun twists to make this pumpkin roll truly your own:
-
Spiced Nut Filling: Fold in some chopped pecans or walnuts into the cream cheese filling for an added crunch!
-
Chocolate Drizzle: Melt some chocolate and drizzle it over the top before serving for a chocolaty touch.
-
Maple Flavor: Swap out the vanilla extract for maple extract in your filling for a different sweet dimension.
-
Pumpkin Spice Lovers: Add an extra sprinkle of pumpkin spice to the batter for a bolder flavor!
-
Gluten-Free Option: Substitute an all-purpose gluten-free blend for the flour to make this recipe gluten-free.
Chef’s Notes
Oh, the memories this recipe has gifted me! Over the years, I’ve made many versions of this pumpkin roll—from mini rolls to double the layers—each with its own story. The first time I presented this glorious dessert, I was so nervous about it cracking. But it turns out that even if it cracks slightly, it’s still just as delicious. Life, just like baking, is all about those little imperfections—even the most luscious rolls have their quirks!
FAQs and Troubleshooting
Here are a few common questions and potential pitfalls to keep in mind:
-
Why did my pumpkin roll crack?
Cracking can happen for a couple of reasons—either the oven temperature is too high, or the cake is rolled too tightly. Make sure to keep the temperature steady and roll gently! -
How can I store leftovers?
Wrap the pumpkin roll tightly in plastic wrap and store it in the fridge for up to a week. You can also freeze it for longer—just make sure to wrap it well in plastic and foil! -
Can I use fresh pumpkin instead of canned?
Absolutely! Just ensure it’s pureed really well and cooked down to a suitable texture. It will give your roll a fresh flavor! -
What should I do if my filling is too runny?
If it’s too runny, it may need a bit more powdered sugar or cream cheese until it firms up. It should be spreadable but not dripping!
Nutritional Info
While I don’t dive deep into nutritional specifics, this pumpkin roll serves up a delightful balance of indulgence and seasonal goodness. Enjoy it in moderation, and savor every bite!
As we wrap up another delightful culinary adventure, remember: good food is about making memories and sharing joyful moments. This classic pumpkin roll is not just a recipe; it’s a pieced-together tapestry of flavors, aromas, and heartwarming experiences. So tie on that apron, grab those ingredients, gather your loved ones, and let’s make some kitchen magic together. Happy baking! 🍂🍰
PrintClassic Pumpkin Roll
A moist, spiced pumpkin cake rolled with a creamy, tangy filling – the perfect autumn dessert.
- Prep Time: 20 minutes
- Cook Time: 15 minutes
- Total Time: 35 minutes
- Yield: 8 servings 1x
- Category: Dessert
- Method: Baking
- Cuisine: American
- Diet: Vegetarian
Ingredients
- 4 tablespoons powdered sugar
- 3/4 cup all-purpose flour (115g)
- 1/2 teaspoon baking powder
- 1/2 teaspoon baking soda
- 1/2 teaspoon ground cinnamon
- 1/2 teaspoon ground cloves
- 1/4 teaspoon salt
- 3 large eggs (room temperature)
- 1 cup granulated sugar (225g)
- 2/3 cup canned pumpkin (175g)
- 8 ounces cream cheese (softened, 227g)
- 1 cup powdered sugar (125g)
- 6 tablespoons butter (softened, 84g)
- 1 teaspoon vanilla extract
- 2 tablespoons powdered sugar (for garnish, if desired)
Instructions
- Preheat your oven to 375°F (190°C) and line your baking pan with parchment paper.
- Mix the flour, baking powder, baking soda, cinnamon, cloves, and salt together in a medium bowl.
- Beat the eggs and granulated sugar in a large bowl until light and fluffy, about 2-3 minutes.
- Add the canned pumpkin and mix gently.
- Combine the dry ingredients with the wet ingredients until just mixed.
- Spread the batter in the prepared pan and bake for 13-15 minutes.
- Prepare for rolling by cooling the cake for a few minutes, then flipping it onto a powdered sugar-dusted towel.
- Roll the cake tightly, let it cool in this form.
- Make the cream cheese filling by beating cream cheese, butter, powdered sugar, and vanilla until smooth.
- Unroll the cake, spread the filling, and roll it back up without the towel.
- Chill in plastic wrap for at least one hour.
- Serve with a dusting of powdered sugar on top.
Notes
Wrap leftovers tightly in plastic wrap and store in the fridge for up to a week. Can be frozen for longer storage.
Nutrition
- Serving Size: 1 slice
- Calories: 300
- Sugar: 25g
- Sodium: 200mg
- Fat: 16g
- Saturated Fat: 8g
- Unsaturated Fat: 6g
- Trans Fat: 0g
- Carbohydrates: 38g
- Fiber: 1g
- Protein: 4g
- Cholesterol: 70mg
Keywords: pumpkin roll, fall dessert, holiday baking