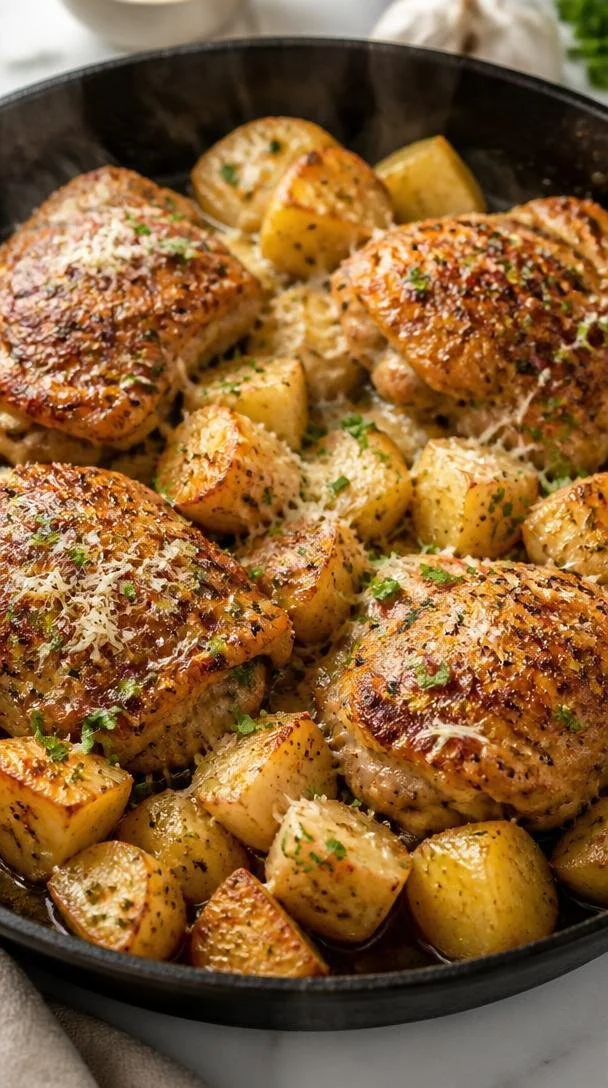
Minute One-Pan Garlic Parmesan Chicken & Potatoes Skillet
Garlic Parmesan Chicken and Potato Skillet: A Comforting Classic
Hello, fellow foodies! Today, I’m thrilled to share one of my all-time favorite dishes that packs a punch of flavor while being incredibly easy to prepare: Garlic Parmesan Chicken and Potato Skillet. This delightful meal is the epitome of comfort food, bringing together juicy chicken thighs and perfectly roasted potatoes all in one pan. It’s perfect for a weeknight dinner or a cozy gathering with friends. So, let’s dive into the flavors and joy of this dish!
A Taste of Nostalgia
You know, every recipe holds a special memory, and Garlic Parmesan Chicken and Potato Skillet is no different for me. I remember one rainy Tuesday evening when my friends had come over after a long day at work. We needed something hearty that wouldn’t keep us slaving away in the kitchen for hours. As the rain drizzled down outside, I decided to whip up this skillet meal. The aroma of garlic filling the air was enough to draw everyone into the kitchen, and soon, we were sharing laughs, stories, and more than a few “just one more bite” moments.
Sitting around the table with warm, gooey cheese falling off the tender chicken paired with golden, crispy potatoes felt like the ultimate hug in a bowl. After that night, this dish became a staple in my cooking repertoire—easy to make and even easier to enjoy. I can’t wait for you to experience that same comfort!
Ingredients
Here’s what you’ll need for this delightful dish:
-
4 chicken thighs: Juicy and tender, chicken thighs have the perfect amount of fat for flavor. If you prefer, you can substitute them with boneless, skinless chicken breasts, but remember they might cook a bit quicker.
-
4 medium potatoes, diced: Potatoes provide that comforting base for this meal. Feel free to use any variety you have on hand—Yukon gold, red, or even sweet potatoes for a different flavor profile!
-
3 tablespoons olive oil: This is our secret to achieving that lovely golden crust. If you’d like, avocado oil works similarly, but stay away from oils with strong flavors like sesame oil.
-
1 tablespoon minced garlic: Fresh garlic adds a fragrant punch. You can substitute it with garlic powder, but use about one teaspoon since it’s more concentrated.
-
1 cup grated Parmesan cheese: This cheese brings a nutty, salty flavor to the dish. Pecorino Romano can be a great alternative if you’re looking for something sharper in taste.
-
Salt and pepper to taste: Essential for elevating the dish, adjust these to your preference.
-
1 tablespoon chopped fresh parsley (for garnish): This adds a lovely pop of color and freshness to your plate. If parsley’s not your jam, try fresh basil or thyme!
Step-by-Step Instructions
Now, let’s get cooking! Follow these steps, and I promise you’ll have a delicious meal in no time.
-
Prep your ingredients: Start by washing and dicing your potatoes into bite-sized pieces. This ensures even cooking. Next, pat your chicken thighs dry with a paper towel and season both sides generously with salt and pepper. Seasoning before cooking helps lock in that flavor.
-
Heat the pan: Grab a large skillet (preferably cast iron for that perfect crust) and drizzle in the olive oil. Heat the pan over medium-high heat until the oil shimmers. This is a crucial step—make sure it’s hot enough before adding your chicken to get that glorious sear.
-
Sear the chicken: Place the chicken thighs skin-side down in the skillet. Don’t overcrowd the pan—if your skillet is small, cook in batches. Sear them for about 5-7 minutes until the skin is crispy and golden, then flip and cook for another 5 minutes. If your chicken starts to brown too much, lower the heat to medium.
-
Add the potatoes and garlic: Once the chicken is browned, toss in those diced potatoes and minced garlic around the chicken. Give them a good mix to coat everything in that residual oil and chicken flavor.
-
Cover and cook: Reduce the heat to medium-low and cover the skillet with a lid. Let it cook for about 20-25 minutes. During this time, the chicken will cook through, and the potatoes will become tender and flavor-packed. Stir occasionally to prevent sticking and ensure even cooking.
-
Add the cheese: When the chicken is cooked through (165°F internal temperature) and the potatoes are tender, sprinkle the grated Parmesan cheese evenly over the top, cover the skillet again, and let it melt for about 3-5 minutes. The melted cheese creates a creamy, delicious topping that pulls this dish together beautifully!
Serving Suggestions
Now that everything is cooked to perfection, it’s time to plate! Transfer the garlic Parmesan chicken and potato skillet onto a large serving platter. To elevate the presentation, sprinkle the dish with freshly chopped parsley. You can serve this alongside a simple green salad and a glass of your favorite white wine for a complete dining experience.
Recipe Variations
Looking to switch things up? Here are some fun variations to consider:
-
Lemon Herb: Add lemon zest and a splash of lemon juice before serving for a bright, zesty finish.
-
Spicy Kick: Toss some red pepper flakes in with the garlic for an extra layer of flavor.
-
Creamy Mushroom: Sauté sliced mushrooms when you add the garlic for a rich, earthy twist.
-
Veggie Boost: Adding some diced bell peppers or zucchini will introduce more color and flavor to the dish.
-
Herbed Cheese: Swap Parmesan for feta or goat cheese if you’re in the mood for something a bit tangier.
Chef’s Notes
This recipe has had its fair share of kitchen adventures! I remember one time experimenting with different cheeses and ended up with a crazy mix of cheddar and mozzarella. Believe me, it was a gooey disaster that littered my kitchen with cheese strings! But through those mishaps, I learned the beauty of simplicity and sticking to what works.
One last tip: Always taste as you go! Cooking is as much about your palate as it is about the recipe. Trust your instincts and adjust flavors as you see fit!
FAQs and Troubleshooting
Q: What if my chicken is undercooked?
A: No worries! Simply lower the heat and cover the skillet again, cooking for a few more minutes. Always check for the internal temperature to reach 165°F.
Q: Can I use the oven for this recipe?
A: Absolutely! You can sear the chicken on the stovetop and then transfer it to a preheated oven at 375°F to finish cooking—just make sure to use an oven-safe skillet!
Q: Why are my potatoes not crisping up?
A: Make sure your potatoes are diced evenly to ensure they cook at the same rate, and give them room to breathe in the pan. If they are packed tightly, they’ll steam instead of crisp.
Q: Can I make this recipe gluten-free?
A: Yes! All the ingredients listed are gluten-free. Just ensure your Parmesan cheese is certified gluten-free if you’re concerned about cross-contamination.
Nutritional Info
While I could give you the exact nutritional breakdown here, the best part is this dish offers a balanced combination of protein from the chicken, carbohydrates from the potatoes, and healthy fats from the olive oil. It’s not only delicious but also satisfying and nourishing!
So there you have it! Garlic Parmesan Chicken and Potato Skillet—a dish that feels like getting a warm hug while sitting at your favorite café. I hope you enjoy making this as much as I do. Tie on your apron, gather your ingredients, and let’s bring a little magic to your table tonight. Happy cooking!
PrintGarlic Parmesan Chicken and Potato Skillet

A comforting skillet meal featuring juicy chicken thighs and crispy potatoes, infused with garlic and topped with melted Parmesan.
- Prep Time: 15 minutes
- Cook Time: 30 minutes
- Total Time: 45 minutes
- Yield: 4 servings 1x
- Category: Main Course
- Method: Skillet
- Cuisine: American
- Diet: Gluten-Free
Ingredients
- 4 chicken thighs
- 4 medium potatoes, diced
- 3 tablespoons olive oil
- 1 tablespoon minced garlic
- 1 cup grated Parmesan cheese
- Salt and pepper to taste
- 1 tablespoon chopped fresh parsley (for garnish)
Instructions
- Prep your ingredients: Wash and dice the potatoes into bite-sized pieces. Pat the chicken thighs dry and season with salt and pepper.
- Heat the pan: Drizzle olive oil in a large skillet and heat over medium-high until shimmering.
- Sear the chicken: Place chicken thighs skin-side down in the skillet, searing for 5-7 minutes. Flip and cook for another 5 minutes.
- Add the potatoes and garlic: Toss in the diced potatoes and minced garlic, mixing to coat in oil and chicken flavor.
- Cover and cook: Reduce heat to medium-low, cover, and cook for 20-25 minutes until chicken is cooked through and potatoes are tender.
- Add the cheese: Sprinkle Parmesan cheese over the top, cover again, and let it melt for 3-5 minutes.
Notes
Always taste as you go to adjust flavors. For gluten-free, ensure Parmesan is certified gluten-free.
Nutrition
- Serving Size: 1 serving
- Calories: 400
- Sugar: 4g
- Sodium: 350mg
- Fat: 18g
- Saturated Fat: 6g
- Unsaturated Fat: 8g
- Trans Fat: 0g
- Carbohydrates: 32g
- Fiber: 3g
- Protein: 30g
- Cholesterol: 100mg
Keywords: chicken, skillet, comfort food, garlic, Parmesan, one-pan meal
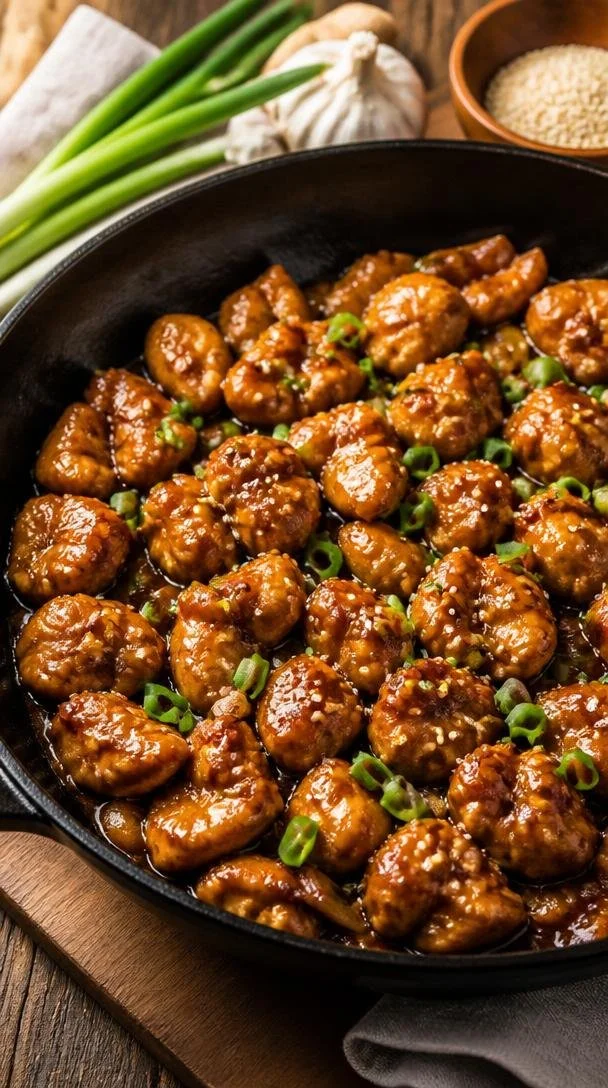
Minute Garlic Ginger Chicken Skillet (Weeknight Dinner)
The Joy of Garlic Ginger Chicken: A Flavorful Journey
Hello, fellow food lovers! Today, we’re diving deep into a dish that captures the essence of cozy home cooking—Garlic Ginger Chicken. This dish combines the intoxicating flavors of garlic and ginger with tender chicken thighs, creating a meal that’s not only delicious but also comforting. So, grab your apron, and let’s get started on a culinary adventure that’s both elegant and approachable!
Our Flavor Adventure Begins
I remember the first time I made Garlic Ginger Chicken. I was hosting a small get-together with friends after a long week of work, and I wanted to prepare something that felt special without requiring me to spend all day in the kitchen. Scrolling through my collection of favorite recipes, I stumbled upon this gem, and it felt like a warm hug on a plate.
As the aroma of ginger and garlic filled my kitchen, my friends gathered around, sipping on sparkling drinks and sharing stories. When I finally pulled the pan off the stove, we dove into the vibrant flavors of that first bite, all laughter and oohs and aahs. As we feasted, I realized that this dish wasn’t just about mixing ingredients; it was about creating memories. It’s a recipe I hold dear, like an old friend you always welcome back into your life.
That’s the magic of Garlic Ginger Chicken—it connects us through food. Now, let’s break down the fantastic ingredients that bring this dish to life!
Ingredient List
-
1 lb. Chicken Thighs (boneless, skinless – cut into small chunks)
Chicken thighs are juicy and packed with flavor. If you’re looking for a leaner option, feel free to use chicken breast; just be mindful that it cooks faster and can dry out. -
1 Egg
The egg serves as a binder in this recipe, helping the cornstarch adhere to the chicken for a lovely crunchy texture. If you’re vegan, you can substitute with a flaxseed egg (1 tablespoon ground flaxseed + 3 tablespoons water). -
3 tbsp Cornstarch
Cornstarch is your secret weapon for achieving that delightful crispy coating! You can swap this with arrowroot powder for a gluten-free alternative or even potato starch if that’s what you have on hand. -
3/4 cup Water
Water helps create the sauce’s silky consistency. You can also use chicken broth for an added flavor boost if you have it on hand. -
1 tbsp Fresh Ginger (very finely chopped)
Ginger provides that aromatic zing that brightens the dish. If you can’t find fresh ginger, ground ginger can work in a pinch—just use about 1 teaspoon. -
1 tbsp Fresh Garlic (very finely chopped)
Nothing quite beats the delicious punch of freshly chopped garlic. In case of a garlic shortage, use garlic powder (1 tsp) or garlic paste for a similar effect. -
1 tbsp Yellow/White Onion (very finely chopped)
Onion adds a subtle sweetness and depth. Shallots are a lovely alternative for a more delicate flavor. -
3 tbsp Soy Sauce
Soy sauce gives this dish its umami goodness. For a gluten-free option, choose tamari or coconut aminos. -
3 tbsp Brown Sugar
Brown sugar balances the salty notes of soy sauce beautifully. If you’re looking to cut sugar, consider using honey or a sugar alternative like maple syrup. -
1 tbsp White Wine Vinegar
This tangy addition brightens all the flavors. Apple cider vinegar would be a solid swap if you’re out of white wine vinegar. -
1 tsp Sesame Oil
Sesame oil brings a warm, nutty flavor. If you don’t have it, feel free to use another oil—just look for something that complements the dish. -
2 tbsp Avocado Oil
This oil is great for sauteing at high temperatures and adds a subtle flavor. Canola oil or light olive oil can easily replace it. -
Green Onions (for garnish)
These not only add a pop of color but also a fresh crunch. If you’re out of green onions, cilantro or parsley can bring a delightful twist. -
Sesame Seeds (for garnish)
Sprinkling sesame seeds lends a lovely crunch and an elegant finish. You can skip them if you don’t have any on hand, but they do elevate the dish!
Step-by-Step Instructions
-
Marinate the Chicken
In a medium bowl, whisk together the egg, cornstarch, and a pinch of salt. Add the chicken chunks and toss until they are coated evenly. Let them marinate for about 15-20 minutes. This step ensures a crispy exterior when cooked! -
Prepare the Sauce
While your chicken marinated, grab another bowl and whisk together the water, soy sauce, brown sugar, white wine vinegar, sesame oil, garlic, ginger, and onion. It should smell divine already! This mixture will bring a burst of flavor to your chicken while it cooks. -
Heat Your Oil
In a large skillet or wok, heat the avocado oil over medium-high heat. You want it hot enough to sizzle but not smoke! An easy tip: test the oil by dropping a small piece of chicken in; if it sizzles immediately, it’s time to cook. -
Cook the Chicken
Carefully add the marinated chicken and cook for about 5-7 minutes until the chicken is golden brown and cooked through, turning occasionally. Cooking in batches can help maintain that gorgeous crispiness! -
Add the Sauce
Once the chicken is cooked, pour in your prepared sauce. Stir gently to coat the chicken pieces evenly. Cook for an additional 3-4 minutes; this allows the sauce to reduce and thicken, coating the chicken beautifully. -
Final Touches
Remove from heat and let it rest for about a minute. This helps the sauce cling to the chicken even better. Garnish with fresh green onions and a sprinkle of sesame seeds before serving.
Serving Suggestions
Plate your Garlic Ginger Chicken over a bed of jasmine rice or crispy noodles for an inviting and hearty meal. To add a fresh touch, include a side of stir-fried vegetables or a light salad dressed in sesame vinaigrette.
Recipe Variations
-
Spicy Garlic Ginger Chicken
Add crushed red pepper flakes or some diced jalapeños to the marinade for a spicy kick! -
Coconut Curry Garlic Ginger Chicken
Mix in coconut milk with the sauce for a creamy, tropical twist. -
Lemon Garlic Ginger Chicken
Squeeze in fresh lemon juice for a zesty bright flavor. -
Honey Soy Garlic Ginger Chicken
Swap out brown sugar for honey for a richer sweetness. -
Veggie-Packed Garlic Ginger Stir-Fry
Toss in bell peppers, snap peas, or bok choy for added nutrition and texture.
Chef’s Notes
This recipe has been a staple in my kitchen for years. I started with it as a base and played around with different flavors and techniques. Over time, it has gone from a simple skillet dish to a family favorite, often requested for potlucks and casual Sunday dinners.
My favorite memory was when I introduced it to my neighbors during a summer BBQ, and they couldn’t believe how easy it was yet tasted like something straight from a restaurant menu. Little did they know the secret was just a few quality ingredients and a little love!
FAQs and Troubleshooting
-
Can I use chicken breast instead of thighs?
Yes! Just keep an eye on the cooking time; chicken breasts can cook faster and might dry out if overcooked. -
The sauce turned out too salty. What happened?
This can happen if your soy sauce is on the saltier side. Next time, try low-sodium soy sauce or adjust the amount to your taste. -
Why isn’t my chicken crispy?
Make sure your oil is hot enough before adding the chicken and avoid overcrowding the pan, which can cause the chicken to steam instead of sear. -
What sides go well with Garlic Ginger Chicken?
Steamed jasmine rice, sautéed bok choy, or a simple cucumber salad provide a refreshing counterbalance to the rich flavors of the chicken.
Nutritional Info
While I won’t go too in-depth, Garlic Ginger Chicken is a wonderful source of protein and can be a healthy addition to your meal, especially when served alongside vegetables. Enjoy it in moderation as part of a balanced diet.
Let’s Create Something Timeless
I hope you find joy in making this Garlic Ginger Chicken! It’s a celebration of flavors that will surely fill your kitchen with warmth and laughter. Remember that cooking isn’t just about the food; it’s about the experience and connections we build along the way. So, tie your apron, turn up that music, and let’s create beautiful moments around our tables together! Happy cooking!
PrintGarlic Ginger Chicken

A flavorful and comforting dish featuring tender chicken thighs marinated in a savory garlic and ginger sauce.
- Prep Time: 20 minutes
- Cook Time: 15 minutes
- Total Time: 35 minutes
- Yield: 4 servings 1x
- Category: Main Course
- Method: Stir-frying
- Cuisine: Asian
- Diet: Gluten-Free
Ingredients
- 1 lb. Chicken Thighs (boneless, skinless – cut into small chunks)
- 1 Egg
- 3 tbsp Cornstarch
- 3/4 cup Water
- 1 tbsp Fresh Ginger (very finely chopped)
- 1 tbsp Fresh Garlic (very finely chopped)
- 1 tbsp Yellow/White Onion (very finely chopped)
- 3 tbsp Soy Sauce
- 3 tbsp Brown Sugar
- 1 tbsp White Wine Vinegar
- 1 tsp Sesame Oil
- 2 tbsp Avocado Oil
- Green Onions (for garnish)
- Sesame Seeds (for garnish)
Instructions
- Marinate the Chicken: In a medium bowl, whisk together the egg, cornstarch, and a pinch of salt. Add the chicken chunks and toss until they are coated evenly. Let them marinate for about 15-20 minutes.
- Prepare the Sauce: While your chicken marinates, grab another bowl and whisk the water, soy sauce, brown sugar, white wine vinegar, sesame oil, garlic, ginger, and onion together.
- Heat Your Oil: In a large skillet or wok, heat the avocado oil over medium-high heat until hot but not smoking.
- Cook the Chicken: Carefully add the marinated chicken and cook for about 5-7 minutes until golden brown and cooked through.
- Add the Sauce: Pour in your prepared sauce and stir gently to coat the chicken evenly. Cook for an additional 3-4 minutes.
- Final Touches: Remove from heat and garnish with fresh green onions and a sprinkle of sesame seeds before serving.
Notes
Serve over jasmine rice or crispy noodles. Can be adapted with various spices or vegetables.
Nutrition
- Serving Size: 1 serving
- Calories: 350
- Sugar: 10g
- Sodium: 800mg
- Fat: 18g
- Saturated Fat: 2g
- Unsaturated Fat: 12g
- Trans Fat: 0g
- Carbohydrates: 22g
- Fiber: 1g
- Protein: 25g
- Cholesterol: 90mg
Keywords: Garlic Ginger Chicken, Chicken Recipe, Easy Chicken Dinner
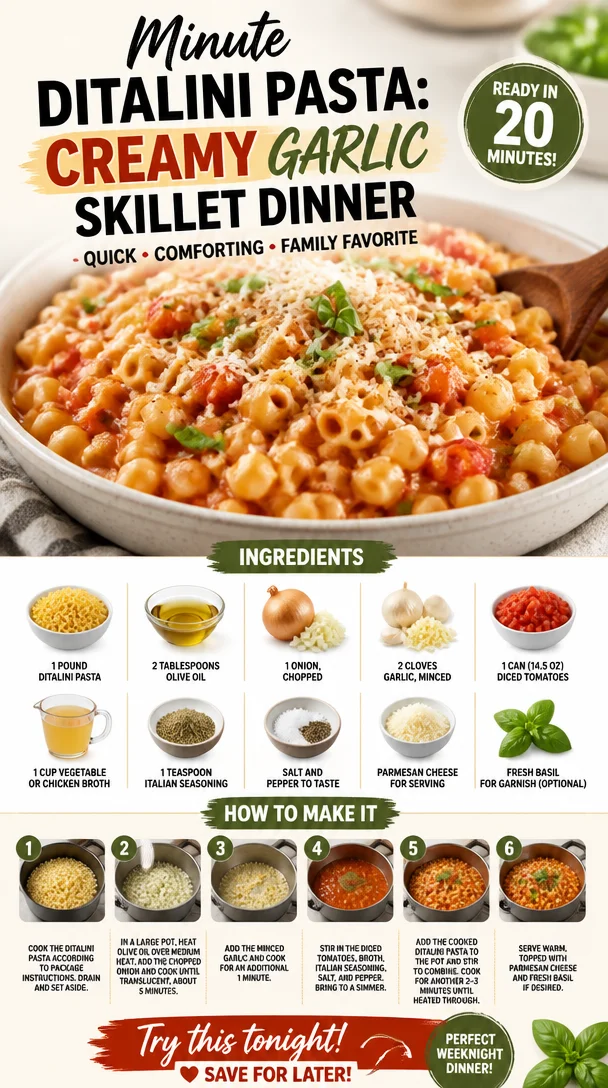
Minute Ditalini Pasta: Creamy Garlic Skillet Dinner
Ditalini Pasta Recipe: A Cozy Dinner Idea You’ll Love!
Hello, fellow food lovers! Today, I’m thrilled to share a delightful recipe that has become a staple in my kitchen: Ditalini Pasta. This comforting dish is not only quick to prepare but also bursting with flavors that’ll warm your heart and fill your home with inviting aromas. Best of all? It’s perfect for any occasion, whether you’re hosting a dinner party or whipping up a cozy meal for yourself. So, roll up your sleeves, and let’s get cooking!
A Fond Memory: The Dinner Table
I remember the first time I made a ditalini pasta dish for a gathering. It was a chilly evening, and I had invited a few close friends over for dinner. As I stirred the pot on the stove, the smell of sautéed garlic and onions filled the air, instantly bringing a cozy vibe to my home. I set a rustic wooden table with candles and fresh herbs, creating an ambiance that felt special yet relaxed.
When my friends arrived, we shared stories, laughter, and a few glasses of wine as I served the ditalini. Each bite was a testament to the warmth and joy of cooking for loved ones. As we dug in, I realized that food isn’t just about nourishment; it’s about connection. Those moments spent around the table, feasting on delicious food together, are what I cherish the most. This dish holds a special place in my heart because it perfectly embodies that spirit of comfort and togetherness.
Ingredients You’ll Need
Let’s gather our ingredients! Here’s what you’ll need for a delightful ditalini pasta dish:
-
1 pound ditalini pasta
Ditalini is a small, tubular pasta that works beautifully in soups or served as a light, hearty dish. Looking for a substitute? Use elbow macaroni or orzo for a similar texture. -
2 tablespoons olive oil
A staple in Mediterranean cooking, olive oil adds richness and flavor. If you’re seeking a lighter option, avocado oil is a great alternative. -
1 onion, chopped
Onions provide an aromatic base for the dish. You can swap with shallots for a sweeter taste or use green onions for a brighter flavor. -
2 cloves garlic, minced
Garlic adds a punch of flavor. If you’re short on fresh garlic, garlic powder can be used, but for best results, fresh is always preferred. -
1 can (14.5 ounces) diced tomatoes
Canned tomatoes are perfect for this dish, adding acidity and a pop of color. They can be substituted with fresh diced tomatoes or crushed tomatoes if you prefer. -
1 cup vegetable or chicken broth
Broth enriches the dish, enhancing the flavor profile. For a vegetarian version, go with vegetable broth, or use chicken broth if you’d like a meaty depth. -
1 teaspoon Italian seasoning
This aromatic blend typically includes basil, oregano, and thyme. No Italian seasoning on hand? Try mixing equal parts of the individual herbs for a homemade option. -
Salt and pepper to taste
Basic, but essential! They are crucial for seasoning and enhancing all flavors. Adjust according to your preference. -
Parmesan cheese for serving
A sprinkle of Parmesan cheese adds a nutty, salty finish. Pecorino Romano can be a bold substitute, or nutritional yeast works for a dairy-free option. -
Fresh basil for garnish (optional)
This herb adds a lovely fresh note on top! If fresh basil isn’t available, try fresh parsley for a similar touch.
Now that we have everything ready, we can dive into the fun part — cooking!
Step-by-Step Instructions
-
Cook the Pasta
In a large pot, bring salted water to a rolling boil. Add 1 pound of ditalini pasta and cook according to package instructions until al dente (approximately 6-8 minutes). Stir occasionally to prevent sticking. Once done, drain the pasta and set aside. This small pasta shape holds sauces beautifully! -
Sauté the Aromatics
In the same pot, heat 2 tablespoons of olive oil over medium heat. Add the chopped onion and sauté until it becomes translucent, about 5 minutes. The smell will be divine! Now, add 2 minced garlic cloves and sauté for another minute, until fragrant. Pro tip: keep an eye on the garlic so it doesn’t burn! -
Incorporate Tomatoes and Broth
Pour in 1 can of diced tomatoes (with juices) and 1 cup of broth. Stir well, and season with 1 teaspoon of Italian seasoning, salt, and pepper. Let this simmer on low for 5-10 minutes. This step allows the flavors to meld beautifully, creating a savory tomato base. -
Combine the Pasta
Add the cooked ditalini pasta back into the pot, stirring gently to combine everything. Make sure every piece is coated in the delicious sauce. Keep it on low heat just for a couple more minutes, allowing the pasta to absorb some of the sauce flavors. If it looks too thick, you can add a little more broth or water to reach your desired consistency. -
Serve and Enjoy
Just before serving, taste and adjust seasonings as needed. If you feel inspired, toss in some fresh basil! Now, scoop individual portions into bowls, generously top with freshly grated Parmesan cheese, and maybe a drizzle of olive oil for that final touch. Enjoy it with a piece of crusty bread — it’s a match made in heaven!
Serving Suggestions
For an elegant presentation, use a large serving bowl and let the colorful ditalini dish shine! Garnish with fresh basil leaves and a sprinkle of grated Parmesan across the top. If you want to elevate it further, add a dash of red pepper flakes for a little heat. This dish pairs beautifully with a simple side salad or some grilled vegetables for a complete meal.
Recipe Variations
-
Add Proteins
Feel free to incorporate cooked sausage, shredded rotisserie chicken, or even chickpeas for a protein boost! -
Vegetable Medley
Toss in sautéed spinach, zucchini, or bell peppers for extra nutrients and flavor. -
Creamy Twist
Stir in a splash of cream or milk just before serving for a creamy tomato pasta sensation. -
Spicy Kick
Add some crushed red pepper flakes or diced jalapeños for a spicier variation. -
Herb-Infused
Experiment with different herbs! Try adding fresh thyme or oregano for a different flavor profile.
Chef’s Notes
This ditalini pasta recipe has gracefully evolved in my kitchen over the years. I started with just a simple tomato broth, but over time, I’ve discovered the beauty of adding herbs and vegetables to enhance the flavors. I once added some roasted bell pepper by chance, and it became an instant hit! Cooking is all about experimenting, so don’t hesitate to make this dish your own. Trust me, no one ever leaves the table disappointed — it’s always a crowd-pleaser!
FAQs and Troubleshooting
-
Q: My pasta ended up sticky. What happened?
A: This can occur if the pasta isn’t stirred enough while cooking or if it’s overcooked. Always remember to stir during cooking and follow the recommended cooking time! -
Q: Can I meal prep this dish?
A: Absolutely! Ditalini pasta stores well. Just keep the pasta and sauce separate to avoid mushiness. Store in airtight containers in the fridge for up to 3 days. -
Q: Is there a way to make this dish gluten-free?
A: Yes! Swap the ditalini pasta for a gluten-free pasta alternative, and you’re good to go! -
Q: How can I make sure my seasoning is on point?
A: Always taste as you go! Start with less salt and seasonings, then add more until you reach your desired flavor profile.
Nutritional Info (Optional)
While I love celebrating the culinary experience, a rough breakdown of a serving of this ditalini pasta would be as follows (assuming 6 servings total):
- Calories: ~300
- Protein: ~9g
- Carbohydrates: ~42g
- Fat: ~9g
By marrying hearty ingredients and simple methods, you’ve created a delightful ditalini pasta dish that speaks of love and joy. I hope you enjoyed this culinary journey as much as I have loved sharing it with you. Now, tie on that apron, grab your ingredients, and let’s get cooking! Here’s to many delicious moments spent around your table. Cheers!
PrintDitalini Pasta
A delightful and comforting ditalini pasta dish, perfect for any occasion, filled with flavors and warmth.
- Prep Time: 10 minutes
- Cook Time: 20 minutes
- Total Time: 30 minutes
- Yield: 6 servings 1x
- Category: Main Course
- Method: Stovetop
- Cuisine: Italian
- Diet: Vegetarian
Ingredients
- 1 pound ditalini pasta
- 2 tablespoons olive oil
- 1 onion, chopped
- 2 cloves garlic, minced
- 1 can (14.5 ounces) diced tomatoes
- 1 cup vegetable or chicken broth
- 1 teaspoon Italian seasoning
- Salt and pepper to taste
- Parmesan cheese for serving
- Fresh basil for garnish (optional)
Instructions
- Cook the Pasta in a large pot of salted boiling water according to package instructions until al dente (approximately 6-8 minutes). Drain and set aside.
- Sauté the Aromatics by heating olive oil in the same pot over medium heat. Add chopped onion and sauté until translucent, about 5 minutes. Then, add minced garlic and sauté for another minute.
- Incorporate Tomatoes and Broth by pouring in diced tomatoes and broth. Season with Italian seasoning, salt, and pepper, then let simmer on low for 5-10 minutes.
- Combine the Pasta back into the pot, stirring gently to coat. Allow to heat through for a couple more minutes, adding more broth if needed.
- Serve and Enjoy by tasting and adjusting seasonings as needed. Scoop into bowls, top with Parmesan cheese, and enjoy with crusty bread.
Notes
Feel free to experiment with adding proteins or vegetables. This dish is versatile and allows for many variations!
Nutrition
- Serving Size: 1 serving
- Calories: 300
- Sugar: 6g
- Sodium: 500mg
- Fat: 12g
- Saturated Fat: 2g
- Unsaturated Fat: 8g
- Trans Fat: 0g
- Carbohydrates: 42g
- Fiber: 3g
- Protein: 9g
- Cholesterol: 5mg
Keywords: ditalini pasta, comfort food, easy dinner recipe, vegetarian pasta, Italian cuisine
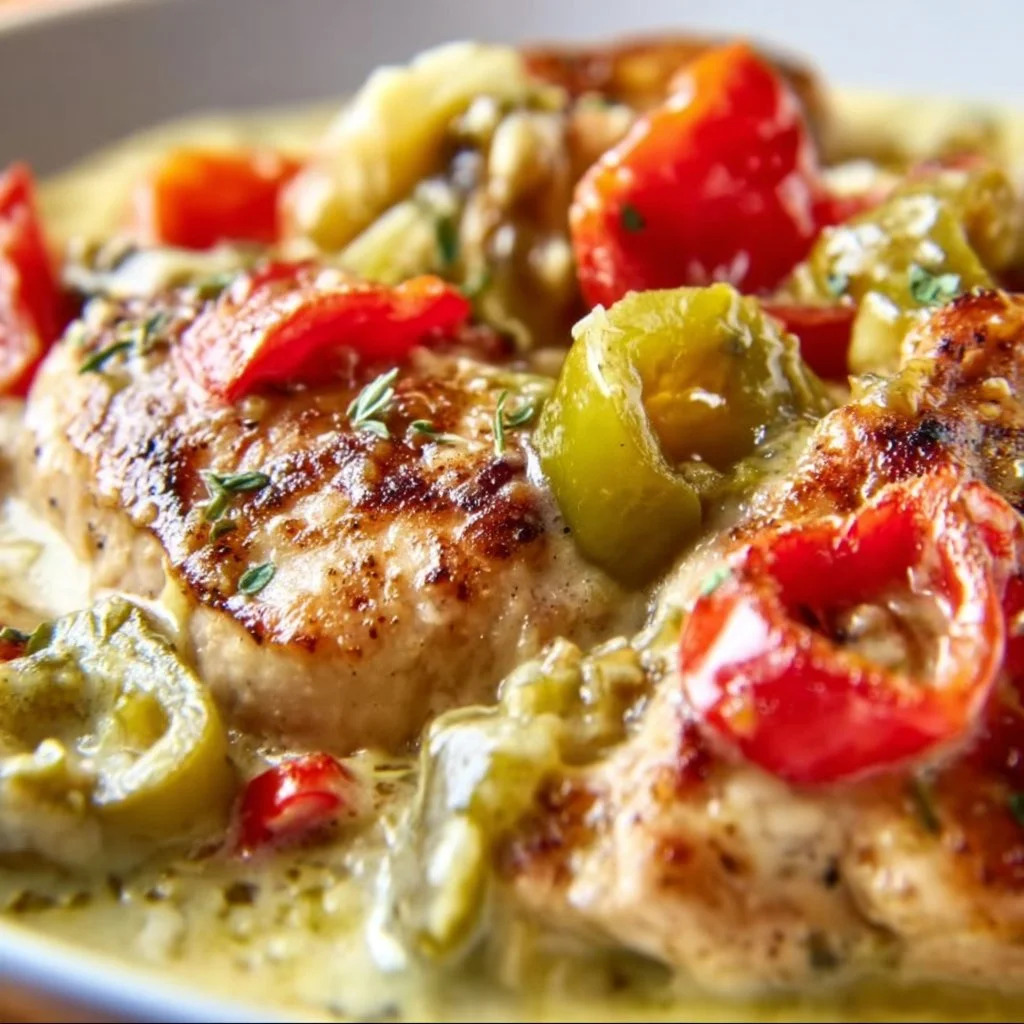
Creamy Banana Pepper Chicken Skillet
Creamy Banana Pepper Chicken Skillet: A Comforting Delight
Introduction
Hello, food lovers! Today, I’m thrilled to share with you one of my kitchen’s crown jewels: Creamy Banana Pepper Chicken Skillet. This dish has a special place in my heart—and my table—thanks to its mouthwatering combination of creamy goodness and zesty peppers. Every time I whip up this savory delight, I’m reminded of the times spent in my grandmother’s kitchen, where laughter and rich aromas filled the air.
You see, cooking is more than just a necessary chore; it’s an experience that evokes emotion, nostalgia, and connection. There’s something magical about gathering loved ones around the table for a meal made with love. Whether it’s a casual weeknight dinner or a celebratory feast, my goal is to create food that not only satisfies but also sparks joy and conversation.
This Creamy Banana Pepper Chicken Skillet does just that. With tender pieces of chicken enveloped in a luscious cream sauce punctuated by the tangy bite of banana peppers, it’s a symphony of flavors that will transport you straight to culinary bliss. Simple ingredients unite in this one-pan wonder, ensuring an effortless clean-up and more time for you to enjoy the company of your family and friends. So, let’s roll up our sleeves, grab our aprons, and dive right into this creamy goodness!
Personal Story
I still vividly recall the first time I made this dish. It was a chilly autumn evening, and I was hosting a small gathering for my close friends. As I prepped in the kitchen, the chatter and laughter flowed in from the living room, seamlessly blending with the sizzle of chicken cooking on the stove. I had discovered banana peppers not long before, and I was intrigued by the idea of incorporating them into a creamy skillet meal.
As the aroma filled my home, I felt a sense of anticipation and excitement. I served the dish to my friends, and the response was electric! Exclamations of delight resonated with each forkful they took. The zesty flavor of the banana peppers elevated the creaminess of the dish in a way that made it unforgettable. That night transformed not only my recipe repertoire but also deepened my appreciation for the power of food and the memories we create around it. Since then, this creamy delight has graced many more tables, and each time it brings a new wave of smiles and satisfaction.
Ingredients
Here’s what you’ll need to create your own Creamy Banana Pepper Chicken Skillet:
-
1 lb chicken breast, cubed
Chicken breast is lean and quick to cook, making it perfect for weeknight meals. You could substitute it with thighs for a juicier option. -
1 cup creamy pepperoncini peppers, sliced
These spicy-sour peppers pack a punch! If you prefer a milder flavor, feel free to substitute with banana peppers or omit some for a less zesty kick. -
1 tablespoon olive oil
Extra virgin olive oil works wonderfully here. You could also use avocado oil for a higher smoke point or any neutral oil you prefer. -
1/2 cup heavy cream
The heavy cream gives this dish its luxurious texture. For a lighter option, you could try half-and-half, but keep in mind it may not be as creamy. -
1 teaspoon garlic powder
This enhances the dish’s flavor profile with a comforting garlic aroma. If you have fresh garlic, you could substitute 1-2 cloves, minced. -
Salt and pepper to taste
Always season your dishes! Kosher salt and freshly cracked pepper will elevate the flavors beautifully. -
Fresh parsley for garnish
A pop of color and freshness. You could use chives or basil if you prefer a different herbal touch.
Step-by-Step Instructions
-
Prep Your Ingredients: Start by cubing the chicken breast into bite-sized pieces. This will help it cook evenly and quickly. Slice the pepperoncini peppers and set everything aside.
-
Heat the Pan: Grab a large skillet and warm up the olive oil over medium-high heat. You want that oil shimmering to ensure a nice sear on your chicken.
-
Cook the Chicken: Add the cubed chicken to the pan, seasoning it generously with salt and pepper. Sear the chicken for about 5-7 minutes, stirring occasionally until it’s golden brown and cooked through. Use a meat thermometer if you have one; the internal temperature should reach 165°F for safety. Don’t overcrowd the pan—if necessary, cook the chicken in batches!
-
Add the Peppers: Once the chicken is cooked, stir in the sliced pepperoncini. Let them cook with the chicken for about 2-3 minutes to soften, releasing their juices. This step is key to infusing your dish with zesty flavor.
-
Make It Creamy: Lower the heat to medium and stir in the heavy cream. Keep stirring to combine everything smoothly. The cream will simmer and bubble slightly, thickening up beautifully. If you like, add garlic powder at this stage; it will meld perfectly with the cream and peppers.
-
Season Smartly: Taste your creamy mixture and adjust the seasoning with more salt and pepper if necessary. Don’t forget that the pepperoncini has its own zing, so be mindful not to overdo it with salt!
-
Garnish and Serve: Once the mixture is creamy and heated through, take it off the heat. Spoon your delectable Creamy Banana Pepper Chicken onto plates and garnish with fresh parsley. It’s the finishing touch that adds vibrancy!
Serving Suggestions
To elevate the presentation of your dish, consider serving it over a bed of fluffy rice or creamy polenta. A sprinkle of extra parsley and perhaps some freshly grated parmesan can add a lovely touch. Pair it with a crisp green salad for a balanced meal that looks as good as it tastes. Your guests will be impressed!
Recipe Variations
If you’re feeling adventurous, know that there are plenty of ways you can twist this recipe to suit your taste:
- Spicy Twist: Add crushed red pepper flakes or diced jalapeños for an extra kick!
- Veggie Boost: Toss in some vibrant bell peppers, spinach, or zucchini for a healthy veggie addition.
- Cheesy Delight: Stir in some shredded cheddar cheese or cream cheese for an even richer sauce.
- Herbaceous Flavor: Experiment with fresh herbs like basil or thyme to deepen the dish’s flavor profile.
- Dietary Swap: For a lighter version, use boneless, skinless chicken thighs or even tofu for a vegetarian option.
Chef’s Notes
One of the things I adore about this recipe is its simplicity. It’s perfect for busy weeknights yet elegant enough for company. I’ve shared this dish several times with friends and family, and each time, I try to put my spin on it, whether adding a new herb or experimenting with different sides. Just the other day, I swapped in fresh mint as a garnish, and it brought such a fresh vibe!
Cooking is a journey, so don’t be afraid to experiment and make it your own. You might just stumble upon a twist that becomes your signature touch!
FAQs and Troubleshooting
-
What if my chicken is dry?
If your chicken turns out dry, it could be due to overcooking. Always ensure your chicken reaches the safe internal temperature without overcooking it. If you find yourself in a pinch, adding a splash more cream or chicken broth can help moisten it up! -
Can I make this in advance?
Absolutely! You can prepare the chicken and sauce ahead of time. Just reheat gently on the stove with a splash of cream before serving. -
How can I store leftovers?
Store any leftovers in an airtight container in the fridge for up to 3-4 days. Reheat in a skillet for the best texture! -
What sides go well with this dish?
Pair it with rice, pasta, or a fresh salad for a balanced meal. I personally love serving it with garlic bread to soak up all that creamy goodness!
Nutritional Info (per serving, approx.)
- Calories: 450
- Protein: 32g
- Fat: 30g
- Carbohydrates: 6g
- Fiber: 1g
So there you have it! With this creamy banana pepper chicken skillet, you’ll have a comforting dish that not only fills bellies but also warms hearts. Gather your loved ones, enjoy the process, and let the flavors pave the way for delightful memories. Happy cooking, my friends!
PrintCreamy Banana Pepper Chicken Skillet

A comforting dish featuring tender chicken in a creamy sauce with zesty banana peppers.
- Prep Time: 15 minutes
- Cook Time: 20 minutes
- Total Time: 35 minutes
- Yield: 4 servings 1x
- Category: Main Course
- Method: Stovetop
- Cuisine: American
- Diet: Gluten-Free
Ingredients
- 1 lb chicken breast, cubed
- 1 cup creamy pepperoncini peppers, sliced
- 1 tablespoon olive oil
- 1/2 cup heavy cream
- 1 teaspoon garlic powder
- Salt and pepper to taste
- Fresh parsley for garnish
Instructions
- Prep your ingredients: Start by cubing the chicken breast into bite-sized pieces and slice the pepperoncini peppers.
- Heat the pan: Warm up the olive oil over medium-high heat in a large skillet.
- Cook the chicken: Add the cubed chicken, seasoning it with salt and pepper, and cook for 5-7 minutes until golden brown.
- Add the peppers: Stir in the sliced pepperoncini and cook for 2-3 minutes.
- Make it creamy: Lower heat, stir in the heavy cream and garlic powder, simmering until thickened.
- Season smartly: Taste and adjust the seasoning as needed.
- Garnish and serve: Finish with fresh parsley and serve over rice or polenta.
Notes
Feel free to experiment with additional spices or substitute chicken with vegetables for a lighter option.
Nutrition
- Serving Size: 1 serving
- Calories: 450
- Sugar: 3g
- Sodium: 600mg
- Fat: 30g
- Saturated Fat: 15g
- Unsaturated Fat: 10g
- Trans Fat: 0g
- Carbohydrates: 6g
- Fiber: 1g
- Protein: 32g
- Cholesterol: 90mg
Keywords: creamy chicken, skillet meal, comfort food, banana pepper, one-pan recipe