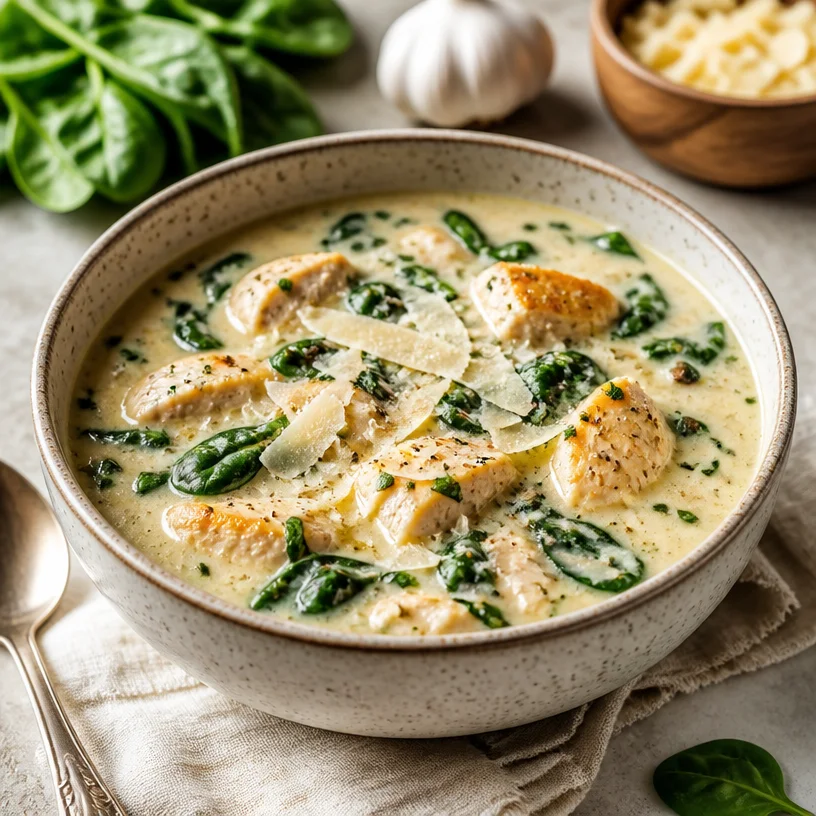
Weeknight Creamy Spinach Chicken Soup in 30 Minutes
A Warm Hug in a Bowl: Creamy Spinach Chicken Soup
Hello there, fellow food lovers! Today, I’m so excited to share a recipe that’s close to my heart: Creamy Spinach Chicken Soup. Trust me, this dish is like a cozy evening hug you can hold in your hands. Imagine sitting by a fireplace or curling up on the couch after a long day, and this soup is the blissful comfort you need. Whether you’re fighting the winter blues or just in need of a delightful meal, this bowl of deliciousness is here to wrap you up in warmth and flavor.
A Taste from the Past
Let me take you on a little journey back to a time when I first discovered this soulful soup. I remember one chilly evening during my early days of hosting. A few friends gathered around my table, and I experimented with a few ingredients I had on hand, one of which was fresh spinach from the local farmer’s market.
As I simmered chicken, garlic, and that glorious green goodness, the aroma filled the kitchen, drawing us all in. When the first bowl was served, I held my breath. Would they love it? The thrill of that moment brought back memories of family dinners growing up, when everyone sat together, enjoying every morsel.
With just one taste, the room erupted in compliments, and I felt a wave of pride wash over me. It wasn’t just delicious—it was a gathering of flavors that felt like home. This is the beauty of cooking! It allows us to share memories and create new ones, one meal at a time.
Ingredients: The Heart of Our Soup
Here’s what you’ll need to create this luscious, hearty soup. Don’t worry if you’re missing an ingredient or two; I’ve got some substitution tips for you!
-
Chicken Breast: Boneless, skinless chicken is my go-to for this recipe. If you’re short on fresh chicken, rotisserie works wonderfully, too! It saves time and still delivers that comforting flavor.
-
Fresh Spinach: This leafy green gem adds a vibrant color and nutrients. If fresh isn’t available, use frozen spinach (just remember to thaw and squeeze out excess moisture).
-
Heavy Cream: This is where the silkiness comes from! If you’re looking for a lighter version, half-and-half works, or even coconut milk for a dairy-free twist.
-
Parmesan Cheese: Grated Parmesan adds a nutty depth to the soup. If you’re not a fan of cheese or need a dairy-free option, nutritional yeast can give a similar savory flavor.
Step-by-Step Instructions: Crafting Your Comfort Bowl
Ready to get cooking? Gather your ingredients and let’s dive into the heart of the kitchen!
-
Prepare Your Chicken: Start by dicing your chicken breast into bite-sized pieces. This ensures quick cooking and easy eating. Season with salt and pepper for that initial layer of flavor. Chef’s Tip: Don’t be shy with the seasoning; it’s a crucial step!
-
Sauté the Chicken: Heat a drizzle of olive oil in your favorite soup pot over medium heat. Add the chicken and cook until it starts to brown, about 5–7 minutes. Stir occasionally! If any bits stick to the bottom, just gently scrape them up—those flavorful bits are gold! Chef Insight: If you’re using rotisserie chicken, skip to the next step!
-
Add Aromatics: Toss in minced garlic (about 2-3 cloves) and sauté for an additional minute until fragrant. Ah, the smell of garlic in the kitchen—it’s pure magic!
-
Incorporate the Spinach: Next, add a generous handful of spinach. Stir until it wilts down, which takes just a couple of minutes. The spinach will not only add beautiful color but also a touch of fresh flavor.
-
Pour in the Cream: Slowly add in 1 cup of heavy cream, stirring continuously. Allow it to come to a gentle simmer. Chef’s Tip: If the soup gets too thick, add a splash of chicken broth to lighten it up!
-
Season to Perfection: Now it’s time for seasoning! Stir in ½ cup grated Parmesan cheese. This will melt beautifully into the soup, creating that creamy texture we all love. Taste and adjust with salt, pepper, and perhaps a hint of nutmeg—it’s a game changer!
-
Finish Cooking: If you want to ensure everything is cooked through, let it simmer for several more minutes. If you’re using rotisserie chicken, just warm through and let the flavors meld.
And voilà! Your Creamy Spinach Chicken Soup is ready to be served. Chef Hack: Drizzle a little extra cream on top for a beautiful garnish.
Serving Suggestions: Presenting Your Creation
To plate this lovely soup, use deep bowls to really showcase the beautiful colors. For that refined touch, remember to sprinkle a bit more Parmesan on top and perhaps a few fresh basil leaves or a drizzle of olive oil. Serve it alongside a crusty piece of bread or a fresh salad to complete the meal. Don’t forget to enjoy it with good company; that’s the best ingredient of all!
Recipe Variations: Get Creative!
Want to switch it up a bit? Here are some fun variations of this creamy delight:
- Spicy Kick: Add red pepper flakes when sautéing the garlic for a spicy surprise.
- Mushroom Medley: Stir in some sautéed mushrooms for an earthy flavor boost.
- Lemon Zest: A squeeze of fresh lemon juice at the end brightens up the flavors beautifully.
- Coconut Spinach Soup: Swap the cream for coconut milk and add a touch of curry powder for an exotic twist.
- Vegan Delight: Substitute the chicken with chickpeas or lentils and use cashew cream in place of dairy for a rich vegan option.
Chef’s Notes: Culinary Reminiscences
This soup has evolved over the years, starting as a simple weeknight meal to becoming a cherished family favorite. I’ve played with various aspects—from adding more greens, such as kale or Swiss chard, to even experimenting with different spices. One time, I accidentally spilled too much nutmeg in (don’t ask), and much to my surprise, it added a delightful warmth that became a staple in my version!
Cooking is all about adapting and having fun in the kitchen. Never be afraid to tweak a recipe to make it your own.
FAQs and Troubleshooting: The Kitchen Q&A
Q: Can I make this soup in advance?
A: Absolutely! It stores well in the fridge for up to 3 days. Just remember to reheat gently and add a splash of cream to bring it back to life.
Q: My soup is too thick! What can I do?
A: Easy fix! Just add some warm chicken broth or water a little at a time until you reach your desired consistency.
Q: Can I freeze the soup?
A: Yes, but with a little caveat! Freeze before adding cream. When you want to enjoy it again, thaw and warm it up, then stir in the cream at the end.
Q: Is it okay to use other greens besides spinach?
A: Definitely! Kale, chard, or even arugula can introduce unique flavors to the soup. Just remember that cooking times and textures might slightly differ.
Nutritional Info (Optional)
A rough estimate per serving (without bread):
- Calories: 320
- Protein: 25g
- Carbohydrates: 10g
- Fat: 20g
- Fiber: 2g
Conclusion
There you have it—a heartwarming recipe for Creamy Spinach Chicken Soup that’s sure to impress at your next gathering or add comfort to a quiet night in. Cooking is about creating memories, sharing experiences, and most importantly—loving every minute of it. So tie on your apron, gather your ingredients, and let’s create something beautiful together!
Thank you for joining me today! I hope this recipe inspires you to whip up a pot of this cozy goodness and share it with those you love. Until next time, happy cooking!
PrintCreamy Spinach Chicken Soup

A warm and comforting bowl of creamy spinach chicken soup, perfect for cozy evenings.
- Prep Time: 10 minutes
- Cook Time: 20 minutes
- Total Time: 30 minutes
- Yield: 4 servings 1x
- Category: Soup
- Method: Stovetop
- Cuisine: Comfort Food
- Diet: Paleo
Ingredients
- 1 lb Boneless, skinless chicken breast
- 4 cups Fresh spinach
- 1 cup Heavy cream
- ½ cup Grated Parmesan cheese
- 2–3 cloves Minced garlic
- Olive oil
- Salt and pepper
Instructions
- Prepare your chicken by dicing it into bite-sized pieces and seasoning with salt and pepper.
- Sauté the chicken in olive oil over medium heat until browned, about 5–7 minutes.
- Add minced garlic and sauté for another minute until fragrant.
- Incorporate the spinach and stir until wilted, about 2 minutes.
- Pour in the heavy cream and let it come to a gentle simmer.
- Season with grated Parmesan, salt, pepper, and nutmeg to taste.
- Finish cooking by letting it simmer for several more minutes or warming rotisserie chicken through.
Notes
This soup can be made ahead and stores well in the fridge. Add a splash of cream when reheating.
Nutrition
- Serving Size: 1 cup
- Calories: 320
- Sugar: 3g
- Sodium: 300mg
- Fat: 20g
- Saturated Fat: 10g
- Unsaturated Fat: 8g
- Trans Fat: 0g
- Carbohydrates: 10g
- Fiber: 2g
- Protein: 25g
- Cholesterol: 80mg
Keywords: spinach, chicken soup, creamy soup, comfort food, cozy recipes

One-Pot Cabbage Roll Soup: Weeknight Comfort in 30 Minutes
A Cozy Bowl of Cabbage Roll Soup: Comfort in Every Sip
Hello and welcome, my fellow food lovers! Today, I’m thrilled to share a recipe that warms the heart and satisfies the soul: Cabbage Roll Soup. If you’ve ever found yourself enjoying the comforting flavors of stuffed cabbage rolls but wished for a quicker, more casual way to enjoy those flavors, you’re in for a treat. This soup is a delightful spin on a classic dish, packed with all the goodness you love, but without the fuss of rolling individual leaves.
My Personal Story: A Family Tradition
Growing up, Sundays were sacred in my household. My mom would gather us around the kitchen table, and we’d be whisked away by the savory aromas wafting through the air. One dish that stood out during those family feasts was mom’s stuffed cabbage rolls. I still remember the first time I attempted to help her in the kitchen. I was probably 10, stepping on my tippy toes to reach the counter, desperately trying to roll those delicate cabbage leaves.
Fast forward a few years, and the idea of rolling each leaf had become less appealing (especially after I moved into my tiny apartment). That’s when I had a lightbulb moment! Why not transform my childhood favorite into a soup? After all, who can resist a hearty broth filled with meat, cabbage, and warm spices? This soup not only brings back cherished memories but also allows me to share a comforting dish that can be whipped up in no time—perfect for today’s busy lifestyle!
Ingredients:
Before diving into the simmering pot of deliciousness, let’s gather our ingredients. Here’s what you’ll need to create this soulful dish:
-
Ground Beef: This is the star of the show! If you’re looking for a leaner option, ground turkey or chicken works beautifully as well.
-
Cabbage: Fresh green cabbage gives the soup its signature flavor and texture. If you’re not a fan of cabbage, feel free to substitute with spinach or kale for a leafy green boost.
-
Rice: I recommend using long-grain white rice—it’s quick to prepare and absorbs the flavors of the broth. Brown rice or quinoa can be great substitutes too, just adjust the cooking time accordingly.
-
Canned Tomatoes: Diced tomatoes add acidity and sweetness. If you have fresh tomatoes, they can be used too, but I’d recommend peeling them first for a smoother bite.
-
Onion and Garlic: These aromatics are essential for building flavor. Shallots are a nice alternative if you’re looking for something a bit sweeter.
-
Beef Broth: A rich beef broth infuses the soup with deep flavor. Vegetable broth works just as well for a lighter option or if you need to keep things vegetarian.
-
Herbs and Spices: Fresh thyme and paprika give depth to the soup. Feel free to play around with dried herbs or even add a bay leaf for an earthy touch!
Step-by-Step Instructions
Now that we’ve scaled our ingredient list, let’s get cooking! Follow these simple steps to whip up a pot of warm, cozy Cabbage Roll Soup.
-
Brown the Meat: Start by heating a large pot over medium heat. Add your ground beef, breaking it up with a wooden spoon as it cooks. This should take about 5-7 minutes until it’s browned. Chef Hack: For extra flavor, don’t forget to season with a pinch of salt and pepper while it’s cooking!
-
Sauté the Aromatics: Once your meat is browned, it’s time to introduce the onion and garlic! Add them to the pot and sauté for another 3-5 minutes, until the onion is translucent and fragrant. The aroma is heavenly—trust me!
-
Incorporate the Cabbage: Toss in the chopped cabbage. It may look like a mountain now, but it will wilt down nicely as it cooks! Stir for about 3-4 minutes until the cabbage begins to soften.
-
Add the Rice and Tomatoes: Next up, add your rice and canned tomatoes (including the juice). Give everything a good stir to combine. The rice will soak up all the delicious flavors as it cooks!
-
Pour in the Broth: Pour the beef broth into the pot, stirring to combine all the ingredients. Bring the soup to a gentle boil.
-
Simmer and Season: Once boiling, reduce the heat to low and cover the pot, letting it simmer for about 25-30 minutes. This is where the magic happens! Chef Tip: Check periodically and give the soup a stir to ensure the rice doesn’t stick to the bottom.
-
Final Touches: After 30 minutes, the rice should be cooked and the cabbage lovely and tender. Taste the soup, and adjust the seasoning with more salt, pepper, or herbs as needed.
-
Serving Time: Serve the soup hot, garnished with fresh parsley or a sprinkle of grated cheese, if desired.
Serving Suggestions
Serving this delightful soup is half the fun! Ladle it into deep bowls, and feel free to add a sprinkle of freshly chopped parsley or a dash of hot sauce for an extra kick. Pair it with crusty bread or a side salad for a complete meal that’s bound to impress (and satisfy!) everyone around your table.
Recipe Variations
-
Spicy Kick: Add some red pepper flakes or a chopped jalapeño for a spicy version. Who doesn’t love a little heat?
-
Vegetarian Version: Swap the ground beef for lentils or mushrooms and use vegetable broth for a plant-based twist.
-
Herbaceous Delight: Experiment with different herbs like dill or cilantro to elevate the flavors. They bring a freshness that can take the soup to the next level.
-
Cheesy Creaminess: Stir in a dollop of cream cheese or a handful of shredded cheese at the end of cooking for a creamy version that’s simply luscious.
-
Add More Veggies: Sneak in veggies like carrots, bell peppers, or peas for added nutrition and color.
Chef’s Notes
This Cabbage Roll Soup has come a long way in my kitchen! It started as a quick fix for busy weeknights and has morphed into a favorite dish I’m proud to share. I’ve tried different meats, herbs, and even various broth bases, and the beauty of this recipe is its flexibility. One time, I even added a splash of lemon juice at the end for a zesty twist—total game changer! Just goes to show that cooking is all about discovering what you love.
FAQs and Troubleshooting
Q: Why is my soup too thick?
A: If the soup ends up thicker than you’d like, simply add more broth or water to thin it out.
Q: Can I make this ahead of time?
A: Absolutely! This soup reheats beautifully. Just store leftovers in an airtight container in the fridge for up to 4 days.
Q: How can I add more flavor to my soup?
A: Don’t hesitate to experiment with different spices and herbs. A splash of Worcestershire sauce can also add depth!
Q: My rice is too mushy. What did I do wrong?
A: Overcooking can make rice mushy, so be mindful of timing. Use long-grain rice for better texture and keep an eye on the simmering time.
Nutritional Info
- Calories: Approximately 300 per serving
- Protein: 20g
- Carbohydrates: 35g
- Fat: 10g
(Nutritional information may vary based on specific ingredient brands and variations)
There you have it! A comforting, hearty Cabbage Roll Soup that’s perfect for any day of the week. Whether you’re cooking for a crowd or enjoying a cozy night in, this dish is sure to leave everyone asking for seconds. So tie on that apron, grab a spoon, and let’s savor a bowl of love together. Happy cooking! 🍽️
PrintCabbage Roll Soup

A comforting soup that captures the flavors of classic stuffed cabbage rolls without the fuss of rolling individual leaves.
- Prep Time: 15 minutes
- Cook Time: 30 minutes
- Total Time: 45 minutes
- Yield: 4 servings 1x
- Category: Main Course
- Method: Simmering
- Cuisine: American
- Diet: None
Ingredients
- 1 lb Ground Beef
- 1 head Cabbage, chopped
- 1 cup Long-Grain White Rice
- 1 can (14.5 oz) Diced Tomatoes
- 1 Onion, chopped
- 3 cloves Garlic, minced
- 4 cups Beef Broth
- 2 tsp Fresh Thyme
- 1 tsp Paprika
- Salt and Pepper, to taste
Instructions
- Brown the meat in a large pot over medium heat for about 5-7 minutes.
- Sauté the onion and garlic for another 3-5 minutes until fragrant.
- Incorporate the chopped cabbage and stir for 3-4 minutes until softened.
- Add the rice and canned tomatoes, stirring to combine.
- Pour in the beef broth and bring to a gentle boil.
- Simmer for 25-30 minutes on low heat, covered.
- Adjust seasoning to taste before serving.
Notes
This soup can be made in advance and reheats beautifully. Add more broth if it thickens too much.
Nutrition
- Serving Size: 1 serving
- Calories: 300
- Sugar: 6g
- Sodium: 800mg
- Fat: 10g
- Saturated Fat: 4g
- Unsaturated Fat: 4g
- Trans Fat: 0g
- Carbohydrates: 35g
- Fiber: 2g
- Protein: 20g
- Cholesterol: 60mg
Keywords: cabbage soup, comfort food, hearty soup
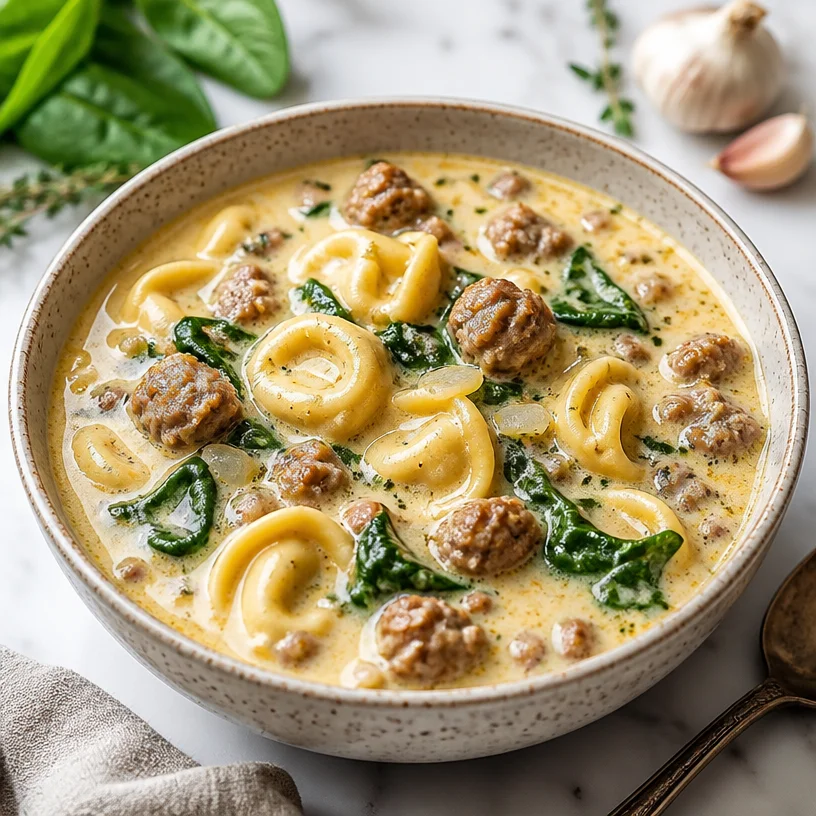
Minute Creamy Tortellini Soup for Busy Weeknights
The Cozy Comfort of Creamy Tortellini Soup
Hello, fellow food lovers! Today, I’m thrilled to share a dish that has become a cherished staple in my kitchen: Creamy Tortellini Soup. Imagine this: a rich, warm bowl of soup that wraps you in a hug, filled with tender cheese tortellini, savory sausage, and vibrant greens. It’s the epitome of comfort food, and it’s perfect for any occasion—whether you’re having a quiet dinner at home or entertaining friends on a chilly evening.
When I first came across a recipe for tortellini soup, it immediately caught my attention. I’ve always loved tortellini; those delightful little pasta pillows filled with cheese, bursting with flavor with every bite. But pairing them with a creamy, savory broth? That was a game changer for me. I knew I had to create my own version that included all of my favorite ingredients, enhancing the dish with layers of flavor and a bit of flair, of course!
Let me take you back to one of my most memorable kitchen moments. It was a rainy day, and I was a budding cook, still learning the ropes. I had invited some friends over for a cozy gathering, and I needed a dish that would impress without taking hours of prep. As I scrolled through my recipe collection, I stumbled upon a tortellini soup recipe. With just a few ingredients, I thought, “What do I have to lose?”
It was during that first pot of creamy goodness that I realized food has an incredible power to bring people together. As I ladled the soup into bowls and served slices of crusty bread on the side, my friends’ eyes lit up with delight. The laughter, the endless seconds for soup, and the warm atmosphere enveloped us like a comforting blanket. It reminded me that cooking is not just about the dishes we create but about the memories we make around the table. Now, let’s dive into this incredible recipe!
Ingredients
Here’s what you’ll need for this delightful Creamy Tortellini Soup:
-
Cheese Tortellini
- Use store-bought or homemade if you’re feeling adventurous! Fresh tortellini offers a fantastic texture, but dried or frozen works just as well.
-
Sausage
- I love using Italian sausage for the robust flavor, but feel free to substitute turkey or chicken sausage for a lighter option or omit it completely for a vegetarian version.
-
Spinach
- Baby spinach is tender and mild, but kale or Swiss chard can add more texture and depth. Fresh herbs can replace spinach for a burst of flavor.
-
Cream
- Heavy cream gives the soup its luscious richness. You can substitute half-and-half for a lighter version or even coconut milk for a dairy-free option.
-
Broth
- A good-quality chicken or vegetable broth enhances the flavor immensely. Homemade broth is ideal, but store-bought works perfectly too! Low-sodium options allow you to control the saltiness.
Step-by-Step Instructions
Now, let’s get cooking!
-
Sauté the Sausage
- In a large pot over medium heat, add a splash of olive oil. Crumble in your sausage, breaking it up with a wooden spoon. Cook for about 5–7 minutes until browned and cooked through. The aroma of the sausage sizzling is heavenly!
-
Add Aromatics
- Throw in a diced onion and a couple of minced garlic cloves. Sauté until the onion becomes translucent and fragrant, which usually takes about 3–4 minutes. Pro tip: add a pinch of salt during this stage—it helps the onions sweat and develop flavor more quickly!
-
Introduce the Broth
- Pour in about 4 cups of broth. Bring the mixture to a gentle simmer. This is where all those flavors start to meld—so let it simmer for about 5 minutes.
-
Tortellini Time!
- Add your cheese tortellini to the pot and cook according to package directions (usually about 3–5 minutes). The tortellini will cook quickly, absorbing the delicious broth!
-
Make it Creamy
- Stir in the cream, allowing the soup to bubble gently. Watch as it turns into a beautiful shade of creamy goodness. If you like your soup extra creamy, feel free to add in more cream or a splash of milk.
-
Add the Spinach
- Fold in the fresh spinach and let it wilt for a couple of minutes. This adds so much freshness to your soup; plus, you’re sneaking in a nice dose of greens!
-
Season to Taste
- Taste your soup and adjust the seasoning with salt, pepper, and a sprinkle of nutmeg for warmth and depth. If you’re feeling fancy, toss in some fresh basil or parsley to elevate it!
-
Serve and Enjoy!
- Your armor of deliciousness is ready! Ladle the soup into bowls, and if you want to be a plating superstar, add a sprinkle of shaved Parmesan and a drizzle of olive oil on top.
Serving Suggestions
Serve this Creamy Tortellini Soup hot, paired with a slice of crusty bread or a side salad for a delightful meal. Don’t forget to offer a sprinkle of fresh herbs or a dollop of pesto on top for an extra pop of flavor!
Recipe Variations
Here are a few creative twists to think about when making this soup:
-
Spicy Kick: Add crushed red pepper flakes to the sausage while cooking for some heat.
-
Mushroom Medley: Sauté some sliced mushrooms with the onions for an earthy depth.
-
Herb Infusion: Swap out the spinach for a blend of fresh herbs like basil, thyme, and parsley for a garden-fresh flavor.
-
Lemon Zest: A squeeze of fresh lemon juice (or zest) brightens up the creaminess and adds a refreshing touch.
-
Gluten-Free: Use gluten-free tortellini to cater to dietary needs while keeping it delicious!
Chef’s Notes
This recipe has evolved over the years, influenced by countless dinner parties and kitchen experiments. One particularly funny kitchen mishap involved me thinking I had chicken broth but pouring in leftover vegetable juice instead—I wasn’t so sure about the outcome. But you know what? It turned out surprisingly delightful, teaching me that sometimes it’s the unexpected moments that bring about the best flavors!
Every time I make this soup, I think of those dear friends who laughed and stuffed themselves silly, asking for seconds and thirds. And every time I ladle out that creamy goodness, I’m reminded that food is about connection, laughter, and warmth.
FAQs and Troubleshooting
1. My soup is too thick. What should I do?
- If your soup is thicker than you’d like, simply add more broth or water a little at a time until you reach your desired consistency.
2. Can I make this soup ahead of time?
- Absolutely! Make the soup, and once it cools, store it in an airtight container in the fridge for up to 3-4 days. Just remember to reheat gently on the stove, and you can add a splash more cream to rejuvenate that creamy texture.
3. Why is my tortellini mushy?
- Mushy tortellini can occur if they are cooked too long. Always follow the package instructions carefully, and add them to the pot towards the end of your cooking time.
4. Can I freeze this soup?
- Yes, you can freeze the soup, but for optimal texture, I recommend freezing it before adding the cream and spinach. Thaw it overnight in the fridge and then add cream and fresh greens just before serving.
Nutritional Info
(Serves 4)
- Calories: ~400 per serving
- Protein: 20g
- Carbohydrates: 40g
- Fat: 20g
Happy cooking, my friends! I hope this Creamy Tortellini Soup warms your kitchen and your hearts as much as it does mine. Feel free to share your culinary creations and any fun stories you have while making this dish—I’d love to hear all about your experiences! Now tie on that ivory apron and let’s create some delicious memories together!
PrintCreamy Tortellini Soup

A warm, comforting soup filled with cheese tortellini, savory sausage, and fresh spinach in a creamy broth.
- Prep Time: 15 minutes
- Cook Time: 30 minutes
- Total Time: 45 minutes
- Yield: 4 servings
- Category: Main Course
- Method: Stovetop
- Cuisine: Italian
- Diet: Vegetarian (if sausage is omitted)
Ingredients
- Cheese Tortellini
- Sausage
- Spinach
- Cream
- Broth
Instructions
- Sauté the sausage in a large pot over medium heat with a splash of olive oil, cooking for about 5–7 minutes until browned.
- Add aromatics like a diced onion and minced garlic; sauté for 3–4 minutes until the onion is translucent.
- Introduce about 4 cups of broth and bring to a gentle simmer for 5 minutes.
- Add cheese tortellini to the pot and cook according to package directions (3-5 minutes).
- Make it creamy by stirring in the heavy cream and allowing it to bubble gently.
- Add spinach and let it wilt for a couple of minutes.
- Season the soup to taste with salt, pepper, and possibly a sprinkle of nutmeg.
- Serve the soup in bowls and garnish with shaved Parmesan and olive oil if desired.
Notes
For a lighter version, substitute half-and-half or coconut milk for the cream. This soup can also be frozen before adding cream and spinach.
Nutrition
- Serving Size: 1 serving
- Calories: 400
- Sugar: 5g
- Sodium: 600mg
- Fat: 20g
- Saturated Fat: 10g
- Unsaturated Fat: 8g
- Trans Fat: 0g
- Carbohydrates: 40g
- Fiber: 3g
- Protein: 20g
- Cholesterol: 60mg
Keywords: creamy soup, tortellini, comfort food, Italian recipes, easy soup

One-Pot Loaded Taco Potato Soup for Busy Weeknights
Loaded Taco Potato Soup: A Warm Hug in a Bowl
Welcome to my cozy kitchen corner! Today, we’re diving into a dish that combines all your favorite comfort foods into one delightful bowl—Loaded Taco Potato Soup. You might be asking, “What’s special about potato soup?” Well, let me tell you, this isn’t just any potato soup! Imagine creamy potatoes mingling with savory ground beef, zesty taco seasoning, and a generous sprinkle of cheddar cheese—are you drooling yet?
Not only is this soup packed with flavor, but it’s also incredibly simple to make. It’s perfect for busy weeknights, lazy weekends, or any day you want to treat yourself and your loved ones to something comforting and delicious. Ready to take a culinary adventure with me? Let’s get started!
A Taste of Nostalgia
As a child, I frequently found myself by my grandmother’s side in her bustling kitchen. One of my fondest memories is of her cooking a hearty soup during the chillier months. The bold spices filled the air, and I would inhale the warmth and love that seemed to drip from every spoonful. Soup, in her kitchen, meant connection. It meant family, laughter, and stories shared over a steaming bowl.
This Loaded Taco Potato Soup was inspired by those heartfelt moments. I wanted to create a dish that not only satisfied the taste buds but also warmed the soul—just like my grandmother’s soups did. There’s something magical about gathering around the table, and with this soup, I feel like I’ve captured a piece of that magic. So, tie on your ivory apron, and let’s make some memories together!
Ingredients
Here’s what you’ll need to whip up this flavor-packed Loaded Taco Potato Soup:
-
Ground Beef
A classic for a reason! Ground beef adds a savory, hearty base to the soup. If you’re looking for alternatives, ground turkey or chicken work beautifully as leaner substitutes. -
Potatoes
The star of our show! Use russets for creaminess or Yukon Golds for a buttery flavor. Want to save time? Pre-cubed frozen potatoes are a great shortcut, though fresh tastes best! -
Taco Seasoning
Seriously, who doesn’t love the classic taco flavor? You can use store-bought (easy peasy!) or whip up a homemade blend of chili powder, cumin, garlic powder, and paprika for a personal touch. -
Cheddar Cheese
Because everything is better with cheese! Sharp cheddar makes this soup extra flavorful. If you’re feeling adventurous, try pepper jack for a spicy kick or even a vegan cheese alternative if you’re avoiding dairy. -
Broth
Chicken, beef, or veggie broth can serve as your base. Use homemade if you have it; otherwise, store-bought works just fine. You can also add extra water for a lighter soup. -
Onions
Chopped onions add depth and flavor. Sweet or yellow onions are great choices. If you’re short on time, use onion powder as a quicker alternative. -
Garlic
Freshly minced garlic brings a fragrant touch! Got garlic powder on hand? It’s a suitable second choice—just use less (about a third of the amount). -
Sour Cream
A dollop adds that creamy finish. Consider Greek yogurt for a healthier alternative or vegan sour cream if dairy’s not your thing. -
Toppings (optional)
Chopped cilantro, diced avocados, jalapeños, and tortilla chips are excellent finishing touches! Feel free to get creative with your favorite toppings.
Step-by-Step Instructions
Now that we’ve gathered our ingredients, it’s time to bring this Loaded Taco Potato Soup to life. Let’s start cooking!
-
Brown the Ground Beef
In a large pot, heat a tablespoon of olive oil over medium heat. Add the ground beef (about a pound) and break it up with a wooden spoon. Season it with some salt and pepper as it cooks. Brown until it’s fully cooked and no longer pink—about 5-7 minutes. Drain any excess fat for a cleaner soup base. -
Add the Aromatics
Toss in a chopped onion and 2-3 cloves of minced garlic. Stir and let them sweat it out together for about 3-4 minutes until the onion becomes translucent. This combination releases divine flavors—trust me; your kitchen will love you! -
Incorporate the Spices
Sprinkle in 2 tablespoons of taco seasoning. The smell will make you swoon! Mix it well, making sure the beef and onions are evenly coated with those delicious spices. -
Introduce the Potatoes
Peel and dice about 2-3 medium potatoes into small cubes (the smaller the cubes, the faster they cook!). Add them to the pot along with 4 cups of broth. Stir it all together. Cover the pot and bring it to a gentle boil. Let it simmer for about 15-20 minutes until the potatoes are fork-tender. They should break apart easily! -
Creamy It Up
Once the potatoes are cooked, use a potato masher to mash some of them right in the pot. This will give the soup a lovely creamy texture without the need for heavy cream. Pour in 1 cup of cheddar cheese, and stir until it has melted into the soup. -
Stir in the Finishing Touches
Add a dollop of sour cream, mix it in, and taste! If you want to elevate it further, add a splash of lime juice for brightness. Adjust seasoning and let it simmer for another 5 minutes, allowing all those flavors to blend. -
Serve Up That Goodness!
Ladle the soup into bowls and top with extra cheese, slices of avocado, or a drizzle of sour cream. Oh, and don’t forget those crispy tortilla chips for that perfect crunch!
Serving Suggestions
When it comes to plating, rustic is the name of the game! Serve your Loaded Taco Potato Soup in deep bowls, and don’t shy away from piling on toppings—think a generous handful of cheese, a few cilantro leaves, or even a spicy jalapeño slice for an extra kick. I like to place my bowl on a wooden board to create a cozy, rustic vibe. Grab a spoon, and let’s dig in!
Recipe Variations
Feel free to mix it up! Here are a few fun ways to put your spin on this soup:
-
Vegetarian Version: Swap out the ground beef for black beans or lentils and use vegetable broth. Add your favorite veggies like corn or zucchini for extra nutrition.
-
Spicy Kick: Add diced jalapeños or a dash of your favorite hot sauce into the mix for those who like it hot!
-
Loaded with Veggies: Throw in some chopped bell peppers or carrots while sautéing the onions and garlic. It’s a nutritious way to sneak in extra vitamins!
-
Cheesy Delight: Try a different cheese, like Monterey Jack or even a crumbled queso fresco for a fun flavor twist.
-
Low-Carb Option: Replace potatoes with cauliflower to cut down on carbs while still keeping a creamy texture.
Chef’s Notes
This recipe is a labor of love, inspired by delightful family gatherings and the cozy nostalgia of home. I’ve played around with it over the years—switching the meats, playing with spices, and even jokingly adding a few silly ingredients when I’m feeling adventurous (canned chili once made an unexpected appearance!). The beauty of this soup is its adaptability. You can adjust it to suit your preferences or whatever’s in your fridge!
Whenever I make this soup, I remember my grandmother’s kitchen filled with laughter and good company. It’s a reminder to me that food isn’t just about the meal. It’s about the connections we make and the moments we share around the table.
FAQs and Troubleshooting
1. Can I make this soup in advance?
Absolutely! This soup actually tastes better the next day as the flavors meld beautifully. Just reheat on the stove or in the microwave before serving.
2. My soup turned out too thick; what can I do?
No problem at all! If your soup is too thick, simply stir in more broth or water until it reaches your desired consistency.
3. Can I freeze leftovers?
Yes! The Loaded Taco Potato Soup freezes well. Just ensure it’s stored in an airtight container. When you’re ready to enjoy, thaw overnight in the fridge and reheat gently on the stove.
4. What can I do if the soup is too salty?
If you find your soup has become too salty, adding extra chopped potatoes can help absorb some of that saltiness. Alternatively, a splash of cream or more broth can balance things out.
Nutritional Info (optional)
If you’re curious, a serving (about 1 cup) of Loaded Taco Potato Soup contains approximately:
- Calories: 250-300 depending on cheese and toppings
- Protein: 15g
- Carbohydrates: 30g
- Fat: 10g
- Fiber: 4g
This is just a rough estimate, so feel free to adjust based on your ingredients!
I hope you enjoyed this culinary journey! There’s something so satisfying about creating a dish that warms the heart and brings people together. Let me know how your Loaded Taco Potato Soup turns out. Happy cooking, and don’t forget—every meal is an opportunity to create wonderful memories. Cheers!
PrintLoaded Taco Potato Soup

A comforting blend of creamy potatoes, savory ground beef, and zesty taco seasoning, topped with cheddar cheese.
- Prep Time: 10 minutes
- Cook Time: 30 minutes
- Total Time: 40 minutes
- Yield: 4 servings 1x
- Category: Main Course
- Method: Stovetop
- Cuisine: Mexican
- Diet: Omnivore
Ingredients
- 1 lb Ground Beef
- 2–3 medium Potatoes, diced
- 2 tbsp Taco Seasoning
- 1 cup Cheddar Cheese
- 4 cups Broth (chicken, beef, or veggie)
- 1 Onion, chopped
- 2–3 cloves Garlic, minced
- 1/2 cup Sour Cream
- Toppings: Chopped cilantro, diced avocados, jalapeños, tortilla chips
Instructions
- Brown the Ground Beef in a large pot with olive oil over medium heat for 5-7 minutes. Drain excess fat.
- Add the Aromatics: onions and garlic, and sweat for 3-4 minutes.
- Incorporate the Spices by sprinkling taco seasoning and mixing well.
- Introduce the Potatoes and broth, cover and bring to a boil. Simmer for 15-20 minutes.
- Creamy It Up: Mash some of the potatoes, then stir in cheddar cheese until melted.
- Stir in the finishing touches with sour cream and lime juice, simmer for 5 more minutes.
- Serve the soup hot, topped with extra cheese and your choice of toppings.
Notes
For a vegetarian version, replace ground beef with black beans and use vegetable broth.
Nutrition
- Serving Size: 1 cup
- Calories: 275
- Sugar: 3g
- Sodium: 750mg
- Fat: 12g
- Saturated Fat: 5g
- Unsaturated Fat: 7g
- Trans Fat: 0g
- Carbohydrates: 30g
- Fiber: 4g
- Protein: 15g
- Cholesterol: 50mg
Keywords: Taco Soup, Comfort Food, Potato Soup, Easy Dinner, Hearty Soup
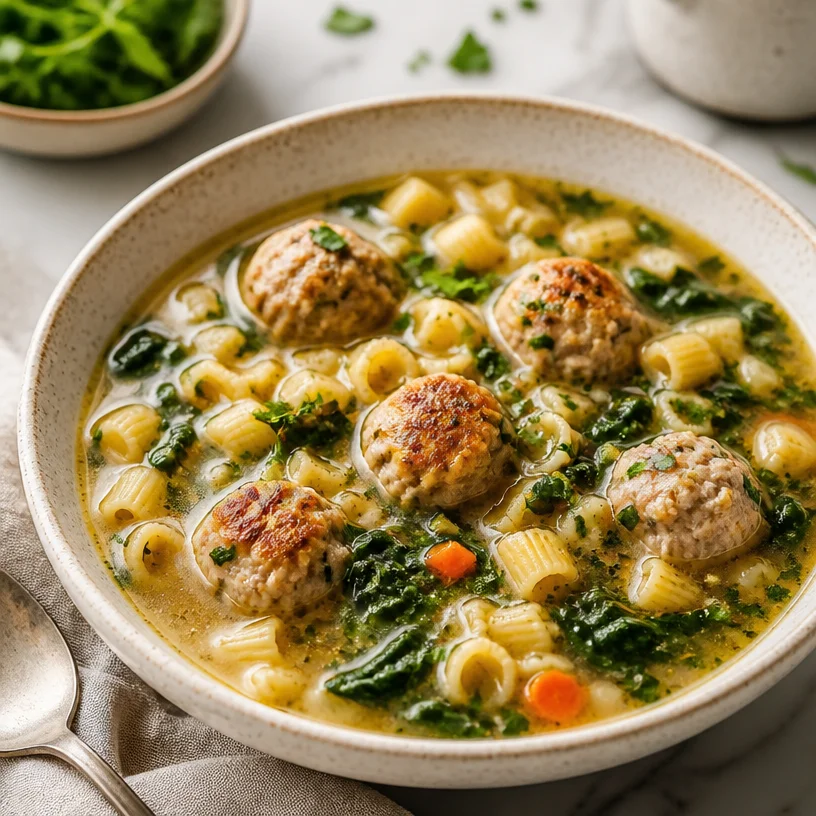
Minute Italian Wedding Soup: One-Pot Weeknight Comfort
Love in a Bowl: The Comfort of Italian Wedding Soup
Welcome to the kitchen, food enthusiasts! Today, we’re diving into the heartwarming world of Italian Wedding Soup—a dish that not only tastes exquisite but also wraps you in cozy memories and warmth, much like a hug in a bowl. This soup is a perfect blend of flavors, textures, and colors, and it embodies the essence of gathering around a table, sharing laughter, and creating lasting memories.
Growing up, my grandmother would whip up the most delightful pots of this soup during special family gatherings. I can still remember the aroma wafting through her tiny kitchen, mingling with the sounds of laughter and the clinking of forks on plates. She always said that food is best enjoyed when shared, and Italian Wedding Soup was her way of inviting everyone to the table. My siblings and I would eagerly await each scoop, enchanted by the tender turkey meatballs, vibrant spinach, and perfectly cooked pasta. It was a dish that transcended mere nourishment; it was a love note from her heart to ours.
Here, I’ll share not just the recipe but also the spirit of what makes this soup so special. So, roll up those sleeves, tie on your apron, and let’s get cooking!
Ingredients
-
Turkey Meatballs:
- Ground turkey is a leaner option compared to traditional beef or pork meatballs, making it a healthier choice. If you want more flavor, feel free to mix in some Italian sausage or use a combination of meats!
-
Spinach:
- Fresh spinach adds a beautiful green color and vibrant nutrients. If you can’t find fresh, a quick-frozen version works well too—just make sure to thaw and drain it before tossing it in!
-
Pasta:
- Small pasta shapes like acini di pepe or orzo are traditional in this recipe, but any small pasta like ditalini or even couscous will do in a pinch. Just keep an eye on cooking times!
-
Broth:
- A rich chicken or vegetable broth serves as the base. Homemade is best, but store-bought (low-sodium) broth works wonderfully too. For a deeper flavor, try adding a splash of white wine while cooking your broth.
Step-by-Step Instructions
1. Preparing the Meatballs
In a large mixing bowl, combine the ground turkey, breadcrumbs, Parmesan cheese, minced garlic, parsley, salt, and pepper. Now, here’s my little chef hack: make sure your hands are slightly damp when forming the meatballs. This helps them stick together without getting too sticky. Shape them into small, bite-sized balls—think the size of a tablespoon. Place them on a baking sheet as you form them.
2. Browning the Meatballs
In a large pot or Dutch oven, heat some olive oil over medium heat. Add the meatballs in a single layer, being careful not to overcrowd the pan. Brown them on all sides for about 5-7 minutes. They don’t need to be fully cooked through at this point, as they will finish cooking in the soup later. Turning them occasionally will help achieve that gorgeous golden color!
3. Sautéing the Vegetables
Once the meatballs are beautifully browned, remove them from the pot and set them aside (don’t worry, they’ll return!). In the same pot, add a bit more olive oil and toss in diced onions, carrots, and celery. These aromatics create a delightful base for your soup! Sauté them until they soften and the onions become translucent, about 5 minutes.
4. Creating the Soup Base
Now, add your broth to the pot. Bring it to a gentle simmer and scrape any flavorful bits off the bottom of the pot. This is where the magic happens! Bring the soup to a gentle simmer and return the meatballs to the pot along with your choice of pasta.
5. Cooking the Pasta and Finishing Touches
Let it simmer for about 10 minutes, or when the pasta is al dente. Once the pasta is cooked perfectly, add in the spinach and cook for an additional two minutes. The spinach just needs a brief moment to wilt beautifully into the soup. Taste it now—this is when you can adjust seasoning to suit your preferences. I love adding a touch of crushed red pepper for a bit of heat!
Serving Suggestions
When it comes to plating, I like to serve this soup family-style in a large pot at the center of the table, so everyone can enjoy serving themselves. However, for a more elegant touch, ladle individual portions into warm bowls. Garnish with extra Parmesan cheese and a sprinkle of fresh parsley. Pair it with crusty bread or a light salad for a complete meal!
Recipe Variations
- Vegetarian/Vegan Version: Substitute turkey meatballs with chickpea or lentil meatballs and use vegetable broth.
- Extra Greens: Kale or Swiss chard can replace spinach for a heartier texture.
- Herb Swap: Experiment with different herbs like basil or thyme for a unique twist.
- Creamy Addition: Stir in a splash of heavy cream or coconut cream for a decadent touch.
- Zesty Kick: Add a tablespoon of lemon juice just before serving for a refreshing zing.
Chef’s Notes
You know, this soup has evolved over the years—it started as grandma’s family recipe, and now, it’s become a canvas for creativity in my kitchen. I love playing with different meats and veggies, depending on what I have on hand. One particularly memorable dinner involved using leftover holiday ham instead of meatballs. It added a smoky flavor that surprised everyone, and now it’s a go-to variation!
Cooking, much like life, is all about experimenting and finding joy in the process. And believe me, if my grandmother were here, she’d be the first to tell you that the best recipes come from a happy heart!
FAQs and Troubleshooting
1. What if my meatballs fall apart?
Don’t worry! If your meatballs aren’t holding together, it could be due to too much moisture or not enough binder. Adding a touch more breadcrumbs or letting them chill for a bit in the fridge before browning can help them firm up.
2. How do I store leftovers?
Store any leftovers in an airtight container in the refrigerator for up to three days. Reheat gently on the stove, adding a splash of broth to revive the soupiness.
3. Can I freeze this soup?
Absolutely! This soup freezes beautifully. Just make sure to undercook the pasta slightly, as it will continue to cook when reheated. Freeze in individual portions for easy meals later!
4. What can I serve alongside this soup?
A crusty baguette or a simple arugula salad with lemon vinaigrette complements this dish perfectly. Or make it a full Italian night with some garlic bread and a classic tiramisu for dessert!
Nutritional Info
(If applicable, you might want to include this section for health-conscious readers, detailing calories, protein, carbs, etc.)
Now that you’re equipped with this delightful Italian Wedding Soup recipe, I can’t wait for you to try it out! Remember, cooking is all about love and intention, so pour your heart into this dish and watch as it brings your friends and family together. Happy cooking, and let’s create something beautiful today!
PrintItalian Wedding Soup

A heartwarming blend of turkey meatballs, vibrant spinach, and small pasta in a rich broth, perfect for cozy gatherings.
- Prep Time: 15 minutes
- Cook Time: 30 minutes
- Total Time: 45 minutes
- Yield: 4 servings 1x
- Category: Main Course
- Method: Cooking
- Cuisine: Italian
- Diet: Gluten-Free
Ingredients
- 1 lb ground turkey
- 1/2 cup breadcrumbs
- 1/4 cup grated Parmesan cheese
- 2 cloves garlic, minced
- 1/4 cup fresh parsley, chopped
- Salt and pepper, to taste
- 2 tbsp olive oil
- 1 small onion, diced
- 2 carrots, diced
- 2 celery stalks, diced
- 6 cups chicken or vegetable broth
- 1 cup small pasta (acini di pepe, orzo, or ditalini)
- 4 cups fresh spinach
Instructions
- Combine the ground turkey, breadcrumbs, Parmesan cheese, garlic, parsley, salt, and pepper in a large mixing bowl. Shape into small meatballs.
- Heat olive oil in a large pot over medium heat. Add meatballs and brown on all sides, about 5-7 minutes.
- Remove the meatballs and set aside. In the same pot, add more olive oil and sauté the onions, carrots, and celery until softened, about 5 minutes.
- Add the broth to the pot and bring to a gentle simmer, scraping any bits off the bottom. Return the meatballs and add the pasta.
- Simmer for about 10 minutes until pasta is al dente. Add spinach and cook for 2 more minutes, adjusting seasoning as desired.
Notes
This soup can be made vegetarian by substituting turkey meatballs with chickpea or lentil meatballs and using vegetable broth.
Nutrition
- Serving Size: 1 serving
- Calories: 350
- Sugar: 5g
- Sodium: 400mg
- Fat: 12g
- Saturated Fat: 4g
- Unsaturated Fat: 6g
- Trans Fat: 0g
- Carbohydrates: 45g
- Fiber: 3g
- Protein: 15g
- Cholesterol: 30mg
Keywords: Italian wedding soup, turkey meatballs, comfort food, soup recipe, family gathering

Minute Creamy Cheeseburger Soup for Busy Weeknights
Dive into Comfort: Cheeseburger Soup Recipe
Welcome, foodie friends! Today, we’re diving into a delightful bowl of comfort: Cheeseburger Soup! This dish is a heartwarming mashup that combines the classic flavors of a cheeseburger with the creamy, cozy goodness of a soup. I’m so excited to share this recipe with you because it’s not just tasty; it’s also incredibly easy to make. Perfect for busy weeknights, this soup turns any dinner into a cozy gathering around the table.
A Trip Down Memory Lane
Let me take you back to my childhood kitchen—the heart of our home where aromas danced through the air and laughter echoed. I remember those chilly autumn nights when my mom decided it was soup night. That meant cozying up in our oversized sweaters after a long day at school, and the promise of something warm, hearty, and oh-so-satisfying simmering on the stove.
She had a few go-to recipes that always delivered, but I particularly loved when she transformed our favorite cheeseburgers into a comforting soup. The sizzling sound of ground beef meeting the pan, followed by the medley of fresh veggies, would fill our home with a delicious anticipation. It was a dish that brought us together, sparked conversations, and left us lingering around the table long after the last bite.
Today, I carry that warmth and nostalgia into my kitchen as I share with you my take on Cheeseburger Soup. Whether you’re feeding a family or enjoying a quiet evening solo, this recipe captures the essence of those cherished moments. So, let’s roll up our sleeves and get cooking!
Ingredients
For this creamy and flavorful Cheeseburger Soup, you’ll need:
-
1 lb ground beef
The star of the show! You can swap for ground turkey or plant-based protein for a lighter option. -
2 medium potatoes (diced)
These hearty bites lend a comforting texture. Feel free to substitute with sweet potatoes for a sweeter twist! -
2 carrots (sliced)
Carrots add a lovely sweetness and color. You can replace them with parsnips or skip them entirely based on your taste. -
1 cup cheddar cheese (shredded)
The ultimate cheeseburger flavor! Go for sharp cheddar for a more robust taste, or use mozzarella for a milder flavor. -
2 cups milk
This creamy base makes everything cozy! If you’re dairy-free, try almond or oat milk, but be mindful of the flavor profile! -
1/4 cup onion (finely chopped)
Onions add depth to the flavor. You can use shallots for a milder taste or skip them for a no-onion approach. -
2 cups beef broth
For that deep, savory flavor! Vegetable broth works too if you’re looking for a lighter touch. -
2 tablespoons olive oil
For sautéing! You can substitute with butter for an even richer taste. -
Seasoning: salt, pepper, and a pinch of cayenne for a little heat
Adjust to your preference! You could also use Italian seasoning for a twist.
Step-by-Step Instructions
1. Sauté Your Base
Start by heating the olive oil in a large pot over medium heat. Add the finely chopped onions and sauté for about 3-4 minutes until they become translucent. This step builds the flavor foundation of your soup.
2. Brown the Beef
Next, add the ground beef to the pot. Use a wooden spoon to break it up and cook until it’s browned, about 5-7 minutes. Season with a good sprinkle of salt and pepper. Don’t rush this stage—let the beef caramelize a bit for extra flavor.
3. Add the Veggies
Toss in the diced potatoes and sliced carrots. Stir them around to get well-coated with the beef and onion mixture. Your kitchen will start smelling heavenly at this point!
4. Pour in the Liquids
Add the beef broth and milk to the pot, bringing everything to a simmer. Keep the heat at medium-low; we want gentle bubbles rather than a full boil.
5. Let It Simmer
Cover the pot and let your soup simmer for 15-20 minutes or until the potatoes are fork-tender, stirring occasionally. This step is key—it allows all the flavors to meld beautifully together.
6. Cheese It Up
Remove the pot from the heat, and gradually stir in the shredded cheddar cheese. Make sure to add it slowly so it melts evenly and creates a creamy texture.
7. Taste and Adjust
Finally, give your soup a taste. Need more seasoning? Adjust the salt, pepper, and cayenne to your liking. If you want a thicker consistency, mash a few potatoes against the side of the pot.
And voila! Your Cheeseburger Soup is ready to serve, bubbling and rich!
Serving Suggestions
Plating is as simple as ladling the soup into wide, comforting bowls. Top each bowl with a sprinkle of fresh herbs—chopped parsley or chives work beautifully—to add a pop of color. You can even throw on an extra handful of shredded cheese for good measure. Serve it alongside crusty bread or homemade biscuits for a satisfying, cozy meal.
Recipe Variations
Why not play around a bit? Here are some fun twists you can make:
- Bacon Lover’s Cheeseburger Soup: Crumble cooked bacon into the mix for a smoky flavor boost.
- Spicy Cheeseburger Soup: Add diced jalapeños or a splash of hot sauce for added heat.
- Creamy Mushroom Cheeseburger Soup: Fold in sautéed mushrooms for extra earthiness.
- Vegetarian Option: Swap out the ground beef for lentils or a veggie burger blend.
Chef’s Notes
This recipe has evolved over time in my kitchen—from a basic soup to a comforting hug in a bowl. I remember the first time I made it for my friends. We were all gathered ’round, some wearing socks with sandals (a must for comfort!), and the soup brought endless laughter and stories. We switched up sides and discovered that even a classic grilled cheese took it to the next level! Over the years, I’ve upped the ante with spices and variations, but the soul of the recipe remains the same: creating warmth and connection through good food.
FAQs and Troubleshooting
Q: My soup is too thin; what can I do?
A: No worries! You can thicken your soup by adding a cornstarch slurry (1 tablespoon cornstarch mixed with 2 tablespoons cold water) and simmering for a few more minutes.
Q: Can I make this soup ahead of time?
A: Absolutely! Just be aware that the potatoes may soak up some broth. Reheat with a splash of milk or broth to bring it back to life.
Q: How can I store leftovers?
A: Store any leftover soup in an airtight container in the fridge for up to 3 days. Reheat gently on the stove.
Q: Is it OK to freeze this soup?
A: You can freeze it, but the texture of the potatoes and cheese may change. If you plan to freeze, consider leaving the cheese out and adding it when you reheat.
Nutritional Info (Optional)
Each serving of Cheeseburger Soup is packed with protein from the beef and calcium from the cheese. It’s a hearty meal that provides comfort on chilly days!
So, there you have it, folks! Cheeseburger Soup: it’s nostalgic, comforting, and oh-so-delicious. Now it’s your turn to put on that apron, gather your ingredients, and dive into this bowl of joy. Remember, good food is all about showing up and sharing it with those you love. Happy cooking!
PrintCheeseburger Soup

A heartwarming mashup that combines the classic flavors of a cheeseburger with the creamy goodness of a soup, perfect for busy weeknights.
- Prep Time: 10 minutes
- Cook Time: 30 minutes
- Total Time: 40 minutes
- Yield: 4 servings 1x
- Category: Main Course
- Method: Stovetop
- Cuisine: American
- Diet: None
Ingredients
- 1 lb ground beef
- 2 medium potatoes (diced)
- 2 carrots (sliced)
- 1 cup cheddar cheese (shredded)
- 2 cups milk
- 1/4 cup onion (finely chopped)
- 2 cups beef broth
- 2 tablespoons olive oil
- Seasoning: salt, pepper, and a pinch of cayenne
Instructions
- Sauté your base by heating the olive oil in a large pot over medium heat. Add the finely chopped onions and sauté for about 3-4 minutes until they become translucent.
- Brown the beef by adding the ground beef to the pot. Use a wooden spoon to break it up and cook until browned, about 5-7 minutes. Season with salt and pepper.
- Add the diced potatoes and sliced carrots to the pot, stirring to coat them in the beef and onion mixture.
- Pour in the beef broth and milk, bringing everything to a simmer over medium-low heat.
- Let it simmer for 15-20 minutes until the potatoes are fork-tender, stirring occasionally.
- Cheese it up by removing the pot from heat and gradually stirring in the shredded cheddar.
- Taste and adjust seasoning as needed.
Notes
Serve topped with fresh herbs and extra cheese alongside crusty bread or biscuits. Can be made ahead and refrigerated or frozen, but texture may change.
Nutrition
- Serving Size: 1 serving
- Calories: 400
- Sugar: 6g
- Sodium: 900mg
- Fat: 20g
- Saturated Fat: 10g
- Unsaturated Fat: 8g
- Trans Fat: 1g
- Carbohydrates: 30g
- Fiber: 3g
- Protein: 25g
- Cholesterol: 70mg
Keywords: cheeseburger soup, comfort food, easy recipe, weeknight dinner, hearty soup

One-Pot Creamy Chicken Pot Pie Soup: Ready in 30 Minutes
Cozy Up with Chicken Pot Pie Soup: The Ultimate Comfort Food
Hello and welcome to a delightful corner of your kitchen! Today, we’re diving into the warming embrace of Chicken Pot Pie Soup. If you’re anything like me, the mere thought of a rich, creamy soup filled with tender chicken and fresh vegetables sends a little shiver of joy down your spine. It’s more than just a dish; it’s a hug in a bowl that brings forth memories of home, laughter, and cherished moments. Whether it’s a cool evening or simply a day that begs for comfort, this soup has your back!
A Taste of Nostalgia
Let me take you back to one of my favorite childhood memories: my mom, apron tied snugly around her waist, bustling around the kitchen on a Sunday afternoon. The scents of sautéing onions and garlic wafted through the house, mingling with laughter from the family room where we gathered, eager for the delicious feast that was on its way. Her famous Chicken Pot Pie was always the highlight, and I can almost hear her voice saying, “Good food brings people together.”
One chilly evening, she decided to shake things up and made a Chicken Pot Pie Soup instead. She had the same flavors but served them in this creamy broth. Everyone was smitten! Dipping warm crusty bread into that heavenly broth felt like the best of all worlds. In my adult years, I made it a point to recreate that feeling—and now, dear friends, I want to share that experience with you!
Ingredients to Gather
Let’s make sure we have everything you need to whip up this comforting bowl of goodness.
-
2 tablespoons olive oil: This not only serves to sauté our should-be-vegetables but also brings a lovely richness. If you’re out of olive oil, canola or sunflower oil work just as well.
-
1 cup onion, diced: Onions add a savory depth to any soup. If you prefer a milder flavor, go for shallots instead!
-
2 cloves garlic, minced: Garlic is a flavor powerhouse. If you find yourself without fresh garlic, a teaspoon of garlic powder can step in.
-
3 carrots, diced: Sweet, bright, and colorful—carrots offer a lovely sweetness. Feel free to swap in parsnips for a different flavor profile.
-
2 celery stalks, diced: This adds crunch and flavor. If you’re not a fan, omit it entirely or replace it with bell peppers.
-
2 cups potatoes, diced: Potatoes add heartiness. For a lighter option, swap in cauliflower for a lower-carb version!
-
4 cups chicken broth: The base of our soup! If you’re aiming for a vegetarian take, vegetable broth will work splendidly.
-
2 cups cooked chicken, shredded: Use rotisserie chicken for convenience! You can also substitute with chickpeas for a vegetarian option.
-
1 cup frozen peas: These pretty little gems add color and sweetness. Fresh peas can work too, but adjust cooking time accordingly.
-
1 teaspoon dried thyme: A must for that aromatic, herbal flavor. If you don’t have it on hand, dried oregano or basil could give a nice twist.
-
1 teaspoon dried rosemary: This adds a woody and pine-like flavor that pairs beautifully with chicken. Fresh rosemary is delightful if you have it.
-
1 cup heavy cream: Oh, the creaminess! For a lighter version, use half-and-half or coconut cream for a dairy-free option.
-
Salt and pepper to taste: Essential for rounding out flavors. Never skip the taste test!
-
Fresh parsley for garnish: This gives a pop of color and freshness! Chives or thyme would also do the trick if you’re out of parsley.
Step-by-Step Instructions
Are you ready to get cooking? Let’s roll up our sleeves, tie on those aprons, and dive into the steps for creating this comforting soup!
-
Sauté Your Aromatics:
In a large pot or Dutch oven, heat the olive oil over medium heat. Add the diced onions and sauté until translucent, about 5 minutes. Ah, the aroma is already perfuming your kitchen! Add the minced garlic and sauté for another minute—just long enough to release those glorious flavors. Don’t let the garlic brown; we want a gentle kiss of flavor here! -
Add Your Veggies:
Toss in the diced carrots and celery, stirring them around for another 5 minutes. You only need to soften them slightly; they’ll continue to cook in the broth. If you want an extra flavor boost, sprinkle in a pinch of salt at this point. Pro tip: Salting releases moisture and enhances flavor—scientifically satisfying! -
Incorporate the Potatoes:
Next, add in the diced potatoes and give everything a good stir to mix the flavors. This is where the magic starts to happen! Cook for an additional 3–4 minutes, just to warm everything through. -
Pour in the Broth:
Now it’s time for a hearty addition. Carefully pour in the chicken broth and stir it all together. Bring to a gentle boil, then reduce the heat and let it simmer for about 15 minutes, or until the potatoes are fork-tender. This is the perfect time to take a breath and enjoy the delicious aroma wafting through your kitchen! -
Shred That Chicken:
While that’s bubbling away, take a moment to shred your cooked chicken. Use two forks or your hands—whichever method feels right! Add the shredded chicken and frozen peas to the pot. These will warm through in just a few minutes. -
Add the Cream and Season:
Stir in the heavy cream, dried thyme, and dried rosemary. Allow it to simmer for another 5 minutes so the flavors meld beautifully. Taste the soup and season with salt and pepper according to your preference. Here’s a chef hack: If you taste and all you notice is the salty flavor, remember that cream can balance it out—try adding more cream for a richer taste! -
Final Touches:
Before serving, give everything a good stir and adjust the seasoning as needed. If the soup seems a bit thick, add a dash of chicken broth or water to reach your desired consistency. You want it creamy but not pudding-like!
Serving Suggestions
Now for the fun part—plating up this scrumptious soup! Use a deep bowl or a rustic bread bowl for a cozy feel. Ladle the soup into the bowls generously, allowing the colorful veggies and tender chicken to shine. Top with freshly chopped parsley for a burst of color and freshness. It’s the perfect invitation to dig in!
Recipe Variations
Feel like experimenting? Here are some tasty twists you can try:
- Herb Twist: Fresh herbs like dill or tarragon can be added for a refreshing change.
- Spicy Kick: Add a dash of red pepper flakes or a splash of hot sauce for a fiery finish!
- Veggie Delight: Boost the veggie content by adding in chopped green beans or corn.
- Grain Variation: For heartiness, you can add cooked rice or pasta to the pot!
- Dairy-Free Option: Swap the cream for coconut milk to give a delicious twist while keeping it dairy-free!
Chef’s Notes
This Chicken Pot Pie Soup has evolved from just a necessity to an experience. The joy of cooking with friends while perfecting it over the years made it a staple in my home! Sometimes, I even let the kids create their own variations—those evenings filled with laughter and creativity are my treasure trove of memories. Oh, and let me tell you about the time I accidentally grabbed chili powder instead of the thyme! Let’s just say the “spicy chicken stew” memories were abundant, and I’ll never live that down!
FAQs and Troubleshooting
Here are some common concerns folks may have about making Chicken Pot Pie Soup:
1. My soup is too thick; what can I do?
No worries! Simply add more broth or water until you reach your desired consistency. Don’t forget to taste and adjust seasoning again if needed!
2. Can I prepare this soup ahead of time?
Absolutely! It can be made in advance and stores well in the fridge for 3–4 days. Just keep in mind that the potatoes may absorb some broth, so you may need to add a splash before reheating.
3. How can I make this a vegetarian dish?
Swap the chicken for hearty mushrooms or chickpeas and use vegetable broth instead. You can still enjoy all the hearty flavors!
4. Can I freeze Chicken Pot Pie Soup?
The soup can be frozen for up to 3 months. Just leave out the cream until you reheat it—this ensures you won’t lose that luscious texture!
Nutritional Info
(This section is optional but quite helpful! Feel free to provide estimates based on typical serving sizes.)
- Calories: 450-500 per serving (based on 1 cup)
- Protein: Approximately 25g
- Fat: 30g
- Carbohydrates: 35g
And there you have it! Your own bowl of Chicken Pot Pie Soup, brimming with warmth and love. Cooking doesn’t just fill the belly; it nourishes the soul. So tie on that apron, gather your loved ones, and enjoy those small, beautiful moments around the table. I can’t wait to hear about your cozy cooking adventure!
PrintChicken Pot Pie Soup

Warm and comforting Chicken Pot Pie Soup with tender chicken and fresh vegetables, perfect for chilly evenings.
- Prep Time: 15 minutes
- Cook Time: 30 minutes
- Total Time: 45 minutes
- Yield: 4 servings 1x
- Category: Soup
- Method: Stovetop
- Cuisine: American
- Diet: Comfort Food
Ingredients
- 2 tablespoons olive oil
- 1 cup onion, diced
- 2 cloves garlic, minced
- 3 carrots, diced
- 2 celery stalks, diced
- 2 cups potatoes, diced
- 4 cups chicken broth
- 2 cups cooked chicken, shredded
- 1 cup frozen peas
- 1 teaspoon dried thyme
- 1 teaspoon dried rosemary
- 1 cup heavy cream
- Salt and pepper to taste
- Fresh parsley for garnish
Instructions
- Sauté the olive oil in a large pot over medium heat. Add the diced onions and sauté until translucent, about 5 minutes. Add the minced garlic and sauté for another minute.
- Add the diced carrots and celery, stirring for another 5 minutes.
- Incorporate the diced potatoes and stir to mix the flavors. Cook for an additional 3–4 minutes.
- Pour in the chicken broth and stir. Bring to a gentle boil, reduce heat, and let simmer for about 15 minutes, or until the potatoes are fork-tender.
- Shred the cooked chicken and add it along with the frozen peas to the pot.
- Add the heavy cream, dried thyme, and dried rosemary. Simmer for another 5 minutes, then season with salt and pepper to taste.
- Final touches: Stir, adjust seasoning if needed, and add broth or water for desired consistency before serving.
Notes
The soup can be made ahead and stored in the fridge for 3–4 days. It can also be frozen for up to 3 months without cream.
Nutrition
- Serving Size: 1 cup
- Calories: 450
- Sugar: 5g
- Sodium: 800mg
- Fat: 30g
- Saturated Fat: 15g
- Unsaturated Fat: 10g
- Trans Fat: 0g
- Carbohydrates: 35g
- Fiber: 4g
- Protein: 25g
- Cholesterol: 100mg
Keywords: Chicken Pot Pie Soup, Comfort Food, Soup Recipes

One-Pan Creamy Tuscan Cabbage Dinner in 20 Minutes
Marry Me Melting Cabbage in Creamy Tuscan Love Sauce
Introduction
Hello, my dear food enthusiasts! Today, we’re diving into a culinary masterpiece that will make your taste buds sing and your heart flutter: Marry Me Melting Cabbage in Creamy Tuscan Love Sauce. If that title doesn’t catch your attention, what will? This dish is a delightful blend of fresh ingredients, creamy goodness, and Tuscan charm that will transform humble cabbage into a show-stopping meal worthy of any dinner table.
Now, let’s be honest—cabbage might not be the first vegetable that comes to mind when you think of romantic meals. But trust me when I say that this dish is about to change your perspective on this leafy green! When cooked just right, cabbage can melt in your mouth, and when cloaked in a dreamy sauce infused with garlic, herbs, and cream, it becomes truly irresistible. This dish embodies warmth, elegance, and a cozy vibe that invites everyone to gather around your table.
Picture this: your friends or family arrive for dinner. The table is set with candles flickering, soft music plays in the background, and you pull this stunning dish from the oven. The caramelized edges of the cabbage wedge peek out from the creamy sauce, making it look as lovely as it tastes. Everyone is intrigued and can’t wait to dig in! Whether you’re hosting an intimate dinner party or simply want to elevate a weeknight meal, this dish has your back.
So, are you ready to create something that not only elevates your dinner but may even earn you a proposal? Let’s put on our aprons, gather our ingredients, and get cooking!
Personal Story
Ah, cabbage—thankfully, it has come a long way from the days of being merely a side dish to steamed meats or a sad salad fare. I remember a particularly memorable family dinner where my grandmother decided to surprise us with her cabbage sauté. She transformed a simple head of cabbage into an unforgettable centerpiece adorned with crispy bits of bacon and heavy amounts of cheese. It was magical! The way the layers melted together made me fall in love with cabbage all over again.
This dish always reminds me of those gatherings filled with laughter and the captivating aroma of her kitchen wafting throughout the house. Over the years, I’ve taken inspiration from her traditional recipe, added my own twists, and turned it into this gorgeous Marry Me Melting Cabbage, draped in a creamy Tuscan love sauce. Every time I cook this dish, I can hear my grandmother’s voice telling me to cook with love, and that it would always bring people together. And boy, does it!
Ingredients
Let’s break down what you’ll need for this sensational dish:
-
1 head Green Cabbage (Cut into 8 wedges)
- This sturdy vegetable is the star! It becomes tender and luscious when cooked properly. If you can’t find green cabbage, savoy cabbage is a lovely substitute for a sweeter flavor and beautiful texture.
-
2 tablespoons Olive Oil (For searing)
- A great oil for sautéing, it brings out the richness of flavors. Feel free to use avocado oil if you prefer a higher smoking point.
-
1 tablespoon Butter
- Adds a beautiful depth of flavor. If you want to keep it dairy-free, just add a tad more olive oil!
-
1 medium Red Onion (Sliced)
- Sweet and colorful, red onions add a lovely bite to the sauce. Yellow onions work fine too for a mellower flavor.
-
4 cloves Garlic (Minced)
- Garlic is love in the kitchen! You can never have too much. If you want a milder taste, use roasted garlic instead.
-
1 cup Chicken Broth
- Provides the building block for the sauce. Use vegetable broth for a vegetarian option—your tastebuds won’t mind!
-
4 ounces Cream Cheese
- This makes the sauce rich and creamy. If you need a dairy-free alternative, go ahead and substitute with ricotta or a vegan cream cheese.
-
1 cup Heavy Cream
- Simplicity and decadence in one ingredient! Coconut cream is a fantastic alternative if you’re going for a dairy-free option.
-
1/2 cup Sun-Dried Tomatoes (Chopped)
- They add a sweet-tart punch to the sauce. Marinated ones pack even more flavor—but make sure they’re drained well!
-
1 teaspoon Oregano
- A classic herb that pairs beautifully with creamy sauces. Use thyme or basil if that’s what you have on hand!
-
1 teaspoon Thyme
- Adds a touch of warmth to the dish. Fresh thyme is fabulous too, just double the amount!
-
1 teaspoon Rosemary
- Great for an earthy note—just ensure you chop it finely for an even distribution of flavor.
-
1 teaspoon Salt (Adjust to taste)
- This brings everything together. Remember, you can always add more, but you can’t take it away!
-
1 teaspoon Pepper (Adjust to taste)
- A pinch adds a nice warmth. Use freshly cracked for the best flavor.
-
1/2 teaspoon Red Pepper Flakes (Optional)
- A little heat never hurt anyone! Keep it out if you’re cooking for the spice-averse.
-
1/2 cup Parmesan Cheese (Grated)
- A classic finishing touch that elevates this dish. Nutritional yeast can step in beautifully for a vegan swap!
-
2 tablespoons Fresh Parsley (Chopped)
- For a pop of color and freshness! Basil works too if you’d like something different.
Step-by-Step Instructions
Are you ready? Let’s get cooking! Here’s how to create this melting masterpiece step-by-step.
-
Prep the Cabbage:
Start by removing any tough outer leaves from your head of cabbage. Cut the cabbage into 8 wedges (as even as possible). You want them to be thick enough to hold their shape, about 2 inches or so at the base. Quick tip: if you have trouble cutting through the core, take a moment to remove it carefully with a paring knife first. -
Sear the Cabbage:
In a large skillet, heat the olive oil over medium-high heat. When shimmering, add the cabbage wedges, cut side down. Sear them without disturbing for about 4–5 minutes, until they’re golden brown. This caramelization adds flavor! Love little crispy bits? Then don’t rush—let them get nicely browned! Gently flip the wedges to cook the other sides for another 3 minutes. -
Add the Butter and Aromatics:
Reduce the heat to medium-low and add the tablespoon of butter to the pan. As it melts, toss in the sliced red onion and minced garlic. Sauté for about 3–4 minutes until the onions become soft and fragrant. This is where the magic begins; the aroma will draw everyone to the kitchen! -
Create the Sauce:
Slowly pour in the chicken or vegetable broth, scraping any bits stuck to the bottom of the pan for extra flavor. Add the sun-dried tomatoes, oregano, thyme, rosemary, and season with salt and pepper. Stir everything together gently and bring to a gentle simmer. -
Mix in the Cream Cheese & Heavy Cream:
Add the cream cheese and heavy cream to the sauce. Stir until the cream cheese is melted and the sauce becomes smooth and creamy. Don’t worry if it looks a little funky at first—keep stirring, and it will all come together beautifully! If it’s too thick, add a splash more chicken broth. -
Nestle the Cabbage:
Carefully place the cabbage wedges back into the pan, cut side down, and spoon some sauce over the top. It’s okay if they’re a little crowded; they’ll cook down as they simmer. -
Simmer and Finish:
Lower the heat to keep it on a gentle simmer. Cover the skillet with a lid and let it cook for 25–30 minutes. The cabbage should become tender and “melt” into the sauce, like a love affair that blossoms with time! Check occasionally to make sure it’s not boiling too hard; we want those inviting flavors to develop slowly. -
Add the Parmesan:
When tender, remove the lid and sprinkle the grated Parmesan cheese evenly over the cabbage. You can either stir it into the sauce for a deeper flavor or leave it on top for a cheesier finish. Pop the lid back on for another 5 minutes, just long enough for the cheese to melt beautifully. -
Garnish and Serve:
Once the cabbage is soft and draped in that glorious sauce, take your skillet off the heat. Sprinkle with freshly chopped parsley for a burst of freshness and color. Serve hot and watch everyone at the table swoon over your creation!
Serving Suggestions
When it comes to plating this beauty, allow the creamy cabbage to shine! Arrange a wedge or two on each plate, pouring a generous amount of that luxurious sauce over the top. A sprinkle of extra parmesan or parsley can add that final touch of elegance. Consider serving it with toasted crusty bread to soak up the sauce, or alongside grilled chicken or fish for a complete meal that satisfies the senses!
Recipe Variations
While the Marry Me Melting Cabbage stands beautifully on its own, sometimes mixing it up can keep things exciting. Here are a few delightful variations to explore:
-
Spicy Love: Add more red pepper flakes or a touch of sriracha to the sauce to give it a fiery kick.
-
Veggie Delight: Toss in some other veggies like mushrooms or bell peppers when you add the onions for added flavor and nutrition.
-
Cheesy Spin: Mix in different cheeses like feta or goat cheese for a tangier profile!
-
Nuts for Crunch: Top with toasted pine nuts or walnuts for an added textural contrast.
-
Plant-Based Option: Swap all creamy elements for cashew cream and a nutritional yeast sprinkle, ensuring a hearty meal that fits any dietary needs.
Chef’s Notes
Every recipe has its story, and this one is no different! Over the years, I’ve created various versions of this dish, experimenting with different herbs and oils. I once mistakenly reached for cinnamon instead of Italian seasoning (don’t ask!) and ended up with a surprisingly delicious twist that made it a member of the sweet-savory family. Remember, cooking is all about exploration and creativity in the kitchen. Don’t be afraid to make this dish your own!
FAQs and Troubleshooting
-
Why is my cabbage still crunchy after cooking?
Cabbage requires time to soften, so if it feels firm, give it an additional 10 minutes simmering in the sauce. If necessary, cover it back up to trap steam. -
Can I make this dish in advance?
Absolutely! You can prepare the cabbage and sauce ahead of time and refrigerate. Reheat gently on the stove, adding a little broth or cream if needed to loosen the sauce before serving. -
What can I do if the sauce is too thick?
It happens! Add a splash of broth or cream while stirring to reach your desired consistency. -
Can I freeze leftovers?
Yes, but for the best texture, I recommend freezing only the sauce! The cabbage may become a bit mushy after thawing. Just reheat on the stovetop from frozen until warmed through!
Nutritional Info
This delightful dish offers a comforting balance of flavors and nutrients, particularly if you load it up with veggies! For an estimate, one serving typically offers around 400-500 calories, alongside protein, healthy fats, and vitamins from the cabbage.
And there you have it—your gourmet adventure featuring Marry Me Melting Cabbage in Creamy Tuscan Love Sauce. This dish encapsulates the love you put into every meal, a true reflection of warmth, comfort, and delightful gatherings. Enjoy experimenting, and remember to always cook with love! Happy cooking!
PrintMarry Me Melting Cabbage in Creamy Tuscan Love Sauce

A delightful blend of fresh ingredients and creamy goodness, this dish transforms cabbage into a show-stopping meal infused with Tuscan charm.
- Prep Time: 15 minutes
- Cook Time: 30 minutes
- Total Time: 45 minutes
- Yield: 4 servings 1x
- Category: Main Course
- Method: Baking
- Cuisine: Italian
- Diet: Vegetarian
Ingredients
- 1 head Green Cabbage (Cut into 8 wedges)
- 2 tablespoons Olive Oil (For searing)
- 1 tablespoon Butter
- 1 medium Red Onion (Sliced)
- 4 cloves Garlic (Minced)
- 1 cup Chicken Broth
- 4 ounces Cream Cheese
- 1 cup Heavy Cream
- 1/2 cup Sun-Dried Tomatoes (Chopped)
- 1 teaspoon Oregano
- 1 teaspoon Thyme
- 1 teaspoon Rosemary
- 1 teaspoon Salt (Adjust to taste)
- 1 teaspoon Pepper (Adjust to taste)
- 1/2 teaspoon Red Pepper Flakes (Optional)
- 1/2 cup Parmesan Cheese (Grated)
- 2 tablespoons Fresh Parsley (Chopped)
Instructions
- Prep the Cabbage: Start by removing any tough outer leaves from your head of cabbage. Cut the cabbage into 8 wedges (as even as possible).
- Sear the Cabbage: In a large skillet, heat the olive oil over medium-high heat. When shimmering, add the cabbage wedges, cut side down.
- Cook for about 4–5 minutes until they’re golden brown. Gently flip the wedges to cook the other sides for another 3 minutes.
- Add the Butter and Aromatics: Reduce the heat to medium-low, add butter, red onion and minced garlic. Sauté for about 3–4 minutes until soft.
- Create the Sauce: Slowly pour in the broth, scraping the pan for flavor. Add sun-dried tomatoes, oregano, thyme, rosemary, salt and pepper, stirring together gently.
- Mix in the Cream Cheese & Heavy Cream: Add cream cheese and heavy cream, stirring until smooth. If too thick, add a splash of broth.
- Nestle the Cabbage: Carefully place the cabbage wedges back into the pan and spoon sauce over them.
- Simmer and Finish: Cover and cook for 25–30 minutes on low heat until tender.
- Add the Parmesan: Remove the lid, sprinkle cheese over the cabbage, cover for 5 minutes for the cheese to melt.
- Garnish and Serve: Sprinkle with parsley and serve hot.
Notes
Serve with toasted crusty bread to soak up the sauce, or alongside grilled chicken or fish.
Nutrition
- Serving Size: 1 serving
- Calories: 450
- Sugar: 3g
- Sodium: 500mg
- Fat: 28g
- Saturated Fat: 16g
- Unsaturated Fat: 10g
- Trans Fat: 0g
- Carbohydrates: 35g
- Fiber: 4g
- Protein: 12g
- Cholesterol: 70mg
Keywords: cabbage recipe, creamy sauce, vegetarian main dish, Tuscan flavors

One-Pan Garlic Herb Chicken: Weeknight Dinner in 30 Minutes
Garlic Herb Chicken: A Flavorful Feast Awaits
Hello, my lovely foodie friends! Today, I’m excited to share a recipe that’s become a staple in my kitchen—Garlic Herb Chicken. Imagine succulent chicken breasts coated in a savory garlic herb mixture, seared to a perfect golden brown, and finished off in a rich, buttery broth. If that sounds mouth-watering, hold on to your aprons because this dish is as delightful to make as it is to eat!
A Flavorful Journey
Every dish has its story, and this one is dear to my heart. Growing up, Sundays were sacred in our household—an occasion we reserved for food, family, and fun. I vividly recall my mother bustling around the kitchen with her trusty apron tied snugly around her waist, effortlessly whipping up what she called “Sunday Special.” That dish often included her famous garlic chicken. The fragrant aroma of garlic and herbs filled the air, mingling with laughter and chatter as we all gathered at the table.
I remember the way she’d present the chicken, glistening with golden brown butter and fresh herbs, looking gorgeous yet so at home on our plates. Those moments around the dinner table taught me that cooking isn’t just about nourishing the body; it’s about nurturing connections. I started experimenting with her recipe, adding my own flair while still honoring those treasured flavors that made every Sunday feel like a celebration.
So, roll up your sleeves, and let’s travel back to that cozy kitchen with the sizzle of garlic in the air!
Ingredients You’ll Need
For this mouthwatering Garlic Herb Chicken, gather the following ingredients:
-
4 boneless skinless chicken breasts: Chicken breasts are easy to work with and absorb flavors beautifully. You can substitute with thighs for a juicier option.
-
3 tablespoons olive oil: A heart-healthy fat that enriches flavor. If you’re out, buttery avocado oil is a great substitute.
-
4 cloves garlic (minced): Garlic is the star of this dish, adding depth. If fresh garlic isn’t available, 1 teaspoon of garlic powder will do in a pinch.
-
2 tablespoons fresh parsley (chopped): This bright herb adds freshness. Dried parsley works too, but fresh is definitely a winner.
-
1 tablespoon fresh thyme leaves: Thyme provides earthy notes. Feel free to use rosemary or oregano as a substitute to mix things up!
-
2 tablespoons butter: Rich and creamy, butter takes this dish over the top. If you’re going dairy-free, use a vegan butter alternative.
-
1 cup chicken broth: Broth adds moisture and flavor. You can use vegetable broth for a lighter touch, or water in a pinch, but it won’t be as rich.
-
2 pounds russet potatoes: Perfect for mashing or roasting! If you prefer, swap them out for sweet potatoes for a different twist.
-
½ cup heavy cream: This provides creaminess; however, you can swap it with coconut cream for a dairy-free version.
-
2 tablespoons brown sugar: This helps to balance flavors. Honey or maple syrup are good alternatives if you’re looking for something different.
-
1 tablespoon balsamic vinegar: To add a tangy touch that complements the richness. Red wine or apple cider vinegar works nicely here too.
Step-by-Step Instructions
Now, let’s dive into the cooking process! Ready your apron—you’re going to want to keep it clean, but let’s be real, you might end up with a bit of flour on it!
-
Prep the Chicken: Start by patting your chicken breasts dry with paper towels. This ensures a good sear. Season both sides generously with salt and pepper. It’s the classic starter, but it’s key to building flavor!
-
Heat the Oil: In a large skillet over medium-high heat, add the olive oil. Let it heat until shimmering. It should sizzle when you add the chicken—it’s time to create a beautiful crust!
-
Sear the Chicken: Add the chicken breasts to the skillet. Don’t overcrowd the pan; you want that golden brown goodness. Sear for about 6-7 minutes on each side until cooked through and golden. You’re aiming for an internal temperature of 165°F (75°C).
-
Make it Flavorful: Once seared, remove the chicken from the skillet and let it rest on a plate. In that same skillet, lower the heat to medium and toss in the minced garlic, cooking until fragrant (about 1 minute). Be careful not to burn it!
-
Create the Base: Add the butter to the skillet, letting it melt and combine with the garlic. Next, pour in the chicken broth to deglaze the pan—scrape up those lovely brown bits!
-
Introduce Freshness: Stir in the fresh herbs (parsley and thyme), brown sugar, and balsamic vinegar, letting it gently simmer for about 2-3 minutes to blend those flavors beautifully.
-
Return the Chicken: Nestle the chicken back into the skillet, spooning some of the broth over the top. Cover the skillet and simmer for about 5 minutes for the chicken to absorb all that delicious flavor.
-
Creamy Finish: Lastly, turn off the heat and stir in the heavy cream, letting it meld into the sauce. Taste and adjust seasoning if necessary (more salt, pepper, or a hint of additional vinegar!).
Serving Suggestions
To serve your Garlic Herb Chicken, place each breast on a plate, spooning some of that luscious garlic sauce over the top. Add a generous serving of creamy mashed potatoes on the side and finish with a sprinkle of fresh parsley for that pop of color. It’s not just food; it’s a masterpiece worthy of any table!
Recipe Variations
Want to shake things up a bit? Here are some delicious variations you can try:
-
Lemon Garlic Chicken: Add a splash of fresh lemon juice and zest along with the cream for a bright twist.
-
Cheesy Herb Chicken: Mix in a handful of your favorite cheese (like parmesan or mozzarella) once the cream is added for a cheesy delight.
-
Spicy Garlic Chicken: Add a pinch of red pepper flakes or some sliced jalapeños when sautéing the garlic for a kick!
-
Herb-Infused Potatoes: Toss some chopped herbs into your mashed potatoes for an added flavor dimension.
-
One-Pan Wonder: Add seasonal vegetables like asparagus or bell peppers in the last 10 minutes of cooking for a complete, colorful meal.
Chef’s Notes
As I’ve evolved in my cooking journey, I’ve learned that garlic can either make or break a dish! Initially, I was heavy-handed with it, but I discovered that a balanced approach elevates the entire meal. Each bite should have harmonious flavors—certainly garlic-forward but never overwhelming! If you ever find yourself with leftover chicken (which is rare since it’s so good), chop it up for a delightful salad or wrap the next day.
FAQs and Troubleshooting
1. How do I know when the chicken is done?
The best way to check is using a meat thermometer. It should read 165°F (75°C).
2. My chicken came out dry; what happened?
Overcooking is usually to blame. Chicken breasts are lean and can dry out quickly, so pay close attention to cooking times.
3. Can I make this dish ahead of time?
Absolutely! Just store the cooked chicken in an airtight container in the fridge for up to 3 days. Reheat gently on the stove with a splash of broth or cream to keep it moist.
4. What can I serve with Garlic Herb Chicken?
Mashed potatoes are a classic choice, but you can also try rice pilaf, roasted vegetables, or a fresh seasonal salad for a delightful side.
Nutritional Info
While I didn’t dive into the nitty-gritty of calories and macros, this dish serves as a wholesome meal rich in protein and flavor. If you’re curious about specific nutritional values, I recommend using a nutrition calculator for more precise information based on your ingredient quantities.
So there you have it, my friends! A delightful and approachable Garlic Herb Chicken recipe awaits you. Whether it’s for a special occasion or just a Tuesday night, this dish is bound to please. Happy cooking, and remember: every meal is an opportunity to create memorable moments! Let’s set that table and gather those you love around it—because good food isn’t just about showing off; it’s about showing up.
PrintGarlic Herb Chicken

Succulent chicken breasts coated in a savory garlic herb mixture, seared to golden perfection, and finished in a rich buttery broth.
- Prep Time: 15 minutes
- Cook Time: 30 minutes
- Total Time: 45 minutes
- Yield: 4 servings 1x
- Category: Main Course
- Method: Baking
- Cuisine: Italian
- Diet: Paleo
Ingredients
- 4 boneless skinless chicken breasts
- 3 tablespoons olive oil
- 4 cloves garlic (minced)
- 2 tablespoons fresh parsley (chopped)
- 1 tablespoon fresh thyme leaves
- 2 tablespoons butter
- 1 cup chicken broth
- 2 pounds russet potatoes
- ½ cup heavy cream
- 2 tablespoons brown sugar
- 1 tablespoon balsamic vinegar
Instructions
- Prep the chicken: Pat your chicken breasts dry with paper towels and season with salt and pepper.
- Heat the oil: In a skillet over medium-high heat, add the olive oil and let it heat until shimmering.
- Sear the chicken: Add the chicken breasts and sear for 6-7 minutes on each side until cooked through and golden.
- Make it flavorful: Remove the chicken and cook the minced garlic in the skillet until fragrant.
- Create the base: Add the butter to melt, then pour in chicken broth and deglaze the pan.
- Introduce freshness: Stir in the fresh herbs, brown sugar, and balsamic vinegar, simmering for 2-3 minutes.
- Return the chicken: Nestle the chicken back in the skillet and cover, simmering for another 5 minutes.
- Creamy finish: Turn off the heat and stir in the heavy cream, adjusting seasoning as needed.
Notes
If you have leftover chicken, chop it up for a delightful salad. Adjust garlic to taste for flavor balance.
Nutrition
- Serving Size: 1 serving
- Calories: 400
- Sugar: 6g
- Sodium: 450mg
- Fat: 17g
- Saturated Fat: 7g
- Unsaturated Fat: 8g
- Trans Fat: 0g
- Carbohydrates: 32g
- Fiber: 4g
- Protein: 32g
- Cholesterol: 90mg
Keywords: chicken, garlic, herb, dinner, main course, savory

Weeknight 15-Minute 5-Ingredient Sweet Potato Gnocchi
Discover the Delight of 5-Ingredient Sweet Potato Gnocchi
Hello, lovely foodies! Today, I’m thrilled to share with you a delightful recipe that beautifully showcases the humble sweet potato: 5-Ingredient Sweet Potato Gnocchi. If you’ve ever been intimidated by the thought of making gnocchi from scratch, fear not! This simple and approachable version will have you feeling like a kitchen rockstar in no time. With just five key ingredients, you can whip up a dish that is not only comforting and satisfying but also impressively elegant.
Imagine sitting around the table with family or friends, laughter and warmth in the air, and a heaping plate of soft, pillowy gnocchi dressed in a simple butter sauce. It’s a dish that invites conversation and connection, a dish that says “welcome” and “stay a little longer.” Let’s dive into this culinary journey together!
A Nostalgic Kitchen Memory
The first time I made gnocchi was in my grandmother’s cozy kitchen when I was just a child. I remember her pulling out sweet potatoes, gently peeling them with care, and talking about how these little gems could be transformed into something magical. We rolled those soft potatoes with flour on her old wooden table, and I giggled as they bounced around, taking on whimsical shapes.
As we worked, the smell of nutmeg wafted through the air, instantly connecting me to memories of autumn festivities. That day, I wasn’t just learning how to cook—I was learning the art of creating a gathering. The joy of sharing food, the conversations around the table, and the love we infused into each dish are memories I cherish. Now, as I share this recipe with you, I hope to evoke that same sense of nostalgia and warmth. Let’s create our own memories, shall we?
Ingredients for Your Delicious Gnocchi
Let’s get to the star of the show—our ingredients! Here’s what you’ll need:
-
1 lb (500g) sweet potatoes (roughly 2 medium)
Sweet potatoes bring a naturally sweet flavor and a vibrant color to our gnocchi. If you can’t find sweet potatoes, you can use regular potatoes, although the flavor will differ slightly. -
1 tablespoon olive oil
Olive oil adds richness and helps to enhance the flavors of our ingredients. You could also use melted butter for a more decadent twist. -
1 cup ricotta
Creamy and dreamy, ricotta lends moisture and a lovely texture. If you’re looking for a dairy-free option, try using a nut-based ricotta or silken tofu blended until smooth. -
1/4 cup grated parmesan cheese
This adds a savory umami punch! If you wish to keep it vegetarian, ensure your parmesan is veggie-friendly or substitute with nutritional yeast for a vegan option. -
1 teaspoon salt
Salt is essential for enhancing all the other flavors. You can adjust it to your taste based on how salty your cheese is. -
1/2 teaspoon nutmeg
Nutmeg adds warmth and a hint of spice that beautifully complements the sweet potatoes. If you aren’t a nutmeg fan, you can skip it or use a pinch of cinnamon for a different flavor profile. -
1 1/4 cups all-purpose flour
Flour is our binding agent and helps create the perfect texture. If you’re gluten-free, feel free to substitute with almond flour or a gluten-free blend—just watch the amount, as you may need less. -
2 oz (50g) chorizo, casing removed and diced (optional)
For those who enjoy a meaty addition, chorizo offers a spicy kick. You can completely omit it for a vegetarian dish or swap in cooked mushrooms for a similar umami flavor. -
4 tablespoons butter
For the sauce, butter brings richness and richness to every bite. You can use olive oil here for a lighter alternative. -
3 garlic cloves, crushed
Garlic adds a beautiful aroma and flavor to the sauce. Feel free to adjust the amount if you prefer milder garlic notes. -
1 sprig of rosemary, stem removed
Rosemary adds a fragrant note that elevates the dish. Thyme or sage would be wonderful substitute herbs if you’re looking for a different flavor direction. -
1 teaspoon flaky salt
Flaky salt is perfect for finishing the dish, adding a crunch that contrasts beautifully with the soft gnocchi. -
Parmesan cheese, grated, to serve
A sprinkle of fresh parmesan at the end is always a good idea!
Step-by-Step Instructions for Making Gnocchi
Now, let’s dive into the cooking process. I promise it’s easier than it sounds!
-
Prepare the Sweet Potatoes
Start by preheating your oven to 400°F (200°C). Pierce the sweet potatoes a few times with a fork and place them on a baking sheet lined with foil. Roast them for about 45 minutes or until they’re tender and easily pierced with a fork. This roasting process intensifies their sweetness! -
Mix the Dough
Once the sweet potatoes are cool enough to handle, peel off the skin and mash them in a large mixing bowl until smooth. Add the ricotta, parmesan cheese, olive oil, salt, and nutmeg. Use a fork to combine everything until it’s creamy and delightful. -
Incorporate the Flour
Gradually add the flour to the sweet potato mixture, mixing gently until a soft dough forms. You may not need all the flour, so add it slowly. The dough should be slightly sticky but manageable. If it feels too wet, add more flour a tablespoon at a time. -
Shape the Gnocchi
Lightly flour your work surface and your hands. Divide the dough into four pieces for easier handling. Roll each piece into a long rope about 1/2 inch thick. Use a knife to cut the rope into bite-sized pieces, about 1 inch apart. For that classic gnocchi look, you can press each piece lightly with a fork to create ridges—that’s where the sauce will cling! -
Boil the Gnocchi
In a large pot of salted boiling water, gently drop the gnocchi in batches. They’re ready when they rise to the surface, which should take about 2-3 minutes. Scoop them out with a slotted spoon and set them on a towel to drain while you prepare the sauce. -
Make the Butter Sauce
In a large skillet over medium heat, melt the butter. Add the crushed garlic and cook until fragrant, about 1 minute—don’t let it brown! Toss in the diced chorizo if you’re using it, and let it cook for a few minutes until it’s nice and crisp. -
Combine Everything
Add the drained gnocchi directly into the skillet with the butter and garlic sauce, tossing to coat. If it feels dry, you can splash in a little reserved pasta water. Add the rosemary and season with flaky salt. -
Serve it Up!
Plate the gnocchi with a sprinkle of grated parmesan on top. You can also add a drizzle of olive oil for extra richness or a few extra fresh herbs.
Serving Suggestions
For serving, I love plating these delightful gnocchi in a shallow bowl or on a rustic wooden platter, allowing the colors and textures to shine. Add a sprinkle of flaky salt and a final touch of fresh parsley or rosemary for that pop of freshness. Pair with a crisp salad and a glass of white wine, and you’re all set for a cozy night in!
Recipe Variations for Everyone
Looking to flex your culinary creativity? Here are a few variations you might enjoy:
- Herbed Gnocchi: Add chopped fresh herbs (like basil or parsley) directly into the dough for a flavor boost.
- Sweet and Savory: Toss in some caramelized onions or roasted garlic for a different layer of flavor.
- Spicy Kick: Mix in some crushed red pepper flakes for a bit of heat in the butter sauce.
- Nutty Flavor: Substitute half of the butter with browned butter for a nutty taste and richer color.
- Veggie Boost: Mix in finely chopped spinach or kale to the dough to sneak in some greens!
Chef’s Notes
This sweet potato gnocchi recipe has truly been a labor of love over the years. I remember the first batch I made was a bit of a disaster—they turned out more like heavy rocks than the pillowy gnocchi I had envisioned! I learned the importance of the right amount of flour and measuring the moisture in sweet potatoes. Each attempt taught me something new. I love that cooking is an ever-evolving journey!
FAQs and Troubleshooting
1. Why is my gnocchi sticky?
This usually happens when there’s too much moisture in the sweet potatoes. Make sure to drain any excess liquid before mixing in the flour. A little extra flour can help, but be careful not to overdo it, or the gnocchi may become tough!
2. Can I freeze gnocchi?
Absolutely! After shaping your gnocchi, lay them on a baking sheet to freeze individually before transferring them to a freezer bag. When you’re ready to cook, just drop them directly into boiling water without thawing.
3. What if my dough is too dry?
If your dough feels too dry, add a touch more ricotta or a little water, one teaspoon at a time, until you reach the desired consistency.
4. Can I make this dish in advance?
Certainly! You can prepare the gnocchi ahead of time and store them in the fridge for up to 24 hours. Just make sure to toss them with a bit of flour to prevent sticking.
Nutritional Info
While I always encourage enjoying food without guilt, here’s a little glimpse into the nutritional aspect per serving (assuming 4 servings):
- Calories: Approx. 400
- Protein: 15g
- Carbohydrates: 56g
- Fat: 15g
Remember, you can adjust the cheese and butter for a lighter version if that’s your preference!
I hope you’re ready to roll up your sleeves and get cooking! This 5-Ingredient Sweet Potato Gnocchi is sure to become a staple in your home just as it has in mine. Together, let’s create those little moments that turn into big memories. Happy cooking, my friends!
Print5-Ingredient Sweet Potato Gnocchi

A simple and delightful recipe for making homemade sweet potato gnocchi with just five ingredients, perfect for cozy gatherings.
- Prep Time: 15 minutes
- Cook Time: 45 minutes
- Total Time: 60 minutes
- Yield: 4 servings 1x
- Category: Main Course
- Method: Baking
- Cuisine: Italian
- Diet: Vegetarian
Ingredients
- 1 lb (500g) sweet potatoes (roughly 2 medium)
- 1 tablespoon olive oil
- 1 cup ricotta
- 1/4 cup grated parmesan cheese
- 1 teaspoon salt
- 1/2 teaspoon nutmeg
- 1 1/4 cups all-purpose flour
- 2 oz (50g) chorizo, diced (optional)
- 4 tablespoons butter
- 3 garlic cloves, crushed
- 1 sprig of rosemary
- 1 teaspoon flaky salt
- Parmesan cheese, grated, to serve
Instructions
- Preheat your oven to 400°F (200°C). Pierce the sweet potatoes a few times with a fork and place them on a baking sheet lined with foil. Roast them for about 45 minutes or until they’re tender.
- Cool the sweet potatoes. Peel off the skin and mash them in a large mixing bowl until smooth. Add the ricotta, parmesan cheese, olive oil, salt, and nutmeg. Use a fork to combine everything until creamy.
- Gradually add the flour to the sweet potato mixture, mixing gently until a soft dough forms. Adjust the flour according to the dough’s stickiness.
- Lightly flour your work surface and hands. Divide the dough into four pieces and roll each into a long rope about 1/2 inch thick. Cut into bite-sized pieces and press lightly with a fork to create ridges.
- Boil the gnocchi in a large pot of salted boiling water in batches. They’re ready when they rise to the surface, about 2-3 minutes. Drain them on a towel.
- Melt the butter in a large skillet over medium heat. Add crushed garlic and cook until fragrant. If using, toss in diced chorizo and cook until crisp.
- Add the drained gnocchi directly into the skillet, tossing to coat. If the mixture feels dry, splash in a little reserved pasta water. Add the rosemary and season with flaky salt.
- Plate the gnocchi with a sprinkle of grated parmesan and a drizzle of olive oil or fresh herbs if desired.
Notes
Customize with fresh herbs or add caramelized onions for extra flavor. This dish can be made in advance and stored in the fridge.
Nutrition
- Serving Size: 1 serving
- Calories: 400
- Sugar: 3g
- Sodium: 550mg
- Fat: 15g
- Saturated Fat: 7g
- Unsaturated Fat: 8g
- Trans Fat: 0g
- Carbohydrates: 56g
- Fiber: 5g
- Protein: 15g
- Cholesterol: 40mg
Keywords: gnocchi, sweet potato, homemade pasta, Italian food