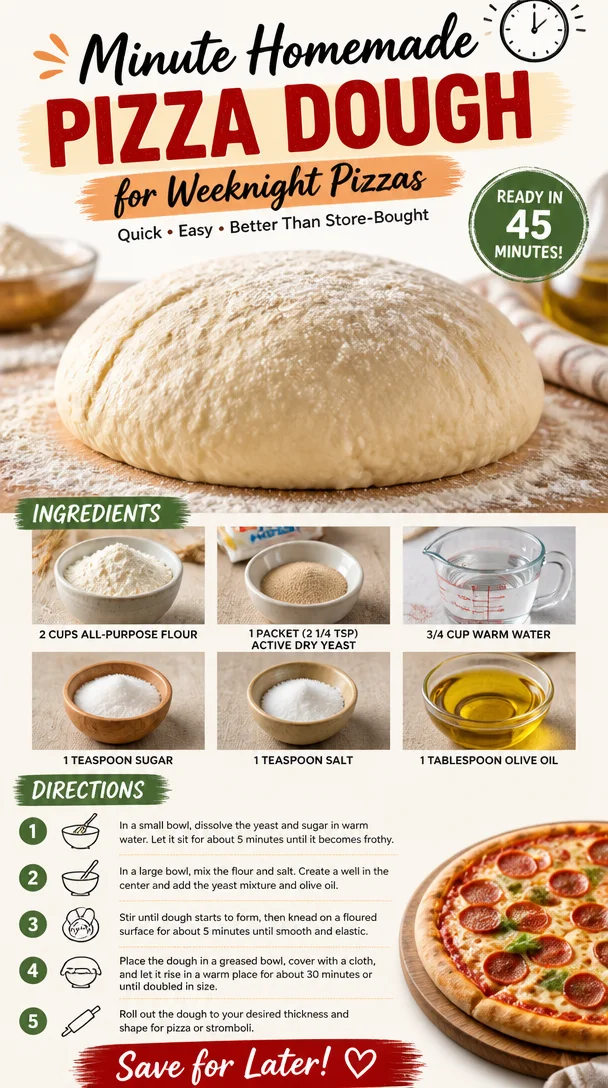
Minute Homemade Pizza Dough for Weeknight Pizzas
The Joy of Homemade: A Simple Guide to Easy Pizza Dough
Hello, kitchen adventurers! Today, we’re diving into something that makes hearts (and stomachs) sing: homemade pizza dough! There’s something so magical about the smell of fresh dough resting on your countertop and the thought of transforming it into your favorite pizza masterpiece. With this easy pizza dough recipe, you’ll be hosting pizza nights that your friends and family will talk about for weeks. So, roll up your sleeves, tie on your ivory apron, and let’s get started!
A Slice of Nostalgia
When I think of pizza, my mind takes me back to childhood, sitting in my grandmother’s dimly lit kitchen surrounded by family. The air was filled with the aroma of melting cheese, bubbling tomato sauce, and the earthy scent of fresh basil. I remember her flour-dusted apron and the twinkle in her eye as she rolled out the dough. We used to gather around the table to shape our own pizzas, each of us crafting our own delicious work of art. It was messy, it was chaotic, but most importantly, it was filled with laughter and togetherness.
One evening, after a bit too much flour had made its way onto the floor, we came up with an “official” title for our creations—“pizza masterpieces.” Each was so unique, from the toppings we chose to the shapes we made. That joyful spirit of creativity and connection is what I want to capture in today’s recipe. Making your own pizza dough might seem a little labor-intensive, but trust me—it’s worth every second when you see your loved ones gathered around the table, ready to enjoy what you’ve created together.
What You’ll Need: Ingredients
Before we jump into the process, let’s gather our ingredients.
-
2 cups all-purpose flour
A versatile choice for creating that perfect base. You can substitute with whole wheat flour for a nuttier flavor or gluten-free flour if you’re avoiding gluten. Just keep in mind that it may affect the texture slightly. -
1 packet (2 1/4 tsp) active dry yeast
This little magic granule helps the dough rise! If you don’t have active dry yeast, you can use instant yeast, which doesn’t require proofing. Just toss it in with the flour! -
3/4 cup warm water
The warmth is crucial for activating the yeast. Make sure it’s not too hot (aim for around 110°F) or it can kill the yeast. If you’re unsure, let it cool for a few moments after boiling. -
1 teaspoon sugar
Just a touch to feed the yeast! It helps the dough rise and adds a hint of sweetness. For a sugar substitute, agave syrup or honey can work too! -
1 teaspoon salt
Essential for flavor! Don’t skip it; it balances the dough. If you’re cutting back on sodium, you can reduce it to 1/2 teaspoon. -
1 tablespoon olive oil
This adds richness and flavor. You can swap it with melted butter or any neutral oil like vegetable or canola oil if you prefer.
Step-by-Step Instructions
Now let’s get to the fun part! Here’s how to make your easy pizza dough step by step:
-
Activate the Yeast: In a mixing bowl, combine the warm water, yeast, and sugar. Stir lightly and let it sit for about 5–10 minutes until it becomes frothy. This shows the yeast is alive and ready to work its magic!
-
Mix the Dry Ingredients: In a large bowl, whisk together the flour and salt. Ensure they’re well combined. Whisking helps to aerate the flour, which makes for a lighter dough.
-
Combine Wet and Dry: Create a well in the center of the flour mixture and pour in the activated yeast mixture and olive oil. Use a fork to mix until a shaggy dough begins to form. It will be quite sticky at this point—don’t worry, that’s perfect!
-
Knead the Dough: Dust your countertop with a little flour and transfer the dough onto it. Knead for about 5–7 minutes until it’s smooth and elastic. If the dough is too sticky, sprinkle a little extra flour as you knead. Proudly channel your inner chef here!
-
Let It Rise: Once kneaded, shape the dough into a ball and place it into a lightly greased bowl. Cover with a damp cloth or plastic wrap. Let it rise in a warm place for about 1 hour, or until it has doubled in size. This is the perfect time to clean up or prepare your toppings!
-
Preheat Your Oven: About 30 minutes before you’re ready to bake, preheat your oven to 475°F (245°C). If you’re using a pizza stone, place it in the oven while it’s heating to ensure it’s hot enough to create a crispy crust.
-
Shape Your Pizza: Once the dough has risen, punch it down to release the air and turn it out onto a floured surface. Divide it into two halves if you want to make two pizzas (or save half for later!). Roll it out with a rolling pin or stretch it by hand to your desired thickness.
-
Top and Bake: Now comes the fun part! Add your favorite sauce, cheese, and toppings. Slide your pizza onto the hot pizza stone or a baking sheet. Bake for 10-12 minutes, or until the cheese is bubbling and the crust is golden brown.
Serving Suggestions
Once your pizza is out of the oven, it’s time to serve! Let it cool for a couple of minutes, then slice it up with a sharp pizza cutter. For an extra touch, drizzle a little olive oil or sprinkle fresh herbs over the top. Presenting your creation on a wooden board with some fresh arugula or a side salad makes it feel extra special. Enjoy with a fresh glass of sparkling water or your favorite beverage!
Recipe Variations
Here are a few fun twists to try with your pizza dough:
-
Herbed Dough: Add 1 tablespoon of Italian seasoning or fresh herbs like rosemary or basil into the flour for extra flavor.
-
Whole Wheat Dough: Swap half of the all-purpose flour with whole wheat for a nutty taste and added nutrition.
-
Cheese-Stuffed Crust: Roll the edges of the dough around some mozzarella sticks before baking for a cheesy surprise!
-
Calzone Variation: Use half the dough to create a delicious calzone stuffed with your favorite fillings.
Chef’s Notes
Over the years, this pizza dough recipe has grown alongside my love for hosting. I started off with a very basic formula and tweaked it as I discovered different flavors and techniques. The best part? I’ve hosted various pizza parties where guests create their own masterpieces, just like I did with my grandmother. There’s magic in that shared experience—the laughter, the taste of crispy crust, and the delight of cooking together.
And don’t get me started on the joy of leftovers! Cold pizza for breakfast? Yes, please! Sometimes I reinvent the dough too, using toppings from the previous night’s meal.
FAQs and Troubleshooting
Q: My dough isn’t rising. What went wrong?
A: It could be that your yeast is expired or the water was too hot. Make sure your water is warm, not boiling! If it’s your first time, double-check the expiration on the yeast packet.
Q: Can I freeze the dough?
A: Absolutely! After the first rise, you can wrap the dough tightly in plastic wrap and store it in the freezer for up to three months. Just defrost in the fridge overnight when you’re ready to use it.
Q: My pizza crust is too thick and doughy. How can I make it thinner?
A: When shaping the pizza, be sure to stretch it out evenly. If you prefer a thinner crust, roll it out to about 1/4 inch thick instead of 1/2 inch.
Q: How can I make the crust crispier?
A: Preheating your oven and pizza stone is crucial! Also, using a baking sheet directly on the oven rack can help. For an even crisper crust, you can also bake the pizza on a perforated pizza pan.
Nutritional Info (optional)
While I focus more on deliciousness than nutritional details, here’s a rough estimation for one serving of this pizza dough (based on the entire recipe divided into 4 servings):
- Calories: 150
- Protein: 4g
- Fat: 3g
- Carbohydrates: 26g
Remember, toppings will vary, so be sure to factor those in as well!
And there you have it! Your easy pizza dough recipe is ready to inspire countless culinary creations. Remember, cooking is all about joy and connection, so gather your friends and family, and let’s make some pizza memories! Bon appétit!
PrintHomemade Pizza Dough
An easy and versatile recipe for making homemade pizza dough, perfect for family pizza nights.
- Prep Time: 15 minutes
- Cook Time: 12 minutes
- Total Time: 1 hour 27 minutes
- Yield: 4 servings 1x
- Category: Main Course
- Method: Baking
- Cuisine: Italian
- Diet: Vegetarian
Ingredients
- 2 cups all-purpose flour
- 1 packet (2 1/4 tsp) active dry yeast
- 3/4 cup warm water
- 1 teaspoon sugar
- 1 teaspoon salt
- 1 tablespoon olive oil
Instructions
- Activate the yeast: In a mixing bowl, combine the warm water, yeast, and sugar. Stir lightly and let it sit for about 5–10 minutes until it becomes frothy.
- Mix the dry ingredients: In a large bowl, whisk together the flour and salt.
- Combine wet and dry: Create a well in the center of the flour mixture and pour in the activated yeast mixture and olive oil.
- Knead the dough: Dust your countertop and transfer the dough. Knead for about 5–7 minutes until smooth and elastic.
- Let it rise: Shape the dough into a ball and place it in a greased bowl. Cover and let it rise for about 1 hour.
- Preheat your oven: About 30 minutes before baking, preheat your oven to 475°F (245°C).
- Shape your pizza: Punch down the risen dough and divide if making two pizzas. Roll out to desired thickness.
- Top and bake: Add your favorite toppings and bake for 10-12 minutes, or until golden brown.
Notes
For a unique flavor, try adding Italian seasoning or using whole wheat flour. Leftover dough can be frozen for later use.
Nutrition
- Serving Size: 1 serving
- Calories: 150
- Sugar: 1g
- Sodium: 400mg
- Fat: 3g
- Saturated Fat: 0.5g
- Unsaturated Fat: 2g
- Trans Fat: 0g
- Carbohydrates: 26g
- Fiber: 1g
- Protein: 4g
- Cholesterol: 0mg
Keywords: pizza, dough, homemade, Italian, family recipe
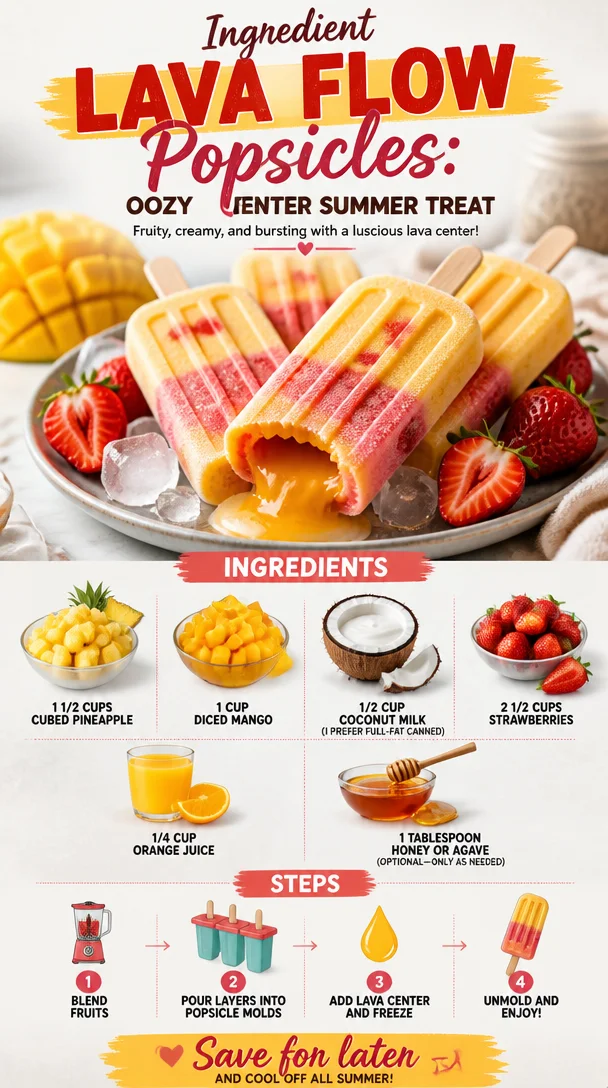
Ingredient Lava Flow Popsicles: Oozy Center Summer Treat
Dive into Delight: Lava Flow Popsicles
Introduction
Hello, food lovers! Are you feeling the heat of summer? If so, there’s nothing quite like a refreshing treat to keep things cool while satisfying your sweet tooth. Today, I’m excited to share with you a recipe that’s bursting with tropical flavors and nostalgic memories—Lava Flow Popsicles! These delightful frozen creations not only tantalize your taste buds but also transport you straight to a sun-kissed beach with each bite.
Picture yourself lounging in the sun, ocean waves crashing in the distance, while you indulge in these stunning popsicles. With their vibrant colors and layers of fruit, they’re as fun to make as they are to eat. Plus, they’re a fantastic activity to involve the little ones in. Have them help you blend, pour, and, of course, taste! You’ll not only create a delicious treat together but also memories that will last a lifetime.
If you’re looking for something simple, refreshing, and oh-so-tasty, you’re in the right place. These Lava Flow Popsicles require minimal ingredients and effort, but oh, do they deliver on flavor! Whether you need a way to cool down on a hot summer day, want to impress guests at your next gathering, or simply crave a healthy dessert option, these popsicles are your perfect solution. So, let’s roll up our sleeves, grab our ingredients, and bring a splash of summer into our kitchens!
Personal Story
I still remember the first time I had a lava flow drink—sipping on it while soaking in the sun at a beachside bar, surrounded by palm trees and laughter. The bartender artfully layered the vibrant colors, and I marveled at how something so delightful could also look like a work of art! I instantly fell in love with the blend of coconut, strawberry, and the golden notes of pineapple and mango. It felt like summer in a glass!
Years later, when I started experimenting with popsicle recipes, the lava flow drink quickly came to mind. I couldn’t shake the thought of creating a frozen dessert that mirrored those sun-drenched memories—all while being easy enough to whip up in my kitchen. The Lava Flow Popsicles were born from this inspiration—bringing a touch of nostalgia to every bite while keeping things super simple and downright delicious. Now, every time I make these pops, I’m reminded of that blissful day by the beach, evoking warm vibes and blissful summer memories. Let’s channel that tropical energy together as we make these delightful popsicles!
Ingredients
-
1 1/2 cups cubed pineapple
Sweet, juicy pineapple adds the perfect tropical touch. You can use fresh or canned pineapple, but make sure it’s packed in juice rather than syrup for a healthier option. -
1 cup diced mango
Mango provides a lovely sweetness and a beautiful golden color. Frozen mango is a great substitute if you don’t have fresh mango on hand—just let it thaw a bit before blending. -
1/2 cup coconut milk (I prefer full-fat canned)
This creamy addition creates that luscious texture we adore. Full-fat coconut milk works best for a richer flavor, but you can also use light coconut milk for a lighter option. -
2 1/2 cups strawberries
Strawberries bring that bright red color and a flavorful tang. Fresh strawberries are fantastic, but if they’re out of season, frozen strawberries work well too—just defrost them first. -
1/4 cup orange juice
A splash of orange juice brightens the flavors and adds a refreshing zing. Freshly squeezed is always best, but store-bought works in a pinch! -
1 Tablespoon honey or agave (optional – only as needed)
Adjust the sweetness to your liking! If your fruit is very sweet, you may not need any sweetener, but honey or agave is a great addition if you want to enhance the flavor.
Step-by-Step Instructions
-
Prep Your Ingredients
Start by gathering all your fruits. If you’re using fresh pineapple and mango, peel and chop them into cubes. For strawberries, remove the stems and chop any large ones in half. This makes blending a breeze! -
Blend the Pineapple Layer
In a blender, combine the cubed pineapple and half of the coconut milk. Blend until smooth and creamy. Taste and see if it needs a bit of sweetness; if so, add honey or agave. -
Prepare the Mango Layer
Next, rinse out the blender (or wipe it down if you’re feeling lazy). Add in the mango chunks and the rest of the coconut milk. Blend until creamy. This layer should be luxurious and smooth! -
Create the Strawberry Layer
Now, it’s strawberry time! Add the strawberries to the cleaned blender along with the orange juice. Blend until well-combined. You might notice a delicious tang here; that’s what we want! -
Layer Your Popsicles
Grab your popsicle molds and start layering! Begin with a couple of tablespoons of the pineapple mixture, then add the mango layer. It’s okay if they mix a bit; that’s part of the charm! Finally, top with the strawberry layer. Continue this until the molds are filled, leaving a little space at the top for expansion. -
Insert Sticks and Freeze
If your popsicle molds come with lids, put them on. Otherwise, insert popsicle sticks directly into the molds. Place them in the freezer for at least 4-6 hours or until fully frozen. If you’re feeling impatient (we’ve all been there), try giving them a few hours and then testing one! -
Unmold and Enjoy!
Once the popsicles are frozen, run warm water over the outside of the molds to help release them easily. Serve these up right away—they won’t last long once your guests (or family!) get a taste!
Serving Suggestions
To display your Lava Flow Popsicles, arrange them upright in a colorful bowl filled with ice for a fun presentation! You can also serve them on wooden boards with tropical-themed decorations, like slices of fresh fruit and a sprig of mint for an elegant touch. The vibrant colors speak for themselves, so let them shine!
Recipe Variations
- Berry Burst: Swap out the strawberries for blueberries or raspberries for a different fruit combo!
- Citrus Splash: Instead of orange juice, try lemon or lime for a zesty twist.
- Creamy Coconut: Use more coconut milk in the pineapple or mango layers for an extra creamy popsicle!
- Tropical Additions: Add a handful of spinach to the mango layer for a vibrant green, nutrient-packed boost!
- Boozy Popsicles: For an adult twist, add a splash of rum or coconut flavored liqueur to the coconut milk.
Chef’s Notes
I love how versatile this recipe can be! Over the years, I’ve played around with different fruits and layers, discovering that almost any combination works beautifully. One time, I got adventurous and added a splash of passion fruit puree for an explosion of flavor—talk about tropical bliss!
Here’s a fun kitchen story: the first time I attempted to make these popsicles, I was eager to show them off at a summer gathering. However, I completely forgot to check the freezer! They were still liquid when it was time to serve. Let’s just say, there was a lot of laughter as we enjoyed a colorful fruit slush instead!
FAQs and Troubleshooting
1. My popsicles won’t come out of the molds, what do I do?
Running the molds under warm water for a few seconds should help release the popsicles. If they’re still stuck, let them sit for a moment, and try again.
2. Can I make these ahead of time?
Absolutely! Lava Flow Popsicles store well in the freezer for about 3 weeks. Just wrap them in plastic wrap or place them in a zip-top bag to prevent freezer burn.
3. What if I don’t have popsicle molds?
No molds, no problem! Use paper cups and wooden sticks or even ice cube trays for mini pops—it will work just fine!
4. Can I use frozen fruit?
Definitely! Frozen fruit is a fantastic option, but be sure to let it thaw slightly before blending to get the right consistency.
Nutritional Info
These popsicles are not only a delightful treat but also a healthier choice compared to store-bought desserts. Each popsicle is made primarily from fruit and coconut milk, providing a dose of vitamins, minerals, and healthy fats. For a specific nutritional breakdown, feel free to calculate based on the quantities given, but you can rest assured they’re a guilt-free indulgence!
With this Lava Flow Popsicle recipe, you’re all set for a slice of summer bliss, any time of year. I can’t wait for you to try these and share your tropical moments. Cheers to sweet memories and even sweeter treats! 🍍✨
PrintLava Flow Popsicles

Refreshing and vibrant Lava Flow Popsicles bursting with tropical flavors—perfect for cooling down on hot summer days!
- Prep Time: 15 minutes
- Cook Time: 0 minutes
- Total Time: 360 minutes
- Yield: 8 servings 1x
- Category: Dessert
- Method: Freezing
- Cuisine: Tropical
- Diet: Vegan
Ingredients
- 1 1/2 cups cubed pineapple
- 1 cup diced mango
- 1/2 cup full-fat coconut milk
- 2 1/2 cups strawberries
- 1/4 cup orange juice
- 1 Tablespoon honey or agave (optional)
Instructions
- Prep your ingredients by gathering all fruits and chopping as needed.
- Blend the pineapple layer, mixing cubed pineapple with half the coconut milk until smooth.
- Prepare the mango layer by blending mango chunks with the remaining coconut milk.
- Create the strawberry layer by blending strawberries with orange juice.
- Layer your popsicles by starting with a pineapple mixture, then adding mango, and topping with the strawberry layer.
- Insert popsicle sticks and freeze for at least 4-6 hours.
- Unmold the popsicles by running warm water over the molds and enjoy!
Notes
These popsicles can be stored in the freezer for about 3 weeks. You can also use different fruit combinations or even add a splash of rum for an adult twist.
Nutrition
- Serving Size: 1 popsicle
- Calories: 150
- Sugar: 18g
- Sodium: 5mg
- Fat: 6g
- Saturated Fat: 5g
- Unsaturated Fat: 1g
- Trans Fat: 0g
- Carbohydrates: 25g
- Fiber: 3g
- Protein: 1g
- Cholesterol: 0mg
Keywords: popsicles, summer treat, tropical dessert, healthy dessert, refreshing snacks
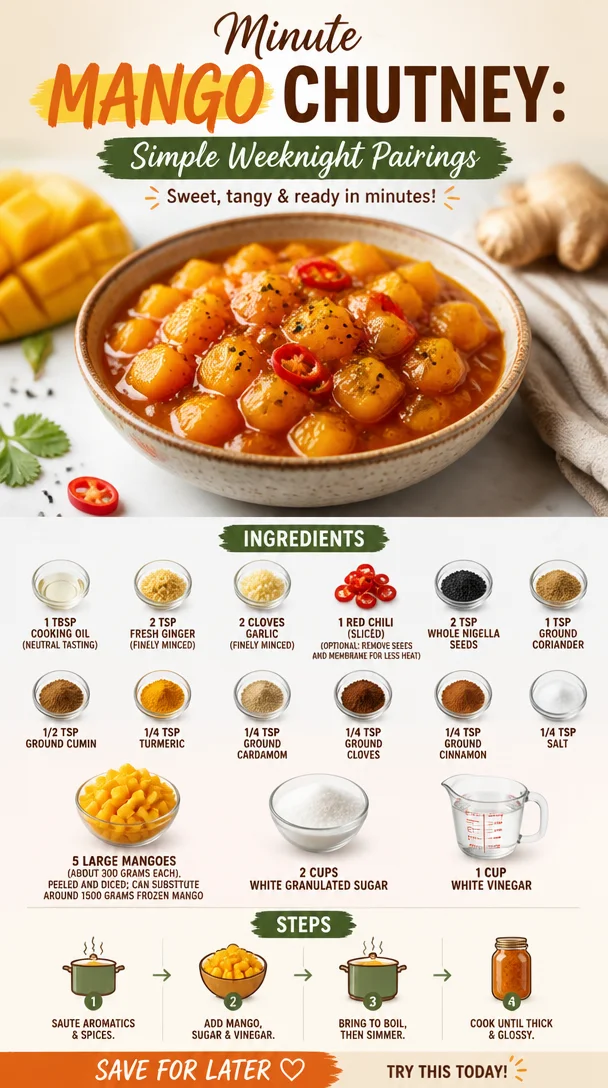
Minute Mango Chutney: Simple Weeknight Pairings
The Best Mango Chutney: A Flavorful Companion for Every Table
Welcome back to Ivory Apron, food lovers! Today, we’re diving into the colorful and aromatic world of Mango Chutney. This delightful condiment is not just a burst of flavor; it’s a bridge between cultures, a celebration of fresh ingredients, and a way to spice up your everyday meals. Whether you’re slathering it on grilled meats or using it to brighten up a simple cheese platter, mango chutney is the sticky-sweet nectar that adds a splash of personality to your dishes.
As you prepare to embark on this culinary adventure, I want you to know that this is more than just a recipe; it’s a chance to gather your loved ones and create beautiful moments around your table. So, let’s roll up our sleeves, tie on our aprons, and get ready to make the best mango chutney you’ll ever taste!
A Personal Story
Ah, mangoes! They hold a special place in my heart. Growing up, my grandmother had a mango tree that seemed to bear fruit all summer long. I remember spending lazy afternoons under that tree, the air thick with sweet, tropical scents. Grandpa would climb up to pluck the ripe mangoes, handing them down to us with a grin. Some would end up in our bellies, while others would be transformed into her famous chutney.
The kitchen was a symphony of sounds: the rhythmic chopping of mangoes, the sizzling of spices, and the occasional giggle as we tasted and adjusted flavors. That chutney was a staple at every family gathering, the perfect accompaniment to curries and grilled meats. As I learned to replicate her recipe, I treasured every bite of nostalgia. Now, it’s time to share that joy with you!
Ingredients
Here’s everything you’ll need to create this vibrant and delicious mango chutney:
-
1 tablespoon cooking oil (neutral-tasting): A light oil like canola or sunflower allows the spices to shine without overwhelming the other flavors.
-
2 teaspoons fresh ginger (finely minced): Ginger adds a warm heat and lots of depth. If you don’t have fresh, you can use ground ginger, but it won’t have the same freshness.
-
2 cloves garlic (finely minced): Garlic brings a savory richness that complements the sweetness of the mango.
-
1 red chili (sliced): For those who crave a bit of spice! Removing the seeds and membrane will tone down the heat, making it milder.
-
2 teaspoons whole nigella seeds: These little black seeds add a unique, slightly onion-like flavor. If you can’t find them, cumin seeds will make a good substitute.
-
1 teaspoon ground coriander: Adds herbal undertones. Ground cumin can replace this if you’re out.
-
1/2 teaspoon ground cumin: Earthy and warm, it pairs perfectly with the sweetness of mango.
-
1/4 teaspoon turmeric: Adds beautiful color and a hint of bitterness, balancing out the sweetness.
-
1/4 teaspoon ground cardamom: This fragrant spice will elevate your mango chutney with a touch of elegance.
-
1/4 teaspoon ground cloves: Strong in flavor, so a little goes a long way here.
-
1/4 teaspoon ground cinnamon: Sweet and warm—this is what gives your chutney that cozy, comforting essence.
-
1/4 teaspoon salt: Don’t skip this; it’ll enhance all those beautiful flavors!
-
5 large mangoes (about 300 grams each, peeled and diced): Ripe, juicy mangoes are the star of this show! If fresh mangoes are out of season, feel free to substitute them with around 1500 grams of frozen mango.
-
2 cups white granulated sugar: This balances the tanginess and adds the classic chutney sweetness. Brown sugar can also work if you want a deeper flavor.
-
1 cup white vinegar: Provides the necessary acidity to balance the sweetness and acts as a preserving agent—essential for keeping your chutney fresh.
Step-by-Step Instructions
Now let’s get cooking! Here’s how to make this mouthwatering mango chutney:
-
Prep Your Ingredients:
Start by gathering all your ingredients. Dice the mangoes and set them aside. Mince your ginger and garlic, and slice your red chili (remember to remove seeds for less heat!). -
Heat the Oil:
In a large saucepan, heat 1 tablespoon of cooking oil over medium heat. You’ll want that oil just hot enough to sizzle when you add your ginger and garlic. -
Sauté the Aromatics:
Once the oil is hot, throw in the minced ginger and garlic. Sauté them for about 1-2 minutes until fragrant. Keep an eye on them; you want them golden, not burnt! -
Add the Spices:
Toss in the red chili, nigella seeds, ground coriander, cumin, turmeric, cardamom, cloves, cinnamon, and salt. Stir everything together for about 30 seconds. This step blooms the spices, releasing their natural oils and enhancing their flavors. -
Incorporate the Mangoes:
Now, it’s time to add your diced mangoes to the pan. Stir gently to coat the mango pieces with the spice mixture. Allow them to cook for about 5 minutes on medium heat until they start to break down. -
Sweeten the Pot:
Pour in the sugar and vinegar. Stir until the sugar has completely dissolved, and the mixture becomes syrupy. Let this cook for another 15-20 minutes on low heat. Stir occasionally to prevent sticking while watching the mangoes transform into a tantalizing chutney. -
Check Your Consistency:
After about 20 minutes, you want your chutney to be thick and glossy. If it’s not there yet, simmer for a few extra minutes, stirring gently. -
Cool and Store:
Once your chutney has reached the desired consistency, remove it from the heat and let it cool. Transfer to a clean, sterilized jar. It will keep well in the fridge for up to a month (although I doubt it’ll last that long!).
Serving Suggestions
Mango chutney is incredibly versatile! Serve it alongside grilled chicken or fish for a tropical twist, or pair it with cheese and charcuterie for a vibrant appetizer spread. A dollop on top of a savory curry can elevate it to new heights. If you have leftovers, try mixing some chutney into a yogurt dip for a refreshing sidekick!
Recipe Variations
-
Spicy Mango Chutney: If you like it hot, be brave! Add a few more red chilies or include a splash of hot sauce for an extra kick.
-
Herbed Chutney: Stir in fresh herbs like cilantro or mint after cooking to add a refreshing element.
-
Peach-Mango Fusion: Swap out half the mangoes for peaches when they’re in season. It makes for a fantastic summer chutney!
-
Apple-Mango Chutney: Try adding diced apples for a crunchy texture and a hint of tartness.
-
Curry-Infused Chutney: Add a teaspoon of curry powder to the spice mix for a unique twist that amplifies the flavors.
Chef’s Notes
You know, every time I whip up a batch of this mango chutney, I can’t help but think of that sunny summer day under my grandmother’s tree. Each preparation feels like a step back in time—a playful mix of nostalgia and innovation. Over the years, I’ve experimented with different spices and fruit combinations, and it has been a thrilling journey.
One funny mishap happened when I accidentally over-sweetened a batch while trying to use up leftover holiday sugar. A quick pinch of salt and a dash of vinegar transformed my gooey mess into a sweet-and-savory masterpiece—sometimes our kitchen “oops” can lead to delightful surprises!
FAQs and Troubleshooting
-
Why is my chutney too sweet?
If your chutney tastes overly sweet, add a splash more vinegar to balance it out. Remember, a little salt can also enhance the flavors. -
Can I use frozen mangoes?
Absolutely! Frozen mango works great, but make sure to let them thaw a bit and drain any excess liquid before cooking. -
How thick should the chutney be?
The chutney will thicken as it cools. Ideally, it should be thick enough to dollop on a plate but still somewhat pourable. -
How should I store the chutney?
Store your chutney in a clean, airtight jar in the refrigerator. It can last for up to a month, but trust me, it won’t last long with how delicious it is!
Nutritional Info
While I believe in enjoying food without guilt, it’s always handy to know what you’re serving. Here’s a simple breakdown per tablespoon of chutney:
- Calories: 70 kcal
- Fat: 0.5g
- Carbohydrates: 17g
- Sugar: 14g
- Fiber: 1g
So there you have it! A lush, delectable mango chutney that’s bound to bring joy to your gatherings and family dinners. This recipe is not just about feeding the stomach; it’s about nourishing the soul and creating memories that will last long after the meal is finished. Until next time, happy cooking, and may your table be filled with love and laughter!
Let’s keep those aprons tied on tight while we create and celebrate together!
PrintThe Best Mango Chutney

A vibrant and flavorful mango chutney that adds a splash of personality to any dish.
- Prep Time: 15 minutes
- Cook Time: 45 minutes
- Total Time: 60 minutes
- Yield: 10 servings 1x
- Category: Condiment
- Method: Cooking
- Cuisine: Indian
- Diet: Vegetarian
Ingredients
- 1 tablespoon cooking oil (neutral-tasting)
- 2 teaspoons fresh ginger (finely minced)
- 2 cloves garlic (finely minced)
- 1 red chili (sliced)
- 2 teaspoons whole nigella seeds
- 1 teaspoon ground coriander
- 1/2 teaspoon ground cumin
- 1/4 teaspoon turmeric
- 1/4 teaspoon ground cardamom
- 1/4 teaspoon ground cloves
- 1/4 teaspoon ground cinnamon
- 1/4 teaspoon salt
- 5 large mangoes (about 300 grams each, peeled and diced)
- 2 cups white granulated sugar
- 1 cup white vinegar
Instructions
- Prep Your Ingredients: Gather all your ingredients. Dice the mangoes and set them aside. Mince your ginger and garlic, and slice your red chili (remove seeds for less heat).
- Heat the Oil: In a large saucepan, heat 1 tablespoon of cooking oil over medium heat until sizzles when you add ginger and garlic.
- Sauté the Aromatics: Add minced ginger and garlic, sauté for 1-2 minutes until fragrant.
- Add the Spices: Toss in red chili, nigella seeds, ground coriander, cumin, turmeric, cardamom, cloves, cinnamon, and salt. Stir for 30 seconds to bloom the spices.
- Incorporate the Mangoes: Add diced mangoes and stir to coat with the spices. Cook for about 5 minutes on medium heat until they start to break down.
- Sweeten the Pot: Pour in sugar and vinegar, stir until sugar dissolves, then cook for another 15-20 minutes on low heat until syrupy.
- Check Your Consistency: Ensure chutney is thick and glossy, simmering longer if needed.
- Cool and Store: Once thickened, remove from heat, let cool, and store in a sterilized jar in the fridge for up to a month.
Notes
Consider adding fresh herbs or spices for variations. Store in a clean, airtight jar for freshness.
Nutrition
- Serving Size: 1 tablespoon
- Calories: 70
- Sugar: 14g
- Sodium: 240mg
- Fat: 0.5g
- Saturated Fat: 0g
- Unsaturated Fat: 0.5g
- Trans Fat: 0g
- Carbohydrates: 17g
- Fiber: 1g
- Protein: 0g
- Cholesterol: 0mg
Keywords: mango chutney, condiment, sweet and spicy, Indian recipes, mango recipes
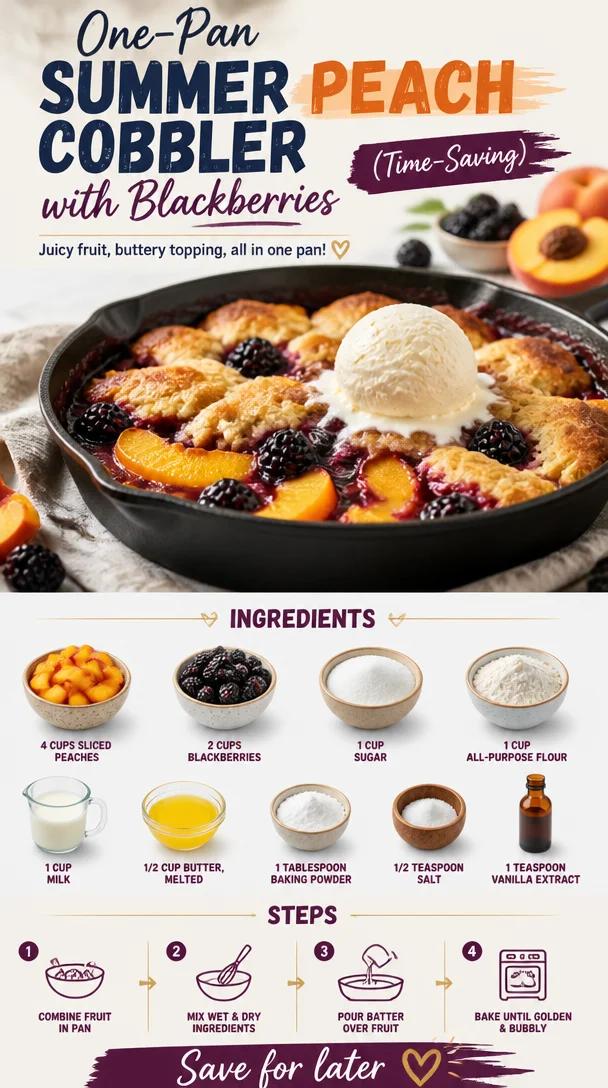
One-Pan Summer Peach Cobbler with Blackberries (Time-Saving)
A Warm Welcome to My Kitchen: Peach Cobbler with Blackberries
Hello, fellow food lovers! Today, we’re diving into one of my absolute favorite desserts—Peach Cobbler with Blackberries. This dish doesn’t just bring a cascade of summer flavors; it’s a beautiful reminder of family gatherings, lazy afternoons, and those moments when you catch the scent of something baking and your entire spirit just lifts. I can feel the warmth of those sun-soaked days just thinking about it!
Now, imagine this: It’s a golden afternoon, your kitchen is filled with the intoxicating aroma of ripe peaches and sweet blackberries bubbling away in the oven. The cobbler is golden, and you can hear that satisfying sizzle as it begins to cool. And when it’s finally time to serve up, everyone gathers around the table with eager eyes and spoons at the ready. This is the magic of peach cobbler, and that’s exactly what we’re creating today!
My love for cobblers, especially this peach and blackberry version, goes way back to summer visits at my grandmother’s house. She’d have baskets of fresh fruit from her garden, and the moment those peaches ripened, we knew what was coming—her famous cobbler! I still recall how we would race to the kitchen, excited to help mix and pour, tasting the luscious filling straight from the bowl. Those moments of pure joy—sticky fingers and laughter—are etched in my memory, and they inspire me to recreate this dish and share that same warmth through my cooking.
Ingredients
Let’s gather everything we need to whip up this fabulous dessert! Here are the ingredients and a bit of chef insight to help you make the best cobbler ever.
-
4 cups sliced peaches
Fresh peaches are key! Make sure they’re juicy and ripe for the best flavor. If you can’t find fresh peaches, you can substitute with frozen (just thaw them first). -
2 cups blackberries
These little gems add a delightful tartness that perfectly complements the sweetness of the peaches. If blackberries are out of season, raspberries or blueberries work just as well! -
1 cup sugar
This is your ticket to sweetness! Feel free to adjust to your taste. If you’re looking to cut back on sugar, coconut sugar or a sugar substitute can also work—just keep in mind the flavor profiles might change slightly. -
1 cup all-purpose flour
The foundation of our cobbler topping. If you’re looking for a gluten-free option, you could use a gluten-free all-purpose blend, though results may vary slightly. -
1 cup milk
Whole milk provides the best richness, but feel free to swap it with almond milk or oat milk if you’re going dairy-free. -
1/2 cup butter, melted
Nothing beats the flavor of good old-fashioned butter. If you’re vegan or dairy-free, coconut oil can be an excellent substitute. -
1 tablespoon baking powder
This is what makes our cobbler rise beautifully! Double check your baking powder is fresh for optimal fluffiness. -
1/2 teaspoon salt
A pinch of salt elevates all the sweet flavors. Never skip it! -
1 teaspoon vanilla extract
Vanilla adds a depth of flavor that’s absolutely divine. Make sure it’s pure vanilla extract for the best results—no imitators here!
Step-by-Step Instructions
Alright, my culinary companions, let’s get started on this delicious Peach Cobbler with Blackberries! Here’s how to make it happen, step-by-step.
1. Preheat Your Oven:
Start by preheating your oven to 375°F (190°C). This is a crucial step; we want that oven nice and hot when we pop our cobbler in for that perfect golden crust!
2. Prepare the Fruit Filling:
In a mixing bowl, combine the sliced peaches and blackberries. Sprinkle 1/2 cup of sugar over the fruit. Let it sit for about 10 minutes to allow the juices to mingle. You’ll be amazed at how flavorful this mixture becomes!
Chef Tip: If you like a little spice, feel free to add a dash of cinnamon or nutmeg to this mix for an extra flavor boost!
3. Make the Batter:
In another bowl, whisk together the flour, remaining 1/2 cup of sugar, baking powder, and salt. Create a well in the center and add the melted butter, milk, and vanilla extract. Mix until just combined—don’t overdo it; a few lumps are okay!
Chef Hack: To incorporate air into your batter for a lighter cobbler, consider folding in the flour and liquid rather than stirring vigorously.
4. Assemble the Cobbler:
Grease a baking dish (a 9×13 works beautifully) and pour the batter evenly into the bottom. Spoon the peach and blackberry mixture over the batter, trying to distribute the fruit evenly. Don’t worry if it looks a bit messy; that’s part of the charm!
Pro Tip: Patience is key! Resist the urge to stir the fruit into the batter. The fruit will sink as it bakes, resulting in a lovely layered effect.
5. Bake:
Pop your baking dish into the oven and let it bake for about 40-45 minutes. You’ll know it’s ready when the top is golden brown and a toothpick inserted into the batter comes out clean.
6. Cool and Serve:
Once it’s out of the oven, allow the cobbler to cool for about 10-15 minutes. It will continue to set as it cools, giving you a more scoop-able dessert.
Serving Suggestions
When it comes to serving your Peach Cobbler with Blackberries, I like to keep it simple yet elegant. Serve warm, straight from the dish, and don’t forget a generous scoop of vanilla ice cream on top! The warm cobbler pairs perfectly with the cold, creamy ice cream, creating a delightful contrast. Also, you can sprinkle a bit of fresh mint on top for that pop of color and freshness!
Recipe Variations
Let’s mix it up a little! Here are some fun variations you can try:
-
Add Spices:
Throw in a dash of cinnamon, nutmeg, or even ginger for those spicy notes that warm your heart. -
Crispy Topping:
For a crunchy twist, sprinkle some rolled oats or crushed nuts over the batter before baking. -
Fruit Swap:
If peaches or blackberries aren’t your jam, try mixing it up with apples and cranberries or pears and blueberries! -
Zesty Lemon:
Grate in some lemon zest into the batter for a bright, zesty touch that cuts through the sweetness. -
Vegan Twist:
Swap the butter for coconut oil and use plant-based milk to make this dish vegan-friendly.
Chef’s Notes
Oh, I can’t help but share a little kitchen story as I reflect on this recipe! The first time I attempted this cobbler on my own, I miscounted the sugar. Can you imagine? Instead of 1 cup, I added 2! Let’s just say it was a pretty sweet experience—literally! Everyone teased me about creating a “dessert with a side of fruit,” but I ended up adjusting the recipe and making it even better over time. Sometimes, those little kitchen flukes lead to the best culinary creations!
This recipe has evolved, much like my cooking style. It has gone from a simple family dish shared around the table to a cherished favorite that warms hearts at gatherings, celebrating everything from summer BBQs to cozy fall evenings.
FAQs and Troubleshooting
-
Can I use frozen fruit instead of fresh?
Yes, you can! Just make sure to thaw and drain excess liquid from the fruit before using it in the recipe. -
What if my cobbler is too watery?
If you find your cobbler is overly juicy, it might be from too much fruit or not enough baking time. Next time, consider reducing the fruit quantity or letting it bake a little longer. -
How do I store leftovers?
Store any leftovers in an airtight container in the fridge for up to 3 days. Reheat in the oven for that fresh-out-of-the-oven taste! -
Can I prepare this ahead of time?
You can prepare the fruit filling a day in advance and store it in the fridge. Just make the batter fresh when you’re ready to bake.
Nutritional Info
(If applicable, please include specific nutritional value, like calories, fat, sugars, etc., for this cobbler.)
And there you have it, my friends! A warm, delicious Peach Cobbler with Blackberries that’s not just a dessert but a delightful experience filled with nostalgia and joy. I hope you feel inspired to gather your loved ones around the table and create your own sweet memories. Don’t forget to tie on that apron, pour something sparkling, and enjoy every moment in the kitchen. Happy cooking!
PrintPeach Cobbler with Blackberries

A delightful summer dessert featuring juicy peaches and tart blackberries, topped with a golden cobbler crust.
- Prep Time: 15 minutes
- Cook Time: 45 minutes
- Total Time: 60 minutes
- Yield: 8 servings 1x
- Category: Dessert
- Method: Baking
- Cuisine: American
- Diet: Vegetarian
Ingredients
- 4 cups sliced peaches
- 2 cups blackberries
- 1 cup sugar
- 1 cup all-purpose flour
- 1 cup milk
- 1/2 cup butter, melted
- 1 tablespoon baking powder
- 1/2 teaspoon salt
- 1 teaspoon vanilla extract
Instructions
- Preheat your oven to 375°F (190°C).
- Combine the sliced peaches and blackberries in a mixing bowl. Sprinkle 1/2 cup of sugar over the fruit and let sit for about 10 minutes.
- Whisk together the flour, remaining 1/2 cup of sugar, baking powder, and salt in another bowl. Create a well in the center and add the melted butter, milk, and vanilla extract. Mix until just combined.
- Grease a 9×13 baking dish and pour the batter evenly into the bottom. Spoon the peach and blackberry mixture over the batter.
- Bake for 40-45 minutes until the top is golden brown.
- Cool for about 10-15 minutes before serving.
Notes
Serve warm with vanilla ice cream for a delightful treat. You can also add a sprinkle of fresh mint on top for garnish.
Nutrition
- Serving Size: 1 serving
- Calories: 380
- Sugar: 22g
- Sodium: 300mg
- Fat: 18g
- Saturated Fat: 10g
- Unsaturated Fat: 8g
- Trans Fat: 0g
- Carbohydrates: 49g
- Fiber: 3g
- Protein: 5g
- Cholesterol: 40mg
Keywords: peach cobbler, blackberry dessert, summer recipe, fruit cobbler
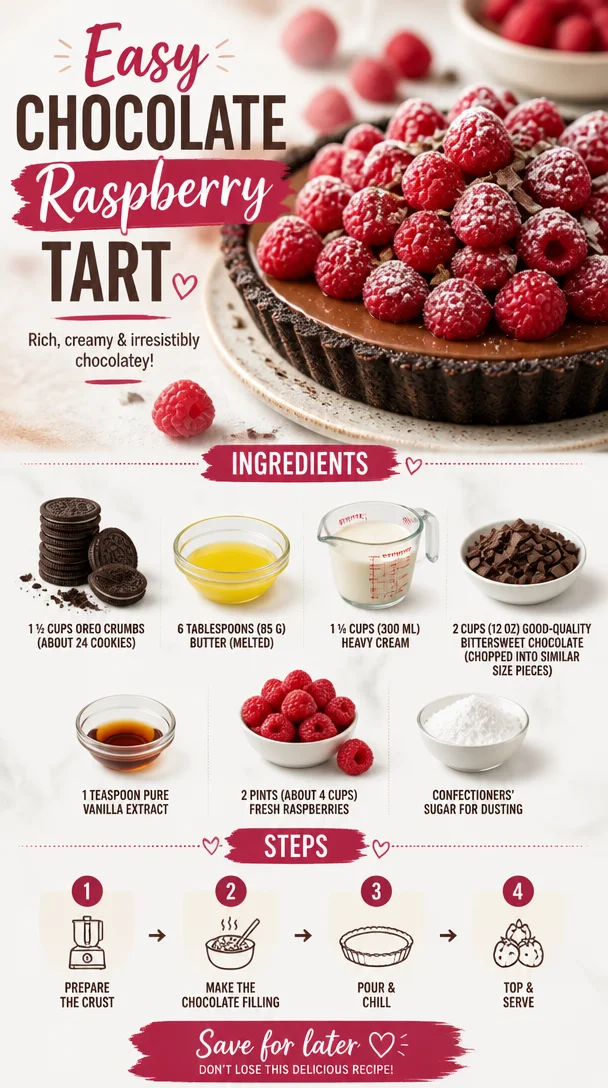
Easy Chocolate Raspberry Tart
Decadent Delight: Easy Chocolate Raspberry Tart
Hello and welcome, fellow foodies! If you’re in the mood for something indulgent, delicious, and oh-so-chic, then let’s talk about one of my all-time favorite desserts — the Easy Chocolate Raspberry Tart. Simple to whip up yet impressively elegant, this tart is a showstopper for any gathering, whether you’re hosting a chic soirée or a cozy dinner with loved ones. So grab your apron, and let’s dive into this delightful chocolatey creation!
Introduction
There’s something magical about dessert, isn’t there? It’s the sweet ending to a beautiful meal, the special treat that brings a smile to our faces, and let’s be honest, the perfect excuse to indulge a little bit. When it comes to desserts that capture elegance without the fuss, this Easy Chocolate Raspberry Tart reigns supreme.
Imagine a velvety chocolate filling cradled in a buttery Oreo crust, topped with vibrant, fresh raspberries that pop in both flavor and color. Together, they create a beautiful harmony of taste — rich yet refreshing, decadent yet light. Each slice tells a story of indulgence that feels just right, no matter the occasion.
What I adore about this tart is how effortlessly it comes together. You don’t need any advanced culinary skills to pull it off; just a bit of love, attention to detail, and maybe a glass of wine to sip on as you create this edible masterpiece. It’s the perfect balance of sophistication and simplicity, making it a must-have recipe in your collection.
Now, let’s talk about the heartwarming personal memory I have with this dish that adds a sprinkle of nostalgia to every bite.
Personal Story
I vividly remember the first time I made this Easy Chocolate Raspberry Tart for my best friend’s birthday. We were both in college, broke but brimming with enthusiasm and dreams of becoming gourmet chefs. On that warm summer afternoon, I laid out the ingredients on our tiny kitchen counter, excitedly chatting with her about our plans while the sun streamed through the windows. As I crushed the Oreos into crumbs, we shared laughter and memories. It felt like a scene from a movie — two aspiring chefs concocting a delicious creation that would bring smiles and joy.
When the tart was finally ready, and we saw the rich chocolate filling juxtaposed with the vibrant raspberries, we couldn’t contain our excitement. We plated it up, dusting it with confectioners’ sugar like true chefs, and sat down to enjoy it together. The combination of smooth chocolate and tart raspberries was heavenly! It was a special moment filled with friendship and the joys of cooking that shaped my passion for sharing food with loved ones.
Now, let’s get into the details of creating this unforgettable dessert so you can make your own delicious memories!
Ingredients
Here’s what you’ll need for this heavenly Easy Chocolate Raspberry Tart. I’ve added some chef insights and substitution tips to guide you along the way.
-
1 ½ cups Oreo crumbs (about 24 cookies)
These provide a rich, chocolatey crust that’s super easy to make. If you’re not a fan of Oreos, feel free to use a homemade chocolate cookie or even graham cracker crumbs mixed with cocoa powder for an alternate twist. -
6 Tablespoons (85 g) butter (melted)
The melted butter brings everything together, adding richness and moisture. You can substitute it with coconut oil for a dairy-free option, but be mindful of the flavor it might impart. -
1 ¼ cups (300 ml) heavy cream
The heavy cream is the backbone of the chocolate filling, making it smooth and rich. If you’re looking for a lighter option, you can use full-fat coconut milk, but the texture will be slightly different. -
2 cups (12 oz) good-quality bittersweet chocolate (chopped into similar size pieces)
I recommend a chocolate with at least 60% cacao for a well-balanced flavor. If you prefer milk chocolate, feel free to use that, but reduce the sugar in the recipe slightly since it’ll be sweeter. -
1 teaspoon pure vanilla extract
This enhances the chocolate flavor and adds warmth. Don’t skip it! However, if you’re out, almond extract can work in a pinch for an intriguing twist. -
2 pints (about 4 cups) fresh raspberries
The fresh raspberries not only add a beautiful pop of color but also a fabulous tartness that cuts through the richness of the chocolate. If fresh berries are out of season, frozen raspberries can work; just thaw and drain any excess moisture. -
Confectioners’ sugar for dusting
This is optional but adds a lovely final touch. You can also use cocoa powder for a deeper chocolate flavor.
Step-by-Step Instructions
Ready to get baking? Here’s a detailed walkthrough for making your Easy Chocolate Raspberry Tart!
-
Prepare the Oreo Crust
Start by preheating your oven to 350°F (175°C). While it heats, combine the Oreo crumbs and melted butter in a mixing bowl. Use a fork or your hands to mix until the crumbs are evenly moistened.Chef Insight: Make sure that the consistency resembles wet sand. You want it to hold together when pressed. Once mixed, firmly press the crumb mixture into the bottom and up the sides of a 9-inch tart pan to create an even layer. Bake for about 10 minutes until set, then let it cool completely while you prepare the filling.
-
Make the Chocolate Ganache
In a medium saucepan, heat the heavy cream over medium heat until it just begins to simmer — you’ll see bubbles forming around the edges. Remove it from the heat and pour it over the chopped bittersweet chocolate in a heatproof bowl. Let it sit for a minute to soften the chocolate.Tip: This is the perfect time to check the texture of your chocolate. If you’re using chocolate chips, they will melt easily, but chopped chocolate bars create a smoother ganache.
-
Stir in Vanilla
After a minute, stir gently until the chocolate is completely melted and the mixture is smooth. Add the vanilla extract and stir to incorporate.Hack: If your ganache has lumps, you can give it a quick blitz with an immersion blender to smooth it out!
-
Pour the Mixture into the Cool Crust
Pour the luscious chocolate ganache into the cooled Oreo crust, spreading it into an even layer. Allow it to set at room temperature for a bit before transferring it to the refrigerator to chill for at least 2 hours, or until firm to the touch.Chef Tip: For an easier release from the tart pan, gently run a knife around the edges before slicing. It makes for a clean cut!
-
Add the Fresh Raspberries
Just before serving, take the tart out of the refrigerator and decorate the top with fresh raspberries. Dust with confectioners’ sugar for that extra wow factor. -
Slice and Serve
Use a sharp knife to slice the tart into wedges, serving it alongside extra raspberries if desired.Pro Tip: If the chocolate gets too solid in the fridge, let it sit at room temperature for a few minutes before slicing for cleaner cuts.
Serving Suggestions
When you serve this tart, think of the presentation! Place a slice on a dessert plate and garnish it with a few fresh raspberries on the side for a pop of color. A dollop of whipped cream or a scoop of vanilla ice cream also pairs splendidly with the tart — the creamy elements balance the rich chocolate beautifully.
Recipe Variations
-
Nutty Crust Variation
Swap out half the Oreo crumbs for finely ground almonds or walnuts for a nutty twist! -
Mint Chocolate Version
Add a drop or two of peppermint extract to the ganache mixture for a refreshing mint chocolate experience. -
Dairy-Free Delight
Use dairy-free chocolate and coconut cream instead of heavy cream to create a vegan-friendly version that doesn’t skimp on flavor. -
Fruit Medley Topping
Mix it up with different fruits! Strawberries or blueberries can provide a delightful change and add a fresh twist to the tart. -
Espresso Infusion
Add a teaspoon of instant espresso powder to the ganache to enhance the chocolate flavor for coffee lovers.
Chef’s Notes
This Easy Chocolate Raspberry Tart has a special place in my heart, and it’s evolved over time. Initially, I used to struggle with cooling the chocolate too quickly, which led to a lumpy ganache. But as I learned to gently heat the cream and give the ganache time to meld, I found that patience truly makes for a richer and smoother filling. Plus, this recipe has become a beloved favorite among friends and family, often making an appearance at birthdays and holiday gatherings. That’s what I cherish about cooking — sharing food that carries love and intention.
FAQs and Troubleshooting
-
Why did my ganache turn out grainy?
This can happen if the chocolate gets too hot or if it’s not stirred enough. Always heat the cream gently and let the chocolate sit to soften before stirring. -
Can I make this tart ahead of time?
Absolutely! You can prepare the tart a day in advance. Just keep it covered in the refrigerator until you’re ready to serve. -
What if my crust crumbled when I tried to slice it?
If the crust crumbles, it may be due to not enough butter binding it together. Next time, consider adding an extra tablespoon of melted butter to the crust mixture. -
How do I store leftovers?
Store any leftovers in the refrigerator in an airtight container for up to four days. However, I doubt it’ll last that long — it’s hard to resist!
Nutritional Info
While this tart is undoubtedly rich and indulgent, it’s all about balance in the kitchen. Each slice contains a delightful mix of flavors with quality ingredients that elevate your sweet indulgence.
So there you have it, my sweet friends! The Easy Chocolate Raspberry Tart is more than just a dessert; it’s a memory maker, a show-stopper, and an absolute treat that you’ll confidently serve time and again. Whether it’s a special occasion or just a Tuesday, let’s gather around the table and enjoy the beautiful moments that good food can create. Happy baking!
PrintEasy Chocolate Raspberry Tart
A simple yet elegant dessert featuring a rich chocolate filling in a buttery Oreo crust, topped with fresh raspberries.
- Prep Time: 20 minutes
- Cook Time: 10 minutes
- Total Time: 130 minutes
- Yield: 8 servings 1x
- Category: Dessert
- Method: Baking
- Cuisine: American
- Diet: Vegetarian
Ingredients
- 1 ½ cups Oreo crumbs (about 24 cookies)
- 6 Tablespoons (85 g) butter (melted)
- 1 ¼ cups (300 ml) heavy cream
- 2 cups (12 oz) good-quality bittersweet chocolate (chopped into similar size pieces)
- 1 teaspoon pure vanilla extract
- 2 pints (about 4 cups) fresh raspberries
- Confectioners’ sugar for dusting (optional)
Instructions
- Preheat your oven to 350°F (175°C). Combine the Oreo crumbs and melted butter in a mixing bowl. Mix until evenly moistened.
- Press the crumb mixture into the bottom and sides of a 9-inch tart pan. Bake for about 10 minutes until set, then let it cool.
- Heat the heavy cream over medium heat until it simmers, then pour it over the chopped bittersweet chocolate. Let it sit for a minute.
- Stir gently until the chocolate is completely melted and smooth. Add the vanilla extract and stir to incorporate.
- Pour the ganache into the cooled Oreo crust. Let it set at room temperature, then refrigerate for at least 2 hours.
- Decorate the tart with fresh raspberries just before serving. Dust with confectioners’ sugar if desired.
- Slice the tart into wedges and serve alongside extra raspberries or whipped cream.
Notes
This tart can be made a day ahead of time. Store in the refrigerator and cover to keep it fresh.
Nutrition
- Serving Size: 1 slice
- Calories: 350
- Sugar: 20g
- Sodium: 250mg
- Fat: 18g
- Saturated Fat: 10g
- Unsaturated Fat: 6g
- Trans Fat: 0g
- Carbohydrates: 45g
- Fiber: 2g
- Protein: 4g
- Cholesterol: 30mg
Keywords: chocolate tart, raspberry dessert, easy dessert, chocolate raspberry tart
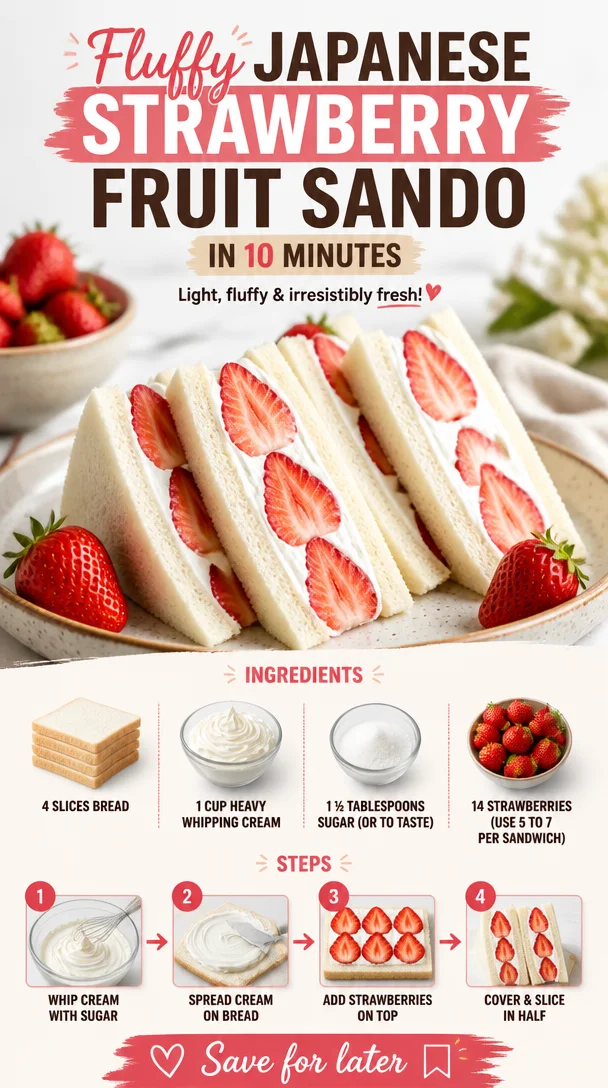
Fluffy Japanese Strawberry Fruit Sando in 10 Minutes
Indulge in Sweet Simplicity: Japanese Fruit Sandwich (フルーツサンド)
Welcome, kitchen adventurers! Today, I’m thrilled to share a delightful treat that’s been winning hearts everywhere — the Japanese Fruit Sandwich, or as it’s affectionately known: フルーツサンド (Furu-tsu Sando). This fluffy masterpiece showcases vibrant strawberries nestled between luscious whipped cream and soft bread, making for a perfect afternoon snack or a whimsical dessert.
Now, I know what you might be thinking: “A sandwich with fruit? Really?” Yes, my friends! This isn’t just any sandwich; it’s a celebration of fresh flavors and textures wrapped in a soft embrace of bread that will make your taste buds dance. Think of it as a rosy cloud of happiness delivered on two slices of happiness! In the busy world of modern life, we all need a little bit of sweetness, and this fruity delight offers that in every glorious bite.
As I recall my first encounter with this Japanese delight, I can’t help but smile. It was during my travels through Japan, where I stumbled across a charming cafe tucked away in a quiet alley. The moment I sank my teeth into that creamy, fruity goodness, I knew I had met my culinary soulmate! The strawberries were perfectly ripe, and the whipped cream was delicately sweetened. It hit all the right notes of nostalgia and comfort. I felt transported back to my childhood, where flavors were simple yet oh-so-satisfying.
Get ready, because I’m going to guide you through making your very own Japanese Fruit Sandwich at home. Dust off that apron and let’s dive into the magic of this sweet treat!
What You’ll Need: Ingredients
To whip up these dreamy fruit sandwiches, gather the following ingredients:
- 4 slices of bread: Choose soft white bread or shokupan (Japanese milk bread) for that pillowy texture. If you’re feeling adventurous, fluffy brioche also works wonderfully!
- 1 cup heavy whipping cream: This is the star of the show! It brings richness and creaminess. If you prefer a lighter option, coconut cream can be a lovely substitute.
- 1 ½ Tablespoons sugar: Sweetening the cream is essential, but taste as you go! You might want to use more or less depending on your sweet tooth.
- 14 strawberries: Fresh and ripe is the name of the game. Aim for sweet, juicy strawberries; you’ll use about 5 to 7 strawberries per sandwich, depending on their size. Alternatively, feel free to swap out strawberries for other fruits like kiwi or mango for fun variations!
Step-by-Step Instructions: Let’s Get Cooking!
Step 1: Prepare the Strawberries
Start by washing and hulling your strawberries. Halve them if they’re large, or leave them whole for a more decadent bite. Remember, it’s all about keeping things visually appetizing! The more colorful, the better.
Chef hack: To enhance the flavor, sprinkle a bit of sugar over the halved strawberries and let them sit for about 10 minutes. This will create a lovely syrup that adds an extra burst of sweetness!
Step 2: Make the Whipped Cream
In a mixing bowl, combine the heavy whipping cream and sugar. Using a hand mixer or a stand mixer, whip the cream until soft peaks form. Be careful not to over-whip it; we want that creamy texture, not butter!
Tip: If you’d like to add flavor to your whipped cream, consider incorporating a splash of vanilla extract or a hint of citrus zest for an interesting twist!
Step 3: Assemble the Sandwiches
Grab your slices of bread and spread a generous layer of the whipped cream on one slice. Arrange your strawberries on top of the cream, making sure to create an aesthetically pleasing pattern.
Now, top it all off with another layer of whipped cream before pressing down with another slice of bread to create a sandwich. Make sure the fillings are aligned for a beautiful presentation!
Step 4: Slice and Serve
Using a sharp knife, slice the sandwiches into quarters or halves, depending on your preference. You can remove the crusts if you want a more traditional look, but I say embrace the crust!
Presentation tip: For a final touch, dust the sandwiches with a sprinkle of powdered sugar for a dreamy finish. You can also arrange them on a pretty plate, adding any leftover strawberries for a pop of color!
Serving Suggestions
When serving these delightful fruit sandwiches, think about creating a serene setting. Pair them with a cup of green tea or a light coffee, and maybe even some delicate pastries. The soft, fluffy nature of the fruit sando makes it perfect for brunch gatherings, picnics, or even as a light dessert after a hearty meal.
Recipe Variations
- Tropical Twist: Swap out the strawberries for ripe mango slices, adding a touch of shredded coconut to the cream for a tropical escape.
- Berry Medley: Mix different berries like blueberries and raspberries with your strawberries for a colorful, berry-burst experience!
- Nutty Delight: Stir in some finely chopped nuts like pistachios or almonds into the whipped cream for added texture and flavor!
- Dairy-Free Option: Substitute heavy cream with coconut cream for a vegan twist. Sweeten with maple syrup if desired.
Chef’s Notes
As I reflect on my journey with this fruit sandwich, I can’t help but giggle at how simple ingredients can create such joy. I remember once trying to impress a friend during a casual get-together, but in my haste, I over-whipped the cream — uh oh! While it didn’t look “perfect,” it made for some great laughs, and we still enjoyed every last morsel.
Over the years, I’ve seen this recipe evolve; some even add a touch of matcha to the whipped cream for a delightful green hint. It’s all about making it your own, so don’t hesitate to get creative!
FAQs and Troubleshooting
Q: Can I use other fruits besides strawberries?
Absolutely! While strawberries are classic, feel free to experiment with other fruits like peaches, kiwi, or even banana.
Q: My whipped cream didn’t hold its shape. What went wrong?
Over-whipping can cause the cream to break down, so be sure to stop as soon as soft peaks form. If it breaks, you can try gently folding in a bit more heavy cream to salvage it.
Q: What’s the best way to store leftover sandwiches?
If you have leftovers (not likely, but just in case!), store them in an airtight container in the fridge for up to a day. Keep in mind the bread might lose its texture, but they’ll still taste great!
Q: Can I make these ahead of time?
While I recommend enjoying them fresh for the best texture, you can prepare the components ahead of time and assemble them just before serving.
Nutritional Info (Optional)
While I don’t usually focus too much on nutrition when sharing these delicious concoctions, it’s always good to be mindful. As a rough estimate, each sandwich (with strawberries) can contain around 300-400 calories, depending on the amounts used. It’s all about balance! Enjoy these sandwiches as part of a delightful experience rather than just a snack.
So, there you have it! A delightful, airy, and oh-so-tempting Japanese Fruit Sandwich that’s sure to charm anyone who takes a bite. Whether you’re enjoying it with friends, on a lazy afternoon, or even as a late-night treat, this recipe is one you’ll come back to time and time again.
Thanks for joining me in this kitchen adventure, and I can’t wait to hear how your fruit sandwiches turn out. Happy cooking, and remember — good food is all about sharing the love! 🍓✨
PrintJapanese Fruit Sandwich (フルーツサンド)
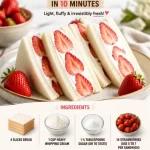
A delightful Japanese treat featuring vibrant strawberries, luscious whipped cream, and soft bread, perfect for a light snack or dessert.
- Prep Time: 15 minutes
- Cook Time: 5 minutes
- Total Time: 20 minutes
- Yield: 2 servings 1x
- Category: Dessert
- Method: No-Cook
- Cuisine: Japanese
- Diet: Vegetarian
Ingredients
- 4 slices of soft white bread or shokupan (Japanese milk bread)
- 1 cup heavy whipping cream
- 1 ½ tablespoons sugar
- 14 strawberries, fresh and ripe
Instructions
- Prepare the strawberries by washing and hulling them. Halve them if large.
- Make the whipped cream by combining heavy whipping cream and sugar, then whipping until soft peaks form.
- Assemble the sandwiches by spreading whipped cream on one slice, adding strawberries, topping with more cream, and placing another slice on top.
- Slice the sandwiches into quarters or halves and serve with a dusting of powdered sugar.
Notes
Consider adding a splash of vanilla extract to the whipped cream for extra flavor. Store leftovers in an airtight container in the fridge for up to a day.
Nutrition
- Serving Size: 1 sandwich
- Calories: 350
- Sugar: 14g
- Sodium: 200mg
- Fat: 25g
- Saturated Fat: 15g
- Unsaturated Fat: 8g
- Trans Fat: 0g
- Carbohydrates: 30g
- Fiber: 2g
- Protein: 3g
- Cholesterol: 75mg
Keywords: fruit sandwich, Japanese dessert, whipped cream, strawberries, soft bread
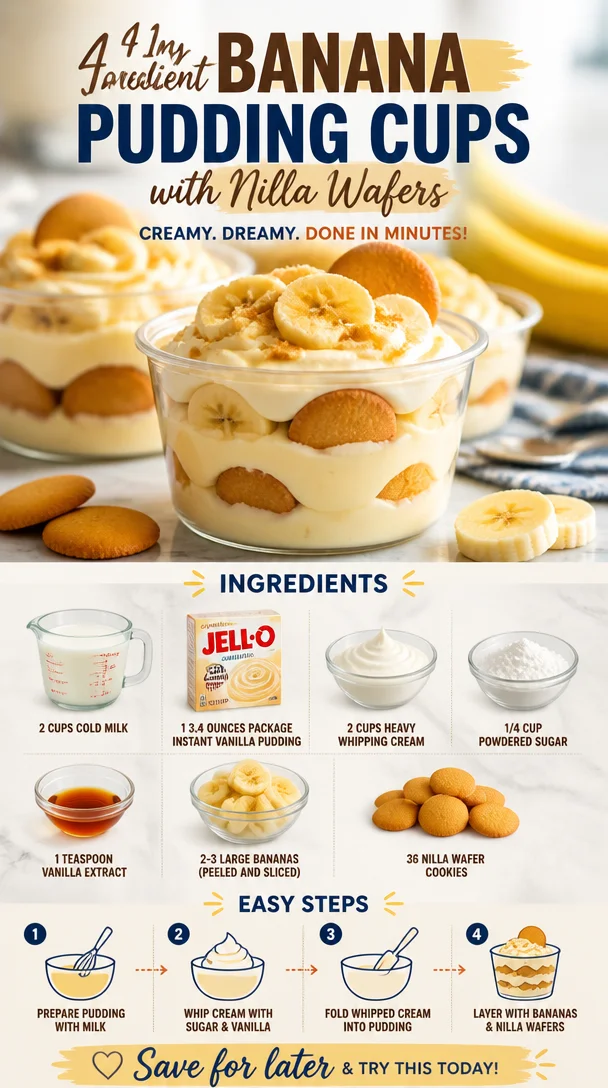
Ingredient Banana Pudding Cups with Nilla Wafers
Nilla Wafer Banana Pudding Cups: A Sweet Nostalgic Delight
Hello, fellow food lovers! Today, we’re diving into a dessert that feels like a warm hug after a long day—Nilla Wafer Banana Pudding Cups. This delightful treat is perfect for any occasion, whether you’re hosting a cozy dinner party or simply craving a sweet bite on a Tuesday night. The balance of creamy vanilla pudding, fresh bananas, and the crunch of Nilla Wafers makes this dessert not just delicious but also a brilliant trip down memory lane.
A Personal Story: A Dessert That Brings Back Memories
I can still picture the summer afternoons of my childhood, sun filtering through the kitchen window, and the enticing aroma of freshly baked treats wafting through the air. My grandma, the ultimate hostess, was a magician in the kitchen, always whipping up something delightful just for us. One of my favorite memories centers around her legendary banana pudding. In her version, layers of ripe bananas, homemade vanilla custard, and crisp Nilla Wafers came together to create a sensational treat that was the highlight of any family gathering.
The best part? She often let me help! I was in charge of layering the bananas and wafers, which was a messy but fun job that always ended with a little pudding on my nose. As we spooned the pudding into cups, we would sneak bites when no one was looking (because who could resist?).
Years later, I still cherish that dish, and now, I’m bringing my own twist to the table with these Nilla Wafer Banana Pudding Cups. They’re a gorgeous tribute to my grandma’s recipe, with a simple yet elegant presentation that feels just right for today’s gatherings.
Ingredients
To whip up these delightful Nilla Wafer Banana Pudding Cups, you’ll need the following ingredients:
-
2 cups cold milk
The base for our pudding. Whole milk works best for a creamy texture, but you can substitute with almond milk or any other milk alternative if you want to lighten things up! -
1 (3.4 ounces) package instant vanilla pudding
This is your shortcut to creamy deliciousness. If you’re feeling adventurous, a homemade vanilla pudding can be a beautiful alternative, although it requires more time and attention. -
2 cups heavy whipping cream
Whipping cream gives a rich, luxurious feel to the pudding. If you’re looking for a lighter option, you can use half-and-half, but be cautious as it won’t whip as beautifully. -
1/4 cup powdered sugar
Sweetens up the whipped cream and pudding without grittiness. Feel free to adjust the amount based on your sweetness preference; you can even use coconut sugar for a less refined choice. -
1 teaspoon vanilla extract
A splash of pure vanilla extract takes the flavor up a notch. I always recommend sticking to pure extract rather than imitation for the best flavor. -
2-3 large bananas (peeled and sliced)
Ripe bananas are key; the sweeter and softer, the better. If you’re worried about browning, toss them in a little lemon juice after slicing! -
36 Nilla Wafer cookies
These little gems add the crunch and classic taste everyone loves. If you’re feeling adventurous, feel free to swap for a chocolate wafer or even almond cookies for a fun twist!
Step-by-Step Instructions
-
Prep the Pudding
In a large mixing bowl, pour in the cold milk. Gradually whisk in the instant vanilla pudding until smooth. Together, they’ll be the creamy base for your delicious cups. -
Whip the Cream
In another bowl, pour in the heavy whipping cream. Add in the powdered sugar and vanilla extract. Using an electric mixer, beat on medium-high speed until soft peaks form. This should take about 3-5 minutes. Make sure not to overbeat; you want it fluffy, but not too stiff! -
Combine
Gently fold the whipped cream into the pudding mixture using a spatula. Be careful not to deflate the whipped cream; we want all that airy goodness to stay intact! -
Prepare Your Cups
Now for the fun part! Grab your dessert cups or any small glasses you want to use. Start with a layer of Nilla Wafers on the bottom of each cup. Feel free to break some of them if they don’t fit! -
Layer the Pudding
Add a generous spoonful of the pudding mixture over the wafers, followed by a layer of banana slices. Repeat the layers—Nilla Wafers, pudding, bananas—until you reach the top, finishing with a dollop of pudding. -
Chill
Cover the cups with plastic wrap and refrigerate for at least 2 hours. If you can let them sit overnight, even better! This is when the flavors meld, and the cookies soften, creating a luscious treat. -
Top & Serve
Before serving, crush a few Nilla Wafers and sprinkle them on top. Feel free to add a small dollop of whipped cream if desired. You’ll end up with a gorgeous presentation that’s sure to impress guests!
Serving Suggestions
For plating, I love serving these Nilla Wafer Banana Pudding Cups on a rustic wooden platter, lined with fresh mint leaves for a pop of color. You could also sprinkle some crushed nuts or chocolate shavings on top for added flair. Either way, these cups will steal the show!
Recipe Variations
Here are a few fun twists to this classic recipe:
- Chocolate Lovers: Swap half of the vanilla pudding for chocolate pudding for a delightful chocolate-banana combo.
- Nutty Banana Bliss: Incorporate chopped walnuts or pecans in between the layers for a crunch!
- Coconut Cream Twist: Use coconut milk instead of regular milk and add shredded coconut into the pudding mixture.
- Add Some Spice: A pinch of cinnamon or nutmeg can add a warm tone to the pudding—perfect for autumn!
Chef’s Notes
This recipe is one that has evolved over time for me. I can’t tell you how many attempts I made trying to get the texture just right! I initially tried using regular whipped cream instead of heavy whipping cream, but the result was never as satisfying. You live and learn! And while my grandma’s version will always hold a special place in my heart, I love how these cups feel modern yet nostalgic. They’re a blend of everything I adore about cooking—comfort, family, and a touch of creativity!
FAQs and Troubleshooting
1. My pudding didn’t set properly! What went wrong?
This often happens if the milk wasn’t cold enough or if it wasn’t whisked enough with the pudding mix. Make sure both are really cold for the right consistency.
2. Are there alternatives to Nilla Wafers?
Absolutely! Try using oreo cookies for a cookies-and-cream twist, or even graham crackers for a classic flavor.
3. Can I make this ahead of time?
Yes! These pudding cups hold up well in the fridge. They’re actually better after a night in the fridge, so feel free to prep them the day before your event.
4. How do I keep my bananas from browning?
Tossing them in a splash of lemon juice is the easiest way to keep them looking fresh and vibrant!
Nutritional Info
While I’m not a nutritionist, it’s worth noting that this dessert does contain rich ingredients like heavy cream and sugar. For those tracking calories, an approximation per cup would be about 320-350 calories, depending on portion sizes and any variations you make. Enjoy in moderation, or make them specially for those “just because” moments!
So there you have it! Nilla Wafer Banana Pudding Cups that bring joy, nostalgia, and deliciousness to your table. Remember, cooking is all about sharing love and creating memories—so gather your people, tie on that apron, and let’s get to work. Happy cooking!
PrintNilla Wafer Banana Pudding Cups
A delightful dessert that combines creamy vanilla pudding, fresh bananas, and the crunch of Nilla Wafers, perfect for any occasion.
- Prep Time: 15 minutes
- Cook Time: 0 minutes
- Total Time: 135 minutes
- Yield: 6 servings 1x
- Category: Dessert
- Method: Chilling
- Cuisine: American
- Diet: Vegetarian
Ingredients
- 2 cups cold milk
- 1 (3.4 ounces) package instant vanilla pudding
- 2 cups heavy whipping cream
- 1/4 cup powdered sugar
- 1 teaspoon vanilla extract
- 2–3 large bananas (peeled and sliced)
- 36 Nilla Wafer cookies
Instructions
- Pour the cold milk into a large mixing bowl. Gradually whisk in the instant vanilla pudding until smooth.
- Add the heavy whipping cream to another bowl. Incorporate the powdered sugar and vanilla extract. Beat on medium-high speed until soft peaks form (about 3-5 minutes).
- Gently fold the whipped cream into the pudding mixture using a spatula.
- Grab your dessert cups and start layering Nilla Wafers on the bottom of each cup.
- Add a spoonful of pudding mixture over the wafers, followed by a layer of banana slices. Repeat layers until reaching the top.
- Cover the cups with plastic wrap and refrigerate for at least 2 hours, or overnight for best results.
- Before serving, crush a few Nilla Wafers and sprinkle them on top, optionally adding a dollop of whipped cream.
Notes
For plating, serve on a rustic wooden platter with mint leaves for color. Experiment with toppings like crushed nuts or chocolate shavings.
Nutrition
- Serving Size: 1 cup
- Calories: 350
- Sugar: 24g
- Sodium: 85mg
- Fat: 25g
- Saturated Fat: 15g
- Unsaturated Fat: 7g
- Trans Fat: 0g
- Carbohydrates: 35g
- Fiber: 1g
- Protein: 4g
- Cholesterol: 80mg
Keywords: banana pudding, dessert, Nilla Wafers, pudding cups, nostalgic dessert
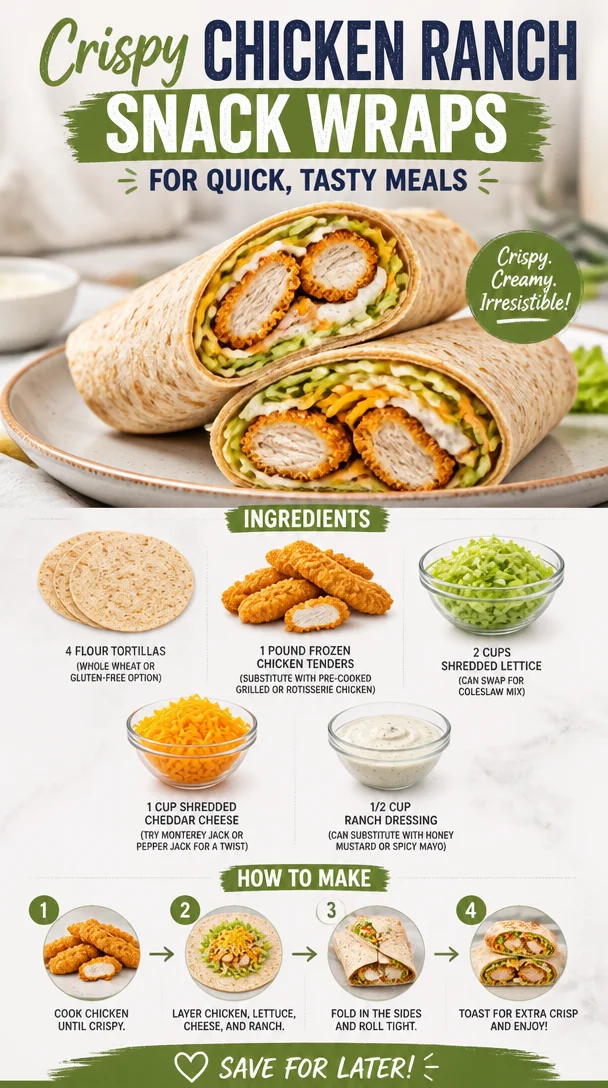
Crispy Chicken Ranch Snack Wraps for Quick, Tasty Meals
Crispy Chicken Ranch Snack Wraps for Quick, Tasty Meals
Hello, friends! Today, we’re diving into a recipe that is a total game changer for quick meals—Crispy Chicken Ranch Snack Wraps. Picture this: it’s a busy weeknight, friends are coming over, or maybe you’ve just had a long day at work. You want to whip up something that feels satisfying yet doesn’t require hours in the kitchen. These snack wraps are not only fast to prepare but also deliver an explosion of flavor in every bite! Trust me, once you fold these up, you’ll wonder where these wraps have been all your life!
Introduction: The Perfect Snack Wrap Solution
One of the things I love most about cooking is its ability to bring comfort and joy, especially when life gets busy. Growing up, there was nothing better than coming home to the smell of something delicious cooking in the kitchen. My mom always had a knack for turning simple ingredients into fabulous meals that felt like a hug from the inside.
When I created my quick Crispy Chicken Ranch Snack Wraps, I wanted to capture that very same feeling: warmth, comfort, and satisfaction—minus the hassle. Now, let’s be honest—when you grab a wrap, you’re grabbing more than just food. You’re grabbing ease, fun, and a little bit of nostalgia. Whether it’s a quick lunch on the go or a crowd-pleasing appetizer for your next gathering, these wraps deliver on all fronts.
The crispy chicken tender, the crunch of fresh lettuce, the creaminess of ranch dressing, and the oozy, melty cheese all come together beautifully, creating layers of texture and flavor that will leave you coming back for more. Let’s get rolling (pun intended!) and whip up a batch of these delightful wraps, shall we?
Personal Story: A Taste of Nostalgia
One of my fondest memories in the kitchen revolves around my college days. I was living with two roommates, and let me tell you, we were all about easy meals that could fuel our late-night study sessions. One of our go-to "late-night hacks" was to throw frozen chicken tenders in the oven, bake them to crispy perfection, and load them into tortillas with all our favorite toppings.
We would gather around the kitchen table, and amid laughter and lighthearted debates over who made the best dip, those humble chicken wraps became our late-night tradition. They sat delicately on our plates, drizzled with ranch dressing, and every bite was bursting with flavor. Those wraps not only fed our tired bodies; they brought us closer together, creating memories that stand the test of time.
Fast forward to today, and I am thrilled to offer you a version of that nostalgic recipe—Crispy Chicken Ranch Snack Wraps—perfect for any occasion, big or small!
Ingredients
Here’s what you’ll need to create your Crispy Chicken Ranch Snack Wraps:
-
4 small flour tortillas
Soft and pliable, flour tortillas are the classic choice. If you’re looking for a healthier twist, opt for whole wheat or even gluten-free alternatives to accommodate dietary preferences. -
1 pound frozen chicken tenders
These are your quick and easy protein source! If you’re in a pinch, feel free to swap them out with pre-cooked grilled chicken or shredded rotisserie chicken for even less prep time. -
2 cups shredded lettuce
Crisp and refreshing, shredded lettuce adds a fantastic crunch. Alternatively, you can use coleslaw mix for a delicious twist that includes added flavor and texture. -
1 cup shredded cheddar cheese
Cheddar is a classic for good reason—it melts beautifully! For a unique flavor profile, experiment with Monterey Jack or even spicy pepper jack cheese to kick things up a notch. -
1/2 cup ranch dressing
Creamy and tangy, ranch dressing is the star of the show here! But if you’re looking for something different, don’t hesitate to substitute it with honey mustard or spicy mayo to match your taste buds.
Step-by-Step Instructions
Let’s roll up our sleeves and get started on these snack wraps!
-
Preheat the Oven: First things first, take a moment to preheat your oven to 400°F (200°C). This will ensure those chicken tenders turn out beautifully crispy.
-
Prepare Your Chicken: Spread the frozen chicken tenders on a baking sheet lined with parchment paper. Bake according to the package instructions—usually about 20-25 minutes—until golden brown and crispy. Flip them halfway through for even cooking. This is where the magic happens!
Tip: While the chicken is baking, you can use this time to chop your veggies and set up your wrap station.
-
Chop & Prep: While the chicken is baking, grab your lettuce and shred it (if it’s not pre-shredded). Feel free to add some diced tomatoes or finely chopped red onions for extra flavor if you’re feeling adventurous.
-
Warm Those Tortillas: Wrap your tortillas in aluminum foil and place them in the oven during the last 5 minutes of the chicken cooking time. Alternatively, you can pop them in the microwave for about 15 seconds to make them warm and supple.
-
Layer It Up: Once your chicken is crispy and your tortillas are warm, it’s time to assemble! Start by placing a warm tortilla on a plate. Lay down a few chicken tenders in the center (about 2-3), followed by a generous handful of shredded lettuce and about 2 tablespoons of cheese.
Chef’s insight: The order of your fillings matters! Place the chicken first to create a sturdy base and prevent your wrap from getting soggy.
-
Dress It: Drizzle your ranch dressing over the top of your fillings, adding however much you like—go big or go home, right?
-
Wrap It Up: Here comes the fun part! Start folding the sides of the tortilla inwards, then roll it up tightly from the bottom. If it feels like it’s going to burst, that’s a good sign—more deliciousness inside!
-
Slice & Enjoy: Finally, slice your wrap in half diagonally for that perfect presentation. Serve alongside extra ranch dressing for dipping, and you’re set!
Chef’s hack: If you want to make it even more fun, you can secure the wraps with a toothpick, or personalize them with colorful skewers before serving!
Serving Suggestions
To elevate your wrap experience, I love serving these crispy chicken ranch wraps on a wooden platter, alongside a colorful array of veggies like baby carrots, cherry tomatoes, and cucumber slices. Lay a few small bowls filled with various dips—think guacamole, salsa, or even a zesty yogurt dip—to create a fun DIY station for your guests. Everyone loves choosing their own adventure!
Recipe Variations
Here are a few fun variations to switch things up:
-
Buffalo Chicken Wrap: Toss the cooked chicken tenders in buffalo sauce for a spicy kick.
-
Mediterranean Style: Substitute ranch with tzatziki sauce, add some cucumber and feta to the mix.
-
Loaded Veggie Wrap: Skip the chicken altogether and load up on grilled veggies, black beans, and avocado.
-
Southwestern Flair: Add corn, black beans, and a dollop of chipotle mayo for a smoky twist.
-
Breakfast Wrap: Scramble some eggs and add them in for a breakfast version, perfect for brunch!
Chef’s Notes
Every time I make these wraps, I can’t help but smile at how simple yet satisfying they are. I remember one time during a particularly busy week, I turned these crispy wraps into an impromptu feast by inviting friends over for a “make-your-own” wrap night. We set up a toppings bar and let everyone personalize their creations. It turned a casual dinner into a lively evening of laughter and cheer. It’s a fun reminder that cooking should be about connecting and enjoying the moment!
FAQs and Troubleshooting
-
Can I use cooked chicken instead of frozen tenders?
Absolutely! Pre-cooked grilled chicken or leftover rotisserie chicken works splendidly. Just warm it through before adding it to your wraps. -
What if my tortillas are breaking?
Warming them is key! If they still break, consider using fresher tortillas or a type with a bit more elasticity, like whole wheat. -
Can I prepare these in advance?
For the best taste and texture, I recommend assembling them fresh. However, you can prep the ingredients (like chopping veggies) a few hours ahead of time. -
How do I keep them crispy?
To maintain that crispy texture, avoid overstuffing your wraps and ensure your chicken is well-cooked and crispy. Serving them immediately after assembling is also a must!
Nutritional Info
While I don’t have specific nutritional info handy, I encourage you to consider the ingredients you choose. Whole wheat tortillas and serving with fresh veggies can elevate the health factor while still keeping it delicious!
There you have it—my Crispy Chicken Ranch Snack Wraps, ready to fit seamlessly into your lifestyle! They’re quick to prepare, share a few laughs over, and serve as a blank canvas for your creativity. So tie on that apron and let’s make some enjoyable moments around the dinner table. Happy cooking, foodie friends!
PrintCrispy Chicken Ranch Snack Wraps

Quick and flavorful Crispy Chicken Ranch Snack Wraps perfect for busy weeknights or gatherings.
- Prep Time: 10 minutes
- Cook Time: 25 minutes
- Total Time: 35 minutes
- Yield: 4 servings 1x
- Category: Snack
- Method: Baking
- Cuisine: American
- Diet: None
Ingredients
- 4 small flour tortillas
- 1 pound frozen chicken tenders
- 2 cups shredded lettuce
- 1 cup shredded cheddar cheese
- 1/2 cup ranch dressing
Instructions
- Preheat the oven to 400°F (200°C).
- Prepare the frozen chicken tenders on a baking sheet lined with parchment paper and bake according to package instructions (20-25 minutes). Flip halfway through.
- Chop your lettuce (and other desired veggies).
- Warm tortillas in aluminum foil in the oven during the last 5 minutes of cooking the chicken.
- Layer a tortilla with chicken tenders, lettuce, and cheese.
- Dress with ranch dressing.
- Wrap tightly by folding the sides and rolling from the bottom.
- Slice in half diagonally and serve with extra ranch dressing.
Notes
Warm tortillas before wrapping for best results. Use pre-cooked chicken for even quicker prep time.
Nutrition
- Serving Size: 1 wrap
- Calories: 350
- Sugar: 2g
- Sodium: 800mg
- Fat: 20g
- Saturated Fat: 5g
- Unsaturated Fat: 10g
- Trans Fat: 0g
- Carbohydrates: 30g
- Fiber: 2g
- Protein: 15g
- Cholesterol: 50mg
Keywords: snack wrap, chicken wraps, quick meal, crispy chicken, ranch dressing

Minute Copycat Crunchwrap Supreme Recipe: Crispy at Home
The Crunchwrap Supreme: Your New Favorite Weeknight Dinner
Hello, fellow food lovers! Are you ready to experience a dish that’s not just an indulgence but a delightful memory of late-night adventures and Taco Bell runs? Today, we’re diving into the world of the Copycat Crunchwrap Supreme! This fun, satisfying meal packs layers of flavor and nostalgia into every bite, making it perfect for casual Fridays or any night you want to shake things up.
Let’s talk about how this recipe came to be a staple in my kitchen. I think we can all recall that feeling of excitement when deciding what to grab after a long day. For me, the Crunchwrap Supreme was always a favorite — that glorious combination of crispy and creamy, savory and fresh, all wrapped in a perfectly soft tortilla. It was the go-to for late-night snacks with friends after a good time out or just a cozy movie night at home. And you know what? It inspires laughter and a bit of friendly competition over who can create the best version at home.
The beauty of making your own Copycat Crunchwrap is that you get to control all the ingredients and flavors while still indulging your cravings. Today, I’ll walk you through how to whip up these delightful wraps in your kitchen so you can bring that fast-food nostalgia home. Let’s gather our ingredients and prepare to create a Crunchwrap that’s not just satisfying but also made with love!
A Little Kitchen Story: Crunchy Memories
I remember vividly the first time I tried to recreate the Crunchwrap Supreme at home. It was a rainy Friday night, and my friends and I had just returned from a long week of work and responsibilities. Instead of heading out for fast food, we decided to have a DIY night! Armed with a list of ingredients and a playful spirit, we got to work.
We laughed at our not-so-perfect folds and had a friendly debate about whether to use guacamole or not (Team Guac won, of course). When those crunchy, cheesy wraps finally came out of the pan, the delicious aroma filled the kitchen, and everyone eagerly gathered around the table. Every bite was met with cheers and laughter, and we ended up eating way more than we had planned. That magical evening solidified my love for creating vibrant dishes at home, reminding me that cooking can be just as fun and rewarding as dining out.
Ingredients
Here’s what you’ll need to assemble your Copycat Crunchwrap Supreme:
-
1/2 lb extra-lean ground beef
A leaner option means less grease, but feel free to swap with ground turkey for a lighter flavor or keep the classic beef. You could also use plant-based ground meat for a vegetarian version! -
1 tbsp taco seasoning
This is where the magic happens! You can use store-bought or whip up your own mix with chili powder, cumin, onion powder, garlic powder, and a pinch of salt. Adjust to taste for those who like it spicy! -
8 large flour tortillas
Soft and pliable, these will be the wrap’s backbone. If you want a whole-grain option, look for whole wheat tortillas. Or, swap for corn tortillas if you’re gluten-free (though the folding may need a gentle touch!). -
1/2 cup jarred nacho cheese sauce or queso (optional)
This is optional but highly recommended for that melting, gooey goodness. You can also use shredded cheese if you prefer that over sauce. Alternatively, a creamy vegan cheese can substitute well! -
4 tostadas
These crispy rounds add that vital crunch factor! If you can’t find tostadas, lightly crisped corn tortillas can also do the trick. -
1/2 cup sour cream
For a classic touch! You can use Greek yogurt for a healthier twist or dairy-free sour cream for a vegan option. -
1 cup iceberg lettuce (shredded)
A fresh, crunchy component that brings brightness to the wrap. Romaine or cilantro can also add a delicious twist! -
1 plum tomato (deseeded and diced)
Fresh tomatoes add juicy sweetness. You can substitute with salsa if you prefer a bigger flavor punch! -
2 cups cheddar cheese (shredded)
Combine sharp or mild cheddar for a flavorful melt—blend with Monterey Jack for a fun twist! -
Cooking spray
For that golden-brown finish! Olive oil or butter can also work to get those tortillas crispy.
Step-by-Step Instructions
Ready to get cooking? Let’s do this! Follow these simple steps to create your very own Copycat Crunchwrap Supreme:
Step 1: Cook the Beef
Start by heating a skillet over medium heat. Add your extra-lean ground beef and break it apart with a spatula. Cook it until browned, about 5-7 minutes. Drain any excess fat, then stir in the taco seasoning along with a splash of water. This helps the spices blend beautifully into the beef. Stir it well and let it simmer for another couple of minutes until everything is combined.
Chef Tip: Use lean ground beef to avoid greasiness, and keep things healthier! You can also make this ahead and store it in the fridge for quick meals during the week.
Step 2: Layer It Up
Now it’s time to build your Crunchwrap! Start with a large tortilla and spread a little nacho cheese sauce in the center. This creates a delicious cheesy barrier. On top of that, add a small handful of the cooked beef, followed by a tostada. Press down gently on the tostada. Then slather on the sour cream, lettuce, diced tomato, and a generous sprinkle of shredded cheddar cheese.
Chef Insight: Don’t worry about being too precise; each Crunchwrap’s personality will shine through its layers!
Step 3: Fold and Close
Here comes the fun part! Carefully take the edges of the tortilla and fold them toward the center, creating pleats as you go. The goal is to form a circular shape with an open center. Once you’ve made it around, it should look like a flower. Place the seam side down on a clean plate.
Chef Hack: To make folding easier, warm the tortillas for a few seconds in the microwave; it makes them more pliable!
Step 4: Crisp It Up
In the same skillet, spray a little cooking spray or heat a bit of butter over medium heat. Place the Crunchwrap seam-side down and cook for 3-4 minutes until golden brown. Carefully flip it over and repeat on the other side. If you want it extra crispy, feel free to cook it for an additional minute or two.
Pro Tip: Use a heavy pan or press down gently with a spatula to help the wrap hold its shape while cooking!
Step 5: Serve and Enjoy
Your Crunchwrap Supreme is ready to be devoured! Cut it in half to reveal those enticing layers and serve with extra sour cream or salsa for dipping.
Chef Tip: Pair it with a side of homemade nacho cheese or a fresh salsa for added flavor!
Serving Suggestions
When plating your Crunchwraps, consider adding a beautiful layer of fresh toppings like diced avocado or cilantro on the side. You could also serve it with a vibrant salad for a colorful plate. Just picture it: a golden-brown Crunchwrap surrounded by a sprinkle of fresh ingredients, inviting your friends and family to dig in!
Recipe Variations
Want to get creative? Here are some fantastic twists you can try:
- Spicy Crunchwrap: Add sliced jalapeños or a few dashes of your favorite hot sauce for a spicy kick!
- Veggie Crunchwrap: Swap the beef for sautéed bell peppers, zucchini, and black beans for a vegetarian delight.
- Breakfast Crunchwrap: Replace the ground beef with scrambled eggs, crumbled bacon, and sautéed vegetables for a fabulous breakfast twist.
- Cheesy Crunchwrap: Use a blend of cheeses (like pepper jack, mozzarella, or goat cheese) to bring a new flavor profile to life!
Chef’s Notes
Looking back on my journey of creating the perfect Crunchwrap, I chuckle at my early attempts. They were less about aesthetics and more about ensuring there was enough cheese to go around! Over time, I found myself drawn to perfecting the balance of flavors and textures, and I love that each family has its own unique way of enjoying this dish. The Kitchen becomes filled with laughter, especially when a few friends are attempting to fold their Crunchwraps at the same time!
FAQs and Troubleshooting
1. My Crunchwrap fell apart! What did I do wrong?
Don’t worry! This happens to the best of us. The key to a successful Crunchwrap is making sure all the layers stay snug. Make sure to fold the tortilla tightly around the filling and ensure it’s closed properly on the seam side.
2. Can I make these ahead of time?
Absolutely! You can prep the filling ahead of time and assemble the Crunchwraps just before cooking. You can store the built Crunchwraps in the fridge for about a day but enjoy them fresh for the best flavor and texture!
3. How do I keep them crispy?
Cook the Crunchwraps over medium heat and avoid overcrowding the pan. If you’re making several at once, keep them warm in a low oven (around 200°F) until serving.
4. What if I don’t have tostadas?
No problem! You can use another layer of tortilla or even try crackers for the crunch factor, just bake them for extra crispness before adding them in.
Nutritional Info
While exact nutritional values will depend on the specific brands and ingredients you use, here’s a basic overview:
- Calories: Approximately 450 per Crunchwrap
- Protein: 25g
- Carbohydrates: 40g
- Fats: 20g (depending on cooking methods and specific ingredients)
So there you have it! The Copycat Crunchwrap Supreme is now ready to steal the spotlight at your dinner table. I hope you enjoy making it as much as I enjoy sharing it. Now, roll up those sleeves, grab your apron, and let’s create something delicious together! Cheers to good company and great food!
PrintCopycat Crunchwrap Supreme

Recreate the beloved Crunchwrap Supreme at home with this fun and satisfying recipe packed with layers of flavor and nostalgia.
- Prep Time: 15 minutes
- Cook Time: 15 minutes
- Total Time: 30 minutes
- Yield: 4 servings 1x
- Category: Main Course
- Method: Pan-frying
- Cuisine: Mexican
- Diet: Optional Meat
Ingredients
- 1/2 lb extra-lean ground beef
- 1 tbsp taco seasoning
- 8 large flour tortillas
- 1/2 cup jarred nacho cheese sauce or queso (optional)
- 4 tostadas
- 1/2 cup sour cream
- 1 cup iceberg lettuce (shredded)
- 1 plum tomato (deseeded and diced)
- 2 cups cheddar cheese (shredded)
- Cooking spray
Instructions
- Cook the beef: Heat a skillet over medium heat, add ground beef, and cook until browned, about 5-7 minutes. Drain excess fat, stir in taco seasoning and water, and let simmer.
- Layer it up: On a large tortilla, spread nacho cheese sauce, top with cooked beef, a tostada, sour cream, lettuce, diced tomato, and shredded cheddar.
- Fold and close: Fold the edges of the tortilla toward the center, creating pleats to form a circular shape.
- Crisp it up: Spray cooking spray or heat butter in the skillet, place the Crunchwrap seam-side down, and cook until golden brown, about 3-4 minutes on each side.
- Serve and enjoy: Cut in half to reveal layers and serve with extra sour cream or salsa.
Notes
For a spicy kick, add jalapeños or hot sauce. For a vegetarian version, swap beef for sautéed veggies.
Nutrition
- Serving Size: 1 Crunchwrap
- Calories: 450
- Sugar: 3g
- Sodium: 600mg
- Fat: 20g
- Saturated Fat: 8g
- Unsaturated Fat: 10g
- Trans Fat: 0g
- Carbohydrates: 40g
- Fiber: 3g
- Protein: 25g
- Cholesterol: 55mg
Keywords: Crunchwrap, Taco, Copycat Recipe, Homemade
Summer Watermelon Lemonade: 5-Ingredient Quick Cooler
Refreshing Watermelon Lemonade: A Summer Favorite
Hello there! If you’re looking for a drink that embodies summer vibes, look no further than this refreshing Watermelon Lemonade. There’s something truly magical about sipping on a glass of sweet, tangy lemonade on a warm afternoon, especially when it’s made with fresh watermelon. Today, I’m excited to share this delightful recipe with you, along with some stories, cooking tips, and creative variations that will make you the hero of your next barbecue or casual get-together!
A Slice of Nostalgia
This Watermelon Lemonade recipe takes me back to my childhood summers spent at my grandmother’s house. She had a pristine garden with a sprawling watermelon patch, and nothing could compare to those juicy, sun-ripened fruits we devoured on hot afternoons. After a long day of playing outside, the first sip of her homemade lemonade with freshly squeezed lemons and the sweetest watermelon was pure bliss. She would blend it all together and pour it over ice, topping it off with mint leaves for that extra flair.
Every family gathering somehow ended up in her kitchen, reminiscent of the good old days, with laughter and love filling the air like the sweet aroma of fresh fruit. Now, as I recreate that cherished drink in my own kitchen for friends and family, I’m reminded of those sun-soaked afternoons. Follow along, and let’s create our own watermelon lemonade memories!
Ingredients
Here’s what you’ll need to whip up this delicious lemonade:
-
1 1/4 cups fresh-squeezed lemon juice: Fresh is key here! You can substitute with bottled lemon juice in a pinch, but nothing beats the vibrant flavor of freshly squeezed lemons.
-
1 cup sugar or sugar substitute: Adjust according to your taste. If you prefer a healthier version, honey or agave syrup works wonderfully.
-
6 cups water: This will help dilute your drink, making it refreshing without being overly sweet. If you’re feeling adventurous, try sparkling water for a fizzy twist!
-
5 cups watermelon juice: Fresh watermelon juiced right from the fruit is the best. If you’re short on time, you can use store-bought watermelon juice, but ensure it’s 100% pure juice without added sugars.
-
Optional garnish: Fresh mint leaves, lemon slices, or watermelon wedges for a beautiful presentation!
Step-by-Step Instructions
Now for the fun part! Here’s how to make the best Watermelon Lemonade:
-
Juice the Watermelon: Start by cutting a medium-sized, ripe watermelon into chunks. Toss them into your blender and blend until smooth. If you want a pulp-free drink, strain the juice through a fine mesh sieve into a bowl. NOTE: Reserve a few small watermelon cubes for later – they make an adorable garnish!
-
Squeeze Those Lemons: While your watermelon is blending, grab about 8-10 juicy lemons (ideally organic for fewer pesticides) and cut them in half. Using a citrus juicer, extract the juice until you have at least 1 1/4 cups. Don’t forget to catch those pesky seeds!
-
Mix the Sweetness: In a large pitcher, combine your fresh lemon juice and sugar (or sugar substitute). Stir well until fully dissolved. If you’re using sugar, warm a little water (~1 cup) can help dissolve it quickly – it’s a simple sugar syrup!
-
Combine Water and Watermelon Juice: Gradually pour in the 6 cups of water and the 5 cups of watermelon juice, mixing gently. Make sure to taste your mixture at this stage; adjust sweetness by adding more sugar or lemon juice if desired.
-
Chill Time: Refrigerate the lemonade for at least 2 hours. This helps meld those flavors beautifully, and it’s perfect for serving icy cold on warm days.
-
Serve with Style: When you’re ready to serve, fill glasses with ice, top off with the bright watermelon lemonade, and garnish with mint leaves, lemon slices, or the reserved watermelon cubes.
Serving Suggestions
Presentation matters, but let’s keep it simple! Pour your beautifully chilled Watermelon Lemonade into clear glasses to showcase that stunning color. Add a sprig of mint or a lemon wedge on the rim to make it visually pop. For those long summer nights, serve it in a large pitcher so guests can help themselves. Trust me, watching the ice slowly melt as the sun sets is a slice of summer heaven.
Recipe Variations
Want to switch things up? Here are a few creative twists on this classic recipe:
-
Spicy Touch: Add fresh jalapeños to the watermelon mixture for a refreshing and spicy kick!
-
Herbal Infusion: Experiment with other fresh herbs like basil or rosemary for a unique twist.
-
Sparkling Delight: Substitute sparkling water for still water for a bubbly lemonade that’s extra refreshing.
-
Lavender Lemonade: Steep dried lavender in the sugar syrup for a floral twist—perfect for high tea!
-
Berry Medley: Blend in strawberries or raspberries for a colorful, mixed-berry version of this watermelon lemonade.
Chef’s Notes
One of the joys of cooking is experimentation! This Watermelon Lemonade has evolved in my kitchen over the years. Initially, I stuck strictly to the lemon and watermelon combo, but as I learned to play with flavors, I discovered exciting layers to this classic drink. I even turned it into a cocktail by adding a splash of vodka or rum for those adult summer gatherings!
Remember, cooking is all about personal expression. Don’t hesitate to make the recipe your own and enjoy the process.
FAQs and Troubleshooting
Q: Why is my watermelon lemonade too sweet?
A: If it’s overly sweet, add a bit more lemon juice to balance out the flavors; it’ll help cut through the sweetness.
Q: How long will this lemonade last in the fridge?
A: It’s best consumed within 2-3 days. Lemons can become bitter if left too long and watermelon juice can start to ferment.
Q: Can I make this recipe ahead of time?
A: Absolutely! You can prepare the watermelon and lemon juices ahead and mix everything together on the day you plan to serve it.
Q: Can I freeze watermelon lemonade?
A: Yes! This lemonade freezes wonderfully. Pour it into ice cube trays for a refreshing addition to future drinks.
Nutritional Info
While I won’t overload you with numbers, just know that Watermelon Lemonade is generally low in calories, especially if you choose a sugar substitute. Watermelon is hydrating and packed with vitamins A and C, making this drink a healthful option compared to sugary sodas!
So there you have it—a bright, refreshing Watermelon Lemonade that bursts with summer’s best flavors! I hope you enjoy making it as much as I enjoy sharing it with you. So grab your juicer, tie on that apron, and let the summer sipping begin! Cheers!
PrintRefreshing Watermelon Lemonade
A delightful, refreshing drink made with fresh watermelon and lemons, perfect for summer gatherings.
- Prep Time: 15 minutes
- Cook Time: 0 minutes
- Total Time: 120 minutes
- Yield: 8 servings 1x
- Category: Beverage
- Method: Juicing
- Cuisine: American
- Diet: Vegetarian
Ingredients
- 1 1/4 cups fresh-squeezed lemon juice
- 1 cup sugar or sugar substitute
- 6 cups water
- 5 cups watermelon juice
- Optional garnish: Fresh mint leaves, lemon slices, or watermelon wedges
Instructions
- Juice the Watermelon: Start by cutting a medium-sized, ripe watermelon into chunks and blend until smooth. Strain the juice if desired and reserve some watermelon cubes for garnish.
- Squeeze Those Lemons: Cut about 8-10 juicy lemons in half and extract juice until you gather 1 1/4 cups.
- Mix the Sweetness: In a large pitcher, combine the lemon juice and sugar, stirring until dissolved. Warm water may help dissolve the sugar.
- Combine Water and Watermelon Juice: Gradually pour in the 6 cups of water and 5 cups of watermelon juice, mix gently, and adjust sweetness as needed.
- Chill Time: Refrigerate the lemonade for at least 2 hours to meld flavors.
- Serve with Style: Fill glasses with ice and pour the lemonade, garnish with mint, lemon slices, or reserved watermelon cubes.
Notes
Experiment with flavors by adding jalapeños for spice, or using sparkling water for a bubbly twist.
Nutrition
- Serving Size: 1 serving
- Calories: 100
- Sugar: 20g
- Sodium: 10mg
- Fat: 0g
- Saturated Fat: 0g
- Unsaturated Fat: 0g
- Trans Fat: 0g
- Carbohydrates: 25g
- Fiber: 1g
- Protein: 1g
- Cholesterol: 0mg
Keywords: watermelon, lemonade, summer drink, refreshing, non-alcoholic