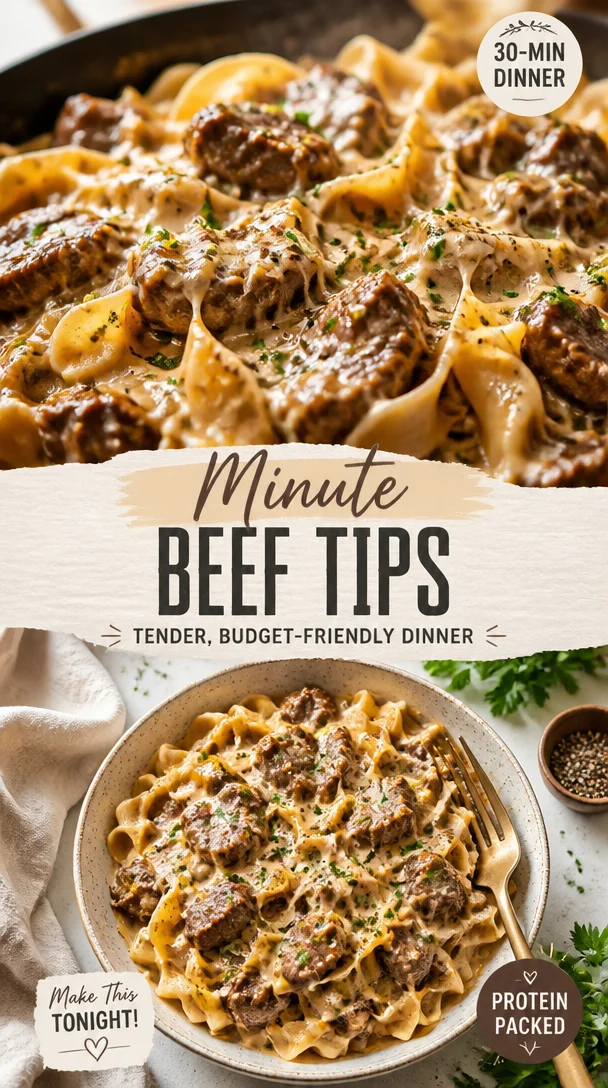
Minute Beef Tips: Tender, Budget-Friendly Dinner
The Best-Ever Beef Tips: Comfort Food with a Twist
Hello, my fellow food enthusiasts! Today, we’re diving into a dish that’s not only a crowd-pleaser but also a staple of home-cooked comfort food—beef tips! Tender, savory, and saucy, these beef tips bring back memories of cozy family dinners and warm gatherings around the table. Are you ready to elevate your next meal with this delicious recipe? Let’s get started!
Personal Story: A Family Tradition
I still remember the first time I experienced the magic of beef tips. I was about eight years old, and my grandmother was hosting one of her legendary Sunday dinners. The smell wafted through the house, pulling the family together like a culinary siren song. She would prepare her famous beef tips, simmering for hours until they were fork-tender, bathing in a savory sauce that made my taste buds dance.
We all gathered around the table—eagerly anticipating the feast about to unfold. I could see the warmth in her eyes as she plated the beef, along with a side of buttery mashed potatoes and steamed green beans. It was the kind of meal that made you feel wrapped in a cozy blanket, no matter the weather outside.
That evening, as laughter filled the room and stories were shared, I realized that food is so much more than just fuel; it’s about connection, love, and tradition. Now, I create my own version of those beloved beef tips, making them my own while keeping the spirit of family cooking alive.
Ingredients
Gathering the right ingredients is half the fun! Here’s what you’ll need for your Best-Ever Beef Tips, along with some handy tips and substitution ideas.
-
2 lbs beef (chuck roast or sirloin)
- Tip: Chuck roast is marbled and tender, making it perfect for this dish. Sirloin also works well for a leaner option. If using sirloin, just make sure not to overcook it!
-
1 cup beef broth
- Substitution: If you don’t have beef broth on hand, vegetable broth or chicken broth can work in a pinch. Just keep in mind that it may alter the flavor slightly.
-
1 onion, chopped
- Chef Insight: Yellow onions are a classic choice here—they add a sweetness as they caramelize. If you prefer a sharper taste, go for white onions.
-
2 cloves garlic, minced
- Quick Tip: Fresh garlic gives so much flavor, but if you’re in a rush, garlic powder can substitute in at a pinch (1/4 tsp per clove).
-
1/4 cup soy sauce
- Substitution: If you’re watching your sodium intake or prefer gluten-free, use tamari or coconut aminos for a similar umami flavor.
-
1 tablespoon Worcestershire sauce
- Insight: This adds a depth of flavor that rounds out the dish. If you’re out, a dash of balsamic vinegar can add that tangy zing instead!
-
2 tablespoons cornstarch
- Hint: This will help thicken your sauce beautifully. If you’re looking for a gluten-free option, you can use arrowroot powder.
-
1/4 cup water
- Usage: This will help dissolve the cornstarch for a smooth sauce.
-
Salt and pepper to taste
- Pro Tip: Always taste and adjust seasoning at the end for the best flavor profile.
-
Cooked rice or mashed potatoes for serving
- Serving Tip: Both are great at soaking up that delicious sauce, so pick whichever you’re in the mood for!
Step-by-Step Instructions
Now that you have your ingredients prepped, let’s get cooking! Follow along with these simple steps to create your Best-Ever Beef Tips.
-
Sear the Beef: Start by cutting your beef into bite-sized pieces. Heat a large skillet over medium-high heat with a splash of oil. Once it’s hot, add the beef pieces in batches (don’t crowd the pan), searing them until they’re browned on all sides. This will lock in those juicy flavors and give the dish a delicious depth. Don’t skip this step!
-
Sauté the Aromatics: Remove the browned beef from the skillet and set it aside. In the same pan, add the chopped onion. Sauté for about 2-3 minutes until it turns translucent and aromatic. Then add in the minced garlic and sauté for another minute. The combination of these two ingredients is where the magic begins!
-
Deglaze the Pan: Pour in the beef broth and use a wooden spoon to scrape up any brown bits stuck to the bottom of the skillet. This is called “deglazing” and it’s where you get all that concentrated flavor. Let the broth come to a gentle simmer.
-
Combine Everything: Once the broth is simmering, return the beef to the skillet. Add the soy sauce and Worcestershire sauce next, stirring to combine all the ingredients. This is where your beef will soak up all those delightful flavors.
-
Thicken the Sauce: In a small bowl, mix the cornstarch with water until smooth. Slowly whisk the mixture into your beef and broth. This will create a luscious, thick sauce that clings to the beef beautifully. Allow everything to simmer for another 15-20 minutes until the beef is tender and the sauce has thickened. You can adjust the seasoning with salt and pepper at this stage.
-
Serve and Enjoy: Once your beef tips are cooked to perfection, it’s time to serve! I like to present them over a bed of fluffy rice or creamy mashed potatoes, drizzling that gorgeous sauce over the top. A sprinkle of fresh herbs—like parsley or chives—adds a pop of color and freshness.
Serving Suggestions
When plating your Best-Ever Beef Tips, remember that presentation adds to the experience! If you’ve chosen rice, use a shallow bowl or plate to scoop a generous helping in the center, then top with your beef tips and sauce. For mashed potatoes, create a small well in the center before adding the beef and let that sauce cascade beautifully over the mound. Maybe add a side of sautéed greens or roasted vegetables for color and added nutrients. Voilà—dinner is served!
Recipe Variations
This recipe is incredibly versatile! Here are a few creative twists or dietary swaps to consider:
- Stout Beef Tips: Replace beef broth with a rich stout beer for a deeper flavor.
- Herb-Infused: Toss in fresh thyme or rosemary while simmering for an aromatic touch.
- Spicy Kick: Add a splash of hot sauce or a pinch of red pepper flakes for heat.
- Vegetarian Version: Swap the beef for hearty mushrooms like portobello and use vegetable broth for a plant-based delight.
- Zesty Citrus: Finish with a squeeze of lemon juice or orange zest for a bright, fresh flavor.
Chef’s Notes
Over the years, my beef tip recipe has evolved, just like my cooking style. Initially, I used to stick to a strict method, but now I embrace improvisation based on what I have in my pantry. Some of my greatest kitchen victories came from experimenting with leftover veggies or spices. Don’t be afraid to make this recipe your own—cooking is about joy, freedom, and creativity!
Also, here’s a funny kitchen story: One time, I was so excited to make these beef tips that I completely forgot to add the cornstarch. I served them in a rush, only to realize the sauce was too thin. My guests, in good spirits, lovingly dubbed the meal "Beef Soup." Since then, I always double-check my ingredients before diving in!
FAQs and Troubleshooting
Q: What should I do if my beef tips are tough?
A: This can happen if the beef isn’t cooked long enough or at a high enough temperature. Make sure to simmer them low and slow until tender.
Q: Can I make this dish ahead of time?
A: Yes! Beef tips actually taste even better the next day as the flavors meld. Just cool and store them in an airtight container in the fridge, then reheat gently.
Q: What if my sauce isn’t thickening?
A: If it’s not thickening to your liking, you can create more cornstarch slurry (1 tablespoon of cornstarch mixed with 2 tablespoons of cold water) and add it in gradually while stirring.
Q: How can I tell if my beef is cooked properly?
A: For beef tips, you want fork-tender pieces. If they can easily be shredded or cut with minimal effort, they’re ready!
Nutritional Info (Optional)
While this dish is undeniably comforting, it’s also packed with protein and nutrients. Here’s a rough breakdown for each serving (based on 6 servings):
- Calories: 350
- Protein: 36g
- Fat: 15g
- Carbohydrates: 25g
Feel free to adjust these numbers based on your chosen type of beef and the sides you pair with it!
There you have it—my Best-Ever Beef Tips recipe, made to share and delight! Remember, cooking is about more than just ingredients; it’s about the connections you make and the memories you create. So, tie on that apron, invite some loved ones over, and let’s savor the joy of good food together! Happy cooking!
PrintBest-Ever Beef Tips

Tender and savory beef tips simmered in a rich sauce, perfect for cozy family dinners.
- Prep Time: 15 minutes
- Cook Time: 30 minutes
- Total Time: 45 minutes
- Yield: 6 servings 1x
- Category: Main Course
- Method: Stovetop
- Cuisine: American
- Diet: None
Ingredients
- 2 lbs beef (chuck roast or sirloin)
- 1 cup beef broth
- 1 onion, chopped
- 2 cloves garlic, minced
- 1/4 cup soy sauce
- 1 tablespoon Worcestershire sauce
- 2 tablespoons cornstarch
- 1/4 cup water
- Salt and pepper to taste
- Cooked rice or mashed potatoes for serving
Instructions
- Sear the beef: Cut beef into bite-sized pieces and sear in a hot skillet.
- Remove beef and sauté onion until translucent; add garlic.
- Deglaze the pan with beef broth, scraping brown bits.
- Combine beef with sauces and simmer.
- Thicken the sauce with cornstarch mixture and let simmer until tender.
- Serve over rice or mashed potatoes, garnished with herbs.
Notes
Adjust seasoning at the end for best flavor. Experiment with variations such as stout beer or adding fresh herbs.
Nutrition
- Serving Size: 1 serving
- Calories: 350
- Sugar: 3g
- Sodium: 800mg
- Fat: 15g
- Saturated Fat: 5g
- Unsaturated Fat: 8g
- Trans Fat: 0g
- Carbohydrates: 25g
- Fiber: 2g
- Protein: 36g
- Cholesterol: 90mg
Keywords: beef tips, comfort food, family recipe, savory beef, quick dinner
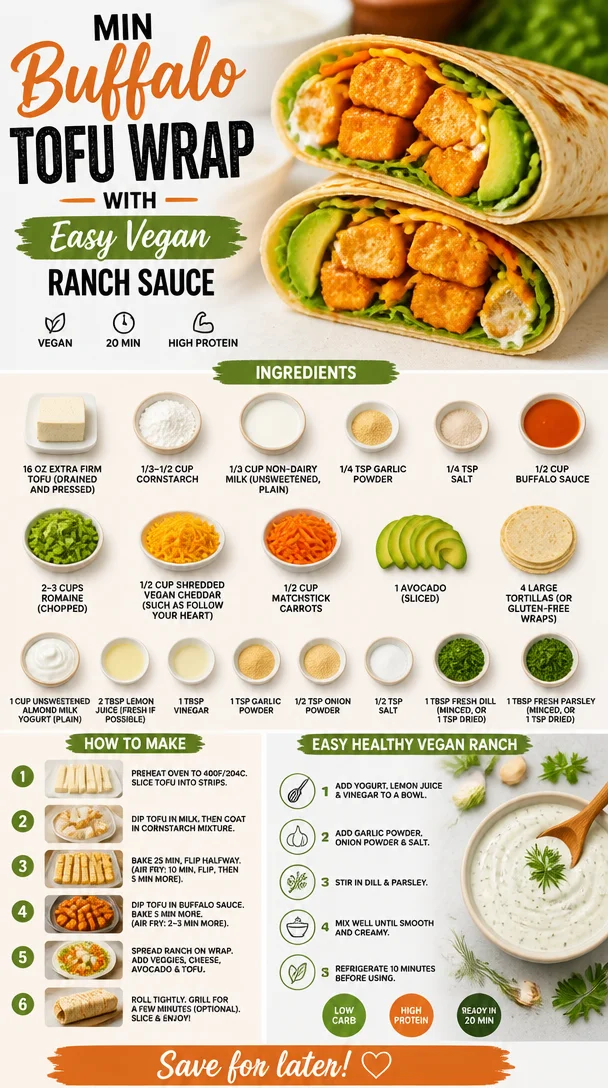
Min Buffalo Tofu Wrap with Easy Vegan Ranch Sauce
Buffalo Tofu Wraps with Easy Vegan Ranch
Introduction
Hey there, my food-loving friends! Today, I’m so excited to share a recipe that has become a staple in my kitchen: Buffalo Tofu Wraps with Easy Vegan Ranch. This dish is a glorious celebration of bold flavors and vibrant colors, perfect for those busy weeknights or when you want something delightful yet stress-free. It’s also a fantastic choice for gatherings, impressing both vegans and non-vegans alike.
I remember the first time I tried buffalo tofu wings at a local vegan cafe. I was skeptical at first; tofu wings? Really? But one bite changed everything. The crispy coating, the tangy heat of the buffalo sauce, and the cool creaminess of ranch dressing created a flavor explosion that had me craving more. It struck me that these components could easily transition into a wrap to make it even more filling and shareable! So, armed with the idea, I rushed home to create my own version of this dish. Spoiler alert: it was a huge hit, and I still make it regularly for get-togethers and casual dinners alike.
You’re going to love how straightforward this recipe is, with steps that lead you to quickly pop these wraps on the table. Let’s roll up our sleeves, tie on our aprons, and get cooking!
Personal Story
Let me take you back to a crisp fall evening a few years ago. I had invited over friends for a casual movie night, and I wanted to whip up something both satisfying and a bit different. Inspired by my newfound love for buffalo tofu, I decided to create these wraps. As the scent of frying tofu filled my kitchen, it brought back memories of my childhood, when my family would gather around the dinner table, sharing stories and laughter.
As I prepared, I laughed at how my kitchen was a delightful mess—spices scattered, veggie peels on the counter, and the sound of laughter escaping the living room where my friends waited in anticipation. The first wrap came together beautifully, and as I took my first satisfying bite, it felt like I was elevating not only my cooking but also the joy of gathering together. These wraps quickly became a beloved dish in my recipe repertoire, and they’ll surely find a special place in yours too!
Ingredients
Here’s what you’ll need to whip up these scrumptious Buffalo Tofu Wraps, along with a few insights to keep in mind:
-
16 oz block extra firm tofu (drained and pressed)
Tofu is a fantastic protein source and perfect for absorbing flavors. Extra firm is essential for that crispy texture. If you can’t find extra firm, you can use firm—just be careful to press it well to remove excess moisture. -
1/3–1/2 cup cornstarch
This is the magic ingredient for achieving a crispy coating. If you prefer a different texture, you can substitute with arrowroot powder or tapioca starch. -
1/3 cup non-dairy milk (unsweetened, plain)
This helps create a light batter. Almond milk, soy milk, or oat milk work like a charm! Choose whatever fits your dietary preference. -
1/4 tsp garlic powder
A must-have for flavor! If you adore garlic, feel free to double this. -
1/4 tsp salt
Essential for enhancing flavors. Adjust according to your taste! -
1/2 cup buffalo sauce
Choose your favorite brand! Want less heat? Pick a milder buffalo sauce or mix in a bit of ketchup. -
2-3 cups romaine (chopped)
Fresh, crunchy greens add a refreshing touch to the wraps. Feel free to swap with spinach or kale if you prefer. -
1/2 cup shredded vegan cheddar (such as Follow Your Heart)
This gives a cheesy flavor without the dairy. You can skip this if you want a lighter wrap or use nutritional yeast as a flavor enhancer. -
1/2 cup matchstick carrots
These add a beautiful crunch! If you’re short on time, buy pre-packaged matchstick carrots. -
1 avocado (sliced)
Creamy and rich, avocados elevate the meal. For a little zing, add a squeeze of lime over the slices! -
4 large tortillas (or gluten-free wraps)
Whole wheat or gluten-free, both work beautifully. A thicker wrap ensures everything holds together well. -
1 cup unsweetened almond milk yogurt (plain)
This is the base for your ranch dressing. Plain coconut yogurt or soy yogurt would work here too. -
2 tbsp lemon juice (fresh if possible)
A fresh-squeezed lemon gives brightness to your dressing. If you don’t have lemon, vinegar is a solid substitute. -
1 tbsp vinegar
This adds a tangy depth; apple cider vinegar is an excellent option. -
1 tsp garlic powder
More garlic goodness! Add more if you’re a fan. -
1/2 tsp onion powder
For a savory punch! Feel free to use fresh diced onion instead. -
1/2 tsp salt
To taste; you can also use garlic salt for added flavor. -
1 tbsp fresh dill (minced, or 1 tsp dried)
Fresh dill brings brightness; you can switch it out for fresh chives or parsley. -
1 tbsp fresh parsley (minced, or 1 tsp dried)
A touch of freshness that completes the ranch. Use any herbs that excite you!
Step-by-Step Instructions
Let’s dive into the cooking process! Follow along, and I promise, it’ll be a breeze.
-
Prepare Your Tofu
Start by draining your tofu and pressing it to remove excess moisture. The longer you press, the firmer the tofu will be! I usually wrap it in a clean kitchen towel or paper towels, place it on a plate, and set something heavy on top for about 15-20 minutes. -
Cut the Tofu
Once pressed, slice the tofu into bite-sized cubes or sticks. A sharp knife is your best friend here! -
Make the Tofu Coating
In a medium bowl, combine the cornstarch, garlic powder, and salt. Add the non-dairy milk and mix until smooth. Your batter should be thick enough to coat the tofu, so adjust your cornstarch and milk ratio accordingly if needed! -
Coat the Tofu
Toss the tofu pieces in this batter until well-coated. This step is crucial for that amazing crispiness; make sure each piece gets its fair share! -
Heat the Oil
In a large non-stick skillet, pour in a tablespoon of oil and heat it over medium heat. You want it hot enough that when you drop a small piece of tofu in, it sizzles! -
Fry the Tofu
Carefully add the battered tofu to the hot skillet in a single layer. Cook for about 3-4 minutes on each side until golden and crispy. Avoid overcrowding the pan; you want that lovely sear! -
Coat with Buffalo Sauce
Once your tofu is golden, remove it from the skillet and place it in a bowl. Pour the buffalo sauce over the tofu, tossing gently to coat each piece. This is where the magic happens! -
Prepare the Vegan Ranch
In a small bowl, mix the almond yogurt, lemon juice, vinegar, garlic powder, onion powder, salt, dill, and parsley. Whisk until combined and creamy. Take a moment to taste it and adjust the seasoning to your liking—this ranch is all about personalization! -
Assemble the Wraps
Take one tortilla and layer it with a handful of romaine, a big scoop of your buffalo tofu, a sprinkle of carrots, a slice of avocado, and a drizzle of your vegan ranch. Don’t be shy—fill it up! -
Wrap It Up
Fold the sides of the tortilla in toward the center, then roll it up from the bottom. Voila! Your wrap is ready to enjoy. If you’re feeling fancy, you can toast it in the skillet for an extra crispy touch.
Serving Suggestions
To serve these tasty wraps, cut them in half on a diagonal and display them on a colorful platter. You could accompany them with extra vegan ranch for dipping, sliced veggies, or even a simple green salad. It’s all about creating your own little spread that makes your gathering feel special!
Recipe Variations
Feeling adventurous? Here are a few exciting twists to keep your wraps fresh and flavorful:
- Spicy Buffalo Ranch: Add a few drops of hot sauce to your vegan ranch for an extra kick!
- Mediterranean Twist: Swap the buffalo sauce for a garlic tahini sauce and add roasted red peppers and olives for a fresh twist.
- BBQ Tofu Wrap: Change it up by using BBQ sauce instead of buffalo for a sweeter, smoky flavor.
- Add More Greens: Throw in some spinach, arugula, or even some sprouts for added freshness and nutrition.
- Stuff more veggies: Sautéed bell peppers or onions are a fantastic addition!
Chef’s Notes
Each time I make these Buffalo Tofu Wraps, I’m reminded of how versatile they are. I love to experiment with whatever’s in my fridge! Sometimes I’ll throw in roasted zucchini or even some quinoa for an added texture. Oh! And back to the frying—my first attempts were a little messy, with oil spattering everywhere. I learned to keep my calm (and my splatter guard handy!). The journey in this cooking adventure is what makes it fun—embrace those kitchen oops moments!
FAQs and Troubleshooting
Q: My tofu didn’t get crispy—what went wrong?
A: This could be from moisture left in the tofu—make sure you press out as much water as possible and try to fry it in a single layer in the pan.
Q: Can I bake the tofu instead of frying it?
A: Absolutely! Preheat your oven to 400°F (200°C), place the coated tofu on a baking sheet lined with parchment paper, and bake for about 25-30 minutes, flipping halfway through.
Q: Is there a gluten-free option for the wraps?
A: Yes! Just use gluten-free tortillas or wraps, and you’re all set!
Q: Can I make the ranch dressing ahead of time?
A: Yes! The vegan ranch can be made a day in advance; it’ll actually develop even more flavor as it sits. Just keep it in an airtight container in the fridge.
Nutritional Info
Per wrap (without additional veggies):
- Calories: Approximately 350
- Protein: 15g
- Carbohydrates: 38g
- Fat: 15g
- Fiber: 6g
These Buffalo Tofu Wraps are not only delicious but offer a satisfying balance of protein, healthy fats, and lots of fresh vegetables.
So there you have it, folks! Buffalo Tofu Wraps with Easy Vegan Ranch—easy to make, a joy to serve, and oh-so-delicious. Tie on that apron, gather your ingredients, and create some culinary magic! Happy cooking!
PrintBuffalo Tofu Wraps with Easy Vegan Ranch
Delicious and healthy Buffalo Tofu Wraps filled with crispy tofu, fresh veggies, and creamy vegan ranch dressing.
- Prep Time: 20 minutes
- Cook Time: 20 minutes
- Total Time: 40 minutes
- Yield: 4 servings 1x
- Category: Main Course
- Method: Frying
- Cuisine: American
- Diet: Vegan
Ingredients
- 16 oz block extra firm tofu (drained and pressed)
- 1/3–1/2 cup cornstarch
- 1/3 cup non-dairy milk (unsweetened, plain)
- 1/4 tsp garlic powder
- 1/4 tsp salt
- 1/2 cup buffalo sauce
- 2–3 cups romaine (chopped)
- 1/2 cup shredded vegan cheddar
- 1/2 cup matchstick carrots
- 1 avocado (sliced)
- 4 large tortillas (or gluten-free wraps)
- 1 cup unsweetened almond milk yogurt (plain)
- 2 tbsp lemon juice (fresh if possible)
- 1 tbsp vinegar
- 1 tsp garlic powder
- 1/2 tsp onion powder
- 1/2 tsp salt
- 1 tbsp fresh dill (minced, or 1 tsp dried)
- 1 tbsp fresh parsley (minced, or 1 tsp dried)
Instructions
- Prepare Your Tofu: Start by draining your tofu and pressing it to remove excess moisture for about 15-20 minutes.
- Cut the Tofu: Slice the tofu into bite-sized cubes or sticks.
- Make the Tofu Coating: In a bowl, combine cornstarch, garlic powder, and salt. Add non-dairy milk and mix until smooth.
- Coat the Tofu: Toss tofu pieces in the batter until well-coated.
- Heat the Oil: In a non-stick skillet, heat a tablespoon of oil over medium heat until hot.
- Fry the Tofu: Cook the battered tofu for about 3-4 minutes on each side until golden and crispy.
- Coat with Buffalo Sauce: Toss the cooked tofu in a bowl with buffalo sauce until well-coated.
- Prepare the Vegan Ranch: Mix almond yogurt, lemon juice, vinegar, garlic powder, onion powder, salt, dill, and parsley in a bowl until creamy.
- Assemble the Wraps: Layer romaine, buffalo tofu, carrots, avocado, and ranch on a tortilla.
- Wrap It Up: Fold the sides in and roll from the bottom. Optionally, toast in the skillet for extra crispiness.
Notes
Feel free to customize the wraps with additional veggies or sauces!
Nutrition
- Serving Size: 1 wrap
- Calories: 350
- Sugar: 5g
- Sodium: 400mg
- Fat: 15g
- Saturated Fat: 2g
- Unsaturated Fat: 10g
- Trans Fat: 0g
- Carbohydrates: 38g
- Fiber: 6g
- Protein: 15g
- Cholesterol: 0mg
Keywords: tofu wraps, buffalo tofu, vegan ranch, easy recipe

One-Pot Spinach Sauce Pasta: 20-Min Weeknight Dinner
Creamy Spinach Sauce Pasta: Elegant, Easy, and Effortlessly Delicious
Hey there, fellow foodies! Welcome back to my cozy corner of the kitchen, where we’re all about creating meals that feel luxurious but are oh-so-simple to whip up. Today, I’m excited to share one of my favorite recipes that captures the essence of elegance and comfort: Pasta with Spinach Sauce. This dish is deliciously creamy, green, and ready to impress your guests or make your weeknight dinner feel a little more special. Ready to dive in? Let’s set the table!
A Taste of Nostalgia
Let me take you back to a sunny afternoon spent at my grandmother’s house. I was about eight years old, standing on a stool, peering over the kitchen counter where she was deftly moving about, preparing one of her famous pasta dishes. The air was filled with the fragrant scent of sautéed garlic, and I remember the vibrant green of the spinach as she tossed it into the pan.
"Cooking is like magic," she said, with a twinkle in her eye, "You take a few simple ingredients and turn them into something extraordinary." Watching her toss the spinach into a glorious sauce and combine it with the freshly cooked pasta was nothing short of spellbinding.
That memory stuck with me, not just for the culinary skills my grandmother imparted but for the love and warmth that filled her kitchen. Today, when I cook this Creamy Spinach Sauce Pasta, I channel that same joy and sparkle. It’s not just about the food; it’s about creating beautiful moments around the table, just like Grandma used to do.
Ingredients
Here’s what you’ll need for this delightful pasta dish:
-
8oz (225 grams) pasta (penne, rigatoni, spaghetti, or your favorite)
- Use any pasta shape you love! Just keep an eye on the cooking time as different shapes can vary.
-
1 Tbsp olive oil or extra virgin olive oil
- A drizzle of high-quality olive oil adds richness. Don’t have olive oil? Any light oil will do in a pinch, but it’s worth the upgrade!
-
2-3 garlic cloves, finely sliced or minced
- Garlic is our aromatic superstar here! Want a milder flavor? Try roasting the garlic first for a sweeter profile.
-
9oz (250 grams) baby spinach, washed
- Fresh spinach is best for this recipe, but frozen spinach can work too; just make sure it’s thawed and drained.
-
¼ tsp fine salt, plus more to taste
- Seasoning is key! Start with less and add to your preference as you taste.
-
5oz (140 grams) cream cheese
- This creates that luscious creaminess! Don’t have cream cheese? You could use mascarpone or ricotta as alternatives.
-
1oz (30 grams) freshly grated parmesan cheese, plus more to serve
- Fresh cheese enhances flavor! If you’re in a pinch, pre-grated can work but won’t melt as beautifully.
-
¼ tsp ground nutmeg, or ⅓ of freshly grated nutmeg, or according to taste
- A tiny pinch of nutmeg warms up the flavors. Not a fan? Leave it out or switch it up with a dash of smoked paprika for a different vibe.
-
Black pepper, to taste
- Freshly cracked pepper adds a lovely kick! For a spicier twist, try red pepper flakes.
Step-by-Step Instructions
-
Cook the Pasta
Bring a large pot of salted water to a boil. Add your pasta and cook according to package instructions until al dente. Make sure to reserve about 1 cup of pasta water before draining! This starchy goodness will help you create a beautiful sauce. -
Sauté the Garlic
In a large skillet, heat the olive oil over medium heat. Once shimmering, add the minced garlic. Sauté for about 1-2 minutes, or until fragrant and golden. Be careful not to burn it—it can turn bitter! -
Add the Spinach
Toss in the baby spinach and sprinkle with salt. Cook, stirring occasionally, until the spinach wilts down, about 3-4 minutes. The vibrant color will remind you of sun-soaked days! -
Create the Sauce
Reduce the heat to low. Stir in the cream cheese until it melts and forms a creamy mixture. Add the reserved pasta water a little at a time until you reach your desired sauce consistency. This is where the magic happens! -
Flavor it Up
Add the grated parmesan and nutmeg. Stir until everything is well combined. Taste the sauce and adjust salt and pepper as needed. A good chef always tastes! -
Combine Pasta and Sauce
Add the drained pasta directly to the skillet. Toss gently to coat the pasta evenly with the spinach sauce. If the sauce is too thick, add more reserved pasta water, a tablespoon at a time. -
Serve
Plate your pasta, adding more parmesan and a drizzle of olive oil on top for that finishing touch. A sprinkle of pepper or a few fresh herbs could also brighten the plate.
Serving Suggestions
For an elegant presentation, twirl the pasta into a nest using a fork and spoon and place it in the center of your favorite plate. Add a light drizzle of olive oil and a sprinkle of fresh parmesan for a polished look. You can also toss in some toasted pine nuts or a squeeze of fresh lemon juice to brighten the flavors and make it pop!
Recipe Variations
Here are a few fun twists you can take with this dish:
-
Add Protein: Toss in some grilled chicken or shrimp for a heartier meal. You could also stir in some cannellini beans for a veggie-packed option!
-
Go Vegan: Substitute cream cheese with cashew cream (soaked blended cashews with a little water) and nutritional yeast instead of parmesan for a creamy sauce.
-
Pack a Punch: Incorporate sun-dried tomatoes or roasted red peppers for a burst of flavor and color.
-
Herb it Up: Fresh or dried herbs like basil or thyme can add an aromatic layer to your sauce. Sprinkle some in while cooking for a fragrant finish!
-
Extra Greens: Mix in other greens like kale or arugula for a nutritional boost and a flavor twist.
Chef’s Notes
This recipe has come a long way since my grandmother taught me the basics of cooking! Over time, I’ve learned the importance of balance in flavors and the joy of using fresh ingredients. I remember the first time I made this dish for a dinner party. I was nervous, but when my friends took their first bites, the compliments poured in. That moment solidified my belief that food is a love language, and a simple pasta can bring people together. Every time I make this dish, I reminisce about those early days in the kitchen with Grandma—her laughter echoing with each turn of the spatula.
FAQs and Troubleshooting
Q: My sauce seems too thick; how can I fix it?
A: No worries! Just add in a couple of tablespoons of reserved pasta water until it reaches your desired consistency.
Q: I ran out of garlic! Can I skip it?
A: While garlic adds tons of flavor, you can substitute with shallots or even a pinch of garlic powder in a pinch for a hint of that beloved garlic taste.
Q: Is it possible to make the sauce ahead of time?
A: Absolutely! You can make the sauce ahead and store it in the fridge. Just warm it up gently before adding the pasta and adjust the consistency with pasta water as needed.
Q: Can I freeze leftovers?
A: It’s best to consume this dish fresh; however, if you have leftovers, you can freeze the sauce separately. Just know that the texture may change a bit when thawed.
Nutritional Info (Optional)
For a single serving of this creamy spinach pasta:
- Calories: Approximately 450
- Protein: 14g
- Carbs: 55g
- Fat: 20g
- Fiber: 3g
This could vary based on the pasta choice and additional ingredients, of course!
And there you have it, my delightful Pasta with Spinach Sauce! I hope it brings as much joy to your kitchen as it does to mine. Remember, cooking is about having fun in the kitchen and enjoying the company of loved ones. So, grab your apron, gather around the table, and let’s keep those beautiful kitchen moments alive together. Happy cooking!
PrintCreamy Spinach Sauce Pasta

An elegant and easy pasta dish featuring a creamy spinach sauce that is perfect for impressing guests or enjoying a cozy dinner at home.
- Prep Time: 15 minutes
- Cook Time: 20 minutes
- Total Time: 35 minutes
- Yield: 4 servings 1x
- Category: Main Course
- Method: Baking
- Cuisine: Italian
- Diet: Vegetarian
Ingredients
- 8oz (225 grams) pasta (penne, rigatoni, spaghetti, or your favorite)
- 1 Tbsp olive oil or extra virgin olive oil
- 2–3 garlic cloves, finely sliced or minced
- 9oz (250 grams) baby spinach, washed
- ¼ tsp fine salt, plus more to taste
- 5oz (140 grams) cream cheese
- 1oz (30 grams) freshly grated parmesan cheese, plus more to serve
- ¼ tsp ground nutmeg, or according to taste
- Black pepper, to taste
Instructions
- Cook the Pasta: Bring a large pot of salted water to a boil. Add your pasta and cook according to package instructions until al dente. Reserve about 1 cup of pasta water before draining.
- Sauté the Garlic: In a large skillet, heat the olive oil over medium heat. Add the minced garlic and sauté for about 1-2 minutes until fragrant and golden.
- Add the Spinach: Toss in the baby spinach and sprinkle with salt. Cook, stirring occasionally, until the spinach wilts down, about 3-4 minutes.
- Create the Sauce: Reduce the heat to low. Stir in the cream cheese until it melts and forms a creamy mixture. Add the reserved pasta water gradually until reaching your desired consistency.
- Flavor it Up: Add the grated parmesan and nutmeg. Stir until well combined and adjust seasoning as needed.
- Combine Pasta and Sauce: Add the drained pasta directly to the skillet. Toss gently to coat the pasta evenly with the sauce.
- Serve: Plate your pasta, adding more parmesan and a drizzle of olive oil on top. Optionally, sprinkle with pepper or fresh herbs.
Notes
For an elegant presentation, twirl the pasta into a nest and top with additional parmesan and a drizzle of olive oil. You can also add toasted pine nuts or a squeeze of fresh lemon juice.
Nutrition
- Serving Size: 1 serving
- Calories: 450
- Sugar: 5g
- Sodium: 400mg
- Fat: 20g
- Saturated Fat: 10g
- Unsaturated Fat: 8g
- Trans Fat: 0g
- Carbohydrates: 55g
- Fiber: 3g
- Protein: 14g
- Cholesterol: 35mg
Keywords: Creamy, Spinach, Pasta, Easy Dinner, Vegetarian Recipe
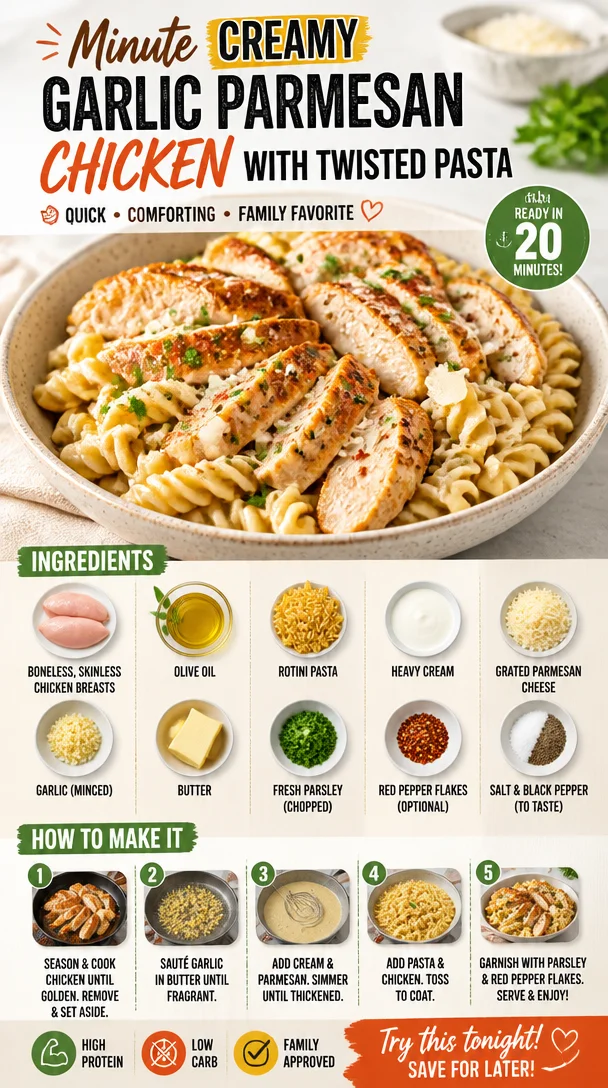
Minute Creamy Garlic Parmesan Chicken with Twisted Pasta
Indulgent Creamy Garlic Parmesan Chicken with Cheesy Twisted Pasta
Welcome back to the delightful world of Ivory Apron, where cooking becomes a joyous adventure. Today, I’m excited to share a recipe that combines comfort and elegance in a way that feels like a warm embrace on a plate. If you’re ready to impress your loved ones and treat yourself to something truly indulgent, then let’s dive into this Creamy Garlic Parmesan Chicken with Cheesy Twisted Pasta!
A Warm Welcome to the Kitchen
Imagine walking into your kitchen after a long day, the kind of day that leaves you needing a little pick-me-up. You might feel weighed down by the mundane, but once you cast your eyes on those ingredients, you remember the magic that happens when you transform simple pieces into an exquisite dish. That’s what makes cooking so special, doesn’t it? It’s not just about nourishment; it’s about creating moments that linger.
This creamy, dreamy chicken dish is perfect for those evenings when you want to serve something that feels both indulgent and approachable. With its rich garlic flavor and the comforting allure of cheesy pasta, it’s a dish that will quickly become a favorite in your cooking repertoire. Ready to cook together? Let’s get started!
My Personal Cooking Memory
Let me take you back a few years to one of the first dinner parties I hosted. Picture this: the cozy glow of candlelight, the chatter of close friends, and—most importantly—the delicious smell wafting through the room from my kitchen. I wanted to impress, and I decided to try making a creamy chicken dish filled with garlic and cheese.
The recipe was, of course, a little hazy; I was determined to wing it. As my guests arrived, the anticipation grew, and so did my nerves. But when I first served that creamy garlic chicken, people were practically swooning at the table, and I knew I had struck culinary gold!
That night, we shared not just a meal but laughter, stories, and the joy of being together. Since then, I’ve improved upon that initial recipe, fine-tuning it to ensure that each bite is delectable while keeping it simple enough for anyone to replicate. It’s a meal that celebrates the art of gathering around the table, and I can’t wait for you to experience it!
Ingredients
To create this indulgent masterpiece, you will need the following ingredients:
-
4 pieces Boneless, skinless chicken breasts
(Consider using thighs for added flavor; they’re juicier and more forgiving during cooking!) -
2 tablespoons Olive oil
(Can be replaced with butter for more richness and a slightly different flavor profile.) -
8 ounces Rotini pasta
(Feel free to use penne or farfalle for variety; they all capture the creamy sauce beautifully!) -
1 cup Heavy cream
(Swap with half-and-half for a lighter option without sacrificing too much creaminess.) -
1 cup Grated Parmesan cheese
(Opt for freshly grated for the best melt and flavor; pre-grated tends to be more starchy.) -
3 cloves Garlic (minced)
(Fresh garlic provides the best results, but you can use garlic powder in a pinch—just use less!) -
2 tablespoons Butter
(For a dairy-free alternative, try a vegan butter substitute; it works just as well.) -
2 tablespoons Fresh parsley (chopped)
(Swap with basil for a different flavor profile; each brings a unique freshness to the dish.) -
1 teaspoon Red pepper flakes (optional)
(Omit for a milder dish or increase for extra heat!) -
To taste Salt and black pepper
(Essential seasonings for flavor balance; don’t skip these!)
Step-by-Step Instructions
Now, let’s get cooking! Follow these steps for a delightful culinary experience.
-
Prep Your Ingredients:
Start by gathering all your ingredients. This will make the cooking process smoother and more enjoyable. Chop your garlic and parsley, and have everything within reach. -
Cook the Pasta:
Bring a large pot of salted water to a boil. Add the rotini pasta and cook according to package instructions until al dente. Reserve about a cup of the pasta water, and then drain the pasta and set it aside. Chef Insight: Saving some pasta water is a game-changer! You can use it later to adjust the creaminess of your sauce. -
Sear the Chicken:
Heat the olive oil in a large skillet over medium-high heat. Season each chicken breast with salt and pepper, then add them to the skillet. Sear them for about 6-7 minutes on each side, or until they are golden brown and cooked through. Tip: If your chicken sticks, it’s usually a sign that it’s not ready to flip yet—patience is key! -
Make the Creamy Sauce:
Once the chicken is done, remove it from the skillet and set it aside to rest. In the same skillet, add the butter and minced garlic, cooking for about a minute until fragrant—don’t let it burn! Pour in the heavy cream and stir. Lower the heat to medium and bring it to a gentle simmer. Here’s where the magic happens. Toss in that beautiful Parmesan cheese and keep stirring until it melts into the cream, creating a luxuriously rich sauce. Hack: If your sauce is too thick, add a little reserved pasta water until you reach your desired consistency. -
Combine Everything:
Once the sauce is beautifully creamy and smooth, add the cooked pasta directly into the skillet along with the chicken, and toss everything until the pasta is well-coated. Stir in the chopped parsley and red pepper flakes at this point for a pop of color and a hint of heat. Chef’s Tip: Taste and adjust salt and pepper—each cheese is different, and you want to get that flavor just right! -
Serve and Enjoy:
Finally, plate your delicious creation! Make sure to cut the chicken into slices for a beautiful presentation. Serve it hot, and watch your guests’ faces light up as they dive in. You’ll feel like a culinary superstar!
Serving Suggestions
To elevate your meal even further, consider serving this rich dish alongside a crisp salad with a tangy vinaigrette or crusty garlic bread for a satisfying crunch. A simple glass of white wine pairs spectacularly with the creaminess of the chicken and the bright flavors of the herbs.
Recipe Variations
Feeling a little adventurous? Here are some creative twists you can try:
-
Lemon Zest: Add a teaspoon of lemon zest to the sauce for a refreshing citrus tang.
-
Mushroom Medley: Sauté sliced mushrooms with the garlic to add earthiness to the dish.
-
Spinach Delight: Stir in fresh spinach right before serving for a pop of color and added nutrients.
-
Bacon Bit Magic: Crumble some crispy bacon on top for an added layer of smoky flavor and crunch.
-
Spicy Sausage: For a heartier take, include slices of your favorite spicy Italian sausage.
Chef’s Notes
I have so many fond memories associated with this recipe. Over the years, I’ve tweaked it to fit my family’s tastes, inspired by countless dinners filled with laughter and good food. I remember one particular dinner when my cousin accidentally added way too much garlic—let’s just say there were a lot of laughs about “garlicky” kisses afterward!
This dish has become a staple during family gatherings, not just for its delicious taste but for the shared experiences it creates at the table. It’s a reminder that cooking is all about connection, love, and living in the moment.
FAQs and Troubleshooting
-
Why is my sauce too thick/thin?
If your sauce is too thick, gradually add some reserved pasta water until you reach your desired consistency. If it’s too thin, let it simmer a few minutes longer to thicken. -
Can I use frozen chicken?
Absolutely! Just ensure that it’s fully thawed before cooking for even results, or adjust your cooking time accordingly. -
What if I don’t have heavy cream?
You can use half-and-half for a lighter sauce, but expect a slightly different texture. Alternatively, you might use a combination of Greek yogurt and milk. -
Can I make this ahead of time?
While it’s best made fresh, you can cook the components separately ahead of time and combine them just before serving to ensure everything tastes fresh!
Nutritional Info
While I love to focus on the enjoyment of cooking and eating, I also understand the importance of being mindful of what we consume. This creamy chicken dish is rich and indulgent, so moderation is key. A hearty serving will typically include about 600 calories but has plenty of protein and satisfying fats to keep you full.
So there you have it! An indulgent Creamy Garlic Parmesan Chicken with Cheesy Twisted Pasta that’s not just easy to make but oh-so-delicious to enjoy! I’m thrilled to share this recipe with you, and I can’t wait for you to create your own beautiful moments around the table. Remember, it’s not just about the food, but the love and laughter that come with it. Happy cooking!
PrintCreamy Garlic Parmesan Chicken with Cheesy Twisted Pasta

A rich and indulgent creamy garlic chicken dish served with cheesy twisted pasta, perfect for impressing your loved ones.
- Prep Time: 15 minutes
- Cook Time: 30 minutes
- Total Time: 45 minutes
- Yield: 4 servings 1x
- Category: Main Course
- Method: Stovetop
- Cuisine: Italian
- Diet: None
Ingredients
- 4 pieces Boneless, skinless chicken breasts
- 2 tablespoons Olive oil
- 8 ounces Rotini pasta
- 1 cup Heavy cream
- 1 cup Grated Parmesan cheese
- 3 cloves Garlic (minced)
- 2 tablespoons Butter
- 2 tablespoons Fresh parsley (chopped)
- 1 teaspoon Red pepper flakes (optional)
- To taste Salt and black pepper
Instructions
- Prep Your Ingredients: Start by gathering all your ingredients. Chop your garlic and parsley, and have everything within reach.
- Cook the Pasta: Bring a large pot of salted water to a boil. Add the rotini pasta and cook according to package instructions until al dente. Reserve about a cup of the pasta water, and then drain the pasta and set it aside.
- Sear the Chicken: Heat the olive oil in a large skillet over medium-high heat. Season each chicken breast with salt and pepper, then add them to the skillet. Sear them for about 6-7 minutes on each side, or until they are golden brown and cooked through.
- Make the Creamy Sauce: Once the chicken is done, remove it from the skillet and set it aside to rest. In the same skillet, add the butter and minced garlic, cooking for about a minute until fragrant. Pour in the heavy cream and stir. Lower the heat to medium and bring it to a gentle simmer. Toss in the Parmesan cheese and keep stirring until it melts into the cream.
- Combine Everything: Once the sauce is creamy, add the cooked pasta and chicken, tossing until well-coated. Stir in the parsley and red pepper flakes.
- Serve and Enjoy: Plate your creation, slice the chicken for presentation, and serve hot.
Notes
Consider serving with a crisp salad or garlic bread. Pairs well with white wine.
Nutrition
- Serving Size: 1 serving
- Calories: 600
- Sugar: 5g
- Sodium: 800mg
- Fat: 30g
- Saturated Fat: 15g
- Unsaturated Fat: 10g
- Trans Fat: 0g
- Carbohydrates: 45g
- Fiber: 3g
- Protein: 40g
- Cholesterol: 120mg
Keywords: creamy chicken, garlic parmesan, pasta recipe, indulgent dinner, Italian cuisine

One-Pan Philly Cheesesteak Pasta for Busy Weeknights
Philly Cheesesteak Pasta: A Cozy Culinary Adventure
Hello, food lovers! Today, I’m thrilled to share a recipe that’s a delightful twist on two beloved classics: the Philly cheesesteak and creamy pasta. This dish is comfort in a bowl, combining savoriness with a touch of indulgence that makes it perfect for family dinners, gatherings, or even a cozy night in. Let’s dive in!
A Fond Culinary Memory
When I think of Philly cheesesteaks, I’m immediately transported to a bustling street food scene in Philadelphia. I remember my first trip to the City of Brotherly Love, where the air was thick with the smell of sizzling meat and melted cheese. I stood in line at a small sandwich shop, taking in the atmosphere, the clattering of pans, and the joyful chatter of fellow food enthusiasts. As I savored my first bite of that iconic sandwich, I realized what magic really tastes like: a combination of juicy beef, gooey cheese, and vibrant bell peppers, all wrapped in a soft hoagie roll.
Inspired by that experience, I wanted to capture the essence of a Philly cheesesteak in a way that feels homey and accessible—hence, Philly Cheesesteak Pasta was born! This dish combines the rich flavors of the cheesesteak with the heartiness of pasta, making it a truly memorable meal that evokes nostalgia and warmth.
Ingredients
Gather your ingredients for this fulfilling dish. Each component plays a unique role in creating that signature flavor profile you know and love!
-
1 lb ground beef or steak strips: The heart of this dish! Ground beef is deliciously convenient, while steak strips offer that authentic cheesesteak experience. If you’re looking for a leaner option, consider using ground turkey.
-
1 green bell pepper, diced: Adds a fresh crunch and sweetness. You can swap this for a red or yellow bell pepper for a different flavor profile.
-
1 onion, diced: A flavor powerhouse! Yellow onions add sweetness when cooked, but you could also use shallots for a milder aroma.
-
2 cloves garlic, minced: Elevates the dish with aromatic depth. Feel free to adjust the amount based on your love for garlic.
-
8 oz cream cheese, softened: This brings a wonderfully creamy texture to the sauce. For a lighter version, you can use Greek yogurt or part-skim ricotta.
-
1 cup shredded provolone cheese: The classic cheesesteak cheese! Mozzarella works as a great substitute if you prefer a milder flavor.
-
12 oz pasta (penne or rigatoni recommended): These sturdy pasta shapes capture the creamy sauce and meat beautifully. If you’re feeling adventurous, try whole wheat or gluten-free pasta!
-
1 cup beef broth: This adds richness and depth. Vegetable broth can be used for a lighter or vegetarian version.
-
Salt and pepper to taste: Essential for enhancing flavors. Don’t be shy—season to your personal preference!
-
1 tbsp olive oil: For sautéing those aromatic veggies. You can replace this with butter or avocado oil for a different taste.
Step-by-Step Instructions
Let’s roll up our sleeves and get cooking! Here’s how to create your own Philly Cheesesteak Pasta.
-
Cook the Pasta: Begin by boiling a large pot of salted water. Add the pasta and cook according to package instructions until al dente. This typically takes about 8-10 minutes. Chef tip: Reserve a cup of pasta water before draining—it’s liquid gold for adjusting sauce consistency!
-
Sauté the Veggies: In a large skillet, heat the olive oil over medium heat. Add the diced onion and sauté it until it becomes translucent (about 3-4 minutes). Next, add your diced green bell pepper and minced garlic; cook for another 2-3 minutes until fragrant and tender. Stir occasionally—you want those veggies to get a bit of color!
-
Brown the Meat: Push the veggies to the side of the skillet, add the ground beef or steak strips, and season with salt and pepper. Use a spatula to break apart the meat. Cook until it’s browned all over (around 5-7 minutes). If you’re using steak strips, cook until they’re just cooked through. Chef hack: Don’t overcrowd the pan; this allows for better browning.
-
Creamy Cheese Sauce: Lower the heat, and stir in the softened cream cheese until it starts to melt. Once incorporated, pour in the beef broth and mix until smooth.
-
Add the Cheesy Goodness: Sprinkle in the shredded provolone cheese a handful at a time, stirring continuously until it melts into that dreamy sauce. If the sauce is too thick, add a splash of the reserved pasta water until you reach the desired consistency.
-
Combine with Pasta: Add the cooked pasta to the skillet, tossing everything together to ensure the noodles are coated in that creamy, cheesy goodness. Taste and adjust seasoning with more salt and pepper if needed.
-
Final Touches: Let everything simmer together for a couple of minutes (about 2-3 minutes) to marry the flavors, and then remove it from the heat.
Serving Suggestions
Now that your Philly Cheesesteak Pasta is ready, it’s time to make it visually appealing! Serve this comforting dish in large bowls, and consider garnishing with freshly chopped parsley or extra cheese on top for an inviting presentation. You could even sprinkle some crushed red pepper flakes for a little kick.
Recipe Variations
Feeling adventurous? Here are some creative twists you can try with this recipe:
-
Veggie-Loaded Cheesesteak: Add mushrooms or spinach for an extra dose of vegetables while keeping the flavors balance intact.
-
Spicy Cheesesteak: Toss in some jalapeños or a dash of hot sauce for heat that brings a new level of excitement.
-
Italian-Inspired: Mix in some marinara sauce for an Italian twist that pairs beautifully with bell peppers and onions.
-
Cheesy Alfredo: Substitute cream cheese with alfredo sauce for a stronger creamy flavor that complements the meat nicely.
-
Zoodle Option: Swap out regular pasta for spiralized zucchini for a healthier, lower-carb alternative.
Chef’s Notes
This recipe has evolved over the years as I’ve experimented with different ingredients and techniques. The beauty lies in its versatility—whether it’s a weeknight dinner or a gathering with friends, it never disappoints! Once, during a dinner party, I stumbled upon a container of leftover meatballs in the fridge, and I tossed them in. To my surprise, the richness was incredible! That’s the beauty of cooking; you can always make it your own!
FAQs and Troubleshooting
-
Why is my sauce too thick?
If you find your sauce has become too thick, add a splash of the reserved pasta water a tablespoon at a time until it reaches your desired consistency. -
Can I make this dish vegan?
Absolutely! Substitute the beef with lentils or mushrooms and use plant-based cream cheese along with vegan cheese. -
What if my pasta is overcooked?
If you accidentally overcook your pasta, consider adding it directly to the sauce rather than the other way around. The sauce can help mask slight mushiness. -
How can I store leftovers?
Store any leftovers in an airtight container in the refrigerator for up to 3 days. Reheat gently on the stove or in the microwave, adding a splash of broth or water if needed to revive the creamy texture.
Nutritional Info
While comfort food should ideally be enjoyed without restraint, here’s a rough estimate of what a serving of Philly Cheesesteak Pasta (based on 6 servings) contains:
- Calories: Approximately 450-550 calories
- Protein: 25-30g
- Carbohydrates: 40-50g
- Fat: 20-25g
Remember that these values can vary based on specific ingredient brands and portions.
So there you have it! Your ultimate guide to creating Philly Cheesesteak Pasta, which serves as a reminder that delightful, restaurant-quality meals can be made in the comfort of your home without the fuss. I hope you enjoy crafting this dish as much as I do! Tie on your apron, gather around your table, and let the good times roll. Happy cooking!
PrintPhilly Cheesesteak Pasta
A delightful twist on Philly cheesesteak and creamy pasta, this dish combines savoriness with a touch of indulgence, perfect for family dinners or a cozy night in.
- Prep Time: 15 minutes
- Cook Time: 20 minutes
- Total Time: 35 minutes
- Yield: 6 servings 1x
- Category: Main Course
- Method: Stovetop
- Cuisine: American
- Diet: None
Ingredients
- 1 lb ground beef or steak strips
- 1 green bell pepper, diced
- 1 onion, diced
- 2 cloves garlic, minced
- 8 oz cream cheese, softened
- 1 cup shredded provolone cheese
- 12 oz pasta (penne or rigatoni recommended)
- 1 cup beef broth
- Salt and pepper to taste
- 1 tbsp olive oil
Instructions
- Cook the Pasta: Begin by boiling a large pot of salted water. Add the pasta and cook according to package instructions until al dente (8-10 minutes). Reserve a cup of pasta water before draining.
- Sauté the Veggies: In a large skillet, heat the olive oil over medium heat. Add the diced onion and sauté until translucent (about 3-4 minutes). Add the diced green bell pepper and minced garlic; cook for another 2-3 minutes.
- Brown the Meat: Push the veggies to the side, add the ground beef or steak strips, and season with salt and pepper. Cook until browned (around 5-7 minutes).
- Creamy Cheese Sauce: Lower the heat, stir in the softened cream cheese until it melts. Pour in the beef broth and mix until smooth.
- Add the Cheesy Goodness: Sprinkle in the shredded provolone cheese a handful at a time, stirring continuously until melted. Add reserved pasta water if needed for consistency.
- Combine with Pasta: Add the cooked pasta to the skillet, tossing together until coated in the creamy sauce. Adjust seasoning if needed.
- Final Touches: Let everything simmer for 2-3 minutes to marry the flavors, then remove from heat.
Notes
Serve in bowls garnished with parsley or extra cheese. For a kick, sprinkle with crushed red pepper flakes. Leftovers can be stored in an airtight container for up to 3 days.
Nutrition
- Serving Size: 1 serving
- Calories: 500
- Sugar: 3g
- Sodium: 600mg
- Fat: 25g
- Saturated Fat: 12g
- Unsaturated Fat: 8g
- Trans Fat: 0g
- Carbohydrates: 45g
- Fiber: 3g
- Protein: 30g
- Cholesterol: 80mg
Keywords: Philly cheesesteak pasta, creamy pasta, comfort food, American cuisine
Creamy Garlic Butter Steak Bites with Cajun Alfredo Pasta
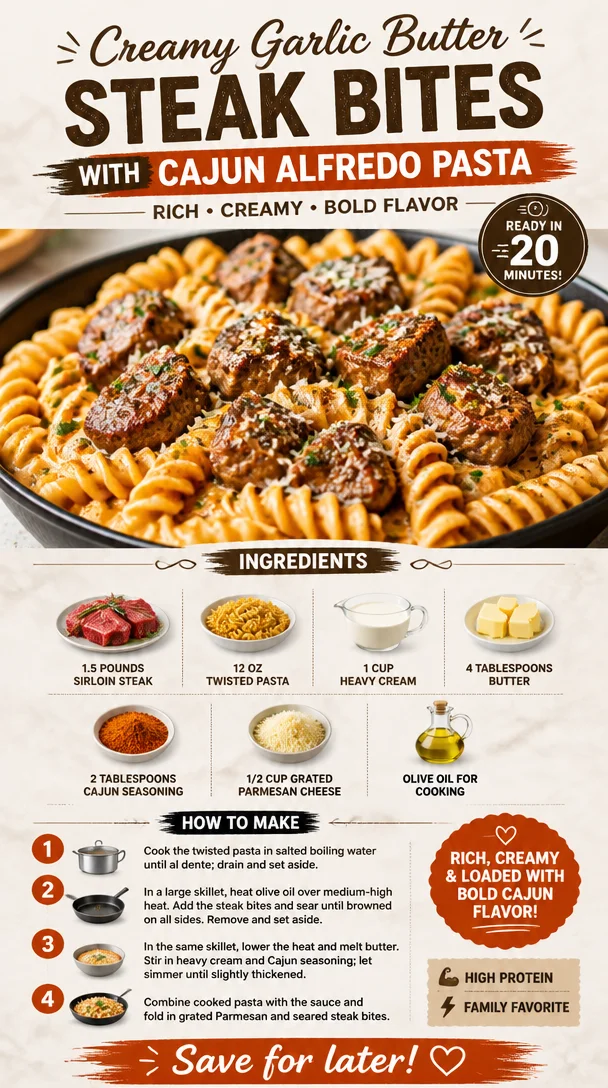
Creamy Garlic Butter Steak Bites with Spicy Cajun Alfredo Twisted Pasta
Welcome back to the kitchen, friends! Today, I’m super excited to invite you on a culinary adventure that’s all about indulgence and flavor-packed goodness. We’re diving into a dish that combines the rich, savory flavors of perfectly cooked steak bites with a creamy, spicy Alfredo sauce tossed with twisted pasta. Trust me, this recipe will have your taste buds dancing with joy!
Let’s set the scene: Imagine a cozy evening with friends gathered around the table, laughter filling the air, and the tantalizing aroma of garlic and butter wafting through the room. That’s the magic we’re aiming for with these creamy garlic butter steak bites and spicy Cajun Alfredo twisted pasta. Whether you’re hosting an intimate dinner party or just looking to elevate your weeknight meal, this dish is a guaranteed crowd-pleaser. So, roll up your sleeves, and let’s get cooking!
Personal Story
This recipe actually takes me back to my college days when I would gather my friends in my tiny apartment for “Pasta Night.” We’d crank up some tunes, pour ourselves a little wine, and whip up whatever pasta dishes we could dream up with the ingredients we had on hand. I remember one particular night when I decided to spice things up (quite literally) by adding Cajun seasoning to my Alfredo sauce. The moment those creamy garlic butter steak bites hit the dining table, it was like a flavor explosion! We all laughed, enjoyed every bite, and even debated our favorite pasta shapes (like how can you resist those cute spirals of fusilli?). Those carefree evenings made me realize how cooking can create memories that stay with us forever. That’s what I want to share with you today: a dish that inspires connection and joy.
Ingredients
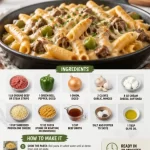
Here’s what you’ll need for this rich and creamy delight:
-
1.5 pounds sirloin steak (or chicken/turkey): Sirloin is my go-to for this dish due to its tenderness and flavor. If you prefer chicken or turkey, both work beautifully, though you may need to adjust the cooking time slightly. Look for cuts that are well-marbled for extra juiciness.
-
12 oz twisted pasta (rotini or fusilli): Twisted pasta is perfect for grabbing that creamy Alfredo sauce! If you’re feeling adventurous, use whole wheat or gluten-free pasta to mix things up.
-
1 cup heavy cream: This is where the magic happens! Heavy cream gives the sauce its luxurious texture. You can substitute with half-and-half for a lighter option, but the sauce will be slightly less decadent.
-
4 tablespoons butter: Because butter makes everything better! Unsalted butter is my choice, but feel free to use salted if that’s what you have on hand.
-
2 tablespoons Cajun seasoning: This is the secret ingredient for some exciting flavor! If you prefer a milder taste, reduce the amount, or try using Italian seasoning if you want to skip the spice.
-
1/2 cup grated Parmesan cheese: Parmesan adds a lovely umami flavor to the sauce. Make sure to use freshly grated if you can; it melts beautifully and enhances the dish.
-
Olive oil for cooking: A drizzle for the pan; it helps to sear the steak to perfection.
Step-by-Step Instructions
Ready to bring this dreamy dish to life? Here’s how to do it!
-
Prep Your Ingredients: Start by gathering all your ingredients. Wash and dry your steak (or chicken/turkey), then cut it into bite-sized pieces. If you are using chicken or turkey, make sure to cut it into uniform pieces for even cooking.
-
Cook the Pasta: Bring a large pot of salted water to a boil. Add your twisted pasta and cook according to package instructions until al dente (about 8-10 minutes usually). Save about a cup of the pasta cooking water before draining it—this starchy water helps create a creamy sauce later!
-
Sear the Steak: While your pasta is cooking, heat a large skillet over medium-high heat. Add a drizzle of olive oil to the pan. Once it’s shimmering, carefully add your steak bites (or chicken/turkey). Sear for about 3-4 minutes until they’re beautifully browned on the outside. If you’re cooking chicken or turkey, make sure they’re cooked through before moving to the next step. Don’t overcrowd the pan; work in batches if needed!
-
Add Garlic and Butter: Lower the heat to medium and add the butter to the skillet. Let it melt, then add minced garlic (2-3 cloves should do the trick). Stir for about a minute until it’s fragrant and heavenly. This is the moment when your kitchen starts smelling amazing!
-
Combine the Sauce: Pour in the heavy cream and add the Cajun seasoning. Stir gently and let it simmer for a few minutes until the sauce thickens slightly. You may want to add a splash of the reserved pasta water to help create that smooth, creamy consistency.
-
Finish with Cheese: Toss in the grated Parmesan cheese and stir until it’s completely melted and you have a luscious sauce. Go ahead and taste—this is your chance to adjust the seasoning if needed!
-
Mix in the Pasta: Add the cooked twisted pasta to the skillet and toss everything together until the pasta is coated in that dreamy sauce. If it’s too thick, add a touch more reserved pasta water until you achieve your desired consistency.
-
Serve It Up: Transfer to a large serving dish or individual bowls. It’s all about how you present it—garnish with a sprinkle of chopped parsley or extra Parmesan cheese for that restaurant-worthy finish!
Serving Suggestions
For a stunning presentation, I love to serve this dish in wide, shallow bowls with a sprinkle of fresh herbs (like parsley or basil) on top and a twist of black pepper. Pair it with a crisp side salad and some warm, crusty bread to soak up any leftover sauce. And don’t forget a little something sparkling to drink—perhaps a nice white wine or a homemade sparkling lemonade!
Recipe Variations
- Spicy: For those who crave heat, try adding sliced jalapeños or a pinch of red pepper flakes to the sauce!
- Veggie Lovers: Toss in some sautéed mushrooms, bell peppers, or spinach for added color and nutrition.
- Low Carb: Swap the twisted pasta for zucchini noodles (zoodles) for a gluten-free, low-carb alternative.
- Herbaceous Twist: Infuse the sauce with fresh herbs like thyme or oregano for a fragrant boost!
- Cheesy Delight: Mix in a different cheese, like mozzarella or cheddar, for a gooey texture that’ll make your heart sing.
Chef’s Notes
Over the years, this dish has evolved from a spontaneous pasta night favorite to a staple I keep coming back to. Every time I make it, I try to add something new—like smuggling in some seasonal veggies or playing with the spices. I still remember that night in college when my friends proclaimed it ‘the best pasta ever!’ It’s the kind of recipe that’s perfect for making memories, whether you’re serving it to a few close friends or a larger gathering. Plus, the leftovers (if there are any!) are amazing for lunch the next day!
FAQs and Troubleshooting
Q: My sauce turned out too thick! What can I do?
A: No worries! Just add a bit more of the reserved pasta water while stirring until you reach your desired consistency. This starchy water is your best friend for adjusting the sauce.
Q: Can I prep this dish ahead of time?
A: Absolutely! You can prepare the steak bites and sauce in advance, then combine everything just before serving. Just reheat gently on the stovetop, adding a bit of reserved pasta water as needed.
Q: What’s the best way to store leftovers?
A: Store any leftovers in an airtight container in the fridge for up to 3 days. When reheating, add a splash of cream or pasta water to get that creamy texture back!
Q: Can I use a different type of meat?
A: Yes! Chicken or turkey works wonderfully. Just adjust the cooking time, making sure it’s cooked through before adding it to the sauce.
Nutritional Info
While I believe in enjoying good food without too much worry about the numbers, if you’re curious, this dish is a hearty meal packed full of protein from the steak and creaminess from the butter and cheeses. Just be mindful of portion sizes if you’re keeping an eye on your dietary needs!
There you have it, my friends! I hope you feel inspired to create a little magic in your kitchen with these creamy garlic butter steak bites and spicy Cajun Alfredo twisted pasta. No matter the occasion, it’s all about enjoying good food and good company. So, let’s tie on those ivory aprons, pour ourselves a lovely drink, and celebrate the art of cooking together. Bon appétit!
PrintCreamy Garlic Butter Steak Bites with Spicy Cajun Alfredo Twisted Pasta

Indulge in the rich flavors of garlic butter steak bites paired with creamy, spicy Cajun Alfredo twisted pasta—a perfect dish for special gatherings or an elevated weeknight meal.
- Prep Time: 15 minutes
- Cook Time: 30 minutes
- Total Time: 45 minutes
- Yield: 4 servings 1x
- Category: Main Course
- Method: Searing and Simmering
- Cuisine: Italian
- Diet: None
Ingredients
- 1.5 pounds sirloin steak (or chicken/turkey)
- 12 oz twisted pasta (rotini or fusilli)
- 1 cup heavy cream
- 4 tablespoons butter
- 2 tablespoons Cajun seasoning
- 1/2 cup grated Parmesan cheese
- Olive oil for cooking
Instructions
- Prep Your Ingredients: Start by gathering all your ingredients. Wash and dry your steak (or chicken/turkey), then cut it into bite-sized pieces.
- Cook the Pasta: Bring a large pot of salted water to a boil. Add your twisted pasta and cook according to package instructions until al dente (about 8-10 minutes). Save about a cup of the pasta cooking water before draining it.
- Sear the Steak: While your pasta is cooking, heat a large skillet over medium-high heat. Add a drizzle of olive oil to the pan. Once it’s shimmering, add your steak bites (or chicken/turkey). Sear for about 3-4 minutes until they’re browned.
- Add Garlic and Butter: Lower the heat to medium and add the butter. Let it melt, then add minced garlic and stir for about a minute until it’s fragrant.
- Combine the Sauce: Pour in the heavy cream and add the Cajun seasoning. Let it simmer for a few minutes until the sauce thickens slightly.
- Finish with Cheese: Toss in the grated Parmesan cheese and stir until it’s melted and the sauce is luscious.
- Mix in the Pasta: Add the cooked twisted pasta and toss everything together until the pasta is coated. Adjust with reserved pasta water for consistency.
- Serve It Up: Transfer to a serving dish and garnish with chopped parsley or extra Parmesan cheese.
Notes
For a stunning presentation, serve in wide bowls and pair with a crisp side salad and warm, crusty bread.
Nutrition
- Serving Size: 1 serving
- Calories: 600
- Sugar: 5g
- Sodium: 600mg
- Fat: 40g
- Saturated Fat: 20g
- Unsaturated Fat: 15g
- Trans Fat: 0g
- Carbohydrates: 45g
- Fiber: 3g
- Protein: 30g
- Cholesterol: 80mg
Keywords: steak bites, Cajun alfredo, creamy pasta, comfort food, dinner party

Creamy Tomato Basil Bisque: 15-Minute Weeknight Comfort
Creamy Tomato Basil Bisque: A Cozy Culinary Hug
Hello, my friends! Today, we’re diving into a warm, comforting classic that dances on your taste buds and wraps around you like a soft, cozy blanket. Yes, I’m talking about Creamy Tomato Basil Bisque. This dish is perfect for those chilly nights when you just want to curl up with something delicious and nourishing. It’s creamy, it’s bright, and it’s bursting with the fresh flavors of summer — even if you enjoy it in the heart of winter!
As we gather around the table and embark on this culinary adventure together, I hope you can feel the joy and warmth that a pot of homemade bisque can bring. So, grab your favorite apron and let’s get cooking!
A Taste of Nostalgia
Before we jump into the recipe, let me share a little personal story. I have fond memories of my grandmother’s kitchen, where the tantalizing aroma of roasted tomatoes would fill the air, beckoning us to the table. She had a magical way of transforming simple ingredients into something extraordinary.
Every Saturday, I would spend the day at her house, and we would make a big batch of tomato soup together. We would pick ripe tomatoes from her garden, their skins so bright they seemed to glow in the sunlight. Our laughter mingled with the sounds of chopping and simmering, and it always felt like we were making more than just soup — we were making memories.
As we poured the velvety bisque into bowls, she would sprinkle fresh basil on top, the vibrant green sparkling like jewels. The first spoonful was always an experience; the creamy tang of the tomatoes perfectly complemented the fresh, herbaceous notes of basil, igniting a symphony of flavors in my mouth.
That feeling of comfort and love has been at the heart of my cooking since then, and I’m excited to share this delicious bisque with all of you. Let’s recreate that magic together!
Ingredients
Here’s what you’ll need to create your own bowl of bliss:
-
2 lbs Roma tomatoes, roasted
Sweet and juicy, Roma tomatoes are perfect for roasting due to their lower moisture content. If you can’t find Roma, any variety will do, but you might need to adjust cooking times slightly. -
1 cup fresh basil, chopped
Fresh basil adds a bright, herby flavor that elevates the bisque. If fresh basil isn’t available, feel free to use a teaspoon of dried basil, but fresh is always best for that vibrant taste! -
1 medium onion, chopped
A pivotal player in adding depth and sweetness. If you’re aiming for a sweeter flavor, try caramelizing the onion first! -
2 cloves garlic, minced
Garlic brings warmth and richness. You can substitute with garlic powder (1 teaspoon) in a pinch, but fresh is always the way to go! -
4 cups vegetable broth
This adds a lovely base to our soup. You can make your own or choose a high-quality store-bought option. Want an extra kick? Try a low-sodium chicken broth! -
1 cup heavy cream
This makes the bisque indulgently creamy. For a lighter version, swap it with coconut cream or cashew cream for a vegan-friendly option. -
Salt and pepper to taste
Essential for highlighting all those fantastic flavors. Feel free to adjust based on your preferences! -
Olive oil
This will help sauté our aromatics and lend a beautiful flavor. If you’re out, avocado oil works beautifully too!
Step-by-Step Instructions
Now, let’s get down to business and whip up this sumptuous bisque. Follow along with these steps, and I promise you’ll be savoring every last spoonful in no time!
-
Roast the Tomatoes: Preheat your oven to 400°F (200°C). Slice your Roma tomatoes in half, drizzle them with olive oil, and sprinkle with salt and pepper. Spread them on a baking sheet, cut side up, and roast for about 30-40 minutes until they are caramelized and bursting with sweetness.
Chef Tip: Keep an eye on your tomatoes! If they’re starting to brown too quickly, don’t hesitate to lower the heat a tad. Roasting brings out the natural sugars in the tomatoes, making your bisque super sweet and flavorful.
-
Sauté the Aromatics: In a large pot, heat 2 tablespoons of olive oil over medium heat. Add the chopped onion and a pinch of salt, cooking until the onion is translucent and fragrant — about 5 minutes. Next, toss in the minced garlic and sauté for another minute, making sure it doesn’t burn.
Chef Hack: To prevent your garlic from burning, you can add it right at the end of the onion cooking time. Garlic can turn bitter if it cooks too long!
-
Combine and Simmer: Once your tomatoes are ready, carefully transfer them to the pot with the onion and garlic mixture. Pour in the vegetable broth and bring everything to a boil. Once boiling, reduce the heat and let it simmer for about 10 minutes to meld those delicious flavors together.
-
Blend It Up: Remove the pot from the heat. You can use an immersion blender for this step, which is a game changer, or transfer the bisque to a blender in batches. Blend until smooth — you want it creamy and luscious!
Little Tip: If you prefer a chunkier texture, blend just half the soup and mix it back with the unblended part.
-
Add the Cream and Basil: Stir in the heavy cream until fully combined, and then add the chopped fresh basil. Let it simmer for another 5 minutes to infuse the flavors.
Pro Tip: Taste before serving! Adjust the seasoning with salt and pepper as needed. Sometimes just a pinch more can bring everything together!
-
Serve Hot: Your bisque is ready to be devoured! Ladle it into bowls and maybe top it with a drizzle of olive oil or a little extra basil for flair.
Serving Suggestions
For an elevated presentation, consider serving your bisque in elegant bowls. A sprinkle of freshly cracked pepper and a drizzle of olive oil on top will make it visually irresistible. Pair it with crusty bread for dipping or a simple side salad for a complete meal.
If you’re feeling fancy, why not serve it with a sprinkle of homemade croutons or a dollop of pesto on top? The options are endless!
Recipe Variations
Here are some creative twists and variations on this bisque:
-
Roasted Garlic Tomato Basil Bisque: Throw in a head of roasted garlic with the tomatoes for an even deeper flavor profile.
-
Spicy Tomato Basil Bisque: Add a pinch of red pepper flakes or a diced jalapeño while sautéing the onions for some heat!
-
Vegan Tomato Basil Bisque: Substitute the heavy cream with full-fat coconut milk for a rich, creamy vegan version. Add a squeeze of lemon for a burst of acidity.
-
Herbed Tomato Basil Bisque: Experiment by adding other herbs like thyme or oregano for a unique flavor twist.
-
Lentil Tomato Basil Bisque: For added protein, toss in some red lentils before blending. They will cook down and add a lovely creaminess too!
Chef’s Notes
This recipe has evolved over time. Initially, it was a simple formula handed down to me by my grandmother — just tomatoes, basil, and cream. Over the years, I’ve played around with the ingredients and techniques. I often remind myself that cooking is all about experimenting and finding out what you love!
One funny kitchen misadventure I had occurred while I was testing a variation that included sun-dried tomatoes. The first time I made it, I accidentally used tomato puree instead of roasted tomatoes. Talk about a flavor bomb! The bisque still turned out well, but it definitely packed a punch and taught me the importance of careful ingredient selection.
FAQs and Troubleshooting
-
Why is my bisque too thin?
If your bisque turns out thinner than expected, you can thicken it by simmering it without a lid for a few extra minutes to evaporate some of the liquid. Alternatively, blend in a little more roasted tomato or add cornstarch mixed with water to achieve a creamier consistency. -
Can I make this bisque in advance?
Absolutely! This bisque actually tastes even better the next day as the flavors meld together. Just be sure to store it in an airtight container in the fridge and reheat gently on the stove. -
What if I don’t have fresh basil?
If fresh basil isn’t available, dried basil is a suitable substitute. Use about 1 teaspoon of dried basil for the best results. Or get creative and try using fresh parsley for a different herbaceous note. -
Can I freeze the bisque?
Yes! This bisque freezes beautifully. Just make sure it’s completely cooled before transferring it to freezer-safe containers. When you’re ready to enjoy it, let it thaw overnight in the fridge and reheat on the stove.
Nutritional Information
If you’re curious: this creamy delight is rich in vitamins and is a filling, heartwarming meal option. A typical serving of this bisque provides a good source of vitamins A and C, with healthy fats coming from the cream and olive oil.
So there you have it, my friends! Your very own bowl of Creamy Tomato Basil Bisque awaits. I hope this dish brings warmth to your kitchen and smiles to your table, just like it has in mine. Remember, cooking is a journey and there’s no right or wrong way — only delicious flavors waiting to be discovered.
Let’s keep gathering around our tables, sharing good food and good company. Until next time, tie on that apron and let the cooking adventures continue at Ivory Apron!
PrintCreamy Tomato Basil Bisque

A cozy and comforting bisque bursting with the fresh flavors of summer, perfect for chilly nights.
- Prep Time: 15 minutes
- Cook Time: 40 minutes
- Total Time: 55 minutes
- Yield: 4 servings 1x
- Category: Soup
- Method: Baking
- Cuisine: Italian
- Diet: Vegetarian
Ingredients
- 2 lbs Roma tomatoes, roasted
- 1 cup fresh basil, chopped
- 1 medium onion, chopped
- 2 cloves garlic, minced
- 4 cups vegetable broth
- 1 cup heavy cream
- Salt and pepper to taste
- Olive oil
Instructions
- Roast the tomatoes: Preheat your oven to 400°F (200°C). Slice your Roma tomatoes in half, drizzle them with olive oil, and sprinkle with salt and pepper. Spread them on a baking sheet, cut side up, and roast for about 30-40 minutes until they are caramelized and bursting with sweetness.
- Sauté the aromatics: In a large pot, heat 2 tablespoons of olive oil over medium heat. Add the chopped onion and a pinch of salt, cooking until the onion is translucent and fragrant — about 5 minutes. Next, toss in the minced garlic and sauté for another minute, making sure it doesn’t burn.
- Combine and simmer: Once your tomatoes are ready, carefully transfer them to the pot with the onion and garlic mixture. Pour in the vegetable broth and bring everything to a boil. Once boiling, reduce the heat and let it simmer for about 10 minutes to meld those delicious flavors together.
- Blend it up: Remove the pot from the heat. Use an immersion blender or transfer the bisque to a blender in batches. Blend until smooth.
- Add the cream and basil: Stir in the heavy cream until fully combined, and then add the chopped fresh basil. Let it simmer for another 5 minutes to infuse the flavors.
- Serve hot: Ladle it into bowls and top with a drizzle of olive oil or a little extra basil for flair.
Notes
For an elevated presentation, consider serving with crusty bread or a simple side salad.
Nutrition
- Serving Size: 1 serving
- Calories: 350
- Sugar: 8g
- Sodium: 800mg
- Fat: 24g
- Saturated Fat: 12g
- Unsaturated Fat: 10g
- Trans Fat: 0g
- Carbohydrates: 30g
- Fiber: 4g
- Protein: 6g
- Cholesterol: 60mg
Keywords: tomato, bisque, soup, creamy, basil, vegetarian, comfort food

Minute Bang Bang Salmon: Crispy, Spicy Weeknight Dinner
Bang Bang Salmon: An Irresistibly Delicious Dish
Hello, fellow foodies! I’m thrilled to share a vibrant and delicious dish that’s sure to make your taste buds dance: Bang Bang Salmon. This dish is not just about the flavors; it’s about bringing people together around the table and creating memorable moments with simple, elegant cooking. Grab your apron and let’s dive into this flavorful journey!
A Whirlwind of Flavor
Bang Bang Salmon is a whimsical nod to the popularity of spicy seafood dishes often served in upscale eateries. Imagine crispy, succulent salmon fillets coated in a luscious, slightly spicy sauce that balances creamy and zesty elements beautifully. This dish is perfect for a casual weeknight dinner or an elegant dinner party—it truly shines no matter the occasion.
I love this dish not just because it’s packed with flavor but also for the vibrant energy it brings to my kitchen. The bright colors and aromas fill the air with anticipation, making cooking feel special. And let’s be honest: who doesn’t love a good excuse to make the kitchen smell incredible?
A Nostalgic Memory
Every time I make Bang Bang Salmon, I’m reminded of a long-ago summer evening spent at a charming little seaside restaurant. The sun was setting, painting the sky in shades of pink and orange, and the air was filled with laughter and the scent of fresh seafood. I was with my best friends, and we shared a platter of spicy fish tacos drizzled with a similar bang bang sauce. Those tacos were delightful, and we devoured them with gusto, our taste buds awakening to the bold flavors.
It’s funny how a memory tied to food can linger in our hearts, isn’t it? Each bite of Bang Bang Salmon takes me back to that carefree evening, reminding me of the power of good food and good company. So, let’s recreate that feeling at home!
Ingredients You’ll Need
Before we get into the cooking, let’s gather our ingredients. The beauty of this dish is that it’s made with accessible components that make it zing without overwhelming your pantry! Here’s what you’ll need:
- 4 salmon fillets (6 oz each): Fresh or thawed, salmon is rich in healthy fats and loaded with flavor. If you’re not a salmon fan, you can swap it with chicken breasts or tofu for a vegetarian option!
- 1/4 cup mayonnaise: This creamy base adds richness. You can use low-fat mayo or even Greek yogurt for a healthier twist.
- 2 tablespoons sriracha: This brings the heat! Don’t worry—it’s customizable; start with one tablespoon if you prefer a milder flavor.
- 1 tablespoon honey: This adds a touch of sweetness to balance the spice. Maple syrup or agave can work as substitutes if you want a vegan option.
- 1 tablespoon rice vinegar: This gives our sauce a tangy twist. Apple cider vinegar or white wine vinegar are suitable replacements.
- 1 tablespoon soy sauce: For that savory depth. You can use tamari or coconut aminos for a gluten-free alternative.
- 1 teaspoon sesame oil: This adds a nutty aroma. If you’re in a pinch, olive oil will work, though it has a different flavor profile.
- 2 green onions, thinly sliced: For garnish and a fresh zing! Feel free to use chives if that’s what you have on hand.
Step-by-Step Instructions
Now that we have our vibrant ingredients, let’s get cooking! Follow these detailed steps for a delightful Bang Bang Salmon experience:
-
Preheat Your Oven: Set your oven to 425°F (220°C). The high heat will give our salmon that perfect crispy exterior while keeping it moist inside.
-
Prepare the Sauce: In a mixing bowl, combine the mayonnaise, sriracha, honey, rice vinegar, soy sauce, and sesame oil. Stir until the sauce is smooth and well incorporated. You’ll want to taste it at this stage; if you prefer it spicier, add an extra drizzle of sriracha!
-
Prepare the Salmon: Line a baking sheet with parchment paper for easy cleanup. Place the salmon fillets skin-side down on the sheet and season with a sprinkle of salt and pepper. Drizzle a little olive oil on top if you like—it helps the skin crisp up beautifully.
-
Sauce It Up: Generously spread half of the bang bang sauce over the salmon fillets, ensuring they are well-coated. Reserve the other half for serving!
-
Bake the Salmon: Place the baking sheet in the preheated oven and let the salmon bake for about 12-15 minutes. You’ll know it’s done when the salmon flakes easily with a fork. The edges should be golden and slightly crispy.
-
Garnish and Serve: Once the salmon is out of the oven, sprinkle your thinly sliced green onions over the top. This adds a fresh crunch and vibrant color. Drizzle with the reserved bang bang sauce for that extra kick!
-
Plating Heroics: Don’t forget to make the presentation beautiful! Serve the salmon on a bed of fluffy rice, quinoa, or alongside roasted vegetables. A fresh squeeze of lime juice can elevate the flavors even more.
Serving Suggestions
To plate your Bang Bang Salmon beautifully, place a generous spoonful of jasmine rice next to the fillet, allowing the sauce to drizzle down the side. Add a handful of colorful, roasted vegetables, and finish with a sprinkle of additional green onions. Your guests (and you!) will be wowed by the dish’s visual appeal before the first bite!
Recipe Variations
Ready to mix things up? Here are a few creative twists you can incorporate into your Bang Bang Salmon:
- Crispy Tofu: For a vegetarian option, swap out the salmon with firm tofu, patted dry and cut into slices. Coat and bake them in the same way for a delightful plant-based alternative.
- Spicy Honey Garlic: Add minced garlic to your bang bang sauce for a punchy flavor and a touch more sweetness.
- Tropical Twist: Mix in a bit of pineapple juice into your sauce for a tropical vibe that pairs beautifully with salmon!
- Zoodles: Serve the salmon over zoodles (zucchini noodles) to lighten things up and add a fresh crunch to the dish.
Chef’s Notes
As with any recipe, don’t hesitate to make this your own! I’ve played around with the sauce over the years—adding in different spices, swapping out the sweetener, and adjusting the heat level. One time, I even added a hint of lime zest to the sauce, and it brought out a refreshing element that paired perfectly with the salmon. It’s all about experimenting, so have fun with it!
And let’s not forget: if you accidentally burn the edges (it happens to the best of us!), simply scrape off the burnt bits, drizzle on extra sauce, and no one will be the wiser!
FAQs and Troubleshooting
1. My salmon is overcooked and dry! What happened?
- It can happen! Salmon is best when cooked just until it’s flaky. Try reducing the cooking time next time, and use an instant-read thermometer; 125°F (52°C) for medium-rare and 145°F (63°C) for well-done is the sweet spot!
2. Can I make the sauce in advance?
- Absolutely! This sauce can be made up to two days ahead and stored in the fridge. Just give it a quick stir before using it.
3. How can I make this gluten-free?
- It’s really simple! Just swap regular soy sauce with tamari or coconut aminos, which are both gluten-free.
4. What can I serve with Bang Bang Salmon?
- Some great sides include steamed asparagus, quinoa, or a crunchy cabbage salad for a delightful contrast in texture.
Nutritional Info (Optional)
This dish is a powerhouse of nutrients! Salmon is a great source of omega-3 fatty acids, while the sauce is rich in flavor without being overly heavy. Depending on your side choices, a meal of Bang Bang Salmon can fit beautifully into a balanced diet.
So, what are you waiting for? Tie on that apron, pour yourself a refreshing beverage, and get that salmon sizzling! I have no doubt this Bang Bang Salmon will become a favorite at your table. Cheers to good food and great company!
PrintBang Bang Salmon

A vibrant and delicious dish featuring crispy salmon fillets coated in a slightly spicy, creamy sauce.
- Prep Time: 15 minutes
- Cook Time: 15 minutes
- Total Time: 30 minutes
- Yield: 4 servings 1x
- Category: Main Course
- Method: Baking
- Cuisine: American
- Diet: Pescatarian
Ingredients
- 4 salmon fillets (6 oz each)
- 1/4 cup mayonnaise
- 2 tablespoons sriracha
- 1 tablespoon honey
- 1 tablespoon rice vinegar
- 1 tablespoon soy sauce
- 1 teaspoon sesame oil
- 2 green onions, thinly sliced
Instructions
- Preheat your oven to 425°F (220°C).
- Prepare the sauce by combining mayonnaise, sriracha, honey, rice vinegar, soy sauce, and sesame oil in a bowl, stirring until smooth.
- Prepare a baking sheet with parchment paper and place the salmon fillets skin-side down, seasoning with salt and pepper.
- Sauce the salmon by spreading half of the bang bang sauce over the fillets.
- Bake the salmon in the oven for 12-15 minutes until it flakes easily and is slightly crispy at the edges.
- Garnish with green onions and drizzle with the reserved bang bang sauce before serving.
- Plate the salmon with rice, quinoa, or roasted vegetables for a beautiful presentation.
Notes
You can substitute salmon with chicken or tofu for a vegetarian option. Make sure to adjust cooking times accordingly.
Nutrition
- Serving Size: 1 serving
- Calories: 350
- Sugar: 6g
- Sodium: 600mg
- Fat: 20g
- Saturated Fat: 3g
- Unsaturated Fat: 15g
- Trans Fat: 0g
- Carbohydrates: 18g
- Fiber: 1g
- Protein: 30g
- Cholesterol: 80mg
Keywords: Bang Bang Salmon, easy salmon recipes, spicy seafood, dinner recipes
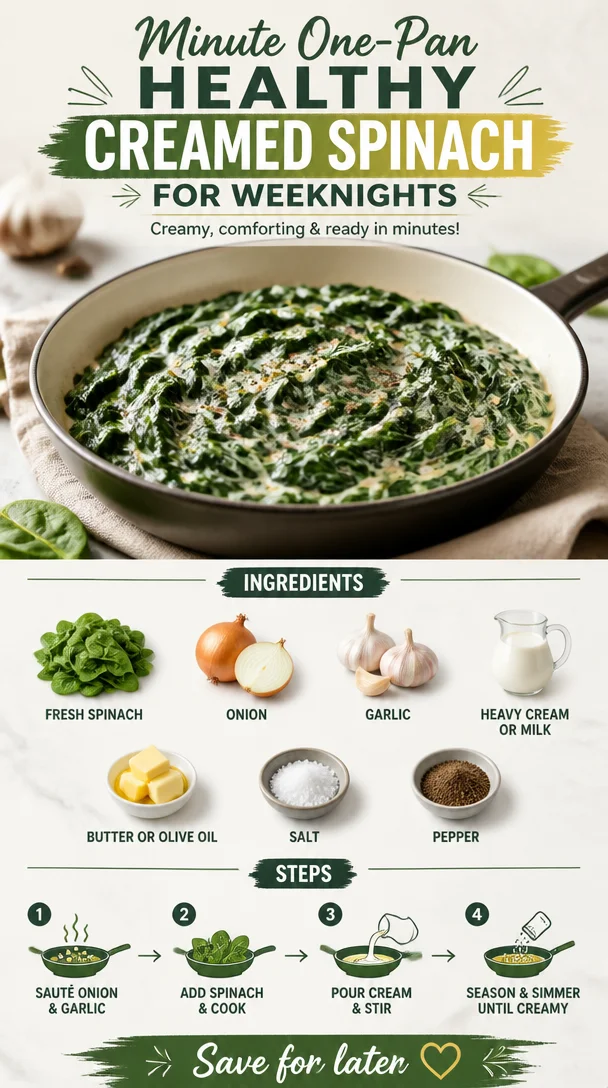
Minute One-Pan Healthy Creamed Spinach for Weeknights
Indulge in Healthy Creamed Spinach: A Comforting Classic with a Twist
Hello fellow foodies! Today, we’re diving into a dish that warms the heart and nourishes the soul — healthy creamed spinach! This dish is a delightful blend of creamy goodness and vibrant greens that will leave your taste buds dancing. Whether you’re looking for a side dish to complement a hearty meal or a way to add more leafy greens to your diet, this recipe is both indulgent and guilt-free.
Now, as someone who firmly believes that cooking should feel elegant yet never intimidating, I want to take you on a journey through my favorite way to prepare creamed spinach. Not only is it easy to whip up, but it also brings a touch of sophistication to your table. So, grab your apron, and let’s get cooking!
A Wholesome Memory: My First Dinner Party
Let me take you back to a chilly evening a few years ago. I was nervously preparing for my very first dinner party, and I wanted everything to be perfect. The table was set, the candles lit, and I decided that creamed spinach would be the star side dish alongside a beautiful roast chicken.
As I stood by the stove, sautéing the onions and garlic, the aroma filled my kitchen and my heart with nostalgia. It reminded me of family gatherings where my grandmother would whip up her creamy version of spinach. She always said that the secret was in the sautéing — it enhances the flavors and brings everyone together.
Well, my dinner party was a smashing success! Everyone raved about the creamed spinach, asking for the recipe, and I felt such a sense of pride in sharing a dish that means so much to me. That night, I realized that food isn’t just about the ingredients; it’s about the love and stories that come along with it.
Ingredients: Crafting Your Creamy Delight
Now, let’s gather our ingredients! For this healthy creamed spinach, you’ll need:
-
Fresh Spinach: The star of our dish! Spinach is packed with nutrients and gives that vibrant green color. If you can’t find fresh spinach, frozen spinach can work too—just make sure to thaw and drain it well.
-
Onion: Sweet and aromatic, onions give a wonderful depth of flavor. Yellow or white onions work best here, but if you prefer a milder taste, shallots are a fabulous substitute.
-
Garlic: Adds that punchy flavor we all love. Fresh garlic is a must, but if you’re in a pinch, you can use garlic powder. Just remember that garlic powder is more concentrated, so use it sparingly!
-
Heavy Cream or Milk: To achieve that luscious creaminess. If you’re looking to make it lighter, opt for whole milk or even a dairy-free milk like almond or oat.
-
Butter or Olive Oil: For sautéing, these fats help to enhance the flavors. Butter will give a rich taste, while olive oil adds a hint of earthiness.
-
Salt and Pepper: Simple seasonings but essential for bringing out the flavors! You can also add a pinch of nutmeg if you want that classic creamed spinach flavor.
Step-by-Step Instructions: Let’s Make Magic!
-
Prep Your Spinach: Rinse your fresh spinach under cold water to remove any dirt. Pat it dry with a clean kitchen towel or spin it in a salad spinner. This helps avoid excess moisture in our dish.
-
Sauté the Aromatics: In a large skillet over medium heat, melt 1 tablespoon of butter or heat a drizzle of olive oil. Add half of a finely chopped onion and sauté until it’s translucent, about 3-4 minutes. The goal here is to soften the onions and develop their sweet flavor.
-
Add Garlic: Toss in 2-3 minced garlic cloves and continue cooking for another 30 seconds to a minute until fragrant. Make sure not to burn the garlic; we want it to be golden, not brown.
-
Incorporate the Spinach: Now, add the fresh spinach in batches, allowing it to wilt down before adding more. This will make it easier to manage in the pan. Stir occasionally until all the spinach is nicely wilted — it should take about 3-5 minutes.
-
Make It Creamy: Once the spinach has wilted, pour in about ½ cup of heavy cream (or your choice of milk). Stir well to combine and let it bubble gently for a couple of minutes until the mixture thickens slightly.
-
Season It Right: Season your creamed spinach with salt and pepper. Keep tasting as you go, adjusting the seasoning to your preference. If you’re feeling adventurous, now is the time to sprinkle in a touch of nutmeg for that classic flavor punch!
-
Finish and Serve: Once everything is creamy and delicious, remove it from the heat. If desired, you can stir in a tablespoon of grated Parmesan cheese for extra richness. Transfer it to a serving dish, and voila! Your healthy creamed spinach is ready to impress!
Serving Suggestions: Elevate Your Presentation
To make your healthy creamed spinach even more visually appealing, consider serving it in a beautiful bowl or dish. A sprig of fresh parsley or a sprinkle of red pepper flakes on top adds the perfect finishing touch. Pair it with your favorite protein, whether it’s grilled chicken, roasted fish, or a hearty vegetarian dish. And remember to encourage your guests to dig in — good food is meant to be shared and savored!
Recipe Variations: Get Creative!
Feeling adventurous? Here are a few delicious twists on this classic dish:
-
Add Nuts: For some crunch, toss in toasted pine nuts or chopped walnuts towards the end of cooking for an added texture contrast.
-
Cheesy Goodness: Swap out some of the cream for a blend of cream cheese and some grated cheddar or gouda for a richer, cheesy flavor.
-
Spicy Kick: Add a pinch of red pepper flakes or a dash of hot sauce for a touch of heat that pairs beautifully with the creamy spinach.
-
Herbed Delight: Stir in some fresh herbs like dill or thyme for an aromatic twist. This brings a refreshing contrast to the richness of the dish.
-
Zesty Citrus: A squeeze of lemon juice or zest added at the end can brighten up the flavors and give it a fresh finish.
Chef’s Notes: Embracing the Journey
I have to admit, my journey with creamed spinach has evolved over the years. There was a time when I used heavy cream and no spinach! But once I realized how flavorful fresh spinach is when cooked properly, I never looked back. I also discovered that the key to a smooth and creamy texture is all in the timing — if you overcook your spinach, it can turn mushy. So treat your greens kindly!
And on a lighter note, there was that one time I accidentally grabbed powdered sugar instead of flour while baking with my niece. Let’s just say our “cream” spinach turned into a sweet spinach disaster! Food adventures are all part of the fun, right?
FAQs and Troubleshooting
Here are a few common questions you might have while making your delicious creamed spinach:
1. Can I make this dish ahead of time?
Absolutely! You can make the creamed spinach ahead and reheat it gently on the stovetop before serving. Just be cautious not to overcook it again!
2. What if I don’t have fresh spinach?
Frozen spinach works perfectly! Just remember to thaw it and drain it thoroughly to avoid excess moisture.
3. How can I make it vegan?
Substitute the heavy cream with coconut milk or unsweetened almond milk, and use olive oil instead of butter. Skip the cheese if you want to keep it completely dairy-free!
4. My spinach is too watery!
Make sure to thoroughly drain any excess moisture from the spinach after cooking it. You can also cook it a bit longer to evaporate any excess liquid.
Nutritional Information (per serving)
While I focus on the joy of cooking and eating, it’s often helpful to know the benefits of the foods we love. Here’s a rough nutritional overview for one serving of healthy creamed spinach:
- Calories: Approximately 150
- Protein: 4g
- Carbohydrates: 6g
- Fiber: 2g
- Fat: 12g
So, there you have it! A beautiful, healthy creamed spinach that’s perfect for any occasion. I can’t wait for you to try this recipe and add your personal touches. Cooking should be about joy, exploration, and a bit of fun — let’s keep that spirit alive in our kitchens! Tie on your apron and get cooking — I’ll be here cheering you on!
PrintHealthy Creamed Spinach
A delightful blend of creamy goodness and vibrant greens, this healthy creamed spinach is both indulgent and guilt-free.
- Prep Time: 15 minutes
- Cook Time: 15 minutes
- Total Time: 30 minutes
- Yield: 4 servings 1x
- Category: Side Dish
- Method: Sautéing
- Cuisine: American
- Diet: Vegetarian
Ingredients
- 1 lb Fresh Spinach
- 1/2 Onion, finely chopped
- 2–3 cloves Garlic, minced
- 1/2 cup Heavy Cream (or milk)
- 1 tablespoon Butter (or Olive Oil)
- Salt, to taste
- Pepper, to taste
- Pinch of Nutmeg (optional)
- Grated Parmesan cheese (optional)
Instructions
- Rinse your fresh spinach under cold water to remove any dirt. Pat it dry with a clean kitchen towel or spin it in a salad spinner.
- In a large skillet over medium heat, melt 1 tablespoon of butter or heat a drizzle of olive oil. Add half of a finely chopped onion and sauté until it’s translucent, about 3-4 minutes.
- Toss in 2-3 minced garlic cloves and continue cooking for another 30 seconds to a minute until fragrant.
- Add the fresh spinach in batches, allowing it to wilt down before adding more.
- Pour in about ½ cup of heavy cream (or your choice of milk), stir well to combine and let it bubble gently for a couple of minutes.
- Season your creamed spinach with salt and pepper and sprinkle in a touch of nutmeg if desired.
- Remove it from the heat. Stir in a tablespoon of grated Parmesan cheese if desired. Transfer it to a serving dish.
Notes
Serve in a beautiful dish with a sprig of parsley for garnish. Try adding nuts or cheese for variations.
Nutrition
- Serving Size: 1 serving
- Calories: 150
- Sugar: 1g
- Sodium: 300mg
- Fat: 12g
- Saturated Fat: 7g
- Unsaturated Fat: 5g
- Trans Fat: 0g
- Carbohydrates: 6g
- Fiber: 2g
- Protein: 4g
- Cholesterol: 30mg
Keywords: creamed spinach, healthy side dish, vegetarian recipe
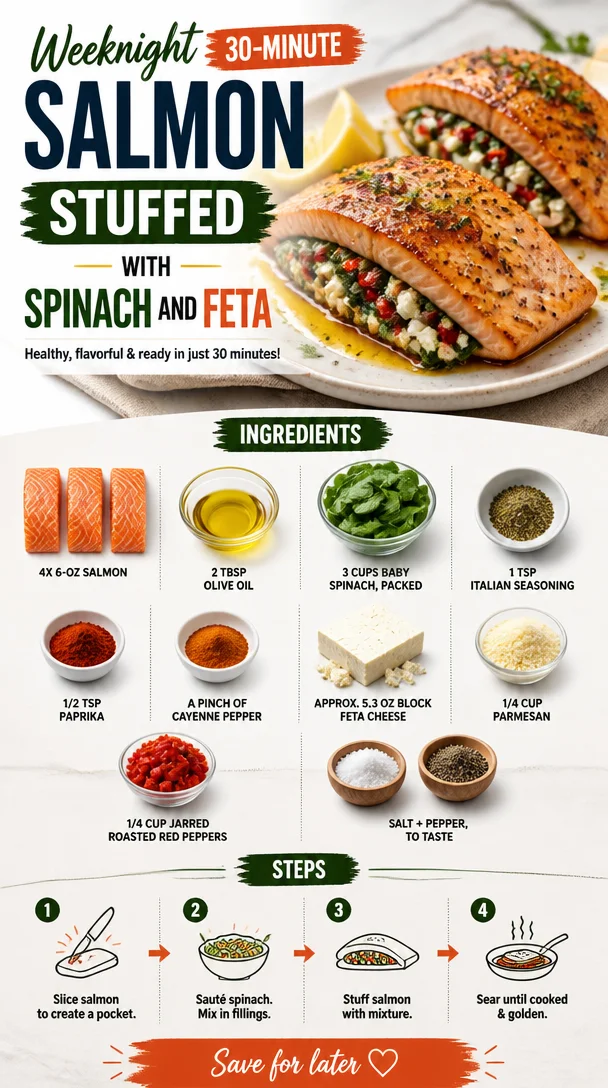
Weeknight 30-Minute Salmon Stuffed with Spinach and Feta
Stuffed Salmon With Spinach & Feta: A Delightful 30-Minute Meal
Hello, culinary adventurers! Today, I’m thrilled to share a recipe that’s become a favorite in my kitchen: Stuffed Salmon with Spinach and Feta. This dish is not only visually stunning but also packed with flavor and nutrients. It’s the perfect meal for those busy weeknights when you want something special without spending hours in the kitchen. So, grab your apron, and let’s dive into cooking magic that will impress your family or friends.
Personal Story
Growing up, my family had a tradition of Friday night dinners, where everyone was encouraged to share their favorite dishes. Salmon was a regular on our table, but it wasn’t until my mom discovered the combination of spinach and feta that things really started to get exciting. I still remember the savory aroma filling the house as she prepped the filling while we set the table, lighting candles and putting out our favorite plates. What I loved most was the way the colors would pop against the pink of the salmon — a truly beautiful sight! This recipe captures that nostalgic flavor, evoking those cherished memories while adding my personal touch. It’s a wonderful meal to make any day feel like a special occasion.
Ingredients
Here’s what you’ll need for this delightful dish:
-
4 x 6-ounce pieces of salmon
(approx. 170 grams each; I find longer pieces of salmon work best)
Tip: Fresh salmon is always best, but you can use frozen if you’re in a pinch. Just be sure to thaw it completely before cooking! -
2 Tbsp olive oil
(divided)
Chef’s insight: Extra virgin olive oil gives a lovely flavor, but feel free to use any oil you prefer; avocado oil works great too. -
3 cups baby spinach, packed
Spinach wilts down significantly, so packing it in gives you the right amount for stuffing.
Substitution: Kale can be used instead if you prefer a heartier green. -
1 tsp Italian seasoning
A blend of dried herbs that enhances the dish’s flavor; you can even make your own mix!
Want a little kick? Add some crushed red pepper flakes for a spicy twist! -
1/2 tsp paprika
(regular or smoked)
Chef hack: Smoked paprika adds a wonderful depth, giving the salmon even more complexity. -
A pinch of cayenne pepper
Balance is key; this adds a bit of heat without overwhelming the dish. -
Approx. 5.3-ounce block of feta cheese
(approx. 150 grams)
Feta’s sharpness complements the rich salmon beautifully. For a twist, try goat cheese for a creamier texture. -
1/4 cup parmesan, freshly grated
(I recommend parmigiano-reggiano)
Freshly grated cheese melts better and offers a richer flavor than pre-grated. -
1/4 cup jarred roasted red peppers
(chopped into small, 1/4-inch pieces)
These add a lovely sweetness and color to the stuffing! Feel free to use fresh roasted peppers if you have them on hand. -
Salt + pepper, to taste
Always season to your liking; the flavors build as you cook!
Step-by-Step Instructions
Step 1: Preheat and Prepare
First things first, let’s preheat your oven to 375°F (190°C). While that’s warming up, grab a baking dish and lightly coat it with a drizzle of olive oil to prevent sticking and to enhance flavor.
Step 2: Sauté the Spinach
In a medium skillet, heat 1 tablespoon of olive oil over medium heat. Toss in the packed spinach and sauté for about 2-3 minutes, just until it wilts down — it’ll shrink significantly, so don’t be alarmed! This is where the magic begins, and those vibrant greens turn into a delightful filling.
Tip: If you want to get fancy, add minced garlic to the oil before adding the spinach. It enhances the flavor beautifully!
Step 3: Mix the Filling
Once the spinach is wilted, remove it from heat and let it cool for a minute. In a mixing bowl, combine the sautéed spinach, crumbled feta, grated parmesan, Italian seasoning, paprika, cayenne pepper, and chopped roasted red peppers. Mix thoroughly and season with salt and pepper to taste. The colors in this filling are so gorgeous, and the aroma? Divine!
Step 4: Prepare the Salmon
Now, let’s get to that beautiful salmon! Place your salmon fillets skin-side down on a clean cutting board. Carefully use a sharp knife to create a pocket in each fillet — you want to slice it horizontally almost all the way through, leaving the other side intact.
Chef Tip: If you find it tricky to cut the pocket, you can use a food processor to blend the filling ingredients before stuffing!
Step 5: Stuff and Sear
Generously stuff each salmon fillet with the delightful spinach and feta mixture. Press gently to ensure it’s packed in there! Now, drizzle a little olive oil over the top of each stuffed fillet and season with salt and pepper.
In that same skillet you used for the spinach, heat the remaining tablespoon of olive oil over medium-high heat. Carefully place the stuffed salmon in the skillet, skin-side down, and sear for about 2-3 minutes until the skin is crispy and golden. This step enhances both texture and flavor.
Step 6: Bake to Perfection
Transfer the seared salmon to your preheated baking dish — skin-side down — and pop it into the oven. Bake for about 12-15 minutes, depending on the thickness of the fillets. You want the salmon to be tender and just cooked through, with an internal temperature of 145°F (63°C). The cheese filling will melt and bubble, creating a heavenly experience!
Serving Suggestions
When your Stuffed Salmon is ready, it’s time to plate! Transfer the salmon to a platter, and serve it with a fresh squeeze of lemon juice on top for brightness. Add a side of quinoa or roasted vegetables to round out the meal — those colors will make your plate pop!
Recipe Variations
Looking to spice things up? Here are some tasty variations and ideas to personalize your stuffed salmon dish:
-
Mediterranean Twist: Substitute the roasted red peppers with sun-dried tomatoes and add olives to the filling for a Mediterranean flair.
-
Creamy Goodness: Mix in a spoonful of cream cheese with the filling for a richer flavor and creamier texture.
-
Herbal Infusion: Swap the spinach for arugula for a peppery bite, or add chopped fresh dill for a refreshing flavor boost.
-
Nutty Delight: Toss in some toasted pine nuts or walnuts for added crunch and depth.
-
Dairy-Free Option: Use a vegan feta cheese and a dairy-free cheese blend for a delicious dairy-free meal!
Chef’s Notes
When I first started making this dish, I experimented a lot with the stuffing. One time, I incorporated some sun-dried tomatoes, and it was a game-changer! The key to making it your own is to taste the filling as you go — it should sing with flavor!
Don’t be afraid to experiment with seasonings. One of my favorite memories was inviting friends over to taste-test a batch of these stuffed salmon fillets and watching their eyes widen in delight with every bite. That joy is why I cook!
FAQs and Troubleshooting
1. What if my salmon is overcooked?
If it turns out a bit dry, don’t despair! Pair it with a flavorful sauce, like a lemon dill sauce, to add moisture.
2. Can I make the stuffing ahead of time?
Absolutely! You can prepare the filling a day ahead and store it in the fridge. Just stuff the salmon right before cooking.
3. What should I serve with stuffed salmon?
Roasted vegetables, a fresh salad, or whole grains like quinoa or rice make excellent accompaniments.
4. Can I freeze the stuffed salmon?
Yes, you can! Just assemble the salmon without baking it, wrap it tightly, and freeze. When you’re ready to enjoy, bake it straight from the freezer — just add a few minutes to the cooking time.
Nutritional Info (Optional)
- Calories: Approximately 380 per serving
- Fat: 24g
- Protein: 36g
- Carbohydrates: 5g
With every bite of this Stuffed Salmon with Spinach and Feta, you’re not just enjoying a delicious meal; you’re creating memories around the table. I hope this recipe inspires you to gather your loved ones and fill your kitchen with laughter and warmth. Remember, good food isn’t just about ingredients; it’s about the moments we share. So, tie on that apron and let’s get cooking!
PrintStuffed Salmon With Spinach & Feta
A visually stunning and flavor-packed meal perfect for busy weeknights.
- Prep Time: 15 minutes
- Cook Time: 30 minutes
- Total Time: 45 minutes
- Yield: 4 servings 1x
- Category: Main Course
- Method: Baking
- Cuisine: Mediterranean
- Diet: Pescatarian
Ingredients
- 4 x 6-ounce pieces of salmon
- 2 Tbsp olive oil
- 3 cups baby spinach, packed
- 1 tsp Italian seasoning
- 1/2 tsp paprika
- A pinch of cayenne pepper
- Approx. 5.3-ounce block of feta cheese
- 1/4 cup parmesan, freshly grated
- 1/4 cup jarred roasted red peppers, chopped
- Salt + pepper, to taste
Instructions
- Preheat your oven to 375°F (190°C) and lightly coat a baking dish with olive oil.
- Sauté the spinach in a medium skillet with 1 tablespoon of olive oil for 2-3 minutes until wilted.
- Mix the sautéed spinach, crumbled feta, grated parmesan, Italian seasoning, paprika, cayenne pepper, and chopped roasted red peppers in a bowl. Season with salt and pepper.
- Prepare the salmon fillets by creating a pocket in each fillet.
- Stuff each salmon fillet with the spinach and feta mixture, then drizzle with olive oil and season.
- Sear the stuffed salmon skin-side down in the skillet for 2-3 minutes until crispy.
- Bake the salmon in the preheated oven for 12-15 minutes until cooked through.
Notes
Serve with a fresh squeeze of lemon juice and sides like quinoa or roasted vegetables.
Nutrition
- Serving Size: 1 serving
- Calories: 380
- Sugar: 3g
- Sodium: 500mg
- Fat: 24g
- Saturated Fat: 10g
- Unsaturated Fat: 10g
- Trans Fat: 0g
- Carbohydrates: 5g
- Fiber: 1g
- Protein: 36g
- Cholesterol: 70mg
Keywords: Stuffed Salmon, Spinach and Feta, Mediterranean, Easy Dinner, Healthy Recipe