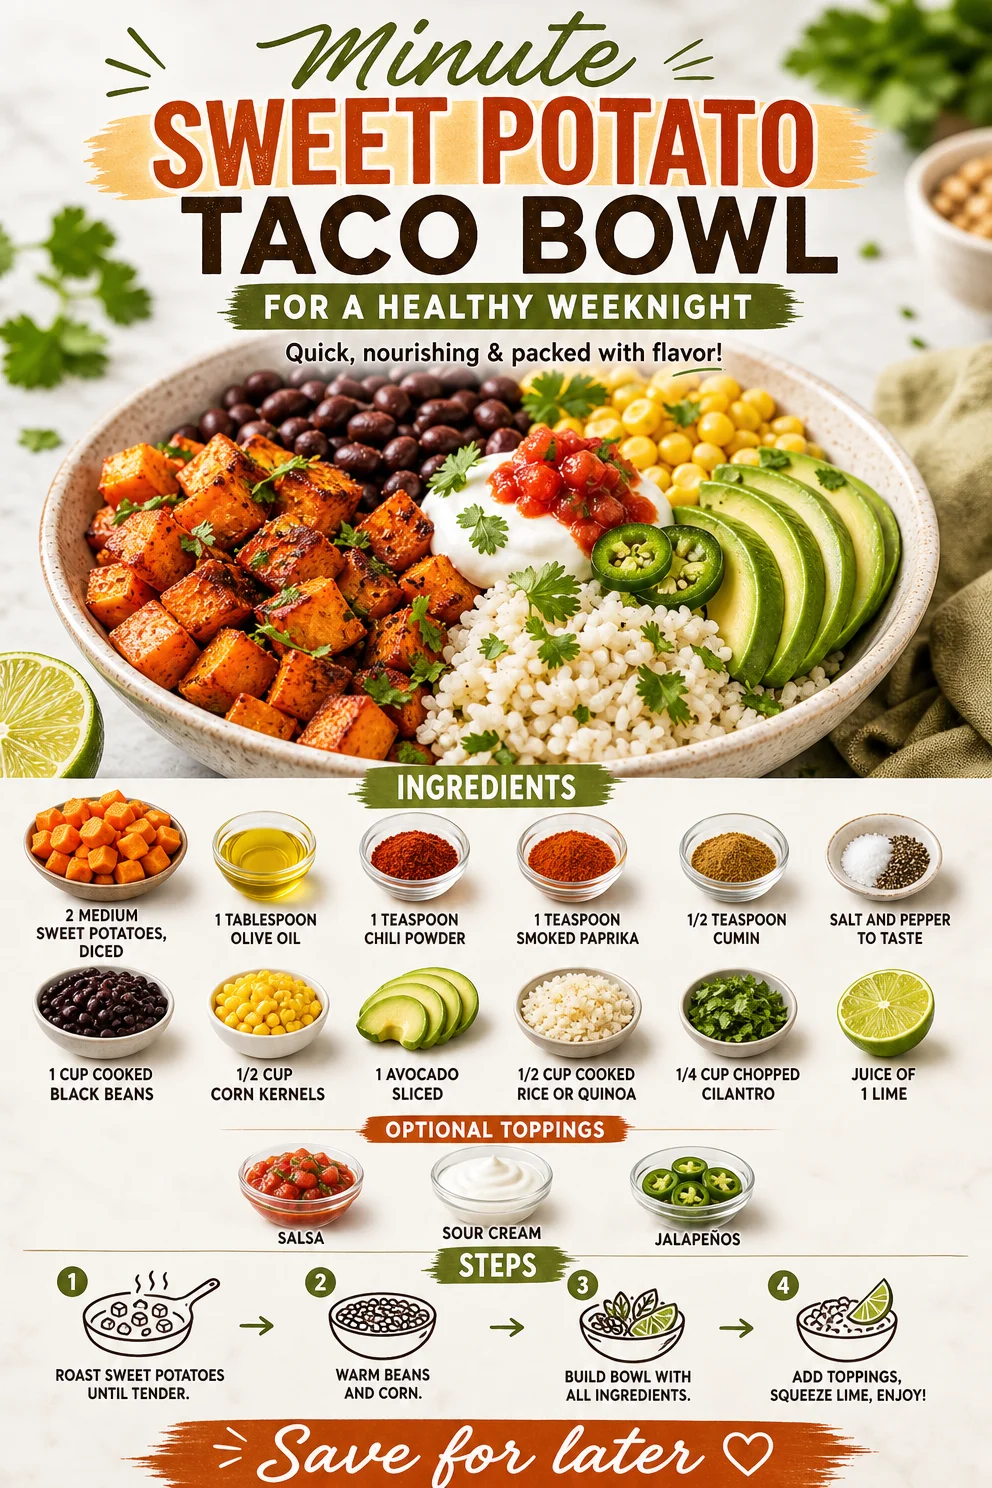
Minute Sweet Potato Taco Bowl for a Healthy Weeknight
A Flavorful Journey: Sweet Potato Taco Bowl Recipe
Hello, fellow food lovers! Today, I’m excited to share a scrumptious and vibrant Sweet Potato Taco Bowl recipe that’s perfect for healthy dinners or casual gatherings. Not only is this dish packed with flavor, but it’s also nourishing and simple to whip up, making it a great choice for a weeknight meal.
So pull up a chair, tie on that apron, and let’s dive into the delightful world of sweet potatoes, spices, and fresh toppings that will leave your taste buds cheering!
A Taste of Home: My Sweet Potato Memories
Let me take you back to a crisp autumn evening a few years ago. The smell of spices danced through my kitchen as I played with what would become my first sweet potato-based recipe. A close friend of mine was coming over for dinner, and I wanted to impress her with something creative but comforting.
I still remember peeling those sweet potatoes — their rich orange hue reminded me of golden leaves falling outside. I seasoned them with a blend of spices I had cobbled together, echoing the warmth of my childhood flavors and my family’s love for vibrant, wholesome meals. As I mixed everything together, I felt transported back to family gatherings where the kitchen acted as the heart of our home. We laughed, caught up, and formed those precious moments while sharing a good meal.
Fast forward a few years, and this Sweet Potato Taco Bowl has become a staple in my entertaining arsenal. Every time I prepare it, I feel that same warmth, and I hope it brings you the same joy that it has brought to me and my loved ones.
Ingredients
Here’s what you’ll need to create this delightful dish:
-
2 medium sweet potatoes (diced)
Sweet potatoes are packed with vitamins A and C, fiber, and antioxidants. Need a substitution? You can swap them with butternut squash or regular potatoes for a different texture or flavor. -
1 tablespoon olive oil
A heart-healthy fat that helps enhance flavors and aids in absorption of fat-soluble vitamins. Avocado oil or melted coconut oil also work wonderfully. -
1 teaspoon chili powder
This gives our bowl a lovely kick! If you prefer less heat, use smoked paprika or omit it altogether. -
1 teaspoon smoked paprika
It adds depth and a cozy smokiness that pairs perfectly with the sweet potatoes. If unavailable, regular paprika will still create a delightful outcome. -
1/2 teaspoon cumin
An earthy spice that brings warmth to the dish. If cumin’s not your thing, try coriander for a brighter flavor. -
Salt and pepper to taste
Fundamental seasonings that can be adjusted based on your preference. Feel free to sprinkle in some garlic powder for an additional flavor punch. -
1 cup cooked black beans
A fantastic source of protein and fiber, black beans lend creaminess to the bowl. If you’re not a black bean fan, try pinto beans or chickpeas. -
1/2 cup corn kernels
Sweet and crunchy, corn adds a burst of color and taste. Frozen or fresh corn works well, and you can omit it if you’d like. -
1 avocado (sliced)
Creamy avocado brings richness to the dish, making it even more satisfying. Don’t have one? A dollop of sour cream or Greek yogurt is a great alternative. -
1/2 cup cooked rice or quinoa
A lovely base to soak up all those delectable flavors. Use any grain you like or opt for a cauliflower rice for a lower-carb option. -
1/4 cup chopped cilantro
Adds a fresh, herbaceous note that brightens the entire meal. If cilantro isn’t your favorite, fresh parsley or scallions can be used instead. -
Juice of 1 lime
A spritz of acidity brightens even the heartiest of dishes. If you don’t have limes, lemon juice can be a fine substitute. -
Optional toppings: salsa, sour cream, jalapeños
These add extra dimensions to your delicious bowl! Go as wild as you want with toppings — top with your favorites.
Step-by-Step Instructions
Ready to cook? Let’s jump into the kitchen and make magic happen!
-
Preheat your oven: Begin by preheating your oven to 400°F (200°C). This will ensure that your sweet potatoes roast to perfection, yielding that golden exterior and soft interior.
-
Prep the sweet potatoes: Rinse and peel the sweet potatoes, then dice them into approximately 1-inch cubes. This size allows them to cook evenly. Channel your inner chef and have fun with your knife skills; it’s all part of the experience!
-
Season the sweet potatoes: In a mixing bowl, toss the diced sweet potatoes with olive oil, chili powder, smoked paprika, cumin, salt, and pepper. Make sure every piece is coated evenly — this is key to ensuring they develop great flavor in the oven.
-
Roast away: Spread the seasoned sweet potatoes on a baking sheet lined with parchment paper (for easy clean-up) in a single layer. Roast them in the oven for about 25–30 minutes, flipping them halfway through to achieve even browning. Keep an eye on them — you want a beautiful caramelization.
-
Heat the black beans: While the sweet potatoes are roasting, take a small saucepan and add your cooked black beans. Heat them over low-medium heat until warm, stirring occasionally. Sprinkle in a touch of cumin and a squeeze of lime juice if you’re feeling adventurous!
-
Prepare the rice/quinoa: Cook your rice or quinoa according to package instructions. Using a rice cooker makes this easy-peasy, but you can also do it on the stove. Both options work just fine!
-
Build your bowl: Once the sweet potatoes are done, it’s time to assemble! Start with a base of rice or quinoa, followed by a generous portion of black beans and roasted sweet potatoes. Top it all off with sliced avocado, corn, and bright cilantro — the freshness here is divine!
-
Finish with flair: Don’t forget about that lime juice! A sprinkle of fresh lime juice just before serving ties everything together beautifully. If you’re using optional toppings, now’s the time to get creative and add your favorite salsas, jalapeños, or sour cream!
Serving Suggestions
To present this dish, consider using a large shallow bowl to create an inviting look. Start with a scoop of your rice or quinoa at the bottom, then artfully arrange the roasted sweet potatoes, black beans, corn, and avocado on top. A sprinkle of fresh cilantro adds that pop of color. Feel free to drizzle any remaining lime juice and a touch of salsa right on top as a finishing touch. Voilà! Your Sweet Potato Taco Bowl is ready to impress.
Recipe Variations
-
Spicy Southwest Bowl: Add diced jalapeños to the mix for added heat, and top with spicy salsa for a kick.
-
Taco-inspired: Mix in taco seasoning with the sweet potatoes and serve with a dollop of sour cream or Greek yogurt for a creamy contrast.
-
Mediterranean Twist: Substitute sweet potatoes for roasted eggplant or zucchini and add feta cheese for a tangy flavor.
-
Vegan Delight: For a completely plant-based option, skip the sour cream and use cashew cream instead — it’s heavenly!
-
Cheesy Goodness: Top with a sprinkle of shredded cheese before serving, letting it melt into the warmth of the sweet potatoes and beans.
Chef’s Notes
I’ve had my fair share of kitchen “oops” moments with this recipe, specifically when I got a little excited with the chili powder — whoops! Take it from me; moderation is key unless you’re aiming for a fiery feast. Over time, this recipe has evolved from a simple weeknight dinner to a versatile dish I can dress up for gatherings or scale down for quiet nights at home. It’s one of those meals that everyone loves, and I never tire of tweaking it to suit different guest preferences.
FAQs and Troubleshooting
-
What if my sweet potatoes aren’t cooking evenly?
Make sure you spread them out on the baking sheet in a single layer to allow proper airflow. If they’re overcrowded, they’ll steam rather than roast. -
Can I make this bowl ahead of time?
Absolutely! Prepare the sweet potatoes and black beans ahead of time and reheat them just before serving. The flavors will meld beautifully! -
How do I store leftovers?
Store any leftovers in airtight containers in the refrigerator for up to three days. Reheat in the microwave, and feel free to freshen it up with a squeeze of lime. -
What can I use instead of rice/quinoa?
Look into cauliflower rice for a low-carb option or even farro or bulgur for a unique grainy alternative.
Nutritional Info
While I won’t delve into numbers here, let’s just say this dish is a nutritional powerhouse! Sweet potatoes deliver ample vitamins A and C, fiber content is boosted with black beans, and avocado contributes healthy fats. Did I mention it’s beautiful food that makes you feel great too? Win-win!
As we embark on our culinary adventures together, remember this: good food isn’t just about what’s on the table. It’s about the moments you create while enjoying it. I can’t wait to see you in your kitchen with this Sweet Potato Taco Bowl! So gather your ingredients, ready your apron, and let the cooking begin!
PrintSweet Potato Taco Bowl
A vibrant and flavorful sweet potato taco bowl, packed with nutrients and perfect for healthy dinners or casual gatherings.
- Prep Time: 15 minutes
- Cook Time: 30 minutes
- Total Time: 45 minutes
- Yield: 4 servings 1x
- Category: Main Course
- Method: Baking
- Cuisine: Mexican
- Diet: Vegetarian
Ingredients
- 2 medium sweet potatoes (diced)
- 1 tablespoon olive oil
- 1 teaspoon chili powder
- 1 teaspoon smoked paprika
- 1/2 teaspoon cumin
- Salt and pepper to taste
- 1 cup cooked black beans
- 1/2 cup corn kernels
- 1 avocado (sliced)
- 1/2 cup cooked rice or quinoa
- 1/4 cup chopped cilantro
- Juice of 1 lime
- Optional toppings: salsa, sour cream, jalapeños
Instructions
- Preheat your oven: Begin by preheating your oven to 400°F (200°C).
- Prep the sweet potatoes: Rinse and peel the sweet potatoes, then dice them into approximately 1-inch cubes.
- Season the sweet potatoes: In a mixing bowl, toss the diced sweet potatoes with olive oil, chili powder, smoked paprika, cumin, salt, and pepper.
- Roast away: Spread the seasoned sweet potatoes on a baking sheet lined with parchment paper in a single layer. Roast them for about 25–30 minutes, flipping halfway through.
- Heat the black beans: In a small saucepan, heat your cooked black beans over low-medium heat until warm.
- Prepare the rice/quinoa: Cook your rice or quinoa according to package instructions.
- Build your bowl: Start with a base of rice or quinoa, then add black beans and roasted sweet potatoes, topped with sliced avocado, corn, and cilantro.
- Finish with flair: Sprinkle fresh lime juice over the bowl and add your choice of optional toppings.
Notes
This bowl can be customized with various toppings and is easy to prepare ahead of time. Perfect for meal prep!
Nutrition
- Serving Size: 1 serving
- Calories: 350
- Sugar: 5g
- Sodium: 400mg
- Fat: 12g
- Saturated Fat: 4g
- Unsaturated Fat: 6g
- Trans Fat: 0g
- Carbohydrates: 45g
- Fiber: 10g
- Protein: 15g
- Cholesterol: 0mg
Keywords: sweet potato, taco bowl, healthy dinner, vegetarian recipe
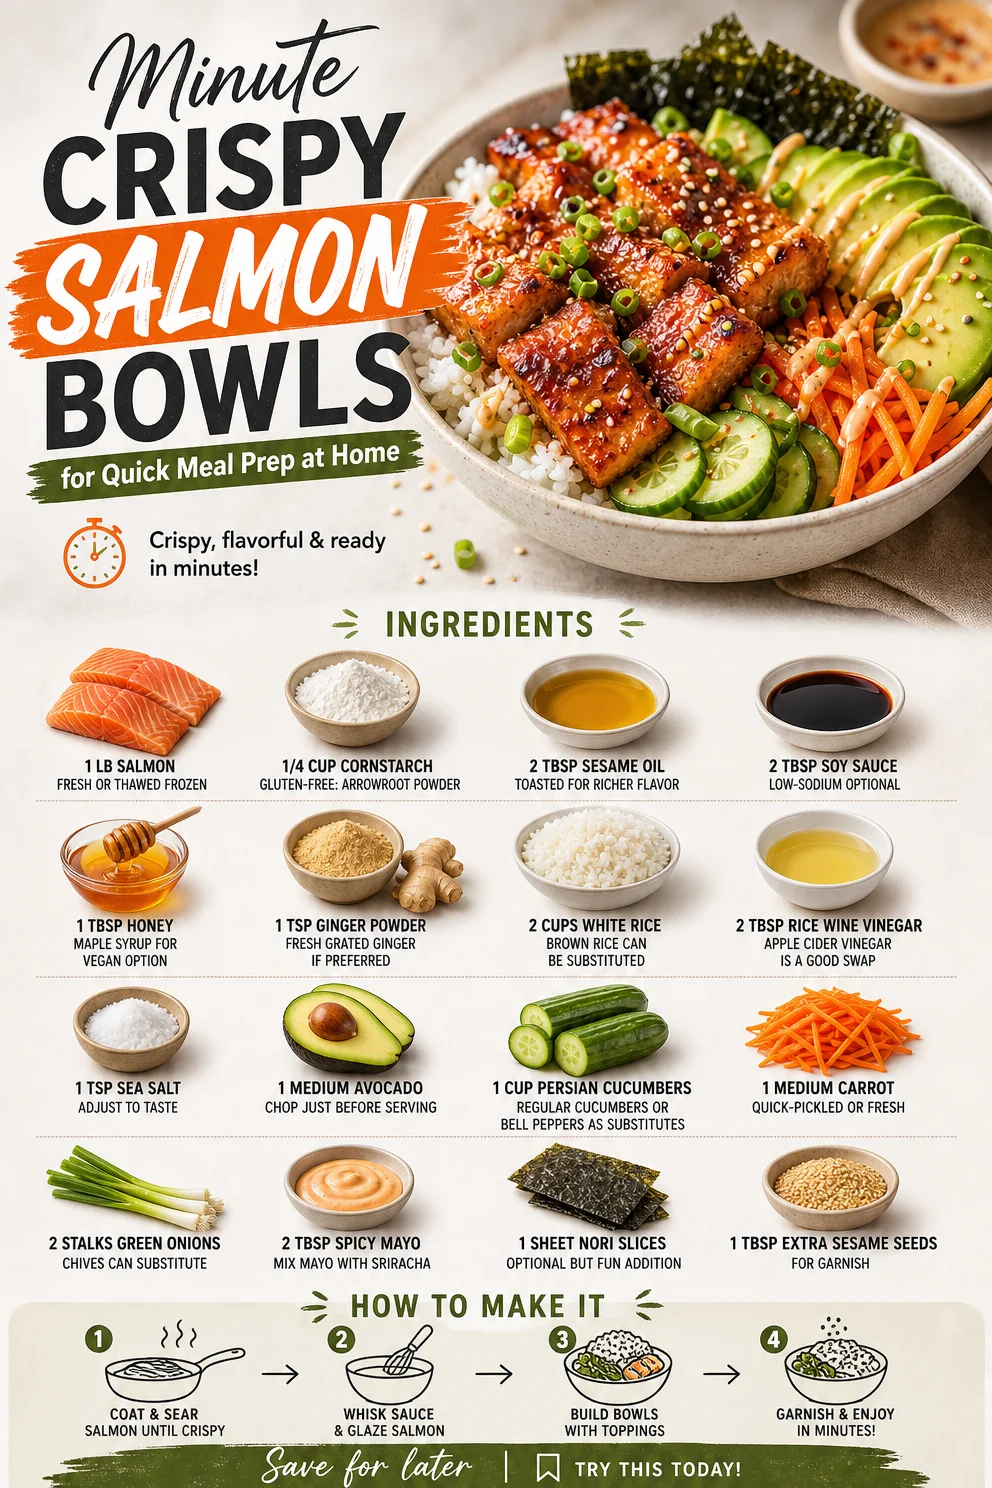
Minute Crispy Salmon Bowls for Quick Meal Prep at Home
Crispy Salmon Bowls: A Flavorful Customizable Delight
Hello, friends! Today, I’m thrilled to share a dish that’s not only bursting with flavor but also offers the ultimate versatility — Crispy Salmon Bowls! Whether you’re hosting friends for a cozy dinner or just treating yourself to a delightful meal at home, these bowls are sure to impress. They’re colorful, nutritious, and just downright delicious. So, grab your apron, and let’s dive in!
The Art of the Bowl: A Personal Story
I remember the first time I experienced a rice bowl. It was during a trip to a vibrant food market in Japan, surrounded by bustling vendors and the tantalizing aroma of grilled fish. I was a bit intimidated at first, but then I was enchanted by the colors and flavors swirling in each bowl. The crispy salmon, perfectly seasoned, perched upon a bed of fluffy rice, garnished with fresh vegetables — it felt like art you could eat! I couldn’t wait to recreate that delicious experience back home.
Fast forward to a cozy evening in my kitchen. I was experimenting with salmon when the idea of a customizable bowl struck me. I wanted to create something that reminded me of that special market experience but that I could also easily share with loved ones around my own table. That night, I crafted my first crispy salmon bowl, balancing flavors and textures to achieve that delightful crunch and freshness. Since then, it’s become a staple in my home, and I can’t wait for you to make it your own!
Ingredients
Here’s what you’ll need to stir up some magic in your kitchen:
-
1 lb Salmon: Fresh is always the way to go, but if frozen is all you have, just make sure to thaw it thoroughly for even cooking. Salmon is rich in omega-3 fatty acids, making it a healthy protein option.
-
1/4 cup Cornstarch: This is your secret ingredient for that crispy exterior! If you’re looking for a gluten-free alternative, arrowroot powder works wonderfully, too.
-
2 tbsp Sesame Oil: Use toasted sesame oil for a deeper flavor; it’s nutty and aromatic! If you’re in a pinch, olive oil is a decent substitute, though you’ll miss that signature toastiness.
-
2 tbsp Soy Sauce: Opt for low-sodium soy sauce to keep it light, or swap it out for tamari to cater to gluten-free diets.
-
1 tbsp Honey: A natural sweetener to balance the savory elements. For a vegan twist, maple syrup does the trick!
-
1 tsp Ginger Powder: Ground ginger is easy, but if you have fresh ginger, go ahead and grate some for a bolder kick.
-
2 cups White Rice: Fluffy white rice is a classic base. Brown rice is nutritious, just adjust the cooking time as needed.
-
2 tbsp Rice Wine Vinegar: This gives a lovely tang. If you’re out, apple cider vinegar will work in a pinch.
-
1 tsp Sea Salt: Please adjust to your preference; we all have different saltiness levels!
-
1 medium Avocado: Chop just before serving to keep it fresh and vibrant.
-
1 cup Persian Cucumbers: They’re crisp and sweet, but regular cucumbers will do. Bell peppers can add a punch of color and crunch, too!
-
1 medium Carrot: You can use it fresh or get creative with quick-pickling for an extra zing.
-
2 stalks Green Onions: These are versatile and add a great flavor punch. Chives are a lovely substitute if you have them on hand.
-
2 tbsp Spicy Mayo: Super simple to make — just mix mayo with sriracha to achieve that perfect kick!
-
1 sheet Nori slices: This is optional, but adding nori gives a beautiful ocean flavor. Plus, it’s fun!
-
1 tbsp Extra Sesame Seeds: For garnish, these add a nice finishing touch and a little crunch!
Step-by-Step Instructions
Let’s get cooking! Here’s how to whip up your crispy salmon bowls:
-
Prepare the Salmon: Start by patting the salmon dry with paper towels to remove excess moisture. This is key for that crispy texture. Then, cut the salmon into bite-sized pieces.
-
Coat with Cornstarch: In a large bowl, mix the cornstarch with a pinch of salt. Toss the salmon pieces in the cornstarch mixture until well-coated. This gives the salmon its crunchy coating — trust me, you’ll want that!
-
Heat the Oil: In a large non-stick skillet, heat the sesame oil over medium-high heat. You want it hot enough to create a sizzle when you add the salmon. If you’re unsure, toss in a small piece; if it sizzles, the oil is ready!
-
Sear the Salmon: Place the salmon in the skillet in a single layer, making sure not to overcrowd it (work in batches if you need). Cook for about 3-4 minutes on each side until beautifully golden brown and crispy. Don’t poke them too much; let them get that nice crust!
-
Add Flavors: Once the salmon is nearly cooked through, drizzle the soy sauce and honey mixture over the salmon in the pan. If you’re using ginger, sprinkle it at this stage. Cook for an additional minute, allowing the sauce to caramelize slightly.
-
Cook the Rice: Meanwhile, cook your rice per the package instructions. Fluff it once done and stir in the rice wine vinegar for a tasty tang.
-
Prep Your Ingredients: While everything’s cooking, chop your cucumbers and carrots. If you’re pickling your carrots, slice them thin and toss them in a mixture of vinegar, sugar, and salt to soften them up!
-
Assemble the Bowls: To serve, start with a generous scoop of rice as your base. Top it with your crispy salmon pieces. Add the chopped cucumbers, carrots, and avocado.
-
Dress It Up: Drizzle the spicy mayo over the top and garnish with freshly sliced green onions and a sprinkle of sesame seeds. If you’re feeling adventurous, add your nori strips for that oceanic flair!
Serving Suggestions
When you present your crispy salmon bowls, keep it colorful — the more vibrant the dish, the more inviting it is! Use a large, shallow bowl for a beautiful display. Remember, your food should look as delightful as it tastes!
Recipe Variations
Get creative with your bowls! Here are a few variations:
-
Grain Swap: Try quinoa or farro instead of rice for a nutty flavor and extra texture.
-
Vegan Delight: Replace the salmon with pan-seared tofu or tempeh for a plant-based version that’s equally delicious.
-
Sriracha Bliss: Add a swirl of sriracha for those who love a little heat in their life.
-
Tropical Twist: Use mango chunks instead of avocado for a fresh, fruity flavor boost!
Chef’s Notes
I can still remember the day I accidentally added too much cornstarch to my salmon — let’s just say I ended up with salmon crisps! While it was not what I intended, they were oddly delightful. My family loved the unexpected crunch, and from that day on, we’ve embraced happy accidents in the kitchen. This recipe has evolved to include all my favorite textures and flavors — each bite a tiny reminder of those beautiful bowls in Japan.
FAQs and Troubleshooting
-
What if my salmon isn’t crispy enough?
- Ensure that your skillet is hot enough when you add the salmon. A dry surface is key to creating that crispy exterior. If needed, you can put it under the broiler for a minute to help.
-
Can I make this in advance?
- You can prepare the rice and chop the veggies ahead of time. However, I suggest waiting to cook the salmon until just before serving to keep that crispy texture intact!
-
What if I don’t have sesame oil?
- No worries! Olive oil will work, or you could use avocado oil—both will provide a nice flavor without compromising the dish.
-
How do I store leftovers?
- Store the salmon and the rice in an airtight container in the refrigerator for up to 2 days. Reheat gently to avoid losing that lovely crunch!
Nutritional Info
This vibrant dish is not just tasty; it’s packed with nutrients! A standard serving of the crispy salmon bowl provides approximately 550 calories, with protein from the salmon, healthy fats from the avocado, and plenty of vitamins from the fresh veggies.
Thanks for joining me on this culinary adventure! I can’t wait for you to try out these crispy salmon bowls and maybe share your own story around the table. Remember, cooking is all about joy and connection. Happy cooking, and don’t forget to tie on that apron!
PrintCrispy Salmon Bowls
Delightful and customizable crispy salmon bowls, bursting with flavor and nutrition.
- Prep Time: 15 minutes
- Cook Time: 30 minutes
- Total Time: 45 minutes
- Yield: 4 servings 1x
- Category: Main Course
- Method: Searing
- Cuisine: Japanese
- Diet: Gluten-Free
Ingredients
- 1 lb Salmon
- 1/4 cup Cornstarch
- 2 tbsp Sesame Oil
- 2 tbsp Soy Sauce
- 1 tbsp Honey
- 1 tsp Ginger Powder
- 2 cups White Rice
- 2 tbsp Rice Wine Vinegar
- 1 tsp Sea Salt
- 1 medium Avocado
- 1 cup Persian Cucumbers
- 1 medium Carrot
- 2 stalks Green Onions
- 2 tbsp Spicy Mayo
- 1 sheet Nori slices
- 1 tbsp Extra Sesame Seeds
Instructions
- Prepare the salmon: Start by patting the salmon dry with paper towels to remove excess moisture. Cut into bite-sized pieces.
- Coat with cornstarch: In a bowl, mix cornstarch with a pinch of salt. Toss salmon pieces until well-coated.
- Heat the oil: In a skillet, heat sesame oil over medium-high heat until hot.
- Sear the salmon: Place salmon in a single layer in the skillet and cook for about 3-4 minutes on each side until golden brown.
- Add flavors: Drizzle soy sauce and honey over the salmon, and cook for an additional minute.
- Cook the rice: Prepare rice per package instructions and stir in rice wine vinegar.
- Prep your ingredients: Chop cucumbers and carrots; pickle carrots if desired.
- Assemble the bowls: Start with rice, top with salmon, cucumbers, carrots, and avocado.
- Dress it up: Drizzle spicy mayo and garnish with green onions and sesame seeds.
Notes
Feel free to customize your bowls with different grains, proteins, or veggies. Enjoy!
Nutrition
- Serving Size: 1 serving
- Calories: 550
- Sugar: 6g
- Sodium: 600mg
- Fat: 20g
- Saturated Fat: 3g
- Unsaturated Fat: 15g
- Trans Fat: 0g
- Carbohydrates: 60g
- Fiber: 4g
- Protein: 25g
- Cholesterol: 60mg
Keywords: salmon, rice bowls, customizable, healthy dinner, quick meal
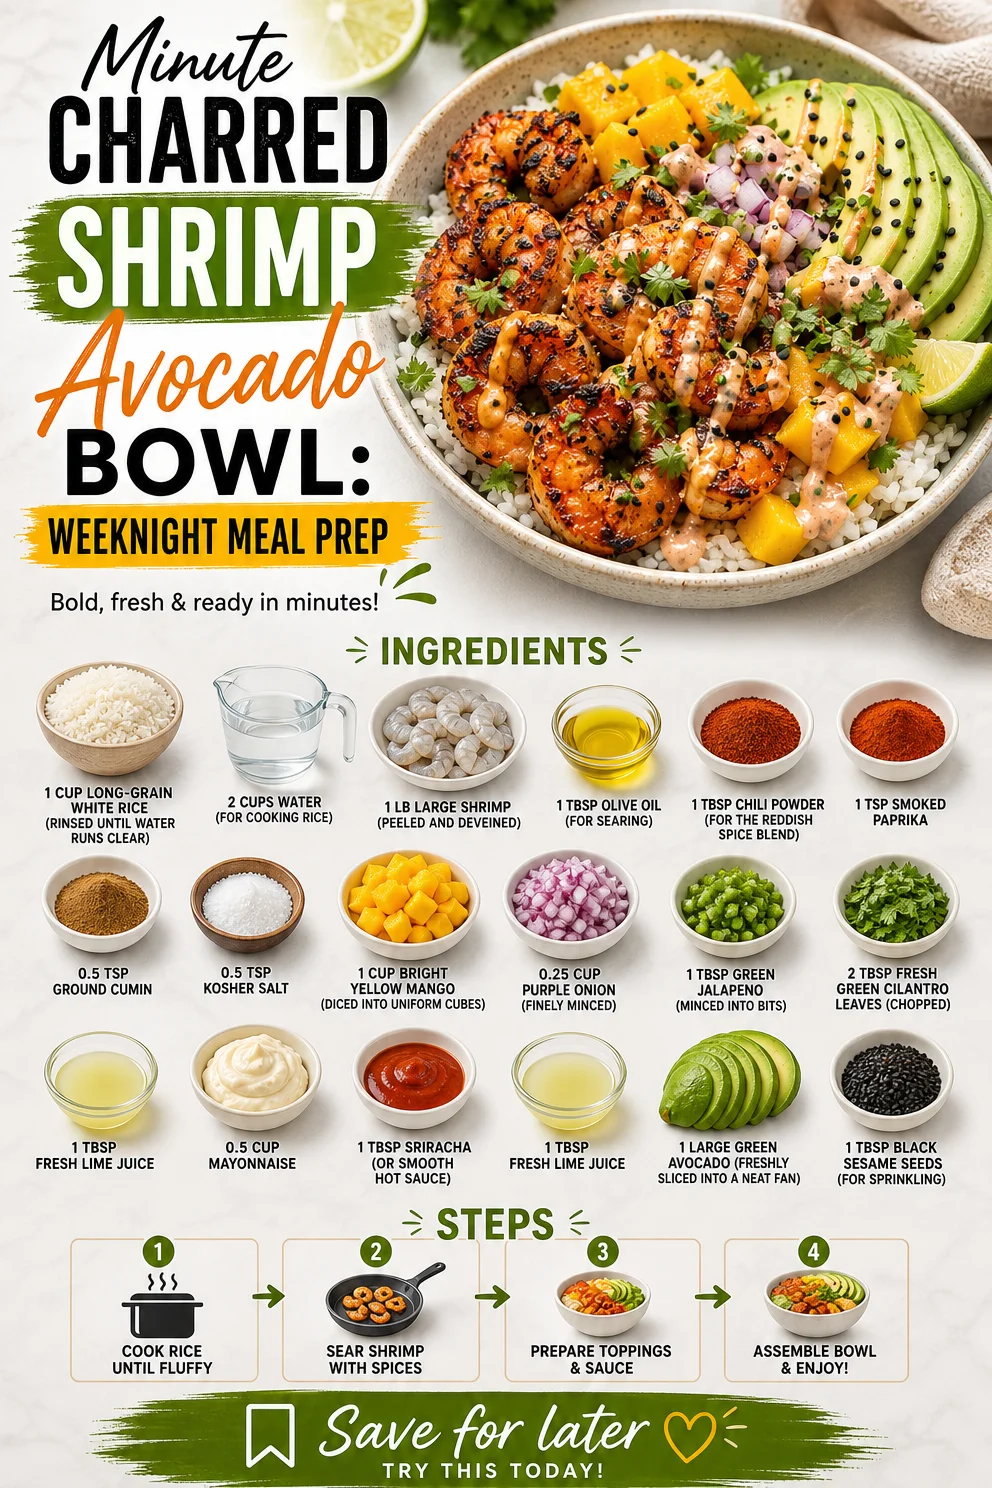
Minute Charred Shrimp Avocado Bowl: Weeknight Meal Prep
The Ultimate Charred Shrimp and Avocado Bowl: A Flavorful Journey
Hello, my fellow food lovers! Today, I’m thrilled to take you on a culinary adventure that stems from one of my absolute favorite dishes—the Charred Shrimp and Avocado Bowl. It’s colorful, packed with flavor, and oh-so satisfying, making it the perfect meal for any occasion. Whether you’re hosting a dinner party or simply looking to spice up your weekday dinner routine, this dish is bound to impress. So, roll up your sleeves, tie on that apron, and let’s get cooking!
A Taste of Nostalgia
Ah, shrimp! This little seafood gem has been a part of many delightful gatherings in my life. I vividly remember a sunny afternoon at my Aunt Mae’s beach house, where she would host fabulous summer cookouts. As children, we would run excitedly along the shoreline while the adults prepared a feast that filled the air with mouthwatering aromas.
One afternoon, Aunt Mae introduced us to her famous charred shrimp skewers, which she marinated in zesty spices and grilled to perfection. It was love at first bite! The smoky flavor combined with a hint of citrus is forever etched in my culinary heart. That experience sparked my passion for cooking and entertaining—teaching me that food is not just about sustenance; it’s about connection and creating cherished memories.
Fast forward to today, and I’ve transformed that memory into my own Charred Shrimp and Avocado Bowl. It brings together juicy shrimp, creamy avocado, and vibrant mango for a dish that sings with freshness and flavor. Are you ready to dive in? Let’s talk ingredients!
Ingredients
-
1 cup long-grain white rice
This serves as the hearty base of your bowl. Rinse the rice well until the water runs clear to remove excess starch for fluffier grains. If you prefer something different, substitute with quinoa or cauliflower rice for a low-carb option. -
2 cups water
Essential for cooking the rice. You can also infuse the water with a bay leaf or a garlic clove for extra flavor. -
1 lb large shrimp
Peeled and deveined, these beauties bring an excellent protein punch. If you’re not a fan of shrimp, feel free to swap in scallops or grilled chicken. -
1 tbsp olive oil
Perfect for searing the shrimp while adding a subtle richness. Don’t have olive oil? Avocado oil or melted butter work just as well. -
1 tbsp chili powder
This spice adds a delicious kick! If you prefer less heat, go easy on it or try a sweeter paprika blend instead. -
1 tsp smoked paprika
This gives a wonderful smoky flavor reminiscent of grill marks, enhancing our charred theme. You can use regular paprika if you prefer a milder taste. -
0.5 tsp ground cumin
Cumin adds warmth and depth. Feel free to experiment with different spices like coriander for an additional layer of flavor! -
0.5 tsp kosher salt
A must for flavor development! You can also try sea salt for a more delicate taste or skip it if you’re watching your sodium intake. -
1 cup bright yellow mango
Fresh mango adds a burst of sweetness and color! If mango isn’t in season, substitute it with peach or pineapple for an equally delightful twist. -
0.25 cup purple onion
Finely minced, this brings a sharp, slightly sweet flavor. Red onion is perfect, but you can also use green onion (scallions) or shallots if preferred. -
1 tbsp green jalapeño
Minced jalapeño adds a nice touch of heat. For those who prefer milder flavors, omit it or replace it with a sprinkle of red pepper flakes. -
2 tbsp fresh green cilantro leaves
Chopped cilantro ties the dish together with its bright herbal notes. If you’re not a fan of cilantro, fresh parsley works nicely! -
1 tbsp fresh lime juice
A splash of lime juice brightens all the flavors! You can substitute with lemon juice if that’s what you have on hand. -
0.5 cup mayonnaise
This creamy base helps create a luscious sauce for the shrimp. If you want to lighten it up, swap half for Greek yogurt or try a vegan mayo. -
1 tbsp sriracha
This adds an exciting heat to the sauce. For less heat, opt for sweet chili sauce or leave it out entirely. -
1 large green avocado
Sliced into a fan for that Instagram-worthy presentation! Make sure your avocado is ripe for that creamy texture. If avocados are scarce, try using sliced cucumbers. -
1 tbsp black sesame seeds
For a final decorative touch! They add a nice crunch and visual pop. White sesame seeds or crushed nuts are wonderful alternatives.
Step-by-Step Instructions
Step 1: Prepare the Rice
Begin by rinsing the 1 cup of long-grain white rice under cold water until the water runs clear. This will help remove excess starch and keep your rice fluffy. In a medium saucepan, combine rinsed rice and 2 cups of water. Bring to a boil over high heat, then reduce to a simmer. Cover and cook for about 18-20 minutes, or until the water is absorbed and the rice is tender. Once done, fluff it with a fork and set it aside.
Chef Tip: Letting the rice rest for a few minutes after cooking allows it to firm up and prevents clumping.
Step 2: Season the Shrimp
While the rice is cooking, let’s get the shrimp ready! In a bowl, combine the 1 lb shrimp with 1 tbsp olive oil, 1 tbsp chili powder, 1 tsp smoked paprika, 0.5 tsp ground cumin, and 0.5 tsp kosher salt. Mix well, ensuring all the shrimp are coated evenly with the spices.
Chef Insight: Don’t be afraid to let the shrimp marinate for 15-30 minutes if you want an extra flavor punch.
Step 3: Sear the Shrimp
Heat a skillet over medium-high heat. Once hot, add the seasoned shrimp in a single layer. Cook for about 2-3 minutes on each side, until they turn pink and opaque. You might want to do this in batches to avoid overcrowding the pan.
Chef Hack: For an extra layer of flavor, squeeze a little lime juice over the shrimp while they cook.
Step 4: Make the Sauce
In a small bowl, combine 0.5 cup mayonnaise, 1 tbsp sriracha, and 1 tbsp fresh lime juice. Mix until smooth and set aside. This sauce will elevate the shrimp and bring everything together.
Serving Suggestion: Try using Greek yogurt instead of mayo for a lighter option!
Step 5: Build Your Bowl
Now comes the fun part! In your serving bowls, start by adding a generous scoop of the fluffy rice. Top it with the charred shrimp, then layer on the diced mango, purple onion, minced jalapeño, chopped cilantro, and the sliced avocado.
Plating Tip: Arrange the avocado in a beautiful fan shape to impress your guests!
Step 6: Drizzle with Sauce and Garnish
Drizzle your spicy mayo sauce over the top, then finish with a sprinkle of black sesame seeds. Voila! You now have a stunning Charred Shrimp and Avocado Bowl.
Serving Suggestions
Presentation is key! Serve the Charred Shrimp and Avocado Bowl in bright, colorful bowls that highlight the dish’s freshness. A sprinkle of fresh herbs and a squeeze of lime on top will add an inviting touch. For a side, consider crunchy tortilla chips or a light salad for added texture.
Recipe Variations
- Spicy Mango Salsa: Swap the diced mango for a spicy mango salsa by mixing diced mango with jalapeños, red onion, and lime juice for a zesty twist.
- Coconut Rice: Replace the water used for cooking rice with coconut milk for a creamy, tropical vibe.
- Herbed Quinoa: Change up the base from rice to quinoa, and toss in fresh herbs for an earthy touch.
- Lime Cilantro Rice: Mix lime zest and chopped cilantro into your cooked rice for added flavor.
- Cauliflower Rice: For a low-carb option, use cauliflower rice instead of traditional grains for a new spin.
Chef’s Notes
As I reflect on the evolution of this dish, I remember the first time I attempted to prepare shrimp. It was a disaster, to say the least! Overcooked shrimp is the enemy—chewy and tough. I learned through countless tries and errors that timing is everything. The added layer of flavors came after experimenting endlessly with sauces and spices. My goal is to pass along these lessons to you and instill confidence in your cooking journey!
FAQs and Troubleshooting
Q: How do I know when shrimp are cooked?
A: Cooked shrimp should be opaque and pink. You can also give them a gentle squeeze; they should feel firm but still tender.
Q: What if I don’t have fresh lime juice?
A: Bottled lime juice can work in a pinch, but fresh is always best for flavor. If you need a substitute, lemon juice is a great alternative.
Q: How can I prevent the avocado from browning?
A: To keep your avocado fresh, sprinkle a little lime juice over the slices before serving.
Q: Can I make this dish ahead of time?
A: Yes! You can prepare the shrimp and rice in advance and store them in airtight containers in the fridge. Just assemble the bowl when you’re ready to enjoy!
Nutritional Info (Optional)
- Calories: 490
- Protein: 34g
- Fat: 26g
- Carbohydrates: 43g
- Fiber: 5g
There you have it! The Ultimate Charred Shrimp and Avocado Bowl is a delightful balance of textures and flavors that perfectly showcases fresh ingredients. It’s an ode to my past memories while being an accessible dish for any night of the week.
So, gather your friends, tie on your apron, and embark on this delicious culinary adventure. Because, at the end of the day, it’s all about sharing beautiful moments around the table over incredible food. Happy cooking!
PrintUltimate Charred Shrimp and Avocado Bowl
A colorful and flavorful bowl featuring charred shrimp, creamy avocado, and vibrant mango, perfect for any occasion.
- Prep Time: 15 minutes
- Cook Time: 20 minutes
- Total Time: 35 minutes
- Yield: 4 servings 1x
- Category: Main Course
- Method: Searing
- Cuisine: Mexican
- Diet: Seafood
Ingredients
- 1 cup long-grain white rice
- 2 cups water
- 1 lb large shrimp, peeled and deveined
- 1 tbsp olive oil
- 1 tbsp chili powder
- 1 tsp smoked paprika
- 0.5 tsp ground cumin
- 0.5 tsp kosher salt
- 1 cup bright yellow mango, diced
- 0.25 cup purple onion, finely minced
- 1 tbsp green jalapeño, minced
- 2 tbsp fresh green cilantro leaves, chopped
- 1 tbsp fresh lime juice
- 0.5 cup mayonnaise
- 1 tbsp sriracha
- 1 large green avocado, sliced
- 1 tbsp black sesame seeds
Instructions
- Prepare the Rice: Rinse the rice under cold water until the water runs clear. Combine the rinsed rice and water in a medium saucepan and bring to a boil. Reduce to a simmer, cover, and cook for about 18-20 minutes. Fluff with a fork and set aside.
- Season the Shrimp: In a bowl, combine the shrimp with olive oil, chili powder, smoked paprika, ground cumin, and kosher salt. Mix well to coat the shrimp evenly.
- Sear the Shrimp: Heat a skillet over medium-high heat and add the seasoned shrimp in a single layer. Cook for about 2-3 minutes on each side until cooked through and opaque.
- Make the Sauce: In a small bowl, combine mayonnaise, sriracha, and lime juice. Mix until smooth and set aside.
- Build Your Bowl: In serving bowls, add a scoop of rice, topped with charred shrimp, diced mango, purple onion, minced jalapeño, cilantro, and sliced avocado.
- Drizzle with Sauce: Drizzle the spicy mayo sauce over the top and sprinkle with black sesame seeds.
Notes
To prevent avocado from browning, sprinkle with lime juice before serving. This dish can be made ahead of time; just assemble when ready to eat.
Nutrition
- Serving Size: 1 bowl
- Calories: 490
- Sugar: 10g
- Sodium: 600mg
- Fat: 26g
- Saturated Fat: 4g
- Unsaturated Fat: 14g
- Trans Fat: 0g
- Carbohydrates: 43g
- Fiber: 5g
- Protein: 34g
- Cholesterol: 220mg
Keywords: shrimp bowl, avocado recipe, healthy seafood
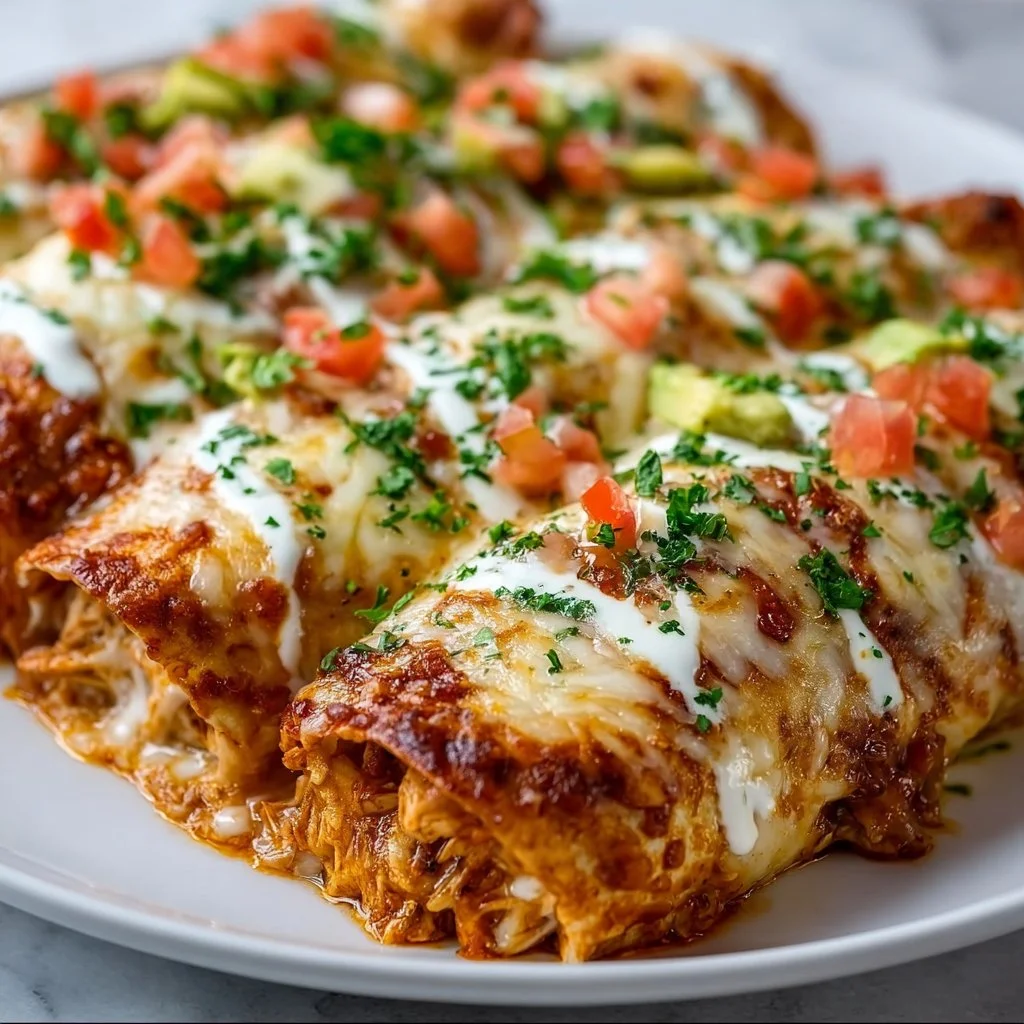
Minute Healthy Chicken Enchiladas: Easy Weeknight Dinner
Quick & Healthy Chicken Enchiladas: A Delicious Journey Awaits
Hello, fellow food lovers! Are you ready to embark on a flavorful trip that’s both quick and healthy? Today, we’re diving into a dish that’s sure to become a cherished staple in your kitchen: Chicken Enchiladas! Imagine tender, shredded chicken wrapped in warm tortillas, blanketed in a tangy enchilada sauce, and topped with ooey-gooey cheese. Sounds dreamy, right? Let’s make that dream a reality while keeping it light and wholesome!
Cooking has always been my way of expressing love, and this recipe represents the blend of tradition and everyday simplicity. Enchiladas hold a special place in my heart, not just for their incredible flavor, but for the beautiful memories they evoke. Picture this: it was a chilly evening, and my friends were gathered in my cozy kitchen, laughter filling the air as I dished out my batch of homemade enchiladas. Their smiles and warm compliments were everything.
So, roll up your sleeves, tie on that apron, and prepare for some culinary magic. I promise you’ll feel like a rockstar in the kitchen!
My Chicken Enchilada Story
Growing up, weekends were often filled with vibrant gatherings of family and friends around a table brimming with delicious food. Enchiladas were a crowd favorite, and I can still recall the excitement of helping my grandmother roll each tortilla, her laughter ringing out as we spilled a bit of filling. I learned that cooking is more than just about the food; it’s about the memories we create around it. One night, we decided to host an impromptu dinner party, and enchiladas were the star of the show. The kitchen was filled with the intoxicating aromas of spices and salsa, as we plated the colorful enchiladas for our guests. With each bite, their smiles grew wider, and that warmth spread through our hearts like a cozy blanket.
Now, let’s bring that same joy into our homes — without needing hours in the kitchen!
Ingredients
Here’s what you’ll need to whip up these scrumptious chicken enchiladas:
-
2 cups cooked shredded chicken: Use rotisserie chicken for a quick option, or cook your own for a fresher flavor. It’s a perfect way to use leftovers too!
-
1 cup black beans, drained and rinsed: These add protein and fiber. If you’re not a fan, feel free to swap them out with pinto beans or even quinoa for a twist.
-
1 cup corn: Fresh, frozen, or canned — corn brings a delightful sweetness that balances the spices beautifully.
-
1 cup diced tomatoes: You can use fresh tomatoes or canned diced tomatoes for convenience. The juicy texture helps keep the enchiladas moist!
-
1 teaspoon chili powder: This spice gives our dish a warm kick. Adjust the amount according to your spice tolerance; a little goes a long way!
-
1 teaspoon cumin: This earthy spice adds depth to the flavors. If you’re out, smoked paprika can offer a unique twist!
-
8 small whole wheat tortillas: Whole wheat tortillas add fiber. If you prefer corn tortillas, go for it! Just be gentle when rolling them as they can be more fragile.
-
1 cup shredded cheese (e.g., cheddar or Mexican blend): Cheese is the magical glue of this dish! Feel free to use dairy-free alternatives if you want a healthier option.
-
1/2 cup enchilada sauce: Store-bought or homemade, just make sure it’s full of flavor to elevate our dish. You can also use salsa if you’re in a pinch!
-
Fresh cilantro for garnish: This bright herb adds a pop of color and flavor. If cilantro isn’t your thing, try fresh parsley or even green onions.
Step-by-Step Instructions
Ready to get cooking? Let’s break it down into simple steps along with some tips and tricks that’ll make this process a breeze!
-
Preheat the Oven: Preheat your oven to 375°F (190°C). This ensures your enchiladas will cook evenly, resulting in that perfect gooey cheese on top!
-
Prepare the Filling: In a large bowl, combine the cooked shredded chicken, black beans, corn, diced tomatoes, chili powder, and cumin. Give it a gentle stir to mix all those delicious flavors together.
-
Soften the Tortillas: If using corn tortillas, lightly heat them in a skillet or microwave for about 20 seconds until they’re pliable. This prevents them from cracking as you fill them!
-
Assemble the Enchiladas: Take a tortilla, place some of the filling in the center (about 1/4 cup should do), and roll it tightly. Place seam-side down in a lightly greased baking dish. Repeat until all tortillas are filled.
-
Pour on the Enchilada Sauce: Once all the enchiladas are in the dish, pour the enchilada sauce evenly over the top. Use the back of a spoon to spread it out, covering every delicious inch!
-
Cheese It Up: Sprinkle the shredded cheese all over the enchiladas. Cheese lovers rejoice; you can always add more if you want that melty magic!
-
Bake to Perfection: Place the baking dish in the preheated oven and bake for 20-25 minutes, or until the cheese is bubbling and golden. Your kitchen is about to smell heavenly!
-
Garnish and Serve: Once they’re done, take them out of the oven, let them cool for a few minutes, then garnish with fresh cilantro.
Serving Suggestions
For the ultimate presentation, serve your chicken enchiladas on a large platter, drizzled with extra enchilada sauce and sprinkled with fresh cilantro. Pair with a simple side salad of mixed greens tossed in a zesty vinaigrette, and perhaps some homemade guacamole or a dollop of Greek yogurt for creaminess.
Recipe Variations
Looking to switch things up? Here are a few creative ideas:
-
Vegetarian Enchiladas: Replace the chicken with sautéed vegetables like zucchini, bell peppers, and mushrooms for a wholesome veggie alternative.
-
Spicy Kick: Add diced jalapeños or a pinch of cayenne pepper to the filling for an extra punch of heat.
-
Cheesy Veggie Delight: Toss in some sautéed spinach or kale into the filling for a nutrient boost.
-
Taco Style: Use taco seasoning instead of chili powder and cumin for a twist that will bring a fun, familiar flavor.
-
Gluten-Free Option: Substitute the whole wheat tortillas with corn tortillas or gluten-free tortillas to accommodate dietary preferences.
Chef’s Notes
I’ve played around with this recipe over the years, and the beauty lies in its flexibility. There was a time when I experimented with different types of cheese — a smoked gouda added a layer of flavor that was to die for! Cooking enchiladas can still lead to accidental spills or misadventures (I once dropped an entire tray face-first on the floor — oops!). But it’s those little mishaps that make the kitchen feel alive and full of laughter.
FAQs and Troubleshooting
Here are some common questions and a few troubleshooting tips to ensure your enchiladas turn out amazing:
1. What if my tortillas break while rolling?
No worries! Simply heat them a bit more to soften them. Alternatively, you can layer them like a lasagna instead of rolling. It’s just as tasty!
2. How can I make my enchiladas extra saucy?
Use more enchilada sauce and even consider drizzling some on top before serving! You can adjust the amount based on your preference.
3. How do I store leftovers?
Store covered in the refrigerator for up to 3 days. To reheat, pop them in the oven or microwave until heated through.
4. Can I freeze these enchiladas?
Absolutely! Just assemble them without baking, wrap them tightly, and freeze. When ready to eat, bake them straight from the freezer, allowing for extra cooking time.
Nutritional Info (Optional)
For a rough estimate, each enchilada contains approximately:
- Calories: 300
- Protein: 24g
- Carbohydrates: 35g
- Fat: 10g
(Note: nutritional information may vary based on specific ingredients.)
So there you have it — an inviting, easy-to-follow recipe that’s bound to impress! I’m thrilled to have shared this journey with you. May every bite elevate your dining experience and create memories around your table. Now, grab your apron, and let’s recreate that special kitchen magic! Welcome to the realm of quick, healthy chicken enchiladas — your taste buds will thank you!
PrintQuick & Healthy Chicken Enchiladas

Delicious and wholesome chicken enchiladas wrapped in warm tortillas with a tangy sauce and melted cheese.
- Prep Time: 15 minutes
- Cook Time: 25 minutes
- Total Time: 40 minutes
- Yield: 4 servings 1x
- Category: Main Course
- Method: Baking
- Cuisine: Mexican
- Diet: Healthy
Ingredients
- 2 cups cooked shredded chicken
- 1 cup black beans, drained and rinsed
- 1 cup corn
- 1 cup diced tomatoes
- 1 teaspoon chili powder
- 1 teaspoon cumin
- 8 small whole wheat tortillas
- 1 cup shredded cheese (e.g., cheddar or Mexican blend)
- 1/2 cup enchilada sauce
- Fresh cilantro for garnish
Instructions
- Preheat the oven to 375°F (190°C).
- Combine the cooked shredded chicken, black beans, corn, diced tomatoes, chili powder, and cumin in a large bowl.
- Heat corn tortillas in a skillet or microwave for about 20 seconds until pliable.
- Take a tortilla, place about 1/4 cup of the filling in the center, and roll it tightly. Place seam-side down in a greased baking dish.
- Pour the enchilada sauce evenly over the top of the enchiladas.
- Sprinkle shredded cheese all over the enchiladas.
- Bake in the preheated oven for 20-25 minutes, until the cheese is bubbling and golden.
- Garnish with fresh cilantro before serving.
Notes
Feel free to customize the filling and toppings to your taste. This recipe is flexible and works well with various ingredients.
Nutrition
- Serving Size: 1 enchilada
- Calories: 300
- Sugar: 5g
- Sodium: 400mg
- Fat: 10g
- Saturated Fat: 4g
- Unsaturated Fat: 6g
- Trans Fat: 0g
- Carbohydrates: 35g
- Fiber: 8g
- Protein: 24g
- Cholesterol: 60mg
Keywords: chicken enchiladas, healthy recipe, easy dinner, Mexican food

Juicy Grilled California Avocado Chicken
Juicy Grilled California Avocado Chicken: Elevate Your Meal with Style
Hello, fellow food lovers! If you’re anything like me, there’s nothing quite like cooking up a storm in the kitchen. It’s where magic happens—ingredients come together, flavors collide, and you create beautiful memories around your table. Today, I’m thrilled to share a dish that perfectly captures those special moments: Juicy Grilled California Avocado Chicken. Trust me; this dish is all about fresh flavors and simple elegance.
Introduction: Let’s Talk About Avocados and Chicken
Picture a sunny California afternoon: the sound of birds chirping, a light breeze blowing through the trees, and the tantalizing aroma of grilled chicken wafting through the air. Avocados are king here, and adding them to your chicken dish elevates it from pretty good to absolutely divine!
This recipe combines succulent grilled chicken with creamy avocado and vibrant tomatoes that will transport you straight to the golden coasts of California. Imagine juicy chicken breasts marinated in a zesty blend of lime juice, garlic, and spices, then grilled to perfection. As if that wasn’t enough, we’re adding ripe avocado slices and sweet cherry tomatoes on top—a beautiful explosion of flavors and textures in each bite.
Beyond the deliciousness, this dish is also about connection. It’s about bringing friends and family together around a beautifully set table. Whether you’re hosting a Sunday brunch, planning a casual dinner, or simply craving a fresh and delicious meal, this Juicy Grilled California Avocado Chicken has got you covered. So grab your apron, and let’s get cooking!
Personal Story: A California Summer
Growing up, I spent my summers soaking in the California sun, often at my grandmother’s house. Her garden was bursting with ripe vegetables and fragrant herbs, and the moment I stepped through her door, I could smell something scrumptious. One of my fondest memories is cooking with her in her backyard kitchen. She would pull out perfectly ripe avocados and tell me stories of how she used to make guacamole for her friends during summer picnics.
One particular day, while she grilled her famous chicken, I asked if we could try something new. That’s when we combined her grilled chicken recipe and those luscious avocados into one incredible dish. We created a summer sensation that had everyone coming back for seconds. My grandma’s eyes twinkled with delight as we prepared our meal, and the laughter shared around the table was priceless. Those moments became the bedrock of my culinary journey and inspire me every time I step into the kitchen today.
Ingredients
Here’s what you’ll need for this delightful dish:
-
2 boneless, skinless chicken breasts
Juicy and lean, chicken breasts are perfect for grilling. They soak up flavors beautifully and deliver a satisfying bite every time. -
2 ripe avocados, sliced
Ripe avocados are rich and creamy, adding a luxurious texture to the dish. Look for avocados that yield slightly to pressure. -
1 cup cherry tomatoes, halved
Sweet and bursting with flavor, cherry tomatoes balance the dish with their juicy freshness. Substitute with grape tomatoes if needed! -
1/4 cup fresh lime juice
This bright and tangy juice not only adds flavor but also helps tenderize the chicken. If fresh limes aren’t available, bottled lime juice will do just fine. -
2 tablespoons olive oil
Great for marinating and grilling, olive oil adds richness. You can substitute it with avocado oil for a more intense avocado flavor. -
1 teaspoon garlic powder
Garlic powder infuses the chicken with a subtle garlicky goodness. If you prefer fresh garlic, 1-2 cloves minced will also work. -
1 teaspoon chili powder
This spice lends warmth and depth to the chicken. Feel free to adjust according to your heat preference. -
1 teaspoon cumin
Cumin adds an earthy flavor that compliments the other spices beautifully. If you don’t have cumin, try smoked paprika as an alternative. -
Salt and pepper to taste
Essential for enhancing all the flavors—don’t skip out! Use coarse salt for better texture! -
Fresh cilantro for garnish
Cilantro adds a fresh herbaceous kick that elevates the entire dish. If you’re not a cilantro fan, fresh parsley is a great substitute!
Step-by-Step Instructions
Alright, let’s dive into the cooking process! Follow these steps to make your gorgeous Juicy Grilled California Avocado Chicken:
-
Prepare the Marinade
In a bowl, combine the lime juice, olive oil, garlic powder, chili powder, cumin, salt, and pepper. Whisk until the mixture is smooth and well combined. This marinade is essential for infusing your chicken with layers of flavor.Chef’s Tip: Marinate your chicken breasts for at least 30 minutes—if you can let them soak for 2 hours or more, even better! This will enhance the flavor and tenderness.
-
Marinate the Chicken
Place the chicken breasts in a resealable plastic bag or a shallow dish. Pour the lime marinade over the chicken, ensuring it’s evenly coated. Seal the bag or cover the dish and refrigerate. Let it work its magic!Little Hack: If you want an extra kick, consider adding a little bit of your favorite hot sauce to the marinade!
-
Preheat the Grill
While your chicken is marinating, preheat your grill over medium-high heat (about 375°F to 450°F). Make sure it’s nice and hot before placing the chicken on it—this will help create those beautiful grill marks!Commentary: You can also use a grill pan on the stove if you don’t have access to an outdoor grill. Just be sure to follow the same heat guidelines!
-
Grill the Chicken
Remove the chicken from the marinade, letting any excess drip off, and place it on the grill. Close the lid and grill for about 6-7 minutes on one side, then flip and grill for another 5-6 minutes, or until the chicken is cooked through and has nice grill marks. A meat thermometer should read 165°F when done.Tip: Avoid flipping too soon! Let it sear to get those perfect grill marks before flipping.
-
Prepare the Avocado and Tomatoes
While the chicken is grilling, slice your ripe avocados and halve your cherry tomatoes. This is your opportunity to add a sprinkle of salt and pepper on the tomatoes for added flavor! -
Rest the Chicken
Once the chicken is done grilling, remove it from the grill and let it rest for about 5 minutes. This allows the juices to redistribute, keeping your chicken moist.Chef Insight: Don’t skip this step! A rested chicken is a happy chicken.
-
Plating Perfection
Slice the grilled chicken, then layer it on a serving platter. Top it with the sliced avocados and halved cherry tomatoes, sprinkling fresh cilantro over everything for that pop of color.Presentation Matters: For an elegant touch, drizzle a little extra lime juice over the top or a dash of balsamic reduction!
Serving Suggestions
Serve this beautiful dish with a side of quinoa salad, garlic bread, or over a bed of mixed greens for a refreshing meal. Pair it with a chilled glass of white wine or lemonade for the ultimate California vibe. Don’t forget to provide extra lime wedges on the side for guests who want an extra zing!
Recipe Variations
Feel free to mix things up with these creative twists:
- Spicy Kick: Add diced jalapeños into the marinade for heat.
- Different Proteins: Swap out chicken for shrimp or firm tofu for a vegetarian version.
- Grilled Veggies: Add grilled veggies like zucchini or bell peppers as sides or toppings.
- Herbed Chicken: Incorporate fresh herbs such as thyme or rosemary into your marinade for a different flavor profile.
- Creamy Avocado Sauce: Blend avocados with Greek yogurt, lime juice, and garlic for a creamy drizzle on top.
Chef’s Notes
I’ve made this recipe countless times, and it never gets old! Every time I prepare it, I think of those summer afternoons with my grandma, creating dishes that filled our home with laughter. I’ve learned that cooking is as much about the experience as it is about the ingredients and techniques. Each bite tells a story of connection and love.
And be prepared for compliments! When you bring this dish to your table, be ready for guests to ask for the recipe—it’s that good!
FAQs and Troubleshooting
1. Can I use frozen chicken?
Absolutely! Just make sure to thaw it completely before marinating and grilling. Otherwise, you’ll end up with uneven cooking.
2. My chicken is dry after grilling. What happened?
Overcooking is usually the culprit! Always check your chicken with a meat thermometer, and remember to let it rest after grilling to retain moisture.
3. What should I do if I can’t find ripe avocados?
You can speed up the ripening process by placing them in a brown paper bag with an apple or banana. However, if you’re in a hurry, sliced cucumbers on the side provide a refreshing alternative!
4. How do I store leftovers?
Store any leftovers in an airtight container in the fridge for up to 3 days. Reheat gently to avoid drying the chicken.
Nutritional Info
While precise nutritional info can vary based on ingredient brands and portions, here’s a rough estimate per serving:
- Calories: 450
- Protein: 30g
- Carbohydrates: 22g
- Fat: 28g
So there you have it, my dear culinary friends! Now you’re ready to create your own Juicy Grilled California Avocado Chicken experience at home. It’s a dish that captures the heart of summer and the essence of gathering together. I can’t wait to hear how yours turns out! Let’s set the table and celebrate the joy of cooking together. Happy cooking! 🍽️✨
PrintJuicy Grilled California Avocado Chicken

A delicious grilled chicken dish topped with creamy avocados and cherry tomatoes, perfect for summer gatherings.
- Prep Time: 30 minutes
- Cook Time: 20 minutes
- Total Time: 50 minutes
- Yield: 4 servings 1x
- Category: Main Course
- Method: Grilling
- Cuisine: California
- Diet: Gluten-Free
Ingredients
- 2 boneless, skinless chicken breasts
- 2 ripe avocados, sliced
- 1 cup cherry tomatoes, halved
- 1/4 cup fresh lime juice
- 2 tablespoons olive oil
- 1 teaspoon garlic powder
- 1 teaspoon chili powder
- 1 teaspoon cumin
- Salt and pepper to taste
- Fresh cilantro for garnish
Instructions
- Prepare the Marinade: In a bowl, combine the lime juice, olive oil, garlic powder, chili powder, cumin, salt, and pepper. Whisk until the mixture is smooth and well combined.
- Marinate the Chicken: Place the chicken breasts in a resealable plastic bag or a shallow dish. Pour the lime marinade over the chicken, ensuring it’s evenly coated. Seal the bag or cover the dish and refrigerate.
- Preheat the Grill: Preheat your grill over medium-high heat (about 375°F to 450°F).
- Grill the Chicken: Remove the chicken from the marinade and place it on the grill. Grill for about 6-7 minutes on one side, then flip and grill for another 5-6 minutes, or until cooked through.
- Prepare the Avocado and Tomatoes: Slice the ripe avocados and halve the cherry tomatoes.
- Rest the Chicken: Remove it from the grill and let it rest for about 5 minutes.
- Plating Perfection: Slice the grilled chicken, layer on a serving platter, top it with the sliced avocados and halved cherry tomatoes, sprinkle fresh cilantro on top.
Notes
Serve with a side of quinoa salad or garlic bread. Add extra lime wedges for guests.
Nutrition
- Serving Size: 1 serving
- Calories: 450
- Sugar: 3g
- Sodium: 700mg
- Fat: 28g
- Saturated Fat: 4g
- Unsaturated Fat: 20g
- Trans Fat: 0g
- Carbohydrates: 22g
- Fiber: 8g
- Protein: 30g
- Cholesterol: 80mg
Keywords: grilled chicken, avocado, summer recipe, healthy meal, California cuisine
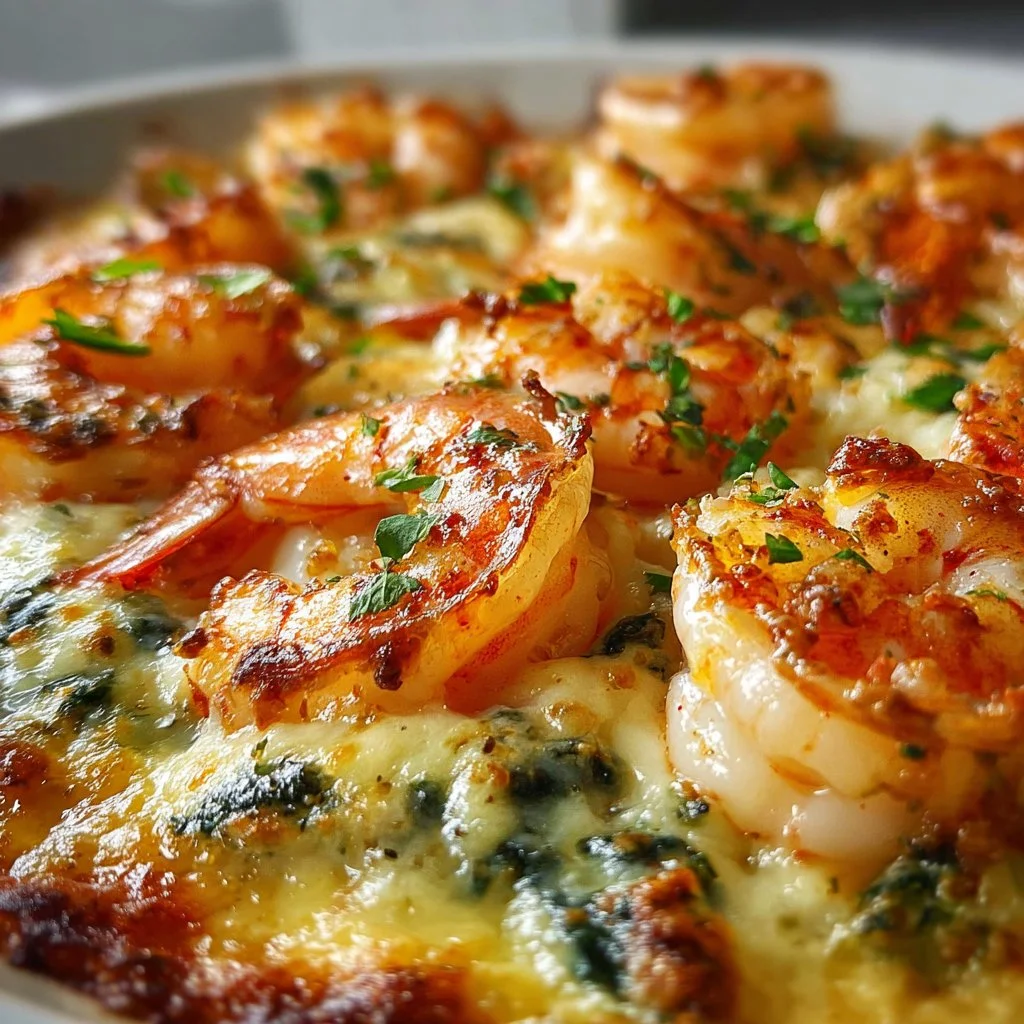
Low-Carb Shrimp Tuscan Bake
Low-Carb Shrimp Tuscan Bake: A Delicious Journey of Flavors
Hello, food lovers! Today, I’m thrilled to bring you a showstopper for your dinner table that’s not only delicious but is also kind to your waistline: the Low-Carb Shrimp Tuscan Bake. This dish is a delightful combination of succulent shrimp, vibrant vegetables, and creamy, cheesy goodness – all baked to perfection. It’s elegant enough for a dinner party yet simple enough for a cozy weeknight dinner (no over-the-top culinary theatrics here!).
The brilliance of this recipe lies in its flavor layers, infusing every bite with the essence of Tuscany while keeping the carbs surprisingly low. Whether you’re entertaining friends, impressing a special someone, or just treating yourself, this bake will have everyone at your table savoring the moment.
I remember the first time I made a Tuscan-inspired dish. It was a chilly evening, and I wanted something comforting yet light. I paired fresh shrimp with the classic flavors of sun-dried tomatoes, garlic, and creamy cheeses, and let me tell you, it was love at first bite! The beautiful colors alone are enough to brighten any meal, and the combination of flavors transport you straight to an Italian trattoria. Trust me, you’re going to want to make this one a staple in your kitchen!
So, grab your apron, toss on some tunes, and let’s cook up some magic in the kitchen!
Personal Story
The inspiration for my Low-Carb Shrimp Tuscan Bake comes from many nights gathered around the dinner table with family. Growing up, Saturday nights were reserved for Italian night. My mom would whip up her famous pasta dishes or classic garlic shrimp, and the whole house would fill with aromas that brought everyone together. One evening, while experimenting with the remaining ingredients in the fridge, I created something that captured the feel of those family dinners but without the carbs hovering over my waistline.
That evening, while tossing together the shrimp, cream, and baby spinach, I was instantly hit with nostalgia as the creamy sauce bubbled on the stovetop. It reminded me of my childhood – those laughter-filled nights and plates piled high. I knew I had something special on my hands, and that’s how the Low-Carb Shrimp Tuscan Bake was born. With every bite, I could almost hear my mom enthusiastically sharing her culinary secrets, and it inspired me to find ways to make those meaningful meals accessible, delicious, and healthy for everyone, no matter their dietary choices.
Ingredients
Here’s what you’ll need to make this delectable dish:
Ingredients:
-
1 pound raw large shrimp, peeled and deveined
Great for quick cooking! If you can’t find shrimp, you can use cooked shrimp – just be mindful not to overcook them as they’ll get rubbery. -
2 tablespoons olive oil
A staple in Mediterranean cooking! You can substitute with avocado oil for a different flavor profile, but let’s be honest, olive oil is the MVP here. -
4 cloves garlic, minced
Garlic is the essence of flavor. Use fresh if possible for the best taste! You can substitute with garlic powder at a pinch, but fresh garlic is truly where it’s at. -
1 cup cherry tomatoes, halved
These sweet gems not only add color but also provide a lovely burst of flavor. If you don’t have cherry tomatoes, feel free to chop up a regular tomato—it’ll work just fine! -
3 cups fresh baby spinach
Spinach brings in essential nutrients and a lovely texture. If spinach isn’t your thing, kale can be a sturdy little substitute. -
1 teaspoon dried Italian seasoning
This is your flavor booster! If you have fresh herbs like basil or oregano on hand, feel free to use those instead. -
1 teaspoon paprika
Adds a warm, subtle sweetness. Smoked paprika could also give an extra layer of flavor—think of it as your secret weapon! -
½ teaspoon crushed red pepper flakes (optional)
Want to bring some heat to the party? Toss these in! If you’re not a fan of spice, you can skip them entirely. -
Salt and black pepper, to taste
Essential for enhancing all the flavors in your dish—never overlook seasoning! -
¾ cup heavy cream
The creamy base of our bake! If you’re looking for a lighter option, half-and-half or coconut cream can be great substitutes. -
¼ cup cream cheese, softened
This adds richness and helps to create a luscious sauce. You can swap it for ricotta or even Greek yogurt for a tangy twist. -
⅓ cup grated Parmesan cheese
A classic Italian cheese that lends its unique flavor. Pecorino Romano can be a great alternative if you’d like a sharper taste. -
1 cup shredded mozzarella cheese
For that gooey melty finish! If you want to streamline your cheese selection, just using mozzarella is perfect, or go for a blend. -
Fresh parsley, chopped (for garnish)
A sprinkle of fresh herbs brightens up any dish. Need a swap? Basil works wonders too!
Step-by-Step Instructions
Ready to get cooking? Here’s how to whip up your Low-Carb Shrimp Tuscan Bake!
Cooking Steps:
-
Preheat Your Oven
- Begin by preheating your oven to 400°F (200°C). It’s always best to start with a hot oven to get that golden bubbly finish!
-
Sauté the Shrimp
- In a large oven-safe skillet, heat the olive oil over medium-high heat. Add your raw shrimp and season with salt, pepper, and paprika. Sauté them for about 2-3 minutes until they turn pink and just start to curl. This is a pivotal moment – avoid fully cooking them here, as they will continue to cook in the oven!
-
Add the Garlic and Tomatoes
- Lower the heat, add minced garlic, and cherry tomatoes to the skillet. Toss everything together for about 1-2 minutes until the tomatoes soften and mingle with the garlic’s aroma. Those fragrant notes are absolutely everything!
-
Incorporate the Spinach
- Toss in the fresh baby spinach and dried Italian seasoning. Cook until the spinach wilts down, which takes about 2-3 minutes. Not only does it add flavor, but it also gives you those lovely green flecks throughout the dish.
-
Make the Creamy Sauce
- Pour in the heavy cream and add the softened cream cheese. Stir continuously until the cream cheese melts and combines beautifully with the cream. You’ll notice it become wonderfully silky! If the sauce feels too thick, you can thin it out with a splash of broth or water.
-
Cheese It Up
- Now, sprinkle in the grated Parmesan cheese and give it a stir. This adds a savory depth that perfectly balances the creaminess. Taste and season further if needed—this is your chance to adjust!
-
Top with Mozzarella
- Reduce the heat to low, then top the entire mixture with the shredded mozzarella, ensuring it covers everything evenly. Trust me, this gooey layer is where the magic happens.
-
Bake Away
- Transfer the skillet into your preheated oven and let it bake for about 15-20 minutes until the cheese is bubbly and golden brown. If you’re feeling adventurous, you can broil it for an additional 2-3 minutes for that irresistible crispy top!
-
Garnish and Serve
- Once done, take it out of the oven and let it cool for a few moments. Then, sprinkle over some freshly chopped parsley for that finishing touch of color and flavor.
Serving Suggestions
To serve, scoop generous portions onto shallow bowls or elegant plates. I love serving this dish alongside a simple arugula salad dressed with lemon and olive oil for a fresh balance. A glass of sparkling water with a slice of lemon is the perfect complement, enhancing the Tuscan feel.
Recipe Variations
Here are a few creative twists to keep things interesting:
-
Add Some Veggies: Consider adding zucchini, bell peppers, or mushrooms to the mix for additional layers of flavor and nutrients.
-
Spice it Up: If you’re craving an extra kick, add fresh diced jalapeños or switch out the paprika for some cayenne.
-
Make It Dairy-Free: Swap the heavy cream and cream cheese with coconut cream and nutritional yeast for a vegan alternative.
-
Different Proteins: Try using chicken or scallops instead of shrimp for a delightful change.
-
Pasta It Up: If carbs aren’t a concern, toss in cooked zucchini noodles or whole wheat pasta for a heartier dish.
Chef’s Notes
Cooking this dish has become a cherished routine in my home, where the house fills with that delicious scent of garlic and roasted cheese. I love that it’s perfect for any occasion—from casual weeknight dinners to special celebrations. Plus, it’s a great way to utilize leftover shrimp or even mixed seafood!
Funny fact: the first time I attempted this dish, I accidentally grabbed smoked paprika—definitely a happy accident! That slight smokiness made the flavors even more robust, and it has made its way into my recipe ever since. Sometimes, the best kitchen stories come from those little mishaps.
FAQs and Troubleshooting
Q: Can I make this dish ahead of time?
A: Absolutely! You can prepare the shrimp and sauce up to a day in advance. Just store the mixture in the fridge and bake when you’re ready to enjoy.
Q: What if my shrimp is tough?
A: Overcooking shrimp can lead to a rubbery texture. Stick to the cooking times suggested—think of them as delicate little morsels that need just the right attention!
Q: How can I make this dish lower in calories?
A: Consider using reduced-fat cream cheese and heavy cream, or go for unsweetened almond milk combined with nutritional yeast for a lighter sauce.
Q: Can I freeze this dish?
A: Yes! However, keep in mind that cream-based sauces can sometimes separate upon thawing. For best results, freeze before baking and allow it to thaw completely in the fridge before baking.
Nutritional Info (Optional)
Per Serving (based on 6 servings):
Calories: 350
Fat: 25g
Carbohydrates: 5g
Protein: 30g
Fiber: 1g
And there you have it! Your Low-Carb Shrimp Tuscan Bake is ready to shine at your dinner table. If you enjoyed this recipe or have any variations you’d love to share, drop a line! Remember, the kitchen is the heart of the home, and I’m so honored to be cooking alongside you. 🍤✨
PrintLow-Carb Shrimp Tuscan Bake
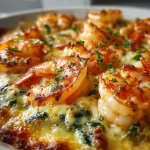
A delightful combination of shrimp, vibrant vegetables, and creamy cheese, all baked to perfection for a low-carb dish.
- Prep Time: 15 minutes
- Cook Time: 20 minutes
- Total Time: 35 minutes
- Yield: 6 servings 1x
- Category: Main Course
- Method: Baking
- Cuisine: Italian
- Diet: Low-Carb
Ingredients
- 1 pound raw large shrimp, peeled and deveined
- 2 tablespoons olive oil
- 4 cloves garlic, minced
- 1 cup cherry tomatoes, halved
- 3 cups fresh baby spinach
- 1 teaspoon dried Italian seasoning
- 1 teaspoon paprika
- ½ teaspoon crushed red pepper flakes (optional)
- Salt and black pepper, to taste
- ¾ cup heavy cream
- ¼ cup cream cheese, softened
- ⅓ cup grated Parmesan cheese
- 1 cup shredded mozzarella cheese
- Fresh parsley, chopped (for garnish)
Instructions
- Preheat your oven to 400°F (200°C).
- Sauté the shrimp in olive oil, seasoning with salt, pepper, and paprika for 2-3 minutes until pink.
- Add minced garlic and cherry tomatoes, cooking for 1-2 minutes until softened.
- Incorporate the fresh spinach and Italian seasoning, cooking until the spinach wilts.
- Make the creamy sauce by stirring in heavy cream and softened cream cheese until combined.
- Cheese it up by adding grated Parmesan and adjusting seasoning as needed.
- Top with shredded mozzarella evenly.
- Bake in the oven for 15-20 minutes until bubbly and golden brown.
- Garnish with freshly chopped parsley before serving.
Notes
Feel free to add vegetables or different proteins. This dish can be made dairy-free using alternatives.
Nutrition
- Serving Size: 1 serving
- Calories: 350
- Sugar: 2g
- Sodium: 700mg
- Fat: 25g
- Saturated Fat: 12g
- Unsaturated Fat: 10g
- Trans Fat: 0g
- Carbohydrates: 5g
- Fiber: 1g
- Protein: 30g
- Cholesterol: 170mg
Keywords: shrimp, low-carb, Tuscan, bake, Italian, dinner, healthy