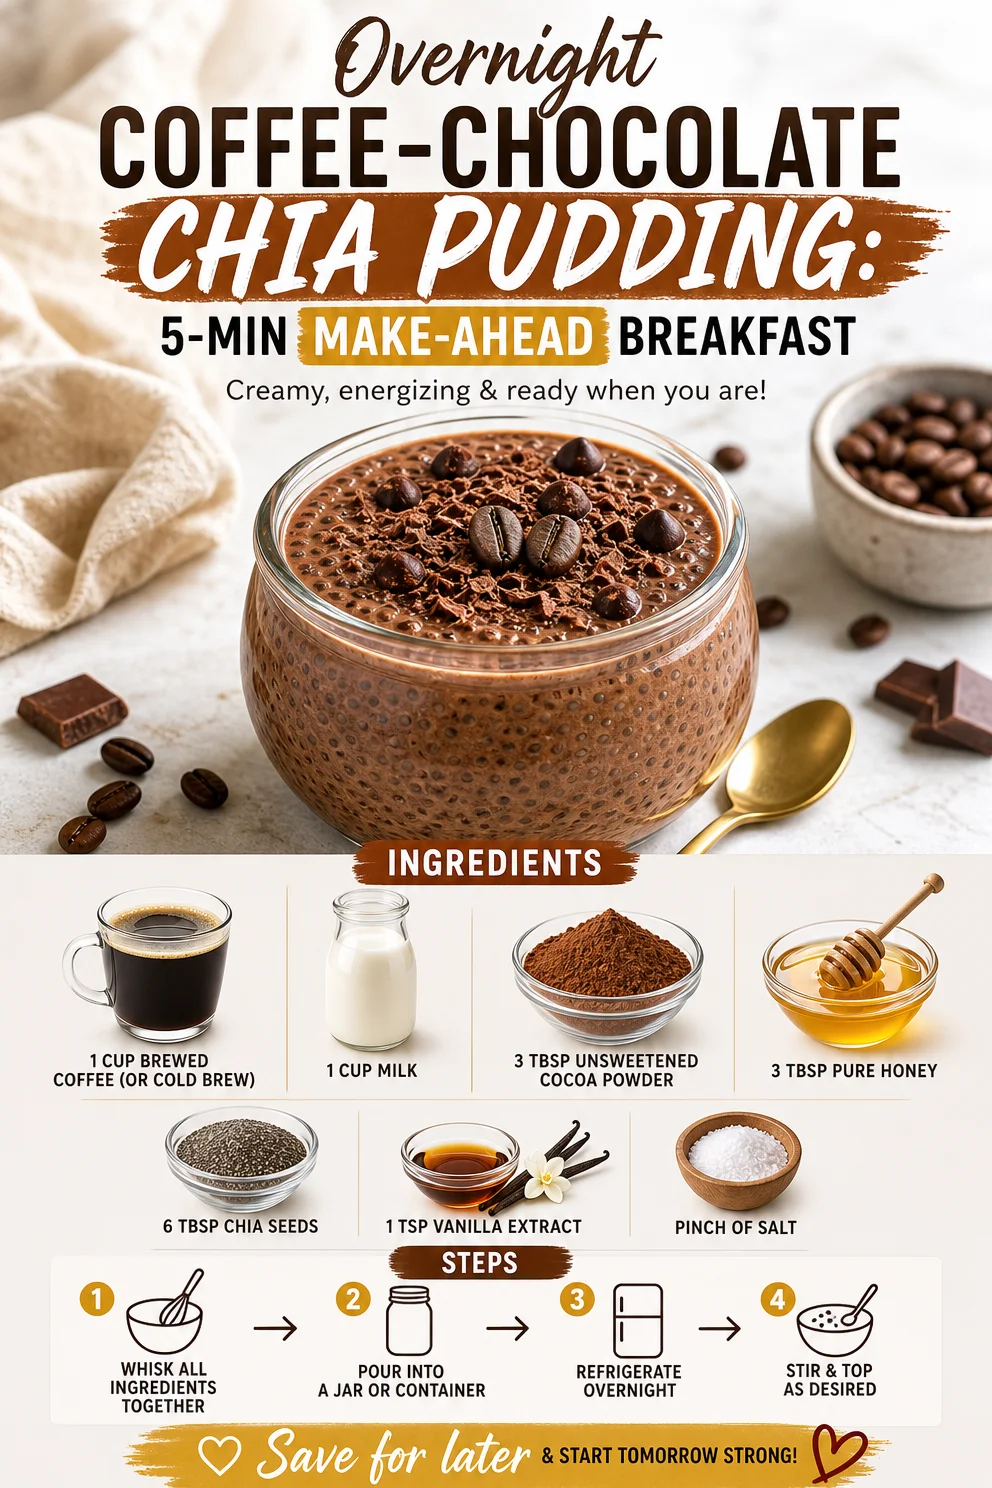
Overnight Coffee-Chocolate Chia Pudding: 5-Min Make-Ahead Breakfast
Overnight Coffee Chocolate Chia Pudding: A Delightful Morning Indulgence
Hello, fellow food lovers! Today, I’m tickled to share a recipe that makes my mornings infinitely better—not to mention super easy and delightfully decadent. We’re diving into the world of Overnight Coffee Chocolate Chia Pudding! Picture this: waking up to a delicious, creamy dessert that’s also packed with energy-boosting goodness. Trust me, it’s the perfect balance of indulgence and nourishment, all thanks to those tiny seeds of magic—chia!
Personal Story
This recipe is close to my heart because it surfaces memories of lazy Sunday mornings spent at my grandmother’s house. She was a coffee enthusiast, and her kitchen always smelled like a dreamy blend of rich coffee and chocolate. One particular Sunday, I remember sneaking into the kitchen early, trying to snag a spoonful of her special dessert. It was a rich chocolate mousse that she claimed had a "secret ingredient." Little did I know she had parked a bunch of flavors in there, including coffee!
Years later, as I became more interested in cooking and experimenting in the kitchen, I thought about that mousse and the way it made me felt—joyful, cozy, and completely satisfied. So, combining my love for coffee and chocolate with a healthy ingredient like chia seeds felt like the perfect tribute to those cherished Sunday mornings. And just like that, this Overnight Coffee Chocolate Chia Pudding was born!
Ingredients
Here’s what you’ll need to whip up this dreamy concoction:
-
1 cup brewed coffee (or cold brew)
This is the base of our pudding and gives it that incredible coffee buzz! You can use regular brewed coffee for a warm touch or cold brew for a refreshing twist. Substitute with decaf if you’re looking to cut back on caffeine. -
1 cup milk
Whole, almond, or oat milk are all great options! For a creamier texture, I recommend using whole milk. Nut and plant-based milks will add their unique flavors, so choose what suits your taste. -
3 tbsp unsweetened cocoa powder
This is what imparts that rich chocolatey flavor. Feel free to use dark cocoa powder if you want to amp up the chocolate intensity. If you’re in a pinch, you can swap in cocoa nibs for added crunch! -
3 tbsp pure honey
Honey naturally sweetens the pudding and adds a floral note. If you’re vegan, maple syrup or agave nectar makes a wonderful substitute. -
6 tbsp chia seeds
These little seeds are the stars of our dish! They provide the thick, pudding-like consistency we adore. If you don’t have chia seeds, you could try ground flaxseeds, though the texture will differ. -
1 tsp vanilla extract
Vanilla is the secret ingredient that brings it all together! Use pure vanilla extract for the best flavor, but if you’re in a bind, imitation vanilla will do. -
Pinch of salt
Just a hint of salt enhances all the flavors and balances the sweetness.
Step-by-Step Instructions
Let’s get cooking! Trust me, you’ll love how easy this is.
-
Brew Your Coffee
Start by brewing a fresh cup of coffee. If you’re using a cold brew, prepare it in advance so it’s chilled and ready to go. This step is crucial because the coffee flavor is what really sings in this pudding! -
Combine the Ingredients
In a mixing bowl, combine the brewed coffee and milk. Add in the cocoa powder, honey, vanilla extract, and pinch of salt. Whisk until everything is smooth and well combined.Chef Tip: Diligently whisk out any lumps from the cocoa powder for a creamy consistency.
-
Add Chia Seeds
Stir in the chia seeds, ensuring they’re evenly distributed throughout the mixture. This step is essential because it allows those little guys to absorb the liquid and plump up overnight. -
Refrigerate
Cover the bowl with plastic wrap or transfer everything into individual jars for an extra touch of fancy. Place it in the fridge for at least 4 hours or, ideally, overnight! -
Final Touches
When you’re ready to indulge, give the mixture a good stir since the chia seeds may settle at the bottom. If you want a thinner consistency, stir in a splash of milk.Chef Hack: For an extra fancy touch, top your pudding with whipped cream or a dollop of Greek yogurt before serving!
Serving Suggestions
To serve, I love to layer the pudding in beautiful glass jars, garnishing with a sprinkle of cocoa powder, a drizzle of honey, and a few dark chocolate shavings on top. This method not only presents beautifully but also makes it super easy for you or your guests to grab and enjoy!
Recipe Variations
Here are some fun ways to switch up this pudding:
-
Coconut Bliss: Use coconut milk instead of regular milk and stir in some shredded coconut for an island vibe.
-
Nutty Delight: Add a spoonful of nut butter (almond or peanut) into the mix for a delightful nutty flavor.
-
Fresh Fruit: Top with seasonal fruits like bananas or berries for a refreshing twist!
-
Spiced Up: Add a pinch of cinnamon or nutmeg into the mixture for a warm, spicy note.
-
Vegan Option: Simply swap out the honey for maple syrup to keep it plant-based!
Chef’s Notes
I can’t tell you how many breakfast gatherings I’ve hosted where this pudding has made an appearance. One time, I experimented with adding a splash of espresso, and wow, did it elevate the flavor! What began as a simple recipe has developed over the years into my go-to for breakfast gatherings and lazy weekends alike. Each bite takes me back to those cozy mornings at Grandma’s, which I cherish deeply.
FAQs and Troubleshooting
-
Can I make this without coffee?
Absolutely! You can substitute it with brewed herbal tea or even chocolate milk for a completely different flavor profile. -
How long does it keep in the fridge?
This pudding can last up to 5 days in the refrigerator. Make sure to keep it sealed, and give it a stir before enjoying! -
What if it’s too thick?
No problem! Just stir in a little more milk until you reach your desired consistency. -
Can I freeze it?
Yes, you can freeze the pudding for up to a month. Just allow it to thaw overnight in the refrigerator before serving!
Nutritional Info
While I won’t bog you down with numbers, rest assured that chia seeds are a powerhouse, packing omega-3 fatty acids, fiber, and protein! This pudding is not only a treat for your taste buds but also offers a nutritious start to your day!
So there you have it—a delightful and effortless way to elevate your mornings, Overnight Coffee Chocolate Chia Pudding! I can’t wait for you to try it. Tie on your apron, grab your ingredients, and let’s whip up some magic in the kitchen! Enjoy every decadent bite, and don’t forget to share your creations with me. Happy cooking!
PrintOvernight Coffee Chocolate Chia Pudding
A delightful and nutritious breakfast treat combining coffee, chocolate, and chia seeds, perfect for lazy mornings.
- Prep Time: 10 minutes
- Cook Time: 0 minutes
- Total Time: 240 minutes
- Yield: 4 servings 1x
- Category: Breakfast
- Method: Refrigerating
- Cuisine: American
- Diet: Vegan
Ingredients
- 1 cup brewed coffee (or cold brew)
- 1 cup milk (whole, almond, or oat)
- 3 tbsp unsweetened cocoa powder
- 3 tbsp pure honey
- 6 tbsp chia seeds
- 1 tsp vanilla extract
- Pinch of salt
Instructions
- Brew your coffee.
- Combine the brewed coffee and milk in a mixing bowl. Add in cocoa powder, honey, vanilla extract, and salt. Whisk until smooth.
- Add chia seeds and stir to ensure even distribution.
- Refrigerate for at least 4 hours or overnight.
- Final touches: Stir before serving and add optional toppings like whipped cream or Greek yogurt.
Notes
This pudding can last up to 5 days in the fridge. For a thinner consistency, stir in a little more milk.
Nutrition
- Serving Size: 1 serving
- Calories: 250
- Sugar: 15g
- Sodium: 140mg
- Fat: 8g
- Saturated Fat: 3g
- Unsaturated Fat: 5g
- Trans Fat: 0g
- Carbohydrates: 38g
- Fiber: 10g
- Protein: 6g
- Cholesterol: 5mg
Keywords: chia pudding, coffee pudding, chocolate dessert, vegan breakfast, overnight oats
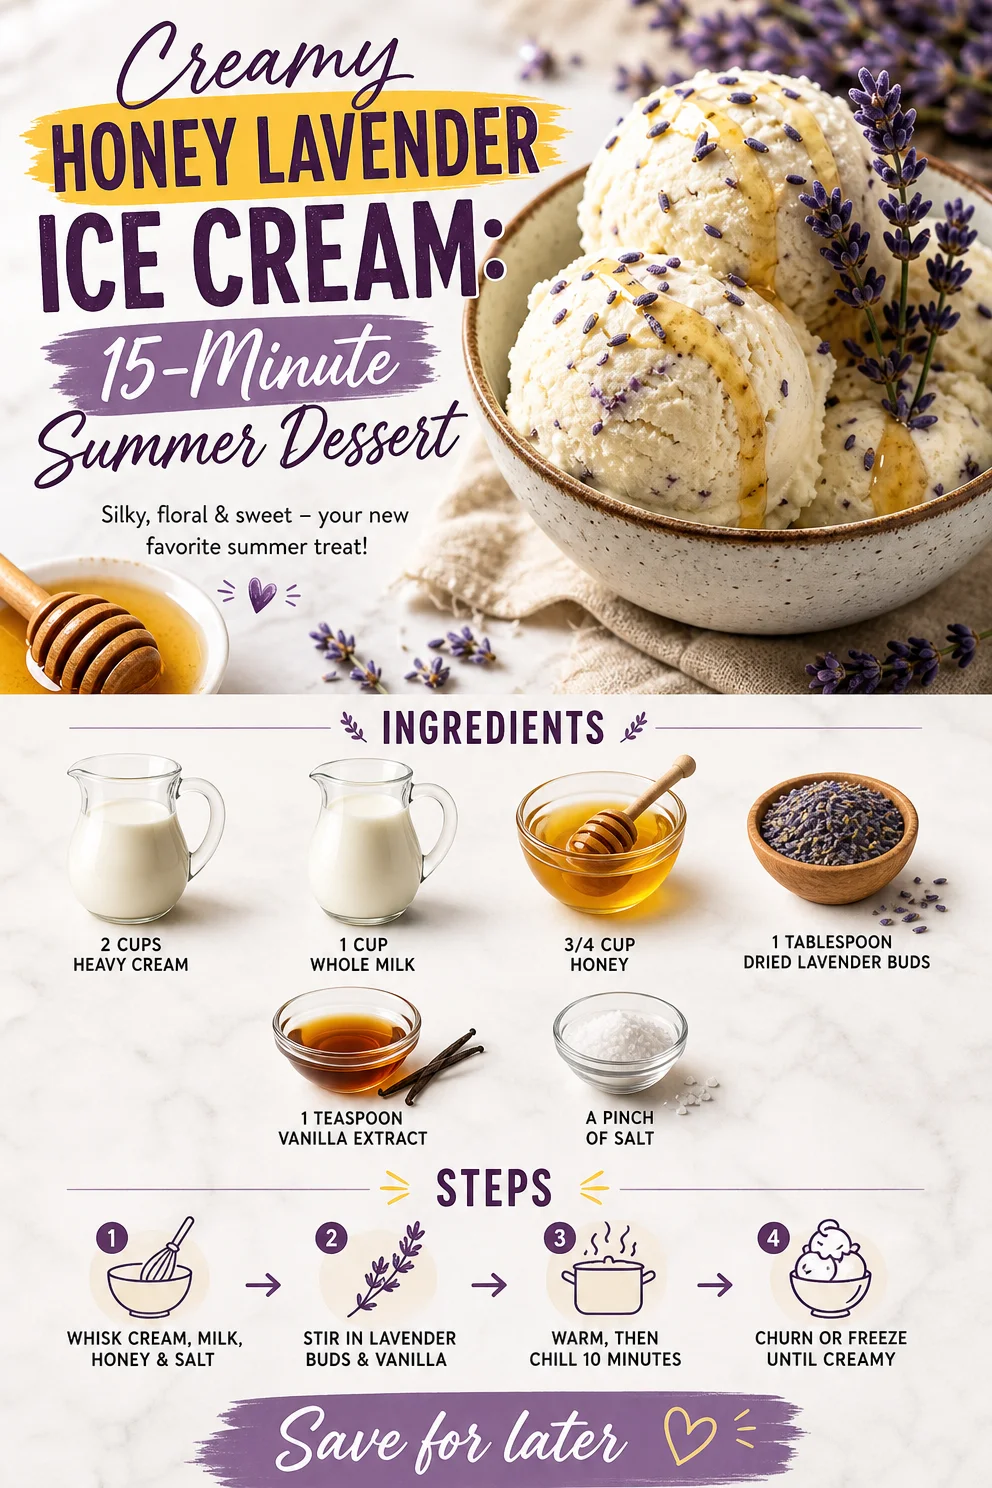
Creamy Honey Lavender Ice Cream: 15-Minute Summer Dessert
Indulge in Summer: The Sweet Serenity of Honey Lavender Ice Cream
Welcome to the whimsical world of sweet treats! If you’re anything like me, you agree that there’s no better way to celebrate a sunny day than with a scoop—or two—of homemade ice cream. And today, dear food lovers, we’re diving deep into the enchanting flavors of Honey Lavender Ice Cream. Imagine a creamy, dreamy concoction that beautifully marries the floral notes of lavender with the natural sweetness of honey. It’s like summer in a bowl!
Picture this: You’re lounging in the garden, surrounded by blooming flowers and the warm sun kissing your skin. You take a bite of this ice cream, and suddenly, it feels as though the world has slowed down. Ah, bliss! Making this delightful treat isn’t just a cooking task; it’s a lovely ritual that transforms your kitchen into a serene escape. And the best part? You don’t need an ice cream machine to create this luscious dessert.
This recipe exudes sophistication, yet its simplicity makes it perfect for anyone looking to impress friends or simply indulge on a quiet evening at home. Allow me to guide you through this enticing culinary experience—let’s scoop into the art of crafting Honey Lavender Ice Cream!
A Beautiful Memory in Every Scoop
When I think of lavender, I don’t just see a pretty purple flower; I’m transported back to my grandmother’s garden. As a child, I would scamper barefoot through her flower-laden oasis, stopping to sniff every lavender bunch I could find. My grandmother would weave lavender sprigs into little bouquets while sharing stories of summers past, all while a gentle waft of honey and fresh cream danced in the air from her kitchen.
One day, she let me help her churn the most magical ice cream filled with her signature lavender flavor. I remember the exhilaration of licking the bowl afterward—savoring the combination of floral and sweet that felt simply ethereal. Now, every time I make Honey Lavender Ice Cream, I’m right back in that garden, savoring memories and sharing stories with friends and family, just like my grandmother taught me.
Ingredients: The Essence of Flavor
Let’s gather our essential ingredients that will create this divine ice cream:
-
2 cups heavy cream: This is the base of our ice cream, providing richness and creaminess. Opt for organic cream for the best flavor. If you’re looking for a lighter version, try blending with half-and-half, though it will be less creamy.
-
1 cup whole milk: It adds a necessary balance of liquid to our cream, helping to create that perfect scoopability. If you’re lactose intolerant, almond or coconut milk can substitute, but the texture will differ.
-
3/4 cup honey: Sweetness at its finest! Opt for a high-quality, raw honey for deeper flavor notes. You can try agave syrup or maple syrup for a vegan option, though the taste would slightly differ.
-
1 tablespoon dried lavender buds: This is where the magic truly happens! Make sure they’re culinary-grade lavender, often found at specialty shops. Not a fan of lavender? Try infusing with vanilla bean instead for a straightforward yet delicious treat.
-
1 teaspoon vanilla extract: Vanilla enhances the floral notes and adds warmth. Pure vanilla extract is the way to go. If unavailable, a few drops of vanilla essence will work too.
-
A pinch of salt: Don’t skip this! Salt enhances the sweetness and balances the flavor. You can use sea salt for a fine finish or Himalayan salt for its unique taste.
Step-by-Step Instructions: Crafting Creamy Bliss
Now that we have our ingredients ready, let’s bring this indulgent treat to life!
Step 1: Infuse the Cream
In a medium saucepan, combine the heavy cream, whole milk, and lavender buds over medium heat. Just heat it until bubbles form around the edges—don’t let it boil! Stir gently and enjoy the aroma filling your kitchen. This infusion is crucial for extracting all those heavenly floral notes from the lavender.
Step 2: Sweeten Up the Magic
Once your cream mixture is warm, remove it from the heat. Add in the honey and vanilla extract, stirring until completely dissolved. The cream should now have a beautiful golden hue, hinting at the luscious sweetness that awaits!
Step 3: Let It Chill
This step is essential! Transfer this mixture into a glass bowl, cover it with plastic wrap, and refrigerate for at least 4 hours, or preferably overnight. This will allow the flavors to develop and the mixture to cool properly before we churn it.
Step 4: Strain the Mixture
After chilling, strain the mixture to remove the lavender buds. You can use a fine mesh sieve or cheesecloth for this. Press gently to extract as much liquid as possible. This step ensures a creamy texture without any floral surprises in your scoops!
Step 5: Chill, Churn, and Freeze
If you have an ice cream machine, pour the mixture into that and churn according to the manufacturer’s instructions until it reaches a soft-serve consistency. If you don’t have an ice cream maker, pour the mixture into a shallow dish and place it in the freezer. Stir it every 30 minutes with a fork for the first 4 hours. This helps to break up any ice crystals, giving you a creamy result.
Step 6: The Waiting Game
Once it’s churned or frozen to your desired consistency, transfer it to an airtight container and let it freeze solid for at least 4 hours. Now, patience is key—allow those heavenly flavors to meld together!
Serving Suggestions: A Feast for the Eyes
When you’re finally ready to serve your Honey Lavender Ice Cream, it’s time to get a little creative! Serve it in elegant ice cream bowls or whimsical cones, topped with a drizzle of honey for that beautiful glisten. Fresh lavender sprigs make a stunning garnish, and don’t shy away from adding chopped pistachios or a sprinkle of sea salt for crunch and contrast.
Drizzle Option: Elevate your experience even further by adding a simple blueberry compote or wrapping it in a delicate crepe for a delightful dessert!
Recipe Variations to Explore
Feeling adventurous? Here are a few variations to spark your creativity:
-
Honey Lemon Lavender: Add zest from one lemon to the mixture for a refreshing citrus twist.
-
Lavender-Wildflower Honey Swirl: Use wildflower honey in the base and swirl in a lavender syrup before freezing for an extra layer of flavor.
-
Minty Lavender: Substitute some of the lavender with fresh mint. Infuse that delicious mint alongside the cream for a refreshing take.
-
Choco-Lavender Delight: Fold in finely chopped dark chocolate after churning for a luscious twist!
-
Dairy-Free Delight: Replace heavy cream and whole milk with full-fat coconut milk for a vegan option that still captures that creamy texture.
Chef’s Notes: Stories from the Kitchen
Every recipe has its quirks and tales, and this Honey Lavender Ice Cream is no exception! Several years back, I tried making this at a friend’s summer garden party. I was so excited that I forgot to strain out the lavender buds. Let’s just say, it ended up being a light floral surprise for my guests! It turned into a laughable memory, and now I always remind myself that the simplest mistakes can create beautiful moments in the kitchen.
This recipe has evolved into a family favorite, sparking curiosity and joy in every scoop shared at gatherings—just like it did in my grandmother’s garden. Plus, I’ve refined the method over the years for a perfectly creamy texture that works every single time.
FAQs and Troubleshooting
Q: How can I tell if my ice cream is ready to serve?
A: It should be firm but still scoopable. If it’s too hard, let it sit at room temperature for a few minutes before serving.
Q: Can I use fresh lavender instead of dried?
A: Absolutely! You’ll want to triple the amount, as fresh lavender is less concentrated than dried.
Q: What if I over-infused the lavender?
A: If it’s too strong, a little extra cream can help balance the flavors! Just remember to chill it again before churning.
Q: My ice cream turned out icy—what went wrong?
A: This usually happens if it hasn’t been stirred enough during the initial freezing process or if it’s been frozen for too long. Remember to stir or churn to break up ice crystals!
Nutritional Info
While I believe in enjoying ice cream in moderation, it’s helpful to know what you’re indulging in! For a 1/2 cup serving, you can expect around 250 calories, 18 grams of fat, and an ample dose of sweetness. Again, these values may vary based on ingredient choices.
So, will you join me in creating this airy Honey Lavender Ice Cream to elevate your dessert game? Remember, cooking is all about experimenting, enjoying, and creating memories around the table. Grab that apron, call some friends, and let’s scoop into summer together! Invite the magic of lavender and honey into your kitchen, and experience the joy of crafting creamy delights that truly feel timeless. Here’s to sweet moments, always. 🍦✨
PrintHoney Lavender Ice Cream
A creamy and dreamy ice cream that combines the floral notes of lavender with the natural sweetness of honey, perfect for summer indulgence.
- Prep Time: 20 minutes
- Cook Time: 10 minutes
- Total Time: 260 minutes
- Yield: 4 servings 1x
- Category: Dessert
- Method: Churning
- Cuisine: American
- Diet: Vegetarian
Ingredients
- 2 cups heavy cream
- 1 cup whole milk
- 3/4 cup honey
- 1 tablespoon dried lavender buds
- 1 teaspoon vanilla extract
- A pinch of salt
Instructions
- Infuse the cream: In a medium saucepan, combine the heavy cream, whole milk, and lavender buds over medium heat. Do not let it boil!
- Sweeten up the magic: Once warm, remove from heat, add honey and vanilla, stirring until dissolved.
- Let it chill: Transfer the mixture into a bowl, cover, and refrigerate for at least 4 hours or overnight.
- Strain the mixture: Use a fine mesh sieve to remove lavender buds, pressing gently.
- Chill, churn, and freeze: Pour into an ice cream machine or shallow dish to freeze. Stir every 30 minutes for the first 4 hours.
- Transfer: Once desired consistency is reached, store in an airtight container and freeze solid for at least 4 hours.
Notes
For variations, consider adding lemon zest for a citrus twist or using coconut milk for a dairy-free version.
Nutrition
- Serving Size: 1/2 cup
- Calories: 250
- Sugar: 25g
- Sodium: 50mg
- Fat: 18g
- Saturated Fat: 11g
- Unsaturated Fat: 7g
- Trans Fat: 0g
- Carbohydrates: 30g
- Fiber: 0g
- Protein: 3g
- Cholesterol: 65mg
Keywords: honey lavender ice cream, homemade ice cream, summer dessert
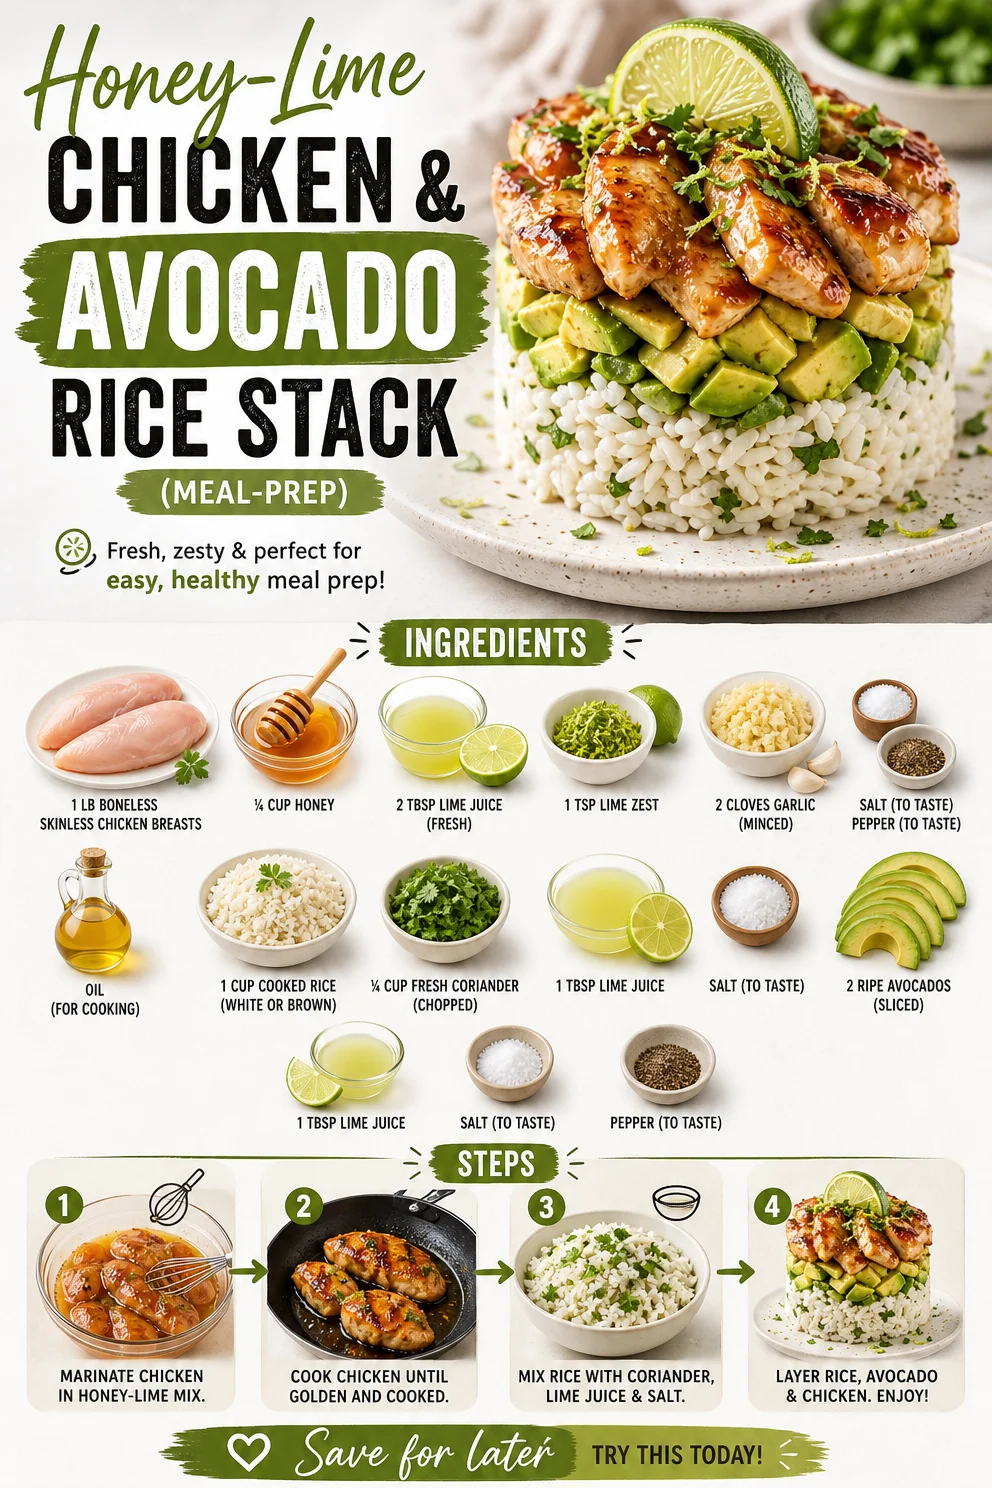
Honey-Lime Chicken & Avocado Rice Stack (Meal-Prep)
Honey Lime Chicken & Avocado Rice Stack: A Delicious Journey
Welcome to Ivory Apron, where cooking meets comfort and elegance! Today, I’m thrilled to share a recipe that brings together a delightful explosion of flavors while still feeling approachable—Honey Lime Chicken & Avocado Rice Stack. This dish is perfect for both a cozy weeknight dinner and an elegant dinner party. So, grab your apron and let’s jump into this beautiful culinary creation!
A Bite of Nostalgia
Growing up, some of my fondest memories involve summer barbecues at my grandma’s house. She would always have a spread of fresh ingredients ready to create incredible meals. One particular dish that stands out is her honey lime chicken, marinated to perfection and grilled with love. I remember the warm summer evenings, family gathered around, the air fragrant with the sweetness of honey and the zing of lime. It was more than a meal; it was a celebration of flavors and togetherness—something I aspire to replicate in my own cooking.
The inspiration for today’s Honey Lime Chicken & Avocado Rice Stack comes from those cherished moments. I took the essence of my grandma’s recipe and transformed it into something visually stunning and wonderfully balanced. It’s simple yet sophisticated, just like those joyful gatherings around her table. I can’t wait for you to create your own memories with this delightful dish!
Ingredients
Before we dive into cooking, let’s gather our high-quality ingredients for that perfect honey lime chicken and creamy avocado rice stack.
-
1 lb boneless, skinless chicken breasts
Tender and juicy, chicken breasts soak up the marinade beautifully. If you prefer a different protein, try using boneless thighs or even tofu for a vegetarian option. -
¼ cup honey
This natural sweetener adds a rich, floral sweetness. Pure honey will give the best flavor, but maple syrup can be a fantastic substitute if you’re looking for a vegan option. -
2 tablespoons lime juice (fresh)
Freshly squeezed lime juice heightens the dish’s flavor. Bottled lime juice won’t have quite the same zest, but in a pinch, it works. -
1 teaspoon lime zest
Zest brings a bright, citrusy punch. No lime? Lemon zest can work as a substitute for a similar brightness. -
2 cloves garlic (minced)
Garlic adds depth and aromatic richness. If you’re in a hurry, garlic powder works as a quick substitute—just use about 1/4 teaspoon. -
Salt and pepper (to taste)
Essential for bringing out the flavors in your dish. Always season your dish as you go for the best flavor! -
Oil (for cooking)
Use olive oil for sautéing or grilling. Avocado oil is another great option with a high smoke point. -
1 cup cooked rice (white or brown)
Rice serves as the comforting base of our stack. Quinoa or cauliflower rice can be fantastic alternatives for a gluten-free or lower-carb option. -
¼ cup fresh coriander (chopped)
It adds a delightful freshness to the dish. If coriander isn’t your thing, feel free to swap in parsley or even dill. -
1 tablespoon lime juice
More acidity to elevate your rice! -
2 ripe avocados (sliced)
Creamy and buttery, avocados complete this dish. If avocados aren’t available, try substituting with hummus or a yogurt-based sauce. -
1 tablespoon lime juice (for avocados)
It prevents browning and gives your avocados a fresh kick. -
Salt and pepper (to taste)
You know the drill—season it to your liking!
Gathering these ingredients will ensure you craft a dish that delights the senses!
Step-by-Step Instructions
Now that we have everything ready, let’s get cooking with this easy-to-follow recipe. Here’s how to make Honey Lime Chicken & Avocado Rice Stack.
-
Prep the Chicken
Start by placing your chicken breasts on a clean cutting board. To ensure even cooking, pound them to an even thickness (about ½ inch) using a meat mallet. This step not only makes for a more tender chicken but also allows the marinade to penetrate more effectively. -
Make the Marinade
In a mixing bowl, whisk together the honey, lime juice, lime zest, minced garlic, salt, and pepper. This marinade is where the magic happens—coating the chicken with bold flavors. Add the chicken to the bowl, ensuring each piece is well-coated. Let it marinate for at least 30 minutes (or up to overnight if you’re planning ahead!). The longer you marinate, the more flavor you’ll impart. -
Cook the Chicken
Heat a tablespoon of oil in a large skillet or grill over medium-high heat. Once hot, add the marinated chicken (discard any leftover marinade). Cook for about 6-7 minutes on each side or until the chicken reaches an internal temperature of 165°F (75°C). Don’t rush this step—getting that lovely golden-brown crust will add incredible flavor.Tip: Avoid overcrowding the pan, as this can lead to steaming rather than a nice sear. If you’re cooking multiple pieces, do them in batches!
-
Prepare the Avocado Rice
While the chicken is cooking, combine the cooked rice, fresh coriander, and 1 tablespoon of lime juice in a large bowl. Season with salt to taste. This fluffy, zesty rice will create a vibrant backdrop for your chicken stack. If you want more flavor, feel free to toss in some diced tomatoes or chopped bell peppers. -
Slice the Chicken
After cooking, let the chicken rest for about 5 minutes. This allows the juices to redistribute, resulting in juicy chicken! While it rests, slice the chicken into strips or bite-sized pieces. -
Assemble the Stacks
To serve, start with a generous scoop of the cilantro rice as your base. Next, layer the avocado slices on top, lightly seasoned with salt and pepper and a squeeze of lime juice for brightness. Finally, top it all with the sliced chicken.Chef Hack: You can use a ring mold or even a measuring cup to create neat layers for a beautiful presentation!
Serving Suggestions
Presentation is everything, my friends! Serve your Honey Lime Chicken & Avocado Rice Stack on a large platter or individual plates for a personal touch. Drizzle a bit of extra honey or lime juice over the top for added elegance. Pair it with a refreshing salad or roasted vegetables for a complete meal. Your guests will be impressed, and you’ll feel like a culinary star!
Recipe Variations
Want to switch things up? Here are a few fun and creative twists for your Honey Lime Chicken & Avocado Rice Stack:
- Spicy Kick: Add a teaspoon of chili powder or a splash of hot sauce to the marinade for a kick of heat.
- Tropical Delight: Top with pineapple salsa for a vibrant tropical flair.
- Grain Swap: Use quinoa, farro, or even couscous instead of rice for a different texture.
- Herbaceous Delight: Mix in fresh herbs like basil or mint with your rice for a unique twist.
- Vegan Option: Substitute chicken with grilled portobello mushrooms or chickpeas for a plant-based version.
Chef’s Notes
This recipe has evolved beautifully over time, and I’m still as passionate about it as I was when I first created it. I remember one of my first attempts at this stack—I accidentally overcooked the chicken. As I was trying to salvage it, I discovered that a drizzle of honey and fresh herbs could save the day! The dish transformed into a family favorite and taught me the invaluable lesson that cooking doesn’t have to be perfect.
FAQs and Troubleshooting
Q: My chicken is dry! What did I do wrong?
A: Overcooking is usually the culprit. Using a meat thermometer can help ensure you pull the chicken at the right time!
Q: How do I store leftovers?
A: Store leftovers in an airtight container in the refrigerator for up to 3 days. Reheat gently to avoid drying out.
Q: Can I freeze this dish?
A: Yes! You can freeze the marinated chicken prior to cooking. Once cooked, however, the assembled stack is best enjoyed fresh.
Q: What if I don’t have fresh lime?
A: While fresh lime is preferred, bottled lime juice can work too—just adjust to taste since it can be slightly more sour or acidic.
Nutritional Info
(For reference, typical serving contains approximately):
- Calories: 450
- Protein: 30g
- Carbohydrates: 45g
- Fat: 20g
- Dietary Fiber: 6g
And there you have it! A scrumptious Honey Lime Chicken & Avocado Rice Stack that’s sure to bring warmth, flavor, and joy to your dining table. Whether you’re hosting friends or enjoying a quiet family meal, this dish is a true crowd-pleaser. I hope it inspires you to create beautiful moments around your own table. Happy cooking, and don’t forget to share your creations with me!
PrintHoney Lime Chicken & Avocado Rice Stack
This dish combines honey lime chicken with creamy avocado rice for a delicious and visually stunning meal that’s perfect for any occasion.
- Prep Time: 15 minutes
- Cook Time: 30 minutes
- Total Time: 45 minutes
- Yield: 4 servings 1x
- Category: Main Course
- Method: Grilling
- Cuisine: Mexican
- Diet: Gluten Free
Ingredients
- 1 lb boneless, skinless chicken breasts
- ¼ cup honey
- 2 tablespoons lime juice (fresh)
- 1 teaspoon lime zest
- 2 cloves garlic (minced)
- Salt and pepper (to taste)
- Oil (for cooking)
- 1 cup cooked rice (white or brown)
- ¼ cup fresh coriander (chopped)
- 1 tablespoon lime juice
- 2 ripe avocados (sliced)
- 1 tablespoon lime juice (for avocados)
- Salt and pepper (to taste)
Instructions
- Prep the Chicken: Pound the chicken breasts to an even thickness for tender results.
- Make the Marinade: Whisk together honey, lime juice, lime zest, minced garlic, salt, and pepper. Marinate chicken for at least 30 minutes.
- Cook the Chicken: Heat oil in a skillet, cook the marinated chicken for 6-7 minutes on each side until cooked through.
- Prepare the Avocado Rice: Combine cooked rice, fresh coriander, and lime juice in a bowl. Season with salt.
- Slice the Chicken: Rest the cooked chicken for 5 minutes, then slice into strips.
- Assemble the Stacks: Start with rice, layer avocado, and top with sliced chicken.
Notes
Serve with a drizzle of extra honey or lime juice. This dish can be easily customized with different grains or spices.
Nutrition
- Serving Size: 1 serving
- Calories: 450
- Sugar: 30g
- Sodium: 300mg
- Fat: 20g
- Saturated Fat: 3g
- Unsaturated Fat: 15g
- Trans Fat: 0g
- Carbohydrates: 45g
- Fiber: 6g
- Protein: 30g
- Cholesterol: 75mg
Keywords: Honey Lime Chicken, Avocado Rice, Summer BBQ, Comfort Food, Chicken Recipe
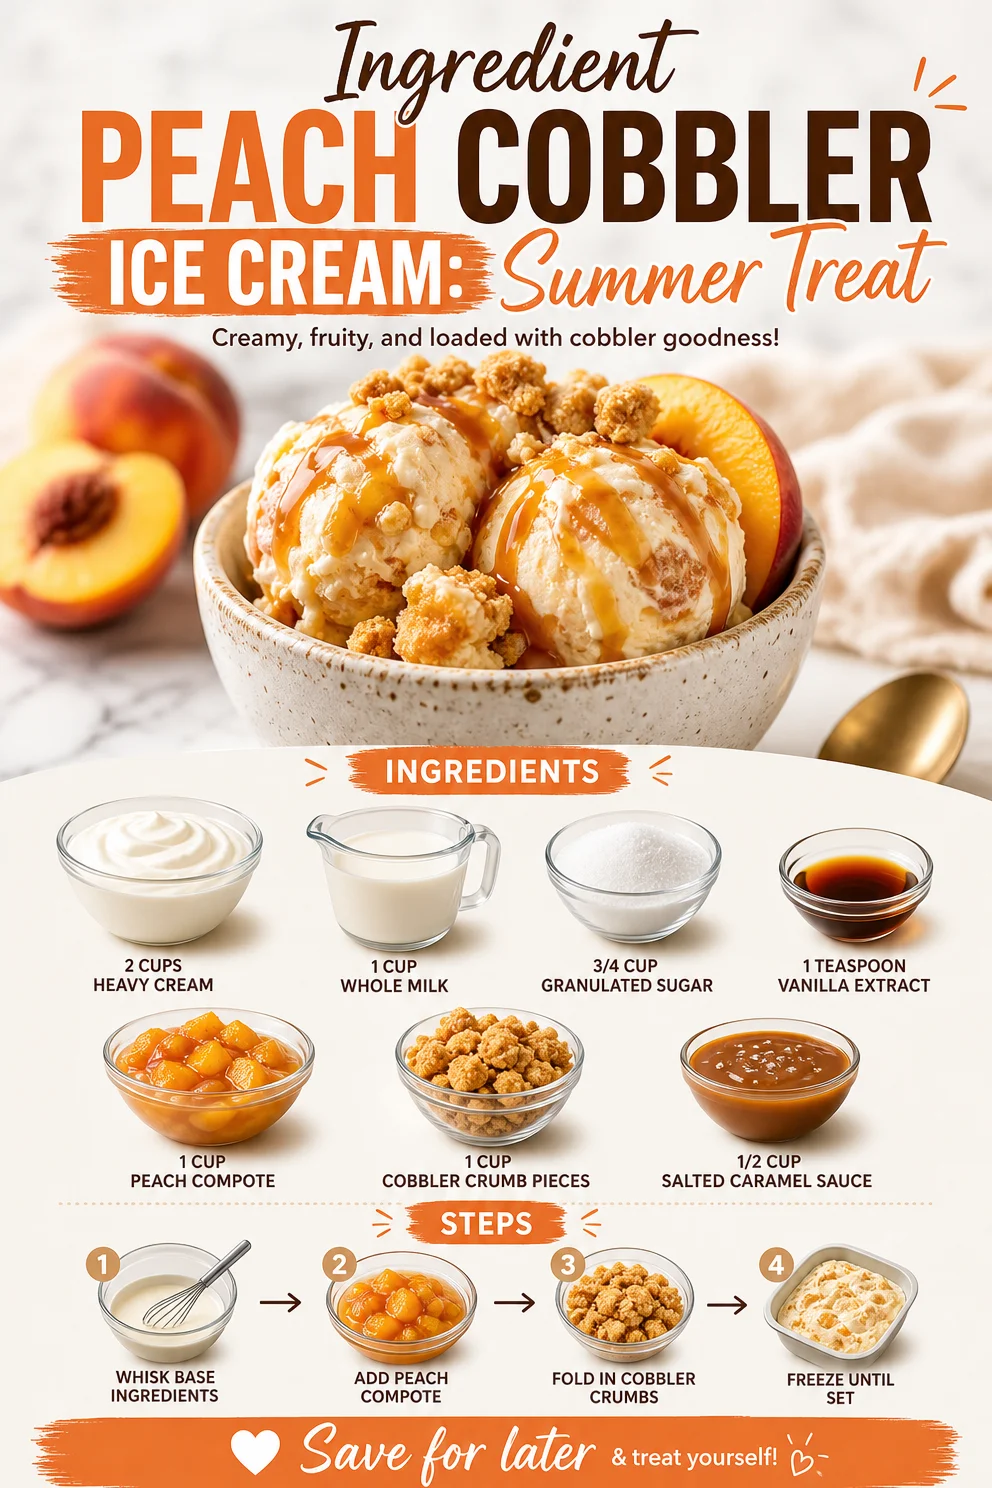
Ingredient Peach Cobbler Ice Cream: Summer Treat
Scoops of Summer: Peach Cobbler Ice Cream Bliss
Hello there, my fellow food enthusiasts! Today, I’m bringing you a delightful sweet treat that perfectly captures the essence of summer: Peach Cobbler Ice Cream. Picture this: warm, sunny days filled with laughter, friends gathered around, and you, the star of the show, serving up scoops of creamy goodness infused with the taste of sweet peaches and baked cobbler. Sounds dreamy, right?
Why Peach Cobbler Ice Cream?
Peaches are one of summer’s greatest gifts. Juicy, succulent, and bursting with flavor, they remind me of lazy afternoons spent in my grandmother’s backyard, where she’d serve us homemade peach cobbler fresh from the oven. That crispy, buttery crust paired with the warmth of vanilla ice cream made it an unbeatable summer dessert. As I grew older and started experimenting in my own kitchen, the idea popped into my head: why not merge those two summer staples into one heavenly dessert? Thus, Peach Cobbler Ice Cream was born—a treat that brings back those sweet memories while keeping things vibrant and fun.
You’ll appreciate how effortless this recipe is to whip up at home using simple ingredients that elevate a classic cobbler with velvety ice cream. And trust me, once you make this, you’ll find yourself indulging in it long after summer fades away.
The Ingredients You’ll Need
Let’s talk about the star players of this dessert. Each ingredient is chosen for its role in delivering that beloved peach cobbler flavor. Here’s what you’ll need:
-
2 cups heavy cream
- This is the base of your ice cream, giving it that rich, creamy texture. If you prefer a lighter option, you can substitute half of this with coconut cream!
-
1 cup whole milk
- Whole milk adds a perfect balance of creaminess without being overly rich. Feel free to use low-fat milk, but do note that the texture may be less creamy.
-
3/4 cup granulated sugar
- Sugar is essential for sweetness and to help prevent ice crystals from forming, giving a smoother texture. You can try using a sugar alternative like honey or agave if you’re looking to cut out refined sugar.
-
1 teaspoon vanilla extract
- Vanilla enhances the flavor of the ice cream, making it taste homemade and oh-so-delicious. High-quality pure vanilla extract yields the best results; it’s totally worth it!
-
1 cup peach compote
- This will be your rich, peachy layer. You can make your own compote with fresh peaches or buy a jar from your favorite store. Make sure it’s flavorful and sweet.
-
1 cup cobbler crumb pieces
- Nothing says cobbler like those little bits of buttery, crispy goodness. Use leftover cobbler, or crumble up your favorite biscuit recipe as a topping.
-
1/2 cup salted caramel sauce
- This is the pièce de résistance! It adds a luxe touch while balancing the sweetness of the peaches. Don’t skimp on this step; homemade or store-bought works fabulously.
Step-by-Step Instructions
Now, let’s dive into the magic of making this Peach Cobbler Ice Cream! The process is straightforward and will have your kitchen smelling divine.
-
Prepare the Peach Compote
If you’re starting from scratch, peel and chop about 4 ripe peaches and cook them over medium heat with a bit of sugar (about 2 tablespoons) until they break down and become syrupy (around 10-15 minutes). Allow it to cool. -
Mix the Base
In a large mixing bowl, combine the heavy cream, whole milk, and granulated sugar. Whisk until the sugar dissolves completely. It’s important to mix until you don’t see any granules of sugar; this ensures a silky ice cream. -
Add the Flavor
Stir in the vanilla extract and peach compote, mixing well. The vibrant orange-peach color is a sure sign that you’re headed in the right direction! To intensify the peach flavor, you can add an extra splash of peach nectar if you’d like. -
Chill the Mixture
Cover your bowl with plastic wrap and refrigerate the mixture for at least 2 hours (or even overnight!). This helps develop flavor and ensures your ice cream churns up nice and creamy. -
Churn the Ice Cream
Once chilled, pour the mixture into your ice cream maker. Follow your manufacturer’s instructions: typically, this takes about 20-30 minutes until it thickens. -
Incorporate Cobbler Crumbs
Near the end of churning, add the cobbler crumb pieces to the mix. These delicious bits will make your ice cream feel like a true cobbler experience. If you like a swirl instead, just fold them in gently after churning. -
Transfer to a Container
Scoop your ice cream into a lidded container, layering in additional cobbler crumbs as you go if you want extra crunch. Drizzle all that caramel sauce over the top like an artistic drizzle! This will ensure every scoop has that divine caramel flavor. -
Freeze Until Firm
Cover the container and pop it into the freezer for at least 4 hours, or until it’s firm enough to scoop. Patience is key here, but it’ll be so worth it when you dig in!
Serving Suggestions
When it comes time to serve your Peach Cobbler Ice Cream, a little presentation goes a long way. Serve in rustic bowls or elegant dessert cups, and don’t forget to drizzle a little extra salted caramel on top for that mouth-watering finish. Garnish with fresh peach slices and crushed cobbler crumbs for added flair. You can also add a sprig of mint for a pop of color!
Recipe Variations
Feeling adventurous? Here are some creative tweaks to customize your Peach Cobbler Ice Cream:
- Frozen Yogurt Twist: Swap half the heavy cream for Greek yogurt for a tangy and creamy texture.
- Berry Blend: Mix in some fresh or frozen berries (like blueberries or raspberries) with the peach compote for added color and flavor.
- Nutty Crunch: Throw in some chopped pecans or almonds during the churning process for an irresistible crunch.
- Pre-Made Mixes: Use store-bought seasonal fruit compotes instead of making your own. Set yourself up for easy and quick enjoyment!
- Tropical Vibe: Incorporate coconut flakes and perhaps a hint of lime juice for a tropical twist to your summer favorite.
Chef’s Notes
As a passionate home cook, I’ve seen my recipes evolve over the years. Peach Cobbler Ice Cream is a reflection of that growth—a recipe that started as simply a craving for summer comfort food but morphed into a beloved centerpiece at gatherings. The beauty of cooking is experimentation; don’t hesitate to tweak it until it feels just right for you! O, and children absolutely adore this; you’ll definitely get requests for seconds—and thirds, I promise you that!
FAQs and Troubleshooting
-
Why is my ice cream icy?
Ice crystals can form if not enough sugar is added. Ensure you’re mixing the sugar well and consider adding a bit more if your mixture doesn’t taste sweet enough. -
How do I get a smoother texture?
Ensure your base is chilled thoroughly and churn it until it thickens well. Over-churning can lead to icy textures; know when to stop! -
Can I make this without an ice cream maker?
Absolutely! After mixing everything, pour it into a container and freeze. Stir every 30 minutes for the first 2-3 hours to break up ice crystals and create a creamier texture. -
How long does this ice cream last?
Typically, it’ll last about 2 weeks in the freezer. But let’s be real—isn’t ice cream always better fresh?
Nutritional Info
For those keeping an eye on nutritional intake, here’s a rough estimate per serving (based on eight servings):
- Calories: 400
- Total Fat: 25g
- Saturated Fat: 15g
- Carbohydrates: 45g
- Sugars: 35g
- Protein: 3g
Now that you’re all set to make this Peach Cobbler Ice Cream, know that each scoop brings back memories and creates new ones. Whether it’s a summer gathering or cozy night at home, this dessert is sure to brighten your day. So, tie on that cute apron, grab some friends, and let’s create something timeless! Enjoy! 🍑🍦
PrintPeach Cobbler Ice Cream

A delightful summer treat that combines the flavors of peach cobbler and creamy ice cream.
- Prep Time: 15 minutes
- Cook Time: 15 minutes
- Total Time: 240 minutes
- Yield: 8 servings 1x
- Category: Dessert
- Method: Churning
- Cuisine: American
- Diet: Vegetarian
Ingredients
- 2 cups heavy cream
- 1 cup whole milk
- 3/4 cup granulated sugar
- 1 teaspoon vanilla extract
- 1 cup peach compote
- 1 cup cobbler crumb pieces
- 1/2 cup salted caramel sauce
Instructions
- Prepare the peach compote by peeling and chopping peaches, then cook with sugar until syrupy.
- Mix the heavy cream, whole milk, and sugar in a bowl until sugar dissolves.
- Add the vanilla extract and peach compote, stirring to combine.
- Chill the mixture in the refrigerator for at least 2 hours.
- Churn the mixture in an ice cream maker according to the manufacturer’s instructions.
- Incorporate the cobbler crumbs near the end of churning.
- Transfer the ice cream to a lidded container, layering in extra crumbs if desired.
- Freeze for at least 4 hours until firm.
Notes
Serve in rustic bowls garnished with fresh peach slices, crushed cobbler crumbs, and a drizzle of salted caramel.
Nutrition
- Serving Size: 1 serving
- Calories: 400
- Sugar: 35g
- Sodium: 100mg
- Fat: 25g
- Saturated Fat: 15g
- Unsaturated Fat: 5g
- Trans Fat: 0g
- Carbohydrates: 45g
- Fiber: 1g
- Protein: 3g
- Cholesterol: 80mg
Keywords: peach cobbler, ice cream, summer dessert, frozen treat, homemade dessert
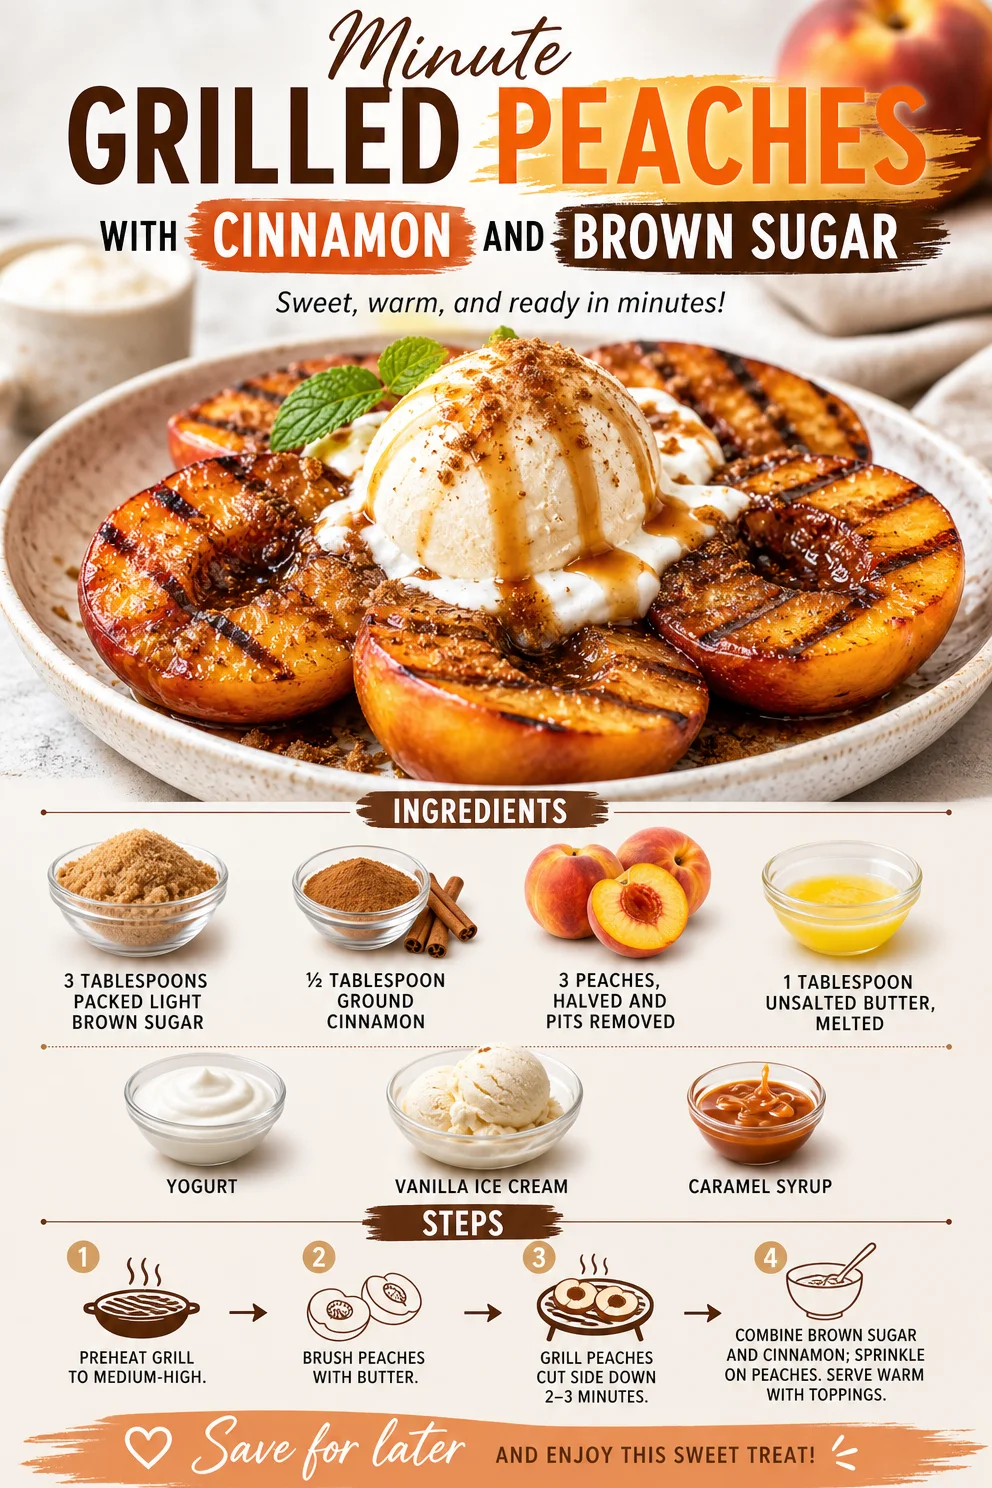
Minute Grilled Peaches with Cinnamon and Brown Sugar
Grilled Peaches with Cinnamon and Brown Sugar: A Sweet Summer Delight
Hello, culinary friends! I’m so delighted to welcome you back to the Ivory Apron kitchen. Today, we’re diving into a recipe that perfectly captures the warmth of summer and the joy of simplicity: Grilled Peaches with Cinnamon and Brown Sugar. If you’re a fan of desserts that feel elegant yet are incredibly easy to whip up, buckle in! This is going to become your new favorite go-to for gatherings, weeknight treats, or just a sweet pick-me-up on those warm summer evenings.
There’s something magical about grilled fruit. The heat transforms the natural sugars, giving them a caramelized flavor that’s utterly irresistible. When you thoughtfully pair that with a sprinkle of cinnamon and brown sugar, you elevate the experience to something truly special. Not to mention, when you serve these peaches with a dollop of creamy yogurt or a scoop of vanilla ice cream, you create a dessert that’s indulgent but still feels light.
Now, let’s grab our aprons and get cooking!
A Sweet Memory
As a child, summer meant family BBQs in my grandmother’s backyard. The sun would shimmer, and laughter filled the air while we played games and waited for the grilled feast to begin. One summer evening, my grandmother decided to experiment with grilling fruit. I remember watching in awe as she placed peach halves on the grill. The sizzle was music to my ears!
Once she sprinkled the grilled peaches with brown sugar and cinnamon, I could hardly contain my excitement. The aroma wafting from the grill was heavenly. We topped them with vanilla ice cream, and I can still recall that first bite—warm, gooey, and sweet, balanced with a hint of spice. Each mouthful tasted like sunshine and love. That memory crops up every summer, and it continues to inspire my love for grilling fruit, so I’m thrilled to share this recipe with you.
Ingredients
Let’s go over our simple, yet delicious ingredients for this beautiful dish. Here’s what you’ll need:
-
3 tablespoons packed light brown sugar
This provides a deep caramel flavor. If you don’t have brown sugar, you can substitute with white sugar mixed with a touch of molasses for that rich, dark sweetness. -
½ tablespoon ground cinnamon
A staple spice that adds warmth and fragrant sweetness. Feel free to substitute with nutmeg or allspice for a different twist. -
3 peaches, halved and pitted
Fresh, ripe peaches are ideal! If they’re not in season, you can use nectarines or even plums for a delightful change. -
1 tablespoon unsalted butter, melted
This buttery goodness adds richness and helps the sugar to caramelize beautifully. If you’re avoiding dairy, coconut oil works great as a substitute. -
Yogurt (optional)
A dollop of creamy yogurt, like Greek or vanilla, provides a nice contrast to the sweet peaches. If you’re dairy-free, consider almond or coconut yogurt! -
Vanilla ice cream (optional)
Who doesn’t love a scoop of ice cream? It adds a delightful creaminess. Swap it with dairy-free ice cream for a lighter option. -
Caramel syrup (optional)
A drizzle of caramel syrup elevates the dessert to new heights. For a healthier choice, consider a homemade date caramel.
Step-by-Step Instructions
Now, let’s get cooking! Follow along with these detailed steps for a delicious outcome:
-
Preheat the Grill
Heat your grill to medium-high. A well-heated grill will give your peaches those beautiful grill marks and a lovely caramelization. If you’re using a grill pan, make sure it’s hot too! -
Prepare the Peaches
While the grill heats, wash your peaches thoroughly. Halve each peach and carefully remove the pit. The peach halves should be intact so that they hold up on the grill. -
Make the Cinnamon Sugar
In a small bowl, combine the brown sugar and cinnamon. Mixing them together beforehand ensures an even distribution when grilling, creating that irresistible sweetness. -
Butter Those Peaches
Brush the cut sides of each peach with the melted butter. This helps in the caramelization process and enhances the flavors. Plus, it keeps the peaches from sticking to the grill. -
Sprinkle with Cinnamon Sugar
Generously sprinkle the cinnamon sugar mixture over the buttered side of each peach half. Don’t be shy! The sugar creates a delightful crust as they grill. -
Grill the Peaches
Place the peaches cut-side down on the grill. Grill for about 4-5 minutes without moving them, allowing grill marks to form and the sugars to caramelize. You can peek underneath to check for those beautiful char marks. -
Turn and Grill Again
Once nicely charred, carefully flip them over (use tongs for safety). Grill for an additional 2-3 minutes. You want them to be tender yet still hold their shape. -
Serve Immediately
Once done, remove the peaches from the grill. They’re best served warm! Top with a dollop of yogurt or a scoop of vanilla ice cream. Drizzle with caramel syrup for that extra touch of decadence.
Serving Suggestions
Plating is where you can let your creativity shine! Place the warm grilled peaches in the center of a shallow bowl or on a pretty plate. If you’re adding yogurt or ice cream, position a spoonful right next to the peaches. A light dusting of cinnamon or a sprinkle of chopped nuts could add a final touch. If you’re feeling fancy, why not add a sprig of fresh mint for an added pop of color?
Recipe Variations
This dish is wonderfully versatile! Here are a few twists to consider:
-
Grilled Peaches and Burrata: Top your peaches with creamy burrata cheese instead of ice cream for a sophisticated salad. Add fresh basil for a burst of flavor—yum!
-
Berry Compote: Whip up a quick berry compote to drizzle over your grilled peaches for an extra layer of flavor. Simply simmer mixed berries with a touch of sugar until they burst!
-
Maple Spice: Swap the brown sugar with maple syrup for a distinctly different sweetness. You can also use pumpkin spice instead of cinnamon for a fall twist.
-
Nutty Delight: Sprinkle chopped pistachios or almonds on top of your already delicious dish for a crunchy element that pairs perfectly with the soft peaches.
-
Cocoa Infusion: For a chocolatey twist, dust with some cocoa powder or drizzle melted dark chocolate over the top after grilling.
Chef’s Notes
I can’t tell you how many entertaining dinners have featured these grilled peaches at my table. They’ve evolved a bit—the first time I made them, I simply tossed on a bit of sugar and grilled without the butter. But that’s where the magic is! The melting butter takes things to another level.
And let me tell you; these delicious peaches are kid-favorites too! One summer, my nephew insisted on getting involved. He skipped the grill and opted to sprinkle the cinnamon sugar on the peaches—what a mess! But, oh, the joy on his face when he took that first bite was worth every bit of sugar that ended up on the floor! Cooking is as much about making memories as it is about creating delicious food.
FAQs and Troubleshooting
1. My peaches are too hard to grill. What should I do?
Choose ripe peaches for grilling, but if they’re still firm, simply give them a little more time on the grill. Alternatively, you can grill them for a few minutes longer, but keep an eye out to prevent them from burning.
2. What if my sugar is burning on the grill?
It’s important to monitor your grill temperature! If you notice the sugar is burning, lower the heat slightly or move them to a cooler part of the grill.
3. Can I make them ahead?
Grilled peaches are best served immediately, but if you have leftover, store them in an airtight container in the fridge. Reheat gently on the grill or in the microwave before serving.
4. How can I ensure perfect grill marks?
To get beautifully distinct grill marks, make sure the grill is well-preheated. Avoid moving the peaches once they’re placed on the grill for the first few minutes to let those marks develop.
Nutritional Info
Grilled peaches are relatively low in calories and rich in vitamins A and C. The brown sugar and butter do add some sweetness and fat, but when served with yogurt or ice cream, you create a delightful balance.
Thank you for stopping by the Ivory Apron kitchen today. I hope these grilled peaches inspire you to get outside, fire up the grill, and create some joyful memories of your own! Remember, cooking is about sharing love and good food, so gather your friends and family, and let’s carry on the delicious tradition. Happy cooking!
PrintGrilled Peaches with Cinnamon and Brown Sugar

A sweet summer dessert featuring caramelized grilled peaches topped with cinnamon and brown sugar, perfect for warm evenings.
- Prep Time: 15 minutes
- Cook Time: 10 minutes
- Total Time: 25 minutes
- Yield: 4 servings 1x
- Category: Dessert
- Method: Grilling
- Cuisine: American
- Diet: Vegetarian
Ingredients
- 3 tablespoons packed light brown sugar
- ½ tablespoon ground cinnamon
- 3 peaches, halved and pitted
- 1 tablespoon unsalted butter, melted
- Yogurt (optional)
- Vanilla ice cream (optional)
- Caramel syrup (optional)
Instructions
- Preheat the grill to medium-high.
- Prepare the peaches by washing them thoroughly and halving each one.
- Make the cinnamon sugar by combining brown sugar and cinnamon in a small bowl.
- Brush the cut sides of the peaches with melted butter.
- Sprinkle the cinnamon sugar mixture over the buttered peach halves.
- Place the peaches cut-side down on the grill and grill for 4-5 minutes.
- Turn the peaches over and grill for an additional 2-3 minutes.
- Serve immediately with yogurt or ice cream and a drizzle of caramel syrup.
Notes
These grilled peaches are best served warm and can be topped with yogurt, ice cream, or caramel syrup for added flavor.
Nutrition
- Serving Size: 1 peach half
- Calories: 150
- Sugar: 10g
- Sodium: 60mg
- Fat: 5g
- Saturated Fat: 3g
- Unsaturated Fat: 2g
- Trans Fat: 0g
- Carbohydrates: 25g
- Fiber: 2g
- Protein: 1g
- Cholesterol: 10mg
Keywords: grilled peaches, summer dessert, cinnamon, brown sugar, easy recipe
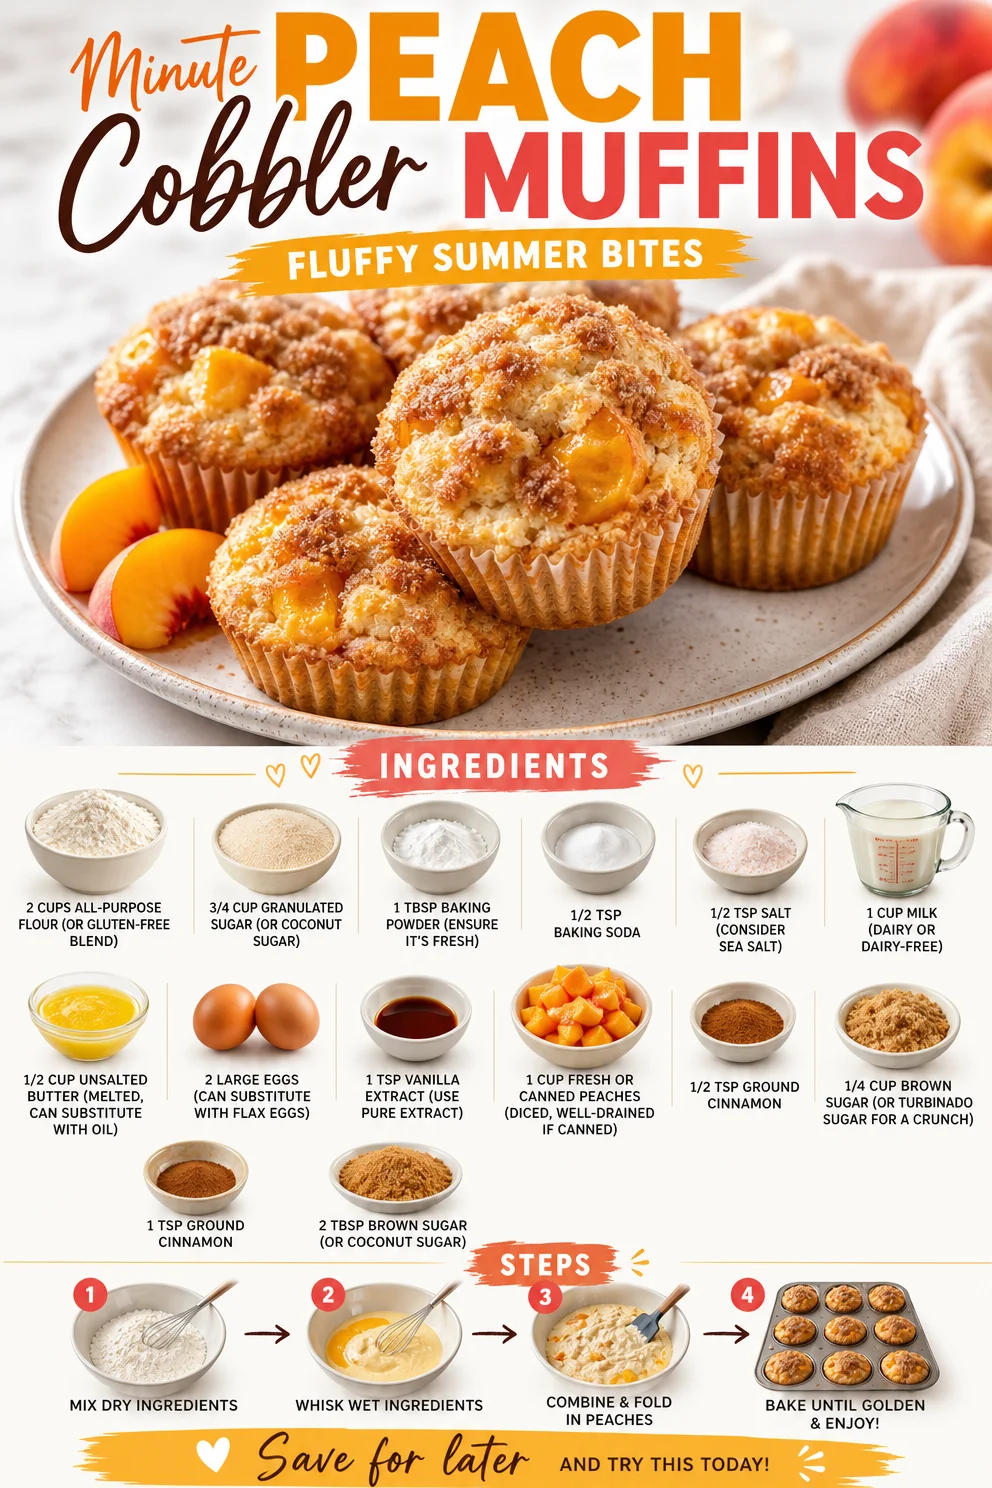
Minute Peach Cobbler Muffins: Fluffy Summer Bites
Peach Cobbler Muffins: Fluffy Bites of Summer Bliss
Hello, my fellow foodie friends! Today, we’re diving into a delightful recipe that embodies the essence of summer: Peach Cobbler Muffins. These fluffy little bites are not just a treat for the taste buds but a journey down memory lane, reminding us of warm summer days spent with family and friends, gathering around the table. So grab your aprons, and let’s get cooking!
A Taste of Nostalgia
Ah, peaches! The essence of summer captured in a juicy, sun-kissed fruit. I remember my grandmother bringing home baskets of fresh peaches from the local farmer’s market every July. The house would fill with their sweet aroma as she would peel and slice them, ready to whip up her famous peach cobbler. I would stand on my tiptoes, watching as she mixed, stirred, and created the magic that always had us coming back for seconds (and thirds!).
Fast forward a few years, and I found myself in my own cozy kitchen, craving that same flavor but wanting something a little easier to share with friends. That’s when the idea of Peach Cobbler Muffins hit me. I could take that sweet, nostalgic flavor and transform it into easy-to-make, portable muffins! Perfect for breakfast, brunch, or a sweet afternoon snack. Plus, who can resist the satisfaction of knowing you can bake with ease—I mean, what’s more delightful than freshly baked muffins that encapsulate the heart of summer?
Ingredients
Let’s gather our ingredients. Here’s what you’ll need for these scrumptious Peach Cobbler Muffins:
-
2 cups All-Purpose Flour
(Can substitute with a gluten-free blend. Just make sure it contains xanthan gum for structure!) -
3/4 cup Granulated Sugar
(Coconut sugar works too for a slightly healthier twist with a hint of caramel flavor.) -
1 tbsp Baking Powder
(Ensure it’s fresh for those muffins to rise perfectly! If it’s been sitting in your pantry for too long, grab a new one!) -
1/2 tsp Baking Soda
(A little helps balance out the acidity of the peaches. It’s essential for that perfect fluff.) -
1/2 tsp Salt
(I prefer sea salt for its mineral taste. It enhances the sweetness beautifully!) -
1 cup Milk
(Dairy works great, but feel free to use almond or oat milk for a dairy-free option.) -
1/2 cup Unsalted Butter
(Melted. You can use vegetable oil as a substitute for a lighter option, but butter gives them that rich flavor.) -
2 large Eggs
(If you’re looking for a vegan option, substitute with flax eggs—2 tablespoons of ground flaxseed mixed with 6 tablespoons of water will do the trick!) -
1 tsp Vanilla Extract
(Always opt for pure vanilla extract. It makes a world of difference!) -
1 cup Fresh or Canned Peaches
(Diced and if using canned, ensure they are well-drained. Fresh peaches are obviously preferred for that pop of summer flavor!) -
1/2 tsp Ground Cinnamon
(A spice that complements peaches perfectly. Feel free to add more if you adore cinnamon!) -
1/4 cup Brown Sugar
(Turbinado sugar works well too for that extra crunch on top!) -
1 tsp Ground Cinnamon
(This is added to the topping for an aromatic finish!) -
2 tbsp Brown Sugar
(Again, you can use coconut sugar for added depth!)
Step-by-Step Instructions
Now, let’s get down to the good stuff: how to make these Peach Cobbler Muffins!
-
Preheat Your Oven
Preheat your oven to 375°F (190°C). This ensures that your muffins bake evenly and rise perfectly! -
Prepare Your Muffin Tin
Line a muffin pan with paper liners or grease them with a bit of non-stick spray to prevent any sticking. Trust me, there’s nothing worse than a muffin refusing to come out of its home! -
Mix the Dry Ingredients
In a mixing bowl, whisk together the flour, granulated sugar, baking powder, baking soda, salt, and the first portion of cinnamon. (Don’t skip this step! Sifting them together ensures a nice, fluffy crumb.) -
Combine the Wet Ingredients
In a separate bowl, beat together the milk, melted butter, eggs, and vanilla. Make sure the butter isn’t too hot or it will cook the eggs. We want to mix seamlessly, not scramble! -
Bring It All Together
Pour the wet ingredients into the dry ingredients, and gently mix until just combined. Be careful not to overmix—lumps are okay! Fold in those lovely peaches at this stage. We want to keep that juicy flavor intact! -
Prepare the Topping
In a small bowl, mix together the brown sugar and the second portion of the cinnamon. This will add a lovely sweetness and aroma to the top of your muffins! -
Fill the Muffin Cups
Divide your batter evenly among the prepared muffin cups, filling them about 2/3 of the way full. Then, sprinkle the cinnamon-sugar topping generously on each muffin. Don’t hold back on that delightful crunch! -
Bake It Up
Pop those muffins in your preheated oven and bake for 18–22 minutes, or until a toothpick inserted in the center comes out clean. The aroma wafting through your kitchen will be heavenly! -
Let Them Cool
Once baked, remove the muffins from the oven and allow them to cool in the pan for about 5 minutes before transferring them to a wire rack to cool completely. This step is vital for texture!
Serving Suggestions
To serve these Peach Cobbler Muffins, I recommend a simple yet elegant presentation. Place a muffin on a lovely plate, dust it with a sprinkle of powdered sugar if you’re feeling fancy, and serve it alongside a dollop of whipped cream or a scoop of vanilla ice cream for an indulgent treat. Don’t forget to brew a pot of coffee or steep a fresh pot of tea for the perfect pairing!
Recipe Variations
-
Berry Delight: Swap out peaches for a mix of fresh berries like blueberries and raspberries for a delightful summer twist!
-
Nutty Crunch: Add 1/4 cup of chopped pecans or walnuts to the batter for an extra crunch and nutty flavor.
-
Spiced Surprise: Mix in a pinch of nutmeg or cardamom along with the cinnamon for an unexpected flavor profile.
-
Oatmeal Love: Incorporate 1/2 cup of rolled oats for a rustic feel and a heartier texture.
-
Coconut Kick: Toss in a handful of shredded coconut for a tropical vibe. It pairs wonderfully with peaches!
Chef’s Notes
I adore how this recipe has evolved over the years. Initially, I made a classic peach muffin, but as I played around, I realized that adding that crispy topping truly captures the essence of peach cobbler. The combination of soft muffin and crunchy topping is just pure joy!
And let’s not forget my epic kitchen failure when I first attempted to bake these. I forgot to add the sugar! The resulting muffins were edible but painfully bland. Thankfully, I learned my lesson: always double-check your ingredients before diving in.
FAQs and Troubleshooting
Q: My muffins turned out dense. What did I do wrong?
A: This usually happens if the batter is overmixed, or if you added too much flour. Remember, mix until just combined!
Q: Can I use frozen peaches?
A: Absolutely! Just ensure they’re thawed and drained well before adding to the batter. They’ll lend a wonderful juiciness!
Q: How do I know when the muffins are done?
A: A toothpick inserted in the center should come out clean or with a few moist crumbs attached. If it’s gooey, they need a bit more time.
Q: Can I make the batter ahead of time?
A: I recommend baking them fresh for the best texture, but you can prepare the dry ingredients in advance and store them until you’re ready to bake!
Nutritional Info (Optional)
While I always encourage enjoying treats in moderation, it’s good to know what’s in them! One muffin (without any toppings) roughly contains:
- Calories: 180
- Total Fat: 7g
- Saturated Fat: 4g
- Cholesterol: 45mg
- Sodium: 180mg
- Total Carbohydrates: 27g
- Dietary Fiber: 1g
- Sugars: 10g
- Protein: 3g
Conclusion
And there you have it, my lovely foodies! These Peach Cobbler Muffins are not just a delightful treat but a perfect way to gather loved ones and create cherished memories. So, tie on that apron and get baking! I can’t wait to hear how your muffins turn out. After all, the heart of cooking lies in sharing, so let’s spread the love, one muffin at a time. Happy baking! 🎉
PrintPeach Cobbler Muffins

Fluffy muffins infused with the sweet essence of summer peaches, perfect for breakfast or as a delightful snack.
- Prep Time: 15 minutes
- Cook Time: 22 minutes
- Total Time: 37 minutes
- Yield: 12 muffins 1x
- Category: Breakfast
- Method: Baking
- Cuisine: American
- Diet: Vegetarian
Ingredients
- 2 cups All-Purpose Flour
- 3/4 cup Granulated Sugar
- 1 tbsp Baking Powder
- 1/2 tsp Baking Soda
- 1/2 tsp Salt
- 1 cup Milk
- 1/2 cup Unsalted Butter, melted
- 2 large Eggs
- 1 tsp Vanilla Extract
- 1 cup Fresh or Canned Peaches, diced
- 1/2 tsp Ground Cinnamon
- 1/4 cup Brown Sugar
- 1 tsp Ground Cinnamon (for topping)
- 2 tbsp Brown Sugar (for topping)
Instructions
- Preheat your oven to 375°F (190°C).
- Prepare a muffin pan with liners or grease to prevent sticking.
- Mix the dry ingredients: flour, granulated sugar, baking powder, baking soda, salt, and cinnamon.
- Combine the wet ingredients: milk, melted butter, eggs, and vanilla.
- Bring the wet mixture into the dry ingredients and mix until just combined, then fold in the peaches.
- Prepare the topping by mixing brown sugar and cinnamon.
- Fill the muffin cups about 2/3 full and sprinkle the topping generously.
- Bake for 18–22 minutes or until a toothpick comes out clean.
- Let them cool in the pan for 5 minutes before transferring to a wire rack.
Notes
For a vegan option, substitute eggs with flax eggs and use a dairy-free milk alternative.
Nutrition
- Serving Size: 1 muffin
- Calories: 180
- Sugar: 10g
- Sodium: 180mg
- Fat: 7g
- Saturated Fat: 4g
- Unsaturated Fat: 2g
- Trans Fat: 0g
- Carbohydrates: 27g
- Fiber: 1g
- Protein: 3g
- Cholesterol: 45mg
Keywords: peach muffins, summer recipes, brunch, baking, easy muffins
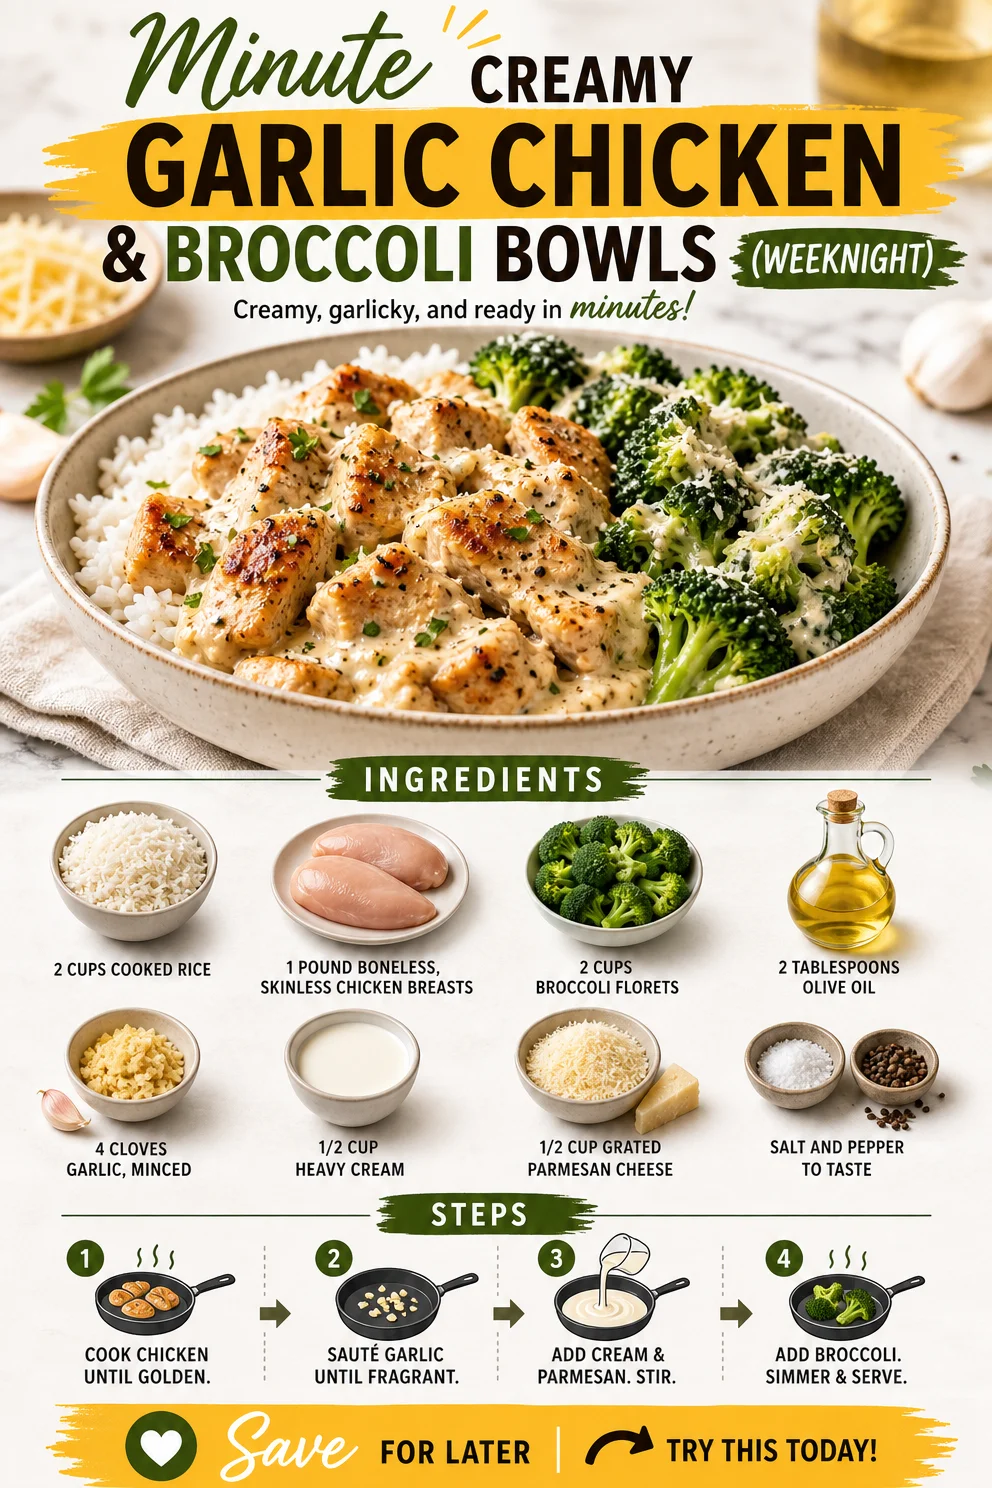
Minute Creamy Garlic Chicken & Broccoli Bowls (Weeknight)
Grilled Chicken Broccoli Bowls with Creamy Garlic Sauce: A Comforting Feast
Hello, fellow food lovers! Today, we’re diving into a dish that radiates warmth and comfort—Grilled Chicken Broccoli Bowls with Creamy Garlic Sauce. Trust me, you’re going to want to save this recipe for those weeknights when you crave something delicious yet easy to whip up. With a delightful combination of tender grilled chicken, vibrant broccoli, and a luscious creamy garlic sauce, this meal is bound to please everyone at your table.
A Taste of Nostalgia
I can still remember the first time I made a version of this dish for my closest friends during a cozy gathering. We were all excited as I pulled out my grilling pan and arranged everything to sizzle away. As the inviting aroma of garlic filled the air, laughter and stories flowed around the kitchen. We ended up enjoying our meal on the terrace, with twinkling lights overhead, sharing bites and moments that felt timeless. It wasn’t just the food that made that night special; it was the atmosphere, the connections, and the joy of creating something delicious together. This dish has since become a staple in my home, perfect for those evenings when you want to impress without stress!
Ingredients
To create these delicious Grilled Chicken Broccoli Bowls, gather the following ingredients:
- 2 cups cooked rice: This serves as the hearty base of our bowls. Use brown rice for a nuttier flavor or quinoa for a healthy twist.
- 1 pound boneless, skinless chicken breasts: Choose high-quality chicken for the best results. If you’re in a pinch, chicken thighs work wonderfully too.
- 2 cups broccoli florets: Fresh broccoli packs in vibrant green color and crunch. In a hurry? Frozen florets can be a great substitute.
- 2 tablespoons olive oil: A staple in any kitchen, olive oil adds richness and aids in grilling. Canola or avocado oil works as well.
- 4 cloves garlic, minced: Garlic is the star of our creamy sauce! Adjust to your taste – if you’re a garlic lover, feel free to add more or substitute with shallots for a milder flavor.
- 1/2 cup heavy cream: For that luscious creaminess, but if you want a lighter version, a mix of Greek yogurt and a splash of milk can be a fantastic alternative.
- 1/2 cup grated Parmesan cheese: This brings a savory depth to the sauce. Nutritional yeast is a great dairy-free substitute that still offers a cheesy flavor.
- Salt and pepper to taste: Always season your dishes to enhance the flavors. Fresh cracked pepper adds a nice kick!
Step-by-Step Instructions
Let’s roll up our sleeves and get cooking! Follow these easy steps to whip up your Grilled Chicken Broccoli Bowls with Creamy Garlic Sauce.
-
Prepare the Rice: If you haven’t cooked your rice yet, now’s the time! You can use a rice cooker or stovetop. Follow package instructions, adding a pinch of salt for flavor. This will take about 20 minutes, so you can multitask while this cooks!
-
Marinate the Chicken: In a bowl, drizzle the chicken breasts with 1 tablespoon of olive oil, salt, and pepper to taste. Give it a good rub so the seasoning penetrates the meat. Let it marinate while you prepare the other ingredients. A hint of lemon can brighten this up too if you have it on hand!
-
Prep the Broccoli: While the chicken marinates, wash and chop your broccoli into bite-sized florets. If you’re using frozen broccoli, simply measure out what you need and it’s ready to go!
-
Grill the Chicken: Heat your grill pan over medium-high heat. Once hot, carefully place the marinated chicken on the grill. Cook for about 6-7 minutes on each side, or until the internal temperature hits 165°F (75°C). The goal is to have nicely charred grill marks while ensuring the chicken stays juicy. Use a meat thermometer for the most accurate results!
-
Blanch the Broccoli: In a separate pot, bring water to a rolling boil and add a pinch of salt. Toss in the broccoli florets and blanch for about 2 minutes until vibrant green and slightly tender. Drain and rinse with cold water to stop the cooking.
-
Make the Creamy Garlic Sauce: In a saucepan over medium heat, add the remaining tablespoon of olive oil. Toss in the minced garlic, letting it sauté for about 1 minute until fragrant (but don’t let it brown!). Pour in the heavy cream, and stir well. Add the grated Parmesan cheese, then season with salt and pepper to your liking. Keep stirring until the cheese is melted and the sauce is silky. If you find it too thick, add a splash of chicken or vegetable broth.
-
Assemble the Bowls: Grab your favorite bowls—start with a generous scoop of rice, layer on the blanched broccoli, and slice the grilled chicken on top. Drizzle the creamy garlic sauce generously over everything. This is where the magic happens!
Serving Suggestions
For a lovely presentation, garnish your bowls with some freshly cracked black pepper and a sprinkle of Parmesan cheese. Fresh parsley or chives adds a pop of color and freshness! Enjoy these bowls warm, perhaps with a side of crusty bread to soak up any remaining creamy sauce—we can’t let any of that go to waste!
Recipe Variations
Want to mix things up? Here are a few creative twists you can try:
- Spicy Kick: Add a teaspoon of red pepper flakes or a dash of hot sauce into your creamy garlic sauce for an exciting kick.
- Veggie Boost: Toss in other vibrant veggies like bell peppers or carrots for extra color and crunch.
- Pasta Option: Swap rice for your favorite pasta to create a delightful creamy pasta dish.
- Herbaceous: Infuse your creamy garlic sauce with herbs such as basil or thyme for an aromatic twist.
- Gluten-Free: Use a gluten-free rice option like cauliflower rice for a lower-carb alternative.
Chef’s Notes
This recipe has been a hit in my kitchen for years, evolving every time I make it. One time, I accidentally dropped half a head of roasted garlic into the sauce—it turned out to be a happy mistake! Now, I sometimes roast garlic ahead of time for an intense, caramelized flavor. Cooking is all about experimenting, so don’t be afraid to make it your own. I encourage you to invite friends in for a cooking night—there’s something so magical about creating together!
FAQs and Troubleshooting
1. How can I ensure my chicken doesn’t dry out?
- The secret is to avoid overcooking! Use a meat thermometer to check for doneness at 165°F (75°C), and let the chicken rest for a few minutes before slicing.
2. Can I make this sauce ahead of time?
- Absolutely! You can make the creamy garlic sauce ahead of time and store it in the fridge. Just reheat it gently over low heat, stirring in a bit of cream if it thickens up too much.
3. What should I serve with these bowls?
- A colorful side salad or some garlic bread complements these bowls wonderfully. You could also add a light vinaigrette for a fresh contrast.
4. My sauce turned out too thick. What can I do?
- No worries! Simply stir in a little chicken broth or milk to loosen it up to your desired consistency.
Nutritional Info (if applicable)
While each serving may vary based on ingredients and portion sizes, here’s an approximate breakdown per serving:
- Calories: 500
- Protein: 37g
- Carbohydrates: 40g
- Fat: 22g
And there you have it! Whip up these Grilled Chicken Broccoli Bowls with Creamy Garlic Sauce and enjoy the charm of sharing a home-cooked meal, no culinary degree required. Remember, cooking should be fun, relaxed, and, most importantly, delicious. So, grab your apron and let’s make some delicious memories! Happy cooking!
PrintGrilled Chicken Broccoli Bowls with Creamy Garlic Sauce

A comforting dish featuring grilled chicken, broccoli, and a creamy garlic sauce, perfect for weeknight dinners.
- Prep Time: 20 minutes
- Cook Time: 30 minutes
- Total Time: 50 minutes
- Yield: 4 servings 1x
- Category: Main Course
- Method: Grilling
- Cuisine: American
- Diet: Gluten-Free
Ingredients
- 2 cups cooked rice
- 1 pound boneless, skinless chicken breasts
- 2 cups broccoli florets
- 2 tablespoons olive oil
- 4 cloves garlic, minced
- 1/2 cup heavy cream
- 1/2 cup grated Parmesan cheese
- Salt and pepper to taste
Instructions
- Prepare the Rice: If you haven’t cooked your rice yet, now’s the time! You can use a rice cooker or stovetop. Follow package instructions, adding a pinch of salt for flavor. This will take about 20 minutes, so you can multitask while this cooks!
- Marinate the Chicken: In a bowl, drizzle the chicken breasts with 1 tablespoon of olive oil, salt, and pepper to taste. Give it a good rub so the seasoning penetrates the meat. Let it marinate while you prepare the other ingredients. A hint of lemon can brighten this up too if you have it on hand!
- Prep the Broccoli: While the chicken marinates, wash and chop your broccoli into bite-sized florets. If you’re using frozen broccoli, simply measure out what you need and it’s ready to go!
- Grill the Chicken: Heat your grill pan over medium-high heat. Once hot, carefully place the marinated chicken on the grill. Cook for about 6-7 minutes on each side, or until the internal temperature hits 165°F (75°C). The goal is to have nicely charred grill marks while ensuring the chicken stays juicy. Use a meat thermometer for the most accurate results!
- Blanch the Broccoli: In a separate pot, bring water to a rolling boil and add a pinch of salt. Toss in the broccoli florets and blanch for about 2 minutes until vibrant green and slightly tender. Drain and rinse with cold water to stop the cooking.
- Make the Creamy Garlic Sauce: In a saucepan over medium heat, add the remaining tablespoon of olive oil. Toss in the minced garlic, letting it sauté for about 1 minute until fragrant (but don’t let it brown!). Pour in the heavy cream, and stir well. Add the grated Parmesan cheese, then season with salt and pepper to your liking. Keep stirring until the cheese is melted and the sauce is silky. If you find it too thick, add a splash of chicken or vegetable broth.
- Assemble the Bowls: Grab your favorite bowls—start with a generous scoop of rice, layer on the blanched broccoli, and slice the grilled chicken on top. Drizzle the creamy garlic sauce generously over everything. This is where the magic happens!
Notes
Garnish with freshly cracked black pepper and a sprinkle of Parmesan cheese for a lovely presentation.
Nutrition
- Serving Size: 1 bowl
- Calories: 500
- Sugar: 3g
- Sodium: 500mg
- Fat: 22g
- Saturated Fat: 10g
- Unsaturated Fat: 6g
- Trans Fat: 0g
- Carbohydrates: 40g
- Fiber: 3g
- Protein: 37g
- Cholesterol: 100mg
Keywords: grilled chicken, broccoli bowls, creamy garlic sauce, quick dinner recipe, comfort food
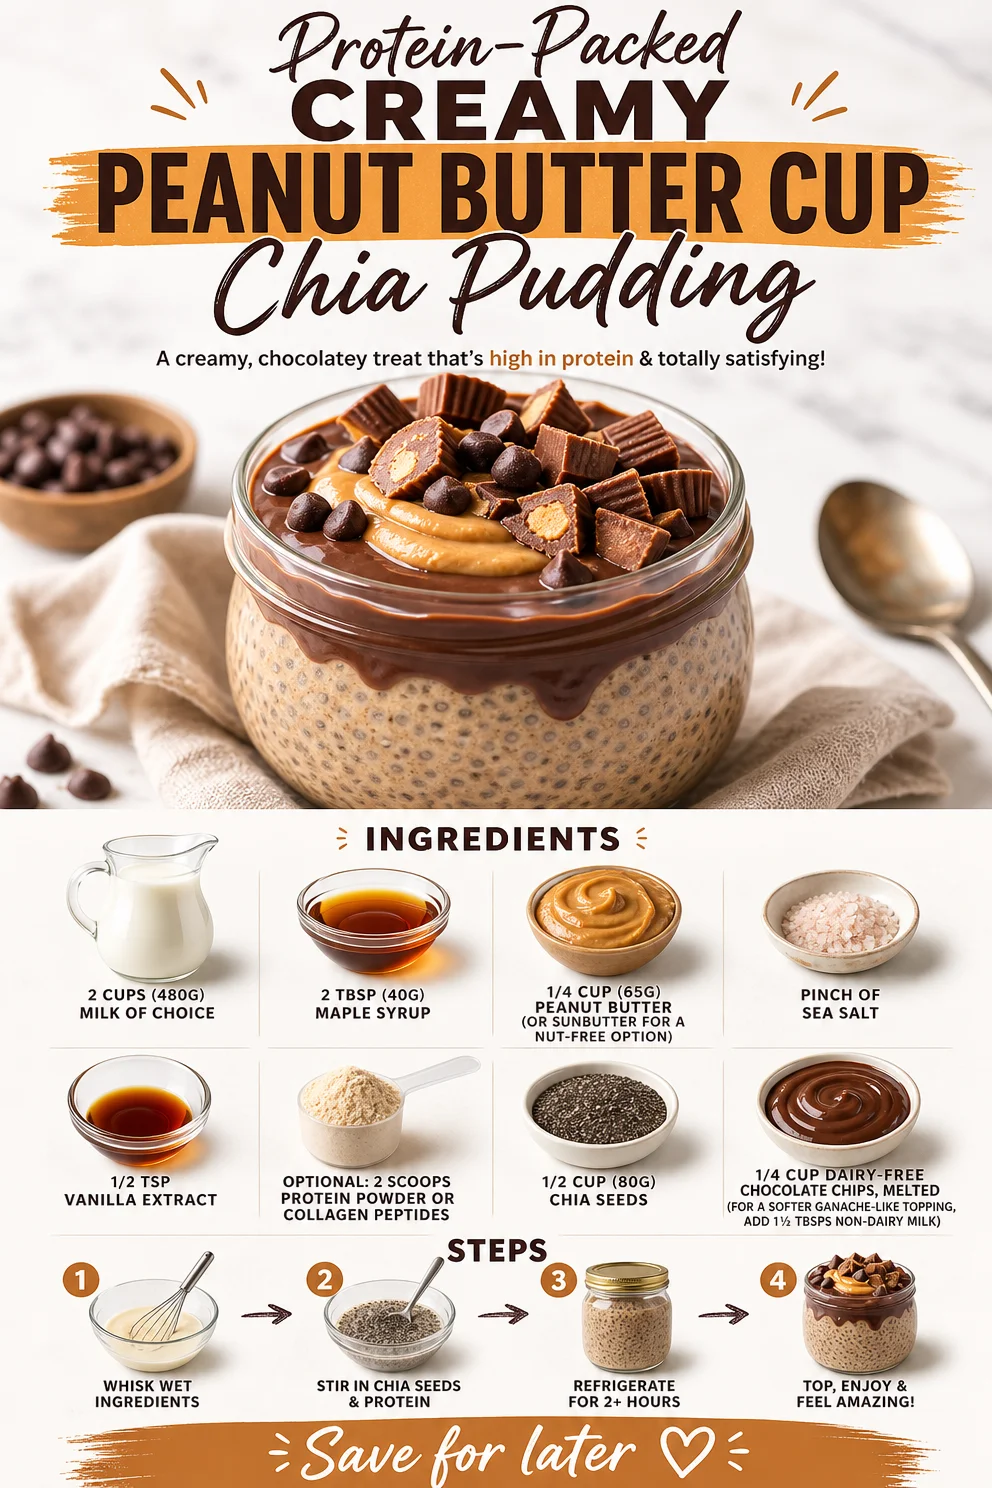
Protein-Packed Creamy Peanut Butter Cup Chia Pudding
Creamy Peanut Butter Cup Chia Pudding: A Decadent Delight
Imagine this: It’s a late afternoon, the sunlight is filtering through your kitchen window, and you can smell the rich aroma of peanut butter wafting through the air. You’re craving something sweet but want to keep it healthy, too. Enter Creamy Peanut Butter Cup Chia Pudding! It’s the perfect blend of indulgence and nourishment, with a nutty twist that satisfies your sweet tooth without the guilt.
This pudding is a fantastic option for breakfast, a snack, or even dessert. Packed with omega-3 fatty acids, protein, and healthy fats, it’s as delightful for your body as it is for your taste buds. Plus, it’ll impress anyone you serve it to with its creamy texture and rich flavor, making it a fantastic addition to your hosting repertoire.
Now, let’s dive into why this dish holds such a special place in my heart and my kitchen!
A Nostalgic Taste of Home
Growing up, peanut butter was a staple in our household. My siblings and I would slather it on everything from fresh bananas to those classic white bread sandwiches, eagerly anticipating our next sweet fix. One of my fondest memories is from a summer afternoon when we concocted our first peanut butter dessert with mom—a no-bake pie that included layers of rich chocolate and creamy peanut butter.
That day sparked a love affair with the pairing, and since then, I’ve dedicated myself to finding ways to incorporate the flavors I adored into healthier options. When I stumbled upon chia seeds, I knew I had to create a pudding that could capture the essence of that nostalgic dessert while packing in plenty of nourishment. And voilà! The Creamy Peanut Butter Cup Chia Pudding was born.
Ingredients
Let’s talk about what you’ll need for this delicious treat! Here’s your shopping list:
- 2 cups (480g) milk of choice: Use almond, coconut, soy, or dairy milk depending on your preference. Each will give a slightly different flavor and texture.
- 2 tbsp (40g) maple syrup: This adds a beautiful sweetness. If you’re looking for a lower-glycemic option, try using agave syrup or even stevia!
- 1/4 cup (65g) peanut butter: For the classic taste! If there are nut allergies or you prefer a different twist, feel free to use SunButter or almond butter.
- Pinch of sea salt: Enhances the flavor and balances the sweetness. Trust me; it makes a difference!
- 1/2 tsp vanilla extract: This adds warmth and depth to the pudding. For a different flavor profile, consider using almond extract.
- Optional: 2 scoops protein powder or collagen peptides: Perfect for adding an extra boost if you’re enjoying this as a post-workout treat.
- 1/2 cup (80g) chia seeds: Packed with fiber and omega-3s, these little guys are what give our pudding that delightful, creamy texture.
- 1/4 cup dairy-free chocolate chips, melted: For a chocolatey topping reminiscent of a peanut butter cup! For a softer consistency, add 1 ½ tbsp of non-dairy milk when melting.
Step-by-Step Instructions
Ready to make this decadent treat? Follow these easy steps to whip up your Creamy Peanut Butter Cup Chia Pudding.
-
Combine the Base Ingredients
In a medium bowl, combine your milk of choice, maple syrup, and peanut butter. Using a whisk, mix until the peanut butter is fully incorporated and there are no lumps. Pro tip: For easier mixing, you can warm the peanut butter slightly—this helps it blend smoothly! -
Add Flavor Enhancers
Sprinkle in the pinch of sea salt, vanilla extract, and protein powder (if using). Stir until everything is well combined. Taste! Adjust sweetness if needed by adding more maple syrup. -
Mix in the Chia Seeds
Add in those chia seeds! Stir well to ensure they’re evenly distributed throughout the mixture. Chia seeds are magical—they’ll swell and create that creamy pudding texture as they absorb the liquid. -
Let it Set
Cover the bowl with plastic wrap or a lid and place it in the fridge for at least 2 hours or overnight if you can wait. This is the patience-testing part, but trust me, it’s worth it! -
Melt the Chocolate
Once your pudding has set, it’s time to melt those chocolate chips. You can do this in a microwave-safe bowl in 30-second intervals, stirring in between, or use a double boiler. If you’re adding the option of non-dairy milk for a softer consistency, mix that in while you melt. -
Assemble and Serve
To serve, spoon the chia pudding into individual cups or small bowls. Drizzle the melted chocolate over the top like a beautiful finishing touch. You can even sprinkle a few extra chocolate chips for added indulgence!
Serving Suggestions
For an extra layer of delight, consider garnishing your pudding with a dollop of coconut whipped cream or a few slices of banana. Set it alongside a warm cup of coffee or tea, and you’ve created a lovely little indulgence that’s perfect for breakfast or dessert!
Recipe Variations
- Nut-Free Option: Swap peanut butter for sunflower seed butter (SunButter) to keep it nut-free.
- Chocolate Overload: Add cocoa powder to the base mix for a richer chocolate flavor.
- Fruity Twist: Mix in some mashed bananas or pureed berries to the base recipe for added sweetness and flavor.
- Spiced Up Pudding: Add a pinch of cinnamon or nutmeg to warm up the flavors.
- Vegan Delight: Ensure all ingredients are plant-based, like opting for coconut yogurt instead of milk.
Chef’s Notes
This recipe has evolved over time through experimentation! I’ve played around with different nut butters, variations of sweeteners, and even added mashed bananas for a fruitier take! The beauty of this pudding lies in its flexibility—it’s truly a canvas for your creativity. And if you’re anything like me, you may end up devouring a bowl (or two) before it even makes it to the fridge!
FAQs and Troubleshooting
-
Why did my chia pudding not thicken?
If your pudding didn’t thicken up, it could be that it didn’t have enough time to set. Chia seeds need enough time to absorb liquid (at least a couple of hours). If it’s too thin after setting, try mixing in a few more chia seeds and letting it sit longer. -
Can I use regular yogurt instead of milk?
Absolutely! You can replace milk with your favorite yogurt to create a thicker texture, but be aware that this may alter the pudding’s flavor slightly. -
What if the pudding is too sweet for me?
Each sweetener has a different level of intensity, so if you find it too sweet, cut back on the maple syrup, or add more milk and chia seeds to balance it out. -
How long will this pudding last?
Store the pudding in an airtight container in the refrigerator for up to 5 days. The flavors will continue to deepen and meld together as it sits!
Nutritional Info
This is an approximate estimate, varies by ingredient choices:
- Calories: 270
- Protein: 10g
- Carbs: 30g
- Fats: 15g
- Fiber: 10g
And there you have it! Your journey to making Creamy Peanut Butter Cup Chia Pudding is complete. This delectable dessert not only pleases the palate but allows you to reminisce about those simple joys of childhood. So, tie on that apron, gather your ingredients, and let’s create this timeless treat together! Enjoy every creamy, dreamy bite—because good food is all about the moments we share at the table. Happy cooking!
PrintCreamy Peanut Butter Cup Chia Pudding
A decadent yet healthy pudding combining peanut butter, chia seeds, and a touch of sweetness for a delightful treat.
- Prep Time: 10 minutes
- Cook Time: 0 minutes
- Total Time: 120 minutes
- Yield: 4 servings 1x
- Category: Dessert
- Method: Refrigeration
- Cuisine: American
- Diet: Vegetarian
Ingredients
- 2 cups (480g) milk of choice
- 2 tbsp (40g) maple syrup
- 1/4 cup (65g) peanut butter
- Pinch of sea salt
- 1/2 tsp vanilla extract
- Optional: 2 scoops protein powder or collagen peptides
- 1/2 cup (80g) chia seeds
- 1/4 cup dairy-free chocolate chips, melted
Instructions
- Combine the milk of choice, maple syrup, and peanut butter in a medium bowl. Whisk until smooth.
- Add the pinch of sea salt, vanilla extract, and protein powder (if using), and stir well.
- Mix in the chia seeds, ensuring they are evenly distributed throughout.
- Cover with plastic wrap and refrigerate for at least 2 hours or overnight.
- Melt the chocolate chips in a microwave or double boiler.
- Assemble by spooning the chia pudding into servings and drizzling melted chocolate over the top.
Notes
For a nut-free option, use sunflower seed butter instead of peanut butter. You can also add cocoa powder or fruits for variations.
Nutrition
- Serving Size: 1 serving
- Calories: 270
- Sugar: 8g
- Sodium: 170mg
- Fat: 15g
- Saturated Fat: 3g
- Unsaturated Fat: 10g
- Trans Fat: 0g
- Carbohydrates: 30g
- Fiber: 10g
- Protein: 10g
- Cholesterol: 0mg
Keywords: chia pudding, healthy dessert, peanut butter, vegan pudding
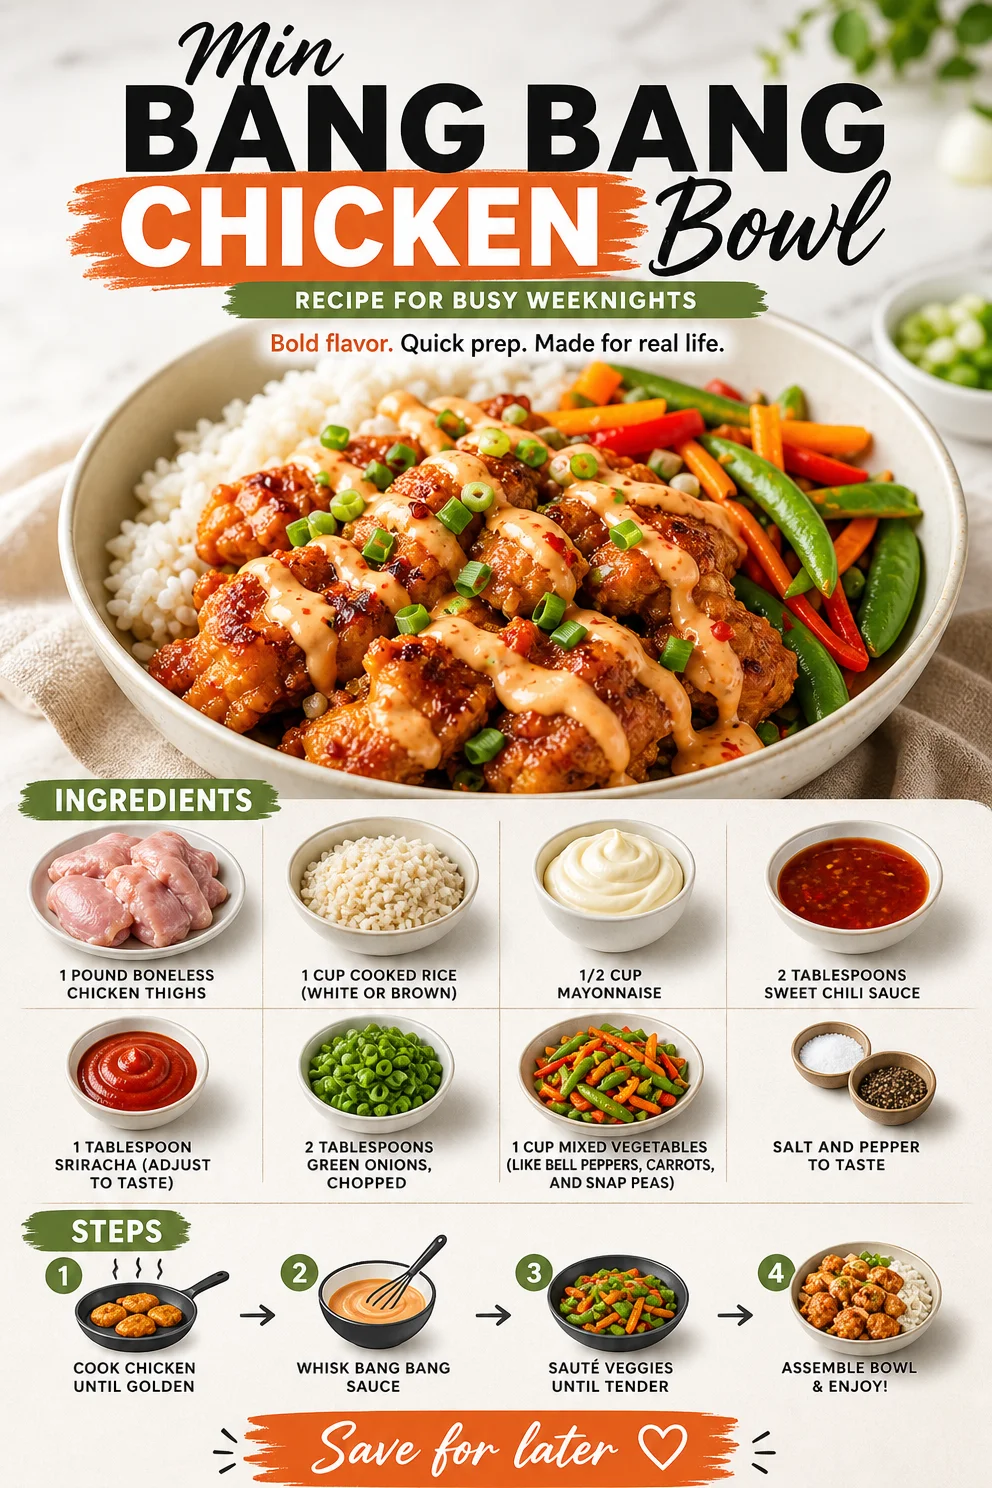
Min Bang Bang Chicken Bowl Recipe for Busy Weeknights
Bang Bang Chicken Bowl: A Flavorful Journey of Comfort and Confidence
Hello food lovers! I’m thrilled to have you here today. Let’s dive into a dish that’s not just delicious but also downright fun to make — the Bang Bang Chicken Bowl. If you’ve ever been to a bustling Asian street market or a cozy eatery serving fusion delights, you know what I mean. This dish is an irresistible balance of crispy chicken, creamy sauce, and fresh veggies, all served over fluffy rice, making it a complete meal that feels both comforting and exciting.
When I first created this recipe, I was inspired by the vibrant flavors and textures that tantalize your taste buds. It’s a bowl of happiness, really! This Bang Bang Chicken Bowl is not only a feast for the eyes but also a celebration of cooking with intention and joy. So, gather your apron and let’s make something mouthwateringly delicious together!
A Flavorful Memory
Let me take you back to a cozy evening a few years ago. I was hosting my closest friends for a casual dinner party — the kind where we didn’t overthink the menu but just went with what felt good. As the sun set, I decided to whip up something that would put smiles on everyone’s faces. That’s when I thought about bang bang chicken.
I had tried this dish at a local fusion restaurant and was in love with the perfect harmony of spicy, sweet, and creamy flavors. I knew I could recreate that same joy at home. So, I set to work in my kitchen, music playing, and the aroma of sautéing chicken filling the air. Everyone gathered around the table, eagerly waiting for that first bite. The laughter, the stories, and the clinking of glasses — it was one of those nights that reminded me why I adore cooking for others. And now, I’m excited to share this recipe with you, so you can create your own memorable moments!
Ingredients
Let’s get to the good part! Here’s your shopping list for this delightful bang bang chicken bowl. Each ingredient plays a vital role, plus I’ll share some handy tips along the way:
-
1 pound boneless chicken thighs
Why thighs? They’re juicy, tender, and don’t dry out as easily as chicken breasts. However, if you prefer white meat, feel free to substitute with boneless chicken breasts! -
1 cup cooked rice (white or brown)
Rice is the perfect base for this bowl. I love using brown rice for a nutty flavor and extra nutrition, but feel free to use jasmine or basmati for a fragrant twist! -
1/2 cup mayonnaise
This creamy component brings richness to our sauce. Want to lighten it up? Substitute with Greek yogurt for a tangy kick! -
2 tablespoons sweet chili sauce
This sauce adds a delightful sweetness with a hint of spice. You can find it in the international aisle of most grocery stores or make your own at home! -
1 tablespoon sriracha (adjust to taste)
Sriracha brings the heat! If you’re not a fan of spice, reduce the amount or use a milder hot sauce like Frank’s RedHot instead. -
2 tablespoons green onions, chopped
These add a fresh crunch and vibrant color. Chives are a tasty substitute if you have them on hand! -
1 cup mixed vegetables (like bell peppers, carrots, and snap peas)
Feel free to mix it up! Broccoli, zucchini, or even frozen stir-fry blends work beautifully here! -
Salt and pepper to taste
Seasoning is always key! Don’t skip this step—let the flavors shine!
Step-by-Step Instructions
Now, let’s move on to the fun part: the cooking! Here’s how to make your bang bang chicken bowl from start to finish, with some chef’s tips sprinkled in:
-
Prep Your Ingredients
- Before anything, wash and chop your veggies, slice the green onions, and get your chicken thighs ready. Having everything prepped saves time and helps you cook more confidently. Plus, it makes the process feel like a breeze when you don’t have to rush around!
-
Cook the Rice
- Whether you’re using a rice cooker, stovetop, or microwave, get that rice cooking according to package instructions. For brown rice, keep in mind it usually takes longer, around 40-45 minutes, to become perfectly fluffy. You can even make it ahead of time and just reheat for serving!
-
Sear the Chicken
- In a large skillet over medium-high heat, add a splash of oil. Once it’s shimmering, place the boneless chicken thighs in the pan. Cook them for about 5-7 minutes on each side, until they’re golden brown and cooked through (internal temperature should be 165°F). This is where you can get that beautiful crust!
-
Make the Bang Bang Sauce
- While the chicken cooks, mix the mayonnaise, sweet chili sauce, and sriracha in a bowl. Taste and adjust the spice level as desired. This sauce brings everything together, so don’t skimp on the flavor. A little more sweet chili? Go for it!
-
Add the Vegetables
- Once the chicken is cooked, remove it from the skillet and let it rest for a couple of minutes. In the same skillet, toss in your mixed vegetables. Sauté for about 3-4 minutes until they’re crisp-tender. This brings out their natural sweetness!
-
Slice the Chicken
- After the chicken has rested, slice it into bite-sized pieces. This is the moment when your kitchen starts to smell incredible, and you can’t help but feel proud of what you’ve created!
-
Assemble Your Bowls
- Now it’s time to bring it all together. Start with a scoop of rice in each bowl, add the sautéed veggies, top it off with those juicy chicken slices, and generously drizzle with the bang bang sauce. Don’t forget to sprinkle some chopped green onions on top for that gourmet touch!
-
Enjoy!
- Dive into your beautifully crafted bang bang chicken bowl and savor every bite. Trust me, the combination of flavors and textures will have you hooked.
Serving Suggestions
Plating matters, friends! To serve this dish, I like to place a mound of rice in the center of the bowl, then artfully arrange the sautéed vegetables around it. Gently fan the sliced chicken atop the rice, drizzle generously with bang bang sauce, and finish with green onions. A few sesame seeds or chopped cilantro could add extra flair if you’re feeling fancy!
Recipe Variations
Now, let’s talk about how you can customize this dish to suit your taste buds:
- Protein Variations: Swap out the chicken for shrimp, tofu, or even grilled steak for a different spin!
- Noodle Bowls: Use ramen or rice noodles instead of rice for a fun twist. Just toss them in with the veggies to warm them up!
- Add Fresh Herbs: Top your creation with fresh cilantro or basil for an aromatic burst.
- Cooked Greens: Toss in some spinach or kale while sautéing the veggies for added nutrition.
- Vegan Option: Use chickpeas or tempeh in place of chicken and substitute mayonnaise with avocado for creaminess.
Chef’s Notes
This recipe has evolved over the years, and every time I make it, I find new ways to add my personal touch. One time, I decided to add a splash of lime juice for an extra zing, and let me tell you, it took the flavors to another level! I love how you can really make this dish your own. Cooking is all about experimentation and having fun, so don’t be afraid to play around with it!
I also adore how this dish fits into busy weeknights or elegant gatherings alike. It’s versatile, which is why it often makes its way to my table.
FAQs and Troubleshooting
Here are some common questions you might have while making your bang bang chicken bowl, along with solutions:
-
Why is my chicken dry?
Overcooking is usually the culprit! Using boneless thighs helps, but always check for doneness at 165°F, so it’s juicy and tender. -
Can I make the sauce ahead of time?
Absolutely! The bang bang sauce can be prepared a day in advance. Just store it in an airtight container in the refrigerator. The flavors actually deepen overnight. -
How can I make this dish spicier?
Add more sriracha to the sauce or include some crushed red pepper flakes in your sautéed veggies for an extra kick! -
What do I do if I have leftover chicken?
Great question! Leftover chicken can be chopped up and added to salads, wraps, or grain bowls throughout the week.
Nutritional Info
This bang bang chicken bowl is not only tasty but can also be nutritious! Here’s a rough estimate per serving:
- Calories: 600
- Protein: 30g
- Carbohydrates: 60g
- Fat: 25g
- Fiber: 4g
Keep in mind the values will vary based on ingredient choices and portions.
And there you have it — a delightful Bang Bang Chicken Bowl that you can whip up in no time! I hope this recipe inspires you to gather your loved ones around the table and create some beautiful memories. After all, cooking is about connection and joy. Don’t forget to wear that apron with pride while you unleash your culinary creativity. Cheers to good food and great company! 🥂✨
PrintBang Bang Chicken Bowl

A delightful bowl combining crispy chicken, creamy bang bang sauce, and fresh vegetables over fluffy rice.
- Prep Time: 15 minutes
- Cook Time: 30 minutes
- Total Time: 45 minutes
- Yield: 4 servings 1x
- Category: Main Course
- Method: Sautéing
- Cuisine: Asian Fusion
- Diet: Non-Vegetarian
Ingredients
- 1 pound boneless chicken thighs
- 1 cup cooked rice (white or brown)
- 1/2 cup mayonnaise
- 2 tablespoons sweet chili sauce
- 1 tablespoon sriracha (adjust to taste)
- 2 tablespoons green onions, chopped
- 1 cup mixed vegetables (like bell peppers, carrots, and snap peas)
- Salt and pepper to taste
Instructions
- Prep your ingredients: Wash and chop veggies, slice green onions, and prepare chicken thighs.
- Cook the rice according to package instructions.
- Sear the chicken in a skillet over medium-high heat for 5-7 minutes on each side until golden brown.
- Make the bang bang sauce by mixing mayonnaise, sweet chili sauce, and sriracha in a bowl.
- Add mixed vegetables to the skillet and sauté for 3-4 minutes until crisp-tender.
- Slice the chicken into bite-sized pieces.
- Assemble the bowls with rice, sautéed veggies, sliced chicken, and drizzle with bang bang sauce. Top with chopped green onions.
- Enjoy!
Notes
Customize with your choice of protein or noodles. You can also prepare the bang bang sauce ahead of time.
Nutrition
- Serving Size: 1 serving
- Calories: 600
- Sugar: 6g
- Sodium: 600mg
- Fat: 25g
- Saturated Fat: 4g
- Unsaturated Fat: 15g
- Trans Fat: 0g
- Carbohydrates: 60g
- Fiber: 4g
- Protein: 30g
- Cholesterol: 90mg
Keywords: Bang Bang Chicken, Asian Cuisine, Comfort Food
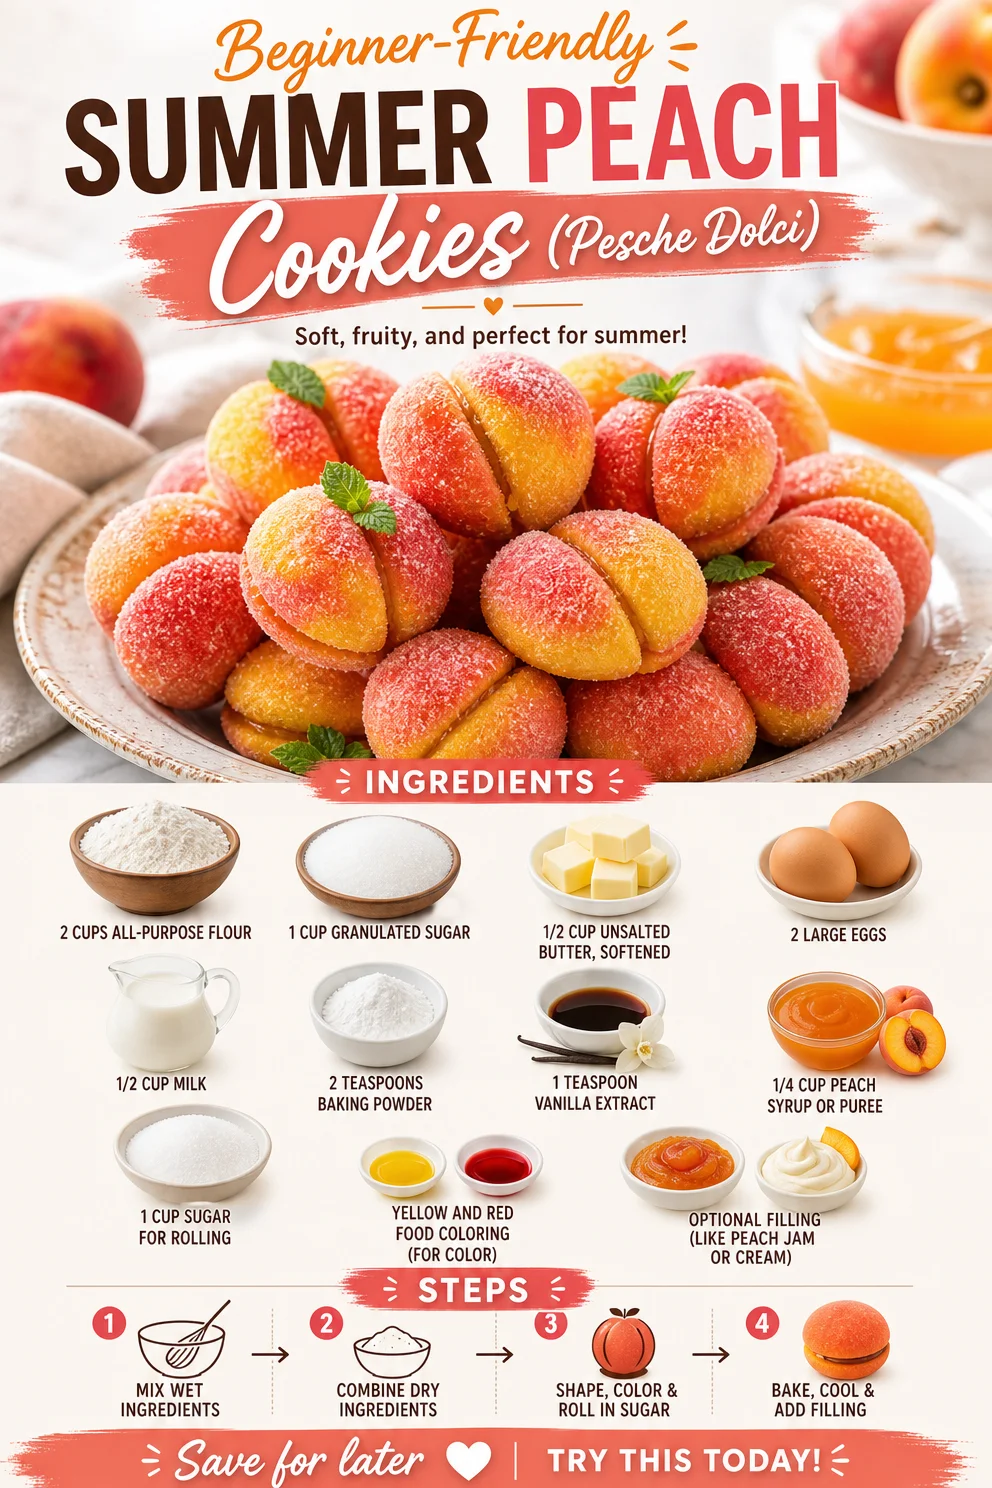
Beginner-Friendly Summer Peach Cookies (Pesche Dolci)
Italian Peach Summer Cookies (Pesche Dolci): A Sweet Slice of Nostalgia
Hello, fellow foodies! Today, I’m excited to take you on a flavorful journey into the heart of Italian summer traditions with a delightful recipe for Italian Peach Summer Cookies, or as they call them, Pesche Dolci. These charming treats are not just cookies; they’re tiny, delectable memories that transport you straight to sun-kissed summer days filled with laughter, love, and of course, irresistible flavors. As we dive into this sweet adventure, get ready to channel your inner pastry chef because we’re about to whip up something special!
A Personal Story: The Family Gatherings
Let me take you back to a sun-drenched afternoon in my grandmother’s kitchen. The aroma of fresh peaches blended with the comforting scent of baked goodies filled the air as the whole family gathered for our yearly summer reunion. My grandmother, with her twinkling eyes and flour-dusted apron, would greet each of us with warmth and love. One of her most beloved recipes was for Pesche Dolci, the Italian peach cookies that everyone eagerly awaited each summer.
As we rolled out the dough and shaped those petite peach-like cookies, she would share stories of her childhood in Sicily. Between giggles and the occasional flour fight, the kitchen came alive with joy. Once cooled, we would fill these golden delights with homemade peach jam, dust them with sugar, and adorn them with vibrant colors that mirrored the beautiful summer sunsets. Each bite was a reminder of the laughter and love that filled our gatherings, making these cookies not just a dessert, but a sweet memory stitched into the fabric of our family history.
Ingredients You’ll Need
Now that you’re feeling the love, let’s gather the ingredients for these delightful cookies. Here’s what you’ll need:
-
2 cups all-purpose flour
The base of our cookies. For a gluten-free option, substitute with a 1:1 gluten-free baking flour. -
1 cup granulated sugar
Sweetness is essential! You can use coconut sugar for a healthier twist, but keep in mind it may offer a different flavor profile. -
1/2 cup unsalted butter, softened
This adds richness to the dough. If you prefer a dairy-free version, coconut oil works nicely. -
2 large eggs
Essential for binding the dough. For an egg-free alternative, you can use flax eggs (1 tablespoon of ground flaxseed mixed with 2.5 tablespoons of water for each egg). -
1/2 cup milk
Use whole milk for creaminess, or substitute with almond milk for a dairy-free option. -
2 teaspoons baking powder
This is our leavening agent, giving the cookies a puff and light texture. -
1 teaspoon vanilla extract
Because every great recipe needs a touch of vanilla magic. -
1/4 cup peach syrup or puree
The star ingredient! Fresh peach puree adds flavor and moistness. Canned peach syrup works well, too. -
1 cup sugar for rolling
This creates a shimmering sweetness on the outside. -
Yellow and red food coloring (for color)
To achieve that perfect peach hue. You can skip this if you’d like a more natural look, using food-safe pigments instead. -
Optional filling (like peach jam or cream)
The surprise inside! You can use your favorite jam or even a creamy filling if you’re feeling decadent.
Step-by-Step Instructions: Let’s Bake!
Ready to hit the kitchen? Let’s transform these ingredients into sweet summer joy!
-
Preheat Your Oven
Start by preheating your oven to 350°F (175°C). This step is crucial—don’t skip it! A properly heated oven ensures even baking. -
Mix the Dry Ingredients
In a large bowl, combine the flour and baking powder. Whisk them together to break up any lumps. This creates a smooth base for our cookies. -
Cream the Butter and Sugar
In another bowl, beat the softened butter and granulated sugar together until light and fluffy—about 3 to 5 minutes. This step introduces air, giving your cookies a lovely texture. A hand mixer works wonders here! -
Add the Eggs and Vanilla
Beat in the eggs one at a time, ensuring each egg is fully incorporated before adding the next. This keeps the mixture smooth. Add the vanilla extract—trust me, your kitchen will smell divine! -
Combine Wet and Dry Ingredients
Gradually add the flour mixture to your butter-sugar-egg blend. Alternate with the milk, starting and ending with the flour. This helps prevent lumps and creates a silky dough. -
Fold in the Peach Puree
Now, gently mix in the peach syrup or puree—this is where the magic happens! Aim for a cohesive dough without overmixing. -
Color the Dough
Divide the dough into two separate bowls. Add a few drops of yellow food coloring to one bowl and red to the other, mixing until you reach that beautiful peach hue. If you’re opting for natural color, beet juice for red and turmeric for yellow can add color without synthetic dyes. -
Chill the Dough
Wrap each portion in plastic wrap and chill in the fridge for at least 30 minutes. This makes rolling easier and prevents cookies from spreading too much in the oven. -
Shape the Cookies
After the dough is chilled, take small portions (about 1 tablespoon each) and roll them into balls. Aim for a slight oval shape to mimic peaches. -
Bake
Place the cookies on a baking sheet lined with parchment paper about 2 inches apart. Bake for 12-15 minutes or until the edges are lightly golden. Don’t worry if they look a bit soft; they’ll firm up as they cool! -
Cool
Let them cool on the baking sheet for a few minutes before transferring them to a wire rack. This helps them set. -
Roll in Sugar
Once completely cooled, roll each cookie in sugar. You can also mix in a bit of cinnamon for an extra flavor kick! -
Fill
If you’re using a filling, gently scoop a small amount out of each cookie’s center and replace it with your jam or cream. Your guests will be pleasantly surprised!
Serving Suggestions: Let’s Make It Beautiful
Now that your Pesche Dolci are baked and ready, it’s time to present them beautifully! Arrange these peachy delights on a vibrant platter, perhaps garnished with a few fresh mint leaves or edible flowers for that touch of elegance. A light dusting of powdered sugar adds a lovely contrast and enhances the visual appeal. Serve alongside a cup of espresso or a refreshing peach iced tea for a delightful summer pairing.
Recipe Variations: Get Creative!
While the traditional filling and flavor are utterly delicious, here are some fun twists you can explore:
- Berry Bliss: Swap the peach filling for raspberry or blueberry jam for a delightful tartness.
- Nutty Addition: Mix in some chopped nuts like almonds or walnuts into the dough for an unexpected crunch.
- Cinnamon Roll Style: Add a sprinkle of cinnamon and nutmeg to the dough for a warm, cozy flavor.
- Chocolate Lovers: Fill the cookies with chocolate ganache or spread some Nutella instead of peach filling for a decadent treat.
- Vegan Version: Substitute with flax eggs and coconut oil, and use plant-based milk and cream to create a delightful vegan treat.
Chef’s Notes: A Dash of Reflection
Throughout the years, my Pesche Dolci recipe has evolved, adapting to new ingredients, dietary preferences, and creative whims. What started as a simple family treat has become a cherished recipe I share with friends and loved ones. I remember the first time I introduced an egg-free version at a summer gathering—everyone loved them just as much!
Cooking is often about the stories and experiences we create together, and I believe these cookies harness that spirit beautifully. So, whether you’re making them for a big gathering or a quiet evening at home, each bite should remind you of the love and tradition that inspired them.
FAQs and Troubleshooting: Let’s Clear It Up
-
My cookies spread too much—what happened?
This can happen if the dough isn’t chilled enough. Ensure you give it that necessary 30 minutes in the fridge. Also, keep an eye on the baking time; overbaking can lead to extra spreading. -
Can I freeze these cookies?
Absolutely! Ensure they are completely cooled, then place them in an airtight container. They can be frozen for up to 3 months. Just thaw them at room temperature before serving. -
What can I do if my dough is too sticky?
If it feels overly tacky, adding a bit more flour (a tablespoon at a time) can help. Remember not to over-flour; you want a manageable dough, not a dry one! -
How do I know when my cookies are done?
Look for a light golden brown color around the edges. They will firm up as they cool, so don’t worry if they seem a little soft right when they come out of the oven.
Nutritional Info
While I don’t focus heavily on nutritional stats, I do believe in enjoying treats in moderation. Each cookie is a delightful indulgence packed with flavors and memories—you can’t put a price on that!
I hope you enjoyed our little culinary adventure and feel inspired to create your own batch of Italian Peach Summer Cookies! Remember, cooking is all about love and creativity, so let your personality shine through in the kitchen. Happy baking! 🍑✨
PrintItalian Peach Summer Cookies (Pesche Dolci)

A delightful recipe for Italian Peach Summer Cookies that brings nostalgia and vibrant flavors of summer to your kitchen.
- Prep Time: 15 minutes
- Cook Time: 15 minutes
- Total Time: 30 minutes
- Yield: 24 servings 1x
- Category: Dessert
- Method: Baking
- Cuisine: Italian
- Diet: Vegetarian
Ingredients
- 2 cups all-purpose flour
- 1 cup granulated sugar
- 1/2 cup unsalted butter, softened
- 2 large eggs
- 1/2 cup milk
- 2 teaspoons baking powder
- 1 teaspoon vanilla extract
- 1/4 cup peach syrup or puree
- 1 cup sugar for rolling
- Yellow and red food coloring (for color)
- Optional filling (like peach jam or cream)
Instructions
- Preheat your oven to 350°F (175°C).
- Mix the dry ingredients: In a large bowl, combine flour and baking powder.
- Cream the butter and sugar in another bowl until light and fluffy.
- Add the eggs one at a time, incorporating each fully before the next.
- Combine the wet and dry ingredients gradually, alternating with milk.
- Fold in the peach puree.
- Color the dough by dividing it and adding food coloring.
- Chill the dough in plastic wrap for at least 30 minutes.
- Shape the cookies into small oval balls.
- Bake for 12-15 minutes or until edges are lightly golden.
- Cool on a wire rack.
- Roll each cookie in sugar when cool.
- Fill with jam or cream if desired.
Notes
You can substitute ingredients to cater to gluten-free or vegan diets. Ensure dough is chilled to prevent spreading.
Nutrition
- Serving Size: 1 cookie
- Calories: 150
- Sugar: 10g
- Sodium: 80mg
- Fat: 6g
- Saturated Fat: 3g
- Unsaturated Fat: 2g
- Trans Fat: 0g
- Carbohydrates: 22g
- Fiber: 1g
- Protein: 2g
- Cholesterol: 20mg
Keywords: Italian dessert, peach cookies, summer recipes, Pesche Dolci, nostalgic cookies