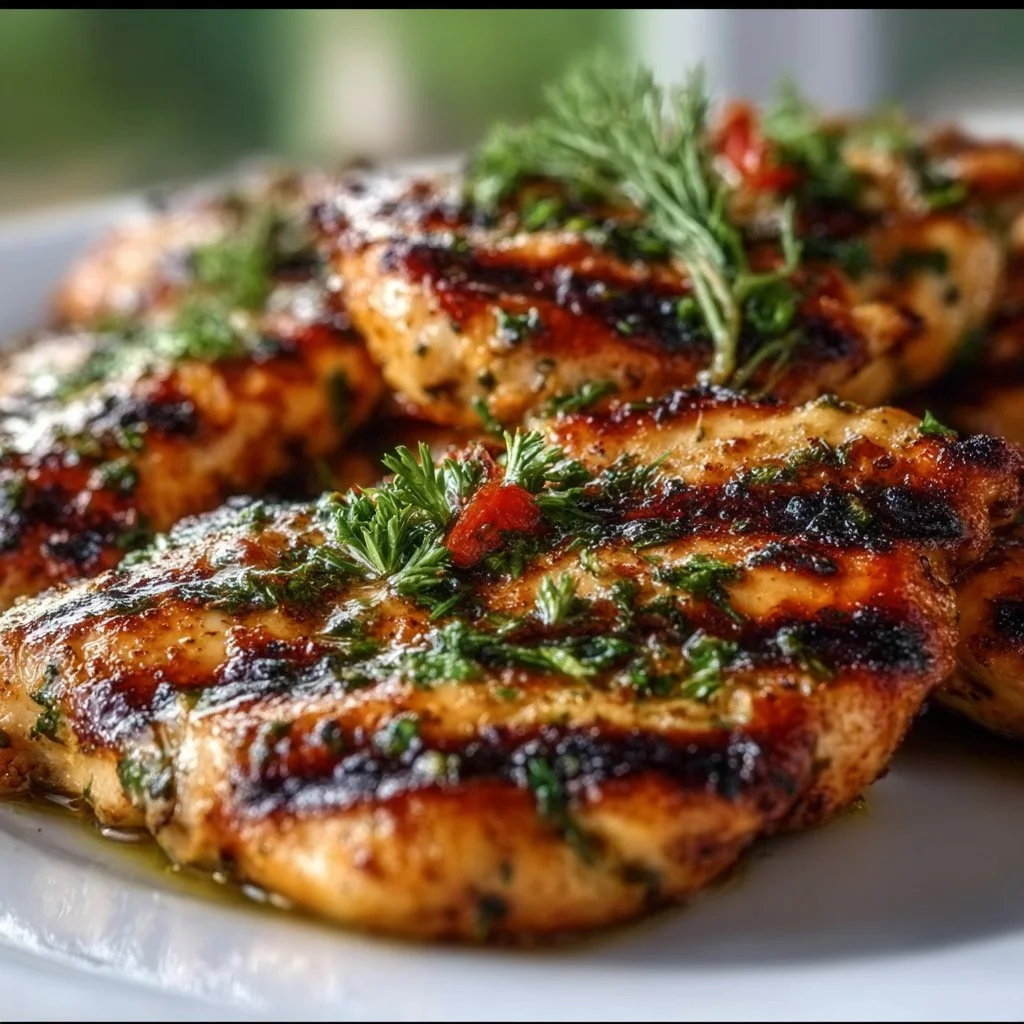
Easy Grilled Chicken
Easy Grilled Chicken: A Flavorful Feast for Everyone
Hello, fellow foodies! Today, we’re diving into one of my all-time favorite staples: grilled chicken! There’s something magical about transforming simple ingredients into a mouthwatering dish that everyone can enjoy. Grilled chicken is not just a summer barbeque hero; it’s a year-round delight that can take center stage on your dining table, regardless of the occasion.
Whether you’re firing up the grill for a weekend gathering, prepping for an easy weeknight dinner, or throwing a casual dinner party, this easy grilled chicken recipe is going to be your go-to. It’s juicy, flavorful, and, best of all, surprisingly simple to pull off! Trust me; your taste buds will thank you for making this dish a regular on your menu.
The magic starts with brining the chicken to lock in moisture and create a delicious base layer of flavor. We’ll add a sprinkle of seasoning for that perfect kick, and you’ll be amazed at how these simple steps elevate your cooking game. Picture this: succulent chicken breasts grilled to golden perfection, with a smoky aroma that’ll have everyone gathered around your table, eager for a taste.
So, grab your apron and let’s get cooking! I can’t wait to share this joyful culinary adventure with you, and by the end of it, you’ll be ready to impress your friends and family with your new grilling prowess.
Personal Story
Growing up, summer evenings were all about the grill at my family’s backyard gatherings. My dad would tend to the barbecue, flipping burgers and chicken while the smell wafted through the air, mingling with laughter and stories over ice-cold drinks. I can still recall my first attempt at grilling with him—how nervous I was about not burning the chicken. He calmed my fears and reminded me that the art of grilling isn’t just about the meat; it’s about the memories you create.
One memorable night, I was in charge of marinating the chicken. I mistakenly added what I thought was a tablespoon of cayenne pepper, but it turned out to be a teaspoon. The chicken was spicier than intended, leading to fits of laughter and plenty of ice cream later to cool off! Even in those fiery moments, the joy of sitting around the table, sharing a meal together, was what truly mattered.
That’s what remains in my heart every time I grill chicken—it’s not just about food; it’s about connection, laughter, and creating lasting memories. With this easy grilled chicken recipe, I hope you create beautiful experiences around your table, just as I have over the years.
Ingredients
To get started, here’s what you’ll need for this delightful grilled chicken:
-
4 boneless chicken breasts (or 8 thighs)
Boneless chicken breasts give you a lean and tender result, but thighs add unbeatable flavor. Choose what you prefer! -
4 cups warm water (for brine)
Warm water helps dissolve the salt and sugar in your brine more effectively. -
1/4 cup kosher salt (for brine)
Kosher salt is ideal due to its larger crystals, making it easy to distribute evenly across the meat. -
2 tbsp brown sugar (for brine)
The sugar not only balances out the saltiness but also helps caramelize the chicken when grilling. -
2 cloves garlic, smashed (for brine)
Garlic infuses the chicken with flavor. Smashing releases more oils and essences for a robust taste. -
2 tbsp olive oil (to coat chicken)
Olive oil keeps your chicken moist while adding a rich taste. A light brush will do wonders! -
1 tsp salt (for seasoning)
This will give your chicken that final boost of flavor. -
1/2 tsp black pepper (for seasoning)
Black pepper enhances all other flavors. A staple in any savory dish. -
1 tsp garlic powder (for seasoning)
An extra punch of garlic goodness! This seasoning makes it easy to distribute flavor evenly. -
1 tsp paprika (adds color)
Paprika not only contributes a vibrant color but also a subtle sweetness and depth. -
1/2 tsp dried oregano (herbal note)
The herbs add a fragrant element that elevates the final dish. -
1/4 tsp cayenne pepper (optional heat)
If you like a kick, throw it in! Adjust to your spice tolerance.
Step-by-Step Instructions
Now let’s get into the nitty-gritty of creating your easy grilled chicken. Follow these simple steps for an effortlessly delicious plate:
1. Make the Brine
In a large bowl or pot, combine the 4 cups of warm water, 1/4 cup of kosher salt, 2 tbsp of brown sugar, and 2 smashed garlic cloves. Stir until the salt and sugar have dissolved completely. This brine will work its magic to ensure that your chicken remains juicy and bursting with flavor.
2. Brine the Chicken
Submerge the chicken breasts or thighs in the brine, ensuring they’re fully submerged. Cover and refrigerate for at least 1 hour or up to 4 hours. This step is crucial because it helps the chicken retain moisture while cooking.
Chef Tip: If you’re short on time, even a quick 30-minute brine can add a world of difference!
3. Prepare the Grill
While the chicken is brining, preheat your grill to a medium-high heat (about 375°F to 400°F). Make sure grates are clean and lightly oiled to prevent sticking.
Chef Hack: If you don’t have a grill, a grill pan on the stovetop works wonders too. Just crank up the heat!
4. Season the Chicken
After brining, remove the chicken from the brine and pat it dry with paper towels. It’s time to add flavor! Drizzle 2 tbsp of olive oil over the chicken, then sprinkle with 1 tsp of salt, 1/2 tsp of black pepper, 1 tsp of garlic powder, 1 tsp of paprika, 1/2 tsp of dried oregano, and 1/4 tsp cayenne pepper (if you like a bit of heat). Use your hands to rub the seasonings into the chicken for an even coating.
5. Grill the Chicken
Place the chicken on the grill and cook for about 6-7 minutes on one side without moving it. This allows for stunning grill marks! Then, flip and cook for an additional 6-7 minutes on the other side until the chicken reaches an internal temperature of 165°F.
Chef Insight: If you’re using thick pieces, cover the grill during the cooking process to trap heat, ensuring thorough cooking. For more flavor, add a few sprigs of fresh herbs to the grill during cooking!
6. Rest and Enjoy
Once cooked, remove the chicken from the grill and let it rest for 5 minutes. This resting period allows the juices to redistribute, ensuring each bite is tender and juicy.
Serving Suggestions
Now for the fun part—plating! Slice the grilled chicken for visual appeal and serve it on a beautiful platter drizzled with a touch of olive oil or a squeeze of fresh lemon for brightness. Pair it with grilled vegetables, a fresh green salad, or fluffy rice seasoned with herbs.
Grill marks and fresh herbs make the dish pop, so consider garnishing with fresh parsley or basil for an elegant touch!
Recipe Variations
Get creative with your grilled chicken! Here are a few variations to keep things exciting:
-
Citrus Marinade: Swap out the brown sugar and garlic for orange or lemon juice, zest, and a splash of soy sauce for a fresh, citrus-driven flavor.
-
Herb Explosion: Instead of dried oregano, use fresh herbs like rosemary or thyme for a more aromatic profile.
-
Mediterranean Twist: Add olives, feta cheese, or a sprinkle of za’atar seasoning to the brine for a taste of the Mediterranean.
-
BBQ Flavor: Slather the grilled chicken with your favorite barbecue sauce during the last few minutes of cooking for a sweet and smoky spin.
-
Honey Mustard Glaze: Brush with honey mustard marinade before grilling for a sweet and tangy flavor.
Chef’s Notes
This recipe is such a crowd-pleaser and has evolved over the years. I often swap ingredients based on what I have in my pantry or what feels right for the season. One of my favorite recent adaptations was adding a splash of balsamic vinegar to the brine, giving the chicken a subtle tang.
I can’t count the number of times I’ve grilled chicken for friends and family, and every gathering is always filled with laughter, stories, and delicious bites. Don’t be afraid to make this recipe your own; experiment and add your flair!
FAQs and Troubleshooting
Q: Why is my grilled chicken dry?
A: Overcooking is usually the culprit. Invest in a meat thermometer (they’re super handy!) to ensure the chicken is cooked just to 165°F.
Q: Can I marinate the chicken overnight?
A: Yes! Just cut back on the salt in the brine, as the longer it sits, the saltier it can become.
Q: Can I grill frozen chicken?
A: It’s best to thaw the chicken beforehand for even cooking. If you’re in a pinch, you can grill them from frozen but cook on low heat to ensure they cook through without burning.
Q: Can I add other flavorings to the brine?
A: Absolutely! Feel free to experiment with different herbs, spices, or even beer or cider for unique flavors.
Nutritional Info (Optional)
Per serving (the following is an estimate):
- Calories: 220
- Protein: 28g
- Total Fat: 10g
- Saturated Fat: 1.5g
- Carbohydrates: 1g
- Sugar: 1g
- Sodium: 800mg
Final Thoughts
And there you have it! With this easy grilled chicken recipe, you’re not just cooking; you’re creating experiences that linger in memories long after the plates have been cleared. Enjoy the process and don’t forget to pour yourself something bubbly while you’re at it! Happy grilling, my friend—here’s to the delicious moments ahead! 🍽✨
PrintEasy Grilled Chicken
A simple and flavorful grilled chicken recipe that’s perfect for any occasion.
- Prep Time: 60 minutes
- Cook Time: 15 minutes
- Total Time: 75 minutes
- Yield: 4 servings 1x
- Category: Main Course
- Method: Grilling
- Cuisine: American
- Diet: Gluten-Free
Ingredients
- 4 boneless chicken breasts (or 8 thighs)
- 4 cups warm water (for brine)
- 1/4 cup kosher salt (for brine)
- 2 tbsp brown sugar (for brine)
- 2 cloves garlic, smashed (for brine)
- 2 tbsp olive oil (to coat chicken)
- 1 tsp salt (for seasoning)
- 1/2 tsp black pepper (for seasoning)
- 1 tsp garlic powder (for seasoning)
- 1 tsp paprika (adds color)
- 1/2 tsp dried oregano (herbal note)
- 1/4 tsp cayenne pepper (optional heat)
Instructions
- Make the brine: In a large bowl or pot, combine the warm water, kosher salt, brown sugar, and smashed garlic. Stir until dissolved.
- Brine the chicken: Submerge the chicken in the brine, cover, and refrigerate for 1 to 4 hours.
- Prepare the grill: Preheat your grill to medium-high heat (375°F to 400°F).
- Season the chicken: Remove the chicken from the brine, pat dry, drizzle with olive oil, and season with salt, pepper, garlic powder, paprika, oregano, and cayenne.
- Grill the chicken: Cook on the grill for 6-7 minutes on each side until reaching 165°F internal temperature.
- Rest and enjoy: Remove the chicken from the grill and let it rest for 5 minutes before serving.
Notes
For extra flavor, garnish with fresh herbs or a squeeze of lemon before serving.
Nutrition
- Serving Size: 1 serving
- Calories: 350
- Sugar: 5g
- Sodium: 800mg
- Fat: 10g
- Saturated Fat: 1.5g
- Unsaturated Fat: 8.5g
- Trans Fat: 0g
- Carbohydrates: 1g
- Fiber: 0g
- Protein: 28g
- Cholesterol: 75mg
Keywords: grilled chicken, easy recipe, summer grilling, healthy meal
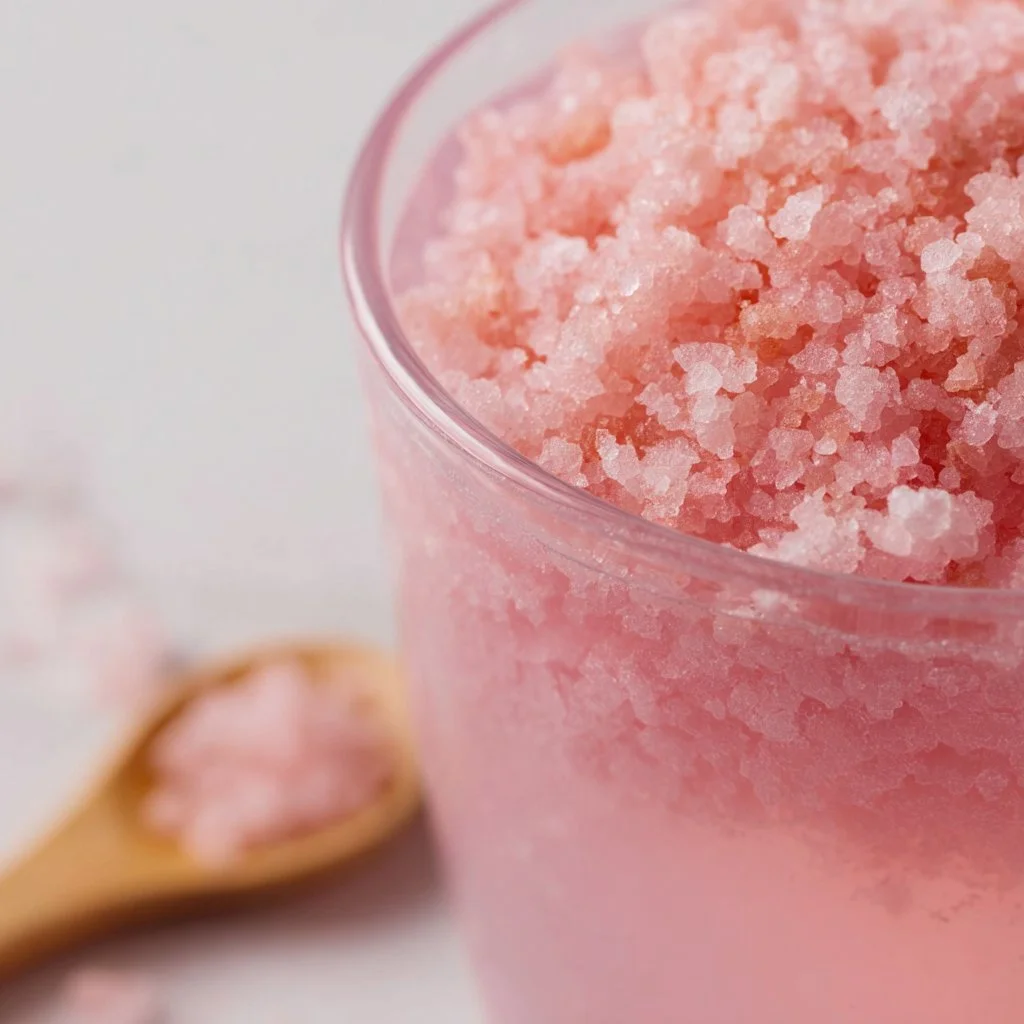
Pink Salt Diet Drink
Sip Your Way to Wellness: The Pink Salt Diet Drink
Hey there, fellow foodies and health enthusiasts! 🌼 Today, let’s dive into something refreshing, easy, and surprisingly beneficial for your wellness journey: the Pink Salt Diet Drink. This drink is not just another health trend but a delightful way to stay hydrated while giving your body a little boost. You may be surprised to learn that the humble pink Himalayan salt, with its gorgeous rosy hue, can benefit your health in various ways—anything from balancing hydration to supporting digestion.
Now, I know what you’re thinking: how can something as simple as salt and water be beneficial? Well, my friend, this isn’t just any salt. Pink Himalayan salt, mined from the mountains of Pakistan, is packed with minerals—over 80, to be exact! These essential minerals work harmoniously to help maintain your body’s pH and electrolyte balance while promoting fluid retention and proper hydration.
Imagine sipping on a warm glass of this magical drink in the morning, giving your body a gentle wake-up call as you soak in the hydration and minerals. You might want to add a splash of lemon juice or a drizzle of honey for flavor—make it your own! So, roll up your sleeves, and let’s whip up this delightful drink together. You’ll be amazed at how something so simple can make you feel so good!
Personal Story
Let’s rewind to a sun-kissed morning a few years ago. I remember sitting at my kitchen table with a splash of morning sun casting rays across my countertop, creating a warm and inviting atmosphere. My grandma always had a ritual she loved to share with me on lazy weekend mornings: sipping a glass of warm water with a pinch of salt to start the day. It was her version of a "wellness tonic," a practice she passed down from her grandmother.
At the time, I thought it was just a quirk of her generation, but I patiently listened as she explained its benefits—hydration, mineral balance, and even digestion! We would often chat about our plans for the day while I helped her squeeze the lemons for some zest. Little did I know that years later, this simple tradition would evolve into my fondness for the Pink Salt Diet Drink. Now, every time I sip on this magical mixture, I can hear her cheerful voice guiding me with kitchen wisdom. It’s not just a drink; it’s a warm embrace of nostalgia and a reminder to treat our bodies well.
Ingredients
Here’s what you’ll need to make this simple yet powerful drink:
-
1 teaspoon Pink Himalayan salt
- Chef Insight: This vibrant salt is different from regular table salt—it contains trace minerals that can help with hydration and electrolyte balance. You can find it at most grocery stores or online! If you don’t have pink salt, sea salt or kosher salt can be a workable substitute, but you’ll lose some of that gorgeous color and mineral benefits.
-
1 glass of warm water
- Substitution Tip: Use filtered water for the best taste and health benefits—bottled or tap water works, but warm water soothes the body and aids absorption. If you prefer keeping it cold, you can chill the drink after mixing, but warmth is key for the best effects.
-
1 tablespoon lemon juice (optional)
- Chef Insight: This adds a delightful tang and vitamin C. Freshly squeezed lemon juice is ideal, but if you have bottled lemon juice on hand, that works too! If citrus isn’t your thing, you can skip this altogether, although it does enhance the taste and health benefits.
-
Honey or natural sweetener (to taste, optional)
- Substitution Tip: If you like your drink a bit sweeter, drizzle in some honey, maple syrup, or agave. For a low-calorie option, try stevia or any other natural sweetener you prefer. Just be cautious not to overdo it; you want to enjoy the taste of the salt too!
Step-by-Step Instructions
-
Start with Your Ingredients
Gather and measure out your ingredients so you’re set up for success. Having everything at hand makes the process so much more enjoyable and allows you to focus on creating magic! -
Warm Your Water
Boil a kettle or heat a small pot of water until it’s comfortably warm—like a cozy blanket for your body! Don’t let it come to a boil; just remember: it should be warm but not scalding hot. That way, when you take a sip, it feels soothing on your throat. -
Mix in the Pink Himalayan Salt
Pour the warm water into a glass and add one teaspoon of pink Himalayan salt. Stir gently until the salt is completely dissolved. You should see a delightful swirl of color as the salt dissolves—like a little artistic moment in your day! If you’re a visual learner, keep an eye on that color change. -
Add Lemon Juice
If you’re opting for that zesty kick, now is the time to squeeze in a tablespoon of fresh lemon juice. Mix again! The brilliant acidity of the lemon will enhance the drink’s flavor and add even more nutrients. Citrus is a fabulous friend for digestion—a lovely sidekick to your salt. -
Sweeten It Up (Optional)
Taste your concoction. If you’d like to sweeten it, drizzle in a little honey or your choice of sweetener. Stir until everything is well combined. You want a slight sweetness to balance the salty flavor. Just remember: a little goes a long way! -
Serve and Enjoy!
Take a moment to pause, inhale the aroma, and appreciate your creation before taking that first sip. This drink is best enjoyed slowly, allowing your body to absorb those nutrients and savor the flavors.
Serving Suggestions
Serve your pink salt diet drink in your favorite glass for an extra touch of elegance! You might consider garnishing with a lemon wedge or a sprig of fresh mint for a beautiful presentation. If you enjoyed bringing friends together around the table, let them sip a glass too—you might just start a wholesome morning ritual together!
Recipe Variations
-
Citrus Salt Boost: Add a splash of orange or grapefruit juice for a delightful citrus medley!
-
Herbal Harmony: Infuse your drink with fresh herbs like mint or basil for an aromatic twist that feels refreshing.
-
Spicy Tang: For the adventurous, a pinch of cayenne pepper can ignite your senses and add a spicy kick!
-
Chilled Treat: Allow the drink to chill in the fridge for a refreshing summer evening sip.
-
Electrolyte Combo: Blend in a pinch of potassium-packed coconut water for an added hydration boost!
Chef’s Notes
You know, each time I make this drink, I can’t help but reflect on all the different variations and experiences I’ve had with it over the years. From cozy mornings alone at home to sunny patio brunches with friends, it seems to bring people together. I’ve played around with flavors and tried it numerous ways. There was that one time I topped it with a touch of ginger—which was a game-changer!
It’s interesting how simple ingredients can evolve together in different recipes while holding onto their foundational health benefits. Whether you prefer going classic or fancy, this drink is your canvas.
FAQs and Troubleshooting
-
What if the salt doesn’t dissolve completely?
If you’re having trouble getting the salt to dissolve, try stirring it in a bit longer or using water that’s hotter. Occasionally, the size of the salt crystals can affect how quickly they dissolve! -
Can I use regular table salt instead?
Yes, although I recommend staying true to pink Himalayan salt for the mineral benefits and its unique flavor—it really makes a difference in the drink’s essence! -
Is it safe to drink this daily?
For most people, a daily salt water drink is safe if done in moderation. It’s important to listen to your body—if you have any medical conditions that limit salt intake, consult with your healthcare provider. -
Why does my drink taste too salty?
You may have accidentally added too much salt or didn’t balance it with enough water. Feel free to adjust the salt level to your taste, starting with half a teaspoon if needed, and gradually increasing.
Nutritional Info (if applicable)
While specific nutritional calculations can vary, here’s a quick overview of what you’re getting from your pink salt diet drink:
- Hydration Boost: Warm water helps with digestion and hydration throughout the day.
- Electrolytes: Pink Himalayan salt is rich in minerals, which help maintain hydration and manage electrolyte levels.
- Antioxidant Benefits: Fresh lemon juice adds vitamin C and antioxidants, promoting overall health and well-being.
And there you have it—a beautiful, simple Pink Salt Diet Drink, complete with memories, tips, and variations to suit your personal flair! I’m excited for you to try this out and make it your own. Remember, cooking is all about experimentation and joy. So tie on that apron, pour yourself a glass, and let the wellness journey begin! Cheers to vibrant health and delightful flavors! 🥂
PrintPink Salt Diet Drink

A refreshing and beneficial drink made with pink Himalayan salt, warm water, and optional lemon juice or honey for flavor.
- Prep Time: 5 minutes
- Cook Time: 0 minutes
- Total Time: 5 minutes
- Yield: 1 serving 1x
- Category: Beverage
- Method: Mixing
- Cuisine: Health Drink
- Diet: Vegetarian
Ingredients
- 1 teaspoon Pink Himalayan salt
- 1 glass of warm water
- 1 tablespoon lemon juice (optional)
- Honey or natural sweetener (to taste, optional)
Instructions
- Gather your ingredients so you’re set up for success.
- Boil a kettle or heat a small pot of water until it’s comfortably warm.
- Pour the warm water into a glass and add one teaspoon of pink Himalayan salt. Stir gently until dissolved.
- Squeeze in a tablespoon of fresh lemon juice if desired.
- Taste your concoction and sweeten with honey or natural sweetener if preferred.
- Pause to appreciate your creation before taking a sip.
Notes
Enjoy variations like adding citrus juice or fresh herbs for added flavor!
Nutrition
- Serving Size: 1 serving
- Calories: 50
- Sugar: 5g
- Sodium: 400mg
- Fat: 0g
- Saturated Fat: 0g
- Unsaturated Fat: 0g
- Trans Fat: 0g
- Carbohydrates: 12g
- Fiber: 0g
- Protein: 0g
- Cholesterol: 0mg
Keywords: pink salt drink, wellness drink, hydration, healthy beverage, pink Himalayan salt
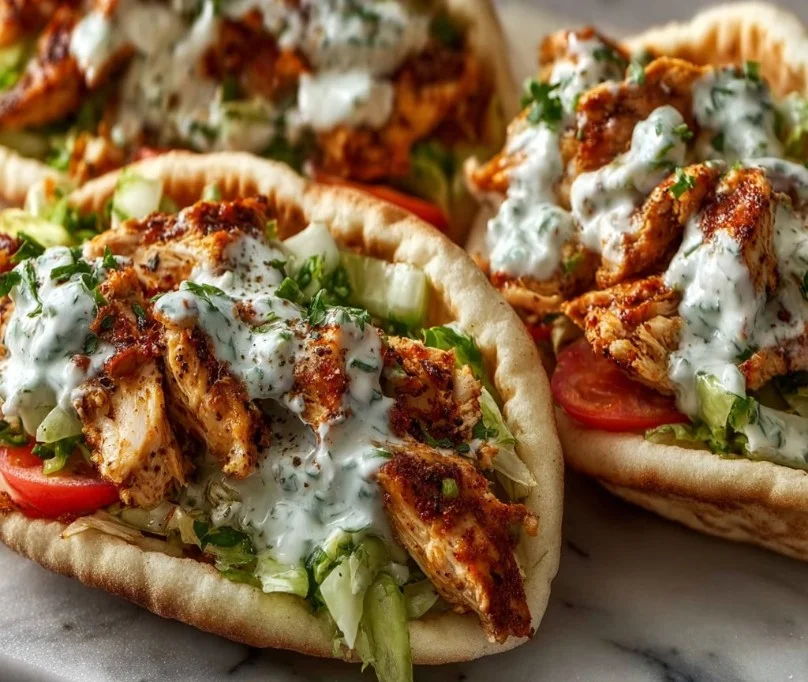
Sheet Pan Chicken Pitas with Herby Ranch
# Sheet Pan Chicken Pitas with Herby Ranch: A Flavorful Family Favorite

## Introduction

Hey there, fellow food enthusiasts! I’m so delighted to have you here at Ivory Apron, where cooking is all about elegance without the intimidation factor. Today, we’re turning up the flavor and ease with a dish that’s perfect for weeknight dinners or casual gatherings: **Sheet Pan Chicken Pitas with Herby Ranch.**

Imagine this: it’s a bustling Wednesday evening, and the clock is ticking down to family dinner time. You want something delicious, healthy, and quick — something that fills the house with a mouthwatering aroma as it roasts away in the oven. You’re in luck because this recipe promises just that and more! With perfectly seasoned chicken, colorful roasted veggies, and a creamy herby ranch sauce nestled inside soft pitas, you’ve got a meal that is not only satisfying but also visually stunning.

But before we dive into the nitty-gritty of cooking, let’s chat about why pitas are such a great choice. Pitas are like little edible pockets of joy, ready to be filled with all the goodness we can muster. And trust me, there's nothing quite like a warm pita bursting with juicy chicken and fresh veggies. So grab your cutting boards and let’s create a dinner that will make your kitchen the star of the evening!

## Personal Story

You know, some of my fondest memories revolve around simple yet comforting meals that brought our family together. I remember one summer when my grandma invited us all over for a backyard barbecue. It was that perfect blend of laughter, warmth, and the tantalizing scent of grilled goodies wafting through the air. She made these chicken pitas that she had marinated overnight, filling them to the brim with the freshest veggies and the most delectable sauce. We sat around the picnic table, devouring our creations and giggling at the ridiculous amounts of ranch dressing we were all dousing on top.

That night, something clicked for me; it wasn't just about the food but about the atmosphere, the connections, and the joy of sharing a meal. It’s moments like these that inspire my recipes and my mission here at Ivory Apron — to make cooking accessible and enjoyable for everyone. So, let’s keep that spirit alive as we dive into our Sheet Pan Chicken Pitas with Herby Ranch!

## Ingredients

Here’s what you’ll need to whip up these delicious pitas:

- **2 boneless, skinless chicken breasts**
  Perfectly tender and quick to cook, these beauties slice beautifully for easy stuffing. Feel free to substitute with turkey or any other lean protein if you're looking for alternatives.

- **1 tablespoon olive oil**
  This gem of an ingredient not only adds flavor but helps everything brown beautifully and keeps your dish juicy. Avocado oil works well too!

- **Salt and pepper, to taste**
  These seasoning staples are crucial for enhancing the natural flavors of the chicken and veggies. Don’t shy away — season generously!

- **1 teaspoon garlic powder**
  A fantastic way to pack in savory flavor with minimal effort. You can substitute with fresh minced garlic if you prefer a punchier taste.

- **1 teaspoon paprika**
  Not just for color; this spice adds a subtle smoky sweetness. You can try smoked paprika for an extra depth of flavor.

- **1 cup mixed vegetables (bell peppers, onions, zucchini)**
  A colorful blend that caramelizes beautifully in the oven. Feel free to use whatever you have on hand; broccoli, cherry tomatoes, or carrots work great too!

- **1/2 cup Greek yogurt**
  The creamy base for our herby ranch sauce, it’s tangy and smooth. If lactose is a concern, dairy-free yogurt can be a great substitute.

- **1 tablespoon ranch seasoning mix**
  This handy blend is packed with flavors you adore, making it easy to achieve that classic ranch taste. You can make your own if you're feeling adventurous!

- **Fresh herbs, to taste (parsley, dill)**
  These beauties will brighten up your dish with aromatic freshness. Use whatever herbs you have handy — cilantro or chives can also add a delightful kick.

- **4 pitas**
  Whether you prefer them soft or slightly toasted, these will cradle the filling beautifully. Whole wheat or gluten-free variants can work too!

## Step-by-Step Instructions

Now, let’s get cooking! We’ll create a dish that’s as fun to make as it is to eat. Here’s the step-by-step breakdown:

### 1. Prepping the Chicken and Veggies
   **Tip:** Start by preheating your oven to 425°F (220°C). It’s all about timing! As it warms, you can prep your ingredients.
   Slice the chicken breasts into bite-sized pieces or strips. This not only helps them cook faster but also makes for easy stuffing later. Place the chicken in a mixing bowl and add the olive oil, salt, pepper, garlic powder, and paprika. Use your hands to massage the spices into the chicken — it’s messy, but that's where the fun is!

### 2. Chopping the Vegetables
   While you’re marinating the chicken, chop up your mixed veggies into similar-sized pieces. You want them to cook evenly and caramelize nicely. Toss them with a pinch of salt, pepper, and a drizzle of olive oil. The goal is to enhance their natural sweetness and prevent drying out!

### 3. Roasting on the Sheet Pan
   **Chef Hack:** Line your sheet pan with parchment paper for easy cleanup!
   Spread the marinated chicken and mixed vegetables evenly on the sheet pan. Ensuring they’re in a single layer allows for that golden-brown crispiness we all love. Pop it into your preheated oven and roast for about 20-25 minutes. You’ll want to stir halfway through to ensure even cooking. The chicken should be fully cooked (165°F internally) and the veggies fork-tender.

### 4. Making the Herby Ranch Sauce
   While everything is roasting, let’s whip up that creamy herby ranch! In a small bowl, combine the Greek yogurt and ranch seasoning mix. Add a sprinkle of fresh herbs to brighten it up — the more, the merrier! Taste it and adjust with more herbs or seasoning as necessary. The key is to balance that creaminess with a bright, herby punch.

### 5. Assembling the Pitas
   **Fun Fact:** You can warm your pitas in the oven for a couple of minutes or in a skillet over medium heat for extra softness.
   Once everything is ready, it’s time to assemble! Open your pitas and stuff them generously with the roasted chicken and veggies. Drizzle with that luscious herby ranch sauce and finish with a sprinkle of extra fresh herbs for a pop of color.

## Serving Suggestions

Serve your stuffed pitas on a lovely platter with a few additional sprigs of herbs peeking out. You can accompany them with some extra herby ranch for dipping on the side or a simple green salad dressed in olive oil and lemon for a bright contrast. Add some crunchy potato chips or roasted chickpeas for an extra crunch, and you have a delightful spread ready to impress!

## Recipe Variations

- **Spicy Kick:** Add a pinch of cayenne pepper or a sprinkle of red pepper flakes to the chicken marinade for a little heat.
- **Mediterranean Twist:** Swap out traditional ranch ingredients for hummus and roasted eggplant for a Mediterranean feel!
- **Veggie-Packed:** Load up on more veggies like spinach or kale, or even swap the chicken for chickpeas for a vegetarian option.
- **Herb Swap:** Use basil or mint in place of dill or parsley for a completely new flavor profile.
- **Whole Grain Pitas:** Try whole wheat or even a flavored pita (like garlic or spinach) for added depth.

## Chef’s Notes

This recipe has evolved beautifully in my kitchen over the years. Originally, I started with a simple chicken and veggie combo, but after countless family dinners, I realized that adding the herby ranch sauce elevated it from great to absolutely unforgettable. This dish is inspired by my love for simple ingredients that create warm memories and joyful gatherings. It’s incredibly versatile, allowing you to mix and match flavors based on what you’ve got at home!

Oh, and I’ll let you in on a little secret: sometimes I roast up extra chicken and veggies so I have leftovers for wraps or salads throughout the week. It’s a total game-changer!

## FAQs and Troubleshooting

### 1. **What if my chicken is dry?**
   If your chicken turns out dry, it might be overcooked. Using a meat thermometer can help ensure you hit that sweet 165°F mark.

### 2. **Can I make this ahead of time?**
   Absolutely! You can marinate the chicken the night before and chop the veggies in advance. Just assemble and roast right before serving.

### 3. **What if my pitas crack when I stuff them?**
   This can happen if the pitas are cold. Warming them thoroughly beforehand will make them more pliable and less likely to crack!

### 4. **How do I store leftovers?**
   Store any leftovers in an airtight container in the fridge for up to three days. Just reheat in the oven for the best results!

## Nutritional Info

**(Per Serving)**
Calories: 370
Protein: 30g
Fat: 12g
Carbohydrate: 40g
Fiber: 5g
Sugar: 4g

And there you have it — Sheet Pan Chicken Pitas with Herby Ranch, a meal that’s not just about the food; it’s about creating beautiful moments around your table. Let’s embrace the joy of cooking together, and don’t forget to share your creations with me! Happy cooking!
Sheet Pan Chicken Pitas with Herby Ranch

A flavorful and easy recipe for sheet pan chicken pitas filled with seasoned chicken, colorful roasted veggies, and a creamy herby ranch sauce.
- Prep Time: 15 minutes
- Cook Time: 25 minutes
- Total Time: 40 minutes
- Yield: 4 servings 1x
- Category: Main Course
- Method: Baking
- Cuisine: Mediterranean
- Diet: Healthy
Ingredients
- 2 boneless, skinless chicken breasts
- 1 tablespoon olive oil
- Salt and pepper, to taste
- 1 teaspoon garlic powder
- 1 teaspoon paprika
- 1 cup mixed vegetables (bell peppers, onions, zucchini)
- 1/2 cup Greek yogurt
- 1 tablespoon ranch seasoning mix
- Fresh herbs, to taste (parsley, dill)
- 4 pitas
Instructions
- Preheat your oven to 425°F (220°C). Slice the chicken breasts into bite-sized pieces or strips. Place the chicken in a mixing bowl and add the olive oil, salt, pepper, garlic powder, and paprika. Massage the spices into the chicken.
- Chop your mixed veggies into similar-sized pieces. Toss them with a pinch of salt, pepper, and a drizzle of olive oil.
- Spread the marinated chicken and mixed vegetables evenly on a sheet pan. Roast for about 20-25 minutes, stirring halfway through, until chicken is cooked and veggies are tender.
- Combine the Greek yogurt and ranch seasoning mix in a small bowl. Add fresh herbs and adjust seasoning as necessary.
- Stuff the pitas generously with the roasted chicken and veggies. Drizzle with the herby ranch sauce and garnish with extra herbs.
Notes
For added flavor, consider marinating the chicken overnight. Leftovers can be stored in an airtight container for up to three days.
Nutrition
- Serving Size: 1 pita
- Calories: 370
- Sugar: 4g
- Sodium: 450mg
- Fat: 12g
- Saturated Fat: 3g
- Unsaturated Fat: 7g
- Trans Fat: 0g
- Carbohydrates: 40g
- Fiber: 5g
- Protein: 30g
- Cholesterol: 70mg
Keywords: chicken pitas, sheet pan dinner, herby ranch, quick dinner, Mediterranean recipes
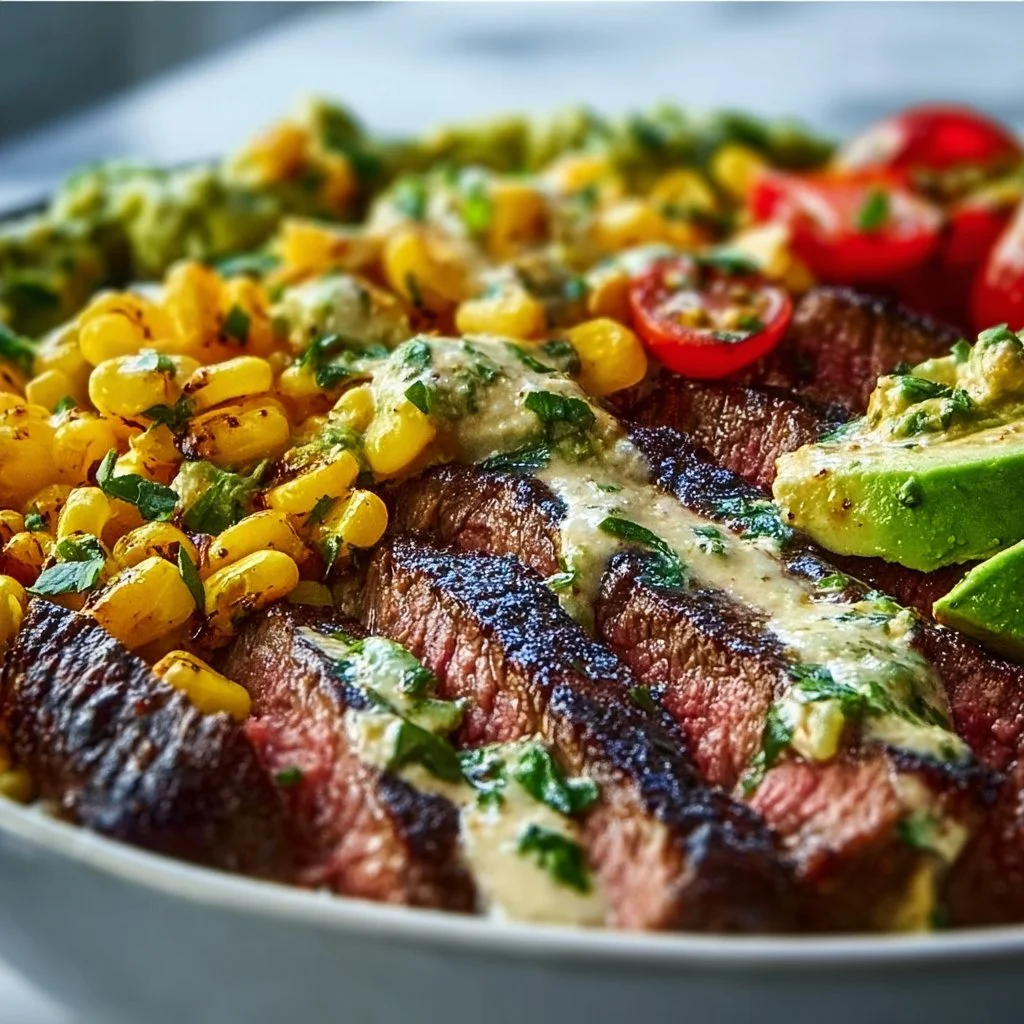
Grilled Steak Bowl with Avocado and Corn
Savory Grilled Steak Bowl with Avocado and Corn
Hello, food lovers! Are you ready to elevate your mealtime game? Today, we’re diving into a dish that’s not just delicious but also brimming with vibrant flavors and textures: the Grilled Steak Bowl with Avocado and Corn. Believe me, this bowl is everything you could ever want—a delightful combination of juicy grilled steak, creamy avocado, and sweet roasted corn, all topped with zesty lime juice and cilantro.
If you’re a fan of quick, satisfying meals that impress without overwhelming, you’ve come to the right place. Perfect for family dinners, casual get-togethers, or that cozy night in, this dish is all about providing the comfort we crave while still looking stunning on the plate.
Imagine the satisfying crunch of sweet corn mingling with the rich flavors of grilled steak, complemented beautifully by creamy avocado—it’s not just food; it’s an experience! And the best part? You don’t need a five-star kitchen or lengthy prep time to create this masterpiece. Just a little intention, quality ingredients, and a sprinkle of love.
Ready to transform your weeknight meals? Grab your apron, and let’s get cooking!
Personal Story
Every time I whip up a Grilled Steak Bowl, I’m taken back to a summer barbecue in my backyard, surrounded by the laughter of friends and the sizzling sound of the grill. It was one of those golden evenings where the setting sun painted the sky with pink and orange hues. The air was filled with the mouth-watering aroma of seasoned steak grilling to perfection.
As I stood by the grill, flipping the steak and listening to everyone’s chatter, I couldn’t help but smile. I remember a dear friend holding up a bowl filled with grilled corn, and saying, “This corn is like candy!” Laughter erupted as we piled our bowls high with grilled goodies, avocado, and whatever fresh veggies we could find in the garden. Those moments of connection, laughter, and delicious food are what it’s all about. And now, I want to share that love, that nostalgia, with you through this recipe!
Ingredients
Here’s what you’ll need to create this savory delight:
-
Juicy Grilled Steak
Whether you choose ribeye, flank, or sirloin, make sure it’s well-marbled for incredible flavor. Look for cuts that have a good balance of fat for that perfect juicy bite. And don’t worry—if steak isn’t your thing, grilled chicken or tofu can be just as fabulous! -
Creamy Avocado
Avocados add a luxurious creaminess that elevates any dish. Look for avocados that yield slightly to gentle pressure; they should be ripe but not overly soft. If avocados are out of season, you can switch to hummus for a creamy alternative! -
Sweet Roasted Corn
Fresh corn is best, but you can easily use canned or frozen corn. Just sauté it in a little bit of oil to achieve that roasted flavor. Pro tip: grill corn on the cob directly on the grill for an extra layer of smokiness! -
Cilantro
This bright herb brings freshness to the dish. If you’re not a fan of cilantro, feel free to swap it for parsley or green onions—both impart a lovely fresh note. -
Sour Cream
It’s a classic topping that adds a tangy creaminess. Greek yogurt is a fantastic substitute if you prefer something lighter. -
Lime Juice
Freshly squeezed lime juice brightens up the flavors, giving it that zesty kick. Bottled lime juice works in a pinch, but fresh is always best! -
Salt and Pepper
Season to taste! Salt enhances the flavors, while freshly cracked black pepper adds a little spice.
Step-by-Step Instructions
Alright, let’s dive into the cooking process! Follow along, and let me share a few chef secrets as we go.
-
Prep the Steak:
First things first—let’s get your steak ready! Take your steak out of the fridge and let it come to room temperature for about 30 minutes. This ensures even cooking. While it’s resting, season it liberally with salt and freshly cracked pepper. This step isn’t just for flavor; it helps form a beautiful crust when you grill. -
Grill the Corn:
While that steak is relaxing, let’s prepare the corn. If you’re using fresh corn, shuck it, then drizzle it with a bit of olive oil and a pinch of salt. Grill it on medium-high heat until it’s slightly charred, about 10 minutes. If you’re using frozen corn, toss it into a skillet with a bit of oil and sauté until golden! -
Fire Up the Grill:
Preheat your grill to high heat. If you don’t have a grill, a cast-iron skillet on the stovetop works wonder, too! Just make sure it’s super hot before you add the steak—you want that sear! -
Grill the Steak:
Place the steak on the grill and resist the urge to move it around too much—let it sear! Depending on the thickness of your steak, grill for about 4-6 minutes per side for medium-rare. Here’s my tip: use an instant-read thermometer; it should read about 135°F for perfect medium-rare. -
Rest the Steak:
Once it’s grilled to your liking, remove it from the heat and let it rest for at least 5-10 minutes. This allows the juices to redistribute throughout the meat, ensuring each bite is tender and juicy. -
Slice and Dine:
After resting, slice the steak against the grain—this is crucial for tenderness! As you slice, imagine the beautiful layers of flavor you’re creating. -
Assemble Your Bowl:
Now, let’s put it all together! In a bowl, layer your sliced steak, grilled corn, and diced avocado. Drizzle with sour cream, a splash of lime juice, and a handful of fresh cilantro.
And voilà! You’ve created a stunning Grilled Steak Bowl that’s a feast for the eyes and the belly!
Serving Suggestions
Presentation is key to making your meal feel special, so let’s plate it up! Start with a generous base of the grilled corn and steak at the bottom. Neatly arrange slices of avocado on top, and finish with a lovely dollop of sour cream. Sprinkle some fresh cilantro over everything for that pop of green. You can even serve it in a rustic bowl or on a wooden board for an extra chic touch!
Recipe Variations
Here are a few creative twists on the classic Grilled Steak Bowl:
- Spicy Kick: Add some diced jalapeños or a drizzle of hot sauce for those who love a little heat.
- Mexican Flair: Swap the sour cream for cotija cheese and add black beans for a heartier meal.
- Vegetarian Delight: Replace steak with grilled portobello mushrooms or marinated tempeh for a satisfying plant-based option.
- Mediterranean Vibe: Use grilled chicken and swap the avocado for tzatziki sauce—a refreshing complement!
- Tropical Twist: Add pineapple chunks in place of some corn for a fruity explosion of flavor.
Chef’s Notes
Over the years, this Grilled Steak Bowl has become a staple in my home. It started as a way to use up leftover grilled steak but evolved into a must-have dish for every gathering. Sometimes I throw in whatever veggies I have left in the fridge, and it always surprises me how versatile it can be.
Funny story: A friend of mine once challenged me to create a bowl entirely without any of the usual ingredients. By the end of the cook-off, I ended up grilling peaches and topping them with balsamic reduction, and it turned out to be a hit! Who knew bowls could be so creatively liberating?
FAQs and Troubleshooting
-
What if my steak is tough?
Make sure to slice the steak against the grain, and let it rest before cutting. If it’s still tough, you might have cooked it too long. A meat thermometer is a great tool to avoid that! -
Can I make this bowl ahead of time?
Absolutely! You can grill the steak and corn in advance. Just store them separately in the fridge and assemble when you’re ready to eat. -
My avocado isn’t ripe; what should I do?
If you find yourself with a hard avocado, place it in a brown paper bag with an apple or banana for a day or two to help it ripen faster. -
How can I make this dish gluten-free?
Great news—this recipe is naturally gluten-free! Just ensure any sides or additional toppings are also gluten-free.
Nutritional Info
While I always emphasize the joy of cooking and sharing, I know that nutritional information can be valuable. Here’s a quick overview:
- Calories: Approximately 550 per bowl (without any additional toppings)
- Protein: 35g
- Fats: 35g (depending on avocado and sour cream)
- Carbohydrates: 30g (mostly from corn)
And there you have it—a delicious journey through the art of creating a Grilled Steak Bowl with Avocado and Corn! I hope you find joy in making and sharing this dish as much as I have. Keep creating those beautiful moments around your table, and remember that the secret ingredient is always love! Happy cooking!
PrintSavory Grilled Steak Bowl with Avocado and Corn
A delightful combination of juicy grilled steak, creamy avocado, and sweet roasted corn, all topped with zesty lime juice and cilantro.
- Prep Time: 15 minutes
- Cook Time: 30 minutes
- Total Time: 45 minutes
- Yield: 4 servings
- Category: Main Course
- Method: Grilling
- Cuisine: American
- Diet: Gluten-Free
Ingredients
- Juicy Grilled Steak
- Creamy Avocado
- Sweet Roasted Corn
- Cilantro
- Sour Cream
- Lime Juice
- Salt and Pepper
Instructions
- Prep the steak: Take your steak out of the fridge and let it come to room temperature for about 30 minutes. Season it with salt and pepper.
- Grill the corn: Prepare the corn and grill it until slightly charred, about 10 minutes.
- Fire up the grill: Preheat your grill to high heat.
- Grill the steak: Place the steak on the grill and grill for about 4-6 minutes per side for medium-rare.
- Rest the steak: Remove it from the heat and let it rest for at least 5-10 minutes.
- Slice and dine: Slice the steak against the grain.
- Assemble your bowl: Layer your sliced steak, grilled corn, and diced avocado, then drizzle with sour cream and lime juice.
Notes
Feel free to add diced jalapeños for a spicy kick or replace steak with portobello mushrooms for a vegetarian option.
Nutrition
- Serving Size: 1 bowl
- Calories: 550
- Sugar: 4g
- Sodium: 500mg
- Fat: 35g
- Saturated Fat: 10g
- Unsaturated Fat: 20g
- Trans Fat: 0g
- Carbohydrates: 30g
- Fiber: 6g
- Protein: 35g
- Cholesterol: 90mg
Keywords: steak bowl, grilled steak, avocado, corn, healthy meal
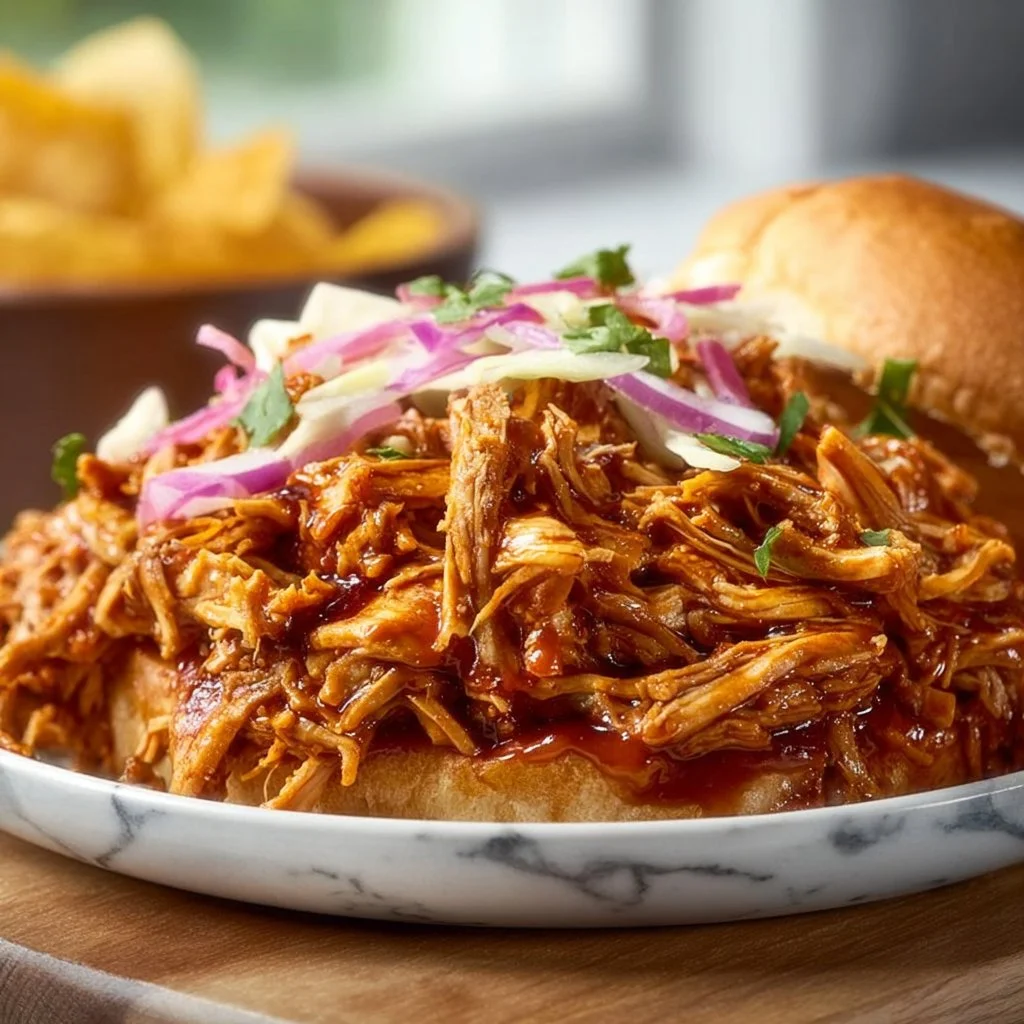
Crock Pot BBQ Pulled Chicken
The Best Crock Pot BBQ Pulled Chicken Recipe
Hey there, fellow foodies! 👋 Welcome back to Ivory Apron, where cooking feels elegant yet comforting, and dishes come together without the fuss. Today, I’m super excited to share one of my absolute favorite recipes: Crock Pot BBQ Pulled Chicken! This dish embodies everything I love about cooking—it’s uncomplicated, flavorful, and perfect for everything from a casual weeknight dinner to a lively gathering with friends.
Picture this: You’ve had a long day, and the last thing you want to do is spend hours in the kitchen. Enter the humble crock pot—your trusty sidekick that does all the heavy lifting while you sit back and binge your favorite show. With just a few ingredients, you’ll create tender, juicy pulled chicken that’s dripping with rich BBQ flavor. Not to mention, your house will smell positively irresistible!
Imagine lifting the lid of your crock pot to reveal perfectly cooked chicken that pulls apart effortlessly. You can serve it on a bun or over a bed of rice, maybe with some coleslaw on the side. If someone asks what the secret is, just smile and say, “Oh, it’s just my little crock pot magic.” But really, it’s this recipe that’s going to win you a standing ovation (well, at least a sincerely satisfied smile from your dinner guests).
So, buckle up for a culinary adventure as I walk you through my go-to recipe for Crock Pot BBQ Pulled Chicken. Before you know it, you’ll be mastering the art of slow cooking like a pro—and you might even want to host a BBQ just to show off your skills!
Personal Story
Every time I make BBQ pulled chicken, I’m transported back to summer evenings at my grandparents’ house. My grandpa, a true culinary artist at heart, would fire up the backyard grill while the family gathered around, sharing stories and laughter. I remember sneaking into the kitchen to snag a taste of the chicken he’d slow-cooked all day, with those smoky BBQ flavors infusing every juicy bite.
Watching him transform simple ingredients into extraordinary dishes inspired my own love for cooking. His BBQ pulled chicken was legendary—a dish so comforting that it felt less like a meal and more like a warm hug. Fast forward to today, and I’ve created my own version in the crock pot, making it easier than ever to achieve that nostalgic flavor without spending all day in the kitchen. Every bite takes me back to those summer evenings, surrounded by family, with hearts as full as our plates.
Ingredients
Here’s what you’ll need to pull off this delicious Crock Pot BBQ Pulled Chicken:
-
4 boneless, skinless chicken breasts
- These are the star of the show! Boneless and skinless keep things tender and easy to shred. If you’re feeling adventurous, you can use thighs for a richer flavor.
-
1 cup BBQ sauce
- Use your favorite store-bought sauce or make your own! For a spicy kick, opt for a chipotle BBQ sauce.
-
1/2 cup chicken broth
- This will keep the chicken moist as it cooks away. If you’re out, vegetable broth or even water will do in a pinch, but aim for the best flavor.
-
1 tablespoon Worcestershire sauce
- Adds a deep, savory element to the dish. If you’re vegan or vegetarian, use a vegan Worcestershire sauce or skip it completely!
-
1 tablespoon apple cider vinegar
- This brightens up the flavors and balances the sweetness of the BBQ sauce. If you don’t have it, feel free to substitute white vinegar or lemon juice.
-
1 tablespoon brown sugar
- Enhances the flavors and gives sweetness. For a healthier option, use honey or maple syrup for that delightful caramelization.
-
1 teaspoon garlic powder
- Garlic is a must for depth and taste. If you prefer fresh, you can crush a garlic clove or two instead.
-
1 teaspoon onion powder
- Adds that sweet onion flavor without the texture. If you’re using fresh onions, sauté them before adding for a deeper taste.
-
Salt and pepper to taste
- Classic seasoning that brings the whole dish together! Remember, you can always add more later, but it’s hard to take it out once it’s in.
With these ingredients, you’re all set to create a dish that’s as fun to make as it is to eat. Trust me, your taste buds will be thanking you!
Step-by-Step Instructions
Now that you have everything prepped, let’s get cooking! Here’s how you create this mouthwatering BBQ pulled chicken:
-
Prepare the Chicken:
- First, grab those lovely chicken breasts and give them a quick rinse under cold water. Pat them dry with paper towels—this helps to make sure they sear beautifully if you choose to brown them first. If you want that extra flavor kick, feel free to brown the chicken in a skillet over medium-high heat for about 2-3 minutes on each side before adding to the crock pot. This step is optional but can enhance the overall flavor.
-
Make Your Sauce:
- In a mixing bowl, combine the BBQ sauce, chicken broth, Worcestershire sauce, apple cider vinegar, brown sugar, garlic powder, and onion powder. Whisk it all together until it’s well mixed. Let me tell you, this fragrant mixture already has me drooling! This is where all your flavors are going to come from, so taste as you go—adjust with a little more vinegar for tang or brown sugar for sweetness if needed.
-
Layer Your Ingredients:
- Place your chicken breasts at the bottom of your crock pot, and then pour the sauce mixture over the chicken, ensuring that everything is nicely coated. I like to get in there with my hands and give it a little loving massage to make sure each piece of chicken gets that delicious BBQ bath.
-
Set It and Forget It:
- Cover your crock pot and set it on low for 6-8 hours, or on high for 3-4 hours. If you’ve chosen to brown your chicken first, the cook time on high might lean towards the shorter end. This is when the magic happens—your kitchen will fill with the tantalizing aroma of BBQ goodness, making it impossible to resist!
-
Shred It:
- Once your cooking time is up, take the lid off and grab two forks. Shred the chicken right in the crock pot, mixing it into the sauce. You’ll know it’s done when the chicken pulls apart easily. If it looks a little too soupy for your liking, you can let it cook for an extra 15-30 minutes with the lid off for the sauce to reduce.
-
Taste Test:
- This is the moment of truth! Give your pulled chicken a taste and adjust the seasoning with salt and pepper. Don’t be shy—this is your creation!
And there you have it—a stunningly tasty Crock Pot BBQ Pulled Chicken that took minimal effort but will deliver maximum flavor and joy!
Serving Suggestions
For the best experience, lay out a spread that invites everyone to dig in. Serve your pulled chicken on fresh brioche buns for classic BBQ sandwiches, or over a fluffy bed of rice for a hearty meal. Pair it with some crunchy coleslaw on the side for that refreshing contrast, and maybe a pickle or two for that delightful bite. Don’t forget a drizzle of extra BBQ sauce on top, because let’s be real—there’s no such thing as too much!
Recipe Variations
Feeling a little adventurous? Here are some fun twists on the classic BBQ pulled chicken:
- Tropical Twist: Add pineapple juice and some diced pineapple to the sauce for a sweet, tropical flair.
- Spicy Kick: Stir in some diced jalapeños or a teaspoon of cayenne pepper to the sauce for a fiery upgrade.
- Mesquite Flavor: Use a smoky BBQ sauce, and toss in a teaspoon of smoked paprika for extra depth.
- Herbed Delight: Add chopped fresh herbs (like cilantro or basil) to the finished chicken for a burst of freshness.
- Make it Pulled Chicken Salad: Mix your pulled chicken with Greek yogurt or mayo and some diced celery for a yummy salad that fits perfectly in a wrap or on a bed of greens.
Let your creativity shine and make this dish your own!
Chef’s Notes
I’ve been making this BBQ pulled chicken recipe for years now, and it has evolved over time. In the beginning, I followed a traditional recipe step-by-step, but I quickly started adding my personal touches until it truly felt like my own. I remember one time when I accidentally poured in a bit too much apple cider vinegar—and you know what? It turned out spectacular! That delightful tang added a new dimension to the chicken, and now I recommend folks to be bold and experiment.
And that’s what I love most about cooking—each dish tells a story, and each time you prepare it, you have the chance to create your own unique version. Let your kitchen be a playground of flavors!
FAQs and Troubleshooting
1. What if my chicken is tough?
This usually means the chicken was overcooked. Chicken breasts can dry out if cooked too long, even in the crock pot. Stick to the recommended cook time, and check the chicken with a fork for tenderness.
2. Can I use frozen chicken breasts?
Yes! If you’re using frozen chicken breasts, it’s best to cook them on low for 8-10 hours to ensure they cook through. Avoid the high setting, as it won’t defrost the chicken evenly.
3. What if the sauce is too thin?
If the sauce seems too watery, remove the lid for the last 30 minutes of cooking to help it thicken up. You can also mix a tablespoon of cornstarch with a splash of water and stir it in to achieve a thicker sauce.
4. How can I store leftovers?
Store any leftover pulled chicken in an airtight container in the fridge for up to 4 days or freeze it for up to 3 months. Just make sure to let it cool down completely before sealing it in for freezing!
Nutritional Info (Optional)
(Per serving based on 4 servings, without buns)
- Calories: 265
- Protein: 36g
- Carbohydrates: 18g
- Fat: 6g
- Sodium: 540mg
Final Thoughts
Crock Pot BBQ Pulled Chicken is not just a meal; it’s a highlight of any gathering, a perfect centerpiece for casual evenings, and a delight to taste. I hope this recipe inspires you to step into the kitchen with confidence and joy. Cooking doesn’t have to be complicated—it can be a delicious expression of love and creativity.
So tie on your apron, gather your ingredients, and let’s create some mouthwatering memories together! Remember, good food is all about showing up. Can’t wait to hear what you think of the recipe—happy cooking! 🍽️
PrintCrock Pot BBQ Pulled Chicken

Uncomplicated, flavorful BBQ pulled chicken made in a crock pot—perfect for weeknight dinners or gatherings.
- Prep Time: 10 minutes
- Cook Time: 240 minutes
- Total Time: 250 minutes
- Yield: 4 servings 1x
- Category: Main Course
- Method: Slow Cooking
- Cuisine: American
- Diet: Gluten-Free
Ingredients
- 4 boneless, skinless chicken breasts
- 1 cup BBQ sauce
- 1/2 cup chicken broth
- 1 tablespoon Worcestershire sauce
- 1 tablespoon apple cider vinegar
- 1 tablespoon brown sugar
- 1 teaspoon garlic powder
- 1 teaspoon onion powder
- Salt and pepper to taste
Instructions
- Prepare the chicken by rinsing and patting dry.
- Make your sauce by combining BBQ sauce, chicken broth, Worcestershire sauce, apple cider vinegar, brown sugar, garlic powder, and onion powder in a bowl.
- Layer the chicken in the crock pot and pour the sauce over it, coating the chicken well.
- Set the crock pot on low for 6-8 hours or high for 3-4 hours.
- Shred the chicken in the crock pot after cooking, mixing with the sauce.
- Taste test and adjust seasoning as needed.
Notes
Great served on brioche buns or over rice with coleslaw.
Nutrition
- Serving Size: 1 serving
- Calories: 265
- Sugar: 6g
- Sodium: 540mg
- Fat: 6g
- Saturated Fat: 1g
- Unsaturated Fat: 3g
- Trans Fat: 0g
- Carbohydrates: 18g
- Fiber: 0g
- Protein: 36g
- Cholesterol: 90mg
Keywords: pulled chicken, crock pot, BBQ, slow cooker
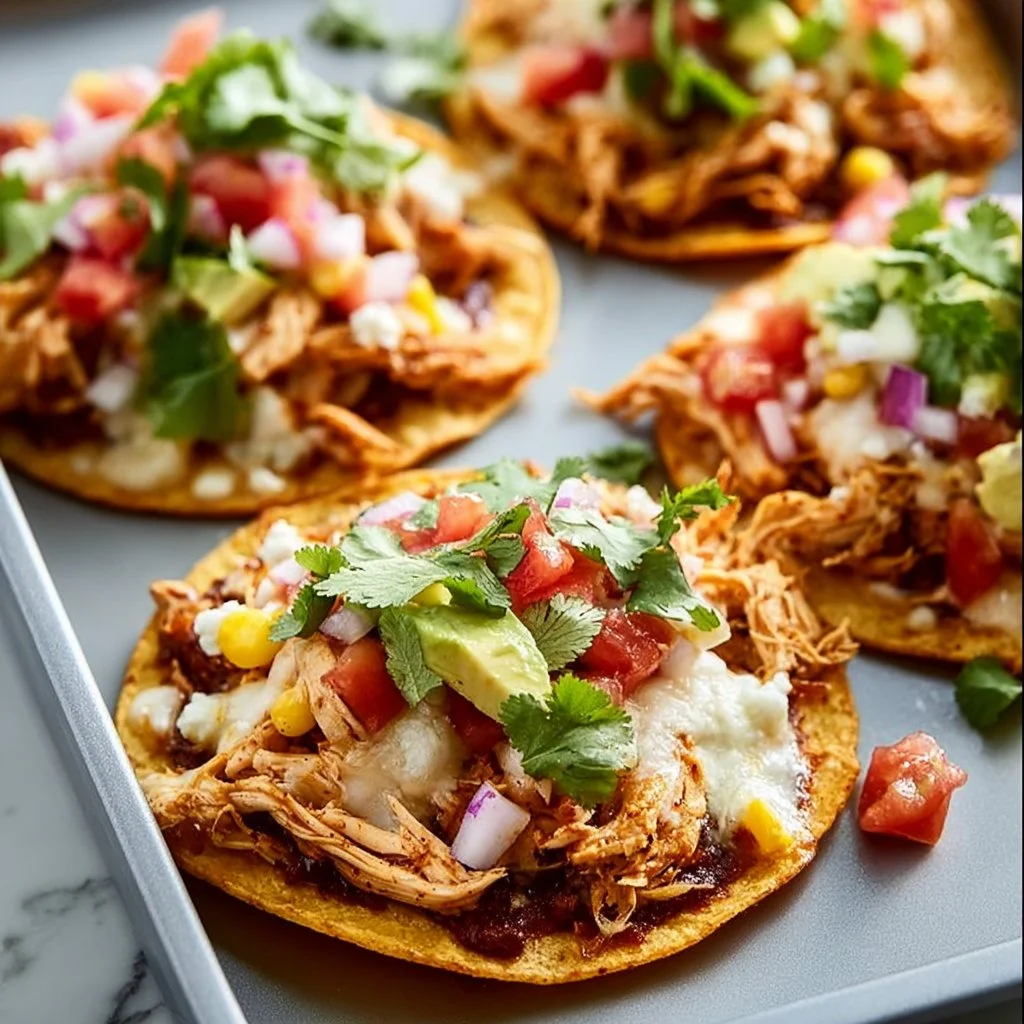
Crispy Rotisserie Chicken Tostadas
Crispy Rotisserie Chicken Tostadas: A Flavorful Fiesta
Hello, fellow food lovers! Today we’re diving into a recipe that’s not just delicious but also oh-so-easy to whip up—Crispy Rotisserie Chicken Tostadas! These scrumptious bites are perfect for weeknight dinners, casual gatherings, or even game day munching. Honestly, is there anything more satisfying than biting into a crunchy tostada topped with juicy chicken and vibrant veggies? I don’t think so!
One of the greatest secrets in the kitchen is harnessing the power of rotisserie chicken. You walk into the grocery store, and there it is—golden, fragrant, and ready to go. No fussing with marinating or roasting. It’s practically a culinary cheat code! This dish is all about celebrating that convenience while adding fresh, simple ingredients to create something that looks and tastes spectacular.
As we make our way through this recipe, you’ll see just how flexible and fun these tostadas can be. They’re a canvas for your creativity, whether you’re craving a burst of freshness or a splash of heat. So grab your trusty apron and let’s get this culinary party started!
Personal Story
Let me take you back to one of my fondest kitchen memories: the day our family hosted a spontaneous taco night. We had friends dropping by, and I wanted something quick yet impressive—something that would make everyone feel welcome at our table. That’s when the idea of tostadas struck me!
With a few ingredients on hand, including a rotisserie chicken (thank you, grocery store!), I set to work. I remember the aroma filling the kitchen as I layered crispy tostada shells with beans, tender chicken, and a flash of color from the tomatoes and avocado slices. The joy on my friends’ faces as they customized their own tostadas was priceless. Everyone loved the idea of creating their own combinations, and laughter filled the air—not to mention, it became a new tradition!
This recipe is all about sharing moments around the table, just like that taco night. Let’s recreate those laughs and little moments of joy as we dive into our Crispy Rotisserie Chicken Tostadas!
Ingredients
Here’s what you’ll need to assemble these mouthwatering tostadas. Keep in mind, I’ll share some handy tips on each ingredient so you can craft your dish like a pro!
-
4 Tostada Shells: The crunchy base of our tostadas! You can buy them pre-made, but if you’re feeling adventurous, you can fry your own corn tortillas until golden and crispy.
-
2 Cups Shredded Rotisserie Chicken: The star of this show! It’s flavorful and tender, but you can use leftover grilled chicken or poached chicken breast as a substitute.
-
1 Cup Refried Beans: These add creaminess and depth. If you prefer a lighter flavor, try black beans or make your own from scratch!
-
1 Cup Shredded Lettuce: For that refreshing crunch! Iceberg or romaine works well, but feel free to switch it up with spinach or arugula for a peppery twist.
-
1 Cup Diced Tomatoes: Juicy and packed with flavor! You can easily swap in fresh pico de gallo or diced bell peppers for a different vibe.
-
1/2 Cup Shredded Cheese (Cheddar or Mexican Blend): Cheese makes everything better! If you’re going dairy-free, try a vegan cheese or even nutritional yeast for a cheesy flavor.
-
1/4 Cup Sour Cream: This creamy topping balances the flavors. Greek yogurt makes a fantastic substitute if you’re looking for something lighter.
-
1/4 Cup Salsa: Choose your favorite salsa—mild, medium, or hot! You could even make your own fresh salsa to really elevate the dish.
-
1 Avocado, Sliced: Because avocado is life! If you’re out, a sprinkle of sliced olives could bring in that creamy element.
-
Cilantro for Garnish: This adds a burst of freshness. If you’re not a fan of cilantro, try parsley or even sliced green onions.
-
Lime Wedges: A squeeze of lime is the perfect finishing touch to brighten the dish, so make sure to have these on hand!
Step-by-Step Instructions
Ready to bring these crispy tostadas to life? Let’s dive in with some step-by-step instructions, complete with tips and tricks to keep things breezy in the kitchen.
Step 1: Prepare the Tostada Shells
Start by warming your tostada shells. If you’re using store-bought, simply place them in the oven at 350°F (175°C) for about 5–7 minutes until they’re crispy. If you’re making them from scratch, heat a couple of tablespoons of oil in a pan over medium heat. Fry each tortilla for about 2-3 minutes on each side until golden and crispy. Don’t forget to drain them on a paper towel to absorb excess oil!
Step 2: Shred the Rotisserie Chicken
While the tostada shells are crisping up, let’s get to the chicken! Use your hands or two forks to shred the rotisserie chicken into bite-sized pieces. I like to leave the skin on for extra flavor. If you have leftovers from a previous meal, this is the best time to use them, saving both time and reducing waste.
Step 3: Heat the Refried Beans
In a small saucepan, gently heat the refried beans over low heat. Stir occasionally to ensure they don’t stick to the bottom. Adding a splash of chicken broth or water can help with consistency if they’re too thick. Pro tip: heating the beans enhances their flavor and creaminess!
Step 4: Assemble the Tostadas
Time to assemble! Grab your crispy tostada shells and start layering. Spread about 2–3 tablespoons of refried beans on each shell, followed by a generous portion of shredded rotisserie chicken. Pile on the shredded lettuce, diced tomatoes, and then sprinkle with the cheese.
Step 5: Add Toppings
Now it’s time for the fun part—toppings! Drizzle a dollop of sour cream on top, followed by a spoonful of salsa. For that creamy goodness, add sliced avocado. Don’t forget to sprinkle some cilantro for a burst of freshness and finesse!
Step 6: Serve and Squeeze
Arrange your plated tostadas on a colorful serving platter. Serve with lime wedges on the side for guests to squeeze over their creations, adding a zesty kick.
And just like that, you’ve created a beautiful spread of Crispy Rotisserie Chicken Tostadas!
Serving Suggestions
To take your serving game to the next level, consider plating the tostadas on a vibrant platter surrounded by extra toppings like chopped jalapeños, pickled onions, or sliced radishes. Your guests will love customizing their tostadas! Pair with a refreshing beverage like iced tea or a margarita, and you’re set for a delightful meal.
Recipe Variations
These crispy tostadas are wonderfully versatile! Here are a few fun variations to switch things up:
- Spicy Chipotle Tostadas: Add adobo sauce from a can of chipotle peppers to the shredded chicken for a smoky twist.
- Vegetarian Tostadas: Skip the chicken and load up on roasted veggies like zucchini, bell peppers, and corn.
- Breakfast Tostadas: Top with scrambled eggs and finish with some salsa verde for a breakfast twist!
- BBQ Chicken Tostadas: Swap the usual salsa for barbecue sauce, and add a sprinkle of crispy fried onions on top.
- Mediterranean Tostadas: Use hummus instead of refried beans, and top with grilled veggies like eggplant and zucchini, then finish with feta cheese.
Chef’s Notes
This recipe has evolved over time at my house and has become a beloved go-to meals for impromptu gatherings. I once tried to impress a new friend with fancy tacos, but ended up with a messy situation in the kitchen! Instead, we made tostadas together, and it turned out to be such a fun bonding moment. Cooking is all about those shared experiences!
Oh, and one last tip: Don’t worry if things get a little chaotic in the kitchen. Sometimes, a little mess adds to the flavor of the memories you’ll create!
FAQs and Troubleshooting
-
What if my tostada shells get soggy?
- Make sure to serve immediately after assembling! If you have leftovers, store the components separately to maintain crispness.
-
Can I use a different type of meat?
- Absolutely! Any cooked meat works—shredded pork, beef, or turkey would all be delicious options.
-
How can I make this gluten-free?
- Just check that your tostada shells are labeled gluten-free, or use corn tortillas which are typically gluten-free.
-
What if I don’t like certain toppings?
- No problem! Tailor the dish to your taste. This is your tostada canvas—get creative!
Nutritional Info
This section is optional. If using it, consider including general nutritional details based on standard ingredient choices.
Calories: Approximately 400 per serving (based on 1 tostada)
Protein: 20g
Carbs: 30g
Fat: 20g
There you have it, friends—Crispy Rotisserie Chicken Tostadas that bring joy to your table and make every meal feel special! Enjoy the cooking, enjoy the company, and most importantly, enjoy the delicious results. Happy cooking! 🍽️
PrintCrispy Rotisserie Chicken Tostadas

Delicious and easy-to-make tostadas topped with juicy rotisserie chicken and fresh veggies—perfect for any occasion!
- Prep Time: 15 minutes
- Cook Time: 15 minutes
- Total Time: 30 minutes
- Yield: 4 servings 1x
- Category: Main Course
- Method: Assembly
- Cuisine: Mexican
- Diet: Gluten-Free, Dairy-Free Option Available
Ingredients
- 4 Tostada Shells
- 2 Cups Shredded Rotisserie Chicken
- 1 Cup Refried Beans
- 1 Cup Shredded Lettuce
- 1 Cup Diced Tomatoes
- 1/2 Cup Shredded Cheese (Cheddar or Mexican Blend)
- 1/4 Cup Sour Cream
- 1/4 Cup Salsa
- 1 Avocado, Sliced
- Cilantro for Garnish
- Lime Wedges
Instructions
- Prepare the Tostada Shells by warming them in the oven or frying tortillas until crispy.
- Shred the Rotisserie Chicken into bite-sized pieces.
- Heat the Refried Beans in a small saucepan over low heat.
- Assemble the Tostadas by layering refried beans, shredded chicken, lettuce, tomatoes, and cheese on the tostada shells.
- Add Toppings like sour cream, salsa, avocado, and cilantro.
- Serve with lime wedges on the side for a zesty kick.
Notes
Feel free to customize your tostadas with your favorite toppings and try different variations for a unique twist!
Nutrition
- Serving Size: 1 tostada
- Calories: 400
- Sugar: 3g
- Sodium: 600mg
- Fat: 20g
- Saturated Fat: 8g
- Unsaturated Fat: 10g
- Trans Fat: 0g
- Carbohydrates: 30g
- Fiber: 5g
- Protein: 20g
- Cholesterol: 45mg
Keywords: Tostadas, Rotisserie Chicken, Easy Recipes, Quick Meals, Mexican Food
Chili Lime Chicken
# Chili Lime Chicken: A Zesty Celebration of Flavor

## Introduction

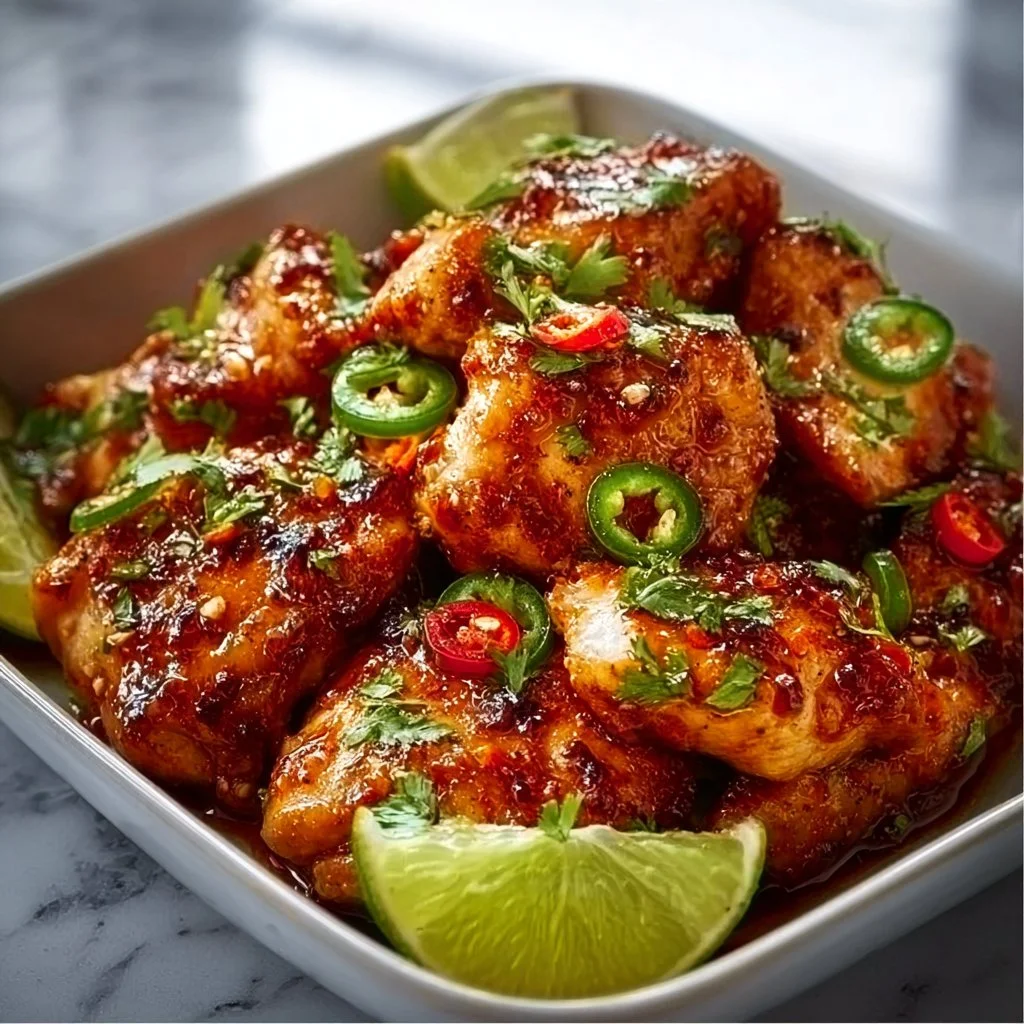
Hello, my fellow food enthusiasts! Today, I’m thrilled to share a vibrant recipe that will light up your dinner table with spectacular flavor: Chili Lime Chicken! This dish is not only a feast for the taste buds, but it’s also incredibly straightforward to whip up — perfect for both busy weeknights and leisurely weekend gatherings.

Imagine your kitchen filled with the tantalizing aroma of fresh lime zest, perfectly searing chicken, and a hint of smokiness from the chili powder. Sounds enticing, right? Let’s talk about why this dish holds a special place in my heart.

Chili lime chicken brings me back to those joyful summer nights spent grilling in my backyard with friends and family. The sizzle of the grill, laughter in the air, and the clinking of glasses as we toast to another beautiful evening — it was all about enjoying each other's company and delicious food. This simple dish quickly became a staple during our summer get-togethers, and now, every bite takes me back to those laughter-filled nights.

Rustic yet impressive, Chili Lime Chicken is marinated to perfection, allowing all the flavors to mingle and celebrate wonderfully on your palate. Toss it on the grill or bake it in the oven; either way, it’s guaranteed to become a family favorite. So, grab your apron and let’s dive into this recipe that perfectly blends zesty brightness with savory satisfaction!

## Personal Story

One of my fondest memories of cooking Chili Lime Chicken was during a warm summer evening. I had invited a handful of close friends over for an impromptu barbecue. You know the kind: laughter sprinkled with spontaneity!

As the sun began to set, I marinated the chicken while chatting and sharing stories. When it was time to grill, I could feel the excitement build as the chicken sizzled, releasing that intoxicating scent of lime and spice into the warm night air.

We paired it with a colorful corn salsa — an explosion of textures and flavors that complemented the chicken perfectly. As we gathered around the table, sharing bites and heartwarming laughter, it became clear that not only was I serving a meal; I was creating lasting memories. This dish, with its vibrant flavors, became the perennial star of our summer celebrations, uniting us over appetites and joy.

## Ingredients

Let’s get started with the ingredients — these are the essentials that will transform your dinner into a taste sensation!

- **4 boneless, skinless chicken breasts**
  Tender chicken breasts are perfect for absorbing the marinating flavors. If you prefer, you can substitute with thighs for more juiciness.

- **1/4 cup lime juice**
  Freshly squeezed lime juice is key to achieving that bright flavor. You can substitute with lemon juice in a pinch, but the taste will shift slightly.

- **2 tablespoons olive oil**
  This adds moisture and helps the spices adhere to the chicken. Feel free to swap it with avocado or canola oil, if desired.

- **2 teaspoons chili powder**
  This is where the dish gets its irresistible kick! Adjust the amount based on your desired spice level – or use smoked paprika for a smokier depth.

- **1 teaspoon garlic powder**
  Garlic powder gives a warm, savory undertone. Fresh minced garlic works too – just remember to use less since it's more potent.

- **1 teaspoon onion powder**
  Bringing in subtle sweetness, onion powder balances out the other flavors. You can skip it if you want a lighter flavor profile.

- **Salt and pepper to taste**
  These pantry staples enhance every dish. Don’t be shy with seasoning; it’s the magic that the chicken needs!

- **Chopped fresh cilantro (optional for garnish)**
  Cilantro adds a pop of color and freshness at the end. If you’re not a fan, try fresh parsley or skip it altogether.

## Step-by-Step Instructions

### 1. Marinate the Chicken

Start by gathering your chicken breasts in a large zip-top bag. Pour in the lime juice, olive oil, chili powder, garlic powder, onion powder, salt, and pepper. Seal the bag and give it a gentle shake to ensure the flavors coat every inch of the chicken.

*Chef’s Hack:* For the best flavor, allow the chicken to marinate for at least 30 minutes. If you have time, let it marinate for up to 2 hours in the fridge. Just remember to take it out and bring it to room temperature for about 15 minutes before cooking.

### 2. Prepare to Cook

Preheat your grill to medium-high. If you’re using an oven, preheat to 375°F (190°C). Grease the grill grates with a bit of olive oil or, if baking, lightly grease a baking dish.

*Chef Insight:* A hot cooking surface will give you those beautiful grill marks or a lovely, golden crust in the oven!

### 3. Cook the Chicken

For grilling, place the marinated chicken on the grill and close the lid. Cook for about 6-8 minutes on each side, or until the internal temperature reaches 165°F (75°C). If using the oven, bake for 25-30 minutes or until cooked through.

*Pro Tip:* If you’ve got a meat thermometer, use it to ensure perfect juiciness! If you find the chicken browning too quickly, lower the heat slightly.

### 4. Rest and Garnish

Once the chicken is done, remove it from the grill or oven and let it rest for 5 minutes. This step is crucial, as it allows the juices to redistribute, retaining that succulent moisture.

Before serving, sprinkle with freshly chopped cilantro for that pop of freshness!

## Serving Suggestions

For a beautiful presentation, slice the chicken against the grain and arrange it artistically on a platter. Drizzle with any leftover marinade or a squeeze of fresh lime juice. Pair it with a vibrant salad, a side of grilled veggies, or perhaps some cilantro-lime rice for a complete meal.

## Recipe Variations

The beauty of Chili Lime Chicken lies in its adaptability. Here are a few creative twists you can try out:

1. **Citrus Swap:** Experiment with different citrus fruits like orange or grapefruit for a sweet twist!

2. **Spicy Kick:** Add red pepper flakes or a dash of cayenne pepper for an extra layer of heat.

3. **Herb-Infused:** Incorporate fresh herbs like oregano or marjoram into the marinade for a fragrant twist.

4. **Tropical Vibes:** Mix in some diced pineapple to the marinade for a tropical flair — sweet and spicy!

5. **Low-Carb Option:** Serve with zucchini noodles or cauliflower rice for a keto-friendly meal.

## Chef’s Notes

Reflecting on the times I made Chili Lime Chicken, I remember one occasion when I mistook chili powder for cinnamon! Let me tell you, the surprised laughter that erupted from my guests was priceless. Luckily, I had a backup plan and whipped up a quick batch of tacos instead!

Over the years, my recipe has evolved with hints of different spices based on what I had on hand, making each chicken adventure a truly unique experience. Food is all about experimentation and sharing joyous moments, right?

## FAQs and Troubleshooting

### Q1: What do I do if my chicken is dry?
If the chicken is overcooked, it can become dry. Always use a meat thermometer to ensure you’re cooking it to the right temperature. If it’s dry, try soaking it in warm broth or a quick sauce post-cooking to add moisture.

### Q2: Can I use frozen chicken?
While fresh chicken yields the best results, you can use thawed frozen chicken. Just make sure to marinate it properly for the right absorption of flavor.

### Q3: What if I don’t have a grill?
No worries! Baking the chicken in the oven at 375°F (190°C) is a fantastic alternative. Alternatively, try a stovetop skillet — just sear it over medium heat until golden brown and cooked through.

### Q4: How can I brighten leftovers?
Refrigerate any leftovers in an airtight container. When reheating, add a splash of lime or a drizzle of olive oil to revive the flavors. Serve it in a salad or as a filling for wraps to enjoy it anew!

## Nutritional Info

While nutrition can vary based on specific ingredients, the beauty of this dish is it gives you a wholesome, satisfying meal! On average, a serving of Chili Lime Chicken (without sides) contains:
- Calories: 250
- Protein: 30g
- Fat: 12g
- Carbohydrates: 1g
- Fiber: 0g

## Conclusion

This Chili Lime Chicken recipe is more than just a meal; it’s an invitation to gather, share, and celebrate the small joys of life. So whether you are grilling this up for your closest friends or cooking a comforting dinner for yourself, remember that every dish tells a story.

Thank you for joining me on this culinary adventure! Now, it’s your turn to make a splash in your kitchen and create unforgettable memories around your table. Tie on that apron, pour yourself something delightful, and let’s keep the celebration of good food and great company alive!
Chili Lime Chicken
A vibrant and zesty Chili Lime Chicken recipe that is perfect for grilling or baking, bringing a burst of flavor to your dinner table.
- Prep Time: 15 minutes
- Cook Time: 30 minutes
- Total Time: 45 minutes
- Yield: 4 servings 1x
- Category: Main Course
- Method: Grilling or Baking
- Cuisine: Mexican
- Diet: Gluten-Free
Ingredients
- 4 boneless, skinless chicken breasts
- 1/4 cup lime juice
- 2 tablespoons olive oil
- 2 teaspoons chili powder
- 1 teaspoon garlic powder
- 1 teaspoon onion powder
- Salt and pepper to taste
- Chopped fresh cilantro (optional for garnish)
Instructions
- Marinate the chicken by gathering the chicken breasts in a large zip-top bag. Pour in the lime juice, olive oil, chili powder, garlic powder, onion powder, salt, and pepper. Seal the bag and shake to coat.
- Prepare to cook by preheating your grill to medium-high or oven to 375°F (190°C). Grease the grill grates or a baking dish.
- Cook the chicken on the grill for 6-8 minutes on each side or bake in the oven for 25-30 minutes until the internal temperature reaches 165°F (75°C).
- Rest the chicken for 5 minutes after cooking, then sprinkle with cilantro before serving.
Notes
For best flavor, marinate the chicken for at least 30 minutes. Use a meat thermometer for perfect doneness.
Nutrition
- Serving Size: 1 serving
- Calories: 250
- Sugar: 1g
- Sodium: 500mg
- Fat: 12g
- Saturated Fat: 2g
- Unsaturated Fat: 8g
- Trans Fat: 0g
- Carbohydrates: 1g
- Fiber: 0g
- Protein: 30g
- Cholesterol: 70mg
Keywords: chili lime chicken, grilled chicken, summer recipes, easy dinner
Pineapple Chicken Kabobs
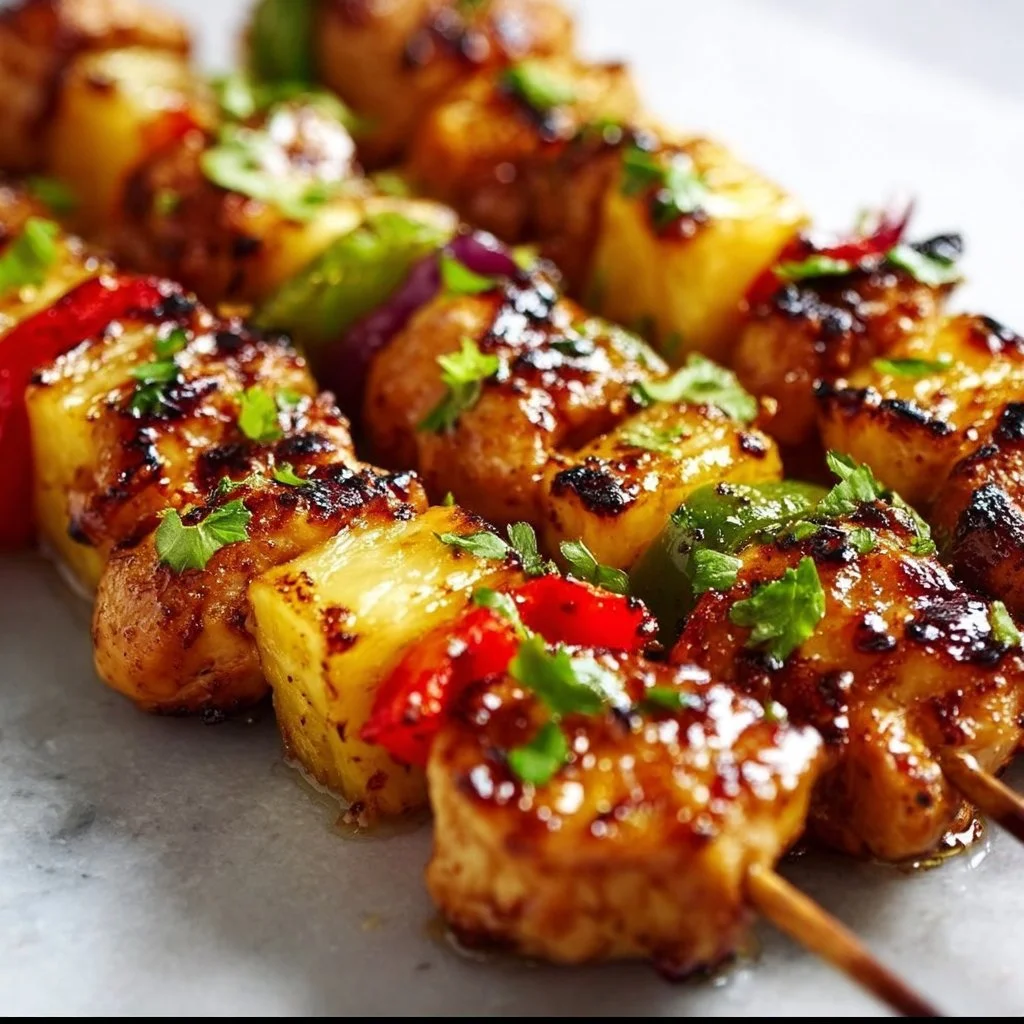
Pineapple Chicken Kabobs: A Flavorful Journey to Your Table
Hello food lover! If you’re like me, you find joy in the process of cooking, the aroma that fills your home, and the lively conversations shared over a delicious meal. Today, I want to take you on a culinary adventure with a dish that’s as vibrant as it is easy to prepare: Pineapple Chicken Kabobs. Inspired by my love for fresh ingredients and a flair for summer grilling, these kabobs are the perfect centerpiece for your next gathering, picnic, or even a cozy family dinner.
Imagine juicy pieces of chicken mingling with sweet pineapple, crunchy bell peppers, and a savory marinade that dances on your taste buds. As the kabobs sizzle on the grill, the intoxicating aroma wafts around, making it impossible not to smile in anticipation. They are not just a meal; they’re an experience. Now, if you’re willing to tie on that lovely apron of yours, let’s dive into the wonderful world of Pineapple Chicken Kabobs!
Personal Story
Growing up, my family made a tradition out of weekend barbecues in our backyard. The sun would set just right, casting a golden hue across the lawn as my dad fired up the grill. He would teach me how to marinate chicken, sharing his secret love for the perfect balance of sweet and savory flavors. One particular summer, we decided to get adventurous and throw pineapple onto the skewers.
With each bite, I was transported back to those warm evenings spent laughing and sharing stories around the table. The kabobs became a staple at our family gatherings, and I fondly remember how we fought over the last piece that had just the right amount of char. Fast forward to today, and I can assure you that these Pineapple Chicken Kabobs bring back that same warm nostalgia, wrapped in a new, exciting twist.
Ingredients
Let’s gather our ingredients! You’ll need:
-
2 chicken breasts, cut into chunks
Chicken breasts are lean protein and perfect for kabobs. If you prefer dark meat, using chicken thighs is an excellent substitute as they provide more flavor and tenderness. -
1 cup fresh pineapple, cut into chunks
Fresh pineapple adds a tropical sweetness that caramelizes beautifully when grilled. You can also use canned pineapple (in juice, not syrup) if fresh isn’t available, but fresh is always best! -
1 bell pepper, cut into chunks
Bell peppers add a lovely crunch and color contrast. Feel free to mix it up with red, yellow, or green peppers for a vibrant visual. -
1/4 cup soy sauce
Soy sauce provides a savory depth of flavor. Use low-sodium soy sauce if you want to reduce the saltiness or tamari for a gluten-free option. -
2 tablespoons honey
Honey not only sweetens the marinade but helps with caramelization on the grill. Maple syrup can be a fantastic alternative, delivering a delightful twist. -
1 tablespoon olive oil
Olive oil helps to keep our kabobs juicy and tender. If you’re looking for a different flavor, avocado oil or sesame oil can work too! -
1 teaspoon garlic powder
This adds a wonderful depth of flavor that’s hard to resist! Fresh garlic can be used as well and would be about 2 cloves minced. -
1 teaspoon ginger, minced
Fresh ginger gives a lovely zing, harmonizing perfectly with the sweetness of the pineapple. Ground ginger can work in a pinch but use less since it’s more concentrated. -
Salt and pepper to taste
Always season to your palate! Remember, you can adjust the seasoning after cooking too. -
Skewers
Wooden or metal skewers work well. If you’re using wooden skewers, soak them in water for about 30 minutes before grilling to prevent burning.
Step-by-Step Instructions
Now that we have our ingredients, let’s get cooking! Follow these detailed steps to create magical Pineapple Chicken Kabobs.
Step 1: Marinate the Chicken
In a large bowl, combine the soy sauce, honey, olive oil, garlic powder, ginger, salt, and pepper. Whisk until everything is well mixed. Add your chicken chunks to the bowl, ensuring every piece is well-coated in the marinade. Cover the bowl with plastic wrap, or transfer it to a resealable bag, and let it marinate in the fridge for at least 30 minutes. If you have time, letting it marinate for a couple of hours or even overnight will amplify the flavors!
Step 2: Prepare the Skewers
While your chicken is soaking up all that flavor, it’s time to prep the skewers. If using wooden skewers, don’t forget to soak them! This will slow down the burning and allow you to grill without worry. On a clean cutting board, wash and chop your bell pepper and pineapple into similar-sized chunks to ensure even cooking. This is also the time to grab your trusty skewer and get ready for assembly.
Step 3: Assemble the Kabobs
Once marinated, let’s build these beauties! Start by threading a piece of chicken onto the skewer, followed by a piece of pineapple, and then a piece of bell pepper. Repeat this process until the skewer is filled, but leave a little space at the end to make it easier to handle on the grill. You can do a fun pattern with colors, alternating the chicken and veggies for visual appeal. Let your creativity shine!
Step 4: Preheat the Grill
Fire up your grill and preheat it to medium-high heat (around 400°F). If you’re using a stovetop grill pan, preheat it on medium heat and lightly oil the surface.
Step 5: Grill the Kabobs
Once the grill is hot, it’s showtime! Place your kabobs on the grill, making sure there’s enough space between them so they can cook evenly. Grill for about 10-12 minutes, turning occasionally until the chicken is cooked through and has those gorgeous char marks. The internal temperature should reach 165°F. If you like a little more caramelization, turn up the heat for the last couple of minutes but watch them closely so they don’t burn!
Step 6: Enjoy!
Once your kabobs are ready, remove them from the grill and let them rest for a minute before serving. This helps retain juices and keeps your chicken tender.
Serving Suggestions
Serving these Pineapple Chicken Kabobs is as fun as making them! You can serve them straight off the skewers or slide the grilled goodies off and create a vibrant platter. Pair them with a bed of jasmine rice, a fresh salad, or grilled veggies for a complete meal. Drizzle with some extra marinade (if reserved and boiled for a few minutes) for added flavor, and don’t forget some fresh herbs on top for that final touch!
Recipe Variations
-
Spicy Pineapple Chicken Kabobs: Add some heat by mixing sriracha or red pepper flakes into the marinade.
-
Tropical Twist Kabobs: Swap out the bell pepper for zucchini and add pieces of mango alongside the pineapple for a tropical flair.
-
Curry Chicken Kabobs: Add curry powder to your marinade for an exotic flavor. The sweet pineapple offsets the spices beautifully.
-
Vegetarian Version: Replace chicken with tofu or tempeh, marinating the same way and adding in your favorite vegetables like mushrooms or cherry tomatoes.
Chef’s Notes
These Pineapple Chicken Kabobs have evolved over the years in my kitchen! Initially, I was intimidated by grilling, but once I learned that it’s all about timing and patience, I fell in love! The combination of sweet and savory continues to inspire me, and each time I make them, I like to experiment with different sauces and marinades. It’s all about what you love; cooking should be a joyous, evolving experience.
FAQs and Troubleshooting
1. My chicken is dry. What happened?
This can happen if you cook the chicken too long or at too high a heat. Always check the internal temperature and take them off the grill once they hit 165°F. Letting them rest also helps retain moisture.
2. Can I bake these kabobs instead of grilling?
Absolutely! Preheat your oven to 400°F. Place the kabobs on a lined baking sheet and bake for about 20-25 minutes, turning halfway through.
3. What if I don’t have skewers?
No worries! You can still enjoy this dish by grilling the chicken and veggies separately, then tossing everything together with the marinade in a bowl.
4. How long can I store the leftovers?
You can store leftover kabobs in an airtight container in the fridge for up to 3 days. They are delightful cold in a salad or reheated in a pan!
Nutritional Info
While I love focusing on flavor, here’s a quick rundown for those watching their intake (per serving, roughly):
- Calories: 300
- Protein: 25g
- Carbs: 18g
- Fat: 14g
Now you’re ready to create a delicious dish filled with flavor and memories! Gather your loved ones, fire up that grill, and let the fun begin! Happy cooking!
PrintPineapple Chicken Kabobs
Juicy chicken marinated in a savory sauce, perfectly grilled with sweet pineapple and crunchy bell peppers.
- Prep Time: 30 minutes
- Cook Time: 12 minutes
- Total Time: 42 minutes
- Yield: 4 servings 1x
- Category: Main Course
- Method: Grilling
- Cuisine: American
- Diet: Gluten-Free
Ingredients
- 2 chicken breasts, cut into chunks
- 1 cup fresh pineapple, cut into chunks
- 1 bell pepper, cut into chunks
- 1/4 cup soy sauce
- 2 tablespoons honey
- 1 tablespoon olive oil
- 1 teaspoon garlic powder
- 1 teaspoon ginger, minced
- Salt and pepper to taste
- Skewers
Instructions
- Marinate the chicken: In a large bowl, combine the soy sauce, honey, olive oil, garlic powder, ginger, salt, and pepper. Whisk until mixed. Add the chicken chunks, ensuring they are coated. Cover and marinate in the fridge for at least 30 minutes.
- Prepare the skewers: Soak wooden skewers in water for 30 minutes if using. Chop the bell pepper and pineapple into similar-sized chunks.
- Assemble the kabobs: Thread chicken, pineapple, and bell pepper onto the skewers, alternating for visual appeal.
- Preheat the grill: Heat to medium-high (around 400°F) or use a stovetop grilling pan.
- Grill the kabobs: Place on the grill, space them out, and cook for about 10-12 minutes, turning occasionally, until chicken is cooked through.
- Enjoy: Remove from the grill and let rest for a minute before serving.
Notes
Serve with jasmine rice, a fresh salad, or grilled veggies for a complete meal. Drizzle with extra marinade for added flavor.
Nutrition
- Serving Size: 1 kabob
- Calories: 300
- Sugar: 11g
- Sodium: 600mg
- Fat: 14g
- Saturated Fat: 2g
- Unsaturated Fat: 12g
- Trans Fat: 0g
- Carbohydrates: 18g
- Fiber: 1g
- Protein: 25g
- Cholesterol: 75mg
Keywords: chicken kabobs, grilling, summer recipes
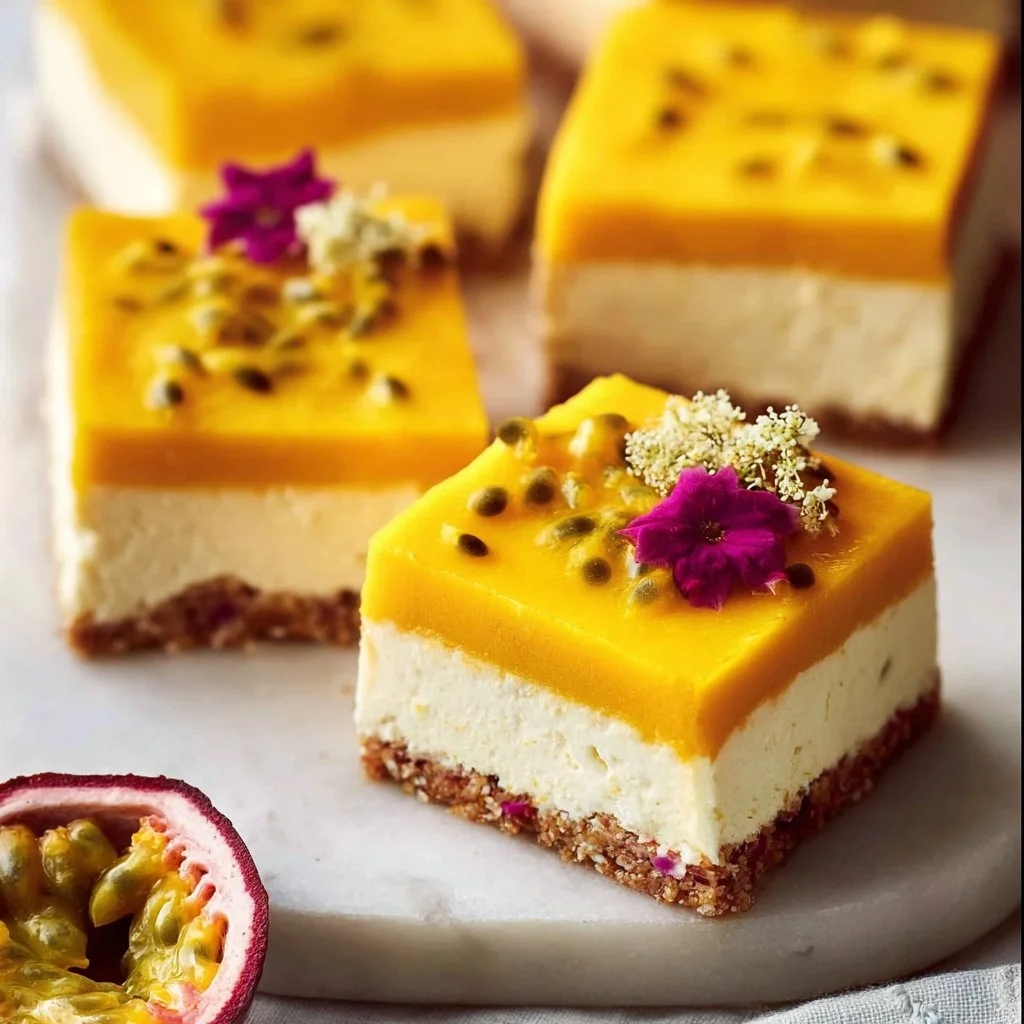
Creamy Vegan Mango Cheesecake Bars
Creamy Vegan Mango Cheesecake Bars
Hello, fellow foodies! 🌟 Today, we’re diving into a deliciously dreamy treat that’s perfect for just about any occasion. If you’re looking for something to impress your guests, elevate your gatherings, or simply pamper yourself during a quiet night in, I’ve got just the recipe for you: Creamy Vegan Mango Cheesecake Bars!
Now, you may be wondering, “How can cheesecake be vegan?” Well, let me tell you, the magic of plant-based ingredients allows for a creamy texture and delightful flavor that’ll have you coming back for seconds—and maybe thirds! These bars are not only decadent and delicious but also light and refreshing thanks to the tropical notes of luscious mango. And the best part? They’re super easy to whip up. Grab your apron, and let’s get started!
I created these bars because I believe dessert should be an experience—something that makes you nostalgic while also making you feel good. Just imagine biting into that velvety mango goodness, the creamy cashew filling melting in your mouth, with a hint of coconut that makes you feel like you’re on a sunny beach far away. Whether you’re planning a picnic, a summer party, or just a cozy night in, these bars are here to bring a bit of sunshine to your day. Let’s bring some tropical vibes to the kitchen!
Personal Story
I often think back to my childhood summers spent in my grandmother’s kitchen. She had this magical ability to turn the simplest ingredients into unforgettable treats. One of my favorites was her classic cheesecake; the way it would set just right in the fridge, creating that perfect blend of rich creaminess—something about it felt like home. Fast forward to adulthood, and I was craving that nostalgic taste, but with a twist that aligns with my plant-forward lifestyle.
The first time I made these mango cheesecake bars, I was struck by memories of those bright, sunny days. The vibrant yellow mango puree brought back the sweet essence of summer, almost like a sunny hug. I remember biting into one of those first bars, and I was immediately transported back to my grandmother’s kitchen. It’s a beautiful reminder of how food connects us to our past while allowing us to craft new experiences. From one nostalgia-filled dessert to another, this recipe is a celebration of flavor and memory. 🎉
Ingredients
-
2 cups cashews, soaked
Cashews provide a creamy texture and serve as the base for our cheesecake filling. Make sure to soak them in water for at least 4 hours (or overnight) to ensure they’re soft and blend easily. If you’re short on time, you can use boiling water for a quick soak (about an hour). -
1 cup mango puree
Mango brings that tropical sweetness and vibrant color. You can buy canned mango puree or blend fresh mango until smooth. If you’re looking for alternatives, try using other fruit purees like passionfruit or even banana for a different take! -
1/2 cup coconut milk
Coconut milk lends rich creaminess while adding a lovely subtle flavor. Use full-fat for extra richness, or if you’re looking for a lighter feel, opt for light coconut milk. Unsweetened almond milk can also work here, but you may want to compensate with a bit more fat from the cashews. -
1/4 cup agave syrup or maple syrup
This sweetener balances the richness of the cheesecake with a gentle sweetness. Maple syrup adds a delightful earthy note, while agave has a neutral flavor. Either option works wonderfully, so choose based on your personal preference! -
1/4 cup lemon juice
Fresh lemon juice brightens up the flavors and provides that classic cheesecake tang. For a different twist, try lime juice for a zesty variation. -
1 teaspoon vanilla extract
Vanilla is the secret ingredient that ties everything together, adding warmth to our cheesecake filling. Use pure vanilla extract for the best flavor—homemade vanilla bean paste can also add a delightful touch! -
1 cup almond flour (for the crust)
Almond flour gives the crust a nutty flavor while keeping things gluten-free. If you don’t have almond flour, you can use finely ground oats or a gluten-free flour blend as an alternative. -
2 tablespoons coconut oil (melted)
Coconut oil helps to bind the crust together and solidifies as it cools, creating that perfect texture. If you’re looking for a nut-free option, vegan margarine can work, too. -
2 tablespoons agave syrup or maple syrup (for the crust)
Just like in the filling, we’ll use some sweetener in our crust to tie the flavors together. This will help it firm up nicely while adding a touch of sweetness.
Step-by-Step Instructions
Step 1: Prepare the Cashews
Start by soaking your cashews in water for at least 4 hours (or overnight, if you have the time!). Once they’re nice and soft, drain and rinse them well. This step is crucial; it ensures our “cheese” filling blends smoothly into a creamy, dreamy mixture without any grit.
Step 2: Make the Crust
In a medium bowl, combine 1 cup of almond flour, 2 tablespoons melted coconut oil, and 2 tablespoons agave (or maple syrup). Mix until you have a crumbly texture that sticks together when pressed. If it feels too dry, add a tiny splash of water or more coconut oil.
Chef Tip: Line your baking dish with parchment paper for easy removal later on! Press the crust mixture firmly into the bottom of an 8-inch square pan to create an even layer. Use the back of a measuring cup to get it nice and compact.
Step 3: Blend the Filling
In a high-speed blender, combine the soaked cashews, 1 cup mango puree, 1/2 cup coconut milk, 1/4 cup agave, 1/4 cup lemon juice, and 1 teaspoon vanilla extract. Blend until completely smooth and creamy, scraping down the sides as needed.
Little Chef Hack: Taste the filling! Don’t be afraid to adjust sweetness or acidity to your preference. If you love more tanginess, add a bit more lemon juice. Prefer it sweeter? Toss in another drizzle of agave!
Step 4: Pour It All Together
Once the filling is smooth, pour it over the prepared crust in the baking dish. Gently spread it out to ensure it’s even.
Step 5: Chill, Chill, Chill!
Cover the dish with plastic wrap or a lid and place it in the freezer for at least 4 hours to set. For best results, chill overnight. This will help the bars firm up beautifully!
Step 6: Slice and Serve
Once fully set, remove the dish from the freezer and let it soften out for about 10 minutes before slicing. Use a sharp knife to cut it into squares or bars—dipping the knife in warm water first makes clean cuts easier!
Step 7: Final Touches
Feel free to garnish with extra mango slices, a sprinkle of shredded coconut, or even a drizzle of coconut cream for an added touch of elegance.
Serving Suggestions
When it’s time to serve these delightful mango cheesecake bars, plating matters! Arrange them on a beautiful platter, and consider adding edible flowers or fresh mint leaves for color. Pair with a light, sparkling beverage, like a fruity spritzer, to create an inviting atmosphere. These bars are perfect for sharing, so be sure to slice them nicely for your guests to enjoy!
Recipe Variations
-
Berry Swirl Variation: Add a berry swirl to the mango filling. Simply blend a cup of your favorite berries with a touch of sweetener and drop spoonfuls into the filling before freezing. Swirl gently with a knife to create a marbled effect.
-
Chocolate Crust: For a decadent twist, mix in 2 tablespoons of cocoa powder into the almond flour crust for a chocolatey base.
-
Spiced Version: Add warmth to the filling by incorporating a pinch of cinnamon or nutmeg. This will give it a cozy feel perfect for fall!
-
Nut-Free Alternative: Substitute almond flour with sunflower seed flour to make the crust nut-free, for those with allergies.
Chef’s Notes
I absolutely love how this vegan mango cheesecake bars recipe has evolved over time. I once tried using different tropical fruits, such as pineapple and passionfruit, and they all brought a unique twist to the classic flavor! Just the other day, I caught my niece trying to sneak a bite before dinner—clearly, these treats have a way of making themselves known. 😄
Also, I fondly remember the time I brought these to a picnic. They were a hit! People were raving and asking for the recipe, which is always such a flattering moment for a chef. Remember, food has a way of fostering connections, sparking joy, and creating memories, just as it did for me around Grandma’s table.
FAQs and Troubleshooting
1. Why are my cheesecake bars not setting?
Ensure you’ve allowed enough chilling time. If you’re still finding the texture is not firming up, it may be due to too much coconut milk. In future batches, cut back on the liquid a little more if needed.
2. Can I make these without refined sugar?
Absolutely! Both agave and maple syrup are natural sweeteners. You can also try using other alternatives like dates or monk fruit sweetener, just adjust the measurement and blend properly.
3. My crust is too crumbly – what went wrong?
This can happen if there isn’t enough wet ingredient to bind it together. Try adding a little more melted coconut oil or sweetener to hold things together.
4. How do I store leftovers?
These bars can be stored in an airtight container in the freezer for up to 3 months, or in the refrigerator for about a week. Just remember to slice them before freezing!
Of course, as with all recipes, feel free to get a little creative and make them your own. Cooking is about love, joy, and sharing those beautiful moments with those around you. So tie on that apron, gather your ingredients, and let’s make these Creamy Vegan Mango Cheesecake Bars together! 🍰✨
PrintCreamy Vegan Mango Cheesecake Bars

Deliciously creamy and refreshing vegan cheesecake bars made with luscious mango and a nutty crust, perfect for any occasion.
- Prep Time: 15 minutes
- Cook Time: 0 minutes
- Total Time: 240 minutes
- Yield: 16 servings 1x
- Category: Dessert
- Method: Chilling
- Cuisine: Vegan
- Diet: Vegan
Ingredients
- 2 cups cashews, soaked
- 1 cup mango puree
- 1/2 cup coconut milk
- 1/4 cup agave syrup or maple syrup
- 1/4 cup lemon juice
- 1 teaspoon vanilla extract
- 1 cup almond flour (for the crust)
- 2 tablespoons coconut oil, melted
- 2 tablespoons agave syrup or maple syrup (for the crust)
Instructions
- Prepare the cashews by soaking them in water for at least 4 hours. Drain and rinse well.
- Make the crust by combining almond flour, melted coconut oil, and agave in a bowl. Press into an 8-inch square pan.
- Blend the soaked cashews, mango puree, coconut milk, agave, lemon juice, and vanilla extract in a high-speed blender until smooth.
- Pour the filling over the prepared crust and spread evenly.
- Chill in the freezer for at least 4 hours or overnight.
- Slice the bars once set, allowing them to soften for 10 minutes before cutting.
- Serve garnished with mango slices or shredded coconut, if desired.
Notes
These bars can be stored in an airtight container in the freezer for up to 3 months, or in the refrigerator for about a week.
Nutrition
- Serving Size: 1 bar
- Calories: 200
- Sugar: 10g
- Sodium: 5mg
- Fat: 12g
- Saturated Fat: 6g
- Unsaturated Fat: 6g
- Trans Fat: 0g
- Carbohydrates: 24g
- Fiber: 3g
- Protein: 3g
- Cholesterol: 0mg
Keywords: vegan cheesecake, mango dessert, no-bake dessert, healthy sweet treat, dairy-free cheesecake
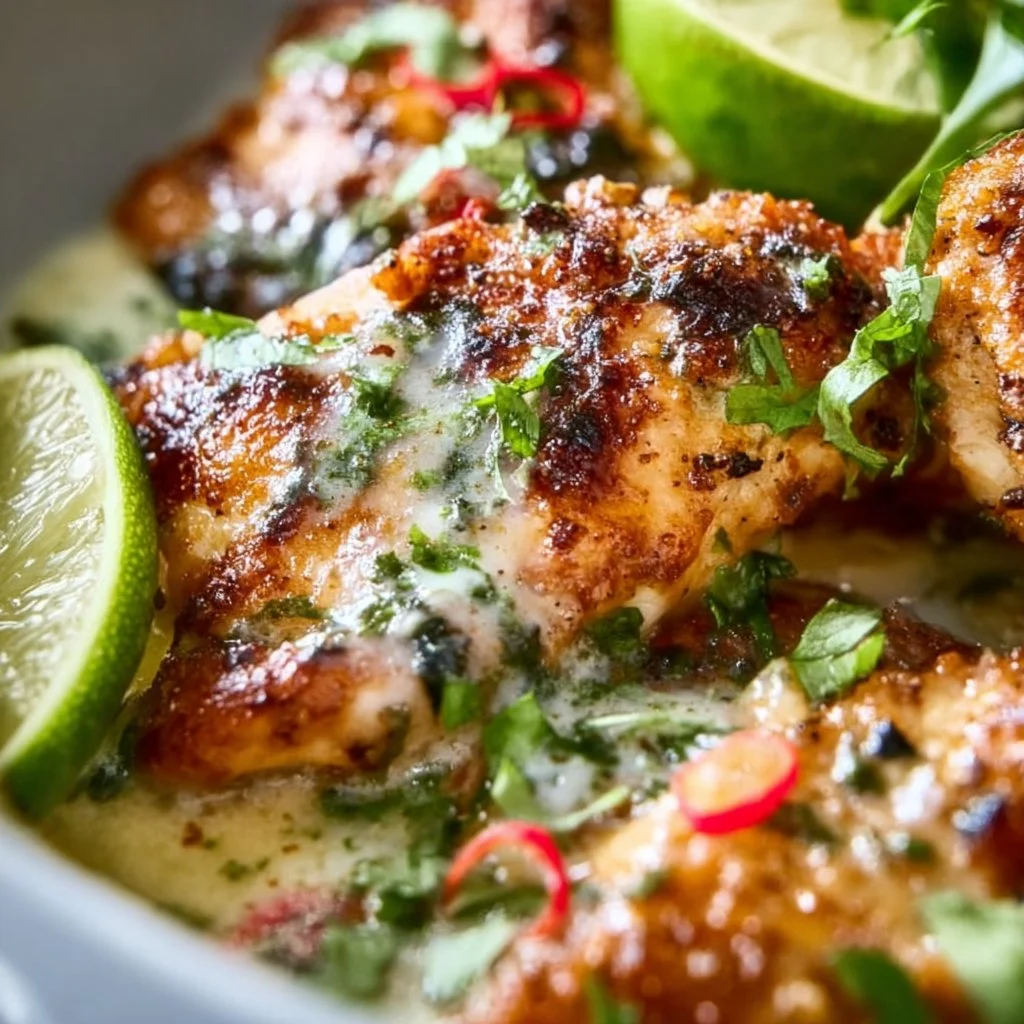
Coconut Lime Chicken
Coconut Lime Chicken: A Tropical Escape Right in Your Kitchen
Introduction
Hello, dear foodie friends! Savannah here from Ivory Apron, and today we’re diving into something truly special — Coconut Lime Chicken! This dish is not just a recipe; it’s an experience, a little piece of tropical paradise that you can create in your very own kitchen.
Picture this: It’s a balmy evening, the sun is setting, and you can almost hear the distant sound of waves crashing on a beach. While we may not all have access to a tropical paradise, we can certainly bring that flavor to our dinner tables. Coconut Lime Chicken combines the richness of coconut milk with the zesty brightness of lime, perfect for those who crave something light yet satisfying. It’s a dish that’s as comforting as it is refreshing, making it perfect for any occasion, whether it’s a weeknight dinner or a fabulous dinner party!
As a recipe creator, nothing makes me happier than sharing culinary adventures with you all. I believe cooking should feel elegant but not intimidating, and that’s what this Coconut Lime Chicken embodies. So, tie on your apron, grab some tropical music, and let’s get cooking!
Personal Story
I can’t help but smile whenever I think about the first time I made Coconut Lime Chicken. It was a sunny Saturday, and my close friends and I had gathered for our monthly potluck. The theme was “Tropical Escape,” and the minute I heard it, my mind raced with all the possible dishes. But one stood out like a beacon of warmth and comfort — Coconut Lime Chicken.
I still remember mingling in the kitchen, buzzing with excitement, as the chicken marinated in a fragrant coconut-lime bath. The scent of fresh cilantro and garlic filled the air, welcoming my friends as they arrived. We laughed, sipped on fruity cocktails, and reminisced about our last vacation together. When the chicken hit the grill, the chorus of sizzling sound transported us to a little beach hut, surrounded by palm trees and laughter.
That day wasn’t just about the food; it was about creating memories around the table, something I cherish deeply. I can’t wait for you to create your own beautiful moments with this recipe!
Ingredients
Let’s get into the delicious details! Here’s what we’ll need for this mouthwatering Coconut Lime Chicken:
-
4 Chicken Breasts
Thick, boneless chicken breasts work best for this recipe. If you’re feeling adventurous, you can substitute chicken thighs for a juicier option! -
1 Cup Coconut Milk
This creamy goodness is the star of the dish, lending a rich texture and tropical flavor. You can use light coconut milk if you’re looking to cut down on calories — but don’t forget that the creaminess contributes to the dish’s overall feel! -
1 Lime (Juiced)
Fresh lime juice adds a vibrant brightness to the dish. If you don’t have lime, lemon juice can be a great substitute, though it will offer a slightly different acidity. -
1/4 Cup Fresh Cilantro (Chopped)
This fresh herb brings a burst of flavor and a lively green color. If cilantro isn’t your thing (you’re not alone!), parsley can be used instead — it’s milder but still adds a lovely touch! -
2 Cloves Garlic (Minced)
Garlic is a must for flavor! If you’re feeling lazy, garlic powder will do in a pinch — just remember, fresh garlic has that unbeatable aromatic kick. -
1 Teaspoon Ginger (Grated)
A little ginger introduces warmth and depth. If you don’t have fresh ginger, ground ginger will work, just use half the amount as it’s more concentrated. -
Salt and Pepper to Taste
Don’t underestimate these staples! Adjust according to your preference, but definitely taste as you go. -
Olive Oil for Cooking
A drizzle of olive oil is all you need to get things sizzling. For grilling, you can use a neutral oil like canola or avocado oil to step up the heat tolerance.
Step-by-Step Instructions
Ready to create some magic? Let’s get down to business with these simple yet effective steps. Grab your apron and let’s cook!
-
Marinate the Chicken
In a bowl, combine the coconut milk, lime juice, chopped cilantro, minced garlic, grated ginger, salt, and pepper. For an extra flavor boost, feel free to add a pinch of red pepper flakes if you like a touch of heat! Place the chicken breasts in a resealable plastic bag or a shallow dish, pouring the marinade over them to coat thoroughly. Seal or cover and let it marinate in the fridge for at least 30 minutes — or up to 2 hours for more intense flavor.Chef Hack: If you’re in a hurry, you can marinate the chicken for just 15 minutes, but the longer it sits, the more the flavors penetrate the chicken.
-
Preheat Your Grill or Skillet
If grilling, preheat your grill to medium-high heat (about 375°F). If you’re using a skillet, place it over medium heat and drizzle with olive oil. -
Cook the Chicken
Once your grill or skillet is hot, remove the chicken from the marinade (letting the excess drip off) and place it on the grill or skillet. Cook for about 6-7 minutes on each side or until the chicken reaches an internal temperature of 165°F.Chef Tip: Resist the temptation to flip it too often! Let that lovely char develop for a few minutes on each side before flipping.
-
Rest the Chicken
Once cooked, transfer the chicken to a plate and cover it loosely with foil. Allow it to rest for about 5-10 minutes. This step is crucial! It helps the juices redistribute, ensuring your chicken is juicy and flavorful. -
Serve and Enjoy
Slice the chicken against the grain for beautiful presentation and serve it up with extra lime wedges and cilantro if desired. You can drizzle any leftover marinade over it for extra flavor!
Serving Suggestions
To plate your Coconut Lime Chicken, consider serving it on a bed of fluffy jasmine rice or alongside grilled vegetables for a beautiful contrast of colors. A light salad with mango and avocado can also complement the dish perfectly, creating a beautiful, refreshing meal that invites everyone to dive in. And don’t forget to garnish with a sprinkle of fresh cilantro on top — it adds that final pop of color and vibrancy that we all love!
Recipe Variations
Feeling inspired? Here are a few creative twists on this recipe:
-
Spicy Mango Salsa: Top your chicken with a fresh mango salsa made with diced mango, red onion, jalapeño, lime juice, and cilantro for a sweet and spicy kick.
-
Coconut Lime Shrimp: Swap chicken for shrimp! Adjust cooking time accordingly (about 2-3 minutes per side). It’s a quick and fabulous variation.
-
Grilled Pineapple: Add grilled pineapple slices on the side for a delightful sweetness and a taste of the tropics.
-
Vegan Delight: Replace chicken with tofu or tempeh for a plant-based version. Make sure to press out excess moisture before marinating to ensure flavor absorption.
-
Coconut Lime Quinoa Bowl: Serve the chicken over quinoa instead of rice, topped with diced cucumbers, avocado, and a drizzle of coconut sauce.
Chef’s Notes
This Coconut Lime Chicken has become a staple in my kitchen, evolving over the years as I’ve played with flavors and techniques. A fun memory I have is when I decided to grill it one summer evening, and I realized that even a simple family meal could turn into an event with just a little creativity and care. The rhapsody of flavors transported us to sunny shores without needing to leave home!
I often find that this recipe is a conversation starter, allowing everyone to share their own travel stories or culinary adventures. I hope, as you serve this dish, it opens up those beautiful moments for you and your loved ones, too.
FAQs and Troubleshooting
-
What if my chicken is dry?
Make sure you don’t overcook it. Use a meat thermometer to check for doneness. Remember, it should be at 165°F for juicy perfection! -
Can I marinate it overnight?
Absolutely! Marinating overnight enhances the flavors. Just be careful not to exceed that time too much to avoid texture issues. -
What if I don’t have coconut milk?
You can use low-sodium chicken broth or plain yogurt for a different creamy base. Just keep in mind it will change the flavor profile slightly. -
Can I grill this indoors?
Yes! If you have a grill pan, it works beautifully on the stovetop. Just monitor the heat to avoid smoking too much.
Nutritional Info (per serving) (optional)
- Calories: 350
- Protein: 37g
- Carbohydrates: 8g
- Fat: 18g
There you have it, friends! A delightful Coconut Lime Chicken recipe that’s sure to bring a touch of the tropics right to your table. I can’t wait to hear your stories and see your creations. Remember, good food isn’t just about the taste; it’s about the moments we create around it. Happy cooking and see you next time on Ivory Apron! 🍽️✨
PrintCoconut Lime Chicken
A light yet satisfying dish that combines the richness of coconut milk with the zesty brightness of lime, perfect for any occasion.
- Prep Time: 30 minutes
- Cook Time: 15 minutes
- Total Time: 45 minutes
- Yield: 4 servings 1x
- Category: Main Course
- Method: Grilling
- Cuisine: Tropical
- Diet: Gluten-Free
Ingredients
- 4 Chicken Breasts
- 1 Cup Coconut Milk
- 1 Lime (Juiced)
- 1/4 Cup Fresh Cilantro (Chopped)
- 2 Cloves Garlic (Minced)
- 1 Teaspoon Ginger (Grated)
- Salt and Pepper to Taste
- Olive Oil for Cooking
Instructions
- Marinate the Chicken: In a bowl, combine the coconut milk, lime juice, chopped cilantro, minced garlic, grated ginger, salt, and pepper. Place the chicken in a resealable bag or shallow dish, pour the marinade over, seal or cover, and let it marinate in the fridge for at least 30 minutes.
- Preheat Your Grill or Skillet: Preheat your grill to medium-high heat (about 375°F) or place a skillet over medium heat and drizzle with olive oil.
- Cook the Chicken: Remove the chicken from the marinade, letting excess drip off, and place it on the grill or skillet. Cook for about 6-7 minutes on each side until the chicken reaches an internal temperature of 165°F.
- Rest the Chicken: Transfer the chicken to a plate and cover loosely with foil. Allow it to rest for about 5-10 minutes.
- Serve and Enjoy: Slice the chicken against the grain, serve with extra lime wedges and cilantro, and drizzle any leftover marinade over it if desired.
Notes
For spicy flavor, add a pinch of red pepper flakes to the marinade. Serving suggestions include jasmine rice or grilled vegetables.
Nutrition
- Serving Size: 1 serving
- Calories: 350
- Sugar: 4g
- Sodium: 450mg
- Fat: 18g
- Saturated Fat: 15g
- Unsaturated Fat: 3g
- Trans Fat: 0g
- Carbohydrates: 8g
- Fiber: 1g
- Protein: 37g
- Cholesterol: 80mg
Keywords: Coconut Chicken, Lime Chicken, Tropical Recipe, Summer Grilling, Easy Chicken Dinner