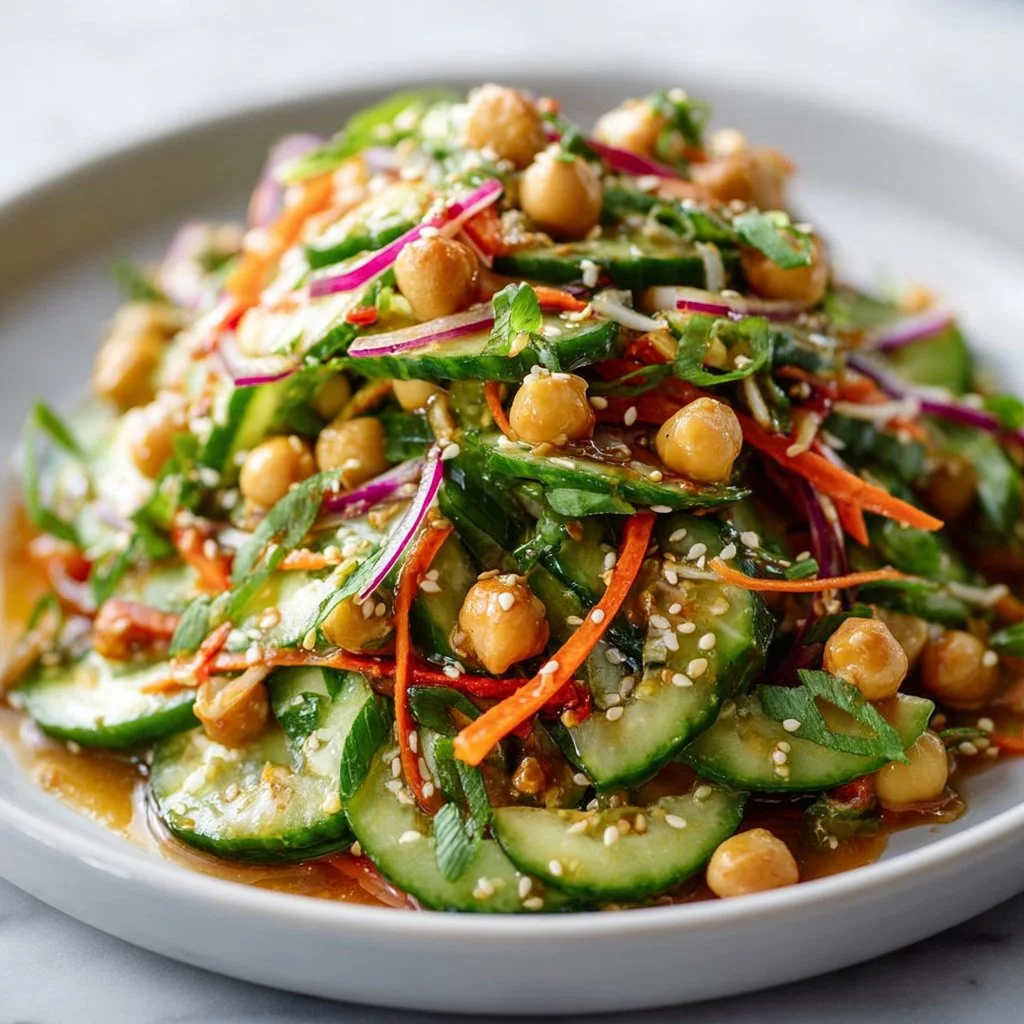
Asian Cucumber and Chickpea Slaw with Sesame Dressing
Refreshing Asian Cucumber and Chickpea Slaw with Sesame Dressing
Hello, my fellow food lovers! Today, let’s take a trip to the kitchen where I’ll show you how to create a vibrant, fresh dish that will make your taste buds dance — Asian Cucumber and Chickpea Slaw with Sesame Dressing. This recipe is one of my go-to favorites for those days when I crave something light yet satisfying. It’s packed with flavor, color, and crunch; perfect as a side dish or even a main event on your table.
There’s something truly magical about a colorful plate of food that transports us to far-off lands, isn’t there? As someone who’s always loved modulating flavors and textures, I appreciate how a simple dish can have layers of complexity, much like life! This slaw is a beautiful harmony combining the crispness of fresh cucumbers and carrots with the hearty texture of chickpeas. Topped with a nutty sesame dressing, it’ll be a crowd-pleaser at any gathering, from casual lunches to lavish dinner parties.
With all that vibrancy, you might think this recipe is complex or challenging, but let me reassure you — it’s a breeze! I’ll walk you through each step, offer some chef tips, and help you master the art of this delightful dish. By the time we’re done, you’ll not only be equipped with a fresh recipe but also with inspiration to whip up this slaw any time you crave a burst of flavor!
So grab your apron and your favorite knife, and let’s dive into the joys of cooking together.
Personal Story
Whenever I think about cucumber slaw, I’m transported back to my childhood, specifically to summer evenings spent at my grandmother’s house. She had this magical garden where she grew fresh cucumbers and vibrant carrots among other vegetables. One hot July evening, she invited the whole family over for dinner. As the sun set, casting a warm golden hue across the table, she pulled out a giant bowl of cucumber slaw, vibrant and glistening with dressing.
The refreshing crunch as we dug in was simply divine! I remember her telling us about how she mixed up various dressings, capturing flavors from her travels to Asia. This slaw was not only a side dish; it was a connection — a blend of memories and love, served from her heart to ours. And every bite was a testament to how simple ingredients could create something magical. That evening shaped how I view cooking — as a way to connect with others and craft memories.
Ingredients
Here’s what you’ll need to get started on this delicious slaw:
-
2 cups shredded cucumber
Cucumbers add a refreshing crunch. I recommend using English cucumbers or Persian cucumbers for their sweetness and lesser seeds. If you’re looking for a substitute, try zucchini for a similar texture. -
1 cup shredded carrots
Carrots bring sweetness and vibrant color. You can use pre-shredded carrots for convenience, but freshly grated truly enhances the flavor. If you don’t have carrots, shredded bell peppers can be a colorful alternative. -
1 can (15 oz) chickpeas, drained and rinsed
Chickpeas are the star of this dish, providing protein and heartiness. Rinsing is essential to get rid of excess sodium. If you’re short on time, canned beans work perfectly! If avoiding legumes, consider cooked quinoa or edamame as a substitute for protein. -
1/4 cup thinly sliced red onion
Red onions add a sharpness that beautifully complements the slaw. If raw onion is too strong for you, soak them in cold water for 10 minutes to mellow the flavor. -
1/4 cup chopped cilantro
Cilantro adds a bright, herby flavor. It’s worth it to chop fresh herbs, but if you’re not a fan or have allergies, parsley is a great substitute. -
2 tablespoons sesame oil
Sesame oil is aromatic and nutty, making it a staple in Asian cuisines. You can replace it with another oil, like avocado oil, but you’ll miss that unique flavor. -
1 tablespoon rice vinegar
Rice vinegar adds a softly sweet acidity. If you’re out, apple cider vinegar can work in a pinch, but cut back slightly since it’s more potent. -
1 tablespoon soy sauce
Soy sauce delivers umami richness. For a gluten-free version, use tamari, or for a low-sodium option, pick a reduced-sodium soy sauce. -
1 teaspoon honey
Honey adds just a touch of sweetness. If you’re vegan, swap it out for agave syrup or maple syrup. -
1 teaspoon grated ginger
Fresh ginger adds a warm, spicy note. If fresh ginger isn’t available, a pinch of ground ginger will suffice, but I always recommend fresh if you can. -
1 clove garlic, minced
Garlic enhances the slaw with its aromatic flavors. For a milder taste, use garlic powder instead, adjusting to your preferences. -
1 tablespoon sesame seeds
Toasted sesame seeds on top add a delightful crunch and a nutty finish. You can also use sunflower seeds if sesame seeds aren’t handy.
Step-by-Step Instructions
Now that we have our ingredients ready, let’s cook this slaw up with some fun tips along the way!
Step 1: Prep Your Vegetables
- Start by washing your cucumbers and carrots thoroughly. If you’re using whole cucumbers, peel them if you prefer a milder flavor. Next, slice the cucumbers into thin rounds, then into strips to achieve that fun shredded profile. You can also use a box grater or food processor to slice your carrots quickly.
Step 2: Shred and Combine
- Once your cucumbers and carrots are prepped, toss them into a large mixing bowl.
- Add in the canned chickpeas (don’t forget to rinse and drain!). Follow with the sliced red onion and chopped cilantro, making sure everything is beautifully mixed and full of color. Give it a gentle toss to combine without smashing the chickpeas!
Step 3: Make the Dressing
- In a separate bowl, whisk together the sesame oil, rice vinegar, soy sauce, honey, grated ginger, and minced garlic. This dressing is a blend of savory, sweet, and tangy; the perfect way to elevate your slaw. If you love it a touch more acidic, add another splash of rice vinegar.
Step 4: Combine Slaw and Dressing
- Drizzle the dressing over the vegetable mixture. Gently fold everything together until the veggies are coated in that scrumptious sauce. Don’t stir too aggressively — we want the chickpeas to remain whole!
Step 5: Let It Rest
- Here’s a great chef hack: Allow your slaw to rest in the fridge for at least 20 minutes before serving. This helps the flavors meld and makes for a more delicious dish! If you’re in a pinch, a quick 10-minute chill will help too.
Step 6: Serve
- When ready to serve, sprinkle the toasted sesame seeds on top for added crunch and presentation.
Serving Suggestions
To serve this delightful slaw, present it in a large, colorful bowl to showcase all those vibrant ingredients. Pair it with grilled meats for a hearty meal or serve it as a delightful side at your next barbecue. Don’t be afraid to adorn the table with some extra lime wedges for that zesty pop right before digging in!
Recipe Variations
Feel free to get creative! Here are a few ideas to switch up the recipe:
- Spicy Twist: Add some Sriracha or red pepper flakes to the dressing for a spicy kick!
- Noodle Bowl: Toss the slaw with cooked soba noodles or rice vermicelli for a wholesome meal.
- Asian Fusion: Swap out chickpeas for shredded cabbage and add shredded chicken or tofu for a twist.
- Fruity Addition: Add in chopped mango or diced apples for a sweet, fruity contrast.
- Herb Swaps: Experiment with fresh basil or mint in place of cilantro for a unique flavor profile.
Chef’s Notes
As with many recipes, this slaw has evolved in my kitchen over the years. I initially focused on traditional Asian flavors, but I soon realized that it worked beautifully with various ingredients I found at local farmers’ markets. The beauty of slaws like this one is their versatility. On lazy days, I’ve even thrown in leftover roasted vegetables or grains, quickly transforming it into a full meal!
And let me tell you, the first time I served this dish at a dinner party, it was met with rave reviews — everyone kept asking for the recipe! I love how cooking can create moments like that — the connection between people, food, and stories ignites joy in our lives.
FAQs and Troubleshooting
Q: Can I make this slaw ahead of time?
A: Absolutely! This slaw holds up well in the fridge. Just keep in mind to add the sesame seeds right before serving for that crunch!
Q: What if I have leftovers?
A: Leftover slaw makes a great topping for sandwiches or tacos! It can last in the fridge for about 3 days, but it’s always best fresh.
Q: Can I use frozen chickpeas?
A: Yes, if you’ve cooked your chickpeas and frozen them, just thaw, rinse, and they’ll work great!
Q: Can I skip the onion or garlic?
A: Sure! Adjust to your taste; omit or use scallions for a milder flavor or garlic-infused oil as a substitute.
Nutritional Info (Optional)
While I don’t focus solely on the nutritional aspects of my recipes, you’ll find that this slaw is not only delicious but also nutritious. It’s packed with fiber, vitamins, and plant-based protein thanks to the chickpeas and veggies. For those monitoring calories, each serving contains roughly 150 calories.
So there you have it! We’ve taken a simple idea and created something that not only tastes wonderful but also feels great to make. Once you serve this slaw, you’ll understand why it became a staple in my family and why it will for yours too! Appreciate the little moments as you share this dish with loved ones around your table. Happy cooking! 🎉
PrintRefreshing Asian Cucumber and Chickpea Slaw with Sesame Dressing
A vibrant, fresh Asian slaw featuring cucumbers, chickpeas, and a nutty sesame dressing that’s perfect for any meal.
- Prep Time: 15 minutes
- Cook Time: 0 minutes
- Total Time: 35 minutes
- Yield: 4 servings 1x
- Category: Salad
- Method: No-Cook
- Cuisine: Asian
- Diet: Vegan
Ingredients
- 2 cups shredded cucumber
- 1 cup shredded carrots
- 1 can (15 oz) chickpeas, drained and rinsed
- 1/4 cup thinly sliced red onion
- 1/4 cup chopped cilantro
- 2 tablespoons sesame oil
- 1 tablespoon rice vinegar
- 1 tablespoon soy sauce
- 1 teaspoon honey
- 1 teaspoon grated ginger
- 1 clove garlic, minced
- 1 tablespoon sesame seeds
Instructions
- Prep Your Vegetables by washing and slicing cucumbers and carrots.
- Shred and combine cucumbers, carrots, chickpeas, red onion, and cilantro in a large mixing bowl.
- Make the dressing by whisking together sesame oil, rice vinegar, soy sauce, honey, ginger, and garlic in a separate bowl.
- Combine slaw and dressing by drizzling the dressing over the vegetable mixture and folding gently.
- Let it rest in the fridge for at least 20 minutes before serving.
- Serve with toasted sesame seeds on top for added crunch.
Notes
Add a splash of lime juice for extra zest and consider adding Sriracha for a spicy twist!
Nutrition
- Serving Size: 1 cup
- Calories: 150
- Sugar: 4g
- Sodium: 320mg
- Fat: 7g
- Saturated Fat: 1g
- Unsaturated Fat: 6g
- Trans Fat: 0g
- Carbohydrates: 22g
- Fiber: 6g
- Protein: 5g
- Cholesterol: 0mg
Keywords: cucumber slaw, chickpea salad, sesame dressing, Asian cuisine, vegan recipe
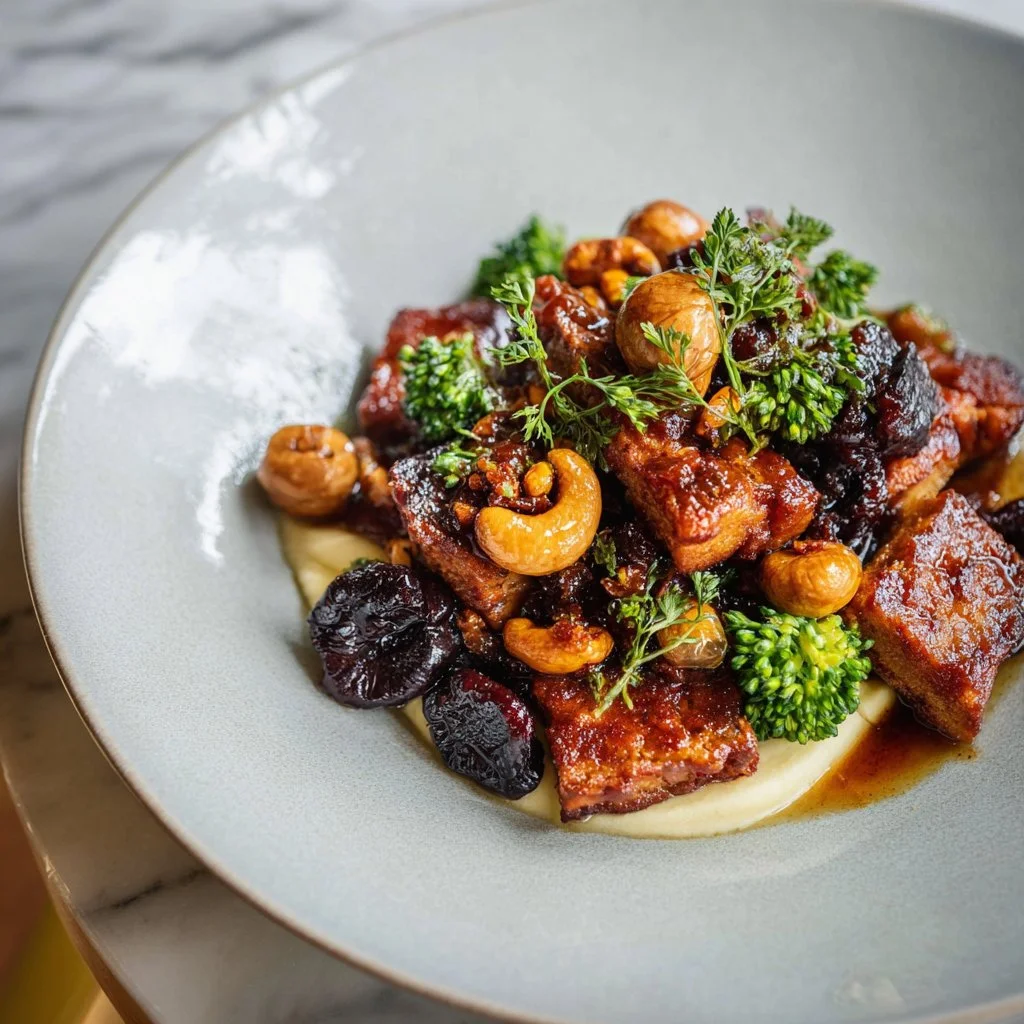
Vegan Tempeh Cock in Wine
# Unveiling Vegan Tempeh Cock in Wine: A Dish to Foster Connection

## Introduction

Hello, fellow food lovers! Today, I’m excited to share with you a dish that’s not just an explosion of flavors, but also a celebration of connection and warmth: Vegan Tempeh Cock in Wine! Cooking should always feel special. And trust me, nothing brings people together quite like a beautifully plated, fragrant dish simmering on the stove.

This dish combines tempeh with rich flavors from port wine, fresh herbs, and hearty vegetables. It’s the perfect comfort food that embraces the spirit of gathering around the table. When you take that first bite, you’ll find yourself wrapping your taste buds in a cozy blanket of earthy flavors and inviting aromas. Whether you're a seasoned chef or a curious beginner, this recipe will inspire you to cook intentionally and share your creations with loved ones.

As we embark on this culinary journey together, let’s chat about what makes this vegan delight so remarkable. Tempeh, a powerhouse made from fermented soybeans, brings a nutty flavor and a unique texture that, when paired with the lusciousness of port wine, creates a symphony in your mouth. If you’ve ever been unsure about cooking with tempeh, fear not! This dish will not only elevate your kitchen game, but it will also demystify any concerns about this fantastic ingredient.

So grab your apron, pour yourself a glass of something sparkling (perhaps a little port to pair later?), and let’s dive into a recipe that promises to fill your home with heavenly scents and your hearts with joy.

## Personal Story

Ah, the magic of shared meals! One of my most treasured memories in the kitchen is hosting my first dinner party. I decided to serve a decadent dish that had my friends raving for weeks. Inspired by classic French cooking, I created a vegan version featuring tempeh—something I was just getting comfortable with. Watching my friends take their first bites, the surprised looks were priceless. They hadn’t expected the delightful depth of flavors from a plant-based dish.

That evening sparked a flame within me, a realization that cooking can produce profound moments of connection. The ambiance was warm and inviting—candlelight flickering, laughter filling the air—and my vegan creation became a centerpiece of our joy, proving that food has an artistry that connects us all. To this day, I still love experimenting with vegan recipes that evoke the same nostalgic warmth, and Vegan Tempeh Cock in Wine has become a go-to for cozy gatherings.

## Ingredients

Now, let’s talk about the star players of our dish—these ingredients are what makes the magic happen!

- **8 oz tempeh, cut into cubes**: Tempeh has a lovely, firm texture and a nutty flavor. If you don’t have tempeh, you can substitute it with firm tofu, but marinate it to enhance flavor.

- **2 cups port wine**: This sweet red wine adds richness and depth. If you prefer a non-alcoholic option, you can use grape juice or a combination of balsamic vinegar and vegetable broth.

- **2 cups vegetable broth**: A quality broth infuses the dish with flavor. Homemade is best, but store-bought is perfectly fine—just check for low sodium!

- **1 cup mushrooms, sliced**: They bring umami and a delightful chewiness to the dish. Feel free to mix varieties, such as cremini or shiitake, for more complex flavors.

- **2 carrots, diced**: Carrots add a hint of sweetness. If you want a more robust flavor, try using parsnips instead!

- **2 parsnips, diced**: They offer a creamy texture and earthiness. You can swap them with more carrots or rutabaga for a different twist.

- **1 onion, diced**: Onions are the foundation of flavor. Yellow or sweet onions work well, but red onions can add a lovely color and sweetness.

- **4 cloves garlic, minced**: Oh, the magic of garlic! It’s essential for depth. If you're a garlic lover, feel free to add more.

- **2 sprigs fresh thyme**: Fresh herbs elevate any dish. If you don’t have thyme, you can use dried (1 tsp) or swap it with rosemary for a different flavor profile.

- **1 bay leaf**: A subtle aromatic that brings warmth. Don’t forget to remove it before serving!

- **Olive oil**: For sautéing—use a good quality for the most flavor impact. You can substitute it with avocado oil if preferred.

- **Salt and pepper to taste**: Always season to your preference!

- **2 cups parsnips, peeled and chopped**: This will be used for our creamy puree later—richness that complements the dish beautifully.

- **1/2 cup coconut cream (or plant-based cream)**: For that luscious finish! Full-fat coconut cream gives a nice richness, but any plant-based cream will work well.

## Step-by-Step Instructions

Alright, my friends, it's time to get cooking! Let’s break down the cooking process step-by-step:

1. **Prep Your Ingredients**: Start by chopping all your veggies and cutting the tempeh into cubes. A well-organized kitchen is a happy kitchen! Lay everything out so you can easily grab what you need as you cook.

2. **Sauté the Tempeh**: In a large pot, heat a drizzle of olive oil over medium heat. Once the oil is shimmering, add the cubed tempeh. Sauté for about 5-7 minutes, stirring occasionally, until golden brown. This step adds a delightful texture. Pro tip: letting tempeh brown evenly adds depth, so be patient!

3. **Add Aromatics**: Toss in your diced onions and minced garlic. Sauté for another 3-5 minutes until the onions are translucent and fragrant. This is where the magic truly begins! Your kitchen should start smelling heavenly.

4. **Incorporate Veggies**: Next, add in the carrots, parsnips, and mushrooms. Stir everything together and let it cook for about 5 minutes, allowing the veggies to soften a bit. This step builds layers of flavor!

5. **Deglaze with Port Wine**: Here comes the fun part! Pour in the port wine and scrape any brown bits off the bottom of the pot. These bits are pure flavor gold! Let the wine simmer for about 5 minutes, allowing it to reduce slightly.

6. **Add Broth and Herbs**: Pour in the vegetable broth, add the bay leaf and thyme. Give it a good stir and bring everything to a gentle simmer. Let it cook for 15-20 minutes, letting the flavors meld beautifully. Your kitchen will be buzzing!

7. **Prepare the Parsnip Purée**: While your stew simmers, boil the chopped parsnips in salted water until tender (about 15 minutes). Drain and blend with the coconut cream until smooth. Season with salt and pepper to taste. This creamy layer will complement the stew's flavors perfectly!

8. **Finishing Touches**: Remove the bay leaf and thyme sprigs from the stew. Taste and adjust seasoning—maybe a pinch more salt or another splash of wine? It’s all about balance.

9. **Serve It Up**: Spoon a generous helping of your stew into bowls, creating a well for the silky parsnip purée. You can even swirl the purée into the stew for a beautiful presentation!

## Serving Suggestions

Now, let’s talk plating! To make your Vegan Tempeh Cock in Wine stunning, serve it in shallow bowls, contrasting the deep brown hues of the stew against the creamy, pale parsnip purée. For a lovely finishing touch, sprinkle fresh thyme or parsley on top for color and brightness. And if you're feeling adventurous, why not add a drizzle of good olive oil for a final flourish?

Pair this dish with crusty bread or a simple green salad to keep the meal light and balanced.

## Recipe Variations

Let’s get creative! Here are a few fun twists you can try with your Vegan Tempeh Cock in Wine:

1. **Spice It Up**: Add a pinch of red pepper flakes or smoked paprika for a hint of heat.

2. **Mushroom Mix**: Incorporate a variety of mushrooms, such as oyster or shiitake, to elevate the umami flavor.

3. **Herb Swap**: Instead of thyme, try fresh rosemary or sage for a different herbal tone.

4. **Add Nuts**: Top with toasted walnuts or pecans for a delightful crunch!

5. **Richness Level-Up**: For an even richer sauce, stir in a tablespoon of vegan butter right before serving.

## Chef’s Notes

Cooking is as much about stories as it is about flavors! Over the years, this Vegan Tempeh Cock in Wine has become my comforting go-to, especially during the colder months. Every time I make it, I think back to that first dinner party—the laughter, clinking glasses, and full bellies.

One of my favorite kitchen mishaps happened when I forgot to add the thyme. The dish was still delicious, but it was missing that herby touch! It taught me that cooking doesn't have to be perfect; it just has to be made with love.

Another fun tip: if you find yourself with leftover stew, it freezes beautifully! Just be sure to freeze it without the parsnip purée, and add that fresh when you're ready to enjoy again.

## FAQs and Troubleshooting

### 1. Can I use tofu instead of tempeh?

Absolutely! If you opt for tofu, make sure to press it well to remove excess moisture and marinate it before sautéing. This will help it absorb flavors wonderfully.

### 2. The stew is too salty; how do I fix it?

If your stew is too salty, try adding a diced potato while it cooks—this can absorb some saltiness. Alternatively, try adding more vegetable broth to dilute it.

### 3. What if I don't have port wine?

No problem! You can replace it with grape juice mixed with a dash of vinegar or use a different red wine. Just be cautious of sweetness levels!

### 4. It seems too thick; how can I thin it out?

If your stew becomes too thick, simply add a bit more vegetable broth or water until it reaches your desired consistency.

## Nutritional Info (Optional)

While I won't dive deep into calories for this recipe, rest assured that tempeh is a great source of protein and fiber, and combined with wholesome vegetables, you’re creating a nutritious meal that’s satisfying and delicious!

---

And that’s it, dear friends! I hope you feel inspired and empowered to try making this Vegan Tempeh Cock in Wine—it's all about gathering around, sharing good food, and cherishing those beautiful moments together. Happy cooking!
Vegan Tempeh Cock in Wine
A delightful vegan dish that combines tempeh with rich port wine and hearty vegetables for a comforting meal.
- Prep Time: 15 minutes
- Cook Time: 40 minutes
- Total Time: 55 minutes
- Yield: 4 servings 1x
- Category: Main Course
- Method: Stovetop
- Cuisine: Vegan
- Diet: Vegan
Ingredients
- 8 oz tempeh, cut into cubes
- 2 cups port wine
- 2 cups vegetable broth
- 1 cup mushrooms, sliced
- 2 carrots, diced
- 2 parsnips, diced
- 1 onion, diced
- 4 cloves garlic, minced
- 2 sprigs fresh thyme
- 1 bay leaf
- Olive oil, for sautéing
- Salt and pepper to taste
- 2 cups parsnips, peeled and chopped
- 1/2 cup coconut cream (or plant-based cream)
Instructions
- Prep your ingredients by chopping all your veggies and cutting the tempeh into cubes.
- Sauté the tempeh in a large pot with olive oil over medium heat until golden brown.
- Add the diced onions and minced garlic, and sauté until the onions are translucent.
- Incorporate the carrots, parsnips, and mushrooms, cooking for about 5 minutes.
- Deglaze the pot with port wine, scraping up brown bits, and let simmer.
- Add vegetable broth, bay leaf, and thyme, and simmer for 15-20 minutes.
- Prepare the parsnip purée by boiling chopped parsnips until tender, then blending with coconut cream.
- Finishing touches: Remove bay leaf and adjust seasoning to taste.
- Serve the stew in bowls with the parsnip purée.
Notes
For a richer sauce, stir in a tablespoon of vegan butter right before serving. Leftovers freeze well without the parsnip purée.
Nutrition
- Serving Size: 1 serving
- Calories: 350
- Sugar: 8g
- Sodium: 600mg
- Fat: 15g
- Saturated Fat: 7g
- Unsaturated Fat: 8g
- Trans Fat: 0g
- Carbohydrates: 45g
- Fiber: 6g
- Protein: 18g
- Cholesterol: 0mg
Keywords: vegan, tempeh, port wine, healthy, comfort food
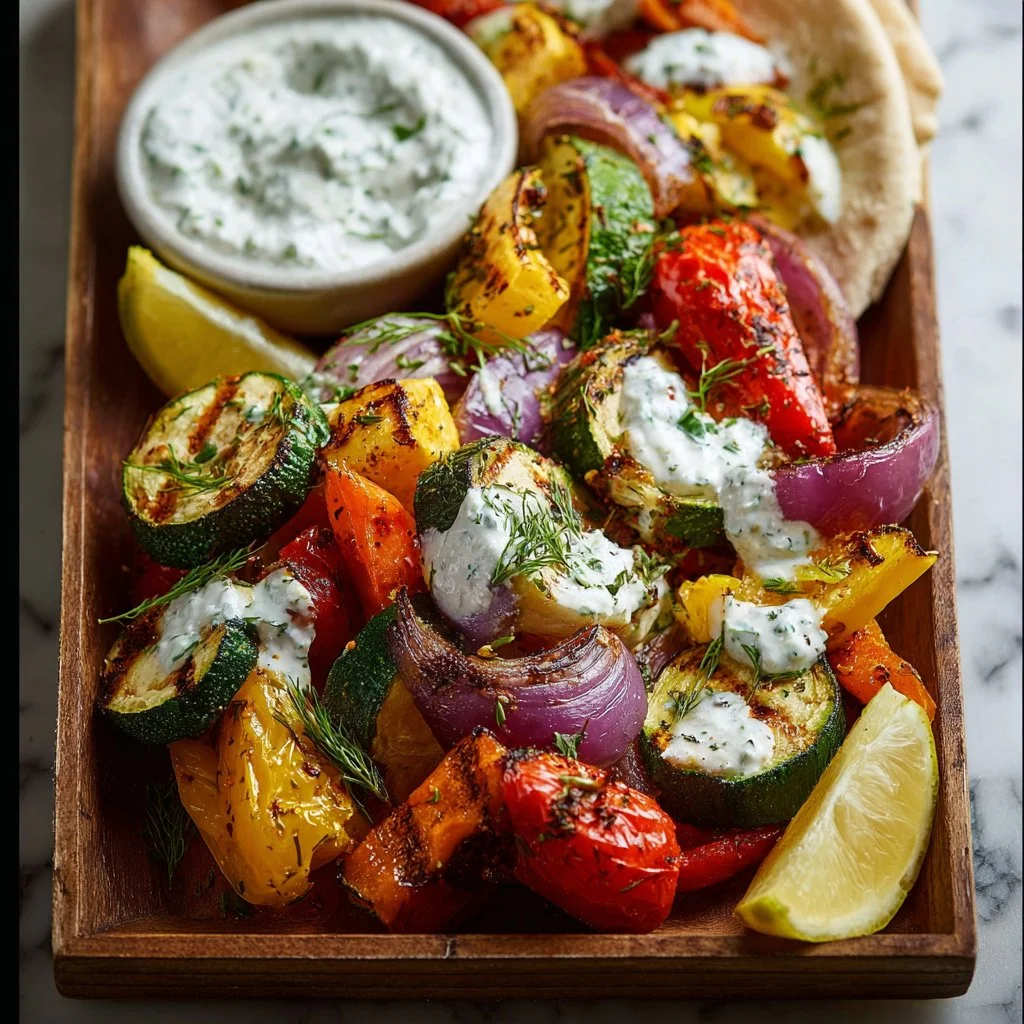
Sheet-Pan Roasted Veggies with Tzatziki & Pita
# Sheet-Pan Roasted Veggies with Tzatziki & Pita: A Flavorful Adventure

**Introduction**

Hello, my culinary friends! Today, we’re diving into a vibrant, wholesome dish that's sure to make your taste buds dance: Sheet-Pan Roasted Veggies with Tzatziki & Pita. Oh, the joy of gathering around a colorful plate filled with perfectly roasted vegetables! There's something both satisfying and comforting about the aroma that wafts through your kitchen as those veggies caramelize and crisp up in the oven.

This recipe is a piece of cake to whip up on any busy weeknight, but it has the elegance to impress even the most discerning Dinner Party Dave. What's the secret? It’s all about harnessing the natural sweetness of fresh veggies, a drizzle of olive oil, and the delightful coolness of homemade or store-bought tzatziki sauce. Top it all off with some warm pita bread, and you have a stunning dish that feels graceful yet effortless.

As a lovable host-at-heart, I promise you that my focus with this blog is to create recipes that make people feel at home, whether you’re sharing stories around the dinner table or prepping for a cozy movie night. So, tie on your apron, pour yourself something bubbly, and let’s get cooking!

---

**Personal Story**

Let me take you back to a sun-drenched afternoon spent at my Aunt Clara's house. She was a master of finding the most delicious veggies at the farmer's market, and every summer, she would invite the entire family over for her iconic roasted veggie platter. I can still visualize those radiant peppers, vibrant zucchinis, and luscious red onions—each piece perfectly caramelized to perfection!

One of my fondest memories is the way she taught me to roast. I can still hear her saying, "Savannah, love, it’s all about letting the veggies dance in the oven!" Those moments stood out to me, not just for the food but the laughter and love shared around the table. As we enjoyed her dish, the tzatziki was the star of the show—cool, refreshing, and full of flavor. That experience motivated me to create my own spin on her recipes, leading to this delightful Sheet-Pan Roasted Veggies with Tzatziki & Pita!

---

**Ingredients**

Here's what you’ll need to create this beautiful dish. For each ingredient, I'll share a quick tip that will make you feel like a pro in your own kitchen!

- **Assorted Vegetables** (bell peppers, zucchini, red onion, etc.)
  - *Chef Insight*: Choosing a variety of colors adds visual appeal and different flavors. Feel free to mix in seasonal veggies like carrots, asparagus, or even eggplant. Just remember to cut them into even-sized pieces to ensure uniform cooking!

- **Olive Oil**
  - *Substitution Tip*: If you’re not a fan of olive oil, avocado oil or grapeseed oil work splendidly too! The oil helps in caramelizing the veggies and enhances their natural flavors.

- **Salt**
  - *Quick Insight*: Salt enhances flavor by drawing out moisture and intensifying taste. Use kosher salt for its coarse texture or sea salt for a bit of added mineral complexity.

- **Pepper**
  - *Quick Insight*: Freshly ground black pepper adds a burst of flavor and a slight heat. If you want a kick, consider crushed red pepper flakes!

- **Garlic Powder**
  - *Chef Insight*: Garlic powder is a great shortcut! If you can't find any, feel free to swap in freshly minced garlic. Just be cautious with the amount—as fresh garlic can be stronger!

- **Tzatziki Sauce**
  - *Chef Insight*: While you can absolutely make your own, store-bought varieties are perfectly acceptable here. Just look for one with fresh ingredients (and no preservatives, if you can!) to keep it light and authentic.

- **Pita Bread**
  - *Substitution Tip*: If you’re feeling adventurous, try using naan or even whole-grain wraps for a twist on the classic. They’ll soak up that tzatziki goodness just beautifully!

---

**Step-by-Step Instructions**

1. **Preheat the Oven:**
   - Start by preheating your oven to 425°F (220°C). This high heat ensures beautifully caramelized veggies that are tender on the inside and crispy on the outside. Trust me; your kitchen will start smelling divine!

2. **Prepare the Vegetables:**
   - Wash your veggies thoroughly and pat them dry. Cutting them into even pieces (about 1-inch cubes for this dish) helps everything cook evenly. I recommend a colorful mix: vibrant bell peppers for sweetness, zucchini for a soft bite, and red onion for a zing of flavor.

3. **Toss with Oil and Seasoning:**
   - In a large mixing bowl, add your chopped veggies and drizzle them with a generous amount of olive oil (about 3-4 tablespoons). Then sprinkle salt, pepper, and garlic powder over the top. Take those kitchen tools and get your hands in there! Toss everything around until all the veggies are evenly coated. Your hands are the best tools for mixing!

4. **Spread on a Baking Sheet:**
   - Line a baking sheet with parchment paper for easy cleanup—because who wants to scrub pans after a delicious meal? Spread the seasoned veggies out in a single layer on the sheet. Overcrowding can lead to steaming instead of roasting, so give them some space!

5. **Roast in the Oven:**
   - Pop that baking sheet into your preheated oven and let those beauties roast for about 20-25 minutes. Give them a good stir halfway through the cooking time. Watch them transform into golden perfection!

6. **Warm the Pita:**
   - About five minutes before the veggies are done, toss the pita bread into the oven (next to the veggies works great) to warm them up. This step is essential—you want those pockets warm and toasty for scooping!

7. **Plate and Serve:**
   - Once your veggies are beautifully roasted, remove them from the oven and let them cool slightly before serving. They’ll be steaming hot! Arrange the warm pita on a serving platter alongside the vibrant veggies and drizzle with tzatziki sauce, either in a bowl or over the top. Voilà!

---

**Serving Suggestions**

Plating this dish is all about showcasing the colors and inviting the eyes to the table. Arrange your roasted veggies in a charming pile on a large platter, then nestle the warmed pita around the edge. Serve the tzatziki in a small bowl with a sprig of fresh mint or parsley for a pop of color. Drizzle a little olive oil over it all for that restaurant-style flair.

---

**Recipe Variations**

Feeling adventurous? Here are some creative spins you can incorporate into your Sheet-Pan Roasted Veggies:

- **Mediterranean Delight**: Add kalamata olives and cherry tomatoes for extra color and tang.
- **Herby Twist**: Sprinkle some fresh herbs like dill or basil over the veggies before serving for a fresh burst of flavor.
- **Spicy Kick**: Toss in some sliced jalapeños or a touch of smoked paprika for a subtle heat.
- **Zesty Citrus**: Squeeze some fresh lemon juice over the dish just before serving to elevate the flavors!
- **Make it a Meal**: Add chickpeas or cooked quinoa to the veggie mix for a heartier, protein-rich dish.

---

**Chef’s Notes**

One of my fondest memories while evolving this recipe was the time I tried adding an unexpected splash of balsamic vinegar before roasting. Boy, that did the trick! It added a whole new level of flavor that was just divine. These roasted goodies can really be a reflection of your personal taste—mix and match until you find what makes your heart (and tummy!) sing.

And trust me, this dish has come a long way from Aunt Clara’s kitchen. It has adapted, evolved, and made my heart swell every time I cook it. I hope when you pack this into your weekly meal prep or bring it out on special occasions, it brings joy to your table!

---

**FAQs and Troubleshooting**

- **What if my veggies aren’t cooked evenly?**
  - Make sure to cut your vegetables into similar sizes, and don't crowd the pan. If some are still crisp while others are soft, just give them a few more minutes in the oven.

- **Can I make this dish ahead of time?**
  - Absolutely! You can roast the veggies and store them in the fridge for 3-4 days. Just reheat in the oven for a few minutes before serving!

- **How do I store leftovers?**
  - Store any leftovers in an airtight container in the fridge. They make a delicious lunch the next day cold or warmed up again!

- **What if I don’t have tzatziki?**
  - Not to fret! You can easily whip up a quick yogurt sauce using Greek yogurt, minced garlic, diced cucumber, and a squeeze of lemon. It’ll give you a similar refreshing flavor!

---

**Nutritional Info** *(Optional)*

**Calories per serving**: Approximately 220 (with tzatziki and pita)
- *Protein*: 6g
- *Fat*: 10g
- *Carbohydrates*: 30g
- *Fiber*: 5g

---

Are you drooling yet, fellow foodies? With this Sheet-Pan Roasted Veggies with Tzatziki & Pita recipe, you’ll not only create a stunning meal but also bring that touch of elegance to your everyday dining. Remember, cooking is as much about the experience as it is about the food. So, gather your loved ones, share some stories, and make beautiful memories around your table. Happy cooking, my friends!
Sheet-Pan Roasted Veggies with Tzatziki & Pita
A vibrant and wholesome dish featuring roasted vegetables served with tzatziki sauce and warm pita bread, perfect for any weeknight dinner or special occasion.
- Prep Time: 15 minutes
- Cook Time: 25 minutes
- Total Time: 40 minutes
- Yield: 4 servings
- Category: Main Course
- Method: Baking
- Cuisine: Mediterranean
- Diet: Vegetarian
Ingredients
- Assorted Vegetables (bell peppers, zucchini, red onion, etc.)
- Olive Oil
- Salt
- Pepper
- Garlic Powder
- Tzatziki Sauce
- Pita Bread
Instructions
- Preheat the oven to 425°F (220°C).
- Prepare the vegetables by washing, drying, and cutting them into even 1-inch cubes.
- Toss the veggies with olive oil, salt, pepper, and garlic powder until evenly coated.
- Spread the seasoned veggies on a lined baking sheet in a single layer.
- Roast in the oven for 20-25 minutes, stirring halfway through.
- Warm the pita bread in the oven about 5 minutes before the veggies are done.
- Plate the roasted veggies with the warm pita and drizzle with tzatziki sauce before serving.
Notes
Feel free to add a variety of seasonal vegetables for more color and flavor. Experiment with different herbs and spice adjustments based on your taste preference.
Nutrition
- Serving Size: 1 serving
- Calories: 220
- Sugar: 5g
- Sodium: 250mg
- Fat: 10g
- Saturated Fat: 1g
- Unsaturated Fat: 7g
- Trans Fat: 0g
- Carbohydrates: 30g
- Fiber: 5g
- Protein: 6g
- Cholesterol: 0mg
Keywords: roasted veggies, tzatziki, pita, Mediterranean, healthy dinner, vegetarian recipes

Creamy Vegan Carrot Potato Soup
Creamy Vegan Carrot Potato Soup: A Cozy Hug in a Bowl
Hello, fellow food enthusiasts! Savannah here, and I’m thrilled to share one of my absolute favorite cozy recipes with you today: Creamy Vegan Carrot Potato Soup. Picture this: it’s a chilly evening, the golden hour light is streaming through your kitchen window, and the aroma of simmering veggies fills the room. You pour yourself a glass of something crisp and refreshing while you whip up this delightful soup that’s as comforting as your favorite sweater.
This soup combines the natural sweetness of carrots and the earthy heartiness of potatoes, all blended together with creamy coconut milk for a dreamy finish. It’s the ultimate winter warmer, and trust me, it will become a staple in your kitchen. This recipe is not just about nourishing your body; it’s about creating that warm, inviting environment we all crave around the dinner table—whether you’re just feeding yourself or hosting a small gathering of loved ones.
The best part? This soup is entirely vegan, gluten-free, and oh-so-easy to whip up. Perfect for weeknight dinners or meal prep, you can tuck away leftovers for a quick lunch or snack. So, tie on your apron and let’s dive into the sunny goodness of this Creamy Vegan Carrot Potato Soup!
Personal Story
I still remember the first time I made carrot potato soup—it was a rainy afternoon, with the drops tap dancing on my window. I was curled up in my cozy kitchen, experimenting with whatever vegetables I had on hand. Carrots and potatoes were staples in my pantry, and as I chopped them up, my mind sparked with nostalgia. It took me back to my childhood, when my grandmother would whip up her famous vegetable soup, filling her tiny kitchen with warmth and laughter.
As a little girl, I was in charge of the “taste-testing,” and I dove into the delicious broth, soaking up all the flavors of her carefully chosen herbs and spices. That essence of love and care permeating through the cooking process has always stuck with me, and I strive to recreate that joy in my own kitchen. This creamy vegan version holds all the heartwarming memories while being a little lighter and a lot more plant-focused—perfect for my modern-day gatherings.
Ingredients
Here’s what you’ll need to create this delectable soup:
-
2 cups carrots, chopped
These sweet orange beauties are the star of the show. When choosing carrots, look for firm, vibrant ones. You can substitute with parsnips for a unique twist! -
2 cups potatoes, peeled and chopped
I love using Yukon gold potatoes for their creamy texture, but feel free to swap in russet or red potatoes. Sweet potatoes can be a fun alternative too if you want a sweeter flavor! -
1 onion, chopped
Onions bring depth to the soup. White onions work well, but yellow or even shallots can be used for a milder taste. -
3 cloves garlic, minced
Garlic enriches the flavor profile with a warm, aromatic note. If you’re a garlic lover, go ahead and add a little extra! -
4 cups vegetable broth
This is the backbone of the soup’s flavor. Homemade broth is ideal, but store-bought ensures convenience. For a low-sodium option, choose a broth that fits your dietary needs. -
1 cup coconut milk
This adds the creamy richness you’re searching for. Canned coconut milk gives the best texture, but for a lighter option, you can use almond or soy milk. -
2 tablespoons olive oil
This helps in sautéing the veggies and brings a delightful richness. Avocado oil is an excellent substitute if you’re looking for something with a higher smoke point. -
Salt and pepper to taste
Essential for bringing out the flavors! Feel free to experiment with smoked paprika for an extra depth. -
Fresh herbs for garnish (optional)
A sprinkle of fresh herbs like cilantro or parsley can elevate the visual appeal of the soup. Try adding a drizzle of coconut cream for a touch of elegance!
Step-by-Step Instructions
-
Sauté the Aromatics
Heat the olive oil in a large pot over medium heat. Once hot, add the chopped onion and sauté until it becomes translucent (about 5-7 minutes). Stir in the minced garlic and cook for an additional 1-2 minutes until fragrant. Pro Tip: Don’t rush this step! The sweeter the onion becomes, the more flavor your soup will have. -
Add the Veggies
Toss in the chopped carrots and potatoes. Stir to coat them all in the aromatic goodness from the pot. Let them sauté for about 5 minutes to bring out their natural flavors. Note: If you love a touch of spice, you can add a pinch of red pepper flakes here! -
Pour in the Broth
Add the vegetable broth, ensuring all vegetables are submerged. Bring the mixture to a gentle boil, then reduce the heat to let it simmer for 20-25 minutes, or until the carrots and potatoes are tender. Chef Tip: You can check for doneness by piercing the potatoes with a fork—if they slide off easily, they’re ready! -
Blend the Soup
Once the veggies are cooked, use an immersion blender to puree the soup directly in the pot until smooth. If you don’t have an immersion blender, carefully transfer the soup in batches to a stand blender. Add coconut milk to the pot and blend until you reach a creamy consistency. Safety Tip: If using a stand blender, always allow some steam to escape while blending to avoid splatters! -
Adjust Seasoning
Stir in salt and pepper to taste, adjusting based on your preference. You might find that the soup needs a bit more salt to really pop! Fun fact: If you find it too thick, you can always add a splash of water or broth to reach your desired consistency! -
Garnish and Serve
Ladle the soup into bowls and sprinkle with fresh herbs for a touch of color and freshness. Tip: A drizzle of olive oil or coconut cream on top can make your soup look even more enticing!
Serving Suggestions
To serve this Creamy Vegan Carrot Potato Soup, I recommend using a wide, shallow bowl to showcase the luscious texture. Layer it with freshly baked bread for dipping, or for a twist, pair it with crunchy pita chips or a bright salad. A light drizzle of garlic-infused olive oil adds an elegant touch, and the optional herbs lend a vibrant splash of color.
Recipe Variations
Feel free to mix it up! Here are a few variations you can try:
- Spicy Kick: Add a diced jalapeño or a dash of cayenne pepper for some heat!
- Herbaceous Touch: Toss in a handful of fresh spinach or kale in the last few minutes of cooking for added nutrients and a pop of color.
- Smoky Flavor: Stir in some smoked paprika for a rich, smoky flavor that pairs beautifully with the sweetness of the carrots.
- Nutty Addition: Top with some toasted pumpkin seeds or sunflower seeds for a crunchy texture.
- Creamy Swaps: If you’re not keen on coconut, use cashew cream or a splash of plant-based cream for that velvety touch.
Chef’s Notes
Every recipe has its little quirks, and I must confess—I’ve had my own soup mishaps. One time, I was so engrossed in a podcast that I accidentally doubled the amount of garlic! Let’s just say it was quite the garlicky experience (and a reminder to keep my mind on the soup). Throughout the years, this recipe has evolved, and I’m constantly tweaking the ingredients based on what I have on hand. It’s become a canvas for creativity in my kitchen, and I encourage you to make it yours as well!
FAQs and Troubleshooting
1. My soup turned out too thick—what should I do?
No worries! Simply add a little extra vegetable broth or water to reach the desired consistency. Stir well to incorporate and heat it gently.
2. Can I freeze this soup?
Absolutely! This soup freezes beautifully. Just let it cool completely before transferring it to airtight containers. It should keep well in the freezer for up to three months. When reheating, add a splash of broth to restore the creamy texture.
3. What if I don’t have coconut milk?
You can substitute with any non-dairy milk, but for a creamy texture, cashew milk or almond milk works best. Just keep in mind it may alter the flavor slightly.
4. How can I customize the spices?
Spices are your friend! Feel free to experiment with spices like thyme, rosemary, or even a hint of curry powder to switch up the flavor profile.
Nutritional Info
This Creamy Vegan Carrot Potato Soup is not only comforting but also packed with nutrients! Here’s a quick run-down:
- Calories: Approximately 180 per serving
- Protein: 4g
- Fat: 9g (mostly healthy fats from coconut milk)
- Carbohydrates: 22g
- Fiber: 4g
Now that’s what I call a bowl of goodness!
I hope this Creamy Vegan Carrot Potato Soup brings warmth and joy to your table just as it does to mine! Happy cooking, and don’t forget—what really matters is the love you pour into your dish. Cheers to cozy nights and delicious moments around the table!
PrintCreamy Vegan Carrot Potato Soup

A cozy, creamy vegan soup that blends sweet carrots and hearty potatoes, perfect for chilly evenings.
- Prep Time: 15 minutes
- Cook Time: 30 minutes
- Total Time: 45 minutes
- Yield: 4 servings 1x
- Category: Soup
- Method: Stovetop
- Cuisine: Vegan
- Diet: Vegan, Gluten-Free
Ingredients
- 2 cups carrots, chopped
- 2 cups potatoes, peeled and chopped
- 1 onion, chopped
- 3 cloves garlic, minced
- 4 cups vegetable broth
- 1 cup coconut milk
- 2 tablespoons olive oil
- Salt and pepper to taste
- Fresh herbs for garnish (optional)
Instructions
- Heat the olive oil in a large pot over medium heat. Once hot, add the chopped onion and sauté until it becomes translucent (about 5-7 minutes). Stir in the minced garlic and cook for an additional 1-2 minutes until fragrant.
- Toss in the chopped carrots and potatoes. Stir to coat them all in the aromatic goodness from the pot. Let them sauté for about 5 minutes to bring out their natural flavors.
- Add the vegetable broth, ensuring all vegetables are submerged. Bring the mixture to a gentle boil, then reduce the heat to let it simmer for 20-25 minutes, or until the carrots and potatoes are tender.
- Use an immersion blender to puree the soup directly in the pot until smooth. If you don’t have an immersion blender, carefully transfer the soup in batches to a stand blender. Add coconut milk and blend until you reach a creamy consistency.
- Stir in salt and pepper to taste, adjusting based on your preference. If the soup is too thick, you can always add a splash of water or broth to reach your desired consistency.
- Ladle the soup into bowls and sprinkle with fresh herbs for a touch of color and freshness.
Notes
This soup can be customized with various garnishes and additional ingredients for a personal touch.
Nutrition
- Serving Size: 1 serving
- Calories: 180
- Sugar: 5g
- Sodium: 400mg
- Fat: 9g
- Saturated Fat: 7g
- Unsaturated Fat: 2g
- Trans Fat: 0g
- Carbohydrates: 22g
- Fiber: 4g
- Protein: 4g
- Cholesterol: 0mg
Keywords: vegan soup, carrot potato soup, winter recipes
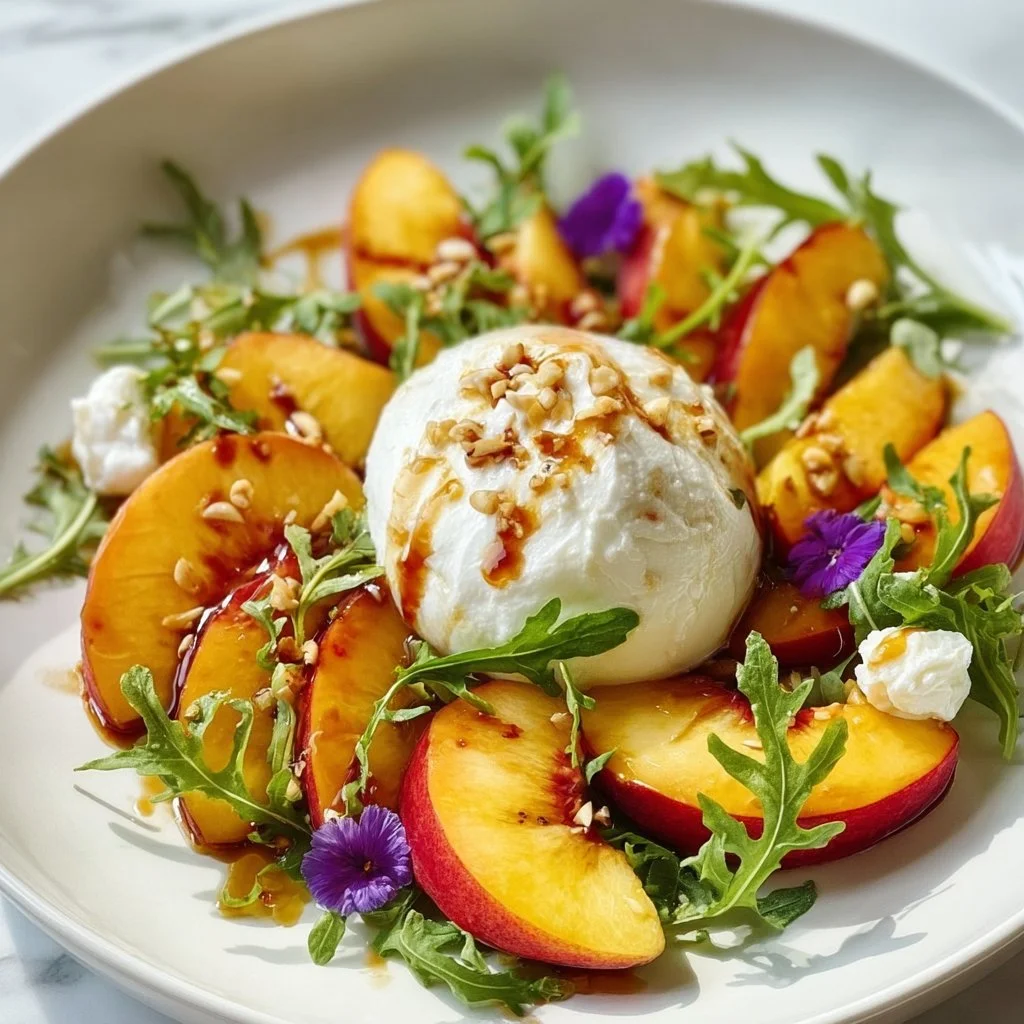
Peach Burrata Salad
A Summer Delight: Peach Burrata Salad Recipe
Hello, lovely food lovers! Today, we’re diving into a dish that beautifully captures the essence of summer—the Peach Burrata Salad. This is not just a salad; it’s a celebration of vibrant flavors and textures that dance together to create something truly special. If you’re ready to impress your guests or simply treat yourself to a delightful meal, grab those aprons and let’s get cooking!
Introduction
There’s just something magical about peaches in the summer. Their sweet, juicy goodness brings a burst of sunshine to any dish. And when combined with the creamy decadence of burrata, you’ve got a match made in culinary heaven! This Peach Burrata Salad is a feast for the senses—visually stunning, texturally pleasing, and oh-so-delicious. It’s perfect for a light summer lunch, a fancy dinner party, or even as a side for your next barbecue.
Imagine biting into a perfectly ripe peach, followed by the luscious creaminess of burrata melting in your mouth, complemented by the peppery bite of arugula and the crunch of toasted almonds. It’s a delight that will leave your taste buds dancing!
As I reflect on my cooking journey, I’m reminded of those sun-kissed summer days spent gathering around the table with family and friends, enjoying nature’s bounty. Each bite of this salad is a reminder of those warm days, moments filled with laughter, and the joy of sharing meals. So, let’s get started, and I’ll walk you through how to create this delightful dish that’s sure to become a summertime favorite!
Personal Story
I’ll never forget the first time I tasted a peach burrata salad. It was on a warm July afternoon at a friend’s garden party, the sun filtering through the leaves of the trees above. We sat at a long table draped in a linen cloth, and the air buzzed with laughter and the smell of grilled veggies. My friend served this stunning salad as a starter, and I was immediately taken by its beauty.
The juicy peaches gleamed under the sun, and the burrata looked almost like a cloud on the plate. One bite, and I was hooked! The harmonious blend of flavors was so delightful that I knew I had to recreate it in my own kitchen. Little did I know back then that it would soon become a staple on my summer menus. It’s funny how certain dishes can transport you back to a moment in time, isn’t it? That first experience fuels my passion for cooking even more, inspiring me to share this recipe with you all.
Ingredients
Here’s what you’ll need to whip up this incredible Peach Burrata Salad:
-
Fresh Burrata Cheese
- The star of the show! Burrata is creamy and rich, offering that perfect melt-in-your-mouth texture. If you can’t find burrata, fresh mozzarella works as a great substitute—just look for the soft kind that oozes a little when you slice into it.
-
Ripe Peaches
- Go for juicy, peachy perfection! In-season peaches are sweet and flavorful. If you can’t find peaches, nectarines can serve as a fantastic alternative—they provide a similar flavor and texture.
-
Arugula
- This peppery green adds a layer of complexity to the dish. If arugula isn’t your thing, feel free to swap in baby spinach or mixed greens for a milder taste.
-
Sliced Almonds
- These add a lovely crunch and nuttiness. You can toast them for an extra depth of flavor, or substitute with walnuts or pecans for a different nutty profile.
-
Balsamic Glaze
- A drizzle of balsamic glaze ties everything together with its sweet and tangy notes. If you don’t have glaze, a splash of balsamic vinegar will work too; just consider adding a touch of honey to mimic the sweetness of the glaze.
-
Olive Oil
- A quality olive oil enhances the salad with its rich flavor. Use extra virgin for the best results!
-
Salt and Pepper
- These simple seasonings elevate all the flavors in your dish. Freshly cracked black pepper is best, and don’t shy away from a pinch of sea salt.
Now that we have our ingredients ready, let’s move on to the fun part—cooking!
Step-by-Step Instructions
-
Prep the Ingredients:
- Start by washing and drying your fresh produce. Slice your peaches into wedges, making sure to remove the pit. If they’re ripe enough, they should slice easily. Set them aside!
- Tear your burrata gently into smaller pieces, letting it rest on a plate. This will make it easier to distribute throughout the salad.
-
Toast the Almonds:
- In a dry skillet over medium heat, add the sliced almonds. Toast them for about 2-3 minutes until they’re golden brown and fragrant. Keep an eye on them; nuts can go from beautifully toasted to burnt in seconds! Once toasted, remove them from the pan and set aside to cool.
-
Assemble the Base:
- Grab a large serving platter or individual plates if you prefer to serve them separately. Begin by laying down a generous handful of arugula as your base. Its peppery taste will contrast beautifully with the sweetness of the peaches.
-
Add the Peaches:
- Arrange the peach slices aesthetically over the arugula. Play around with the layout—this is your edible artwork!
-
Layer on the Burrata:
- Now it’s time to place the burrata. Nestle the creamy pieces throughout the salad. The burrata should look like fluffy clouds on a beautiful summer day.
-
Drizzle with Olive Oil and Balsamic Glaze:
- Take your extra virgin olive oil and drizzle it generously over the salad, followed by the balsamic glaze. Aim for an even coating; this will enhance each bite!
-
Season to Perfection:
- Finally, sprinkle a pinch of salt and freshly cracked black pepper over the entire salad. This step is crucial for bringing out the flavors of the ingredients.
-
Add the Crunch:
- Toss those toasted almonds on top for that satisfying crunch! They’ll add texture and a nutty flavor that perfectly complements the creaminess of the burrata and the sweetness of the peaches.
-
Serve Immediately:
- This salad is best enjoyed fresh. Serve it immediately to savor the glorious combination of flavors!
Serving Suggestions
To plate, serve your salad in a large bowl or on individual plates for a more elegant presentation. Finish with a final drizzle of balsamic glaze and a light sprinkle of salt. If you want to take it up a notch, consider pairing your Peach Burrata Salad with a crisp white wine, like a Sauvignon Blanc, which will perfectly complement the flavors of this dish.
Recipe Variations
This Peach Burrata Salad is incredibly versatile! Here are a few creative twists you can try:
-
Herb Infusion: Add fresh basil or mint for a fragrant touch. This pair wonderfully with the peaches and enhance the freshness of the salad.
-
Add Some Protein: Grilled chicken or shrimp can turn this salad into a heartier meal. Just season your protein well and grill it before slicing it and adding to your salad.
-
Stone Fruit Medley: Play with different fruits! Substitute peaches with plums, apricots, or cherries for a delightful flavor surprise.
-
Vegan Version: Swap burrata for extra-firm tofu marinated in a balsamic reduction to maintain the creamy texture without the cheese.
-
Spicy Kick: Add a touch of chili flakes or slices of jalapeño for a spicy kick that melds beautifully with the sweet and creamy elements.
Chef’s Notes
This Peach Burrata Salad is one of those recipes that’s simple yet profound in flavor. What I love most about it is how it evolves with the seasons. In the fall, I might swap the peaches for roasted butternut squash or apples. As for the burrata, I’ve tried adding a sprinkle of truffle oil on special occasions, which really elevates the whole experience. Cooking should be an adventure—don’t be afraid to make this salad your own!
And let me tell you a little kitchen story—once, I attempted to make this salad for a picnic and accidentally brought balsamic vinegar instead of glaze. I panicked when I realized this at the park! But guess what? It still turned out delicious! Sometimes, mistakes lead to unexpected flavor discoveries, and that’s the beauty of cooking.
FAQs and Troubleshooting
1. The peaches aren’t sweet enough. What can I do?
- If your peaches aren’t as sweet as you’d hoped, consider drizzling a little honey over them to enhance their sweetness.
2. What if I can’t find burrata?
- No worries! Fresh mozzarella or even ricotta can work as substitutes. Just aim for a creamy texture to balance the salad.
3. Can I make this salad ahead of time?
- To maintain freshness, I recommend assembling it just before serving. Prep the ingredients in advance and toss them together when you’re ready!
4. What’s the best way to store leftovers?
- If you have any leftovers, store the salad components separately in airtight containers. Combine when you’re ready to enjoy again, but keep in mind that the textures may vary a bit after refrigeration.
Nutritional Info
For those keeping an eye on their nutritional intake, this salad is packed with nutrients! Each serving provides a good source of vitamins A and C, healthy fats from the olive oil and almonds, and protein from the burrata. The fresh produce also contributes fiber, making it a light yet satisfying option.
And there you have it—my delightful Peach Burrata Salad recipe! I hope you enjoy making it as much as I do. It’s a dish that brings together the beauty of seasonal ingredients and perfect for sharing with loved ones. Happy cooking! 🍑✨
PrintPeach Burrata Salad

A vibrant summer salad featuring ripe peaches, creamy burrata, peppery arugula, and toasted almonds drizzled with balsamic glaze.
- Prep Time: 15 minutes
- Cook Time: 5 minutes
- Total Time: 20 minutes
- Yield: 4 servings 1x
- Category: Salad
- Method: No Cooking
- Cuisine: American
- Diet: Vegetarian
Ingredients
- 8 oz Fresh Burrata Cheese
- 2 Ripe Peaches, sliced
- 4 cups Arugula
- 1/2 cup Sliced Almonds
- 2 tbsp Balsamic Glaze
- 2 tbsp Olive Oil
- Salt and Pepper to taste
Instructions
- Prep the ingredients: Wash and dry your fresh produce. Slice your peaches into wedges, removing the pit. Tear the burrata into smaller pieces.
- Toast the almonds: In a dry skillet over medium heat, toast the sliced almonds for 2-3 minutes until golden brown.
- Assemble the base: Lay down a generous handful of arugula on a serving platter.
- Add the peaches: Arrange the peach slices aesthetically over the arugula.
- Layer on the burrata: Place the burrata pieces throughout the salad.
- Drizzle with olive oil and balsamic glaze.
- Season to perfection: Sprinkle salt and freshly cracked black pepper over the salad.
- Add the crunch: Toss the toasted almonds on top.
- Serve immediately to enjoy fresh.
Notes
This salad is best enjoyed fresh. Consider pairing with a crisp white wine like Sauvignon Blanc.
Nutrition
- Serving Size: 1 serving
- Calories: 300
- Sugar: 10g
- Sodium: 200mg
- Fat: 18g
- Saturated Fat: 5g
- Unsaturated Fat: 10g
- Trans Fat: 0g
- Carbohydrates: 30g
- Fiber: 4g
- Protein: 8g
- Cholesterol: 25mg
Keywords: peach salad, burrata salad, summer salad, vegetarian salad, healthy salad
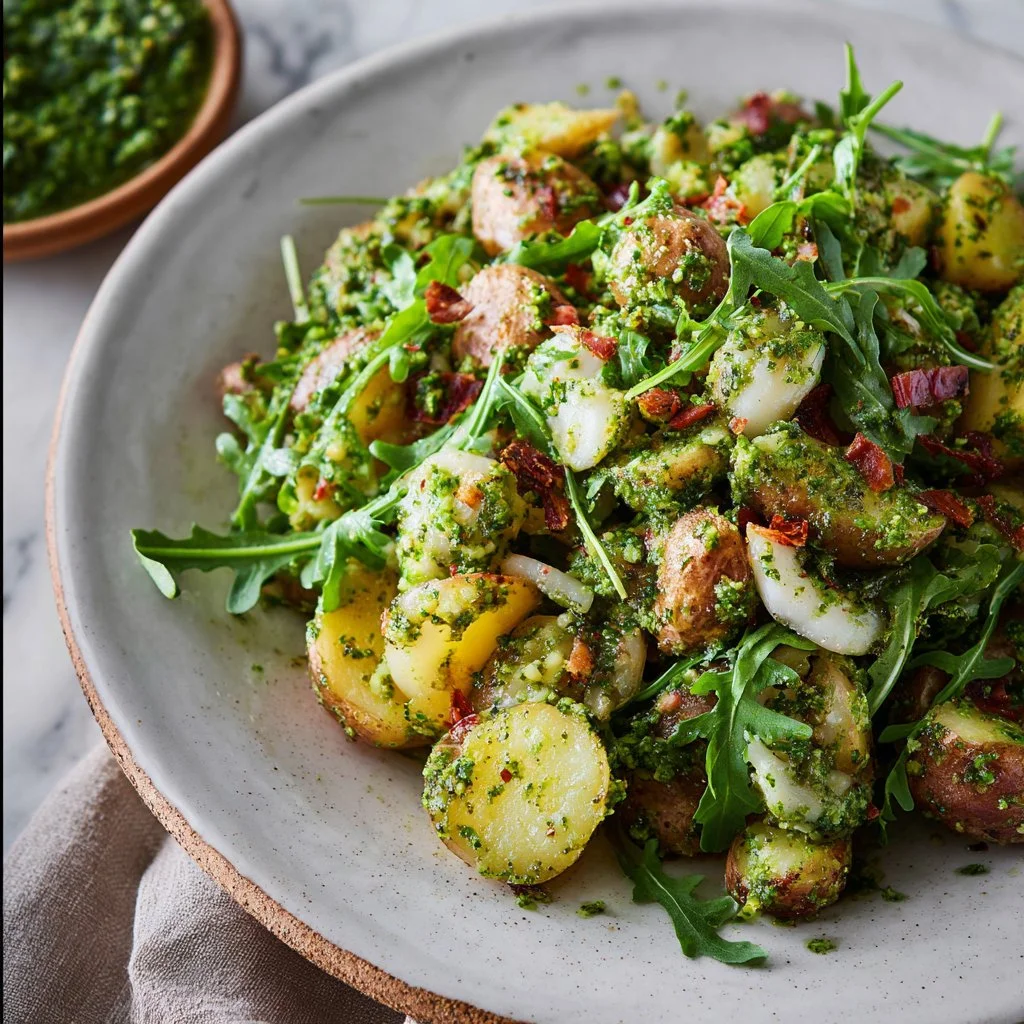
Arugula Pesto Potato Salad
Arugula Pesto Potato Salad: A Fresh Take on a Classic Dish
Hey there, kitchen enthusiasts! Today, we’re diving into a vibrant twist on an old favorite: Arugula Pesto Potato Salad. If you’re anything like me, potato salad has a special place in your heart. It’s versatile, comforting, and practically a staple at gatherings, barbecues, and family reunions. But let’s be honest: nobody wants the same ol’ mayo-laden version every time!
That’s where this fabulous arugula pesto comes in. With its peppery, fresh flavor, this bright green sauce will elevate your potato salad game to a whole new level. The best part? It’s uncomplicated enough to whip up on a weeknight yet elegant enough to wow your dinner guests. So, grab your apron and let’s get cooking!
In this blog post, I’ll share a delightful personal memory tied to this dish, guide you through the ingredients, and offer step-by-step instructions to ensure you nail this recipe. Plus, I’ll sprinkle in some serving suggestions and variations to help you tailor it to your taste. Let’s gather around the table and make some delicious food together!
Personal Story
I remember the first time I tried arugula pesto. It was a summer BBQ at my best friend’s house, and the sky was a perfect blue, the kind that makes everything feel brighter. She had spent the whole afternoon preparing dishes, turning her backyard into a haven of deliciousness. The moment I tasted this unique pesto, I was hooked. It was a little spicy, a little nutty, and paired perfectly with her grilled veggies and, of course, the potato salad she had made on a whim.
That day, we laughed until our sides hurt, shared stories under the warm sun, and of course, tasted everything on the table. The memory of that meal was sparked by a simple yet transformative ingredient – arugula. It reminded me of how food could create connections, evoke nostalgia, and even foster creativity in the kitchen. Fast forward to today, and I find joy in recreating that experience by sharing my version with all of you!
Ingredients
Key Ingredients for Arugula Pesto Potato Salad
-
2 lbs "pee wee" potatoes, halved
These small, tender potatoes cook quickly and have a creamy texture. You can substitute with fingerling or baby Yukon gold potatoes if you can’t find pee wees. -
Olive oil
A rich source of healthy fats, olive oil adds depth and flavor. Extra virgin olive oil is preferred for its robust taste, but a light olive oil works too. -
Kosher salt
Essential for enhancing the flavor in cooking. If you only have table salt, use about half the amount since it’s finer. -
Freshly cracked black pepper
A sprinkle of this adds a hint of warmth and complexity. Use freshly cracked for the best flavor! -
3 red spring onions, thinly sliced
These onions bring a mild sweetness and vibrant color. Chives or green onions are excellent substitutes if you can’t find red spring onions. -
2 cups packed arugula
This leafy green is peppery and full of nutrients. If you’re not a fan, spinach or kale can be blended in for a milder taste. -
6 radishes, thinly shaved on a mandolin
Radishes contribute crunch and earthiness. If you don’t have radishes, sliced cucumbers can add a different but refreshing crunch. -
1 cup packed basil leaves
Fresh basil adds a lovely aroma and flavor to the pesto. Feel free to mix in some parsley for a twist! -
1 small handful chives
They add a delicate onion flavor. If you’re out of chives, feel free to increase the amount of spring onions. -
2 garlic cloves, chopped
Garlic is essential for depth; it elevates the pesto. If you prefer a milder taste, you can roast the garlic in olive oil before adding it to the mix. -
⅓ cup toasted pine nuts
Pine nuts provide rich nuttiness and healthy fats. If you have a nut allergy, sunflower seeds or pumpkin seeds can work in a pinch. -
⅓ cup grated pecorino romano cheese
This cheese brings a sharp, salty kick. Parmesan can be used for a similar flavor. -
½ tsp lemon zest
Adding zest brightens the flavor of the pesto. Make sure to zest the lemon before juicing! -
2 tbsp lemon juice
Freshly squeezed lemon juice balances creamy and savory flavors beautifully. -
1 tbsp honey
A hint of sweetness smooths out the pesto’s flavors. Feel free to substitute with maple syrup for a vegan option! -
¾ cup extra virgin olive oil
This is the base for your pesto, providing richness and body.
Step-by-Step Instructions
Cooking the Potatoes
-
Boil the Potatoes
Fill a large pot with salted water and bring it to a boil. Add the halved pee wee potatoes and cook until fork-tender, about 15-20 minutes. Make sure to keep an eye on them! You want them soft but not mushy.Tip: To ensure even cooking, start with potatoes that are all similar in size.
-
Drain and Cool
Once tender, drain the potatoes in a colander and let them cool for about 10 minutes. Drizzling them with a little olive oil while they cool will prevent them from sticking together.
Making the Arugula Pesto
-
Blend the Pesto
In a food processor, combine 2 cups of arugula, basil leaves, chives, garlic, toasted pine nuts, and grated pecorino Romano cheese. Drizzle in the lemon juice and honey, and start adding olive oil. Blend until smooth but still slightly chunky for texture.Chef Hack: If your pesto is too thick, you can add more olive oil or a splash of water to achieve your desired consistency.
-
Season
Once blended, add the lemon zest, kosher salt, and freshly cracked black pepper to taste. Blend again briefly to combine. Give it a taste test—you want that perfect harmony of flavors!
Assembling the Salad
-
Combine Ingredients
In a large mixing bowl, gently toss the cooled potatoes with the arugula pesto until they’re nicely coated. Add in the thinly sliced red spring onions and shaved radishes.Tip: Don’t toss too vigorously; you want to keep the potatoes intact!
-
Final Adjustments
Take a moment to taste the salad once more. Add additional salt, pepper, or lemon juice to brighten things up if needed.
Serving the Salad
-
Plate
Transfer the potato salad to a serving dish. Make it visually appealing by artfully layering or arranging the salad, allowing the rainbow of colors to shine through.Presentation Tip: Garnish with additional arugula, basil leaves, or a sprinkle of pecorino cheese for that "wow" factor!
Recipe Variations
- Caprese Twist: Add cherry tomatoes and mozzarella balls for a Caprese-inspired salad!
- Vegan Twist: Substitute the cheese with nutritional yeast and the honey with agave syrup.
- Spicy Kick: Include red pepper flakes in the pesto for a spicy surprise!
- Mediterranean Flair: Toss in some marinated olives and roasted red peppers for a robust flavor.
- Herby Variation: Experiment with different herbs like dill or mint for a unique twist on flavor.
Chef’s Notes
This Arugula Pesto Potato Salad has become a staple in my kitchen, and I love how it evolves with the seasons. Sometimes, I swap in seasonal veggies to keep it fresh—just recently, I tossed in some blanched asparagus and snap peas! Also, remember that the pesto can be made ahead of time and stored in the fridge, so it’s perfect for meal prep.
Every time I serve this dish, I get stories from friends about their potato salad memories. I think it’s fascinating how food can stir nostalgia and even create new memories around the table!
FAQs and Troubleshooting
-
What if my potatoes are mushy?
If you accidentally over-boil the potatoes, try using them in a creamy mashed potato recipe instead! -
Can I make the pesto ahead of time?
Absolutely! Pesto can be stored in the fridge for up to a week. Just make sure to cover it with a thin layer of olive oil to avoid discoloration. -
Can I freeze the pesto?
Yes, you can freeze arugula pesto! Ice cube trays are great for portioning it out—just thaw in the fridge when you want to use it! -
Why is my pesto turning brown?
This often happens when it’s exposed to air. Be sure to store it airtight, and if some browning occurs, it’s still edible, but you can add a splash of lemon juice to brighten it up again.
Nutritional Info
This Arugula Pesto Potato Salad is packed with fresh greens, healthy fats, and earthy flavors—all while offering a delicious balance of carbs and nutrients. You can expect approximately:
- Calories: 350 per serving (1 cup)
- Protein: 8g
- Carbohydrates: 30g
- Fat: 24g
Whether you’re in need of an easy weeknight meal or an impressive dish for entertaining, this Arugula Pesto Potato Salad will not disappoint. Tie on your apron, enjoy your time in the kitchen, and let’s make beautiful memories—one delicious plate at a time!
PrintArugula Pesto Potato Salad
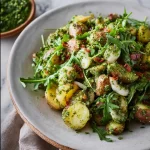
A vibrant twist on a classic potato salad featuring a peppery arugula pesto that elevates traditional flavors.
- Prep Time: 15 minutes
- Cook Time: 20 minutes
- Total Time: 35 minutes
- Yield: 4 servings 1x
- Category: Side Dish
- Method: Boiling and Blending
- Cuisine: Mediterranean
- Diet: Vegetarian
Ingredients
- 2 lbs “pee wee” potatoes, halved
- ⅓ cup olive oil
- 1 tsp kosher salt
- ½ tsp freshly cracked black pepper
- 3 red spring onions, thinly sliced
- 2 cups packed arugula
- 6 radishes, thinly shaved
- 1 cup packed basil leaves
- 1 small handful chives
- 2 garlic cloves, chopped
- ⅓ cup toasted pine nuts
- ⅓ cup grated pecorino romano cheese
- ½ tsp lemon zest
- 2 tbsp lemon juice
- 1 tbsp honey
- ¾ cup extra virgin olive oil
Instructions
- Boil the potatoes in salted water until fork-tender, about 15-20 minutes.
- Drain the potatoes and let them cool for about 10 minutes.
- Blend the pesto ingredients: arugula, basil, chives, garlic, pine nuts, and cheese with lemon juice and honey. Gradually add olive oil until smooth.
- Season the pesto with lemon zest, salt, and pepper. Blend briefly to combine.
- Combine the cooled potatoes with the arugula pesto, spring onions, and radishes in a large bowl.
- Final adjustments with salt, pepper, or lemon juice to taste.
- Plate the salad in a serving dish, garnishing as desired.
Notes
Pesto can be made ahead of time. Keep it in the fridge covered with olive oil to prevent discoloration. Customize with seasonal veggies and herbs!
Nutrition
- Serving Size: 1 serving
- Calories: 350
- Sugar: 5g
- Sodium: 400mg
- Fat: 24g
- Saturated Fat: 4g
- Unsaturated Fat: 16g
- Trans Fat: 0g
- Carbohydrates: 30g
- Fiber: 4g
- Protein: 8g
- Cholesterol: 10mg
Keywords: potato salad, pesto, arugula, summer recipes, vegetarian side dish
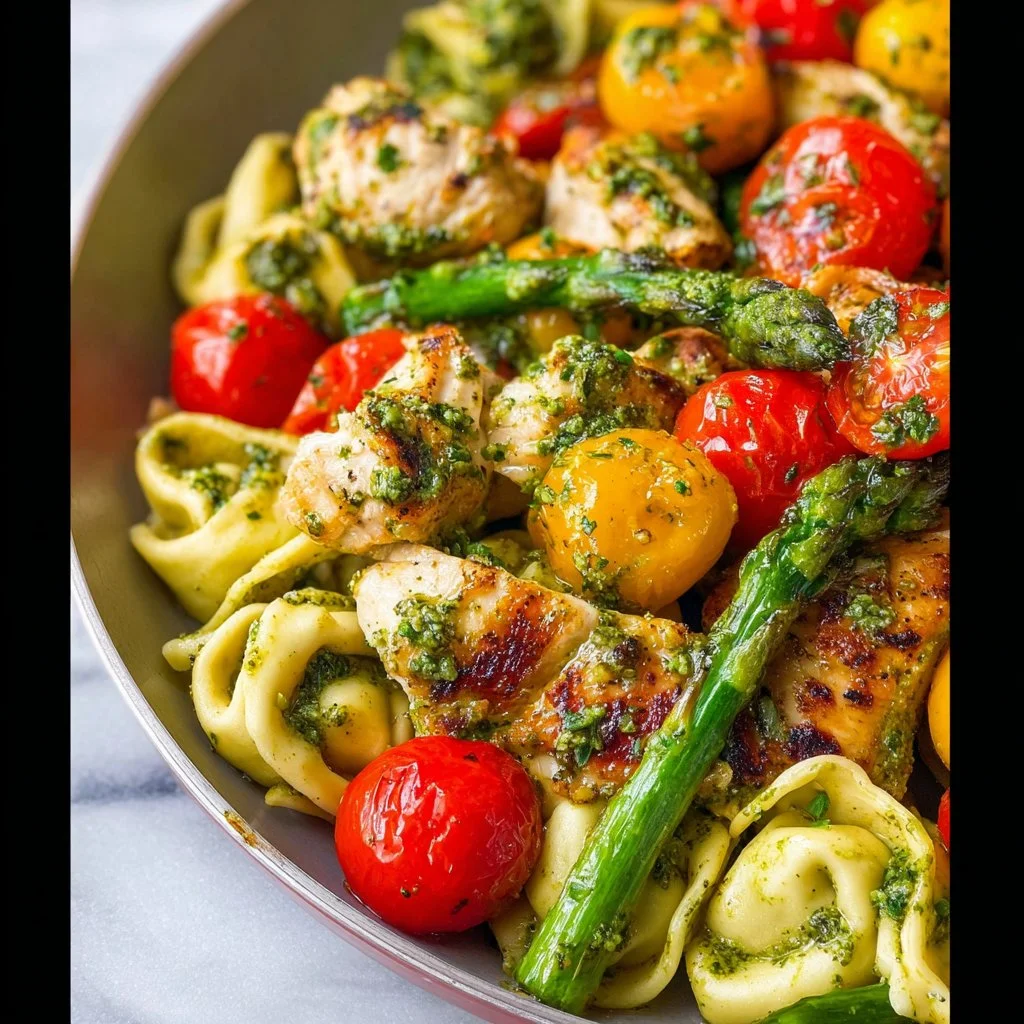
One-Pan Pesto Chicken, Tortellini, and Veggies
One-Pan Pesto Chicken, Tortellini, and Veggies: A Delightful Dinner Solution
Ah, the joy of one-pan meals! They have a special place in my heart (and my kitchen) — where flavors harmonize, and cleanup is a breeze. If you’re anything like me, you appreciate the simplicity of a dish that can be whipped up without sending a mountain of cookware to the sink. Today, I’ve got a fantastic recipe that combines juicy chicken, tender tortellini, and vibrant veggies all bathed in that luscious, bright green goodness called pesto. Welcome to my One-Pan Pesto Chicken, Tortellini, and Veggies!
This dish is not only a feast for the eyes but also a delightful explosion of flavors sure to please even the pickiest of eaters. Now, imagine golden, crispy chicken nestled beside plump tortellini that have soaked up the pesto’s aromatic essence, paired with crisp asparagus and sweet cherry tomatoes. This truly is comfort food at its finest!
When you gather around your dinner table with a steaming dish of this pesto marvel, it paints the perfect picture of warmth and togetherness. Plus, I adore how it can be made any night of the week. Quick, easy, and oh-so-satisfying—what more could you ask for? So, grab your apron, and let’s dive into this deliciously simple recipe that’s guaranteed to become a family favorite.
Personal Story
I still remember the first time I made a pesto dish that truly knocked everyone’s socks off. It was a warm summer evening, and my friends had gathered at my little apartment. The kitchen was abuzz with laughter and the clinking of glasses. I wanted to impress them but also keep it easy for myself. So, I pulled out my trusty jar of store-bought pesto, a couple of chicken breasts, some odds and ends from the veggie drawer, and – voilà! Within mere minutes, my little kitchen transformed into an aromatic haven.
As the chicken sizzled away and the tortellini danced in the pot, I could tell my guests were intrigued by the enticing smells filling the air. By the time we sat down together, laughter and conversation floated around the table like a warm embrace. That evening, surrounded by vibrant flavors and cherished friends, I knew I had found my groove. From that moment, one-pan meals like this one became my go-to for gatherings, those time-crunched weekday dinners, and everything in between. This is a dish that encapsulates the idea that cooking can be both fun and fulfilling—just like the memories we create around the table.
Ingredients
Here’s what you need to bring this delightful dish to life:
-
2 chicken breasts: The star of the show! Opt for boneless and skinless for quick cooking. If you’re looking for a leaner option, turkey cutlets work wonderfully too.
-
1 cup tortellini: Chewy, pasta-filled goodness! Fresh tortellini takes just a few minutes to cook, while frozen varieties hold up great, too. You could even use any other pasta you have on hand if needed.
-
1 cup asparagus, chopped: Adds a fresh crunch and vibrant color. If asparagus isn’t in season, feel free to swap it out with green beans or broccoli.
-
1 cup cherry tomatoes, halved: These sweet gems burst with flavor when cooked. If they’re not available, any kind of diced tomato will do, though the sweetness is lovely.
-
1/4 cup pesto: The hero that ties everything together! You can use store-bought for convenience or whip up a homemade version with basil, garlic, nuts, and olive oil.
-
2 tablespoons olive oil: This adds a lovely richness. Feel free to replace with melted butter or avocado oil for a different flavor profile.
-
Salt and pepper to taste: Simple yet effective! Seasoning properly is key to elevating the whole dish.
Step-by-Step Instructions
Get ready to unleash your inner chef! Here’s how to make this One-Pan Pesto Chicken, Tortellini, and Veggies:
Step 1: A Little Prep Work
Start by prepping your ingredients. Chop the asparagus into bite-sized pieces and halve the cherry tomatoes. Give your chicken breasts a light pat down with a paper towel—this helps to get that golden brown crust we all adore. Season both sides generously with salt and pepper.
Chef Tip: Always season your proteins! It’s an easy way to infuse flavor from the very start.
Step 2: Searing the Chicken
In a large skillet, heat the olive oil over medium-high heat. Once hot (it should shimmer), add the seasoned chicken breasts. Sear them for about 5-6 minutes on each side until golden brown and cooked through. If you’re not sure they’re done, a meat thermometer should read 165°F (74°C).
Chef Hack: To check for doneness without a thermometer, cut into one breast slightly—it should be white, not pink. Don’t overcook, though, or you’ll have dry chicken!
Step 3: Cook the Tortellini
While the chicken is cooking, bring a pot of salted water to a boil. Add your tortellini and cook according to package instructions (usually 2-3 minutes for fresh and about 4-5 for frozen). Once cooked, drain and set aside.
Step 4: Add the Veggies
After removing the chicken from the skillet, add all your chopped asparagus to the same pan, along with the halved cherry tomatoes. Sauté for about 4-5 minutes until tender, yet still crisp. This is what adds that delightful crunch!
Chef Insight: Sautéing veggies in the same pan keeps all those tasty chicken juices, making your meal even more flavorful.
Step 5: Mix It All Together
Once the veggies are just tender, it’s time to incorporate the chicken back into the mix. Slice the chicken into strips and add it back to the skillet, along with your cooked tortellini. Pour in the pesto, and toss everything gently until well-coated. Let it simmer for a minute or two to warm through.
Step 6: Plating Time
Now for the fun part! Serve this gorgeous mixture straight from the pan or plate it up in individual bowls. Garnish with some more fresh basil or a sprinkle of grated Parmesan if you like.
Chef Tip: An extra drizzle of olive oil or a squeeze of lemon juice can brighten the dish even further!
Serving Suggestions
This One-Pan Pesto Chicken, Tortellini, and Veggies is as beautiful to look at as it is to eat. Serve it in a big family-style platter for that communal feel or in individual bowls for a fun twist. Place a sprinkle of fresh basil on top, and get ready to impress!
Recipe Variations
Feeling adventurous? Here are a few ways you can make this dish your own:
-
Pesto Variations: Switch out basil pesto for sun-dried tomato pesto or even a spicy arugula pesto.
-
Different Proteins: Swap chicken for shrimp or diced tofu for a vegetarian option.
-
Zucchini Noodles: For a low-carb option, use spiralized zucchini instead of tortellini.
-
Extra Veggies: Incorporate bell peppers, spinach, or even kale for added nutrition and flavor.
-
Cheesy Twist: Mix in some mozzarella or goat cheese before serving for a creamy, dreamy texture!
Chef’s Notes
This dish has become a staple in my home, often evolving as I play with available ingredients. I remember one particularly rainy evening when I had three grocery bags full of assorted veggies that needed using. I threw them into the pan, and what emerged was a colorful amalgamation that even surprised me! The beauty of one-pan cooking is that it allows for creativity without any rigid rules. Cooking should be a joyful experience rather than a stressful chore.
FAQs and Troubleshooting
1. What if my chicken is still pink inside?
Don’t panic! It might need a bit more time on the heat. Return it to the pan, cover it, and let it cook for just a few more minutes. A meat thermometer can also help if you’re unsure.
2. How do I store leftover pasta?
Store the leftovers in an airtight container in the fridge for up to 3 days. It reheats best in a skillet over medium heat with a splash of olive oil.
3. Can I use dry tortellini?
Absolutely! Just cook it according to the package instructions before adding it to the pan. It may take a bit longer, so plan accordingly.
4. My tortellini is sticking together; why?
This can happen if they’re overcooked or if they didn’t have enough water when boiling. Make sure to stir them gently while cooking and drain immediately after.
Nutritional Info
While I always advocate for enjoying food in moderation, here’s a rough estimate:
- Calories per Serving: Approximately 480
- Protein: 35g
- Carbs: 45g
- Fat: 18g
Keep in mind that these numbers can vary based on ingredient brands and serving sizes!
And there you have it—your new go-to recipe that brings joy to mealtime without the fuss! This One-Pan Pesto Chicken, Tortellini, and Veggies is as easy to make as it is to love. Cooking doesn’t have to be complicated, and with this dish, you’ll wow your guests (or yourself!) while enjoying the beauty of simplicity. So, let’s keep those aprons tied and hearts open to the warmth of home-cooked meals. Happy cooking! 🍽️✨
PrintOne-Pan Pesto Chicken, Tortellini, and Veggies
A delightful one-pan meal featuring juicy chicken, tender tortellini, and vibrant veggies all bathed in delicious pesto.
- Prep Time: 15 minutes
- Cook Time: 30 minutes
- Total Time: 45 minutes
- Yield: 4 servings 1x
- Category: Main Course
- Method: Sautéing
- Cuisine: Italian
- Diet: None specified
Ingredients
- 2 chicken breasts, boneless and skinless
- 1 cup tortellini
- 1 cup asparagus, chopped
- 1 cup cherry tomatoes, halved
- 1/4 cup pesto
- 2 tablespoons olive oil
- Salt and pepper to taste
Instructions
- Prep your ingredients by chopping the asparagus and halving the cherry tomatoes. Season the chicken breasts with salt and pepper.
- Heat the olive oil in a large skillet over medium-high heat and sear the chicken for about 5-6 minutes on each side.
- Boil a pot of salted water and cook the tortellini according to package instructions, then drain.
- Add chopped asparagus and halved cherry tomatoes to the skillet and sauté for about 4-5 minutes.
- Incorporate the cooked tortellini and sliced chicken back into the skillet, add pesto, and toss gently.
- Serve from the pan or plate it with a garnish of fresh basil.
Notes
Extra flavor can be added with a drizzle of olive oil or a squeeze of lemon juice before serving.
Nutrition
- Serving Size: 1 serving
- Calories: 480
- Sugar: 5g
- Sodium: 600mg
- Fat: 18g
- Saturated Fat: 3g
- Unsaturated Fat: 10g
- Trans Fat: 0g
- Carbohydrates: 45g
- Fiber: 3g
- Protein: 35g
- Cholesterol: 70mg
Keywords: one-pan meal, pesto chicken, easy dinner, tortellini recipe
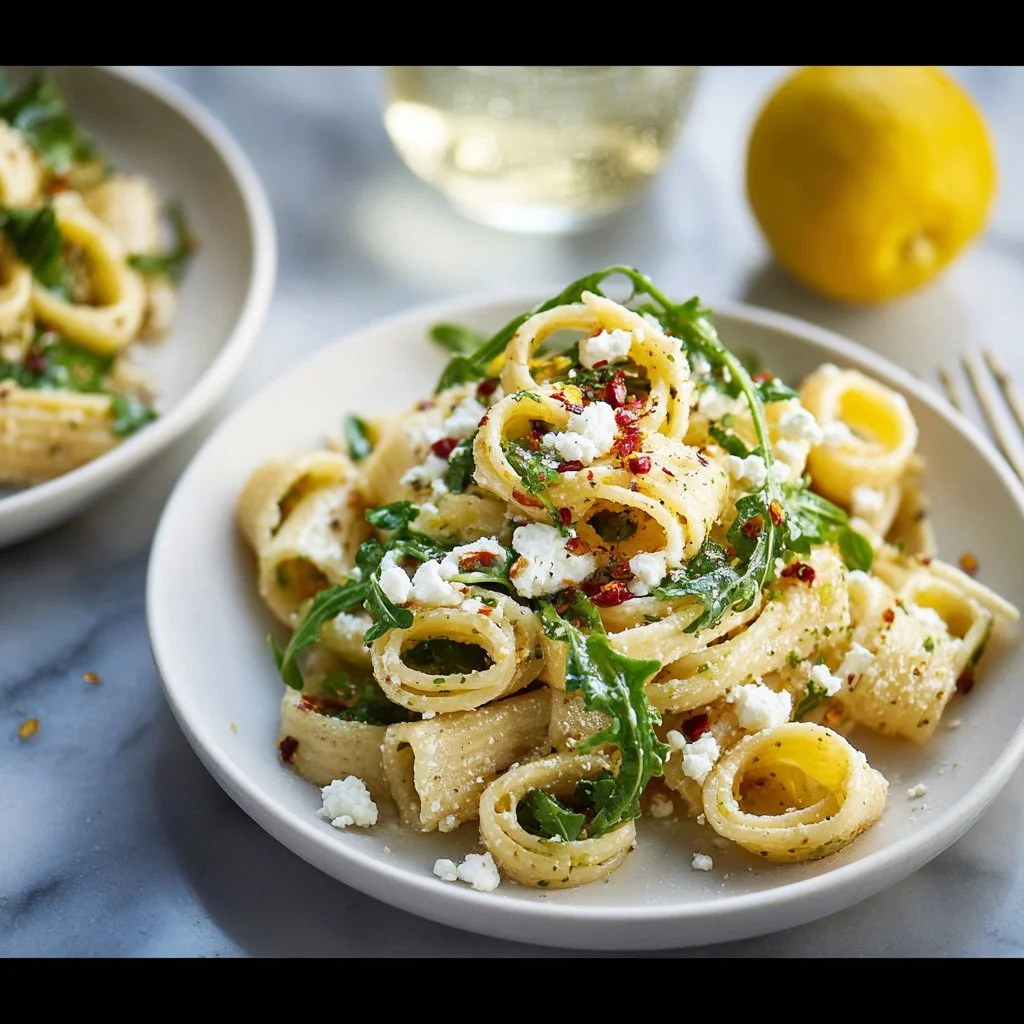
Lemon Ricotta Pasta With Arugula
# Lemon Ricotta Pasta with Arugula: A Bright and Creamy Delight

## Introduction

Ah, pasta! Is there anything more comforting and delightful? It’s a dish that brings people together, whether it’s a cozy family dinner on a weeknight or an elegant dinner party. Today, I am thrilled to share with you my recipe for **Lemon Ricotta Pasta with Arugula** — a dish that perfectly fuses brightness and creaminess while keeping things beautifully simple.

I always love to create recipes that elevate everyday meals, and this one is no exception. Imagine buttery, rich ricotta paired with the zesty brightness of lemon and the peppery flair of arugula — it's like a summer picnic on your plate! Plus, this dish comes together in about 20 minutes, so it's perfect for those busy weeknights when you still want to prepare something special.

One of my favorite things about cooking is that it’s all about sharing stories and experiences. This pasta is rooted in both nostalgia and innovation. The simplicity of the ingredients allows for endless variations, making it an ever-evolving classic in my kitchen.

Let’s dive into the world of Lemon Ricotta Pasta with Arugula, and I promise you’ll be feeling like a kitchen superstar in no time!

## Personal Story

I can still remember the first time I made this pasta dish. I was hosting a small gathering for friends on a sunny Saturday afternoon, and I wanted to create a meal that felt just as light and refreshing as the weather outside. As I grabbed ingredients from my fridge, I spotted a tub of creamy ricotta cheese and a few lemons I had been saving for a special occasion.

That inspired the entire meal! With a pot of boiling water and a few quick strokes, the magic began. As my friends arrived, the aroma of lemon mingling with fresh herbs filled my kitchen. That gathering was unforgettable—not just for the food but for the laughter, stories, and memories we shared. Since that day, Lemon Ricotta Pasta has become a go-to recipe in my household, especially for warm evenings when the sun is setting and good company is nearby.

## Ingredients

To make this vibrant dish, you’ll need the following ingredients:

- **1 lb short pasta (like penne or rigatoni)**: These shapes hold on to the creamy sauce beautifully. If you're gluten-free, feel free to substitute with your favorite gluten-free pasta.

- **1 cup whole milk ricotta cheese**: The star of this dish! Opt for whole milk for that rich, creaminess, but part-skim works if you're watching your calories.

- **1 cup finely grated Parmesan or Pecorino**: Adds a savory depth. If you’re dairy-free, you can use nutritional yeast for a cheesy flavor.

- **1 tablespoon freshly grated lemon zest**: This brightens up the dish and provides a delightful citrus aroma.

- **¼ cup fresh lemon juice from 1-2 lemons, plus extra wedges for serving**: Fresh is key here! Bottled lemon juice can't quite capture that bright flavor.

- **2 cups arugula**: Adding this peppery green brings a fresh, vibrant finish. Spinach can work as a mild substitute if you’re not a fan of the peppery taste.

- **Chili flakes for serving**: This adds a fantastic kick! If you'd rather not have heat, simply skip it or use a sprinkle of black pepper.

- **Salt and black pepper to taste**: Essential for flavoring.

- **Olive oil for serving**: Drizzling a bit of quality olive oil on top enhances the richness of the dish.

- **Thinly sliced or torn basil leaves for serving (optional)**: Fresh basil takes this dish up a notch with its aromatic and sweet flavor.

## Step-by-Step Instructions

Let’s get cooking! Follow these steps to create a delightful bowl of Lemon Ricotta Pasta with Arugula.

1. **Bring a Large Pot of Water to a Boil**
   Fill a big pot with water and add a generous pinch of salt. Bring it to a rolling boil, then add your pasta. Salt is key here; it helps infuse flavor into the pasta.

2. **Cook the Pasta**
   Toss in the short pasta, stirring occasionally. Cook it according to package instructions until it’s al dente—usually about 8-10 minutes. Make sure to taste a piece; you want it firm and slightly chewy!

3. **Reserve Pasta Water**
   Right before you drain the pasta, carefully scoop out about 1 cup of the starchy pasta cooking water using a measuring cup. This water is liquid gold; it'll help create a luscious sauce later!

4. **Drain the Pasta**
   Drain the cooked pasta in a colander, but don't rinse it! You want the starch to help the sauce cling to each noodle.

5. **Mix the Ricotta and Lemon Juice**
   In a large mixing bowl, combine the ricotta cheese and lemon juice. Stir until smooth. The lemon juice will bring brightness, and the creamy ricotta will make the dish luxurious.

6. **Combine Pasta and Sauce**
   Add the hot, drained pasta into the bowl with the ricotta and lemon mixture. Toss everything together, blending the flavors. If it seems too thick, gradually add the reserved pasta water until you reach your desired creaminess.

7. **Stir in Lemon Zest and Arugula**
   Gently fold in the lemon zest and arugula. The arugula will wilt slightly from the heat of the pasta, giving the dish a fresh, vibrant bite. Season generously with salt and pepper, adjusting to your taste.

8. **Plate It Up!**
   Serve immediately! Divide the pasta onto plates or bowls. Drizzle with olive oil and a sprinkle of extra cheese and chili flakes for that perfect finishing touch. If you’ve got fresh basil, toss some torn leaves on top for a fragrant garnish.

## Serving Suggestions

For the perfect presentation, pile the creamy pasta into shallow bowls, allowing the arugula to peek through. Gently drizzle with olive oil and a sprinkle of Parmesan. Serve with fresh lemon wedges on the side for those who want an extra burst of citrus. It looks beautiful and feels inviting, promising that each bite will be delicious!

## Recipe Variations

- **Add Protein**: Toss in cooked shrimp or grilled chicken for a heartier meal.
- **Veggie Boost**: Add sautéed zucchini or roasted cherry tomatoes for a burst of color and flavor.
- **Herb Mix**: Try fresh parsley or dill instead of basil for a different spin, or combine herbs for a fragrant touch.
- **Spice It Up**: Experiment with smoked paprika for a deeper flavor, or add capers for a tangy kick!
- **Nutty Twist**: For a crunchy texture, sprinkle some toasted pine nuts or walnuts on top right before serving.

## Chef’s Notes

This recipe started as a simple weeknight meal for me, but over time, it has evolved into a guest favorite! I remember one time, in a rush to impress my friends, I accidentally added too much lemon zest. While I held my breath waiting for their reaction, they all said it was the best version of the dish yet! So, the moral here is to embrace the happy accidents because they may just lead to new favorites in the kitchen.

## FAQs and Troubleshooting

**1. What if my pasta is too sticky?**
If your pasta clumps together, it might have exceeded its cooking time or didn’t have enough water while cooking. Next time, remember to stir occasionally while boiling and add a bit more pasta water to loosen the sauce before serving.

**2. Can I make this recipe ahead of time?**
Yes, you can! Prepare the pasta and sauce separately and store them in the fridge. When you’re ready to serve, simply reheat and combine.

**3. What if I can't find ricotta cheese?**
No ricotta? No problem! You can substitute with creamy cottage cheese or almond cream cheese for a dairy-free option. Just be mindful that the texture may vary slightly.

**4. Is this dish good for meal prep?**
Absolutely! Take advantage of meal prep by making a batch on the weekend. Just store the pasta securely in the fridge and enjoy it throughout the week—even cold in salads!

## Nutritional Info

This dish is not only satisfying but also packed with nutrients! Each serving provides a good balance of carbohydrates, protein from the cheese, and healthy fats from the olive oil. Plus, the fresh arugula adds beneficial vitamins and minerals.

---

There you have it! My beloved Lemon Ricotta Pasta with Arugula, a dish that's as elegant as it is comforting. So, grab your apron, gather your ingredients, and let’s make some delicious memories in the kitchen!
Lemon Ricotta Pasta with Arugula
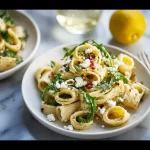
A bright and creamy pasta dish that fuses the richness of ricotta with the zestiness of lemon and peppery arugula for a delightful meal.
- Prep Time: 10 minutes
- Cook Time: 10 minutes
- Total Time: 20 minutes
- Yield: 4 servings 1x
- Category: Pasta
- Method: Boiling
- Cuisine: Italian
- Diet: Vegetarian
Ingredients
- 1 lb short pasta (like penne or rigatoni)
- 1 cup whole milk ricotta cheese
- 1 cup finely grated Parmesan or Pecorino
- 1 tablespoon freshly grated lemon zest
- ¼ cup fresh lemon juice from 1-2 lemons, plus extra wedges for serving
- 2 cups arugula
- Chili flakes for serving
- Salt and black pepper to taste
- Olive oil for serving
- Thinly sliced or torn basil leaves for serving (optional)
Instructions
- Bring a large pot of water to a boil.
- Cook the pasta according to package instructions until al dente, about 8-10 minutes.
- Reserve about 1 cup of pasta cooking water.
- Drain the pasta in a colander, without rinsing.
- Mix the ricotta cheese and lemon juice in a large mixing bowl until smooth.
- Combine the hot pasta with the ricotta mixture, adding reserved pasta water to reach desired creaminess.
- Stir in the lemon zest and arugula, seasoning with salt and pepper to taste.
- Plate and serve immediately, drizzling with olive oil and adding cheese and chili flakes as desired.
Notes
For a heartier meal, add cooked shrimp or grilled chicken. For a veggie boost, consider sautéing zucchini or adding roasted cherry tomatoes.
Nutrition
- Serving Size: 1 serving
- Calories: 450
- Sugar: 2g
- Sodium: 350mg
- Fat: 15g
- Saturated Fat: 4g
- Unsaturated Fat: 9g
- Trans Fat: 0g
- Carbohydrates: 60g
- Fiber: 3g
- Protein: 18g
- Cholesterol: 30mg
Keywords: pasta, lemon, ricotta, arugula, vegetarian, quick meal, Italian, comfort food
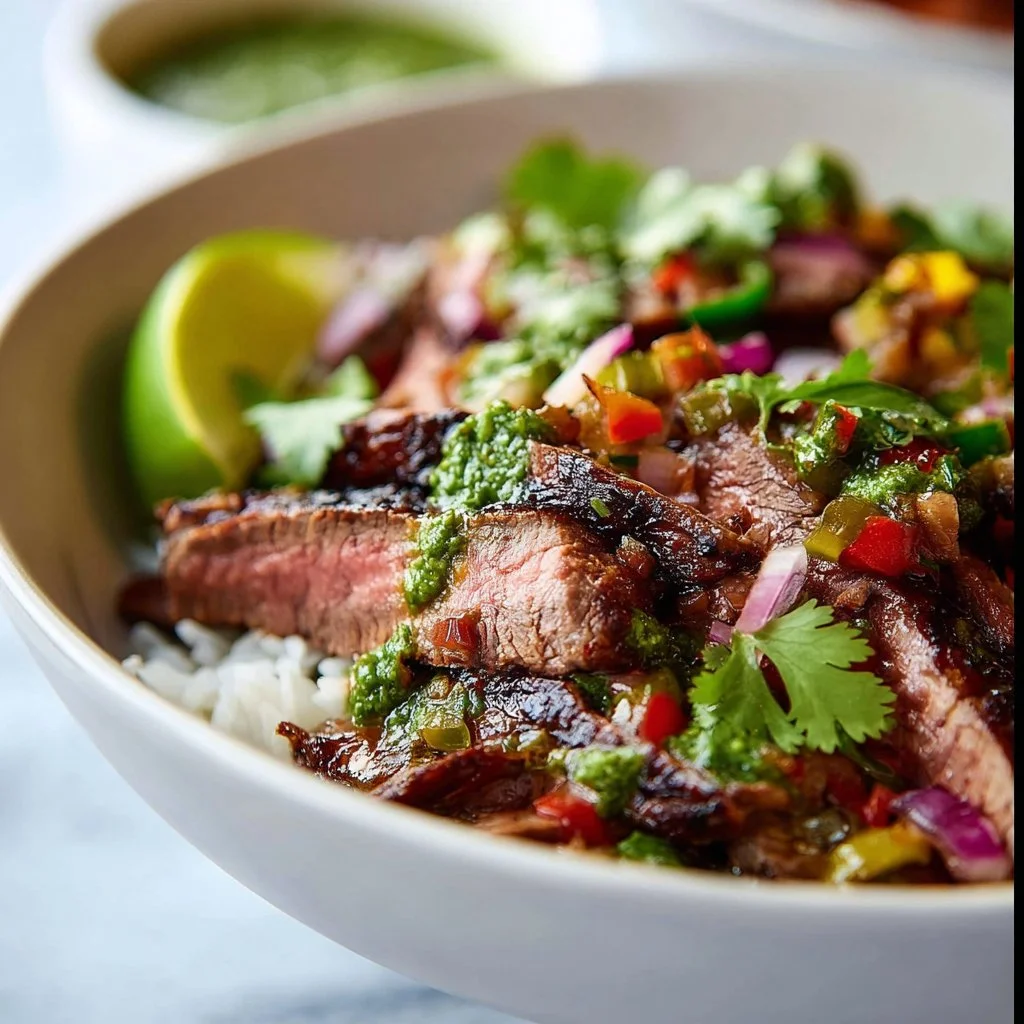
Flank Steak Bowl
Flank Steak Bowl: A Simplified Culinary Delight
Welcome to my kitchen, food lovers! Today, I’m thrilled to share with you one of my absolute favorite recipes — the vibrant, delicious, and oh-so-easy Flank Steak Bowl. Picture this: juicy, marinated flank steak, tender rice, hearty black beans, and a rainbow of fresh vegetables, all drizzled with zesty lime juice and sprinkled with feta cheese. Does it get any better than that? This recipe strikes the perfect balance between comfort and elegance, making it ideal for both casual weeknight dinners and gatherings with friends.
I remember the first time I ever made a steak bowl. It was one of those spontaneous nights where I had a little flank steak sitting in the fridge and a pantry filled with colorful veggies. I wanted something that was quick to whip up but also felt a bit fancy — just like my cooking philosophy of having elegance without intimidation. As I mixed and matched different ingredients, I realized how versatile and fun these bowls could be, showcasing seasonal produce and flavors. Each layer of the bowl is a tribute to my love for fresh ingredients and the joy of sharing meals that tell a story.
So grab your apron, roll up your sleeves, and let’s dive into creating a Flank Steak Bowl that’s packed with flavor, health, and a whole lot of love!
Personal Story
Flank steak has always held a special place in my heart (and stomach!). Growing up, my family often gathered around the dinner table for weekend barbecues, and the smell of a perfectly grilled flank steak would waft through our backyard. I remember watching my dad season the meat, chatting about his day while he flipped it on the grill, transforming it into a delicious centerpiece for our family meals. There was something magical about the anticipation while we waited for that first slice — the steak slightly pink in the middle and succulent with flavor.
One summer evening, I decided to recreate that memory and make my own version, and it just clicked. As I plated the rice, beans, and colorful vegetables, I felt my childhood memories blend with my present. I realized that cooking is so much more than just preparing meals; it’s about creating connections, sharing stories, and inviting loved ones to the table. And now, I love seeing the joy on my friends’ faces when they take their first bite of my Flank Steak Bowl. It’s truly a dish that brings everyone together, echoing a tradition that feels timeless yet personal.
Ingredients
Here’s what you’ll need to conjure up this delightful dish:
-
Flank Steak:
- A lean cut that packs a punch of flavor, perfect for grilling or pan-searing. If you’re looking for a substitution, sirloin or skirt steak can work well too. Just keep an eye on cooking time as these cuts can vary in tenderness.
-
Rice:
- Use your favorite variety — white, brown, or even quinoa for a twist! If you’re short on time, microwaveable rice packets can be your best friend. Otherwise, cook it on the stovetop for fluffy perfection.
-
Black Beans:
- Canned black beans are a convenient choice, packed with protein. If you prefer homemade, be sure to soak and cook them ahead of time. Canned kidney beans or chickpeas can also make a delightful replacement.
-
Corn:
- Fresh, frozen, or canned corn works wonders in this bowl. I love using grilled corn in the summer when it’s sweet and smoky. If you can find fresh corn on the cob, cut the kernels off and give them a quick char!
-
Fresh Vegetables (bell peppers, tomatoes, avocado):
- Add whatever’s in season or speak to your taste buds! Bell peppers (red, yellow, or green) are crunchy and sweet. Don’t forget avocados for that creamy, rich texture.
-
Feta Cheese (optional):
- Crumbled feta adds a tangy touch that elevates the dish. If you want a dairy-free alternative, try nutritional yeast for a cheesy flavor sans the cheese!
-
Olive Oil:
- Use high-quality extra virgin olive oil for marinating the steak and drizzling over your bowl for a robust flavor. Avocado oil is excellent if you prefer a higher smoke point.
-
Lime Juice:
- Fresh lime juice adds acidity and brightness. Lemon can work in a pinch, but lime gives that authentic sharp flavor that ties everything together.
-
Salt and Pepper:
- Simple seasonings elevate the flavor of your dish. Always use kosher salt for seasoning your meats; it helps in drawing out moisture while amplifying taste.
Step-by-Step Instructions
Let’s get cooking! Here’s how to create your irresistible Flank Steak Bowl, step by step.
-
Marinate the Flank Steak:
- Start by crafting a simple marinade. In a mixing bowl, combine ¼ cup of olive oil, the juice of 2 fresh limes, 2 teaspoons of salt, and a good pinch of freshly cracked pepper. Toss the flank steak in the marinade, ensuring every inch is coated. Let it marinate for at least 30 minutes (or up to overnight in the fridge if you have the time). This step is your golden ticket to elevate flavor!
-
Cook the Rice:
- While the steak is marinating, cook your rice according to the package instructions. Making homemade rice? Rinse it first to remove excess starch. Use a 2:1 water-to-rice ratio for fluffy outcomes. Adding a splash of olive oil and a pinch of salt in the cooking water can enhance the flavor instantly!
-
Prepare the Vegetables:
- While the rice cooks, chop your fresh vegetables. Dice the bell peppers, slice the tomatoes, and scoop out your avocado. Set them all aside in separate bowls. This not only keeps you organized but makes for a beautiful presentation when you assemble your bowl.
-
Cook the Flank Steak:
- After marinating, heat a skillet or grill over medium-high heat. If you’re grilling, sear the flank steak for 5-7 minutes on each side, depending on thickness and how well done you like it. Aim for medium-rare for the most tender result! If you’re using a skillet, add a little olive oil before placing the steak in — this prevents sticking and enhances browning.
-
Let It Rest:
- Once cooked, remove the steak from the heat and let it rest for about 10 minutes. This is a crucial step for juicy steak — it allows the juices to redistribute. While it rests, you can finish any remaining ingredients or condiments!
-
Assemble Your Bowls:
- Now for the fun part! In individual bowls, start layering your ingredients. Begin with a scoop of rice at the bottom. Next, add the black beans and corn, followed by the vibrant chopped veggies. Drizzle a little olive oil and fresh lime juice over everything for that zest!
-
Slice Your Steak:
- Thinly slice the flank steak against the grain for optimal tenderness. Don’t forget to let those beautiful juices flow; it’ll keep your bowl moist and delicious. Place slices of steak over the veggies.
-
Top It Off:
- Finish with crumbled feta cheese, a sprinkle of salt, and a final squeeze of lime juice. Voila! Your Flank Steak Bowl is ready to be devoured.
Serving Suggestions
When it comes to plating, remember that presentation is key! Use wide, shallow bowls to create an inviting visual. Start with a base of rice, layer on the beans and corn, artfully position your vibrant veggies, and finally, crown it with succulent steak slices. A sprinkle of fresh herbs like cilantro or parsley can add an extra pop of color. Serve with lime wedges on the side for guests to add brightness to their own bowls!
Recipe Variations
Feeling adventurous? Here are a few creative twists to make this dish yours:
-
Spicy Kick: Add diced jalapeños to your vegetables for an extra zing.
-
Taco Style: Swap the rice for crunchy tortilla chips and pile on toppings for a nacho-inspired bowl.
-
Cilantro Lime Rice: Mix fresh cilantro and lime juice into your cooked rice for a flavor boost.
-
Vegetarian Option: Substitute the flank steak with marinated grilled portobello mushrooms for a hearty veggie bowl.
-
Salsa Fiesta: Top with your favorite salsa instead of dressing for a fresh burst of flavor!
Chef’s Notes
One of my fondest experiences with this recipe happened when I invited friends over for a casual dinner. I had a mix-up in the freezer and ended up with an absurdly large flank steak! Instead of panicking, I decided to make a “Steak Bowl Bar.” Each guest was encouraged to build their own bowls, and it turned into a culinary adventure. Seeing everyone mix and match their ingredients and flavors was a beautiful reminder that cooking is all about sharing experiences. So don’t hesitate to make it your own and invite friends over for some delicious fun!
FAQs and Troubleshooting
1. What if my steak is tough?
- This could be due to overcooking, or if the meat wasn’t sliced against the grain. Always aim for medium-rare to medium for the most tender results.
2. Can I make this in advance?
- Absolutely! You can marinate the steak a day ahead and prep all your veggies, beans, and rice. Just assemble everything right before serving to keep it fresh.
3. What can I do if I don’t have a grill?
- A skillet or grill pan works perfectly! Just make sure your pan is hot enough to get a good sear.
4. How can I store leftovers?
- Store any leftovers in airtight containers in the fridge for up to 3 days. Keep ingredients separate if you want to maintain freshness, especially with avocado!
Nutritional Info
This Flank Steak Bowl is not only delicious but also incredibly nutritious! A serving can provide a balanced dose of protein (thanks to the flank steak and beans), healthy fats (from the avocado and olive oil), and a colorful array of vitamins (from the fresh vegetables).
So there you have it! A dish that’s not just a meal but an experience, full of heart and flavor. I hope you make it your own, celebrate beautiful moments around your table, and enjoy every flavorful bite. Happy cooking!
PrintFlank Steak Bowl

A vibrant and delicious Flank Steak Bowl featuring marinated flank steak, tender rice, hearty black beans, and fresh vegetables, all drizzled with zesty lime juice and sprinkled with feta cheese.
- Prep Time: 30 minutes
- Cook Time: 15 minutes
- Total Time: 45 minutes
- Yield: 4 servings 1x
- Category: Main Course
- Method: Grilling
- Cuisine: American
- Diet: Carnivore
Ingredients
- 1 lb flank steak
- 1 cup rice (white or brown)
- 1 can black beans, drained and rinsed
- 1 cup corn (fresh, frozen, or canned)
- 1 bell pepper, diced
- 1 tomato, sliced
- 1 avocado, sliced
- 1/2 cup crumbled feta cheese (optional)
- 1/4 cup olive oil
- Juice of 2 fresh limes
- 2 teaspoons kosher salt
- Freshly cracked pepper to taste
Instructions
- Marinate the flank steak by combining olive oil, lime juice, salt, and pepper in a bowl. Coat the steak and let it marinate for at least 30 minutes.
- Cook the rice according to package instructions.
- Prepare the fresh vegetables by chopping them and setting them aside.
- Cook the flank steak on a skillet or grill for 5-7 minutes per side for medium-rare.
- Let the steak rest for 10 minutes before slicing.
- Assemble the bowls starting with rice, then add black beans, corn, and vegetables.
- Slice the steak against the grain and place it on top of the bowl.
- Top with feta cheese, salt, and lime juice before serving.
Notes
Feel free to customize your bowl with seasonal vegetables and toppings. Great as a casual dinner or a gathering with friends!
Nutrition
- Serving Size: 1 serving
- Calories: 500
- Sugar: 5g
- Sodium: 800mg
- Fat: 20g
- Saturated Fat: 5g
- Unsaturated Fat: 10g
- Trans Fat: 0g
- Carbohydrates: 55g
- Fiber: 10g
- Protein: 35g
- Cholesterol: 60mg
Keywords: flank steak, steak bowl, healthy dinner, grilled steak, quick meal
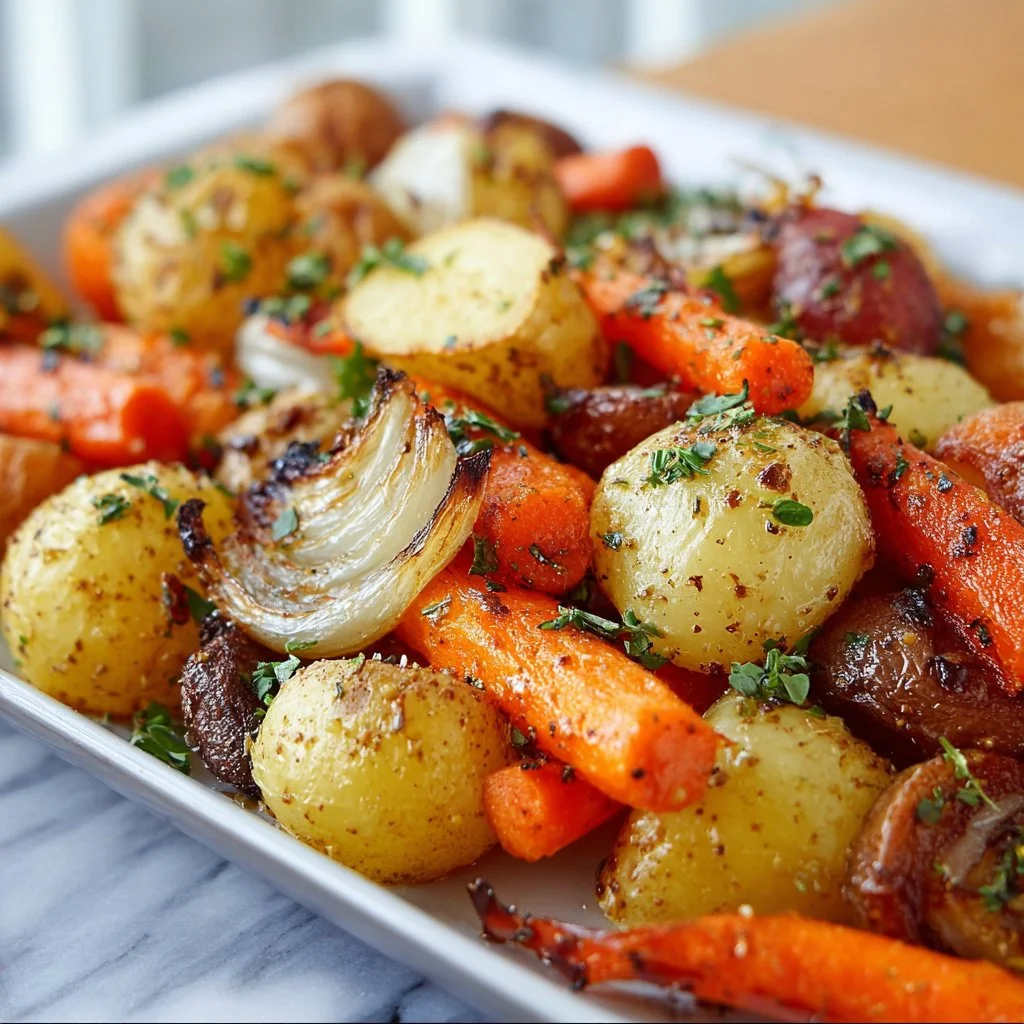
Roast Carrots, Potatoes & Onions: A Simple, Flavorful Side Dish
Roast Carrots, Potatoes & Onions: A Simple, Flavorful Side Dish
Hello, fellow food lovers! Today, we’re diving into a dish that’s as simple as it is stunning: Roast Carrots, Potatoes, and Onions. Picture it: vibrant orange carrots, hearty potatoes, and sweet onions culminating in a golden-brown roast that enchants your kitchen with mouthwatering aromas. Doesn’t that sound delightful? This isn’t just a side dish; it’s a canvas for flavor and a celebration of seasonal ingredients that can elevate any meal, from casual weeknight dinners to festive gatherings!
Roasted vegetables are like the unassuming heroes of the culinary world. They require minimal finesse but yield extraordinary results. Trust me, if you’re in a pinch and need something to wow your guests, this is it! It’s one of those recipes that embodies my cooking philosophy: elegant yet achievable. Plus, the best part? You don’t need any fancy gadgets or culinary degrees to make this dish shine. Just a few quality ingredients, some love, and a dash of creativity, and you’ll be serving up a side dish that even the pickiest eaters will clamor for!
In this post, I’ll guide you through each step of the process, share some personal stories, and give you a few handy tips to amp up the flavor and presentation of your roasted veggies. So, gather your carrots, potatoes, and onions – let’s set the table for some flavorful fun!
Personal Story
Let me take you on a little trip down memory lane. I remember the first time I prepared roasted vegetables for a gathering. I was hosting a dinner party, filled with laughter, candles, and an air of joyous anticipation. Of course, I wanted everything to be perfect. After scanning countless recipes, I stumbled upon a simple roasted vegetable recipe that spoke to me.
As I chopped the vibrant carrots and chunky potatoes, I could hear my grandmother’s voice in my head, telling me, “Food is an extension of your heart, darling.” She used to roast her veggies with love, wisdom, and just the right amount of olive oil, telling me how roasting brings out the natural sweetness in every ingredient. I was a tad nervous, but as the dish came together, I could smell the warmth enveloping my kitchen.
When the vegetables emerged from the oven, they were caramelized to perfection, and I couldn’t wait to tantalize my guests with their flavors. The crispy edges and soft interiors were a hit! Everyone kept going back for seconds, and that was when I realized that roasting veggies wasn’t just a cooking technique; it was a way to create lasting memories around the table. This roast carrots, potatoes, and onions dish has been a staple in my kitchen ever since, always reminding me of the power of shared meals!
Ingredients
To embark on your journey to perfect roasted vegetables, you’ll need the following ingredients:
-
2 pounds of carrots (peeled and cut into uniform pieces)
Carrots not only add vibrant color but also natural sweetness. Choose firm, fresh carrots for the best flavor. If you prefer, consider using baby carrots for a more rustic look! -
6 whole potatoes (washed and cut into even pieces)
Potatoes bring heartiness to the dish. I often use Yukon Gold for their buttery flavor, but feel free to substitute with red potatoes or sweet potatoes for a twist! -
1 whole sweet onion (peeled and cut into eighths)
Sweet onions, like Vidalia, add elegance and balance. If you want more bite, use yellow onions. They caramelize beautifully and provide a depth of flavor. -
3 cloves garlic (minced)
Garlic enhances the aromatic qualities of the dish. If you’re a garlic lover, feel free to add more or use roasted garlic for a sweeter flavor. -
6 tbsp olive oil (for coating vegetables)
Extra virgin olive oil drizzles lovingly over the veggies, ensuring they don’t stick and enhances their rich flavors. Replace it with melted coconut oil for a different profile! -
1/2 tsp dried thyme (for seasoning)
Thyme pairs beautifully with all root vegetables. If you have fresh thyme on hand, use a tablespoon instead! How delightful would that be? -
1/2 tsp dried parsley (for seasoning)
Parsley brings a refreshing pop of herbaceousness. If you want a punchier flavor, you could substitute fresh parsley. -
Salt (to taste)
The secret to great flavor! Sea salt is my go-to, but kosher salt works just as well. -
Black pepper (to taste)
Freshly cracked black pepper adds warmth and a little heat. If you’re feeling adventurous, use smoked pepper for added depth!
Step-by-Step Instructions
Step 1: Preheat Your Oven
Start by preheating your oven to 425°F (220°C). This high temperature creates those coveted caramelized edges that make roasted vegetables so irresistible. While your oven is warming up, gather your ingredients and get ready to chop!
Step 2: Prep Your Veggies
Next, grab your cutting board and sharp knife. Peel the carrots and cut them into uniform pieces (about 1 inch long works well) to ensure even cooking. Wash your potatoes thoroughly – we want all that earthy goodness! Cut them into half or quarters, depending on their size. Aim for pieces similar in size to your carrot pieces. Finally, slice your onion into eighths, breaking them into individual layers. Aim for a rustic vibe; they’ll caramelize beautifully!
Step 3: Combine Ingredients
In a large mixing bowl, toss together your chopped carrots, potatoes, and onions. Then, sprinkle in the minced garlic, dried thyme, and dried parsley. The flavors will mingle together beautifully!
Step 4: Drizzle & Season
Now for the olive oil! Drizzle 6 tablespoons over the vegetable mix and season with salt and freshly cracked black pepper. Using your clean hands, toss everything together until every piece is glistening with oil and seasoning. This step is crucial—don’t be shy; get your hands in there!
Step 5: Spread on a Baking Sheet
Transfer your vibrant vegetable mixture to a large baking sheet. Make sure they’re spread out in a single layer – overcrowding the pan will lead to steaming instead of roasting. If they’re too close, the flavors won’t meld as beautifully.
Step 6: Roast Away
Pop the baking sheet into your preheated oven and roast for about 25-30 minutes. Halfway through, give them a good toss with a spatula to ensure even browning. You’ll know they’re done when they are fork-tender and have that beautiful golden-brown color—just divine!
Step 7: Cool and Serve
Once they’re out of the oven, let them cool for a few minutes (if you can wait!). Taste a piece and adjust your seasoning if necessary. Those caramelized bits will provide an explosion of flavor, making it hard to resist them straight off the tray.
Serving Suggestions
For presentation, I love serving these roasted veggies in a large, elegant bowl or platter, topped with a sprinkle of fresh parsley for color. If you’re feeling extra festive, drizzle a balsamic glaze over the top or a squeeze of fresh lemon to brighten the flavors even more. Gather your friends and family around the table, and watch them marvel at the beautiful colors and aromas before diving in!
Recipe Variations
Want to switch things up? Here are a few fun ideas:
- Add Spices: Try sprinkling some cumin or paprika for a warm, smoky flavor.
- Cheesy Delight: Add Parmesan cheese during the last 5 minutes of roasting for a savory twist.
- Sweet Surprise: Toss in apple slices or dried cranberries for a sweet and savory combination—perfect for fall gatherings!
- Herb Infusion: Use fresh herbs like rosemary or dill for a fragrant touch.
- Nutty Crunch: Top with toasted nuts or seeds for added texture.
Chef’s Notes
Over the years, my roast carrots, potatoes, and onions recipe has become a fan favorite at my dinner parties. The beauty of this dish is its simplicity and versatility. I once made a double batch for a large family reunion, and it vanished in minutes! I also remember roasting these veggies with my best friend, who hilariously mistook a tablespoon for a teaspoon while seasoning them. The look on her face when we tasted the overly salted dish had us both in stitches!
This recipe has taught me that even in the kitchen, laughing at little mishaps can lead to the best memories—the kind you tell over and over again!
FAQs and Troubleshooting
Q: How do I prevent my vegetables from getting mushy?
A: Always cut your veggies into uniform sizes and avoid overcrowding the baking sheet. This ensures they roast instead of steam!
Q: Can I make this dish in advance?
A: Absolutely! Roast the vegetables, let them cool, and store them in an airtight container. Reheat them in the oven or microwave before serving.
Q: What can I do with leftovers?
A: Leftover roasted veggies make fantastic additions to salads, grain bowls, or omelets. You can even blend them into a soup for a quick meal!
Q: How do I know when they’re done?
A: Look for tender vegetables that are golden-brown on the edges but still have a bit of firmness. You can test with a fork for doneness.
Nutritional Info (Optional)
This dish is chock-full of vitamins and minerals! Here’s a rough estimate per serving (using 6 servings):
- Calories: 180
- Protein: 3g
- Fat: 7g
- Carbohydrates: 27g
- Dietary Fiber: 4g
This nutritional info will vary depending on the exact ingredients used and serving size. Always feel free to adjust based on your dietary needs!
So there you have it—my love letter to Roast Carrots, Potatoes, and Onions! I hope it brings warmth, flavors, and fond memories to your table, just like it has to mine. Tie on your apron, get cooking, and don’t forget to invite your loved ones to gather around! Happy roasting!
PrintRoast Carrots, Potatoes & Onions
A simple yet stunning side dish featuring roasted carrots, potatoes, and onions that elevate any meal with vibrant flavors and aromas.
- Prep Time: 15 minutes
- Cook Time: 30 minutes
- Total Time: 45 minutes
- Yield: 6 servings 1x
- Category: Side Dish
- Method: Roasting
- Cuisine: American
- Diet: Vegetarian
Ingredients
- 2 pounds carrots, peeled and cut into uniform pieces
- 6 whole potatoes, washed and cut into even pieces
- 1 whole sweet onion, peeled and cut into eighths
- 3 cloves garlic, minced
- 6 tbsp olive oil
- 1/2 tsp dried thyme
- 1/2 tsp dried parsley
- Salt, to taste
- Black pepper, to taste
Instructions
- Preheat your oven to 425°F (220°C).
- Prep your veggies by cutting them into uniform pieces for even cooking.
- Combine carrots, potatoes, onions, garlic, thyme, and parsley in a large mixing bowl.
- Drizzle olive oil over the mixture and season with salt and black pepper; toss to combine.
- Spread the vegetable mixture on a large baking sheet in a single layer.
- Roast in the oven for 25-30 minutes, tossing halfway through.
- Cool slightly, taste, and adjust seasoning if necessary before serving.
Notes
For presentation, serve in a large bowl or platter, optionally drizzled with balsamic glaze or fresh lemon juice.
Nutrition
- Serving Size: 1 serving
- Calories: 180
- Sugar: 4g
- Sodium: 200mg
- Fat: 7g
- Saturated Fat: 1g
- Unsaturated Fat: 5g
- Trans Fat: 0g
- Carbohydrates: 27g
- Fiber: 4g
- Protein: 3g
- Cholesterol: 0mg
Keywords: roasted vegetables, side dish, carrots, potatoes, onions, easy recipe