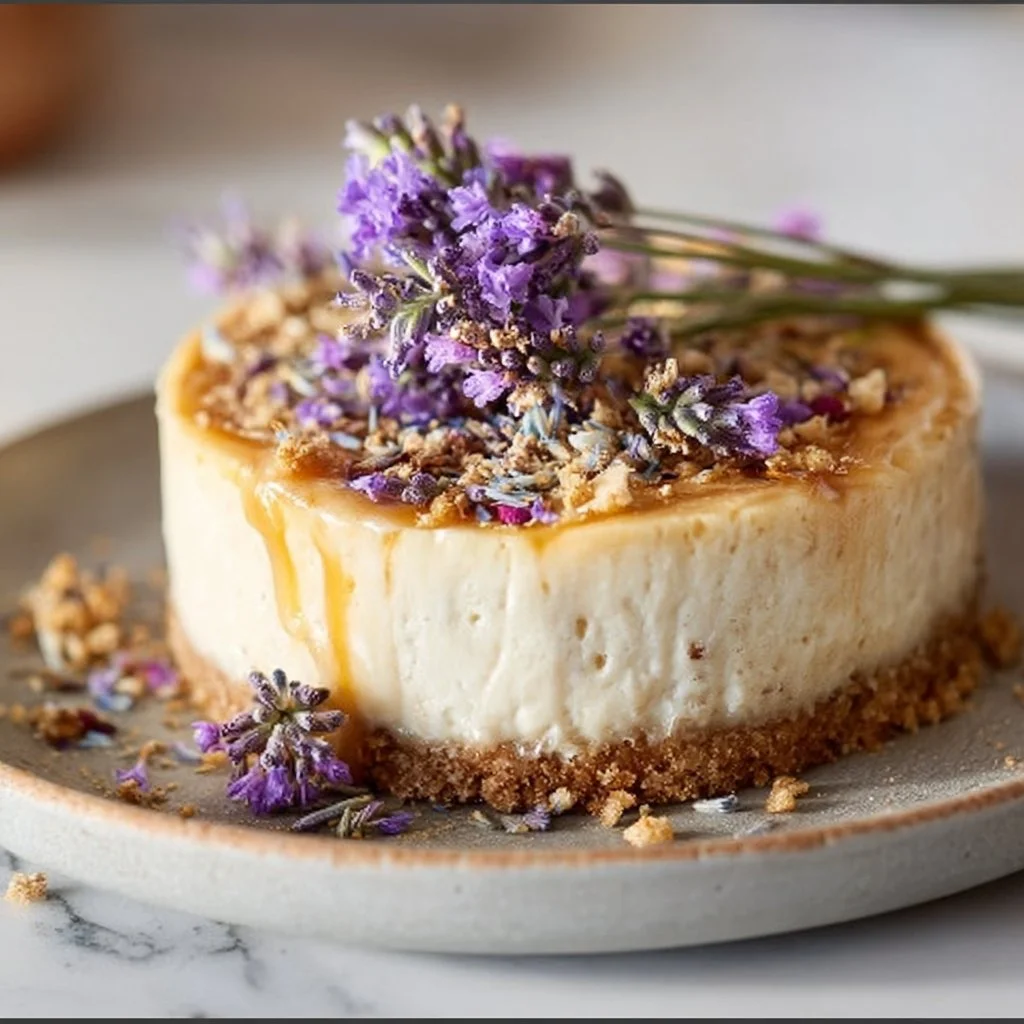
Honey Lavender Cheesecake Recipe
Indulge in Elegance: Honey Lavender Cheesecake Recipe
Hello, fellow food lovers! Today, we’re diving into a sweet and dreamy world of flavors with my Honey Lavender Cheesecake. This delightful dessert perfectly combines the floral essence of lavender with the luscious sweetness of honey, creating a cheesecake that’s not just a feast for the palate, but also a visual delight. I can’t wait to share this recipe with you, so grab your apron and let’s get started!
A Sweet Memory
Before we jump into the recipe, I have to share a charming little story that inspired this dish. One sunny afternoon, I found myself wandering through a local farmer’s market—one of my favorite weekend rituals. As I strolled past colorful stalls, a delicate aroma caught my attention. It was a vendor selling lavender-infused honey, and the moment I tasted it, I was transported to a blissful moment in my childhood.
My grandmother—a culinary wizard in her own right—had a habit of incorporating unique flavors into her desserts. One summer, she decided to experiment with lavender in her cooking. We spent evenings in her cozy kitchen, blending ingredients and laughing, as the aroma of her sweet concoctions wafted through the air. That lavender honey sparked a memory, and I promised myself that one day, I would create a dessert that brought that feeling of warmth and nostalgia back. Today, we’ll bring that dream to life with this luscious Honey Lavender Cheesecake.
Ingredients
To make this exquisite cheesecake, we’ll need the following ingredients:
For the Crust:
-
1 ½ cups graham cracker crumbs
This forms the base of your cheesecake, providing a sweet, crunchy texture. If you’re looking for alternatives, digestive biscuits or crushed Oreos work beautifully, too. -
¼ cup granulated sugar
This adds sweetness to the crust. You can replace it with coconut sugar for a hint of caramel flavor or omit it entirely if you prefer a less sweet crust. -
6 tbsp unsalted butter (melted)
The butter binds the crumbs together. You can substitute it with coconut oil for a dairy-free option.
For the Filling:
-
3 (8 oz) packages cream cheese, softened
Cream cheese brings that rich, creamy texture we all love in cheesecake. Neufchâtel cheese can be used for a lighter version. -
¾ cup honey
This is the star of our recipe, adding sweetness and flavor. If you’re looking for a vegan option, you can use maple syrup or agave nectar. -
1 cup heavy cream
Heavy cream helps achieve that velvety texture. For a lighter alternative, you can use Greek yogurt, but be aware it may change the tanginess. -
3 large eggs
Eggs provide structure and stability. For a vegan alternative, use a flaxseed meal or a commercial egg replacer. -
1 tsp vanilla extract
This adds depth to the flavor. If you have the opportunity, vanilla beans would be a fantastic upgrade! -
1 tbsp dried culinary lavender
Dried lavender gives our cheesecake its unique flavor. If you can’t find it, feel free to use lavender extract instead. -
2 tbsp cornstarch
This helps to set the cheesecake. If you’re looking for a gluten-free option, you can use arrowroot powder.
For the Honey Lavender Syrup (Optional Topping):
-
½ cup honey
A sweet drizzle to enhance your cheesecake. -
1 tbsp dried culinary lavender
Keep that floral note alive! -
¼ cup water
This helps to create the syrup base.
Step-by-Step Instructions
Step 1: Prepare the Crust
-
Preheat your oven to 350°F (175°C). Let’s get that warm haven ready for our cheesecake!
-
In a large bowl, combine the graham cracker crumbs, sugar, and melted butter. Mix until everything is well combined; it should resemble damp sand.
-
Press the mixture into the bottom of a 9-inch springform pan. You want to create an even layer that’s firmly packed, so don’t be shy about applying a bit of elbow grease. A flat-bottomed glass works wonderfully for this!
-
Bake the crust for about 10 minutes, or until it’s lightly golden. This helps to caramelize the sugars and gives it a delicious crunch. Once it’s done, remove it from the oven and allow it to cool while you whip up the filling.
Step 2: Make the Filling
-
In a large mixing bowl, beat the softened cream cheese using a hand mixer or a stand mixer. You want it to be smooth and creamy—no lumps allowed! This should take about 2-3 minutes.
-
Add in the honey, and mix until it’s fully incorporated. Feel free to taste along the way. We want that perfect balance of sweetness!
-
Next, add the heavy cream and continue mixing until silky smooth. The heavy cream adds richness, so ensure it’s blended well!
-
Incorporate the eggs one at a time. Mix on low speed after each addition until just combined. You want to avoid incorporating too much air, which can lead to cracks.
-
Add the vanilla extract, dried lavender, and cornstarch. Again, mix until just combined. The lavender will give a subtle flavor that is sophisticated yet comforting.
Step 3: Bake the Cheesecake
-
Pour the filling over the cooled crust in the springform pan. Gently tap the pan on the counter to release any air bubbles—this will ensure a dense and creamy texture.
-
Bake the cheesecake for about 50-60 minutes, or until the edges are set but the center still jiggles slightly. Remember, it’s going to set more as it cools!
-
Turn off the oven and crack the door open; let the cheesecake cool in the oven for about an hour. This helps to prevent sudden temperature changes, which can cause cracking.
-
Once cooled, transfer it to the fridge and chill for at least 4 hours, ideally overnight. Trust me; the flavors will develop beautifully during that time!
Step 4: Make the Honey Lavender Syrup (Optional)
-
In a small saucepan, combine honey, dried lavender, and water. Bring it to a gentle boil over medium heat.
-
Reduce the heat and let it simmer for about 5 minutes, stirring occasionally, until thickened slightly. Strain the syrup through a fine-mesh sieve to remove the lavender buds, and allow it to cool.
Serving Suggestions
When it’s time to serve, remove the cheesecake from the springform pan and transfer it to a beautiful serving platter. Drizzle the honey lavender syrup over the top and garnish with a few sprigs of fresh lavender or some small edible flowers for that elegant touch! Slice into pieces and watch as everyone’s eyes light up.
Recipe Variations
-
Lemon Zest Twist: Add the zest of one lemon to the filling for a bright, citrusy contrast to the floral notes.
-
Chocolate Drizzle: For a richer dessert, drizzle melted dark chocolate over the cheesecake before serving.
-
Nutty Crust: Mix in some finely chopped almonds or pecans with your graham cracker crumbs for additional flavor and texture.
-
Spiced Notes: Incorporate a pinch of cardamom or cinnamon into the filling for a warm spice that complements the lavender beautifully.
-
Fruit Toppings: Fresh berries or candied citrus slices can provide a pop of flavor and color on top!
Chef’s Notes
This recipe has evolved beautifully over time! I’ve played around with different flavors, textures, and components. One of my personal favorites is swapping honey for a tart fruit puree as a topping—it brings a whole new level of freshness to the cheesecake. Also, don’t be surprised if you start serving this at every gathering; trust me, friends and family will come knocking just to get a slice!
FAQs and Troubleshooting
1. Why did my cheesecake crack?
Cracking often occurs due to rapid changes in temperature. Make sure to cool it gradually in the oven and avoid over-mixing your batter.
2. Can I make this in advance?
Absolutely! In fact, making it the day before allows the flavors to meld beautifully, so it’s perfect for planning ahead.
3. How do I store leftovers?
Store any uneaten cheesecake in an airtight container in the refrigerator for up to 5 days. It can also be frozen for longer storage—just be sure to wrap it well!
4. What can I use instead of cream cheese?
You can try a dairy-free cream cheese for a vegan option, though the texture may vary slightly. Silken tofu blended until creamy is another alternative, though it will change the flavor a bit.
Nutritional Info
While I won’t include exact nutritional information here, I encourage you to enjoy this cheesecake in moderation and savor each delightful bite. Indulgence is part of the joy of cooking!
That’s it for today, my culinary friends! Thank you so much for joining me on this journey of flavors and memories. I hope my Honey Lavender Cheesecake brings joy to your kitchen and becomes a staple in your dessert rotation. Remember, cooking is all about love and sharing. So, gather your friends and family around the table, slice up that cheesecake, and create some sweet memories! Happy baking!
PrintHoney Lavender Cheesecake
A delightful cheesecake combining the floral essence of lavender with the sweetness of honey for a dreamy dessert experience.
- Prep Time: 20 minutes
- Cook Time: 60 minutes
- Total Time: 80 minutes
- Yield: 8 servings 1x
- Category: Dessert
- Method: Baking
- Cuisine: American
- Diet: Vegetarian
Ingredients
- 1 ½ cups graham cracker crumbs
- ¼ cup granulated sugar
- 6 tbsp unsalted butter (melted)
- 3 (8 oz) packages cream cheese, softened
- ¾ cup honey
- 1 cup heavy cream
- 3 large eggs
- 1 tsp vanilla extract
- 1 tbsp dried culinary lavender
- 2 tbsp cornstarch
- ½ cup honey (for syrup)
- 1 tbsp dried culinary lavender (for syrup)
- ¼ cup water (for syrup)
Instructions
- Preheat your oven to 350°F (175°C).
- Combine the graham cracker crumbs, sugar, and melted butter in a large bowl.
- Press the mixture into the bottom of a 9-inch springform pan.
- Bake the crust for about 10 minutes until lightly golden.
- Beat the softened cream cheese until smooth and creamy.
- Add honey and mix until fully incorporated.
- Incorporate the heavy cream and mix until silky smooth.
- Add the eggs one at a time, mixing on low speed after each addition.
- Mix in vanilla extract, dried lavender, and cornstarch until just combined.
- Pour the filling over the cooled crust.
- Bake for 50-60 minutes, or until the edges are set but the center jiggles slightly.
- Turn off the oven and crack the door open, letting the cheesecake cool for about an hour.
- Chill in the fridge for at least 4 hours, ideally overnight.
- Combine honey, dried lavender, and water in a saucepan for the syrup; bring to a gentle boil.
- Simmer for about 5 minutes until thickened slightly, then strain and cool.
Notes
For a richer flavor, try adding lemon zest, chocolate drizzle, or a nutty crust variation. Store leftovers in an airtight container in the refrigerator.
Nutrition
- Serving Size: 1 slice
- Calories: 350
- Sugar: 25g
- Sodium: 300mg
- Fat: 20g
- Saturated Fat: 10g
- Unsaturated Fat: 8g
- Trans Fat: 0g
- Carbohydrates: 35g
- Fiber: 1g
- Protein: 5g
- Cholesterol: 100mg
Keywords: cheesecake, dessert, lavender, honey, baking
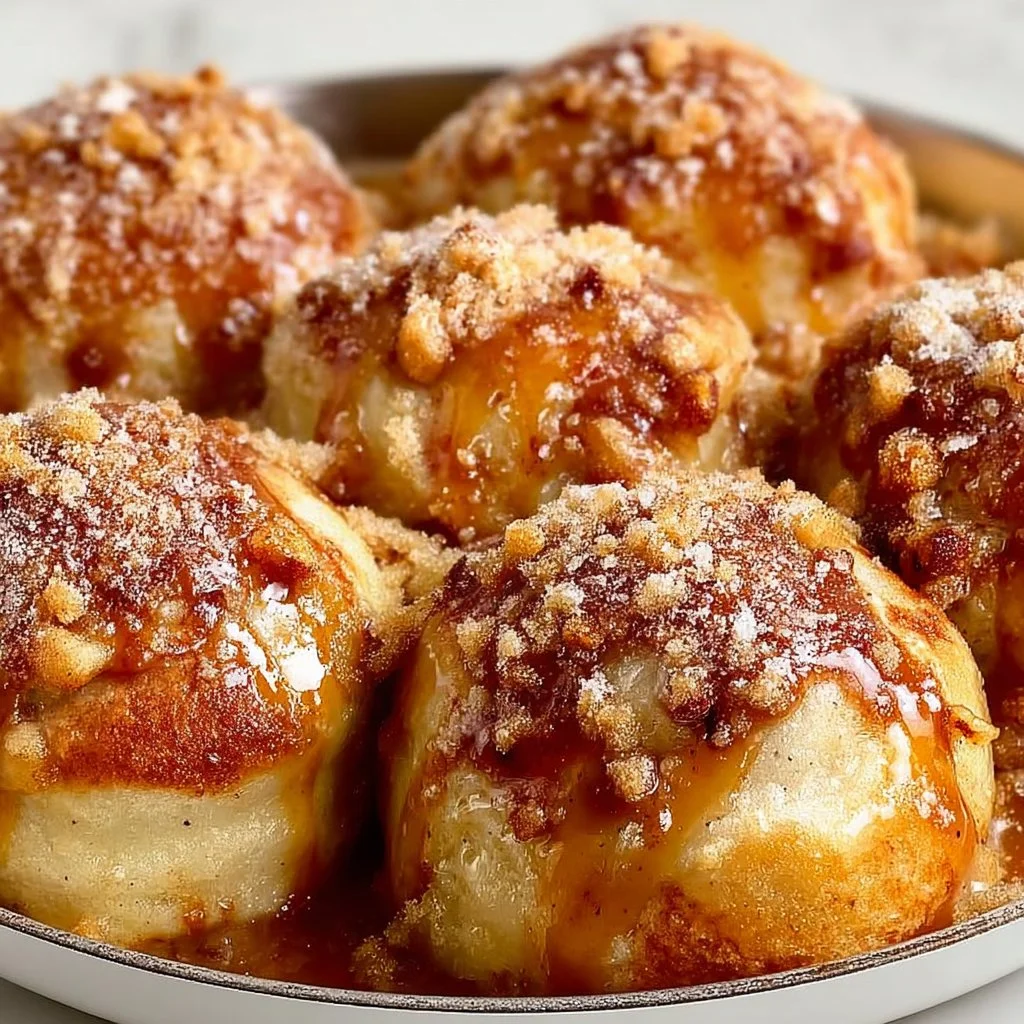
Simple Caramel Apple Pie Bombs
Simple Caramel Apple Pie Bombs: A Nostalgic Delight
Hello, and welcome back to my kitchen! Today, we’re diving into a dessert that merges nostalgia with absolute deliciousness — Simple Caramel Apple Pie Bombs. Picture this: sweet, tender apples enveloped in a buttery pie crust, drizzled with warm caramel, and baked to golden perfection. 🍏✨
Let’s face it; we all have those cherished memories of autumn gatherings filled with laughter, warm cider, and, of course, delicious treats. Caramel apple pie has always been a family favorite. It’s the kind of dessert that brings everyone together, a symbol of comfort and joy. And while we could whip up a traditional apple pie, sometimes, we crave something that’s bit-sized, portable, and oh-so-fun to eat! That’s where these delightful bombs come in!
As I was recalling my childhood, I remembered making caramel apples with my grandma during those cool fall afternoons. We’d dip crisp apples into rich, gooey caramel, relishing every sticky moment. Fast forward to today, and I’ve taken that classic idea and turned it into these irresistible pie bombs. They encapsulate that same joy, making them perfect for any occasion — from cozy nights at home to festive gatherings with friends.
So, grab your apron, and let’s create some sweetness that’s sure to put a smile on your face and warmth in your heart!
Personal Story
I vividly remember the yearly family tradition of baking pies with my grandma. Each fall, we’d gather in her sunny kitchen, surrounded by the sweet aroma of baking apples, cinnamon, and a hint of caramel wafting through the air. Those afternoons were filled with laughter as we would mix flour, sugar, and spice while sharing stories about our day.
One particular year, I can recall our experiment with caramel apples — we had so much fun dipping each apple in the warm, gooey caramel, and inevitably, we ended up with sticky fingers and lots of giggles. It was truly a cherished memory, and I believe that my love for baking was born in those moments spent with her.
When I came up with the idea for these Simple Caramel Apple Pie Bombs, I couldn’t help but smile at the nostalgia. They’re a fun and modern twist on our classic recipe, bringing back those sweet memories while allowing us to enjoy them in a delightful little package. Every bite sings of those warm afternoons shared over baked treats, reminding us that food is more than just sustenance — it’s about creating bonds and celebrating life’s small joys.
Ingredients
Here’s what you’ll need to create these delectable bites:
-
1 package refrigerated pie crusts: Convenient and time-saving, these crusts provide a flaky, buttery base. If you want to go homemade, a buttery flaky crust works beautifully as well!
-
2 cups peeled and diced apples: Choose your favorite apples! Tart varieties like Granny Smith bring a lovely contrast to the sweet caramel. Honeycrisp adds a delightful crunch. You can substitute them with pears for a different flavor profile.
-
1 cup caramel sauce: This is where the magic happens! You can use store-bought caramel for convenience, or if you’re feeling adventurous, I’ll share a quick recipe for a homemade caramel sauce later.
-
1 teaspoon cinnamon: A warm spice that complements apples wonderfully. If you’re a cinnamon lover, feel free to add a dash more. Alternatively, you could use apple pie spice!
-
1/4 cup sugar: This enhances the sweetness of the apples, balancing out the flavors. Consider swapping granulated sugar for brown sugar to add a touch of molasses flavor.
-
1 egg (for egg wash): This gives your pie bombs that beautiful golden finish when baked. If you’re avoiding eggs, a splash of milk or a vegan butter rub can work too!
-
Flour (for dusting): Just a little sprinkle to keep everything from sticking while you’re rolling out your crust.
With these ingredients, you’re well on your way to creating a delightful treat that’s sure to impress.
Step-by-Step Instructions
Now, let’s get cooking! Follow these detailed steps for creating your Simple Caramel Apple Pie Bombs:
-
Preheat the Oven: Start by preheating your oven to 375°F (190°C). This is the perfect temperature for crisping up your pastry. While the oven warms, lay your pie crusts on a lightly floured surface.
-
Roll Out the Crusts: If your refrigerated pie crusts are a bit thick, use a rolling pin to gently roll them out until they’re about 1/8 inch thick. This ensures every bite is flaky. Don’t have a rolling pin? A wine bottle works in a pinch!
-
Prepare the Filling: In a mixing bowl, combine the peeled and diced apples, sugar, cinnamon, and caramel sauce. Stir everything together until the apples are well-coated. Let it sit for about 10 minutes; this allows the flavors to mingle and the apples to release some juices.
-
Cut the Crusts: Using a round cookie cutter or a large glass, cut the pie crust into circles — about 4 to 5 inches in diameter. This will be the base of our bombs. Gather the scraps, reroll them, and cut out more circles!
-
Fill the Crusts: Place about a tablespoon of the apple filling in the center of each circle of pie crust. Be cautious not to overfill! You want these bombs to close up easily.
-
Seal It Up: Brush the edges of the pie crust circles with the beaten egg (this acts as glue!). Then, fold the crust over the filling, forming a half-moon shape. Use a fork to crimp the edges tightly, ensuring they are well-sealed. This is where you can get creative; use your fingers to pinch or twist the edges for a fun design!
-
Egg Wash and Bake: Place your sealed bombs on a parchment-lined baking sheet. Brush the tops with the egg wash to achieve a beautiful golden color when baked. Pop them in the oven and bake for about 20-25 minutes or until they are golden brown and bubbly.
-
Let Them Cool: Once baked, remove your pie bombs from the oven and let them cool for about 5-10 minutes. The caramel will be molten and can cause a little splatter!
-
Serve Warm: Drizzle some extra caramel sauce over the top for that little extra touch of sweetness!
And voila! You’ve created your very own Simple Caramel Apple Pie Bombs that are not only delicious but also a total crowd-pleaser!
Serving Suggestions
To serve, present your pie bombs on a rustic wooden board or a classic white platter – it’s all about that beautiful contrast! Drizzle some caramel sauce, and add a scoop of vanilla ice cream or a dollop of whipped cream on the side. Consider garnishing with a sprinkle of cinnamon or a sprinkle of chopped pecans for added texture and flavor. Trust me, your guests will be asking for seconds!
Recipe Variations
Feeling adventurous? Here are a few ways to change up your Caramel Apple Pie Bombs:
-
Add Nuts: Incorporate chopped walnuts or pecans into your filling for an extra crunch.
-
Spiced Up Flavor: Add a pinch of nutmeg or ginger to the apple filling for a spiced twist.
-
Chocolate Drizzle: Drizzle melted chocolate over the tops for a decadent finish. Chocolate and caramel are a match made in heaven!
-
Savory Edition: Swap out apples for cooked diced butternut squash and add sage or rosemary for a savory take.
-
Mini Versions: Use mini-muffin tins to create bite-sized bombs. Just adjust your baking time accordingly!
Chef’s Notes
One of my favorite adaptations of this recipe is swapping out traditional caramel sauce for salted caramel. Crisp, tart apples paired with the complexity of sea salt take these bombs to a whole new level. And speaking of adaptations, if you end up with extra filling, don’t throw it away! It’s perfect for topping yogurt, pancakes, or even just spooning straight from the bowl. Trust me, it’s that good!
Every time I make these pie bombs, I think back to those afternoons with my grandma. The excitement of pulling golden, bubbling bites from the oven — it never gets old! Kitchen messes may happen (I once spilled a full bowl of caramel on the counter), but it’s those little mishaps that make cooking memorable and fun.
FAQs and Troubleshooting
1. What if my pie bombs are leaking during baking?
This can happen if they’re overfilled or not sealed properly. Make sure to crimp the edges well and leave some space for expansion when filling.
2. How do I store leftovers?
Keep them in an airtight container in the fridge for up to 3 days. Reheat in the oven for a few minutes to regain that crispy texture.
3. Can I make these in advance?
Absolutely! You can prepare and seal them a day ahead, store them in the fridge, and bake them fresh right before serving!
4. What if I don’t have pie crust?
You can replace it with puff pastry, crescent roll dough, or even biscuit dough in a pinch. Each gives a unique texture and flavor!
Creating Simple Caramel Apple Pie Bombs is more than just a recipe; it’s an experience filled with laughter, warmth, and delicious memories. So, tie on your apron, gather your loved ones, and let’s bake something beautiful together! Happy cooking! 🍏❤️
PrintSimple Caramel Apple Pie Bombs

A fun and modern twist on the classic caramel apple pie, these bite-sized bombs are filled with tender apples and warm caramel, all encased in a flaky pie crust.
- Prep Time: 15 minutes
- Cook Time: 25 minutes
- Total Time: 40 minutes
- Yield: 4 servings 1x
- Category: Dessert
- Method: Baking
- Cuisine: American
- Diet: Vegetarian
Ingredients
- 1 package refrigerated pie crusts
- 2 cups peeled and diced apples
- 1 cup caramel sauce
- 1 teaspoon cinnamon
- 1/4 cup sugar
- 1 egg (for egg wash)
- Flour (for dusting)
Instructions
- Preheat the oven to 375°F (190°C).
- Roll out the refrigerated pie crusts on a lightly floured surface.
- Combine the diced apples, sugar, cinnamon, and caramel in a mixing bowl.
- Cut the pie crust into circles using a round cutter.
- Place about a tablespoon of filling in the center of each crust circle.
- Brush the edges with beaten egg and fold over to seal.
- Place on a baking sheet and brush tops with egg wash.
- Bake for 20-25 minutes until golden brown.
- Let cool for 5-10 minutes before serving.
Notes
For an extra touch, drizzle additional caramel sauce over the top before serving. Leftover filling works well as a topping for yogurt or pancakes.
Nutrition
- Serving Size: 1 serving
- Calories: 320
- Sugar: 20g
- Sodium: 150mg
- Fat: 14g
- Saturated Fat: 4g
- Unsaturated Fat: 9g
- Trans Fat: 0g
- Carbohydrates: 40g
- Fiber: 2g
- Protein: 3g
- Cholesterol: 37mg
Keywords: caramel, apple, pie, dessert, fall treats, nostalgic, baking
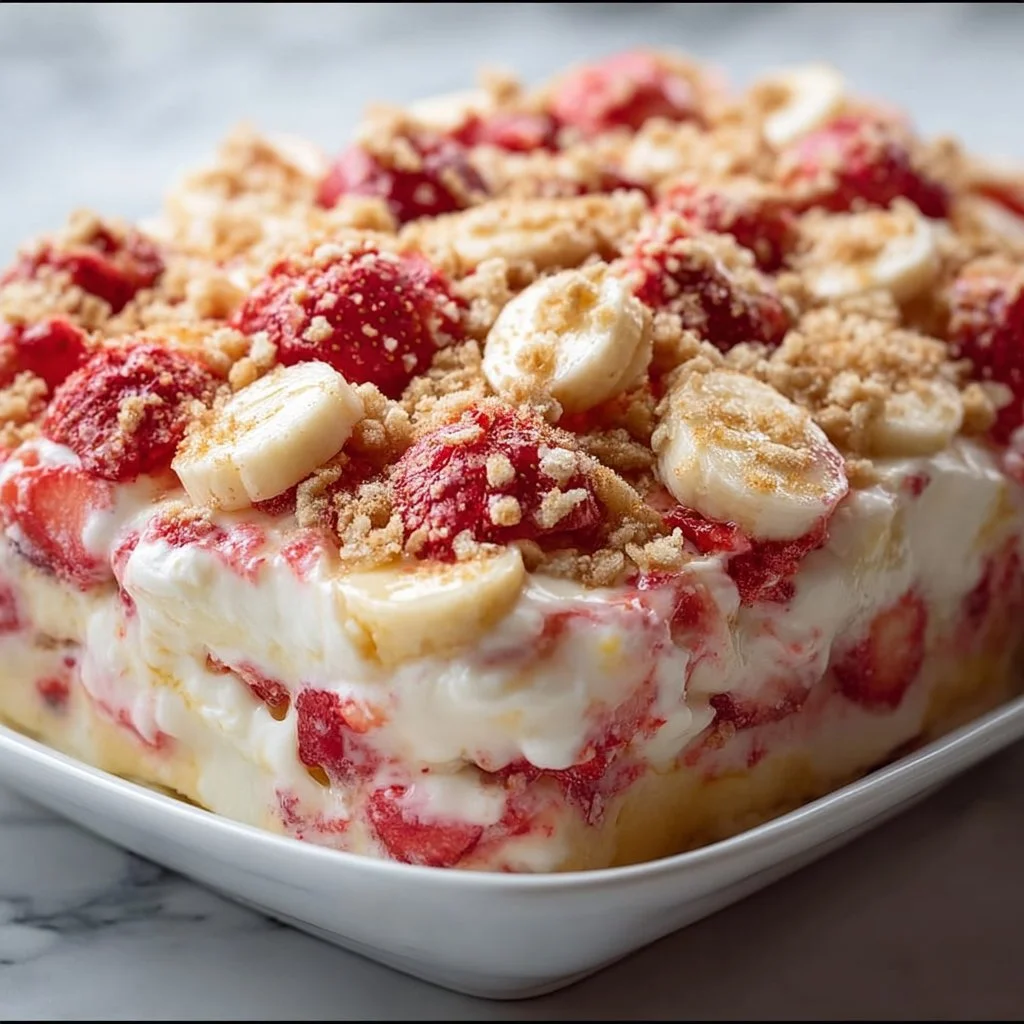
Strawberry Crunch Banana Pudding
The Delightful Harmony of Strawberry Crunch Banana Pudding
Hello, fellow food lovers! Today, let’s dive into a dish that’s near and dear to my sweet tooth—Strawberry Crunch Banana Pudding. This dessert isn’t just another pudding; it’s a delightful medley that combines the creaminess of vanilla pudding, the brightness of fresh bananas, and the unexpected crunch from strawberry cookie crumble. Whether you’re looking for a treat to impress your friends at a dinner party or simply want to indulge in something sweet after a long day, this recipe is here to save the day!
Growing up, I spent a lot of time in my grandmother’s kitchen while she worked her culinary magic. One of my fondest memories is when she would whip up her famous banana pudding during family gatherings. We’d all gather around the table, and the air would fill with laughter and that inviting aroma of pudding cooling in the refrigerator. She had a way of making the ordinary feel special—like a masterpiece crafted from everyday ingredients. Fast forward to today, and I’ve added my own twist: a strawberry crunch topping to elevate her classic recipe into something new and exciting.
This Strawberry Crunch Banana Pudding brings back all those warm memories while letting me share my passion for creating sophisticated yet simple desserts. Pairing the smooth vanilla pudding with the freshness of bananas and that buttery strawberry crunch is a joyous experience that will have your taste buds dancing. Let’s explore how to craft this delicious treat together!
Ingredients
To create this beautiful dessert, you’ll need the following ingredients:
-
1 package of vanilla pudding mix
The base of this dessert, vanilla pudding, provides a creamy and smooth texture. If you want an alternative, consider using a sugar-free version or a flavored pudding mix like banana or cheesecake. -
2 cups of milk
Whole milk creates a richer texture, but you can experiment with skim milk or plant-based alternatives like almond milk or oat milk for a different flavor. -
3 bananas, sliced
Ripe bananas are a must for this recipe; their natural sweetness adds to the dessert’s charm. If you’re not a banana fan, you could swap them out for thinly sliced peaches or berries for a fresh twist. -
1 container of whipped topping
This adds a light and airy texture to the pudding. You can use homemade whipped cream if you prefer a more natural option, or an alternative like coconut whipped cream for a dairy-free version. -
1 cup of strawberry cookie crumble
This is where the magic happens! You can make your crumble with buttery strawberry cookies, or if they’re not available, any buttery shortbread cookies mixed with some strawberry powder can work beautifully. -
Fresh strawberries for garnish (optional)
A pop of color and freshness, fresh strawberries make the dessert look inviting and add a burst of flavor. If you’re short on strawberries, blueberries or raspberries could work too!
Step-by-Step Instructions
Step 1: Prepare Your Pudding
- In a large mixing bowl, combine the vanilla pudding mix with 2 cups of milk.
Tip: Whisk vigorously for about 2 minutes until the mixture thickens—this is where the magic starts! Use a handheld mixer on low if you want to make it even fluffier.
Step 2: Fold in the Whipped Topping
- Once the pudding has set, gently fold in the container of whipped topping.
Chef Hack: Use a spatula and a gentle folding motion to keep the mixture light and airy. Remember, we want that creamy texture without losing all the fluffiness!
Step 3: Layer Your Ingredients
-
In a large glass serving dish or individual cups, start layering: begin with a layer of pudding, followed by a layer of sliced bananas.
Bonus Tip: Arrange the banana slices in a circle for a beautiful presentation—trust me, your guests will be impressed! -
Repeat the layering process until you’ve reached the top of your dish, finishing with a layer of pudding.
Step 4: Top with Crunch
- Sprinkle the strawberry cookie crumble generously over the top layer.
Chef Insight: Don’t hold back on the crumble—this is the highlight of the dish! If you’d like extra crunch, consider toasting the crumble slightly in a pan for 5-7 minutes.
Step 5: Chill and Garnish
- Place the finished pudding in the refrigerator for at least 2 hours (or ideally overnight) to allow the flavors to meld and the pudding to set perfectly.
Final Touch: When ready to serve, garnish with fresh strawberries for that extra charm.
Serving Suggestions
When it comes to serving your Strawberry Crunch Banana Pudding, the beauty is in the details! For a stunning presentation, consider using individual glass cups or jars. This not only showcases the delightful layers but also makes for an appealing dessert buffet. Drizzle a bit of homemade chocolate sauce or caramel on top just before serving for an extra special treat!
Recipe Variations
Let’s get playful! Here are some fun twists on this classic recipe:
- Chocolate-Chip Banana Pudding: Add mini chocolate chips to the pudding for that chocolate lover’s touch.
- Nutty Banana Crunch: Sprinkle in some chopped nuts like pecans or almonds for added texture.
- Berry Medley: Swap out the strawberries for a mix of your favorite berries—blueberries, raspberries, and blackberries for a fruity explosion!
- Savory Banana Pudding: A hint of cream cheese in the pudding could offer a delightful tang if you’re feeling adventurous.
- Lemon Zest: A little lemon zest in the pudding adds a refreshing punch—perfect for warm weather gatherings!
Chef’s Notes
As many recipes do, this Strawberry Crunch Banana Pudding has evolved over time. I even remember the first time I served it at a family gathering—a few skeptical looks turned to delight as forks dove in. The crunch was indeed a game-changer! My journey with this dish ignited my love for creating layers of flavor and texture. Plus, it’s an easy go-to when unexpected guests stop by; it takes less than 30 minutes to prep!
One thing I always keep in mind is to bring my personality into my cooking. There’s something magical about sharing food with loved ones that creates connection and warmth. This dish has become a staple—it’s a reminder of my grandmother’s kitchen where so much love began.
FAQs and Troubleshooting
1. Can I make this pudding ahead of time?
Absolutely! This pudding actually tastes better the next day, once it has chilled and all the flavors have melded together.
2. What if I can’t find strawberry cookies?
No worries! You can make your crumble with any buttery cookies. Just blend them with a touch of strawberry jam or freeze-dried strawberries for that strawberry flavor!
3. Why is my pudding not thickening?
Make sure you’re whisking the pudding mix and milk well for the recommended time. If it still doesn’t thicken, you may need to check the expiration date on your pudding mix.
4. How should I store leftovers?
Keep any leftovers covered in the refrigerator. It should stay fresh for about 3-4 days, though the crumble might lose some crunch.
Nutritional Info
If you’d like to know the nutritional breakdown, a serving of Strawberry Crunch Banana Pudding contains approximately:
- Calories: 250
- Total Fat: 10g
- Saturated Fat: 5g
- Carbohydrates: 38g
- Sugars: 20g
- Protein: 3g
Remember, these figures may vary depending on the specific brands of ingredients used.
So there you have it! Your very own guide to creating Strawberry Crunch Banana Pudding that marries nostalgia with elegance. I hope you find joy in making this dish as much as I do. Let’s gather around the table, dive into some layers of deliciousness, and create memories that last! I can’t wait to hear how yours turns out—happy cooking!
PrintStrawberry Crunch Banana Pudding
A delightful medley of creamy vanilla pudding, fresh bananas, and crunchy strawberry cookie crumble.
- Prep Time: 30 minutes
- Cook Time: 0 minutes
- Total Time: 120 minutes
- Yield: 4 servings 1x
- Category: Dessert
- Method: Chilling
- Cuisine: American
- Diet: Vegetarian
Ingredients
- 1 package of vanilla pudding mix
- 2 cups of milk
- 3 bananas, sliced
- 1 container of whipped topping
- 1 cup of strawberry cookie crumble
- Fresh strawberries for garnish (optional)
Instructions
- In a large mixing bowl, combine the vanilla pudding mix with 2 cups of milk. Whisk vigorously for about 2 minutes until the mixture thickens.
- Once the pudding has set, gently fold in the container of whipped topping.
- In a large glass serving dish or individual cups, start layering: begin with a layer of pudding, followed by a layer of sliced bananas.
- Repeat the layering process until you’ve reached the top, finishing with a layer of pudding.
- Sprinkle the strawberry cookie crumble generously over the top layer.
- Place the finished pudding in the refrigerator for at least 120 minutes (or ideally overnight) to allow the flavors to meld.
Notes
Consider using individual glass cups for serving. Drizzle homemade chocolate sauce or caramel on top before serving.
Nutrition
- Serving Size: 1 serving
- Calories: 250
- Sugar: 20g
- Sodium: 105mg
- Fat: 10g
- Saturated Fat: 5g
- Unsaturated Fat: 5g
- Trans Fat: 0g
- Carbohydrates: 38g
- Fiber: 1g
- Protein: 3g
- Cholesterol: 15mg
Keywords: banana pudding, strawberry dessert, summer dessert
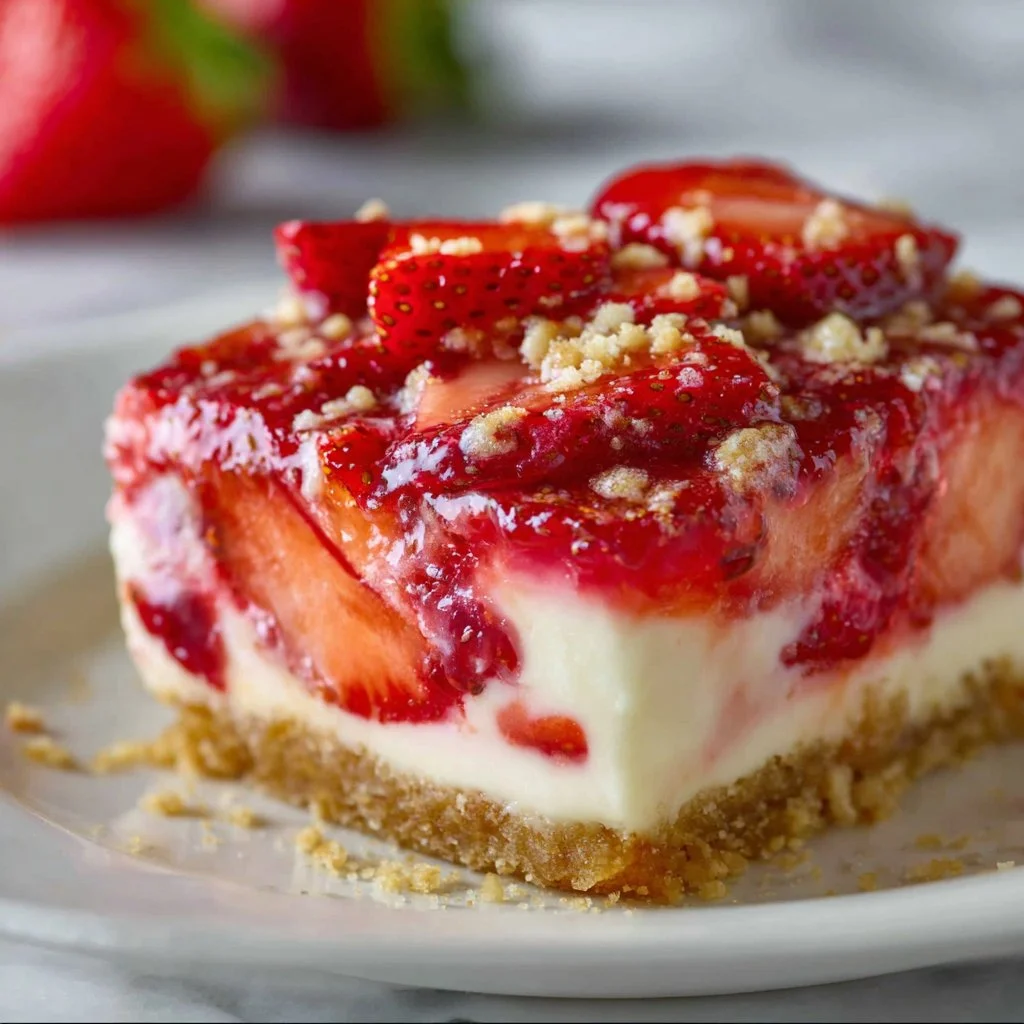
Strawberry Rhubarb Custard Dessert
The Sweet Symphony of Strawberry Rhubarb Custard Dessert
Hello, my culinary companions! Today, let’s dive into a dish that beautifully captures the essence of spring and the joyful gatherings it inspires: Strawberry Rhubarb Custard Dessert. Imagine this — a creamy, luscious custard meets the tart bite of rhubarb and the sweet surprise of strawberries, all encased in a delightful cookie crust. It’s the kind of dessert that makes you feel at home, even if you’re whipping it up for the first time.
I still remember the first time I tasted this vibrant dessert. It was at a family picnic, tucked between blankets and laughter, with a warm breeze rustling the leaves. My Aunt Lydia brought her famous strawberry rhubarb creation, and as soon as I took that first bite, it was like a revelation! The tartness of rhubarb softened by the sweetness of strawberries created a symphony in my mouth. Ever since then, I’ve cherished it not just as a recipe, but as a memory — a time when good food and great company merged into something magical.
As I’m sharing this recipe with you, I want you to think of it as not just a dessert, but as a vessel for creating your own unforgettable moments. So, whether you’re hosting a dinner party, celebrating a special occasion, or just treating yourself on a Tuesday, let’s bring a slice of joy into your kitchen together!
Personal Story
My journey with strawberry rhubarb custard desserts truly began in my grandmother’s kitchen. It was one of those places where flour always dusted the countertops and the aroma of baked goods danced through the air. I can vividly recall her grinning as she handed me the mixing bowl, urging me to stir the buttery sugar cookie crust. It felt like a rite of passage: as I mixed, she shared tales of her own childhood — running through fields of rhubarb and foraging strawberries with friends, just like we were doing that day.
After layers of laughter and mischief, we’d pop the delicious green and red creation into the oven, the kitchen filling with tantalizing scents that promised warmth. And when it came time to serve, she’d always say, “Good food draws people in!” This dessert became a staple at every family gathering, a tradition that passed down through generations. I’ll never forget the evening we all gathered on the porch, sun setting over the horizon, enjoying that sweet tart delight while reliving old stories. It was as if every bite held a piece of our family’s history.
Now, I’m thrilled to pass this tradition along to you. Let’s mix up some nostalgic memories of our own while making this delectable dish!
Ingredients
Here’s what you’ll need to create this irresistible Strawberry Rhubarb Custard Dessert. Each ingredient adds its own unique flair, so let’s break them down!
-
1 pouch of Betty Crocker Sugar Cookie Mix
This is the base of our crust and gives a delightful sweetness that perfectly contrasts the tart filling. Feel free to swap with any pre-made sugar cookie mix you prefer! If you’re feeling ambitious, homemade sugar cookies would be fabulous too. -
1/2 cup softened butter
Butter is essential for creating that rich flavor and tender texture in your crust. Make sure it’s softened for easy blending. If you’re looking for a dairy-free option, use vegan butter or coconut oil! -
1 large egg
This acts as a binding agent, holding our crust together. For an egg-free version, try using 1/4 cup of unsweetened applesauce or a flax egg (1 tablespoon ground flaxseed mixed with 2.5 tablespoons water). -
2 tbsp all-purpose flour
This little bit helps to absorb moisture and keeps our crust from becoming too crumbly. You can substitute it with gluten-free flour if needed! -
3 large eggs, beaten
These are crucial for creating our rich custard layer. The eggs provide structure and creaminess. For a dairy-free custard, consider using silken tofu blended until smooth as an alternative. -
1 1/2 cups granulated sugar
This sweetens our custard and brings balance to the tart rhubarb. You can experiment with brown sugar for a deeper flavor, or coconut sugar for a more natural sweetener. -
1/2 cup heavy whipping cream
Heavy cream lends a luxurious texture to the custard, making it decadent. If you prefer non-dairy, you can use coconut cream instead, which will add a delightful tropical twist! -
1/3 cup all-purpose flour
Just like in our crust, this helps stabilize our custard and gives it that lovely creamy consistency once baked. -
1/2 tsp salt
A pinch of salt enhances the sweetness and balances the flavors beautifully. Don’t skip this step; it’s a flavor booster! -
3 cups chopped fresh or thawed rhubarb
Rhubarb is the star of the show, providing that unique tartness that pairs perfectly with strawberries. If you can’t find fresh rhubarb, frozen works just as well! -
2 cups chopped strawberries
Sweet and juicy strawberries bring a burst of flavor to our dessert. You can substitute frozen strawberries if necessary; just make sure to drain any excess liquid!
Step-by-Step Instructions
Now, let’s get to the fun part! Follow these simple steps to create your very own Strawberry Rhubarb Custard Dessert, with a few chef tips sprinkled in for good measure.
-
Preheat Your Oven
Preheat your oven to 350°F (175°C). This ensures that your dessert bakes evenly and perfectly golden brown. -
Make the Cookie Crust
In a mixing bowl, combine the sugar cookie mix, softened butter, 1 egg, and 2 tablespoons of flour. Mix until it forms a soft dough. It’s okay if it’s a little crumbly; it will come together!Chef Tip: Don’t over-mix! A gentle touch keeps the crust tender.
-
Press the Dough Into the Pan
Lightly grease a 9×13 inch baking dish. Spread the cookie dough evenly on the bottom and slightly up the sides, creating a “crust.” It doesn’t have to be perfect — rustic is charming!Chef Tip: Use your fingers or the bottom of a measuring cup to press it down firmly, ensuring it’s even.
-
Bake the Crust
Place your crust in the preheated oven and bake for about 10-12 minutes, or until it’s lightly golden. Keep an eye on it — you want it just set, not overbaked!Chef Tip: While the crust is baking, you can start preparing the custard to save time.
-
Prepare the Custard Filling
In a large bowl, whisk together the 3 beaten eggs, granulated sugar, heavy cream, 1/3 cup flour, and salt until smooth and combined. This will be the heart of your dessert!Chef Tip: Make sure all ingredients are at room temperature for a creamy consistency!
-
Add the Fruit
Gently fold in the chopped rhubarb and strawberries into the custard mixture, making sure they’re well coated. This mix will infuse flavor throughout!Chef Tip: If you like a more intense fruit flavor, let the mixture sit for about 10 minutes to allow the juices to mingle before adding it to the crust.
-
Combine and Bake
Pour the fruit and custard mixture over the baked crust, spreading it evenly. Place the dish back in the oven and bake for an additional 30-40 minutes, or until the custard is set and the edges are slightly puffed.Chef Tip: To check for doneness, gently shake the pan; if the center is slightly jiggly but not liquidy, it’s ready!
-
Cool and Chill
Once done, remove it from the oven and let it cool to room temperature. Then, refrigerate for at least 2 hours before serving. This allows the flavors to meld and the dessert to set properly.Chef Tip: You can prep this dessert a day in advance; it gets better with time as the flavors deepen!
Serving Suggestions
When it’s finally time to serve your strawberry rhubarb delight, slice it into squares and place them on dessert plates or a beautiful serving tray. A light dusting of powdered sugar adds a touch of elegance. Serve with a dollop of fresh whipped cream or a scoop of vanilla ice cream for an extra treat. You can also garnish with fresh mint leaves for a pop of color and flavor.
Recipe Variations
Feeling adventurous? Here are a few creative twists you can try on this classic dessert:
-
Berry Medley Twist: Instead of just strawberries, use a mix of berries like blueberries and raspberries for a colorful medley!
-
Spiced Custard: Add a pinch of cinnamon or a splash of vanilla extract to the custard to enhance the flavor profile.
-
Gluten-Free Version: Use gluten-free sugar cookie mix and substitute the all-purpose flour in the custard with a gluten-free blend.
-
Nutty Crunch: Sprinkle some crushed nuts on top before baking for added texture and flavor.
-
Coconut Flour Option: Swap out the 1/3 cup of flour in the custard for coconut flour for a surprising twist!
Chef’s Notes
I’ve made this recipe countless times, and each time it brings back the beautiful memories of cooking with family. You know, I once burned the first batch while chatting with friends about our favorite childhood desserts. I learned the hard way that when cooking with love, sometimes a clock can get lost in laughter!
This dessert has evolved over the years, adapting to the fruits of each season and different family tastes. One year, I played with adding a layer of mango to the fruit mix, and it turned out deliciously surprising! Each family dinner or gathering has introduced new favorites and memories that I cherish.
FAQs and Troubleshooting
-
Why did my custard turn out runny?
This can happen if the custard is underbaked. Make sure to bake until the edges are firm and the center is slightly jiggly. If it remains runny, it needs more time in the oven. -
Can I use frozen rhubarb and strawberries?
Absolutely! Just thaw and drain excess liquid from the fruit to avoid a soggy dessert. Frozen fruits can impart extra flavor, if well prepared! -
How do I store any leftovers?
Store leftover dessert in an airtight container in the refrigerator. It should stay fresh for about 3-4 days. Just remember it tastes even better the next day! -
What if I want to make this in advance?
You can make it up to a day in advance. Just cool completely, refrigerate, and serve cold or at room temperature.
Nutritional Info (Optional)
While I believe in enjoying desserts, particularly one as delightful as this, if you’re curious about the nutritional aspects, here’s an estimate per serving (1/12th of the pan):
- Calories: 250
- Total Fat: 10g
- Saturated Fat: 6g
- Carbohydrates: 38g
- Sugars: 16g
- Protein: 3g
Now, go on and whip up that Strawberry Rhubarb Custard Dessert! I can’t wait to hear about your own kitchen adventures and the memories you create along the way. Happy baking, my friends! 🍓🌿
PrintStrawberry Rhubarb Custard Dessert
A creamy custard layered with tart rhubarb and sweet strawberries, all encased in a delightful cookie crust.
- Prep Time: 20 minutes
- Cook Time: 50 minutes
- Total Time: 70 minutes
- Yield: 12 servings 1x
- Category: Dessert
- Method: Baking
- Cuisine: American
- Diet: Vegetarian
Ingredients
- 1 pouch of Betty Crocker Sugar Cookie Mix
- 1/2 cup softened butter
- 1 large egg
- 2 tbsp all-purpose flour
- 3 large eggs, beaten
- 1 1/2 cups granulated sugar
- 1/2 cup heavy whipping cream
- 1/3 cup all-purpose flour
- 1/2 tsp salt
- 3 cups chopped fresh or thawed rhubarb
- 2 cups chopped strawberries
Instructions
- Preheat your oven to 350°F (175°C).
- Combine the sugar cookie mix, softened butter, 1 egg, and 2 tablespoons of flour in a mixing bowl until it forms a soft dough.
- Press the dough into a lightly greased 9×13 inch baking dish.
- Bake the crust for 10-12 minutes, until lightly golden.
- Whisk together the 3 beaten eggs, granulated sugar, heavy cream, 1/3 cup flour, and salt in a large bowl until smooth.
- Fold in the chopped rhubarb and strawberries gently.
- Pour the fruit and custard mixture over the baked crust, spreading it evenly.
- Bake again for 30-40 minutes, until the custard is set.
- Cool to room temperature and refrigerate for at least 2 hours before serving.
Notes
Serve chilled with a dusting of powdered sugar and optional whipped cream or ice cream.
Nutrition
- Serving Size: 1 serving
- Calories: 250
- Sugar: 16g
- Sodium: 150mg
- Fat: 10g
- Saturated Fat: 6g
- Unsaturated Fat: 4g
- Trans Fat: 0g
- Carbohydrates: 38g
- Fiber: 1g
- Protein: 3g
- Cholesterol: 80mg
Keywords: dessert, strawberry, rhubarb, custard, spring, sweet, baking
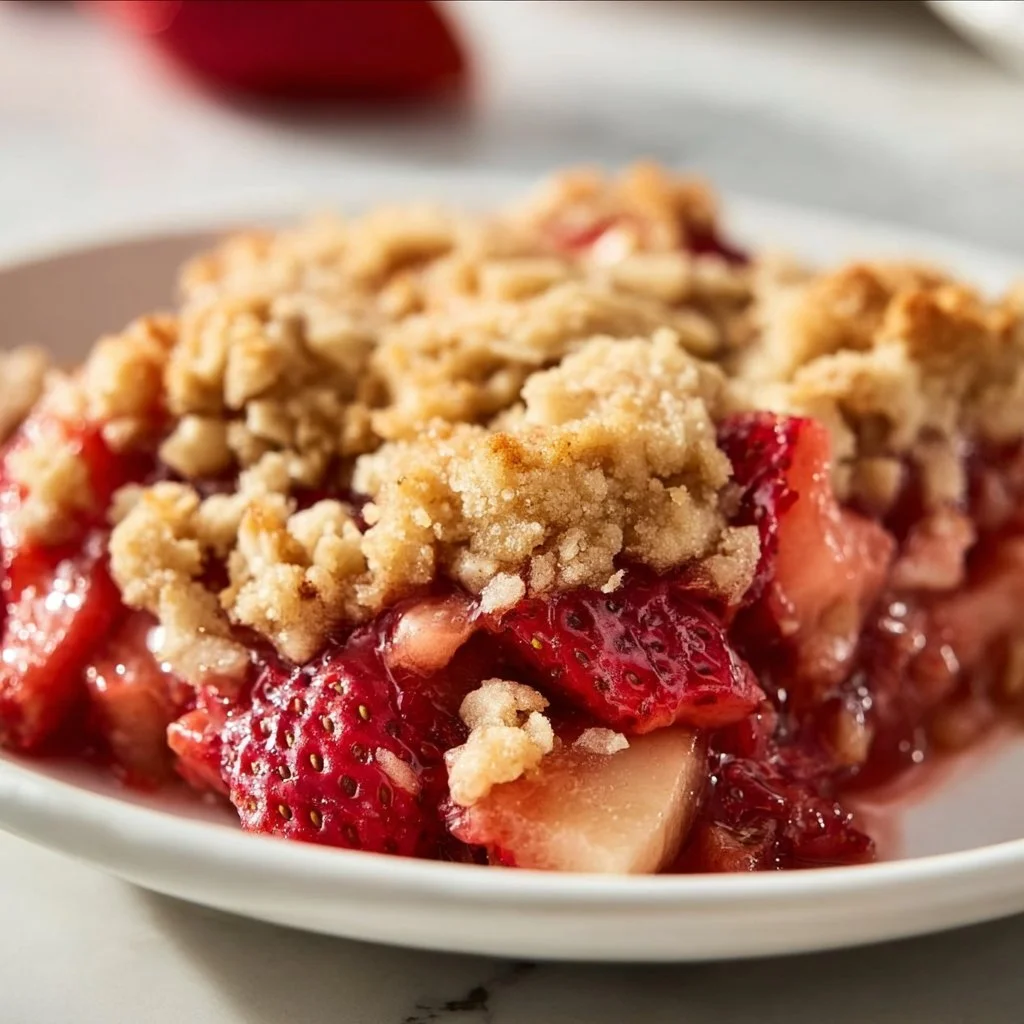
Strawberry Rhubarb Crisp
Indulge in Sweet Nostalgia: Recipe for Strawberry Rhubarb Crisp
Hello, fellow foodies! 🎉 Today we’re diving into a delightful dish that marries sweet and tart in a way that feels like a warm hug from the inside out — Strawberry Rhubarb Crisp! Not only is it a crowd-pleaser, but it’s also a beautiful reminder of those sunny afternoons spent in grandma’s kitchen, where the air was filled with laughter and the sweet scent of baked goods bubbling in the oven.
But before we roll up our sleeves and tie on our aprons, let’s bask in the nostalgia of this classic dessert and the joy it brings to our tables today.
A Whiff of Nostalgia: My Strawberry Rhubarb Crisp Story
I can still picture the sun streaming through the window as I stood on a stool, arms deep in a mixing bowl, on the hunt for the perfect crumble topping for our family’s summer gatherings. My grandmother, the queen of desserts, had a delightful way of turning the simplest ingredients into something extraordinary. Every time she made her famous Strawberry Rhubarb Crisp, the whole house would buzz with excitement.
Rhubarb plants grew abundantly in her backyard, a vibrant pink poking out of the earth, ready to be snipped and tossed into the mix alongside sweet, juicy strawberries. We would rummage through the pantry for oats and flour, a bit of sugar, and, of course, that secret sprinkle of cinnamon that always kept us guessing.
As the crisp baked, we’d hang out in the kitchen, chatting and stealing occasionally glances at the oven, anticipating that bubbling goodness and warm, buttery aroma. The first taste was always magical, that perfect combination of flavors marrying together in a way that only memories can describe. And let me tell you, dear friends, each spoonful tasted like love itself.
We may not have had fancy gourmet gadgets at our disposal, but my grandma taught me the artistry of simplicity. So, roll up those sleeves, and let’s create our own patch of sweet nostalgia!
Ingredients for Your Strawberry Rhubarb Crisp
Let’s get to the good stuff! Here’s everything you’ll need to whip up this delightful crisp. Each ingredient brings something special to the party, and I’m here to share tips to ensure your dish is a hit!
-
2 cups fresh strawberries, hulled and sliced
These juicy gems are the star of the show. Look for plump strawberries that are fragrant — you want the sweetness to shine! If fresh strawberries aren’t available, you can use frozen ones, but reduce the sugar slightly as they can be a bit sweeter. -
2 cups rhubarb, chopped
Ah, the tangy counterpart of the strawberries! Rhubarb adds a lovely tartness that balances the sweetness. If rhubarb isn’t in season, you can use apple or even sour cherries as a substitute. -
1 cup granulated sugar
This brings the sweetness needed to balance the tangy rhubarb. For a healthier option, you can substitute half of this with honey or maple syrup — just note that it will alter the texture slightly. -
2 tablespoons cornstarch
This is our secret weapon for thickening the delicious filling — it helps give the crisp that lovely structure. If you’re out of cornstarch, you can use all-purpose flour, but the filling may be a tad thinner. -
1 tablespoon lemon juice
A splash of acidity that brightens the flavors and enhances the fruitiness. If you’re fresh out of lemon, a splash of orange juice works almost as well! -
1 cup rolled oats
These provide the crunchy topping and a nutty depth of flavor. Quick oats can work in a pinch, but I love the texture that rolled oats provide in this dish. -
1 cup all-purpose flour
Essential for our crumbly topping — it gives the right structure and texture. If you’re looking for a gluten-free option, almond flour or a gluten-free flour blend can do the trick! -
1/2 cup brown sugar
This delivers a subtle molasses flavor that caramelizes beautifully during baking. You can reduce it to 1/3 cup if you prefer less sweetness! -
1/2 cup butter, softened
The source of all that rich, buttery goodness in our crisp! If you want a plant-based version, coconut oil or vegan butter can work well too — just keep an eye on the melting time. -
1 teaspoon cinnamon
Cinnamon is the perfect warm spice that lifts all the flavors in this crisp. Feel free to sprinkle a bit more if you like a stronger flavor or mix in some nutmeg for an extra kick!
Step-by-Step Instructions for the Perfect Crisp
Alright, it’s time to make some magic happen in the kitchen! Grab those ingredients and follow these steps for a delicious strawberry rhubarb crisp that will impress your friends and family.
1. Preheat Your Oven
Set your oven to 350°F (175°C). A preheated oven ensures that your crisp will cook evenly and bubble perfectly!
2. Prepare the Filling
In a large mixing bowl, combine your sliced strawberries, chopped rhubarb, granulated sugar, cornstarch, and lemon juice.
- Tip: Gently toss these ingredients together, ensuring each piece of fruit is coated. You want that sugar to play nice with the fruit juices while you’re combining them!
3. Pour the Fruit into the Baking Dish
Transfer the luscious fruit mixture into a greased 9-inch baking dish. Spread it out evenly so every spoonful will have that sweet-and-tangy combo.
4. Make the Topping
In a separate bowl, combine the rolled oats, all-purpose flour, brown sugar, butter, and cinnamon.
- Chef’s Insight: Use a fork or your fingers to mix everything until it resembles a crumbly texture. You want those bits of butter to stay intact for a beautiful crispy finish!
5. Crumble that Topping
Sprinkle the oat mixture evenly over the rhubarb and strawberry mixture, covering it completely. Don’t hold back — the more, the merrier!
6. Bake the Crisp
Pop it into your preheated oven and let it bake for 40-45 minutes. You’ll know it’s ready when the filling is bubbling and the topping is beautifully golden brown.
- Pro Tip: Toss some foil over the top if it’s browning too quickly, allowing the fruit to finish cooking without burning the crispy goodness.
7. Cool and Serve
Let the crisp cool for about 10-15 minutes before diving in so you don’t burn your taste buds. This also helps stabilize the filling a bit.
Woohoo! Your strawberry rhubarb crisp is ready to shine!
Serving Suggestions
To serve, scoop generous portions into bowls and top with a dollop of fresh whipped cream or a scoop of vanilla ice cream. The warm crisp combined with the cold ice cream creates a dreamy contrast that is absolutely heavenly! You could also sprinkle a few fresh mint leaves on top for a pop of color and freshness.
Recipe Variations to Explore
- Add Nuts: Consider adding chopped walnuts or pecans for an extra crunch to the topping!
- Spiced Crisps: Replace the cinnamon with pumpkin spice or a dash of ginger for a different seasonal twist.
- Berry Mix: Combine other berries, like blueberries or raspberries, for a mixed berry crisp that’s bursting with flavor!
- Vegan Alternative: Substitute the butter with coconut oil and use a flax egg for an easy vegan option.
- Gluten-Free: Use gluten-free oats and flour to create a deliciously inclusive dish for everyone to enjoy!
Chef’s Notes
This recipe has evolved over time in my kitchen and has become a staple for summer gatherings. I cherish how simple it is to make while allowing you to explore flavors based on what’s in season! I once had a little “oops” moment when I accidentally swapped salt for sugar in the filling. Let’s just say that day didn’t go as planned, but it sparked an idea to double-check measurements — a lesson learned with a laugh!
FAQs and Troubleshooting
1. Why is my topping soggy?
If the topping turns out soggy, it might be because the butter was overmixed into the dry ingredients. You want a crumbly texture, not a paste. Also, ensure you’ve added the right amount of cornstarch for thickening the fruit juices.
2. Can I make this ahead of time?
Absolutely! You can assemble the crisp, cover it, and store it in the fridge for 1-2 days before baking. Just make sure to add a few extra minutes to the baking time if it’s chilled.
3. Can I use frozen fruit?
Yes! If using frozen strawberries or rhubarb, there’s no need to thaw, but add a little extra cornstarch to help absorb the extra juices released during baking.
4. How do I store leftovers?
Keep any leftovers in an airtight container in the fridge for up to 3 days. Reheat it in the oven for that fresh-baked taste!
Nutritional Info (Optional)
While not exact, a single serving of this strawberry rhubarb crisp (approximately 1/8 of the dish) may contain around:
- Calories: 250
- Protein: 2g
- Fat: 11g
- Carbohydrates: 39g
- Sugar: 18g
Note: These numbers can vary based on serving size and ingredient brands used.
And there you have it! A delicious, heartwarming Strawberry Rhubarb Crisp that’s bound to evoke joy — whether for yourself or your loved ones gathered around the table. Here’s to the beauty of cooking with intention, letting flavors first speak of memories, and creating new ones with every delightful bite.
If you try this recipe, I’d love to hear how it turned out! Snap a picture, tag me on your social media, and let’s keep the cooking conversation going. Cheers to sweet moments and tasty treats! 🍓🌿✨
PrintStrawberry Rhubarb Crisp
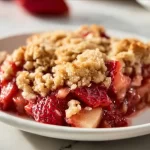
A delightful dessert that marries sweet strawberries and tangy rhubarb, topped with a crunchy oat crumble.
- Prep Time: 15 minutes
- Cook Time: 45 minutes
- Total Time: 60 minutes
- Yield: 8 servings 1x
- Category: Dessert
- Method: Baking
- Cuisine: American
- Diet: Vegetarian
Ingredients
- 2 cups fresh strawberries, hulled and sliced
- 2 cups rhubarb, chopped
- 1 cup granulated sugar
- 2 tablespoons cornstarch
- 1 tablespoon lemon juice
- 1 cup rolled oats
- 1 cup all-purpose flour
- 1/2 cup brown sugar
- 1/2 cup butter, softened
- 1 teaspoon cinnamon
Instructions
- Preheat your oven to 350°F (175°C).
- Combine your sliced strawberries, chopped rhubarb, granulated sugar, cornstarch, and lemon juice in a large mixing bowl.
- Transfer the fruit mixture into a greased 9-inch baking dish.
- In a separate bowl, combine the rolled oats, all-purpose flour, brown sugar, butter, and cinnamon.
- Mix everything until it resembles a crumbly texture.
- Sprinkle the oat mixture evenly over the fruit mixture.
- Pop it into your preheated oven and let it bake for 40-45 minutes.
- Cool for 10-15 minutes before serving.
Notes
Serve with whipped cream or vanilla ice cream for a perfect combo!
Nutrition
- Serving Size: 1 serving
- Calories: 250
- Sugar: 18g
- Sodium: 100mg
- Fat: 11g
- Saturated Fat: 7g
- Unsaturated Fat: 3g
- Trans Fat: 0g
- Carbohydrates: 39g
- Fiber: 3g
- Protein: 2g
- Cholesterol: 30mg
Keywords: Strawberry Rhubarb Crisp, Dessert, Summer Recipe, Warm Dessert
Mango Curd Tart
Mango Curd Tart: A Sun-Kissed Delight
Hello, fellow food lovers! Have you ever taken a bite of something so delicious that it instantly transports you to a sun-drenched beach or a vibrant summer picnic? That’s exactly the kind of experience you’ll get with my Mango Curd Tart. With its creamy, luscious mango filling nestled in a buttery, melt-in-your-mouth crust, this dessert is a celebration of everything we love about summer — and it’s so easy to make!
Imagine hosting a dinner party, friends gathered around the table with laughter ringing in the air, and you proudly presenting this stunning tart as the grand finale. Trust me, the moment your guests take their first bite, you’ll see their eyes light up with delight, and you’ll be the star of the evening!
This tart holds a special place in my heart. Once, during a sunny afternoon at my friend Chloe’s garden, we decided to whip up something refreshing. With ripe mangoes just begging to be used and a little playful competition to see who could create the best dessert, the Mango Curd Tart was born! We stirred, whisked, and poured our way to a sweet victory as the tart baked, filling the kitchen with an irresistible aroma. In that lively atmosphere, friendships deepened, and belly laughs echoed. It became more than just a dessert — it was a token of memories made, laughter shared, and the sheer joy of cooking together.
Whether you’re looking to impress your guests or simply want to indulge in a slice of sunshine, this Mango Curd Tart is your answer. So, grab your apron, and let’s embark on this fruity journey together!
Personal Story
I don’t think there’s ever been a summer where mangoes didn’t play a starring role in our family gatherings. I remember one particularly hot weekend when my parents decided to host an impromptu BBQ. As the grill sizzled and the sweet scent of barbecued meats wafted through the air, my mom dashed into the kitchen, determined to create the ultimate summer dessert.
She pulled out her secret stash of ripe mangoes and a few essential baking ingredients. As I watched her transform simple ingredients into something magical, I realized that cooking was about the joy it brings — both in the process and in the delicious results. That day, we devoured palm-sized slices of mango tart, sticky with sweet juice and topped with whipped cream. Each bite was a reminder of summer warmth and family love.
Now, every time I whip up a Mango Curd Tart, it’s a little homage to those sunny days spent in the kitchen with my mom. It’s my way of reconnecting with that carefree spirit and celebrating the sweet, juicy goodness of mangoes. You’re going to love bringing this tart to life in your own kitchen!
Ingredients
Here’s what you’ll need to whip up this tropical delight:
- 1 1/2 cups all-purpose flour
- The foundation of your pastry crust. If you’re gluten-free, feel free to use a gluten-free all-purpose blend!
- 1/2 cup unsalted butter, softened
- Butter provides richness and flavor to the crust. Be sure it’s softened for easy mixing — you can also use coconut oil for a dairy-free option!
- 1/4 cup powdered sugar
- This sweetener results in a tender, melt-in-your-mouth crust. If you’re out, granulated sugar works in a pinch, though the texture will be slightly different.
- 1/4 teaspoon salt
- Just a pinch enhances the sweetness of the crust.
- 1 large egg yolk
- This helps bind your crust together and adds richness. If you need an egg-free option, consider using flaxseed meal mixed with water as a substitute.
- 1/4 cup cold water
- This helps bring your dough together; cold water solidifies the butter, ensuring a flaky crust.
- 1 cup mango puree
- Aim for fresh or frozen mangoes — just blend them until smooth! You can also use store-bought puree for convenience.
- 3/4 cup sugar
- This sweetens your curd. Feel free to reduce the sugar depending on your sweetness preference.
- 3 large eggs
- The eggs provide structure and creaminess. If you want an egg-free version, silken tofu blended until smooth can work too!
- 1/2 cup lemon juice
- Adds brightness and balances the sweetness — fresh is always best! If you’re in a pinch, bottled lemon juice works too.
- 1 tablespoon lemon zest
- A little zest gives that extra zing to your curd. If you don’t have lemons, limes or oranges could be alternate zest options!
- 1/2 cup heavy cream
- This transforms your curd into a luxurious experience. For a lighter option, you can use whipped coconut cream or dairy-free heavy cream.
Step-by-Step Instructions
Step 1: Prepare the Crust
-
Combine Dry Ingredients:
- In a mixing bowl, whisk together the all-purpose flour, powdered sugar, and salt. This helps evenly distribute the ingredients.
-
Cut in the Butter:
- Add the softened butter and, using your fingers or a pastry cutter, work it into the flour mixture until it resembles coarse crumbs. This is a fun step! Just think of it as a mini workout for your hands.
-
Add Egg Yolk:
- Mix in the egg yolk until combined. This adds a beautiful richness to your crust.
-
Incorporate Cold Water:
- Gradually add the cold water one tablespoon at a time, mixing gently until the dough comes together. Don’t overwork it; we want it tender!
-
Chill the Dough:
- Wrap the dough in plastic wrap and refrigerate for at least 30 minutes. This will make it easier to roll out later and help prevent shrinkage.
Step 2: Bake the Crust
-
Preheat Oven:
- Preheat your oven to 350°F (175°C). A warm oven is key for a perfectly baked tart!
-
Roll Out the Dough:
- On a lightly floured surface, roll out the chilled dough to about 1/8 inch thick. Carefully transfer it to a tart pan (a removable-bottom tart pan is great for easy serving).
-
Blind Bake:
- Prick the bottom with a fork and line it with parchment paper. Fill with pie weights or dried beans. Bake for 15 minutes or until lightly golden. Blind baking ensures a crisp crust.
-
Cool:
- Remove from the oven, take out the weights, and let the crust cool completely. Keep an eye on it as it cools; the slightly warm crust helps the curd set nicely!
Step 3: Prepare the Mango Curd
-
Combine Mango Puree and Sugar:
- In a saucepan over medium heat, whisk together the mango puree and sugar until the sugar fully dissolves. This fragrant step sets the stage for your curd.
-
Add Eggs and Lemon Juice:
- Gradually whisk in the eggs and the lemon juice. Make sure to whisk constantly to avoid scrambling the eggs! The mixture should be smooth and bright.
-
Cook the Mixture:
- Keep cooking and whisking constantly until the mixture thickens (this happens around 170°F; you can use a thermometer for precision). This process takes patience, but it’s worth it!
-
Strain (Optional):
- If you want the smoothest curd, strain the mixture through a fine-mesh sieve into a clean bowl. This removes any potential egg bits, giving you that silky texture.
-
Finish with Cream:
- Stir in the lemon zest and heavy cream until fully combined. Your mango curd will be magical, creamy, and oh-so-tropical!
Step 4: Assemble the Tart
-
Pour the Curd:
- Gently pour the mango curd into the cooled tart crust, spreading it evenly. Watching it fill the crust is like pouring sunshine!
-
Chill:
- Refrigerate the tart for at least 2-3 hours, allowing the curd to set perfectly. You can even leave it overnight for an easier day tomorrow!
Serving Suggestions
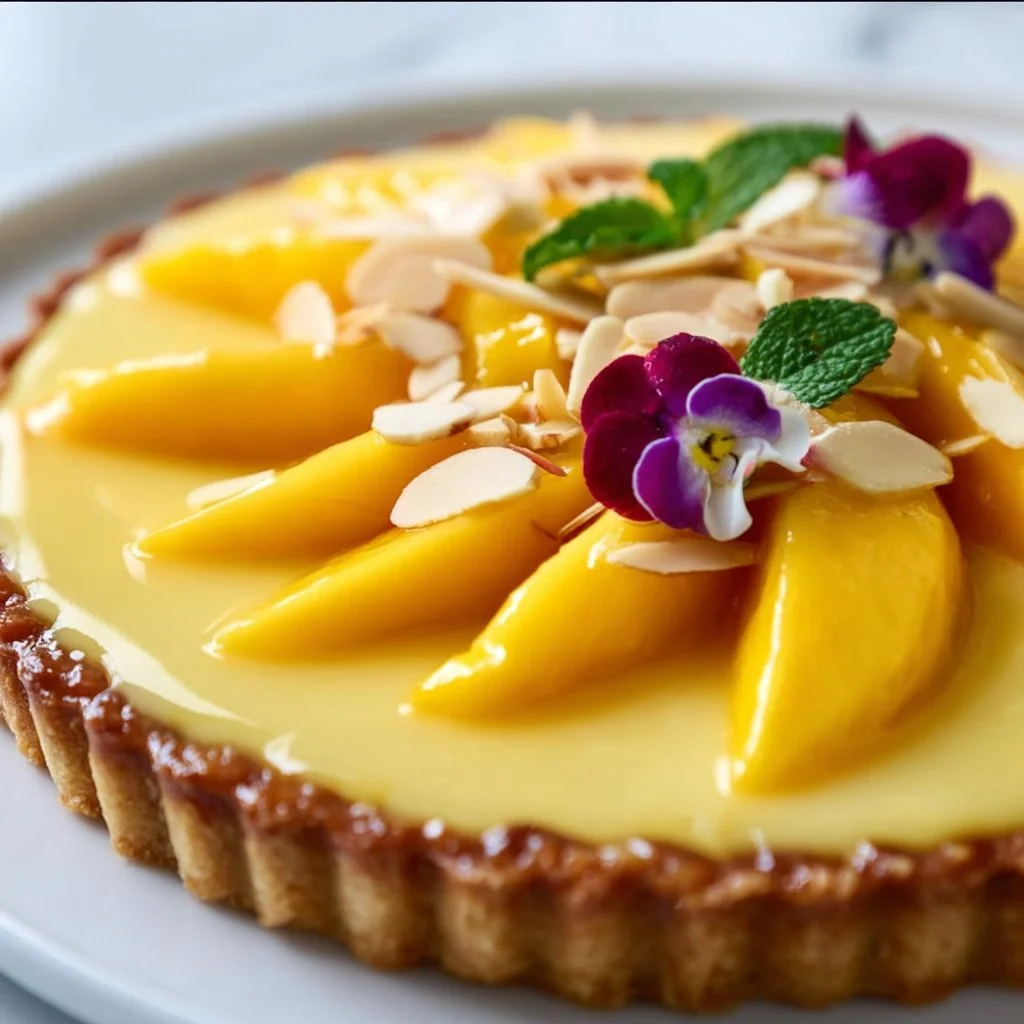
To serve your stunning Mango Curd Tart, slice it into wedges and garnish with a dollop of whipped cream, fresh mango slices, or mint leaves for a pop of color. A sprinkle of toasted coconut or crushed pistachios can add a delightful crunch!
The vibrant yellow of the mango curd contrasts beautifully with the buttery crust, making it a visually stunning centerpiece at any gathering.
Recipe Variations
- Berry Bliss: Replace mango puree with mixed berry puree for a tart berry version.
- Coconut Twist: Add shredded coconut to the curd for a tropical flair or use coconut cream instead of heavy cream for a dairy-free option.
- Spicy Kick: Incorporate a pinch of cayenne pepper or sliced jalapeños for a spicy kick to balance the sweetness.
- Citrus Medley: Mix in different citrus juices like orange or lime for a zesty twist!
- Nut Crust: Switch out the all-purpose flour for almond flour or hazelnut flour to add a nutty flavor and gluten-free option.
Chef’s Notes
Creating this Mango Curd Tart has been a delightful journey through the years. I still remember the first time I attempted to make curd from scratch. Let’s just say it was a year of trials and laughter! My earlier attempts often resulted in scrambled eggs — one time, I even managed to churn out a mango-flavored omelet!
But with each time I made it, I learned more about the delicate dance between heat and whisking, leading to the smooth, creamy curd we know and love today. This tart has become a staple in my kitchen, symbolizing the importance of persistent experimentation and savoring the process of cooking.
FAQs and Troubleshooting
1. Why did my curd turn out runny?
- Ensure you cooked the mixture until it thickened fully — the generous heat helps the eggs set properly.
2. Can I make the crust ahead of time?
- Absolutely! You can prepare the crust a day in advance, wrap it well, and store it in the fridge.
3. What if I don’t have a tart pan?
- No worries! Use a pie dish or even muffin tins for individual servings — just adjust the baking time.
4. How can I prevent my crust from shrinking?
- Cooling the dough and blind-baking are key. Try not to stretch it when placing it in the pan; instead, gently press it in.
Nutritional Info (Optional)
| Nutrient | Per Slice (1/8 of Tart) |
|———————|————————-|
| Calories | 300 |
| Total Fat | 18g |
| Saturated Fat | 10g |
| Cholesterol | 85mg |
| Sodium | 150mg |
| Total Carbohydrates | 35g |
| Dietary Fiber | 2g |
| Sugars | 20g |
| Protein | 3g |
There you have it — a delightful Mango Curd Tart recipe that’s more than just a dessert; it’s a celebration of flavors and memories! I hope it finds a special place in your kitchen, just as it has in mine. Enjoy every sunny bite — happy cooking!
PrintMango Curd Tart
A creamy and luscious mango filling nestled in a buttery, melt-in-your-mouth crust, perfect for summer gatherings.
- Prep Time: 30 minutes
- Cook Time: 30 minutes
- Total Time: 120 minutes
- Yield: 8 servings 1x
- Category: Dessert
- Method: Baking
- Cuisine: Tropical
- Diet: Vegetarian
Ingredients
- 1 1/2 cups all-purpose flour
- 1/2 cup unsalted butter, softened
- 1/4 cup powdered sugar
- 1/4 teaspoon salt
- 1 large egg yolk
- 1/4 cup cold water
- 1 cup mango puree
- 3/4 cup sugar
- 3 large eggs
- 1/2 cup lemon juice
- 1 tablespoon lemon zest
- 1/2 cup heavy cream
Instructions
- Combine Dry Ingredients: In a mixing bowl, whisk together the all-purpose flour, powdered sugar, and salt.
- Cut in the Butter: Add the softened butter and work it into the flour mixture until it resembles coarse crumbs.
- Add Egg Yolk: Mix in the egg yolk until combined.
- Incorporate Cold Water: Gradually add the cold water one tablespoon at a time, mixing gently until the dough comes together.
- Chill the Dough: Wrap the dough in plastic wrap and refrigerate for at least 30 minutes.
- Preheat Oven: Preheat your oven to 350°F (175°C).
- Roll Out the Dough: On a lightly floured surface, roll out the chilled dough to about 1/8 inch thick and transfer it to a tart pan.
- Blind Bake: Prick the bottom with a fork and line it with parchment paper. Bake for 15 minutes.
- Cool: Remove from the oven and let the crust cool completely.
- Combine Mango Puree and Sugar: In a saucepan, whisk together the mango puree and sugar over medium heat.
- Add Eggs and Lemon Juice: Gradually whisk in the eggs and lemon juice.
- Cook the Mixture: Keep cooking and whisking until the mixture thickens.
- Strain (Optional): Strain the mixture through a fine-mesh sieve into a clean bowl.
- Finish with Cream: Stir in the lemon zest and heavy cream until fully combined.
- Pour the Curd: Gently pour the mango curd into the cooled tart crust.
- Chill: Refrigerate the tart for at least 2-3 hours to set.
Notes
Garnish with whipped cream, fresh mango slices, or mint leaves before serving.
Nutrition
- Serving Size: 1 slice
- Calories: 300
- Sugar: 20g
- Sodium: 150mg
- Fat: 18g
- Saturated Fat: 10g
- Unsaturated Fat: 6g
- Trans Fat: 0g
- Carbohydrates: 35g
- Fiber: 2g
- Protein: 3g
- Cholesterol: 85mg
Keywords: Mango, Curd, Tart, Summer Dessert, Tropical Dessert
Mango Cheesecake
Mango Cheesecake: A Slice of Bright Paradise
Hello, fellow foodies! Grab your apron and get ready for a culinary adventure that will transport your taste buds straight to a tropical paradise. Today, we’re whipping up a delightful Mango Cheesecake that’s as luscious as a sun-drenched beach and as refreshing as a gentle ocean breeze.
This cheesecake combines the creamy richness of classic cheesecake with the vibrant sweetness of ripe mangoes, creating a dessert that feels elegant yet is surprisingly easy to make. Whether you’re planning a gathering, celebrating a special occasion, or simply in need of a little indulgence after a long week, this mango cheesecake is the perfect answer. It’s a show-stopper that impresses, yet it holds a special place in anyone’s heart who loves the simple joys of cooking and sharing delicious food.
What I adore about this dessert is its versatility; it can be a comforting after-dinner delight or a dazzling centerpiece for your dessert table. Plus, the process of making it— from crushing those graham crackers for the crust to swirling in that glorious mango purée— feels rewarding in every sense. Best of all, whether you’re an experienced home cook or just starting, I promise you’ll feel like a kitchen rockstar!
So, lean in, and let’s dive into the world of flavors, memories, and of course, a delicious mango cheesecake that will have your friends asking for seconds!
Personal Story
Growing up, one of my fondest memories revolves around family gatherings at my grandmother’s house. Every summer, my cousins and I would gather around her kitchen while she whipped up her splendid cheesecakes—each one more decadent than the last. Among them, her mango cheesecake became a family favorite.
I vividly remember the bright yellow color of the mango swirl as it danced atop the creamy filling, so inviting that a slice seemed impossible to decline. As the sunlight poured through the kitchen window, we waited impatiently for it to chill in the fridge, giggling and sharing stories while our impatient stomachs grumbled.
One detail that always stood out was Grandma’s joyful spirit, which filled the air as she shared tips and secrets about the cheesecake. “It’s all about using fresh fruit, sweethearts!” she’d say with a wink. Inspired by those cherished moments, I’ve added my little spin, making this mango cheesecake a personal tribute to her love for cooking, family, and the power of coming together over good food.
Ingredients
To embark on our mango cheesecake journey, here’s what you’ll need:
-
2 cups graham cracker crumbs
A classic base for cheesecakes, they provide that delightful crunch! If you’re feeling adventurous, try using crushed vanilla wafers or gingersnaps for a unique twist. -
1/2 cup unsalted butter, melted
This is the glue that holds your crust together. Prefer a dairy-free option? Try coconut oil—it adds a subtle tropical flavor! -
1 cup sugar, divided
Sweetness is essential! Use granulated sugar for the filling, and consider using brown sugar for an earthier flavor in the crust. -
4 (8-ounce) packages cream cheese, softened
The star of the show! Ensure it’s softened to room temperature; this makes mixing smoother. If you want a lighter version, opt for Neufchâtel cheese. -
1 teaspoon vanilla extract
This enhances flavor while bringing warmth to the cheesecake. Pure vanilla extract delivers the best flavor, but imitation works too in a pinch. -
4 large eggs
Eggs create the rich, custardy texture. If you need an egg-free option, consider using flax eggs (1 tablespoon flaxseed meal mixed with 3 tablespoons of water per egg). -
1 cup pureed mango
The key ingredient! Aim for ripe, fresh mangoes for optimum flavor. In a hurry? Use store-bought mango purée! -
1/4 cup sour cream
Adds tanginess and richness. Greek yogurt is a great substitute if you’re looking for a healthier option.
Step-by-Step Instructions
Let’s dive right into creating this delightful mango cheesecake! Gather your ingredients and let’s get cooking.
-
Preheat Your Oven: Begin by preheating your oven to 325°F (160°C). Preheating is an essential step to ensure your cheesecake sets beautifully.
-
Make the Crust: In a medium bowl, combine the graham cracker crumbs with melted butter and 1/4 cup of sugar. Mix until the crumbs are well-coated and the mixture resembles wet sand. Here’s a little tip: pressing the mixture firmly into the bottom of your springform pan creates a deliciously crunchy base. Use a measuring cup to press the crust down evenly!
-
Bake the Crust: Once your mixture is well-formed, pop it into the oven and bake for about 8-10 minutes, until it’s lightly browned. The aroma filling your kitchen will have your mouth watering—trust me! Allow it to cool as you prepare the filling.
-
Prepare the Cream Cheese Mixture: In a large mixing bowl, use a hand mixer or stand mixer to beat the softened cream cheese until it’s creamy and smooth. Dump in the remaining 3/4 cup of sugar and vanilla, mixing until fully combined. This is where the magic begins!
-
Add the Eggs: One at a time, add in the eggs, mixing well after each addition. Take care not to overmix; we want to keep the batter light and airy. An over-mixed batter can lead to a cheesecake that cracks when it bakes—nobody wants that!
-
Incorporate Mango: Gently fold in the mango puree and sour cream into the cream cheese mixture. Make sure it’s all well combined but be careful not to deflate the batter! The vibrant color of the mango is just stunning, isn’t it?
-
Pour and Smooth: Pour the cheesecake filling over the cooled crust, spreading it evenly. Now, here’s a pro tip: tap the pan gently on the countertop before baking to release any air bubbles that might be lurking in there.
-
Bake It: Bake your cheesecake in the preheated oven for about 60-70 minutes. The edges should be set, while the center has a slight jiggle—don’t worry, it will firm up as it cools! Place a shallow pan with water on the lower rack of the oven to create steam, helping to prevent cracks.
-
Cool Down: Once baked, turn off the oven and crack the door open—let the cheesecake cool gently for about an hour. This gradual cooling helps prevent cracks, so patience is key!
-
Chill: After it’s cooled, cover the cheesecake and pop it in the fridge for at least 4 hours or overnight for the best flavor. Trust me; good things come to those who wait!
Serving Suggestions
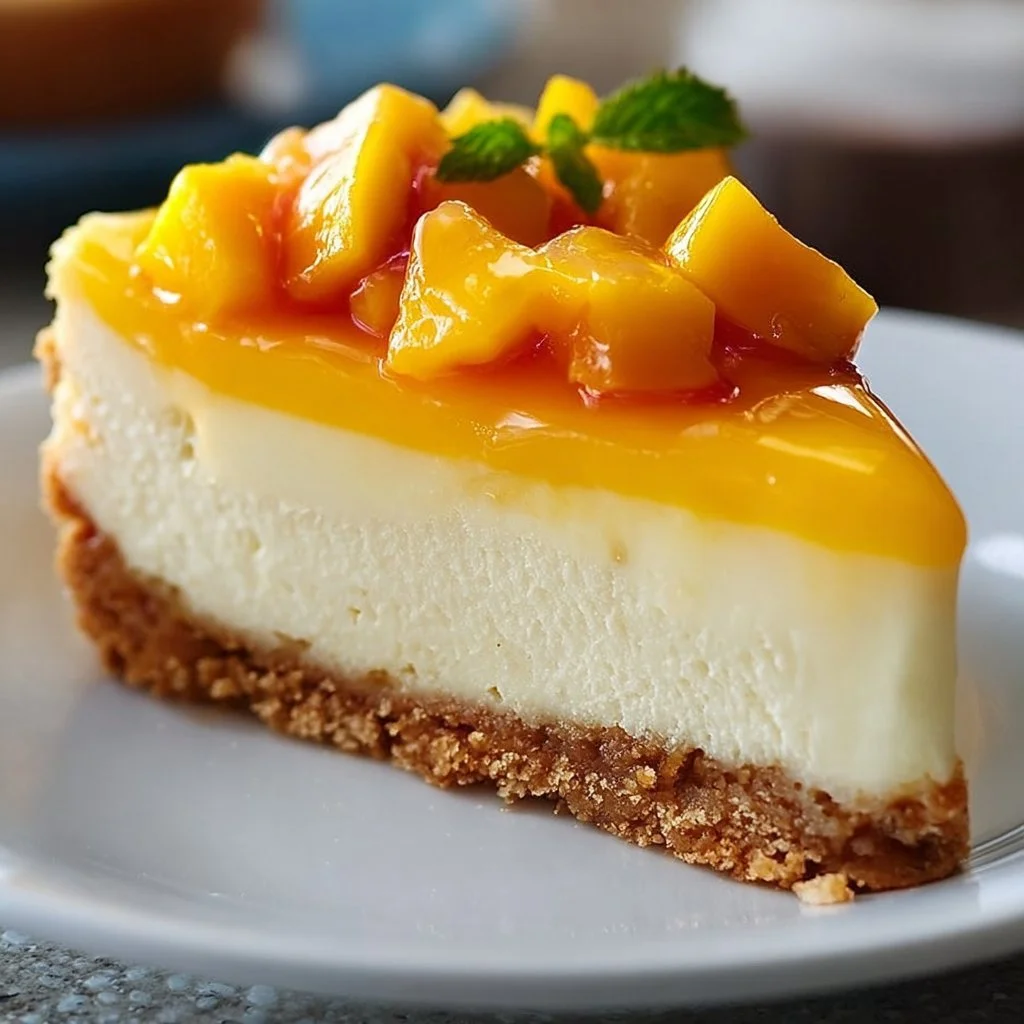
When you’re ready to serve your glorious mango cheesecake, take a moment to appreciate its beauty. I like to garnish mine with a sprinkle of crushed graham crackers on top and a few slices of fresh mango. For an extra pop of flavor, drizzle a little honey or a sprinkle of fresh mint leaves around the edges.
Slice it up, and serve each piece on a chilled plate. Your guests will be in for a treat, and if you’re hosting a gathering, just watch their smiles light up the room!
Recipe Variations
Want to get creative with your mango cheesecake? Here are some delicious twists and substitutions to consider:
-
Passion Fruit Mango Delight: Swirl in some passion fruit purée alongside the mango for an exotic flavor boost!
-
Chocolate Graham Crust: Mix cocoa powder into your graham cracker crust for a delightful chocolatey base, pairing well with the mango.
-
Coconut Cream Cheesecake: Fold in coconut cream into the batter and top with toasted coconut flakes for a tropical vibe—paradise on a plate!
-
Vegan Version: Substitute cream cheese with your favorite vegan cream cheese product, eggs with aquafaba (the water from chickpeas), and use coconut yogurt instead of sour cream for a plant-based delight.
-
Spiced Mango Cheesecake: Add a dash of cinnamon or nutmeg to the filling for a warm spice that complements the natural sweetness of the mango.
Chef’s Notes
This mango cheesecake holds a special place in my heart—like a canvas for creativity. Over the years, I’ve tinkered with spices, trying out fresh fruit variations, and even taming the sweetness to cater to different preferences. Each iteration taught me something new about balancing flavors and textures.
One time, in a rush to make this for a family gathering, I accidentally grabbed salt instead of sugar! Let’s just say, desserts and salty surprises don’t mix well… But every mistake turned out to be a lesson, reminding me that mistakes can lead to moments of joy and creativity in the kitchen.
Today, the mango cheesecake stands as a testament to loving not just the outcome, but the process! So, feel free to let your imagination run wild on this one.
FAQs and Troubleshooting
-
Why did my cheesecake crack?
Cracks often occur when the batter is overmixed or due to rapid temperature changes. To prevent this, always mix just until incorporated, and allow gradual cooling in the oven when done baking. -
Can I use frozen mango?
Absolutely! Just be sure to thaw and drain any excess liquid before puréeing. Fresh mango yields a brighter flavor, but frozen works well in a pinch. -
How do I know when my cheesecake is done?
The edges should be set, and the center should have a slight jiggle. It will firm up nicely during cooling, so trust your instincts! -
How do I store leftovers?
Cover any uneaten cheesecake and store it in the refrigerator for up to 5 days. If you’re feeling inventive, try using leftovers in a smoothie or parfait the next day!
Nutritional Info
(Insert optional nutritional info if desired. For example: A slice contains approximately 350 calories, 22g fat, 30g carbs, and 5g protein.)
Well, there you have it! A scrumptious and inviting mango cheesecake that’s sure to bring a smile to your face and those you love. It’s all about enjoying the little moments—from mixing, baking, and sharing this delightful dessert. So, tie on that apron, get to the kitchen, and create some beautiful memories with this incredible recipe. Happy baking, friends! 🍰🌞
PrintMango Cheesecake
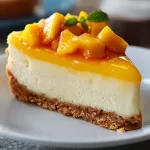
A delightful mango cheesecake that combines creamy richness with vibrant mango sweetness, perfect for gatherings or as a comforting dessert.
- Prep Time: 30 minutes
- Cook Time: 70 minutes
- Total Time: 100 minutes
- Yield: 12 servings 1x
- Category: Dessert
- Method: Baking
- Cuisine: American
- Diet: Vegetarian
Ingredients
- 2 cups graham cracker crumbs
- 1/2 cup unsalted butter, melted
- 1 cup sugar, divided
- 4 (8-ounce) packages cream cheese, softened
- 1 teaspoon vanilla extract
- 4 large eggs
- 1 cup pureed mango
- 1/4 cup sour cream
Instructions
- Preheat your oven to 325°F (160°C).
- Make the crust by combining graham cracker crumbs, melted butter, and 1/4 cup of sugar.
- Bake the crust for about 8-10 minutes until lightly browned. Allow it to cool.
- Prepare the cream cheese mixture by beating cream cheese until creamy, then mixing in 3/4 cup of sugar and vanilla extract.
- Add in the eggs one at a time, mixing well after each addition.
- Incorporate the mango puree and sour cream into the mixture gently.
- Pour the filling over the cooled crust, smoothing it out.
- Bake for 60-70 minutes until the edges are set and the center has a slight jiggle.
- Cool the cheesecake in the oven with the door cracked for about an hour.
- Chill in the refrigerator for at least 4 hours or overnight.
Notes
For best results, let the cheesecake cool gradually and chill overnight for optimal flavor.
Nutrition
- Serving Size: 1 slice
- Calories: 350
- Sugar: 22g
- Sodium: 300mg
- Fat: 22g
- Saturated Fat: 12g
- Unsaturated Fat: 8g
- Trans Fat: 0g
- Carbohydrates: 30g
- Fiber: 1g
- Protein: 5g
- Cholesterol: 100mg
Keywords: cheesecake, mango dessert, tropical cheesecake, summer dessert, easy cheesecake
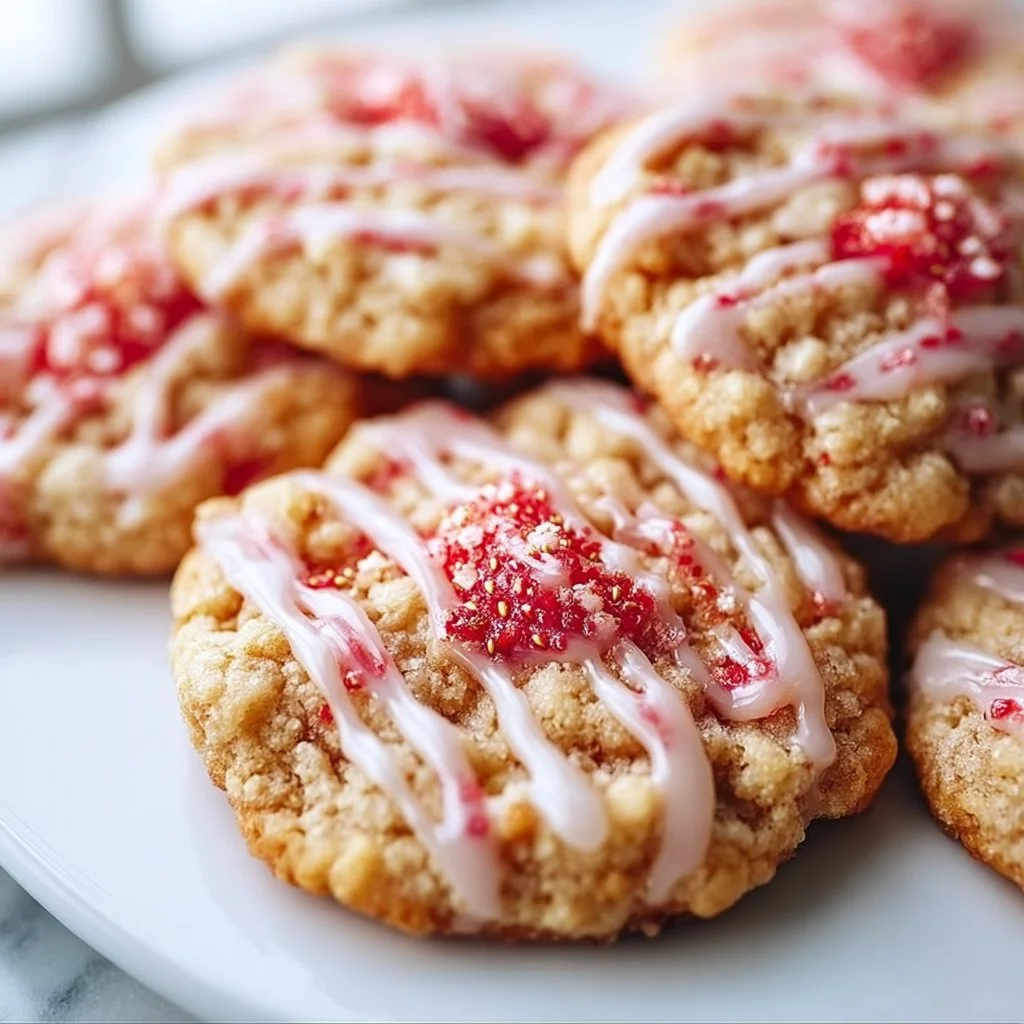
Easy Strawberry Crunch Cookies
Easy Strawberry Crunch Cookies: A Sweet Journey to Nostalgia
Introduction
Hello, my fellow foodies! If there’s one thing I know for sure, it’s that cookies have a magical way of bringing people together. Whether it’s the comforting scent wafting through your kitchen or the crunch of a perfectly baked cookie, each bite tells a delicious story. Today, I’m excited to share a recipe that embodies the essence of joy, nostalgia, and creativity: Easy Strawberry Crunch Cookies.
Picture this: it’s a warm summer afternoon, and the sun is shining happily through your kitchen window. You’re whipping up something special for your friends (or maybe just for yourself—you deserve it!) when you remember that one childhood favorite snack—the sweet crunch of strawberry cereal. Now, imagine transforming that delightful memory into a gourmet cookie that not only impresses but also evokes smiles all around the table. With every bite of these cookies, you’ll transport yourself back to those carefree days of summer, when the biggest worry was how to tackle your next carton of strawberries.
This recipe is not just easy to make; it also packs a nutrition punch with real strawberries mixed into the dough for an irresistible aroma and freshness. Plus, the delightful crunch from the cereal ensures an exciting texture that’ll keep your taste buds dancing. So, let’s tie on our aprons, gather our ingredients, and embark on this sweet journey together!
Personal Story
The first time I baked cookies as a young girl, it was to impress my friends during a lazy summer afternoon. My little kitchen was filled with laughter, flour dust, and the intoxicating aroma of melting butter and sugar. I remember my mom handing me a box of strawberry cereal and encouraging me to mix it into the dough, giving the cookies a playful twist. We giggled as we shaped them into all sorts of creatures—hearts, stars, and even silly faces.
As we served our Strawberry Crunch Cookies, my friends’ eyes lit up. “These are the best cookies ever!” one exclaimed, and I felt like a superstar. That moment ignited my passion for baking, a passion I carry to this day. Today, I share this recipe not just as a collection of steps, but as a celebration of those sunny afternoons filled with friendship and creativity. And I hope that this delightful treat creates just as many sweet memories for you and your loved ones!
Ingredients
Before we dive into the how-to, let’s gather our ingredients. Here’s what you’ll need to whip up these scrumptious cookies:
-
1 cup unsalted butter, softened
- For a luscious flavor and texture. You can use margarine as a substitute, but the taste won’t be quite the same.
-
1 cup granulated sugar
- This adds sweetness and a slight crunch. If you want to cut down on sugar, use a sugar substitute like Stevia, but keep in mind it may change the flavor.
-
1 cup brown sugar, packed
- Provides moisture and a subtle flavor depth. Feel free to swap for coconut sugar for a healthier twist.
-
2 large eggs
- Binds the ingredients together! For a vegan option, you can use flax eggs (1 tablespoon of ground flaxseed mixed with 2.5 tablespoons of water).
-
1 teaspoon vanilla extract
- For a warm, fragrant backdrop. Use almond extract for a twist!
-
2 1/2 cups all-purpose flour
- The base of our cookies. Whole wheat flour works too if you prefer a heartier base.
-
1 teaspoon baking soda
- Helps the cookies rise and maintain the perfect texture.
-
1/2 teaspoon salt
- Enhances the overall flavors. Feel free to use sea salt for an added crunch and flavor.
-
1 cup crushed strawberry cereal
- This is the crunch factor! You can substitute with any fruity cereal you love for a different flavor profile.
-
1 cup chopped fresh strawberries
- Pure sweetness! If strawberries aren’t in season, you could use frozen strawberries, but remember to thaw and drain them first.
Step-by-Step Instructions
Now that we have all our lovely ingredients ready, let’s get baking!
Step 1: Preheat your oven to 350°F (175°C). Greasing or lining a baking sheet with parchment paper will prevent sticking, ensuring easy cookie removal!
Step 2: In a large mixing bowl, cream together the unsalted butter, granulated sugar, and packed brown sugar until the mixture becomes light and fluffy, about 2-3 minutes. Here’s a little chef hack: The softer your butter, the easier it beats in, making those cookies airy and delightful!
Step 3: Add the two eggs, one at a time, followed by the vanilla extract. Mix until well combined. Remember to scrape down the sides of your bowl to incorporate all that buttery goodness!
Step 4: In a separate bowl, whisk together the all-purpose flour, baking soda, and salt. Gradually add this dry mixture to the wet ingredients, mixing until just combined—don’t overmix; it can make your cookies tough!
Step 5: Now comes the fun part! Gently fold in the crushed strawberry cereal along with the chopped fresh strawberries. Unevenly mixing these in not only ensures a vibrant, fruity cookie but also keeps the strawberries intact for that delicious burst of flavor in every bite!
Step 6: Using a cookie scoop (or just a spoon!), drop dollops of dough about 2 inches apart onto your prepared baking sheet. A little tip here: try to make them uniform in size so they bake evenly—no one likes a half-baked cookie!
Step 7: Bake in the preheated oven for 10-12 minutes, or until the edges are lightly golden. Your kitchen will start to smell like a strawberry paradise. Resist the temptation to open the oven door too soon, or you might let the heat out!
Step 8: Once done, remove the cookies from the oven, allowing them to cool on the baking sheet for about 5 minutes before transferring them to a wire rack to cool completely. Seriously, they’ll be even better once cooled—trust me!
Serving Suggestions
To serve these lovely cookies, arrange them on a beautiful platter with a sprinkle of powdered sugar for an elegant touch. Consider pairing them with a dollop of whipped cream or a scoop of vanilla ice cream for an indulgent treat. You might even serve them alongside a fresh fruit salad to complement that strawberry flavor—perfect for hosting a summer brunch or a casual afternoon gathering!
Recipe Variations
Feeling adventurous? Here are some tasty variations to spice things up:
-
Chocolate Strawberry Crunch Cookies: Add 1/2 cup of mini chocolate chips to the dough for a delightful chocolatey twist.
-
Lemon Zest Variation: Add 1 tablespoon of freshly grated lemon zest for a refreshing citrus twist.
-
Nutty Crunch: Swap out the crushed strawberry cereal with chopped nuts for a crunchy texture.
-
Gluten-Free Delight: Use a gluten-free flour blend instead of all-purpose flour for a gluten-free option.
Chef’s Notes
Ah, the joys of experimenting in the kitchen! I can still remember the day I tossed in not just the strawberries, but also a handful of chocolate chips, thinking, “Why not?” It was a deliciously chaotic moment, teaching me that the kitchen is a space for creativity and joy. And let’s be real—who doesn’t love a good mishap that turns into a delightful surprise?
These cookies have evolved over the years from simply sweet to a fun canvas for whatever ingredients are in season—ripe peaches in the summer, maybe even crushed peppermint for the holidays. Each iteration has its own special charm, just like the memories they create.
FAQs and Troubleshooting
Q: My cookies spread too much. What did I do wrong?
A: Make sure your butter isn’t too soft—room temperature is great. If it’s melting, it’ll cause your cookies to spread. Also, chilling the dough for about 30 minutes can help keep them from spreading too much.
Q: Can I use frozen strawberries?
A: Absolutely! Just be sure to thaw and drain them first. Otherwise, the added moisture can make your cookie dough too wet.
Q: How do I store leftover cookies?
A: Keep cookies in an airtight container at room temperature for up to a week or freeze for longer storage. Just make sure you separate layers with parchment paper to prevent them from sticking together!
Q: Can I double the recipe?
A: Yes! Just remember to keep an eye on the baking time as cookies may require a few extra minutes.
Nutritional Info (optional)
While I’m all about enjoyment in cooking, a little nutritional insight never hurts. Each cookie has approximately:
- Calories: 150
- Total fat: 7g
- Saturated fat: 4g
- Carbohydrates: 22g
- Sugar: 10g
- Protein: 2g
Of course, these values will vary based on portion size and specific ingredients used, but they help you keep a good balance while enjoying these cookies!
So there you have it! Easy Strawberry Crunch Cookies that not only taste divine but also create unforgettable kitchen memories. I can’t wait to hear about your own experiences as you make this delightful treat! Happy baking, and remember: the kitchen is your canvas—make it sweet! 🍓
PrintEasy Strawberry Crunch Cookies

Delicious cookies that combine real strawberries and strawberry cereal for a sweet and crunchy treat that evokes nostalgic summer memories.
- Prep Time: 15 minutes
- Cook Time: 12 minutes
- Total Time: 27 minutes
- Yield: 24 servings 1x
- Category: Dessert
- Method: Baking
- Cuisine: American
- Diet: Vegetarian
Ingredients
- 1 cup unsalted butter, softened
- 1 cup granulated sugar
- 1 cup brown sugar, packed
- 2 large eggs
- 1 teaspoon vanilla extract
- 2 1/2 cups all-purpose flour
- 1 teaspoon baking soda
- 1/2 teaspoon salt
- 1 cup crushed strawberry cereal
- 1 cup chopped fresh strawberries
Instructions
- Preheat your oven to 350°F (175°C) and prepare a baking sheet.
- Cream together the unsalted butter, granulated sugar, and packed brown sugar until light and fluffy, about 2-3 minutes.
- Add the eggs, one at a time, followed by the vanilla extract, mixing until well combined.
- Whisk together the flour, baking soda, and salt in a separate bowl. Gradually add to the wet ingredients and mix until just combined.
- Fold in the crushed strawberry cereal and chopped strawberries gently.
- Scoop dollops of dough 2 inches apart onto the prepared baking sheet.
- Bake for 10-12 minutes, or until the edges are lightly golden.
- Cool on the baking sheet for about 5 minutes before transferring to a wire rack to cool completely.
Notes
For a sweeter treat, serve cookies with a sprinkle of powdered sugar or alongside whipped cream.
Nutrition
- Serving Size: 1 cookie
- Calories: 150
- Sugar: 10g
- Sodium: 200mg
- Fat: 7g
- Saturated Fat: 4g
- Unsaturated Fat: 2g
- Trans Fat: 0g
- Carbohydrates: 22g
- Fiber: 1g
- Protein: 2g
- Cholesterol: 30mg
Keywords: strawberry cookies, dessert recipe, easy baking
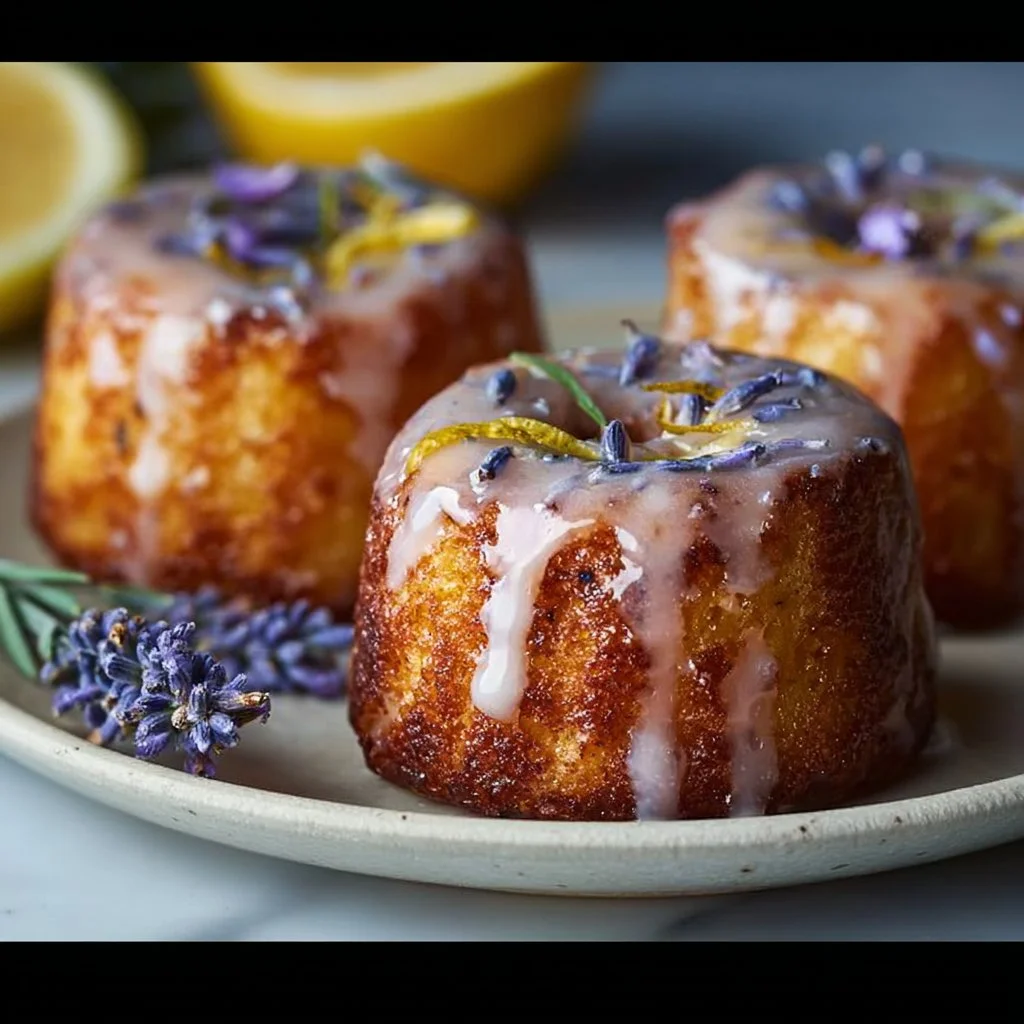
Mini Lemon Cakes With Lavender Glaze
Delightful Mini Lemon Cakes with Lavender Glaze: A Journey of Flavors!
Hello, lovely foodies! Today, we’re stepping into the bright and cheerful world of desserts with a truly special treat: Mini Lemon Cakes with Lavender Glaze. If you’ve ever enjoyed the sun-drenched taste of fresh lemons while being enveloped in the delicate aroma of lavender, you know we’re in for a delightful culinary experience!
Picture this: it’s a warm afternoon, the sun is shining, and you’re enjoying a breezy gathering with friends or family. The air is filled with laughter, soft chatter, and the sweet scent of something delectable baking in the oven. These mini lemon cakes are not just a food item; they are the centerpiece of those beautiful moments when everyone gathers around the table, ready to share stories and enjoy each other’s company.
The joy of creating these cakes lies not only in how they taste but also in how simple they are to make! Using fresh ingredients that are easy to find, you can whip up these delightful treats that look polished yet are approachable for any home cook. So, tie on your apron and let’s embark on this tasty journey together!
Personal Story
Growing up, my grandmother had a garden filled with vibrant lavender and zesty lemons. Her backyard was our secret escape, where we spent countless afternoons picking herbs, smelling blossoms, and watching her prepare beautiful dishes. I distinctly remember one sunny day when she decided to teach me how to bake lemon cupcakes. The house filled with the zesty aroma of lemon zest mixed with buttery bliss, and soon, golden treats emerged from the oven.
As if that weren’t enough, we drizzled a sweet lavender frosting over the warm cakes. I can still hear the voice of my grandmother saying, “Baking is about making memories, Savannah. These cakes are sweet like life, so let’s share them and spread joy.” From that day on, a love affair with lemon cakes began! Now, I’m excited to share my own twist on the classic — mini lemon cakes with a super refreshing lavender glaze.
Ingredients
For the Mini Lemon Cakes:
-
1 1/3 cups all-purpose flour
Whether you’re using bleached or unbleached flour, both work well in this recipe. You could also use a gluten-free blend, keeping in mind that it might change the texture slightly. -
1/2 tsp kosher salt
A pinch of salt enhances the sweetness and flavor of the cake. Don’t skip it! -
1/8 tsp baking soda
This little pinch will help lift our cakes, making them fluffy and light. -
1/2 cup unsalted butter, softened
Softened butter is key to achieving creamy, light cakes. If you’re short on time, cube the butter and microwave it for 10 seconds. -
2/3 cup granulated sugar
Bringing sweetness and texture to our mini cakes, using granulated sugar allows for a perfect golden color. -
1/3 cup packed light brown sugar
This adds warmth and depth to the flavor—brown sugar has a hint of molasses that complements the lemon beautifully. -
1 tbsp grated lemon zest (from 2 lemons)
Make sure to zest the lemons lightly and avoid the bitter white pith. The zest is where the flavor magic lies! -
2 large eggs, at room temperature
Room temperature eggs blend better, ensuring that your batter is smooth and silky. -
1/4 cup sour cream, at room temperature
This adds moisture and a subtle tanginess; you can substitute with Greek yogurt if needed. -
1/4 cup whole milk, at room temperature
Milk helps to keep the cake moist; almond milk is a good non-dairy substitute here. -
1 tsp vanilla extract
A hint of vanilla compliments the lemon’s brightness wonderfully.
For the Lavender Glaze:
-
1/4 cup whole milk
As with the cake, room temperature milk makes for a smoother glaze. -
1/2 tsp culinary lavender
Make sure to use culinary-grade lavender for safe edible use. If you can’t find it, try substituting with dried chamomile! -
1 1/2 cups powdered sugar
Sweetening our glaze perfectly, powdered sugar dissolves smoothly and creates that heavenly glaze texture. -
1/4 tsp kosher salt
Just a pinch helps balance the sweetness of the glaze. -
1/8 tsp vanilla extract, as needed
Adjust as needed for flavor; I recommend a splash! -
Edible flowers and lemon zest (for garnish)
These are entirely optional but definitely add a sophisticated and beautiful touch to your presentation.
Step-by-Step Instructions
Step 1: Preheat Your Oven
Start by preheating your oven to 350°F (175°C). This is a crucial step to get those cakes baked evenly. While that’s warming up, it’s the perfect time to gather all your ingredients and prep your workspace.
Step 2: Prepare the Muffin Tin
Grease a mini muffin tin with a touch of butter or line it with cupcake liners. If you’re using a non-stick pan, just a light coating is enough to ensure they pop out easily once baked.
Step 3: Mix the Dry Ingredients
In a medium bowl, whisk together the flour, salt, and baking soda. This step ensures that all the baking soda gets evenly distributed throughout the cake batter. Set this aside while you mix the wet ingredients.
Step 4: Cream the Butter and Sugars
In a large mixing bowl, beat the softened unsalted butter with granulated and brown sugars until the mixture is fluffy and light—about 3-4 minutes. The color will change to a pale yellow, indicating that it’s well-mixed. Pro tip: Use a stand mixer if you have one—it saves your arm some workout!
Step 5: Add the Eggs and Zest
Next, crack in the room temperature eggs one at a time, blending well after each addition. Fold in the lemon zest, releasing that delightful citrus aroma.
Step 6: Incorporate Sour Cream and Milk
Pour in the sour cream, milk, and vanilla extract. Mix until just combined—over-mixing here can lead to dense cakes.
Step 7: Combine Dry and Wet Ingredients
Gradually add the dry ingredients to the wet mixture. Gently fold them in, stopping just before the flour is fully incorporated. It’s okay if a little bit of dry flour remains; we want to keep that cake light and airy!
Step 8: Fill the Muffin Tin
With a spoon or a small scoop, divide the batter evenly among the mini muffin cups. They should fill about 2/3 of the way full.
Step 9: Bake!
Bake the mini cakes in the preheated oven for 12-15 minutes or until they are golden brown and a toothpick comes out clean. Your kitchen will smell amazing during this time—trust me!
Step 10: Cool Down
Once baked, remove the mini cakes from the oven and allow them to cool in the pan for about 5 minutes before transferring them to a wire rack to cool completely.
Making the Lavender Glaze
Step 11: Prepare the Lavender Milk
In a small saucepan, heat the milk over medium heat until warm but not boiling. Add the culinary lavender and let it steep for about 5 minutes—this infuses the milk with a delicate floral flavor. Strain the milk into a bowl, discarding the lavender.
Step 12: Make the Glaze
In another bowl, mix the powdered sugar with the warm lavender-infused milk and kosher salt. Stir until you achieve a smooth glaze. If it’s too thick, add a little more milk; if it’s too thin, whisk in more powdered sugar.
Step 13: Glaze the Cakes
Once your mini lemon cakes are completely cool, dip each one into the glaze or drizzle it generously over the top. Allow the glaze to set for a few minutes before garnishing.
Serving Suggestions
To plate these mini lemon cakes, arrange them on a beautiful serving platter or cake stand. You can create an inviting display by garnishing with a sprinkle of lemon zest or placing edible flowers beside them. This simple touch transforms your dessert into a work of art, ready to impress your guests!
Recipe Variations
- Coconut Lemon Cakes: Swap out the milk for coconut cream in both the batter and the glaze for a tropical twist.
- Blueberry Lemon Cakes: Fold in fresh or frozen blueberries into the batter before baking for an extra burst of flavor.
- Lemon Almond Cakes: Add a teaspoon of almond extract and replace half the flour with almond flour for a nutty, delicious flavor.
- Vegan Version: Substitute eggs with flax eggs (1 tbsp flaxseed meal + 2.5 tbsp water for each egg) and replace dairy with plant-based milk and vegan butter.
Chef’s Notes
Over the years, I’ve played around with this recipe and have discovered that lemon is such a versatile flavor. Each variation brings a new layer of joy to the table. The lavender glaze, in particular, holds a special place in my heart, reminding me of those idyllic afternoons spent in my grandmother’s garden, surrounded by blooms and laughter.
One funny kitchen story comes to mind: I once tried to create lavender-infused sugar by tossing in fresh lavender with my sugar and leaving it in a cupboard. Instead of the delicate flavor I aimed for, I accidentally created a funky, floral mess. The lesson? Always use culinary-grade ingredients!
FAQs and Troubleshooting
-
Why are my mini cakes dense?
If your cakes are dense, it might be due to over-mixing the batter or using cold ingredients. Make sure all your ingredients, especially eggs and dairy, are at room temperature. -
How can I make the glaze less sweet?
To reduce the sweetness of the glaze, you can add a little more milk or lemon juice, which will add delicious tanginess and balance against the sugar. -
Can I store these cakes?
Absolutely! Store the mini cakes in an airtight container at room temperature for up to 3 days or in the refrigerator for up to a week. For best results, glaze them just before serving. -
What other flavors can I combine with lemon?
Lemon pairs beautifully with herbs like thyme or rosemary, or you can even create a shortcut by adding a splash of limoncello to the batter or glaze for an adult twist!
Nutritional Info (Optional)
Calories: 120 per mini cake
Fat: 4g
Carbohydrates: 19g
Protein: 2g
Final Thoughts
There you have it, my friends! Mini Lemon Cakes with Lavender Glaze are not just a dessert; they are a celebration of life’s little moments. Using fresh ingredients and simple techniques, you can create something that looks as good as it tastes. So, let’s gather around the table and enjoy the fruits of our labor together!
Happy baking, and remember: the joy of cooking lies in sharing delicious food with loved ones. Cheers! 🍋💛
PrintMini Lemon Cakes with Lavender Glaze
Delightful mini lemon cakes topped with a sweet lavender glaze, perfect for gatherings or a sweet treat.
- Prep Time: 15 minutes
- Cook Time: 15 minutes
- Total Time: 30 minutes
- Yield: 24 mini cakes 1x
- Category: Dessert
- Method: Baking
- Cuisine: American
- Diet: Vegetarian
Ingredients
- 1 1/3 cups all-purpose flour
- 1/2 tsp kosher salt
- 1/8 tsp baking soda
- 1/2 cup unsalted butter, softened
- 2/3 cup granulated sugar
- 1/3 cup packed light brown sugar
- 1 tbsp grated lemon zest (from 2 lemons)
- 2 large eggs, at room temperature
- 1/4 cup sour cream, at room temperature
- 1/4 cup whole milk, at room temperature
- 1 tsp vanilla extract
- 1/4 cup whole milk (for the glaze)
- 1/2 tsp culinary lavender
- 1 1/2 cups powdered sugar
- 1/4 tsp kosher salt (for the glaze)
- 1/8 tsp vanilla extract (for the glaze)
- Edible flowers and lemon zest (for garnish)
Instructions
- Preheat your oven to 350°F (175°C).
- Prepare a mini muffin tin by greasing it with butter or lining with cupcake liners.
- Mix the flour, salt, and baking soda in a medium bowl.
- Cream the softened butter with granulated and brown sugars until fluffy.
- Add the eggs one at a time, blending well after each.
- Incorporate sour cream, milk, and vanilla extract, mixing until just combined.
- Combine dry ingredients with wet mixture, folding gently until just combined.
- Fill the muffin tin with batter, filling each cup about 2/3 full.
- Bake for 12-15 minutes or until golden brown and a toothpick comes out clean.
- Cool in the pan for 5 minutes before transferring to a wire rack.
- Prepare the lavender milk by heating milk and steeping with culinary lavender.
- Make the glaze by mixing powdered sugar with the lavender-infused milk and salt.
- Glaze the cooled mini cakes by dipping or drizzling the glaze over them.
Notes
Store in an airtight container for up to 3 days at room temperature or up to a week in the refrigerator. Glaze just before serving for best results.
Nutrition
- Serving Size: 1 cake
- Calories: 120
- Sugar: 5g
- Sodium: 200mg
- Fat: 4g
- Saturated Fat: 2g
- Unsaturated Fat: 2g
- Trans Fat: 0g
- Carbohydrates: 19g
- Fiber: 0g
- Protein: 2g
- Cholesterol: 20mg
Keywords: mini cakes, lemon, lavender, dessert, baking
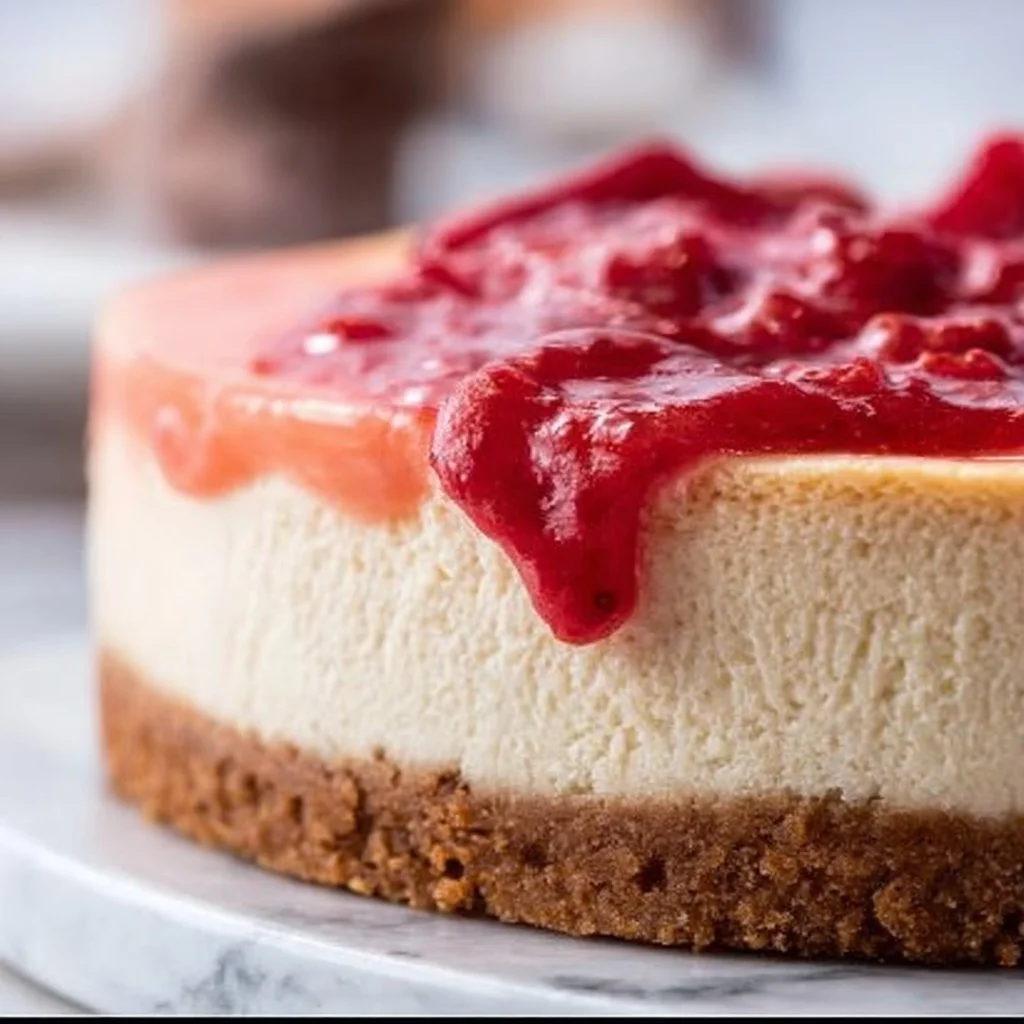
Guava Cheesecake
Indulging in a Tropical Delight: Guava Cheesecake
Hello, fellow food lovers! Today, I’m bursting with excitement to share a recipe that not only tickles your taste buds but also whisks you away to tropical paradise—Guava Cheesecake! Think creamy, dreamy cheesecake united with the sweet, fragrant notes of guava. It’s the kind of dessert that makes you feel fancy without the fuss. Now, I don’t know about you, but when I think of cheesecake, I’m transported to sun-drenched afternoons, laughter ringing in the air, and that wonderful feeling that life is truly delightful.
Guava cheesecake is a tropical twist on a classic favorite, and if you’ve never had the pleasure of biting into a slice, oh buddy, you’re in for a treat! This dessert is smooth, rich, and oh-so-decadent, yet it carries that lively essence of guavas—perfectly balancing sweetness and a touch of tang. Whether it’s for a summer gathering, a cozy dinner party, or just a self-indulgent weekend treat, this cheesecake is sure to impress.
What I love about this recipe is how it encapsulates memories of my childhood. I can vividly remember sitting around the table with family, sharing stories while savoring the velvety goodness of guava cheesecake. It’s comforting, nostalgic, and surely something that I want you to experience! So grab your aprons and let’s get cooking!
Personal Story
I still vividly remember the first time I tasted guava cheesecake. It was at a friend’s birthday party in a small, sunlit café filled with the fragrant scent of fresh flowers and baked goods. The moment I took that first bite, it felt as if I was biting into a piece of sunshine! The creamy filling coupled with the tropical sweetness of guava danced on my palate, and my taste buds sang.
After that day, I was hooked! I began experimenting with recipes, trying to recreate that doughy, luscious feeling I experienced. Over the years, I tinkered and mastered the perfect guava cheesecake that embodies that joyful memory, adding my unique twist here and there. Each slice is like a little love letter to that sunny afternoon—a reminder to gather with loved ones and enjoy the sweetness of life. It’s amazing how food can evoke such beautiful memories, isn’t it?
Ingredients
Now, let’s dive into the flavorful world of guava cheesecake. Here’s what you’ll need:
-
300 g Tennis biscuits
- A delightful South African treat made of coconut, perfect for the crust. If you can’t find these, replace them with Graham crackers or digestive biscuits for that crunchy foundation.
-
150 g unsalted butter (melted)
- This brings richness and helps bind your crust. Always use unsalted to control the saltiness; you can use coconut oil as a dairy-free alternative if desired.
-
700 g cream cheese
- The star of the show! It creates that signature creamy texture. A full-fat version is recommended for the best results. If you prefer a lighter option, use Neufchâtel cheese.
-
250 g castor sugar
- Adds sweetness and contributes to the creamy consistency. If you’d like it less sweet, reducing the sugar to 200 g won’t hurt at all.
-
4 eggs (extra large)
- Provides structure and richness. You can substitute eggs with 1/2 cup of unsweetened applesauce or silken tofu for a vegan option.
-
1 tsp vanilla extract
- For that warm, lovely aroma! If you’re feeling adventurous, almond extract can add a wonderful twist.
-
200 ml whipping cream
- Optional for decadence! It adds richness. If you want a lighter option, substitute it with whipped coconut cream.
-
200 g guavas (for decorating)
- Fresh guavas will make your cheesecake pop with color and flavor! They’re tart yet sweet. If guavas are out of season, consider using strawberries or passion fruit.
-
500 g guavas (fresh, chopped, and peeled)
- For the filling, these are the key flavor component! Be sure they’re ripe for the best taste.
-
80 g sugar (white granulated)
- This will sweeten the guava mixture. You can also experiment with brown sugar for an interesting caramel flavor.
-
1 tbsp lime juice
- Adds a zesty kick that compliments the guava beautifully! If you don’t have limes, fresh lemon juice works as a great substitute.
Step-by-Step Instructions
Let’s gather our ingredients and get started on this tropical masterpiece!
Step 1: Prepare the Crust
-
Crush the Tennis biscuits. Use a food processor to pulse the biscuits into fine crumbs. If you don’t have one, place the biscuits in a ziplock bag and crush them with a rolling pin.
- Chef hack: The finer the crumbs, the better the crust will hold together!
-
Mix with melted butter. In a bowl, combine the crushed biscuits and melted butter until well mixed. It should resemble wet sand.
- Chef tip: If it’s too dry, add a touch more melted butter. If too wet, add a little more biscuit crumbs.
-
Press into a springform pan. Take the mixture and press it evenly into the bottom of a 9-inch springform pan. Use the back of a measuring cup to pack it tightly.
- Tip: To prevent sticking, line the bottom of the pan with parchment paper!
Step 2: Prepare the Cheesecake Filling
-
Preheat your oven to 160°C (320°F). This ensures your cheesecake bakes evenly without a crack top.
-
Blend cream cheese and sugar. In a large mixing bowl, beat the cream cheese and castor sugar until smooth and creamy. This may take about 3-5 minutes.
- Recipe hack: Be sure to scrape down the sides to incorporate all ingredients!
-
Add eggs one at a time. Beat in each egg slowly, ensuring they are fully incorporated before adding the next one.
- Chef tip: This method helps to introduce air into the batter, leading to a lighter cheesecake.
-
Mix in vanilla extract and whipping cream. Incorporate the vanilla and whipping cream into the mixture, beating gently.
- Pro tip: The whipped cream adds a luscious texture, so give it a nice fold to keep it airy!
Step 3: Incorporate the Guava
-
Prepare the guava puree. In a blender, combine the 500 g of freshly chopped guavas, 80 g of sugar, and lime juice. Blend until smooth.
- Tip: If the guavas aren’t very sweet, taste the puree first. You may need to add a little more sugar!
-
Fold in the guava puree. Gently combine the guava puree into the cream cheese mixture. You want to maintain the airiness!
- Chef insight: A marbled effect can be beautiful! Just swirl a few spoonfuls back through the batter for a lovely look.
Step 4: Bake!
-
Pour the filling into the crust. Carefully pour the cheesecake filling over the prepared biscuit crust. Smooth the top with a spatula if needed.
- Tip: Tap the pan gently on the counter to remove any air bubbles.
-
Bake the cheesecake. Place the springform pan into the preheated oven and bake for 45-55 minutes, or until the center is just slightly jiggly.
- Chef hack: For a water bath, place the pan in a larger dish filled with boiling water. This prevents cracking and ensures even baking.
Step 5: Cool and Serve
-
Cool in the oven. Turn off the oven and crack the door open slightly, letting the cheesecake cool gradually for about an hour. This helps prevent cracking.
- Tip: After it’s cool, chill it in the refrigerator for at least 4 hours, but overnight is best.
-
Decorate with guavas. Once fully chilled, carefully remove the cheesecake from the springform pan, slice it, and decorate the top with fresh guava slices for that beautiful finish.
- Pro tip: Add a sprinkle of lime zest for an extra burst of flavor!
-
Slice and enjoy! Each slice is a taste of tropical bliss!
Serving Suggestions
Plate your guava cheesecake on a beautiful platter, and garnish with fresh mint leaves and some colorful edible flowers if you feel fancy! Serve it with a dollop of whipped cream on the side, and if you’re feeling adventurous, a drizzle of passionfruit sauce can elevate the tropical vibes even more.
Recipe Variations
Want to switch it up a bit? Here are some variations:
-
Passionfruit Guava Cheesecake: Replace some or all of the guava puree with fresh passionfruit for a tangy twist.
-
Chocolate Swirl Guava Cheesecake: Drizzle melted dark chocolate into the filling for a decadent chocolate guava creation.
-
Lemon Guava Cheesecake Bars: Transform the cheesecake into portable bars by baking it in a rectangular dish and cutting it into squares.
-
Vegan Guava Cheesecake: Replace the cream cheese with cashew cream and eggs with flax eggs (1 tbsp flax mixed with 3 tbsp water), combined with a splash of coconut cream for richness.
-
Gluten-Free Version: Use gluten-free biscuits for the crust and enjoy this delightful treat without compromise.
Chef’s Notes
Over the years, this recipe has become a cherished staple in my kitchen. Each time I prepare it, I can’t help but think about that sunny gathering with friends and family. There was this one time when I accidentally burnt the crust because I got lost in a riveting kitchen tale (don’t worry, I just scraped it off!). It taught me to always keep an eye on the oven and, more importantly, to enjoy the journey—mistakes and all. Cooking is about connection and creating memories, and I hope this cheesecake helps you make some of your own.
FAQs and Troubleshooting
Q: My cheesecake cracked on top. What happened?
A: This may occur due to rapid temperature changes. To avoid cracks, let it cool gradually in the oven and avoid overbaking.
Q: How do I know when my cheesecake is done?
A: The center should be slightly jiggly; it will set as it cools in the fridge.
Q: Can I make this cheesecake in advance?
A: Absolutely! The cheesecake can be made a day or two ahead. Just keep it well covered in the fridge.
Q: Can I freeze the cheesecake?
A: Yes! You can freeze your cheesecake for up to a month. Just be sure to wrap it tightly in plastic wrap and then in foil.
Nutritional Info (Optional)
Serving Size: 1 slice (1/12th of cake)
- Calories: 350
- Total Fat: 22g
- Saturated Fat: 12g
- Cholesterol: 88mg
- Sodium: 200mg
- Total Carbohydrates: 30g
- Dietary Fiber: 1g
- Sugars: 18g
- Protein: 5g
And there you have it—your gateway to a beautiful guava cheesecake that’ll have your friends and family raving. Remember, it’s all about enjoying the process—so tie on that apron, pour yourself something refreshing, and let’s make memories that’ll last a lifetime. Happy baking! 🍰💖
PrintGuava Cheesecake
A tropical twist on a classic favorite, this Guava Cheesecake features a creamy texture balanced with the sweet and tangy notes of guava for an indulgent dessert.
- Prep Time: 20 minutes
- Cook Time: 55 minutes
- Total Time: 75 minutes
- Yield: 12 servings 1x
- Category: Dessert
- Method: Baking
- Cuisine: Tropical
- Diet: Vegetarian
Ingredients
- 300 g Tennis biscuits
- 150 g unsalted butter (melted)
- 700 g cream cheese
- 250 g castor sugar
- 4 eggs (extra large)
- 1 tsp vanilla extract
- 200 ml whipping cream
- 200 g guavas (for decorating)
- 500 g guavas (fresh, chopped, and peeled)
- 80 g sugar (white granulated)
- 1 tbsp lime juice
Instructions
- Prepare the crust: Crush the Tennis biscuits into fine crumbs. Mix with melted butter. Press into a springform pan.
- Preheat your oven to 160°C (320°F).
- Blend cream cheese and sugar until smooth. Add eggs one at a time, incorporating fully.
- Mix in vanilla extract and whipping cream.
- Prepare the guava puree: Blend guavas, sugar, and lime juice until smooth.
- Fold in the guava puree into the cream cheese mixture.
- Pour the filling into the crust and bake for 45-55 minutes.
- Cool in the oven, then chill in the refrigerator for at least 4 hours.
- Decorate with fresh guava slices.
- Slice and enjoy!
Notes
For a lighter option, substitute cream cheese with Neufchâtel cheese and use whipped coconut cream instead of whipping cream. Leave room for creativity with flavors like passionfruit or chocolate.
Nutrition
- Serving Size: 1 slice
- Calories: 350
- Sugar: 18g
- Sodium: 200mg
- Fat: 22g
- Saturated Fat: 12g
- Unsaturated Fat: 10g
- Trans Fat: 0g
- Carbohydrates: 30g
- Fiber: 1g
- Protein: 5g
- Cholesterol: 88mg
Keywords: cheesecake, guava, tropical dessert, summer dessert, baking