
Creamy Rosemary Cod with Potatoes: One-Pan Weeknight Dinner
Creamy Rosemary Cod with Potatoes: A Simple Elegance
Hello there, my culinary friends! I can’t tell you how excited I am to share this delightful recipe for Creamy Rosemary Cod with Potatoes. This dish embodies everything I love about cooking: it’s elegant yet approachable, comforting yet refined. Cooking should be a joy, not a chore, and I’m here to guide you through this delicious journey.
Imagine this: It’s a cool evening, the sun has set, and a soft golden light spills through your kitchen. You’ve set the table with your favorite plates, perhaps a sprig of rosemary casually tossed onto each one for a touch of class. The enticing scent of creamy rosemary sauce fills the air, making everyone feel instantly at home. The aroma wafts in from the kitchen as you pull out a dish that looks not only stunning but also speaks of love and care. That’s the magic of cooking – it brings people together, and with this recipe, you’ll be the host that everyone raves about!
So, let’s dive into making this dish that highlights the flaky, tender cod beautifully complemented by the creamy sauce and perfect potatoes. It’s an instant classic that’s sure to make your weeknights brighter and your dinner guests impressed. Ready? Let’s go!
A Taste of Nostalgia
When I think of cod, I instantly transport back to my childhood kitchen, where my grandmother would prepare our family meals. She had a knack for taking simple ingredients and turning them into something extraordinary. I can still smell the rosemary she would chop by hand, its earthy aroma mingling with the rich creaminess of the sauces she would whip up. One of my fondest memories is of staying over at her house, watching her cook dinner while sharing stories and laughter. She taught me that food is more than just nourishment; it’s about connection.
One particular evening, she prepared a creamy fish dish that turned out to be a magical blend of flavors, and my taste buds danced with delight! That dish stayed with me over the years, bubbling to the surface every time I saw fresh cod at the market. I promised myself I would recreate her dish, but with my twist — hence, the birth of this Creamy Rosemary Cod with Potatoes! This recipe brings back those cherished memories while adding my unique flair, and I hope it does the same for you.
Ingredients
Let’s gather our star players for this dish! Here’s what you’ll need:
-
4 cod fillets
Cod is buttery and mild, perfect for absorbing flavors. If cod isn’t available, you can easily substitute it with haddock or tilapia. -
4 medium potatoes, peeled and diced
Potatoes add heartiness to the dish. I recommend using Yukon Gold for their buttery flavor. If you’re looking for a healthier option, sweet potatoes are a delightful alternative! -
1 cup heavy cream
This is what makes our sauce luxuriously creamy. If you prefer a lighter version, substitute with half-and-half or coconut cream for a dairy-free option. -
2 tablespoons fresh rosemary, chopped
Fresh rosemary gives this dish its aromatic flair. If you only have dried rosemary on hand, use 1 tablespoon instead. Remember that dried herbs are more potent! -
2 tablespoons olive oil
Olive oil is our go-to for sautéing; it adds depth to our dish. For a different flavor kick, you could swap this with garlic-infused oil. -
Salt and pepper to taste
Always season your dishes! This is your chance to bring out those beautiful flavors. Feel free to experiment with other spices like paprika or lemon zest for added zest!
Step-by-Step Instructions
Now, let’s get into the nitty-gritty of creating this culinary masterpiece together!
-
Prep the Ingredients
Start by washing, peeling, and dicing your potatoes into even-sized cubes for uniform cooking. This ensures they all cook at the same pace—no one wants mushy potatoes on their plate! -
Parboil the Potatoes
In a pot of salted boiling water, throw in the diced potatoes and let them bubble away for about 5-7 minutes until they begin to soften. You want them tender but not mushy! Drain and set aside. -
Sauté the Cod
In a large skillet, heat the olive oil over medium heat. Season your cod fillets with salt and pepper on both sides. Carefully lay them in the hot skillet. Cook for 3-4 minutes on each side, or until they flake easily with a fork. You want a nice golden crust on each side!Chef Tip: If you notice the fillets browning too fast, dial down the heat a bit. Patience is key in ensuring that beautiful crust!
-
Make the Creamy Sauce
Once your cod is cooked to perfection, remove it from the skillet and set aside. In the same skillet, add the parboiled potatoes and sauté them for about 2-3 minutes. Then pour in the heavy cream and sprinkle in the chopped rosemary. Let it simmer gently until the cream starts thickening, which takes about 3-4 minutes. Don’t forget to scrape up any delicious bits left in the pan – that’s where all the flavor lives! -
Combine and Serve
Gently return the cod to the skillet, spooning that luscious creamy rosemary sauce over the fillets. Let it cook together for another minute, allowing the cod to soak in all those flavors. You can set the heat to low to keep everything warm and inviting. -
Plate It Up!
Serve your Creamy Rosemary Cod with Potatoes on a beautiful platter! Drizzle some extra sauce over the top and garnish with fresh rosemary sprigs for that “wow” factor. Presentation is key, but remember, it’s about the love you put into it!
Serving Suggestions
To elevate your dining experience, pair this dish with a simple green salad drizzled with lemon vinaigrette or some sautéed greens. Serve it alongside crusty bread for dunking in that heavenly sauce. Pour a crisp glass of white wine, like a Sauvignon Blanc, to complement the flavors beautifully.
Recipe Variations
Feeling adventurous? Here are a few twists to switch up the flavors:
-
Lemon Zest
Add a teaspoon of lemon zest to the sauce for a brightness that dances on your palate. -
Spinach and Garlic
Toss in some fresh spinach and minced garlic to the cream sauce for a vibrant and earthy touch. -
Mushroom Medley
Sauté some mushrooms along with the potatoes for a rich umami flavor that pairs well with the cod. -
Coconut Curry
Swap the heavy cream for coconut milk and add curry powder for an exotic flair! -
Herbed Parmesan Topping
Sprinkle some grated Parmesan cheese over the top before serving for an extra layer of decadence.
Chef’s Notes
Cooking is an art, and art is always evolving! This recipe started as a heartfelt tribute to my grandmother’s cooking but transformed as I experimented. Each time, I’d tweak ingredients or add my own spin. One time, I accidentally overcooked the cod while talking to a friend on the phone, and though disappointed, it turned out that a few more minutes in the pan gave it a wonderfully charred flavor that I’d never planned but came to love! Cooking is full of happy accidents, and those unpredictable moments often lead to delightful discoveries. So embrace each step with a pinch of joy!
FAQs and Troubleshooting
Q: What if my cod ends up dry?
A: Ensure you’re cooking it just until it flakes easily with a fork. Overcooking is common, so take it out of the pan as soon as it’s done!
Q: Can I make this ahead of time?
A: Absolutely! You can prepare everything and combine it just before serving for the best flavor. Simply reheat gently to avoid overcooking the fish.
Q: What sides pair well with this dish?
A: A light salad or roasted vegetables would complement the creamy flavors beautifully. You could also serve it with a side of quinoa or couscous!
Q: Can I use frozen cod?
A: Yes! Just make sure to thaw and pat it dry before cooking for the best results. Frozen fish can be just as delicious when cooked properly!
Nutritional Info
For those watching their nutritional intake, here’s a quick rundown per serving (estimation):
- Calories: 500
- Protein: 32g
- Fat: 35g
- Carbohydrates: 30g
Remember that these can vary based on specific ingredients and serving sizes.
Now that we’ve made this Creamy Rosemary Cod with Potatoes together, I hope you feel inspired to tie on that apron, embrace your creativity, and gather your loved ones around the table. Cooking is about so much more than the food on the plate; it’s about the memories we create. Enjoy every moment, and happy cooking, my foodie friends!
PrintCreamy Rosemary Cod with Potatoes

A delightful dish featuring flaky cod fillets in a creamy rosemary sauce served with hearty potatoes.
- Prep Time: 15 minutes
- Cook Time: 20 minutes
- Total Time: 35 minutes
- Yield: 4 servings 1x
- Category: Main Course
- Method: Sautéing
- Cuisine: American
- Diet: Gluten Free
Ingredients
- 4 cod fillets
- 4 medium potatoes, peeled and diced
- 1 cup heavy cream
- 2 tablespoons fresh rosemary, chopped
- 2 tablespoons olive oil
- Salt and pepper to taste
Instructions
- Prep the ingredients by washing, peeling, and dicing your potatoes into even-sized cubes.
- Parboil the potatoes in a pot of salted boiling water for about 5-7 minutes until they begin to soften. Drain and set aside.
- Sauté the cod in a large skillet with olive oil over medium heat, seasoning with salt and pepper. Cook for 3-4 minutes on each side.
- Make the creamy sauce by adding the parboiled potatoes to the same skillet, sautéing for 2-3 minutes, then adding heavy cream and rosemary. Let it simmer for 3-4 minutes.
- Combine the cod back into the skillet, spooning the sauce over it, and let it cook for another minute.
- Plate the dish beautifully, drizzling with extra sauce and garnishing with fresh rosemary sprigs.
Notes
Serve with a green salad or crusty bread and a glass of Sauvignon Blanc.
Nutrition
- Serving Size: 1 serving
- Calories: 500
- Sugar: 3g
- Sodium: 500mg
- Fat: 35g
- Saturated Fat: 20g
- Unsaturated Fat: 10g
- Trans Fat: 0g
- Carbohydrates: 30g
- Fiber: 3g
- Protein: 32g
- Cholesterol: 100mg
Keywords: cod, rosemary, creamy sauce, potatoes, seafood

Cheesy Taco Sticks
Cheesy Taco Sticks: An Easy, Fun, and Flavorful Snack
Hello, fellow food lovers! If you’re in the mood for a snack that’s equal parts cheesy, cozy, and downright delicious, then you’ve come to the right place. Today, we’re diving into a recipe for Cheesy Taco Sticks—a treat that will have everyone hovering around the kitchen like it’s a taco truck on wheels. Think of this as your invite to a gourmet fiesta, right in the comfort of your own home!
A Quick Taco Time Tale
Let me take you back to one of my favorite childhood memories. I was still in school, and my mom would surprise us with taco night every Friday. The aroma of seasoned beef sizzling on the stove, the crispness of fresh veggies, and the sight of gooey cheese melting over everything was enough to send my heart soaring. All week long, I dreamed about that glorious taco spread and the delicious chaos that followed—sour cream-covered faces, salsa splatters on the table, and laughter about who could stack the tallest taco tower.
One special night, while we were preparing our tacos, my mom had a fun twist up her sleeve. She rolled out some dough and stuffed it with all the taco goodness, transforming our weekly tradition into something new, exciting, and utterly delightful. There we were, biting into cheesy taco sticks, and I was hooked! From that moment on, I knew that anything smothered in cheese and seasoned beef deserved a spot in my kitchen. Now, I’m thrilled to pass this tradition on to you with my version of Cheesy Taco Sticks!
Ingredients
Here’s what you’ll need to bring this cheesy dream to life:
-
1 lb ground beef
A staple in any taco-inspired dish. If you prefer a lighter option, feel free to swap it with ground turkey or even black beans for a vegetarian twist. -
1 packet taco seasoning
This is your secret weapon for flavor! Taco seasoning blends spices like cumin, chili powder, and garlic for those authentic taco vibes. You can easily make your own with common spices at home! -
1 cup shredded cheese (cheddar or Mexican blend)
Cheese is essential for that melty goodness! Cheddar brings sharpness, while a Mexican blend adds complexity. If you’re feeling adventurous, try pepper jack for a kick! -
1 can refrigerated crescent dough
This crescent dough is a magic ingredient! It’s flaky, buttery, and extremely forgiving—ideal for creating the perfect cheesy stick. For a healthier route, look for whole wheat dough. -
Sour cream and salsa for dipping
Because what’s cheese without some zesty dipping? These pair perfectly, balancing the richness of the taco sticks. Feel free to swap salsa for guacamole if you’re team green!
Step-by-Step Instructions
Now, let’s roll up our sleeves and get cooking—these cheesy taco sticks are oh-so-easy to prepare!
-
Preheat Your Oven
Begin by preheating your oven to 375°F (190°C). This will ensure that our taco sticks get golden brown and crisp. -
Cook the Beef
In a skillet over medium heat, add your ground beef. Use a wooden spoon to break it up as it cooks. Cook until browned (approximately 6-8 minutes). Drain any excess fat if needed. Pro tip: Adding a splash of water while cooking helps keep the meat tender and juicy! -
Season the Beef
Sprinkle the taco seasoning over the beef. Add a splash of water (about ¼ cup) and stir to combine. Allow it to cook for a couple more minutes until the mixture is thick and fragrant. Don’t be afraid to taste it! Adjust seasoning if you like it zippier. -
Prepare the Dough
Roll out the refrigerated crescent dough on a clean surface. You can press the seams together to create a single sheet, which will make it easier to wrap the beef mixture. Chef’s tidbit: You can also slice the dough into squares for a more rustic look! -
Assembly Time!
Spoon a generous amount of the seasoned beef mixture onto one end of the dough. Top it with a sprinkle of shredded cheese. Roll the dough over the filling into a log shape and pinch the seams to seal. Place seam side down on a baking sheet lined with parchment paper. Tip: Brush a little melted butter on top for added golden richness! -
Bake to Perfection
Pop the baking sheet into your preheated oven and let those sticks bake for about 12-15 minutes, or until they are golden brown. The aroma wafting through your kitchen will be irresistible! -
Serve Warm
Once baked, remove the sticks from the oven and let them cool slightly. They are best served warm, right out of the oven! Remember to dive in with those dipping sauces—the creaminess of sour cream against the warmth of the sticks is heavenly!
Serving Suggestions
For presentation, slice the cheesy taco sticks into bite-sized pieces and arrange them on a platter. You can garnish with a sprinkle of chopped cilantro for color and freshness. Serve alongside a small bowl of salsa and sour cream for dipping goodness! It’s all about making your taco feast feel festive and inviting.
Recipe Variations
Here are a few creative flips you can try with this recipe:
- Chicken Taco Sticks: Substitute ground beef with shredded rotisserie chicken.
- Bean & Cheese Twist: For a vegetarian option, use refried beans and top with cheese.
- Spicy Taco Sticks: Add some diced jalapeños to the beef mixture for an extra kick.
- Loaded Taco Sticks: Mix in black olives, corn, or chopped bell peppers for added texture.
Chef’s Notes
Over the years, I’ve made Cheesy Taco Sticks countless times, tweaking and experimenting along the way. One of my funniest memories was when I decided to add too much cheese—let’s just say they were oozing and ended up looking more like a taco explosion! What a mess, but oh my, they tasted divine! This is one recipe that has truly evolved as I’ve shared it with friends and family, each one adding their secret ingredients or techniques. I love that cooking is not just about following directions but about sharing those funny moments and culinary adventures.
FAQs and Troubleshooting
1. My dough didn’t seal properly—what happened?
Sometimes, it can be tricky to seal the dough well, especially if it’s cold. Make sure to pinch the seams tightly and, if needed, use a bit of water to help stick them together.
2. Can I freeze the uncooked sticks?
Absolutely! You can assemble them ahead of time, wrap them well in plastic, and freeze. Bake straight from the freezer, but add a few extra minutes to the baking time.
3. How do I prevent sogginess?
To prevent sogginess, make sure to drain the beef mixture well after cooking. Also, avoid overloading the filling—keep it balanced for the best texture.
4. What can I do with leftover filling?
Fear not! You can use any leftover filling in salads, tacos, or nachos. It’s versatile and could make a fantastic lunch option!
Nutritional Info
For those interested in the numbers, each cheesy taco stick (if you cut them into six pieces) contains approximately:
- Calories: 210
- Protein: 10g
- Carbohydrates: 15g
- Fat: 12g
(Note: Nutritional values can vary based on specific brands and adjustments to the recipe.)
Cooking should be a celebration—a way to create beautiful, flavorful moments. I hope you enjoy making these Cheesy Taco Sticks as much as I have over the years. Gather your loved ones, unleash your inner foodie, and let’s keep this culinary tradition going! Whether for a cozy movie night, a party, or just a fun Friday treat, you can’t go wrong with these cheesy delights. So, tie on that apron, crank the oven, and let’s get cooking!
PrintCheesy Taco Sticks

An easy, fun, and flavorful snack that combines cheesy goodness with seasoned beef, all wrapped in flaky crescent dough.
- Prep Time: 15 minutes
- Cook Time: 15 minutes
- Total Time: 30 minutes
- Yield: 4 servings 1x
- Category: Snack
- Method: Baking
- Cuisine: Mexican
- Diet: Beef
Ingredients
- 1 lb ground beef
- 1 packet taco seasoning
- 1 cup shredded cheese (cheddar or Mexican blend)
- 1 can refrigerated crescent dough
- Sour cream and salsa for dipping
Instructions
- Preheat your oven to 375°F (190°C).
- Cook the ground beef in a skillet over medium heat, breaking it up until browned (about 6-8 minutes), and drain excess fat.
- Season the beef with taco seasoning and a splash of water, stirring to combine.
- Prepare the refrigerated crescent dough on a clean surface, pressing seams together.
- Spoon the beef mixture onto one end of the dough and top with cheese. Roll and seal.
- Place on a baking sheet lined with parchment paper and brush with melted butter.
- Bake for 12-15 minutes or until golden brown.
- Serve warm with sour cream and salsa.
Notes
Make sure to drain the beef well and avoid overloading the filling for the best texture.
Nutrition
- Serving Size: 1 serving
- Calories: 210
- Sugar: 1g
- Sodium: 500mg
- Fat: 12g
- Saturated Fat: 6g
- Unsaturated Fat: 4g
- Trans Fat: 0g
- Carbohydrates: 15g
- Fiber: 0g
- Protein: 10g
- Cholesterol: 50mg
Keywords: cheesy snacks, taco sticks, party food

Crispy Cheesy Roll Ups
Crispy Cheesy Roll Ups: A Nostalgic Treat That’s Sure to Delight!
Hello, my fellow food enthusiasts! Today, I’m thrilled to share with you a delightful dish that’s not only super easy to make but is also packed with nostalgia—Crispy Cheesy Roll Ups. This tempting treat is perfect for a cozy night in, a casual gathering, or even a gourmet spin on your weekday meals. Ready to take a trip down memory lane? Let’s dive right in!
Introduction
When I think of comfort food, my mind instantly drifts to those cherished childhood moments spent in the kitchen with my family, joyfully creating simple yet delicious snacks that made us all smile. One dish that stands out is the crispy cheesy roll up—a delightful fusion of crispy exteriors and gooey cheese that brings back so many warm memories. The beauty of these roll-ups lies in their versatility; they can be tailored to suit any palate and are equally great as an appetizer, snack, or even a light meal.
Imagine the sound of sizzling bread as it hits the hot pan, the aroma of melting cheese wafting through the air, and the satisfaction of dipping a perfectly crisp roll into a rich tomato soup or tangy marinara sauce. Does it get any better? Not to mention, these roll-ups require minimal prep but deliver maximum flavor! So grab your apron—let’s create something scrumptious!
Personal Story
I remember the very first time I made Crispy Cheesy Roll Ups. I was about ten years old, and my best friend invited me over for a sleepover. We decided to venture into the kitchen, fueled by late-night giggles and an insatiable craving for snacks. We scoured the pantry, realizing we had bread and an abundance of cheese. I recall my excitement as we rolled each slice and carefully watched them fry to golden perfection.
As we eagerly dipped our creations into warm tomato soup, I felt a surge of accomplishment; we had made our very own special dish! That night wasn’t just about satisfying our hunger—it was about creativity, camaraderie, and the sheer joy of being together. To this day, every bite of these roll-ups brings back a flood of sweet memories, and I can’t wait for you to share in this delicious experience.
Ingredients
-
Slices of Bread:
- Choose your favorite type—white, whole grain, or sourdough all work wonders! For a gluten-free option, simply swap in gluten-free bread.
-
Cheese (Cheddar, Mozzarella, or Your Favorite):
- Opt for a melty cheese like cheddar or mozzarella that provides that gooey goodness. Feel free to experiment with pepper jack or gouda for an extra kick!
-
Butter (for frying):
- Butter not only adds flavor but helps achieve that crispy golden crust. If you’re feeling adventurous, try using olive oil for a lighter twist.
-
Tomato Soup or Marinara Sauce (for dipping):
- These classic dips elevate the dish! You can easily swap in a creamy ranch dressing or a zesty aioli for added flair.
Step-by-Step Instructions
-
Prepare Your Ingredients:
- Gather your bread, cheese, and any dipping sauces you plan to use. Prepping everything beforehand ensures a smooth cooking experience.
-
Flatten the Bread:
- Using a rolling pin, gently flatten each slice of bread. This helps with rolling and achieving that crispy texture! If you don’t have a rolling pin, a glass or bottle works just fine.
-
Add the Cheese:
- Place a slice of your chosen cheese on the flattened bread. Be generous—this is where the magic happens! Remember, the more cheese, the gooier the roll-up.
-
Roll It Up:
- Starting at one end, carefully roll the bread tightly around the cheese. Use a bit of pressure to keep it together. For added security, you can gently pinch the ends to seal in the cheesy goodness.
-
Heat the Pan:
- In a skillet, add a generous amount of butter. Heat over medium until melted and bubbling. The sizzle is part of the fun!
-
Fry the Roll-Ups:
- Place the roll-ups seam side down in the hot butter. Fry for about 2-3 minutes on each side or until golden brown and crispy. Keep an eye on them—nobody likes burnt cheese!
-
Drain Excess Butter:
- Once they’re golden, transfer your roll-ups to a paper towel-lined plate to soak up any extra butter. This keeps them crispy and not soggy!
-
Serve with Your Dipping Sauce:
- Arrange the crispy roll-ups on a beautiful platter, surrounded by your chosen dipping sauce. This adds a touch of elegance to your comfort food!
Serving Suggestions
Plating is an art, and these roll-ups deserve a little love! Serve them on a rustic wooden board or a bright ceramic platter. Drizzle a bit of olive oil on the side and garnish with fresh herbs (like basil or parsley). Don’t forget warm dips are essential! Create a mini dipping station with bowls of tomato soup or marinara sauce to enhance the aesthetic and the experience. Your guests are going to love it!
Recipe Variations
-
Herbed Roll-Ups:
- Add fresh herbs like basil or parsley between the cheese and the bread for an aromatic twist.
-
Spicy Kick:
- Incorporate sliced jalapeños or sriracha-infused cheese for those who like a bit of spice.
-
Sweet Tooth:
- Swap the cheese for Nutella or peanut butter and serve with a sweet dip—think honey or chocolate sauce.
-
Veggie Boost:
- Toss in some thinly sliced spinach or tomatoes for an extra layer of flavor and nutrition.
-
Cheesy Combination:
- Experiment with mixed cheeses, like cheddar and gouda, for a deeper flavor profile.
Chef’s Notes
As a self-proclaimed cheese enthusiast, I can’t help but chuckle at the many mishaps in my kitchen over the years. I once accidentally used too much cheese in a batch and felt devastated as I watched it ooze everywhere! But you know what? Some of the best culinary moments come from those happy accidents. Now, every cheesy overflow reminds me of those playful experiments and the joy of creation. Each time I roll up some bread with cheese, I’m reminded that the kitchen is a space for memories, laughs, and admittedly, delicious messes!
FAQs and Troubleshooting
1. My roll-ups are bursting open while frying. What did I do wrong?
- This can happen if the bread isn’t rolled tightly enough or if you overloaded on cheese. Make sure to pinch the seams well and stick to a reasonable cheese amount.
2. How do I make these roll-ups extra crispy?
- Make sure your butter is hot enough before adding the roll-ups. Frying at medium-high heat will create that delightful crispy texture.
3. Can I prepare these in advance?
- Yes! You can roll them up and refrigerate them before frying. Just pop them in the pan right before serving for a hot, crispy snack!
4. What if I don’t have any dipping sauce?
- Don’t fret! Even on their own, these roll-ups are delicious. You can also drizzle them with honey or a balsamic reduction for a sweet twist!
Nutritional Info (optional)
While I believe in indulging in delicious treats like these roll-ups in moderation, I understand that knowledge is power! Here’s a rough estimate per roll-up if you use standard bread and cheddar cheese:
- Calories: ~150
- Fat: ~9g
- Carbohydrates: ~15g
- Protein: ~5g
Enjoy these crispy cheesy roll-ups as a delightful treat that will surely warm your heart and bring every mouthful you take back to those cherished moments in the kitchen. I’m so glad you’re here to share this culinary journey with me at Ivory Apron! So, tie on your apron and let’s create something timeless together! Happy cooking!
PrintCrispy Cheesy Roll Ups

A delightful fusion of crispy exteriors and gooey cheese, perfect as an appetizer, snack, or light meal.
- Prep Time: 10 minutes
- Cook Time: 10 minutes
- Total Time: 20 minutes
- Yield: 4 servings
- Category: Snack
- Method: Frying
- Cuisine: American
- Diet: Vegetarian
Ingredients
- Slices of Bread (white, whole grain, or sourdough)
- Cheese (Cheddar, Mozzarella, or your favorite)
- Butter (for frying)
- Tomato Soup or Marinara Sauce (for dipping)
Instructions
- Prepare your ingredients: Gather your bread, cheese, and any dipping sauces.
- Flatten the bread: Use a rolling pin to flatten each slice of bread.
- Add the cheese: Place a slice of cheese on the flattened bread.
- Roll it up: Roll the bread tightly around the cheese.
- Heat the pan: Add butter to a skillet and heat until melted.
- Fry the roll-ups: Fry seam side down for about 2-3 minutes on each side.
- Drain excess butter: Transfer to a paper towel-lined plate.
- Serve with your dipping sauce: Arrange on a platter with chosen sauce.
Notes
For an extra crispy texture, ensure the butter is hot before adding the roll-ups. You can refrigerate them before frying for a quick snack.
Nutrition
- Serving Size: 1 serving
- Calories: 150
- Sugar: 2g
- Sodium: 300mg
- Fat: 9g
- Saturated Fat: 5g
- Unsaturated Fat: 4g
- Trans Fat: 0g
- Carbohydrates: 15g
- Fiber: 1g
- Protein: 5g
- Cholesterol: 20mg
Keywords: Crispy Cheesy Roll Ups, comfort food, snacks, easy recipes
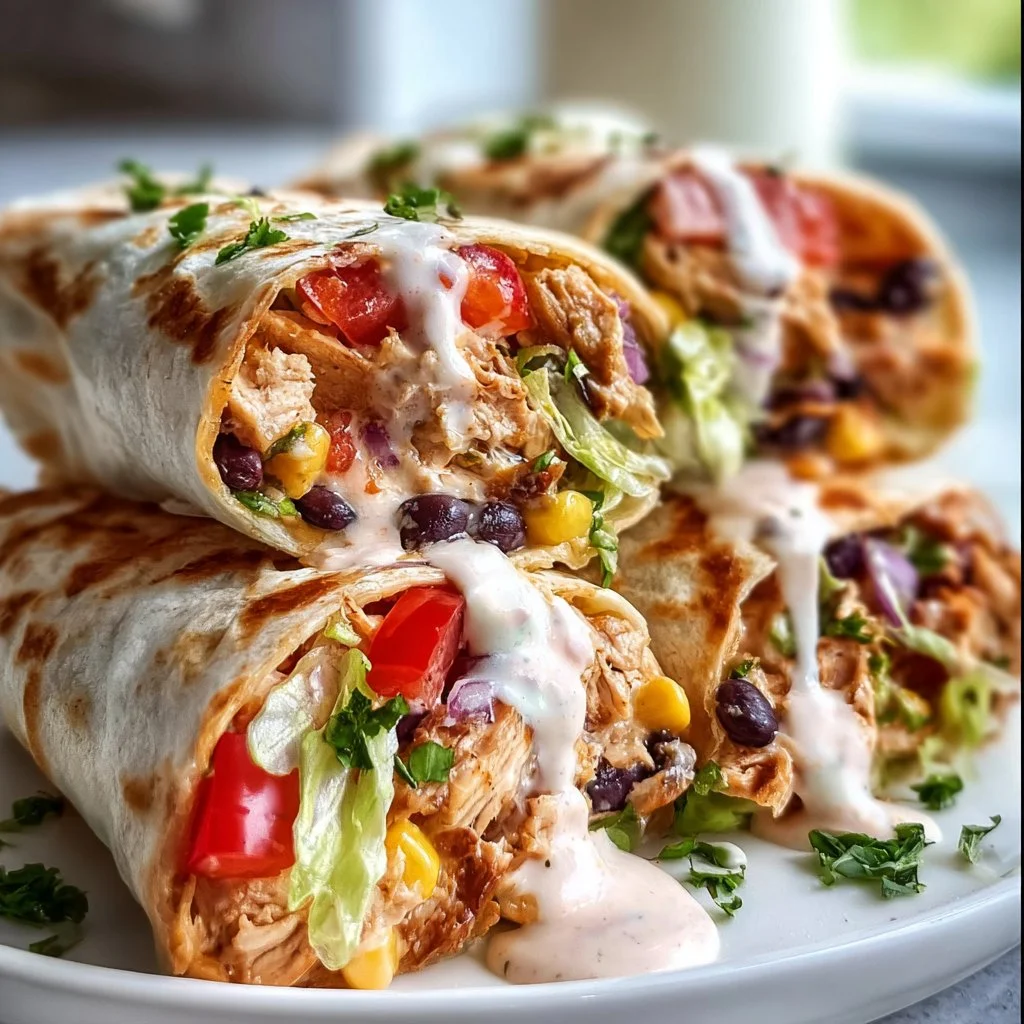
Southwest Chicken Wraps
Southwest Chicken Wraps: A Flavorful Taste of Togetherness
Hello, lovely food enthusiasts! Welcome back to Ivory Apron, where we dish up delightful recipes that are as approachable as they are elegant. Today, I’m thrilled to share one of my all-time favorite meals that not only tickles your taste buds but also brings people together at the table: Southwest Chicken Wraps. Imagine biting into a wrap packed with tender, shredded chicken, sweet corn, vibrant bell peppers, and creamy ranch—all seasoned just right. It’s like a fiesta in your hands!
A Culinary Journey of Flavor
Let’s take a stroll down memory lane. I remember my best friend’s birthday party when we were teenagers. Her mom had this wonderful tradition of hosting dinner parties, and she always served these spectacular wraps as a light yet satisfying meal. It was one of those hot summer evenings where laughter floated in the air, and the food tasted even better shared with great friends.
As we sat around the table, with music playing softly in the background, I watched my friends eagerly bite into those colorful wraps. It wasn’t just about the food; it was the atmosphere of love, joy, and friendship that enveloped us all. That evening ignited my passion for cooking, teaching me that a simple dish could become a cherished memory. Now, every time I make Southwest Chicken Wraps, I’m reminded of that magical night and how food can bond us in the most beautiful ways.
Ingredients
Here’s what you’ll need to whip up these scrumptious Southwest Chicken Wraps:
-
2 cups cooked chicken, shredded: Using leftover rotisserie chicken is a great shortcut! You can also use turkey or cook chicken breasts or thighs in advance.
-
1 cup bell peppers, diced: Choose any color you love! Red, yellow, and orange peppers add sweetness, while green offers a sharp crunch.
-
1 cup corn: Fresh corn is delightful, but frozen or canned corn works perfectly too. Just make sure to drain and rinse if you’re using canned.
-
1 cup black beans, rinsed and drained: Great for protein and fiber! You can swap them for pinto beans or chickpeas for a different flavor profile.
-
1/2 cup red onion, diced: This adds a nice sharpness. If you prefer something milder, try using green onions or shallots instead.
-
1/2 cup mild cheddar cheese, shredded: Cheddar adds creaminess. Feel free to swap with Monterey Jack or pepper jack for a kick!
-
4 large flour tortillas: Whole wheat or spinach tortillas can give a healthful twist—plus, they look beautiful on the plate!
-
1/2 cup ranch dressing: Store-bought is convenient, but homemade ranch takes it to the next level! Just mix mayo, buttermilk, and your favorite herbs.
-
1 tablespoon taco seasoning: This flavorful blend brings warmth. You can use homemade seasoning by mixing chili powder, cumin, garlic powder, and a pinch of cayenne.
-
Salt and Pepper to taste: Always remember to taste as you go!
Step-by-Step Instructions
Alright, let’s get down to business! Follow these steps to create your own delicious Southwest Chicken Wraps:
-
Prep Your Ingredients: Start by shredding your cooked chicken. If you’re using rotisserie chicken, simply pull it apart using two forks—it’s a wonderful, therapeutic process! Dice your bell peppers, rinse and drain those black beans, and chop that red onion.
-
Mix the Filling: In a large mixing bowl, combine the shredded chicken, bell peppers, corn, black beans, red onion, taco seasoning, and ranch dressing. Give it a good toss! This is where the magic begins as flavors meld together. I like using my hands for this step—much more fun and you can feel the satisfying texture!
-
Taste the Mixture: This is crucial! Give your filling a quick taste to ensure all the flavors are harmonious. Adjust seasoning with salt and pepper as needed—don’t underestimate the importance of a flavor check!
-
Warm Your Tortillas: Before filling, warm the tortillas for about 10-15 seconds in the microwave or on a skillet. This will make them pliable and easy to fold. Trust me, warm tortillas make all the difference!
-
Assemble the Wraps: One by one, place a generous amount of your filling in the center of each tortilla (about 1/4 of the mixture per wrap). Fold the sides in, then roll it up tightly from the bottom to create a lovely burrito shape. Don’t be shy—if your wraps are overstuffed, they’ll have personality!
-
Final Touch (Optional): For a warm, crispy finish, place the wraps seam-side down in a heated skillet or grill for a few minutes until golden and crispy. This is a fun step that adds texture!
-
Slice and Serve: Cut each wrap in half diagonally to reveal the colorful filling. Arrange them on a platter to serve, and don’t forget to drizzle with a little extra ranch dressing for presentation or a side of salsa for dipping.
Serving Suggestions
For a vibrant presentation, pile your Southwest Chicken Wraps onto a wooden board or a colorful platter. Surround them with bowls of assorted salsas, guacamole, and extra ranch dressing to encourage your guests to dive in. Add a sprinkle of fresh cilantro or parsley on top for a pop of color.
Recipe Variations
Feel free to get creative with these wraps! Here are some ideas to switch things up:
-
Spicy Kick: Add diced jalapeños or a sprinkle of cayenne pepper to the filling for a fiery touch!
-
Veggie-Loaded: Replace chicken with grilled vegetables or tofu for a delicious vegetarian option.
-
Creamy Avocado Twist: Mix mashed avocado with the ranch dressing for a rich and creamy filling.
-
Fusion Fun: Incorporate some Asian flavor by adding a drizzle of teriyaki sauce and substituting bell peppers with shredded carrots.
Chef’s Notes
These Southwest Chicken Wraps have lived a wonderful life in my kitchen! They’ve evolved over the years, starting from that original recipe at my friend’s birthday party. After a few experiments and countless gatherings, I found the perfect balance of flavors. Sometimes, I’ll even sneak in leftover grilled steak or shrimp to change things up!
And let me tell you, a funny moment happened during one gathering when I thought I had bought flour tortillas but accidentally grabbed corn tortillas instead. Let’s just say, the wraps became taco-style creations that night, and we had a blast figuring out how to fold them!
FAQs and Troubleshooting
-
What if my chicken is dry?
If your chicken turns out dry, add a bit more ranch dressing or a splash of chicken broth to the filling. This will help moisten it up beautifully. -
Can I make these wraps ahead of time?
Absolutely! Just tightly wrap them in plastic wrap and store them in the fridge. They hold up nicely for about a day. Just remember to warm them again before serving! -
What can I do if I’m gluten-free?
Simply use gluten-free tortillas, and you’re good to go! There are many delicious varieties available at most grocery stores now—check the gluten-free aisle! -
How do I store leftovers?
Leftover wraps (if you have any) can be stored in an airtight container in the fridge for up to three days. Just know that the tortillas may soften a bit, but they’ll still be delicious!
Nutritional Info
If you’re interested in the nutritional aspects, here’s a general overview per wrap (based on using the suggested ingredients):
- Calories: approx. 360
- Protein: 25g
- Carbohydrates: 36g
- Fat: 15g
- Fiber: 6g
So, there you have it, my culinary friends! I hope you find joy in creating these Southwest Chicken Wraps as much as I do. They’re perfect for any occasion—whether it’s a casual dinner or a festive gathering, they’re sure to please a crowd.
Happy cooking, and let’s keep those aprons tied on tight! Celebrate togetherness around your table with these beautiful flavors. Remember, good food isn’t just about what’s on your plate; it’s about the love you serve it with. Enjoy!
PrintSouthwest Chicken Wraps

Delicious Southwest Chicken Wraps filled with tender chicken, vibrant vegetables, and creamy ranch dressing, perfect for gatherings.
- Prep Time: 15 minutes
- Cook Time: 10 minutes
- Total Time: 25 minutes
- Yield: 4 servings 1x
- Category: Main Course
- Method: Wrap
- Cuisine: Mexican
- Diet: None
Ingredients
- 2 cups cooked chicken, shredded
- 1 cup bell peppers, diced
- 1 cup corn
- 1 cup black beans, rinsed and drained
- 1/2 cup red onion, diced
- 1/2 cup mild cheddar cheese, shredded
- 4 large flour tortillas
- 1/2 cup ranch dressing
- 1 tablespoon taco seasoning
- Salt and Pepper to taste
Instructions
- Prep your ingredients: Start by shredding your cooked chicken. Dice your bell peppers, rinse and drain the black beans, and chop the red onion.
- Mix the filling: In a large mixing bowl, combine the shredded chicken, bell peppers, corn, black beans, red onion, taco seasoning, and ranch dressing. Give it a good toss!
- Taste the mixture: Ensure all flavors are harmonious, and adjust seasoning with salt and pepper as needed.
- Warm your tortillas: Microwave or skillet warm them for about 10-15 seconds.
- Assemble the wraps: Place a generous amount of filling in each tortilla, fold in the sides, and roll it up tightly.
- Final touch: Optionally, place wraps seam-side down in a skillet until golden and crispy.
- Slice and serve: Cut each wrap in half and serve on a platter with extra ranch dressing or salsa.
Notes
These wraps can be made ahead of time and stored in the fridge for up to a day. Reheat before serving.
Nutrition
- Serving Size: 1 wrap
- Calories: 360
- Sugar: 5g
- Sodium: 500mg
- Fat: 15g
- Saturated Fat: 5g
- Unsaturated Fat: 8g
- Trans Fat: 0g
- Carbohydrates: 36g
- Fiber: 6g
- Protein: 25g
- Cholesterol: 60mg
Keywords: chicken wraps, Southwest wraps, easy dinner
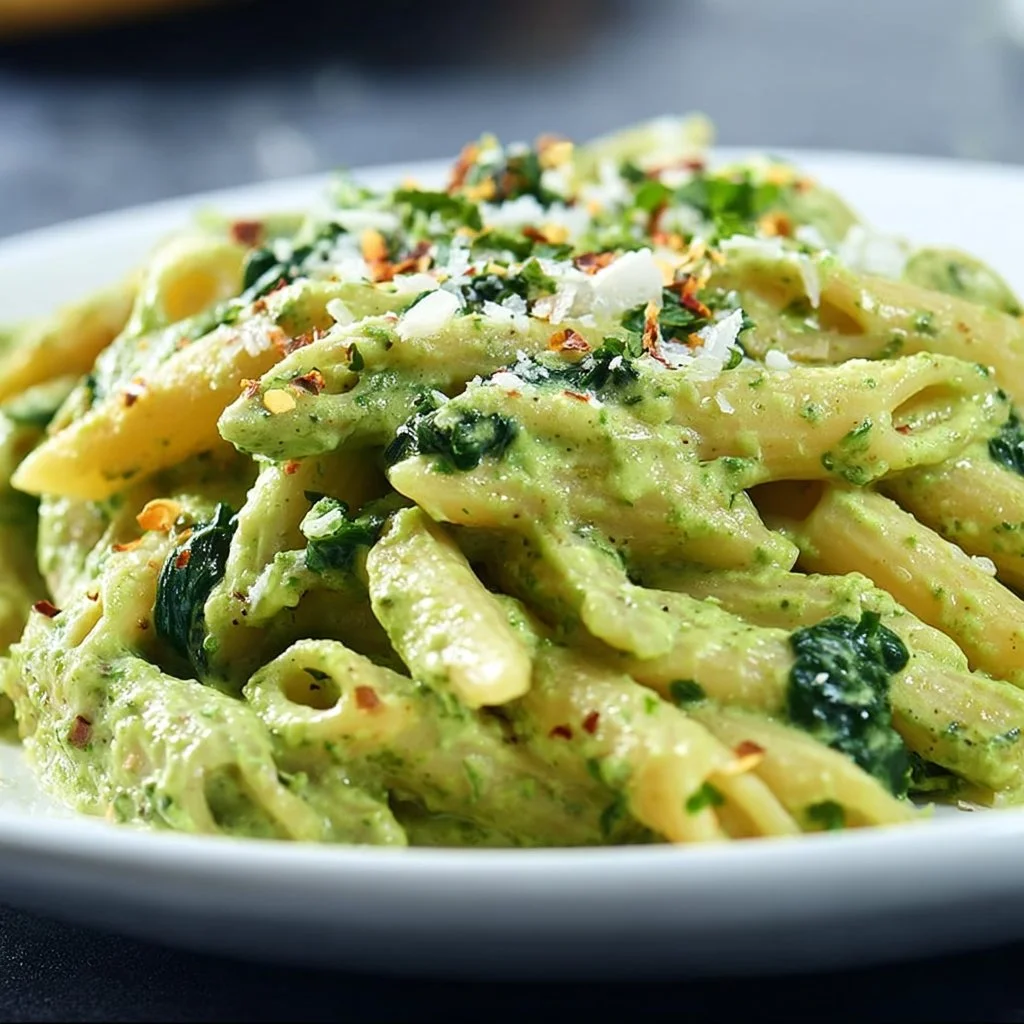
Creamy Spinach Pasta
Creamy Spinach Pasta: A Comforting Delight
Hello, fellow food enthusiasts! Today, I’m excited to share a recipe that embodies everything I adore about cooking — rich flavors, vibrant colors, and that cozy atmosphere we all crave when we gather around the table. Introducing my Creamy Spinach Pasta! This recipe is not only a feast for the eyes but also a delicious dish that’s perfect for a cozy weeknight dinner or a casual gathering with friends.
Now, let’s dive in and make some magic in the kitchen together!
A Personal Story with Spinach Pasta
Let me take you back to my childhood. I vividly remember those Sunday dinners at my grandma’s house, where the kitchen was filled with the tantalizing aromas of something wonderful just bubbling on the stove. My favorite was her creamy pasta! While she had her secrets (she was a master at hiding things from us eager little chefs), one day I caught a glimpse of her sneaking in a vibrant green spinach puree. I was puzzled but intrigued — how could something so green create such a heavenly dish?
Fast forward to the present, and that memory has fueled my passion for combining comfort food with healthy ingredients. Today, when I make Creamy Spinach Pasta, I can’t help but feel a connection to those lovely Sunday dinners. And the best part? It’s a dish that’s easy to recreate, ensuring that my friends and family can share in the joy, just like I did back then.
Ingredients
To create your own creamy masterpiece, you’ll need the following ingredients:
-
Fresh Palak (Spinach) Puree: This is the star of the dish! Use fresh spinach for vibrant color and flavor. You can substitute with frozen spinach, but be sure to thaw and drain it well.
-
Milk: Whole milk is ideal for a rich creaminess, but you can swap in almond milk or oat milk for a dairy-free option.
-
Wheat Flour: Essential for thickening the sauce. If you’re gluten-free, almond flour or cornstarch can be great alternatives.
-
Mozzarella Cheese: This adds a delightful stretch and creaminess. Feel free to use cheddar or a vegan cheese alternative if you prefer.
-
Salt: Essential for bringing out all the flavors. Always taste and adjust to your preference!
-
Pepper: Freshly cracked black pepper adds a subtle kick.
-
Olive Oil: A good quality olive oil not only adds flavor but also richness to the dish.
-
Garlic: Fresh garlic creates a depth of flavor that’s hard to beat. If you’re in a pinch, garlic powder will do, but fresh is best!
-
Onion: Finely diced onion adds sweetness and complexity. You can use shallots for a milder taste.
Step-by-Step Instructions
Let’s get cooking! Here’s how to whip up this Creamy Spinach Pasta in a few simple steps:
-
Prepare the Spinach Puree:
- Start by washing 2 cups of fresh spinach thoroughly. In a pot of boiling water, blanch the spinach for about 2-3 minutes until it turns vibrant green. Quickly transfer it to a bowl of ice water to stop the cooking process.
- Once cool, drain the spinach and squeeze out excess water. Blend it in a food processor until smooth. Voilà! You have your fresh palak puree.
-
Sauté the Aromatics:
- In a large skillet, heat 2 tablespoons of olive oil over medium heat. Add 1 finely chopped onion and 3 minced garlic cloves.
- Sauté until the onion becomes translucent and fragrant, about 3-4 minutes. This step is crucial, as it builds the base flavor for your sauce.
-
Make the Creamy Sauce:
- Sprinkle in 2 tablespoons of wheat flour and stir for about 1 minute to form a roux. This step will help thicken your sauce.
- Slowly whisk in 2 cups of milk, allowing the mixture to come to a gentle simmer. Stir continuously for about 5 minutes until it thickens. Chef tip: Don’t rush this process! Patience is key to a silky sauce.
-
Add Spinach Puree and Cheese:
- Stir in the spinach puree and mix well. Add 1 cup of shredded mozzarella cheese, stirring until melted and combined.
- Season with salt and pepper to taste. Remember to taste your sauce; this is your chance to adjust and personalize!
-
Cook the Pasta:
- While your sauce is bubbling away, cook your pasta of choice (about 8 oz) according to package instructions. I love using pappardelle or fettuccine for this dish but feel free to use whatever you have on hand!
- Reserve about 1 cup of pasta water before draining to adjust the consistency of the sauce later if needed.
-
Combine and Serve:
- Toss the drained pasta into the sauce, adding a splash of the reserved pasta water if it’s too thick. Mix until the pasta is well coated.
- Serve immediately, garnished with extra mozzarella or a sprinkle of fresh herbs for that extra touch!
Serving Suggestions
For an elegant presentation, plate your Creamy Spinach Pasta in shallow bowls. Add a generous amount of sauce on top, and finish with a light sprinkle of freshly grated Parmesan cheese or some crushed red pepper flakes for a kick. A drizzle of high-quality olive oil can elevate the dish even more, and don’t forget some freshly cracked black pepper for good measure. Additionally, pair it with a crisp green salad and a glass of white wine for a truly delightful dining experience!
Recipe Variations
Want to switch up this creamy delight? Here are a few creative twists you might consider:
- Add Protein: Toss in grilled chicken, sautéed shrimp, or roasted chickpeas for added protein.
- Change the Greens: Substitute spinach with other greens like kale or arugula for different flavors.
- Spice It Up: Add red pepper flakes for heat or mix in some sun-dried tomatoes for a burst of flavor.
- Vegan Version: Replace dairy with plant-based milk, nutritional yeast for cheesy flavor, and use a vegan cheese substitute.
- Pasta Alternatives: Experiment with whole grain or gluten-free pasta, or even spiralized veggies like zucchini!
Chef’s Notes
Cooking is one of those beautiful processes that evolves over time. This creamy spinach pasta has certainly transformed from my early attempts. Initially, I followed a more traditional Alfredo route, but over the years, I’ve gathered so many tips and tricks that brought this dish to life! One particularly funny moment involved a “tiny” explosion of flour while making the roux that left my kitchen looking like a snowy wonderland. Now, I’m extra cautious when whisking!
As this recipe continues to be a favorite in my home, I love being able to pass it on to others. It’s such a comforting delight and holds a special place in my heart!
FAQs and Troubleshooting
-
Why is my sauce too thick?
- If your sauce turns out thicker than expected, gradually add some of the reserved pasta water while mixing until you reach the desired consistency.
-
Can I make this ahead of time?
- Absolutely! You can prepare the sauce and pasta separately, storing them in the fridge. Just reheat and combine when you’re ready to serve.
-
Is it possible to freeze the dish?
- Yes! Freeze the pasta before adding the sauce. You can freeze the sauce separately as well. When you’re ready to enjoy, simply thaw and reheat.
-
My sauce isn’t creamy enough — what should I do?
- If you find your sauce lacking creaminess, you can stir in a splash of heavy cream or cream cheese for an ultra-rich texture.
Nutritional Info (Optional)
While I won’t dive deep into numbers here, I will say that this Creamy Spinach Pasta is rich in vitamins A and K from the spinach, calcium from the dairy, and provides a good amount of carbs for energy — a balanced dish that’s perfect for those cozy nights in.
There you have it, my friends! A delightful embrace of comfort and elegance with every bite of this Creamy Spinach Pasta. I hope you enjoy making it as much as I do, and that it becomes a cherished part of your gatherings just as it has in mine. Happy cooking, and let’s keep creating those beautiful moments around the table!
PrintCreamy Spinach Pasta
A comforting and delicious creamy spinach pasta perfect for cozy dinners or gatherings.
- Prep Time: 15 minutes
- Cook Time: 30 minutes
- Total Time: 45 minutes
- Yield: 4 servings 1x
- Category: Main Course
- Method: Cooking
- Cuisine: Italian
- Diet: Vegetarian
Ingredients
- 2 cups Fresh Spinach Puree
- 2 cups Whole Milk (or almond/oat milk)
- 2 tablespoons Wheat Flour (or almond flour/cornstarch)
- 1 cup Shredded Mozzarella Cheese (or cheddar/vegan cheese)
- Salt to taste
- Freshly cracked black Pepper to taste
- 2 tablespoons Olive Oil
- 3 minced Garlic Cloves
- 1 Finely chopped Onion
- 8 oz Pasta (pappardelle or fettuccine)
Instructions
- Prepare the Spinach Puree: Wash and blanch spinach for 2-3 minutes, then blend until smooth.
- Sauté the Aromatics: Heat olive oil in a skillet, add onion and garlic, and sauté until translucent.
- Make the Creamy Sauce: Add flour to the skillet, stir to form a roux, then whisk in milk and simmer until thickened.
- Add Spinach Puree and Cheese: Mix in spinach puree and cheese, and season with salt and pepper.
- Cook the Pasta: Prepare pasta according to package instructions and reserve pasta water before draining.
- Combine and Serve: Toss pasta with sauce, adjusting consistency with reserved pasta water as needed, and serve immediately.
Notes
For a creamier texture, you may stir in a splash of heavy cream or cream cheese. You can also add protein like grilled chicken or shrimp for variations.
Nutrition
- Serving Size: 1 serving
- Calories: 350
- Sugar: 8g
- Sodium: 400mg
- Fat: 18g
- Saturated Fat: 8g
- Unsaturated Fat: 6g
- Trans Fat: 0g
- Carbohydrates: 45g
- Fiber: 4g
- Protein: 14g
- Cholesterol: 30mg
Keywords: spinach pasta, creamy pasta, vegetarian pasta, easy dinner recipe

Cheesy Taco Sticks
Cheesy Taco Sticks: The Perfect Party Appetizer
Welcome to another delightful post from Ivory Apron! Today, we’re diving into the world of Cheesy Taco Sticks—a dish that perfectly combines bold flavors, gooey cheese, and a crispy texture that everyone will love. Whether it’s a casual weeknight dinner, a weekend gathering, or game day snacking, these cheesy delights will quickly become a family favorite. So, tie on your apron and let’s get started!
Personal Story
Picture this: a bustling kitchen filled with the sounds of laughter, sizzling pans, and the mouthwatering aroma of tacos. I remember one unforgettable taco night with my family when I was younger. My mom was busy whipping up her famous taco spread, and the excitement in the air was palpable. As she called us in, I spotted the melted cheese bubbling over the top of our ground beef tacos. This wasn’t just about the food; it was about the time spent together, the stories shared, and, of course, the fun of building our own taco creations.
Fast forward to today, and I’ve taken that nostalgic feeling and transformed it into something a little different—Cheesy Taco Sticks! They’re easy to make, fun to share, and bring back all those warm memories of family taco nights. So, whether you’re hosting a game night with friends or just looking for a cozy meal with loved ones, these cheesy treats will do the trick!
Ingredients
Let’s gather our ingredients! Here’s what you need for these Cheesy Taco Sticks:
-
1 package of flour tortillas
- These soft, chewy tortillas serve as the perfect vessel for all the delicious fillings. You can substitute with whole wheat or corn tortillas if you prefer a different flavor or texture!
-
1 cup shredded cheddar cheese
- Cheddar brings a tangy, bold flavor to our taco sticks. If you’re feeling adventurous, try a blend of cheeses like Monterey Jack or pepper jack for an extra kick!
-
1 cup cooked taco meat (beef or turkey)
- Ground beef is classic, but don’t shy away from ground turkey for a leaner option! Feel free to season your meat with your favorite spices to enhance the flavors.
-
1/2 cup salsa
- Salsa adds a vibrant kick! If you’re looking for a milder option, go with a chunky tomato salsa. For a spicy version, opt for a salsa verde or a roasted salsa to give it more depth and flavor.
-
1 tablespoon taco seasoning
- This is where the magic happens! You can use store-bought seasoning or mix your own with cumin, paprika, garlic powder, and a pinch of cayenne for some heat.
-
Cooking spray or olive oil for brushing
- A light brush of oil or spray helps the taco sticks become crispy and golden. You can use cooking spray for convenience or a drizzle of olive oil for a little extra flavor.
Step-by-Step Instructions
-
Preheat Your Oven:
Preheat your oven to 400°F (200°C). This ensures your Cheesy Taco Sticks will be perfectly crispy and golden brown when they come out of the oven. -
Prepare Your Taco Filling:
In a mixing bowl, combine the cooked taco meat, shredded cheddar cheese, salsa, and taco seasoning. Stir until well mixed. The cheese will act like a delicious glue that holds everything together, and the salsa will add moisture and flavor. Test it for seasoning—after all, a tasty filling is the heart of any good taco stick! -
Assemble the Taco Sticks:
Lay a flour tortilla on a clean surface. Spoon a generous amount of your taco filling onto one end of the tortilla. The key is not to overfill; less is often more here! Roll the tortilla tightly like a burrito, tucking in the ends as you go to secure the filling. Repeat this with the remaining tortillas. -
Brush and Bake:
Place the rolled taco sticks seam-side down on a baking sheet lined with parchment paper. Lightly spray or brush the tops with cooking spray or olive oil—this helps achieve that desirable golden crust. -
Bake Until Golden:
Bake them in your preheated oven for about 15-20 minutes until the tortillas are crisp and the cheese is melted and bubbly. Keep an eye on them to ensure they don’t brown too quickly! -
Slice and Serve:
Once out of the oven, allow them to cool for a few minutes before slicing them into bite-sized pieces. You can cut them diagonally for that trendy presentation or straight across for easy dipping.
Serving Suggestions
Serve your Cheesy Taco Sticks on a large platter with a selection of dipping sauces like sour cream, guacamole, or extra salsa. For flair, garnish with fresh cilantro or sliced green onions to make it visually stunning and appetizing. Whether it’s a party or a family dinner, these sticks are sure to be a hit!
Recipe Variations
Want to put a twist on these Cheesy Taco Sticks? Here are some fun ideas to experiment with:
-
Buffalo Chicken Taco Sticks: Use shredded buffalo chicken in place of taco meat and add a sprinkle of blue cheese for a spicy kick.
-
Vegetarian Delight: Substitute the meat with black beans or lentils. Throw in some corn and diced bell peppers for an added crunch.
-
Tex-Mex Twist: Mix in some chopped jalapeños or diced green chiles for a spicy touch.
-
Cheesy Veggie Option: Swap the beef for a melty cheese and spinach mixture for a delicious veggie option everyone can enjoy.
-
Breakfast Taco Sticks: Use scrambled eggs, breakfast sausage, and cheese wrapped in tortillas for a fun breakfast twist!
Chef’s Notes
Cooking is all about finding joy in the process, and these Cheesy Taco Sticks are no exception! I’ve had some hilarious mishaps while making these—like the time I accidentally added too much taco seasoning and turned our meal into a spicy adventure!
Over the years, this recipe has evolved from simple tacos to these trendy taco sticks that please both kids and adults alike. Remember, there are no hard and fast rules—keep experimenting and make it your own!
FAQs and Troubleshooting
1. What can I do if my taco sticks are soggy?
If you find your taco sticks are soggy, make sure to use a generous amount of cheese to bind the filling, and avoid adding too much liquid from the salsa. A sprinkle of additional cheese on top before baking can also help create a crispier texture.
2. Can I prepare these ahead of time?
Absolutely! You can assemble your taco sticks in advance and store them in the fridge. Just make sure to bake them fresh when you’re ready to serve so they maintain that delicious crunch.
3. How do I store leftovers?
If you have any leftovers (though they’re unlikely!), store them in an airtight container in the fridge. They can be reheated in the oven or air fryer for that crispy texture again.
4. Can I freeze these taco sticks?
Yes! These taco sticks freeze well. Just freeze them before baking, and when you’re ready to enjoy, bake from frozen—just add a few extra minutes to the cook time.
Nutritional Info
(If desired, please customize based on recipe specifics but here’s a general outline)
- Serving Size: 1 Stick
- Calories: Approx. 180
- Protein: 7g
- Fat: 8g
- Carbohydrates: 22g
There you have it! A delightful journey from the nostalgia of taco nights to creating your delicious Cheesy Taco Sticks. I hope you’re inspired to hop into your kitchen and make these for your next gathering. Remember, cooking is all about love and sharing, so gather your friends or family and enjoy the process. Happy cooking!
PrintCheesy Taco Sticks

Delicious Cheesy Taco Sticks combining bold flavors and gooey cheese, perfect for parties or family dinners.
- Prep Time: 15 minutes
- Cook Time: 20 minutes
- Total Time: 35 minutes
- Yield: 4 servings 1x
- Category: Appetizer
- Method: Baking
- Cuisine: Mexican
- Diet: Vegetarian option available
Ingredients
- 1 package of flour tortillas
- 1 cup shredded cheddar cheese
- 1 cup cooked taco meat (beef or turkey)
- 1/2 cup salsa
- 1 tablespoon taco seasoning
- Cooking spray or olive oil for brushing
Instructions
- Preheat your oven to 400°F (200°C).
- Combine the cooked taco meat, shredded cheddar cheese, salsa, and taco seasoning in a mixing bowl.
- Lay a flour tortilla on a clean surface and spoon a generous amount of filling onto one end.
- Roll the tortilla tightly like a burrito, tucking in the ends as you go.
- Place the rolled taco sticks seam-side down on a baking sheet lined with parchment paper.
- Brush the tops with cooking spray or olive oil.
- Bake for 15-20 minutes until the tortillas are crisp and the cheese is melted.
- Allow to cool for a few minutes before slicing into bite-sized pieces.
Notes
Serve with sour cream, guacamole, or extra salsa; garnish with fresh cilantro or sliced green onions.
Nutrition
- Serving Size: 1 stick
- Calories: 180
- Sugar: 2g
- Sodium: 500mg
- Fat: 8g
- Saturated Fat: 4g
- Unsaturated Fat: 3g
- Trans Fat: 0g
- Carbohydrates: 22g
- Fiber: 1g
- Protein: 7g
- Cholesterol: 30mg
Keywords: Cheesy Taco Sticks, Party Appetizer, Mexican Recipe

Pepperoni Pizza Crescent Rolls
Pepperoni Pizza Crescent Rolls: The Perfect Crowd-Pleaser
Hello, fellow food lovers! Today, we’re diving into a recipe that’s close to my heart and even closer to my stomach — Pepperoni Pizza Crescent Rolls! Perfect for game night, family gatherings, or just a cozy movie marathon at home, these little treats meld the gooey goodness of pizza with the buttery flakiness of crescent rolls. It’s like a pizza pocket but with that delightful pop-and-flake that only crescent dough can provide. Let’s roll up our sleeves and get cooking!
A Slice of Nostalgia
Growing up, pizza was more than just a meal; it was a family affair. I remember those Friday nights when my siblings and I would gather around the kitchen table with flour-dusted aprons, ready to make our own mini pizzas. We’d lay out various toppings, from gooey mozzarella to spicy pepperoni, and let our imaginations run wild. Each creation was a masterpiece, and everything was fair game, even the odd leftover broccoli that somehow made it onto the pizza.
But the real magic happened when my mom introduced us to crescent rolls. Oh, the joy of popping that can open! The crescents turned out to be a perfect vessel for pizza ingredients, transforming our casual Friday night into the aerial display of modern culinary gymnastics. Fast forward to today, and I can still taste that nostalgia in each flaky bite of these Pepperoni Pizza Crescent Rolls.
Ingredients
Let’s gather our ingredients for this super fun dish! Here’s what you’ll need:
-
1 can (8 oz) refrigerated crescent roll dough
The star of our show! For a healthier option, you can use whole wheat dough or a gluten-free version if you’re avoiding gluten. -
24 slices pepperoni
Classic, spicy, and oh-so-savory! If you prefer, switch it up with turkey pepperoni or even sliced salami for a gourmet twist. -
4 mozzarella string cheese sticks (cut in half lengthwise)
The gooey, melty cheese is what makes these rolls special. For a vegan version, use plant-based cheese sticks or chunks. -
2 tablespoons pizza sauce (optional, for rolling)
Dip, roll, or fill! Use homemade or store-bought. You can also use marinara or a spicy arrabbiata sauce for a kick. -
1 tablespoon butter (melted)
This will give your rolls a beautiful golden finish when baked. Feel free to substitute with olive oil or a dairy-free version for a lighter touch. -
½ teaspoon Italian seasoning
A sprinkle of this enhances the pizza flavor. If you don’t have it, try mixing dried basil, oregano, and thyme instead. -
¼ teaspoon garlic powder
For that extra flavor punch. Fresh minced garlic works beautifully here, too! -
Grated Parmesan cheese (optional, for topping)
Because everything’s better with cheese! Nutritional yeast can replace this if you’re keeping it vegan. -
Extra pizza or marinara sauce (for dipping)
You can never have too much sauce. Grab your favorite for that final touch.
Step-by-Step Instructions
Now that we’re all prepped, let’s dive into the cooking process. Follow along as we create those drool-worthy Pepperoni Pizza Crescent Rolls!
-
Preheat Your Oven:
Start by preheating your oven to 375°F (190°C). This ensures that our rolls bake evenly and get that enticing golden hue. Best way to preheat? Turn on the oven while you prepare the rest. This saves time! -
Prepare Your Baking Sheet:
Line a baking sheet with parchment paper or a silicone baking mat. Not only does this make clean-up easier, but it also helps the rolls crisp up perfectly on the bottom. -
Unroll the Crescent Dough:
Open that can of crescent dough — the pop is half the fun! Carefully unroll it on a clean surface to prevent tearing. You should see a triangle shape for each piece. -
Add the Sauce:
Grab the pizza sauce and use a small spoon to spread about half a teaspoon onto the wider end of each crescent triangle. This step is optional but adds an extra flavor layer. -
Layer the Toppings:
Place 3 slices of pepperoni on top of the sauce, followed by a half-piece of string cheese. The beauty here is the way the cheese melts into the pepperoni and creates that pizza magic we all adore. -
Roll It Up:
Starting from the wider end, gently roll the dough towards the tip. Tuck in the sides as you go to avoid the cheese peeking out. Place the rolls on the prepared baking sheet with the point side down to prevent them from opening up while baking. -
Brush with Butter:
In a small bowl, mix the melted butter with Italian seasoning and garlic powder. Brush the mixture generously over each roll for an added, buttery flavor and crispy finish. -
Sprinkle with Cheese:
If you’re feeling extra fancy, sprinkle a little grated Parmesan cheese over the top of each roll. This will lend a delightful nuttiness and make your rolls even more irresistible. -
Bake It Up:
Slide the baking sheet into the preheated oven and let them bake for about 12-15 minutes, or until the rolls are golden brown and the cheese is bubbly. Keep an eye out; everyone’s oven behaves a bit differently! -
Cool and Serve:
Once removed from the oven, allow the rolls to cool for a few minutes. This helps the cheese set a little and keeps you from burning your mouth — we want to savor, not scald!
Serving Suggestions
For that perfect presentation, plate these Pepperoni Pizza Crescent Rolls on a large wooden board or a stylish serving platter. Serve them alongside the extra pizza or marinara sauce for dipping. Feel free to sprinkle some fresh basil or parsley over the top for a pop of color. These rolls also look fabulous surrounded by a simple salad, creating a beautiful, inviting table!
Recipe Variations
-
Veggie Delight: Add chopped bell peppers, mushrooms, or olives for a veggie-packed version. Just be sure not to overstuff the rolls!
-
BBQ Chicken: Swap in shredded cooked chicken mixed with BBQ sauce instead of pepperoni for a great twist.
-
Buffalo Style: Use buffalo chicken and blue cheese for a spicy take. Your taste buds will thank you for the explosion of flavors!
-
Sweet N’ Savory: Try adding a hint of honey drizzled over the baked rolls for a delightful sweet contrast to the salty pepperoni.
Chef’s Notes
This recipe is one of those wonderful “kitchen-sink” creations. I love to experiment with whatever I have handy — I’ve even thrown in spinach or some sautéed veggies when I’m feeling a bit health-conscious! Also, if you have leftovers (which is rare but can happen), they make for an excellent lunch the next day — just pop them back in the oven to reheat for that freshly-baked taste. Trust me; they’ll be just as delicious!
FAQs and Troubleshooting
Can I use homemade dough instead of store-bought?
Absolutely! Just roll it out to the same thickness as crescent roll dough, and follow the same rolling and filling instructions.
What if my rolls burst open during baking?
Don’t fret! Sometimes the cheese may ooze out a bit, and that’s totally fine. If you want to prevent this, try to roll them tighter or use the point of the dough to seal everything in snugly.
How do I store leftovers?
Store them in an airtight container in the refrigerator for up to 2 days. Reheat in the oven for a few minutes to restore their flaky texture.
Can I freeze these rolls?
Yes! Assemble the rolls, but do not bake them. Freeze them on a baking sheet, then transfer them to a freezer-safe container. When you’re ready to enjoy, bake directly from frozen, adding a few extra minutes to the cooking time.
And there you have it: your complete guide to making delicious Pepperoni Pizza Crescent Rolls! They’re simple to whip up, packed with flavor, and truly the ultimate comfort food. So, what are you waiting for? Tie on that apron, gather your loved ones, and let’s make some memories in the kitchen. Happy cooking!
PrintPepperoni Pizza Crescent Rolls

Delicious crescent rolls filled with pepperoni and cheese, perfect for gatherings or movie nights.
- Prep Time: 15 minutes
- Cook Time: 15 minutes
- Total Time: 30 minutes
- Yield: 8 servings 1x
- Category: Appetizer
- Method: Baking
- Cuisine: Italian
- Diet: Vegetarian
Ingredients
- 1 can (8 oz) refrigerated crescent roll dough
- 24 slices pepperoni
- 4 mozzarella string cheese sticks (cut in half lengthwise)
- 2 tablespoons pizza sauce (optional, for rolling)
- 1 tablespoon butter (melted)
- ½ teaspoon Italian seasoning
- ¼ teaspoon garlic powder
- Grated Parmesan cheese (optional, for topping)
- Extra pizza or marinara sauce (for dipping)
Instructions
- Preheat your oven to 375°F (190°C).
- Prepare a baking sheet lined with parchment paper.
- Unroll the crescent dough on a clean surface.
- Add pizza sauce to the wider end of each crescent triangle.
- Layer 3 slices of pepperoni and half a piece of cheese on top of the sauce.
- Roll the dough gently from the wider end to the tip, tucking in the sides.
- Brush melted butter mixed with Italian seasoning and garlic powder over each roll.
- Sprinkle grated Parmesan cheese on top if desired.
- Bake for 12-15 minutes, or until golden brown.
- Cool for a few minutes before serving.
Notes
Feel free to experiment with different toppings or sauces. Leftovers can be reheated in the oven for freshness.
Nutrition
- Serving Size: 1 roll
- Calories: 250
- Sugar: 1g
- Sodium: 450mg
- Fat: 15g
- Saturated Fat: 7g
- Unsaturated Fat: 6g
- Trans Fat: 0g
- Carbohydrates: 25g
- Fiber: 1g
- Protein: 9g
- Cholesterol: 25mg
Keywords: pepperoni pizza rolls, crescent rolls, easy appetizers, game night snacks, vegetarian recipes
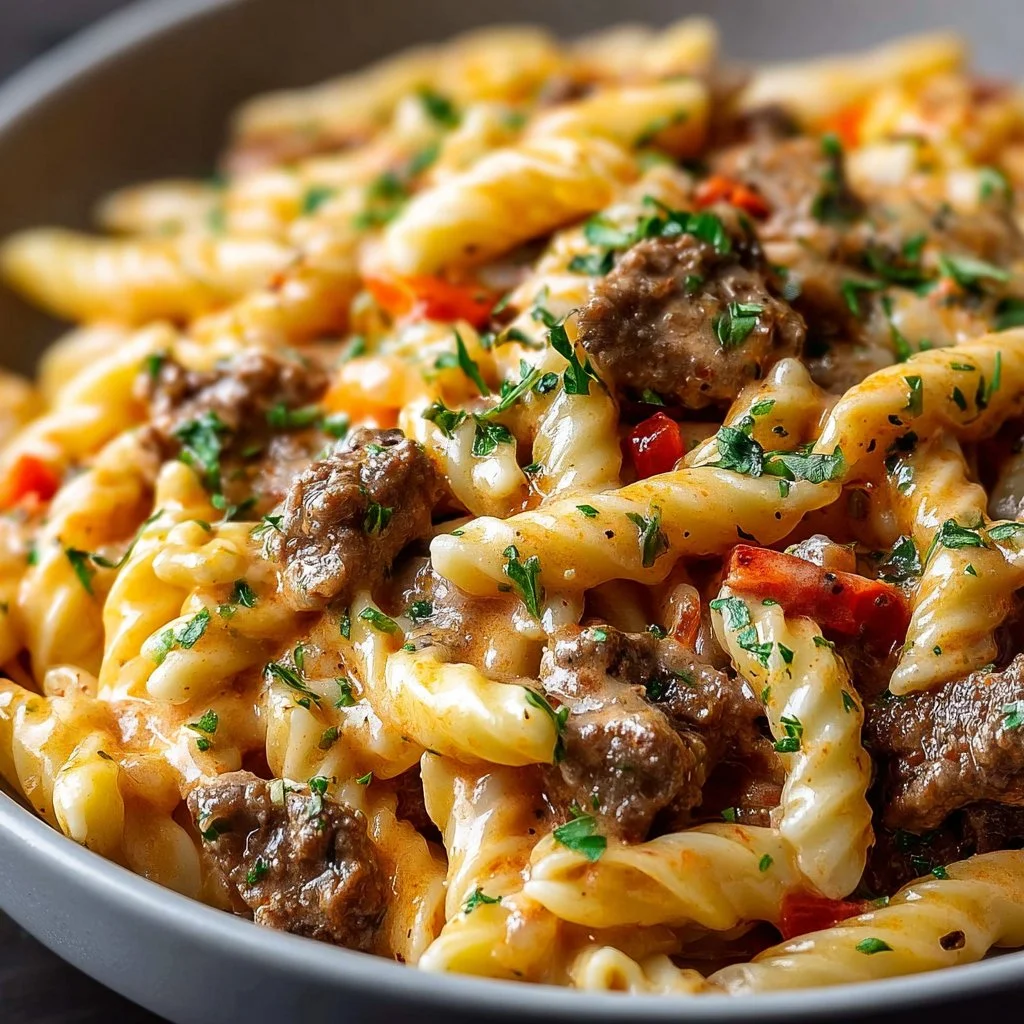
Creamy Beef Pasta
Creamy Beef Pasta: A Comforting Classic You’ll Adore
Hello, culinary friends! Today, we’re diving into a dish that promises to warm your heart and fill your home with delightful aromas: Creamy Beef Pasta. This recipe is perfect for cozy weeknights or when you just want something easy yet utterly satisfying. With luscious creaminess, savory beef, and comforting pasta, you’ll be ready to gather everyone around the table in no time. So, grab your apron and let’s get cooking!
A Taste of Nostalgia
Ah, pasta! It’s one of those magical foods that never fails to evoke memories. I remember the first time I tried a creamy beef pasta at a family gathering. It was one of those chilly autumn evenings, and my aunt had just taken it out of the oven, its cheesy top bubbling and golden brown. The moment I took a bite, I was transported to a warm embrace of flavors: the richness of the cream, the savory depth from the beef, and the satisfying chewiness of the pasta.
It became an instant classic in our family, making appearances at birthdays and casual Sunday dinners alike. Now, I’ve taken that nostalgic recipe and put my own spin on it, simplifying the steps while maximizing the flavor. Trust me, once you try this creamy beef pasta, it might just become a beloved dish in your household as well!
Ingredients
Here’s what you’ll need to whip up this delicious dish:
-
8 oz penne pasta
This pasta shape holds onto the sauce beautifully, making every bite a creamy delight! If you don’t have penne, feel free to swap it with fusilli or even spaghetti; just adjust the cooking times. -
1 lb lean ground beef
A fantastic protein that adds richness and flavor. If you’re looking for a leaner option, ground turkey or chicken works here too—just ensure it’s well-seasoned! -
1 cup heavy cream
This is the star of the show, lending that comforting creaminess we crave. If you’re looking for a lighter version, half-and-half can be a good substitute, but it won’t be quite as rich. -
3 cloves garlic, minced
Garlic infuses this dish with mouthwatering aroma and flavor. If you’re not a fan of garlic, shallots can be a milder alternative. -
1 medium onion, diced
Onions add natural sweetness and depth. Red onions can be used for a slightly different flavor profile, or you can omit them entirely if you prefer. -
1 cup grated Parmesan cheese
Absolutely essential for that cheesy goodness! Pecorino Romano is a great substitute for a bit of zing, or you can use a mix of your favorites like mozzarella for a different texture. -
2 tsp Italian seasoning
This blend of dried herbs rounds out the flavor perfectly. You can use fresh herbs if you have them—like basil or oregano—just chop them finely and sprinkle in as desired! -
Salt and pepper to taste
Essential for bringing all those flavors to life! Always taste as you go to ensure the perfect seasoning. -
2 tsp olive oil for sautéing
Olive oil is my go-to for sautéing because it adds flavor. If you want to mix it up, avocado oil is a great option!
Step-by-Step Instructions
Now that you have your ingredients ready, let’s get to the heart of the matter. Here’s how to make your creamy beef pasta come to life!
-
Cook the Pasta
Start by bringing a large pot of salted water to a boil. Add in the penne pasta and cook according to package instructions until al dente (about 8-10 minutes). Don’t forget to reserve about ½ cup of pasta water before draining! This starchy water can help adjust the sauce’s consistency later. -
Sauté the Aromatics
While your pasta is cooking, heat 2 tsp of olive oil in a large skillet over medium heat. Toss in the diced onion and sauté for about 3-4 minutes until it becomes translucent. Follow it up with the minced garlic, and cook for an additional minute until fragrant. (Ah, the smell of garlic! Who can resist?) -
Brown the Beef
Increase the heat to medium-high and add the ground beef to the skillet. Use a wooden spoon to break it up as it cooks. Season with salt, pepper, and 2 tsp of the Italian seasoning. Cook until the beef is browned and no longer pink, about 5-7 minutes. Make sure to drain any excess fat for a lighter dish. -
Stir in the Cream
Once your beef is perfectly browned, reduce the heat to medium and pour in 1 cup of heavy cream. Stir it all together, allowing the cream to meld with the beef and onions. This is the moment when things start to get dreamy! -
Add Cheese and Create the Sauce
Gradually sprinkle in the grated Parmesan cheese, stirring continuously to create a creamy sauce. If it seems too thick, this is where your reserved pasta water comes in. Add a splash or so until you like the consistency—creamy but not too heavy! -
Combine with Pasta
Add the drained pasta directly into the skillet. Toss it well with the sauce, ensuring every piece of pasta is coated in that luscious creaminess. Taste and adjust the seasoning if needed—maybe a touch more salt or pepper. -
Serve and Enjoy!
Once everything is well combined, it’s time to plate up. This dish is best enjoyed fresh, while the cream is still warm and inviting!
Serving Suggestions
When it comes to serving your creamy beef pasta, a little presentation never hurt anyone! You can dish out generous portions in shallow bowls or plates. A sprinkle of additional Parmesan cheese and a few fresh basil leaves on top can elevate the dish visually and flavor-wise. And if you want to add a pop of color, place a few cherry tomatoes or a side salad next to the bowl for that beautiful contrast. Trust me, your guests will be impressed!
Recipe Variations
-
Veggie-Loaded Version: Add sautéed mushrooms, bell peppers, or spinach for an extra dose of nutrients. Just toss them in with the onions!
-
Spicy Kick: Mix in some red pepper flakes while sautéing the garlic for a touch of heat.
-
Swap the Meat: Try using ground sausage for a richer flavor or lentils for a vegetarian twist.
-
Dairy-Free Option: Substitute the heavy cream with coconut milk and use nutritional yeast instead of cheese for a creamy yet dairy-free alternative.
-
Herb Infusion: Add fresh rosemary or thyme during the cooking process for a fragrant twist.
Chef’s Notes
Every recipe tells a story, and this creamy beef pasta is no different. Over the years, I’ve tried countless variations, from adding white wine to the cream to experimenting with different cheese combos. My kitchen has seen its fair share of “oops” moments—like the time I accidentally added too much cream, resulting in what I fondly dubbed my “Oopsie Creamy Pasta.” Once you get the hang of it, though, this dish becomes second nature. Just remember, if you ever find yourself unsure, trust your palate and feel free to adjust! Cooking is all about love and flavor, after all.
FAQs and Troubleshooting
1. My sauce is too thick. What should I do?
Add reserved pasta water gradually until you reach your desired consistency.
2. How do I prevent the cream from curdling?
Make sure to lower the heat after adding cream and stir continuously, ensuring it doesn’t boil.
3. Can I make this ahead of time?
Yes! You can prepare the beef and sauce ahead of time, but I’d recommend cooking the pasta fresh right before serving.
4. My pasta is sticky. What went wrong?
This can happen if the pasta is overcooked or if it wasn’t stirred during the first few minutes of cooking. Always keep an eye on it!
Nutritional Info
(Feel free to add your specific nutritional info based on estimated values!)
Now that you’re armed with this creamy beef pasta recipe, I can’t wait for you to try it! Let me know how it turns out, and share your own kitchen adventures. Remember, every meal is a chance to gather, connect, and create beautiful memories around the table. Happy cooking!
PrintCreamy Beef Pasta

A comforting and creamy beef pasta dish perfect for cozy weeknights.
- Prep Time: 10 minutes
- Cook Time: 20 minutes
- Total Time: 30 minutes
- Yield: 4 servings 1x
- Category: Main Course
- Method: Stovetop
- Cuisine: Italian
- Diet: None
Ingredients
- 8 oz penne pasta
- 1 lb lean ground beef
- 1 cup heavy cream
- 3 cloves garlic, minced
- 1 medium onion, diced
- 1 cup grated Parmesan cheese
- 2 tsp Italian seasoning
- Salt and pepper to taste
- 2 tsp olive oil for sautéing
Instructions
- Cook the pasta: Bring a large pot of salted water to a boil. Add in the penne pasta and cook according to package instructions until al dente (about 8-10 minutes). Don’t forget to reserve about ½ cup of pasta water before draining!
- Sauté the aromatics: Heat olive oil in a large skillet over medium heat. Toss in the diced onion and sauté for about 3-4 minutes until translucent. Add minced garlic and cook for an additional minute.
- Brown the beef: Increase heat to medium-high and add ground beef. Cook until browned and no longer pink, about 5-7 minutes. Drain excess fat.
- Stir in the cream: Reduce heat to medium and pour in heavy cream, stirring to combine.
- Add cheese and create the sauce: Gradually sprinkle in grated Parmesan cheese, stirring continuously. Adjust consistency with reserved pasta water if needed.
- Combine with pasta: Add drained pasta to the skillet and toss with the sauce until coated.
- Serve and enjoy: Plate generously and garnish with more cheese and fresh basil if desired.
Notes
For a veggie-loaded version, include mushrooms, bell peppers, or spinach. Adjust garlic and cheese depending on preference.
Nutrition
- Serving Size: 1 serving
- Calories: 500
- Sugar: 2g
- Sodium: 600mg
- Fat: 25g
- Saturated Fat: 12g
- Unsaturated Fat: 10g
- Trans Fat: 0g
- Carbohydrates: 45g
- Fiber: 3g
- Protein: 30g
- Cholesterol: 80mg
Keywords: creamy pasta, beef pasta, comfort food, Italian pasta, easy dinner
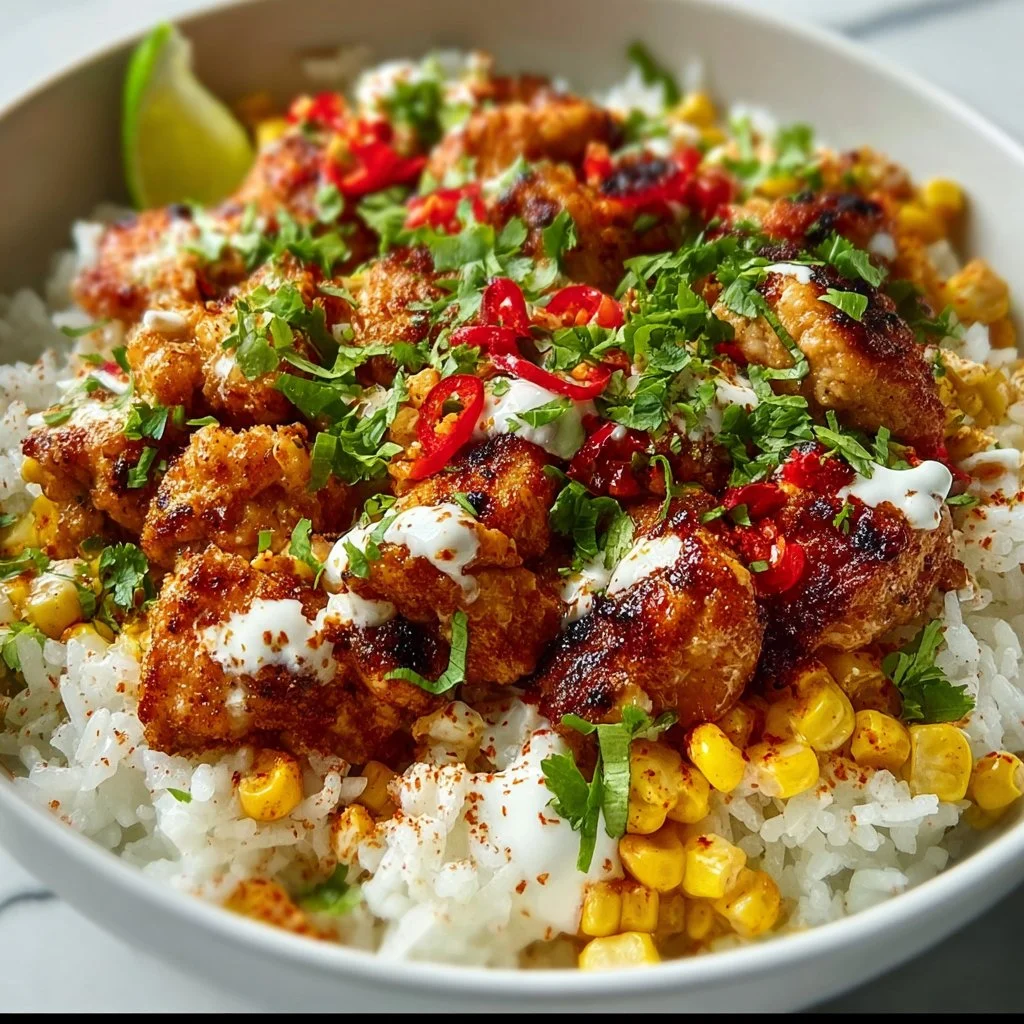
Street Corn Chicken Rice Bowl
Street Corn Chicken Rice Bowl: A Flavorful Journey in a Bowl
Hello there, fellow food lover! Are you ready to embark on an unforgettable culinary adventure? Today, we’re diving into the vibrant, zesty, and absolutely mouthwatering world of the Street Corn Chicken Rice Bowl. This dish is not only a feast for the taste buds; it’s also a celebration of fresh ingredients and easy cooking techniques. So, grab your apron, and let’s dive in!
Picture this: It’s a sultry summer evening, and the air is thick with the aroma of spices and the delightful sizzle of food cooking on the street. Street vendors are bustling, and the sound of laughter mingles with the tantalizing scents wafting through the air. This is the heart of street food culture, and it’s where our dish finds its inspiration.
The Street Corn Chicken Rice Bowl captures the colorful, lively essence of street corn—a beloved Mexican street food. With a base of fluffy rice, grilled chicken, and an array of fresh toppings, this dish brings all the joys of street food right to your dinner table. Think: creamy, cheesy goodness mingling with smoky spices and pops of sweetness from corn. It’s summer vibes in a bowl, and truly, who wouldn’t want that?
I love this recipe because it’s endlessly customizable, making it perfect for a casual weeknight dinner or an impressive gathering with friends. And believe me when I say, once you set this dish on the table, it will steal the spotlight! As we say here at Ivory Apron, cooking should be elegant yet approachable—so let’s create something together that you’ll be proud to serve!
Personal Story
I remember the first time I tasted street corn. It was during a summer festival in my hometown, where food trucks lined the streets, boldly showcasing mouthwatering treats. One warm evening, I spotted a vendor with corn on the cob, generously slathered in mayonnaise and then dusted with cotija cheese, chili powder, and a squeeze of lime. As it touched my lips, I swear I could feel the sun set with every bite. That unforgettable burst of flavors became a source of inspiration for me as I began crafting this recipe.
The idea of bringing that glorious street food experience home was thrilling! What could be better than recreating those vibrant flavors in a dish that feels both comforting and elevated? So, after experimenting and tweaking, I finally landed on this Street Corn Chicken Rice Bowl—a recipe that captures all those street-side vibes while being beautifully simple to prepare.
Ingredients
Let’s gather our ingredients! Here’s what you’ll need to create your Street Corn Chicken Rice Bowl:
-
2 cups cooked rice
- You can use white rice, brown rice, or even cilantro-lime rice for an extra zing! If you’re short on time, store-bought cooked rice works, too.
-
2 chicken breasts (grilled and sliced)
- Boneless, skinless chicken is a favorite here, but feel free to switch it up with grilled shrimp or cooked chickpeas for a meat-free option.
-
1 cup corn kernels
- Fresh corn off the cob is the gold standard, but frozen or canned corn works beautifully in a pinch. Make sure to drain and rinse the canned variety!
-
1/2 cup black beans
- Black beans are a protein-packed powerhouse. If you’re not a fan, kidney beans or pinto beans can make a great alternative.
-
1/4 cup diced red onion
- Red onion adds a sweet crunch. For a milder flavor, consider using green onions or shallots instead.
-
1/4 cup diced tomatoes
- Fresh tomatoes brighten up the dish, but you can use tomatillos for a more vibrant kick.
-
1/4 cup crumbled cotija cheese
- This crumbly cheese brings a creamy, salty punch! Feta or ricotta salata can be used as excellent stand-ins.
-
2 tablespoons chopped fresh cilantro
- Cilantro adds a fresh note and is key to that authentic flavor. If cilantro isn’t your thing, fresh parsley is a great substitute.
-
1 tablespoon olive oil
- A drizzle of olive oil enhances the dish’s richness; avocado oil is another wonderful option!
-
1 teaspoon chili powder
- This spice brings warmth and robust flavors. If you prefer heat, cayenne pepper is a fantastic alternative.
-
1/2 teaspoon smoked paprika
- Smoky paprika transports you right back to that street-side grill! For something milder, regular paprika works beautifully.
-
1/2 teaspoon cumin
- Earthy and warm, cumin balances out the flavors. Caraway seeds in a pinch can lend a different twist.
-
1/4 teaspoon salt
- Always adjust to taste, and remember that the cheese will add saltiness too!
-
1/4 teaspoon black pepper
- Freshly ground black pepper is ideal, but pre-ground will work in a pinch.
-
1/2 cup sour cream or Greek yogurt
- Both options provide creaminess. Greek yogurt gives you a protein boost; feel free to use a dairy-free substitute if needed.
-
Juice of 1 lime
- Fresh lime juice adds brightness and acidity, brightening all the flavors. Bottled lime juice works if you’re in a hurry, but fresh is always best!
-
1/2 teaspoon garlic powder
- Garlic powder provides a mellow garlic flavor. Fresh chopped garlic can elevate this if that’s your style.
-
1/4 teaspoon salt (for the sour cream/yogurt mix)
- Perfect for enhancing the creamy topping!
Step-by-Step Instructions
Ready to get cooking? Let’s bring all those vibrant flavors together!
-
Cook Your Rice:
- Begin by cooking your rice according to package instructions. If you want to amp up the flavor, substitute half of the water with chicken broth. This small step will take your rice from ordinary to extraordinary!
-
Prepare the Chicken:
- While your rice is cooking, season the chicken breasts with olive oil, chili powder, smoked paprika, cumin, salt, and pepper. Let these flavors meld by marinating for at least 15 minutes (or even overnight if you have the time).
- Preheat your grill or a grill pan over medium-high heat. Cook the chicken for about 6–7 minutes on each side or until fully cooked through (internal temperature should reach 165°F or 75°C). Let the chicken rest for a few minutes before slicing it into thin strips.
-
Sauté the Corn:
- In a separate skillet, add a drizzle of olive oil over medium heat. Throw in your corn and cook for about 5 minutes, stirring occasionally, until it begins to char slightly. This step adds an authentic depth of flavor, reminiscent of those street vendors!
-
Prepare the Black Beans and Toppings:
- In a small saucepan, warm the black beans over low heat, seasoning them with a pinch of cumin and a sprinkle of salt. Meanwhile, chop your red onion, tomatoes, and cilantro.
-
Create the Sour Cream Sauce:
- In a small bowl, combine sour cream or Greek yogurt with lime juice, garlic powder, and salt. This creamy topping is the perfect finishing touch to your bowl, providing a cool contrast to the savory elements.
-
Assemble the Bowls:
- Once everything is ready, it’s time to assemble! Take your cooked rice and place a generous scoop in the base of a serving bowl. Layer the sliced chicken, sautéed corn, black beans, diced red onion, diced tomatoes, and crumbled cotija on top.
-
Finish it Off with Flavor:
- Drizzle your sour cream sauce over the entire bowl. Sprinkle fresh cilantro on top and maybe an extra squeeze of lime juice for that signature brightness.
-
Presentation Matters:
- Don’t forget to step back and admire your beautiful creation! A well-presented dish always makes the meal feel more special.
Serving Suggestions
For an inviting presentation, use shallow bowls and add all the components in a colorful, layered fashion. Start with a base of rice, then artfully arrange the chicken and assorted toppings. For that final touch, garnish with cilantro and a sprinkle of cotija. Trust me, your guests will be snapping pictures before they even take a bite!
Pair this bowl with a refreshing drink—perhaps a sparkling limeade or a nice chilled glass of rosé—to elevate your dining experience even further.
Recipe Variations
Love to get creative? Here are some fun twists you can try on this dish:
- Taco Twist: Add taco seasoning to your chicken for a flavor-packed twist reminiscent of your favorite taco shop.
- Veggie Delight: Replace chicken with grilled zucchinis for a wonderful vegetarian alternative; you can also add bell peppers for crunch!
- Spicy Kick: Mix in a fresh diced jalapeño for an added kick that’s sure to satisfy spice lovers!
- Cheesy Goodness: Incorporate a sprinkle of shredded Monterey Jack or pepper jack cheese for an added cheesy layer.
- Chili Beans: Swap out the black beans for spicy chili beans for a heartier, more robust dish!
Chef’s Notes
This Street Corn Chicken Rice Bowl has become a staple in my kitchen, evolving with every new creation I try. The base flavors stay true, while toppings or proteins change depending on what I have on hand. A fond memory attached to this dish was a fun dinner party with friends where we made a ‘create your own bowl’ station, and everyone had a blast customizing their meals! So, get creative and make it your own. That’s what cooking is all about—joy, laughter, and connection around the table.
FAQs and Troubleshooting
1. Can I make this dish in advance?
Absolutely! You can prep the components ahead of time. Just store each component separately in airtight containers, and assemble just before serving to keep everything fresh.
2. How do I store leftovers?
Keep any leftovers in the fridge for up to 3 days. Heat them up gently on the stove to maintain that delicious flavor for another meal!
3. My corn isn’t charring; how can I improve that?
If your corn isn’t getting that lovely char, make sure your skillet is hot enough before adding it. You can also roast the corn in the oven on high heat if you’re looking for a caramelized flavor.
4. Can I use a different protein?
Absolutely! Feel free to experiment with grilled shrimp, tofu, or even seasoned ground beef. Each alternative will bring a unique spin to this dish!
Nutritional Info
For those interested in nutritional values, here’s a rough breakdown per serving (this can vary based on exact ingredients used):
- Calories: ~550
- Protein: ~40g
- Carbohydrates: ~60g
- Fat: ~15g
- Fiber: ~10g
(Always adjust based on your specific ingredients and serving sizes!)
Conclusion
As we wrap up this delicious journey, I hope you’re inspired to create your own Street Corn Chicken Rice Bowl. Remember, it’s all about enjoying the process and savoring those beautiful moments around your table. Cooking doesn’t have to be intimidating—it can be joyous, sharing, and filled with laughter. So, tie on that ivory apron and let’s celebrate the magic of home-cooked meals together, one delightful bowl at a time!
Thank you for cooking alongside me today, and happy eating!
PrintStreet Corn Chicken Rice Bowl

A vibrant and customizable bowl featuring grilled chicken, fluffy rice, and a medley of fresh toppings inspired by the beloved Mexican street corn.
- Prep Time: 20 minutes
- Cook Time: 20 minutes
- Total Time: 40 minutes
- Yield: 4 servings 1x
- Category: Main Course
- Method: Grilling
- Cuisine: Mexican
- Diet: Gluten-Free
Ingredients
- 2 cups cooked rice
- 2 chicken breasts (grilled and sliced)
- 1 cup corn kernels
- 1/2 cup black beans
- 1/4 cup diced red onion
- 1/4 cup diced tomatoes
- 1/4 cup crumbled cotija cheese
- 2 tablespoons chopped fresh cilantro
- 1 tablespoon olive oil
- 1 teaspoon chili powder
- 1/2 teaspoon smoked paprika
- 1/2 teaspoon cumin
- 1/4 teaspoon salt
- 1/4 teaspoon black pepper
- 1/2 cup sour cream or Greek yogurt
- Juice of 1 lime
- 1/2 teaspoon garlic powder
- 1/4 teaspoon salt (for the sour cream/yogurt mix)
Instructions
- Cook your rice according to package instructions, using chicken broth for extra flavor if desired.
- Prepare the chicken by marinating it in olive oil, chili powder, smoked paprika, cumin, salt, and pepper for at least 15 minutes. Grill until cooked through.
- Sauté the corn in olive oil over medium heat for about 5 minutes until charred.
- Warm the black beans in a small saucepan with a pinch of cumin and salt.
- Create the sour cream sauce by combining sour cream or Greek yogurt with lime juice, garlic powder, and salt.
- Assemble the bowls by placing a scoop of rice at the base, followed by chicken, corn, black beans, red onion, tomatoes, and cotija cheese.
- Drizzle with sour cream sauce and garnish with cilantro and extra lime juice.
- Serve and enjoy your beautifully crafted bowls!
Notes
Customize this dish with different proteins or toppings based on preference. Store leftovers in the fridge for up to 3 days.
Nutrition
- Serving Size: 1 bowl
- Calories: 550
- Sugar: 6g
- Sodium: 500mg
- Fat: 15g
- Saturated Fat: 4g
- Unsaturated Fat: 8g
- Trans Fat: 0g
- Carbohydrates: 60g
- Fiber: 10g
- Protein: 40g
- Cholesterol: 75mg
Keywords: street corn, chicken bowl, Mexican food, summer recipes, customizable meals
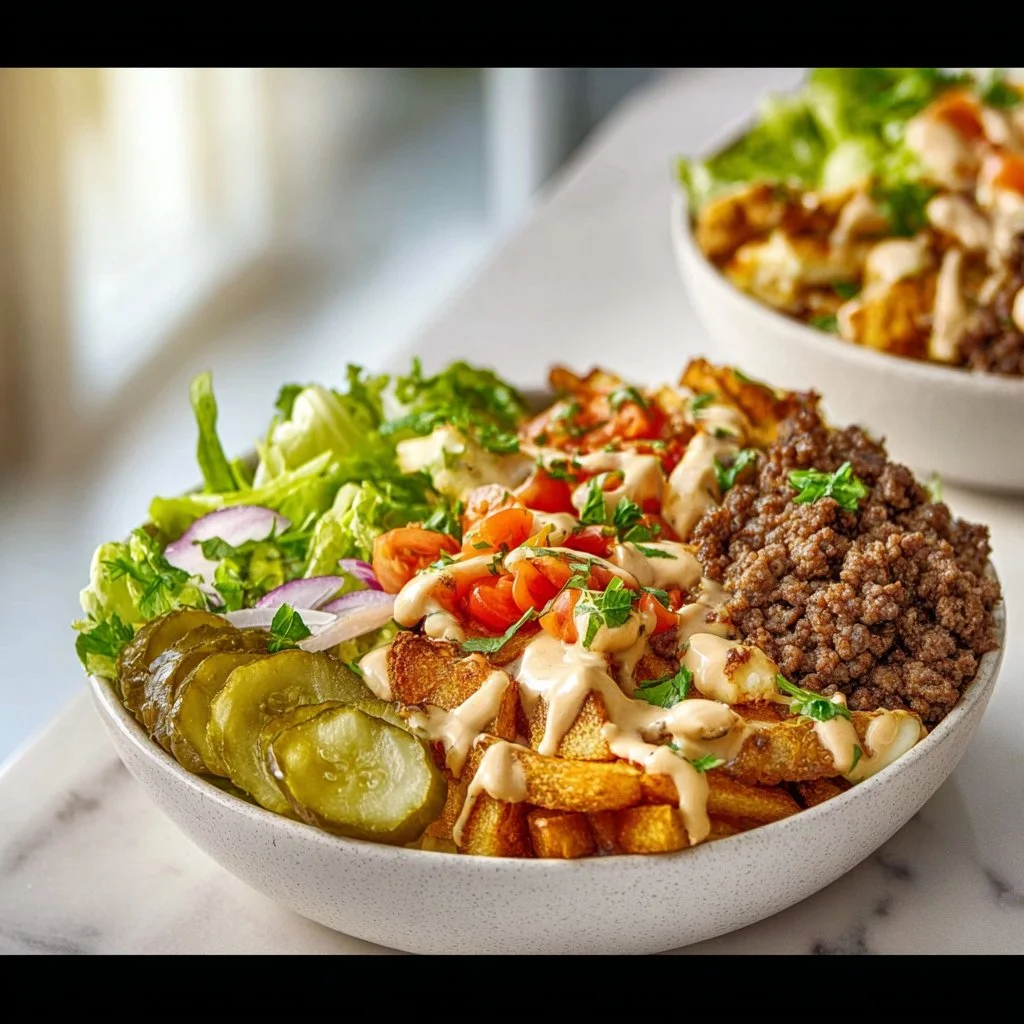
Burger Bowls
Burger Bowls: A Delectable Twist on Classic Burgers
If you’re anything like me, you love charming meals that pack flavor and fun without the fuss. Enter Burger Bowls — the delightful culmination of everything you love about a juicy burger, but without the bun mess. I can practically hear the happy voices echoing around your dinner table as everyone digs in. Picture this: a colorful bowl brimming with perfectly seasoned beef, golden crispy potatoes, and all of your favorite burger toppings. Who can resist that?
Today, I’m thrilled to share with you my beloved Burger Bowls recipe, which goes beyond the typical burger experience. It’s a wholesome meal that invites creativity and can even accommodate dietary preferences! The beauty of Burger Bowls is that they feel elegant while being incredibly simple to prepare. So grab your apron, pour something sparkling, and let’s get started!
Personal Story
My love affair with burgers dates back to summer barbecues at my grandparents’ house. I remember that mouthwatering scent wafting through the air as my grandfather fired up the grill, marinating and flipping patties with the kind of flair that only comes from years of practice. We kids would chase each other around, waiting impatiently for the first batch to come off the grill. My grandmother would stand ready with her homemade pickles, glistening under the golden afternoon sun, and heaps of freshly sliced tomatoes and crisp lettuce.
As I grew older, I realized my fondness for burgers went beyond the taste; it was about connection — the gathering of loved ones and shared laughter. So, when I created these Burger Bowls, I wanted to capture that spirit of joy and togetherness without losing the essence of flavor and satisfaction. Now, you can whip them up any night of the week or for elegant dinner parties, and still create that same warm atmosphere.
Ingredients
Here’s what you’ll need for these scrumptious Burger Bowls:
-
1 ½ teaspoons smoked paprika
A wonderful spice that adds warmth and a subtle smoky flavor. If you’re in a pinch, regular paprika works too! -
1 teaspoon garlic powder
Perfect for an easy burst of garlic flavor. Want to swap it out? Fresh minced garlic can add a delightful kick (just use about 2 cloves). -
1 teaspoon onion powder
This adds sweetness and earthiness. Can’t find it? Finely chopped fresh onions will do the trick! -
1 teaspoon dried oregano or mixed herbs
They brighten up the flavor like a sunny afternoon. Feel free to use Italian seasoning or even fresh herbs if you have them on hand. -
½ teaspoon salt
Enhances all your other flavors. Sea salt or kosher salt works best! -
¼ teaspoon black pepper
For an aromatic touch. Cracked black peppercorns will add even more depth. -
2-3 medium potatoes
These will transform into crispy, golden bites. Sweet potatoes also make a lovely swap for a sweeter, creamier base. -
2 tablespoons olive oil (divided)
This helps in achieving that crispy golden texture. Avocado oil can be a great alternative if you prefer it. -
500 grams lean beef mince
A classic choice for protein-packed goodness. If you’d like a leaner option, ground turkey works well too. -
Lettuce (shredded)
Offers freshness and crunch. I recommend romaine or iceberg, but mixed greens are delightful as well! -
Cheese (dairy-free or regular)
Adds a creamy, rich element. Feel free to experiment with cheese types — cheddar, mozzarella, or even vegan cheese — the sky’s the limit! -
Pickle slices
Essential for that tangy, crunchy finish. Any type of pickle will do, but dill adds a nice zest. -
4 tablespoons mayonnaise
For that irresistible creaminess. Consider swapping with Greek yogurt for a lighter option! -
1 tablespoon ketchup
A classic burger condiment. If you’re not a ketchup fan, look for spicy sauces for a zingy upgrade. -
1 teaspoon mustard (Dijon or yellow)
Adds a lovely sharpness. You could also try spicy mustard for extra bite! -
1 teaspoon pickle juice (from the jar of pickles)
A nifty way to infuse all that pickle flavor into your sauce. You can also use lemon juice for a zesty twist. -
½ teaspoon garlic powder
(for the dressing) — a double feature! Garlic lovers rejoice! -
½ teaspoon smoked paprika
A repeat here to keep the flavor consistent across the dish!
Step-by-Step Instructions
Let’s get cooking! You’ll find that the steps are straightforward and full of cooking tips to elevate your Burger Bowls to new heights.
-
Preheat Your Oven: Begin by preheating your oven to 425°F (220°C). A hot oven is key for crispy potatoes that rival any burger joint!
-
Prepare the Potatoes:
- Wash and cube the potatoes into bite-sized pieces. Uniform sizes ensure even cooking.
- In a bowl, drizzle 1 tablespoon of olive oil over your cubed potatoes. Sprinkle with smoked paprika, salt, and black pepper.
- Toss until evenly coated. This will give you that beautiful golden hue and flavor when roasted.
-
Roast the Potatoes:
- Spread the seasoned potato cubes onto a baking sheet lined with parchment paper. Make sure they have some space between them for optimal crisping.
- Roast in the oven for about 25-30 minutes, flipping them halfway through. Keep an eye out during the last few minutes to ensure they don’t burn!
-
Cook the Beef:
- While the potatoes are roasting, take a large skillet and heat the remaining tablespoon of olive oil over medium-high heat.
- Add the lean beef mince and sprinkle with garlic powder, onion powder, oregano, and salt.
- Break up the meat with a spatula as it cooks. Sauté until browned, about 7-10 minutes. I recommend using a meat thermometer to ensure it reaches an internal temperature of 160°F (71°C) for safety.
-
Make the Sauce:
- In a small bowl, mix together the mayonnaise, ketchup, mustard, pickle juice, ½ teaspoon garlic powder, and ½ teaspoon smoked paprika. Taste and adjust seasoning if necessary. This creamy sauce is what brings your Burger Bowl all together!
-
Assemble the Bowls:
- Grab your favorite bowl and start layering! Begin with a bed of shredded lettuce, followed by the cooked beef.
- Next, add a generous scoop of those crispy potatoes, some shredded cheese, and finish with pickle slices on top.
-
Drizzle & Enjoy:
- Finally, drizzle your sauce across the top of your masterpiece. Feel free to add any additional toppings or garnishes you love!
-
Take a Moment to Admire Your Work:
- Don’t forget to snap a picture! These bowls are not only incredibly tasty but stunning to look at.
Serving Suggestions
To plate these Burger Bowls beautifully, consider using clear or colorful bowls that highlight all of the vibrant ingredients. Drizzle the dressing generously on top, and for an extra touch, add a sprinkle of fresh herbs like parsley or chives.
If you want to take it a step further, serve with crispy onion rings on the side for that classic burger feel or even homemade fries for some extra carb love!
Recipe Variations
Here are some fun ways to customize your Burger Bowls:
-
Veggie Burger Bowls: Swap the beef for a plant-based protein (like lentils, chickpeas, or a premade veggie burger). It’s delicious and can accommodate your vegetarian friends!
-
Spicy Twist: Add minced jalapeños or a splash of hot sauce to your beef as it cooks for an added kick!
-
Bacon Lovers: Crumble some crispy bacon on top for an extra layer of flavor.
-
Keto-Friendly: Skip the potatoes and replace them with roasted cauliflower for a low-carb delight.
-
Buffalo Style: Toss your cooked beef in buffalo sauce before assembling your bowl for an extra spicy treat!
Chef’s Notes
These Burger Bowls have become a staple in my kitchen. I love how easily they adapt to whatever ingredients I have on hand! I often swap out toppings based on the season — for instance, during the summer, adding fresh tomatoes and grilled corn puts a vibrant twist on this dish.
And let’s chat about those crispy potatoes! One time, I didn’t cut them small enough, and it turned into a funny mishap in my kitchen. But those crispy chunks danced with flavor, and now I lean into them being a little thicker. Cooking is an adventure!
FAQs and Troubleshooting
-
What can I use instead of beef?
You can substitute it with ground turkey, chicken, or even crumbled tofu for a vegetarian option. -
How do I prevent my potatoes from getting soggy?
Be sure to spread them evenly on the baking sheet and avoid overcrowding. This ensures they roast rather than steam. -
How can I store leftovers?
Store the components separately in airtight containers in the fridge for up to three days. Reheat the beef and potatoes in the oven for optimum crispness. -
What should I do if my sauce is too thick?
You can thin it out with a splash of water or milk (dairy or plant-based depending on preference). Adjust seasonings afterward!
Nutritional Info
Approximate Per Serving:
- Calories: 450
- Protein: 28g
- Fat: 25g
- Carbohydrates: 35g
- Fiber: 4g
- Sugar: 3g
(Note: Adjust depending on specific ingredient brands and serving sizes.)
I hope you’re as excited as I am to make these Burger Bowls in your kitchen! Share your creations and tag me; I’d love to see how your dishes turn out. Sit back, enjoy the company, and as always, remember that good food is about bringing people together. Happy cooking! 🍔🥗
PrintBurger Bowls

A delightful twist on classic burgers that brings together juicy beef, crispy potatoes, and all your favorite toppings without the bun mess.
- Prep Time: 15 minutes
- Cook Time: 30 minutes
- Total Time: 45 minutes
- Yield: 4 servings 1x
- Category: Main Course
- Method: Baking
- Cuisine: American
- Diet: Gluten Free
Ingredients
- 1 ½ teaspoons smoked paprika
- 1 teaspoon garlic powder
- 1 teaspoon onion powder
- 1 teaspoon dried oregano or mixed herbs
- ½ teaspoon salt
- ¼ teaspoon black pepper
- 2–3 medium potatoes
- 2 tablespoons olive oil (divided)
- 500 grams lean beef mince
- Lettuce (shredded)
- Cheese (dairy-free or regular)
- Pickle slices
- 4 tablespoons mayonnaise
- 1 tablespoon ketchup
- 1 teaspoon mustard (Dijon or yellow)
- 1 teaspoon pickle juice
- ½ teaspoon garlic powder (for the dressing)
- ½ teaspoon smoked paprika (for the dressing)
Instructions
- Preheat your oven to 425°F (220°C).
- Wash and cube the potatoes into bite-sized pieces.
- Drizzle 1 tablespoon of olive oil over your cubed potatoes and sprinkle with smoked paprika, salt, and black pepper.
- Toss until evenly coated.
- Spread the seasoned potato cubes onto a baking sheet lined with parchment paper.
- Roast in the oven for about 25-30 minutes, flipping them halfway through.
- Heat the remaining tablespoon of olive oil in a large skillet over medium-high heat.
- Add the lean beef mince and sprinkle with garlic powder, onion powder, oregano, and salt.
- Break up the meat with a spatula and sauté until browned, about 7-10 minutes.
- Mix together the mayonnaise, ketchup, mustard, pickle juice, ½ teaspoon garlic powder, and ½ teaspoon smoked paprika in a small bowl.
- Grab your favorite bowl and layer with shredded lettuce, cooked beef, crispy potatoes, shredded cheese, and pickle slices on top.
- Drizzle your sauce across the top and enjoy!
- Snap a picture of your beautiful bowl!
Notes
These Burger Bowls can be customized to accommodate dietary preferences, making them versatile for any occasion.
Nutrition
- Serving Size: 1 serving
- Calories: 450
- Sugar: 3g
- Sodium: 500mg
- Fat: 25g
- Saturated Fat: 8g
- Unsaturated Fat: 12g
- Trans Fat: 0g
- Carbohydrates: 35g
- Fiber: 4g
- Protein: 28g
- Cholesterol: 70mg
Keywords: burger bowls, easy dinner, comfort food, family meal, customizable recipe