
One-Pot Creamy Broccoli & Potato Soup for Weeknights in 30 Minutes
Creamy Broccoli Potato Soup Recipe: A Warm Hug in a Bowl
Hello, fellow food lover! Today we’re diving into a delightful blend of flavors with my Creamy Broccoli Potato Soup. Picture this: a cozy night, a chilly breeze outside, and a pot bubbling away filled with tender broccoli, velvety potatoes, and zesty cheddar cheese. This dish is more than just a soup; it’s a warm hug in a bowl, perfect for dinner or a comforting lunch. Let’s whip up some magic together!
Personal Story: A Taste of Home
I distinctly remember my early cooking adventures in my grandmother’s kitchen. Every winter, the aroma of her Broccoli Potato Soup wafted through the house, inviting the whole family to gather around the table. As a child, I was always eager to help chop the onions and stir the pot, my hands small but my enthusiasm boundless.
I can still see her gently scooping the vibrant green soup into bowls, topped with a sprinkle of cheese and a dash of pepper. It wasn’t just about the meal; it was the laughter, the stories shared, and the warmth that filled the room. Those moments instilled a profound love for cooking in me, and they echoed the sentiment that good food is all about connection.
Oh, the joy of gathering with loved ones over a steaming bowl of homemade soup! So today, let’s recreate that nostalgia. Grab your apron, and let’s get started!
Ingredients
Here’s what you’ll need for our Creamy Broccoli Potato Soup:
-
Broccoli: Fresh or frozen can work! Broccoli is loaded with vitamins. If you’re in a pinch, substitute with cauliflower for a similar texture and flavor.
-
Potatoes: I love using Yukon Gold for their creamy texture. However, Russets work just as well. Both provide that silky base for our soup.
-
Cheddar Cheese: Sharp cheddar adds a robust taste. You could also use Gruyère for a nutty twist or a dairy-free cheese to make it vegan.
-
Onion: Sweet onions are the best for a gentle sweetness, but yellow onions will do nicely.
-
Garlic: Fresh garlic is a must! If you don’t have any, garlic powder in a pinch can work, but the flavors won’t be quite as vibrant.
-
Vegetable Broth: Homemade is always best, but store-bought works in a pinch. Look for low-sodium options to control the salt.
-
Cream: Heavy cream gives a luscious texture, but half-and-half or coconut milk can also be fabulous substitutes for a lighter version.
-
Salt and Pepper: To taste! Always feel free to adjust based on your preference.
Step-by-Step Instructions
Now, let’s get cooking! Follow these easy steps to achieve your creamy masterpiece:
-
Prep Your Ingredients: Start by rinsing the broccoli thoroughly. You’ll want to chop it into small florets for even cooking. Dice the potatoes into small cubes—this will help them cook faster and blend into a creamy consistency. Mince the garlic and chop half an onion for aromatic goodness!
-
Sauté the Onion and Garlic: In a large pot over medium heat, add a splash of olive oil (or butter, if you prefer). Once it’s shimmering, add the chopped onion. Sauté for about 3-5 minutes until it’s translucent and fragrant. Then toss in the minced garlic, and sauté for about another minute. Fun tip: Ensure your heat isn’t too high; we’re aiming for sweet, not burnt!
-
Add the Broccoli and Potatoes: Time to throw in your chopped broccoli and cubed potatoes! Give everything a good stir to coat the veggies with the onion and garlic combination—hello, flavor!
-
Pour in the Broth: Now, add your vegetable broth until it just covers the veggies. Bring the mixture to a gentle simmer. That’s when magic happens! Cover the pot and let it simmer for about 15-20 minutes until the potatoes are fork-tender. You’ll know it’s ready when the bright green of the broccoli deepens and your kitchen is filled with delicious scents.
-
Blend for Creaminess: Once your vegetables are nice and tender, remove the pot from heat. Using an immersion blender, blend the soup until smooth. If you’re using a traditional blender, carefully transfer the soup in batches. Just remember to leave a little steam escape to prevent a soupy explosion—trust me on this one!
-
Stir in the Cream and Cheese: Return the smooth soup to low heat and add the cream, stirring until well combined. Gradually add in your cheddar cheese, one handful at a time, while mixing. This will help the cheese melt beautifully without clumping. Season with salt and pepper to taste.
-
Final Blend: If you like your soup extra creamy, feel free to blend it again briefly. This is where you can decide how velvety you want your soup to be—smooth and luxurious or with a bit more texture!
Serving Suggestions
Pour the soup into bowls and finish with a sprinkle of fresh chives or parsley on top to add a pop of color. Serve with a side of crusty bread or a light salad. Your table will look inviting, and trust me, the aroma alone will have everyone flocking to the kitchen!
Recipe Variations
Feeling adventurous? Here are a few creative twists you can try:
-
Spicy Kick: Add a pinch of red pepper flakes or a dash of hot sauce to blow the taste buds away.
-
Herb-infused: Toss in fresh herbs like thyme or rosemary while simmering for a complex aroma.
-
Nutty Flavor: Swirl in some toasted pine nuts or sprinkle them on top for a delightful crunch.
-
Creamy Vegan Option: Swap cream for coconut milk and cheddar for a dairy-free alternative for a vegan-friendly soup.
Chef’s Notes
Over the years, this soup has evolved from my grandmother’s classic recipe to my own playful take. I’ve swapped in different cheeses, experimented with fresh herbs, and even tried adding some smoked paprika for a depth of flavor. Every time I make it, I feel like I’m continuing a family tradition, all while putting my spin on it. It’s simple yet sophisticated—the very essence of what cooking is all about!
FAQs and Troubleshooting
1. My soup is too thick; what can I do?
No worries! Just add a bit more vegetable broth or water to thin it out to your desired consistency while reheating.
2. Can I use frozen broccoli?
Absolutely! Frozen broccoli works just as well. Just keep in mind that it might cook quicker, so adjust your simmering time accordingly.
3. How do I store leftovers?
Let the soup cool down before transferring it to an airtight container. It can last in the refrigerator for about 3-4 days or you can freeze it for up to 3 months. Just reheat gently on the stove when you’re ready to dive back into that creamy goodness!
4. Why does my soup taste bland?
If the soup is lacking flavor, try adjusting with a bit more salt, pepper, or even a splash of lemon juice to brighten everything up!
Nutritional Info
While specific nutritional information can vary, on average, a serving of this creamy soup contains roughly 250 calories, with significant amounts of vitamin C, fiber, and calcium. Perfect for a healthy, balanced choice that also feels indulgent!
Cooking is a beautiful journey, and I’m thrilled you’re sharing it with me. This Creamy Broccoli Potato Soup not only nourishes the body but also warms the soul. Remember, whether you’re cooking for yourself or a table full of loved ones, the heart of it all is love. So, tie on that apron and let’s keep creating those beautiful moments together!
PrintCreamy Broccoli Potato Soup

A delightful blend of tender broccoli, velvety potatoes, and zesty cheddar cheese, perfect for a comforting dinner or lunch.
- Prep Time: 10 minutes
- Cook Time: 30 minutes
- Total Time: 40 minutes
- Yield: 4 servings 1x
- Category: Soup
- Method: Cooking
- Cuisine: American
- Diet: Vegetarian
Ingredients
- 2 cups broccoli florets
- 2 cups Yukon Gold potatoes, diced
- 1 cup sharp cheddar cheese, shredded
- 1 onion, chopped
- 2 cloves garlic, minced
- 4 cups vegetable broth
- 1 cup heavy cream
- Salt and pepper, to taste
Instructions
- Prep your ingredients by rinsing the broccoli and chopping it into small florets. Dice the potatoes and mince the garlic.
- Sauté the onion and garlic in a large pot with olive oil over medium heat until fragrant.
- Add the broccoli and potatoes to the pot and stir to combine.
- Pour in the vegetable broth until it covers the veggies. Bring to a simmer and cover.
- Blend the soup with an immersion blender until smooth.
- Stir in the cream and cheddar cheese until melted and combined.
- Final blend if desired for extra creaminess and adjust seasoning.
Notes
Serve topped with fresh chives or parsley and crusty bread.
Nutrition
- Serving Size: 1 serving
- Calories: 250
- Sugar: 3g
- Sodium: 500mg
- Fat: 18g
- Saturated Fat: 10g
- Unsaturated Fat: 8g
- Trans Fat: 0g
- Carbohydrates: 27g
- Fiber: 4g
- Protein: 7g
- Cholesterol: 40mg
Keywords: broccoli soup, creamy soup, vegetarian recipe, comfort food, easy soup
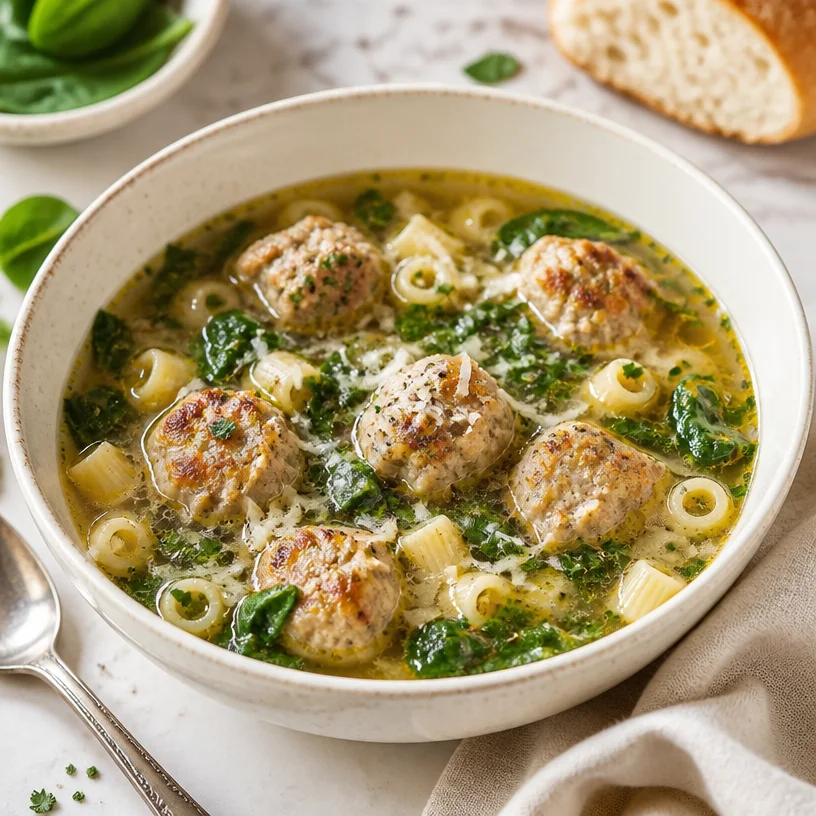
Healthy Italian Wedding Soup: 30-Minute Weeknight Dinner
A Warm Bowl of Comfort: Italian Wedding Soup
When the chill of winter sets in, or when you’re just craving a bowl of something comforting, there’s nothing quite like a steaming bowl of Italian Wedding Soup. This dish, dear friends, is more than just a meal; it’s a celebration of hearty flavors, cozy ingredients, and the warmth of togetherness. Let’s dive into how this Italian classic can bring a bit of joy to your kitchen, whether you’re hosting a gathering or just looking to warm up on a quiet evening.
My Love Affair with Italian Wedding Soup
Ah, Italian Wedding Soup. The mere thought of it takes me back to my childhood kitchen where the air was thick with the aromas of simmering broth and herbs. My grandmother, a tiny force of nature in an apron, would always prepare a massive pot every Sunday. Our family would gather, and the moment we walked through the front door, we could smell her rich, savory soup welcoming us like an old friend.
I remember thinking how magical it was that something so simple could taste so divine. The tiny meatballs bobbing in the broth were like little gems, and the vibrant greens made the soup look as lively as the conversations happening around the table. Sipping on that warm broth was like a hug for my soul, making every family story and laugh a bit more vibrant.
That’s why I’m so thrilled to share my take on this classic Italian dish! Using turkey meatballs for a lighter twist while still capturing the heartiness that we love, this Italian Wedding Soup is perfect for gatherings, weeknight dinners, or simply when you need a comforting bowl of love.
Ingredients: Filling Your Bowl with Flavor
Here’s what you’ll need to create this delightful soup:
-
Turkey Meatballs:
- These are the star of the show! Ground turkey keeps things light and flavorful. If you’re feeling adventurous, swap it for chicken or even beef. A little garlic and onion add depth—trust me, you’ll want to savor every bite.
-
Fresh Spinach:
- Spinach is what gives this soup its beautiful green color and delicate flavor. If you’re not a fan, feel free to use kale or Swiss chard. Just note that kale will take a little longer to soften.
-
Pasta:
- Small pasta shapes such as acini di pepe, orzo, or ditalini are perfect for this soup. They add a lovely texture! Don’t have any on hand? Any small pasta will work, but you might need to adjust the cooking time a bit.
-
Broth:
- A good quality chicken or vegetable broth is essential for flavor. Homemade is always the best, but store-bought works just fine. If you’re looking for a vegetarian option, opt for vegetable broth and keep the meatballs plant-based.
-
Herbs and Seasonings:
- Fresh thyme and parsley will elevate your broth’s flavor profile. Don’t have fresh? Dried herbs work too; just reduce the amount used as dried herbs are more potent.
Step-by-Step Instructions: Crafting Your Comfort Bowl
-
Make the Meatballs:
- In a mixing bowl, combine 1 pound of your choice of ground turkey, 1/3 cup breadcrumbs, 1 beaten egg, 2 cloves of minced garlic, salt, and pepper to taste.
- Tip: Keep your hands wet while shaping the meatballs to avoid sticking—the perfect meatball should be about the size of a golf ball!
-
Brown the Meatballs:
- Heat a tablespoon of olive oil in a large pot over medium heat. Once hot, add your turkey meatballs, browning them on all sides (about 5-7 minutes).
- Chef Hack: You don’t need to cook them through, as they’ll finish cooking in the broth later. Just get that lovely golden color!
-
Sauté the Aromatics:
- Remove the meatballs and set them aside. In the same pot, add chopped onions, a few cloves of minced garlic, and a pinch of red pepper flakes. Sauté until the onions are translucent.
- Insight: This step builds a flavor base, so don’t rush! Allow those onions to sweat and caramelize a touch.
-
Add the Broth:
- Pour in 6 cups of chicken broth and bring it to a simmer. Scrape the bottom of the pot to incorporate any flavorful bits left behind.
- Pro Tip: If you want to deepen the flavor even more, stir in a splash of white wine!
-
Cook the Pasta:
- Once your broth is simmering, add in your pasta of choice and cook according to package instructions. Fresh pasta options will only need a few minutes, while dried may take up to 10.
- Hint: To prevent overcooked pasta, you can cook it separately and add it directly into each bowl when serving.
-
Return the Meatballs:
- After your pasta is cooked, gently slide the meatballs back into the pot. Simmer for another 5 minutes for everything to meld beautifully.
- Tip: If you like a bit more broth, just add a splash more before serving!
-
Toss in the Spinach:
- Just before serving, stir in a couple of cups of fresh spinach and let it wilt for a couple of minutes.
- Chef Insight: Timing is key here! You want that vibrant color and fresh taste, not mushy greens.
Serving Suggestions: Plating with Love
Ladle generous portions of your Italian Wedding Soup into wide, shallow bowls. Finish with a sprinkle of freshly grated Parmesan cheese and a drizzle of high-quality olive oil for that extra touch. A few sprigs of fresh parsley on top will elevate both flavor and presentation. Serve with crusty bread or a simple green salad on the side to soak up all that delicious broth!
Recipe Variations: A Twist on Tradition
- Pesto Surprise: Stir in a spoonful of pesto at the end for a punch of basil goodness.
- Spicy Meatballs: Mix in some crushed red pepper or Italian sausage into your turkey mixture for a kick.
- Vegetarian Delight: Substitute the meatballs with lentils and opt for vegetable broth.
- Lemon Zest: Add a squeeze of fresh lemon juice before serving for a delightful brightness.
- Different Greens: Swap spinach for arugula for a peppery twist.
Chef’s Notes: The Evolution of My Recipe
As I’ve grown in my cooking journey, this soup has become a canvas for my creativity. What started with my grandma’s recipe has transformed through my personal tastes and interactions with fellow food lovers. I’ve discovered new spices, adapted meat options, and have enjoyed experimenting with gluten-free pasta. Each time I make Italian Wedding Soup, it’s a delightful reminder of those family gatherings, but it also reflects my growth as a chef.
And let me tell you—some of my funniest kitchen stories revolve around this dish! I once accidentally dropped an entire box of dry pasta in the broth. The soup turned out more like a pasta salad! Not my finest moment, but it became a family favorite story for years to come!
FAQs and Troubleshooting
-
Why are my meatballs falling apart?
- Ensure your meatballs are well mixed and form them tightly. You can also add another egg or breadcrumbs for better binding.
-
Can I make this soup ahead of time?
- Absolutely! Just prepare the soup but add the pasta and spinach right before serving to keep them fresh and al dente.
-
What can I serve with Italian Wedding Soup?
- Pair it with some crusty Italian bread, garlic knots, or a side salad for a complete meal.
-
How do I store leftovers?
- Store in an airtight container in the fridge for up to 3 days. It may thicken, so just add more broth when reheating.
Nutritional Info
Serving Size: About 1 cup
Calories: Approximately 250 kcal
Protein: 20g
Carbohydrates: 22g
Fat: 12g
Fiber: 2g
So there you have it—your step-by-step guide to creating a heartwarming bowl of Italian Wedding Soup! I hope this recipe finds its way into your kitchen traditions just as it has in mine. Remember to take your time, enjoy the process, and most importantly, gather those you love around the table. Happy cooking!
PrintItalian Wedding Soup

A comforting Italian classic featuring turkey meatballs, fresh spinach, and small pasta in a savory broth.
- Prep Time: 15 minutes
- Cook Time: 30 minutes
- Total Time: 45 minutes
- Yield: 4 servings 1x
- Category: Main Course
- Method: Cooking
- Cuisine: Italian
- Diet: Non-Vegetarian
Ingredients
- 1 lb ground turkey
- 1/3 cup breadcrumbs
- 1 beaten egg
- 2 cloves garlic, minced
- Salt and pepper, to taste
- 1 tbsp olive oil
- 1 onion, chopped
- Red pepper flakes, to taste
- 6 cups chicken broth
- 2 cups small pasta (acini di pepe, orzo, or ditalini)
- 2 cups fresh spinach
- Fresh thyme and parsley, to taste
Instructions
- Combine the ground turkey, breadcrumbs, beaten egg, minced garlic, salt, and pepper in a mixing bowl to make the meatballs.
- Heat olive oil in a large pot over medium heat and brown the meatballs for 5-7 minutes.
- Remove the meatballs and set aside. In the same pot, sauté chopped onions, minced garlic, and red pepper flakes until translucent.
- Pour in the chicken broth and bring to a simmer.
- Add the pasta to the broth and cook according to package instructions.
- Return the meatballs to the pot and simmer for 5 minutes.
- Stir in the fresh spinach just before serving, allowing it to wilt.
Notes
Serve with freshly grated Parmesan cheese and a drizzle of olive oil for added flavor. Pair with crusty bread or a simple salad.
Nutrition
- Serving Size: 1 cup
- Calories: 250
- Sugar: 2g
- Sodium: 800mg
- Fat: 12g
- Saturated Fat: 3g
- Unsaturated Fat: 5g
- Trans Fat: 0g
- Carbohydrates: 22g
- Fiber: 2g
- Protein: 20g
- Cholesterol: 80mg
Keywords: Italian Wedding Soup, comfort food, turkey meatballs, soup recipe, healthy soup

Creamy Tomato Basil Soup in 20 Minutes (Weeknight Ready)
Creamy Tomato Basil Soup: A Cozy Bowl of Love
Ah, tomato basil soup—it’s like a warm hug on a chilly day! This timeless classic has a way of bringing comfort, making it the perfect dish for any occasion. Whether you’re reminiscing about childhood lunches or serving it up at a dinner party, each spoonful brings back memories. Today, I’m super excited to share my take on this beloved recipe and help you create a bowl that feels elegant yet approachable.
Picture this: sunlight streaming through your kitchen window, the aroma of garlic dancing in the air, and vibrant, ripe tomatoes piled high on your countertop. This visualization is just the start of your culinary adventure! Cooking should be a joyful experience, and I’m here to show you how to channel that joy into every batch of creamy tomato basil soup you create.
A Childhood Memory
Growing up, my grandmother would whip up her famous tomato basil soup every Sunday afternoon. I remember the sound of her laughter mixing with the sizzling of garlic in the pan, while the rest of the family gathered around the circular table, eagerly anticipating our bowls of goodness. She would serve it with golden, crusty bread and a sprinkle of fresh basil on top.
One particularly rainy Sunday, we decided to have a cozy indoor picnic. Blankets were spread across the living room floor, and she somehow turned our mundane space into a magical bistro. As we dipped our bread into the soup, my grandmother shared stories from her youth, and the simple act of gathering became a cherished memory. It was in those moments that I learned that food wasn’t just sustenance—it was love, connection, and warmth. That’s why I created this recipe—to bring that same feeling of comfort and community to your table.
Ingredients
Let’s gather our ingredients! Here’s what you’ll need to whip up a pot of creamy tomato basil soup, along with some handy tips.
-
Tomatoes:
Fresh, ripe tomatoes are the star of the show! If you’re short on time, you can substitute with canned tomatoes—just make sure they’re high quality for the best flavor. Opt for San Marzano if you can; their sweetness is unbeatable. -
Fresh Basil:
Basil adds that lovely aromatic kick. If you can’t find fresh basil, dried basil can work in a pinch—just use about one-third of the amount. -
Garlic:
A few cloves of minced garlic elevate the flavor profile. Roasting garlic beforehand adds a sweet, caramelized note, but raw will add a sharper edge. -
Cream:
Heavy cream gives the soup its luscious texture. For a lighter option, you can substitute with half-and-half or even coconut cream if you’re aiming for dairy-free.
Step-by-Step Instructions
Ready to dive into the magical process of making this soup? Here’s how to create your creamy tomato basil soup:
-
Prep Your Ingredients:
Start by washing your tomatoes and basil. If using whole tomatoes, core and roughly chop them. For garlic, peel and mince it. This step is crucial, as it sets the stage for everything that follows! -
Sauté the Garlic:
In a large pot, heat two tablespoons of olive oil over medium heat. Add the minced garlic and cook for about 1-2 minutes until fragrant but not browned. Trust me, that garlicky aroma will make your kitchen feel like a cozy trattoria! -
Add the Tomatoes:
Toss in your chopped tomatoes and bring them to a simmer. Stir occasionally, allowing them to soften and release their juicy goodness. You’ll want to let them cook for around 10-15 minutes. If you’re using canned tomatoes, reduce this time a bit, as they’re already cooked. -
Season and Blend:
Once your tomatoes are nice and soft, throw in a pinch of salt, a splash of black pepper, and a handful of fresh basil. Using an immersion blender, puree the soup until smooth. If you don’t have one, carefully transfer the mixture to a regular blender in batches (just be cautious—hot soup can splatter!). -
Add the Cream:
After blending, return the soup to the pot if you used a regular blender. Stir in the cream and let it simmer for another 5 minutes. This is the moment when the soup goes from good to absolutely luscious! -
Taste and Adjust:
Before serving, take a little taste. Adjust salt and pepper as needed. If you want a bit more basil flavor, tear a few leaves and stir them in! -
Serve Hot:
Ladle the soup into bowls, and finish with a drizzle of olive oil, a sprinkle of crushed red pepper for some heat, and extra basil leaves for color.
Serving Suggestions
For a beautiful presentation, serve your creamy tomato basil soup in rustic bowls. A swirl of cream or a drizzle of good olive oil on top makes it look restaurant-worthy. Pair your soup with a crusty baguette, grilled cheese, or a fresh garden salad for a complete meal. Encourage everyone to gather around the table for a cozy experience!
Recipe Variations
Here are a few fun twists you can try:
-
Roasted Tomato Version:
Roast your tomatoes before adding them to the pot. Just toss them with olive oil, salt, and pepper, and roast at 400°F (200°C) until caramelized, about 25-30 minutes. -
Spicy Kick:
Add a pinch of red pepper flakes for a kick or a diced jalapeño for a fresher heat. -
Herbed Twist:
Throw in some fresh thyme or oregano along with the basil for an extra layer of flavor. -
Dairy-Free Option:
Use full-fat coconut milk if you’re avoiding dairy—it adds a lovely creaminess without sacrificing flavor. -
Additional Veggies:
Incorporate chopped carrots or bell peppers during the sautéing step for added nutrition and texture.
Chef’s Notes
I love how this recipe has evolved over the years! Initially, I used to make it with basic canned tomatoes and some dried herbs, but as my love for fresh ingredients grew, so did the complexity of the flavors. I remember one time, I was in a rush and tried to make it without blending—let’s just say it turned into a “chunky tomato adventure,” and while it was still tasty, my family had a good laugh at my “rustic” soup!
FAQs and Troubleshooting
-
Why is my soup too acidic?
Sometimes, tomatoes can be a bit tangy. Adding a pinch of sugar or a splash of cream will balance the acidity. -
Can I freeze this soup?
Absolutely! Let it cool completely, then store it in an airtight container for up to three months. To reheat, thaw in the fridge overnight and warm on the stove. -
How do I prevent my soup from burning?
Stir frequently and adjust the heat if needed. If you notice it sticking to the bottom, add a splash of water or broth to loosen it. -
Can I add protein to this dish?
Definitely! Shredded rotisserie chicken or cooked lentils could make this soup a heartier meal.
Nutritional Info
While nutrition information can vary widely, a typical serving of this creamy tomato basil soup is approximately:
- Calories: 250
- Protein: 6g
- Carbohydrates: 15g
- Fat: 20g
- Fiber: 2g
Conclusion
There you have it—your cozy bowl of creamy tomato basil soup is just a few steps away! I hope you enjoy creating this dish as much as I do. It’s all about sharing love through food, gathering at the table, and making memories. So tie on your apron, gather your ingredients, and let’s bring warmth and joy into your kitchen! Remember, whether it’s a rainy Sunday or a fancy dinner party, this soup is sure to impress. Happy cooking!
PrintCreamy Tomato Basil Soup

A cozy and comforting bowl of creamy tomato basil soup, perfect for any occasion.
- Prep Time: 15 minutes
- Cook Time: 30 minutes
- Total Time: 45 minutes
- Yield: 4 servings 1x
- Category: Soup
- Method: Stovetop
- Cuisine: Italian
- Diet: Vegetarian
Ingredients
- 2 cups fresh, ripe tomatoes, chopped
- 1/2 cup fresh basil leaves
- 3 cloves garlic, minced
- 2 tablespoons olive oil
- 1 cup heavy cream
- Salt and pepper to taste
- Crushed red pepper (optional, for serving)
Instructions
- Wash your tomatoes and basil. If using whole tomatoes, core and roughly chop them. For garlic, peel and mince it.
- Heat olive oil in a large pot over medium heat. Add minced garlic and cook for 1-2 minutes until fragrant.
- Add chopped tomatoes and bring to a simmer, cooking for 10-15 minutes.
- Season with salt and pepper, then use an immersion blender to puree the soup until smooth.
- Return to the pot if using a regular blender, stir in the cream, and let simmer for 5 minutes.
- Taste and adjust seasoning before serving.
- Ladle the soup into bowls, drizzling with olive oil and garnishing with basil and crushed red pepper.
Notes
For added richness, serve with a swirl of cream or a drizzle of good olive oil. This soup pairs beautifully with crusty bread or a fresh garden salad.
Nutrition
- Serving Size: 1 bowl
- Calories: 250
- Sugar: 4g
- Sodium: 300mg
- Fat: 20g
- Saturated Fat: 10g
- Unsaturated Fat: 8g
- Trans Fat: 0g
- Carbohydrates: 15g
- Fiber: 2g
- Protein: 6g
- Cholesterol: 60mg
Keywords: tomato soup, basil soup, creamy soup, vegetarian recipe, comfort food
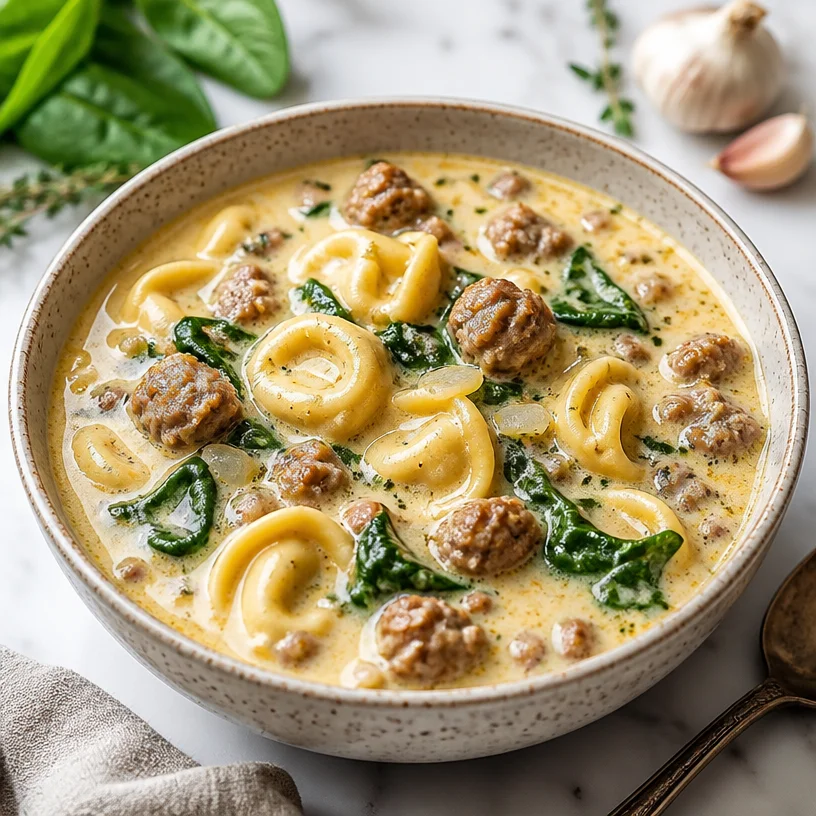
Minute Creamy Tortellini Soup for Busy Weeknights
The Cozy Comfort of Creamy Tortellini Soup
Hello, fellow food lovers! Today, I’m thrilled to share a dish that has become a cherished staple in my kitchen: Creamy Tortellini Soup. Imagine this: a rich, warm bowl of soup that wraps you in a hug, filled with tender cheese tortellini, savory sausage, and vibrant greens. It’s the epitome of comfort food, and it’s perfect for any occasion—whether you’re having a quiet dinner at home or entertaining friends on a chilly evening.
When I first came across a recipe for tortellini soup, it immediately caught my attention. I’ve always loved tortellini; those delightful little pasta pillows filled with cheese, bursting with flavor with every bite. But pairing them with a creamy, savory broth? That was a game changer for me. I knew I had to create my own version that included all of my favorite ingredients, enhancing the dish with layers of flavor and a bit of flair, of course!
Let me take you back to one of my most memorable kitchen moments. It was a rainy day, and I was a budding cook, still learning the ropes. I had invited some friends over for a cozy gathering, and I needed a dish that would impress without taking hours of prep. As I scrolled through my recipe collection, I stumbled upon a tortellini soup recipe. With just a few ingredients, I thought, “What do I have to lose?”
It was during that first pot of creamy goodness that I realized food has an incredible power to bring people together. As I ladled the soup into bowls and served slices of crusty bread on the side, my friends’ eyes lit up with delight. The laughter, the endless seconds for soup, and the warm atmosphere enveloped us like a comforting blanket. It reminded me that cooking is not just about the dishes we create but about the memories we make around the table. Now, let’s dive into this incredible recipe!
Ingredients
Here’s what you’ll need for this delightful Creamy Tortellini Soup:
-
Cheese Tortellini
- Use store-bought or homemade if you’re feeling adventurous! Fresh tortellini offers a fantastic texture, but dried or frozen works just as well.
-
Sausage
- I love using Italian sausage for the robust flavor, but feel free to substitute turkey or chicken sausage for a lighter option or omit it completely for a vegetarian version.
-
Spinach
- Baby spinach is tender and mild, but kale or Swiss chard can add more texture and depth. Fresh herbs can replace spinach for a burst of flavor.
-
Cream
- Heavy cream gives the soup its luscious richness. You can substitute half-and-half for a lighter version or even coconut milk for a dairy-free option.
-
Broth
- A good-quality chicken or vegetable broth enhances the flavor immensely. Homemade broth is ideal, but store-bought works perfectly too! Low-sodium options allow you to control the saltiness.
Step-by-Step Instructions
Now, let’s get cooking!
-
Sauté the Sausage
- In a large pot over medium heat, add a splash of olive oil. Crumble in your sausage, breaking it up with a wooden spoon. Cook for about 5–7 minutes until browned and cooked through. The aroma of the sausage sizzling is heavenly!
-
Add Aromatics
- Throw in a diced onion and a couple of minced garlic cloves. Sauté until the onion becomes translucent and fragrant, which usually takes about 3–4 minutes. Pro tip: add a pinch of salt during this stage—it helps the onions sweat and develop flavor more quickly!
-
Introduce the Broth
- Pour in about 4 cups of broth. Bring the mixture to a gentle simmer. This is where all those flavors start to meld—so let it simmer for about 5 minutes.
-
Tortellini Time!
- Add your cheese tortellini to the pot and cook according to package directions (usually about 3–5 minutes). The tortellini will cook quickly, absorbing the delicious broth!
-
Make it Creamy
- Stir in the cream, allowing the soup to bubble gently. Watch as it turns into a beautiful shade of creamy goodness. If you like your soup extra creamy, feel free to add in more cream or a splash of milk.
-
Add the Spinach
- Fold in the fresh spinach and let it wilt for a couple of minutes. This adds so much freshness to your soup; plus, you’re sneaking in a nice dose of greens!
-
Season to Taste
- Taste your soup and adjust the seasoning with salt, pepper, and a sprinkle of nutmeg for warmth and depth. If you’re feeling fancy, toss in some fresh basil or parsley to elevate it!
-
Serve and Enjoy!
- Your armor of deliciousness is ready! Ladle the soup into bowls, and if you want to be a plating superstar, add a sprinkle of shaved Parmesan and a drizzle of olive oil on top.
Serving Suggestions
Serve this Creamy Tortellini Soup hot, paired with a slice of crusty bread or a side salad for a delightful meal. Don’t forget to offer a sprinkle of fresh herbs or a dollop of pesto on top for an extra pop of flavor!
Recipe Variations
Here are a few creative twists to think about when making this soup:
-
Spicy Kick: Add crushed red pepper flakes to the sausage while cooking for some heat.
-
Mushroom Medley: Sauté some sliced mushrooms with the onions for an earthy depth.
-
Herb Infusion: Swap out the spinach for a blend of fresh herbs like basil, thyme, and parsley for a garden-fresh flavor.
-
Lemon Zest: A squeeze of fresh lemon juice (or zest) brightens up the creaminess and adds a refreshing touch.
-
Gluten-Free: Use gluten-free tortellini to cater to dietary needs while keeping it delicious!
Chef’s Notes
This recipe has evolved over the years, influenced by countless dinner parties and kitchen experiments. One particularly funny kitchen mishap involved me thinking I had chicken broth but pouring in leftover vegetable juice instead—I wasn’t so sure about the outcome. But you know what? It turned out surprisingly delightful, teaching me that sometimes it’s the unexpected moments that bring about the best flavors!
Every time I make this soup, I think of those dear friends who laughed and stuffed themselves silly, asking for seconds and thirds. And every time I ladle out that creamy goodness, I’m reminded that food is about connection, laughter, and warmth.
FAQs and Troubleshooting
1. My soup is too thick. What should I do?
- If your soup is thicker than you’d like, simply add more broth or water a little at a time until you reach your desired consistency.
2. Can I make this soup ahead of time?
- Absolutely! Make the soup, and once it cools, store it in an airtight container in the fridge for up to 3-4 days. Just remember to reheat gently on the stove, and you can add a splash more cream to rejuvenate that creamy texture.
3. Why is my tortellini mushy?
- Mushy tortellini can occur if they are cooked too long. Always follow the package instructions carefully, and add them to the pot towards the end of your cooking time.
4. Can I freeze this soup?
- Yes, you can freeze the soup, but for optimal texture, I recommend freezing it before adding the cream and spinach. Thaw it overnight in the fridge and then add cream and fresh greens just before serving.
Nutritional Info
(Serves 4)
- Calories: ~400 per serving
- Protein: 20g
- Carbohydrates: 40g
- Fat: 20g
Happy cooking, my friends! I hope this Creamy Tortellini Soup warms your kitchen and your hearts as much as it does mine. Feel free to share your culinary creations and any fun stories you have while making this dish—I’d love to hear all about your experiences! Now tie on that ivory apron and let’s create some delicious memories together!
PrintCreamy Tortellini Soup

A warm, comforting soup filled with cheese tortellini, savory sausage, and fresh spinach in a creamy broth.
- Prep Time: 15 minutes
- Cook Time: 30 minutes
- Total Time: 45 minutes
- Yield: 4 servings
- Category: Main Course
- Method: Stovetop
- Cuisine: Italian
- Diet: Vegetarian (if sausage is omitted)
Ingredients
- Cheese Tortellini
- Sausage
- Spinach
- Cream
- Broth
Instructions
- Sauté the sausage in a large pot over medium heat with a splash of olive oil, cooking for about 5–7 minutes until browned.
- Add aromatics like a diced onion and minced garlic; sauté for 3–4 minutes until the onion is translucent.
- Introduce about 4 cups of broth and bring to a gentle simmer for 5 minutes.
- Add cheese tortellini to the pot and cook according to package directions (3-5 minutes).
- Make it creamy by stirring in the heavy cream and allowing it to bubble gently.
- Add spinach and let it wilt for a couple of minutes.
- Season the soup to taste with salt, pepper, and possibly a sprinkle of nutmeg.
- Serve the soup in bowls and garnish with shaved Parmesan and olive oil if desired.
Notes
For a lighter version, substitute half-and-half or coconut milk for the cream. This soup can also be frozen before adding cream and spinach.
Nutrition
- Serving Size: 1 serving
- Calories: 400
- Sugar: 5g
- Sodium: 600mg
- Fat: 20g
- Saturated Fat: 10g
- Unsaturated Fat: 8g
- Trans Fat: 0g
- Carbohydrates: 40g
- Fiber: 3g
- Protein: 20g
- Cholesterol: 60mg
Keywords: creamy soup, tortellini, comfort food, Italian recipes, easy soup

One-Pot Creamy Chicken Corn Chowder for Busy Weeknights
Cozy Comfort: Chicken Corn Chowder That Warms the Soul
Hello, my food-loving friends! Let’s take a delightful journey into the world of solace that only a bowl of Chicken Corn Chowder can offer. Picture this: it’s a chilly evening, the kind that encourages you to wrap a soft blanket around your shoulders and sip on something warm. Suddenly, the savory aroma wafting from your kitchen begins to fill your home, pulling loved ones to the heart of your gathering place. This is exactly the kind of cozy experience that Chicken Corn Chowder promises, evoking warmth and a sprinkle of nostalgia.
Why is this dish so special, you ask? Think about it: tender chicken, sweet corn, creamy potatoes, and a hint of herbs coming together in harmonious bliss. It’s comfort food at its finest, and it comes with a story that’s as rich as its flavor. Whether you’re nurturing a winter chill or simply craving something delightful and hearty, Chicken Corn Chowder is your answer. And the best part? Anyone can make it! You don’t need to be a culinary wizard; you just need to roll up those sleeves and let your kitchen become your cozy haven.
Gather up your ingredients, tie on that apron, and let’s create an unforgettable dish that’s simple enough for weeknight dinners but marvelous enough for special occasions. Trust me, your family and friends will want to linger at the table for just one more bowl. Are you ready to dive in? Let’s get cooking!
Personal Story
I still remember the first time I made Chicken Corn Chowder. It was a rainy Saturday afternoon, and I was a college student desperately trying to impress my friends with my “culinary prowess.” Armed with a few recipes scrawled on crumpled pieces of paper and a fierce determination, I set out to create what I considered the ultimate comfort food.
As the chowder simmered and the flavors melded, I could scarcely believe the transformation happening in my little kitchen. The sound of laughter mixed with the aroma of the corn and chicken was pure magic. Friends trickled in, curious about what was bubbling away on the stove. By the time I served the chowder, my kitchen was alive, filled with warmth, chatter, and, thankfully, the sweet scent of success!
That first bowl of Chicken Corn Chowder was met with cheers and satisfied slurps, and I realized I had created more than just a meal; I had crafted a moment. It solidified my love for cooking while also reinforcing the importance of gathering together around the table. Now, every time I make this dish, I’m transported back to that memorable day, always excited to recreate that magic again and again.
Ingredients
Let’s talk ingredients! Here’s what you’ll need to whip up this wonderful Chicken Corn Chowder:
-
Chicken (2 cups, cooked and shredded)
Use cooked rotisserie chicken for convenience or simply cook chicken breasts or thighs in advance. If you’re looking for a healthier option, skinless chicken is great, and for a heartier punch, dark meat works beautifully here. -
Corn (2 cups, fresh or frozen)
Fresh corn brings an unmatched sweetness, but frozen corn can be just as delightful—just make sure it’s thawed! Canned corn is fine too; just rinse it well to remove excess sodium. -
Potatoes (2 medium, diced)
Yukon Gold or Russet potatoes are fantastic for this dish. They bring creaminess; however, if you’re aiming for a lower-carb dish, sweet potatoes can work wonders—just cut down on cooking time. -
Cream (1 cup)
Heavy cream is traditional and adds luxurious richness. For a lighter version, half-and-half or even full-fat coconut milk can be excellent substitutes. On a tight budget? Just use whole milk, but it might be slightly less creamy. -
Butter (2 tablespoons)
Butter brings richness and flavor depth. If you’re dairy-free, coconut oil or olive oil can both provide a pleasant twist. -
Onion (1 medium, diced)
This caramelizes beautifully in the fat and builds a flavor base. Shallots work too if you’re after a subtler flavor. -
Garlic (2 cloves, minced)
Who doesn’t love the aroma of garlic cooking? If you’re in a pinch, garlic powder can substitute, but fresh is the best! -
Thyme (1 teaspoon, dried or fresh)
This herb complements the chowder wonderfully——it’s timeless and elevates the comforting flavors beautifully. Substitute with rosemary if you want a bolder flavor. -
Chicken broth (4 cups)
Opt for low-sodium for better control over seasoning. Homemade chicken broth adds a personal touch, but you can always use a cube or packet if time is short. -
Salt and Pepper (to taste)
Always essential for bringing out flavors. A pinch of smoked paprika can also spark things up a notch if you’re feeling adventurous!
Step-by-Step Instructions
Step 1: Prepare the Chicken
Start by ensuring your chicken is precooked and shredded. If you decide to use raw chicken, season it well and cook it in a skillet over medium heat until fully cooked (about 6-8 minutes per side, depending on thickness). You can also boil it or use a slow cooker for tenderness. Once cooked, shred it with two forks, and set it aside.
Chef Tip: For extra flavor, try sautéing the chicken with a bit of garlic and onion before shredding it.
Step 2: Sauté the Aromatics
In a large pot or Dutch oven, melt the butter over medium heat. Once melted, add the diced onion. Sauté for about 3-4 minutes until it becomes translucent, then throw in the garlic and thyme. Cook for about a minute longer, allowing those fragrant aromas to fill your kitchen.
Little Chef Hack: Be careful not to burn the garlic—if it turns brown, it can add a bitter taste.
Step 3: Add the Potatoes and Broth
Now, add your diced potatoes to the pot, followed by the chicken broth. Bring it to a gentle boil, then reduce the heat to a simmer. Cover and let it cook for about 10 minutes or until the potatoes are tender.
Pro Tip: If you want a creamier texture, consider mashing a few of the potato chunks against the side of the pot with the back of a spoon to thicken the base!
Step 4: Incorporate the Corn and Chicken
Stir in the shredded chicken and corn. Let it simmer for another 5 minutes to ensure everything is heated through and the flavors meld together beautifully.
Chef’s Insight: If using fresh corn, you might want to add it at the end of this step to keep that delightful crunch intact.
Step 5: Add Cream and Season
Lower the heat, and stir in the cream. Season with salt and pepper to taste. Let it warm through—a couple of minutes should do it.
Trick for Creaminess: For an extra thick chowder, reserve some of your cooked potatoes, blend them, and stir them back into the chowder.
Serving Suggestions
Time for the fun part—plating! Serve your Chicken Corn Chowder in rustic bowls. To elevate the experience, garnish with freshly cracked pepper, a sprinkle of fresh thyme, or even some crisp bacon bits for added texture and flavor. Pair it with crusty bread for dipping or atop lightly toasted sourdough for something extra special!
Recipe Variations
- Spicy Twist: Add diced jalapeños or a dash of cayenne pepper for a kick.
- Herbaceous Flair: Try adding fresh basil or dill for a bright flavor profile.
- Veggie Boost: Toss in chopped bell peppers or carrots for added color and nutrition.
- Seafood Chowder: Replace the shredded chicken with cooked shrimp or crab for a delicious seafood variation.
- Vegan Delight: Swap chicken for beans (like cannellini) or tofu, and replace cream with coconut milk for a rich, dairy-free version.
Chef’s Notes
This Chicken Corn Chowder recipe has been a work in progress, evolving over time based on what’s available in my pantry. Each time I make it, I’m reminded of how adaptable cooking can be. I’ve swapped ingredients, tried different herbs, and even experimented with toppings. It’s exciting to see how a simple recipe can transform with a few tweaks. Plus, every version has its own memory associated with it—sharing laughs and stories (and sometimes a little too much of the good stuff) with friends and family over steaming bowls of this chowder.
And let’s not forget the time I accidentally grabbed cayenne pepper instead of the sweet paprika. A pinch made for a surprisingly delightful zesty experiment that had everyone reaching for their water glasses!
FAQs and Troubleshooting
-
What should I do if my chowder is too thick?
If your chowder turns out thicker than you’d like, simply add a little more chicken broth or water until it reaches your desired consistency. -
Can I freeze Chicken Corn Chowder?
Certainly! Just allow it to cool completely, store it in an airtight container, and it can last in the freezer for about 3 months. Thaw in the fridge overnight before reheating. -
How can I make this dish gluten-free?
This chowder is naturally gluten-free! Just be sure any broth or additional seasonings you use are certified gluten-free as well. -
What if I don’t have fresh corn?
Frozen corn is a fantastic substitute! Thaw it before adding, or you can throw it in directly from the bag—no need to alter cooking times.
Nutritional Info
While the nutrition can vary based on portion size and variations you choose, a typical serving of this Chicken Corn Chowder contains approximately:
- Calories: 350
- Protein: 25g
- Carbohydrates: 30g
- Fat: 15g
Nothing says comfort like this Chicken Corn Chowder! Serve it with love and laughter, and those who gather around your table will carry the memory of the meal long after the last spoonful. Happy cooking, my friends!
PrintCozy Comfort: Chicken Corn Chowder That Warms the Soul

A delightful Chicken Corn Chowder that brings warmth and comfort on chilly evenings. Perfect for gatherings and weeknight dinners.
- Prep Time: 15 minutes
- Cook Time: 30 minutes
- Total Time: 45 minutes
- Yield: 4 servings 1x
- Category: Main Course
- Method: Stovetop
- Cuisine: American
- Diet: None
Ingredients
- 2 cups cooked chicken, shredded
- 2 cups corn (fresh or frozen)
- 2 medium potatoes, diced
- 1 cup cream (or substitute)
- 2 tablespoons butter
- 1 medium onion, diced
- 2 cloves garlic, minced
- 1 teaspoon thyme (dried or fresh)
- 4 cups chicken broth
- Salt and pepper to taste
Instructions
- Prepare the chicken by ensuring it is precooked and shredded.
- Sauté the aromatics: Melt butter in a pot, and add onion, sautéing until translucent, then add garlic and thyme.
- Add the diced potatoes and chicken broth, bringing to a gentle boil, then simmer until potatoes are tender.
- Incorporate the shredded chicken and corn, simmering for another 5 minutes.
- Add cream and season with salt and pepper, warming through.
Notes
Serve in rustic bowls, garnished with pepper and fresh thyme. Great with crusty bread.
Nutrition
- Serving Size: 1 serving
- Calories: 350
- Sugar: 5g
- Sodium: 400mg
- Fat: 15g
- Saturated Fat: 10g
- Unsaturated Fat: 5g
- Trans Fat: 0g
- Carbohydrates: 30g
- Fiber: 3g
- Protein: 25g
- Cholesterol: 70mg
Keywords: chicken, chowder, comfort food, soup, hearty
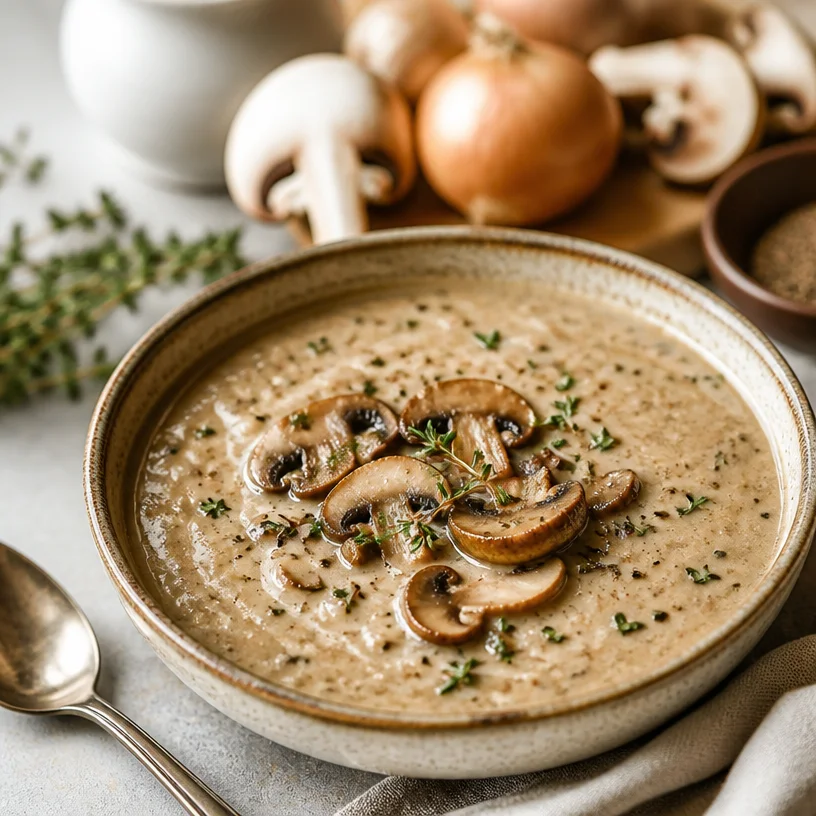
Minute Creamy Mushroom Soup for Busy Weeknights
Indulge in Comfort: Creamy Mushroom Soup Recipe
Hello, fellow food lovers! Welcome to another delicious journey together. Today, I’m excited to share one of my all-time favorite comfort foods: Creamy Mushroom Soup. The sort of dish that wraps you in warmth, like a cozy blanket on a chilly evening. Whether you’re looking for a starter for an elegant dinner or a soul-soothing bowl for a quiet night in, this recipe ticks all the boxes. Grab your apron, pour yourself a cup of something warm, and let’s dive into this creamy treasure.
A Memory to Stir the Soul
The first time I made cream of mushroom soup was a memorable experience that instantly transported me back to my childhood kitchen. I vividly remember the days when my grandmother would whip up her signature mushroom soup, filling our home with that magical earthy aroma that made our mouths water in anticipation. She had an uncanny ability to keep it simple yet utterly divine, utilizing fresh ingredients from her garden. I can still hear her laughter mingling with the sounds of the soup bubbling on the stove, and every spoonful brought a flood of cozy comfort and love.
For me, cooking isn’t just about the food; it’s about the moments we share around the table. Each bowl of creamy mushroom soup is a love letter to those cherished times, reminding us that food is best enjoyed when shared. Fast forward to today, and I’ve put my own twist on Grandma’s classic, balancing elegance with simplicity. Ready to make some memories of your own? Let’s get cooking!
Ingredients
Here’s what you’ll need to create this luscious soup:
-
Mushrooms (about 1 pound): The star of the show! Use a mix of cremini and button mushrooms for depth and texture. If you’re feeling adventurous, try adding shiitake or oyster mushrooms for an added umami kick. No mushrooms? Try using canned mushrooms if you’re in a pinch, though fresh will always yield better flavor!
-
Onion (1 medium): This aromatic gem adds sweetness and depth. If a yellow onion isn’t available, feel free to swap it with shallots for a more delicate flavor or even a red onion for a slight tang.
-
Fresh Thyme (1 tablespoon): This herb brings earthy notes that complement the mushrooms beautifully. If fresh thyme isn’t available, use dried thyme—just remember, dried herbs are usually stronger, so cut the amount in half!
-
Heavy Cream (1 cup): For that decadent, creamy texture. You can substitute with half-and-half for a lighter version or even coconut cream for a dairy-free option—just be aware the flavor will change a bit.
-
Vegetable Broth (4 cups): This forms the soup’s foundation. Feel free to use homemade or store-bought broth. If you’re looking for a richer flavor, chicken broth can also be used.
-
Salt and Pepper (to taste): Seasoning is key! A pinch of salt enhances the flavors, while fresh cracked pepper adds warmth.
Step-by-Step Instructions
-
Prepare the Mushrooms:
Start by cleaning your mushrooms. Gently wipe them with a damp cloth to remove any dirt. Avoid rinsing them under water, as mushrooms are like sponges and will absorb the water. Chop your mushrooms into slices or cubes, whichever you prefer. -
Sauté the Aromatics:
In a large pot, melt 2 tablespoons of butter (or olive oil for a lighter touch) over medium heat. Once melted and bubbly, add your chopped onion and sauté for about 3-4 minutes until they become translucent and fragrant. Be sure not to rush this step; caramelizing the onions will add a rich base flavor to your soup. -
Cook the Mushrooms:
Toss in your chopped mushrooms and fresh thyme, stirring well to combine. Cook for about 8-10 minutes, allowing the mushrooms to soften and release their moisture. You want them to become golden and tender. Here’s a chef hack: avoid overcrowding the pan! If necessary, work in batches to give your mushrooms that lovely sautéed color. -
Season:
Once your mushrooms are ready, it’s time to season! Sprinkle in some salt and pepper, then stir for another minute to let the spices engage with all those amazing flavors. -
Add Broth:
Pour in your vegetable broth. Bring the mixture to a gentle boil, then reduce the heat and let it simmer for about 15 minutes. This is when all the flavors start to marry together, creating a delightful aroma that fills your kitchen. -
Blend the Soup:
If you prefer a creamy texture, you can use an immersion blender to purée the soup to your desired consistency—smooth or leave some chunks for texture! If you don’t have an immersion blender, carefully transfer to a countertop blender, blending in batches if necessary. -
Stir in Cream:
Return the soup to the pot (if using a countertop blender) and whisk in the heavy cream until beautifully blended. Taste and adjust the seasoning if necessary. If you want an extra layer of flavor, consider adding a splash of sherry or white wine before the cream—divine! -
Serve:
Allow the soup to heat through just a couple of minutes more, then serve hot, garnished with a drizzle of cream or a sprinkle of fresh thyme for an eye-catching finish.
Serving Suggestions
When it’s time to serve your creamy mushroom soup, consider plating it in wide, shallow bowls to allow for elegant presentation. Drizzle a little extra cream or a swirl of truffle oil on top for a sophisticated touch. Serve alongside crusty bread or buttery crackers to add a delightful crunchy element that complements the soup’s creamy texture.
Recipe Variations
-
Add Protein: Stir in shredded chicken or sautéed shrimp for a heartier meal.
-
Spice it Up: Incorporate a dash of cayenne pepper or smoked paprika for a warming kick that will amplify the mushroom flavor.
-
Go Vegan: Substitute heavy cream with full-fat coconut milk and use vegetable broth—all the creaminess without the dairy!
-
Herb Infusion: Swap thyme for rosemary or parsley for a twist on traditional flavors.
-
Nutty Flavor: Add a tablespoon of nutritional yeast for a cheesy, nutty flavor perfect for vegan diets.
Chef’s Notes
This creamy mushroom soup has been a personal favorite of mine for years, evolving from Grandma’s simple recipe to a dish that I love to add my own flair to. I remember a hilarious moment the first time I tried to make it… I accidentally used baking soda instead of salt. Let’s just say, the flavor was unforgettable in the worst way possible! It was a learning moment that taught me to pay attention when measuring my ingredients!
Over time, I’ve realized that cooking should come with lightheartedness and creativity. There’s nothing wrong with experimenting—food is about exploration. So, if you find yourself in the kitchen thinking, “What if I added…?”—go for it! You might just create your own masterpiece or discover your personal take on this classic dish.
FAQs and Troubleshooting
-
Why is my soup too thin?
If your soup turns out too thin, try whisking in a cornstarch slurry (1 tablespoon cornstarch mixed with 2 tablespoons cold water) to thicken it up as it simmers. Alternatively, blend in more mushrooms to deepen the flavor and texture. -
Can I make this soup ahead of time?
Absolutely! This soup is perfect for meal prep. Just store it in an airtight container in the fridge. It can keep well for up to 3 days. Just remember to reheat gently to maintain that lovely creamy texture. -
What should I do if it’s too salty?
If your soup turns out too salty, add a splash of cream or coconut milk to balance it out. You could also stir in a few slices of raw potato during cooking; they will absorb some of the salt. Remember to remove them before serving! -
Can I freeze creamy mushroom soup?
Yes! Allow the soup to cool and pour it into freezer-safe containers, leaving some headspace for expansion. It can last about 2-3 months. When reheating, add a bit of fresh cream to restore the creaminess.
Nutritional Info
Serving size: 1 cup
Calories: 300
Fat: 24g
Carbohydrates: 16g
Protein: 4g
Fiber: 2g
So, my fellow food enthusiasts, there you have it: a delightful recipe for creamy mushroom soup that warms the heart and lifts the spirit. I hope you find as much joy in preparing this dish as I do. Remember, good food isn’t about show; it’s about love, community, and the moments we create together around the table. Happy cooking!
PrintCreamy Mushroom Soup
A cozy creamy mushroom soup recipe that warms the heart, perfect for any occasion.
- Prep Time: 15 minutes
- Cook Time: 30 minutes
- Total Time: 45 minutes
- Yield: 4 servings 1x
- Category: Soup
- Method: Stovetop
- Cuisine: American
- Diet: Vegetarian
Ingredients
- 1 pound mushrooms (mix of cremini and button)
- 1 medium onion
- 1 tablespoon fresh thyme
- 1 cup heavy cream
- 4 cups vegetable broth
- Salt and pepper to taste
Instructions
- Prepare the mushrooms by cleaning and chopping them.
- Sauté the onions in butter until translucent.
- Cook the mushrooms and thyme until tender.
- Season with salt and pepper.
- Add vegetable broth and simmer for 15 minutes.
- Blend the soup to your desired consistency.
- Stir in heavy cream and heat through.
- Serve hot with optional garnishes.
Notes
Can be made ahead and stored in the fridge for up to 3 days. Freezes well for 2-3 months.
Nutrition
- Serving Size: 1 cup
- Calories: 300
- Sugar: 4g
- Sodium: 800mg
- Fat: 24g
- Saturated Fat: 12g
- Unsaturated Fat: 10g
- Trans Fat: 0g
- Carbohydrates: 16g
- Fiber: 2g
- Protein: 4g
- Cholesterol: 60mg
Keywords: creamy soup, mushroom soup, comfort food, vegetarian soup
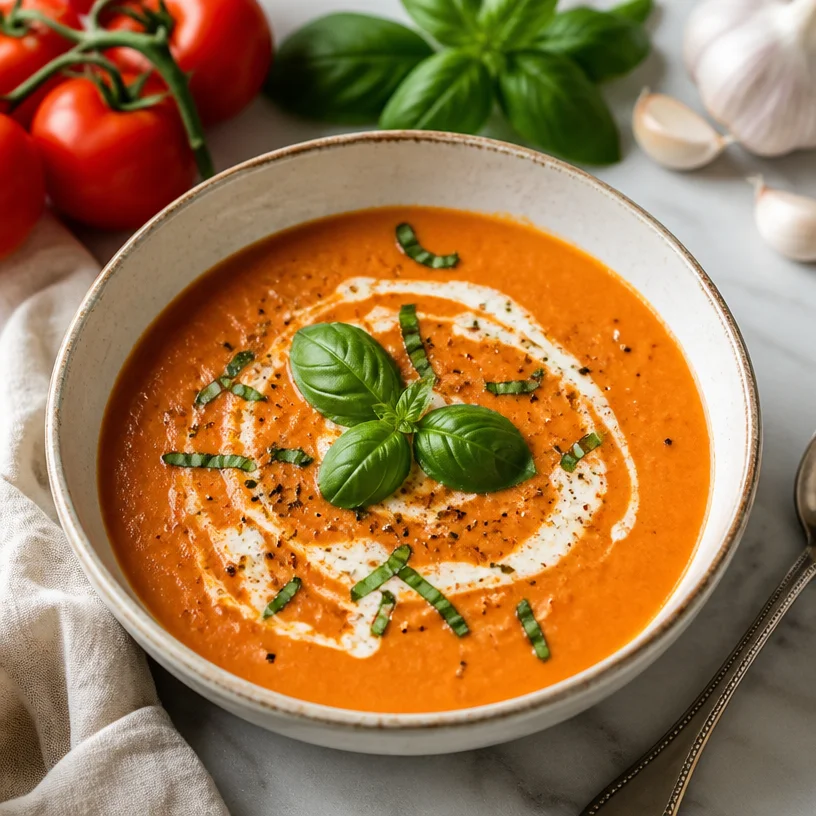
Creamy Tomato Basil Soup in 30 Minutes (Weeknight Dinner)
The Ultimate Tomato Basil Soup: Comfort in a Bowl
Hello, fellow food lovers! Today, we’re diving into the warm and soulful world of homemade Tomato Basil Soup—a comforting classic that feels like a hug in a bowl. This dish has a beautiful simplicity that brings fresh flavors to life, turning ordinary moments into extraordinary ones. Whether you’re enjoying a quiet evening at home or hosting a gathering of friends, this soup is guaranteed to delight.
Growing up, I had a special bond with my grandmother, who made the best tomato basil soup. The smell of tomatoes roasting in the oven, mingling with aromatic basil and garlic, was a scent that signaled love and comfort. I still vividly remember the first time I warmed up a bowl of her recipe on a rainy day, the soup’s vibrant red hue promising warmth and coziness. As I took that first spoonful, it felt as if the soup wrapped around me, shielding me from the dreary weather outside and bringing memories flooding back to life. That’s the magic of a good tomato basil soup—it’s not just a dish; it’s a connection to happiness, nostalgia, and warmth.
So, grab your apron and let’s create this delightful dish together!
Ingredients
Let’s gather what you’ll need for this comforting Tomato Basil Soup:
-
Fresh Tomatoes:
Juicy, ripe tomatoes are the star of this dish. They provide that rich, vibrant flavor. Cherry tomatoes or on-the-vine tomatoes are fantastic, but you can also use canned whole tomatoes in a pinch. Just look for those packed in tomato juice for the best flavor! -
Fresh Basil:
Bright, fragrant basil takes this soup from basic to extraordinary. Substitute with dried basil if you don’t have fresh, but remember that dried herbs are more potent, so use about a third of the amount. -
Garlic:
Garlic adds depth and richness. Use fresh cloves for the best flavor. If you’re pressed for time, garlic powder will work in a hurry—just start with half a teaspoon. -
Cream:
Cream gives the soup a silky texture and a touch of indulgence. Half-and-half or even coconut milk can be a fantastic substitute for a dairy-free version, adding a unique taste while still maintaining that luscious mouthfeel. -
Chicken or Vegetable Stock:
Stock enhances the soup’s overall flavor profile. Store-bought or homemade both work; just avoid the low-sodium versions unless you adjust the salt later. -
Olive Oil:
A good splash of extra virgin olive oil adds a lovely richness. If you want to amp up the flavor, try infusing your olive oil with garlic first! -
Salt and Pepper:
Simple seasoning is essential for balancing the flavors in your soup. Using sea salt and freshly cracked pepper elevates the taste effortlessly.
Step-by-Step Instructions
Now that we have our ingredients ready, it’s time to get cooking! Follow these steps for a delicious Tomato Basil Soup.
-
Prep Your Ingredients:
Start by washing and quartering the fresh tomatoes. If you’re using canned, you can skip this step—just open the can! Mince the garlic and roughly chop the basil, reserving a few whole leaves for garnish later. The more prepared you are, the smoother the cooking process will be! -
Sauté the Aromatics:
In a large pot, heat a drizzle of olive oil over medium heat. Add the minced garlic and stir for about 30 seconds until it’s fragrant. Be careful not to let it burn; burnt garlic can taste bitter and ruin the dish. As the garlic becomes fragrant, let the nostalgia kick in! -
Add the Tomatoes:
Add the quartered fresh tomatoes (or canned ones) to the pot. If you’re feeling ambitious, you can also roast the tomatoes in the oven before adding them to the soup for an extra layer of flavor. Stir the tomatoes and let them cook down for about 5-7 minutes until they start breaking apart. -
Pour in the Stock:
Add your stock—chicken or vegetable—then season with a pinch of salt and a few cracks of pepper. Bring the soup to a gentle simmer and let it bubble away for about 15-20 minutes. This allows the flavors to meld beautifully. Keep the beautiful aromas wafting in your kitchen! -
Blend It Up:
Once the tomatoes are soft and the soup has simmered, you’re ready to blend! If you prefer a smoother texture, use an immersion blender directly in the pot. Alternatively, let the soup cool briefly and blend in batches using a regular blender. Just be sure to allow steam to escape when blending hot liquids! -
Stir in the Cream and Basil:
After blending, stir in the cream and chopped basil. Taste and adjust your seasoning if needed. Let it simmer for another 5 minutes to heat through while stirring gently—it’s all about creating that creamy, dreamy texture. -
Serve It Up:
Serve your sumptuous Tomato Basil Soup hot, ladled into bowls. You can garnish each bowl with fresh basil leaves and an extra drizzle of olive oil for an elegant touch.
Serving Suggestions
For an elevated touch, serve this delightful soup with a side of crusty bread or a classic grilled cheese sandwich. The contrast of the crisp bread with the velvety soup is pure bliss. If you’re feeling fancy, a sprinkle of freshly grated Parmesan or a swirl of pesto can take it to the next level.
Recipe Variations
-
Spicy Kick: Add a pinch of red pepper flakes while sautéing the garlic for a spicy twist, or swirl in some harissa for an extra flavor boost!
-
Roasted Garlic Version: Roast a whole bulb of garlic in the oven until soft, then squeeze the cloves into the soup instead of minced garlic for a sweet and rich flavor.
-
Herbaceous: Besides basil, experiment with other herbs like thyme or oregano for a different herbal profile.
-
Cheesy Soup: Stir in some cream cheese or Gruyere cheese right after you blend for a creamy, cheesy delight.
-
Vegan Delight: For a vegan version, simply skip the cream and replace it with coconut milk or a creamy cashew blend.
Chef’s Notes
This Tomato Basil Soup recipe has evolved over time, influenced by seasons, available ingredients, and a desire for simplicity. My grandmother’s soup was just the tomatoes, basil, and some stock, but I’ve found that a touch of cream and roasted garlic just makes it sing! It’s become a staple in my home, and it often feeds my friends and loved ones during cozy gatherings. Remember, no two bowls will ever be the same, and that’s what makes this dish so wonderfully unique!
FAQs and Troubleshooting
-
Why is my soup too acidic?
Tomatoes can sometimes have varying acidity levels. If your soup is too tangy, stir in a teaspoon of sugar to balance it out. -
Can I freeze the soup?
Absolutely! This soup freezes beautifully. Just let it cool completely before transferring to airtight containers. It should last up to 3 months in the freezer. -
It doesn’t taste as good as I remember!
Flavor comes from good quality ingredients. Always opt for the freshest tomatoes and basil you can find, and remember to adjust seasonings to your taste! -
How can I make it thicker?
For a thicker soup, consider adding a potato when you add the tomatoes, or toss in some cooked rice or quinoa for extra texture.
Enjoy crafting your beautiful bowl of Tomato Basil Soup! I can’t wait for you to experience the love and comfort it brings as you share it with family and friends. It’s moments like these that make cooking so special. Happy cooking, and remember—good food isn’t just about the recipe; it’s about the love that goes into it!
PrintThe Ultimate Tomato Basil Soup

A comforting classic Tomato Basil Soup that feels like a hug in a bowl, bursting with fresh flavors.
- Prep Time: 15 minutes
- Cook Time: 30 minutes
- Total Time: 45 minutes
- Yield: 4 servings 1x
- Category: Soup
- Method: Stovetop
- Cuisine: Italian
- Diet: Vegetarian
Ingredients
- 4 cups Fresh Tomatoes, quartered
- 1 cup Fresh Basil, chopped
- 3 cloves Garlic, minced
- 1 cup Cream (or coconut milk for a dairy-free option)
- 4 cups Chicken or Vegetable Stock
- 2 tablespoons Olive Oil
- Salt, to taste
- Pepper, to taste
Instructions
- Prep your ingredients: Wash and quarter the fresh tomatoes. Mince the garlic and chop the basil, reserving a few leaves for garnish.
- Sauté the aromatics: In a pot, heat olive oil and add garlic. Cook for 30 seconds until fragrant.
- Add the tomatoes to the pot and stir. Cook for 5-7 minutes until they break apart.
- Pour in the stock and season with salt and pepper. Simmer for 15-20 minutes.
- Blend the soup using an immersion blender or in batches until smooth.
- Stir in the cream and chopped basil. Adjust seasoning and simmer for another 5 minutes.
- Serve hot in bowls, garnished with fresh basil and a drizzle of olive oil.
Notes
For a spicy kick, add red pepper flakes or harissa. It freezes beautifully for up to 3 months.
Nutrition
- Serving Size: 1 bowl
- Calories: 250
- Sugar: 8g
- Sodium: 600mg
- Fat: 18g
- Saturated Fat: 10g
- Unsaturated Fat: 6g
- Trans Fat: 0g
- Carbohydrates: 30g
- Fiber: 4g
- Protein: 5g
- Cholesterol: 30mg
Keywords: Tomato Basil Soup, comforting recipes, easy soup, homemade soup, vegetarian recipes

One-Pot Creamy Broccoli Cheddar Soup for Weeknight Dinners
A Cozy Bowl of Broccoli Cheddar Soup: Your New Favorite Comfort Food
Hello, my friends! Today, we’re diving into a cozy bowl of pure comfort: Broccoli Cheddar Soup. There’s something so warm and inviting about a creamy, cheesy soup that just makes your heart smile, don’t you think? It wraps you in a blanket of deliciousness like a big hug.
As the chill of fall sets in, we all start dreaming of hearty soups that not only feed our bodies but also our souls. This recipe is one of my personal favorites—and I can’t wait to share it with you. We’re talking about the kind of soup that makes you feel like you’re sitting at a quaint café on a rainy day, savoring every spoonful while remembering the joys of home-cooked meals.
A Spoonful of Nostalgia
Let me take you back to my childhood kitchen, where the air was always rich with the perfume of simmering vegetables and melted cheese. My mom would make this incredible Broccoli Cheddar Soup on chilly Sunday afternoons, and the entire house would transform into a haven of warmth and laughter. We’d gather around the table, bowls steaming, as my dad would challenge us to guess her secret ingredient (spoiler alert: it was love, and maybe a pinch of nutmeg!).
There’s just something about the combination of broccoli and cheddar that brings back memories of family togetherness and heartwarming chats. I remember my excitement every time she’d lift the lid off the pot, revealing that vibrant green color topped with a thick golden layer of cheese. I can still hear the sound of a spoon gliding through the creamy concoction, and the joyous gathering of family around the kitchen island, test tasting with our breadsticks dipped in.
So here we are today, ready to recreate that beautiful experience in our own kitchens!
Ingredients You’ll Need
To whip up this delightful Broccoli Cheddar Soup, gather the following ingredients:
-
Fresh Broccoli: About 4 cups of broccoli florets. Broccoli is packed with nutrients and gives the soup its vibrant color. If you’re in a pinch, frozen broccoli works too—just thaw it before cooking!
-
Carrots: 2 medium-sized, diced. Carrots add a sweet earthiness to the soup. If you want to switch it up, parsnips or sweet potatoes can substitute nicely.
-
Cheddar Cheese: 2 cups of sharp cheddar cheese, shredded. This is the star ingredient, bringing the soup to its cheesy glory! If you want a different flavor profile, feel free to mix in some Gruyère or Monterey Jack.
-
Heavy Cream: 1 cup. Cream adds that silky richness. For a lighter version, you can use whole milk or even a plant-based substitute like coconut cream.
-
Onion: 1 medium onion, chopped. Onion creates a flavorful base for the soup. Shallots or leeks can be a lovely alternative, introducing their unique sweetness.
-
Garlic: 2 cloves, minced. Garlic brings that savory aroma and depth of flavor. If you’re not a garlic fan, you can omit it—just know you’ll miss out on that wonderful depth.
-
Vegetable or Chicken Broth: 4 cups. This is the liquid gold that melds everything together! Use homemade broth if you have it, or opt for low-sodium store-bought options.
-
Salt and Pepper: To taste. These are essentials in any kitchen. Add a touch of cayenne or paprika for a hint of spice!
Step-by-Step Instructions
-
Prep Your Veggies: First things first, wash and chop all your vegetables. It’s like prepping for a performance—every actor (or ingredient) needs to be stage-ready!
-
Sauté the Aromatics: In a large pot or Dutch oven over medium heat, add a splash of olive oil. Once heated, toss in the chopped onions and sauté until they’re translucent, about 5 minutes. Add the minced garlic and cook until fragrant (about a minute). This is where the magic begins, filling your kitchen with heavenly aromas!
-
Add Carrots and Broccoli: Stir in the diced carrots and broccoli florets. Let them mingle in the pot for another 5 minutes—this step softens them up a bit and lets their flavors shine.
-
Pour in the Broth: Reduce the heat to low and pour in the vegetable or chicken broth. Give it a gentle stir, and bring the mixture to a simmer. Allow it to bubble away for about 15-20 minutes, or until the broccoli and carrots are fork-tender.
-
Blend It Up: Once the veggies are soft, it’s time to blend! Using an immersion blender, blend the soup until it reaches your desired consistency—smooth or chunky, whatever you fancy. If you don’t have an immersion blender, carefully transfer batches of the soup to a standing blender (don’t overfill) and blend until smooth.
-
Stir in the Cream and Cheese: Return the blended soup to the pot, and over low heat, stir in the heavy cream. Allow it to warm through before gradually adding in the shredded cheddar cheese, stirring until it’s all melted and wonderfully gooey. This step is like watching a cheesy magic trick unfold!
-
Season to Taste: Give it a taste, and don’t forget to add salt and pepper to your liking. If you’re feeling adventurous, a dash of nutmeg pairs beautifully with cheddar.
Serving Suggestions
To serve, ladle the soup into bowls and top it with a handful of extra cheese, a sprinkle of freshly cracked pepper, or some crisp croutons for added texture. A wedge of crusty sourdough bread (my personal favorite!) on the side is perfect for dipping, creating an extra cozy experience.
Recipe Variations
Feeling adventurous? Here are a few fun twists you can add:
- Spiced Broccoli Cheddar: Add a pinch of red pepper flakes or a splash of hot sauce to the soup for a spicy kick.
- Nutty Flavor: Stir in some toasted pine nuts or walnuts for an added crunch and a pop of flavor.
- Add Protein: Toss in some cooked diced chicken or white beans for a heartier meal.
- Greens Galore: Consider adding in some baby spinach or kale for an extra dose of nutrients.
Chef’s Notes
Over the years, this recipe has undergone its transformations as I’ve experimented with different cheeses and textures. I once added a splash of white wine, which lent a beautiful depth to the soup. Every time I tackle this soup, I think of how warming it was on those cold Sundays, and I find joy in bringing that same comfort to my family and friends today.
And, fun fact! I once accidentally used blue cheese instead of cheddar. While it didn’t go as planned, it was a funny kitchen mishap that led to a crazy concoction that, surprisingly, we enjoyed. Kitchen disasters may happen, but sometimes they create unexpected delights!
FAQs and Troubleshooting
1. The soup is too thick; what can I do?
No worries! If you’ve ended up with a thickness that feels more like a dip, simply add more broth or cream until it reaches the desired consistency.
2. What if my soup is too salty?
Taste as you go, but if you do find it a bit too salty, adding a few diced potatoes while simmering can help absorb some of that saltiness. Just blend it all together later!
3. Can I make this soup ahead of time?
Absolutely! In fact, the flavors deepen and become even more wonderful after a day in the fridge. Just reheating it gently before serving is key.
Nutritional Info (Optional)
While I did not include exact nutritional info, I can share that this delightful soup is rich in vitamins from the broccoli and carrots, plus the calcium from the cheese and cream. It’s comfort food that can nourish not just your belly but your soul.
So, gather your loved ones, pull out those aprons, and let’s create a bowl of Broccoli Cheddar Soup filled with love and laughter. Each spoonful holds stories, warmth, and the promise of togetherness. Let’s cook, enjoy, and make every meal a moment to remember! Your kitchen awaits!
PrintCozy Broccoli Cheddar Soup

A warm and inviting cream-based soup filled with vibrant broccoli and rich cheddar cheese, perfect for chilly days.
- Prep Time: 15 minutes
- Cook Time: 30 minutes
- Total Time: 45 minutes
- Yield: 4 servings
- Category: Soup
- Method: Cooking
- Cuisine: American
- Diet: Vegetarian
Ingredients
- Fresh Broccoli: About 4 cups of broccoli florets
- Carrots: 2 medium-sized, diced
- Cheddar Cheese: 2 cups of sharp cheddar cheese, shredded
- Heavy Cream: 1 cup
- Onion: 1 medium onion, chopped
- Garlic: 2 cloves, minced
- Vegetable or Chicken Broth: 4 cups
- Salt and Pepper: To taste
Instructions
- Prep your veggies: Wash and chop all your vegetables.
- Sauté the aromatics: In a large pot or Dutch oven over medium heat, add a splash of olive oil. Toss in the chopped onions and sauté until they’re translucent, about 5 minutes. Add the minced garlic and cook until fragrant, about a minute.
- Add carrots and broccoli: Stir in the diced carrots and broccoli florets. Let them cook for another 5 minutes.
- Pour in the broth: Reduce the heat to low and pour in the vegetable or chicken broth. Stir gently and bring to a simmer. Allow to cook for about 15-20 minutes.
- Blend it up: Once the veggies are soft, blend the soup until it reaches your desired consistency.
- Stir in the cream and cheese: Return the blended soup to the pot, and over low heat, stir in the heavy cream. Allow to warm through before adding in the shredded cheddar cheese, stirring until melted.
- Season to taste: Give it a taste and add salt and pepper as needed.
Notes
For a lighter version, substitute heavy cream with whole milk or a plant-based alternative. Feel free to customize with spices or extra ingredients like cooked chicken or greens.
Nutrition
- Serving Size: 1 bowl
- Calories: 400
- Sugar: 6g
- Sodium: 750mg
- Fat: 24g
- Saturated Fat: 14g
- Unsaturated Fat: 8g
- Trans Fat: 0g
- Carbohydrates: 30g
- Fiber: 5g
- Protein: 12g
- Cholesterol: 60mg
Keywords: broccoli cheddar soup, comfort food, easy soup recipe, creamy soup

Min Creamy Tortellini Soup for Busy Weeknights
Creamy Tortellini Soup: A Cozy Bowl of Bliss
Hello, fellow food lovers! Today, I’m excited to share a recipe that’s as comforting as a warm hug on a chilly evening: Creamy Tortellini Soup. This dish is a delicious medley of flavors, hearty ingredients, and a touch of indulgence, making it perfect for any occasion, whether it’s a weeknight dinner or a cozy gathering with friends.
My journey with this creamy delight began in a bustling kitchen during my college days, where I often found myself entertaining friends. Not only did we gather around the table to enjoy meals, but I also loved the laughter and joy that filled the room when I cooked. Each time I whipped together this tortellini soup, it became a staple, evoking memories of those carefree nights full of warmth, vibrant conversation, and hearty laughter.
The best part? It’s super simple to make and loaded with flavor. Trust me; once you try it, this soup will earn a permanent spot in your recipe rotation. So, grab your apron, and let’s dive into the creamy goodness of this tortellini soup!
A Personal Touch: A Nostalgic Food Memory
Let me take you back to one of my most cherished kitchen memories. It was a crisp fall evening, and I was hosting a small gathering for my college friends. The air was filled with the rich fragrance of sautéed sausage, garlic, and fresh spinach. Everyone was in high spirits, and I could feel the warmth of friendship wrap around us like a cozy blanket.
As we gathered around the table, I served up steaming bowls of creamy tortellini soup. The first spoonfuls brought smiles and, of course, several “Mmm’s” of delight. One friend exclaimed, “This feels like a warm hug in a bowl!” That phrase has stuck with me ever since, and now, every time I make this soup, I can almost hear my friends’ laughter echoing through the kitchen. It’s moments like these that remind me just how magical cooking can be.
Let’s create your own moments over a bowl of comforting tortellini soup!
Ingredients: What You’ll Need
Gather these ingredients, and let’s get cooking!
- Cheese Tortellini: The star of our soup! Opt for fresh or frozen tortellini. For a lighter take, try whole grain or gluten-free varieties.
- Italian Sausage: I love using mild Italian sausage, but feel free to swap it for spicy if you prefer a kick! You can also use turkey sausage for a lighter option.
- Fresh Spinach: Adds a burst of color and nutrients. If you don’t have spinach, kale makes an excellent substitute, but chop it finely as it can take a bit longer to wilt.
- Heavy Cream: This is what gives our soup that luscious creaminess. For a lighter version, you can use half-and-half or even coconut milk for a dairy-free option.
- Chicken or Vegetable Broth: The base of our soup, adding depth of flavor. Homemade is best, but store-bought works just as well. If you’re looking for a vegan option, vegetable broth is a great choice.
With just these few key ingredients, you’ll create a deliciously satisfying soup that’s sure to impress!
Step-by-Step Instructions: Let’s Cook!
-
Cook the Sausage: In a large pot over medium heat, add a drizzle of olive oil and the Italian sausage. Break it apart with a wooden spoon and cook until brown and crispy, about 5-7 minutes. This process adds depth to our soup, so take your time!
-
Sauté the Aromatics: Once the sausage is nicely browned, add in minced garlic (about 3 cloves). Sauté for another minute until fragrant—seriously, the aroma here is heavenly.
-
Add the Broth: Pour in 4 cups of chicken or vegetable broth and stir to combine. Bring this mixture to a simmer. The more flavorful your broth, the better your soup will be, so don’t skimp here!
-
Tortellini Time: Toss in 2 cups of cheese tortellini. Allow the soup to gently simmer for about 5-7 minutes or until the tortellini is tender. If you’re using frozen tortellini, it may take an extra couple of minutes.
-
Stir in the Spinach: Once the tortellini is lovely and soft, fold in about 4 cups of fresh spinach. It will wilt quickly, adding a vibrant green color to our soup.
-
Creamy Goodness: Now for the magic! Lower the heat and slowly pour in 1 cup of heavy cream. Stir well, allowing it to mingle with all those delicious flavors. If you like your soup extra creamy, feel free to add more!
-
Season and Serve: Taste it! Add salt, pepper, and perhaps a pinch of freshly grated nutmeg. Seasoning is key to elevating any dish, so don’t be shy.
-
Final Touch: For a pop of freshness, garnish with freshly chopped parsley or grated Parmesan cheese just before serving.
There you have it: a warm bowl of creamy tortellini soup that’s sure to bring smiles around your table.
Serving Suggestions: How to Plate
When serving your creamy tortellini soup, I recommend using rustic bowls to enhance that cozy vibe. Ladle the soup generously, ensuring each bowl has a good portion of tortellini and spinach. Top with a sprinkle of fresh parsley and a drizzle of olive oil for that touch of elegance. Pair it with crusty bread for dipping, and you’ve got yourself a meal that’s pure comfort.
Recipe Variations: Get Creative!
This recipe is versatile, and you can put your own twist on it:
- Add Seasonal Veggies: Consider adding diced carrots, zucchini, or bell peppers for extra nutrition and texture.
- Swap Proteins: Healthier options like shredded rotisserie chicken or even diced tofu can replace the sausage.
- Make it Spicy: Add red pepper flakes or your favorite hot sauce for a spicy kick!
- Herb Medley: Fresh basil or thyme can elevate the flavor even further. Just add these when you toss in the cream.
- Replace the Tortellini: Use gnocchi or other pasta shapes for a different texture and feel.
Embrace your creativity and make this recipe your own!
Chef’s Notes: A Journey of Flavor
Every recipe tells a story, and my creamy tortellini soup is a reflection of my culinary journey. I used to make this with whatever I had on hand, transforming leftovers into something magical. You see, cooking is not just about measurements; it’s about love, memories, and the joy of sharing food.
Over the years, I’ve swapped ingredients, adjusted spices, and invited new flavors into this dish. It has evolved into a comfort food that captures the essence of gathering around the table.
You might find that your version of this soup becomes a canvas for your culinary creativity too!
FAQs and Troubleshooting
-
Can I use frozen tortellini?
Absolutely! Just add them directly to the broth without thawing. It may take a few extra minutes to cook. -
What if my soup is too thick?
Simply stir in more broth or water until you reach your desired consistency. -
How can I store leftovers?
Store any leftovers in an airtight container in the refrigerator for up to 3 days. Reheat gently on the stovetop, adding a splash of broth or water to loosen it up. -
Can I make this soup ahead of time?
Yes! You can make the soup, but I recommend adding the cream and spinach just before serving to maintain their texture and flavor.
Nutritional Info
While I usually encourage focusing on the joy of cooking over calorie counting, here’s a rough idea of what a serving might contain:
- Calories: 350
- Protein: 15g
- Carbohydrates: 32g
- Fat: 20g
Cooking is a wonderful journey, and this creamy tortellini soup is a delightful stop along the way. So, gather your ingredients, and let’s create something delicious together! Bon appétit!
PrintCreamy Tortellini Soup

A delicious and comforting creamy tortellini soup that’s perfect for cozy nights.
- Prep Time: 15 minutes
- Cook Time: 30 minutes
- Total Time: 45 minutes
- Yield: 4 servings 1x
- Category: Main Course
- Method: Stovetop
- Cuisine: Italian
- Diet: Non-Vegetarian
Ingredients
- 2 cups cheese tortellini
- 1 pound Italian sausage
- 4 cups fresh spinach
- 1 cup heavy cream
- 4 cups chicken or vegetable broth
- 3 cloves garlic, minced
- Olive oil for cooking
- Salt and pepper to taste
- Fresh parsley for garnish
- Grated Parmesan cheese for serving (optional)
Instructions
- Cook the sausage: In a large pot over medium heat, add a drizzle of olive oil and the Italian sausage. Break it apart with a wooden spoon and cook until brown and crispy, about 5-7 minutes.
- Sauté the aromatics: Once the sausage is browned, add in minced garlic and sauté for another minute until fragrant.
- Add the broth: Pour in the chicken or vegetable broth and stir to combine. Bring this mixture to a simmer.
- Toss in the tortellini: Allow the soup to gently simmer for about 5-7 minutes or until the tortellini is tender.
- Fold in the spinach: Once the tortellini is soft, fold in the fresh spinach.
- Pour in the cream: Lower the heat and slowly pour in the heavy cream. Stir well.
- Season and serve: Taste the soup, adding salt, pepper, and nutmeg as desired.
- Garnish with parsley or Parmesan just before serving.
Notes
For a lighter version, substitute heavy cream with half-and-half or coconut milk. Store leftovers in an airtight container for up to 3 days.
Nutrition
- Serving Size: 1 serving
- Calories: 350
- Sugar: 5g
- Sodium: 700mg
- Fat: 20g
- Saturated Fat: 10g
- Unsaturated Fat: 6g
- Trans Fat: 0g
- Carbohydrates: 32g
- Fiber: 3g
- Protein: 15g
- Cholesterol: 50mg
Keywords: tortellini soup, creamy soup, Italian recipe, comfort food, easy recipes

Minute Monster Meatball Sliders for Weeknight Feasts
Monster Meatball Sliders: A Fun and Flavorful Feast
Hello, foodies! If you’re ready to take your dining experiences to a new level of fun and flavor, then you’re in for a treat! Today, I’m absolutely thrilled to share one of my all-time favorite recipes that perfectly combines nostalgia with a dash of creativity: Monster Meatball Sliders! These sliders are not only delicious but also incredibly fun to serve — perfect for parties, family gatherings, or even a cozy movie night at home.
As I was developing this recipe, I couldn’t help but reminisce about the weekend get-togethers at my grandmother’s house. Her kitchen was always filled with the incredible aroma of rich tomato sauce simmering on the stove, and giant meatballs rolling around like they had a life of their own! The atmosphere was always lively, filled with laughter and animated conversations over plates piled high with spaghetti and homemade meatballs.
Inspired by those cherished memories, I wanted to create something that encapsulated the childhood warmth of those gatherings but with a twist that would bring a smile to everyone’s face — hence the Monster Meatball Sliders! Imagine a perfectly seasoned meatball, snugly tucked into a fluffy slider bun, all topped off with gooey mozzarella and a touch of marinara. With a bit of creativity, these sliders become a playful dish that even the littlest foodies will adore. So, let’s dig in and get our hands a bit messy!
A Fond Kitchen Memory
One sunny afternoon while experimenting with recipes, I came across a few leftover meatballs from a previous dinner party. Rather than letting them go to waste, I decided to transform them into sliders. I can still picture the surprised faces of my friends when I plopped these glorious little sandwiches in front of them, complete with olive “eyes” and a light-hearted monster theme. Everyone couldn’t help but laugh and immediately dug in!
That day lit a little spark inside me — food isn’t just about sustenance; it’s about creating an experience, a memory that brings people together. These Monster Meatball Sliders became a staple at my gatherings, a fun way to evoke joy around the table. The blend of classic flavors with a whimsical presentation makes this dish a delightful addition to any table.
Ingredients
To make your Monster Meatball Sliders, you’ll need the following ingredients:
- Meatballs:
- You can use store-bought or homemade meatballs. If you’re feeling adventurous, making them from scratch using ground beef, breadcrumbs, cheese, and seasoning will elevate this dish immensely!
- Slider Buns:
- Opt for soft slider buns or mini brioche rolls. These add just the right touch of sweetness and texture. For a gluten-free option, use gluten-free buns or lettuce wraps.
- Mozzarella:
- Fresh mozzarella balls (bocconcini) work wonderfully for that melt-in-your-mouth factor. If you want something sharper, use provolone or cheddar for a flavor twist!
- Marinara Sauce:
- A good-quality marinara sauce is essential. You can easily swap this with pesto or a homemade tomato sauce for added flair.
- Olive Eyes:
- Black olives are perfect for creating those adorable little eyes! Feel free to use green olives for a pop of color or skip them altogether if you’re not a big olive fan.
Step-by-Step Instructions
Let’s get cooking! Follow these simple steps, and you’ll be well on your way to crafting your very own Monster Meatball Sliders.
-
Preheat the Oven:
- Begin by preheating your oven to 375°F (190°C). A warm oven is essential for that toasty bun experience!
-
Prepare the Meatballs:
- If you’re making your own meatballs, mix together your ground meat, breadcrumbs, eggs, minced garlic, and Italian seasoning. Roll them into golf ball-sized rounds. If you’re using store-bought, just set them aside while you prepare the rest.
-
Bake the Meatballs:
- Place your meatballs on a baking sheet lined with parchment paper. Bake them for about 20 minutes or until they are browned and cooked through. This step helps to lock in moisture and flavor!
-
Heat the Marinara Sauce:
- While the meatballs are baking, gently heat your marinara sauce in a small saucepan over medium heat. I sometimes like to add a pinch of red pepper flakes for that extra kick!
-
Assemble the Sliders:
- Once your meatballs are ready, slice your slider buns in half. Spread a spoonful of marinara sauce on the bottom half of each slider bun. Then, place a meatball on top, followed by a generous layer of mozzarella.
-
Melt the Cheese:
- Place the sliders in the oven for about 5-7 minutes until the cheese is bubbly and golden. This is the time to grab a kitchen towel and get ready to plate!
-
Add the Olive Eyes:
- Once out of the oven, use a toothpick or skewer to add two black olives to each slider — our deliciously cute monster eyes! It’s all about the presentation here—get creative!
-
Complete the Sliders:
- Top off each slider with the other half of the bun, and voilà! Your delicious Monster Meatball Sliders are ready to be devoured.
Serving Suggestions
When it comes to serving these sliders, I love to plate them on a large wooden board or platter for that family-style feel. You can add a sprinkle of fresh parsley or dried oregano on top for a garnish, and serve with extra marinara for dipping. Pair these sliders with a crisp green salad or a side of sweet potato fries to round out the meal.
Recipe Variations
Looking to mix it up a bit? Here are some fun variations to try:
- Buffalo Style: Toss your meatballs in buffalo sauce prior to baking for a zesty spin, and top with blue cheese crumbles instead of mozzarella.
- Vegetarian Option: Substitute meatballs with a plant-based meatball or roasted vegetables with spices to create a veggie-friendly version.
- Beachy Flavor: Use seafood meatballs made with crab or shrimp, and serve with a zesty lemon aioli!
- Cheesy Goodness: Go wild with cheese! Mix in cheddar or pepper jack instead of mozzarella for a flavorful punch.
Chef’s Notes
One of the first times I made these sliders, I thought I’d impress everyone with a fancy herb-infused sauce. However, I realized my friends loved the simple, comforting flavors of classic marinara more than anything else! It’s a reminder that sometimes simplicity wins, and that’s perfectly okay. If I could share one piece of advice, it’s to never hesitate to experiment, but also honor the classics that bring back nostalgic memories!
FAQs and Troubleshooting
-
What if my meatballs are dry?
- If your meatballs turn out dry, ensure you’re not overcooking them. Drizzling a bit of olive oil or adding moisture (like milk) to the mixture can help too!
-
Can I make this ahead of time?
- Absolutely! You can make the meatballs and sauce ahead of time, store them in the fridge, and assemble the sliders just before serving for that warm, fresh taste.
-
What are some good sides to pair with these sliders?
- Fresh salads, crispy fries, or even a charcuterie board work wonderfully. You’ll want something light to balance the hearty sliders.
-
How can I make this gluten-free?
- Simply swap out traditional breadcrumbs for gluten-free breadcrumbs, and check that your slider buns are gluten-free!
Nutritional Info
While I don’t always focus on the numbers, if you’re curious, a typical Monster Meatball Slider has approximately 250 calories, 12g protein, and 15g of fat per serving. Adjust portions based on your needs!
And there you have it—your guide to crafting delightful Monster Meatball Sliders! I hope this recipe brings as much joy to your table as it has to mine. Don your apron, roll up those sleeves, and let the kitchen festivities begin. Celebrate the art of cooking and the joy of eating together. Until next time, happy cooking!
PrintMonster Meatball Sliders

Fun and delicious sliders featuring seasoned meatballs, mozzarella, and marinara sauce served in fluffy buns, perfect for parties or family gatherings.
- Prep Time: 15 minutes
- Cook Time: 30 minutes
- Total Time: 45 minutes
- Yield: 4 servings
- Category: Appetizer
- Method: Baking
- Cuisine: American
- Diet: None
Ingredients
- Meatballs (store-bought or homemade)
- Soft slider buns or mini brioche rolls
- Fresh mozzarella balls (bocconcini)
- Good-quality marinara sauce
- Black olives for eyes
Instructions
- Preheat the oven to 375°F (190°C).
- Prepare the meatballs by mixing ground meat, breadcrumbs, eggs, minced garlic, and Italian seasoning, rolling them into golf ball-sized rounds.
- Bake the meatballs on a parchment-lined baking sheet for about 20 minutes or until browned.
- Heat the marinara sauce in a small saucepan over medium heat.
- Assemble the sliders by slicing the buns, spreading marinara, and adding a meatball and mozzarella.
- Melt the cheese in the oven for 5-7 minutes until bubbly.
- Add two black olives to each slider for eyes.
- Complete the sliders by placing the other half of the bun on top.
Notes
Feel free to experiment with meatball variations, including buffalo style or vegetarian options.
Nutrition
- Serving Size: 1 slider
- Calories: 250
- Sugar: 3g
- Sodium: 600mg
- Fat: 15g
- Saturated Fat: 7g
- Unsaturated Fat: 6g
- Trans Fat: 0g
- Carbohydrates: 20g
- Fiber: 1g
- Protein: 12g
- Cholesterol: 30mg
Keywords: meatball sliders, party food, fun recipes, family gathering, comfort food