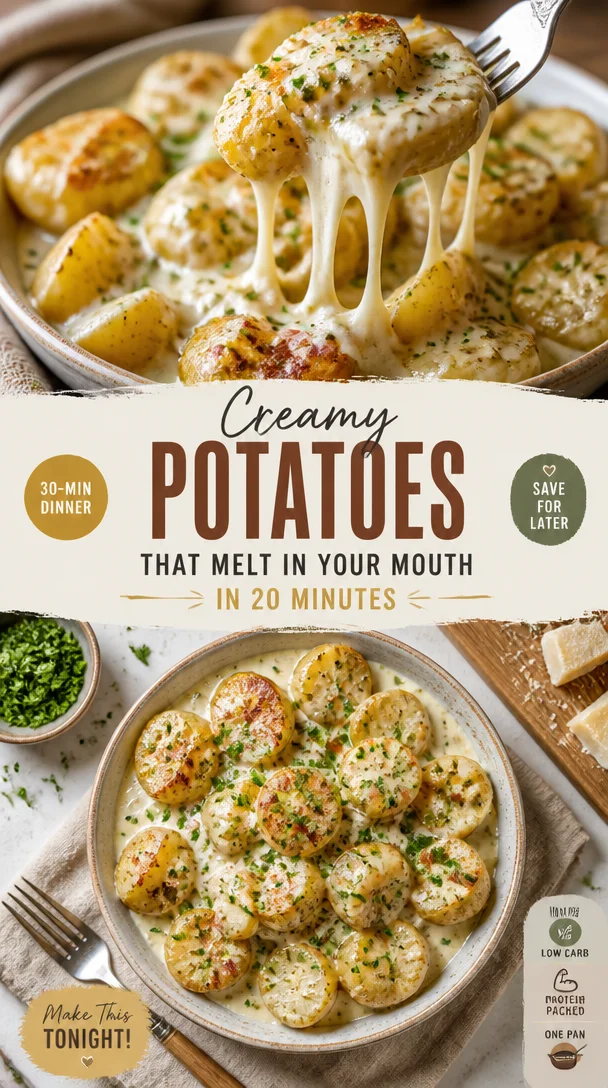
Creamy Potatoes That Melt in Your Mouth in 20 Minutes
Melt In Your Mouth Potatoes
Hello, my lovely food friends! Today, we’re diving into the cozy world of cooking and embracing one of life’s simplest yet most comforting side dishes—Melt In Your Mouth Potatoes. Trust me; these little gems are going to become your new best friend in the kitchen. With a golden, buttery exterior and a creamy interior that practically begs to be devoured, this dish is perfect for both weeknight dinners and fancy gatherings.
As we navigate the culinary landscape together, I’ll share not just the recipe but the stories and inspirations behind these potatoes, making this experience truly special. So, pull up a chair, tie your apron, and let’s get cooking!
A Nostalgic Gathering
One of my favorite memories in the kitchen revolves around a family gathering that epitomized warmth, laughter, and, of course, delicious food. I can vividly recall my grandmother’s kitchen during the holidays, where the air was filled with the irresistible aroma of her famous buttery roasted potatoes. She had this magical knack for transforming simple ingredients into extraordinary dishes, using nothing but love and a little bit of elbow grease.
One particular Thanksgiving, she let me take the reins for the potato dish. I was nervous, but her encouraging smile reassured me. We peeled and chopped together while exchanging stories about family recipes and the importance of warmth and hospitality around the table. Those Melt In Your Mouth Potatoes became more than just comfort food—they symbolized connection, celebration, and the joy of gathering. It is in those moments that I understood the heart of cooking: it’s not merely about the food but the emotions and memories we create around it.
Ingredients
Here’s what you’ll need to create your delightful Melt In Your Mouth Potatoes:
-
2 lbs (900 g) Yukon Gold or baby potatoes
These potatoes are creamy and buttery, perfect for achieving that melt-in-your-mouth texture. If you can’t find Yukon Golds, feel free to use red potatoes or even small fingerlings. -
4 tablespoons unsalted butter (melted)
Butter is the key to rich flavor. If you’re dairy-free, swap it with olive oil or a vegan butter alternative for a guilt-free version! -
2 tablespoons olive oil
This adds another layer of flavor and helps achieve that beautiful golden-brown color. You can use avocado oil instead for a different taste. -
3 cloves garlic (finely minced)
Fresh garlic elevates the dish! If you’re in a pinch, garlic powder can substitute—use about 1 teaspoon. -
1 teaspoon salt
Just the right amount to enhance flavors—not too much, or you’ll overpower the dish. -
½ teaspoon black pepper
Freshly cracked pepper produces the best flavor. It’s a game-changer! -
1 teaspoon dried thyme or rosemary (optional)
Fresh or dried, these herbs pair beautifully with potatoes. If you love herbaceous flavors, feel free to mix in your favorites! -
½ cup (120 ml) chicken or vegetable broth
This helps infuse flavor and keeps the potatoes moist during baking. Homemade broth is ideal, but store-bought works just fine, too. -
Fresh parsley (chopped for garnish, optional)
A sprinkle of fresh herbs brightens up the dish and adds a splash of color!
Step-by-Step Instructions
Now that we have our ingredients, let’s dive into the cooking process! Here’s how to turn those humble potatoes into a luxurious side dish:
-
Preheat the Oven
Preheat your oven to 400°F (200°C). Think of it as setting the stage for the delicious show about to unfold! -
Prepare the Potatoes
Scrub your Yukon Gold or baby potatoes under cool running water to get rid of any dirt. If you’re using larger potatoes, cut them into halves or quarters for even cooking. Smaller baby potatoes can be left whole. -
Make the Sauce
In a large bowl, whisk together the melted butter, olive oil, minced garlic, salt, black pepper, and herbs (if using). This is where the magic begins. The aromas alone will have your stomach growling! -
Coat the Potatoes
Add the potatoes to the bowl and toss them in the butter mixture until they’re thoroughly coated. Don’t be shy! Get your hands in there and ensure every morsel is enveloped in that buttery goodness. -
Transfer to Baking Dish
Spread the potatoes in a single layer in a large baking dish or on a parchment-lined baking sheet. Pour any remaining butter mixture over the top—no need to waste that flavor! -
Add the Broth
Carefully pour the chicken or vegetable broth around the potatoes in the baking dish. This will keep them moist while roasting, ensuring they absorb all the delicious flavors. -
Roast Away
Pop those potatoes into the preheated oven and roast for about 30-40 minutes. Halfway through, give them a gentle shake or stir to promote even browning. After 20 minutes, you can start checking for doneness. When they’re tender and golden brown, they’re ready! -
Finishing Touches
Once they’re out of the oven, sprinkle optional fresh parsley over the top for a pop of color and freshness. Let them rest for a few minutes before serving—trust me, the patience will pay off!
Serving Suggestions
Plating your Melt In Your Mouth Potatoes shouldn’t feel like a chore! For a beautiful presentation, arrange them in a shallow serving dish, allowing the golden tops to peek out. Drizzle any remaining broth over the potatoes and garnish with freshly chopped parsley for that added touch of elegance. They pair beautifully with roasted meats, grilled fish, or as a stunning centerpiece for a vegetarian feast.
Recipe Variations
Here are a few creative twists to personalize your Melt In Your Mouth Potatoes:
-
Cheesy Delight: Add 1 cup of grated cheese (like cheddar or Parmesan) to the top for the last 10 minutes of roasting for a gooey, cheesy finish.
-
Spicy Kick: Include a pinch of red pepper flakes or smoked paprika in the butter mixture for a flavorful heat.
-
Lemon Zest: A dash of lemon zest brings brightness that perfectly balances the rich flavors of the potatoes.
-
Herb Garden: Experiment with fresh herbs! Thyme, rosemary, or even dill will bring new life to each bite.
-
Vegan Version: Swap butter for vegan alternatives and use vegetable broth to make this a plant-based delight!
Chef’s Notes
Over the years, my Melt In Your Mouth Potatoes have transformed alongside my cooking journey. I remember the first time I attempted to make them for a dinner party. I was stressing about every little detail, but my friends loved them so much they didn’t even notice the couple of imperfections. They reminded me that cooking is as much about the experience as it is about the food itself! Now, I freely experiment with flavors and enjoy the process more than ever.
FAQs and Troubleshooting
Here are a few common reader questions that might help you on your cooking adventure:
-
Why are my potatoes not crispy enough?
Ensure they are well-coated in oil and butter. A hot oven is crucial for crisping them up. Also, make sure they’re in a single layer on your baking sheet. -
Can I prepare these in advance?
Absolutely! You can prep the potatoes, toss them in the butter mixture, and refrigerate them up to a day in advance. Just add a little extra time to your baking if they’re cold from the fridge. -
What if they’re overcooked?
Overcooked potatoes can still be delicious. Serve them mashed with extra broth and herbs for a creamy alternative! -
Can I use different kinds of potatoes?
Yes! Just keep in mind that different varieties will yield slightly different textures, but experimenting is half the fun.
Nutritional Info (if applicable)
While I believe food is meant to be enjoyed, it can also be helpful to be mindful of nutrition! This recipe is rich in vitamins and healthy fats, especially if you utilize olive oil. Each serving has roughly:
- Calories: 210
- Fat: 11g
- Carbohydrates: 29g
- Protein: 2g
Keep that in mind, and remember that sharing these potatoes around the table brings joy and warmth—what can be better than that?
And there you have it! Your guide to Melt In Your Mouth Potatoes, filled with love, stories, and tasty tips that celebrate everything I adore about cooking. I can’t wait for you to dive into this recipe and share your own stories around the dinner table. Happy cooking, and remember—good food is about showing up and creating memories!
PrintMelt In Your Mouth Potatoes

Experience the comforting delight of Melt In Your Mouth Potatoes, featuring a buttery exterior and a creamy interior that’s perfect for any occasion.
- Prep Time: 10 minutes
- Cook Time: 30 minutes
- Total Time: 40 minutes
- Yield: 4 servings 1x
- Category: Side Dish
- Method: Baking
- Cuisine: American
- Diet: Vegetarian
Ingredients
- 2 lbs (900 g) Yukon Gold or baby potatoes
- 4 tablespoons unsalted butter (melted)
- 2 tablespoons olive oil
- 3 cloves garlic (finely minced)
- 1 teaspoon salt
- ½ teaspoon black pepper
- 1 teaspoon dried thyme or rosemary (optional)
- ½ cup (120 ml) chicken or vegetable broth
- Fresh parsley (chopped for garnish, optional)
Instructions
- Preheat your oven to 400°F (200°C).
- Scrub your Yukon Gold or baby potatoes under cool running water.
- In a large bowl, whisk together the melted butter, olive oil, minced garlic, salt, black pepper, and herbs (if using).
- Add the potatoes to the bowl and toss them in the butter mixture until they’re thoroughly coated.
- Spread the potatoes in a single layer in a large baking dish or on a parchment-lined baking sheet.
- Carefully pour the chicken or vegetable broth around the potatoes in the baking dish.
- Pop those potatoes into the preheated oven and roast for about 30-40 minutes.
- Once they’re golden brown, sprinkle optional fresh parsley over the top for a pop of color.
Notes
To enhance flavors, feel free to experiment with different herbs and add cheese or a spicy twist!
Nutrition
- Serving Size: 1 serving
- Calories: 210
- Sugar: 1g
- Sodium: 400mg
- Fat: 11g
- Saturated Fat: 4g
- Unsaturated Fat: 7g
- Trans Fat: 0g
- Carbohydrates: 29g
- Fiber: 3g
- Protein: 2g
- Cholesterol: 30mg
Keywords: potatoes, side dish, vegetarian, comfort food, baking

One-Pan Crispy Garlic Dill Potatoes for Weeknight Dinners
Garlicky Potatoes with Dill: A Comfort Food Delight
Hello, fellow food lovers! Today, I’m thrilled to share a dish that’s close to my heart and a staple in my kitchen: Garlicky Potatoes with Dill. If you’re looking for a side dish that perfectly marries earthy flavors and fresh herbs, you’re in for a treat. This recipe is not only easy to whip up but it’s also impressively versatile—perfect for both casual family dinners and fancy soirées.
Introduction
There’s something enchanting about a simple potato dish that warms the soul and brings a smile to your face. At Ivory Apron, we believe that good food doesn’t have to be complicated. This dish is the epitome of elegance meeting ease, with drag-you-in aromas of garlic and the refreshing zest of dill. Whether you’re a seasoned cook or just starting out, this recipe empowers you to create something divine without the stress.
Garlicky Potatoes with Dill finds its roots in my childhood memories of family gatherings. Picture this: a long table adorned with colorful dishes, laughter echoing, and the air thick with the delightful scent of garlic wafting from the kitchen. As a little girl, I remember hopping onto a stool to help my mom peel the potatoes. I would sneak little bites, savoring the creamy texture and the warm garlic-infused flavors. It was in those moments that my love for cooking blossomed—a passion that I’ve since transformed into my cherished recipe collection.
This dish embodies the joy of cooking together, sharing stories, and creating lasting memories. So, let’s tie on our aprons, gather our ingredients, and get started on this comforting journey!
Personal Story
Growing up, my family had a tradition of gathering every Sunday for what we called “Family Feast Day.” It was an opportunity to catch up, share laughs, and, of course, enjoy a hearty meal together. My grandmother was the kitchen queen, and her version of Garlicky Potatoes would steal the show every time. They weren’t just delicious; they were a symbol of love and the heart of our gatherings.
One particular Sunday, I remember trying to impress my grandmother by making the potatoes myself. But, as fate would have it, I accidentally grabbed the wrong spice jar, sprinkling cinnamon instead of salt! The look on my grandmother’s face was priceless. Instead of disappointment, she chuckled and turned it into a learning moment. We spent the afternoon perfecting the dish together, and I’ll never forget that lesson in kitchen resilience. It taught me that even the smallest mistakes could lead to the biggest memories—and that’s what this recipe is all about.
Ingredients
Let’s gather our stars for this delectable dish:
-
4 Medium Potatoes: I love using Yukon Gold or Russet potatoes for their creamy texture. Both are excellent choices! If you’re looking for a lower-carb option, try using cauliflower instead.
-
2 Cloves Garlic: These little wonders bring depth and flavor. If you adore garlic, feel free to add more! For a milder taste, you can roast the garlic first before adding it to the potatoes.
-
2 Tablespoons Fresh Dill: This herb adds a bright and fresh note that pairs beautifully with the potatoes. If you can’t find dill, fresh parsley or chives work well as substitutes.
-
Salt to Taste: Salt is essential for enhancing flavor. Always start with a little and adjust according to your preference.
Step-by-Step Instructions
Now that we have all our ingredients ready, let’s dive into the preparation! Here’s how to make Garlicky Potatoes with Dill:
-
Prep the Potatoes: Start by washing the potatoes thoroughly to remove any dirt. Then, peel them if you prefer; I usually keep the skins on for added texture and nutrition. Cut them into even-sized chunks (about 1-inch) to ensure they cook evenly.
-
Boil the Potatoes: Place the diced potatoes in a large pot filled with cold, salted water. This is important! Starting with cold water helps the potatoes cook evenly. Bring to a boil over high heat. Once boiling, reduce the heat to a simmer for about 15-20 minutes or until fork-tender. You want them soft but not mushy—consider this your first chef hack!
-
Sauté the Garlic: While the potatoes are cooking, peel and finely mince your garlic cloves. In a skillet, heat a tablespoon of olive oil over medium heat. Add the minced garlic and sauté for about 1-2 minutes, just until it becomes fragrant. Be careful not to let it burn (trust me, burnt garlic is a kitchen sin!)—you want that lovely golden hue.
-
Drain and Toss: Once the potatoes are cooked, drain them in a colander and return them to the pot while they’re still hot. This helps them absorb some moisture and flavor. Quickly pour the sautéed garlic and olive oil over the warm potatoes.
-
Add Dill and Season: Now comes the magic moment! Add the fresh dill and salt to the potatoes. Toss everything gently to combine, making sure not to mash them. You want all those delightful flavors to embrace each other without losing the integrity of the potato.
-
Taste and Adjust: Here’s where you get to play the chef! Take a small bite and see if it needs more salt or dill. Adjust to your liking, and don’t hesitate to sprinkle a bit more garlic if you love that bold flavor.
Serving Suggestions
When it comes to plating, think simple yet inviting. Transfer your Garlicky Potatoes to a beautiful serving dish, perhaps a rustic wooden bowl or a vibrant ceramic plate. Garnish with a few extra sprigs of dill for a pop of color. You can also drizzle a little olive oil on top for that finishing touch. Serve them alongside your favorite protein—grilled chicken, roasted fish, or a hearty vegetable stew—and watch them disappear!
Recipe Variations
Now, let’s get creative! Here are a few variations to take your Garlicky Potatoes to the next level:
-
Lemon Zest: Add the zest of one lemon for a bright, zingy flavor that complements the garlic beautifully.
-
Cheesy Delight: Sprinkle some grated parmesan or feta cheese on top before serving for a creamy, savory twist.
-
Spicy Kick: Toss in a pinch of red pepper flakes with the garlic for a delightful heat.
-
Herbed Mashed Potatoes: If you’re in the mood for mash, simply mash the cooked potatoes with some heavy cream and whip in fresh dill for a creamy side dish.
-
Smoky Flavor: Add a hint of smoked paprika to the garlic while sautéing for a subtle smokiness in every bite.
Chef’s Notes
This recipe is definitely a labor of love in my kitchen. I’ve played around with it over the years, adjusting flavors and ingredients until it felt just right. One of my favorite kitchen memories is when I made this for a group of friends who had no idea how easy it was to make. Their surprised expressions when they tasted them for the first time was priceless!
I’d love to hear what your version of Garlicky Potatoes turns out like! The beauty of cooking is making each recipe uniquely yours. Embrace the process, and don’t hesitate to experiment. The kitchen should be your playground!
FAQs and Troubleshooting
Here are a few common questions and potential pitfalls when making Garlicky Potatoes:
-
Q: My potatoes turned mushy. What happened?
A: This typically happens if they are boiled too long. Be sure to test regularly with a fork for doneness and drain them as soon as they’re tender. -
Q: What if I don’t have fresh dill?
A: No worries! Dried dill can be used as a substitute, but use less—about 1 teaspoon should do. You can also try fresh parsley or chives for a different flavor profile. -
Q: Can I make these potatoes ahead of time?
A: Absolutely! You can prepare the potatoes and toss them in garlic and dill up to a day in advance. Just reheat them gently before serving to retain their texture. -
Q: How can I prevent my garlic from burning?
A: Always sauté garlic over medium heat and keep an eye on it. If you notice it browning too quickly, lower the heat. Another trick is to add a splash of broth or water to the pan if you’re worried about it cooking too fast.
Nutritional Info (Optional)
While I love indulging in delightful flavors, I also keep an eye on nutrition. Each serving of Garlicky Potatoes contains a fair amount of fiber and vitamins from the potatoes, and the olive oil adds heart-healthy fats. Overall, it’s a balanced and wholesome side dish!
Thank you for joining me today at Ivory Apron! I hope you feel inspired to try these Garlicky Potatoes with Dill in your own kitchen. Remember, the essence of cooking is to enjoy the process and share love with others through food. Happy cooking, friends!
PrintGarlicky Potatoes with Dill

A simple and comforting dish featuring creamy potatoes infused with garlic and fresh dill.
- Prep Time: 15 minutes
- Cook Time: 20 minutes
- Total Time: 35 minutes
- Yield: 4 servings 1x
- Category: Side Dish
- Method: Boiling and Sautéing
- Cuisine: American
- Diet: Vegetarian
Ingredients
- 4 Medium Potatoes (Yukon Gold or Russet)
- 2 Cloves Garlic (minced)
- 2 Tablespoons Fresh Dill (chopped)
- Salt to Taste
- 1 Tablespoon Olive Oil
Instructions
- Prep the potatoes by washing and peeling them if desired, then cut into 1-inch chunks.
- Boil the potatoes in a large pot of cold, salted water, bringing to a boil and then simmer for 15-20 minutes until fork-tender.
- Sauté the minced garlic in olive oil over medium heat for 1-2 minutes until fragrant.
- Drain the cooked potatoes and return them to the pot while hot.
- Add the sautéed garlic and olive oil over the potatoes, then toss gently.
- Mix in the fresh dill and salt, adjusting to taste.
Notes
For variations, consider adding lemon zest, cheese, or spices like red pepper flakes.
Nutrition
- Serving Size: 1 serving
- Calories: 220
- Sugar: 1g
- Sodium: 300mg
- Fat: 10g
- Saturated Fat: 1g
- Unsaturated Fat: 8g
- Trans Fat: 0g
- Carbohydrates: 30g
- Fiber: 3g
- Protein: 4g
- Cholesterol: 0mg
Keywords: potatoes, garlic, dill, side dish, comfort food
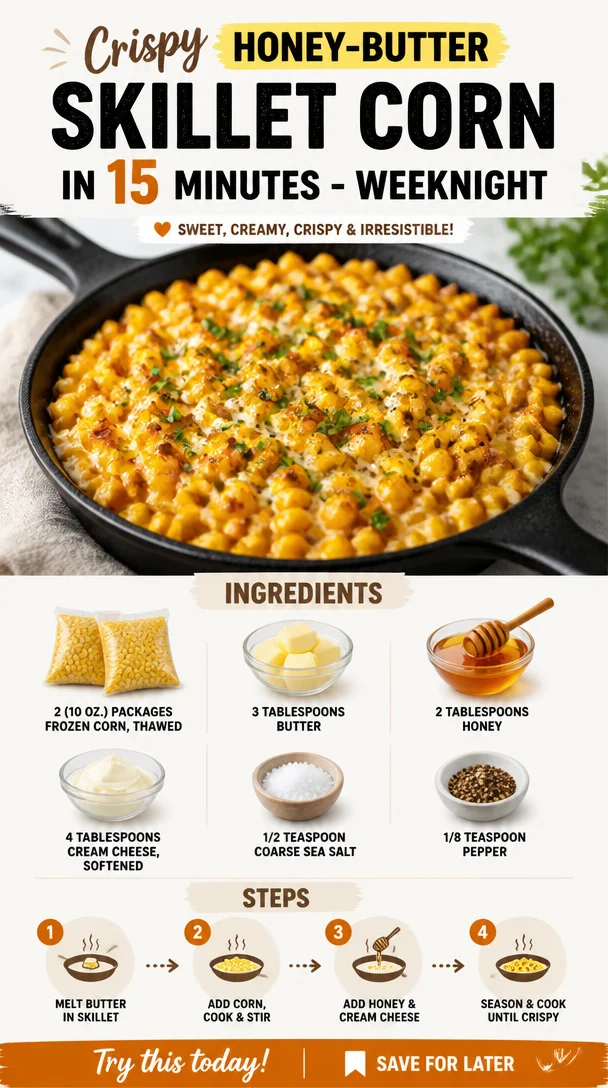
Crispy Honey-Butter Skillet Corn in 15 Minutes – Weeknight
Honey Butter Skillet Corn: A Sweet and Savory Side Dish
Hello there, fellow food enthusiasts! I’m Savannah Pierce, and I’m delighted to have you join me in the kitchen today. This blog post is dedicated to a show-stopping side dish that is bound to steal the spotlight at your next gathering: Honey Butter Skillet Corn! If you’ve never had the pleasure of savouring this sweet and savory blend, you’re in for a treat. Let me take you on a delightful culinary journey that brings together the warm flavors of butter and honey with the crisp essence of corn—perfectly simple yet incredibly satisfying!
So, ready your skillet, and let’s dive into the recipe together!
A Memory with Corn
Let me whisk you back in time to a hot summer day when I was a little girl—my loved ones gathered in my grandmother’s kitchen, laughter bouncing off the walls. The smells of garlic and butter filled the air as we prepared dinner together. My grandma always adored serving corn made fresh from her garden. But what set her corn apart from any other dish was the sweet secret ingredient she added: honey! That unique twist was my introduction to the simplicity of combining sweet and savory, forever changing how I viewed flavors. Whenever I reminisce about those warm summer nights, I can almost hear the clinking of forks and see the smiles around the table. Today, I channel that nostalgic energy into my Honey Butter Skillet Corn recipe, which is a delightful homage to those precious memories.
Ingredients
Let’s gather everything you need to whip up this tantalizing dish:
-
2 (10 oz.) packages frozen corn, thawed: Frozen corn is not only convenient but also retains its sweetness. Don’t have frozen corn? Fresh corn works perfectly too—just make sure to cut it from the cob!
-
3 tablespoons butter: Butter brings that rich, creamy texture. If you’re looking for a healthier alternative, feel free to use olive oil or coconut oil for sautéing.
-
2 tablespoons honey: Honey adds that irresistible sweetness. You can substitute agave syrup or maple syrup if you’re looking for a vegan option.
-
4 tablespoons cream cheese, softened: Cream cheese lends a delectable creaminess to the dish. For a lighter version, you can opt for Greek yogurt instead (but it will have a tangier flavor).
-
1/2 teaspoon coarse sea salt: Salt enhances the sweetness of the corn beautifully. You can use regular table salt if that’s all you have, but the texture of sea salt adds an extra layer of depth.
-
1/8 teaspoon pepper: Freshly ground pepper complements the sweetness of the corn—feel free to adjust it according to your taste!
Step-by-Step Instructions
Now that we have our ingredients, let’s create this magical dish together! Follow along with me for a fun cooking experience.
-
Get Your Skillet Hot: Heat a large skillet over medium heat. Love that sizzle! Adding your ingredients to a properly heated pan ensures a nice sautée without the corn getting watery.
-
Melt the Butter: Add the 3 tablespoons of butter once your skillet is hot. Let it melt completely, swirling the pan to coat its surface evenly. This is where the magic starts! The golden, nutty aroma of melted butter sets the stage for our star ingredient.
-
Sauté the Corn: Add the thawed corn to the skillet. Spread it out evenly to ensure maximum contact with the pan. It should sizzle nostalgically! Stir it frequently for about 5-7 minutes until the corn is heated through and slightly caramelized. That’s how you amp up the flavors and add depth.
-
Incorporate Honey: Drizzle your 2 tablespoons of honey over the corn. Stir gently to combine, allowing the honey to coat each kernel. Feel free to adjust the amount according to your sweet tooth—honey-loving friends will thank you!
-
Add Cream Cheese: Now, drop in the softened cream cheese in dollops. Stir to mix until the cream cheese has melted into the corn and created a luscious, creamy coating. It should feel like a warm hug! Be gentle at this stage—you want everything to blend beautifully.
-
Season It Up: Sprinkle the coarse sea salt and pepper, stirring to combine. Taste and adjust. If you like a bit more sweetness, add a touch more honey. Want more zest? A squeeze of fresh lime juice can brighten it right up!
-
Cook and Tray It Up: Allow everything to simmer together for an additional minute, ensuring all flavors meld. Then, remove it from the heat. It’s time to plate your delicious Honey Butter Skillet Corn!
Serving Suggestions
When it comes to serving, presentation is key! Transfer your Honey Butter Skillet Corn to a beautiful serving bowl, garnishing with fresh herbs like parsley or basil for pops of color. You can also sprinkle some crumbled feta cheese on top for an extra layer of flavor—talk about impressive!
Recipe Variations
The beauty of this Honey Butter Skillet Corn recipe is its versatility! Here are a few fun options to give this dish a twist:
-
Add Fresh Herbs: Toss in some fresh basil or cilantro towards the end of cooking for a burst of freshness.
-
Spicy Kick: Mix in a pinch of cayenne pepper or red pepper flakes for a savory kick to balance the sweetness.
-
Lime-Infused: Add zest and juice from a lime for a citrusy flair.
-
Cheesy Delight: Fold in shredded cheese like cheddar or pepper jack to enhance creaminess and flavor complexity.
-
Bacon Lovers Unite: Sauté chopped bacon before adding your corn for a smoky flavor that pairs beautifully with the honey!
Chef’s Notes
I can’t help but share that this recipe has evolved throughout the years. Early on, I made it for my friends during our summer BBQs, and it quickly became a staple. Over time, I experimented with new ingredients based on what was in season or what I had on hand, leading to the vibrant and luscious version you see today. One never knows when inspiration for a new twist will strike—it could be the random herb in your fridge or a spicy condiment waiting on your shelf. Embrace your creativity, and don’t shy away from making this recipe your own!
FAQs and Troubleshooting
Let’s troubleshoot some common questions you might have as you embark on this culinary adventure!
-
Why is my corn watery? Make sure to sauté it long enough to remove excess moisture! Frozen corn can sometimes retain water, so a few extra minutes cooking will help.
-
Can I make this recipe ahead of time? Absolutely! You can prepare the dish in advance and warm it up gently on the stove before serving. Just be cautious not to overcook it—keep that vibrant corn texture!
-
What can I do with leftovers? This dish makes a fantastic omelet filling or a topping for nachos. Get creative!
-
Can I use canned corn? Yes, but be sure to drain and rinse thoroughly! Sautéing canned corn typically requires less time since it’s already cooked.
Nutritional Info
Though I focus on enjoyment over counting calories, if you’re curious, this Honey Butter Skillet Corn can serve as a delightful addition to any meal. It’s a great source of fiber, thanks to the corn, and provides a touch of healthy fats from the butter and cream cheese.
And there you have it—a delightful journey through the art of Honey Butter Skillet Corn! I hope this dish fills your home with warmth and laughter, just like it does for me. Don’t hesitate to share your own variations and stories in the comments below. Until next time, happy cooking, and remember—good food is about showing up, not showing off!
Let’s get cooking! 🍽️✨
PrintHoney Butter Skillet Corn
A delightful side dish combining the sweet and savory flavors of corn, butter, and honey.
- Prep Time: 10 minutes
- Cook Time: 15 minutes
- Total Time: 25 minutes
- Yield: 4 servings 1x
- Category: Side Dish
- Method: Sautéing
- Cuisine: American
- Diet: Vegetarian
Ingredients
- 2 (10 oz.) packages frozen corn, thawed
- 3 tablespoons butter
- 2 tablespoons honey
- 4 tablespoons cream cheese, softened
- 1/2 teaspoon coarse sea salt
- 1/8 teaspoon pepper
Instructions
- Get Your Skillet Hot: Heat a large skillet over medium heat.
- Melt the Butter: Add the 3 tablespoons of butter once your skillet is hot.
- Sauté the Corn: Add the thawed corn to the skillet and stir it frequently for about 5-7 minutes until heated through.
- Incorporate Honey: Drizzle your 2 tablespoons of honey over the corn and stir gently.
- Add Cream Cheese: Drop in the softened cream cheese in dollops and mix until melted.
- Season It Up: Sprinkle the coarse sea salt and pepper, stirring to combine.
- Cook and Tray It Up: Allow everything to simmer together for an additional minute before plating.
Notes
This recipe can be made ahead of time and reheated before serving. Feel free to add fresh herbs or other variations.
Nutrition
- Serving Size: 1 serving
- Calories: 250
- Sugar: 10g
- Sodium: 300mg
- Fat: 10g
- Saturated Fat: 5g
- Unsaturated Fat: 5g
- Trans Fat: 0g
- Carbohydrates: 35g
- Fiber: 4g
- Protein: 6g
- Cholesterol: 25mg
Keywords: corn, sides, honey butter, easy recipe, summer dish
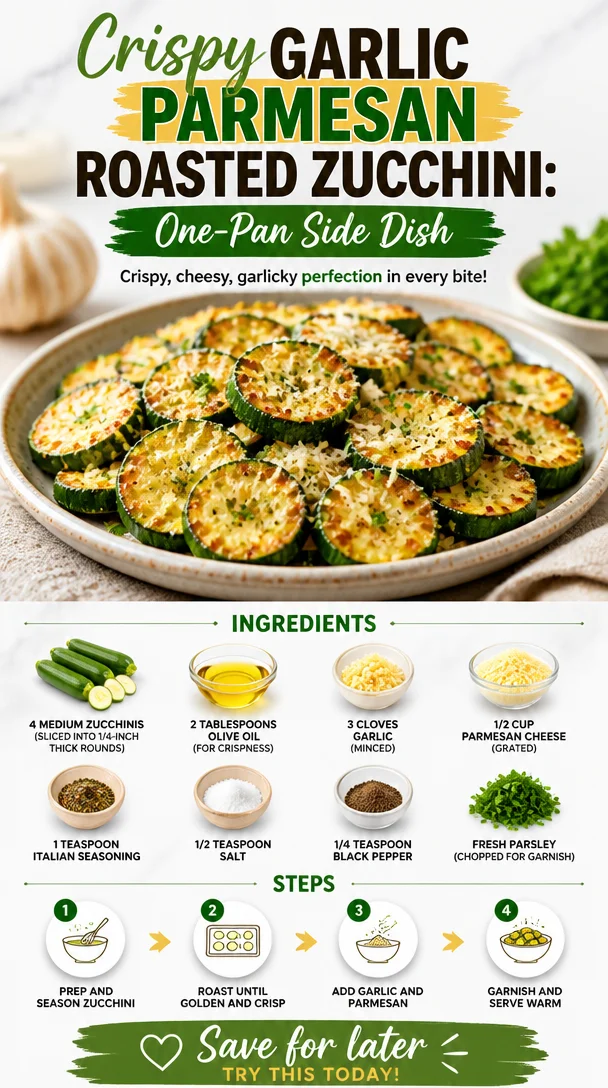
Crispy Garlic Parmesan Roasted Zucchini: One-Pan Side Dish
Irresistibly Crunchy Garlic Parmesan Roasted Zucchini
Hello and welcome back to Ivory Apron! Today, we’re diving into a dish that’s bursting with flavor, texture, and goodness: Irresistibly Crunchy Garlic Parmesan Roasted Zucchini. This dish is not just another side—it’s a celebration of one of summer’s most versatile vegetables, zucchini! If you’ve ever wondered how to make your veggies a showstopper, you’re in the right place.
So, put on your apron, grab your knife, and let’s get ready to make zucchini the star of your dinner table!
A Little Personal Story: Zucchini Memories
Zucchini has always held a special place in my heart. Growing up, summer vacations meant visiting my grandmother’s house, where her garden was a treasure trove of fresh vegetables. She had a particular knack for transforming modest veggies into mouthwatering dishes. I remember picking zucchini from her garden, gleaming in the sun, and she would say, “Savannah, zucchini is like a blank canvas—let’s paint it delicious!”
One memorable afternoon, we crafted a dish much like today’s. We roasted zucchini infused with garlic and Parmesan, and the kitchen filled with the most heavenly aroma. It was a simple moment, yet it taught me that even the humblest of ingredients could bring joy. It’s this spirit that inspires me to share my recipes with you!
Let’s make those memories together with this crispy, cheesy, and utterly delightful dish.
Ingredients
Gather these fresh ingredients to get started on our garlic Parmesan roasted zucchini:
-
4 medium zucchinis: Sliced into 1/4-inch thick rounds. Look for firm, shiny zucchinis for the best texture. You can also use yellow squash for a pop of color!
-
2 tablespoons olive oil: This not only helps in crisping up the zucchini but also adds a lovely flavor. For a different twist, you can use avocado oil, which has a high smoke point and a mild taste.
-
3 cloves garlic: Minced. Fresh garlic delivers the best flavor! In a pinch, you can use garlic powder—just adjust to taste.
-
1/2 cup Parmesan cheese: Grated. The sharper the cheese, the more flavor it’ll impart. If you’re feeling adventurous, try Pecorino Romano for a salty kick.
-
1 teaspoon Italian seasoning: A blend of herbs that captures the essence of Italian cooking. Feel free to customize it with your favorite herbs—thyme and rosemary work beautifully here!
-
1/2 teaspoon salt: To enhance all the flavors in your dish. Always taste and adjust!
-
1/4 teaspoon black pepper: Freshly cracked offers the best heat. If you want an extra kick, try a sprinkle of red pepper flakes.
-
Fresh parsley: Chopped for garnish. This adds a vibrant color and fresh flavor, making your dish pop!
Step-by-Step Instructions
Now that we’ve gathered our ingredients, it’s time to get cooking! Follow these steps to create your crispy zucchini masterpiece.
-
Preheat the Oven: Start by preheating your oven to 425°F (220°C). A hotter oven will give us that nice roasted color and crunch we’re after.
-
Prepare the Baking Sheet: Line a rimmed baking sheet with parchment paper for easy cleanup and to prevent sticking. This little hack can save you time and hassle later!
-
Slice the Zucchini: Wash the zucchinis under cold water, then slice them into 1/4-inch thick rounds. Consistency is key here, so try to keep them uniform for even cooking. Using a mandoline slicer can speed this up if you have one!
-
Toss with Olive Oil: In a large mixing bowl, combine the sliced zucchini with olive oil. Use your hands to toss and coat the zucchini evenly. This helps crisp them up in the oven!
-
Add Garlic and Seasonings: Next, add in the minced garlic, Italian seasoning, salt, and black pepper. Toss everything together again until the zucchini is thoroughly coated. Don’t skip on the garlic—it’s what really brings the flavor!
-
Layer on the Baking Sheet: Spread the seasoned zucchini rounds in a single layer on your prepared baking sheet. Overcrowding will lead to steaming instead of roasting, so give them some space to breathe.
-
Sprinkle with Parmesan: Now, it’s time for the pièce de résistance! Generously sprinkle the grated Parmesan cheese over the top of the zucchini. If you’re feeling cheesy, don’t hold back!
-
Roast Away: Pop the baking sheet into your preheated oven and roast for about 20-25 minutes. Halfway through, give them a stir to ensure even cooking and that all that beautiful cheese gets nice and golden.
-
Check for Crispiness: Trust your nose here—they should smell incredible and be slightly browned. The edges will get crispy, while the middle retains a bit of tenderness.
-
Garnish and Serve: Once they’re out of the oven, give them a final sprinkle of fresh parsley for that beautiful pop of color. And there you have it—Irresistibly Crunchy Garlic Parmesan Roasted Zucchini!
Serving Suggestions
For plating, layer the crispy zucchini on a beautiful serving dish. Consider drizzling a little extra balsamic glaze or a squeeze of fresh lemon juice over the top for that added zing. Serve alongside grilled chicken or fish, or enjoy them just as they are! You’ll find they impress guests without overshadowing your main dish.
Recipe Variations
Feeling adventurous? Here are some fun variations to give your zucchini dish a personal twist:
- Spicy Garlic Zucchini: Add a pinch of red pepper flakes or cayenne pepper to the seasoning for a kick!
- Herb-Infused: Swap Italian seasoning for fresh herbs like dill or basil for a refreshing take.
- Vegan Version: Substitute nutritional yeast for the Parmesan and use a vegan olive oil substitute.
- Mediterranean Delight: Toss in halved cherry tomatoes and olives with the zucchini for a colorful Mediterranean flair.
- Balsamic Glazed: Drizzle some balsamic reduction over the zucchini just before serving for a sweet and tangy finish.
Chef’s Notes
Zucchini has come a long way since my grandmother’s garden days. I’ve experimented with this recipe over the years, tweaking the seasoning and methods until it reached perfection. One funny memory involves a dinner party where I accidentally confused the salt for sugar while seasoning! Let me tell you, people are less enthusiastic about zucchini when it’s a sweet surprise!
But that’s the beauty of cooking—mistakes often lead to delightful discoveries. Always taste as you go and let your creativity shine!
FAQs and Troubleshooting
How do I make sure my zucchini isn’t soggy?
Great question! One key is to slice your zucchini evenly and not overcrowd the baking sheet. And don’t forget to preheat your oven well!
Can I make this dish ahead of time?
Absolutely! You can prep the zucchini and seasonings a few hours ahead, and store them in the fridge until you’re ready to roast. Just double-check your cook time—cold zucchini may require a bit longer.
What if I don’t have Parmesan cheese?
No problem! You can use any hard cheese you have on hand, like aged Gouda or Pecorino. If dairy is an issue, try using a vegan alternative or nutritional yeast.
Why is my zucchini mushy?
If your zucchini is mushy, it may be overcooked or the zucchinis were too large or too ripe. Aim for firm, fresh zucchinis, and always keep an eye on them as they roast.
Nutritional Info
While I always encourage enjoying food in moderation, here’s a rough estimate for a serving of our Irresistibly Crunchy Garlic Parmesan Roasted Zucchini (based on 4 servings):
- Calories: 150
- Protein: 5g
- Fat: 10g
- Carbohydrates: 8g
- Fiber: 2g
Remember, nutritional values can vary based on ingredient brands and preparation methods!
Conclusion
There you have it—Irresistibly Crunchy Garlic Parmesan Roasted Zucchini that will make you a veggie lover for life! Remember, cooking is about enjoying the journey as much as it is about the destination. Share this dish with your friends and family, and let the flavors tell your kitchen’s story.
I hope this recipe brings you joy, flavor, and some lovely kitchen memories. Now, get your hands dirty, savor every moment, and let’s celebrate the art of cooking together!
Happy cooking, and see you next time at Ivory Apron!
PrintIrresistibly Crunchy Garlic Parmesan Roasted Zucchini
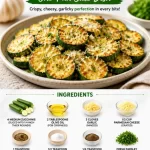
Crispy, cheesy, and utterly delightful roasted zucchini infused with garlic and Parmesan.
- Prep Time: 10 minutes
- Cook Time: 25 minutes
- Total Time: 35 minutes
- Yield: 4 servings 1x
- Category: Side Dish
- Method: Roasting
- Cuisine: Italian
- Diet: Vegetarian
Ingredients
- 4 medium zucchinis, sliced into 1/4-inch thick rounds
- 2 tablespoons olive oil
- 3 cloves garlic, minced
- 1/2 cup Parmesan cheese, grated
- 1 teaspoon Italian seasoning
- 1/2 teaspoon salt
- 1/4 teaspoon black pepper
- Fresh parsley, chopped for garnish
Instructions
- Preheat the oven to 425°F (220°C).
- Prepare a rimmed baking sheet lined with parchment paper.
- Wash the zucchinis under cold water, then slice them into 1/4-inch thick rounds.
- Toss the sliced zucchini with olive oil in a large mixing bowl.
- Add minced garlic, Italian seasoning, salt, and black pepper to the zucchini and toss again.
- Spread the seasoned zucchini rounds in a single layer on the baking sheet.
- Sprinkle grated Parmesan cheese generously over the top.
- Roast in the preheated oven for about 20-25 minutes, stirring halfway.
- Check for crispiness and a slight browning.
- Garnish with fresh parsley before serving.
Notes
For added flavor, drizzle with balsamic glaze or lemon juice before serving. Avoid overcrowding the baking sheet to prevent steaming.
Nutrition
- Serving Size: 1 serving
- Calories: 150
- Sugar: 2g
- Sodium: 400mg
- Fat: 10g
- Saturated Fat: 3g
- Unsaturated Fat: 7g
- Trans Fat: 0g
- Carbohydrates: 8g
- Fiber: 2g
- Protein: 5g
- Cholesterol: 15mg
Keywords: zucchini, roasted vegetables, garlic parmesan, side dish