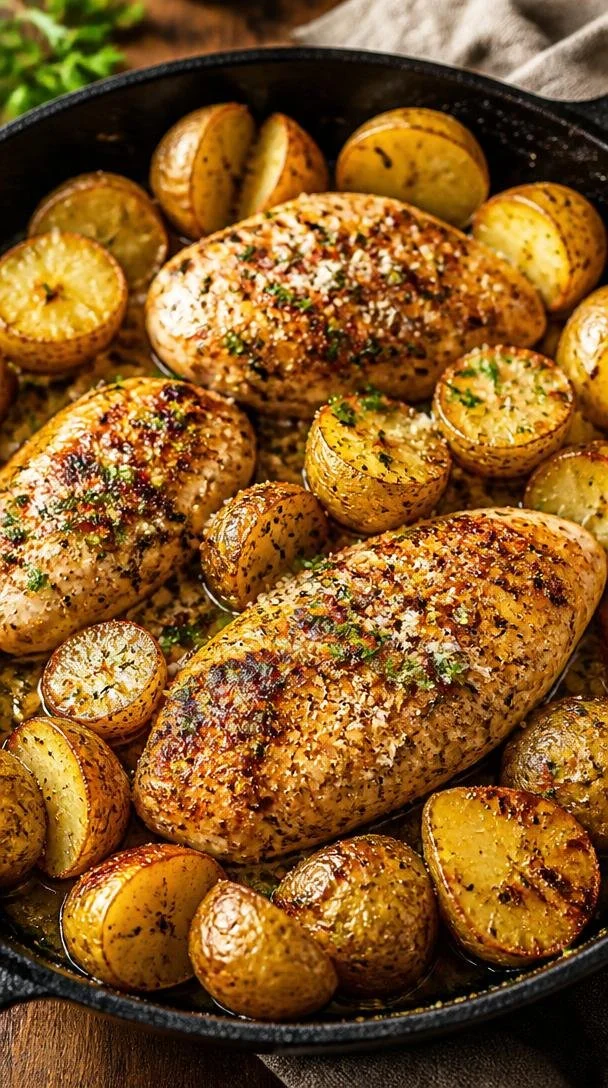
Garlic Parmesan Chicken and Potatoes
Garlic Parmesan Chicken and Potatoes: A Timeless Comfort
Hello, fellow food lovers! Today, I am beyond thrilled to share one of my all-time favorite comfort dishes: Garlic Parmesan Chicken and Potatoes. This dish is everything you crave—crispy, cheesy, and oh-so-satisfying. It’s the kind of meal that effortlessly brings warmth to the table, and it’s perfect for weeknights or special occasions alike. With just the right balance of garlic and creamy parmesan, this dish will have your loved ones asking for seconds!
There’s something really special about gathering around a warm meal with friends or family. It’s that magical moment where conversations flow, laughter fills the air, and everyone feels at home. Garlic Parmesan Chicken and Potatoes is one of those meals that never fails to spark joy. Just imagine the aroma wafting through your kitchen as the garlic and herbs dance together in harmony. Ah, bliss!
So grab your apron, and let’s dive into this delightful recipe that combines ease, elegance, and oh-so-delicious flavors. Whether you’re cooking for your family or impressing guests, this dish is sure to shine!
A Special Memory in the Kitchen
Looking back, I can’t help but smile at the memories I have of my grandmother bustling around her kitchen, filling the air with the rich aroma of garlic and rosemary. She had a knack for turning simple ingredients into something extraordinary. Garlic Parmesan Chicken and Potatoes reminds me of those cherished Sundays spent in her kitchen, where the whole family gathered around a big table, eagerly waiting for the feast to begin.
One particular Sunday, she decided to try her hand at turning her classic chicken dish into something special for a family gathering. With a few tweaks here and there—more garlic, an extra sprinkle of cheese, and her unparalleled love—the dish became an instant hit! Everyone raved about it, and the laughter that filled the room was the perfect accompaniment to that delicious meal. Now, any time I make Garlic Parmesan Chicken and Potatoes, I can’t help but feel like I’m channeling my grandmother’s spirit—it’s comfort food that tells a story.
Ingredients
Here’s what you’ll need for this delightful dish:
-
1 ½ lbs boneless (skinless) chicken breasts (about 3–4 pieces)
Juicy and lean, these chicken breasts are the perfect canvas for all the flavors to shine. If you’re looking for a heartier option, feel free to swap them out for skin-on chicken thighs—just be sure to adjust cooking time accordingly! -
1 ½ lbs baby potatoes (halved or quartered if large)
These little gems are just the right size for roasting and have a lovely creaminess. If you can’t find baby potatoes, regular potatoes will do just fine; just cut them into similar-sized pieces for even cooking. -
3 tbsp olive oil (divided)
A must-have in any kitchen! The olive oil not only helps to roast the chicken and potatoes but also provides a subtle flavor. If you prefer, avocado oil is an excellent alternative for its high smoke point. -
4 cloves garlic (minced)
Ah, garlic—the star of the show! It imparts a robust flavor that really elevates the dish. If you’re feeling adventurous, try roasting the garlic first for a sweeter, milder taste! -
1 tsp Italian seasoning
This delightful blend brings a bit of the Italian countryside right to your kitchen! If you don’t have Italian seasoning, a combination of dried oregano, basil, and thyme works beautifully too. -
½ tsp paprika
Paprika adds not just a hint of color, but also a warm, smoky flavor. For a spicier kick, don’t hesitate to use smoked paprika or add a pinch of cayenne pepper! -
½ tsp salt (more to taste)
Salt enhances every flavor; however, adjust to your preference, especially if you’re using parmesan cheese, which can already be salty. -
½ tsp black pepper
Freshly ground black pepper adds a lovely warmth to the dish. Don’t skimp on it! -
½ cup grated Parmesan cheese
This cheese brings that creamy, umami flavor that pairs so beautifully with the garlic and chicken. If you’re looking for a non-dairy version, consider nutritional yeast for a cheesy flavor without the dairy! -
2 tbsp fresh parsley (chopped, for garnish)
A sprinkle of fresh parsley adds a pop of color and freshness. You could also use fresh thyme or basil for a delightful twist in flavor! -
2 tbsp unsalted butter (melted)
Butter elevates the richness of the dish and helps the garlic and herbs cling beautifully to the chicken and potatoes. If you’re avoiding dairy, feel free to substitute with olive oil or a plant-based butter.
Step-by-Step Instructions
Now, let’s get our hands a little messy and cook up this wonderful dish together!
1. Preheat the Oven
Start by preheating your oven to 400°F (200°C). A hot oven not only helps to crisp up the chicken and potatoes but also seals in all those delicious flavors.
2. Prepare Your Baking Dish
Grab a large baking dish (or a sheet pan works great too!) and drizzle 1 tablespoon of olive oil across the bottom. This will create a non-stick base for your chicken and potatoes while adding extra flavor right from the start.
3. Season the Chicken
In a small bowl, whisk together the remaining olive oil, minced garlic, Italian seasoning, paprika, salt, and black pepper. This fragrant mixture will coat your chicken beautifully! Take your chicken breasts and season them generously with the marinade, making sure to coat all sides. If you have time, let them marinate for about 15–30 minutes to really enhance those flavors!
4. Prep the Potatoes
While your chicken is soaking up the flavors, it’s time to prep the baby potatoes! Halve or quarter them, depending on their size. Add the potatoes to the baking dish and pour the remaining marinade over them. Give everything a good toss until the potatoes are well-coated. You can use your hands for this—nothing beats the old-fashioned way of getting in there!
5. Add to the Oven
Place the chicken on top of the potatoes in the baking dish. This allows the chicken juices to drip down and flavor the potatoes as they cook. Slide the baking dish into the preheated oven and let it roast for about 30-35 minutes. The chicken should reach an internal temperature of 165°F (74°C), and the potatoes should be fork-tender and beautifully browned.
6. Cheese Time!
Once your chicken and potatoes are done roasting, pull them out of the oven and sprinkle the grated Parmesan cheese evenly over the chicken and potatoes. Switch your oven to broil and pop them back in for 2–3 more minutes, just until the cheese is golden and bubbly. Keep a close watch during this time so it doesn’t burn!
7. The Finishing Touch
Once the cheese is perfectly melted, drizzle the melted butter over the dish for that additional richness and shine. Finally, garnish with freshly chopped parsley for a burst of color and flavor. Step back and admire your creation—it’s about to impress everyone!
Serving Suggestions
To serve, dish out generous portions of the Garlic Parmesan Chicken alongside the potatoes, making sure to include that browned, cheesy goodness on top. For a lovely presentation, you can serve this dish on a large platter, atop a bed of fresh arugula or lemon-dressed greens for extra freshness. Pair with a light white wine, and you’re ready for a fabulous night in!
Recipe Variations
Feeling adventurous? Here are some fun twists you can put on this classic dish:
-
Add Veggies: Toss in seasonal vegetables like bell peppers, asparagus, or zucchini alongside the potatoes for a colorful medley.
-
Spicy Kick: Add a pinch of crushed red pepper flakes or a dash of hot sauce to the marinade for a bit of heat.
-
Herbed Butter: Mix fresh herbs into softened butter and baste the chicken with it before serving for an extra punch of flavor.
-
Creamy Spin: For an indulgent twist, add a splash of cream or a dollop of sour cream to the potatoes before serving.
-
Lemon Zest: Incorporate lemon zest in the marinade for a bright, fresh flavor that dances on the palate!
Chef’s Notes
Every time I make this dish, I’m reminded of how cooking can be both simple and sophisticated. It’s all about layering flavors and using quality ingredients. One of my favorite things about Garlic Parmesan Chicken and Potatoes is that it’s incredibly versatile—you can easily adapt it to suit any season or occasion!
I once had an unexpected kitchen mishap while preparing this dish, where I mistook paprika for cinnamon. The resulting flavor was…interesting, to say the least! Thankfully, my guests were kind and didn’t mention it, allowing me to laugh about it afterward and learn to always double-check my spices!
FAQs and Troubleshooting
1. What if my chicken isn’t cooking evenly?
Ensure your pieces are of similar size for even cooking. Using a meat thermometer will help you avoid undercooked chicken!
2. How can I make it ahead of time?
You can marinate the chicken and prepare the potatoes in advance. Just cover and refrigerate until you’re ready to bake—perfect for meal prep!
3. Why are my potatoes not getting crispy?
Make sure not to overcrowd the baking dish. If the potatoes are too close together, they’ll steam rather than roast. Ensure they get enough space to turn golden brown!
4. Can I freeze leftovers?
Absolutely! Store any leftovers in an airtight container. They can be frozen for up to two months. To reheat, simply bake in a preheated oven until heated through.
Nutritional Info
While I recommend enjoying this dish in moderation, here’s a quick glance at the estimated nutritional breakdown per serving (based on four servings):
- Calories: 450
- Protein: 42g
- Total Fat: 24g
- Saturated Fat: 6g
- Carbohydrates: 18g
- Dietary Fiber: 3g
- Sugars: 1g
There you have it! Your very own Garlic Parmesan Chicken and Potatoes is ready to impress. Remember, it’s not just about the food; it’s about the moments created around it. Enjoy cooking, and happy gathering! 🥂
PrintGarlic Parmesan Chicken and Potatoes

A comforting dish featuring crispy, cheesy garlic parmesan chicken served with tender baby potatoes.
- Prep Time: 15 minutes
- Cook Time: 35 minutes
- Total Time: 50 minutes
- Yield: 4 servings 1x
- Category: Main Course
- Method: Baking
- Cuisine: Italian
- Diet: None
Ingredients
- 1 ½ lbs boneless (skinless) chicken breasts (about 3–4 pieces)
- 1 ½ lbs baby potatoes (halved)
- 3 tbsp olive oil (divided)
- 4 cloves garlic (minced)
- 1 tsp Italian seasoning
- ½ tsp paprika
- ½ tsp salt (more to taste)
- ½ tsp black pepper
- ½ cup grated Parmesan cheese
- 2 tbsp fresh parsley (chopped, for garnish)
- 2 tbsp unsalted butter (melted)
Instructions
- Preheat the oven to 400°F (200°C).
- Prepare a large baking dish by drizzling 1 tablespoon of olive oil across the bottom.
- In a small bowl, whisk together the remaining olive oil, minced garlic, Italian seasoning, paprika, salt, and black pepper. Coat the chicken with this marinade.
- Halve or quarter the baby potatoes and add them to the baking dish. Pour the remaining marinade over them and toss well.
- Place the chicken on top of the potatoes, then roast in the oven for about 30-35 minutes.
- Once cooked, sprinkle grated Parmesan cheese over the chicken and potatoes and broil for 2-3 minutes until golden.
- Drizzle melted butter over the dish and garnish with fresh parsley.
Notes
For added flavor, consider including seasonal vegetables or spices. This dish can be prepared ahead of time by marinating the chicken and preparing the potatoes in advance.
Nutrition
- Serving Size: 1 serving
- Calories: 450
- Sugar: 1g
- Sodium: 500mg
- Fat: 24g
- Saturated Fat: 6g
- Unsaturated Fat: 14g
- Trans Fat: 0g
- Carbohydrates: 18g
- Fiber: 3g
- Protein: 42g
- Cholesterol: 90mg
Keywords: Garlic, Parmesan, Chicken, Potatoes, Comfort Food, Italian
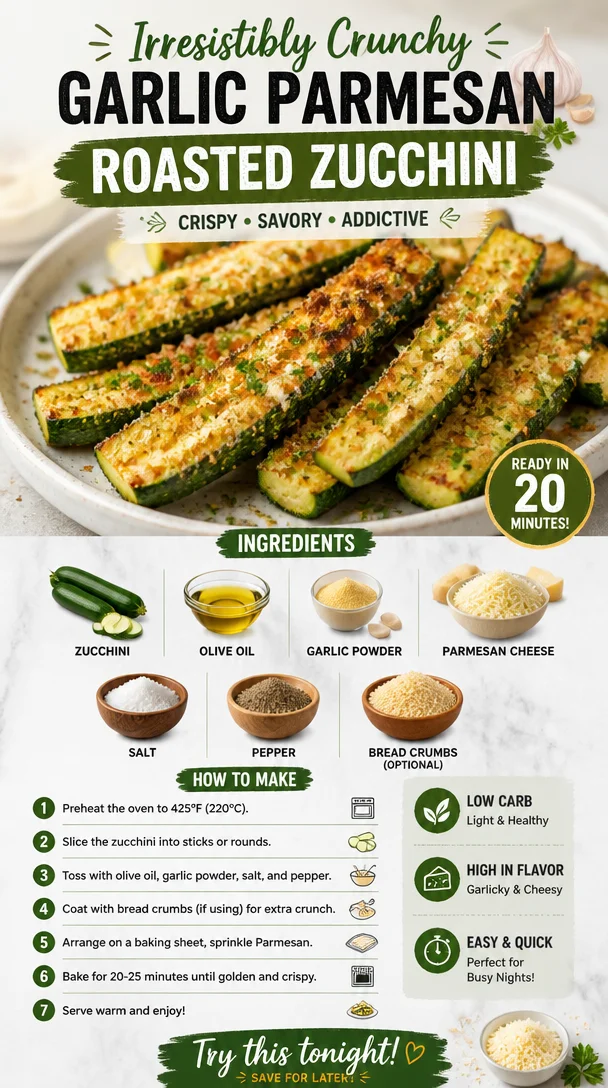
Irresistibly Crunchy Garlic Parmesan Roasted Zucchini
Irresistibly Crunchy Garlic Parmesan Roasted Zucchini
Hello dear friends! If you’re like me and love to whip up simple yet extraordinary dishes, then today’s recipe for Irresistibly Crunchy Garlic Parmesan Roasted Zucchini is just what you need. This delightful vegetable side dish is not only easy to prepare, but it also packs a punch of flavor that elevates any meal. Zucchini, with its tender crunch, is transformed into golden bites of goodness that are perfectly seasoned and absolutely satisfying!
Introduction
Zucchini often gets a bad rap for being bland or unexciting, but I’m here to tell you that, with the right approach, it can be a showstopper at your dinner table! Imagine this: it’s a beautiful summer evening, and you’ve got friends gathered around, possibly with a glass of Chardonnay in hand. You bring out a dish of perfectly roasted zucchini, golden and crunchy, with that irresistible garlic and Parmesan aroma wafting through the air. The first bite is met with gasps of delight. What once was a humble vegetable is now a star of the show!
When preparing this dish, I want you to feel the joy and ease of cooking in your own kitchen. The best part? It’s all about transforming something simple into something fabulous! You’ll shock your guests and impress your family with just a handful of ingredients and… dare I say it? minimal effort. So, let’s get started and make some culinary magic happen with this utterly scrumptious recipe.
Personal Story
I fondly remember the summer evenings of my childhood, running through our backyard with my siblings while the sun dipped low and the air filled with the scent of freshly mowed grass and grilled food. My mom often cooked zucchini, slicing it up and tossing it on the grill with her signature garlic seasoning. It was that perfect balance of charred on the outside, yet tender on the inside, and I couldn’t get enough! Although I may have preferred dessert at the time, those roasted zucchini pieces linger in my mind as a staple of warmth and togetherness around the dinner table.
As I grew older, my love for cooking blossomed, and I rediscovered how versatile zucchini could be. I began experimenting with various seasonings and techniques, and that’s when I created this restaurant-quality dish right in my kitchen. Trust me, friends, these roasted zucchini bites will become a staple at your table just as they did at mine.
Ingredients
Here’s what you’ll need to create these delectable bites:
-
Zucchini: Opt for firm and shiny zucchini. They should be medium-sized; too big can mean a watery texture. If you’re in a pinch, yellow squash works beautifully as a substitute!
-
Olive Oil: This is your essential fat for roasting. Its fruity flavor enhances the dish while helping achieve a lovely golden color. If you’re looking for a lighter option, avocado oil is a great choice!
-
Garlic Powder: For that unmistakable garlicky flavor. If desired, fresh minced garlic can also do the trick—just use about a clove or two.
-
Parmesan Cheese: Aged and sharper in flavor, Parmesan adds a nutty richness. If you’re dairy-free, try nutritional yeast for a similar cheesy flavor without the lactose.
-
Salt: Essential for bringing out all the flavors. Feel free to experiment with flavored salts, such as garlic salt or herb-infused salts.
-
Pepper: A dash of freshly cracked black pepper adds that extra bit of warmth. Have fun with it! Try using chili flakes for a spicy kick!
-
Bread Crumbs (optional): Want extra crunch? Toss in some breadcrumbs! Use panko for a lighter, airier texture, or go for seasoned breadcrumbs for added flavor!
Step-by-Step Instructions
Now that we have our ingredients lined up, let’s get cooking! Follow these simple steps, and I promise you’ll end up with zucchini that will have everyone asking for seconds.
-
Preheat Your Oven: Set that oven to 425°F (220°C). A hot oven is essential for achieving that crispy texture we’re all after.
-
Prep the Zucchini:
- Wash your zucchini, then slice it into rounds about ½ inch thick. If you’re feeling fancy, cut them into batons for a more elegant presentation!
- Think about using slightly bigger pieces to maximize that crunchy edge!
-
Toss with Olive Oil:
- In a large mixing bowl, drizzle about 2 tablespoons of olive oil over your zucchini slices.
- Give them a good toss, ensuring every piece is coated. A quick chef’s tip: If you’re using your hands, take this moment to get a little messy! Feel that olive oil coating each slice.
-
Season Generously:
- Now, sprinkle in about 1 teaspoon of garlic powder, and season with salt and pepper to taste. Toss it again, adding more olive oil if needed to ensure everything is evenly coated.
- Pro tip: When you season, go light at first; you can always add more later!
-
Add the Parmesan:
- This is the moment you’ve been waiting for! Grab that grated Parmesan and sprinkle it generously over the zucchini. Toss to evenly coat.
- If you want that crunchy topping, add your breadcrumbs here too!
-
Spread on a Baking Sheet:
- Line a baking sheet with parchment paper for easy cleanup (and to keep those zucchini from sticking). Spread the zucchini out in a single layer—you don’t want them to steam; you want them to roast!
-
Roast to Perfection:
- Pop them in the oven and roast for about 20-25 minutes, turning them halfway through. You’re looking for a golden-brown color and a crispy texture—heavenly!
- Keep an eye on them; the last few minutes matter! Once they look deliciously crispy, they’re ready to shine.
-
Final Touches:
- Once out of the oven, let them sit for a minute or two. Feel free to sprinkle a bit more Parmesan or fresh herbs like parsley or basil over them before serving for that finishing touch!
Serving Suggestions
Serving these roasted zucchini pieces is a breeze—place them right in the center of the table! Arrange them on a beautiful platter. For an extra touch, garnish with fresh herbs and a light drizzle of olive oil or balsamic glaze for added sophistication. They make an excellent side dish to grilled meats, pasta, or even tucked into a warm pita.
Recipe Variations
Feel free to play around with this recipe! Here are a few tasty twists you can try:
-
Italian Herb Zucchini: Add Italian seasoning or fresh rosemary to the olive oil mix for an extra layer of flavor.
-
Spicy Zucchini: Toss in a pinch of cayenne pepper or chili flakes for a bit of heat.
-
Cheesy Zucchini Bake: Layer the zucchini in a baking dish with marinara sauce and mozzarella cheese for a hearty twist on baked zucchini.
-
Vegan Version: Skip the cheese and add a sprinkle of nutritional yeast for a cheesy flavor without the dairy.
-
Mediterranean Zucchini: Incorporate sundried tomatoes, olives, and feta cheese for a Mediterranean flair.
Chef’s Notes
You know, it’s funny how recipes evolve over time. This one started as a simple roasted zucchini with basic seasonings, but I couldn’t resist the allure of making it crispy and cheesy! I also had a couple of mishaps along the way—like that one time I accidentally loaded too much garlic! Let me tell you, the aroma! It was heavenly but left me with slightly vampire-repelling vibes!
Always keep experimenting and improvising; cooking is as much about creativity as it is about following a recipe. You’ll find your unique sparkle in the kitchen, just like I did!
FAQs and Troubleshooting
-
Why are my zucchini slices mushy?
Make sure to slice them evenly and don’t overcrowd the baking sheet. Roasting too many together can result in steaming rather than crispy roasting. Always give them space! -
How can I ensure even cooking?
Turn your zucchini halfway through roasting. Keeping an eye on them during the last few minutes is vital for ensuring they do not overcook! -
My zucchini didn’t crisp up, what happened?
If they didn’t brown, it could be due to too much liquid in the zucchini. Always dry your slices well after washing them and consider salting them before roasting to draw out excess moisture! -
Can I prepare zucchini ahead of time?
Absolutely! Prep your zucchini and toss it in the olive oil and seasonings a few hours in advance, storing it in the fridge. Roasting right before serving will keep them crispy!
Nutritional Info
While nutrition may vary based on specific ingredients, here’s a general breakdown per serving (not including any optional toppings):
- Calories: 120
- Protein: 6g
- Carbohydrates: 7g
- Fat: 9g
Now that you’re armed with this delicious recipe, I can’t wait for you to dive in and start creating your own culinary moments! Remember, cooking should always be fun, approachable, and above all, a way to connect with those you love around the table. Happy cooking!
PrintIrresistibly Crunchy Garlic Parmesan Roasted Zucchini
A delightful vegetable side dish featuring zucchini that is roasted to golden perfection with garlic and Parmesan.
- Prep Time: 10 minutes
- Cook Time: 25 minutes
- Total Time: 35 minutes
- Yield: 4 servings 1x
- Category: Side Dish
- Method: Roasting
- Cuisine: Italian
- Diet: Vegetarian
Ingredients
- 2 medium Zucchini, sliced into ½ inch rounds
- 2 tablespoons Olive Oil
- 1 teaspoon Garlic Powder
- ½ teaspoon Salt
- ¼ teaspoon Pepper
- ¼ cup Parmesan Cheese, grated
- ¼ cup Bread Crumbs (optional)
Instructions
- Preheat your oven to 425°F (220°C).
- Prep the zucchini by washing and slicing it into rounds.
- Toss the zucchini with olive oil in a large mixing bowl.
- Season generously with garlic powder, salt, and pepper.
- Add the grated Parmesan and breadcrumbs, if using, and toss to coat.
- Spread the zucchini on a lined baking sheet in a single layer.
- Roast for 20-25 minutes, turning halfway through, until golden brown and crispy.
- Let sit for a minute before serving, optionally garnishing with more Parmesan or fresh herbs.
Notes
For extra flavor, try adding Italian herbs or chili flakes to the seasoning.
Nutrition
- Serving Size: 1 serving
- Calories: 120
- Sugar: 2g
- Sodium: 300mg
- Fat: 9g
- Saturated Fat: 3g
- Unsaturated Fat: 5g
- Trans Fat: 0g
- Carbohydrates: 7g
- Fiber: 2g
- Protein: 6g
- Cholesterol: 10mg
Keywords: garlic, zucchini, parmesan, roasted vegetables, side dish
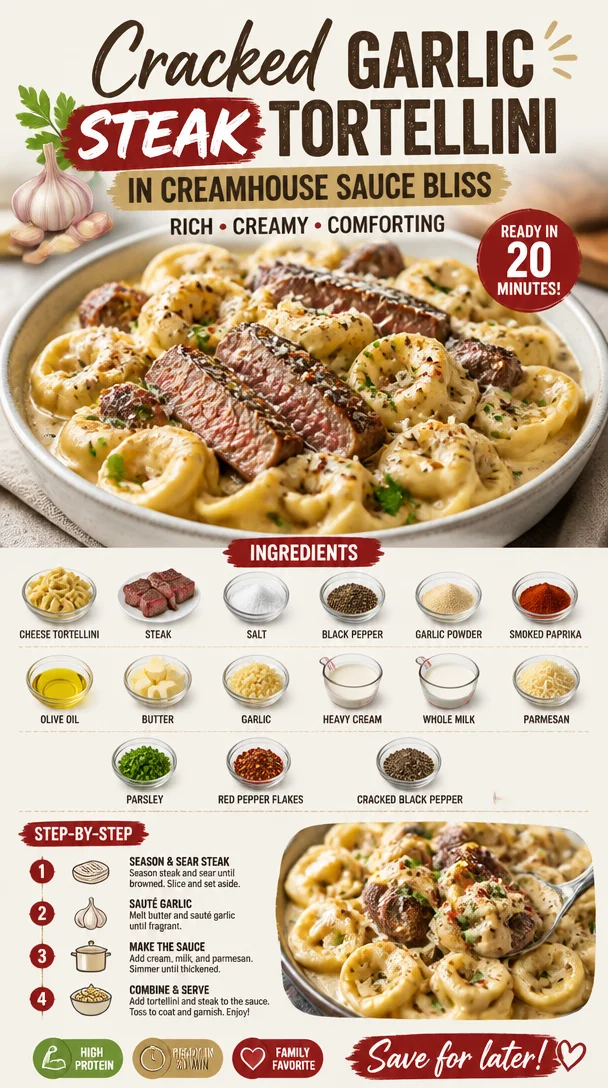
Cracked Garlic Steak Tortellini in Creamhouse Sauce Bliss
Cracked Garlic Steak Tortellini in Creamhouse Sauce Bliss
Hello, fellow food enthusiasts! Today, I’m sharing a recipe that’s not just a dish; it’s a delightful experience. Imagine tender cheese tortellini enveloped in a rich cream sauce, adorned with perfectly seared steak and a hint of garlicky goodness. Quite honestly, there’s nothing better than a plate of Cracked Garlic Steak Tortellini in Creamhouse Sauce Bliss. This dish is perfect for those cozy weeknights when you want to impress without the stress.
A Culinary Memory Worth Sharing
Let me take you back to a balmy summer evening when I decided to host a dinner party for my closest friends. It was one of those nights when everything just seemed to click. I had just returned from the farmer’s market with a bounty of fresh ingredients, and of course, I had a fresh batch of cheese tortellini. As I prepped the meal, the aroma of sizzling steak mingling with garlic hit the air, and it felt like magic. Every bite we took was met with laughter and stories, making it a celebration of good food and even better company.
That evening taught me two things: first, that simple ingredients can create extraordinary moments, and second, never underestimate the power of a good cream sauce! The star of our meal was a variation of this very recipe, bringing joy and warmth to our gathering. Today, I’d like to rekindle that joy by sharing this timeless recipe with you.
Ingredients
Here’s what you need to whip up this dish that’s all about comfort and flavor:
-
20 oz cheese tortellini
Fresh or refrigerated varieties yield the best texture and taste. You could also use frozen, but make sure to cook it according to package instructions. -
1 lb steak (sirloin or ribeye)
Sirloin is leaner; ribeye is more tender and packed with flavor. Opt for grass-fed if you’re looking for a more robust flavor! -
Salt and black pepper
Essential for seasoning the steak and balancing the dish. Kosher salt is preferred for its larger grains, but you can use table salt if that’s all you have. -
1 tsp garlic powder
While fresh garlic is ideal for the sauce, a sprinkle of garlic powder enhances the steak. -
1 tsp smoked paprika
Adds a hint of smokiness that pairs beautifully with the creamy sauce. If you want a bit more heat, try using hot paprika instead! -
2 tbsp olive oil
Essential for searing the steak, bringing in a nice crust. Can be substituted with vegetable oil for a different flavor profile, but olive oil is my go-to. -
4 tbsp butter
Creates a creamy sauce base and adds depth of flavor. For a dairy-free version, you can use vegan butter. -
5 cloves garlic, minced
Adds aromatic richness to the sauce; trust me, more garlic is never a bad idea! -
1 cup heavy cream
Contributes to that velvety smoothness we all crave. You can swap it for half-and-half for a lighter version, but it won’t be quite as dreamy. -
3/4 cup whole milk
Balances the richness of the sauce, making it easy to devour. If you’re looking for a dairy-free option, coconut milk can work, though it will change the flavor slightly. -
1 1/4 cups parmesan, shredded or freshly grated
Brings a savory, cheesy flavor that ties everything together. Always taste your parmesan — there’s nothing like that nutty goodness! -
Parsley, chopped (optional)
Brightens the dish with color and freshness. Fresh basil could be a fantastic substitute! -
Red pepper flakes (optional)
For a spicy kick that can elevate the dish. Adjust the level of heat to your liking — I like to keep it mild! -
Cracked black pepper (optional garnish)
Elevates the flavor with a little pop. Freshly cracked is always better than pre-ground!
Step-by-Step Instructions
Let’s get cooking! Grab your apron and let’s dive into the steps of creating this creamy delight:
-
Cook the Tortellini:
Start by bringing a large pot of salted water to a boil. Add the cheese tortellini, cooking it according to the package instructions. Fresh pasta usually takes about 3-5 minutes, but keep an eye on them. Once they float to the top, they’re ready! Drain and set aside, but don’t rinse— we want to keep that starchy goodness!Chef Tip: While the tortellini cooks, prep your other ingredients to keep things moving smoothly.
-
Prepare the Steak:
While the pasta is cooking, take your steak out of the fridge to let it come to room temperature for about 15 minutes. This ensures even cooking. Pat the steak dry with a paper towel, then season generously with salt, black pepper, garlic powder, and smoked paprika on both sides.Chef Insight: Searing a steak at room temperature helps achieve a beautiful crust.
-
Sear the Steak:
In a large skillet, heat 2 tablespoons of olive oil over medium-high heat. Once hot, add the steak. Let it sear without moving it around for about 3-4 minutes on one side until nicely browned. Flip and sear for another 3-4 minutes for medium-rare.Chef Hack: Use a meat thermometer—130°F is your magic number for medium-rare! Once cooked, remove the steak from the skillet and let it rest on a cutting board for at least 5 minutes before slicing.
-
Create the Sauce:
In the same skillet (don’t wipe it out; we want those delicious drippings!), melt the 4 tablespoons of butter over medium heat. Add minced garlic and sauté for about 1-2 minutes until fragrant. Pour in the heavy cream and whole milk, stirring gently to combine.Pro Tip: Scrape the bottom of the skillet to incorporate all those tasty bits into the sauce!
-
Cheese It Up:
Gradually whisk in the parmesan cheese until it melts and incorporates into a creamy sauce. Season with salt and pepper to taste. If it’s too thick, add a splash of milk until you reach your desired consistency.Chef Insight: If your sauce is clumpy, you may need to lower the heat and whisk continuously!
-
Combine Everything:
Now, add the drained tortellini to the skillet, tossing gently to coat in the creamy sauce. Slice your perfectly rested steak against the grain and lay it over the tortellini, spooning some of that lovely sauce over the top.Chef Tip: Don’t skip the slicing step! Cutting against the grain helps tenderize the steak.
Serving Suggestions
Plate up your Cracked Garlic Steak Tortellini with an artistic flair! Twirl the tortellini in the center of the plate, nestling in the slices of steak. Drizzle with extra cream sauce and a sprinkle of chopped parsley for a pop of color. Your guests will think you’re a culinary wizard!
Recipe Variations
Want to switch things up? Here are a few delicious twists:
- Add Veggies: Toss in sautéed spinach or roasted cherry tomatoes for a pop of color and nutrition.
- Make it Spicy: Add a diced jalapeño to the sauce or use spicier sausage instead of steak.
- Go Vegetarian: Substitute the steak with sautéed mushrooms or zucchini slices for a hearty yet plant-based version.
- Herbed Cream Sauce: Incorporate fresh herbs like basil or thyme to the sauce for an aromatic twist.
Chef’s Notes
This recipe has evolved over time, and it’s become one of my go-to comfort meals! The combination of steak and tortellini was inspired by those cozy Italian restaurants where you feel right at home. Plus, I’ve learned that the secret to a truly great pasta dish lies in the way you layer flavors. Remember, it doesn’t have to be perfect — just make it with love!
FAQs and Troubleshooting
1. My sauce is too thick; what do I do?
Simply whisk in a bit more milk or cream until you reach your desired consistency!
2. Can I use a different type of cheese?
Absolutely! Fontina, pecorino, or even a good quality cheddar can work. Just be sure to adjust the seasonings as needed.
3. What if I overcooked the steak?
If your steak is overcooked, slice it thinly and mix it into the sauce. The creaminess can help mask a little of the dryness!
4. Is there a way to make this dish dairy-free?
Yes! Use dairy-free butter, coconut milk or oat milk, and a dairy-free cheese alternative to create a similarly satisfying dish while keeping it dairy-free.
Nutritional Info (Optional)
Per serving, you’ll find a hearty portion of protein, healthy fats, and comfort carbs, making this a fulfilling dish! While exact nutrition can vary based on exact ingredients, this dish typically contains about 600-700 calories per serving.
There you have it, friends! Your culinary adventure awaits with this Cracked Garlic Steak Tortellini in Creamhouse Sauce Bliss. Tag me on social media when you make it; I can’t wait to see how you make it your own. Remember, no matter how simple or complex your dish, the heart of cooking lies in sharing it with others. So tie on that apron, pour a glass of your favorite drink, and let’s create something fabulous together!
PrintCracked Garlic Steak Tortellini in Creamhouse Sauce Bliss
A delightful dish featuring tender cheese tortellini enveloped in a rich cream sauce with perfectly seared steak and a hint of garlicky goodness.
- Prep Time: 15 minutes
- Cook Time: 20 minutes
- Total Time: 35 minutes
- Yield: 4 servings 1x
- Category: Main Course
- Method: Searing and Saucing
- Cuisine: Italian
- Diet: Meat
Ingredients
- 20 oz cheese tortellini
- 1 lb steak (sirloin or ribeye)
- Salt and black pepper
- 1 tsp garlic powder
- 1 tsp smoked paprika
- 2 tbsp olive oil
- 4 tbsp butter
- 5 cloves garlic, minced
- 1 cup heavy cream
- 3/4 cup whole milk
- 1 1/4 cups parmesan, shredded or freshly grated
- Parsley, chopped (optional)
- Red pepper flakes (optional)
- Cracked black pepper (optional garnish)
Instructions
- Cook the Tortellini: Start by bringing a large pot of salted water to a boil. Add the cheese tortellini, cooking it according to the package instructions. Once they float to the top, they’re ready! Drain and set aside.
- Prepare the Steak: Take your steak out of the fridge to let it come to room temperature for about 15 minutes. Pat the steak dry and season generously with salt, black pepper, garlic powder, and smoked paprika on both sides.
- Sear the Steak: In a large skillet, heat 2 tablespoons of olive oil over medium-high heat. Add the steak and let it sear without moving it for about 3-4 minutes on one side. Flip and sear for another 3-4 minutes for medium-rare. Let it rest before slicing.
- Create the Sauce: In the same skillet, melt 4 tablespoons of butter over medium heat. Add minced garlic and sauté for 1-2 minutes. Pour in the heavy cream and whole milk, stirring gently to combine.
- Cheese It Up: Gradually whisk in the parmesan cheese until melted. Season with salt and pepper to taste. If it’s too thick, add a splash of milk.
- Combine Everything: Add the drained tortellini to the skillet and toss gently to coat in the sauce. Slice the rested steak against the grain and lay it over the tortellini.
Notes
For a dairy-free version, substitute with vegan butter, coconut milk, and dairy-free cheese alternatives. Consider adding sautéed vegetables or using spicier sausage for variations.
Nutrition
- Serving Size: 1 serving
- Calories: 650
- Sugar: 3g
- Sodium: 800mg
- Fat: 35g
- Saturated Fat: 15g
- Unsaturated Fat: 15g
- Trans Fat: 0g
- Carbohydrates: 45g
- Fiber: 2g
- Protein: 35g
- Cholesterol: 90mg
Keywords: steak tortellini, cream sauce, Italian recipe, comfort food, dinner party
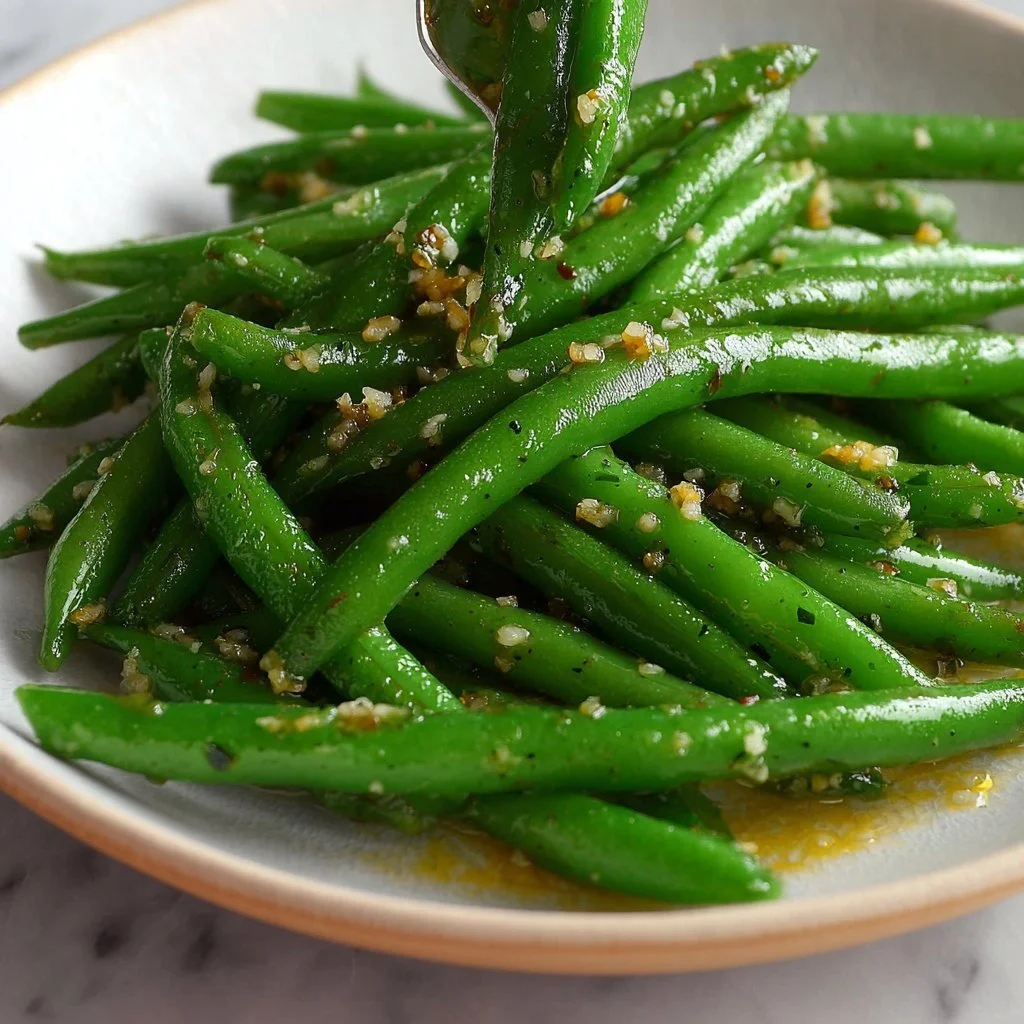
Garlic Green Beans
Garlic Green Beans: Elevate Your Side Dish Game!
Hey fellow food lovers! If there’s one thing I absolutely adore, it’s making vegetables sing on the dinner table. Today, I’m sharing a simple yet elegant side dish that’s bound to become a staple in your kitchen: Garlic Green Beans. Ah, green beans—the unsung heroes of the vegetable world! These beauties are not only nutritious but also incredibly versatile, making them a fantastic addition to any meal.
Imagine sitting at your dining table, surrounded by friends or family, with a steaming platter of vibrant, garlic-infused green beans in front of you. The aroma fills the air, and you can almost taste the love that went into preparing this dish. And trust me, it’s as easy as it is delightful! With just a handful of quality ingredients and a few simple steps, you can whip up a dish that feels both sophisticated and homey.
I was inspired to share this recipe after reminiscing about family dinners growing up, where Mom would always make green beans that were perfectly tender and bursting with flavor. She’d roast them with garlic until lightly caramelized, and the kitchen would smell heavenly! This dish brings back those comforting, nostalgic memories while adding a modern twist that I know you’ll love. So, let’s roll up those sleeves, tie on that apron, and dive right into the world of Garlic Green Beans!
Personal Story
I’ll never forget the first time I attempted to make green beans on my own. Picture this: a young Savannah, freshly out of college, excited to impress my friends with what I thought would be a remarkable dinner. I had grand plans for a three-course meal, complete with a fancy main dish and decadent dessert. But when it came to the sides, I almost defaulted to frozen peas (gasp!). Instead, I thought of those delicious garlic green beans Mom would make.
I called her up, and with a dash of self-doubt, I asked for her secret. “It’s simple, darling. Just sauté garlic in olive oil, toss in the beans, and finish with a sprinkle of salt. Trust your instincts!” Her words resonated. That night, as I heard laughter and clinking glasses around the table, I served those glorious green beans. They were a hit! That meal affirmed my belief that good cooking doesn’t have to be complicated; it’s all about loving the process and sharing moments together.
Fast forward to today, and this recipe continues to be a favorite in my kitchen! Join me as I explore this timeless dish and share tips to make it your own.
Ingredients
Let’s gather our ingredients for the Garlic Green Beans and chat about each one!
-
1 pound fresh green beans, trimmed
Fresh green beans are crisp, vibrant, and full of nutrients. Look for ones that are firm and bright green with no blemishes. If you can’t find fresh ones, frozen will work just fine! Simply thaw and pat dry before using. -
2 tablespoons olive oil
Extra virgin olive oil adds richness and a beautiful flavor. It’s my go-to, but feel free to substitute with avocado oil or even unsalted butter for a different twist! -
3 cloves garlic, minced
Ah, garlic—the star of the show! Minced garlic adds a bold flavor and a touch of sweetness when cooked. If you’re short on fresh garlic, you can use ½ teaspoon of garlic powder as a substitute, though I personally recommend fresh for the best taste. -
Salt and pepper to taste
Simple seasoning is essential. Kosher salt is my preference because it’s easy to pinch and sprinkle! Adjust the amount according to your palate; you can also experiment with flavored salts for an extra kick. -
Lemon wedges (optional, for serving)
A squeeze of fresh lemon juice elevates the flavor profile and adds brightness to the dish. Don’t skip this if you love citrus zest!
Step-by-Step Instructions
Now that we’ve got our ingredients, let’s dive into the cooking process! Here’s how to make Garlic Green Beans that will impress everyone around your table.
Step 1: Prep Your Ingredients
Start by washing your green beans under cold water. Trim the ends by snapping them off or cutting with a knife. Fresh, crisp beans are ideal! Mince the garlic as finely as you can; this allows it to infuse the oil beautifully.
Step 2: Heat the Olive Oil
In a large skillet or sauté pan, heat the olive oil over medium heat. You want the oil to shimmer but not smoke. This is a great time to add a pinch of salt to the oil, which helps flavor the beans while they cook.
Step 3: Sauté the Garlic
Once your oil is ready, add the minced garlic to the pan. Keep an eye on it, as garlic can go from perfectly golden to burnt in a heartbeat! Stir the garlic frequently for about 30 seconds or until it becomes fragrant and lightly golden. This is the moment where your kitchen will start smelling heavenly—trust me!
Step 4: Add the Green Beans
Now, it’s time to increase the flavor game! Add the trimmed green beans to the pan with the sautéed garlic. Toss them around gently in the oil, ensuring they get a good coating. You want to stir-fry the beans for about 5-7 minutes until they’re bright green and tender-crisp. If you prefer them softer, cook them a few minutes longer—just don’t let them get mushy!
Step 5: Season to Taste
Once your green beans are cooked to perfection, season them with salt and pepper. Give them a good toss, and taste to see if they need any more seasoning. If you’re feeling adventurous, consider adding a pinch of red pepper flakes for some heat or a sprinkle of parmesan cheese if you’re looking for that creamy finish!
Step 6: Serve and Enjoy
Transfer your beautifully sautéed garlic green beans to a serving dish. If you’re using lemon, cut a few wedges to serve on the side. A little drizzle of lemon juice adds that final touch of brightness. Gather your family around the table to share in the deliciousness you just created!
Serving Suggestions
For an elegant touch, I recommend plating the Garlic Green Beans on a large white platter, creating a lush centerpiece on your table. Drizzle with a touch of olive oil and add a few fresh herb sprigs—like parsley or thyme—on top for a pop of color. Not only does it look fabulous, but it also brings freshness to the dish. Serve alongside your favorite protein (think roasted chicken, grilled fish, or succulent steak) for a full meal experience.
Recipe Variations
-
Balsamic-Glazed Garlic Green Beans
Drizzle balsamic vinegar over the green beans during the last minute of cooking for a tangy twist! -
Asian-Inspired Garlic Green Beans
Add a splash of soy sauce and a sprinkle of sesame seeds to take your dish on a flavor adventure. -
Garlic Green Beans with Nuts
Toss in toasted almonds or pecans just before serving for a delightful crunch. -
Spicy Garlic Green Beans
Add red pepper flakes while sautéing for a kick, or toss in a diced chili pepper with the garlic. -
Herb-Infused Garlic Green Beans
Experiment with fresh herbs like thyme, dill, or basil to add layers of fresh flavor.
Chef’s Notes
Garlic Green Beans have come a long way since my college days! I’ve played around with countless variations, from adding crispy bacon bits to using different oils for deeper flavor. One time, I served these at a potluck, and they disappeared within minutes! I learned quickly that even the simplest recipes can become crowd-pleasers when made with love and quality ingredients.
Don’t hesitate to adapt this recipe as you find your cooking style. Maybe you’ve just harvested herbs from your garden or have a special seasoning blend you love—experiment! You’d be surprised at how a small change can transform the dish.
FAQs and Troubleshooting
Q: Can I use frozen green beans?
A: Absolutely! Just make sure to thaw and pat them dry before sautéing. Frozen beans may require a few extra minutes in the pan.
Q: How can I prevent the garlic from burning?
A: Keep the heat at medium and watch it closely. Stirring constantly will help prevent burning. If you’re worried, you can add the garlic a bit later into the cooking process!
Q: What can I do if my beans are too tough?
A: If they’re still firm after sautéing, you can add a splash of water to the pan, cover it, and let them steam for 2-3 minutes for tenderness.
Q: Can I prepare these ahead of time?
A: Yes! You can blanch the beans ahead of time and then simply sauté them with garlic when you’re ready to serve. Just keep in mind that fresh is always best for flavor.
Nutritional Info
(per serving, based on a 4-serving recipe)
- Calories: 120
- Protein: 3g
- Fat: 9g
- Carbohydrates: 9g
- Fiber: 4g
Cooking Garlic Green Beans is not just about the food; it’s about the joy of gathering, laughing, and creating memories with loved ones. I hope this recipe brings that same warmth to your kitchen as it has to mine. Happy cooking, and remember: every meal is an opportunity to share love! 🥰
Thanks for stopping by Ivory Apron, and don’t forget to sprinkle in your own flair when trying this recipe! Cheers to delicious, heartfelt meals! 🍽️
PrintGarlic Green Beans
A simple yet elegant side dish featuring tender, garlic-infused green beans that’s perfect for family dinners.
- Prep Time: 10 minutes
- Cook Time: 10 minutes
- Total Time: 20 minutes
- Yield: 4 servings 1x
- Category: Side Dish
- Method: Sautéing
- Cuisine: American
- Diet: Vegetarian
Ingredients
- 1 pound fresh green beans, trimmed
- 2 tablespoons olive oil
- 3 cloves garlic, minced
- Salt and pepper to taste
- Lemon wedges (optional, for serving)
Instructions
- Prep your ingredients by washing the green beans and trimming the ends.
- Heat the olive oil in a large skillet over medium heat.
- Sauté the minced garlic in the oil until fragrant and lightly golden.
- Add the trimmed green beans to the pan and toss to coat them in the garlic oil.
- Season with salt and pepper, adjusting to taste.
- Serve the green beans warm, with lemon wedges on the side.
Notes
For added flavor, consider adding red pepper flakes or parmesan cheese when seasoning. You can also experiment with various herbs.
Nutrition
- Serving Size: 1 serving
- Calories: 120
- Sugar: 2g
- Sodium: 200mg
- Fat: 9g
- Saturated Fat: 1g
- Unsaturated Fat: 8g
- Trans Fat: 0g
- Carbohydrates: 9g
- Fiber: 4g
- Protein: 3g
- Cholesterol: 0mg
Keywords: garlic green beans, side dish, vegetarian, easy recipe, healthy cooking