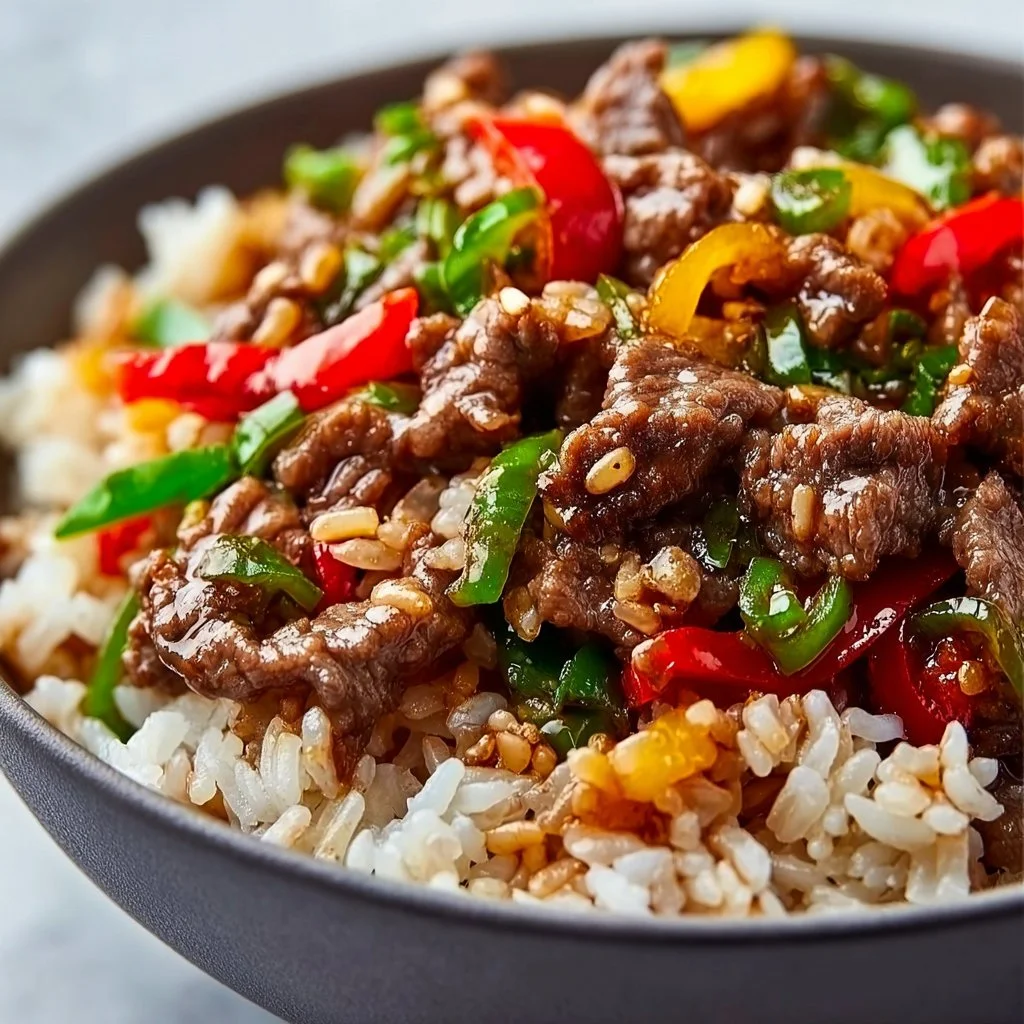
Beef and Pepper Rice Bowl
# Savory Beef and Pepper Rice Bowl: A Heartwarming Family Classic

## Introduction

Welcome back, culinary friends! Today, we’re diving into one of my all-time favorite comfort dishes: the Beef and Pepper Rice Bowl. This recipe is all about bringing together flavors that make your taste buds dance while keeping things simple. Trust me, this colorful, hearty dish is perfect for any night of the week, especially when you’re craving something that feels like a warm hug.

What I love most about this dish is how it effortlessly combines textures and tastes. The ground beef adds a rich, satisfying heartiness, while the bell peppers and jalapeño bring a burst of freshness and a hint of spicy zing. And don’t get me started on the fluffy rice—it serves as the ideal canvas for all those vibrant flavors.

This recipe is not just about feeding the belly; it’s about feeding the soul. I distinctly remember the first time I made this dish for a gathering at my home. Everyone was raving about how delicious it was, and I felt an overwhelming sense of joy knowing I created something everyone loved. So let’s get cooking and bring that same joy to your table!

## Personal Story

As I sit here reminiscing, I can clearly picture the vibrant kitchen of my childhood home. My mom would whip up a wonderful Beef and Pepper dish that would fill the entire house with a mouthwatering aroma. Growing up, it was a staple on our dinner table. The sounds of sizzling beef and chopping veggies would spark our family gatherings—the essence of togetherness that I still cherish.

After school, I often found myself lingering in the kitchen, helping her chop bell peppers while she shared the stories of her day. Those moments made me appreciate not just the meal but also the love that went into it. Years later, when I moved into my first apartment, I knew I had to recreate this dish. With every bite, it felt like I was wrapped in the comfort of home. Fast forward to now, and I’m thrilled to be sharing this hearty Beef and Pepper Rice Bowl with you, so you can create similar memories with your loved ones!

## Ingredients

Before we jump into the cooking, let’s gather our ingredients. Here’s what you’ll need for the Beef and Pepper Rice Bowl:

- **1 lb ground beef**
  - *Chef Insight:* Feel free to substitute with ground turkey or chicken for a leaner option or go vegetarian with lentils!

- **1 onion, diced**
  - *Substitution Tip:* Any onion will do, but yellow onions offer a balanced sweetness that complements the dish beautifully.

- **1 bell pepper, diced**
  - *Quick Tip:* Use any color you like—red, yellow, or green—to add a pop of color and different sweetness levels.

- **1 jalapeño, diced**
  - *Substitution Tips:* If you prefer a milder flavor, remove the seeds and membranes, or swap it out for a chopped poblano pepper.

- **3 cups cooked rice**
  - *Chef Insight:* Leftover rice works like a charm! You can also use quinoa or cauliflower rice for a gluten-free or lower-carb option.

- **2 tablespoons soy sauce**
  - *Quick Tip:* Low-sodium soy sauce is a great option if you’re watching your salt intake. For a gluten-free version, use tamari.

- **1 teaspoon garlic powder**
  - *Chef Insight:* Fresh garlic lends a brighter taste if you have it; just use 2-3 minced cloves instead!

- **1 teaspoon ground black pepper**
  - *Quick Tip:* Freshly cracked pepper elevates the flavor, but powdered works just fine if that’s all you have on hand.

- **1 tablespoon olive oil**
  - *Chef Insight:* Feel free to use avocado, canola, or even sesame oil for a different flavor twist.

## Step-by-Step Instructions

Now that we’ve got everything prepped, let’s get cooking! Follow these detailed steps to create your delectable Beef and Pepper Rice Bowl.

1. **Heat the Oil:**
   - In a large skillet over medium heat, drizzle in the olive oil. Let it warm for about 1 minute. This helps to create a nice sear on your beef and brings out its flavor.

2. **Cook the Onion:**
   - Add the diced onion to the skillet. Sauté for about 3-4 minutes until it becomes translucent and fragrant. Pro tip: For extra flavor, throw in a pinch of salt while cooking the onion.

3. **Brown the Beef:**
   - Next, add in the ground beef. Use a spatula to break it apart as it cooks. Continue cooking for about 5-7 minutes until it’s fully browned. Make sure to drain off excess fat, but don’t worry about getting every drop! That little bit of grease adds flavor.

4. **Add the Peppers:**
   - Once the beef is browned, stir in the diced bell pepper and jalapeño. Cook for about 3-4 minutes until they soften up. The colors will start blending, and your kitchen will smell absolutely divine!

5. **Seasoning Time:**
   - Sprinkle garlic powder and ground black pepper over the mixture. Pour in the soy sauce—this is where the magic happens! Stir everything thoroughly to ensure even flavor distribution. Let it cook together for another 2-3 minutes so the rice can soak up those delicious juices.

6. **Mix in the Rice:**
   - Gently fold in your cooked rice. I like to use a spatula to carefully mix it—this keeps the rice from breaking apart too much. Cook for an additional 2-3 minutes until everything is heated through.

7. **Final Taste Test:**
   - Before serving, take a little taste! If it needs a little more oomph, go ahead and sprinkle in more soy sauce or a dash of salt.

## Serving Suggestions

Now that your Beef and Pepper Rice Bowl is ready, let’s talk presentation! To serve, scoop generous portions into bowls. For an extra touch, I love to garnish with fresh cilantro, sliced green onions, or a drizzle of tangy lime juice on top. A squeeze of fresh lime brightens the dish and elevates those flavors even more!

## Recipe Variations

Get creative with this Beef and Pepper Rice Bowl! Here are some fun twists you can try:

- **Spicy Sriracha Kick:** Drizzle a little Sriracha on top for an extra punch.
- **Tex-Mex Version:** Swap out the bell peppers for corn and black beans, and serve with avocado slices.
- **Curry Flavor:** Stir in a tablespoon of curry powder for a warm, exotic twist.
- **Low-carb Option:** Substitute rice with cauliflower rice, and load it up with extra veggies.
- **More Veggies:** Add in zucchini or carrots for added nutrition and color.

## Chef’s Notes

What I love about this recipe is how it’s evolved over time. Growing up, my mom often added her own twists, and I’ve carried that tradition forward. Sometimes, if I have it on hand, I toss in a handful of spinach or kale for that pop of green!

Funny enough, one time, I completely forgot to buy bell peppers, so I had to use up some leftover frozen mixed veggies. It was a hit! So don’t be afraid to switch things up or use what you already have. Let your creativity flow!

## FAQs and Troubleshooting

**1. My dish came out too salty. What can I do?**
Don’t worry! Add a little more cooked rice or a splash of water to dilute the saltiness. It helps balance the flavors.

**2. Can I make this dish ahead of time?**
Absolutely! It stores well in the fridge for up to 3 days. Reheat on the stovetop or in the microwave before serving.

**3. What can I substitute for ground beef?**
Aside from ground turkey or chicken, consider using plant-based meat alternatives or lentils for a vegetarian option.

**4. My rice turned mushy. What happened?**
Mushy rice can result from overcooking. For next time, ensure your rice is cooked al dente before mixing it into the dish. If you have leftover rice, make sure it’s cooled properly before using it.

## Nutritional Info

While I encourage you to enjoy this comforting dish, I understand many of you can appreciate nutritional details too! Typically, this hearty bowl offers:

- **Calories:** Approximately 450 per serving
- **Protein:** About 25g
- **Carbohydrates:** Around 45g
- **Fat:** Roughly 15g

Feel free to adjust the ingredients and portion sizes according to your dietary needs!

---

So there you have it, my friends! A Beef and Pepper Rice Bowl that’s not only delicious but also filled with love and memories. I hope you enjoy making this recipe as much as I do. So, tie on your apron, gather your loved ones, and let’s make magic happen in our kitchens. Happy cooking!
Savory Beef and Pepper Rice Bowl

A heartwarming Beef and Pepper Rice Bowl that combines ground beef, vibrant vegetables, and fluffy rice for a comforting family meal.
- Prep Time: 10 minutes
- Cook Time: 20 minutes
- Total Time: 30 minutes
- Yield: 4 servings 1x
- Category: Main Course
- Method: Sautéing
- Cuisine: American
- Diet: None
Ingredients
- 1 lb ground beef
- 1 onion, diced
- 1 bell pepper, diced
- 1 jalapeño, diced
- 3 cups cooked rice
- 2 tablespoons soy sauce
- 1 teaspoon garlic powder
- 1 teaspoon ground black pepper
- 1 tablespoon olive oil
Instructions
- Heat the oil in a large skillet over medium heat, drizzling in the olive oil and letting it warm for about 1 minute.
- Cook the onion by adding it to the skillet and sauté for about 3-4 minutes until translucent and fragrant.
- Brown the beef by adding in the ground beef, breaking it apart as it cooks, and continue cooking for about 5-7 minutes until fully browned.
- Add the diced bell pepper and jalapeño, cooking for about 3-4 minutes until softened.
- Season by sprinkling garlic powder and black pepper over the mixture, pouring in the soy sauce, and letting it cook together for another 2-3 minutes.
- Mix in the cooked rice gently, cooking for an additional 2-3 minutes until everything is heated through.
- Taste before serving and add more soy sauce or salt if needed.
Notes
Garnish with fresh cilantro, sliced green onions, or a drizzle of lime juice for extra flavor.
Nutrition
- Serving Size: 1 serving
- Calories: 450
- Sugar: 5g
- Sodium: 800mg
- Fat: 15g
- Saturated Fat: 5g
- Unsaturated Fat: 7g
- Trans Fat: 0g
- Carbohydrates: 45g
- Fiber: 3g
- Protein: 25g
- Cholesterol: 70mg
Keywords: beef, rice bowl, comfort food, dinner recipe, family meal

Creamy Spinach and Mushroom Lasagna
Creamy Spinach and Mushroom Lasagna: A Culinary Journey
Welcome back to the kitchen, my fellow foodies! Today, we’re embarking on a delicious adventure with a dish that has a wealth of flavor and tradition: Creamy Spinach and Mushroom Lasagna. This comforting dish is not just a favorite for vegetarians; it’s a vibrant centerpiece for family dinners, casual gatherings, or even a cozy night in with a loved one.
Lasagna often conjures memories of family, warmth, and those heavenly layers of ricotta, cheese, and sauce bubbling away in the oven. While it can seem a bit intimidating, I promise you that with the right approach and a sprinkle of care, it can be as simple as pie (or should I say pasta?). This Creamy Spinach and Mushroom Lasagna is all about layering in fresh, wholesome ingredients with flavors that meld together beautifully.
As we dive into this culinary creation, I want you to think of it as a canvas—each ingredient a brushstroke contributing to a masterpiece. And the best part? This dish is perfect for cozy weeknight dinners and grand celebrations alike. So grab your apron and let’s transform your kitchen into a warm, welcoming space where amazing meals come to life!
Personal Story
Growing up, Sundays were sacred in my house. The soft sounds of classical music filled the air as my mom whipped up a myriad of dishes—each more comforting than the next. It was her ritual to make homemade lasagna on Sunday afternoons. I still remember the intoxicating aroma of garlic and sautéed mushrooms, mingling with the freshness of basil, wafting through the house.
One particular Sunday stands out to me—my mom had invited a few of our family friends over. As she layered the lasagna with precision, I insisted on helping. I remember her patiently showing me how to spoon the creamy ricotta mixture between the sheets of pasta, teaching me that cooking could be both an art and a shared experience.
That day, we laughed, accidentally dropped a few bits of cheese, and made wonderful memories. The moment that cheesy, golden-brown dish made its way to the table, all the laughter and love poured into it filled our hearts. This Creamy Spinach and Mushroom Lasagna carries that nostalgia, and I hope to pass that joy of shared meals into your kitchen today!
Ingredients
Let’s gather all the necessary ingredients to create this creamy delight. Here’s what you’ll need:
-
3 Garlic cloves
Minced for a robust flavor. If you’re short on fresh garlic, garlic powder (1/4 teaspoon per clove) can work in a pinch. -
2 cups Mushrooms
Sliced—choose your favorite variety! Button mushrooms are classic, but feel free to experiment with cremini or portobello for a deeper flavor. -
3 cups Spinach, fresh
Wash and chop. Fresh spinach gives that earthy flavor and vibrant color. Frozen spinach can also work, just be sure to thaw and drain it well before using. -
3 tbsp All-purpose flour
This will help thicken your creamy sauce. You can substitute with a gluten-free flour blend if you’re keeping it gluten-free! -
1/2 tsp Nutmeg, ground
A dash of nutmeg elevates your dish with warmth. If you’re not a fan, you can leave it out without losing the essence. -
Salt and pepper to taste
Essential for seasoning. Always taste as you go! -
2 tbsp Olive oil
For sautéing. Extra virgin adds richness, but any quality olive oil will do. -
3 tbsp Butter
Enhances the creaminess of your sauce. You can replace it with more olive oil if you prefer a dairy-free version. -
3 cups Milk
The base of our creamy sauce. You can use whole, 2%, or even an alternative like almond milk, but make sure it’s unsweetened. -
2 cups Mozzarella cheese
Shredded for that perfect gooey melty layer. Feel free to mix shredded cheeses such as provolone or fontina for a twist. -
1/2 cup Parmesan cheese, grated
Provides that salty, sharp kick. Reggiano is wonderful if you want to splurge! -
1 cup Ricotta cheese
Creamy, smooth, and a must for lasagna. For a lighter option, cottage cheese can work—but blend it for a smoother texture!
Step-by-Step Instructions
-
Prep Your Ingredients: Start by mincing the garlic and slicing the mushrooms. Rinse and chop the spinach. Having all your ingredients ready will make the cooking process smooth and enjoyable.
-
Sauté the Vegetables: In a large skillet, heat the olive oil over medium heat. Add the minced garlic and sauté for about a minute until fragrant. Be careful not to burn it! Your kitchen should smell divine by now.
-
Add Mushrooms: Toss the sliced mushrooms into the skillet. Sauté them for about 4-5 minutes until they are tender and release their juices. This is where flavor starts building—you can add a pinch of salt at this stage to enhance their natural sweetness.
-
Incorporate Spinach: Gradually add the chopped spinach, stirring until it wilts—around 2-3 minutes. You might feel like it’s a mountain at first, but it cooks down beautifully. Once wilted, remove the skillet from heat and set aside.
-
Make the Creamy Sauce: In a saucepan, melt the butter over medium heat. Whisk in the flour to create a roux, stirring constantly for about 2 minutes until it’s lightly golden and bubbling.
-
Add Milk: Gradually pour in the milk, whisking continuously to prevent lumps. Cook until the sauce thickens—about 5-7 minutes. You’re looking for a creamy consistency that coats the back of a spoon.
-
Season It Up: Sprinkle in nutmeg, salt, and pepper. Give it a taste and adjust if necessary. This is your chance to make it just right.
-
Cheese It Up: Turn off the heat and stir in the ricotta cheese until creamy. Reserve a bit of mozzarella for topping later. This adds an extra layer of creaminess to our exciting layered marvel.
-
Layer the Lasagna: Preheat your oven to 375°F (190°C). In a baking dish, start by spreading a spoonful of the creamy sauce on the bottom. This helps prevent sticking. Layer cooked lasagna noodles (you can use no-boil noodles for convenience), add a portion of the spinach and mushroom mixture, followed by a spoonful of the creamy sauce, and top with mozzarella and Parmesan.
-
Repeat the Layers: Continue layering the ingredients—noodle, vegetable mixture, creamy sauce, and cheese—until you’ve used up all the fillings. End with a final layer of noodles topped with the remaining sauce and cheese.
-
Bake: Cover with foil and bake in the preheated oven for 25 minutes. Remove the foil and bake for an additional 15-20 minutes until golden and bubbly. Pro tip: watch towards the end to make sure it doesn’t brown too much!
-
Rest Before Serving: Allow the lasagna to rest for about 10 minutes before slicing—this lets everything settle and makes for cleaner slices.
Serving Suggestions
When it comes to serving this Creamy Spinach and Mushroom Lasagna, presentation is key. A simple sprinkle of freshly chopped parsley or basil on top adds a beautiful pop of color. Serve it alongside a simple arugula salad dressed with lemon vinaigrette for a refreshing contrast, or crusty garlic bread to mop up every delightful morsel. Either way, your guests will be singing your praises!
Recipe Variations
-
Add Protein: For a non-vegetarian twist, add cooked chicken or Italian sausage between the layers. Just be sure to season well!
-
Cheese Swap: Try using goat cheese or feta for a tangy twist. This elevates the flavor profile and adds a nice creaminess.
-
Herb Infusion: Add fresh herbs such as basil or thyme to the ricotta mixture for an aromatic experience.
-
Veggie Boost: Layer in more veggies like zucchini or roasted red peppers for added texture and sweetness.
-
Vegan Option: Substitute the ricotta with blended silken tofu or cashew cream, and use vegan cheese for a delicious dairy-free version.
Chef’s Notes
Let me tell you, lasagna holds a special place in my heart. The first time I attempted to make it on my own, I was a college student who could barely boil water. My attempt at a classic meat lasagna resulted in a bit of a slide-off disaster when I reached for the final layer—but boy, did I learn a lot that day! Over the years, I’ve adapted this recipe to make it my own, leaning into the kind of flavors I love.
Cooking is about evolving—and every recipe tells a story! This lasagna has transformed from the traditional meaty variant to the creamy, earthy vegetarian delight you see today.
FAQs and Troubleshooting
1. Why does my lasagna seem watery?
If your sauce is too thin, try letting it simmer a bit longer to thicken. Also, make sure any vegetables are well-drained to avoid excess moisture!
2. Can I freeze lasagna?
Absolutely! This dish freezes beautifully. Just be sure to wrap it tightly before placing it in an airtight container.
3. Can I make this ahead of time?
Yes! You can assemble it a day in advance and keep it in the fridge until you’re ready to bake it. Just make sure to cover with foil to keep it from drying out.
4. How do I know when it’s done cooking?
Look for a golden brown top and bubbling edges—that’s a sign of goodness! You can also insert a knife in the center; it should come out hot with melting cheese.
Nutritional Info
(For an approximate serving size of 1 piece, nutritional values may vary)
- Calories: 450
- Protein: 25g
- Fat: 25g
- Carbohydrates: 40g
- Fiber: 3g
Conclusion
Cooking is such a joyous, creative endeavor, and this Creamy Spinach and Mushroom Lasagna is the perfect dish to showcase that. With layers of rich cheese, hearty vegetables, and a creamy sauce, you have a meal that is as delightful to make as it is to eat. So gather your loved ones, put on some music, and enjoy the process of creating something delicious together.
Happy cooking, my friends! Let me know how your lasagna turns out!
PrintCreamy Spinach and Mushroom Lasagna

A comforting, creamy lasagna with layers of spinach, mushrooms, and rich cheeses, perfect for family dinners.
- Prep Time: 15 minutes
- Cook Time: 40 minutes
- Total Time: 55 minutes
- Yield: 6 servings 1x
- Category: Main Course
- Method: Baking
- Cuisine: Italian
- Diet: Vegetarian
Ingredients
- 3 Garlic cloves, minced
- 2 cups Mushrooms, sliced
- 3 cups Spinach, fresh, washed and chopped
- 3 tbsp All-purpose flour
- 1/2 tsp Nutmeg, ground
- Salt and pepper to taste
- 2 tbsp Olive oil
- 3 tbsp Butter
- 3 cups Milk
- 2 cups Mozzarella cheese, shredded
- 1/2 cup Parmesan cheese, grated
- 1 cup Ricotta cheese
Instructions
- Prep your ingredients: Start by mincing the garlic and slicing the mushrooms. Rinse and chop the spinach.
- Sauté the vegetables: Heat the olive oil over medium heat in a large skillet. Add the minced garlic and sauté for about a minute.
- Add mushrooms: Toss the sliced mushrooms into the skillet and sauté for about 4-5 minutes.
- Incorporate spinach: Gradually add the chopped spinach, stirring until it wilts, around 2-3 minutes.
- Make the creamy sauce: In a saucepan, melt the butter over medium heat and whisk in the flour to create a roux.
- Add milk: Gradually pour in the milk, whisking continuously to prevent lumps and cook until thickened, about 5-7 minutes.
- Season it up: Sprinkle in nutmeg, salt, and pepper, and adjust to taste.
- Cheese it up: Stir in the ricotta cheese until creamy.
- Layer the lasagna: Spread a spoonful of creamy sauce in a baking dish, layer with noodles, spinach-mushroom mixture, creamy sauce, and cheeses.
- Repeat the layers until all ingredients are used, finishing with sauce and cheese on top.
- Bake: Cover with foil and bake in a preheated oven at 375°F (190°C) for 25 minutes, then remove foil to bake an additional 15-20 minutes.
- Rest before serving: Allow the lasagna to rest for about 10 minutes before slicing.
Notes
For a deeper flavor, experiment with different mushroom varieties. You can make ahead and freeze for later.
Nutrition
- Serving Size: 1 serving
- Calories: 450
- Sugar: 5g
- Sodium: 600mg
- Fat: 25g
- Saturated Fat: 15g
- Unsaturated Fat: 8g
- Trans Fat: 0g
- Carbohydrates: 40g
- Fiber: 3g
- Protein: 25g
- Cholesterol: 70mg
Keywords: spinach lasagna, vegetarian lasagna, creamy pasta

Philly Cheesesteak Sliders
Philly Cheesesteak Sliders: A Hearty Delight for Any Gathering
Hey there, food enthusiasts! Today, we’re diving into a scrumptious recipe that’s sure to be the star of your next gathering: Philly Cheesesteak Sliders! Imagine this: the aroma of sizzling beef, sweet caramelized onions, and vibrant green peppers wafting through your kitchen, inviting everyone to gather around for a bite of something truly delicious. Whether it’s game day, a casual get-together, or just a way to make a weeknight dinner feel a bit more special, these sliders are the ideal comfort food.
But what is it about a hot, melty cheesesteak that brings everyone together? In a world full of gourmet options, there’s something delightful about sinking your teeth into a modest slider that packs in layers of flavor, nostalgia, and loads of cheese. I’ll guide you through every step of this delicious journey, sharing tips and tricks that’ll make you feel like a pro in your own kitchen. So, roll up those sleeves, and let’s get to work on these iconic little bites that pack big flavor!
Personal Story
Ah, cheesesteaks – they remind me of my college days. I remember a late-night escapade with friends, the kind that started with laughter and ended with a quest for a bite to eat after too many hours in the library. We stumbled into a small, bustling diner where the sandwiches were crafted with love and more than a little elbow grease. I distinctly recall the moment I bit into my first cheesesteak. The rich beef, gooey cheese, and soft roll combined in a cheerful explosion of flavor, and I was instantly hooked! Fast forward many years, and I’ve taken that love and transformed it into these sliders. They capture all the essence of that unforgettable night, but in a size that’s perfect for sharing. Plus, they’re easy to make, meaning we can keep the party going without a fuss!
Ingredients
Let’s gather our ingredients! Each element plays a vital role in achieving that classic Philly cheesesteak flavor. Here’s what you’ll need:
-
1 lb ground beef
This is the heart of our sliders! You can substitute it with ground turkey or chicken for a lighter option, or use plant-based beef for a vegetarian twist. -
1 onion, chopped
Sweet or yellow onions are perfect for caramelizing. If you’re a fan of a bit more crunch and color, try adding red onions instead! -
1 green bell pepper, chopped
Provides that fresh crunch and vibrant color! Feeling adventurous? Swap it out for a red, yellow, or even a spicy pepper for a kick. -
8 oz provolone cheese, sliced
Melty, stretchy cheese is a must! You can use mozzarella or even a sharp cheddar for a different flavor profile. -
12 slider buns
Classic soft dinner rolls work beautifully, but you can use whole wheat or gluten-free buns as well. -
1/2 cup mayonnaise
This creamy base adds a delightful richness. For a zingy twist, mix in a touch of Dijon mustard! -
1 tablespoon Worcestershire sauce
Adds depth of flavor. If you’re avoiding soy, look for a soy-free alternative for a similar umami taste. -
Salt and pepper to taste
Essential seasonings that elevate every layer of flavor. -
Butter for greasing
For that beautiful golden finish on your buns!
Step-by-Step Instructions
Now that we’ve gathered everything, let’s get cooking! Here’s how to create these sliders from scratch:
-
Prep Your Ingredients: Start by chopping your onion and green bell pepper. Having everything ready to go is a game-changer, especially when you’re cooking with eager dinner guests waiting in the next room!
-
Sauté the Veggies: In a skillet over medium heat, melt some butter. Add the chopped onion and green bell pepper. Sauté for about 5-7 minutes until they are soft and caramelized. This step not only makes the onions sweet but helps develop flavors that will marry perfectly with the beef.
-
Brown the Beef: Add the ground beef to the skillet with the onion and pepper mixture. Cook until browned, breaking it apart with a wooden spoon as it cooks—approximately 8-10 minutes. Add Worcestershire sauce, salt, and pepper to taste. This is where the fun starts—watch as the flavors combine into a beautiful savory mix.
-
Assemble the Sliders: Preheat your oven to 350°F (175°C). Grease a baking dish with butter then slice the slider buns in half. Place the bottom halves in the dish. Layer your beef and veggie mixture generously on top, followed by slices of provolone cheese. You can’t have too much cheese, right? Top it off with the other half of the buns.
-
Add the Mayonnaise: Spread the mayonnaise on the top of the slider buns. This might seem unconventional, but it creates a creamy, decadent topping that takes these sliders to the next level.
-
Bake to Perfection: Brush the tops of the buns lightly with more melted butter, then pop them into the oven for about 15-20 minutes. You’re waiting for the cheese to become gooey, and the tops become golden brown. The smell alone will have everyone gathering in the kitchen!
-
Serve and Enjoy: Once out of the oven, let the sliders cool for a couple of minutes. They can be a bit messy when hot, but they are definitely worth the wait!
Each of these steps comes with its own little chef hacks. Don’t be shy to taste as you go—seasoning is key! And trust me, your kitchen will smell divine.
Serving Suggestions
To plate these glorious sliders, simply cut them apart and serve them on a festive platter. You can garnish them with fresh herbs like parsley or even some pickled jalapeños for an extra zing. Serve with a side of crispy potato chips or a fresh green salad for a complete meal. The combination of textures will leave everyone wanting more!
Recipe Variations
Now, let’s get a little creative! Here are a few twists to keep things exciting:
-
Mushroom and Swiss Sliders: Replace the beef with sautéed mushrooms and use Swiss cheese.
-
BBQ Cheesesteak: Mix in a bit of your favorite barbecue sauce for a sweet and smoky flavor profile.
-
Spicy Cheese Sauce: Add a jalapeño cheese sauce instead of provolone for a spicy kick!
-
Veggie Delight: Swap out the beef for lentils or chickpeas and add in your favorite veggies for a plant-based feast.
-
Mediterranean Twist: Use feta cheese, add olives, and replace the Worcestershire with a splash of lemon juice for a light, zesty option.
Chef’s Notes
I’ve made these sliders countless times, and they always bring back the warm feelings of gathering with friends and family. One time, I even made a giant version—a cheesesteak “cake” for a birthday party! It was as messy as it was delicious, and a huge hit. Just remember, these sliders are all about comfort and enjoyment—don’t stress too much about perfection. Remember, it’s all about the company and the memories you create around the table.
FAQs and Troubleshooting
-
Can I make the sliders ahead of time?
Absolutely! You can prepare the filling ahead and assemble them before baking. Just pop them in the oven when you’re ready to serve. -
What if my sliders are dry?
This can happen if the beef is overcooked. Always monitor it to retain moisture. Also, the mayo helps keep them juicy! -
Can I use different buns?
Yes, feel free to experiment with baguettes, pita bread, or even lettuce wraps for a low-carb option. -
How do I store leftovers?
Store any leftovers in an airtight container in the fridge. They’re great reheated in the oven or even the microwave for a quick snack!
Nutritional Info (Optional)
While I haven’t added nutritional info specifically, as a guideline, a typical Philly cheesesteak slider provides an excellent source of protein, fats from the cheese, and carbohydrates from the buns. For a healthier twist, consider the variations provided above!
Well, there you have it, my friends! A delicious guide to making scrumptious Philly Cheesesteak Sliders. They’re easy, fun, and sure to impress anyone who takes a bite. So, grab your apron and let’s create some unforgettable moments around the dinner table! Happy cooking! 🍽️
PrintPhilly Cheesesteak Sliders

Hearty Philly cheesesteak sliders packed with flavor and perfect for any gathering.
- Prep Time: 15 minutes
- Cook Time: 30 minutes
- Total Time: 45 minutes
- Yield: 6 servings 1x
- Category: Appetizer
- Method: Baking
- Cuisine: American
- Diet: None
Ingredients
- 1 lb ground beef
- 1 onion, chopped
- 1 green bell pepper, chopped
- 8 oz provolone cheese, sliced
- 12 slider buns
- 1/2 cup mayonnaise
- 1 tablespoon Worcestershire sauce
- Salt and pepper to taste
- Butter for greasing
Instructions
- Prep your ingredients: Start by chopping your onion and green bell pepper.
- Sauté the veggies: In a skillet over medium heat, melt some butter. Add the chopped onion and green bell pepper. Sauté for about 5-7 minutes.
- Brown the beef: Add the ground beef to the skillet with the onion and pepper mixture. Cook until browned, approximately 8-10 minutes.
- Assemble the sliders: Preheat your oven to 350°F (175°C). Grease a baking dish with butter then slice the slider buns in half.
- Add the mayonnaise: Spread the mayonnaise on the top of the slider buns.
- Bake to perfection: Brush the tops of the buns lightly with melted butter, then pop them into the oven for about 15-20 minutes.
- Serve and enjoy: Once out of the oven, let the sliders cool for a couple of minutes.
Notes
Feel free to experiment with different types of cheese or add spices to the beef for extra flavor.
Nutrition
- Serving Size: 1 slider
- Calories: 400
- Sugar: 3g
- Sodium: 500mg
- Fat: 18g
- Saturated Fat: 7g
- Unsaturated Fat: 9g
- Trans Fat: 1g
- Carbohydrates: 30g
- Fiber: 1g
- Protein: 20g
- Cholesterol: 50mg
Keywords: philly cheesesteak, sliders, comfort food, easy appetizer, party food

Black Pepper Chicken
Savory Black Pepper Chicken: A Recipe to Make You Shine
Hello, my fellow food enthusiasts! Today, we’re diving into a dish that’s full of flavor and sophistication but stays completely approachable: Black Pepper Chicken. This dish is a beautiful balance of warmth, spice, and heart, perfect for a cozy dinner or a wow-factor dish for friends.
Growing up, one of my favorite things to do was gather around the table with my family, sharing meals that made our home feel alive. There was always the delightful hum of laughter mixed with the clinking of forks and spoons, but one dish that really stole the show—especially during the cooler months—was a spicy, fragrant Black Pepper Chicken. My mom had a way with simple ingredients that could transport you to a cozy corner of a bistro, all while making sure each bite was infused with the love and care she put into preparing it.
What I love about Black Pepper Chicken is its versatility and the fact that it can be dressed up or down, depending on the occasion. Whether you’re celebrating a milestone, hosting a casual dinner party, or just need a comforting weeknight meal, this recipe is your go-to! Let’s roll up those sleeves, tie on that apron, and embark on a culinary adventure!
Personal Story
The first time I tried making Black Pepper Chicken on my own, I was a bit nervous. It was the first recipe I decided to tackle when I moved into my first apartment. I remember inviting a few close friends over for dinner, and the butterflies were doing a merry dance in my stomach as I prepped. The aroma of the chicken sizzling, the garlic infusing the air, and those freshly cracked peppercorns created a symphony of scents that I still associate with warmth and friendship.
When my friends arrived, the first thing they commented on was how delicious it smelled. They could hardly wait to dig in! It was a night filled with laughter, stories, and, of course, that perfectly seasoned chicken that held everything together. Since then, Black Pepper Chicken has become a favorite in my kitchen—reminding me that the most meaningful moments often revolve around food and good company. Whether it’s served over a bed of fluffy rice or paired with a colorful stir-fry, this dish always brings back those treasured memories. Here’s how you can create your own version!
Ingredients
Let’s check out what we need to make this fabulous Black Pepper Chicken.
Ingredients List:
-
Chicken (Boneless, Skinless Breast or Thighs): About 1 pound
- Why – Chicken is the perfect canvas for the robust black pepper flavor.
- Substitution Tip – For a lighter option, you can substitute chicken with tofu or tempeh.
-
Black Peppercorns: 2 tablespoons, freshly ground
- Why – Freshly ground pepper gives that aromatic kick!
- Chefs Insight – If you don’t have a grinder, use pre-ground pepper—but freshly ground is always better!
-
Soy Sauce: 3 tablespoons
- Why – Adds umami depth and enhances the overall flavor profile.
- Substitution Tip – Use low-sodium soy sauce or tamari for a gluten-free version.
-
Garlic: 4 cloves, minced
- Why – Because garlic and chicken are a match made in heaven!
- Quick Tip – Fresh is best, but in a pinch, jarred minced garlic works.
-
Ginger: 1 tablespoon, minced
- Why – This fragrant root adds warmth and a hint of sweetness to the dish.
- Substitution Tip – If you’re out of ginger, a dash of ground ginger will work in a pinch!
-
Cornstarch: 1 tablespoon (for coating)
- Why – It helps to achieve that slight crispy texture on the chicken.
- Substitution Tip – Arrowroot powder can be used if you’re looking for a gluten-free option.
-
Vegetable Oil: For frying
- Why – A neutral oil works best to allow the flavors to do their thing.
- Chefs Insight – Canola or grapeseed oil are great options too!
-
Scallions: For garnish
- Why – These add a fresh, crunchy finish and a pop of color.
- Substitution Tip – Chopped fresh herbs like parsley or cilantro can also add a nice touch!
Step-by-Step Instructions
Ready to bring this dish to life? Let’s get cooking!
Step 1: Prepare the Chicken
Start by cutting your chicken into bite-sized pieces. This helps them get coated evenly and cook faster!
Chef’s Tip: Use a sharp knife—it makes all the difference!
Step 2: Marinate the Chicken
In a medium bowl, combine your chicken pieces with soy sauce, minced garlic, and minced ginger. This is where the magic begins! Let it marinate for at least 30 minutes.
Commentary: If you have more time, let it soak for a few hours or overnight for an even deeper flavor!
Step 3: Add Cornstarch
Once marinated, sprinkle your cornstarch over the chicken and toss to coat. This will ensure that your chicken gets that luxury, crispiness when cooked.
Hacks: Make sure every piece gets a nice coating. You can even use a ziploc bag for mess-free coating!
Step 4: Heat Up the Oil
In a large skillet or wok, heat about 2 tablespoons of vegetable oil over medium-high heat until shimmering. Add a little water to test if it’s hot enough—it should sizzle!
Tip: Don’t overcrowd the pan—this helps to avoid steaming the chicken instead of frying it.
Step 5: Cook the Chicken
Carefully add your coated chicken to the hot oil. Cook for about 5–7 minutes until golden brown and cooked through. Don’t forget to stir occasionally!
Chef Insight: If your pieces are sticking, just give them a little time! They will release on their own when perfectly cooked.
Step 6: Crank Up the Flavor
Once the chicken is cooked, add the freshly ground black pepper—don’t skimp here! Toss everything to coat the chicken in that peppery goodness.
Step 7: Serve It Up
Once everything is well-mixed and nice and hot, remove from heat. Serve it right away while it’s crispy!
Tip: Keep the cooking vessel on the table for a rustic touch so everyone can help themselves.
Serving Suggestions
For a beautiful presentation, serve your Black Pepper Chicken over a fluffy bed of steamed jasmine rice or alongside vegetable stir-fry. Garnish with chopped scallions or fresh herbs for that pop of color.
Impress Tip: Use a beautiful serving platter and let the colors shine!
Recipe Variations
Feel free to mix it up!
-
Spicy Black Pepper Chicken: Add a teaspoon of red pepper flakes or sliced fresh chilies for an extra kick!
-
Sesame Black Pepper Chicken: Drizzle some toasted sesame oil just before serving for a nutty flavor.
-
Veggie Boost: Toss in some snap peas, bell peppers, or broccoli for a colorful stir-fry option!
-
Citrus Zest: A squeeze of lime or lemon juice just before serving adds a refreshing zing.
-
Gluten-Free Option: Substitute soy sauce with liquid aminos or coconut aminos to make this dish gluten-free.
Chef’s Notes
Over the years, I’ve tweaked this recipe countless times to suit my cravings and the ingredients on hand. I’ve added a splash of orange juice for Sunday dinners or switched out the chicken for shrimp on a whim—each time with delicious results! This dish truly is a canvas, waiting for you to express your own culinary style.
FAQs and Troubleshooting
1. Why is my chicken not crispy?
- Ensure your oil is hot enough before adding the chicken. If it’s not sizzling, your chicken will steam instead of fry.
2. What if the sauce is too salty?
- Balance it out with a splash of vinegar or citrus juice to cut through the saltiness.
3. Can I prep this dish ahead of time?
- Absolutely! Marinate the chicken the night before, and simply cook when you’re ready to serve.
4. What’s the best way to store leftovers?
- Store any leftovers in an airtight container in the refrigerator for up to three days. Reheat in a skillet with a splash of water to keep it moist.
Nutritional Info
(Optional) If you’re interested in keeping tabs on your nutritional intake, a serving of Black Pepper Chicken generally contains about:
- Calories: 330
- Protein: 30g
- Carbs: 7g
- Fat: 20g
And there you have it—an inviting, enticing, and absolutely delicious Black Pepper Chicken recipe that’s sure to warm hearts and feed souls. With every bite, remember that good food is about connection, joy, and simply showing up for one another. Tie on your apron, gather your friends or family, and let’s savor the moments around the table together. Enjoy!
PrintSavory Black Pepper Chicken

A flavorful and sophisticated Black Pepper Chicken recipe that’s perfect for cozy dinners or impressing friends.
- Prep Time: 30 minutes
- Cook Time: 10 minutes
- Total Time: 40 minutes
- Yield: 4 servings
- Category: Main Course
- Method: Stir-frying
- Cuisine: Asian
- Diet: Gluten-Free Option Available
Ingredients
- Chicken (Boneless, Skinless Breast or Thighs): About 1 pound
- Black Peppercorns: 2 tablespoons, freshly ground
- Soy Sauce: 3 tablespoons
- Garlic: 4 cloves, minced
- Ginger: 1 tablespoon, minced
- Cornstarch: 1 tablespoon (for coating)
- Vegetable Oil: For frying
- Scallions: For garnish
Instructions
- Prepare the Chicken by cutting it into bite-sized pieces.
- Marinate the Chicken with soy sauce, minced garlic, and minced ginger for at least 30 minutes.
- Add Cornstarch to the marinated chicken and toss to coat.
- Heat the oil in a large skillet or wok over medium-high heat until shimmering.
- Cook the Chicken for about 5–7 minutes until golden brown and cooked through.
- Crank Up the Flavor by adding the freshly ground black pepper.
- Serve it hot, garnished with scallions.
Notes
For variation, consider adding spicy elements or using shrimp instead of chicken. You can also marinate the chicken the night before for deeper flavor.
Nutrition
- Serving Size: 1 serving
- Calories: 330
- Sugar: 1g
- Sodium: 800mg
- Fat: 20g
- Saturated Fat: 3g
- Unsaturated Fat: 10g
- Trans Fat: 0g
- Carbohydrates: 7g
- Fiber: 1g
- Protein: 30g
- Cholesterol: 80mg
Keywords: Black Pepper Chicken, Asian Cuisine, Dinner Recipe, Quick Meals, Comfort Food

Healthy Zucchini Noodles with Grilled Chicken and Basil Pesto
Savoring Summer: Healthy Zucchini Noodles with Grilled Chicken and Basil Pesto
Hello there, fellow food lover! Today, we’re diving into one of my favorite summer dishes — Healthy Zucchini Noodles with Grilled Chicken and Basil Pesto. Picture a plate bursting with fresh flavors, vibrant colors, and wholesome goodness. It’s comfort food made light, perfect for those warm evenings when you want something delicious without feeling weighed down.
Zucchini noodles, or “zoodles” as they charmingly call them, are not just a trendy substitute for pasta; they bring a delightful crunch and subtle sweetness that pairs perfectly with well-seasoned grilled chicken and the fragrant, nutty essence of basil pesto. And here’s the best part: this dish is incredibly easy to whip up! So why not put on that apron of yours, grab your favorite kitchen tools, and join me in creating a dish that sings summer?
This dish transports me right back to my childhood summers spent in my grandmother’s garden, where the zucchini grew in abundance. She would pick them fresh, and we’d often make amazing meals together, creating memories alongside our food. Now, I share those flavors with you but with a bit of my own twist. Grab a glass of something refreshing, and let’s sauté our way into a culinary adventure that celebrates both the simplicity and elegance of home cooking.
Personal Story
I vividly remember summers on my grandmother’s farm, where the sun kissed the earth, and the air was sweet with the scent of fresh basil and ripe tomatoes. As a kid, I loved the excitement of harvesting vegetables from her garden. One summer day, she asked me to help her prepare dinner for the family. We grabbed a basket and headed out to gather a bunch of crunchy, green zucchinis and a handful of fragrant basil.
Returning to the cozy kitchen, I watched in awe as she turned our simple harvest into a beautiful meal. With just a handful of ingredients, she created magic: sautéed zucchini with grilled chicken, drizzled with a homemade pesto that made every bite irresistible. Her joy in cooking filled the kitchen, creating a warm and inviting atmosphere that made every meal special — a tradition I carry on today.
Now, as I step into my kitchen, I strive to replicate that feeling: the joy of cooking with fresh ingredients and the warmth that comes from sharing with friends and family. Every time I make zucchini noodles, it feels like I’m taking a trip back to my roots, honoring my grandmother while bringing a fresh perspective to the dish.
Ingredients
Here’s what you’ll need to create this delightful summer dish:
-
Zucchini (4 medium)
- The star of our show! Zucchini is low in calories and high in nutrients. If you want a twist, yellow squash works beautifully too.
-
Grilled Chicken (2 boneless, skinless breasts)
- Seasoned to perfection, grilled chicken adds protein and heartiness. Feel free to swap in tofu or chickpeas for a vegetarian option!
-
Basil Pesto (1 cup)
- A luscious blend of fresh basil, garlic, and pine nuts — homemade is best, but store-bought works in a pinch. For nut-free pesto, try sunflower seeds instead!
-
Olive Oil (2 tablespoons)
- Extra virgin is best for dressing and sautéing. It’s full of healthy fats! Avocado oil can be a good substitute with a milder flavor.
-
Salt (to taste)
- Enhances flavor — always start small and adjust! Sea salt or kosher salt are great choices.
-
Black Pepper (to taste)
- Freshly cracked pepper adds an aromatic touch. If you like a little heat, try a pinch of red pepper flakes.
-
Parmesan Cheese (optional, for topping)
- Adds a savory depth to the dish. You can use nutritional yeast as a dairy-free option.
-
Cherry Tomatoes (1 cup, halved)
- A pop of sweetness and color. Feel free to substitute with diced bell peppers for a different flavor profile.
Step-by-Step Instructions
Let’s get cooking! Follow these steps and allow yourself to enjoy the process:
-
Spiralize the Zucchini:
- Using a spiralizer, create long strands of zucchini. If you don’t have a spiralizer, a vegetable peeler can also produce delightful ribbons! I love how this method transforms ordinary zucchini into something visually exciting. Tip: Salt the zucchini noodles lightly and allow them to sit for about 10 minutes. This will draw out excess moisture, preventing your dish from becoming too watery.
-
Prepare the Chicken:
- Preheat your grill or a grill pan over medium-high heat. While it’s heating up, season both sides of the chicken breasts with olive oil, salt, and black pepper. This simple seasoning lets the grilled flavor shine through. When the grill is hot, add the chicken and cook for about 6-7 minutes on each side until fully cooked. You can tell it’s done when the juices run clear! Once cooked, let the chicken rest for a few minutes before slicing it into thin strips — this keeps it juicy.
-
Make the Pesto:
- If you’re preparing homemade pesto, blend the fresh basil, garlic, pine nuts, and olive oil in a food processor until smooth. Season with salt and additional olive oil as desired. Tasting along the way is key — adjust to your preference! No worries if you’re using store-bought — just give it a quick stir and set it aside.
-
Sauté the Zucchini Noodles:
- In a large skillet, heat a tablespoon of olive oil over medium heat. Add the zucchini noodles to the skillet, sautéing them for just 2-3 minutes. You want them to remain tender yet retain a little crunch; overcooking will turn them mushy. As they sauté, toss in the halved cherry tomatoes, mixing everything together until warmed through.
-
Combine and Serve:
- Now, it’s time to bring it all together! Add the sliced grilled chicken to the skillet and gently mix in the bright green basil pesto until everything is coated with that delicious, aromatic sauce. It’s visually stunning — you’ll want to dive right in!
Serving Suggestions
For plating, I suggest a simple yet elegant approach. Use a large bowl or plate to create a nest of zucchini noodles, topped with a generous portion of grilled chicken and then a drizzle of extra pesto to finish. Garnish with freshly grated Parmesan cheese, a few basil leaves, and a sprinkle of black pepper for that restaurant-worthy touch. Pair with a chilled glass of white wine or sparkling water, and you’re all set for a delightful meal!
Recipe Variations
Here are a few fun twists you can play with to keep things exciting:
-
Zoodles with Shrimp: Swap out the chicken for shrimp for a quick, seafood option. Just sauté them until they turn pink, and you’re golden!
-
Spicy Pesto: Add a few red pepper flakes to your basil pesto for a spicy kick that adds an extra layer of flavor.
-
Roasted Vegetable Medley: Toss in some roasted bell peppers, asparagus, or cherry tomatoes for added nutrition and depth.
-
Creamy Avocado Sauce: Blend ripe avocados with garlic and lime juice instead of pesto for a creamy, dairy-free sauce.
-
Savory Vegan Option: Substitute grilled chicken with chickpeas and use nutritional yeast in place of cheese for a full vegan transformation.
Chef’s Notes
As I reflect on the evolution of this recipe, I think back to the first time I glimpsed zucchini noodles on a gourmet menu. I remember being skeptical but intrigued. Once I tried them, I was hooked! This dish has evolved over time, becoming a staple in my own kitchen, and I have played around with flavors, from adding spicy elements to experimenting with different sauces. The heart of the recipe remains grounded in that simple joy of cooking with fresh ingredients and sharing it with loved ones.
Cooking is as much about creativity as it is about technique — don’t hesitate to play around with flavors! Each iteration tells a story, just like my grandmother’s zucchini-inspired meals.
FAQs and Troubleshooting
-
How do I prevent my zucchini noodles from turning mushy?
- Great question! Salt your zoodles lightly before cooking to draw out moisture and sauté them just until tender (2-3 minutes) for a nice bite!
-
Can I make the basil pesto in advance?
- Absolutely! You can prepare your pesto up to a week in advance. Store it in an airtight container and drizzle a little olive oil on top to prevent browning.
-
What if I don’t have a spiralizer?
- No problem! You can simply use a vegetable peeler to create wide ribbons of zucchini or even slice them into thin strips with a knife.
-
Is this dish suitable for meal prep?
- Yes! This dish stores well in the refrigerator for up to 3 days. Just remember to keep the sauce separate until you’re ready to eat to maintain the zoodles’ texture.
Nutritional Info
Per Serving (Based on 4 servings):
- Calories: 320
- Protein: 32g
- Carbohydrates: 12g
- Dietary Fiber: 3g
- Sugars: 4g
- Total Fat: 18g
- Saturated Fat: 3g
I hope you enjoy creating these delightful Healthy Zucchini Noodles with Grilled Chicken and Basil Pesto as much as I do! Remember, cooking is all about sharing love and joy through food, so invite a friend over, and let’s fill the table with laughter and beautiful moments. Happy cooking! 🍽️
PrintHealthy Zucchini Noodles with Grilled Chicken and Basil Pesto

A light and flavorful summer dish featuring zucchini noodles, grilled chicken, and homemade basil pesto.
- Prep Time: 15 minutes
- Cook Time: 20 minutes
- Total Time: 35 minutes
- Yield: 4 servings 1x
- Category: Main Course
- Method: Sautéing, Grilling
- Cuisine: Italian
- Diet: Gluten-Free, Low-Carb
Ingredients
- 4 medium Zucchini
- 2 boneless, skinless Grilled Chicken breasts
- 1 cup Basil Pesto
- 2 tablespoons Olive Oil
- Salt (to taste)
- Black Pepper (to taste)
- Parmesan Cheese (optional, for topping)
- 1 cup Cherry Tomatoes, halved
Instructions
- Spiralize the Zucchini: Using a spiralizer, create long strands of zucchini. Lightly salt and let sit for about 10 minutes.
- Prepare the Chicken: Preheat the grill. Season the chicken with olive oil, salt, and pepper. Grill for 6-7 minutes per side until fully cooked. Let it rest before slicing.
- Make the Pesto: Blend fresh basil, garlic, pine nuts, and olive oil in a food processor until smooth, seasoning to taste.
- Sauté the Zucchini Noodles: Heat olive oil in a skillet, sauté zucchini noodles for 2-3 minutes, then mix in the halved cherry tomatoes.
- Combine and Serve: Add sliced chicken and pesto to the skillet, mixing until well-coated. Serve garnished with Parmesan cheese and basil.
Notes
For a vegetarian option, substitute chicken with tofu or chickpeas. Experiment with different vegetables for added flavor.
Nutrition
- Serving Size: 1 serving
- Calories: 320
- Sugar: 4g
- Sodium: 300mg
- Fat: 18g
- Saturated Fat: 3g
- Unsaturated Fat: 10g
- Trans Fat: 0g
- Carbohydrates: 12g
- Fiber: 3g
- Protein: 32g
- Cholesterol: 70mg
Keywords: zucchini noodles, grilled chicken, basil pesto, healthy recipe, summer dish, low-carb

Mediterranean Stuffed Sweet Potato Boats
Mediterranean Stuffed Sweet Potato Boats: A Flavorful Journey
Welcome, fellow food lovers! Today, I’m excited to share a recipe that’s as vibrant and delightful as a sunny Mediterranean afternoon—Mediterranean Stuffed Sweet Potato Boats. These little treasures are not only visually stunning, but they’re also brimming with flavors and nutrients that will make your taste buds dance with joy!
Picture this: A warm sweet potato, tender and earthy, serving as a cozy vessel for a colorful medley of chickpeas, feta, and fresh vegetables. It’s the perfect combination of comfort and elegance, making it an ideal dish for a weeknight dinner or a festive gathering. Plus, it’s straightforward to whip up, so you can feel like a culinary star without spending hours in the kitchen.
Why wait? Let’s embark on this delicious culinary journey! I’ll guide you step-by-step, sharing my favorite tips and stories along the way. Whether you’re new to cooking or a seasoned pro, these stuffed sweet potato boats will quickly become a cherished addition to your recipe repertoire.
Personal Story
I still remember the first time I tried a stuffed sweet potato. It was at a quaint little café nestled in a sun-drenched corner of Santorini, Greece. The moment the waiter placed that beautifully presented dish in front of me, adorned with vibrant colors and fragrant herbs, I was captivated. Each bite felt like a warm hug, bursting with flavor that screamed of home-cooked goodness.
That experience inspired me to recreate that memorable dish in my own kitchen. I wanted to capture the essence of those sunny Mediterranean days while putting my unique spin on it. After some experimentation, I settled on this version, which marries the sweetness of the potatoes with savory chickpeas, creamy feta, and fresh vegetables. Sharing this recipe with you feels like passing on a piece of my travelogue, and I hope it brings a splash of joy to your table, just as it did mine!
Ingredients
Here’s what you’ll need to create these scrumptious boats:
- 4 sweet potatoes: The star of the show! Sweet potatoes offer a lovely sweetness and nutritious benefits. If you need a substitute, butternut squash works well too.
- 1 can chickpeas, drained and rinsed: Packed with protein and fiber, chickpeas add a delightful texture. You could swap them with black beans for a different flavor.
- 1 cup feta cheese, crumbled: Feta adds that perfect tang. Don’t love feta? Try goat cheese or a dairy-free alternative.
- 1 cup mixed vegetables (bell peppers, zucchini, spinach): Feel free to mix it up! Any of your favorite vegetables will do—broccoli or cherry tomatoes would be fabulous, too.
- 1/4 cup fresh herbs (parsley or cilantro), chopped: Fresh herbs brighten the dish up. You can use dried herbs, but fresh really makes a difference!
- 1 lemon, juiced: A splash of lemon juice brightens everything up. If you’re in a pinch, red wine vinegar will work as a substitute.
- Salt and pepper to taste: Essential for seasoning at every step. Adjust according to your taste!
- Olive oil for drizzling: The finishing touch that adds richness and depth. Use high-quality extra virgin olive oil for the best flavor.
Step-by-Step Instructions
Now, let’s get cooking! Here’s how to whip up your Mediterranean Stuffed Sweet Potato Boats:
Step 1: Preheat the Oven
Start by preheating your oven to 400°F (200°C). This ensures that those sweet potatoes come out perfectly tender and delicious.
Step 2: Bake the Sweet Potatoes
- Preparation: While the oven is preheating, wash your sweet potatoes thoroughly. Pat them dry.
- Fork They Go: Pierce each potato a few times with a fork. This helps steam escape while they cook, preventing any unfortunate potato explosions.
- Bake: Place them on a baking sheet and pop them in the preheated oven. Bake for about 45 to 60 minutes, or until they’re tender when pierced with a fork.
Chef Tip: If you’re short on time, you can microwave the sweet potatoes for about 10-12 minutes, flipping them halfway through. They won’t have that roasted flavor, but it’s a solid shortcut!
Step 3: Prepare the Filling
- Sauté the Vegetables: While the potatoes bake, heat a tablespoon of olive oil in a skillet over medium heat. Toss in your mixed vegetables. Sauté for about 5–7 minutes or until they’re tender.
- Mix it Up: In a large bowl, combine the sautéed vegetables, drained chickpeas, crumbled feta cheese, chopped herbs, lemon juice, salt, and pepper. Toss everything together gently—don’t be too rough! You want to keep that feta chunky for some lovely bites.
Chef Insight: I love to use leftovers in my filling mix! If you have any roasted veggies or a bit of quinoa hanging around, toss them in. It’s a great way to prevent food waste and throw in some extra flavor!
Step 4: Assemble the Sweet Potato Boats
- Slice Open: Once the sweet potatoes are done, carefully remove them from the oven (they’ll be hot, so use oven mitts!). Let them cool for a few minutes. Then, slice each one down the center lengthwise, being careful not to cut all the way through—the idea is to create a “boat” to hold your filling.
- Fluff it Up: Gently fluff the insides of the potatoes with a fork. This creates a soft base for all those delicious toppings you’re about to add.
- Fill ‘Em Up: Generously spoon the vegetable and chickpea mixture into each sweet potato half. Don’t be shy; pile it high!
Serving Suggestion: Drizzle a little more olive oil on top for that finishing touch and a sprinkle of fresh herbs for color.
Step 5: Final Bake
- Back to the Oven: Place the stuffed potatoes back on the baking sheet and return them to the oven for about 10–15 minutes. This allows those flavors to meld together beautifully.
Chef Hack: If you’re a big fan of crispy edges, throw the broiler on for the last 2–3 minutes. Just watch them closely—they can turn from golden to burnt in a flash!
Serving Suggestions
These Mediterranean Stuffed Sweet Potato Boats are best served warm right out of the oven. To plate them up beautifully, arrange the boats on a vibrant platter or individual plates. Drizzle with a little extra olive oil and garnish with more fresh herbs to elevate both flavor and presentation. Pair these with a crisp side salad or some warm, crusty bread for a meal that feels both rustic and elegant.
Recipe Variations
Feel free to get creative with your stuffed sweet potatoes! Here are a few delicious variations to consider:
- Spicy Twist: Add a pinch of red pepper flakes or mix in some chopped jalapeños for a spicy kick.
- Protein Packed: Toss in some cooked chicken or turkey for an extra protein boost.
- Mediterranean-Style: Swap the feta for sliced olives and add a dollop of tzatziki sauce on top.
- Vegan Delight: Omit the feta altogether or use a vegan cheese alternative, and make sure to use chickpeas for protein.
- Seasonal Flavors: In fall, consider adding cranberries or nuts; in summer, grilled corn or zucchini would be exquisite!
Chef’s Notes
As I created this recipe, I learned that the stuffed sweet potato is incredibly forgiving. You can really play around with flavors and ingredients based on what’s in season or what you have on hand. I’ve had nights where I opened the fridge and turned what would have been dinner disappointment into creative triumph, all thanks to the versatility of these boats! Trust me, that’s what cooking is all about—experimenting and having fun!
FAQs and Troubleshooting
-
Why are my sweet potatoes not soft enough?
Sometimes, the size and type of sweet potato can impact cooking times. Always test them with a fork; if they aren’t tender, give them more time in the oven. -
Can I make these ahead of time?
Absolutely! You can prep the potatoes and filling in advance, then assemble and bake just before serving. They’ll keep in the fridge for 2-3 days covered. -
How do I know when my sweet potatoes are done baking?
They should be soft to the touch and easily pierced with a fork or knife. If you’re unsure, you can always slice one open to check—just be cautious! -
What can I use as a topping besides feta?
Other great options include goat cheese, shredded mozzarella, or even a vegan cheese. Experimenting with different cheeses can add delightful twists to your dish!
Nutritional Info
This dish is not only delicious but also nutrient-packed! Each serving is full of fiber, vitamins, and minerals—sweet potatoes provide beta-carotene, while chickpeas are an excellent source of plant-based protein.
And there you have it! Mediterranean Stuffed Sweet Potato Boats that will delight both the eyes and the palate. As you gather around your table, I hope these flavor-rich boats foster warmth and connection, just as they do in my home. Happy cooking and enjoy every delicious bite!
PrintMediterranean Stuffed Sweet Potato Boats

Delightful sweet potato boats filled with chickpeas, feta, and fresh vegetables, showcasing the vibrant flavors of the Mediterranean.
- Prep Time: 15 minutes
- Cook Time: 60 minutes
- Total Time: 75 minutes
- Yield: 4 servings 1x
- Category: Main Course
- Method: Baking
- Cuisine: Mediterranean
- Diet: Vegetarian
Ingredients
- 4 sweet potatoes
- 1 can chickpeas, drained and rinsed
- 1 cup feta cheese, crumbled
- 1 cup mixed vegetables (bell peppers, zucchini, spinach)
- 1/4 cup fresh herbs (parsley or cilantro), chopped
- 1 lemon, juiced
- Salt and pepper to taste
- Olive oil for drizzling
Instructions
- Preheat the oven to 400°F (200°C).
- Wash the sweet potatoes thoroughly and pat them dry.
- Pierce each potato a few times with a fork.
- Bake on a baking sheet for about 45 to 60 minutes, until tender.
- Heat a tablespoon of olive oil in a skillet and sauté the mixed vegetables for about 5–7 minutes.
- Combine the sautéed vegetables, chickpeas, feta, chopped herbs, lemon juice, salt, and pepper in a bowl.
- Slice each sweet potato down the center lengthwise and fluff the insides.
- Fill each sweet potato half with the vegetable and chickpea mixture.
- Return to the oven for 10–15 minutes.
Notes
Feel free to get creative with your fillings and toppings—these boats are versatile and forgiving!
Nutrition
- Serving Size: 1 serving
- Calories: 450
- Sugar: 6g
- Sodium: 500mg
- Fat: 15g
- Saturated Fat: 5g
- Unsaturated Fat: 8g
- Trans Fat: 0g
- Carbohydrates: 66g
- Fiber: 10g
- Protein: 15g
- Cholesterol: 30mg
Keywords: stuffed sweet potatoes, Mediterranean recipe, vegetarian meal, healthy dinner, chickpeas, feta

Sweet Potato Taco Bowl
Sweet Potato Taco Bowl: A Cozy Culinary Journey
Hello, my fellow foodies! Today, I’m inviting you into my kitchen to whip up a delightful Sweet Potato Taco Bowl that’s not just delicious but also packed with vibrancy and texture. Whether you’re looking to impress guests or treat yourself to a satisfying weeknight dinner, this recipe is the perfect go-to. Imagine a warm, inviting bowl filled with roasted sweet potatoes, fluffy rice, creamy avocado, and a sprinkle of your favorite toppings—all coming together for a truly unforgettable meal.
This dish embodies the spirit of cozy gatherings around the dinner table; it’s bright, colorful, and just the right amount of comforting. I remember when I first served a version of this bowl to a group of friends during a chilly evening gathering. As the fragrant sweet potatoes roasted in the oven, the lively chatter around my dining table filled the air with warmth. Could it be the delicious aroma or the clinking of glasses? Perhaps a bit of both! I can’t help but smile remembering how we savored our creations; the sweet potatoes were the star of the show, and the camaraderie was the icing on the cake.
Not only is this taco bowl easy to prepare, but it’s also versatile. You can adjust the seasonings, mix in your favorite veggies, or dress it up with toppings galore. It’s all about what you love and what inspires you! Join me as I take you through the journey of creating this Sweet Potato Taco Bowl, sprinkled with personal stories, tips, and a few chef hacks along the way. Ready? Let’s get cooking!
Personal Story
When it comes to sweet potatoes, I have a vivid memory that warms my heart. It was during a family gathering a few years back when my Aunt Lucy first introduced the idea of a sweet potato taco bowl. She was known for her zesty personality and her vibrant cooking style, often throwing impromptu dinner parties that felt like mini festivals. One cozy autumn evening, she set out various bowls filled with toppings and let each of us build our own taco bowls. The delicious aroma of paprika, cumin, and roasted sweet potatoes wafted through the house as we assembled our dishes.
As I piled on black beans, corn, and a drizzle of salsa, I felt a rush of creativity. Grabbing a generous avocado slice, I garnished my bowl and proudly presented it to my family. The laughter, the sharing—I realized that cooking isn’t just about making food; it’s about creating memories. Aunt Lucy’s simple yet gorgeous sweet potato taco bowls have since become a staple in my kitchen, and every time I make them, I feel connected to that moment. Just like the vibrant colors of the dish, life is all about those vibrant moments shared at the table.
Ingredients
To create your Sweet Potato Taco Bowl, you’ll need the following ingredients:
-
2 medium sweet potatoes (cubed)
Sweet potatoes bring natural sweetness and a rich, earthy flavor to the bowl. If you don’t have sweet potatoes, you can use regular potatoes or even butternut squash for a different texture and flavor. -
2 tablespoons olive oil
Olive oil helps to achieve that crispy-roasted texture for the sweet potatoes. Alternatively, you can use avocado oil or melted coconut oil. -
1 teaspoon paprika
Paprika adds a beautiful smokiness to the sweet potatoes. If you’re looking for a little kick, you could substitute smoked paprika or cayenne pepper. -
1 teaspoon ground cumin
Cumin brings warmth and depth of flavor. If you’re not a fan, coriander or taco seasoning can work instead. -
½ teaspoon chili powder
A sprinkle of chili powder adds a gentle heat that complements the sweetness of the potatoes. Adjust to your preference or skip it for a milder dish. -
Salt & pepper to taste
Seasoning enhances every component of the bowl; don’t skimp on it! You can also use garlic powder or onion powder for additional depth. -
Cooked rice or quinoa
This forms the hearty base of your taco bowl. Choose your favorite grain—brown rice, wild rice, or even cauliflower rice for a lighter option! -
Black beans (rinsed)
These provide protein and a creamy texture. You can substitute with pinto beans or chickpeas if you prefer. -
Corn kernels
Sweet corn adds a crunch and pops of sweetness. Canned, frozen, or fresh corn works perfectly here. -
Avocado slices
Creamy avocado balances the flavors beautifully. If you’re out of avocado, Greek yogurt or sour cream could provide a similar creaminess. -
Salsa or sour cream (optional)
Dress your taco bowl with salsa for zest or sour cream for richness. Fresh pico de gallo or guacamole can elevate your bowl even more.
Step-by-Step Instructions
Now, let’s dive into the cooking process! Follow these steps, and your Sweet Potato Taco Bowl will be ready to impress:
-
Preheat Your Oven
Preheat your oven to 425°F (220°C). A hot oven means crispy sweet potatoes! -
Prepare Your Sweet Potatoes
Start by peeling and cubing your sweet potatoes. Aim for about 1-inch cubes; they’ll roast evenly and get beautifully caramelized. -
Season the Sweet Potatoes
In a large bowl, toss the cubed sweet potatoes with olive oil, paprika, cumin, chili powder, and a generous sprinkle of salt and pepper. Make sure every cube is coated; this is where the flavor magic happens!Chef Tip: Instead of tossing them in a bowl, you can spread everything on a baking sheet lined with parchment for easy cleanup.
-
Roast the Sweet Potatoes
Spread the seasoned sweet potatoes in a single layer on a baking sheet. Roast for about 25–30 minutes, turning them halfway through. You want them golden and tender!Little Chef Hack: For super crispiness, turn on the broiler for the last 2–3 minutes of cooking! Just keep an eye on them to prevent burning.
-
Prepare Your Bases
While the sweet potatoes are roasting, cook your rice or quinoa according to package instructions. This will ensure you have a fluffy base for your taco bowl. -
Warm the Black Beans and Corn
In a small saucepan over medium heat, warm the black beans and corn together. Just a few minutes should do the trick, allowing the flavors to mingle. Season lightly with a pinch of salt. -
Slice the Avocado
While the beans and corn warm up, slice your ripe avocado. Aim for thin, beautiful slices that will add a lovely creamy texture. Sprinkle a dash of lemon or lime juice on the slices to keep them from browning. -
Assemble Your Taco Bowl
Once everything is cooked and ready, it’s time to assemble! In a bowl, start with a generous scoop of rice or quinoa. Layer on the roasted sweet potatoes, followed by the warm black beans and corn. Finish with avocado slices, a dollop of salsa or sour cream, and maybe some fresh herbs if you’re feeling fancy.Presentation Hack: Place each ingredient in sections to create a colorful visual appeal, making it as much a feast for the eyes as it is for the palate!
-
Enjoy!
Grab your fork, dig in, and savor every bite of your Sweet Potato Taco Bowl! I recommend sharing it with friends or family—there’s something truly special about a meal enjoyed together.
Serving Suggestions
When it comes to plating, remember that appealing to the eye is half the fun! Use a wide, shallow bowl to showcase the vibrant colors of the sweet potatoes, black beans, corn, and fresh avocado. Drizzle hot sauce or a squeeze of lime over the top for an extra zesty finish.
Fun Fact:
Adding a sprinkle of crumbled feta or fresh cilantro can turn your taco bowls into a picnic-worthy feast! Pair it with a light salad or tortilla chips for a complete meal.
Recipe Variations
To keep things exciting, here are some fun variations to try with your Sweet Potato Taco Bowl:
-
Spicy Kick: Add some diced jalapeños for an extra layer of heat.
-
Southwestern Twist: Mix in roasted bell peppers and serve with chipotle crema for a smoky flavor.
-
Vegetable Medley: Add sautéed onions, zucchini, or other seasonal veggies to enrich the bowl.
-
Protein Boost: Top your bowl with shredded chicken, grilled shrimp, or even a poached egg for added protein.
-
Gluten-Free: Swap rice for quinoa or cauliflower rice to make it gluten-free while keeping it packed with flavor.
Chef’s Notes
This Sweet Potato Taco Bowl has evolved over time in my kitchen. I started with basic flavors, but as I experimented more, I discovered the joy of layering different components. Initially, I was daunted by the thought of roasting sweet potatoes, fearing they wouldn’t be fluffy or flavorful. But after many trials (and a few burnt batches!), I learned how to get the perfect roast.
Funny Kitchen Memory: One time, I forgot to turn on the oven while preparing for a dinner party! As my friends waited, I panicked and threw together a makeshift raw veggie platter that turned out to be a hit. Now we joke that I could host a party with only sweet potatoes and still have a good time!
FAQs and Troubleshooting
1. My sweet potatoes are mushy instead of crispy. What went wrong?
This could be due to overcrowding the baking sheet. Ensure your sweet potatoes are placed in a single layer with some space in between, allowing them to roast evenly.
2. Can I prep this dish in advance?
Absolutely! You can roast the sweet potatoes a day ahead and store them in the fridge. Just warm them up before serving.
3. How do I keep my avocado from browning?
Squeeze some lemon or lime juice on your avocado slices just before serving. This natural acid helps slow down the oxidation process.
4. Can I make this vegan?
Yes! This recipe is already vegan-friendly. Just ensure your rice or quinoa is also vegan, and enjoy away!
Nutritional Info (Optional)
A single serving of this Sweet Potato Taco Bowl contains approximately:
- Calories: 400
- Protein: 12g
- Carbohydrates: 60g
- Fat: 15g
- Fiber: 12g
Please note that these values can vary based on ingredient choices and portion sizes!
And there you have it! A delicious, colorful, and wholesome Sweet Potato Taco Bowl that celebrates the art of easy cooking with elegance. I hope this recipe finds a cherished place in your kitchen, just as it has in mine. Happy cooking, and may your table always be filled with laughter and good food!
PrintSweet Potato Taco Bowl

A delightful bowl filled with roasted sweet potatoes, fluffy rice, creamy avocado, and your favorite toppings; perfect for a cozy dinner.
- Prep Time: 15 minutes
- Cook Time: 30 minutes
- Total Time: 45 minutes
- Yield: 4 servings 1x
- Category: Main Course
- Method: Baking
- Cuisine: Mexican
- Diet: Vegan
Ingredients
- 2 medium sweet potatoes, cubed
- 2 tablespoons olive oil
- 1 teaspoon paprika
- 1 teaspoon ground cumin
- ½ teaspoon chili powder
- Salt & pepper to taste
- Cooked rice or quinoa
- Black beans, rinsed
- Corn kernels
- Avocado slices
- Salsa or sour cream (optional)
Instructions
- Preheat your oven to 425°F (220°C).
- Prepare your sweet potatoes by peeling and cubing them into 1-inch pieces.
- Season the sweet potatoes with olive oil, paprika, cumin, chili powder, salt, and pepper.
- Roast the sweet potatoes in a single layer on a baking sheet for 25–30 minutes, turning halfway.
- Prepare your rice or quinoa according to package instructions.
- Warm the black beans and corn together in a small saucepan over medium heat.
- Slice your avocado and sprinkle with lemon or lime juice.
- Assemble the taco bowl starting with a scoop of rice, then layer roasted sweet potatoes, warm black beans and corn, and avocado slices.
- Finish with salsa, sour cream, or additional toppings of your choice.
- Enjoy your delicious Sweet Potato Taco Bowl!
Notes
You can easily customize this bowl with additional toppings or veggie variations.
Nutrition
- Serving Size: 1 serving
- Calories: 400
- Sugar: 6g
- Sodium: 300mg
- Fat: 15g
- Saturated Fat: 2g
- Unsaturated Fat: 10g
- Trans Fat: 0g
- Carbohydrates: 60g
- Fiber: 12g
- Protein: 12g
- Cholesterol: 0mg
Keywords: sweet potato, taco bowl, vegan recipe, healthy dinner, gluten-free, vegetarian

Creamy Parmesan Beef Linguine with Garlic Butter Sauce
# Creamy Parmesan Beef Linguine with Garlic Butter Sauce: A Cozy Comfort Food Delight

Hello, food lovers! Today, we're diving into a dish that embodies comfort while being elegant enough for any dinner table. If you’re in the mood for a creamy, dreamy, and utterly delicious pasta dish, then our Creamy Parmesan Beef Linguine with Garlic Butter Sauce is just what you need!

## A Taste of Comfort in Every Bite

Picture this: a warm, inviting kitchen where the air is filled with the aromatic scent of garlic sizzling in butter and parmesan melting into a luscious cream sauce. This isn’t just dinner; it’s a symphony of flavors that transports you straight to comfort food heaven. The best part? You can whip it up on a weeknight or impress your guests at a cozy gathering!

My inspiration for this delightful pasta comes from countless evenings spent at my grandmother’s house. She had a knack for transforming simple ingredients into something magical. I remember watching her stir a pot of bubbling sauce, her laughter mingling with the sizzle of garlic, as she recounted stories from her childhood. Pasta was always at the heart of our meals—comforting, unpretentious, and the perfect vessel for family love.

Years later, I found myself recreating those evenings. Armed with my apron and a few cherished recipes, I began experimenting in my kitchen, ultimately landing on this luscious Creamy Parmesan Beef Linguine. It might have started as a simple meal, but with a touch of nostalgia, it became my go-to for feeding both family and friends.

## Ingredients: What You'll Need

To bring this creamy delight to life, you’ll need a few quality ingredients. Here’s your shopping list and some quick notes about each:

- **8 ounces linguine pasta**
  A classic choice—thin yet hearty, linguine is great for twirling around your fork. If you prefer, fettuccine or spaghetti can also work well!

- **1 pound ground beef**
  The star protein in this dish! Lean ground beef provides a rich flavor. Looking for a lighter option? You can use ground turkey or chicken instead.

- **2 tablespoons butter**
  For that luxurious garlic butter base! Unsalted butter allows for better control over the seasoning.

- **4 cloves garlic, minced**
  Fresh garlic elevates this dish with a bold flavor. If you're in a pinch, you can use garlic powder, but fresh is always best.

- **1 cup heavy cream**
  The heart of the creaminess! Heavy cream gives you that decadent texture—if you’re looking for a lighter option, half-and-half can work in a pinch.

- **1 cup grated Parmesan cheese**
  Aged and nutty, parmesan adds a depth of flavor. Don’t have any? Pecorino Romano is a great substitute, though it’s saltier.

- **Salt and pepper to taste**
  Essential for enhancing flavor! Always season as you go.

- **Chopped parsley for garnish**
  Fresh parsley provides a pop of color and brightness. A sprinkle of grated lemon zest can also refresh the dish if you’re feeling adventurous.

## Step-by-Step Instructions: Let’s Get Cooking!

Ready to roll up your sleeves? Here’s how to make your Creamy Parmesan Beef Linguine with Garlic Butter Sauce step by step.

1. **Cook the Linguine**:
   Bring a large pot of salted water to a rolling boil. Add the linguine and cook according to package instructions until al dente (usually around 9-11 minutes). This is a great time to prep your beef and sauce ingredients!

2. **Brown the Ground Beef**:
   In a large skillet, heat 1 tablespoon of butter over medium heat. (The butter adds flavor while preventing the beef from sticking.) Add the ground beef, breaking it apart with a wooden spoon. Cook until browned, about 5-7 minutes. Season with salt and pepper as it cooks.

3. **Sauté the Garlic**:
   Once the beef is nicely browned, push it to one side of the skillet. Add the remaining tablespoon of butter to the empty side; let it melt, then stir in the minced garlic. Sauté for about 30 seconds, until fragrant. Be careful not to let it burn!

4. **Create the Creamy Sauce**:
   Now, slowly pour in the heavy cream, stirring to combine with the beef and garlic. Bring the mixture to a gentle simmer.

5. **Add the Parmesan**:
   Gradually add the grated Parmesan cheese while stirring continuously. This will make the sauce luscious and creamy. If the sauce is too thick, don't be afraid to add a splash reserved pasta water!

6. **Combine Pasta and Sauce**:
   Once the linguine is done cooking, reserve a cup of the pasta water, then drain the linguine. Add it directly to the skillet with the sauce. Toss everything together gently until the pasta is well coated. If the sauce feels too thick, add a little of that reserved pasta water to loosen it up to your desired consistency.

7. **Final Touches**:
   Taste and adjust seasoning with more salt and pepper if needed. Turn off the heat and let the mixture sit for a minute. It will thicken slightly as it cools.

## Serving Suggestions: Make it Beautiful!

No exceptional meal is complete without a little finesse in presentation! For this creamy pasta, I suggest serving it in warm, shallow bowls. Twirl a generous portion of the linguine in the center and let the sauce cascade elegantly over it. Finish with a sprinkle of chopped parsley and a light dusting of extra Parmesan cheese for that touch of refinement.

If you’re entertaining, consider adding a slice of crispy garlic bread on the side or a fresh green salad drizzled with a lemon vinaigrette to balance out the richness of the dish!

## Recipe Variations: Play with Your Pasta!

While this dish is stunning as is, here are some delightful variations to consider:

1. **Vegetable Upgrade**: Toss in some sautéed spinach or sun-dried tomatoes for extra color and nutrition.

2. **Mushroom Lovers**: Add sautéed mushrooms to the beef for an earthy flavor boost.

3. **Zesty Twist**: Mix in a squeeze of fresh lemon juice to brighten the creamy sauce and complement the richness.

4. **Spicy Kick**: Add a pinch of red pepper flakes right before pouring in the cream for a gentle heat.

5. **Pasta Swap**: Use zoodles (zucchini noodles) or whole wheat pasta for a lighter or healthier twist.

## Chef’s Notes: A Personal Touch

This pasta recipe has evolved over the years from a simple weeknight meal to a cherished family favorite. I remember the first time I invited friends over to share it. There were smiles, laughter, and, most importantly, the delightful sounds of people enjoying every bite.

As we gathered around the table, someone, completely enamored by the dish, said it felt like “a warm hug on a plate.” That’s precisely the kind of comfort I aim to create in my kitchen—simple, beautiful, and most importantly, shared with loved ones.

## FAQs and Troubleshooting: Let’s Clear Things Up!

**Q1: Why did my sauce curdle?**
A: This can happen if the cream is cooked at too high a heat. Keep your heat low and stir occasionally to maintain a smooth consistency.

**Q2: Can I make this dish ahead of time?**
A: Absolutely! You can prepare everything and store it in the fridge. Reheat gently on the stove, adding a splash of cream or chicken broth to bring it back to life.

**Q3: My sauce is too thick. What should I do?**
A: No worries! Just add a bit of the reserved pasta water or more heavy cream to thin it out. Stir well until you reach the desired consistency.

**Q4: How do I store leftovers?**
A: Store leftovers in an airtight container in the fridge for up to three days. Reheat gently on the stove with a splash of water or cream to prevent dryness.

## Nutritional Info (Optional):

While I believe in enjoying food without guilt, understanding the nutritional composition can be helpful. A serving of this creamy pasta (with ground beef) clocks in at approximately:

- **Calories**: 600-700
- **Protein**: 30g
- **Carbohydrates**: 60g
- **Fat**: 30g

*Note: Nutritional values may vary based on specific ingredients and serving sizes used.*

---

So there you have it—my Creamy Parmesan Beef Linguine with Garlic Butter Sauce! It’s an elegant dish that’s easy enough for a Tuesday night but fancy enough to impress your guests. I hope you try it and share it around your own table, creating memories just as I did.

Let’s keep inspiring one another in the kitchen! Until next time, happy cooking!

**Savannah Pierce**
Creamy Parmesan Beef Linguine with Garlic Butter Sauce

A cozy and elegant pasta dish featuring creamy parmesan sauce and ground beef, perfect for any dinner table.
- Prep Time: 15 minutes
- Cook Time: 30 minutes
- Total Time: 45 minutes
- Yield: 4 servings 1x
- Category: Main Course
- Method: Baking
- Cuisine: Italian
- Diet: None
Ingredients
- 8 ounces linguine pasta
- 1 pound ground beef
- 2 tablespoons butter
- 4 cloves garlic, minced
- 1 cup heavy cream
- 1 cup grated Parmesan cheese
- Salt and pepper to taste
- Chopped parsley for garnish
Instructions
- Cook the linguine: Bring a large pot of salted water to a rolling boil. Add the linguine and cook according to package instructions until al dente (usually around 9-11 minutes).
- Brown the ground beef: In a large skillet, heat 1 tablespoon of butter over medium heat. Add the ground beef, breaking it apart with a wooden spoon. Cook until browned, about 5-7 minutes. Season with salt and pepper as it cooks.
- Sauté the garlic: Push the beef to one side of the skillet. Add the remaining tablespoon of butter to the empty side; let it melt, then stir in the minced garlic. Sauté for about 30 seconds, until fragrant.
- Create the creamy sauce: Slowly pour in the heavy cream, stirring to combine with the beef and garlic. Bring to a gentle simmer.
- Add the Parmesan: Gradually add the grated Parmesan cheese while stirring continuously. If the sauce is too thick, add a splash of reserved pasta water!
- Combine pasta and sauce: Once the linguine is done cooking, reserve a cup of pasta water, then drain. Add the linguine to the skillet with the sauce and toss until well coated.
- Final touches: Taste and adjust seasoning with more salt and pepper if needed. Let the mixture sit for a minute to thicken slightly.
Notes
For added flavor, consider tossing in sautéed mushrooms or spinach. This dish can be made ahead and reheated gently.
Nutrition
- Serving Size: 1 serving
- Calories: 650
- Sugar: 5g
- Sodium: 500mg
- Fat: 35g
- Saturated Fat: 20g
- Unsaturated Fat: 10g
- Trans Fat: 0g
- Carbohydrates: 60g
- Fiber: 3g
- Protein: 30g
- Cholesterol: 80mg
Keywords: pasta, comfort food, creamy sauce, beef linguine, Italian dinner

Bang Bang Chicken Skewers
Bang Bang Chicken Skewers: A Flavorful Journey to the Grill
Hello, fellow food enthusiasts! It’s Savannah here, and today I’m tickled to share one of my favorite recipes that brings the sizzle and spice right to your backyard or dining table: Bang Bang Chicken Skewers. If you’re in the mood for something that’s both elegant and easy to whip up, you’ve stumbled onto the right recipe!
Picture this: a warm summer evening, the sun dipping low, golden rays cascading onto your patio, laughter ringing in the air, and the tantalizing aroma of chicken grilling to perfection. These Bang Bang Chicken Skewers are truly the stars of the show, bringing together juicy chicken with a creamy, spicy sauce that you’ll want to drizzle (or slather) on everything! It’s all about having fun in the kitchen, and trust me, these skewers are an accessible way to bring a culinary flair without breaking a sweat.
The beauty of Bang Bang Chicken Skewers lies not just in their flavor, but also in their adaptability. They’re great for weeknight dinners, friendly gatherings, or even more formal occasions. Plus, the vibrant colors and the delightful presentation will make your plate pop! Whether you’re an experienced cook or a newbie looking to impress, I’m here to walk you through it step by step. So grab your apron, and let’s get started!
Personal Story
I first encountered Bang Bang Chicken Skewers at a friend’s birthday party a few summers ago. It was one of those magical evenings where everything just clicked: the lights were twinkling, the music was playing, and the food was simply divine. My friend’s mom had grilled these skewers to perfection, and as I took my first bite, the explosion of flavors danced merrily on my palate. The hint of sweetness from the chili sauce, the subtle heat of sriracha, and the creamy mayo brought a delightful balance that had me reaching back for seconds.
That moment sparked a mission: to recreate those skewers and bring that joyful experience to my own table. After some experimenting in the kitchen – a little trial and error here and there – I finally perfected my version. Each skewer now brings a wave of nostalgia and happiness, perfectly suited for gatherings or quiet dinners at home. So, here’s a recipe that invites you to replicate a moment of joy, flavor by flavor!
Ingredients
Here’s what you’ll need to make these crowd-pleasing Bang Bang Chicken Skewers:
-
1 lb Chicken Breast, cubed
A classic choice; chicken breast remains tender and juicy when marinated and grilled. You could substitute with chicken thighs for added flavor if you prefer a richer taste. -
1/2 cup Mayonnaise
Adds creaminess and richness to our sauce. For a lighter version, try using Greek yogurt instead, which will provide a similar tanginess with fewer calories. -
1/4 cup Sweet Chili Sauce
This is the backbone of our Bang Bang sauce, lending a perfect balance of sweetness. No sweet chili sauce? You can use hoisin sauce mixed with a bit of sugar as a substitute. -
1-2 tablespoons Sriracha (to taste)
Gives that signature kick! Feel free to adjust the amount based on your heat tolerance. For a milder flavor, switch to a less spicy hot sauce or omit it altogether. -
1 tablespoon Lime Juice
Fresh lime juice brightens the dish and enhances the flavors. In a pinch, lemon juice can be used as a zesty alternative. -
Salt and Pepper to taste
Essential for enhancing the overall flavors of the dish. Don’t skip this – it makes a huge difference! -
Skewers (wooden or metal)
Wooden skewers should be soaked in water for at least 30 minutes prior to using them to prevent burning. Metal skewers are great because they don’t require this step!
Step-by-Step Instructions
-
Prepare The Marinade:
In a medium bowl, combine the mayonnaise, sweet chili sauce, sriracha, lime juice, and a pinch of salt and pepper. Whisk until smooth and well-blended. The texture should be creamy yet pourable. This marinade is both a basting sauce for the chicken and a delicious dipping sauce for when the skewers are ready to serve. Yum! -
Marinate the Chicken:
Cube the chicken breast into bite-sized pieces (about 1-inch cubes). Add the chicken to the marinade, ensuring each piece is generously coated. Cover the bowl with plastic wrap and let it marinate in the fridge for at least 30 minutes. If you have time, marinating for a few hours will elevate the flavor even more! -
Skewer the Chicken:
Preheat your grill to medium-high heat. While it’s heating up, thread the cubed chicken onto your skewers. Leave a bit of space between each piece to ensure even cooking. If you’re using wooden skewers, remember those should be soaking in water for at least 30 minutes before threading. -
Grill The Skewers:
Place the skewers on the grill and cook for about 10-12 minutes, turning occasionally, until the chicken is golden brown and reaches an internal temperature of 165°F (75°C). If you fancy a bit of charring (who doesn’t!), feel free to cook a tad longer, but keep an eye on them to avoid burning. -
Baste and Brown:
During the last few minutes of grilling, brush a little of the remaining marinade on the skewers. This will enhance the flavor and add a beautiful glaze. You might want to reserve just a touch more marinade for an extra serving sauce — perfect for dipping! -
Serve Immediately:
Once the chicken is cooked through and beautifully charred, remove the skewers from the grill and let them rest for a minute. This step allows the juices to redistribute. Serve the skewers with any remaining sauce (it’s too good to waste!) and enjoy those satisfied smiles around the table!
Serving Suggestions
Plate these Bang Bang Chicken Skewers on a vibrant platter, perhaps over a bed of lightly dressed greens or alongside a fragrant rice dish. Drizzling the extra sauce over the skewers will not only enhance the presentation but compel your guests to reach for another! Consider garnishing with freshly chopped cilantro or green onions for an added pop of color and flavor.
Recipe Variations
-
Vegetarian Version: Swap out the chicken with cubed tofu or larger vegetable chunks (like zucchini, bell peppers, or mushrooms) for a delightful meat-free option.
-
Add a Simple Side: Serve with a refreshing cucumber salad or pickled vegetables to counterbalance the richness of the skewers.
-
Sriracha Alternative: For a smoky flavor, replace sriracha with chipotle sauce or harissa. It will add a different layer of complexity!
-
Flavor Twist: Incorporate different nut butters (think peanut or cashew) into the marinade for a nutty flavor, and up the creaminess. Just be mindful of allergens!
-
Asian Flair: If you want to go further with the Asian vibe, consider adding a splash of sesame oil for depth of flavor or some crushed peanuts for texture.
Chef’s Notes
Every recipe tells a story and, oh boy, do I have one with these Bang Bang Chicken Skewers! It’s evolved over time from that memorable birthday party into something I confidently serve at my own gatherings. I remember one summer night, I decided to attempt these skewers for a dinner with friends. To my horror, I realized I was out of sweet chili sauce—and panic set in! After a brief moment of ingenuity and a dash of this and that from my pantry, I mixed up a makeshift sauce that surprisingly was a hit. Now, I could tell you about my various mishaps in the kitchen, but I prefer to think of my kitchen as a playground; sometimes, the best flavors come from a little adventurous improvisation!
FAQs and Troubleshooting
Q: My chicken skewers are dry. What did I do wrong?
Don’t fret! Dry chicken usually means they were overcooked. Keep an eye on the grill, and use a meat thermometer to ensure that the internal temperature reaches 165°F (75°C) but no more. Marinating also helps keep the chicken juicy.
Q: My sauce is too spicy! How do I tone it down?
If you find the sauce too hot, a dash more mayonnaise can help balance out the heat. Alternatively, you can mix in a bit of honey or sugar for sweetness.
Q: Can I bake these skewers instead of grilling?
Absolutely! Preheat your oven to 400°F (200°C) and place the skewers on a baking sheet lined with parchment paper. Bake for about 20-25 minutes, turning them halfway through, until the chicken is cooked through.
Q: How do I store leftovers?
Place any leftover skewers in an airtight container and store them in the refrigerator for up to 3 days. They also make for a rewarding cold lunch the next day!
Nutritional Info (Optional)
While the specific nutritional content can vary based on brands and cooking methods, here’s a concise estimate for one serving (assuming 4 servings total) of Bang Bang Chicken Skewers:
- Calories: 320
- Protein: 30g
- Fat: 20g (mostly from the mayo)
- Carbohydrates: 10g
- Dietary Fiber: 1g
- Sugar: 4g
Bang Bang Chicken Skewers are not just a dish; they are a celebration of flavors, memories, and the joy of sharing meals with those you love. I hope you enjoy crafting these as much as I do! Let’s keep the flavors flowing, and don’t hesitate to share your own kitchen adventures with me. Happy cooking!
PrintBang Bang Chicken Skewers

Flavorful Bang Bang Chicken Skewers with a creamy, spicy sauce that’s perfect for grilling at any gathering.
- Prep Time: 10 minutes
- Cook Time: 12 minutes
- Total Time: 42 minutes
- Yield: 4 servings 1x
- Category: Appetizer
- Method: Grilling
- Cuisine: Asian
- Diet: Gluten-Free
Ingredients
- 1 lb Chicken Breast, cubed
- 1/2 cup Mayonnaise
- 1/4 cup Sweet Chili Sauce
- 1–2 tablespoons Sriracha (to taste)
- 1 tablespoon Lime Juice
- Salt and Pepper to taste
- Skewers (wooden or metal)
Instructions
- Prepare the Marinade: In a medium bowl, combine mayonnaise, sweet chili sauce, sriracha, lime juice, and a pinch of salt and pepper. Whisk until smooth and well-blended.
- Marinate the Chicken: Cube the chicken breast into bite-sized pieces. Add the chicken to the marinade, ensuring each piece is generously coated. Cover and let it marinate in the fridge for at least 30 minutes.
- Skewer the Chicken: Preheat your grill to medium-high heat. Thread the cubed chicken onto the skewers, leaving space between each piece.
- Grill The Skewers: Place the skewers on the grill and cook for about 10-12 minutes, turning occasionally until golden brown and cooked through.
- Baste and Brown: During the last few minutes of grilling, brush remaining marinade on the skewers.
- Serve Immediately: Let the skewers rest for a minute after grilling and serve them with any leftover sauce.
Notes
For a vegetarian version, substitute chicken with cubed tofu or vegetables. Enjoy with a refreshing side salad or rice.
Nutrition
- Serving Size: 1 skewer
- Calories: 320
- Sugar: 4g
- Sodium: 500mg
- Fat: 20g
- Saturated Fat: 5g
- Unsaturated Fat: 10g
- Trans Fat: 0g
- Carbohydrates: 10g
- Fiber: 1g
- Protein: 30g
- Cholesterol: 70mg
Keywords: Bang Bang Chicken, Chicken Skewers, Grill Recipes, Asian Cuisine, Appetizers, Party Food

Cowboy Butter Steak & Broccoli Linguine Recipe
# Cowboy Butter Steak & Broccoli Linguine Recipe

## Introduction

Welcome to the delicious world of Cowboy Butter Steak & Broccoli Linguine! If you’ve ever thought that a meal could embody the very spirit of a cozy supper with a touch of Western charm, you’ve just hit the jackpot! This dish is all about the marriage of succulent steak, vibrant broccoli, and a luscious butter sauce that’s packed with flavor. It’s perfect for a date night, a family gathering, or even a casual weeknight culinary escape.

Imagine this: You’re snug in your kitchen, maybe a little music playing in the background, the savory aroma of sizzling steak is wafting through the air, and you know that in just a few short minutes, something wonderful is going to happen—a magical meal that brings people together at the table. This isn't just any ordinary pasta; we're turning up the flavor dial with Cowboy Butter, ensuring every bite feels like a warm hug.

So, what’s the deal with “Cowboy Butter”? It’s not just a cheeky name; it’s a robust compound butter that elevates every dish it graces. You’re going to love how it wraps itself around the steak and linguine, making each forkful an unforgettable experience. Grab your apron because we’re about to create something truly special!

## Personal Story

Ah, the memories of my childhood kitchen come rushing back as I think about a dish like Cowboy Butter Steak & Broccoli Linguine. I remember my father returning after a long week at work, his face lighting up at the sight of steak sizzling on the grill and a hearty pasta dinner in the mix. That was our evening routine—lively chatter, laughter, and of course, sharing food that meant love and home.

I would stand by my mom, eagerly asking questions while she cooked, and she’d say, “You can never go wrong with good butter and garlic, honey.” Those words stuck with me. Now, every time I make a dish that calls for butter, I’m transported back to those simple, yet meaningful moments. This recipe brings that same warmth to my table, and I hope it brings a little nostalgia to yours too!

## Ingredients

Here’s what you’ll need for this delightful meal:

- **1 lb sirloin or ribeye steak**: These cuts are tender and flavorful. Ribeye is richer due to its marbling, while sirloin is leaner. Both are fantastic choices! For a budget-friendly option, you can substitute with flank steak or chicken if you prefer.

- **1 tsp smoked paprika**: Adds a lovely smoky flavor. If you want to change it up, try regular paprika or even chili powder for a kick.

- **½ tsp garlic powder**: A pantry staple that enhances flavor. Fresh minced garlic can also be used, just double the amount!

- **½ tsp black pepper**: Freshly ground is the best option for a robust flavor. Whole peppercorns can be crushed if you’d like some extra texture.

- **Salt, to taste**: Always a key seasoning! Opt for kosher salt or sea salt for the best results.

- **2 tbsp olive oil**: This will help sear your steak beautifully. You can swap it out for avocado oil if you’re looking for a higher smoke point.

- **6 tbsp unsalted butter**: The star of our Cowboy Butter! Unsalted butter allows more control over seasoning. Feel free to use ghee for a lactose-free version.

- **4 cloves garlic, minced**: Fresh garlic will give your Cowboy Butter that fragrant boost. If you're not a huge garlic fan, you can reduce the amount.

- **½ tsp crushed red pepper flakes (optional)**: For those who like a little heat! Adjust to taste, or skip if you prefer a milder version.

- **1 tsp Dijon mustard**: It adds a rich tanginess to the butter. You can substitute with yellow mustard if needed or leave it out for a classic butter flavor.

- **Juice of 1 lemon**: Brightens the dish beautifully! Lime juice can be a great substitute if lemons aren't handy.

- **2 tbsp fresh parsley, chopped**: This herb adds freshness and color. Cilantro can work too if you're after a different flavor profile.

- **1 tbsp fresh chives, chopped**: Offers a mild onion flavor that complements the butter. Green onions can be used if you prefer.

- **12 oz linguine**: Perfect for capturing that luscious sauce! Gluten-free pasta or zoodles (zucchini noodles) can be used for a lighter version.

- **3 cups broccoli florets**: Broccoli not only adds flavor but also bright green color. Asparagus or green beans can be fabulous substitutes here!

- **½ cup reserved pasta water**: When cooking pasta, save that starchy water! It works wonders for making the sauce creamy.

- **½ cup grated Parmesan cheese (plus extra for serving)**: Adds a nutty, rich finish. Pecorino Romano is a flavorful alternative if you'd like something with a bit more bite.

## Step-by-Step Instructions

Now that we’ve gathered our ingredients, let’s dive into this mouthwatering journey:

1. **Cook the linguine**: Bring a large pot of salted water to a boil over high heat. Add linguine and cook according to package instructions, usually about 9-11 minutes. You want it al dente since it will keep cooking in the pan with the steak and broccoli later. Once it’s done, *don’t forget to reserve about a half-cup of that precious pasta water* before draining!

    *Chef’s Tip*: Always salt your pasta water generously. It’s your only chance to infuse flavor into the noodles!

2. **Prepare the broccoli**: Add the broccoli florets to the boiling pasta water during the last 2-3 minutes of the linguine cooking time. This ensures they cook just enough to be tender yet crunchy. Drain both together and set aside.

    *Pro Tip*: You can also steam the broccoli instead for a vibrant color and slightly different texture!

3. **Season and sear the steak**: While the pasta and broccoli are cooking, let’s work on that steak! Place your steak cubes in a bowl and season them with smoked paprika, garlic powder, black pepper, and a good pinch of salt. Make sure every piece is well-coated, as this will enhance the flavor.

    *Chef Hack*: For a deeper flavor, let your steak sit at room temperature for about 30 minutes after seasoning—this helps the spices penetrate more deeply.

4. **Heat the oil**: In a large skillet, heat 2 tablespoons of olive oil over medium-high heat. Once the oil is shimmering, add the seasoned steak in a single layer (do this in batches if necessary to avoid steaming).

    *Sizzle Alert*: You want that steak to sizzle right as it touches the pan for a beautiful crust!

5. **Sear the steak**: Cook the steak for about 3-4 minutes on one side without moving it, then flip and cook for another 2-3 minutes. The goal is a beautiful brown crust while keeping the center juicy. If you like it more well-done, just adjust the cooking time accordingly.

    *Chef Insight*: A meat thermometer can be your best friend here! Aim for 130-135°F for medium-rare.

6. **Add the butter and garlic**: Once your steak is cooked to perfection, reduce the heat to medium. Add the unsalted butter and minced garlic to the skillet. Stir them around until the butter melts and the garlic becomes fragrant (around 1-2 minutes).

    *Magic Moment*: This is where the Cowboy Butter action begins! You’ll be mesmerized by that buttery garlic aroma—just wait until it combines with your pasta!

7. **Incorporate the remaining ingredients**: Next, add the Dijon mustard, lemon juice, crushed red pepper flakes (if using), chives, and herbs. Toss to combine, letting all those beautiful flavors mingle together.

    *Don’t rush this part*—the more you swirl, the more delicious flavors come together!

8. **Combine linguine and broccoli**: Add your drained linguine and broccoli to the skillet along with the reserved pasta water and Parmesan cheese. Toss everything well to coat in the Cowboy Butter sauce.

    *Final Touch*: If the pasta seems dry, add a splash more of that reserved pasta water until you reach your desired consistency.

## Serving Suggestions

When it comes to plating, remember that presentation is key but does not have to be perfect! Twirl some of the linguine onto a plate, making a nest for those vibrant green broccoli florets and juicy steak. Sprinkle a little more grated Parmesan on top and a drizzle of the buttery sauce. Add a few fresh parsley leaves for a pop of color. Voila! Your table is ready for some serious compliments!

## Recipe Variations

Get a little creative with these flavor options:

- **Spicy Cowboy Butter**: Add a touch more crushed red pepper flakes or even a drizzle of sriracha for an extra kick.

- **Cheesy Spin**: Stir in some cream cheese for an even creamier sauce, or swap the Parmesan for a melty blend of Italian cheeses.

- **Vegetarian Option**: Skip the steak and opt for sautéed mushrooms as a meaty alternative or toss in roasted chickpeas for a hearty plant-based twist.

- **Zesty Addition**: Play with different citrus! Lime juice or a bit of orange zest can brighten up the Cowboy Butter in a fun way.

- **Herbaceous Delight**: Experiment with different herbs like thyme or basil for a fresh surprise in every bite.

## Chef’s Notes

You know, recipes are like old friends—there's a story behind every single one! This Cowboy Butter Steak & Broccoli Linguine has evolved over the years. It started as just a "what's in the fridge?" meal, but has transformed into this elegantly simple dish that I’m proud to share.

I remember my first attempt; I accidentally flipped the steak too soon and ended up with a rubbery mess. Yikes! But oh, what a learning experience! Now, every time I cook, I embrace imperfections; it’s all part of the process, right? It made me realize that cooking is about enjoying the moment—who cares if the garlic is a little browned?

## FAQs and Troubleshooting

1. **What if my pasta sauce is too thick?**
   Simply add a little more reserved pasta water or a splash of chicken or vegetable broth to loosen it up.

2. **How can I prevent my steak from overcooking?**
   Keep an eye on the internal temperature with a meat thermometer and remember that it will continue to cook a little after being removed from the heat.

3. **Can I make this in advance?**
   Absolutely! You can cook the steak and pasta ahead of time, just toss them together with the Cowboy Butter when you're ready to serve.

4. **Why is my steak tough?**
   Cooking it too long or at too high a heat might be to blame. Try using a more tender cut or allowing the steak to rest before cutting into it to maintain tenderness.

## Nutritional Info (if applicable)

*(Optional, add relevant nutritional facts if desired.)*

In closing, I hope this Cowboy Butter Steak & Broccoli Linguine receives the warmest welcome on your dining table, just as it has on mine. Remember, cooking is about love and togetherness, and I’m so honored to share this experience with you. Now, pour yourself a glass of something bubbly, tie that apron, and let's create beautiful moments around your table. Bon appétit!
Cowboy Butter Steak & Broccoli Linguine

A delightful meal featuring succulent steak, vibrant broccoli, and a luscious Cowboy Butter sauce over linguine.
- Prep Time: 15 minutes
- Cook Time: 30 minutes
- Total Time: 45 minutes
- Yield: 4 servings 1x
- Category: Main Course
- Method: Stovetop
- Cuisine: Italian
- Diet: Beef
Ingredients
- 1 lb sirloin or ribeye steak
- 1 tsp smoked paprika
- ½ tsp garlic powder
- ½ tsp black pepper
- Salt, to taste
- 2 tbsp olive oil
- 6 tbsp unsalted butter
- 4 cloves garlic, minced
- ½ tsp crushed red pepper flakes (optional)
- 1 tsp Dijon mustard
- Juice of 1 lemon
- 2 tbsp fresh parsley, chopped
- 1 tbsp fresh chives, chopped
- 12 oz linguine
- 3 cups broccoli florets
- ½ cup reserved pasta water
- ½ cup grated Parmesan cheese (plus extra for serving)
Instructions
- Cook the linguine: Bring a large pot of salted water to a boil over high heat. Add linguine and cook according to package instructions, usually about 9-11 minutes. Reserve about a half-cup of that precious pasta water before draining!
- Prepare the broccoli: Add the broccoli florets to the boiling pasta water during the last 2-3 minutes of the linguine cooking time. Drain both together and set aside.
- Season and sear the steak: Season steak cubes with smoked paprika, garlic powder, black pepper, and salt.
- Heat the oil: In a large skillet, heat 2 tablespoons of olive oil over medium-high heat. Add the seasoned steak in a single layer.
- Sear the steak: Cook the steak for about 3-4 minutes on one side without moving it. Flip and cook for another 2-3 minutes.
- Add the butter and garlic: Reduce the heat to medium. Add the unsalted butter and minced garlic to the skillet.
- Incorporate the remaining ingredients: Add Dijon mustard, lemon juice, crushed red pepper flakes, chives, and herbs. Toss to combine.
- Combine linguine and broccoli: Add drained linguine and broccoli to the skillet along with reserved pasta water and Parmesan cheese. Toss well to coat.
Notes
This dish can be varied with spicy or cheesy options. Serve with additional Parmesan on top!
Nutrition
- Serving Size: 1 serving
- Calories: 450
- Sugar: 3g
- Sodium: 500mg
- Fat: 22g
- Saturated Fat: 10g
- Unsaturated Fat: 9g
- Trans Fat: 0g
- Carbohydrates: 40g
- Fiber: 4g
- Protein: 30g
- Cholesterol: 70mg
Keywords: steak, linguine, cowboy butter, broccoli, pasta