
Creamy Vegan Mango Cheesecake Bars
Creamy Vegan Mango Cheesecake Bars
Hello, fellow foodies! 🌟 Today, we’re diving into a deliciously dreamy treat that’s perfect for just about any occasion. If you’re looking for something to impress your guests, elevate your gatherings, or simply pamper yourself during a quiet night in, I’ve got just the recipe for you: Creamy Vegan Mango Cheesecake Bars!
Now, you may be wondering, “How can cheesecake be vegan?” Well, let me tell you, the magic of plant-based ingredients allows for a creamy texture and delightful flavor that’ll have you coming back for seconds—and maybe thirds! These bars are not only decadent and delicious but also light and refreshing thanks to the tropical notes of luscious mango. And the best part? They’re super easy to whip up. Grab your apron, and let’s get started!
I created these bars because I believe dessert should be an experience—something that makes you nostalgic while also making you feel good. Just imagine biting into that velvety mango goodness, the creamy cashew filling melting in your mouth, with a hint of coconut that makes you feel like you’re on a sunny beach far away. Whether you’re planning a picnic, a summer party, or just a cozy night in, these bars are here to bring a bit of sunshine to your day. Let’s bring some tropical vibes to the kitchen!
Personal Story
I often think back to my childhood summers spent in my grandmother’s kitchen. She had this magical ability to turn the simplest ingredients into unforgettable treats. One of my favorites was her classic cheesecake; the way it would set just right in the fridge, creating that perfect blend of rich creaminess—something about it felt like home. Fast forward to adulthood, and I was craving that nostalgic taste, but with a twist that aligns with my plant-forward lifestyle.
The first time I made these mango cheesecake bars, I was struck by memories of those bright, sunny days. The vibrant yellow mango puree brought back the sweet essence of summer, almost like a sunny hug. I remember biting into one of those first bars, and I was immediately transported back to my grandmother’s kitchen. It’s a beautiful reminder of how food connects us to our past while allowing us to craft new experiences. From one nostalgia-filled dessert to another, this recipe is a celebration of flavor and memory. 🎉
Ingredients
-
2 cups cashews, soaked
Cashews provide a creamy texture and serve as the base for our cheesecake filling. Make sure to soak them in water for at least 4 hours (or overnight) to ensure they’re soft and blend easily. If you’re short on time, you can use boiling water for a quick soak (about an hour). -
1 cup mango puree
Mango brings that tropical sweetness and vibrant color. You can buy canned mango puree or blend fresh mango until smooth. If you’re looking for alternatives, try using other fruit purees like passionfruit or even banana for a different take! -
1/2 cup coconut milk
Coconut milk lends rich creaminess while adding a lovely subtle flavor. Use full-fat for extra richness, or if you’re looking for a lighter feel, opt for light coconut milk. Unsweetened almond milk can also work here, but you may want to compensate with a bit more fat from the cashews. -
1/4 cup agave syrup or maple syrup
This sweetener balances the richness of the cheesecake with a gentle sweetness. Maple syrup adds a delightful earthy note, while agave has a neutral flavor. Either option works wonderfully, so choose based on your personal preference! -
1/4 cup lemon juice
Fresh lemon juice brightens up the flavors and provides that classic cheesecake tang. For a different twist, try lime juice for a zesty variation. -
1 teaspoon vanilla extract
Vanilla is the secret ingredient that ties everything together, adding warmth to our cheesecake filling. Use pure vanilla extract for the best flavor—homemade vanilla bean paste can also add a delightful touch! -
1 cup almond flour (for the crust)
Almond flour gives the crust a nutty flavor while keeping things gluten-free. If you don’t have almond flour, you can use finely ground oats or a gluten-free flour blend as an alternative. -
2 tablespoons coconut oil (melted)
Coconut oil helps to bind the crust together and solidifies as it cools, creating that perfect texture. If you’re looking for a nut-free option, vegan margarine can work, too. -
2 tablespoons agave syrup or maple syrup (for the crust)
Just like in the filling, we’ll use some sweetener in our crust to tie the flavors together. This will help it firm up nicely while adding a touch of sweetness.
Step-by-Step Instructions
Step 1: Prepare the Cashews
Start by soaking your cashews in water for at least 4 hours (or overnight, if you have the time!). Once they’re nice and soft, drain and rinse them well. This step is crucial; it ensures our “cheese” filling blends smoothly into a creamy, dreamy mixture without any grit.
Step 2: Make the Crust
In a medium bowl, combine 1 cup of almond flour, 2 tablespoons melted coconut oil, and 2 tablespoons agave (or maple syrup). Mix until you have a crumbly texture that sticks together when pressed. If it feels too dry, add a tiny splash of water or more coconut oil.
Chef Tip: Line your baking dish with parchment paper for easy removal later on! Press the crust mixture firmly into the bottom of an 8-inch square pan to create an even layer. Use the back of a measuring cup to get it nice and compact.
Step 3: Blend the Filling
In a high-speed blender, combine the soaked cashews, 1 cup mango puree, 1/2 cup coconut milk, 1/4 cup agave, 1/4 cup lemon juice, and 1 teaspoon vanilla extract. Blend until completely smooth and creamy, scraping down the sides as needed.
Little Chef Hack: Taste the filling! Don’t be afraid to adjust sweetness or acidity to your preference. If you love more tanginess, add a bit more lemon juice. Prefer it sweeter? Toss in another drizzle of agave!
Step 4: Pour It All Together
Once the filling is smooth, pour it over the prepared crust in the baking dish. Gently spread it out to ensure it’s even.
Step 5: Chill, Chill, Chill!
Cover the dish with plastic wrap or a lid and place it in the freezer for at least 4 hours to set. For best results, chill overnight. This will help the bars firm up beautifully!
Step 6: Slice and Serve
Once fully set, remove the dish from the freezer and let it soften out for about 10 minutes before slicing. Use a sharp knife to cut it into squares or bars—dipping the knife in warm water first makes clean cuts easier!
Step 7: Final Touches
Feel free to garnish with extra mango slices, a sprinkle of shredded coconut, or even a drizzle of coconut cream for an added touch of elegance.
Serving Suggestions
When it’s time to serve these delightful mango cheesecake bars, plating matters! Arrange them on a beautiful platter, and consider adding edible flowers or fresh mint leaves for color. Pair with a light, sparkling beverage, like a fruity spritzer, to create an inviting atmosphere. These bars are perfect for sharing, so be sure to slice them nicely for your guests to enjoy!
Recipe Variations
-
Berry Swirl Variation: Add a berry swirl to the mango filling. Simply blend a cup of your favorite berries with a touch of sweetener and drop spoonfuls into the filling before freezing. Swirl gently with a knife to create a marbled effect.
-
Chocolate Crust: For a decadent twist, mix in 2 tablespoons of cocoa powder into the almond flour crust for a chocolatey base.
-
Spiced Version: Add warmth to the filling by incorporating a pinch of cinnamon or nutmeg. This will give it a cozy feel perfect for fall!
-
Nut-Free Alternative: Substitute almond flour with sunflower seed flour to make the crust nut-free, for those with allergies.
Chef’s Notes
I absolutely love how this vegan mango cheesecake bars recipe has evolved over time. I once tried using different tropical fruits, such as pineapple and passionfruit, and they all brought a unique twist to the classic flavor! Just the other day, I caught my niece trying to sneak a bite before dinner—clearly, these treats have a way of making themselves known. 😄
Also, I fondly remember the time I brought these to a picnic. They were a hit! People were raving and asking for the recipe, which is always such a flattering moment for a chef. Remember, food has a way of fostering connections, sparking joy, and creating memories, just as it did for me around Grandma’s table.
FAQs and Troubleshooting
1. Why are my cheesecake bars not setting?
Ensure you’ve allowed enough chilling time. If you’re still finding the texture is not firming up, it may be due to too much coconut milk. In future batches, cut back on the liquid a little more if needed.
2. Can I make these without refined sugar?
Absolutely! Both agave and maple syrup are natural sweeteners. You can also try using other alternatives like dates or monk fruit sweetener, just adjust the measurement and blend properly.
3. My crust is too crumbly – what went wrong?
This can happen if there isn’t enough wet ingredient to bind it together. Try adding a little more melted coconut oil or sweetener to hold things together.
4. How do I store leftovers?
These bars can be stored in an airtight container in the freezer for up to 3 months, or in the refrigerator for about a week. Just remember to slice them before freezing!
Of course, as with all recipes, feel free to get a little creative and make them your own. Cooking is about love, joy, and sharing those beautiful moments with those around you. So tie on that apron, gather your ingredients, and let’s make these Creamy Vegan Mango Cheesecake Bars together! 🍰✨
PrintCreamy Vegan Mango Cheesecake Bars

Deliciously creamy and refreshing vegan cheesecake bars made with luscious mango and a nutty crust, perfect for any occasion.
- Prep Time: 15 minutes
- Cook Time: 0 minutes
- Total Time: 240 minutes
- Yield: 16 servings 1x
- Category: Dessert
- Method: Chilling
- Cuisine: Vegan
- Diet: Vegan
Ingredients
- 2 cups cashews, soaked
- 1 cup mango puree
- 1/2 cup coconut milk
- 1/4 cup agave syrup or maple syrup
- 1/4 cup lemon juice
- 1 teaspoon vanilla extract
- 1 cup almond flour (for the crust)
- 2 tablespoons coconut oil, melted
- 2 tablespoons agave syrup or maple syrup (for the crust)
Instructions
- Prepare the cashews by soaking them in water for at least 4 hours. Drain and rinse well.
- Make the crust by combining almond flour, melted coconut oil, and agave in a bowl. Press into an 8-inch square pan.
- Blend the soaked cashews, mango puree, coconut milk, agave, lemon juice, and vanilla extract in a high-speed blender until smooth.
- Pour the filling over the prepared crust and spread evenly.
- Chill in the freezer for at least 4 hours or overnight.
- Slice the bars once set, allowing them to soften for 10 minutes before cutting.
- Serve garnished with mango slices or shredded coconut, if desired.
Notes
These bars can be stored in an airtight container in the freezer for up to 3 months, or in the refrigerator for about a week.
Nutrition
- Serving Size: 1 bar
- Calories: 200
- Sugar: 10g
- Sodium: 5mg
- Fat: 12g
- Saturated Fat: 6g
- Unsaturated Fat: 6g
- Trans Fat: 0g
- Carbohydrates: 24g
- Fiber: 3g
- Protein: 3g
- Cholesterol: 0mg
Keywords: vegan cheesecake, mango dessert, no-bake dessert, healthy sweet treat, dairy-free cheesecake

Coconut Lime Chicken
Coconut Lime Chicken: A Tropical Escape Right in Your Kitchen
Introduction
Hello, dear foodie friends! Savannah here from Ivory Apron, and today we’re diving into something truly special — Coconut Lime Chicken! This dish is not just a recipe; it’s an experience, a little piece of tropical paradise that you can create in your very own kitchen.
Picture this: It’s a balmy evening, the sun is setting, and you can almost hear the distant sound of waves crashing on a beach. While we may not all have access to a tropical paradise, we can certainly bring that flavor to our dinner tables. Coconut Lime Chicken combines the richness of coconut milk with the zesty brightness of lime, perfect for those who crave something light yet satisfying. It’s a dish that’s as comforting as it is refreshing, making it perfect for any occasion, whether it’s a weeknight dinner or a fabulous dinner party!
As a recipe creator, nothing makes me happier than sharing culinary adventures with you all. I believe cooking should feel elegant but not intimidating, and that’s what this Coconut Lime Chicken embodies. So, tie on your apron, grab some tropical music, and let’s get cooking!
Personal Story
I can’t help but smile whenever I think about the first time I made Coconut Lime Chicken. It was a sunny Saturday, and my close friends and I had gathered for our monthly potluck. The theme was “Tropical Escape,” and the minute I heard it, my mind raced with all the possible dishes. But one stood out like a beacon of warmth and comfort — Coconut Lime Chicken.
I still remember mingling in the kitchen, buzzing with excitement, as the chicken marinated in a fragrant coconut-lime bath. The scent of fresh cilantro and garlic filled the air, welcoming my friends as they arrived. We laughed, sipped on fruity cocktails, and reminisced about our last vacation together. When the chicken hit the grill, the chorus of sizzling sound transported us to a little beach hut, surrounded by palm trees and laughter.
That day wasn’t just about the food; it was about creating memories around the table, something I cherish deeply. I can’t wait for you to create your own beautiful moments with this recipe!
Ingredients
Let’s get into the delicious details! Here’s what we’ll need for this mouthwatering Coconut Lime Chicken:
-
4 Chicken Breasts
Thick, boneless chicken breasts work best for this recipe. If you’re feeling adventurous, you can substitute chicken thighs for a juicier option! -
1 Cup Coconut Milk
This creamy goodness is the star of the dish, lending a rich texture and tropical flavor. You can use light coconut milk if you’re looking to cut down on calories — but don’t forget that the creaminess contributes to the dish’s overall feel! -
1 Lime (Juiced)
Fresh lime juice adds a vibrant brightness to the dish. If you don’t have lime, lemon juice can be a great substitute, though it will offer a slightly different acidity. -
1/4 Cup Fresh Cilantro (Chopped)
This fresh herb brings a burst of flavor and a lively green color. If cilantro isn’t your thing (you’re not alone!), parsley can be used instead — it’s milder but still adds a lovely touch! -
2 Cloves Garlic (Minced)
Garlic is a must for flavor! If you’re feeling lazy, garlic powder will do in a pinch — just remember, fresh garlic has that unbeatable aromatic kick. -
1 Teaspoon Ginger (Grated)
A little ginger introduces warmth and depth. If you don’t have fresh ginger, ground ginger will work, just use half the amount as it’s more concentrated. -
Salt and Pepper to Taste
Don’t underestimate these staples! Adjust according to your preference, but definitely taste as you go. -
Olive Oil for Cooking
A drizzle of olive oil is all you need to get things sizzling. For grilling, you can use a neutral oil like canola or avocado oil to step up the heat tolerance.
Step-by-Step Instructions
Ready to create some magic? Let’s get down to business with these simple yet effective steps. Grab your apron and let’s cook!
-
Marinate the Chicken
In a bowl, combine the coconut milk, lime juice, chopped cilantro, minced garlic, grated ginger, salt, and pepper. For an extra flavor boost, feel free to add a pinch of red pepper flakes if you like a touch of heat! Place the chicken breasts in a resealable plastic bag or a shallow dish, pouring the marinade over them to coat thoroughly. Seal or cover and let it marinate in the fridge for at least 30 minutes — or up to 2 hours for more intense flavor.Chef Hack: If you’re in a hurry, you can marinate the chicken for just 15 minutes, but the longer it sits, the more the flavors penetrate the chicken.
-
Preheat Your Grill or Skillet
If grilling, preheat your grill to medium-high heat (about 375°F). If you’re using a skillet, place it over medium heat and drizzle with olive oil. -
Cook the Chicken
Once your grill or skillet is hot, remove the chicken from the marinade (letting the excess drip off) and place it on the grill or skillet. Cook for about 6-7 minutes on each side or until the chicken reaches an internal temperature of 165°F.Chef Tip: Resist the temptation to flip it too often! Let that lovely char develop for a few minutes on each side before flipping.
-
Rest the Chicken
Once cooked, transfer the chicken to a plate and cover it loosely with foil. Allow it to rest for about 5-10 minutes. This step is crucial! It helps the juices redistribute, ensuring your chicken is juicy and flavorful. -
Serve and Enjoy
Slice the chicken against the grain for beautiful presentation and serve it up with extra lime wedges and cilantro if desired. You can drizzle any leftover marinade over it for extra flavor!
Serving Suggestions
To plate your Coconut Lime Chicken, consider serving it on a bed of fluffy jasmine rice or alongside grilled vegetables for a beautiful contrast of colors. A light salad with mango and avocado can also complement the dish perfectly, creating a beautiful, refreshing meal that invites everyone to dive in. And don’t forget to garnish with a sprinkle of fresh cilantro on top — it adds that final pop of color and vibrancy that we all love!
Recipe Variations
Feeling inspired? Here are a few creative twists on this recipe:
-
Spicy Mango Salsa: Top your chicken with a fresh mango salsa made with diced mango, red onion, jalapeño, lime juice, and cilantro for a sweet and spicy kick.
-
Coconut Lime Shrimp: Swap chicken for shrimp! Adjust cooking time accordingly (about 2-3 minutes per side). It’s a quick and fabulous variation.
-
Grilled Pineapple: Add grilled pineapple slices on the side for a delightful sweetness and a taste of the tropics.
-
Vegan Delight: Replace chicken with tofu or tempeh for a plant-based version. Make sure to press out excess moisture before marinating to ensure flavor absorption.
-
Coconut Lime Quinoa Bowl: Serve the chicken over quinoa instead of rice, topped with diced cucumbers, avocado, and a drizzle of coconut sauce.
Chef’s Notes
This Coconut Lime Chicken has become a staple in my kitchen, evolving over the years as I’ve played with flavors and techniques. A fun memory I have is when I decided to grill it one summer evening, and I realized that even a simple family meal could turn into an event with just a little creativity and care. The rhapsody of flavors transported us to sunny shores without needing to leave home!
I often find that this recipe is a conversation starter, allowing everyone to share their own travel stories or culinary adventures. I hope, as you serve this dish, it opens up those beautiful moments for you and your loved ones, too.
FAQs and Troubleshooting
-
What if my chicken is dry?
Make sure you don’t overcook it. Use a meat thermometer to check for doneness. Remember, it should be at 165°F for juicy perfection! -
Can I marinate it overnight?
Absolutely! Marinating overnight enhances the flavors. Just be careful not to exceed that time too much to avoid texture issues. -
What if I don’t have coconut milk?
You can use low-sodium chicken broth or plain yogurt for a different creamy base. Just keep in mind it will change the flavor profile slightly. -
Can I grill this indoors?
Yes! If you have a grill pan, it works beautifully on the stovetop. Just monitor the heat to avoid smoking too much.
Nutritional Info (per serving) (optional)
- Calories: 350
- Protein: 37g
- Carbohydrates: 8g
- Fat: 18g
There you have it, friends! A delightful Coconut Lime Chicken recipe that’s sure to bring a touch of the tropics right to your table. I can’t wait to hear your stories and see your creations. Remember, good food isn’t just about the taste; it’s about the moments we create around it. Happy cooking and see you next time on Ivory Apron! 🍽️✨
PrintCoconut Lime Chicken

A light yet satisfying dish that combines the richness of coconut milk with the zesty brightness of lime, perfect for any occasion.
- Prep Time: 30 minutes
- Cook Time: 15 minutes
- Total Time: 45 minutes
- Yield: 4 servings 1x
- Category: Main Course
- Method: Grilling
- Cuisine: Tropical
- Diet: Gluten-Free
Ingredients
- 4 Chicken Breasts
- 1 Cup Coconut Milk
- 1 Lime (Juiced)
- 1/4 Cup Fresh Cilantro (Chopped)
- 2 Cloves Garlic (Minced)
- 1 Teaspoon Ginger (Grated)
- Salt and Pepper to Taste
- Olive Oil for Cooking
Instructions
- Marinate the Chicken: In a bowl, combine the coconut milk, lime juice, chopped cilantro, minced garlic, grated ginger, salt, and pepper. Place the chicken in a resealable bag or shallow dish, pour the marinade over, seal or cover, and let it marinate in the fridge for at least 30 minutes.
- Preheat Your Grill or Skillet: Preheat your grill to medium-high heat (about 375°F) or place a skillet over medium heat and drizzle with olive oil.
- Cook the Chicken: Remove the chicken from the marinade, letting excess drip off, and place it on the grill or skillet. Cook for about 6-7 minutes on each side until the chicken reaches an internal temperature of 165°F.
- Rest the Chicken: Transfer the chicken to a plate and cover loosely with foil. Allow it to rest for about 5-10 minutes.
- Serve and Enjoy: Slice the chicken against the grain, serve with extra lime wedges and cilantro, and drizzle any leftover marinade over it if desired.
Notes
For spicy flavor, add a pinch of red pepper flakes to the marinade. Serving suggestions include jasmine rice or grilled vegetables.
Nutrition
- Serving Size: 1 serving
- Calories: 350
- Sugar: 4g
- Sodium: 450mg
- Fat: 18g
- Saturated Fat: 15g
- Unsaturated Fat: 3g
- Trans Fat: 0g
- Carbohydrates: 8g
- Fiber: 1g
- Protein: 37g
- Cholesterol: 80mg
Keywords: Coconut Chicken, Lime Chicken, Tropical Recipe, Summer Grilling, Easy Chicken Dinner
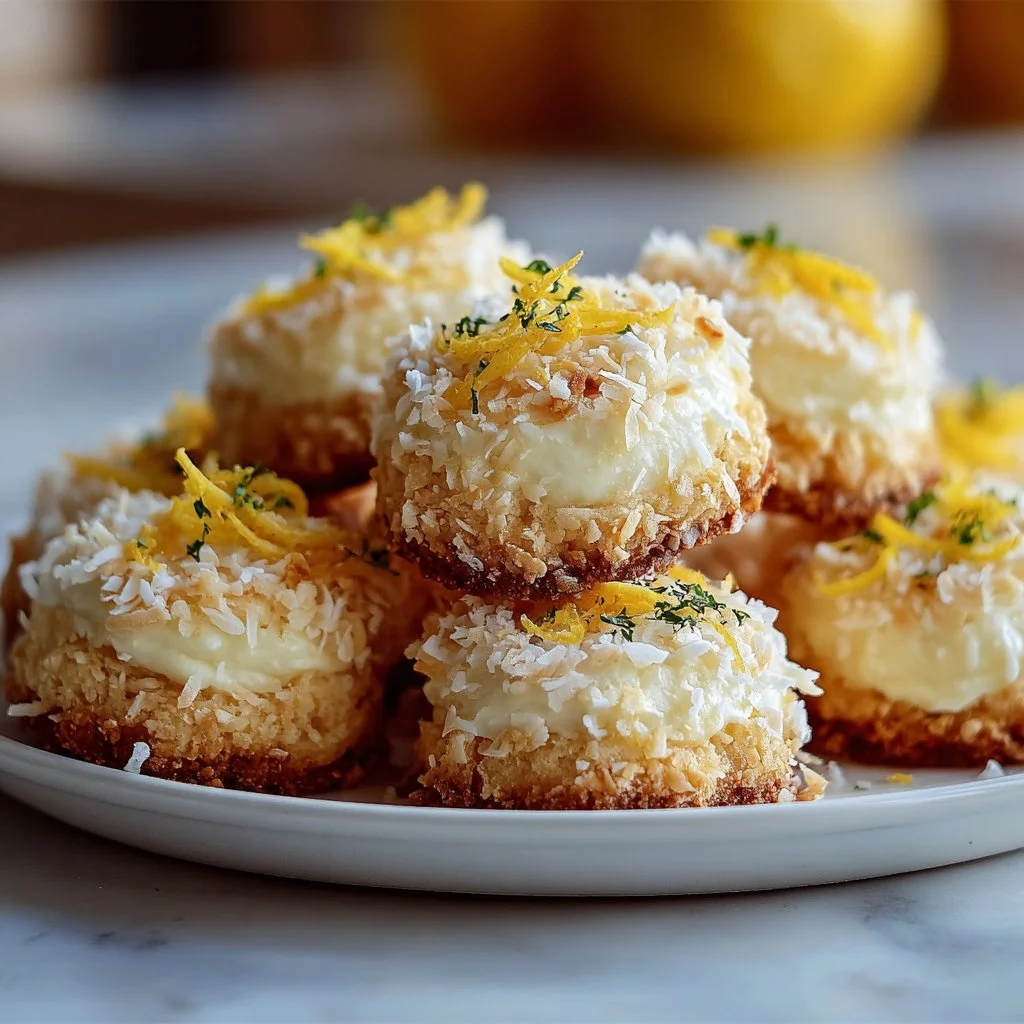
Lemon Coconut Cheesecake Cookies
# Lemon Coconut Cheesecake Cookies: A Sweet Slice of Sunshine

Hello, dear foodies! Today, I’m bubbling over with excitement to share with you a recipe that feels like a little sun-kissed getaway – Lemon Coconut Cheesecake Cookies! These delightful bites are more than just sweets; they carry a memory that is as rich in flavor as it is in sentiment. Picture yourself on a warm afternoon, the sun flickering through the trees, the tantalizing smell of citrus wafting through the kitchen, and a plate of cookies waiting to be savored. Let’s dive in, because these cookies are about to take your taste buds on a joyful ride!

## A Sunny Kitchen Memory

Growing up, my family had an unspoken tradition every summer: the “Baking Day.” We’d gather in the kitchen, flour dusting the countertops and laughter filling the air. My job was always to zest the lemons – a job I took so seriously. I loved watching the bright yellow zest spark against the white of the sugar, and the tantalizing aroma that filled the room was something else. On one particular Baking Day, we decided to experiment, throwing together a blend of our favorite flavors: lemon, cream cheese, and coconut. As the cookies baked, we sprawled on the floor, flipping through magazines, excitedly brainstorming names for our creation. “Lemon Coconut Cheesecake Cookies!” I shouted, and from that moment on, they earned a special place in our home. To this day, every bite of these cookies takes me back to those golden afternoons, overflowing with joy and sweetness.

## Ingredients

To embark on this delightful baking journey, gather the following ingredients:

- **1 cup all-purpose flour**
  The backbone of our cookies, providing structure. If you're gluten-free, swap it with a mix of almond flour and coconut flour for a soft, chewy texture.

- **1/2 cup unsweetened shredded coconut**
  This adds a tropical twist! You can use sweetened if you prefer a sweeter cookie, but adjust the sugar accordingly.

- **1/4 cup granulated sugar**
  Sweetness is key! For a healthier option, you can replace this with coconut sugar – it has a lovely caramel flavor.

- **1/2 cup cream cheese, softened**
  Cream cheese gives our cookies that cheesecake-like richness. Make sure it’s room temperature for smooth mixing, or use mascarpone for a slightly different flavor!

- **1/4 cup butter, softened**
  Butter brings moisture and flavor. If you need a dairy-free version, coconut oil works wonderfully!

- **1 large egg**
  This binds our ingredients together. If you’re vegan, a flaxseed or chia seed egg (1 tablespoon ground seeds mixed with 3 tablespoons water) will do the trick.

- **1 tablespoon lemon zest**
  This brightens the flavor profile! Don’t skip it; the zest is where all the lemony magic happens.

- **1 teaspoon vanilla extract**
  A classic flavor booster! If you’re feeling adventurous, try using almond extract for a different twist.

- **1/2 teaspoon baking powder**
  This helps the cookies rise nicely, making them tender and fluffy.

- **1/4 teaspoon salt**
  A pinch of salt enhances all the flavors beautifully!

## Step-by-Step Instructions

Now that we have our ingredients on hand, let’s jump into the fun part – baking these heavenly cookies!

### Step 1: Preheat Your Oven
Preheat your oven to 350°F (175°C). This little step helps your cookies bake evenly right from the start!

### Step 2: Prep Your Baking Sheet
Line a baking sheet with parchment paper. This ensures our cookies don’t stick and makes cleanup a breeze. Plus, a lined sheet gives you perfectly rounded edges every time!

### Step 3: Mix the Wet Ingredients
In a large mixing bowl, cream together the softened butter and cream cheese until the mixture is light and fluffy. This usually takes about 2-3 minutes of good mixing! Add in the granulated sugar, lemon zest, and vanilla extract, and beat until combined. You’ll know you’re there when the mixture is smooth and smells divine!

### Step 4: Add the Egg
Crack that large egg into the mix, and stir until fully incorporated. It’ll help bring all these fabulous flavors together.

### Step 5: Combine the Dry Ingredients
In a separate bowl, whisk together the all-purpose flour, shredded coconut, baking powder, and salt. Mixing your dry ingredients ensures they distribute evenly throughout the dough.

### Step 6: Bring It All Together
Gradually add your dry mixture to the wet ingredients, folding gently until you can no longer see any flour. Try not to overmix; we want our cookies to stay tender and oh-so-chewy.

### Step 7: Scoop and Bake
Use a cookie scoop or a tablespoon to drop dollops of dough onto your prepared baking sheet, spacing them about 2 inches apart. The cookies will spread slightly, so give them a little room to breathe! Bake them in your preheated oven for about 12-15 minutes, or until they’re golden brown on the edges and slightly soft in the center.

### Step 8: Cool Your Cookies
Once they’re out of the oven, let them cool on the baking sheet for about 5 minutes before transferring them to a wire rack to cool completely. This part is key – it allows them to set while still being delightfully warm!

## Serving Suggestions

To serve these lovely cookies, arrange them on a beautiful platter, perhaps with a sprig of fresh mint or a dusting of powdered sugar on top for that extra elegant touch. They pair wonderfully with a cup of tea or lemonade, making them perfect for summer gatherings or cozy evenings at home.

## Recipe Variations

1. **Add a Chocolate Twist:** Fold in some white chocolate chips for a creamy, decadent variation that perfectly complements the lemon and coconut.

2. **Coconut Lime Cookies:** Replace the lemon zest with lime zest for a refreshing twist, perfect if you’re feeling adventurous!

3. **Nutty additions:** Mix in chopped macadamia nuts or pecans for a satisfying crunch.

4. **Frosted Delight:** Top your cooled cookies with a light lemon glaze or cream cheese frosting for a truly extravagant treat.

5. **Spiced Version:** Add a pinch of nutmeg or even ginger for a warm, spiced cookie that’s perfect for fall.

## Chef's Notes

As with many recipes, these cookies have evolved over time in my kitchen. Initially, they were a simple lemon drop cookie, but after years of experimenting (and tasting!), they grew into these Lemon Coconut Cheesecake delights. I love how baking can turn a simple idea into something extraordinary – it’s all about experimentation and, of course, love. One of my fondest memories was baking several batches for a wedding; when I finally saw the dessert table brimming with cookies, my heart swelled with pride.

## FAQs and Troubleshooting

1. **Why are my cookies spreading too much?**
   This usually happens if your butter is too warm or the dough isn’t chilled. Make sure your butter is just softened and consider chilling your dough for about 30 minutes before baking.

2. **What if my cookies are too dry?**
   This can happen if there was too much flour added. Always spoon your flour into the measuring cup instead of scooping directly from the bag. For a super moist cookie, ensure your butter and cream cheese are at room temperature.

3. **Can I freeze the dough?**
   Absolutely! Just scoop the dough onto a baking sheet and freeze until solid. Then, transfer them to a freezer-safe bag. Bake from frozen, just adding a couple of minutes to your baking time.

4. **How can I tell when cookies are done?**
   Look for edges that are set and slightly browned. Remember, they’ll continue to firm as they cool on the baking sheet!

## Nutritional Info

To be mindful of your delicious indulgence, each cookie has approximately:
- **Calories:** 120
- **Fat:** 6g
- **Carbohydrates:** 15g
- **Protein:** 1g
- **Sugar:** 5g

---

There you have it! A delectable batch of Lemon Coconut Cheesecake Cookies that are sure to become a dear staple in your baking repertoire. Whether you’re sharing them with friends, family, or simply savoring them on your own, these cookies embody everything I love about cooking – joy, connection, and warmth. So, tie on that apron, channel your inner sunny chef, and let’s create something some sweet together!
Lemon Coconut Cheesecake Cookies

Delightful lemon coconut cheesecake cookies that embody the essence of summer with their bright flavors and soft texture.
- Prep Time: 15 minutes
- Cook Time: 15 minutes
- Total Time: 30 minutes
- Yield: 24 cookies 1x
- Category: Dessert
- Method: Baking
- Cuisine: American
- Diet: Vegetarian
Ingredients
- 1 cup all-purpose flour
- 1/2 cup unsweetened shredded coconut
- 1/4 cup granulated sugar
- 1/2 cup cream cheese, softened
- 1/4 cup butter, softened
- 1 large egg
- 1 tablespoon lemon zest
- 1 teaspoon vanilla extract
- 1/2 teaspoon baking powder
- 1/4 teaspoon salt
Instructions
- Preheat your oven to 350°F (175°C).
- Line a baking sheet with parchment paper.
- In a large mixing bowl, cream together the softened butter and cream cheese until light and fluffy.
- Add in the granulated sugar, lemon zest, and vanilla extract, and beat until combined.
- Crack the large egg into the mix, and stir until fully incorporated.
- Whisk together the all-purpose flour, shredded coconut, baking powder, and salt in a separate bowl.
- Gradually add the dry mixture to the wet ingredients, folding gently until no flour is visible.
- Scoop dollops of dough onto your prepared baking sheet, spacing them about 2 inches apart.
- Bake for about 12-15 minutes, or until golden brown on the edges and slightly soft in the center.
- Let them cool on the baking sheet for 5 minutes before transferring to a wire rack.
Notes
For a gluten-free option, use almond flour and coconut flour. Adjust sugar when using sweetened coconut. Can freeze cookie dough for later use.
Nutrition
- Serving Size: 1 cookie
- Calories: 120
- Sugar: 5g
- Sodium: 50mg
- Fat: 6g
- Saturated Fat: 4g
- Unsaturated Fat: 2g
- Trans Fat: 0g
- Carbohydrates: 15g
- Fiber: 1g
- Protein: 1g
- Cholesterol: 30mg
Keywords: cookies, desserts, lemon, coconut, cheesecake

Lemon Quinoa and Chickpea Salad
# Lemon Quinoa and Chickpea Salad: A Refreshing Taste of Summer

## Introduction

Hello, food lovers! Today, we're diving into a vibrant, refreshing dish that captures the essence of summer right on your plate—Lemon Quinoa and Chickpea Salad! This isn’t just any salad; it’s a delightful mélange of wholesome ingredients, zesty flavors, and a sprinkling of sunshine that brightens even the cloudiest of days.

Imagine sitting under a blue sky, the fragrant breeze rustling the leaves around you, as you savor each bite of this colorful salad. Packed with protein-rich quinoa and fiber-filled chickpeas, this dish makes a perfect light lunch or a fabulous side at any gathering. The lemon dressing dances on your taste buds, while fresh vegetables offer a crisp crunch that feels like a hug for your palate. Plus, it’s a quick and simple recipe that even novice cooks can master—but shh, I won’t tell if you take all the credit for it!

What I love most about this salad is how versatile it is—it's the perfect canvas for experimenting with flavors. Whether you’re adding some colorful cherry tomatoes, feta cheese, or even avocado, there's a way to make this dish uniquely yours. Plus, it’s great for meal prep; just whip up a batch at the start of your week, and you'll have a wholesome dish ready to go whenever hunger strikes!

So, grab your freshest ingredients and let’s roll up our sleeves together. By the end of this post, you’ll not only have a delicious recipe in your back pocket, but a story to share around your table—because, as I always say, good food is all about good company!

## Personal Story

Let me take you back to one of my favorite summer memories. I was hosting a sunny backyard picnic for friends, the kind of gathering where laughter filled the air, and every bite was savored. As I set up picnic blankets, I decided to serve a fresh quinoa salad as the centerpiece of the table. I remember buzzing around my kitchen, the aroma of herbs wafting through the open windows, while I told my friend Jenna all about quinoa's amazing benefits.

That day, everyone was raving about the salad—its bright flavors were a hit. I watched my friends go back for seconds (and even thirds), and it warmed my heart to see how something so simple could bring so much joy. This Lemon Quinoa and Chickpea Salad became a staple in my recipe repertoire because it reminded me of that day—when food wasn’t just about sustenance but about connection, laughter, and love shared around a table.

## Ingredients

Here’s what you’ll need to whip up this scrumptious salad:

### Salad Components

- **1 cup quinoa**
  *This small seed is a complete protein, making it a powerhouse! You can use any color—white, red, or black—depending on your preference.*

- **1 can chickpeas, drained and rinsed**
  *Wonderfully versatile and packed with protein comes these little gems. If you’re feeling adventurous, you can toss in cooked lentils instead!*

- **1 cucumber, diced**
  *Crisp and refreshing! If you prefer a different crunch, try swapping in chopped bell pepper or carrots.*

- **1 bell pepper, diced**
  *Sweet and colorful, bell peppers offer vibrant flavor. You can use different colors like red, yellow, or even orange to make the dish pop!*

- **1/4 red onion, finely chopped**
  *They add a punch of flavor! If you’re sensitive to raw onion, substitute with green onions or chives for a milder taste.*

- **1/4 cup fresh parsley, chopped**
  *Herbal freshness at its best! You can replace it with cilantro for a brighter twist.*

### Dressing Ingredients

- **1/4 cup olive oil**
  *A drizzle of this liquid gold is a must for richness! Use avocado oil if you're looking for a neutral flavor.*

- **Juice of 1 lemon**
  *The star of the show! Freshly squeezed lemon juice will brighten the entire salad.*

- **1 teaspoon Dijon mustard**
  *Adds tang and depth! You can swap this with whole grain mustard or skip it entirely for a simpler dressing.*

- **Salt and pepper to taste**
  *Essential for balancing flavors! Don’t forget to taste as you go—this is key in cooking.*

With these vibrant and healthful ingredients, you're ready to create a salad that celebrates all the fresh, delicious flavors of summer!

## Step-by-Step Instructions

Alright, let’s get cooking! Here’s how to whip up your Lemon Quinoa and Chickpea Salad:

### Step 1: Rinse Your Quinoa

Before we start cooking, it's important to rinse the quinoa under cold running water for about 1-2 minutes. This step helps remove the natural coating called saponin, which can give it a bitter taste. It makes such a difference!

### Step 2: Cook the Quinoa

In a medium saucepan, combine 1 cup of rinsed quinoa with 2 cups of water (or broth for extra flavor). Bring it to a gentle boil, then lower the heat to a simmer and cover. Let it cook for about 15 minutes or until all the water is absorbed. A pro tip? Once it’s cooked, remove it from heat and fluff it with a fork—this will keep your quinoa light and airy, perfect for mixing into salads.

### Step 3: Chop Your Veggies

While the quinoa is cooking, grab your cutting board and chop up your veggies—cucumber, bell pepper, and red onion—into bite-sized pieces. The more colorful, the better! As you chop, let your mind wander to the flavors; imagine the fresh crunch mingling with zesty lemon in each bite.

### Step 4: Mix the Dressing

In a small bowl, whisk together the olive oil, juice of the lemon, Dijon mustard, salt, and pepper. Taste it! Adjust the seasoning if needed. I often add an extra squeeze of lemon to make it a bit zestier—totally up to you!

### Step 5: Combine It All

Once your quinoa is fluffy and slightly cooled, it’s time to mix everything! In a large bowl, combine the quinoa, chickpeas, chopped veggies, and parsley. Drizzle the dressing over the top and toss gently to combine. You want every piece coated in that zesty goodness.

### Step 6: Taste and Adjust

This is the fun part! Grab a spoon and take a taste. Does it need more salt? A splash more lemon? Adjust to your liking—it’s your salad, after all!

### Step 7: Refrigerate or Serve

You can serve it right away, but I love letting it chill in the fridge for at least 30 minutes. This allows all those flavors to meld beautifully. Plus, it’s an incredibly refreshing dish straight from the fridge on hot days!

## Serving Suggestions

When it comes to plating your Lemon Quinoa and Chickpea Salad, simplicity is key. Serve it in a large bowl or plate it individually for your guests. A sprinkle of extra parsley on top can add a pop of color. If you want to add a touch of elegance, a lemon wedge and a drizzle of olive oil finish it off beautifully. And for those extra hungry guests, serve it alongside some grilled chicken or fish for a more hearty meal.

## Recipe Variations

Feel like getting creative? Here are a few fun twists to make this salad your own:

1. **Mediterranean Twist:** Add crumbled feta cheese and some kalamata olives for a Mediterranean flair.
2. **Tex-Mex Style:** Mix in black beans, corn, diced avocado, and a pinch of chili powder for a hearty version.
3. **Herb-Infused:** Experiment with different herbs like mint or basil to give it a refreshing herbal kick.
4. **Crunch Factor:** Toss in some toasted sunflower seeds or slivered almonds for an additional crunch.
5. **Spicy Kick:** Add a dash of red pepper flakes or diced jalapeños for a spicy blast of flavor.

## Chef’s Notes

Every recipe tells a story, and over the years, this Lemon Quinoa and Chickpea Salad has evolved into a versatile dish. I remember the first time I made it; I was so focused on the presentation that I almost forgot to taste it! Don’t be like me! Having a taste along the way is crucial—it’s how you'll ensure it's perfect.

Also, I must confess, I've made this salad with countless variations, including adding roast vegetables and even some chopped apples for sweetness! It’s like a blank canvas that welcomes your creativity in the kitchen, keeping things fun and fresh!

## FAQs and Troubleshooting

**1. My quinoa is mushy. What did I do wrong?**
  Overcooking quinoa or adding too much water can lead to a mushy texture. Make sure to follow the 2:1 water to quinoa ratio and keep an eye on cooking times. Quinoa should be fluffy, not sticky!

**2. Can I make this salad ahead of time?**
  Absolutely! It tastes even better the next day as the flavors meld together. Just keep it stored in an airtight container in the fridge.

**3. How long will leftovers last?**
  This salad can last up to 3-4 days in the refrigerator. Just give it a stir before serving again!

**4. Can I use frozen chickpeas?**
  Yes! If you're using frozen chickpeas, just ensure they are fully thawed, drained, and rinsed well.

## Nutritional Info

Nutritionally speaking, this Lemon Quinoa and Chickpea Salad is not just delicious but also incredibly nutritious! It’s high in protein, fiber, and tons of vitamins from the fresh vegetables. A single serving typically contains:

- Calories: 320
- Protein: 12g
- Carbohydrates: 45g
- Fiber: 10g
- Fat: 12g (mostly from healthy olive oil)

***

And there you have it, folks—a vibrant, zesty Lemon Quinoa and Chickpea Salad recipe that’s bound to become your new favorite! Whether it's a picnic, meal prep, or a gathering with loved ones, this salad shines in every setting. So tie on that apron, gather around the table, and let’s celebrate the joy of good food together!
Lemon Quinoa and Chickpea Salad

A refreshing summer salad made with protein-rich quinoa, fiber-filled chickpeas, and a zesty lemon dressing.
- Prep Time: 15 minutes
- Cook Time: 15 minutes
- Total Time: 30 minutes
- Yield: 4 servings 1x
- Category: Salad
- Method: No Cooking
- Cuisine: Mediterranean
- Diet: Vegetarian
Ingredients
- 1 cup quinoa
- 1 can chickpeas, drained and rinsed
- 1 cucumber, diced
- 1 bell pepper, diced
- 1/4 red onion, finely chopped
- 1/4 cup fresh parsley, chopped
- 1/4 cup olive oil
- Juice of 1 lemon
- 1 teaspoon Dijon mustard
- Salt and pepper to taste
Instructions
- Rinse your quinoa under cold running water for about 1-2 minutes.
- Cook the quinoa by combining it with 2 cups of water, bring to a boil, then lower to a simmer and cover for about 15 minutes.
- Chop your veggies into bite-sized pieces.
- Mix the dressing ingredients in a small bowl: olive oil, lemon juice, Dijon mustard, salt, and pepper.
- Combine quinoa, chickpeas, veggies, and parsley in a large bowl; drizzle the dressing and toss gently.
- Taste and adjust the seasoning as needed.
- Refrigerate for at least 30 minutes before serving, if desired.
Notes
This salad is perfect for meal prep and tastes even better the next day as flavors meld together.
Nutrition
- Serving Size: 1 serving
- Calories: 320
- Sugar: 3g
- Sodium: 150mg
- Fat: 12g
- Saturated Fat: 1g
- Unsaturated Fat: 10g
- Trans Fat: 0g
- Carbohydrates: 45g
- Fiber: 10g
- Protein: 12g
- Cholesterol: 0mg
Keywords: quinoa salad, chickpea salad, summer salad, vegetarian recipe, healthy salad
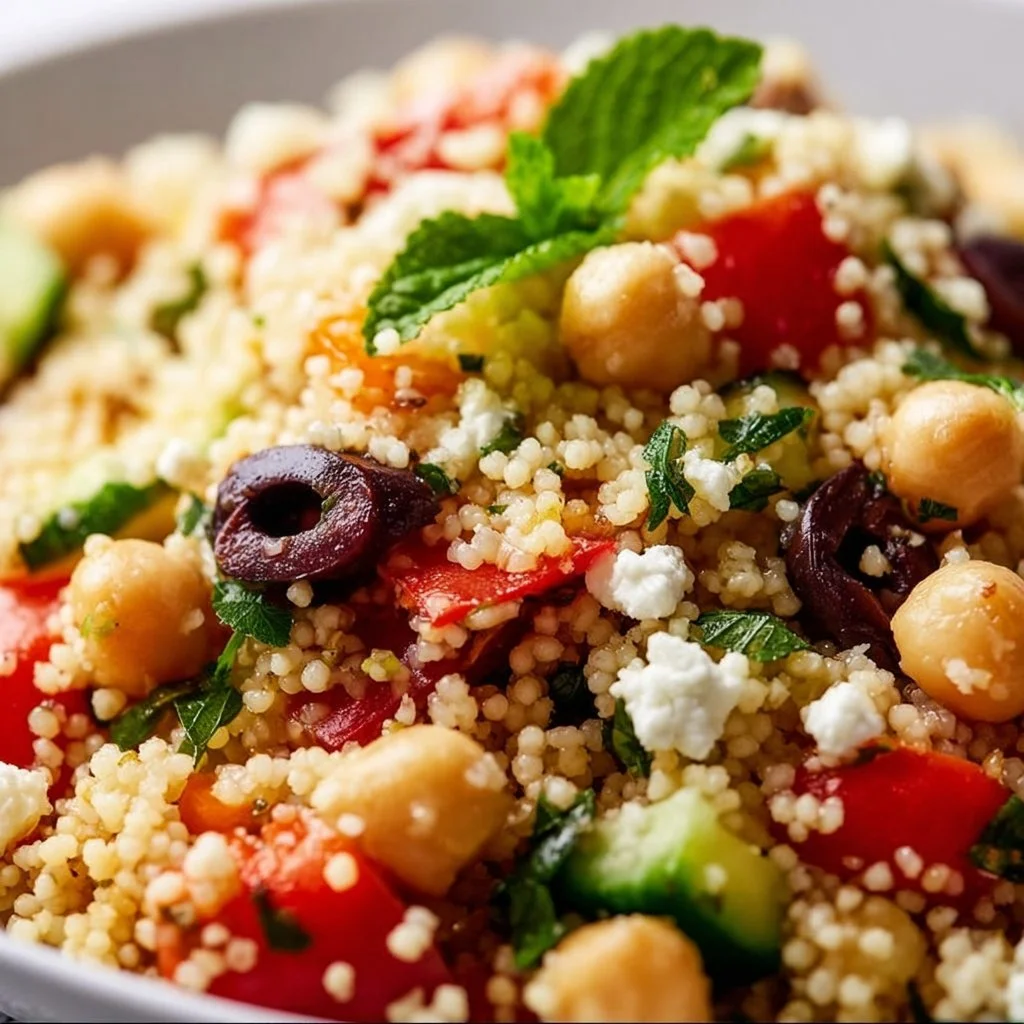
Healthy Mediterranean Couscous Salad
Healthy Mediterranean Couscous Salad: A Flavorful Journey to the Mediterranean
Introduction
Welcome back, dear foodies! Today, we’re going to whip up something that not only delights the taste buds but also brings a splash of Mediterranean sun to your dining table. Yes, I’m talking about a deliciously vibrant Healthy Mediterranean Couscous Salad! This dish is packed with fresh ingredients and bold flavors, making it perfect for those warm evenings when you want something light yet satisfying.
Couscous is one of those magical ingredients that bring a cozy atmosphere to any gathering. It’s quick to prepare, pairs well with just about anything, and its fluffy texture is simply irresistible. Whether you’re looking for a side dish for your next barbecue, a wholesome lunch, or a highlight for your weeknight dinner, this salad checks all the boxes. The best part? Making it is a breeze, and you’ll be rocking those flavors in less time than it takes to find your favorite playlist!
So, grab your apron, pour yourself a refreshing drink (maybe something citrusy!), and let’s dive into this culinary adventure. I promise you’ll have a delightful meal that’s not only healthy but also evokes the sunny vibes of the Mediterranean coast.
Personal Story
Whenever I think of Mediterranean cuisine, I’m transported back to a family vacation on the Greek islands. I remember wandering through picturesque villages, the warm sun kissing my skin, and the tantalizing aroma of roasted vegetables and spices wafting through the air. One unforgettable evening, we stopped at a small taverna where a charming old chef served us a beautiful couscous dish drizzled with olive oil and dotted with vibrant veggies. It was so simple yet bursting with flavor. The joy of sharing that meal with my loved ones—sinking into hearty conversation while relishing every bite—remains etched in my memory.
That night ignited my passion for Mediterranean flavors—fresh herbs, the zing of lemons, and the richness of olive oil. Now, whenever I make couscous salad, I sprinkle it with the same love and sunshine I felt on that unforgettable trip. Join me in crafting this salad, and let’s recreate our own Mediterranean moment right in your kitchen!
Ingredients
Here’s what you’re going to need for this delightful salad:
-
1 cup couscous
Couscous is a versatile grain that’s quick to prepare. If you can’t find couscous, you can substitute with quinoa or bulgur wheat for a different flavor and texture. -
1 1/4 cups vegetable broth
Using broth instead of water adds depth to the couscous. You can use chicken broth too, or for a lighter option, stick with water if you prefer. -
1 cup cherry tomatoes, halved
These little gems add sweetness and color. If you have regular tomatoes on hand, diced ones will work just as well! -
1 cucumber, diced
Crisp and refreshing, cucumbers provide a lovely crunch. Feel free to swap in zucchini if you’re looking for a change. -
1/2 red onion, finely chopped
Red onions bring a sweet bite to the dish. If they’re a bit too strong for your taste, milder green onions would also be fantastic. -
1 cup canned chickpeas, rinsed and drained
Chickpeas are the protein powerhouse here! If you want to keep it vegetarian, they’re perfect. For added flavor, roast them before adding, which gives a wonderful crunch. -
1/2 cup feta cheese, crumbled
Feta adds a creamy, tangy saltiness. If you’re dairy-free, try using a vegan feta or a sprinkle of nutritional yeast for a cheesy flavor. -
1/4 cup Kalamata olives, sliced
These olives add a briny punch. You can substitute black olives or omit them if they’re not your thing. -
2 tablespoons olive oil
Go for high-quality extra-virgin olive oil for the best flavor. You might want to drizzle a bit more on top before serving; it’s totally worth it! -
2 tablespoons lemon juice
Freshly squeezed lemon juice brightens up the whole dish. Limes can work in a pinch if you don’t have any lemons. -
Salt and pepper to taste
Essential for enhancing all those lovely flavors! -
Fresh parsley for garnish
Parsley not only looks beautiful but also adds freshness to the dish. You can swap it with any fresh herb you love, such as basil or mint!
Step-by-Step Instructions
Alright, let’s get cooking! Follow these steps, and you’ll have a fabulous Mediterranean Couscous Salad in no time.
-
Cook the Couscous
In a medium saucepan, bring the vegetable broth to a boil. Once it’s bubbling, add the couscous, give it a gentle stir, and then remove it from heat. Cover the pan with a lid and let it sit for about 5 minutes—this allows the couscous to absorb the broth and the flavors to mingle wonderfully.Chef Tip: Fluff your couscous with a fork before adding in the other ingredients. This keeps it light and prevents clumping!
-
Prepare Your Veggies
While the couscous is resting, let’s chop up those vibrant vegetables! Halve the cherry tomatoes, dice the cucumber into bite-sized pieces, and finely chop the red onion. Rinse and drain the chickpeas; you want them nice and clean.Chef Hack: A flexible cutting board is your best friend here! It makes transferring veggies from the board to the bowl so much easier.
-
Mix Everything Together
In a large mixing bowl, combine the fluffed couscous, cherry tomatoes, diced cucumber, red onion, chickpeas, crumbled feta, and sliced olives.Commentary: Don’t be shy when mixing; you want everything to get all cozy together!
-
Dress It Up
Drizzle in the olive oil and lemon juice, then sprinkle with salt and pepper to taste. Give everything a good toss until the ingredients are well coated.Tip: Taste as you go! This is a great way to find that perfect balance of flavors.
-
Final Touch and Garnishing
Once mixed, sprinkle fresh parsley on top for that finishing touch. It adds not only color but also a fresh bite that brightens the dish.Chef Note: If you want to use this salad for meal prep, consider adding the feta and olives just before serving to keep everything fresh!
Serving Suggestions
To serve, spoon the couscous salad onto a lovely plate or in a large serving bowl. A crisp white dish really lets the colors pop! You can also serve it in individual bowls for a more personal touch. Drizzle a bit more olive oil on top and perhaps a sprinkle of additional feta or olives for that gourmet look.
Recipe Variations
The beauty of this Mediterranean Couscous Salad is its versatility! Here are some creative twists you might consider:
-
Add Grilled Chicken or Shrimp: For a heartier meal, add in some grilled chicken or shrimp. They pair beautifully with the fresh flavors.
-
Spicy Kick: Incorporate sliced jalapeños or a dash of red pepper flakes to bring some heat.
-
Roasted Veggies: Try adding roasted bell peppers or eggplant for a deeper flavor profile.
-
Different Grains: Swap couscous for farro or orzo for a different texture and flavor.
-
Herb Explosion: Mix in other fresh herbs like mint or dill for a unique twist.
Chef’s Notes
As I developed this recipe over time, I discovered that the magic truly lies in the quality of your ingredients. Fresh produce makes a world of difference! I remember one time I rushed through a trip to the grocery store and picked up wilted tomatoes, and the salad just didn’t resonate the same way. Lesson learned: fresher is always better!
Another fun kitchen story involves a dinner party where I made this salad for friends. I accidentally grabbed a bottle of sake instead of olive oil. Let’s just say, they had quite a confused expression as I showcased my "special" dressing. Rest assured, it was a gift that kept on giving in laughs!
FAQs and Troubleshooting
-
Can I make this salad ahead of time?
Absolutely! Make it a day in advance for the flavors to meld even more. Just remember to keep the feta and olives separate if you want those to stay fresh. -
Why is my couscous sticky?
If your couscous gets sticky, it’s often due to too much moisture. Make sure to fluff it with a fork after it absorbs the broth, and consider reducing the liquid next time. -
How can I make this salad gluten-free?
You can replace couscous with quinoa or millet, which are both gluten-free grains that absorb flavors beautifully. -
What can I substitute for feta?
You can try using goat cheese for a creamier texture, or you might use marinated tofu for a vegan option without compromising on taste!
Nutritional Info
While I didn’t provide precise nutritional information, this salad is packed with plant-based protein from chickpeas, healthy fats from olives and olive oil, and a variety of vitamins from fresh vegetables. It’s a well-balanced dish that supports an active lifestyle!
And there you have it, my lovely friends—a Healthy Mediterranean Couscous Salad that fills your kitchen with flavor, brings people together, and best of all, makes your everyday dining feel special. I can’t wait for you to create this delightful dish and share the experience with those you cherish most. Happy cooking, and bon appétit! 🍽️
PrintHealthy Mediterranean Couscous Salad

A vibrant and refreshing salad packed with fresh vegetables, chickpeas, and couscous, perfect for a light meal or side dish.
- Prep Time: 10 minutes
- Cook Time: 5 minutes
- Total Time: 15 minutes
- Yield: 4 servings 1x
- Category: Salad
- Method: Mixing
- Cuisine: Mediterranean
- Diet: Vegetarian
Ingredients
- 1 cup couscous
- 1 1/4 cups vegetable broth
- 1 cup cherry tomatoes, halved
- 1 cucumber, diced
- 1/2 red onion, finely chopped
- 1 cup canned chickpeas, rinsed and drained
- 1/2 cup feta cheese, crumbled
- 1/4 cup Kalamata olives, sliced
- 2 tablespoons olive oil
- 2 tablespoons lemon juice
- Salt and pepper to taste
- Fresh parsley for garnish
Instructions
- Cook the couscous: In a medium saucepan, bring the vegetable broth to a boil. Add the couscous, stir gently, and remove from heat. Cover and let sit for 5 minutes.
- Prepare your veggies: While the couscous rests, chop the cherry tomatoes, cucumber, and red onion. Rinse and drain the chickpeas.
- Mix everything together: In a large bowl, combine the fluffed couscous, tomatoes, cucumber, onion, chickpeas, feta, and olives.
- Dress it up: Drizzle with olive oil and lemon juice, sprinkle with salt and pepper, and toss to combine.
- Final touch: Sprinkle fresh parsley on top to garnish.
Notes
For meal prep, consider adding feta and olives just before serving to maintain freshness. Use high-quality ingredients for best flavor.
Nutrition
- Serving Size: 1 serving
- Calories: 300
- Sugar: 4g
- Sodium: 300mg
- Fat: 14g
- Saturated Fat: 3g
- Unsaturated Fat: 8g
- Trans Fat: 0g
- Carbohydrates: 35g
- Fiber: 8g
- Protein: 10g
- Cholesterol: 15mg
Keywords: couscous salad, Mediterranean, healthy salad, vegetarian recipe, fresh ingredients

Healthy Mini Lemon Blueberry Cheesecakes
Delightfully Healthy Mini Lemon Blueberry Cheesecakes: A Bite of Brilliance!
Hello, fellow food lovers! Savannah Pierce here, and I’m thrilled to invite you into my kitchen for a delightful exploration of flavor with these Healthy Mini Lemon Blueberry Cheesecakes. They’re the perfect balance of creamy goodness, bright citrus zing, and fresh blueberry bursts, all in a charming, portion-controlled format that will impress at your next gathering or cozy night in. So grab your apron, and let’s cook up something special together!
A Taste of Nostalgia
Ah, cheesecakes. The very word brings back memories of my childhood—those sunny summer afternoons spent in my grandmother’s kitchen. She had a certain magic about her, effortlessly mixing cream cheese and sugar, while I stood at her side, eagerly anticipating the fruits of our labor. I can still picture her pulling out the classic cheesecake, garnished with fresh fruits and a sprinkle of zest, and my heart would flutter with excitement.
When I embarked on my journey to create Ivory Apron, I knew I wanted to revisit that experience, but with a healthier twist. Enter the Mini Lemon Blueberry Cheesecake, inspired by my grandmother’s timeless recipe but loaded with fresh, vibrant flavors and guilt-free ingredients. These dainty desserts are perfect for satisfying your sweet tooth while keeping it light and refreshing. Just like my grandmother, I want you to experience the joy of creating and sharing beautiful treats that make memories linger long after the last bite.
Ingredients
Let’s talk about what goes into these mouthwatering mini cheesecakes. Here’s what you’ll need:
-
1 cup graham cracker crumbs
These provide a delightful crunch and a slightly sweet flavor. If you’re looking for gluten-free options, crushed almond or oat flour works beautifully as a substitute! -
1/4 cup melted butter
This binds the crumbs together and adds richness. For a lighter option, you can use coconut oil or unsweetened applesauce. -
16 oz cream cheese, softened
A classic cheesecake base! Using full-fat cream cheese will give you the creamiest texture. However, you can swap this for low-fat cream cheese or even vegan cream cheese for a plant-based version. -
1/2 cup Greek yogurt
This adds a tangy note and makes the cheesecake lighter. If you’d like a dairy-free alternative, coconut yogurt is a great choice! -
1/2 cup powdered sugar
This sweetens the mix while keeping it silky smooth. Feel free to substitute with honey or agave syrup for a more natural sweetener, just adjust the amount to taste. -
1 tablespoon lemon juice
Freshly squeezed is best! It brightens the flavors and complements the blueberries wonderfully. Bottled lemon juice will work in a pinch, but nothing beats the zing of fresh! -
1 teaspoon lemon zest
Adds that extra citrus aroma and depth. Use a microplane or zester to capture just the yellow outer layer of the lemon peel—this prevents bitterness. -
1 cup fresh blueberries
Bursting with flavor, these little gems add freshness and a vibrant pop to every bite. Frozen blueberries can be used, just make sure to thaw and drain them first.
Step-by-Step Instructions
Let’s get right into the fun part—making these delectable mini cheesecakes!
Step 1: Prepare the Crust
In a mixing bowl, combine 1 cup graham cracker crumbs with 1/4 cup melted butter. Stir until fully combined and the mixture resembles wet sand. If it feels too dry, add a touch more melted butter.
Step 2: Form the Crust
Grab a muffin tin and line it with muffin liners for easy removal. Spoon about a tablespoon of the graham cracker mixture into each liner. Using the back of a spoon or your fingers, press down firmly to create a compact, even layer. Don’t worry if it’s not perfect; a little rustic charm adds character!
Step 3: Blend the Cheesecake Filling
In a large bowl, beat 16 oz cream cheese with an electric mixer until smooth and creamy. Add in 1/2 cup Greek yogurt, 1/2 cup powdered sugar, 1 tablespoon lemon juice, and 1 teaspoon lemon zest. Beat on medium speed until well combined, scraping down the sides of the bowl as needed. This is where the magic happens!
Step 4: Incorporate Blueberries
Gently fold in 1 cup fresh blueberries, being careful not to crush them. You want those beautiful bursts of blueberry flavor intact!
Step 5: Fill the Cups
Spoon the cheesecake filling onto the prepared crusts, filling each cup to just about the top. Prefer a little extra? Go for it—just be prepared for a delightful treat!
Step 6: Chill!
Place the muffin tin in the refrigerator and let them chill for at least 4 hours or until set. This is crucial! The long chill time allows the flavors to meld beautifully and firms up the cheesecake.
Step 7: Serve and Enjoy
Once they’re set, remove the mini cheesecakes from the muffin tin. Carefully peel away the liners and place them on a serving platter. Garnish with additional blueberries or a sprig of mint for that lovely pop of color.
Serving Suggestions
These mini cheesecakes shine when served fresh and chilled. A sprinkle of lemon zest and a few extra blueberries on top adds an inviting touch that makes them Instagram-ready! You can also serve them with a dollop of whipped cream or a drizzle of homemade lemon glaze for those who love a decadent finish.
Recipe Variations
Feeling adventurous? Here are a few twists to try:
- Berry Medley: Substitute blueberries with raspberries or strawberries for a mix of fresh fruits.
- Zesty Twist: Add a splash of orange juice and zest alongside the lemon for an extra burst of flavor.
- Nutty Crust: Swap graham cracker crumbs with crushed pecans or walnuts for a nutty flavor profile.
- Choco-Citrus Delight: Swirl in some melted dark chocolate into the filling for a rich, chocolatey layer.
Chef’s Notes
This recipe has evolved over the years. What started as a standard cheesecake has transformed into this indulgently light and healthier version, thanks to my pursuit of balance. One particularly amusing kitchen moment I recall was the time I mistook salt for sugar in a cheesecake recipe and ended up with a rather unfortunate outcome. So, always double-check those tiny containers!
FAQs and Troubleshooting
-
Why did my cheesecakes not set properly?
If they’re too soft, they may need more chilling time. Ideally, let them sit overnight for best results! -
Can I make these gluten-free?
Absolutely! Use gluten-free graham crackers or nut-based crusts instead. -
What if I don’t have muffin liners?
No worries! Just use a well-greased muffin tin, and gently run a knife around the edge to release them. -
How do I store leftovers?
These mini cheesecakes can be stored in an airtight container in the fridge for up to five days (if they last that long!). They’re great for meal prep—just pull one out for a sweet snack!
Now you’re all set to whip up these delightful Healthy Mini Lemon Blueberry Cheesecakes and share them with your friends and family! Cooking should be fun, and I hope this recipe inspires you to gather around the table and create beautiful moments. Happy cooking! 🥳
PrintHealthy Mini Lemon Blueberry Cheesecakes

Delightfully creamy mini cheesecakes with bright lemon flavor and fresh blueberries, perfect for indulgence without guilt.
- Prep Time: 15 minutes
- Cook Time: 0 minutes
- Total Time: 240 minutes
- Yield: 12 servings 1x
- Category: Dessert
- Method: Chilling
- Cuisine: American
- Diet: Vegetarian
Ingredients
- 1 cup graham cracker crumbs
- 1/4 cup melted butter
- 16 oz cream cheese, softened
- 1/2 cup Greek yogurt
- 1/2 cup powdered sugar
- 1 tablespoon lemon juice
- 1 teaspoon lemon zest
- 1 cup fresh blueberries
Instructions
- Prepare the Crust: In a mixing bowl, combine graham cracker crumbs with melted butter. Stir until fully combined.
- Form the Crust: Line a muffin tin with muffin liners. Spoon the graham cracker mixture into each liner and press down to form a compact layer.
- Blend the Cheesecake Filling: In a large bowl, beat cream cheese until smooth. Add Greek yogurt, powdered sugar, lemon juice, and lemon zest. Beat until well combined.
- Incorporate Blueberries: Gently fold in fresh blueberries.
- Fill the Cups: Spoon the cheesecake filling onto the prepared crusts.
- Chill! Place the muffin tin in the refrigerator for at least 4 hours or until set.
- Serve and Enjoy: Remove from muffin tin, peel away liners, and garnish with additional blueberries.
Notes
Serve chilled with lemon zest or blueberries on top for an appealing presentation. These cheesecakes can be made gluten-free by substituting graham crackers.
Nutrition
- Serving Size: 1 cheesecake
- Calories: 220
- Sugar: 10g
- Sodium: 160mg
- Fat: 12g
- Saturated Fat: 7g
- Unsaturated Fat: 4g
- Trans Fat: 0g
- Carbohydrates: 26g
- Fiber: 1g
- Protein: 4g
- Cholesterol: 30mg
Keywords: cheesecake, lemon, blueberry, dessert, healthy dessert
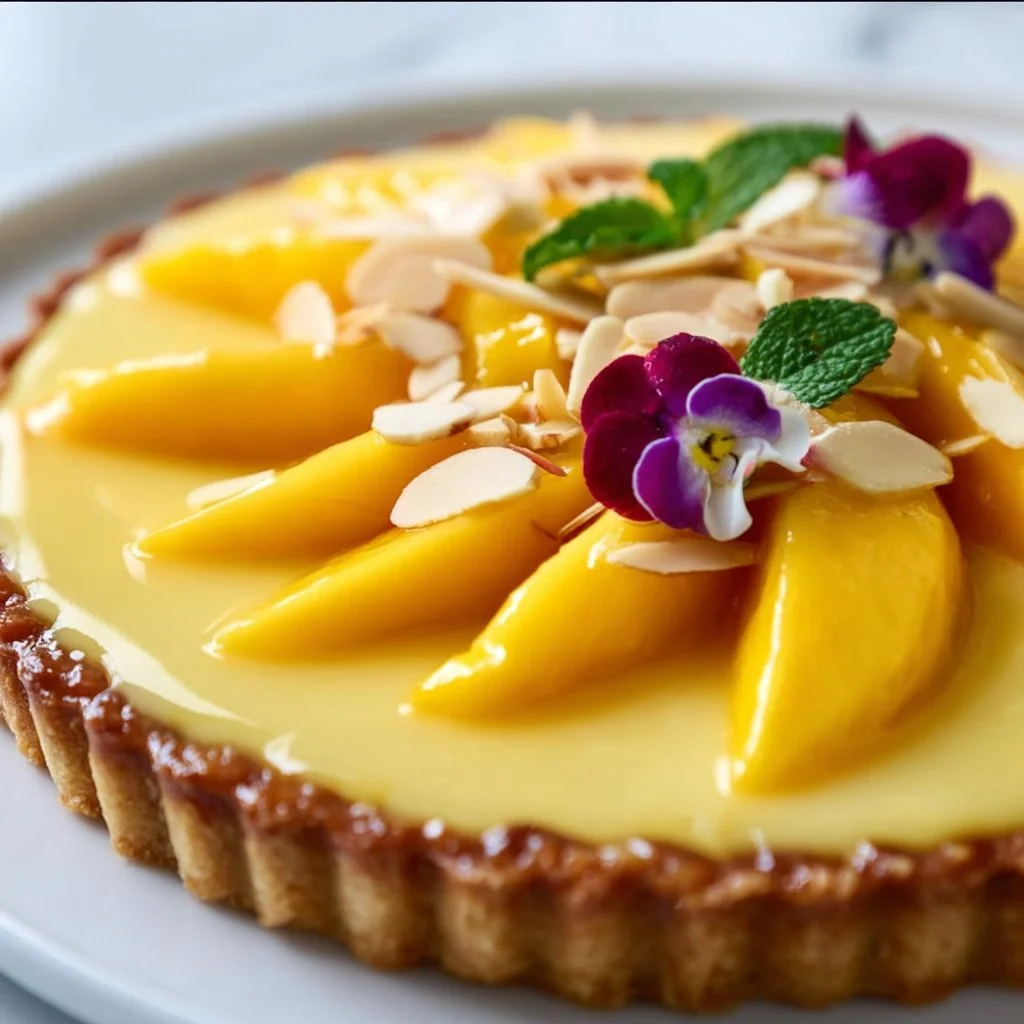
Mango Curd Tart
Mango Curd Tart: A Sun-Kissed Delight
Hello, fellow food lovers! Have you ever taken a bite of something so delicious that it instantly transports you to a sun-drenched beach or a vibrant summer picnic? That’s exactly the kind of experience you’ll get with my Mango Curd Tart. With its creamy, luscious mango filling nestled in a buttery, melt-in-your-mouth crust, this dessert is a celebration of everything we love about summer — and it’s so easy to make!
Imagine hosting a dinner party, friends gathered around the table with laughter ringing in the air, and you proudly presenting this stunning tart as the grand finale. Trust me, the moment your guests take their first bite, you’ll see their eyes light up with delight, and you’ll be the star of the evening!
This tart holds a special place in my heart. Once, during a sunny afternoon at my friend Chloe’s garden, we decided to whip up something refreshing. With ripe mangoes just begging to be used and a little playful competition to see who could create the best dessert, the Mango Curd Tart was born! We stirred, whisked, and poured our way to a sweet victory as the tart baked, filling the kitchen with an irresistible aroma. In that lively atmosphere, friendships deepened, and belly laughs echoed. It became more than just a dessert — it was a token of memories made, laughter shared, and the sheer joy of cooking together.
Whether you’re looking to impress your guests or simply want to indulge in a slice of sunshine, this Mango Curd Tart is your answer. So, grab your apron, and let’s embark on this fruity journey together!
Personal Story
I don’t think there’s ever been a summer where mangoes didn’t play a starring role in our family gatherings. I remember one particularly hot weekend when my parents decided to host an impromptu BBQ. As the grill sizzled and the sweet scent of barbecued meats wafted through the air, my mom dashed into the kitchen, determined to create the ultimate summer dessert.
She pulled out her secret stash of ripe mangoes and a few essential baking ingredients. As I watched her transform simple ingredients into something magical, I realized that cooking was about the joy it brings — both in the process and in the delicious results. That day, we devoured palm-sized slices of mango tart, sticky with sweet juice and topped with whipped cream. Each bite was a reminder of summer warmth and family love.
Now, every time I whip up a Mango Curd Tart, it’s a little homage to those sunny days spent in the kitchen with my mom. It’s my way of reconnecting with that carefree spirit and celebrating the sweet, juicy goodness of mangoes. You’re going to love bringing this tart to life in your own kitchen!
Ingredients
Here’s what you’ll need to whip up this tropical delight:
- 1 1/2 cups all-purpose flour
- The foundation of your pastry crust. If you’re gluten-free, feel free to use a gluten-free all-purpose blend!
- 1/2 cup unsalted butter, softened
- Butter provides richness and flavor to the crust. Be sure it’s softened for easy mixing — you can also use coconut oil for a dairy-free option!
- 1/4 cup powdered sugar
- This sweetener results in a tender, melt-in-your-mouth crust. If you’re out, granulated sugar works in a pinch, though the texture will be slightly different.
- 1/4 teaspoon salt
- Just a pinch enhances the sweetness of the crust.
- 1 large egg yolk
- This helps bind your crust together and adds richness. If you need an egg-free option, consider using flaxseed meal mixed with water as a substitute.
- 1/4 cup cold water
- This helps bring your dough together; cold water solidifies the butter, ensuring a flaky crust.
- 1 cup mango puree
- Aim for fresh or frozen mangoes — just blend them until smooth! You can also use store-bought puree for convenience.
- 3/4 cup sugar
- This sweetens your curd. Feel free to reduce the sugar depending on your sweetness preference.
- 3 large eggs
- The eggs provide structure and creaminess. If you want an egg-free version, silken tofu blended until smooth can work too!
- 1/2 cup lemon juice
- Adds brightness and balances the sweetness — fresh is always best! If you’re in a pinch, bottled lemon juice works too.
- 1 tablespoon lemon zest
- A little zest gives that extra zing to your curd. If you don’t have lemons, limes or oranges could be alternate zest options!
- 1/2 cup heavy cream
- This transforms your curd into a luxurious experience. For a lighter option, you can use whipped coconut cream or dairy-free heavy cream.
Step-by-Step Instructions
Step 1: Prepare the Crust
-
Combine Dry Ingredients:
- In a mixing bowl, whisk together the all-purpose flour, powdered sugar, and salt. This helps evenly distribute the ingredients.
-
Cut in the Butter:
- Add the softened butter and, using your fingers or a pastry cutter, work it into the flour mixture until it resembles coarse crumbs. This is a fun step! Just think of it as a mini workout for your hands.
-
Add Egg Yolk:
- Mix in the egg yolk until combined. This adds a beautiful richness to your crust.
-
Incorporate Cold Water:
- Gradually add the cold water one tablespoon at a time, mixing gently until the dough comes together. Don’t overwork it; we want it tender!
-
Chill the Dough:
- Wrap the dough in plastic wrap and refrigerate for at least 30 minutes. This will make it easier to roll out later and help prevent shrinkage.
Step 2: Bake the Crust
-
Preheat Oven:
- Preheat your oven to 350°F (175°C). A warm oven is key for a perfectly baked tart!
-
Roll Out the Dough:
- On a lightly floured surface, roll out the chilled dough to about 1/8 inch thick. Carefully transfer it to a tart pan (a removable-bottom tart pan is great for easy serving).
-
Blind Bake:
- Prick the bottom with a fork and line it with parchment paper. Fill with pie weights or dried beans. Bake for 15 minutes or until lightly golden. Blind baking ensures a crisp crust.
-
Cool:
- Remove from the oven, take out the weights, and let the crust cool completely. Keep an eye on it as it cools; the slightly warm crust helps the curd set nicely!
Step 3: Prepare the Mango Curd
-
Combine Mango Puree and Sugar:
- In a saucepan over medium heat, whisk together the mango puree and sugar until the sugar fully dissolves. This fragrant step sets the stage for your curd.
-
Add Eggs and Lemon Juice:
- Gradually whisk in the eggs and the lemon juice. Make sure to whisk constantly to avoid scrambling the eggs! The mixture should be smooth and bright.
-
Cook the Mixture:
- Keep cooking and whisking constantly until the mixture thickens (this happens around 170°F; you can use a thermometer for precision). This process takes patience, but it’s worth it!
-
Strain (Optional):
- If you want the smoothest curd, strain the mixture through a fine-mesh sieve into a clean bowl. This removes any potential egg bits, giving you that silky texture.
-
Finish with Cream:
- Stir in the lemon zest and heavy cream until fully combined. Your mango curd will be magical, creamy, and oh-so-tropical!
Step 4: Assemble the Tart
-
Pour the Curd:
- Gently pour the mango curd into the cooled tart crust, spreading it evenly. Watching it fill the crust is like pouring sunshine!
-
Chill:
- Refrigerate the tart for at least 2-3 hours, allowing the curd to set perfectly. You can even leave it overnight for an easier day tomorrow!
Serving Suggestions
To serve your stunning Mango Curd Tart, slice it into wedges and garnish with a dollop of whipped cream, fresh mango slices, or mint leaves for a pop of color. A sprinkle of toasted coconut or crushed pistachios can add a delightful crunch!
The vibrant yellow of the mango curd contrasts beautifully with the buttery crust, making it a visually stunning centerpiece at any gathering.
Recipe Variations
- Berry Bliss: Replace mango puree with mixed berry puree for a tart berry version.
- Coconut Twist: Add shredded coconut to the curd for a tropical flair or use coconut cream instead of heavy cream for a dairy-free option.
- Spicy Kick: Incorporate a pinch of cayenne pepper or sliced jalapeños for a spicy kick to balance the sweetness.
- Citrus Medley: Mix in different citrus juices like orange or lime for a zesty twist!
- Nut Crust: Switch out the all-purpose flour for almond flour or hazelnut flour to add a nutty flavor and gluten-free option.
Chef’s Notes
Creating this Mango Curd Tart has been a delightful journey through the years. I still remember the first time I attempted to make curd from scratch. Let’s just say it was a year of trials and laughter! My earlier attempts often resulted in scrambled eggs — one time, I even managed to churn out a mango-flavored omelet!
But with each time I made it, I learned more about the delicate dance between heat and whisking, leading to the smooth, creamy curd we know and love today. This tart has become a staple in my kitchen, symbolizing the importance of persistent experimentation and savoring the process of cooking.
FAQs and Troubleshooting
1. Why did my curd turn out runny?
- Ensure you cooked the mixture until it thickened fully — the generous heat helps the eggs set properly.
2. Can I make the crust ahead of time?
- Absolutely! You can prepare the crust a day in advance, wrap it well, and store it in the fridge.
3. What if I don’t have a tart pan?
- No worries! Use a pie dish or even muffin tins for individual servings — just adjust the baking time.
4. How can I prevent my crust from shrinking?
- Cooling the dough and blind-baking are key. Try not to stretch it when placing it in the pan; instead, gently press it in.
Nutritional Info (Optional)
| Nutrient | Per Slice (1/8 of Tart) |
|———————|————————-|
| Calories | 300 |
| Total Fat | 18g |
| Saturated Fat | 10g |
| Cholesterol | 85mg |
| Sodium | 150mg |
| Total Carbohydrates | 35g |
| Dietary Fiber | 2g |
| Sugars | 20g |
| Protein | 3g |
There you have it — a delightful Mango Curd Tart recipe that’s more than just a dessert; it’s a celebration of flavors and memories! I hope it finds a special place in your kitchen, just as it has in mine. Enjoy every sunny bite — happy cooking!
PrintMango Curd Tart

A creamy and luscious mango filling nestled in a buttery, melt-in-your-mouth crust, perfect for summer gatherings.
- Prep Time: 30 minutes
- Cook Time: 30 minutes
- Total Time: 120 minutes
- Yield: 8 servings 1x
- Category: Dessert
- Method: Baking
- Cuisine: Tropical
- Diet: Vegetarian
Ingredients
- 1 1/2 cups all-purpose flour
- 1/2 cup unsalted butter, softened
- 1/4 cup powdered sugar
- 1/4 teaspoon salt
- 1 large egg yolk
- 1/4 cup cold water
- 1 cup mango puree
- 3/4 cup sugar
- 3 large eggs
- 1/2 cup lemon juice
- 1 tablespoon lemon zest
- 1/2 cup heavy cream
Instructions
- Combine Dry Ingredients: In a mixing bowl, whisk together the all-purpose flour, powdered sugar, and salt.
- Cut in the Butter: Add the softened butter and work it into the flour mixture until it resembles coarse crumbs.
- Add Egg Yolk: Mix in the egg yolk until combined.
- Incorporate Cold Water: Gradually add the cold water one tablespoon at a time, mixing gently until the dough comes together.
- Chill the Dough: Wrap the dough in plastic wrap and refrigerate for at least 30 minutes.
- Preheat Oven: Preheat your oven to 350°F (175°C).
- Roll Out the Dough: On a lightly floured surface, roll out the chilled dough to about 1/8 inch thick and transfer it to a tart pan.
- Blind Bake: Prick the bottom with a fork and line it with parchment paper. Bake for 15 minutes.
- Cool: Remove from the oven and let the crust cool completely.
- Combine Mango Puree and Sugar: In a saucepan, whisk together the mango puree and sugar over medium heat.
- Add Eggs and Lemon Juice: Gradually whisk in the eggs and lemon juice.
- Cook the Mixture: Keep cooking and whisking until the mixture thickens.
- Strain (Optional): Strain the mixture through a fine-mesh sieve into a clean bowl.
- Finish with Cream: Stir in the lemon zest and heavy cream until fully combined.
- Pour the Curd: Gently pour the mango curd into the cooled tart crust.
- Chill: Refrigerate the tart for at least 2-3 hours to set.
Notes
Garnish with whipped cream, fresh mango slices, or mint leaves before serving.
Nutrition
- Serving Size: 1 slice
- Calories: 300
- Sugar: 20g
- Sodium: 150mg
- Fat: 18g
- Saturated Fat: 10g
- Unsaturated Fat: 6g
- Trans Fat: 0g
- Carbohydrates: 35g
- Fiber: 2g
- Protein: 3g
- Cholesterol: 85mg
Keywords: Mango, Curd, Tart, Summer Dessert, Tropical Dessert

Cilantro Lime Pasta Salad
Cilantro Lime Pasta Salad: A Refreshing Twist for Your Next Gathering!
Hello, my lovely foodies! Today, we’re diving into one of my favorite summer dishes that’s just bursting with flavor and sunshine: Cilantro Lime Pasta Salad. If you’re looking for a refreshing, easy-to-make dish that’s perfect for summer barbecues, potlucks, or a light weeknight dinner, you’ve hit the jackpot.
Picture this: a warm, sunny afternoon, the grill sizzling just outside, and your favorite people gathered around a beautifully set table. You serve up plates of this vibrant pasta salad, and instantly, smiles spread across faces. The combination of zesty lime, fresh cilantro, and creamy avocado dances on the palate, making everyone feel right at home. That’s the magic of this dish—it’s approachable elegance at its best!
When it comes to cooking, I always believe in sourcing the best quality ingredients you can find, and simply letting them shine through your dishes. This Cilantro Lime Pasta Salad embraces that philosophy beautifully. Imagine twirling your fork around perfectly cooked pasta, highlighted by the crunch of sweet corn, juicy cherry tomatoes, and the creamy richness of avocado—all drizzled with a bright and zesty lime dressing. Heaven, right?
So, let’s roll up our sleeves and get to work. I promise you’ll not only wow your guests (or even your family), but you’ll enjoy every minute of preparing this delightful dish. Let’s make magic happen in the kitchen together!
Personal Story
I have a special place in my heart for this Cilantro Lime Pasta Salad, reminding me of summer dinners at my childhood home. My mother had this way of turning every meal into a celebration, often inspired by whatever was freshest at the market. One year, we decided to host a big family reunion in our backyard, and I was tasked with bringing a dish everyone could enjoy.
That’s when my mom and I concocted the first version of this pasta salad. We stood together in the kitchen, laughing and talking, as the aroma of garlic wafted in from a nearby dish. We tossed together vibrant greens and fresh veggies, drizzling them with lime as if it were sunshine itself. As family filtered into our backyard, the tables filled with dishes from everyone’s homes, but it was our pasta salad that stole the show!
Everyone was raving about the flavors, the colors, the textures, and I knew we’d created something special. Through the years, this recipe has evolved, but every bite still transports me back to those sunlit afternoons, surrounded by love and laughter. I’m thrilled to share it with you today—let’s make some delicious memories in your kitchen!
Ingredients
Here’s what you’ll need to whip up this Cilantro Lime Pasta Salad:
-
8 oz pasta (your choice)
Choose your favorite pasta shape! I often go for fusilli or penne for the fun texture, but spaghetti or rotini work beautifully as well. Gluten-free pasta can be used if you prefer. -
1 cup fresh corn (cut from the cob or frozen)
Fresh sweet corn adds a delicious crunch. If it’s not corn season, frozen corn works perfectly. Just make sure to thaw it before use! -
1 cup cherry tomatoes (halved)
These little gems bring a juicy pop to each bite! Any variety works; try using heirloom tomatoes for a rustic touch. -
1/2 red onion (diced)
Red onion offers a nice crunch and a hint of sweetness. For a milder flavor, soak the diced onion in cold water for 10-15 minutes to tone down the bite. -
1 avocado (diced)
Creamy avocado elevates this salad to a whole new level. Make sure it’s ripe but still firm; if you’re making this salad for later, toss the avocado in lime juice to keep it from browning. -
1/4 cup fresh cilantro (chopped)
This herb adds a bright, fresh flavor that just can’t be beaten! If you’re not a cilantro fan, fresh parsley can be a nice substitute. -
Juice of 2 limes
Fresh lime juice provides that zesty punch! If limes are hard to find, lemon juice can be a good alternative, though the flavor will shift slightly. -
1/4 cup olive oil
A quality extra virgin olive oil adds richness; use a nice one for the best flavor. You can mix things up with avocado oil or a nut oil to change the flavor profile. -
Salt and pepper to taste
Always season with care! You can always add more later, but start light and build gradually.
Step-by-Step Instructions
Ready to dive into the cooking process? Let’s make this delicious Cilantro Lime Pasta Salad together!
-
Cook the Pasta:
Begin by bringing a large pot of salted water to a rolling boil. Add your pasta and cook according to package instructions until al dente. This usually takes about 8-10 minutes, but check it! Ensure you taste a piece—it should have just a slight firmness in the center. Once done, drain and rinse under cold water to stop the cooking process. This step is super important; we want our pasta to be cool and ready to soak in all the dressing! -
Prepare the Veggies:
While the pasta cooks, let’s chop! Dice the red onion, halve the cherry tomatoes, and chop the cilantro. If you’re using fresh corn, carefully cut the kernels off the cob. Make it a family affair—get your loved ones in on the chopping fun! Remember, the prettier the presentation, the more inviting the dish! -
Make the Dressing:
In a small bowl or mason jar, combine the lime juice, olive oil, salt, and pepper. Shake or whisk until combined. Tasting is key here! If you feel it needs more acidity, add another splash of lime juice or a pinch more salt. This dressing is the heart of the salad—don’t be shy to get it just right! -
Combine Everything:
In a large mixing bowl, combine your cooled pasta, corn, tomatoes, onion, avocado, and cilantro. Drizzle the dressing on top and gently toss everything together until well coated. Be gentle when mixing, particularly with the avocado, so we don’t end up with guacamole! -
Taste and Adjust:
Now, this is where you should be tasting again! Every ingredient needs to shine through, and if it feels a little flat, add more lime juice or salt. This is your creation, and it should sing in harmony! -
Chill and Serve:
Cover the salad and let it chill in the fridge for at least 30 minutes. This allows all the flavors to meld beautifully. Right before serving, give it a final gentle toss to reintroduce all those delightful flavors.
Serving Suggestions
When it comes to presentation, think simple yet elegant! Use a large, bright bowl to showcase the vibrant colors of the salad. For a fun twist, serve in individual cups or small bowls for outdoor gatherings. Sprinkle extra cilantro on top for that fresh, vibrant finish. This salad pairs beautifully with grilled chicken, shrimp, or even as a standalone dish on a warm day—it’s all about that effortless elegance!
Recipe Variations
Now let’s get creative! Here are a few fun variations to tailor this salad to your taste:
-
Spicy Kick: Add diced jalapeños or chili flakes for a zesty heat that balances wonderfully with the creaminess of the avocado.
-
Protein Boost: Toss in some grilled chicken, shrimp, or even black beans for a heartier meal.
-
Cheesy Delight: Crumble some feta or cotija cheese for a salty kick that complements the lime beautifully.
-
Nutty Flavor: Include toasted sunflower seeds or chopped walnuts for an added crunch and nutty flavor.
-
Seasonal Twist: In place of corn, use diced bell peppers or zucchini when they’re in season for a fresh key flavor.
Chef’s Notes
Cilantro Lime Pasta Salad has become a staple recipe in my kitchen. Over the years, I’ve taken it to countless gatherings and watched it evolve from a simple dish to a showstopper. I recall one time, I added diced mango, and it was an instant hit—who knew that sweet and savory could complement each other so well?
Embrace the evolution of your recipes! Don’t be afraid to mix in ingredients based on what you have on hand or what’s currently in season. Cooking, after all, is about expressing your creativity while making delicious memories.
FAQs and Troubleshooting
1. Can I prepare this salad in advance?
Absolutely! You can prepare the salad a day ahead of time, just hold off on adding the avocado until you’re about to serve. This keeps it fresh and prevents browning.
2. What if the dressing is too tangy?
Start with less lime juice! You can always add more, but it’s hard to take out. Balance it out with a little more olive oil or a pinch of sugar if needed.
3. Can I switch out the pasta type?
Of course! Use any pasta you love—gluten-free or whole wheat variations work perfectly. Just keep an eye on cooking times.
4. How do I store leftovers?
Keep any leftover salad in an airtight container in the fridge for about 2-3 days. You may want to add fresh avocado when serving leftovers to keep things vibrant.
Nutritional Info (if applicable)
While I typically don’t stress the numbers, it’s good to know that this salad is packed with nutrients! It includes healthy fats from the avocado and olive oil, fiber from the veggies and pasta, and a wealth of vitamins—especially if you pile on the produce.
There you have it, my wonderful friends—a fresh and tantalizing Cilantro Lime Pasta Salad that’s sure to impress and inspire! As you tie on your apron and get to creating, remember that every dish tells a story. I can’t wait to hear about your own kitchen adventures. Happy cooking!
PrintCilantro Lime Pasta Salad

A refreshing and zesty pasta salad bursting with flavors of lime, cilantro, and creamy avocado, perfect for summer gatherings.
- Prep Time: 15 minutes
- Cook Time: 10 minutes
- Total Time: 45 minutes
- Yield: 4 servings 1x
- Category: Salad
- Method: Mixing
- Cuisine: Mexican
- Diet: Vegetarian
Ingredients
- 8 oz pasta (your choice)
- 1 cup fresh corn (cut from the cob or frozen)
- 1 cup cherry tomatoes (halved)
- 1/2 red onion (diced)
- 1 avocado (diced)
- 1/4 cup fresh cilantro (chopped)
- Juice of 2 limes
- 1/4 cup olive oil
- Salt and pepper to taste
Instructions
- Cook the Pasta: Begin by bringing a large pot of salted water to a rolling boil. Add your pasta and cook according to package instructions until al dente. Drain and rinse under cold water.
- Prepare the Veggies: While the pasta cooks, chop the red onion, halve the cherry tomatoes, and chop the cilantro. Cut kernels off the corn if using fresh.
- Make the Dressing: In a bowl or jar, combine lime juice, olive oil, salt, and pepper. Shake or whisk until combined.
- Combine Everything: In a large bowl, combine cooled pasta, corn, tomatoes, onion, avocado, and cilantro. Drizzle dressing on top and gently toss.
- Taste and Adjust: Taste the salad and add more lime juice or salt as needed.
- Chill and Serve: Cover and chill in the fridge for at least 30 minutes before serving.
Notes
For a creamy avocado, ensure it’s ripe. Toss with lime juice if preparing in advance to prevent browning.
Nutrition
- Serving Size: 1 serving
- Calories: 350
- Sugar: 5g
- Sodium: 400mg
- Fat: 18g
- Saturated Fat: 2g
- Unsaturated Fat: 14g
- Trans Fat: 0g
- Carbohydrates: 45g
- Fiber: 6g
- Protein: 10g
- Cholesterol: 0mg
Keywords: pasta salad, summer recipes, healthy salad

Easy Tomato Mozzarella Salad
Easy Tomato Mozzarella Salad: A Taste of Sunshine
Welcome, fellow food lovers! Today, I’m thrilled to share with you one of my all-time favorite summer dishes—Easy Tomato Mozzarella Salad. It’s bright, fresh, and bursting with flavor! This salad is more than just a side; it’s a vibrant celebration of seasonal ingredients that brings warmth and joy to any table.
Imagine a warm summer evening, the sun casting a golden glow as you gather with friends and family outdoors. The laughter fills the air, and the scent of fresh herbs wafts by. At the center of your beautifully set table lies a gorgeous Tomato Mozzarella Salad, its colors reminiscent of a sunset. This delightful dish is the epitome of simplicity, yet it’s so elegant that it feels special at any gathering.
What I love about this salad is that it’s perfect for both casual weeknight dinners and festive celebrations. With juicy cherry tomatoes, creamy mozzarella, and fragrant basil mingling together, it’s a dish that transports you straight to the Italian countryside. Plus, it requires minimal time in the kitchen—just enough to enjoy a glass of wine while you create.
This recipe embraces the concept of “elevated simplicity.” You don’t need to be a culinary expert or have a fancy kitchen. All you need is intention, quality ingredients, and a willingness to gather—the heart and soul of cooking. So let’s dive into the details!
Personal Story
I’ll never forget the first time I made this Tomato Mozzarella Salad for a gathering at my friend Mia’s place. It was a sunny Saturday afternoon, and we were celebrating her birthday. I wanted to bring something light and refreshing, so I turned to this classic dish.
As I chopped the tomatoes and mozzarella, the kitchen filled with laughter and chatter. Mia’s husband was behind the grill, throwing on a couple of steaks, and the delicious aroma wafted through the air. When I tossed the simple ingredients together, I noticed how they instantly became something magical. The vibrant colors reminded me of Mia’s infectious enthusiasm for life.
When I served the salad on a beautiful platter, everyone gathered around, and I remember the sparkle in Mia’s eyes when she took her first bite. “This is like summer on a plate!” she exclaimed. That moment solidified my love for this dish—not just for how easy it is to make, but for the memories it helps create. From that day forward, Tomato Mozzarella Salad became a staple at my gatherings.
Ingredients
Let’s gather our ingredients! Here’s what you’ll need to create this scrumptious salad:
-
2 cups cherry tomatoes, halved
Like little jewels, these tomatoes burst with sweetness and color! If cherry tomatoes aren’t available, you can substitute with grape tomatoes or diced large tomatoes; just ensure they’re ripe for maximum flavor. -
8 oz fresh mozzarella balls (bocconcini), halved
Creamy mozzarella adds richness to the salad. For a dairy-free option, you could use marinated tofu or a vegan mozzarella substitute instead. Just ensure it’s well-drained to avoid excess water in your salad. -
1/4 cup fresh basil leaves, chopped
Basil is a game-changer here—its aromatic essence elevates the dish! If basil isn’t available, consider using other herbs like fresh parsley or mint for a twist on flavor. -
2 tablespoons olive oil
Extra virgin olive oil is a must! It brings a beautiful richness to the salad. Can’t find it? Try avocado oil for a lighter touch. -
1 tablespoon balsamic vinegar
Balsamic adds a touch of acidity that beautifully balances the creaminess. If you’d like a sweeter variant, using a balsamic glaze can work wonders! -
Salt and pepper to taste
Always taste as you go! Good quality sea salt and freshly cracked pepper enhance the natural sweetness of the ingredients.
Step-by-Step Instructions
Ready to create this culinary delight? Let’s get started! Follow these steps to whip up your Easy Tomato Mozzarella Salad.
Step 1: Prepare Your Ingredients
Begin by washing your cherry tomatoes and basil leaves under cold running water. Pat them dry with a clean kitchen towel. Fresh ingredients are the star of the show!
Step 2: Halve the Tomatoes
Take the halved cherry tomatoes and place them in a large mixing bowl. I like to use a sharp knife for this—the cleaner the cut, the better! If you’re feeling fancy, you could even score the cut sides with a knife for a more rustic look.
Step 3: Add the Mozzarella
Next, halve the fresh mozzarella balls and toss them in with the tomatoes. The creamy mozzarella paired with the fresh tomatoes has an incredible flavor—trust me, it’s a match made in heaven!
Step 4: Add the Basil
Tear or chop your basil leaves, and scatter them over the tomatoes and mozzarella. This is where the magic happens! As you chop the basil, notice the intoxicating aroma that fills your kitchen—it’s going to take your salad to the next level.
Step 5: Dress the Salad
In a small bowl, whisk together the olive oil and balsamic vinegar. Pour this delightful dressing over the salad, and gently toss everything together with your hands or a wooden spoon. Tip: Use clean hands for the best mixing, and try to avoid smashing the mozzarella.
Step 6: Season to Taste
This is the moment to sprinkle in a generous pinch of sea salt and cracked black pepper. Toss again to combine, and taste! Adjust the seasoning as necessary.
Step 7: Plate the Salad
To serve, spoon the Tomato Mozzarella Salad onto a beautiful platter or bowl. Pro tip: Don’t overcrowd the plate; give the salad some breathing room so it looks inviting and appetizing!
Final Touch
For a final flourish, you could drizzle a touch more olive oil or balsamic vinegar over the top, and perhaps a sprinkle of extra basil for that pop of color. Voilà! Your beautiful salad is ready to serve.
Serving Suggestions
Presentation matters! I love to serve this salad in a shallow, wide bowl to showcase its vibrant colors. Consider pairing it with crusty bread, grilled chicken, or even as a topping for bruschetta. It makes a wonderful centerpiece for a summer barbecue or a light lunch alongside a glass of chilled rosé.
Recipe Variations
Here are a few creative twists to try:
- Caprese Skewers: Thread cherry tomatoes, mozzarella balls, and basil leaves onto skewers for a fun appetizer idea!
- Avocado Addition: Dice a ripe avocado and add it to the salad for a creamy texture boost.
- Pesto Twist: Swap out the olive oil and balsamic for a drizzle of basil pesto for extra herbaceous flavor.
- Spicy Kick: Add a pinch of red pepper flakes for a little heat—perfect for those who love a spicy kick!
- Grilled Version: Toss the cherry tomatoes on the grill before adding to the salad for a smoky flavor.
Chef’s Notes
You know, this Tomato Mozzarella Salad has been a beloved recipe in my kitchen for years. It’s amazing how something so simple can evolve with every season and occasion! I once made a big batch of it for a summer wedding—and because I was running out of time, I opted for a deconstructed version! I served each ingredient separately on a large platter; it was a showstopper.
Another fun story: I once mistakenly grabbed a container of feta instead of mozzarella while grocery shopping. The result? A delightful feta-tomato salad, which was an unexpected hit! Cooking is all about experimentation, so never be afraid to make it your own.
FAQs and Troubleshooting
Here are some common questions and tips that may help you as you embark on your salad-making journey:
Q1: Can I make this salad ahead of time?
A: While this salad is best served fresh, you can prepare the ingredients a few hours in advance. Just mix everything together right before serving to keep the flavors vibrant.
Q2: My salad is too watery; how can I fix this?
A: If your salad becomes watery, it’s usually due to the tomatoes releasing their juices. You can drain a bit of the excess liquid and serve the salad in a slightly raised bowl to keep it from sitting in the juices.
Q3: How do I store leftovers?
A: If you have leftovers, store them in an airtight container in the fridge for up to 2 days. However, it’s best to keep the dressing separate until you’re ready to eat as it can make the salad soggy.
Q4: What if I can’t find fresh mozzarella?
A: Don’t fret! You can substitute with shredded mozzarella, burrata, or even a good-quality aged cheese. Just adjust the quantity based on the cheese you choose!
Nutritional Info (Optional)
Calories per serving: Approx. 150
Protein: 8g
Fat: 12g (mostly healthy fats from olive oil and mozzarella)
Carbohydrates: 4g
Fiber: 1g
Note: Nutritional values can vary based on ingredient substitutions and serving sizes.
There you have it—a delightful Easy Tomato Mozzarella Salad that’s as delicious as it is visually stunning! I hope this recipe brings joy, fresh flavors, and happy memories to your table. Remember, it’s not just about the food; it’s about the moments we create around it. Tie on your apron, gather your loved ones, and let’s celebrate the beauty of home-cooked meals together! 🍅✨
PrintEasy Tomato Mozzarella Salad

A vibrant summer salad featuring cherry tomatoes, creamy mozzarella, and fresh basil, perfect for any gathering.
- Prep Time: 10 minutes
- Cook Time: 0 minutes
- Total Time: 10 minutes
- Yield: 4 servings 1x
- Category: Salad
- Method: No cooking required
- Cuisine: Italian
- Diet: Vegetarian
Ingredients
- 2 cups cherry tomatoes, halved
- 8 oz fresh mozzarella balls (bocconcini), halved
- 1/4 cup fresh basil leaves, chopped
- 2 tablespoons olive oil
- 1 tablespoon balsamic vinegar
- Salt and pepper to taste
Instructions
- Prepare your ingredients by washing the cherry tomatoes and basil leaves under cold running water. Pat them dry with a clean kitchen towel.
- Halve the tomatoes and place them in a large mixing bowl.
- Add the mozzarella balls and toss them in with the tomatoes.
- Add the chopped basil leaves over the tomatoes and mozzarella.
- Dress the salad by whisking together the olive oil and balsamic vinegar in a small bowl, then pour over the salad.
- Season generously with salt and pepper and toss again to combine.
- Plate the salad onto a serving platter, optionally drizzled with extra olive oil or balsamic vinegar before serving.
Notes
Best served fresh but can be prepared a few hours in advance. Store leftovers in an airtight container in the fridge for up to 2 days, keeping the dressing separate to avoid sogginess.
Nutrition
- Serving Size: 1 serving
- Calories: 150
- Sugar: 4g
- Sodium: 200mg
- Fat: 12g
- Saturated Fat: 6g
- Unsaturated Fat: 4g
- Trans Fat: 0g
- Carbohydrates: 4g
- Fiber: 1g
- Protein: 8g
- Cholesterol: 20mg
Keywords: salad, tomato salad, mozzarella, summer recipes, Italian cuisine

Mango Cheesecake
Mango Cheesecake: A Slice of Bright Paradise
Hello, fellow foodies! Grab your apron and get ready for a culinary adventure that will transport your taste buds straight to a tropical paradise. Today, we’re whipping up a delightful Mango Cheesecake that’s as luscious as a sun-drenched beach and as refreshing as a gentle ocean breeze.
This cheesecake combines the creamy richness of classic cheesecake with the vibrant sweetness of ripe mangoes, creating a dessert that feels elegant yet is surprisingly easy to make. Whether you’re planning a gathering, celebrating a special occasion, or simply in need of a little indulgence after a long week, this mango cheesecake is the perfect answer. It’s a show-stopper that impresses, yet it holds a special place in anyone’s heart who loves the simple joys of cooking and sharing delicious food.
What I adore about this dessert is its versatility; it can be a comforting after-dinner delight or a dazzling centerpiece for your dessert table. Plus, the process of making it— from crushing those graham crackers for the crust to swirling in that glorious mango purée— feels rewarding in every sense. Best of all, whether you’re an experienced home cook or just starting, I promise you’ll feel like a kitchen rockstar!
So, lean in, and let’s dive into the world of flavors, memories, and of course, a delicious mango cheesecake that will have your friends asking for seconds!
Personal Story
Growing up, one of my fondest memories revolves around family gatherings at my grandmother’s house. Every summer, my cousins and I would gather around her kitchen while she whipped up her splendid cheesecakes—each one more decadent than the last. Among them, her mango cheesecake became a family favorite.
I vividly remember the bright yellow color of the mango swirl as it danced atop the creamy filling, so inviting that a slice seemed impossible to decline. As the sunlight poured through the kitchen window, we waited impatiently for it to chill in the fridge, giggling and sharing stories while our impatient stomachs grumbled.
One detail that always stood out was Grandma’s joyful spirit, which filled the air as she shared tips and secrets about the cheesecake. “It’s all about using fresh fruit, sweethearts!” she’d say with a wink. Inspired by those cherished moments, I’ve added my little spin, making this mango cheesecake a personal tribute to her love for cooking, family, and the power of coming together over good food.
Ingredients
To embark on our mango cheesecake journey, here’s what you’ll need:
-
2 cups graham cracker crumbs
A classic base for cheesecakes, they provide that delightful crunch! If you’re feeling adventurous, try using crushed vanilla wafers or gingersnaps for a unique twist. -
1/2 cup unsalted butter, melted
This is the glue that holds your crust together. Prefer a dairy-free option? Try coconut oil—it adds a subtle tropical flavor! -
1 cup sugar, divided
Sweetness is essential! Use granulated sugar for the filling, and consider using brown sugar for an earthier flavor in the crust. -
4 (8-ounce) packages cream cheese, softened
The star of the show! Ensure it’s softened to room temperature; this makes mixing smoother. If you want a lighter version, opt for Neufchâtel cheese. -
1 teaspoon vanilla extract
This enhances flavor while bringing warmth to the cheesecake. Pure vanilla extract delivers the best flavor, but imitation works too in a pinch. -
4 large eggs
Eggs create the rich, custardy texture. If you need an egg-free option, consider using flax eggs (1 tablespoon flaxseed meal mixed with 3 tablespoons of water per egg). -
1 cup pureed mango
The key ingredient! Aim for ripe, fresh mangoes for optimum flavor. In a hurry? Use store-bought mango purée! -
1/4 cup sour cream
Adds tanginess and richness. Greek yogurt is a great substitute if you’re looking for a healthier option.
Step-by-Step Instructions
Let’s dive right into creating this delightful mango cheesecake! Gather your ingredients and let’s get cooking.
-
Preheat Your Oven: Begin by preheating your oven to 325°F (160°C). Preheating is an essential step to ensure your cheesecake sets beautifully.
-
Make the Crust: In a medium bowl, combine the graham cracker crumbs with melted butter and 1/4 cup of sugar. Mix until the crumbs are well-coated and the mixture resembles wet sand. Here’s a little tip: pressing the mixture firmly into the bottom of your springform pan creates a deliciously crunchy base. Use a measuring cup to press the crust down evenly!
-
Bake the Crust: Once your mixture is well-formed, pop it into the oven and bake for about 8-10 minutes, until it’s lightly browned. The aroma filling your kitchen will have your mouth watering—trust me! Allow it to cool as you prepare the filling.
-
Prepare the Cream Cheese Mixture: In a large mixing bowl, use a hand mixer or stand mixer to beat the softened cream cheese until it’s creamy and smooth. Dump in the remaining 3/4 cup of sugar and vanilla, mixing until fully combined. This is where the magic begins!
-
Add the Eggs: One at a time, add in the eggs, mixing well after each addition. Take care not to overmix; we want to keep the batter light and airy. An over-mixed batter can lead to a cheesecake that cracks when it bakes—nobody wants that!
-
Incorporate Mango: Gently fold in the mango puree and sour cream into the cream cheese mixture. Make sure it’s all well combined but be careful not to deflate the batter! The vibrant color of the mango is just stunning, isn’t it?
-
Pour and Smooth: Pour the cheesecake filling over the cooled crust, spreading it evenly. Now, here’s a pro tip: tap the pan gently on the countertop before baking to release any air bubbles that might be lurking in there.
-
Bake It: Bake your cheesecake in the preheated oven for about 60-70 minutes. The edges should be set, while the center has a slight jiggle—don’t worry, it will firm up as it cools! Place a shallow pan with water on the lower rack of the oven to create steam, helping to prevent cracks.
-
Cool Down: Once baked, turn off the oven and crack the door open—let the cheesecake cool gently for about an hour. This gradual cooling helps prevent cracks, so patience is key!
-
Chill: After it’s cooled, cover the cheesecake and pop it in the fridge for at least 4 hours or overnight for the best flavor. Trust me; good things come to those who wait!
Serving Suggestions
When you’re ready to serve your glorious mango cheesecake, take a moment to appreciate its beauty. I like to garnish mine with a sprinkle of crushed graham crackers on top and a few slices of fresh mango. For an extra pop of flavor, drizzle a little honey or a sprinkle of fresh mint leaves around the edges.
Slice it up, and serve each piece on a chilled plate. Your guests will be in for a treat, and if you’re hosting a gathering, just watch their smiles light up the room!
Recipe Variations
Want to get creative with your mango cheesecake? Here are some delicious twists and substitutions to consider:
-
Passion Fruit Mango Delight: Swirl in some passion fruit purée alongside the mango for an exotic flavor boost!
-
Chocolate Graham Crust: Mix cocoa powder into your graham cracker crust for a delightful chocolatey base, pairing well with the mango.
-
Coconut Cream Cheesecake: Fold in coconut cream into the batter and top with toasted coconut flakes for a tropical vibe—paradise on a plate!
-
Vegan Version: Substitute cream cheese with your favorite vegan cream cheese product, eggs with aquafaba (the water from chickpeas), and use coconut yogurt instead of sour cream for a plant-based delight.
-
Spiced Mango Cheesecake: Add a dash of cinnamon or nutmeg to the filling for a warm spice that complements the natural sweetness of the mango.
Chef’s Notes
This mango cheesecake holds a special place in my heart—like a canvas for creativity. Over the years, I’ve tinkered with spices, trying out fresh fruit variations, and even taming the sweetness to cater to different preferences. Each iteration taught me something new about balancing flavors and textures.
One time, in a rush to make this for a family gathering, I accidentally grabbed salt instead of sugar! Let’s just say, desserts and salty surprises don’t mix well… But every mistake turned out to be a lesson, reminding me that mistakes can lead to moments of joy and creativity in the kitchen.
Today, the mango cheesecake stands as a testament to loving not just the outcome, but the process! So, feel free to let your imagination run wild on this one.
FAQs and Troubleshooting
-
Why did my cheesecake crack?
Cracks often occur when the batter is overmixed or due to rapid temperature changes. To prevent this, always mix just until incorporated, and allow gradual cooling in the oven when done baking. -
Can I use frozen mango?
Absolutely! Just be sure to thaw and drain any excess liquid before puréeing. Fresh mango yields a brighter flavor, but frozen works well in a pinch. -
How do I know when my cheesecake is done?
The edges should be set, and the center should have a slight jiggle. It will firm up nicely during cooling, so trust your instincts! -
How do I store leftovers?
Cover any uneaten cheesecake and store it in the refrigerator for up to 5 days. If you’re feeling inventive, try using leftovers in a smoothie or parfait the next day!
Nutritional Info
(Insert optional nutritional info if desired. For example: A slice contains approximately 350 calories, 22g fat, 30g carbs, and 5g protein.)
Well, there you have it! A scrumptious and inviting mango cheesecake that’s sure to bring a smile to your face and those you love. It’s all about enjoying the little moments—from mixing, baking, and sharing this delightful dessert. So, tie on that apron, get to the kitchen, and create some beautiful memories with this incredible recipe. Happy baking, friends! 🍰🌞
PrintMango Cheesecake

A delightful mango cheesecake that combines creamy richness with vibrant mango sweetness, perfect for gatherings or as a comforting dessert.
- Prep Time: 30 minutes
- Cook Time: 70 minutes
- Total Time: 100 minutes
- Yield: 12 servings 1x
- Category: Dessert
- Method: Baking
- Cuisine: American
- Diet: Vegetarian
Ingredients
- 2 cups graham cracker crumbs
- 1/2 cup unsalted butter, melted
- 1 cup sugar, divided
- 4 (8-ounce) packages cream cheese, softened
- 1 teaspoon vanilla extract
- 4 large eggs
- 1 cup pureed mango
- 1/4 cup sour cream
Instructions
- Preheat your oven to 325°F (160°C).
- Make the crust by combining graham cracker crumbs, melted butter, and 1/4 cup of sugar.
- Bake the crust for about 8-10 minutes until lightly browned. Allow it to cool.
- Prepare the cream cheese mixture by beating cream cheese until creamy, then mixing in 3/4 cup of sugar and vanilla extract.
- Add in the eggs one at a time, mixing well after each addition.
- Incorporate the mango puree and sour cream into the mixture gently.
- Pour the filling over the cooled crust, smoothing it out.
- Bake for 60-70 minutes until the edges are set and the center has a slight jiggle.
- Cool the cheesecake in the oven with the door cracked for about an hour.
- Chill in the refrigerator for at least 4 hours or overnight.
Notes
For best results, let the cheesecake cool gradually and chill overnight for optimal flavor.
Nutrition
- Serving Size: 1 slice
- Calories: 350
- Sugar: 22g
- Sodium: 300mg
- Fat: 22g
- Saturated Fat: 12g
- Unsaturated Fat: 8g
- Trans Fat: 0g
- Carbohydrates: 30g
- Fiber: 1g
- Protein: 5g
- Cholesterol: 100mg
Keywords: cheesecake, mango dessert, tropical cheesecake, summer dessert, easy cheesecake