
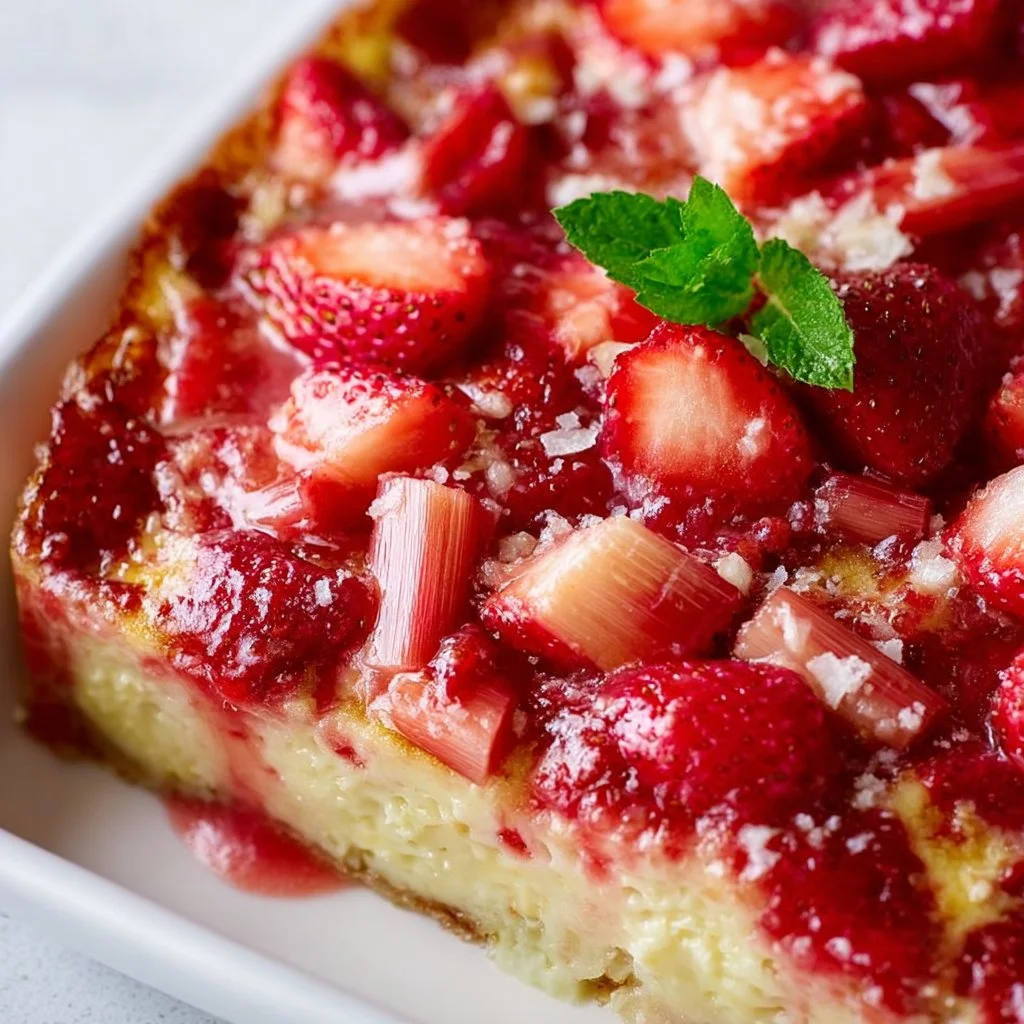
Strawberry Rhubarb Crisp
Indulge in Sweet Nostalgia: Recipe for Strawberry Rhubarb Crisp
Hello, fellow foodies! 🎉 Today we’re diving into a delightful dish that marries sweet and tart in a way that feels like a warm hug from the inside out — Strawberry Rhubarb Crisp! Not only is it a crowd-pleaser, but it’s also a beautiful reminder of those sunny afternoons spent in grandma’s kitchen, where the air was filled with laughter and the sweet scent of baked goods bubbling in the oven.
But before we roll up our sleeves and tie on our aprons, let’s bask in the nostalgia of this classic dessert and the joy it brings to our tables today.
A Whiff of Nostalgia: My Strawberry Rhubarb Crisp Story
I can still picture the sun streaming through the window as I stood on a stool, arms deep in a mixing bowl, on the hunt for the perfect crumble topping for our family’s summer gatherings. My grandmother, the queen of desserts, had a delightful way of turning the simplest ingredients into something extraordinary. Every time she made her famous Strawberry Rhubarb Crisp, the whole house would buzz with excitement.
Rhubarb plants grew abundantly in her backyard, a vibrant pink poking out of the earth, ready to be snipped and tossed into the mix alongside sweet, juicy strawberries. We would rummage through the pantry for oats and flour, a bit of sugar, and, of course, that secret sprinkle of cinnamon that always kept us guessing.
As the crisp baked, we’d hang out in the kitchen, chatting and stealing occasionally glances at the oven, anticipating that bubbling goodness and warm, buttery aroma. The first taste was always magical, that perfect combination of flavors marrying together in a way that only memories can describe. And let me tell you, dear friends, each spoonful tasted like love itself.
We may not have had fancy gourmet gadgets at our disposal, but my grandma taught me the artistry of simplicity. So, roll up those sleeves, and let’s create our own patch of sweet nostalgia!
Ingredients for Your Strawberry Rhubarb Crisp
Let’s get to the good stuff! Here’s everything you’ll need to whip up this delightful crisp. Each ingredient brings something special to the party, and I’m here to share tips to ensure your dish is a hit!
-
2 cups fresh strawberries, hulled and sliced
These juicy gems are the star of the show. Look for plump strawberries that are fragrant — you want the sweetness to shine! If fresh strawberries aren’t available, you can use frozen ones, but reduce the sugar slightly as they can be a bit sweeter. -
2 cups rhubarb, chopped
Ah, the tangy counterpart of the strawberries! Rhubarb adds a lovely tartness that balances the sweetness. If rhubarb isn’t in season, you can use apple or even sour cherries as a substitute. -
1 cup granulated sugar
This brings the sweetness needed to balance the tangy rhubarb. For a healthier option, you can substitute half of this with honey or maple syrup — just note that it will alter the texture slightly. -
2 tablespoons cornstarch
This is our secret weapon for thickening the delicious filling — it helps give the crisp that lovely structure. If you’re out of cornstarch, you can use all-purpose flour, but the filling may be a tad thinner. -
1 tablespoon lemon juice
A splash of acidity that brightens the flavors and enhances the fruitiness. If you’re fresh out of lemon, a splash of orange juice works almost as well! -
1 cup rolled oats
These provide the crunchy topping and a nutty depth of flavor. Quick oats can work in a pinch, but I love the texture that rolled oats provide in this dish. -
1 cup all-purpose flour
Essential for our crumbly topping — it gives the right structure and texture. If you’re looking for a gluten-free option, almond flour or a gluten-free flour blend can do the trick! -
1/2 cup brown sugar
This delivers a subtle molasses flavor that caramelizes beautifully during baking. You can reduce it to 1/3 cup if you prefer less sweetness! -
1/2 cup butter, softened
The source of all that rich, buttery goodness in our crisp! If you want a plant-based version, coconut oil or vegan butter can work well too — just keep an eye on the melting time. -
1 teaspoon cinnamon
Cinnamon is the perfect warm spice that lifts all the flavors in this crisp. Feel free to sprinkle a bit more if you like a stronger flavor or mix in some nutmeg for an extra kick!
Step-by-Step Instructions for the Perfect Crisp
Alright, it’s time to make some magic happen in the kitchen! Grab those ingredients and follow these steps for a delicious strawberry rhubarb crisp that will impress your friends and family.
1. Preheat Your Oven
Set your oven to 350°F (175°C). A preheated oven ensures that your crisp will cook evenly and bubble perfectly!
2. Prepare the Filling
In a large mixing bowl, combine your sliced strawberries, chopped rhubarb, granulated sugar, cornstarch, and lemon juice.
- Tip: Gently toss these ingredients together, ensuring each piece of fruit is coated. You want that sugar to play nice with the fruit juices while you’re combining them!
3. Pour the Fruit into the Baking Dish
Transfer the luscious fruit mixture into a greased 9-inch baking dish. Spread it out evenly so every spoonful will have that sweet-and-tangy combo.
4. Make the Topping
In a separate bowl, combine the rolled oats, all-purpose flour, brown sugar, butter, and cinnamon.
- Chef’s Insight: Use a fork or your fingers to mix everything until it resembles a crumbly texture. You want those bits of butter to stay intact for a beautiful crispy finish!
5. Crumble that Topping
Sprinkle the oat mixture evenly over the rhubarb and strawberry mixture, covering it completely. Don’t hold back — the more, the merrier!
6. Bake the Crisp
Pop it into your preheated oven and let it bake for 40-45 minutes. You’ll know it’s ready when the filling is bubbling and the topping is beautifully golden brown.
- Pro Tip: Toss some foil over the top if it’s browning too quickly, allowing the fruit to finish cooking without burning the crispy goodness.
7. Cool and Serve
Let the crisp cool for about 10-15 minutes before diving in so you don’t burn your taste buds. This also helps stabilize the filling a bit.
Woohoo! Your strawberry rhubarb crisp is ready to shine!
Serving Suggestions
To serve, scoop generous portions into bowls and top with a dollop of fresh whipped cream or a scoop of vanilla ice cream. The warm crisp combined with the cold ice cream creates a dreamy contrast that is absolutely heavenly! You could also sprinkle a few fresh mint leaves on top for a pop of color and freshness.
Recipe Variations to Explore
- Add Nuts: Consider adding chopped walnuts or pecans for an extra crunch to the topping!
- Spiced Crisps: Replace the cinnamon with pumpkin spice or a dash of ginger for a different seasonal twist.
- Berry Mix: Combine other berries, like blueberries or raspberries, for a mixed berry crisp that’s bursting with flavor!
- Vegan Alternative: Substitute the butter with coconut oil and use a flax egg for an easy vegan option.
- Gluten-Free: Use gluten-free oats and flour to create a deliciously inclusive dish for everyone to enjoy!
Chef’s Notes
This recipe has evolved over time in my kitchen and has become a staple for summer gatherings. I cherish how simple it is to make while allowing you to explore flavors based on what’s in season! I once had a little “oops” moment when I accidentally swapped salt for sugar in the filling. Let’s just say that day didn’t go as planned, but it sparked an idea to double-check measurements — a lesson learned with a laugh!
FAQs and Troubleshooting
1. Why is my topping soggy?
If the topping turns out soggy, it might be because the butter was overmixed into the dry ingredients. You want a crumbly texture, not a paste. Also, ensure you’ve added the right amount of cornstarch for thickening the fruit juices.
2. Can I make this ahead of time?
Absolutely! You can assemble the crisp, cover it, and store it in the fridge for 1-2 days before baking. Just make sure to add a few extra minutes to the baking time if it’s chilled.
3. Can I use frozen fruit?
Yes! If using frozen strawberries or rhubarb, there’s no need to thaw, but add a little extra cornstarch to help absorb the extra juices released during baking.
4. How do I store leftovers?
Keep any leftovers in an airtight container in the fridge for up to 3 days. Reheat it in the oven for that fresh-baked taste!
Nutritional Info (Optional)
While not exact, a single serving of this strawberry rhubarb crisp (approximately 1/8 of the dish) may contain around:
- Calories: 250
- Protein: 2g
- Fat: 11g
- Carbohydrates: 39g
- Sugar: 18g
Note: These numbers can vary based on serving size and ingredient brands used.
And there you have it! A delicious, heartwarming Strawberry Rhubarb Crisp that’s bound to evoke joy — whether for yourself or your loved ones gathered around the table. Here’s to the beauty of cooking with intention, letting flavors first speak of memories, and creating new ones with every delightful bite.
If you try this recipe, I’d love to hear how it turned out! Snap a picture, tag me on your social media, and let’s keep the cooking conversation going. Cheers to sweet moments and tasty treats! 🍓🌿✨
PrintStrawberry Rhubarb Crisp

A delightful dessert that marries sweet strawberries and tangy rhubarb, topped with a crunchy oat crumble.
- Prep Time: 15 minutes
- Cook Time: 45 minutes
- Total Time: 60 minutes
- Yield: 8 servings 1x
- Category: Dessert
- Method: Baking
- Cuisine: American
- Diet: Vegetarian
Ingredients
- 2 cups fresh strawberries, hulled and sliced
- 2 cups rhubarb, chopped
- 1 cup granulated sugar
- 2 tablespoons cornstarch
- 1 tablespoon lemon juice
- 1 cup rolled oats
- 1 cup all-purpose flour
- 1/2 cup brown sugar
- 1/2 cup butter, softened
- 1 teaspoon cinnamon
Instructions
- Preheat your oven to 350°F (175°C).
- Combine your sliced strawberries, chopped rhubarb, granulated sugar, cornstarch, and lemon juice in a large mixing bowl.
- Transfer the fruit mixture into a greased 9-inch baking dish.
- In a separate bowl, combine the rolled oats, all-purpose flour, brown sugar, butter, and cinnamon.
- Mix everything until it resembles a crumbly texture.
- Sprinkle the oat mixture evenly over the fruit mixture.
- Pop it into your preheated oven and let it bake for 40-45 minutes.
- Cool for 10-15 minutes before serving.
Notes
Serve with whipped cream or vanilla ice cream for a perfect combo!
Nutrition
- Serving Size: 1 serving
- Calories: 250
- Sugar: 18g
- Sodium: 100mg
- Fat: 11g
- Saturated Fat: 7g
- Unsaturated Fat: 3g
- Trans Fat: 0g
- Carbohydrates: 39g
- Fiber: 3g
- Protein: 2g
- Cholesterol: 30mg
Keywords: Strawberry Rhubarb Crisp, Dessert, Summer Recipe, Warm Dessert

Lime Chicken Party
Lime Chicken Party: A Zesty Delight for Any Gathering!
Hello, fellow foodies! Welcome back to my cozy corner of culinary creativity here at Ivory Apron! If you’re looking to elevate your next gathering with something vibrant and delicious, then you’ve landed in the right place. Today, I’m excited to share with you a recipe that not only celebrates the zestiness of lime but also embodies all the warmth of a friendly gathering. Say hello to my Lime Chicken Party—a dish that’s as effortless as it is impressive!
Cooking is all about creating experiences, and there’s something special about gathering around the table to share a meal infused with flavors and fresh ingredients. The bright acidity of lime combined with the tender juiciness of chicken brings sunshine to any plate, and I can’t wait for you to experience it with your loved ones!
Let’s Get Personal: A Memory with Lime Chicken
This Lime Chicken recipe holds a special place in my heart because it reminds me of a long summer evening spent with family and friends in my backyard. One year, during a balmy summer evening, I decided to host a casual barbecue to celebrate my cousin’s birthday. As we set up the string lights overhead and arranged picnic blankets on the grass, I wanted a showstopper of a dish that wouldn’t keep me stuck in the kitchen.
I marinated chicken breasts in a luscious lime mixture, using fresh herbs and spices to brighten the flavor. As the chicken grilled to perfection, the sizzle mixed with our laughter and the smell of charred goodness wafted through the air. I recall the joy on everyone’s faces as they took the first bite—the zesty chicken paired deliciously with ripe avocado and colorful salads. That night was filled with great conversations, hearty laughter, and a lot of love, and I’ve been sharing this fabulous dish ever since!
Ingredients
Here’s what you’ll need to create this vibrant Lime Chicken Party dish. Each ingredient is not only essential but also brings something special to the table:
-
4 Chicken Breasts
Tender and versatile, chicken breasts serve as the perfect canvas for our zesty marinade. You can swap these for chicken thighs for a juicier bite or even use tofu for a vegetarian-friendly option. -
2 Limes (juiced)
Fresh lime juice adds a bright acidity that elevates the dish. Bottled lime juice is convenient in a pinch, but I highly recommend fresh for that vibrant flavor. -
1 Avocado (sliced)
Creamy avocados balance out the zesty lime and add richness to your plate. If you’re feeling adventurous, you can swap it for mango for a fruity twist! -
1/4 Cup Fresh Cilantro (chopped)
Fresh cilantro introduces a lovely herbaceous note. If cilantro isn’t your thing, parsley works beautifully as a substitute or skip it altogether for a milder flavor. -
1 Teaspoon Chili Powder
A hint of chili powder adds depth and a touch of warmth. You can adjust the heat level by using smoked paprika for a smoky flavor or cayenne pepper for an extra kick. -
1 Tablespoon Olive Oil
This helps to keep the chicken moist and adds a touch of richness. You can use avocado oil or grapeseed oil for a neutral flavor. -
Salt and Pepper to taste
Essential for enhancing flavors. Don’t forget to taste as you go—seasoning is key!
Step-by-Step Instructions
Alright, let’s dive into the fun part: cooking this fabulous Lime Chicken! Follow these steps and remember, cooking should feel joyful, so dance around the kitchen if inspiration strikes!
Step 1: Prepare the Marinade
- Mix it Up! In a bowl, combine the juice of two limes, olive oil, chili powder, and a pinch of salt and pepper. Whisk until well blended.
Chef Note: The acid from the lime juice helps to tenderize the chicken, making it juicy and delicious.
Step 2: Marinate the Chicken
- Let It Soak Up Flavor! Place your chicken breasts in a zip-top bag or shallow dish and pour the marinade over. Seal the bag or cover the dish, then refrigerate for at least 30 minutes. If you have more time, let it marinate for up to 2 hours for maximum flavor.
Pro Tip: Always refrigerate while marinating to keep the chicken safe!
Step 3: Preheat the Grill (or Pan)
- Let’s Get Cooking! Preheat your grill to medium-high heat, or if you prefer using a skillet, heat a drizzle of olive oil in a large pan over medium heat.
Chef Tip: A well-heated grill ensures that your chicken gets those beautiful grill marks!
Step 4: Grill the Chicken
- On the Heat! Remove the chicken from the marinade (discard the marinade), and grill each breast for about 6-7 minutes per side or until they’re cooked through (165°F internal temperature).
Commentary: For that extra charred flavor, don’t move the chicken too much! Let it sear before flipping.
Step 5: Rest and Slice
- The Waiting Game! Once cooked, transfer the chicken to a plate and let it rest for about 5 minutes. This helps the juices redistribute, ensuring your chicken remains juicy.
Chef Insight: Always rest your meat—this is where the magic happens!
Step 6: Assemble Your Dish
- Time to Plate Up! Slice the grilled chicken, serve it with sliced avocado, a sprinkle of fresh cilantro, and some lime wedges on the side for an extra burst of flavor.
Serving Suggestion: Arrange it beautifully on a platter for that wow factor!
Serving Suggestions
Presentation makes all the difference! For serving, arrange the sliced chicken on a large platter with the avocado nestled beside it. Scatter some chopped cilantro over the top and garnish with lime wedges. Not only does it look gorgeous, but it’s also a feast for the eyes, inviting everyone to dig in!
Recipe Variations
Getting creative is half the fun! Try out some of these ideas for a unique twist on this Lime Chicken:
- Tropical Twist: Add diced pineapple or mango to the marinade for a sweet tropical flavor.
- Spice It Up: Incorporate fresh jalapeños into the marinade for a fiery kick!
- Herbed Delight: Swap lime juice with lemon or orange juice for a different citrus spin, accompanied by fresh basil instead of cilantro.
- Colombian Ajiaco Style: Create a hearty bowl with potatoes and corn, served alongside the chicken for a comforting dish.
Chef’s Notes
This Lime Chicken recipe has evolved over time in my kitchen, swapping in and out of various ingredients based on what I have on hand or the season. I remember one evening when I had some leftover coconut milk— I added it to the marinade. The result? It was absolutely tropical bliss! Experimenting like this is what keeps cooking fun and exciting, so don’t be afraid to trust your instincts!
FAQs and Troubleshooting
Q1: What if my chicken is dry?
A: Dry chicken often results from overcooking. Use a meat thermometer to check doneness and aim for 165°F.
Q2: Can I make this dish ahead of time?
A: Absolutely! You can marinate the chicken a day in advance, and when ready to serve, just grill it!
Q3: How can I adjust the lime flavor?
A: If you find lime too tart, balance it by adding a teaspoon of honey or agave to the marinade for a touch of sweetness.
Q4: Is it okay to freeze the marinated chicken?
A: Yes! Just make sure to thaw in the refrigerator before cooking it to maintain its juiciness.
Nutritional Info
Optional, but helpful!
While specifics excite some, generally, a serving of this Lime Chicken (without sides) is about 200 calories, packed with protein and fresh flavors. Perfect for a healthy meal that doesn’t compromise on taste!
And there you have it! My Lime Chicken Party recipe is not just food; it’s an experience waiting to unfold in your kitchen. I hope you find joy in making this dish as much as I do. Remember, it’s all about sharing flavors, laughter, and beautiful moments around your table! So tie on your apron, gather your loved ones, and let’s create something magical together. Happy cooking! 🍗💛
PrintLime Chicken Party

A zesty Lime Chicken dish perfect for gatherings, combining fresh flavors and tender grilled chicken with vibrant lime.
- Prep Time: 15 minutes
- Cook Time: 30 minutes
- Total Time: 45 minutes
- Yield: 4 servings 1x
- Category: Main Course
- Method: Grilling
- Cuisine: Mexican
- Diet: Paleo
Ingredients
- 4 Chicken Breasts
- 2 Limes (juiced)
- 1 Avocado (sliced)
- 1/4 Cup Fresh Cilantro (chopped)
- 1 Teaspoon Chili Powder
- 1 Tablespoon Olive Oil
- Salt and Pepper to taste
Instructions
- Mix it Up! In a bowl, combine the juice of two limes, olive oil, chili powder, and a pinch of salt and pepper. Whisk until well blended.
- Let It Soak Up Flavor! Place your chicken breasts in a zip-top bag or shallow dish and pour the marinade over. Seal the bag or cover the dish, then refrigerate for at least 30 minutes. If you have more time, let it marinate for up to 2 hours for maximum flavor.
- Preheat your grill to medium-high heat, or if you prefer using a skillet, heat a drizzle of olive oil in a large pan over medium heat.
- Remove the chicken from the marinade (discard the marinade), and grill each breast for about 6-7 minutes per side or until they’re cooked through (165°F internal temperature).
- Transfer the chicken to a plate and let it rest for about 5 minutes to ensure juiciness.
- Slice the grilled chicken, serve it with sliced avocado, a sprinkle of fresh cilantro, and some lime wedges on the side for an extra burst of flavor.
Notes
For added taste, you can incorporate fresh jalapeños into the marinade or swap lime juice with lemon for a different citrus spin.
Nutrition
- Serving Size: 1 serving
- Calories: 200
- Sugar: 1g
- Sodium: 300mg
- Fat: 10g
- Saturated Fat: 1.5g
- Unsaturated Fat: 7g
- Trans Fat: 0g
- Carbohydrates: 6g
- Fiber: 3g
- Protein: 28g
- Cholesterol: 70mg
Keywords: lime chicken, grilled chicken, party recipe, summer recipe, healthy chicken

Easy Classic Strawberry Rhubarb Pie
The Essence of Flavor: Easy Classic Strawberry Rhubarb Pie
Hello there, fellow food lovers! Today, I’m excited to whisk you away on a delicious journey into the world of baking with my beloved Easy Classic Strawberry Rhubarb Pie. This pie isn’t just a dessert; it’s a nostalgic trip down memory lane, bursting with flavors that scream summer and warmth.
Imagine this: a golden-brown flaky crust cradling a vibrant, bubbling filling of sweet strawberries and tart rhubarb. Every slice is a celebration of contrasts — the sweetness of the strawberries mingling beautifully with the slight tang of the rhubarb, all enhanced by a hint of citrus. And the flaky crust? It’s just the cherry on top! This recipe is a staple in my kitchen and a crowd-pleaser at any gathering. Not only is it incredibly elegant for entertaining, but it also holds a special place in my heart, reminding me of sunny afternoons spent with loved ones.
Now, whether you’re a seasoned baker or just starting to explore the world of pie-making, fear not! I’ll guide you through every step, sharing tips and stories along the way. You won’t need a culinary degree to impress your friends or family with this stunning dessert. So, tie on your apron, grab your mixing bowl, and let’s make some magic happen in the kitchen!
Personal Story
Growing up, my family had a tradition of gathering in the kitchen every summer. I can still picture my grandmother, apron tied snugly around her waist, presiding over a countertop laden with fresh produce. Rhubarb was her star ingredient, and every year she’d whip up a batch of strawberry rhubarb pie that seemed to disappear faster than it was made. I remember the way the warm aroma would waft through the house, drawing everyone in like moths to a flame. She taught me that baking was more than just a process; it was about love, family, and shared memories.
One summer afternoon, determined to prove I was ready to tackle the pie on my own, I gathered the ingredients, following her handwritten recipe with much excitement. The pie made it into the oven, and all that was left was the waiting — the hardest part! When I finally pulled it out, golden and bubbly, I felt like a kitchen magician. That first slice took me right back to those sunlit afternoons, and the joy on my family’s faces was all the affirmation I needed. From that moment on, each pie I made carried a piece of that memory, inviting everyone to linger a little longer around the table.
Ingredients
Here’s what you’ll need to make this scrumptious Easy Classic Strawberry Rhubarb Pie:
For the Pie Crust:
-
1 cup (2 sticks) unsalted butter, cold and diced
Tip: Unsalted butter allows you to control the salt content in your pie. For a richer flavor, you can use European-style butter. -
2½ cups all-purpose flour
Substitution: For a nutty flavor, try using half whole wheat flour. -
1 Tablespoon sugar
Chef Insight: A hint of sugar in the crust enhances its flavor, making it perfect for sweet fillings. -
1 teaspoon salt
Tip: This balances the sweetness of the filling, ensuring every bite is seasoned well. -
½ cup ice water or buttermilk (plus more if needed)
Chef Insight: Ice water keeps the butter cold, which helps form a flaky crust. Buttermilk adds a tangy flavor if you want something unique!
For the Filling:
-
3 cups sliced rhubarb (½ inch slices)
Tip: Fresh rhubarb is ideal, but you can use frozen as well—just thaw and drain excess moisture. -
2½ cups chopped strawberries
Substitution: Swap with raspberries for a deeper flavor or blueberries for something a bit sweeter. -
⅓ cup granulated sugar
Chef Insight: Adjust the sugar to taste based on the sweetness of your fruits. -
⅓ cup brown sugar
Tip: Brown sugar adds a depth of flavor that granulated sugar lacks. -
¼ cup cornstarch
Substitution: You can use flour as a thickener, but cornstarch gives a clearer filling. -
¼ teaspoon salt
Tip: This enhances the natural flavors of the fruits. -
Zest of 1 orange
Chef Insight: A zest of citrus brightens up the filling and balances the tartness of the rhubarb. -
1 Tablespoon orange juice or orange liqueur
Tip: Use liqueur for an adult twist—Grand Marnier is a great option! -
1 teaspoon sugar (for assembling pie)
Tip: Sprinkle this over the crust for a nice caramelized finish. -
1 teaspoon flour (for assembling pie)
Chef Insight: This absorbs excess moisture and helps the filling set nicely. -
2 Tablespoons unsalted chilled butter, cubed (for assembling pie)
Tip: This little touch ensures a rich filling. -
1 large egg, whisked (for egg wash)
Tip: An egg wash gives the crust a beautiful golden color. -
1 Tablespoon milk or cream (for egg wash)
Substitution: You can also use a plant-based milk if you prefer. -
Coarse sugar (for sprinkling)
Tip: A sprinkle of coarse sugar adds a delightful crunch and sparkle!
Step-by-Step Instructions
-
Make the Pie Crust:
Start by grabbing a large mixing bowl. Combine the flour, sugar, and salt. Add the cold, diced butter, using your fingers or a pastry cutter to incorporate it until the mixture resembles coarse crumbs. Remember: the colder the butter, the flakier your crust. -
Add the Ice Water:
Gradually add the ice water (or buttermilk), stirring gently until the dough begins to hold together. Be careful not to overwork it; we want to keep those delicious butter chunks intact. If it needs more moisture, add a little more water, one tablespoon at a time. -
Chill the Dough:
Divide the dough into two parts, shape them into disks, wrap in plastic, and chill in the refrigerator for at least 1 hour. Chilling helps stabilize the dough and makes it easier to roll out. -
Prepare the Filling:
In a large bowl, combine the sliced rhubarb, chopped strawberries, granulated sugar, brown sugar, cornstarch, salt, orange zest, and orange juice (or liqueur). Gently toss everything together until the fruit is well coated. Allow it to sit for about 15 minutes while the juices develop. -
Preheat the Oven:
Preheat your oven to 425°F (220°C). A hot oven is crucial for a beautifully baked crust. -
Roll out the Dough:
On a lightly floured surface, roll out one disk of dough into a circle roughly 12 inches in diameter. Transfer it to a 9-inch pie dish. Don’t be shy; use your fingers to press it into the dish and crimp the edges stylishly. -
Assemble the Pie:
Pour the fruit filling into the prepared pie crust, ensuring it’s evenly distributed. Sprinkle the additional teaspoon of flour over the filling, followed by the cubed butter. -
Roll the Top Crust:
Roll out the second disk of dough and place it over the filling. You can slice some ventilation slits or create a lattice top for that classic pie look. If you’re going for the classic full crust, make sure to cut slits for steam to escape! -
Brush and Sprinkle:
Brush the top crust with the whisked egg and milk mixture. Sprinkle with coarse sugar for that lovely sparkle. -
Bake:
Bake the pie for 15 minutes at 425°F (220°C), then reduce the oven temperature to 350°F (175°C) and bake for an additional 35-45 minutes, or until the filling is bubbly and the crust is golden brown. Tip: If the edges brown too quickly, shield them with aluminum foil. -
Cool and Serve:
Once out of the oven, let your pie cool completely for at least 2 hours. The filling will set properly as it cools.
Serving Suggestions
Slice up that heavenly pie and serve it warm or at room temperature, perhaps with a scoop of vanilla ice cream or a dollop of freshly whipped cream. For an extra touch, garnish each slice with fresh mint leaves or sprinkle a little more orange zest on top. Remember, presentation matters, but it doesn’t have to be perfect — a rustic charm can be just as inviting!
Recipe Variations
-
Add a Crunch: Throw in some chopped nuts like pecans or walnuts to the filling for added texture.
-
Berry Mix-Up: Use a combination of different berries like blueberries or blackberries if strawberries aren’t available.
-
Spice It Up: Add a pinch of cinnamon or nutmeg to the filling for a hint of warmth; it complements the fruit beautifully.
-
Zesty Lemon Twist: Substitute lemon juice for orange juice to give a bright flavor contrast to the pie.
-
Gluten-Free Crust: For a gluten-free option, replace all-purpose flour with a gluten-free blend specifically designed for baking.
Chef’s Notes
This pie has seen many iterations in my kitchen, adapting to what’s in season or what I have on hand. I fondly recall one Thanksgiving when I decided to add a touch of maple syrup to the filling for a fall twist—let me tell you, it was a hit! Each time I make this easy classic strawberry rhubarb pie, I’m reminded not only of my grandmother but of the joy of experimenting in the kitchen. Embrace your own twists; there’s no wrong way to share the love when it comes to baking!
FAQs and Troubleshooting
Q: Why is my pie crust tough?
A: This usually happens when the dough is overworked or too much water is added. Aim for a light hand and keep that butter cold!
Q: My filling is runny. What went wrong?
A: Ensure you’re using enough cornstarch or flour to thicken your filling, especially if the fruit is exceptionally juicy. Letting the pie cool for a couple of hours helps it set as well!
Q: Can I freeze the pie?
A: Absolutely! You can freeze unbaked pies or baked ones. Just ensure it’s well-wrapped. Thaw in the fridge before baking or serving.
Q: What if I don’t have rhubarb?
A: No worries! You can replace it with more strawberries or use other tart fruits like cherries or tart apples.
Nutritional Info
(Note: Nutritional info is approximate and varies based on the specific ingredients and brands you use.)
- Calories per slice (1/8 of the pie): 290
- Total Fat: 15g
- Saturated Fat: 9g
- Cholesterol: 50mg
- Sodium: 150mg
- Total Carbohydrates: 37g
- Dietary Fiber: 2g
- Sugars: 15g
- Protein: 3g
So there you have it! Your guide to creating an Easy Classic Strawberry Rhubarb Pie that’ll have everyone singing your praises. Make sure to invite friends over because this pie is best when shared. Happy baking, and as always, let’s make beautiful memories around the table!
PrintEasy Classic Strawberry Rhubarb Pie

A nostalgic pie featuring a flaky crust filled with sweet strawberries and tart rhubarb.
- Prep Time: 20 minutes
- Cook Time: 50 minutes
- Total Time: 70 minutes
- Yield: 8 servings 1x
- Category: Dessert
- Method: Baking
- Cuisine: American
- Diet: Vegetarian
Ingredients
- 1 cup (2 sticks) unsalted butter, cold and diced
- 2½ cups all-purpose flour
- 1 tablespoon sugar
- 1 teaspoon salt
- ½ cup ice water or buttermilk (plus more if needed)
- 3 cups sliced rhubarb (½ inch slices)
- 2½ cups chopped strawberries
- ⅓ cup granulated sugar
- ⅓ cup brown sugar
- ¼ cup cornstarch
- ¼ teaspoon salt
- Zest of 1 orange
- 1 tablespoon orange juice or orange liqueur
- 1 teaspoon sugar (for assembling pie)
- 1 teaspoon flour (for assembling pie)
- 2 tablespoons unsalted chilled butter, cubed (for assembling pie)
- 1 large egg, whisked (for egg wash)
- 1 tablespoon milk or cream (for egg wash)
- Coarse sugar (for sprinkling)
Instructions
- Make the Pie Crust: Combine flour, sugar, and salt, then add cold butter and mix until coarse.
- Add the Ice Water: Gradually mix in ice water until dough holds together.
- Chill the Dough: Divide, wrap in plastic, and chill for at least 1 hour.
- Prepare the Filling: Toss together rhubarb, strawberries, sugars, cornstarch, salt, orange zest, and orange juice.
- Preheat the Oven: Heat to 425°F (220°C).
- Roll out the Dough: Roll one disk into a 12-inch circle and place in a pie dish.
- Assemble the Pie: Fill with fruit mixture, sprinkle with flour and butter.
- Roll the Top Crust: Cover with second disk, slice ventilation slits.
- Brush and Sprinkle: Add egg wash and sprinkle coarse sugar on top.
- Bake: Bake for 15 minutes at 425°F, then reduce to 350°F and bake for 35-45 minutes.
- Cool and Serve: Let cool for at least 2 hours before serving.
Notes
Serve with vanilla ice cream or whipped cream for a delightful dessert.
Nutrition
- Serving Size: 1 slice
- Calories: 290
- Sugar: 15g
- Sodium: 150mg
- Fat: 15g
- Saturated Fat: 9g
- Unsaturated Fat: 6g
- Trans Fat: 0g
- Carbohydrates: 37g
- Fiber: 2g
- Protein: 3g
- Cholesterol: 50mg
Keywords: pie, strawberry, rhubarb, dessert, summer

Rhubarb Cinnamon Jam
Delightful Rhubarb Cinnamon Jam: A Cherished Recipe to Sweeten Your Table
Hello, fellow food lovers! Today, I’m excited to share with you a recipe that’s near and dear to my heart: Rhubarb Cinnamon Jam. This delightful preserve not only dazzles the taste buds but also fills your kitchen with the warm and inviting aroma of cinnamon—a true nostalgic treat that mirrors the sweet essence of home.
Growing up, my grandmother had a rhubarb garden that sprang to life every spring. I vividly recall the bright pink stalks standing tall, almost waving to me as I raced to her backyard after school. She would slice the rhubarb, and together we blended it with sugar and a sprinkle of cinnamon—always a little extra, just for good measure! The first official rhubarb dish I helped her with was jam, and to this day, it remains one of my favorite memories. The bubbling pot on the stove felt like magic as we transformed those tart stalks into glossy jars of happiness.
When I taste this jam, I’m transported back to those cherished moments—smelling the cinnamon wafting through the air as we sat at her kitchen table, nibbling on homemade biscuits slathered with this sweet-tart goodness. It’s incredible how food can conjure such fond memories, isn’t it?
This jam is perfect for a multitude of occasions, whether you’re hosting a brunch, craving something special for breakfast, or looking for a unique gift from your kitchen. So, grab your apron and let’s get started on creating a flavorful batch of Rhubarb Cinnamon Jam that will surely add a touch of sweetness to your life!
Personal Story
One of my fondest memories associated with rhubarb jam happened during a sunny spring afternoon when I was about ten years old. My grandmother and I decided to make rhubarb jam together for our annual family picnic. As we chopped the bright pink stalks, she shared her favorite stories of gathering rhubarb from her mother’s garden, weaving a tapestry of family history into our cooking session.
Once we had our rhubarb ready, we tossed it into the pot with sugar and spiced it up with cinnamon, filling the kitchen with an intoxicating aroma. I remember sneaking spoonfuls of the warm mixture (don’t tell my grandmother!) and the way she laughed every time I got caught.
Making that jam became our bonding ritual, and today, every time I prepare this recipe, I feel her presence—like she’s right there beside me. It reminds me of the simple joys that cooking can bring and how sharing food can create lasting connections with those we love. So, let’s dive into this beautiful recipe that has been passed down through generations and make some new memories!
Ingredients
Here’s what you’ll need to whip up your very own Rhubarb Cinnamon Jam:
-
4 cups chopped rhubarb
Rhubarb brings a unique tartness and vibrant color to your jam. Make sure to chop it uniformly for even cooking. Substitution Tip: If you can’t find rhubarb, you could use tart cherries or even green apples, but the flavor will change. -
2 cups sugar
Sugar is essential for both sweetness and to help the jam set. This recipe has a balanced sweetness that allows the rhubarb’s natural tartness to shine. Quick Insight: If you’re looking to reduce sugar, you could try using half the amount, but remember it may affect the consistency. -
1 teaspoon ground cinnamon
Ah, cinnamon—the warm hug your jam needs! It adds wonderful depth and flavor. Substitution Tip: If you’re feeling adventurous, try cardamom or nutmeg for a different spice twist! -
1/4 cup lemon juice
Lemon juice not only adds brightness but also helps in the jamming process—its acidity aids in setting the jam. Chef Insight: Fresh lemon juice is best here, but bottled works in a pinch. -
1 package (1.75 oz) fruit pectin
Pectin is what helps our jam hold its beautiful shape. You can find it in most grocery stores. Substitution Tip: If you prefer a natural alternative, look for low-sugar pectin options!
Step-by-Step Instructions
Here’s how to create your Rhubarb Cinnamon Jam one step at a time:
Step 1: Prepare Your Ingredients
Start by washing and chopping the rhubarb. Aim for uniform pieces, around 1-inch long so they cook evenly. You’ll need about 4 cups, tightly packed. If you’re using fresh rhubarb, take a moment to admire its bright color—it’s simply mesmerizing!
Step 2: Combine in the Pot
In a large pot, combine your chopped rhubarb, sugar, and lemon juice. Stir it gently, allowing the sugar to begin breaking down the rhubarb juices. Let it sit for about 10-15 minutes while the rhubarb releases its delicious juices—this is your jam’s flavor base!
Step 3: Add the Spice
Once you’ve given it a moment, sprinkle in that fragrant ground cinnamon. Give it another stir and turn your heat to medium. You want to bring this mixture to a gentle boil, stirring often to avoid any sticking.
Step 4: Pectin Power
When your mixture reaches a rolling boil, slowly stir in the fruit pectin. Keep stirring as it comes back to a boil, and let it cook for about 1-2 minutes. You’ll see the mixture begin to thicken—this is the magic of science, my friends!
Step 5: Test Your Jam
To be sure it’s ready, do a quick test: take a spoonful and pour it onto a cold plate. Allow it to sit for a minute, then run your finger through it—if it holds its shape, you’re ready to jar it up! If it’s still runny, give it another minute or so.
Step 6: Jar It Up
Once your jam sets perfectly, remove it from heat. Carefully ladle the hot jam into sterilized jars, leaving about 1/4-inch headspace at the top. Wipe any jam residue from the rims of the jars for a clean seal.
Step 7: Seal and Store
Seal your jars with lids and turn them upside down for 5 minutes—this helps achieve a good seal. Afterward, turn them back right side up and let them cool at room temperature for at least 12 hours. After cooling, store in the refrigerator or process in a hot water bath if you plan on saving them for longer.
Serving Suggestions
When it comes to serving, the options are endless! Spread your delightful Rhubarb Cinnamon Jam on warm, buttery biscuits, slather it on toast with a sprinkling of cream cheese, or even use it as a tart filling for pastries. The jam also pairs beautifully with cheese boards—try it with sharp cheddar or creamy brie for a delectable contrast.
Recipe Variations
Here are some fun twists on your basic Rhubarb Cinnamon Jam:
- Spiced Vanilla Twist: Add a vanilla bean or a teaspoon of vanilla extract for a warm, aromatic addition.
- Ginger Zing: Add a tablespoon of grated fresh ginger for a zesty kick that complements the rhubarb beautifully.
- Berry Blend: Mix in some fresh strawberries or raspberries to add color and a hint of sweetness.
- Zesty Citrus: Substitute lime juice for lemon for a zesty flavor that brightens the jam.
- Chili Heat: For some heat, include a pinch of red chili flakes—it’s surprising but works beautifully!
Chef’s Notes
Rhubarb Cinnamon Jam has been a beloved recipe in my kitchen for years, and I remember making it with my grandmother, who’d lovingly remind me to “not skip the cinnamon!” Initially, I wasn’t a huge fan of rhubarb, but once I experienced its transformation into jam, everything changed. Over the years, I’ve fine-tuned the spices and ingredients to reflect my personal taste.
Funny enough, I once made this jam to take to a gathering, but forgot it on the counter! Imagine my surprise when I received a text from my friend saying, “What’s this delightful smell? Did you accidentally leave a jar of heaven?” Lesson learned—this jam is too good to keep hidden away!
FAQs and Troubleshooting
Q1: My jam didn’t set—what went wrong?
This can happen for several reasons—either the pectin wasn’t activated properly or the ratio of sugar to fruit was off. If you encounter this issue, you can reheat the jam and add a bit more pectin, bringing it back to a gentle boil and stirring constantly.
Q2: How long will this jam last?
If sealed properly and kept in the fridge, your jam can last for several months. For longer storage, consider canning it using a water bath method. Just make sure your jars are sterilized!
Q3: Can I double the recipe?
Absolutely! Just remember to use a larger pot to ensure the jam cooks evenly. If you’re using different size jars, keep an eye on the cooking time as that can alter the set.
Q4: Can I use frozen rhubarb?
Yes! Frozen rhubarb is a perfect substitute—just make sure to thaw and drain any excess water before cooking for the best results.
Nutritional Info (Optional)
While I’ll leave the exact nutritional information up to the experts, I can tell you that this gem is made from fruit, sugar, and spices, making it a treat to enjoy in moderation. Like all delicious preserves, it’s best savored with laughter around the table!
So there you have it—your guide to creating the perfect Rhubarb Cinnamon Jam. I hope it fills your kitchen with warmth and joy, just like it does mine. Happy cooking, and don’t forget to gather your loved ones around the table for those small beautiful moments we cherish so much!
PrintRhubarb Cinnamon Jam

A nostalgic preserve that captures the tartness of rhubarb combined with the warmth of cinnamon, perfect for adding sweetness to your table.
- Prep Time: 20 minutes
- Cook Time: 30 minutes
- Total Time: 50 minutes
- Yield: 6 servings 1x
- Category: Condiment
- Method: Canning
- Cuisine: American
- Diet: Vegetarian
Ingredients
- 4 cups chopped rhubarb
- 2 cups sugar
- 1 teaspoon ground cinnamon
- 1/4 cup lemon juice
- 1 package (1.75 oz) fruit pectin
Instructions
- Prepare your ingredients by washing and chopping the rhubarb into uniform pieces.
- Combine in a large pot the chopped rhubarb, sugar, and lemon juice. Let it sit for 10-15 minutes.
- Add the ground cinnamon and mix well. Turn the heat to medium and bring it to a gentle boil.
- Stir in the fruit pectin once boiling, then cook for 1-2 minutes until it thickens.
- Test the jam by pouring a spoonful onto a cold plate; if it holds its shape, it’s ready.
- Jar the jam into sterilized jars, leaving 1/4-inch headspace.
- Seal the jars and turn them upside down for 5 minutes, then cool at room temperature for at least 12 hours.
Notes
Great with biscuits, toast, or as a filling in pastries. Experiment with spice variations for different flavors.
Nutrition
- Serving Size: 1 tablespoon
- Calories: 80
- Sugar: 16g
- Sodium: 5mg
- Fat: 0g
- Saturated Fat: 0g
- Unsaturated Fat: 0g
- Trans Fat: 0g
- Carbohydrates: 21g
- Fiber: 0g
- Protein: 0g
- Cholesterol: 0mg
Keywords: rhubarb jam, cinnamon jam, fruit preserves, homemade jam, sweet spreads
Strawberry Rhubarb Custard Dessert
Sweet Memories: Creating a Strawberry Rhubarb Custard Dessert
Hello there, fellow food enthusiasts! Today we’re diving into a dessert that perfectly marries the sweet and tart: Strawberry Rhubarb Custard Dessert. This dish is not just a treat for your taste buds; it’s a culinary homage to warm summer days, friendly gatherings, and the simplicity of fresh ingredients. With the vibrant colors of strawberries and the tangy crunch of rhubarb, each bite of this dessert sparks joy and nostalgia.
You see, cooking for me goes beyond just the end result. It’s about the stories we craft while whisking batter, the laughter shared over simmering pots, and how a simple dessert can evoke cherished memories. I still remember the first time I tasted strawberry rhubarb pie at my grandmother’s kitchen table. The sun streamed in through the window, illuminating her laughter as she shared stories of her garden adventures, where she lovingly tended to her rhubarb patch. That flavor—sweet strawberries intertwined with the zing of rhubarb—carried with it the warmth of family, love, and tradition. And that, my friends, is how this delightful dessert became a staple in my kitchen.
You’re in for a treat today, as we create this delicious custard dessert that not only looks impressive but is also incredibly attainable. Whether you’re planning to impress guests during a dinner party or simply treating yourself on a cozy night in, this recipe has got you covered. Let’s gather those aprons and dive right in!
Personal Story
The first time I fell head over heels for the combination of strawberries and rhubarb was during a weekend visit to my grandmother’s house in late spring. She was preparing her famous strawberry rhubarb pie, which had been a family favorite for generations. I recall the way her kitchen smelled—sweet and tangy, with the light spice of freshly baked crust wafting through the air.
As she rolled out the pastry, I eagerly helped chop the vibrant red rhubarb stalks and pluck the strawberries from their green tops. It became a delightful assembly line of laughter, flour dusting the countertops, and bowls precariously piled high with the fruits. I can still hear her gentle reminders about the difference between sugar and salt—a kitchen lesson I’ll forever cherish.
That pie made its debut at the kitchen table that evening, shining brightly under the twinkling lights. Each bite was a celebration, a small moment of joy that resonated deeply with everyone around that table. It was in that shared experience that I discovered the magic of cooking: it can unite us, create memories, and often become a delicious legacy. Today, we’re recreating a version of that beloved dish—only this time, we’re crafting a custard dessert that captures all those flavors without the fuss of pie crust. Let’s get started!
Ingredients
For our Strawberry Rhubarb Custard Dessert, you’ll need the following ingredients. Each element plays a significant role in creating that perfect balance of flavors, and I’m also sharing some substitution tips where applicable.
-
1 cup sugar
For sweetness! You can substitute with brown sugar for a deeper flavor or even a sugar alternative like coconut sugar if you’re watching your intake. -
1/2 cup butter, softened
Adds richness to our custard. If you want to make it dairy-free, coconut oil or vegan butter can work nicely too. -
1 egg
Helps to bind everything together. You can replace it with a flax egg (1 tablespoon of ground flaxseed with 2.5 tablespoons of water) for a vegan option. -
1 1/2 cups all-purpose flour
The base of our dessert. If gluten-free is your jam, a 1:1 gluten-free flour blend should do the trick. -
1/2 teaspoon baking powder
To give our dessert structure. You can omit it if you prefer a denser custard. -
1/4 teaspoon salt
Enhances all the flavors. Don’t skip this, it’s essential! -
2 cups chopped rhubarb
This gives our dessert that classic zing. If you can’t find rhubarb, you can substitute with tart apples or a little more strawberries, but you’ll miss that distinct flavor. -
1 cup sliced strawberries
For the sweetness and joy! Feel free to use frozen strawberries in a pinch—just thaw and drain before using. -
2 cups milk
The heart of our custard. Any milk works—whole, skim, almond, or oat milk—for this recipe! -
3/4 cup sugar
For our custard sweetness! You can use the same substitutions here. -
3 tablespoons cornstarch
Helps thicken our custard. If you don’t have cornstarch, you can use flour or arrowroot powder. -
1 teaspoon vanilla extract
Add warmth and depth to the flavors. Always opt for pure vanilla extract if you can find it—it makes a difference! -
4 large eggs, beaten
These are crucial for creating a creamy, luscious custard. For a plant-based option, try silken tofu blended until smooth in equal measurement.
Step-by-Step Instructions
Now that we have all our ingredients ready, it’s time to roll up our sleeves and get cooking! Follow these simple steps for a delightful dessert that’s sure to impress.
-
Preheat the Oven
Start by preheating your oven to 350°F (175°C). This is crucial—no one likes a dessert that’s unevenly cooked, am I right? While the oven is warming, you can prepare the rest of your ingredients. -
Prepare the Fruit
In a medium bowl, combine the chopped rhubarb and sliced strawberries. Toss them with 1/2 cup of the sugar. Set them aside to macerate while you prepare the rest of your batter. This will draw out the juices and create a beautiful mixture of flavors! -
Make the Base
In a large mixing bowl, cream the softened butter and remaining sugar together until light and fluffy (about 3–5 minutes). This process is super important for achieving that dreamy texture. If you’re feeling adventurous, add a dash of almond extract for a unique twist. -
Incorporate the Egg
Add in one egg at a time, mixing well after each addition. This ensures a silky smooth batter. Don’t rush—give each egg time to combine before adding the next. -
Mix the Dry Ingredients
In a separate bowl, whisk together the flour, baking powder, and salt. Gradually add this dry mixture to the butter-sugar-egg mixture. Mix just until combined. Over-mixing can lead to a tougher texture, which we want to avoid! -
Layer the Fruit
Carefully fold in the macerated rhubarb and strawberries into your batter. Here’s a chef tip: to keep your fruit evenly distributed, coat them lightly with flour before folding them in—that way they won’t sink to the bottom during baking. -
Prepare the Custard
In another bowl, whisk together the milk, 3/4 cup of sugar, cornstarch, vanilla extract, and beaten eggs until smooth. This custard will be poured over the fruit later, so it should be creamy and luscious! -
Assemble the Dessert
In a greased baking dish (9×13 works perfectly!), pour the batter first, then gently spoon the custard mixture over the top. You’ll see the fruit peeping through, and that’s exactly what we want! This layer effect makes for a stunning presentation once it’s baked. -
Bake
Pop it in the oven for about 45–55 minutes, or until the custard is set and a light golden crust forms on top. The aroma? Out of this world! If you notice the top is browning too quickly, feel free to cover it gently with foil. -
Cool and Serve
Allow your dessert to cool for at least 20 minutes before slicing into it. This not only helps the flavors settle but makes it easier to serve.
Serving Suggestions
When it comes to serving this delightful custard dessert, presentation is key! I love to serve it warm or at room temperature, topped with a dollop of fresh whipped cream or a scoop of vanilla ice cream. Drizzle some caramel or berry sauce for that extra touch of elegance. And don’t forget a sprig of mint for a pop of color!
Place each slice on a decorative plate, garnished with fresh berries and maybe even a sprinkle of powdered sugar. Your guests won’t just eat with their mouths—they’ll feast with their eyes!
Recipe Variations
While the classic version is unmatched, who says we can’t get creative? Here are some exciting variations you might enjoy:
-
Berry Medley: Swap out the strawberries and rhubarb for a mix of blackberries, blueberries, and raspberries. It adds a different level of tartness and sweetness!
-
Citrus Zing: Add the zest of an orange or lemon to the custard for a refreshing twist. The citrus notes pair beautifully with the berries.
-
Nutty Crunch: Before baking, sprinkle chopped pecans or walnuts atop the batter for added texture and flavor.
-
Coconut Custard: Substitute half of the milk with coconut milk to infuse a tropical vibe into the dish.
-
Spiced Option: Incorporate a dash of cinnamon or nutmeg into the batter for warmth, especially cozy during the colder months.
Chef’s Notes
This Strawberry Rhubarb Custard Dessert has come a long way since those cherished days of baking at my grandmother’s table. It’s evolved into a crowd-pleaser in my kitchen, appearing at everything from casual family dinners to elegant gatherings. I love telling the story of how this dessert came to be, sparking conversations and often, a few nostalgic tears.
Over the years, I’ve had my share of kitchen disasters—like the time I mistook salt for sugar and ended up with a rather sad custard. But those experiences are what have helped shape my approach to cooking. The essence of creating delicious food isn’t in achieving perfection; it’s in sharing love through the process, from mishaps to masterpieces.
FAQs and Troubleshooting
1. My custard didn’t set properly. What went wrong?
It’s likely that the custard didn’t bake long enough, or the eggs weren’t beaten well enough. For a foolproof set, ensure your eggs are well mixed, and let it bake until it just jiggles in the center when you gently shake the pan.
2. How do I store leftovers?
Store any leftovers in an airtight container in the refrigerator for up to 3 days. The flavors will continue to meld, making it even tastier the next day!
3. Can I freeze this dessert?
While it’s not ideal to freeze custard desserts, you can freeze slices of this dessert for up to a month. Just be sure to wrap them tightly. Thaw in the fridge overnight before serving!
4. Can I make this vegan?
Absolutely! Use flax eggs for binding, almond milk instead of regular milk, and coconut oil in place of butter. The flavor will still shine through beautifully!
Nutritional Info
[Optional section based on specific dietary requirements you may want to add here!]
And there you have it, my friends! Your very own Strawberry Rhubarb Custard Dessert—a beautiful blend of nostalgia and flavor that will surely impress everyone around your table. Remember, cooking is an adventure, and every recipe is a chance to create lasting memories. Now, let’s tie on those aprons, pour a little sparkling drink, and get baking!
PrintStrawberry Rhubarb Custard Dessert

A delightful dessert combining sweet strawberries and tart rhubarb, encased in a creamy custard for a nostalgic culinary experience.
- Prep Time: 20 minutes
- Cook Time: 55 minutes
- Total Time: 75 minutes
- Yield: 8 servings 1x
- Category: Dessert
- Method: Baking
- Cuisine: American
- Diet: Vegetarian
Ingredients
- 1 cup sugar
- 1/2 cup butter, softened
- 1 egg
- 1 1/2 cups all-purpose flour
- 1/2 teaspoon baking powder
- 1/4 teaspoon salt
- 2 cups chopped rhubarb
- 1 cup sliced strawberries
- 2 cups milk
- 3/4 cup sugar
- 3 tablespoons cornstarch
- 1 teaspoon vanilla extract
- 4 large eggs, beaten
Instructions
- Preheat the oven to 350°F (175°C).
- Combine the chopped rhubarb and sliced strawberries with 1/2 cup of sugar and set aside.
- Cream the softened butter and remaining sugar together until light and fluffy.
- Add one egg at a time, mixing well after each addition.
- Whisk together the flour, baking powder, and salt in a separate bowl.
- Add the dry mixture to the butter-sugar-egg mixture until just combined.
- Fold in the macerated rhubarb and strawberries.
- Whisk together the milk, 3/4 cup sugar, cornstarch, vanilla extract, and beaten eggs until smooth.
- Pour the batter into a greased baking dish and spoon the custard mixture over the top.
- Bake for 45–55 minutes, until set and golden.
- Cool for at least 20 minutes before serving.
Notes
Serve warm with whipped cream or ice cream for added indulgence. Experiment with variations like berry medleys or citrus zest.
Nutrition
- Serving Size: 1 serving
- Calories: 350
- Sugar: 25g
- Sodium: 180mg
- Fat: 20g
- Saturated Fat: 8g
- Unsaturated Fat: 10g
- Trans Fat: 0g
- Carbohydrates: 45g
- Fiber: 3g
- Protein: 6g
- Cholesterol: 140mg
Keywords: strawberry, rhubarb, custard, dessert, summer, baking, family recipe

Slow Cooker Shrimp Boil
# Slow Cooker Shrimp Boil: An Effortless Feast

## Introduction

Hey, fellow food lovers! If you’re looking for a laid-back, crowd-pleasing dinner that has all your favorite flavors, you’ve landed in the right place. Today, we're diving into the world of a classic Southern tradition with a twist: a Slow Cooker Shrimp Boil! Picture this — succulent shrimp, tender potatoes, zesty sausage, and sweet corn all melting together in a symphony of flavors. Yep, it’s about to get delicious!

Now, I know what you might be thinking. "A shrimp boil? Isn’t that complicated?" Well, let me assure you, my friend, it doesn't have to be! With the trusty slow cooker, you can kick back and enjoy the aroma of the sea as it fills your kitchen while you prepare for a cozy dinner with friends or family. Plus, the most beautiful part of cooking is sharing a meal that bonds us together, so let’s make sure it’s a celebration worth remembering!

In this blog post, I'll guide you through my personal touch on the shrimp boil, along with stories that will make you smile, tips that’ll keep you cooking like a pro, and of course, that easy-breezy shine of effortless elegance that I strive for here at Ivory Apron. So, grab your apron, prepare to be whisked away to seaside vibes, and let’s get cooking!

## Personal Story

This shrimp boil holds a special place in my heart, just like the sun-drenched summer days spent at my grandparents' beach house. Every Fourth of July, the tradition was simple yet magical: a huge pot simmering outside, the sound of laughter floating through the salty air, and friends and family gathered around with makeshift tables made of picnic blankets.

I can still picture my uncle Mike proudly wearing his oversized bib, ready to tackle the feast. The dogs would trot around, hoping for a stray corn kernel, and my grandmother would squeeze lemon over the spicy, juicy shrimp, urging us all to dig in. There was something undeniably satisfying about the communal spirit of a shrimp boil — hands messy, laughter loud, and everyone instantly transformed into a family.

When I moved away and began hosting my own gatherings, I wanted to capture that same spontaneous joy. Thus, the slow cooker version was born! It allows me to recreate those cherished memories without the fuss of standing over a boiling pot in the heat. Plus, it gives me time to relax and mingle with my guests, just like those sunny days at the beach.

## Ingredients

Let’s make sure you have everything you need to whip up this delectable dish. Here’s your shopping list, along with some tips for each ingredient:

- **1 pound shrimp, deveined**
  - Fresh or frozen works great! If using frozen shrimp, just be sure to thaw them in the fridge overnight. Can't find shrimp? Try substituting with chicken or even lobster for a twist.

- **2 pounds potatoes, quartered**
  - I love using small baby potatoes — they cook evenly and are so tender! If you’re short on time, you can use pre-cut potatoes. Sweet potatoes can also add a lovely sweetness to the dish.

- **1 pound smoked sausage, sliced**
  - Andouille is classic, but don’t hesitate to explore! Turkey sausage is a lighter option, or you could even try chorizo for a spicy kick.

- **4 ears corn, halved**
  - Fresh corn brings a sweetness that’s hard to beat. Canned corn can substitute in a pinch, but it will lack that crunch. If you can’t find corn on the cob, frozen corn works beautifully too.

- **2 tablespoons Old Bay seasoning**
  - This iconic blend is a must! If you can’t find Old Bay, try a mix of paprika, garlic powder, and a hint of cayenne for heat.

- **4 cups water**
  - For the best flavor, consider using seafood stock or vegetable broth instead!

- **Salt and pepper to taste**
  - A little seasoning goes a long way. Start with a pinch and adjust as you go; you can always add more, but you can’t take it out!

- **Lemon wedges (for serving)**
  - Fresh lemon brightens up the dish, so don’t skip it! A twist of lime also offers a delightful twist.

## Step-by-Step Instructions

Alright, let’s roll up those sleeves and get to cooking. This slow cooker shrimp boil is as simple as it gets, and I’ll guide you through each step.

1. **Prepare Your Ingredients**: Start by washing your potatoes and corn. Quarter those potatoes and cut the corn in half. Give your shrimp a good rinse if they’re fresh. You want them sparkling clean!

2. **Layer the Ingredients**: In your slow cooker, begin by adding the quartered potatoes. They’ll need a little more time to cook than the other ingredients, so we’re giving them a head start. Next, layer on the sausage slices — this is where the flavor starts to build!

3. **Add Corn and Water**: Toss the corn halves into the pot, followed by the Old Bay seasoning and the water (or stock if you opted for that). Make sure to stir a little to evenly distribute the spices — we want every bite packed with flavor!

4. **Set the Slow Cooker**: Cover the slow cooker and set it on low for about 4 hours. This is the beauty of slow cooking — you can go about your day and let those flavors meld beautifully without any fuss.

5. **Check the Potatoes**: After 4 hours, take a quick peek and poke the potatoes with a fork. If they’re tender, it’s time to add in your shrimp. If they need more time, let them go for another half hour or so.

6. **Shrimp Power!**: When the potatoes are just right, stir in the shrimp. They cook quickly, so just let them simmer for about 15-20 minutes on low until they turn pink and opaque. This is where the magic happens — they soak up all those fantastic flavors from the broth!

7. **Season to Taste**: Before serving, taste a bite! Add salt or pepper if needed to elevate those flavors. You can always add more Old Bay if you’re feeling adventurous!

8. **Plate It Up**: Once everything is cooked just right, you’re ready to serve. Carefully scoop out the shrimp, potatoes, corn, and sausage into a large bowl or platter, letting that juicy broth pool around the bottom.

## Serving Suggestions

Here’s where the fun really begins! Serve your slow cooker shrimp boil family-style on a big, beautiful platter. Don’t forget to garnish with the lemon wedges — they’re an essential part of the whole experience. Encourage everyone to dig in with their hands, just like our beach gatherings. If you want to bring a touch of elegance, consider laying down some parchment paper on the table to catch those flavorful drips.

Pair it with a crisp green salad or some crusty bread to soak up the tasty broth. And don’t skimp on the drinks — sparkling lemonade or a chilled white wine would complement this dish beautifully!

## Recipe Variations

Feeling creative? Here are a few fun variations you can try:

1. **Spicy Kick**: Add sliced jalapeños or sprinkle with red pepper flakes for some extra heat.
2. **Herbed Delight**: Toss in freshly chopped parsley or dill right before serving for a fresh finish.
3. **Cajun Twist**: Swap Old Bay for a Cajun seasoning blend to give it that southern flair.
4. **Veggie Boost**: Add bell peppers, zucchini, or even artichokes for a pop of color and nutrition!
5. **Gluten-Free Twist**: Make sure to choose gluten-free sausage and paired ingredients, if required!

## Chef's Notes

I remember my first attempts at hosting a shrimp boil; I was so eager to impress! I barely sat down, running back and forth to the kitchen. One time, I accidentally sent a guest in search of napkins, but they came back with a family-sized pack of paper towels instead! We had a good laugh, and from that moment on, I learned to embrace the chaos of hosting. This shrink boil has evolved through the years — adding personal touches from each gathering and transforming into a staple on my dining table.

Oh, and a little tip: don’t forget to enjoy the process! If you find yourself feeling stressed, slow down and savor the moments. That’s what cooking is all about — creating spaces for connection, laughter, and joy.

## FAQs and Troubleshooting

1. **Why did my shrimp turn out rubbery?**
   - Overcooking is the culprit! Be sure to add the shrimp toward the end of the cooking time. They're quick to cook, so keep an eye on them.

2. **Can I make this ahead of time?**
   - Absolutely! Prep your potatoes and sausage, and layer everything in the slow cooker. Cook it when you’re ready, or put it in the fridge and reheat it on low when it’s party time!

3. **What can I do with leftovers?**
   - You’re in luck! Use leftover shrimp and sausage in a pasta dish, stir them into a rice bowl, or throw them in an omelet for a tasty breakfast!

4. **How can I make it spicier?**
   - If you like the heat, be bold! Add some cayenne pepper to the Old Bay, or toss in those jalapeños mentioned earlier to elevate the flavor profile.

## Nutritional Info

Although I refrain from being overly focused on numbers, here's an approximate breakdown per serving:

- **Calories**: 350
- **Protein**: 25g
- **Carbohydrates**: 45g
- **Fat**: 12g

Remember, this recipe is about enjoying good food and good company, so take the nutritional info lightly and delight in the flavors!

---

Now that you’ve got everything you need to recreate this Slow Cooker Shrimp Boil, I can’t wait for you to gather your loved ones and serve it up! Cooking is such a beautiful experience, and I hope this dish brings you as much joy as it brings me. Here’s to heartfelt gatherings, flavorful adventures, and making memories around the table. Happy cooking!
Slow Cooker Shrimp Boil

A classic Southern shrimp boil made easy in a slow cooker, featuring shrimp, potatoes, sausage, and corn with zesty flavors.
- Prep Time: 15 minutes
- Cook Time: 240 minutes
- Total Time: 255 minutes
- Yield: 4 servings 1x
- Category: Main Course
- Method: Slow Cooking
- Cuisine: Southern
- Diet: Seafood
Ingredients
- 1 pound shrimp, deveined
- 2 pounds potatoes, quartered
- 1 pound smoked sausage, sliced
- 4 ears corn, halved
- 2 tablespoons Old Bay seasoning
- 4 cups water
- Salt and pepper to taste
- Lemon wedges (for serving)
Instructions
- Prepare your ingredients by washing the potatoes and corn, quartering the potatoes, and cutting the corn in half.
- Layer the quartered potatoes in the slow cooker, followed by the sausage slices.
- Add the corn halves, Old Bay seasoning, and water, stirring to distribute the spices.
- Set the slow cooker on low for about 4 hours.
- Check the potatoes for tenderness after 4 hours, and adjust cooking time if necessary.
- Add the shrimp when potatoes are tender, and let them simmer for 15-20 minutes until cooked through.
- Season to taste with salt and pepper before serving.
- Plate the shrimp, potatoes, corn, and sausage into a serving dish, enjoying the broth.
Notes
Serve family-style with lemon wedges and encourage guests to eat with their hands for a communal experience.
Nutrition
- Serving Size: 1 serving
- Calories: 350
- Sugar: 5g
- Sodium: 400mg
- Fat: 12g
- Saturated Fat: 4g
- Unsaturated Fat: 6g
- Trans Fat: 0g
- Carbohydrates: 45g
- Fiber: 3g
- Protein: 25g
- Cholesterol: 130mg
Keywords: shrimp boil, slow cooker, Southern cuisine, seafood recipe, easy dinner

Honey Garlic Chicken Kabobs
# Sweet and Savory Honey Garlic Chicken Kabobs

## Introduction

Hey there, fellow foodies! Welcome to another delicious adventure in my kitchen. Today, we’re diving into a dish that’s equal parts comforting and exciting: **Honey Garlic Chicken Kabobs**. Perfect for grilling up in the summer or roasting during colder months, these skewers are bursting with flavor that’ll make your taste buds dance!

Now, I have to say, there’s something undeniably fun about cooking kabobs. Maybe it’s the beautiful colors of the ingredients, or perhaps it’s the memories they bring back of gathering with family and friends around a smoky grill. Whatever it is, when I think of kabobs, I’m immediately transported to sunny backyard barbecues, laughter echoing in the air, and the intoxicating aroma of grilling chicken wafting through the neighborhood.

The joy of assembling skewers can’t be understated. It’s like food art—each ingredient gets to shine, all while creating a symphony of flavors. And trust me, when you drizzle that sweet honey garlic sauce over the chicken and veggies, it’s pure magic.

So, roll up your sleeves, tie on that apron, and let’s create something unforgettable together! Whether you’re hosting a gathering or just treating yourself to a satisfying meal, this recipe is sure to impress. Plus, the best part? It’s super approachable, so you can get glorious results even if you’re just starting your cooking journey. Let's dive in!

## Personal Story

I remember the first time I made kabobs—it was a warm summer evening, and I had invited a few close friends over for a barbecue. It was one of those magical nights where everything seems effortless. I had marinated the chicken earlier in the day, prepping the honey garlic sauce and fresh veggies. The kitchen filled with sweet and savory aromas, making even my impatient friends hang around, eagerly awaiting the grilled delight.

As the sun dipped below the horizon, we gathered in the backyard, the grill crackling with heat. I handed each friend a skewered kabob, and we toasted with our glasses of lemonade, laughing as we cooked together. The moment we took that first bite was unforgettable; the combination of juicy chicken, crisp veggies, and that sticky honey glaze was nothing short of heavenly.

That night not only filled our bellies but also created cherished memories. It solidified the notion that food isn’t just about the ingredients—it's about the people and moments we share. To me, that’s what cooking is really about: bringing people together around the table (or grill, in this case) to savor beautiful moments and delicious flavors.

## Ingredients

Here’s what you’ll need to whip up these scrumptious **Honey Garlic Chicken Kabobs**:

- **2 lbs chicken breast, cubed**: Chicken breast is our star ingredient here. Use fresh, high-quality chicken for the juiciest results. If you’re looking for a leaner option, boneless, skinless thighs work beautifully too.

- **1/4 cup honey**: This is what adds that delightful sweetness and glossy finish. If you’re out of honey, maple syrup can be a fun and tasty substitute that also brings a touch of sweetness.

- **1/4 cup soy sauce**: Packed with umami, soy sauce balances the sweetness of the honey. You can opt for low-sodium soy sauce if you’re watching your sodium intake, or even coconut aminos for a gluten-free option.

- **3 cloves garlic, minced**: Garlic adds depth and flavor to our marinade. Fresh is key here, but you can use powdered garlic in a pinch. Just remember that it’s more potent, so use about 1 teaspoon.

- **1 tablespoon sesame oil**: This oil infuses a nutty flavor that enhances our dish. If you’re looking to cut calories, you can use olive oil instead, though you’ll miss that sesame allure.

- **1/2 teaspoon black pepper**: A dash of black pepper adds a subtle kick. If you want to spice things up, feel free to add red pepper flakes or even a pinch of cayenne!

- **Bell peppers, cut into pieces**: I love using colorful bell peppers for their crunch and sweetness. Throw in some red, yellow, and green for a vibrant dish! If you prefer other veggies, zucchini, mushrooms, or cherry tomatoes work excellently here.

- **Onions, cut into pieces**: Onions caramelize beautifully on the grill and add a nice flavor contrast. Red or yellow onions are perfect for this. If you want a milder taste, consider using sweet onions.

- **Skewers (wooden or metal)**: Whether you use wooden skewers or metal ones is a matter of preference. If you’re going with wooden skewers, don’t forget to soak them in water for about 30 minutes beforehand to prevent burning on the grill!

## Step-by-Step Instructions

### Step 1: Marinate the Chicken

In a mixing bowl, combine the honey, soy sauce, minced garlic, sesame oil, and black pepper. Whisk until well blended.

**Chef Tip:** If you have time, marinate the chicken for at least 30 minutes or even overnight in the refrigerator. The longer it sits, the more flavorful it becomes!

### Step 2: Cube Your Chicken

Cut the chicken breasts into 1-inch cubes, making sure they’re all around the same size for even cooking.

**Chef Hack:** If your chicken is a bit too slippery to cut, try placing it in the freezer for 15–20 minutes. This firms up the meat, making it much easier to slice.

### Step 3: Assemble the Kabobs

Thread the marinated chicken onto your skewers, alternating with pieces of bell peppers and onions.

**Chef Insight:** Don’t crowd the skewer! Leave a little space between each ingredient to allow for even cooking and that beautiful char we all crave.

### Step 4: Preheat the Grill

Get your grill sizzling hot over medium-high heat. If you're using a grill pan, heat it on the stovetop until it’s hot.

### Step 5: Grill the Kabobs

Place the skewers on the grill and cook for about 10-12 minutes, turning them occasionally. You want that char to develop on all sides and ensure the chicken is fully cooked (165°F or 75°C internal temperature).

**Chef Tip:** Avoid constantly flipping the kabobs too early! Let them get a nice sear before turning them to lock in those flavors.

### Step 6: Glaze and Serve

In the last few minutes of grilling, brush on any leftover marinade for an extra layer of flavor.

**Chef Hack:** Just be sure to reserve a small amount of marinade beforehand if you want to avoid cross-contamination!

### Step 7: Check for Doneness

Once the kabobs are beautifully charred and the chicken is no longer pink, remove them from the grill. Let them rest for a couple of minutes to allow the juices to redistribute.

## Serving Suggestions

To plate these kabobs, simply arrange them on a large platter, garnishing with fresh herbs like parsley or cilantro for a pop of color and freshness. Serve them warm alongside a refreshing side salad or fluffy rice to soak up that marvelous honey garlic sauce.

## Recipe Variations

1. **Spicy Honey Garlic Kabobs:** Add a splash of Sriracha or a pinch of red pepper flakes to the marinade for a kick!

2. **Teriyaki Twist:** Substitute the honey with a sweet teriyaki sauce for a different flavor profile that will still wow your guests.

3. **Vegetarian Delight:** Swap out the chicken for cubed firm tofu or tempeh, marinating it the same way. Toss in assorted veggies like zucchini and mushrooms for a delightful plant-based option.

4. **Herb-Infused Kabobs:** Add fresh herbs like rosemary or thyme to the marinade for an aromatic touch.

5. **Fruit & Chicken Combo:** Add chunks of pineapple to the skewers for a sweet twist that complements the savory chicken beautifully.

## Chef’s Notes

Every time I make these kabobs, I’m reminded of how versatile they are! I’ve adapted the recipe over the years, playing with different marinades and veggie combinations. Sometimes, I’ll even stuff the chicken with cheese for a gooey surprise!

A funny memory that comes to mind is the time I got a little too creative with the skewers. I decided to mix chicken, shrimp, and veggies on the same skewers. Let’s just say, I learned that some proteins cook at different rates. I ended up with perfectly cooked shrimp and slightly undercooked chicken! Lesson learned—stick with one type of protein per skewer for the best results.

## FAQs and Troubleshooting

### 1. **What if my chicken is dry?**

Overcooking is the most common culprit for dry chicken. Always use a meat thermometer—aim for 165°F (75°C) for perfectly juicy chicken. If you’re grilling on high heat, remember it cooks faster, so keep an eye on it!

### 2. **How do I prevent veggies from burning?**

To ensure your veggies cook evenly, cut them into larger pieces than the chicken. Also, give them a light coat of oil to prevent direct charring. If you’re worried about burning, consider grilling them in a grill basket.

### 3. **Could I bake these kabobs?**

Absolutely! Preheat your oven to 400°F (200°C) and place the kabobs on a foil-lined baking sheet. Bake for about 15-20 minutes, turning halfway through. I still recommend broiling the last couple of minutes for that nice char.

### 4. **Can I use frozen chicken?**

While it’s best to use fresh chicken, you can use frozen chicken as long as you thaw it fully before marinating and grilling. Just remember that thawing will take time, so plan ahead!

## Nutritional Info (Optional)

While this recipe offers a delightful serving of protein and veggies, I recommend checking nutritional values based on your specific ingredient brands and quantities!

---

So, are you ready to don that apron and get started on these delicious **Honey Garlic Chicken Kabobs**? Whether it's a casual weeknight dinner or an exciting grilling party, this flavorful dish might just become a new favorite. Happy cooking, and don’t forget to gather those you love around the table to enjoy!
Honey Garlic Chicken Kabobs

Delicious honey garlic chicken kabobs bursting with flavor, perfect for grilling or roasting.
- Prep Time: 30 minutes
- Cook Time: 12 minutes
- Total Time: 42 minutes
- Yield: 4 servings 1x
- Category: Main Course
- Method: Grilling
- Cuisine: American
- Diet: Gluten-Free
Ingredients
- 2 lbs chicken breast, cubed
- 1/4 cup honey
- 1/4 cup soy sauce
- 3 cloves garlic, minced
- 1 tablespoon sesame oil
- 1/2 teaspoon black pepper
- Bell peppers, cut into pieces
- Onions, cut into pieces
- Skewers (wooden or metal)
Instructions
- Marinate the chicken: In a mixing bowl, combine honey, soy sauce, minced garlic, sesame oil, and black pepper. Whisk until well blended.
- Cube your chicken: Cut the chicken breasts into 1-inch cubes, making sure they’re all around the same size for even cooking.
- Assemble the kabobs: Thread the marinated chicken onto your skewers, alternating with pieces of bell peppers and onions.
- Preheat the grill: Get your grill sizzling hot over medium-high heat.
- Grill the kabobs: Place the skewers on the grill and cook for about 10-12 minutes, turning them occasionally.
- Glaze and serve: In the last few minutes of grilling, brush on any leftover marinade.
- Check for doneness: Once the kabobs are beautifully charred and the chicken is no longer pink, remove them from the grill.
Notes
For added flavor, allow the chicken to marinate for a longer time. Serve with fresh herbs for garnish.
Nutrition
- Serving Size: 1 kabob
- Calories: 350
- Sugar: 14g
- Sodium: 750mg
- Fat: 10g
- Saturated Fat: 2g
- Unsaturated Fat: 8g
- Trans Fat: 0g
- Carbohydrates: 25g
- Fiber: 2g
- Protein: 30g
- Cholesterol: 70mg
Keywords: chicken kabobs, honey garlic, grilled chicken, summer recipe, easy dinner

Crockpot BBQ Chicken
Slow Cooker BBQ Chicken: A Savory Sensation for Any Gathering
Hey there, fellow food lovers! Welcome back to Ivory Apron, where the kitchen feels like home and cooking feels like an art. Today, I’m beyond excited to share one of my go-to recipes for those busy weeknights or laid-back weekends—Crockpot BBQ Chicken! This dish is perfect for cozy family dinners, entertaining guests, or even as meal prep for the week.
Picture this: It’s a warm evening; the sun is setting, casting a beautiful golden glow in your kitchen. You’ve tied on your favorite apron, and the tantalizing aroma of BBQ chicken wafts through the air, promising deliciousness. Not only does this dish deliver that mouthwatering flavor, but it’s also incredibly easy to make—just toss everything into the crockpot and let it work its magic!
I’ll take you through every step from preparation to serving, ensuring that you feel like a pro—even if it’s your first time in the kitchen. Whether you’re hosting a backyard BBQ or simply craving some comforting chicken sandwiches, this recipe is your ticket to culinary bliss. So grab your apron, and let’s get cooking!
Personal Story
Ah, BBQ chicken! It takes me back to those long summer evenings at my grandparents’ backyard; the grill was always fired up, and the laughter of family sprinkled the air. My grandmother would marinate the chicken in her secret BBQ sauce, letting it soak in that smoky-sweet flavor. I can still see my younger self stealing bites as it grilled, trying to sneak a taste of that delicious sauce.
When we moved our gatherings inside for some reason—perhaps a sudden summer storm or an unexpected drop in temperature—the crockpot came to the rescue. My mom would whip up her version of BBQ chicken, letting it simmer away while we played board games. It became a family favorite—something that was equally perfect for game night as it was for Sunday dinners. Now I get to share the joys of this dish with you, blending nostalgia with practicality in the modern kitchen.
Ingredients
Here’s what you’ll need to prepare this delectable dish:
-
4 Boneless, Skinless Chicken Breasts
These beauties are the heart of the dish! They’re tender, juicy, and soak up every ounce of flavor from the BBQ sauce. You can easily substitute with thighs if you prefer dark meat; they’re a bit richer in flavor and won’t dry out as easily. -
1 Cup BBQ Sauce
Choose your favorite brand or homemade variety! I love a classic sauce that balances sweetness and tanginess. If you’re feeling adventurous, try a spicy or smoky BBQ sauce for a flavor twist. -
1/4 Cup Chicken Broth
This adds moisture and richness without overwhelming the BBQ flavor. If you don’t have broth on hand, water or even apple cider can work—though that may change the flavor profile a bit. -
1 Tablespoon Worcestershire Sauce
This umami-packed sauce enhances the overall flavor and gives a depth that’s simply divine. If you’re avoiding it, soy sauce is an excellent substitute, though it may alter the flavor slightly. -
1 Teaspoon Garlic Powder
Garlic lovers rejoice! This ingredient adds a savory kick. If you have fresh garlic, feel free to substitute 2-3 minced cloves for an even fresher taste. -
1 Teaspoon Onion Powder
A must-have for that deep, aromatic taste. In a pinch, finely chopped onions or shallots can do the trick! -
Salt and Pepper to Taste
Essential for bringing all the flavors together. I recommend starting with a bit and adding more as needed during cooking. -
Buns for Serving (Optional)
These are a great way to turn your BBQ chicken into delicious sandwiches! Opt for soft brioche buns for a little luxury, or use whole grain for a healthier twist.
Step-by-Step Instructions
Here’s how to get your Crockpot BBQ Chicken ready for a glorious feast!
1. Prep Your Chicken
Begin by rinsing your chicken breasts under cold water, then pat them dry with paper towels. Drying them ensures better seasoning absorption and browning. Trim off any excess fat for a leaner dish.
2. Season and Layer
Sprinkle the chicken breasts with salt, pepper, garlic powder, and onion powder. Don’t be shy—seasoning is where flavor starts! Lay them in the bottom of the crockpot, making sure they’re arranged neatly in a single layer.
3. Mix Your Sauces
In a separate bowl, whisk together the BBQ sauce, Worcestershire sauce, and chicken broth until it’s well combined. This is where you can taste-test and adjust—add a pinch of chili powder or honey if you like!
4. Pour and Cover
Pour the mixture over the seasoned chicken, making sure they’re well coated. Pop the lid on your crockpot, set it to low heat, and let it do its magic for 6-8 hours. Pro tip: avoid lifting the lid during cooking! Every time you check, you lose precious heat and extend the cooking time.
5. Shred and Serve
When you’re ready to eat, carefully insert a fork or two into the chicken and shred it right in the pot! It should fall apart easily if cooked correctly. If you want a thicker sauce, keep the lid off for the last half hour and let it reduce.
6. Toast Your Buns
For that extra touch, pop some buns under the broiler for a minute or two until they’re delightfully toasted. A little butter before toasting goes a long way for flavor!
Serving Suggestions
Now that your BBQ chicken is ready, it’s time to serve! Pile the juicy, shredded chicken onto toasted buns, adding coleslaw or pickle slices for crunch if you like. Arrange them on a wooden cutting board surrounded by napkins for a rustic touch. It’s perfect for feeding a crowd.
Recipe Variations
Want to shake things up? Here are a few creative twists you can make with this recipe:
-
Spicy BBQ Chicken: Mix in some cayenne pepper or hot sauce into the BBQ sauce for a kick!
-
Honey Mustard Flavor: Swap out the BBQ sauce for honey mustard for a sweet-savory experience!
-
Greek Inspired: Add some oregano, lemon juice, and serve it in pita bread with tzatziki.
-
Veggie Lovers Delight: Toss in some halved bell peppers or onions while cooking for added veggies and flavor.
-
Low-Carb Option: Serve over lettuce instead of buns for a refreshing, low-carb alternative.
Chef’s Notes
Every time I make this recipe, I’m reminded of family gatherings and the love that food brings us together. There was one summer where I overestimated how hungry we all were—I had made way too much chicken! But instead of leftovers, my friends and family made unforgettable memories, serving the BBQ chicken in tacos, nachos, and even pizzas! Creativity flourishes in the kitchen, and that’s what makes cooking so special. Trust me; this dish will cater to any occasion!
FAQs and Troubleshooting
1. What if my chicken is dry?
If your chicken turns out dry, make sure to season it adequately and check that your crockpot temperature is set correctly. Adding more liquid during cooking can help keep it moist.
2. How can I make this recipe ahead of time?
Prep everything the night before! Season the chicken and mix your sauces, storing it in the fridge. In the morning, toss it into the crockpot for effortless evening dinner!
3. Can I use frozen chicken?
Yes, you can use frozen chicken, but increase the cooking time to 8-10 hours. Always check to ensure the chicken is thoroughly cooked before serving.
4. How can I store leftovers?
Store any leftover BBQ chicken in an airtight container in the refrigerator for up to three days. You can also freeze portions for up to three months—perfect for a quick weeknight meal!
Nutritional Info (Optional)
While specific nutritional information can vary, here’s a general overview for this BBQ chicken recipe:
- Calories: Approximately 300 per serving (including a bun)
- Protein: 30g
- Carbohydrates: 30g
- Fat: 6g
Feel free to adapt the recipe’s elements to suit any dietary requirements!
I hope you’ll give this Crockpot BBQ Chicken recipe a try—it’s simplicity and delicious flavor are sure to impress any diners at your table. Remember, the best memories are made around the table, and I can’t wait to hear about your culinary adventures! Happy cooking, and let’s keep spreading the love of good food. 🌟
PrintSlow Cooker BBQ Chicken

A savory and easy slow cooker BBQ chicken dish perfect for any gathering.
- Prep Time: 15 minutes
- Cook Time: 480 minutes
- Total Time: 495 minutes
- Yield: 4 servings 1x
- Category: Main Course
- Method: Slow Cooking
- Cuisine: American
- Diet: None
Ingredients
- 4 Boneless, Skinless Chicken Breasts
- 1 Cup BBQ Sauce
- 1/4 Cup Chicken Broth
- 1 Tablespoon Worcestershire Sauce
- 1 Teaspoon Garlic Powder
- 1 Teaspoon Onion Powder
- Salt and Pepper to Taste
- Buns for Serving (Optional)
Instructions
- Prep Your Chicken: Rinse the chicken breasts under cold water, then pat them dry with paper towels.
- Season and Layer: Sprinkle the chicken with salt, pepper, garlic powder, and onion powder, then lay them in the crockpot.
- Mix Your Sauces: Whisk together the BBQ sauce, Worcestershire sauce, and chicken broth in a separate bowl.
- Pour and Cover: Pour the sauce mixture over the seasoned chicken, cover, and set to low for 6-8 hours.
- Shred and Serve: Shred the chicken in the pot with forks when ready to eat.
- Toast Your Buns: Toast the buns under the broiler if desired.
Notes
For extra flavor, consider adding some cayenne pepper or hot sauce to the BBQ sauce.
Nutrition
- Serving Size: 1 serving
- Calories: 300
- Sugar: 8g
- Sodium: 600mg
- Fat: 6g
- Saturated Fat: 1g
- Unsaturated Fat: 5g
- Trans Fat: 0g
- Carbohydrates: 30g
- Fiber: 1g
- Protein: 30g
- Cholesterol: 80mg
Keywords: BBQ chicken, slow cooker, easy chicken recipes, family dinner

Juicy Grilled California Avocado Chicken
Juicy Grilled California Avocado Chicken: Elevate Your Meal with Style
Hello, fellow food lovers! If you’re anything like me, there’s nothing quite like cooking up a storm in the kitchen. It’s where magic happens—ingredients come together, flavors collide, and you create beautiful memories around your table. Today, I’m thrilled to share a dish that perfectly captures those special moments: Juicy Grilled California Avocado Chicken. Trust me; this dish is all about fresh flavors and simple elegance.
Introduction: Let’s Talk About Avocados and Chicken
Picture a sunny California afternoon: the sound of birds chirping, a light breeze blowing through the trees, and the tantalizing aroma of grilled chicken wafting through the air. Avocados are king here, and adding them to your chicken dish elevates it from pretty good to absolutely divine!
This recipe combines succulent grilled chicken with creamy avocado and vibrant tomatoes that will transport you straight to the golden coasts of California. Imagine juicy chicken breasts marinated in a zesty blend of lime juice, garlic, and spices, then grilled to perfection. As if that wasn’t enough, we’re adding ripe avocado slices and sweet cherry tomatoes on top—a beautiful explosion of flavors and textures in each bite.
Beyond the deliciousness, this dish is also about connection. It’s about bringing friends and family together around a beautifully set table. Whether you’re hosting a Sunday brunch, planning a casual dinner, or simply craving a fresh and delicious meal, this Juicy Grilled California Avocado Chicken has got you covered. So grab your apron, and let’s get cooking!
Personal Story: A California Summer
Growing up, I spent my summers soaking in the California sun, often at my grandmother’s house. Her garden was bursting with ripe vegetables and fragrant herbs, and the moment I stepped through her door, I could smell something scrumptious. One of my fondest memories is cooking with her in her backyard kitchen. She would pull out perfectly ripe avocados and tell me stories of how she used to make guacamole for her friends during summer picnics.
One particular day, while she grilled her famous chicken, I asked if we could try something new. That’s when we combined her grilled chicken recipe and those luscious avocados into one incredible dish. We created a summer sensation that had everyone coming back for seconds. My grandma’s eyes twinkled with delight as we prepared our meal, and the laughter shared around the table was priceless. Those moments became the bedrock of my culinary journey and inspire me every time I step into the kitchen today.
Ingredients
Here’s what you’ll need for this delightful dish:
-
2 boneless, skinless chicken breasts
Juicy and lean, chicken breasts are perfect for grilling. They soak up flavors beautifully and deliver a satisfying bite every time. -
2 ripe avocados, sliced
Ripe avocados are rich and creamy, adding a luxurious texture to the dish. Look for avocados that yield slightly to pressure. -
1 cup cherry tomatoes, halved
Sweet and bursting with flavor, cherry tomatoes balance the dish with their juicy freshness. Substitute with grape tomatoes if needed! -
1/4 cup fresh lime juice
This bright and tangy juice not only adds flavor but also helps tenderize the chicken. If fresh limes aren’t available, bottled lime juice will do just fine. -
2 tablespoons olive oil
Great for marinating and grilling, olive oil adds richness. You can substitute it with avocado oil for a more intense avocado flavor. -
1 teaspoon garlic powder
Garlic powder infuses the chicken with a subtle garlicky goodness. If you prefer fresh garlic, 1-2 cloves minced will also work. -
1 teaspoon chili powder
This spice lends warmth and depth to the chicken. Feel free to adjust according to your heat preference. -
1 teaspoon cumin
Cumin adds an earthy flavor that compliments the other spices beautifully. If you don’t have cumin, try smoked paprika as an alternative. -
Salt and pepper to taste
Essential for enhancing all the flavors—don’t skip out! Use coarse salt for better texture! -
Fresh cilantro for garnish
Cilantro adds a fresh herbaceous kick that elevates the entire dish. If you’re not a cilantro fan, fresh parsley is a great substitute!
Step-by-Step Instructions
Alright, let’s dive into the cooking process! Follow these steps to make your gorgeous Juicy Grilled California Avocado Chicken:
-
Prepare the Marinade
In a bowl, combine the lime juice, olive oil, garlic powder, chili powder, cumin, salt, and pepper. Whisk until the mixture is smooth and well combined. This marinade is essential for infusing your chicken with layers of flavor.Chef’s Tip: Marinate your chicken breasts for at least 30 minutes—if you can let them soak for 2 hours or more, even better! This will enhance the flavor and tenderness.
-
Marinate the Chicken
Place the chicken breasts in a resealable plastic bag or a shallow dish. Pour the lime marinade over the chicken, ensuring it’s evenly coated. Seal the bag or cover the dish and refrigerate. Let it work its magic!Little Hack: If you want an extra kick, consider adding a little bit of your favorite hot sauce to the marinade!
-
Preheat the Grill
While your chicken is marinating, preheat your grill over medium-high heat (about 375°F to 450°F). Make sure it’s nice and hot before placing the chicken on it—this will help create those beautiful grill marks!Commentary: You can also use a grill pan on the stove if you don’t have access to an outdoor grill. Just be sure to follow the same heat guidelines!
-
Grill the Chicken
Remove the chicken from the marinade, letting any excess drip off, and place it on the grill. Close the lid and grill for about 6-7 minutes on one side, then flip and grill for another 5-6 minutes, or until the chicken is cooked through and has nice grill marks. A meat thermometer should read 165°F when done.Tip: Avoid flipping too soon! Let it sear to get those perfect grill marks before flipping.
-
Prepare the Avocado and Tomatoes
While the chicken is grilling, slice your ripe avocados and halve your cherry tomatoes. This is your opportunity to add a sprinkle of salt and pepper on the tomatoes for added flavor! -
Rest the Chicken
Once the chicken is done grilling, remove it from the grill and let it rest for about 5 minutes. This allows the juices to redistribute, keeping your chicken moist.Chef Insight: Don’t skip this step! A rested chicken is a happy chicken.
-
Plating Perfection
Slice the grilled chicken, then layer it on a serving platter. Top it with the sliced avocados and halved cherry tomatoes, sprinkling fresh cilantro over everything for that pop of color.Presentation Matters: For an elegant touch, drizzle a little extra lime juice over the top or a dash of balsamic reduction!
Serving Suggestions
Serve this beautiful dish with a side of quinoa salad, garlic bread, or over a bed of mixed greens for a refreshing meal. Pair it with a chilled glass of white wine or lemonade for the ultimate California vibe. Don’t forget to provide extra lime wedges on the side for guests who want an extra zing!
Recipe Variations
Feel free to mix things up with these creative twists:
- Spicy Kick: Add diced jalapeños into the marinade for heat.
- Different Proteins: Swap out chicken for shrimp or firm tofu for a vegetarian version.
- Grilled Veggies: Add grilled veggies like zucchini or bell peppers as sides or toppings.
- Herbed Chicken: Incorporate fresh herbs such as thyme or rosemary into your marinade for a different flavor profile.
- Creamy Avocado Sauce: Blend avocados with Greek yogurt, lime juice, and garlic for a creamy drizzle on top.
Chef’s Notes
I’ve made this recipe countless times, and it never gets old! Every time I prepare it, I think of those summer afternoons with my grandma, creating dishes that filled our home with laughter. I’ve learned that cooking is as much about the experience as it is about the ingredients and techniques. Each bite tells a story of connection and love.
And be prepared for compliments! When you bring this dish to your table, be ready for guests to ask for the recipe—it’s that good!
FAQs and Troubleshooting
1. Can I use frozen chicken?
Absolutely! Just make sure to thaw it completely before marinating and grilling. Otherwise, you’ll end up with uneven cooking.
2. My chicken is dry after grilling. What happened?
Overcooking is usually the culprit! Always check your chicken with a meat thermometer, and remember to let it rest after grilling to retain moisture.
3. What should I do if I can’t find ripe avocados?
You can speed up the ripening process by placing them in a brown paper bag with an apple or banana. However, if you’re in a hurry, sliced cucumbers on the side provide a refreshing alternative!
4. How do I store leftovers?
Store any leftovers in an airtight container in the fridge for up to 3 days. Reheat gently to avoid drying the chicken.
Nutritional Info
While precise nutritional info can vary based on ingredient brands and portions, here’s a rough estimate per serving:
- Calories: 450
- Protein: 30g
- Carbohydrates: 22g
- Fat: 28g
So there you have it, my dear culinary friends! Now you’re ready to create your own Juicy Grilled California Avocado Chicken experience at home. It’s a dish that captures the heart of summer and the essence of gathering together. I can’t wait to hear how yours turns out! Let’s set the table and celebrate the joy of cooking together. Happy cooking! 🍽️✨
PrintJuicy Grilled California Avocado Chicken

A delicious grilled chicken dish topped with creamy avocados and cherry tomatoes, perfect for summer gatherings.
- Prep Time: 30 minutes
- Cook Time: 20 minutes
- Total Time: 50 minutes
- Yield: 4 servings 1x
- Category: Main Course
- Method: Grilling
- Cuisine: California
- Diet: Gluten-Free
Ingredients
- 2 boneless, skinless chicken breasts
- 2 ripe avocados, sliced
- 1 cup cherry tomatoes, halved
- 1/4 cup fresh lime juice
- 2 tablespoons olive oil
- 1 teaspoon garlic powder
- 1 teaspoon chili powder
- 1 teaspoon cumin
- Salt and pepper to taste
- Fresh cilantro for garnish
Instructions
- Prepare the Marinade: In a bowl, combine the lime juice, olive oil, garlic powder, chili powder, cumin, salt, and pepper. Whisk until the mixture is smooth and well combined.
- Marinate the Chicken: Place the chicken breasts in a resealable plastic bag or a shallow dish. Pour the lime marinade over the chicken, ensuring it’s evenly coated. Seal the bag or cover the dish and refrigerate.
- Preheat the Grill: Preheat your grill over medium-high heat (about 375°F to 450°F).
- Grill the Chicken: Remove the chicken from the marinade and place it on the grill. Grill for about 6-7 minutes on one side, then flip and grill for another 5-6 minutes, or until cooked through.
- Prepare the Avocado and Tomatoes: Slice the ripe avocados and halve the cherry tomatoes.
- Rest the Chicken: Remove it from the grill and let it rest for about 5 minutes.
- Plating Perfection: Slice the grilled chicken, layer on a serving platter, top it with the sliced avocados and halved cherry tomatoes, sprinkle fresh cilantro on top.
Notes
Serve with a side of quinoa salad or garlic bread. Add extra lime wedges for guests.
Nutrition
- Serving Size: 1 serving
- Calories: 450
- Sugar: 3g
- Sodium: 700mg
- Fat: 28g
- Saturated Fat: 4g
- Unsaturated Fat: 20g
- Trans Fat: 0g
- Carbohydrates: 22g
- Fiber: 8g
- Protein: 30g
- Cholesterol: 80mg
Keywords: grilled chicken, avocado, summer recipe, healthy meal, California cuisine

Flavorful Hawaiian Teriyaki Chicken Kabobs
Flavorful Hawaiian Teriyaki Chicken Kabobs: Elevate Your Grilling Game!
Aloha, foodies! If you’re looking for a dish that screams summer vibes, beach parties, and the smell of the ocean, then you’ve stumbled upon the right recipe. Today, we’re diving into the world of Hawaiian Teriyaki Chicken Kabobs—a dish that’s not only packed with flavor but also takes you straight to a tropical paradise with every bite.
Imagine this: juicy pieces of chicken marinated in a luscious teriyaki sauce, threaded with sweet pineapple chunks, and grilled to perfect char. It’s an irresistible combination that you simply can’t resist. Whether you’re hosting a summer BBQ or planning a cozy weeknight dinner, these kabobs will undoubtedly impress your guests and delight your taste buds.
But wait—there’s more! Cooking these kabobs isn’t just about following a recipe; it’s about the experience, the laughter around the grill, and the memories you’ll create while sharing them with loved ones. And trust me, everyone will want the secret to your mouthwatering teriyaki sauce!
So, grab your apron, and let’s make some magic happen in the kitchen! Ready to bring a taste of the islands to your table? Let’s get started on these delicious Hawaiian Teriyaki Chicken Kabobs!
Personal Story
I vividly remember the first time I grilled kabobs. It was during a family reunion in my aunt’s backyard, where the scent of grilled meats wafted through the air like an aromatic hug. My uncle was the grilling guru, teaching us the art of marinating and skewering. I was assigned the pineapple duty—certainly a delicious job! As I watched the vibrant colors of the chicken and pineapple transform under the heat, I knew I was hooked.
That evening was filled with laughter, stories, and a strong dose of nostalgia as we reminisced about summers spent together. The kabobs were a hit, and little did I know, they would evolve into one of my go-to recipes for any gathering. Each time I grill these Hawaiian Teriyaki Chicken Kabobs, I channel that first grilling experience and the joy it brought to my family. A couple of bites in, and it transports me back to that beautiful summer day.
Ingredients
Here’s what you’ll need to whip up these delightful kabobs:
-
2 lbs boneless, skinless chicken thighs, cut into 1.5-inch cubes
Tender and juicy, chicken thighs are perfect for kabobs since they stay moist even on the grill. If you prefer a leaner cut, chicken breasts will work—just be sure to marinate them longer to maintain moisture! -
1 medium fresh pineapple, peeled and cut into chunks (about 2 cups)
Sweet and tangy, pineapple adds a lovely tropical flavor. You can substitute with mango or bell peppers if you’re feeling adventurous! -
Wood or metal skewers
If you go for wooden skewers, make sure to soak them in water for at least 30 minutes to prevent burning on the grill. Metal skewers are a great eco-friendly option and eliminate the soaking step. -
½ cup soy sauce (low-sodium preferred)
This is the backbone of our teriyaki marinade! Low-sodium soy sauce keeps the dish from becoming overly salty. Tamari is an excellent gluten-free substitute. -
¼ cup honey or brown sugar
For sweetness and that sticky texture we adore in teriyaki sauce! Agave syrup is a lovely alternative if you’re looking for a vegan option. -
2 tbsp toasted sesame oil
This oil gives a wonderful nutty aroma. If you don’t have it, regular sesame oil will suffice or even a little olive oil, although the taste will differ slightly. -
2 cloves garlic, minced
Fresh garlic is an essential flavor booster. If you’re in a pinch, garlic powder works too, but fresh is always better! -
1 tbsp fresh ginger, grated
The fresh ginger adds a zesty kick to the marinade. Ground ginger is a less intense substitute, but fresh really shines in this dish. -
2 tbsp rice vinegar
Its mild acidity balances the sweetness of the sauce. White wine vinegar can also do the trick. -
1 tsp sriracha or chili flakes (optional)
Want a kick? Spice it up with sriracha! Prefer less heat? Skip this step or reduce the amount.
Step-by-Step Instructions
Now that we have our fantastic ingredients lined up, let’s get cooking! Follow these instructions closely, and soon you’ll have a dish that’s ready to impress.
Step 1: Marinate the Chicken
-
Combine your marinade: In a mixing bowl, whisk together the soy sauce, honey (or brown sugar), toasted sesame oil, minced garlic, grated ginger, rice vinegar, and your choice of heat (sriracha or chili flakes). It’s all about getting those flavors to mingle!
-
Mix it up: Once everything is combined, taste! If you want more sweetness, add a little more honey; for salty, a splash of soy sauce! Finding balance is key.
-
Add the chicken: Take your cubed chicken thighs and add them to the marinade. Use your hands to ensure every piece is fully coated—this is where the magic happens.
-
Chill out: Cover the bowl (or transfer to a resealable bag) and let it marinate in the fridge for at least 30 minutes. Trust me, more flavor happens with longer marination—up to 4 hours is even better!
Step 2: Prep and Skewer
-
Skewering time: Grab your soaked skewers (if using wood) and start threading the chicken and pineapple alternately. I recommend starting and ending with chicken for stability. Leave a little space between each piece so they grill evenly.
-
Preheat the grill: While you prepare the skewers, preheat your grill over medium heat. You can use an outdoor grill, a stovetop grill pan, or even a broiler if you’re inside.
Step 3: Grill the Kabobs
-
Get grilling: Once your grill is hot, place the kabobs on the grates. Grill them for about 10-15 minutes, turning every few minutes to ensure even cooking.
-
Glazing with marinade: If you’re feeling fancy, you can brush some of that leftover marinade (once brought to a boil for safety) onto the kabobs during the last few minutes of grilling for extra flavor and that glossy finish!
Step 4: Check for Doneness
-
Check for doneness: The kabobs are ready when the chicken reaches an internal temperature of 165°F (75°C). Use a meat thermometer for the perfect results!
-
Let them rest: Once cooked, remove the kabobs from the grill and let them rest on a plate for about 5 minutes. This helps keep them juicy!
Serving Suggestions
Now for my favorite part—serving these lovely kabobs! Arrange the grilled kabobs on a colorful platter, garnishing with fresh cilantro or sesame seeds for a pop of flavor and color. You can also serve them alongside a bright salad or over fluffy rice for a complete meal. Finding ways to make them visually appealing elevates the presentation, so get creative!
Recipe Variations
Feeling adventurous? Here are a few variations you might want to whip up:
-
Veggie Kabobs: Swap out half the chicken for zucchini, bell peppers, or mushrooms for a delightful vegetarian option!
-
Spicy Teriyaki: Add pineapple juice and more sriracha for a tangy, spicy twist!
-
Tropical Twist: Throw in some cherry tomatoes or red onion for extra flavor and color.
-
Soy-Free: Substitute soy sauce with coconut aminos for a soy-free teriyaki flavor.
-
Skewered Shrimp: Try shrimp instead of chicken for a seafood take on the traditional kabob!
Chef’s Notes
This recipe has evolved over the years—what started as a straightforward chicken recipe has turned into a celebration of flavors. I once added an unexpected twist: a sprinkle of coconut flakes right before serving, which brought an added depth of tropical goodness. Some family members weren’t fans, but those who were couldn’t get enough! Cooking is all about experimenting and having fun in the kitchen. Who knew a simple kabob could tell such a rich story?
FAQs and Troubleshooting
1. My chicken is dry; what did I do wrong?
No worries! Chicken thighs are forgiving, but if you overcook them, they can still dry out. Always use a thermometer for precise cooking!
2. Can I make this ahead of time?
Absolutely! Marinated chicken can be stored in the fridge for a day or two. Just grill when you’re ready to serve.
3. Can I use another protein?
Indeed! These kabobs work well with beef, pork, or even tofu. Just adjust the cooking times accordingly.
4. What can I serve with these kabobs?
Pair them with a simple cucumber salad, jasmine rice, or even a cold noodle salad for a refreshing meal!
Nutritional Info (Optional)
This dish is packed with protein, healthy fats, and plenty of vitamins from the pineapple and seasonings. Each serving of teriyaki chicken kabobs offers approximately:
- Calories: 350
- Protein: 30g
- Carbohydrates: 26g
- Fat: 15g
(Note: Nutritional values may vary based on specific ingredients used.)
So there you have it, dear foodie friends! With a sprinkle of passion and a dash of creativity, you’ve whipped up delicious Hawaiian Teriyaki Chicken Kabobs that are ready to take center stage at your next gathering! Remember, the magic happens not just in the kitchen but at the table with the people you love. Enjoy, and happy cooking!
PrintHawaiian Teriyaki Chicken Kabobs

Juicy grilled chicken kabobs marinated in teriyaki sauce, paired with sweet pineapple for a tropical flavor.
- Prep Time: 30 minutes
- Cook Time: 15 minutes
- Total Time: 45 minutes
- Yield: 4 servings 1x
- Category: Main Course
- Method: Grilling
- Cuisine: Hawaiian
- Diet: None
Ingredients
- 2 lbs boneless, skinless chicken thighs, cut into 1.5-inch cubes
- 1 medium fresh pineapple, peeled and cut into chunks (about 2 cups)
- Wood or metal skewers
- ½ cup soy sauce (low-sodium preferred)
- ¼ cup honey or brown sugar
- 2 tbsp toasted sesame oil
- 2 cloves garlic, minced
- 1 tbsp fresh ginger, grated
- 2 tbsp rice vinegar
- 1 tsp sriracha or chili flakes (optional)
Instructions
- Combine your marinade: In a mixing bowl, whisk together the soy sauce, honey, toasted sesame oil, minced garlic, grated ginger, rice vinegar, and sriracha or chili flakes.
- Add the chicken: Take your cubed chicken thighs and add them to the marinade. Use your hands to ensure every piece is fully coated.
- Chill out: Cover the bowl and let it marinate in the fridge for at least 30 minutes.
- Grab your soaked skewers and start threading the chicken and pineapple alternately.
- Preheat your grill over medium heat.
- Get grilling: Once your grill is hot, place the kabobs on the grates. Grill them for about 10-15 minutes, turning every few minutes.
- Check for doneness: The kabobs are ready when the chicken reaches an internal temperature of 165°F (75°C).
- Let them rest: Remove the kabobs from the grill and let them rest for about 5 minutes.
Notes
For extra flavor, brush the kabobs with marinade during the last few minutes of grilling after boiling it for safety.
Nutrition
- Serving Size: 1 kabob
- Calories: 350
- Sugar: 15g
- Sodium: 800mg
- Fat: 15g
- Saturated Fat: 3g
- Unsaturated Fat: 10g
- Trans Fat: 0g
- Carbohydrates: 26g
- Fiber: 2g
- Protein: 30g
- Cholesterol: 100mg
Keywords: Hawaiian, kabobs, teriyaki, chicken, grilling, summer, BBQ