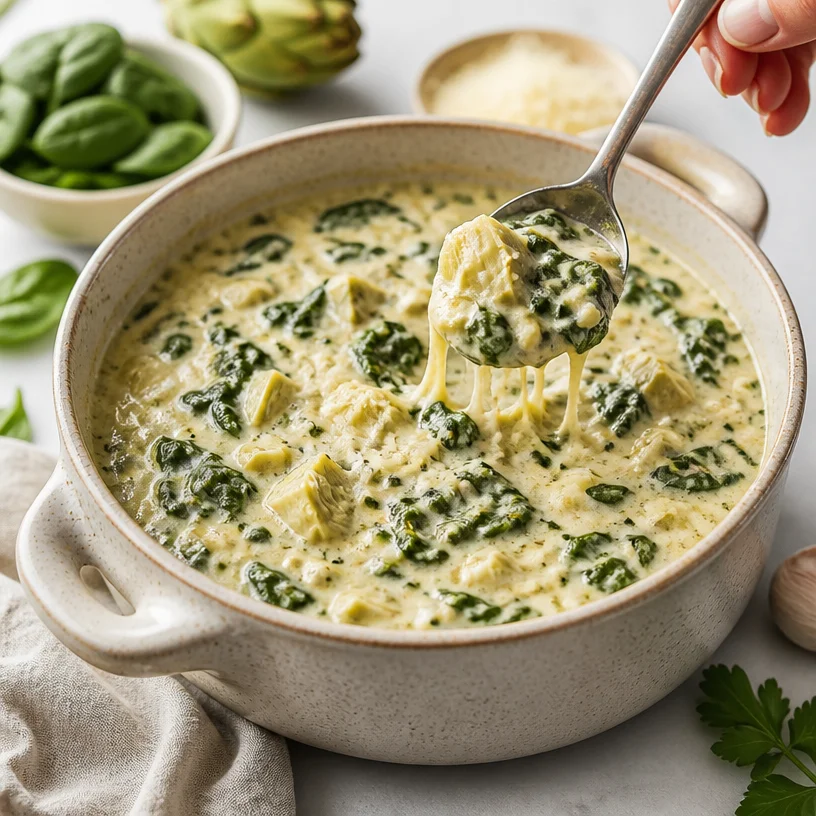
One-Pot Spinach Artichoke Soup (Creamy Weeknight Dinner)
Spinach Artichoke Soup: A Cozy Bowl of Comfort
Hello, my lovely food friends! Today, I’m excited to share with you a recipe that combines warmth, nostalgia, and that wonderful, creamy goodness we all crave – Spinach Artichoke Soup. This dish wraps you in a plush hug of flavor, making it the perfect choice for chilly evenings or whenever you want to impress guests with a cozy starter.
Picture this: It’s a chilly Sunday afternoon, and you’ve gathered your favorite people around your table. Perhaps the smell of garlic is wafting through the air while vegetables simmer gently on the stove. You have bright green spinach, tender artichokes, and just the right amount of creamy richness swirling together in your pot. You can almost hear the laughter that’s about to fill your kitchen, and that’s where the magic starts!
What I love about this spinach artichoke soup is that it’s inspired by the classic dip we all know and love. Remember those gatherings when the spinach artichoke dip would vanish faster than you could say “seconds, please”? Well, think of this soup as that beloved dip’s warm, soul-nourishing sibling. It’s comforting, rich, and has that delightful creaminess that begs for a warm bread roll on the side. Let’s dive into this dreamy recipe that’s easier than you think, featuring some quality ingredients that’ll take your cooking game up a notch!
A Nostalgic Kitchen Memory
As we dive into this recipe, let me take you back a few years. It was a crisp autumn evening, and I was hosting a cozy dinner party at my home. The lights were dim, candles flickered on the table, and a gentle jazz playlist set the mood. I decided to make a big pot of my Spinach Artichoke Soup, which has become a staple whenever I want to impress my guests with something that feels fancy yet deeply comforting.
As I finished stirring that velvety soup, I suddenly realized I had forgotten to buy bread for serving. Panic! But then, I remembered that last-minute kitchen hack: I quickly whipped up some homemade croutons from stale bread lying around and toasted them with garlic and olive oil. What a lifesaver! My guests were thrilled, and after the first taste of that rich soup, the croutons became the talk of the evening. It’s moments like these that inspire me to put my heart into every recipe. Let’s recreate some magic, shall we?
Ingredients
To create this luscious Spinach Artichoke Soup, you’ll need the following ingredients:
-
Fresh Spinach (4 cups)
Spinach brings a vibrant green color and a host of nutrients to the soup! If fresh isn’t accessible, you can substitute it with two cups of frozen spinach. Just make sure to thaw and drain it before adding. -
Canned Artichoke Hearts (1 can, drained)
They add a tangy element to the soup and a delightful texture. If you can’t find canned artichokes, marinated ones work too, but adjust the salt in the recipe since they might be pre-seasoned. -
Cream Cheese (8 oz)
This is where the creaminess comes in! If you want a lighter version, you can use Neufchâtel cheese or even sour cream, though the taste will vary slightly. -
Parmesan Cheese (½ cup, grated)
This adds a rich, nutty flavor to the soup. If you’re in a pinch, Pecorino Romano could be a good substitute. -
Garlic (2 cloves, minced)
Nothing pairs better with spinach and artichokes than garlic! Feel free to use garlic powder (½ teaspoon) if you don’t have fresh. -
Onion (1 medium, diced)
Sweet onions add a lovely base flavor. If you prefer a milder taste, shallots can do wonders here. -
Chicken or Vegetable Broth (4 cups)
This acts as the soup’s base. If you’re looking for a heartier flavor, use low-sodium broth to control the seasoning better. -
Olive Oil (2 tablespoons)
A little fat helps sauté the vegetables and adds depth to the flavor. Butter works beautifully here too if you want that rich, buttery undertone. -
Salt and Pepper to taste
Essential for rounding out the flavors, taste as you go, and remember that cheese adds salt too!
Step-by-Step Instructions
Let’s get cooking! Follow these steps to whip up this comforting Spinach Artichoke Soup:
-
Sauté the Aromatics
In a large pot, heat olive oil over medium heat. Once it’s shimmering, add the diced onion and minced garlic. Sauté them for about 5 minutes, until the onion is translucent – this step builds such a fragrant base for your soup! -
Add the Broth
Pour in the chicken or vegetable broth and bring it to a gentle simmer. This is the magic moment where all those beautiful flavors come together. Give it a stir and let it simmer for about 10 minutes. -
Add Spinach and Artichokes
Toss in the fresh spinach and the drained artichoke hearts. Let it cook for 4–5 minutes until the spinach wilts and the artichokes warm through. Just look at that vivid green color! It’s like spring in a bowl. -
Cream It Up
Now, it’s time for the star players – cream cheese and Parmesan. Add both to the pot, stirring until smooth and creamy. If the soup feels too thick, pour in a bit more broth to reach your desired consistency. Pro tip: If you find it hard to get the cream cheese to mix in, chop it into small cubes first! -
Season and Blend
Taste the soup and season with salt and pepper as needed. If you want a silky texture, use an immersion blender to puree the soup to your ideal smoothness. Just a few quick pulses will do the trick; I love leaving some chunky pieces to create contrast. However, if you prefer a chunky soup, feel free to skip this step! -
Serve!
After blending (or not!), let the soup simmer for another 2-3 minutes to meld the flavors. You absolutely can’t skip this; it elevates the taste even more. Now, take a moment to bask in the smells wafting through your kitchen!
Serving Suggestions
When serving this Spinach Artichoke Soup, I love to garnish it with a sprinkle of extra Parmesan cheese and a drizzle of olive oil for a touch of elegance. Pair it with some crusty bread or homemade crackers for dipping. Or if you’re feeling fancy, serve it in individual ramekins and top them with a little fresh herb for a beautiful presentation!
Recipe Variations
Here are a few twists you can try to keep things exciting:
- Creamy Coconut Twist: Substitute cream cheese with coconut cream for a vegan-friendly option.
- Spicy Kick: Add a pinch of red pepper flakes or a dash of hot sauce for a spicy version.
- Protein Boost: Stir in shredded rotisserie chicken for a heartier meal.
- Herb Infusion: A handful of fresh dill or basil can elevate the soup with a fragrant touch.
- Cheesy Delight: Experiment with different cheeses like Gouda or Gruyere for a new flavor profile!
Chef’s Notes
Over the years, this recipe has become a family favorite, and I’ve made countless tweaks to get it just right. I remember once experimenting with adding a touch of lemon juice at the end, which brightened up the flavors beautifully! Kitchen experiments can sometimes lead to delightful surprises, so don’t hesitate to play around with the ingredients based on what you have.
And, of course, nothing is more fun than gathering friends and sharing a good meal. Don’t stress about perfection in the presentation; just focus on the joy of serving something homemade from your heart!
FAQs and Troubleshooting
1. What if my soup is too thick?
No worries! Just gradually stir in more broth or water until it reaches your desired consistency. Taste as you go to maintain the flavor balance.
2. Can I freeze this soup?
Absolutely! Let it cool completely, then store it in an airtight container. It can keep well in the freezer for up to three months. Just thaw and reheat gently when ready to serve!
3. My soup tastes bland. What should I do?
Flavor is key! Add salt or a splash of lemon juice to brighten it up. You can also throw in a pinch of garlic powder or Italian seasoning for extra depth.
4. Can I make this soup ahead of time?
Definitely! It actually tastes even better the next day once the flavors have had time to meld. Just reheat it gently on the stove and serve, adding extra broth if needed.
Nutritional Info (Optional)
Calories: Approximately 280 per serving (based on 6 servings without toppings)
Carbohydrates: 10g
Protein: 9g
Fat: 22g
Fiber: 2g
(Note: Nutritional information will vary based on serving sizes and specific ingredients used.)
Now, my fabulous friends, it’s time to tie on your apron, gather your ingredients, and let’s create this delightful Spinach Artichoke Soup together! Your taste buds will thank you, and so will the people you serve it to. Happy cooking!
PrintSpinach Artichoke Soup

A warm and creamy Spinach Artichoke Soup that combines vibrant spinach and tender artichokes, perfect for chilly evenings.
- Prep Time: 15 minutes
- Cook Time: 30 minutes
- Total Time: 45 minutes
- Yield: 4 servings
- Category: Appetizer
- Method: Stovetop
- Cuisine: American
- Diet: Vegetarian
Ingredients
- Fresh Spinach (4 cups)
- Canned Artichoke Hearts (1 can, drained)
- Cream Cheese (8 oz)
- Parmesan Cheese (½ cup, grated)
- Garlic (2 cloves, minced)
- Onion (1 medium, diced)
- Chicken or Vegetable Broth (4 cups)
- Olive Oil (2 tablespoons)
- Salt and Pepper to taste
Instructions
- Sauté the Aromatics: In a large pot, heat olive oil over medium heat. Add the diced onion and minced garlic. Sauté for about 5 minutes, until the onion is translucent.
- Add the Broth: Pour in the chicken or vegetable broth and bring it to a gentle simmer for about 10 minutes.
- Add Spinach and Artichokes: Toss in the fresh spinach and the drained artichoke hearts. Cook for 4–5 minutes until the spinach wilts.
- Cream It Up: Stir in cream cheese and Parmesan until smooth. Add more broth if needed to reach desired consistency.
- Season and Blend: Taste soup, season with salt and pepper. Use an immersion blender for a silky texture, if desired.
- Serve! Let it simmer for another 2-3 minutes before serving.
Notes
Garnish with extra Parmesan and a drizzle of olive oil. Serve with crusty bread or homemade crackers.
Nutrition
- Serving Size: 1 serving
- Calories: 280
- Sugar: 4g
- Sodium: 650mg
- Fat: 22g
- Saturated Fat: 13g
- Unsaturated Fat: 7g
- Trans Fat: 0g
- Carbohydrates: 10g
- Fiber: 2g
- Protein: 9g
- Cholesterol: 40mg
Keywords: soup, spinach, artichoke, comfort food, vegetarian

One-Pot Creamy Chicken Corn Chowder in 30 Minutes
The Creamy Comfort of Chicken Corn Chowder: A Kitchen Adventure
Welcome to my kitchen, fellow food enthusiasts! Today, we’re diving into a delightful bowl of warmth: Chicken Corn Chowder. As the weather turns crisp and the leaves begin to fall, there’s nothing quite like a hearty bowl of chowder to wrap you in cozy vibes. This creamy, dreamy dish whispers comfort in every spoonful and is perfect for those cooler evenings when your heart (and belly) craves something a little extra special.
There’s a beautiful simplicity to Chicken Corn Chowder that’s both nostalgic and inviting. Each ingredient harmonizes flawlessly in a comforting melody, creating a warm embrace—it’s like a hug from the inside! Whether you’re whipping it up for a weeknight family dinner or adding a touch of elegance to your next gathering, I promise this chowder will bring smiles all around.
So, grab your apron, light up those stovetop flames, and let’s create something timeless together. Trust me, you won’t just be making dinner; you’ll be crafting a fantastic experience. Let’s get started!
A Sweet Memory: The First Taste of Chowder
Imagine a brisk fall evening filled with the intoxicating scents of garlic, herbs, and sweet corn drifting through the air. I remember the first time I enjoyed chicken corn chowder; I was just a kid, huddled at my grandmother’s kitchen table, eagerly waiting for her to ladle out the fragrant goodness. She was always at her best in the kitchen, an artist of sorts, layering flavors in a way that made every meal feel like a celebration.
One specific evening stands out vividly in my mind. My grandmother had invited friends over, and as the dining room filled with laughter and stories, I sat there mesmerized, watching her move between the stove and the table. The way she stirred the chowder with love, added a sprinkle of herbs, and then smiled as she ladled it into bowls is forever etched in my heart. That warm, creamy chowder, paired with crusty bread, was the highlight of the evening.
Now, as I recreate that cherished dish in my own kitchen, I realize it’s more than just about the flavors; it’s about the love and gathering of friends and family. Chicken Corn Chowder is not just a recipe; it’s a moment—a memory filled with laughter and love. Now, let’s create our own memories as we gather around our tables!
Ingredients for Your Delicious Chicken Corn Chowder
Here’s what you’ll need to create this delightful chowder:
-
Chicken:
- Use boneless, skinless chicken breast or thighs; both work beautifully. If you have leftover rotisserie chicken, that’s a great time-saver too!
-
Corn:
- Fresh corn is ideal, but you can also use canned or frozen corn. If using fresh, just cut the kernels off the cob for that sweet, juicy flavor.
-
Potatoes:
- Yukon gold potatoes are perfect for chowder as they provide a creamy texture when cooked. Feel free to swap in red potatoes if that’s what you have on hand.
-
Cream:
- Heavy cream gives this chowder its signature richness. If you’re looking for a lighter version, you can use half-and-half or whole milk. For a dairy-free alternative, coconut cream works wonderfully.
-
Onion and Garlic:
- These aromatics are essential for building flavor. Fresh onion will add sweetness, while garlic brings a punch!
-
Chicken Broth:
- Opt for low-sodium chicken broth so you have better control over the seasoning. Homemade broth is always a wonderful touch!
-
Thyme:
- Fresh thyme is ideal for its fragrant, earthy notes. Dried thyme works too—just reduce the quantity by half.
-
Salt and Pepper:
- Essential for seasoning. Adjust according to taste. A pinch of cayenne pepper adds an optional kick if you’re feeling adventurous!
With these ingredients, you’ll be ready to create a bowl of warmth that sings comfort with every spoonful!
Step-by-Step Instructions to Your Chowder Masterpiece
Now, let’s take a step into the heart of the kitchen as we transform these ingredients into a steaming bowl of Chicken Corn Chowder. Follow along with me!
-
Prep Your Ingredients:
- Begin by gathering all your ingredients. Chop the onion and garlic, cube the potatoes, and slice up the chicken into bite-sized pieces. This always helps the cooking process flow smoothly—no one enjoys scrambling for ingredients during cooking!
-
Sauté the Aromatics:
- Heat a large pot over medium heat and add a bit of olive oil. Once shimmering, toss in the chopped onions. Sauté them until soft and translucent, about 5 minutes. Add in the minced garlic and sauté for another minute until fragrant. You’ll want your kitchen to smell like heaven at this point!
-
Cook the Chicken:
- Increase the heat to medium-high and add the chicken pieces to your pot. Season with salt, pepper, and thyme. Cook the chicken until it’s browned and cooked through, about 7-10 minutes. Don’t skip this step—browning adds incredible flavor!
-
Add the Potatoes:
- Toss your cubed potatoes into the pot, stirring to combine well. The potatoes will absorb all the good stuff, adding to the chowder’s creaminess later.
-
Pour in the Broth:
- Add the chicken broth to the pot, stirring to combine. Bring the mixture to a gentle simmer. Let your chowder bubble away for about 15-20 minutes, or until the potatoes are tender. This is when the magic begins to happen!
-
Incorporate the Corn:
- Once the potatoes are fork-tender, stir in the corn. Allow it to cook for another 5 minutes. This quick addition lets the corn retain its sweetness without becoming mushy.
-
Add Cream and Adjust Seasoning:
- Finally, pour in the heavy cream, stirring until well combined. Taste and adjust the seasoning with more salt, pepper, or even a pinch of cayenne if you’re feeling bold. Let it warm through for a few more minutes so that all those flavors meld beautifully together.
-
Serve It Up:
- The chowder is ready to be served! Ladle it into bowls and get ready for the compliments that will surely follow—it smells that good!
Serving Suggestions to Elevate Your Chowder
For a delightful presentation, consider garnishing your chowder with a sprinkle of fresh herbs—chopped parsley, chives, or thyme not only add a beautiful splash of color but also enhance the flavor. A drizzle of olive oil or a dollop of sour cream can elevate your dish even further. Serve with warm crusty bread or homemade cornbread for a lovely pairing. Your guests will be coming back for seconds (or thirds)!
Recipe Variations for a Fun Twist
This recipe can be your canvas for creativity! Here are some variations to consider:
- Spicy Chowder: Add diced jalapeños while cooking the onions for a spicy kick.
- Seafood Chowder: Substitute chicken with shrimp or crab for a coastal twist.
- Vegetarian Option: Replace chicken with chickpeas for a hearty meatless dish, using vegetable broth instead.
- Zesty Lemon: Add a squeeze of fresh lemon juice before serving to brighten up the flavors.
- Herb Infusion: Try using fresh basil or dill in place of thyme for a unique spin on the classic flavor profile.
Chef’s Notes: A Journey Through Chowder
As I’ve developed this recipe over the years, I’ve learned that it’s all about balance. You want a creamy texture, but a touch of brightness keeps it from feeling heavy. One evening, I accidentally added too much cream and thought I’d ruined it. But a splash of lemon juice saved the day, creating a deliciously balanced flavor! Cooking is a journey of discovery, and I love embracing the little hiccups that make us better chefs.
Remember, this chowder is versatile! It’s evolved from my grandmother’s traditional recipe into a reflection of my own culinary adventures. So, feel free to make it your own!
FAQs and Troubleshooting Your Chowder Journey
1. What if my chowder is too thick?
- If you find your chowder is thicker than you’d like, simply stir in more chicken broth or water until you reach your desired consistency.
2. Can I make this ahead of time?
- Absolutely! This chowder keeps well in the fridge for about 3-4 days. Reheat gently on the stovetop, adding a splash of broth if necessary.
3. How can I make this dish dairy-free?
- Use full-fat coconut milk instead of cream, and ensure that your broth is free from dairy ingredients.
4. What should I do if it’s too salty?
- If your chowder is too salty, you can balance it out by adding more potatoes or cream to dilute the saltiness. A pinch of sugar can also help counteract saltiness.
Nutritional Info
While this Chicken Corn Chowder is packed with comfort and flavor, here’s an estimated breakdown of its nutritional value per serving:
- Calories: 450
- Protein: 25g
- Carbohydrates: 30g
- Fat: 25g
- Fiber: 3g
Of course, this will vary based on the exact ingredients you use!
And there you have it—Chicken Corn Chowder, straight from my kitchen to yours! I hope you enjoy exploring this dish just as much as I have. Remember, cooking is about joy, creativity, and connection. So tie that apron on and let’s make something incredible together. Happy cooking, friends!
PrintCreamy Chicken Corn Chowder

A delightful bowl of warmth filled with chicken, corn, and creamy goodness, perfect for cozy evenings.
- Prep Time: 15 minutes
- Cook Time: 30 minutes
- Total Time: 45 minutes
- Yield: 4 servings 1x
- Category: Main Course
- Method: Stovetop
- Cuisine: American
- Diet: Non-Vegetarian
Ingredients
- 1 lb boneless, skinless chicken breast or thighs
- 2 cups fresh, canned, or frozen corn
- 2 medium Yukon gold potatoes, cubed
- 1 cup heavy cream (or half-and-half, or coconut cream for dairy-free)
- 1 onion, chopped
- 2 cloves garlic, minced
- 4 cups low-sodium chicken broth
- 1 tsp fresh thyme (or 0.5 tsp dried thyme)
- Salt and pepper to taste
- Pinch of cayenne pepper (optional)
Instructions
- Prep your ingredients: Gather, chop the onion and garlic, cube the potatoes, and slice the chicken.
- Sauté the aromatics: Heat olive oil in a large pot and sauté onions until soft, then add garlic and sauté until fragrant.
- Cook the chicken: Increase heat, add chicken, season with salt, pepper, and thyme, and brown for 7-10 minutes.
- Add the potatoes: Stir in the cubed potatoes and combine well.
- Pour in the broth: Add chicken broth, bring to a gentle simmer, and let bubble for 15-20 minutes until potatoes are tender.
- Incorporate the corn: Stir in the corn and cook for another 5 minutes.
- Add cream and adjust seasoning: Pour in heavy cream, stir, and adjust seasoning as needed.
- Serve it up: Ladle chowder into bowls and enjoy!
Notes
Garnish with fresh herbs and serve with warm crusty bread or cornbread for the best experience.
Nutrition
- Serving Size: 1 bowl
- Calories: 450
- Sugar: 5g
- Sodium: 600mg
- Fat: 25g
- Saturated Fat: 12g
- Unsaturated Fat: 10g
- Trans Fat: 0g
- Carbohydrates: 30g
- Fiber: 3g
- Protein: 25g
- Cholesterol: 90mg
Keywords: chicken, corn, chowder, soup, creamy, fall recipe

Creamy One-Pot Sweet Potato Soup in 25 Minutes (Weeknights)
The Cozy Comfort of Sweet Potato Soup
Hello, lovely foodies! If there’s one dish that wraps you up in a warm hug on a chilly evening, it’s good ol’ sweet potato soup. The moment you take a spoonful, it’s like a cozy, velvety cloud of comfort has enveloped you. Today, I’m thrilled to share my favorite sweet potato soup recipe that’s perfect for everyday meals and special gatherings alike.
You’re going to love how easy and sophisticated this recipe is. Let’s dive in together and make something truly delightful!
A Journey Back to My Grandmother’s Kitchen
I can vividly recall the days spent in my grandmother’s quaint kitchen, where the aroma of sweet potatoes simmering on the stovetop always signaled a family gathering. She had a way of transforming simple ingredients into pure magic. I remember one particular winter evening when the snow blanketed our little town. My family huddled around the dining table, where bowls of her creamy sweet potato soup awaited us. The golden hue of the soup looked enticing, and each spoonful was rich, smooth, and spiced just right.
She always added a pinch of cinnamon to enhance the natural sweetness of the potatoes, and oh boy, that little detail made the soup unforgettable. When she served it with a sprinkle of freshly chopped herbs, I thought it was the prettiest dish I had ever seen. Those warm memories are what inspire me to recreate this soup, ensuring that every bowl is filled not only with flavors but with love and nostalgia.
Ingredients
Here’s what you’ll need to bring this lovely soup to life. Each ingredient plays a pivotal role, so let’s give them some love!
-
Sweet Potatoes:
- Why: The star of the show! Their natural sweetness and creaminess result in a wonderfully rich texture.
- Substitution Tip: You can use butternut squash if sweet potatoes are unavailable, but the flavor will differ slightly.
-
Onion:
- Why: Onions add a savory base that enhances the soup’s flavor. Sautéing them brings out their natural sweetness.
- Substitution Tip: Shallots work wonderfully too! They’re slightly milder and can add a subtler depth.
-
Brother (Vegetable or Chicken):
- Why: Broth adds richness and depth to the soup. It serves as the liquid base and ties all the flavors together.
- Substitution Tip: Feel free to use homemade broth for extra flavor or to keep it vegetarian-friendly!
-
Cinnamon:
- Why: A hint of cinnamon adds warmth and a surprising depth that pairs beautifully with sweet potatoes.
- Substitution Tip: If you’re out of cinnamon, nutmeg or allspice could work, but start with a smaller amount as they’re more potent.
Step-by-Step Instructions
Let’s roll up our sleeves and get cooking! This soup is simple, yet the results are nothing short of spectacular.
-
Prepare Your Ingredients:
- Start by peeling and dicing the sweet potatoes into uniform cubes. This ensures they cook evenly. I usually aim for about 1-inch cubes.
-
Sauté the Onions:
- In a large pot, heat a drizzle of olive oil over medium heat. Add the chopped onions and a pinch of salt. Cook for about 5-7 minutes, stirring occasionally, until the onions are translucent and soft. This is where those sweet, savory flavors begin to bloom.
-
Add the Sweet Potatoes and Broth:
- Once the onions are ready, toss the diced sweet potatoes into the pot. Pour in enough broth to cover the potatoes, about 4 cups should do it. Bring everything to a gentle boil.
-
Season with Cinnamon:
- Add ½ to 1 teaspoon of cinnamon, depending on how spicy you like your soup. I usually start with a smaller amount and later adjust to taste. Trust me; the aroma as it heats is divine!
-
Simmer Away:
- Lower the heat and let it simmer for about 20-25 minutes, or until the sweet potatoes are fork-tender. You’re looking for that delightful softness that makes them easy to blend.
-
Blend Until Smooth:
- Once the potatoes are tender, remove the pot from heat. Use an immersion blender to puree the soup until velvety smooth. If you don’t have one, carefully transfer the mixture to a standard blender in batches. Just be cautious! Hot liquids can splash!
-
Taste and Adjust:
- After blending, taste your soup. This is a crucial step. Adjust the seasoning with salt and pepper, and if you want it a bit sweeter, add a drizzle of maple syrup — there’s no judgment here!
-
Serve and Enjoy:
- Ladle the soup into bowls and get ready for that comforting feeling!
Serving Suggestions
Presentation is everything, right? Spoon the soup into beautiful bowls (try to choose ones that remind you of home), and consider garnishing with a drizzle of coconut cream, a sprinkle of fresh herbs, or even crispy croutons for texture. A pinch of extra cinnamon on the top adds a lovely touch, too!
Recipe Variations
-
Spicy Sweet Potato Soup: Add a touch of chili powder or cayenne pepper during cooking for a kick of heat.
-
Coconut Curry Twist: Replace half of the broth with coconut milk and add a tablespoon of curry paste for a tropical flare!
-
Herbed Variation: Incorporate fresh herbs like thyme, rosemary, or cilantro either during cooking or as a garnish to heighten the flavor profile.
-
Creamy Version: Stir in a splash of heavy cream at the end for a luscious, ultra-creamy texture.
-
Served Cold: Enjoy it as a chilled soup on a hot day — just chill it in the fridge before serving!
Chef’s Notes
I can’t help but reminisce about how this soup has evolved over time in my kitchen. Initially, I cooked it without the cinnamon, and while it was delicious, that hint of spice changed everything. I often find myself experimenting with different garnishes and spices — what can I say, I love to play! This recipe is forgiving and changes with the seasons. Just like my grandmother, every pot I create is a little different, yet equally filled with love and warmth.
FAQs and Troubleshooting
Q1: My soup turned out too watery. What should I do?
If your soup is too thin, simmer it a bit longer to help it reduce. Alternatively, you can add a spoonful of instant potato flakes to thicken it up!
Q2: Can I freeze this soup?
Absolutely! Sweet potato soup freezes beautifully. Just store it in an airtight container, leaving a little space for expansion, and it will keep for about 3 months.
Q3: What’s the best way to reheat it?
Reheat it slowly on the stovetop, adding a splash of broth if it seems too thick. Stir regularly to ensure even heating and enjoy that homemade aroma!
Q4: Do I have to blend the soup?
Not at all! If you prefer a chunkier texture, mash the potatoes with a potato masher instead of blending. It’ll give a different but delightful experience!
Nutritional Info
While I believe that good food should be enjoyed without guilt, it’s often nice to know what you’re indulging in. This sweet potato soup is high in vitamins A and C, fiber, and potassium. A comforting bowl can be enjoyed for around 200 calories or less, depending on your ingredients and toppings.
So there you have it, dear friends! Your very own warm bowl of sweet potato soup, brimming with flavor and heart. I hope you’ll make it, savor it, and share it with those you love. After all, as I always say, good food is less about the ingredients and more about the memories you create around it.
So tie on your apron, gather your loved ones, and let’s make magic together in the kitchen! Happy cooking!
PrintSweet Potato Soup

A cozy and velvety sweet potato soup, perfect for chilly evenings and family gatherings.
- Prep Time: 15 minutes
- Cook Time: 30 minutes
- Total Time: 45 minutes
- Yield: 4 servings 1x
- Category: Soup
- Method: Stovetop
- Cuisine: Comfort Food
- Diet: Vegan
Ingredients
- 4 cups Sweet Potatoes, peeled and diced
- 1 Onion, chopped
- 4 cups Broth (Vegetable or Chicken)
- ½ to 1 teaspoon Cinnamon
- Olive oil, for sautéing
- Salt, to taste
- Pepper, to taste
- Maple syrup, optional for sweetness
Instructions
- Prepare your ingredients by peeling and dicing the sweet potatoes into uniform cubes.
- Sauté the onions by heating olive oil in a large pot over medium heat.
- Add the sweet potatoes and broth to the pot, bringing it to a gentle boil.
- Season with cinnamon according to your taste preference.
- Simmer the soup for about 20-25 minutes until the sweet potatoes are fork-tender.
- Blend the soup until smooth using an immersion blender or a standard blender.
- Taste and adjust the seasoning with salt and pepper.
- Serve the soup into bowls and enjoy!
Notes
For added flavor, garnish with coconut cream, fresh herbs, or crispy croutons. Experiment with variations like spicy or creamy versions!
Nutrition
- Serving Size: 1 serving
- Calories: 200
- Sugar: 5g
- Sodium: 600mg
- Fat: 7g
- Saturated Fat: 1g
- Unsaturated Fat: 6g
- Trans Fat: 0g
- Carbohydrates: 33g
- Fiber: 5g
- Protein: 3g
- Cholesterol: 0mg
Keywords: sweet potato, soup, vegetarian, comfort food, cozy
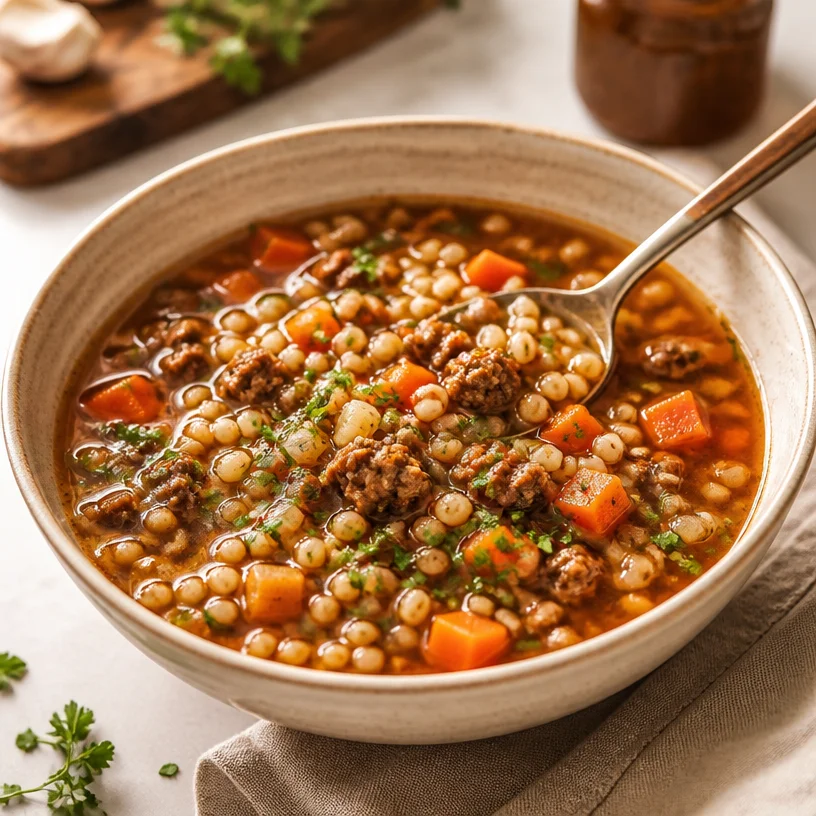
One-Pot Beef Barley Soup: Easy Weeknight Meal Prep
Warm Up with Hearty Beef Barley Soup: A Comforting Classic
Hello, fellow food enthusiasts! Today, we’re diving into a dish that’s not just a recipe but a cozy embrace on a chilly day: Beef Barley Soup. This soul-warming creation is a staple in homes worldwide, offering a delightful mix of tender beef, wholesome barley, and vibrant vegetables.
When the temperatures drop, there’s nothing quite like a bowl of steaming soup to chase the chill away. As we gather around our dining tables, sharing stories and laughter, it’s the simple recipes, like this beef barley soup, that remind us of the beauty of home-cooked meals. So, grab your apron, pour yourself something warm, and let’s get cooking!
A Personal Connection: An Heirloom Memory
I can’t help but think back to my childhood when I hear the word “soup.” My grandmother had this magical way of turning humble ingredients into something extraordinary. One of my favorite memories is of her hand-rolling dough for homemade dumplings while the aroma of her beef barley soup wafted through the air. The kitchen was always her stage, and we, her adoring audience.
She believed in the power of good food—a belief I carry into my own kitchen. Every spoonful of that soup held layers of flavor and love. Today, I’m excited to share a version of her recipe with a few of my own twists to make it easier for all of us home chefs. Each time I make this soup, I feel as if I’m sharing a piece of my heart, a bit like she did.
Ingredients You’ll Need
To whip up a delicious beef barley soup, gather the following ingredients:
-
Beef (chuck roast or stew meat)
- Perfectly tender cuts of beef work best for this soup. Opt for chuck roast if you’re a fan of rich flavor. Want a leaner option? Go for sirloin!
-
Barley (pearl or hulled)
- Pearl barley cooks faster and has a chewy texture, while hulled barley is more nutritious but takes longer to cook. Both add a lovely heartiness to the soup!
-
Carrots (diced)
- Vibrant and sweet, diced carrots lend a beautiful color and flavor. If you’re feeling adventurous, throw in some parsnips for a unique twist!
-
Celery (diced)
- A critical component in the flavor base of many soups, celery adds depth. If you’re not a fan, feel free to substitute with bell peppers or zucchini.
-
Onions (diced)
- The aromatic backbone for many dishes, onions bring sweetness once sautéed. Yellow onions are great for this soup; red onions can add a splash of color, too.
-
Garlic (minced)
- A hint of garlic enhances the flavor profile. Fresh is best, but if you’re in a pinch, a pinch of garlic powder will suffice.
-
Beef broth (or stock)
- A rich base amplifies the flavors. Homemade beef broth is fantastic, but a low-sodium store-bought version is perfectly fine!
-
Thyme (fresh or dried)
- This herb brings a wonderful earthiness to the soup. If you’re out of thyme, fresh parsley or rosemary can work as substitutes.
-
Bay leaves (2)
- Adding bay leaves during cooking infuses the soup with subtle flavors. Just remember to remove them before serving!
-
Salt and pepper (to taste)
- Simple seasoning elevates the whole dish. Remember, you can always add more, but you can’t take it away!
-
Olive oil (for sautéing)
- A healthy fat that helps to build flavor in the soup.
Step-by-Step Instructions
-
Prepare Your Ingredients
Start by gathering all your ingredients and preparing them. Dice the beef into bite-sized cubes, chop the vegetables, and measure out your spices. Having everything ready ensures a smooth cooking experience. -
Sauté the Beef
In a large pot or Dutch oven, heat a splash of olive oil over medium-high heat. Season the beef with salt and pepper, then add it to the pot. Let it sear for about 3-4 minutes on each side until it’s nicely browned. This caramelization is key to building flavor. Remove it from the pot and set it aside. -
Build the Flavor Base
In the same pot, add a bit more olive oil if needed, then toss in the diced onions and cook until they’re translucent—about 5 minutes. Add the minced garlic, followed by the diced carrots and celery. Sauté for another 3-4 minutes. This is where your kitchen starts to smell heavenly! -
Bring It Together
Return the browned beef to the pot. Pour in the beef broth, scraping up any browned bits from the bottom of the pot (that’s where the flavor lives!). Toss in the barley, thyme, bay leaves, and a sprinkle of salt and pepper. Stir everything together. -
Simmer and Relax
Bring the soup to a gentle boil, then reduce the heat to low, cover the pot, and let it simmer for about 1.5 hours. The low and slow method allows the flavors to meld beautifully, while the barley thickens the soup. -
Finishing Touches
Once the beef is tender and the barley is cooked, taste the soup and adjust seasoning as needed. If you like, stir in some fresh herbs like parsley just before serving for a burst of freshness.
Serving Suggestions
Serve your Beef Barley Soup hot in generous bowls, garnished with a sprinkle of fresh herbs or a dash of freshly cracked pepper. Pair it with a crusty loaf of bread or a side salad for a complete meal. The beauty of this soup lies in its simplicity, so don’t stress the presentation—just serve it warm with a smile!
Recipe Variations
- Vegetarian Twist: Swap beef for hearty mushrooms or lentils and use vegetable broth instead.
- Spicy Kick: Add diced jalapeños or a splash of hot sauce for a little heat.
- Herb-Infused: Experiment with different herbs like basil or oregano for a unique twist.
- Root Veggie Bonanza: Add turnips or sweet potatoes for an extra dose of nutrition and flavor.
- Whole Grains: Try farro or quinoa in place of barley for a different texture and taste.
Chef’s Notes
I’ve played around with this recipe over the years. The first time I made it, I overcooked the barley, turning it into mush. Since then, I’ve learned to keep an eye on it! And while you can use frozen vegetables as a shortcut, there’s something magical about using fresh ingredients that makes the effort worthwhile. Each batch has its own personality, and I love that about cooking!
FAQs and Troubleshooting
-
My soup is too thick—what do I do?
Simply add a bit more broth or water until you reach your desired consistency, then re-season as needed. -
Can I freeze this soup?
Absolutely! Beef barley soup freezes well. Just store it in airtight containers and thaw it in the fridge overnight before reheating. -
What can I do if my beef isn’t tender?
If the beef isn’t tender enough after the simmering time, let it cook longer on low heat. Adding more broth can help if it’s drying out. -
How do I store leftovers?
Store leftovers in the fridge in airtight containers for up to four days. Reheat gently on the stovetop or in the microwave.
Nutritional Info
Though I prefer to keep things delicious over formally calculated, a typical serving of beef barley soup offers a hearty blend of protein, fiber, and healthy fats. Feel free to adjust servings based on portion sizes, but generally, you’ll find this dish is both filling and nutritious!
Let this Beef Barley Soup be the warm centerpiece of your winter meals. Embrace the process, enjoy the cooking, and share this classic with those you love. See you at the table!
PrintBeef Barley Soup

A cozy and hearty beef barley soup, perfect for warming up on a chilly day.
- Prep Time: 15 minutes
- Cook Time: 90 minutes
- Total Time: 105 minutes
- Yield: 4 servings 1x
- Category: Soup
- Method: Simmering
- Cuisine: American
- Diet: None
Ingredients
- 1 lb beef (chuck roast or stew meat)
- 1 cup barley (pearl or hulled)
- 2 carrots (diced)
- 2 celery stalks (diced)
- 1 onion (diced)
- 3 cloves garlic (minced)
- 6 cups beef broth (or stock)
- 1 tsp thyme (fresh or dried)
- 2 bay leaves
- Salt and pepper (to taste)
- 2 tbsp olive oil (for sautéing)
Instructions
- Prepare your ingredients: Dice the beef into bite-sized cubes, chop the vegetables, and measure out your spices.
- Sauté the beef in a large pot with olive oil, seasoning with salt and pepper, until browned (3-4 minutes on each side). Remove and set aside.
- Build the flavor base by adding onions to the same pot. Cook until translucent, then add garlic, carrots, and celery. Sauté for another 3-4 minutes.
- Bring it together by returning the beef to the pot and adding beef broth, scraping any browned bits from the bottom. Add barley, thyme, bay leaves, and seasoning; stir.
- Simmer the soup for about 90 minutes on low heat until the beef is tender and barley is cooked.
- Finishing touches: Adjust seasoning, and stir in fresh herbs if desired before serving.
Notes
For variations, substitute beef with mushrooms or lentils for a vegetarian option, or add spicy jalapeños for heat.
Nutrition
- Serving Size: 1 serving
- Calories: 450
- Sugar: 5g
- Sodium: 700mg
- Fat: 15g
- Saturated Fat: 6g
- Unsaturated Fat: 7g
- Trans Fat: 0g
- Carbohydrates: 55g
- Fiber: 8g
- Protein: 30g
- Cholesterol: 80mg
Keywords: beef soup, barley soup, winter comfort food, hearty soup, American cuisine

One-Pot Creamy Tomato Tortellini Soup: Ready in 30 Minutes
Creamy Tomato Tortellini Soup: A Hug in a Bowl
Hello, food lovers! Today, let’s dive into a recipe that’s not only heartwarming but also oh-so-delicious—Creamy Tomato Tortellini Soup. This dish is like that old cozy blanket you reach for on brisk autumn nights. It’s a bowl of warmth that wraps around you and reminds you that good food is all about comfort and joy.
Imagine slurping a rich, creamy soup loaded with tender tortellini and bright tomatoes, each spoonful inviting you to take another. Whether you’re catching up with friends, enjoying a quiet evening in, or simply looking for a delightful weeknight dinner, this soup is your ticket to cozy bliss.
A Personal Story: A Delicious Family Tradition
Growing up, my family always gathered around the table, but there was one dish that consistently made an appearance during our chilly evenings—my mom’s tomato soup. It was rich, tangy, and paired perfectly with grilled cheese sandwiches. As children, my siblings and I would fight for the first round of seconds, spooning the soup into our bowls and delighting in every creamy bite.
When I started to explore cooking, I sought to bring my childhood memories into my adult culinary creations. One day, inspired by the classic tomato soup, I thought, “What if I jazz this up a bit?” With a quick trip to the grocery store, I came back with fresh tortellini and cream. That night, Creamy Tomato Tortellini Soup was born, and it quickly became a new family favorite—bringing that nostalgic warmth right back to our table.
Ingredients
Here’s what you’re going to need to whip up this delightful soup:
-
Fresh Tortellini: Go for cheese or spinach tortellini for the best flavor. If you can’t find fresh, frozen works just fine!
-
Canned Tomatoes: I love using whole or crushed San Marzano tomatoes for their rich sweetness. You can substitute them with fresh ripe tomatoes, but you may need to add a bit of sugar for sweetness.
-
Heavy Cream: This is what gives the soup its luxurious creaminess. You can swap it with half-and-half for a lighter version, or coconut cream if you want a dairy-free option.
-
Fresh Basil: This herb adds a burst of fresh flavor. If fresh isn’t in season, grab some dried basil, but remember to use less since dried is more concentrated.
-
Garlic: Freshly minced garlic elevates the flavor profile. You can replace it with garlic powder in a pinch—just use about half the amount.
-
Onion: A medium onion adds sweetness and depth. Red onions can be substituted if you prefer a milder taste.
-
Vegetable or Chicken Broth: Using broth adds another layer of flavor; however, water is an option if you’re in a bind. Just season more generously.
-
Salt & Pepper: Always adjust to your taste! Fresh ground pepper enhances the overall dish, while a pinch of salt accentuates the flavors.
Now you’re prepped and ready to cook!
Step-by-Step Instructions
-
Sauté the Aromatics: In a large pot, heat 1 tablespoon of olive oil over medium heat. Toss in your diced onion and sauté for about 3-4 minutes until they’re soft and translucent. This step is important as it builds the foundation of flavor!
-
Add Garlic: Once the onion is softened, add 2-3 cloves of minced garlic and sauté for an additional minute until fragrant. Keep an eye on it—burnt garlic is not your friend!
-
Crush the Tomatoes: Bring in your canned tomatoes (either whole or crushed) and use a wooden spoon to break them up if using whole. Let this simmer on medium-low heat for about 10 minutes, allowing the flavors to meld beautifully.
-
Pour in the Broth: Add around 4 cups of your veggie or chicken broth, stirring to combine. Bring it back to a gentle boil and season generously with salt and pepper.
-
Add the Tortellini: Once boiling, toss in the fresh tortellini and wait about 5-7 minutes or until they’re al dente. Keep stirring gently—tortellini loves to stick together!
-
Time for Cream: Reduce the heat and slowly pour in the heavy cream, stirring continuously until the soup is beautifully blended and rich. This is where the magic really happens!
-
Finishing Touches: Add a handful of freshly chopped basil and stir to incorporate. Taste and adjust the seasoning if needed—a little more salt or pepper can make a significant difference!
-
Serve Hot and Enjoy: Ladle the soup into bowls and garnish with extra basil, a drizzle of cream, and perhaps a sprinkle of Parmesan cheese for that extra touch of elegance.
Serving Suggestions
To truly elevate your dining experience, consider serving your Creamy Tomato Tortellini Soup with a crusty loaf of bread or a light, crisp salad. Garnish with a fresh basil sprig or a dollop of cream for those Instagram-worthy moments. The warmth of the soup pairs beautifully with the crunch of the bread, creating an inviting dish everyone will love.
Recipe Variations
Feeling adventurous? Here are some fun variations you might want to try:
-
Add Vegetables: Toss in some chopped spinach or kale before serving for a boost of nutrition and color.
-
Spicy Kick: Add a pinch of red pepper flakes for a hint of heat.
-
Meat Lovers: Brown some Italian sausage or bacon before adding the onions for a hearty twist.
-
Cheesy Goodness: Stir in a handful of shredded mozzarella or a sprinkle of grated Parmesan cheese.
-
Herb Infusion: Swap out basil for fresh thyme or oregano for a different herbal note.
Chef’s Notes
I’ll let you in on a little secret: this soup actually improves the next day! The flavors deepen, giving you an even richer bowl. And let’s chat about leftovers—this soup freezes beautifully! Just let it cool completely before transferring it into freezer-safe containers, and you’ll have a quick meal waiting for you on hectic nights.
And on a light-hearted note, the first time I served this at a family gathering, I accidentally spilled the entire pot all over the kitchen floor! We laughed so hard, and I swear it ended up being one of those magical moments—everyone dined on what was salvageable, and it became a running joke at every gathering since. Now I always make a double batch!
FAQs and Troubleshooting
-
Can I use dried tortellini?
Yes! If you’re using dried tortellini, increase the cooking time to about 10-12 minutes, or until they’re cooked according to package instructions. -
How do I make this soup ahead of time?
You can prepare everything up to the addition of the cream and tortellini ahead of time and store it in the refrigerator. Just heat it up and add the cream and tortellini when you’re ready to serve! -
Why is my soup too thick?
If your soup thickens more than you’d like, simply add a bit more broth or water to reach your desired consistency. -
Can I make it dairy-free?
Absolutely! Substitute heavy cream with coconut cream and ensure your tortellini is dairy-free as well.
Nutritional Info (Based on 1 serving)
- Calories: Approximately 350
- Protein: 12g
- Carbohydrates: 45g
- Fat: 15g
- Fiber: 3g
So there you have it! A delightful Creamy Tomato Tortellini Soup that is guaranteed to warm your heart and fill your home with the scents of comfort and joy. Now, roll up those sleeves and let’s get cooking—your new favorite dish is just a bowl away!
PrintCreamy Tomato Tortellini Soup

A heartwarming Creamy Tomato Tortellini Soup that wraps you in warmth and comfort, perfect for chilly evenings.
- Prep Time: 15 minutes
- Cook Time: 30 minutes
- Total Time: 45 minutes
- Yield: 4 servings
- Category: Main Course
- Method: Cooking
- Cuisine: Italian
- Diet: Vegetarian
Ingredients
- Fresh Tortellini (cheese or spinach)
- Canned Tomatoes (whole or crushed San Marzano)
- Heavy Cream
- Fresh Basil
- Garlic (minced)
- Onion (medium)
- Vegetable or Chicken Broth
- Salt & Pepper (to taste)
Instructions
- Sauté the Aromatics: Heat 1 tablespoon of olive oil in a large pot over medium heat, add diced onion, and sauté for 3-4 minutes until soft.
- Add Garlic: Once softened, add minced garlic and sauté for 1 minute until fragrant.
- Crush the Tomatoes: Add canned tomatoes to the pot, breaking them up, and let simmer for 10 minutes.
- Pour in the Broth: Add around 4 cups of broth, stir to combine, and season with salt and pepper.
- Add the Tortellini: Toss in fresh tortellini and cook for 5-7 minutes until al dente.
- Time for Cream: Reduce heat and pour in heavy cream, stirring until blended.
- Finishing Touches: Stir in freshly chopped basil, adjust seasoning if needed.
- Serve Hot and Enjoy: Ladle into bowls, garnish with basil and cream.
Notes
This soup improves in flavor the next day and freezes well for easy meals later.
Nutrition
- Serving Size: 1 serving
- Calories: 350
- Sugar: 6g
- Sodium: 400mg
- Fat: 15g
- Saturated Fat: 7g
- Unsaturated Fat: 5g
- Trans Fat: 0g
- Carbohydrates: 45g
- Fiber: 3g
- Protein: 12g
- Cholesterol: 30mg
Keywords: soup, tortellini, tomato, creamy, comfort food, Italian recipe

Lemon Chicken Orzo Soup
A Bowl of Sunshine: Lemon Chicken Orzo Soup
Hello there, fellow foodie! Today, we’re diving into a dish that’s not just comforting but also bursting with bright, tangy flavors—Lemon Chicken Orzo Soup. Imagine cozying up with a warm bowl of this delightful soup after a long day, its fragrant aroma filling your home with a sense of calm and contentment. This recipe is more than just a meal; it’s an experience that brings a smile to your face and warmth to your heart.
So grab your apron, and let’s add a little sunshine to your kitchen!
A Personal Story: The Heart of the Kitchen
Growing up, my family spent countless afternoons in the kitchen, cooking up storms and making memories. One particular afternoon stands out—the day we perfected our take on Lemon Chicken Orzo Soup. I can still see my mom zipping around the kitchen, her laughter echoing as she coaxed me to chop vegetables, all while letting me taste the broth along the way. Those small moments, stirring the pot and sneaking bites of tender chicken and zesty lemons, filled our home with joy and love.
Fast forward to today, and I found myself recreating that very soup on a chilly fall evening, in an attempt to capture the warmth and connection it once brought us. I can assure you, this soup has the power to evoke memories and create new ones. Whether you’re making it for a cozy family dinner or hosting friends, it wrapped everyone in a hug, one delicious spoonful at a time.
Ingredients
Here’s what you’ll need to create this delightful Lemon Chicken Orzo Soup:
-
Chicken (boneless, skinless)
Tender chicken breast or thighs work beautifully here. You can also substitute with rotisserie chicken for a quick option. -
Orzo pasta
This tiny pasta cooks quickly, soaking up all the tasty broth. If you’re gluten-free, feel free to swap it with quinoa or rice for a similar texture. -
Lemon
Freshly squeezed lemon juice adds a bright, zesty kick to the soup. If you’re in a pinch, bottled lemon juice can work, but fresh is always best! -
Spinach
Fresh spinach adds a lovely pop of green and brings a nutritional boost. Kale or Swiss chard can be great alternatives if you want to mix it up. -
Carrots
Sweet and tender, they add color and flavor. You could easily replace them with chopped celery for a different texture. -
Celery
Classic soup ingredient! Use it for the delicious aroma it brings while cooking. If you don’t have celery, just add more carrots, or you can use green bell peppers instead. -
Garlic
Fresh garlic brings incredible depth to the soup; however, you can also substitute it with garlic powder—about 1/8 teaspoon for each clove. -
Chicken Broth
Homemade is best, but store-bought works too! Low-sodium is preferable if you’re watching your salt intake. -
Olive Oil
Just a drizzle enhances the flavors. You can opt for avocado oil if that’s what you have on hand. -
Salt and Pepper
Essential for seasoning. Use Himalayan sea salt or fresh ground black pepper for the best flavor.
Step-by-Step Instructions
Now, let’s get cooking! Here’s how to whip up this dazzling Lemon Chicken Orzo Soup:
-
Prep the Ingredients
Start by chopping your carrots and celery into small, uniform pieces. Also, mince your garlic and zest and juice your lemon (the zest will enhance the lemon flavor even more). Make sure to have your chicken ready, diced into bite-sized pieces. -
Sauté Aromatics
In a large pot or Dutch oven, heat about 2 tablespoons of olive oil over medium heat. Once hot, toss in the minced garlic, diced carrots, and celery. Cook for about 4-5 minutes, stirring frequently, until the veggies soften and the garlic becomes fragrant. This is the foundation of flavor! -
Add Chicken
Now, add the diced chicken to the pot, season with salt and pepper, and sauté until it’s no longer pink—about 5-7 minutes. The goal here is to get a little browning on the chicken for flavor. -
Pour in the Broth
Once your chicken is cooked through, pour in about 6 cups of chicken broth. Bring the soup to a boil to really kick off those flavors. -
Introduce the Orzo
After the soup reaches a gentle boil, add in the orzo. Stir well to prevent it from clumping together and reduce the heat to simmer. Let it cook for about 8-10 minutes until the orzo is al dente. Remember, it will keep softening even after you’ve removed it from the heat, so don’t overdo it! -
Add Spinach and Lemon
When the orzo is just about perfect, stir in your fresh spinach until it wilts. This only takes a couple of minutes. Squeeze in the juice of one lemon and add the zest for that delightful zing! -
Taste and Adjust
Give your soup a taste and adjust for salt, pepper, and more lemon juice as needed. Remember, it’s all about balance! -
Serve It Up
Ladle the soup into bowls and finish with a sprinkle of freshly cracked black pepper or a delightful drizzle of olive oil for added richness.
Serving Suggestions
Plate your Lemon Chicken Orzo Soup in wide, shallow bowls for an inviting presentation. Garnish with a sprinkle of freshly chopped parsley or dill on top for a pop of color. Crusty bread on the side makes for the perfect pairing—who doesn’t love dipping into a cozy soup?
Recipe Variations
Feeling adventurous? Here are a few twists to put your own spin on this recipe:
- Mediterranean Flair: Add diced zucchini or bell peppers for more color and flavor.
- Herb Infusion: Swap in fresh dill or thyme for a different herbaceous touch.
- Creamy Texture: Stir in a splash of heavy cream or coconut milk for added richness.
- Spicy Kick: Toss in some red pepper flakes for a spicy finish!
Chef’s Notes
This recipe has become a staple in my kitchen because it’s so adaptable. I’ve gone through phases of adding different herbs or varying the type of greens, and each time it surprises me with a new personality! A funny memory: I once forgot the orzo and tried to make it with rice instead. Let’s just say the texture was… interesting, but hey, even the “flops” can still turn into tasty dinners in our homes!
FAQs and Troubleshooting
-
Why is my chicken tough?
If your chicken turns out tough, it’s likely overcooked. Keep an eye on it after adding to the broth; it should just reach doneness before adding the orzo. -
Can I make this soup ahead of time?
Absolutely! Just store it in the fridge for up to 3 days. If you’re reheating, you may want to add a splash of broth or water, as orzo can absorb a lot of liquid. -
What can I do if the soup is too salty?
Add a piece of raw potato into the soup while simmering—it helps absorb some excess salt. Just remember to take it out before serving! -
Can I freeze Lemon Chicken Orzo Soup?
Yes, you can! Freeze in an airtight container, but consider leaving out the orzo if you plan to freeze leftovers, as it can become mushy when reheated.
Nutritional Info
While I don’t like to get too caught up in numbers, a serving of Lemon Chicken Orzo Soup typically contains around 300 calories, packed with protein and vitamins from the veggies.
And there you have it! A soothing bowl of Lemon Chicken Orzo Soup that warms your soul and delights your taste buds. If you recreate this recipe, I’d love to hear how it turns out for you! Here’s to cozy moments in the kitchen and shared meals around the table. Happy cooking!
PrintLemon Chicken Orzo Soup

A comforting and bright soup filled with tender chicken, orzo pasta, and fresh vegetables, perfect for cozy dinners.
- Prep Time: 15 minutes
- Cook Time: 30 minutes
- Total Time: 45 minutes
- Yield: 4 servings 1x
- Category: Main Course
- Method: Simmering
- Cuisine: Mediterranean
- Diet: Gluten-free option available
Ingredients
- 1 lb Chicken (boneless, skinless)
- 1 cup Orzo pasta
- 1 Lemon (juiced and zested)
- 2 cups Fresh spinach
- 2 Carrots (chopped)
- 1 Celery stalk (chopped)
- 3 cloves Garlic (minced)
- 6 cups Chicken broth
- 2 tablespoons Olive oil
- Salt and Pepper to taste
Instructions
- Prep the ingredients: chop carrots and celery, mince garlic, and prepare chicken.
- Sauté aromatics in a pot with olive oil for 4-5 minutes.
- Add diced chicken, season, and sauté until no longer pink, about 5-7 minutes.
- Pour in chicken broth and bring to a boil.
- Introduce the orzo and simmer for 8-10 minutes until al dente.
- Add spinach and lemon juice/zest, stirring to combine.
- Taste and adjust seasoning with salt, pepper, and more lemon as needed.
- Serve in bowls and garnish with black pepper or olive oil.
Notes
This soup is versatile—feel free to add your favorite vegetables or herbs.
Nutrition
- Serving Size: 1 serving
- Calories: 300
- Sugar: 4g
- Sodium: 800mg
- Fat: 10g
- Saturated Fat: 1g
- Unsaturated Fat: 8g
- Trans Fat: 0g
- Carbohydrates: 35g
- Fiber: 2g
- Protein: 25g
- Cholesterol: 75mg
Keywords: Lemon, Chicken Soup, Orzo, Comfort Food, Italian
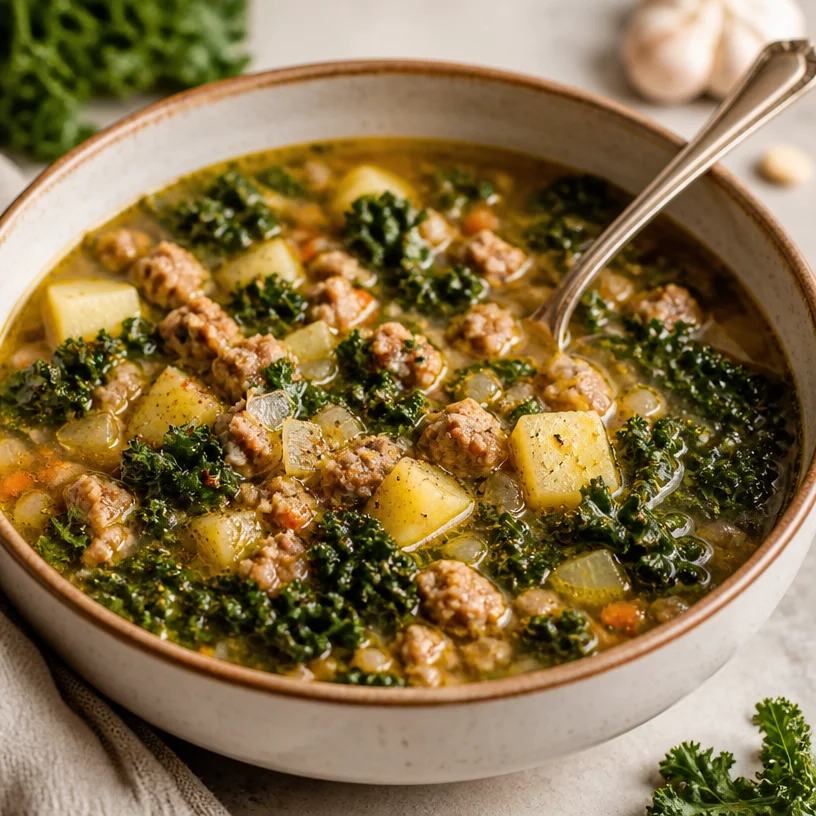
One-Pot Sausage Kale Soup: 30-Minute Comfort & Kid-Friendly
Savory Comfort in a Bowl: Your Go-To Sausage Kale Soup
Hey there, my fellow kitchen adventurers! Today, we’re diving into a dish that’s all about warmth, flavor, and that cozy feeling of home: Sausage Kale Soup. If you’ve ever curled up on a chilly evening with a bowl of heartwarming soup, you’ll know exactly what I mean. This dish is a hug in a bowl—satisfying, nourishing, and incredibly easy to make. So, grab your apron, and let’s get cooking!
Personal Story
Let me take you down memory lane to a winter evening long ago. I remember standing by my parents’ kitchen, the aroma of rich Italian sausage sizzling in the pan filling the air. My little hands were busy chopping veggies while my mom stirred the bubbling pot on the stove. “It’s all about layering flavors,” she would say with a wink, her Italian accent turning “flavors” into a lilting melody.
That night, we shared stories over bowls of soup at the dinner table, laughter mingling with the steam rising from our bowls. Each spoonful was a reminder of the love and comfort found in cooking and sharing meals together. It’s moments like these that spark our passion for cooking, don’t you think? Now, whenever I make sausage kale soup, I’m transported back to those winter nights, filled with love, warmth, and delizioso flavors!
Ingredients
Here’s a list of the wholesome ingredients you’ll need to bring your sausage kale soup to life:
-
Italian Sausage: The star of the show! Choose spicy or mild depending on your preference. For a leaner option, turkey or chicken sausage are excellent substitutes.
-
Kale: This leafy green adds a beautiful color and nutrition. If kale isn’t your jam, try Swiss chard or spinach for a different twist.
-
Potatoes: They bulk up the soup and give it a hearty texture. Russet or Yukon Gold are my favorites, but sweet potatoes would add an interesting sweet note!
-
Broth: Chicken or vegetable broth works great here. Homemade is always best, but store-bought is perfectly fine too—just keep an eye on the sodium content!
-
Onions & Garlic: For that extra flavor base. Yellow onions are classic, but shallots or red onions can add a nice sweetness, while garlic is non-negotiable!
-
Carrots (optional): Adding sweetness and color, carrots are a great touch. You can always reach for frozen carrots in a pinch too!
-
Salt and Pepper: Essential for seasoning! Remember to taste as you go.
Step-by-Step Instructions
Ready to create some kitchen magic? Let’s break it down into easy peasy steps:
-
Prep Your Ingredients: Start by washing and chopping your vegetables. Dice 1 onion, minced 3 cloves of garlic, and chop up a couple of carrots (if using) into small rounds. Cube your potatoes (about 2 medium ones) and roughly chop a generous bunch of kale. The more vibrant the kale, the better!
-
Brown the Sausage: In a large pot or Dutch oven, over medium-high heat, add your Italian sausage (about 1 pound, remove the casings if necessary). Use a wooden spoon to break it up into small pieces as it cooks for about 5-7 minutes, until nicely browned. Chef hack: Searing the sausage well develops fantastic flavor!
-
Add Aromatics: Once the sausage is browned, toss in the diced onions and garlic. Stir everything around, and let the onions sweat and soften for about 3-4 minutes. Your kitchen should start smelling heavenly!
-
Toss in the Veggies: Add your chopped potatoes and carrots to the pot (if using). Stir to combine, then pour in about 6 cups of broth. Bring the mix to a gentle simmer, scraping any bits off the bottom of the pot. Those bits = flavor-bombs!
-
Simmer Away: Let the soup simmer for about 15-20 minutes, or until the potatoes are tender. Keep an eye on it and give it a good stir now and then.
-
In with the Kale: Once those potatoes are soft, it’s time to add the kale. Stir it in and allow it to wilt down for about 5-7 minutes. Don’t forget to taste and add salt and pepper!
-
Last-minute Touches: If you’d like to brighten up the soup, a squeeze of fresh lemon juice just before serving can elevate the flavors beautifully.
And voilà! Your sausage kale soup is ready to be enjoyed!
Serving Suggestions
Now, let’s talk presentation! Spoon the soup into rustic bowls and garnish with a sprinkle of freshly grated Parmesan cheese (because, cheese!). You can also add a drizzle of olive oil or a few red pepper flakes for a little kick. Serve it with crusty bread on the side for dipping—perfect for sopping up every last drop!
Recipe Variations
Feel free to get creative! Here are some delightful twists you can try:
- Creamy Delight: For a creamy version, stir in a splash of heavy cream or half-and-half at the end.
- Add Beans: Toss in a can of drained white beans for added protein and fiber!
- Spice it Up: Add some crushed red pepper flakes or a dash of smoked paprika for a smoky kick.
- Swap the Sausage: Use vegetarian sausage or lentils for a plant-based version.
- Herb Infusion: Fresh herbs like thyme or rosemary can be a great addition for extra aroma. Just toss them in during the simmering phase!
Chef’s Notes
Ah, this soup has been a labor of love! I remember the first time I made it for my friends during a cozy gathering. They couldn’t believe something so delicious could come together so easily! It’s a recipe that has evolved over time—my mom’s initial version, packed with traditional flavors, taught me not just how to cook, but how to build relationships through food.
Sometimes, I challenge myself to change up the herbs or try different types of sausage just to keep things fresh. Remember, cooking is all about personal expression—embrace it!
FAQs and Troubleshooting
Here are some common questions and troubleshooting tips for your sausage kale soup experience:
-
What if my soup is too salty?: If you’ve added too much salt, you can balance it out by adding more water or low-sodium broth.
-
Can I freeze this soup?: Absolutely! This soup freezes well. Just make sure to let it cool completely before transferring it to airtight containers. It’ll last about 3 months in the freezer.
-
My kale is too tough: Make sure you’re using fresh, tender kale. If it seems tough, give it a little extra cooking time to soften!
-
How can I thicken my soup?: A great trick is to mash some of the potatoes against the side of the pot to release their starch, which will naturally thicken the broth!
Nutritional Info
While I don’t focus heavily on nutrition per se, a hearty serving of this soup generally packs in vitamins, protein, and fiber, making it a well-rounded meal. Each bowl is filled with nutrients, especially from the kale, making it a fantastic option for a wholesome weeknight dinner.
So there you have it—a bowl of sausage kale soup that warms not just your body but your spirit too. Thank you for cooking this with me! I hope it brings as much joy to your dinner table as it does to mine. Let’s keep sharing the love of food! Happy cooking!
PrintSausage Kale Soup

A heartwarming and nourishing soup filled with Italian sausage, kale, and hearty vegetables, perfect for chilly evenings.
- Prep Time: 15 minutes
- Cook Time: 30 minutes
- Total Time: 45 minutes
- Yield: 4 servings 1x
- Category: Main Course
- Method: Simmering
- Cuisine: Italian
- Diet: Paleo
Ingredients
- 1 pound Italian sausage (spicy or mild)
- 4 cups kale, roughly chopped
- 2 medium potatoes, cubed
- 6 cups chicken or vegetable broth
- 1 onion, diced
- 3 cloves garlic, minced
- 2 carrots, sliced (optional)
- Salt and pepper to taste
Instructions
- Prep your ingredients: Wash and chop your vegetables.
- Brown the sausage: In a large pot over medium-high heat, cook the Italian sausage, breaking it into small pieces, until browned.
- Add aromatics: Toss in the diced onions and garlic, and cook until softened.
- Toss in the veggies: Add chopped potatoes and carrots, stirring to combine, then pour in the broth.
- Simmer away: Let the soup simmer until potatoes are tender.
- In with the kale: Stir in the kale and allow to wilt for a few minutes.
- Finish with a squeeze of lemon juice before serving.
Notes
Serve with grated Parmesan cheese and crusty bread for dipping.
Nutrition
- Serving Size: 1 serving
- Calories: 450
- Sugar: 5g
- Sodium: 600mg
- Fat: 18g
- Saturated Fat: 6g
- Unsaturated Fat: 9g
- Trans Fat: 0g
- Carbohydrates: 45g
- Fiber: 6g
- Protein: 20g
- Cholesterol: 50mg
Keywords: soup, kale, sausage, Italian, comfort food, hearty, winter recipes

Chicken Enchilada Soup
Cozy Up to Comfort: Perfect Chicken Enchilada Soup
Hello, lovely readers! If you’re looking for a bowl of comfort that warms not only your body but also your soul, you’ve landed in the right spot. Today, we’re diving into a dish that embodies cozy evenings spent with family and friends—Chicken Enchilada Soup. This vibrant, flavorful soup is everything you love about enchiladas, turned into a delightful, easy-to-savor bowl of goodness.
Now, picture this: it’s a chilly evening, the kind that makes you want to huddle up under a blanket with something warm in hand. That’s when this recipe shines. It’s a combination of hearty chicken, zesty enchilada sauce, and lusciously creamy beans, all simmering together to create a soul-satisfying experience. Trust me; even the pickiest eaters won’t be able to resist!
My Chicken Enchilada Soup Story
Let me share a little story. A few years back, I hosted a small gathering for friends at my home to celebrate a milestone. It was one of those nights where laughter flowed as freely as the wine, the candles flickered softly, and the air was filled with fantastic aromas from the kitchen. I wanted to create something that was a crowd-pleaser but also simple enough for me to manage while also mingling with my guests. That’s when I settled on this Chicken Enchilada Soup recipe, inspired by my childhood love for enchiladas.
Growing up, my family often made that classic dish on special occasions. The house would turn into a whirlwind of color, with vibrant artwork on our tables and heaps of cheese melting on top of the tortillas. I remember my mother pouring her heart into the food, and as we gathered around the table, we knew we were in for a treat. Bringing this soup to life felt like capturing all those heartwarming memories in one delicious bowl.
Ingredients
Here’s what you’ll need to whip up this delightful Chicken Enchilada Soup:
- 2 cups cooked chicken
Shredded or cubed—use rotisserie chicken for a quick knock-off or any leftover chicken you have on hand. - 2 cups enchilada sauce
You can buy this pre-made or whip up a homemade version. Homemade gives a fresher taste, but a store-bought one is great for a time-saver. - 1 can (15 oz) black beans
These add protein and fiber. If you prefer, substitute with pinto beans or white beans—whatever you have on hand! - 1 cup corn (canned or frozen)
Sweet corn is a great addition. If you have fresh corn, roast it for a smoky flavor! - 1 medium onion, diced
The base of flavor! You can swap it for shallots or leeks for something a bit sweeter. - 2 cloves garlic, minced
Always use fresh garlic when possible! If you’re in a pinch, jarred minced garlic works too, but fresh triumphs in flavor. - 1 cup chicken broth
This adds depth! Use low-sodium broth or homemade for a richer flavor. You can also sub it with vegetable broth if you want to keep things lighter. - 1 tsp cumin
It’ll add that warm, earthy flavor. Adjust to your liking; more can intensify the depth! - Salt and pepper, to taste
Always taste as you go. Remember, you can always add but can’t take away. - 1 cup shredded cheese (for topping)
A blend of Mexican cheeses works beautifully. Monterey Jack or Cheddar will melt luxuriously; feel free to skip it for a lighter version.
Step-by-Step Instructions
Now that we’ve gathered our ingredients, let’s get cooking! Here’s how to create your Chicken Enchilada Soup:
-
Prep Time: Start by shredding your cooked chicken. If you’re using a store-bought rotisserie chicken, just remove the skin, shred the meat, and set it aside. Easy peasy!
-
Sauté the Base: In a large pot, heat a drizzle of olive oil over medium heat. Add the diced onion and sauté until translucent, about 3-4 minutes. This is where those lovely flavors begin to build! I like to sprinkle a pinch of salt in here—it helps the onion release its moisture and sweeten.
-
Garlic Action: Add the minced garlic and sauté for an additional minute until fragrant. Don’t let it brown; we want sweet garlic flavor, not burnt pieces! This step is so aromatic—it’ll have everyone wondering what’s cooking!
-
Mix It All Together: Next, add your shredded chicken, black beans, corn, enchilada sauce, and broth to the pot. Stir well to combine.
-
Spice It Up: Toss in the cumin, along with some salt and pepper to taste. Bring the mixture to a gentle boil over medium-high heat, then reduce it to low and let it simmer. This is where the magic happens! Let it bubble for about 20 minutes—you’ll want those flavors to meld together.
-
Final Adjustments: After simmering, taste your soup! Adjust the seasoning if needed. Sometimes a splash more of broth or a dash of salt and pepper does the trick.
-
Serve It Up: Ladle the hot soup into bowls and finish it off with your choice of shredded cheese. You can let the cheese melt right on top in the hot soup—it’ll be just divine.
Serving Suggestions
For a complete experience, consider adding toppings such as diced avocado, fresh cilantro, tortilla strips, or a dollop of sour cream. You can rearrange your toppings to fit the mood of the night—maybe a garnish of lime or a sprinkle of jalapeño for those who like a little heat.
Recipe Variations
Here are some twists you could try for added fun:
- Spicy Enchilada Soup: Add chopped jalapeños or a splash of hot sauce to give your soup a kick!
- Vegetarian Delight: Replace chicken with more beans or even some roasted vegetables like zucchini or bell peppers for a hearty veggie version.
- Creamy Comfort: Add a swirl of cream or cream cheese for a richer, creamier texture. You could turn it into a creamy chicken enchilada soup—yum!
- Bulk It Up: Want to stretch it out? Add diced potatoes or even quinoa for a heartier soup!
- Herbaceous Flavor: Toss in fresh herbs like cilantro or parsley right before serving for an herbal freshness that elevates the dish!
Chef’s Notes
This recipe has evolved while I’ve tinkered with it over the years. Originally, I was a stickler for traditional flavors, but I love how versatile it can be now! I remember one time I had too many canned goods in the pantry; that week, we had soup every day with different toppings and variations. It sparked so much creativity that I’ve become never-endingly inspired to play with flavors. It’s such a forgiving dish—perfect for a kitchen beginner or someone seasoned like many of you, my lovely readers!
FAQs and Troubleshooting
Q: How can I make the soup thicker?
A: If you prefer a thicker soup, try adding more beans or a little cornmeal mixed with water to the pot during simmering. You can also blend a portion of it to create a creamier texture.
Q: Can I freeze Chicken Enchilada Soup?
A: Absolutely! Let it cool completely before transferring to an airtight container, and it’ll keep in the freezer for about three months. Just make sure to separate the toppings, such as cheese and avocado, at the time of serving.
Q: What can I serve this soup with?
A: It pairs beautifully with corn tortillas or crunchy tortilla chips. A fresh salad on the side can also provide a delightful contrast!
Q: What if I don’t like beans?
A: No worries! Leave them out and add more veggies or even some pasta. You can also try rice for a comforting heartiness!
Nutritional Info
While I always encourage enjoying food without guilt, here’s a little breakdown of approximate nutritional values for a typical serving (without excess toppings):
- Calories: Approximately 300
- Protein: 25g
- Carbs: 35g
- Fat: 10g
Cooking is all about love, creativity, and sharing, and this Chicken Enchilada Soup embodies all of those qualities. Whether you’re gathering friends for a cozy evening or treating yourself to a comforting meal, this soup will tick all the boxes. So, tie on your apron, and let’s make some magic in the kitchen! Enjoy!
PrintChicken Enchilada Soup

A vibrant and flavorful soup that combines hearty chicken, zesty enchilada sauce, and creamy beans, creating a soul-satisfying experience perfect for chilly evenings.
- Prep Time: 15 minutes
- Cook Time: 30 minutes
- Total Time: 45 minutes
- Yield: 4 servings 1x
- Category: Main Course
- Method: Stovetop
- Cuisine: Mexican
- Diet: Non-Vegetarian
Ingredients
- 2 cups cooked chicken
- 2 cups enchilada sauce
- 1 can (15 oz) black beans
- 1 cup corn (canned or frozen)
- 1 medium onion, diced
- 2 cloves garlic, minced
- 1 cup chicken broth
- 1 tsp cumin
- Salt and pepper, to taste
- 1 cup shredded cheese (for topping)
Instructions
- Prep the chicken by shredding it if using a rotisserie chicken.
- Sauté the diced onion in olive oil until translucent, about 3-4 minutes.
- Add the minced garlic and sauté for an additional minute until fragrant.
- Mix the shredded chicken, black beans, corn, enchilada sauce, and broth into the pot.
- Toss in the cumin and season with salt and pepper, then bring to a gentle boil.
- Reduce heat and let the soup simmer for about 20 minutes.
- Taste the soup and adjust the seasoning as necessary.
- Serve hot, topped with shredded cheese and any additional toppings of your choice.
Notes
For a complete experience, consider adding diced avocado, fresh cilantro, tortilla strips, or a dollop of sour cream as toppings.
Nutrition
- Serving Size: 1 serving
- Calories: 300
- Sugar: 3g
- Sodium: 800mg
- Fat: 10g
- Saturated Fat: 4g
- Unsaturated Fat: 4g
- Trans Fat: 0g
- Carbohydrates: 35g
- Fiber: 8g
- Protein: 25g
- Cholesterol: 70mg
Keywords: soup, enchilada, chicken, comfort food, Mexican recipes

Creamy Pumpkin Curry Soup: 30-Minute Weeknight Comfort
Whip Up This Delight: Pumpkin Curry Soup That Warms the Soul
Hello, fellow food enthusiasts! Today, I’m thrilled to share with you a recipe that’s bound to add a cozy touch to your kitchen—Pumpkin Curry Soup. This delightful dish is not just easy to whip up; it brings a comforting warmth that transforms any meal into a celebration. So, grab your aprons, and let’s dive into the wonderful world of flavors where autumn meets a tropical twist!
On a crisp fall day, there’s nothing quite like a steaming bowl of soup to wrap your hands around. It’s like a warm hug on a cold day, don’t you think? Just the thought of pumpkin curry soup conjures up images of golden hues, fragrant spices, and that creamy texture that makes you feel all kinds of comfortable. It’s a dish that has grown close to my heart—partly because it reminds me of my favorite autumn gatherings and partly because it’s so darn good!
This recipe is easy to make, but what truly makes it special are the stories and love infused into every bowl. I remember the first time I created this dish. I was hosting my friends for a cozy dinner party, and the air was filled with laughter and the rich aroma of spices. I wanted to impress them while still keeping things simple, and this pumpkin curry soup was the hero! As we gathered around the table, serving bowls of this vibrant orange bliss, the conversations flowed as freely as the soup did from the pot. It was a hit! And now, I’m excited to share it with you, so you too can create those warm, memorable moments around your own table.
The Magic of Ingredients
Here’s what you’ll need to make this delightful pumpkin curry soup. Each ingredient is a star in its own right—let’s introduce them one by one!
-
Pumpkin Purée:
- This is the heart of our soup! You can use canned pumpkin purée for convenience or roast your own pumpkin if you’re feeling adventurous. Fresh pumpkin lends a lovely earthy flavor, just be sure to scoop it out and blend it well.
-
Coconut Milk:
- Creamy and rich, coconut milk adds a luscious texture and a hint of sweetness that balances the spices perfectly. If you prefer a lighter version, you can substitute it with a coconut milk light or almond milk, but I recommend sticking with the full-fat option for that indulgent feel!
-
Curry Paste:
- This is where the magic happens! Choose your favorite curry paste—red, green, or yellow will work wonders. If you’re sensitive to heat, start with a smaller amount and adjust to your taste. If you don’t have curry paste on hand, you can create a quick substitute using a blend of spices like turmeric, cumin, and coriander.
-
Vegetable Broth:
- This helps to thin the soup and adds extra flavor! You could also use chicken broth if you wish.
-
A Dash of Lime Juice:
- This brightens up the dish and enhances the other flavors. Can’t find lime? Lemon juice works in a pinch!
-
Fresh Herbs for Garnish:
- I love topping my soup with fresh cilantro or basil for an added layer of freshness. If you’re not a fan of cilantro, chives or parsley could be delightful substitutes!
Step-by-Step Instructions
Ready to cook? Let’s bring this pumpkin curry soup to life with some straightforward steps. Put on your favorite playlist, roll up your sleeves, and let’s do this!
-
Prep Your Veggies: If you’re using fresh pumpkin, slice it in half, seed it, and roast it in the oven at 400°F (about 200°C) for 30-40 minutes until tender. Let it cool, scoop out the flesh, and set aside. If using canned pumpkin, you can skip this step—easy peasy!
-
Sauté Aromatics: In a large pot, heat up a tablespoon of oil over medium heat. Add chopped onions and sauté until they turn translucent—about 5 minutes. The sweet smell of onions will start to fill your kitchen, inviting everyone to gather around.
-
Spice It Up: Stir in 2–3 tablespoons of your chosen curry paste and let it cook for another 2 minutes. This is where you’ll notice the vibrant aroma beginning to rise. Cooking the paste slightly helps to release those hidden flavors!
-
Add the Pumpkin: Now it’s time to bring the star of the show into the pot! Add the pumpkin purée (or fresh pumpkin) and stir to combine. Cook this mixture for about 2-3 minutes to let the flavors meld together.
-
Pour in the Broth and Coconut Milk: Slowly pour in the vegetable broth, stirring well to integrate everything. Then, add the coconut milk while reserving a small amount for garnish later. Bring the mix to a gentle simmer, allowing it to bubble away for about 10-15 minutes. This step allows all those fabulous flavors to dance together!
-
Blend it Up: Once it’s simmering and everything is blended in together, use an immersion blender to puree the soup until it’s smooth. If you don’t have one, carefully transfer the soup in batches to a regular blender. Just make sure to let it cool slightly before blending—safety first, my friend!
-
Finish with Lime Juice: Add a splash of lime juice at the end to brighten up the flavors. Taste and adjust seasoning as needed—maybe a bit more curry paste or salt? You know your taste buds best!
-
Serve and Enjoy: Ladle the soup into bowls and drizzle the reserved coconut milk on top as a garnish. Don’t forget to sprinkle on some fresh herbs for that touch of elegance!
Serving Suggestions
Plating is an art, and I believe even a simple bowl of soup deserves a little style! Serve your pumpkin curry soup in deep, rustic bowls. For an added touch of warmth, consider browning some sourdough bread to toast alongside. Place a sprig of fresh cilantro or basil on top for a pop of color. If you’re feeling festive, add a few toasted pumpkin seeds for crunch—so Instagram-worthy!
Recipe Variations
Want to switch things up a bit? Here are some fun variations to inspire your creativity:
- Add Protein: Toss in some shredded chicken or chickpeas for extra protein and heartiness.
- Make it Spicy: Spice enthusiasts can include a pinch of cayenne or fresh chopped chili for that extra kick!
- Coconut Curry: Add a few tablespoons of peanut butter for a creamy, nutty twist—trust me, it’s divine!
- Herb Infusion: Try using herbs like lemongrass or ginger for a fragrant aroma and deeper flavor.
- Plant-Based Twist: Swap coconut milk with cashew cream for a nutty flavor difference without the coconut!
Chef’s Notes
Ah, the memory lane! This pumpkin curry soup has certainly evolved over the years. I once made it for a charity soup event, and let me tell you—the fierce competition unleashed my creativity! I decided to add some roasted garlic one night, and let’s just say that my friends haven’t let me make it without garlic ever since! Kitchen escapades like these are a gentle reminder that cooking is an adventure; don’t shy away from experimenting. You never know when you might stumble upon a new favorite!
FAQs and Troubleshooting
-
Why is my soup too thick? Don’t fret! Simply stir in more vegetable broth or water until you reach your desired consistency.
-
What if my soup is too spicy? You can calm the heat down by adding a bit more coconut milk or sugar to balance the flavors.
-
Can I make this soup ahead of time? Absolutely! This soup actually tastes even better the next day, as the flavors marry nicely. Just reheat it gently on the stove.
-
How can I store leftovers? Store in an airtight container in the refrigerator for up to 4-5 days. You can also freeze it for longer storage—just remember to leave some room for expansion!
Nutritional Info
Here’s a quick glimpse at the nutritional benefits of this comforting soup:
- Rich in vitamins A and C from the pumpkin, great for your skin and immune system.
- Coconut milk offers healthy fats that support heart health.
- High in fiber, this soup will keep you full and satisfied.
So there you have it—a friendly, comforting recipe for Pumpkin Curry Soup, poured straight from my cherished kitchen adventures to yours. Whether you’re enjoying a quiet evening at home or hosting friends, I hope you find joy in every spoonful. Remember to embrace those moments spent around the table; that’s what truly makes cooking worthwhile.
I’m excited to hear how your soup turns out! Feel free to drop your thoughts, variations, or questions in the comments. Happy cooking! 🌟
PrintPumpkin Curry Soup

A comforting pumpkin curry soup that blends autumn flavors with tropical spices.
- Prep Time: 10 minutes
- Cook Time: 30 minutes
- Total Time: 40 minutes
- Yield: 4 servings 1x
- Category: Soup
- Method: Cooking
- Cuisine: Fusion
- Diet: Vegetarian
Ingredients
- 1 can Pumpkin Purée (or 1 fresh pumpkin, roasted)
- 1 can Coconut Milk
- 2–3 tablespoons Curry Paste
- 4 cups Vegetable Broth
- 1 tablespoon Lime Juice
- Fresh Herbs for Garnish (such as cilantro or basil)
Instructions
- Prep your veggies: If using fresh pumpkin, slice it in half, seed it, and roast at 400°F (200°C) for 30-40 minutes until tender. Let cool, scoop out flesh, and set aside. Skip this step if using canned pumpkin.
- Sauté aromatics: Heat oil in a large pot over medium heat. Add chopped onions and sauté until translucent, about 5 minutes.
- Spice it up: Stir in curry paste and let it cook for another 2 minutes to release flavors.
- Add the pumpkin purée and stir to combine. Cook for 2-3 minutes.
- Pour in broth and coconut milk, stirring well. Bring to a gentle simmer for 10-15 minutes.
- Blend it up: Use an immersion blender to puree the soup until smooth.
- Finish with lime juice, adjusting seasoning as necessary.
- Serve in bowls, garnishing with reserved coconut milk and fresh herbs.
Notes
This soup tastes even better the next day. Feel free to add protein like chickpeas or chicken for extra heartiness.
Nutrition
- Serving Size: 1 bowl
- Calories: 350
- Sugar: 8g
- Sodium: 600mg
- Fat: 20g
- Saturated Fat: 12g
- Unsaturated Fat: 8g
- Trans Fat: 0g
- Carbohydrates: 40g
- Fiber: 6g
- Protein: 5g
- Cholesterol: 0mg
Keywords: pumpkin soup, curry soup, vegan soup, autumn recipes, cozy food
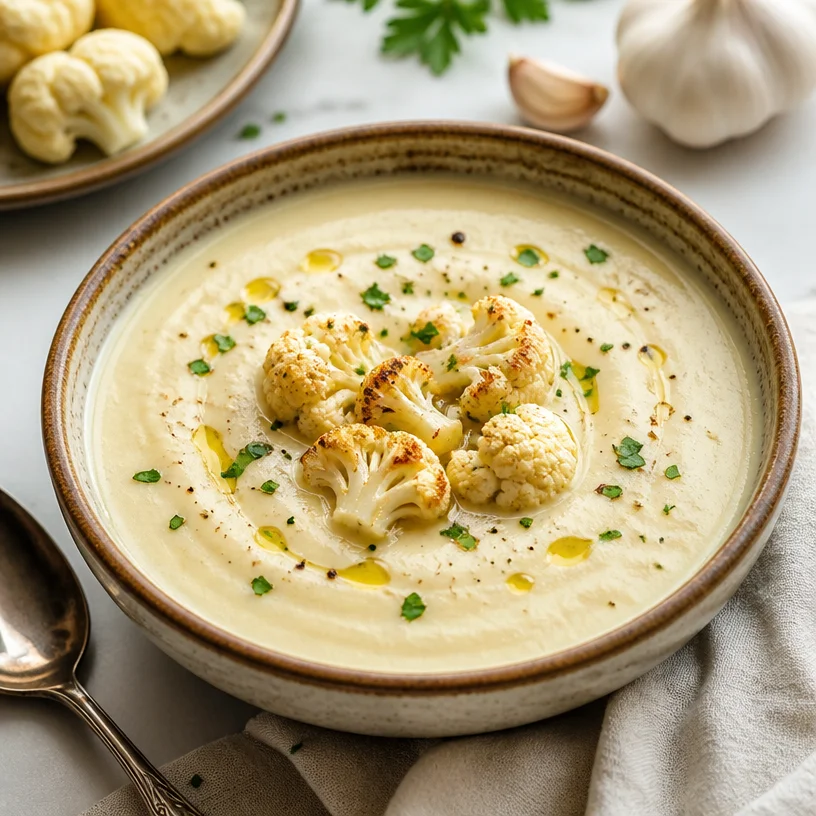
Creamy Cauliflower Soup: Fast, One-Pot Weeknight Comfort
Creamy Cauliflower Soup: A Comforting Bowl of Love
Hello, dear friends! Today, we’re diving headfirst into a bowl of happiness with my Creamy Cauliflower Soup. Whether you’re looking to warm up on a chilly evening or impress your guests with an elegant starter, this soup delivers on every front. It’s creamy, indulgent, and surprisingly easy to make. Plus, it highlights one of my favorite vegetables — cauliflower!
A Cozy Kitchen Memory
Let me take you back to the first time I ever made a creamy cauliflower soup. It was a brisk autumn evening, and I was hosting my very first dinner party at my apartment. I wanted to impress my friends, but my cooking repertoire at the time was limited to pasta and grilled cheese. So, I decided to venture into uncharted culinary territory with this soup.
After a bit of trial and error—where I may or may not have slightly overcooked the garlic and made the kitchen smell like burnt garlic heaven—I finally got it right. The moment my guests took their first spoonful, you could see the delight in their eyes. They kept asking for seconds, and my heart swelled with joy. That night wasn’t just about the soup; it was about connection, laughter, and memories made around the table.
Now, whenever I make this creamy cauliflower soup, I’m reminded of that evening—how a simple dish could bring friends together. Cooking is truly a celebration, and I want to share that spirit with you!
Ingredients:
- 1 large head of cauliflower: Cauliflower is the star of our show! It’s packed with nutrients and has a mild flavor that allows us to create a rich, creamy soup. If you can’t find cauliflower, you can substitute half a head of broccoli for a different but equally delicious flavor.
- 1 medium onion: Onions add a depth of flavor. Use yellow for sweetness or red for a touch of spice! If you’re looking for a milder option, shallots could work beautifully here.
- 3 cloves of garlic: Garlic brings warmth and earthiness to the soup. If you’re not a huge garlic fan, you can halve the amount; however, I promise you, the garlic balances out beautifully with the cream!
- 2 cups of vegetable broth: This forms the base of your soup. Feel free to swap in chicken broth if you’re not vegetarian. Homemade stock is always a winner, but store-bought will work just fine.
- 1 cup of heavy cream: Cream gives our soup that luxurious texture. If you’re looking for a lighter option, you can use half-and-half, or for a dairy-free spin, try coconut milk for a hint of sweetness.
- Salt and pepper to taste: Simple but essential! Adjust according to your palate, and don’t skip tasting along the way. Trust your taste buds!
Step-by-Step Instructions
-
Prep the Cauliflower: Begin by removing the leaves and the core of the cauliflower. Cut it into florets—about 1-inch pieces. This will help them cook more evenly and quickly. Not to mention, it makes for a beautiful presentation!
-
Sauté the Aromatics: In a large pot over medium heat, add a splash of olive oil. Once it’s shimmering, add the chopped onion. Sauté for about 5 minutes until they’re translucent and fragrant—this is where your kitchen will start to smell magical! Next, toss in the minced garlic and sauté for an additional minute, just until fragrant. Keep an eye on it; you want the garlic to be golden, not burnt!
-
Cook the Cauliflower: Add the cauliflower florets to the pot, and stir them around to coat in the wonderful onion and garlic mixture. Now, it’s time to pour in your vegetable broth. Bring everything to a gentle simmer, cover the pot, and let it cook for about 15-20 minutes until the cauliflower is tender.
-
Blend It Up: Once the cauliflower is soft, remove the pot from the heat and let it cool slightly. Carefully transfer the mixture (in batches, if necessary) to a blender. Add the heavy cream, salt, and pepper. Blend until silky smooth. Bonus chef tip: For an extra touch, you can reserve a few cauliflower florets to toss back into the soup afterward for texture.
-
Serve It Right: Pour your creamy concoction back into the pot to warm through one last time. Taste and adjust seasoning, if necessary. I often add a little squeeze of lemon juice at this stage to brighten everything up!
Serving Suggestions
The right presentation can take your soup from homey to haute! Serve the creamy cauliflower soup in delicate bowls, garnished with a drizzle of olive oil or a swirl of cream. Add a sprinkle of fresh herbs like chives or parsley for a pop of color. Crusty bread or garlic croutons on the side will make it feel like a complete meal. Shine brighter, my friends—this soup is good enough to be the star of any dinner table!
Recipe Variations
- Herb Infusion: Add fresh herbs like thyme or rosemary during the cook time for an aromatic twist. Remove the stems before blending!
- Spicy Kick: Toss in some red pepper flakes with your garlic for a gentle heat that complements the creamy texture.
- Cheesy Pleasure: Stir in a handful of grated Parmesan or sharp cheddar just before serving to take your soup to the next level—a creamy soup with savory cheese? Yes, please!
- Nutty Flavor: Add a tablespoon of tahini or almond butter when blending for a nutty profile that deepens the flavor.
- Vegan Version: Substitute the heavy cream with canned coconut milk, and use nutritional yeast instead of cheese for a deliciously dairy-free option.
Chef’s Notes
This soup has been a staple in my kitchen for years! Initially, I followed a strict recipe every time, but as I became more confident, I started making it my own. I once had a friend bring over some roasted garlic, and I decided to throw it in; oh my goodness, that elevated the soup in ways I hadn’t anticipated! Now, experimentation is the name of the game in my kitchen. Each batch is a little different, and I love that it allows me to get creative while maintaining that comforting classic.
FAQs and Troubleshooting
Q1: My soup turned out too thick; what can I do?
A: Fear not! Simply add more broth or water until you reach your desired consistency.
Q2: Can I make this soup in advance?
A: Absolutely! This soup stores beautifully in the fridge for up to three days. Just reheat gently on the stove, adding a splash more cream or broth for extra creaminess.
Q3: How can I make this soup gluten-free?
A: Worry not! All of the ingredients listed are naturally gluten-free. Just double-check your broth for any added ingredients and you’re good to go!
Q4: Can I freeze the soup?
A: Totally! It freezes well for up to two months. When you’re ready to enjoy it again, thaw it in the fridge overnight and reheat on the stove. Some cream and a dash of seasoning may do wonders to revive its lusciousness!
Nutritional Info
*Caloric information can vary based on your specific ingredients and portion sizes, but on average, one serving provides about:
*Calories: 220
*Fat: 15g (with cream)
*Carbohydrates: 12g
Protein: 5g
There you have it, gorgeous souls! Your very own bowl of Creamy Cauliflower Soup awaits. Whether you’re crafting it for dinner guests or treating yourself to a cozy night in, remember that cooking is about the love and the joy of sharing. So tie on your apron and let the aromas fill your kitchen—together, let’s create something delicious. Cheers!
PrintCreamy Cauliflower Soup

A creamy and indulgent cauliflower soup, perfect for warming up on chilly evenings or impressing dinner guests.
- Prep Time: 15 minutes
- Cook Time: 30 minutes
- Total Time: 45 minutes
- Yield: 4 servings 1x
- Category: Soup
- Method: Blending
- Cuisine: American
- Diet: Vegetarian
Ingredients
- 1 large head of cauliflower
- 1 medium onion
- 3 cloves of garlic
- 2 cups of vegetable broth
- 1 cup of heavy cream
- Salt and pepper to taste
Instructions
- Prep the cauliflower: Begin by removing the leaves and the core of the cauliflower. Cut it into florets—about 1-inch pieces.
- Sauté the aromatics: In a large pot over medium heat, add a splash of olive oil. Add the chopped onion and sauté for about 5 minutes until translucent. Then, add the minced garlic and sauté for an additional minute.
- Cook the cauliflower: Add the cauliflower florets to the pot, stir to coat in the onion and garlic mixture, then pour in the vegetable broth. Bring to a gentle simmer, cover, and cook for about 15-20 minutes until the cauliflower is tender.
- Blend it up: Remove the pot from heat and let it cool slightly. Carefully transfer the mixture to a blender, add the heavy cream, salt, and pepper, and blend until silky smooth.
- Serve it right: Pour the creamy soup back into the pot to warm through. Adjust seasoning if necessary.
Notes
Serve with a drizzle of olive oil or a swirl of cream. Garnish with fresh herbs and pair with crusty bread or garlic croutons.
Nutrition
- Serving Size: 1 serving
- Calories: 220
- Sugar: 4g
- Sodium: 400mg
- Fat: 15g
- Saturated Fat: 9g
- Unsaturated Fat: 5g
- Trans Fat: 0g
- Carbohydrates: 12g
- Fiber: 3g
- Protein: 5g
- Cholesterol: 60mg
Keywords: cauliflower soup, creamy soup, vegetarian soup