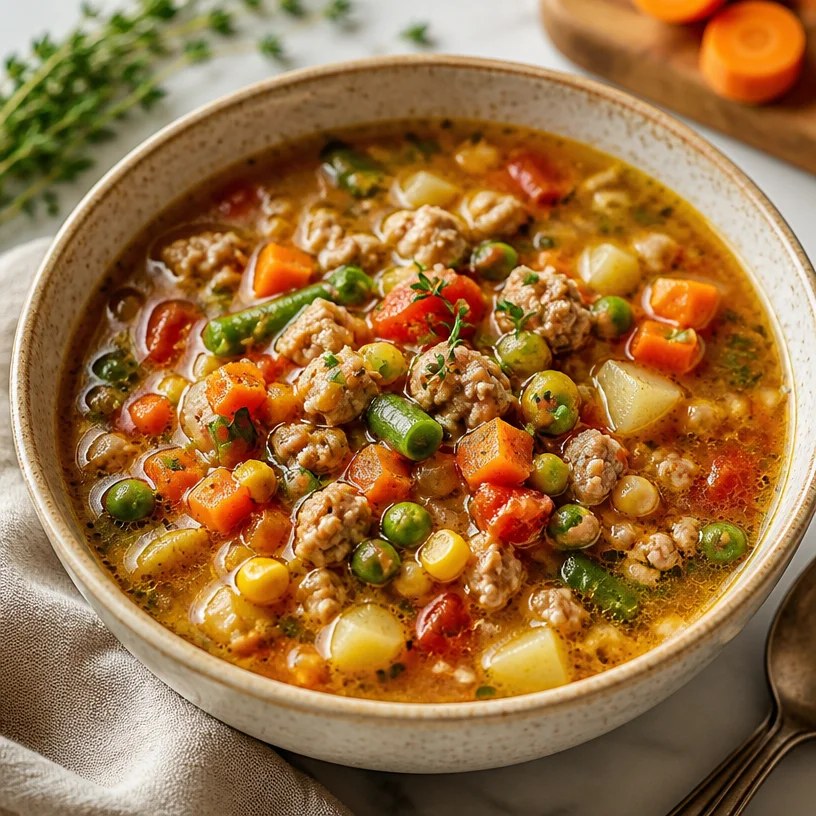
One-Pot Turkey Vegetable Soup: 30-Minute Healthy Dinner
Warm Up with Turkey Vegetable Soup: Your Ultimate Comfort in a Bowl
Hello, food lovers! If you’re seeking a heartwarming dish that wraps you in nostalgia and fills your home with an incredible aroma, you’re in the right place. Today, we’re diving into a favorite of mine: Turkey Vegetable Soup. As the weather turns chilly, there’s nothing quite like the cozy embrace of warm soup that warms your body and soul.
This soup is not only a delicious way to use leftover turkey, but it also celebrates the beauty of fresh vegetables, aromatic herbs, and a rich broth. Plus, it’s beautifully adaptable, so you can play around with the ingredients depending on what you have on hand. So, grab your favorite apron, and let’s get cooking!
A Story That Warms the Heart
Let me take you back to a chilly November evening a few years ago. My family and I were hosting our annual Friendsgiving feast, which, as you might imagine, was a glorious affair! Imagine a long table adorned with twinkling lights, fragrant candles, and enough food to feed an army. Everyone brought a dish, and my contribution was this delightful Turkey Vegetable Soup.
As friends arrived, the smell of simmering turkey and vegetables wafted through the air, inviting everyone to gather around the stove. Once it was time to eat, we ladled the soup into bowls and topped it with fresh herbs. Laughter filled the room as I shared the story of how I combined leftover turkey from the previous day’s feast with fresh veggies from the farmer’s market.
That evening was not just about the food; it was about connection, camaraderie, and the warmth of good company. And I realized that this soup wasn’t just a recipe; it was a vessel for creating beautiful memories!
Ingredients for Your Soup
Now, let’s talk about what you’ll need to create this delightful soup! Here’s the ingredient list, along with a few tips to get you started:
-
Turkey:
- Use leftover turkey, shredded or diced. If you don’t have turkey, chicken works beautifully too. You can also roast a small turkey breast or buy pre-cooked turkey from the store.
-
Mixed Vegetables:
- You can use fresh vegetables like carrots, celery, and peas. Or opt for frozen mixed vegetables for convenience. Just remember, whatever you use, aim for a rainbow of colors for a visually appealing soup!
-
Broth:
- Chicken or turkey broth is preferred for that rich flavor, but vegetable broth can be a great alternative if you want a lighter base or if you’re going vegetarian.
-
Herbs:
- Fresh thyme, rosemary, or parsley add depth and flavor. If using dry herbs, remember that they are more potent — use about one-third of the amount. A bay leaf can also elevate the soup but remove it before serving!
Step-by-Step Instructions
Ready to get your hands cozy in the kitchen? Here’s how to whip up this fabulous Turkey Vegetable Soup:
-
Prep Your Ingredients:
- Chop your vegetables — a fun, therapeutic task! Aim for uniform pieces so they cook evenly. Pro tip: always start with onions and garlic for that aromatic base!
-
Sauté the Aromatics:
- In a large pot, heat a drizzle of olive oil over medium heat. Add diced onions and minced garlic, stirring until translucent (about 3-5 minutes). Trust me, this step builds the flavor foundation!
-
Add the Veggies:
- Toss in the chopped carrots, celery, and any other veggies you’ve selected. Sauté for another 5-7 minutes until they start to soften. The colors will start to brighten up your kitchen!
-
Incorporate the Turkey:
- Add in your turkey and stir to combine, letting the turkey warm through. This is the moment your kitchen will smell divine!
-
Pour in the Broth:
- Add the broth to your pot and stir. Raise the heat until the soup comes to a gentle boil.
-
Season that Soup:
- Toss in your herbs (fresh or dried), bay leaf, and a pinch of salt and pepper. Let it all simmer for about 20-30 minutes. This simmering is magical — it melds all those flavors together.
-
Taste and Adjust:
- After about 30 minutes, taste your soup. You may want to add more salt, pepper, or perhaps a dash of lemon juice to brighten everything up.
-
Finish and Serve:
- If using fresh parsley, stir it in just before serving for a burst of color and freshness.
And there you have it — a pot of gratitude in a bowl!
Serving Suggestions
When it comes to plating (or should I say, "bowling"?), I recommend serving this soup in wide, shallow bowls. This allows both the vibrant colors and the delicious aromas to shine. Finish with a sprinkle of fresh herbs for a pop of color and flavor. Pair it with crusty bread or a fresh salad for a complete meal. Don’t forget a glass of something bubbly to toast with—it’s all about celebrating the moment!
Recipe Variations
Now, if you’re feeling adventurous, here are a few creative twists you might want to try:
-
Spicy Kick:
- Add a dash of red pepper flakes or a splash of hot sauce for some heat!
-
Herb Variations:
- Swap out the thyme and rosemary for fresh basil and dill for a different flavor profile.
-
Noodle it Up:
- Stir in cooked noodles like egg noodles or rice for a heartier version.
-
Creamy Delight:
- For a creamy soup, add a splash of heavy cream or coconut milk towards the end of cooking.
-
Vegetarian Version:
- Replace the turkey with chickpeas or lentils and use vegetable broth for a plant-based dish that’s just as satisfying!
Chef’s Notes
You know, over the years, this Turkey Vegetable Soup has evolved into a comfort staple in my home. I started by using what we had left over, but I’ve since tailored it to our seasonal needs. Some fall, I’ll add acorn squash for a touch of sweetness; in summer, I toss in fresh corn! That’s the beauty of soup: it’s forgiving, versatile, and incredibly personal.
I once made a version for a potluck, and it vanished within minutes! I suppose that’s how you know you’ve got a winner on your hands!
FAQs and Troubleshooting
-
What if my soup is too salty?
- If you find it salty, add a few pieces of raw potato and let them simmer for 10-15 minutes. They will absorb some of that saltiness. Don’t forget to remove them before serving!
-
Can I make this soup ahead of time?
- Absolutely! This soup stores wonderfully in the refrigerator for up to 3 days or can be frozen for up to 3 months. Just reheat gently on the stove.
-
What if my soup is too thick?
- Simply add more broth or water until you reach your desired consistency — easy peasy!
-
How can I make it richer?
- For more depth, sauté the vegetables in a bit of butter instead of olive oil, and you could also use homemade stock for that ultimate flavor boost.
Nutritional Info
If you’re curious about the nutritional content, you can expect a comforting bowl of turkey vegetable soup to be approximately 200 calories per serving, packed with protein, vitamins, and minerals thanks to those wonderful vegetables. The best part? It’s low in carbs and full of flavor!
Let’s Wrap It Up!
And there you have it, my fellow foodies! Your very own Turkey Vegetable Soup that’s warming, comforting, and just downright delicious. I hope you find as much joy in making (and sharing) this recipe as I do. Remember, cooking is all about creating memories and, yes, enjoying those little moments around the table. So tie on your apron, gather some friends or family, and pull up a chair to share a bowl of this delightful soup.
Happy cooking! I can’t wait to hear your own stories and variations when you try this recipe!
PrintTurkey Vegetable Soup

A heartwarming Turkey Vegetable Soup loaded with fresh veggies and aromatic herbs, perfect for chilly days and made from leftover turkey.
- Prep Time: 15 minutes
- Cook Time: 30 minutes
- Total Time: 45 minutes
- Yield: 4 servings 1x
- Category: Soup
- Method: Stovetop
- Cuisine: American
- Diet: High Protein
Ingredients
- 2 cups leftover turkey, shredded or diced
- 2 carrots, chopped
- 2 celery stalks, chopped
- 1 cup mixed vegetables (fresh or frozen)
- 1 onion, diced
- 2 cloves garlic, minced
- 6 cups chicken or turkey broth
- 1 bay leaf
- 1 teaspoon fresh thyme (or 1/3 teaspoon dried)
- 1 teaspoon fresh rosemary (or 1/3 teaspoon dried)
- Salt and pepper to taste
- Olive oil for sautéing
Instructions
- Prep your ingredients: Chop your vegetables into uniform pieces.
- Sauté the aromatics: In a large pot, heat olive oil over medium heat. Add diced onions and minced garlic, stirring until translucent (about 3-5 minutes).
- Add the veggies: Toss in the chopped carrots, celery, and mixed vegetables. Sauté for another 5-7 minutes.
- Incorporate the turkey: Add in your turkey and stir to combine, letting it warm through.
- Pour in the broth: Add the broth and stir, raising the heat until the soup comes to a gentle boil.
- Season that soup: Toss in your herbs, bay leaf, and a pinch of salt and pepper. Let it simmer for about 20-30 minutes.
- Taste and adjust: After about 30 minutes, taste your soup and adjust seasonings as needed.
- Finish and serve: If using fresh parsley, stir it in just before serving.
Notes
This soup is forgiving and adaptable to whatever vegetables you have on hand.
Nutrition
- Serving Size: 1 serving
- Calories: 200
- Sugar: 5g
- Sodium: 600mg
- Fat: 8g
- Saturated Fat: 1g
- Unsaturated Fat: 7g
- Trans Fat: 0g
- Carbohydrates: 15g
- Fiber: 3g
- Protein: 20g
- Cholesterol: 60mg
Keywords: turkey soup, vegetable soup, comfort food, easy recipe, healthy soup

Stuffed Pepper Soup: One-Pot, 30-Minute Weeknight Dinner
Comfort in a Bowl: The Best Stuffed Pepper Soup Recipe
Welcome, food lovers! Today, we’re diving into a warm, comforting dish that brings all the nostalgia of stuffed peppers without the fuss. That’s right — I’m talking about stuffed pepper soup! Whether it’s a chilly evening or just a day when you need a hug in a bowl, this recipe delivers all the flavors you adore in those classic stuffed peppers, but in a cozy, easy-to-make soup. Grab your apron, and let’s start this delicious journey together!
A Soup to Remember: My Culinary Adventures with Stuffed Peppers
The first time I remember trying stuffed peppers, I was a teenager, anxiously flipping through my mom’s well-worn cookbook. The vibrant bell peppers looked so enticing, and I was eager to make my mark in the kitchen. We whipped up a batch together, and as we stood around the stove, she would tell me stories about how her mother used to make them with a secret ingredient — a dash of love and a sprinkle of nostalgia.
The aroma that filled our home was unforgettable, and those peppers became a staple for family dinners. Years later, when I started hosting my own gatherings, I wanted to recreate that same warmth and fondness we had in our kitchen. While I loved the idea of stuffed peppers, I found myself craving something with a little less prep time and a bit more flexibility. Lo and behold, stuffed pepper soup was born! This dish captures all that childhood flavor, minus the hassle of stuffing each pepper.
Ingredients You’ll Need
Here’s what you’ll need for a pot of hearty stuffed pepper soup:
-
Ground Beef
Tip: Brown it until it’s nicely caramelized for maximum flavor. If you prefer a leaner option, ground turkey or chicken works beautifully as substitutes. -
Bell Peppers
Insight: Choose a mix of colors for a vibrant, appealing soup. Red, yellow, and green all offer different flavors — yellow and red add sweetness, while green is a bit more bitter. -
Rice
Substitution: White or brown rice works well. If you’re looking for a low-carb option, cauliflower rice is a great substitute — just add it towards the end of cooking. -
Canned Tomatoes
Tip: Diced tomatoes bring the soup to life; the juices help create a rich broth. Fire-roasted diced tomatoes can add a lovely smoky flavor. -
Onion
Insight: Onions add depth of flavor. You can use yellow onion for sweetness or red onion for a sharper taste. -
Garlic
Tip: Fresh garlic is key! It packs a punch; you can always adjust the amount based on your taste preference. -
Beef Broth
Insight: Homemade beef stock is fantastic if you have it on hand, but good-quality store-bought broth works in a pinch. -
Seasonings
- Oregano: Adds a Mediterranean touch.
- Salt and Pepper: Essential for enhancing all the flavors.
- Crushed Red Pepper Flakes: For a kick, adjust to your spice tolerance!
Each of these ingredients plays a crucial role in transforming humble ingredients into a heartwarming dish.
Step-by-Step Cooking Instructions
-
Brown the Ground Beef
In a large pot over medium heat, add the ground beef. Breaking it up with a spoon, cook until browned, about 5-7 minutes. Make sure to let it caramelize a bit — that’s where the flavor resides! Drain excess fat if necessary. -
Sauté the Aromatics
Add in a chopped onion and minced garlic to the browned beef. Sauté for another 3-4 minutes until the onion turns translucent and the garlic is fragrant. Your kitchen will smell divine! -
Introduce the Peppers
Dice the bell peppers and throw them into the pot. Stir everything together and cook for an additional 5 minutes. The peppers will soften slightly, adding their sweetness to the mix. -
Add the Tomatoes and Broth
Pour in a can of diced tomatoes (don’t drain them) and 4 cups of beef broth. Give it a good stir to meld all those beautiful flavors together. -
Season It Up
Really get your hands in there; stir in 1 teaspoon of dried oregano, salt, pepper, and optional crushed red pepper flakes. Adjust the spices to taste — remember, you can always add more, but you can’t take it away. -
Stir in the Rice
Add one cup of rice (white or brown) to the mix. The rice will absorb the broth and make the soup hearty. -
Simmer Away
Bring the soup to a boil, then reduce the heat to low. Cover and let it simmer for about 20-30 minutes. If you’re using brown rice, it may take a little longer, around 40-45 minutes. Stir occasionally! -
Check the Consistency
If the soup is too thick for your liking, add a bit more broth or water. Remember, with the rice, it thickens as it sits, so adjust accordingly! -
Final Touches
Once everything is cooked through and the flavors have had a chance to shine, taste the soup and adjust the seasoning if needed. I always add a dash of freshly cracked pepper right before serving for an extra kick!
Serving Suggestions
Serve this stuffed pepper soup hot, garnished with a sprinkle of fresh parsley or even a dollop of sour cream. Pair it with a crusty loaf of bread for dipping, and you’ve got a meal that not only warms the belly but the soul.
Creative Twist: Recipe Variations
- Vegetarian Delight: Swap the ground beef for lentils, quinoa, or a mix of black beans for a healthy vegetarian option.
- Cheesy Goodness: Stir in shredded cheddar or mozzarella just before serving for a melty surprise.
- Spicy Version: Add diced jalapeños or poblano peppers during the sauté stage for an extra kick.
- Herb Infusion: Fresh basil or cilantro can add a refreshing twist — try it out for a different take on flavors.
Chef’s Notes
This stuffed pepper soup has been a staple at my dinner table for years, evolving with every season and personal touch. One time, in a quest to make it even heartier, I added some corn — the sweetness balanced beautifully with the savory beef. And the most important lesson? Don’t stress about being perfect! This soup is about comfort and care. Perfect is overrated; it’s the love you give that truly matters.
FAQs and Troubleshooting
Q: Why did my soup turn out too thick?
A: It may have absorbed too much liquid from the rice. Simply add more broth or water while it simmers to reach your desired consistency.
Q: Can I make this soup ahead of time?
A: Absolutely! It keeps well in the fridge for up to 4 days. Reheat gently on the stove, adding a splash of broth or water to bring it back to life.
Q: How can I freeze this soup?
A: Let it cool completely, then transfer to an airtight container or freezer bags. It can be frozen for up to three months — simply thaw overnight in the fridge and reheat for a quick meal.
Q: What are the best sides to serve with this soup?
A: Pair it with a crisp side salad, grilled cheese sandwiches, or a simple garlic bread for a full meal experience!
Nutritional Info (Optional)
While nutritional content may vary, here’s a general breakdown per serving (assuming 6 servings):
- Calories: 320
- Protein: 21g
- Carbs: 30g
- Fat: 15g
And there you have it — a delectable, easy-to-make stuffed pepper soup that’s perfect for any occasion! I hope this recipe inspires you to create beautiful moments around your table. Remember, good food isn’t just about the ingredients; it’s about the memories you create along the way. Now, grab your spoon and enjoy a bowl of warmth and love!
PrintStuffed Pepper Soup

A warm and comforting soup that brings all the flavors of stuffed peppers in a cozy bowl.
- Prep Time: 15 minutes
- Cook Time: 30 minutes
- Total Time: 45 minutes
- Yield: 6 servings 1x
- Category: Main Course
- Method: Simmering
- Cuisine: American
- Diet: None
Ingredients
- 1 lb Ground Beef
- 3 Bell Peppers, diced
- 1 cup Rice (white or brown)
- 1 can Canned Diced Tomatoes
- 1 Onion, chopped
- 3 cloves Garlic, minced
- 4 cups Beef Broth
- 1 tsp Oregano
- Salt and Pepper to taste
- Crushed Red Pepper Flakes (optional)
Instructions
- Brown the ground beef in a large pot over medium heat for about 5-7 minutes.
- Sauté the chopped onion and minced garlic for 3-4 minutes until translucent and fragrant.
- Introduce the diced bell peppers and cook for an additional 5 minutes.
- Add the canned diced tomatoes and beef broth, stirring well.
- Season it up with oregano, salt, pepper, and optional crushed red pepper flakes.
- Stir in the rice and let the soup come to a boil.
- Simmer the soup on low heat for 20-30 minutes or longer if using brown rice.
- Check the consistency, adding more broth or water if too thick.
- Final touches: Adjust seasoning and serve hot.
Notes
Serve garnished with fresh parsley or a dollop of sour cream. Pairs well with crusty bread.
Nutrition
- Serving Size: 1 bowl
- Calories: 320
- Sugar: 5g
- Sodium: 450mg
- Fat: 15g
- Saturated Fat: 6g
- Unsaturated Fat: 8g
- Trans Fat: 0g
- Carbohydrates: 30g
- Fiber: 2g
- Protein: 21g
- Cholesterol: 60mg
Keywords: stuffed pepper soup, comfort food, easy soup recipe, cozy meal
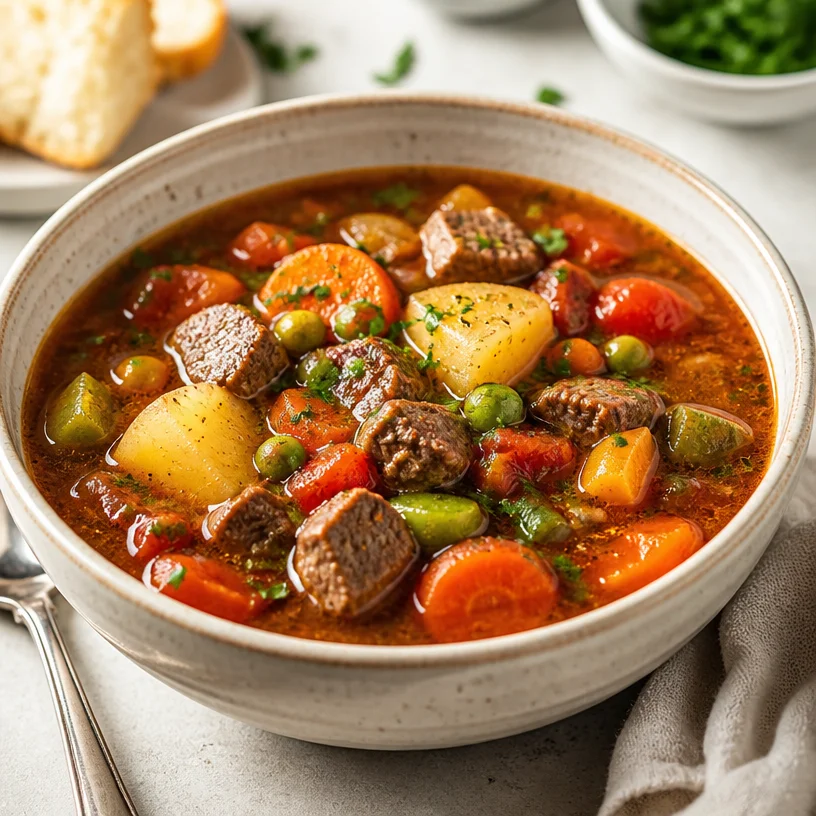
One-Pot Beef Vegetable Soup: 30-Minute Budget Family Meals
A Cozy Bowl of Comfort: Beef Vegetable Soup
Ah, the beauty of a hearty Beef Vegetable Soup! There’s something so wonderfully nostalgic about a pot bubbling away on the stove, filling the kitchen with the warmth of a home-cooked meal. It’s like a hug in a bowl—inviting, comforting, and utterly satisfying. As the air cools and we cozy up with blankets and good books, there’s no better time to whip up this timeless dish. Let me take you on a flavorful journey where we’ll blend tender beef with fresh vegetables, creating a masterpiece that will leave everyone asking for seconds.
But first, a little secret—this recipe is not just about the ingredients but about the love and memories woven into each spoonful. From the first time I crafted this dish for my family during a snowy winter evening to the countless lunch leftovers that transformed into a requested dinner, it’s one of those recipes that feels like home. So, tie on your apron, and let’s make some magic!
A Memory from the Kitchen
I can still hear the sound of laughter echoing through the kitchen the first time I made Beef Vegetable Soup. It was a chilly afternoon, and my family had gathered at our house for what we called “soup Sundays.” I remember standing on a stool, chopping vegetables alongside my grandmother—a culinary wizard in her own right. With every diced carrot and cubed potato, she shared stories of her own childhood, how her mother would make a pot of soup every week.
On that day, she taught me the delicate dance of balancing flavors, how to coax the natural sweetness out of each vegetable and infuse the broth with just the right amount of seasoning. The room was filled with the comforting scent of simmering beef and earthy herbs. When the soup was finally served, the clinking of bowls punctuated our family stories, each spoonful bridging generations. It wasn’t just dinner; it was a lesson about love, tradition, and the art of nourishing both body and spirit.
Ingredients
-
Beef (Chuck Roast or Stew Meat)
A good cut of beef, preferably from the chuck section, provides flavor and tenderness. If you’re looking for a leaner alternative, you can substitute with sirloin, though cook time may vary since sirloin is more tender. -
Potatoes (Yukon Gold or Russet)
Yukon Golds add a buttery flavor, while Russets get fluffy and dissolve slightly in the broth, thickening the soup. Don’t have these? Use sweet potatoes for a different twist! -
Carrots (Fresh)
Sweet and earthy, carrots infuse a beautiful color and flavor into the dish. If you’re short on fresh carrots, frozen peas or green beans can add a freshness too. -
Peas (Green Peas, Fresh or Frozen)
Peas add a pop of color and sweetness. Frozen peas work like a charm and are a great time-saver! -
Tomatoes (Canned Diced or Fresh)
Tomatoes add acidity and depth. If you have fresh ripe tomatoes, feel free to use them instead. Just remember to peel them for a smooth texture (a quick blanch will do the trick)!
Step-by-Step Instructions
-
Prep Your Ingredients
Start by washing, peeling, and chopping the vegetables. Cut the beef into bite-sized pieces and season generously with salt and pepper. Pro tip: Let your beef sit at room temperature for about 30 minutes before cooking for even cooking. -
Brown the Beef
In a large pot or Dutch oven, heat a tablespoon of olive oil over medium-high heat. Once the oil is shimmering, add the beef in batches, not crowding the pan. Sear the meat for about 3-4 minutes until it develops a rich, brown crust. This step locks in flavor! Once browned, remove the beef and let it rest while you sauté the veggies. -
Sauté the Vegetables
In the same pot, toss in diced onions and cook until they’re translucent. Add minced garlic, carrots, and potatoes, stirring occasionally. This process takes about 5 minutes and marries all those beautiful flavors together. If your fond bits are sticking to the pot, deglaze with a splash of red wine or broth! -
Combine Ingredients
Return the beef to the pot and sprinkle in your herbs (think thyme, bay leaf, or even a touch of rosemary). Pour in enough beef broth to cover everything—about 6-8 cups should do the trick. Bring to a gentle simmer, then reduce the heat to low. -
Let it Simmer
Allow the soup to simmer gently for at least 1 hour, but the longer, the better! If you can let it bubble for 2-3 hours, you’ll be rewarded with deeply infused flavors. Stir occasionally and skim off any foam that rises to the surface. -
Add Peas and Tomatoes
About 10 minutes before serving, stir in the peas and tomatoes. This maintains their vibrant color and texture. Taste and adjust seasoning with salt and pepper to your liking. Remember, balance is key! -
Serve and Enjoy
Once everything is harmoniously blended and cooked to perfection, it’s time to dish it up! Remove the bay leaf and serve the soup in warm bowls, accompanied by crusty bread or a sprinkle of fresh herbs.
Serving Suggestions
When it comes to the presentation, let’s keep it simple yet elegant. Ladle the soup into rustic bowls, and garnish with chopped parsley or a drizzle of olive oil for a touch of brightness. Serve alongside a warm loaf of sourdough bread for dipping – trust me, it’s a game changer!
Recipe Variations
- Vegetarian Update: Swap the beef for hearty mushrooms or lentils for a plant-based delight. Use vegetable broth as your base.
- Spicy Twist: Add a pinch of red pepper flakes or toss in some diced jalapeños for an extra kick.
- Herb Infusion: Swap thyme for fresh basil or dill to bring a unique flavor profile to your soup.
- Creamy Version: Finish your soup with a splash of cream or a dollop of crème fraîche for a rich, velvety texture.
Chef’s Notes
This Beef Vegetable Soup has become a staple in my kitchen over the years. Each time I make it, I find myself reminiscing about that chilly afternoon spent with my grandmother, a sprig of thyme in one hand and a ladle in the other. One memorable moment was when I realized I had run out of broth and used leftover coffee instead—don’t ask me how it happened! But you know what? It actually added a cozy depth to the flavor, reminding me that cooking is all about experimentation and finding joy in the unexpected.
FAQs and Troubleshooting
Q: Why is my soup too salty?
A: If you find your soup is over-seasoned, add a peeled, raw potato to absorb some saltiness. Let it simmer for 10–15 minutes, then remove the potato!
Q: How do I store leftovers?
A: Leftover soups can be stored in an airtight container in the fridge for up to 4 days. They also freeze beautifully for up to 3 months—just make sure to leave space in your container, as soups expand when frozen.
Q: Can I make this soup in a slow cooker?
A: Absolutely! Sauté the beef and veggies, then add everything to a slow cooker. Cook on low for 6-8 hours for a wonderful depth of flavor.
Q: My soup is too thick; how can I fix it?
A: Simply add more broth or water until you reach your desired consistency. Remember to taste and adjust seasoning as needed!
Nutritional Info
(If applicable, you can include estimated nutritional information per serving, such as calories, protein, fats, carbs, etc.)
There you have it—your go-to guide for crafting a warm, delightful pot of Beef Vegetable Soup that feels like a big hug from your kitchen. I hope you find as much joy in making it as I do. Remember, cooking is all about connection—both with the food and the people you share it with. Now go on, tie that apron, and let’s create something beautiful together!
PrintBeef Vegetable Soup

A hearty and comforting Beef Vegetable Soup filled with tender beef and fresh vegetables.
- Prep Time: 30 minutes
- Cook Time: 120 minutes
- Total Time: 150 minutes
- Yield: 6 servings 1x
- Category: Soup
- Method: Simmering
- Cuisine: American
- Diet: None
Ingredients
- 2 lbs Beef (Chuck Roast or Stew Meat)
- 3 Potatoes (Yukon Gold or Russet)
- 2 Carrots (Fresh)
- 1 cup Peas (Green Peas, Fresh or Frozen)
- 2 cups Tomatoes (Canned Diced or Fresh)
- 1 Onion (diced)
- 3 cloves Garlic (minced)
- 6–8 cups Beef Broth
- 1 tablespoon Olive Oil
- Salt and Pepper (to taste)
- Herbs (Thyme, Bay Leaf, Rosemary – to taste)
Instructions
- Prep your ingredients: Wash, peel, and chop the vegetables. Cut the beef into bite-sized pieces and season generously with salt and pepper. Let beef sit at room temperature for about 30 minutes.
- Brown the beef in a large pot with olive oil over medium-high heat until seared and browned.
- Sauté the diced onions until translucent, then add minced garlic, carrots, and potatoes, stirring well.
- Combine the beef back into the pot, add herbs, and pour in beef broth to cover everything.
- Let it simmer gently for at least 1 hour, longer for deeper flavors.
- Add peas and tomatoes about 10 minutes before serving, adjusting seasoning if needed.
- Serve in bowls with a garnish of chopped parsley or a drizzle of olive oil.
Notes
For a vegetarian version, substitute beef with mushrooms or lentils and use vegetable broth. Soup stores well in the fridge for up to 4 days or can be frozen for up to 3 months.
Nutrition
- Serving Size: 1 bowl
- Calories: 400
- Sugar: 5g
- Sodium: 600mg
- Fat: 15g
- Saturated Fat: 6g
- Unsaturated Fat: 6g
- Trans Fat: 0g
- Carbohydrates: 40g
- Fiber: 5g
- Protein: 30g
- Cholesterol: 80mg
Keywords: beef soup, hearty soup, vegetable soup, comfort food, winter soup
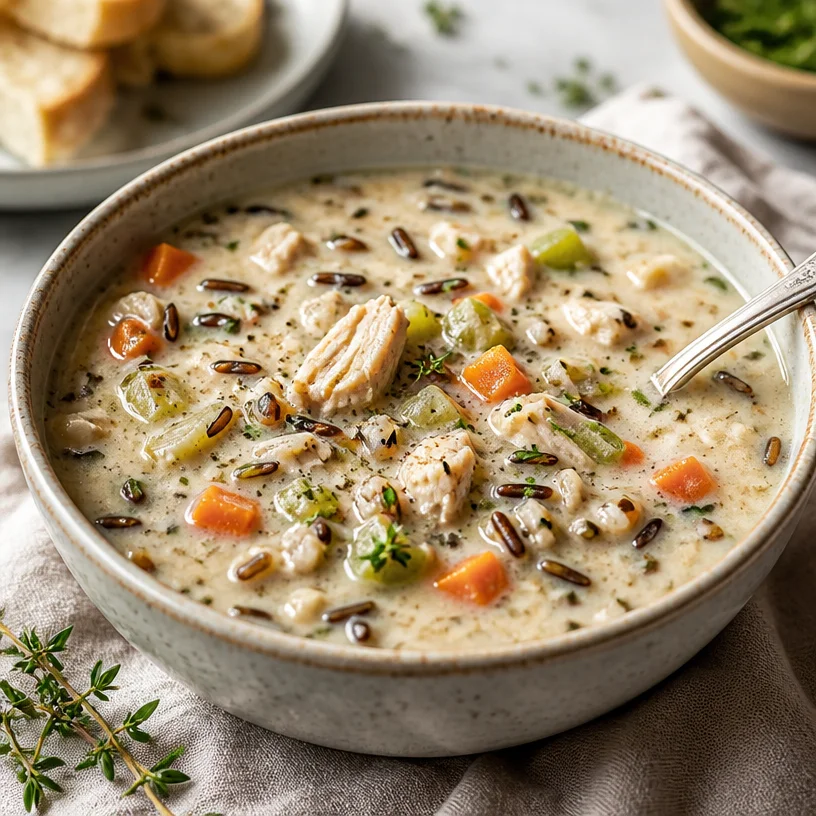
Creamy Chicken Wild Rice Soup: 30-Min Weeknight Meal
Cozy Up with a Bowl of Chicken Wild Rice Soup
Hello, dear foodies! Today, I invite you to cozy up and dive into a bowl of nostalgia, warmth, and flavor with a classic Chicken Wild Rice Soup. This isn’t just any soup; it’s one that wraps you in a loving embrace on chilly days, feeds your soul, and shares a story with every spoonful. Whether you’re coming in from the cold or simply craving something comforting, this dish is your ticket to culinary happiness.
As I stir this creamy concoction simmering on the stove, I can’t help but be transported back to my childhood. Picture this: the first hints of winter in the air, the smell of wood smoke from the fireplace, and my mom in the kitchen, stirring her own version of this soulful creation. I remember sitting at our cozy table, our hands wrapped around steaming bowls, the gentle clinking of spoons echoing in the warmth of laughter. The soup wasn’t just a meal; it was part of our treasured family rituals, a way to reconnect after busy days. Those moments inspired me to create my own Chicken Wild Rice Soup, blending my memories with a modern twist.
So, whether you’re planning a cozy dinner for two or just need simplicity with a side of elegance for a weeknight meal, let’s gather our ingredients and get cooking!
Ingredients: What You’ll Need
Here’s a list of the stars of the show for our Chicken Wild Rice Soup, along with some helpful notes:
-
Chicken (2 cups, cooked and shredded)
- You can use rotisserie chicken for a quick shortcut or poach your own chicken breasts. Remember, skinless, boneless chicken thighs also add great moisture!
-
Wild Rice (1 cup, uncooked)
- Wild rice has a nutty flavor and chewy texture, making it perfect for this soup. If you can’t find wild rice, a combination of brown rice and a bit of black rice works in a pinch.
-
Carrots (2, diced)
- Sweet and colorful, carrots add depth and a lovely earthiness. Feel free to swap these with parsnips for a unique twist.
-
Celery (2 stalks, diced)
- This crunchy vegetable enhances the flavor base of the soup. If you don’t have celery, chopped bell peppers can add a fun pop of color.
-
Cream (1 cup, heavy or half-and-half)
- For richness! You can substitute with coconut milk for a dairy-free twist or use low-fat cream for a lighter option.
-
Chicken Broth (6 cups)
- Homemade broth is fantastic if you have it, but any low-sodium chicken broth will do. For vegetarian options, vegetable broth works perfectly.
-
Onion (1 medium, diced)
- A classic aromatics base, adding flavor and aroma. You can use shallots for a milder taste or even leeks for a gourmet touch.
-
Garlic (3 cloves, minced)
- Fresh garlic elevates flavor. In a pinch? Try garlic powder—about 1 teaspoon will suffice.
-
Thyme (1 teaspoon, dried or a few sprigs fresh)
- This herb brings a fragrant, earthy essence. You can also use rosemary or sage for a different flavor profile.
-
Bay Leaves (2)
- These add depth during cooking but be sure to remove them before serving!
-
Salt and Pepper, to taste
- As always, seasoning is key. Start with a little and build up as needed.
Step-by-Step Instructions: Cooking Your Soul-Warming Soup
Step 1: Prepare Your Ingredients
Start by gathering all your ingredients. It’s always helpful to have everything ready before you fire up the stove. Dice the carrots, celery, and onion, mince your garlic, and shred that chicken. If you haven’t cooked your wild rice yet, now’s the time to do so.
Step 2: Sauté the Aromatics
In a large pot or Dutch oven, heat 2 tablespoons of olive oil over medium heat. Add the diced onion, and sauté for about 2-3 minutes until it becomes translucent. Toss in the garlic and cook for an additional minute until fragrant. Pro tip: Be careful not to burn the garlic; it can turn bitter if overcooked!
Step 3: Add the Vegetables
Stir in the diced carrots and celery. Cook for another 4-5 minutes, allowing the vegetables to soften. This builds a lovely flavor base! As they cook, feel free to season with a pinch of salt and pepper.
Step 4: Pour in the Chicken Broth
Once your vegetables are soft, it’s time to pour in 6 cups of chicken broth. Add two bay leaves and a teaspoon of dried thyme. Let it come to a simmer; you’ll start to see the steam rise and smell that delicious aroma filling your kitchen!
Step 5: Add the Wild Rice
Stir in the uncooked wild rice. Cover the pot and let it simmer for about 45 minutes, or until the rice is tender and has absorbed some of that beautiful broth. Give it a stir every now and then so the rice doesn’t stick to the bottom.
Step 6: Introduce the Chicken and Cream
Once the rice is ready, stir in your cooked and shredded chicken. Now for the cream! Pour in 1 cup of heavy cream (or your chosen substitute) and let the soup simmer for an additional 5-10 minutes. This is where the soup transforms into a creamy dream! Taste and adjust seasoning if needed.
Step 7: Final Touches
Remove the bay leaves, and if using fresh thyme, pluck the leaves from the stems and toss them in for a burst of freshness. Give the soup one last gentle stir!
Serving Suggestions: Plating Your Masterpiece
To serve, ladle the warm soup into your favorite bowls. For a beautiful touch, you could drizzle a bit of olive oil on top or add a sprinkle of freshly chopped parsley. Serve with crusty bread or a fresh green salad for a complete meal. Trust me; your friends and family will be asking for seconds!
Recipe Variations: Get Creative!
-
Herbed Wild Rice: Add a tablespoon of freshly chopped dill or parsley right at the end for a fresh pop!
-
Mushroom Medley: Sauté some sliced mushrooms with the onions for an earthy depth.
-
Spicy Kick: Toss in a pinch of red pepper flakes for heat, or finish with a splash of hot sauce!
-
Vegetarian Version: Omit the chicken and use chickpeas or lentils for protein, and swap chicken broth for vegetable broth.
-
Extra Veggies: Incorporate peas or spinach right at the end for added texture and color.
Chef’s Notes: From My Kitchen to Yours
This Chicken Wild Rice Soup recipe has evolved over the years as I’ve experimented with flavors and textures. I love how it brings back those warm memories of family dinners and laughter around the table. Sometimes, I even sneak in a splash of white wine while sautéing the onions for an added layer of flavor. Cooking is all about making it your own, after all!
One of my favorite kitchen stories involves my best friend trying to recreate this soup for a gathering. She forgot to remove the bay leaves and ended up serving them alongside the soup, which made for quite the laugh and a lesson learned!
FAQs and Troubleshooting
Q: Can I use leftover rice instead of uncooked wild rice?
- A: Definitely! If you have leftover cooked wild rice, stir it in after you’ve simmered the broth and vegetables for about 20 minutes. Just heat it through, and you’re good to go!
Q: My soup is too thick. What can I do?
- A: If your soup thickens too much, simply add more chicken broth or water a little at a time until you reach your desired consistency.
Q: What if I don’t have chicken?
- A: You can substitute with shredded turkey, or make it vegetarian with beans, lentils, or additional veggies.
Q: Can I freeze this soup?
- A: Yes! Just be sure to omit the cream before freezing and add it in when reheating for the best texture.
Nutritional Info (Optional)
While the nutritional information can vary based on exact ingredients and portions used, a serving of Chicken Wild Rice Soup typically contains:
- Calories: ~400
- Protein: ~30g
- Carbohydrates: ~45g
- Fats: ~15g
This delicious soup is not only comforting but also packed with nutrients, making it a delightful choice any day of the week!
And there you have it! A cheerful, comforting journey through the making of Chicken Wild Rice Soup. Remember, cooking is a love language—take your time, make it yours, and enjoy every bite! Happy cooking, and may your table always be filled with love and laughter.
PrintChicken Wild Rice Soup

A comforting and creamy Chicken Wild Rice Soup perfect for chilly days, blending nostalgic flavors with modern twists.
- Prep Time: 15 minutes
- Cook Time: 60 minutes
- Total Time: 75 minutes
- Yield: 6 servings 1x
- Category: Soup
- Method: Simmering
- Cuisine: American
- Diet: Non-Vegetarian
Ingredients
- 2 cups cooked and shredded Chicken
- 1 cup uncooked Wild Rice
- 2 Carrots, diced
- 2 stalks Celery, diced
- 1 cup heavy Cream (or substitute)
- 6 cups Chicken Broth
- 1 medium Onion, diced
- 3 cloves Garlic, minced
- 1 teaspoon dried Thyme (or fresh)
- 2 Bay Leaves
- Salt and Pepper, to taste
Instructions
- Prepare your ingredients by gathering and prepping them before you start cooking.
- Sauté the aromatics, heating olive oil in a large pot and cooking onion and garlic until fragrant.
- Add the diced carrots and celery, cooking until softened.
- Pour in the chicken broth and add bay leaves and thyme, bringing it to a simmer.
- Add the uncooked wild rice, cover, and let it simmer until tender.
- Introduce the shredded chicken and cream, simmering for a few more minutes.
- Remove the bay leaves and add fresh thyme if desired before serving.
Notes
For variations, consider adding herbs or extra veggies. Make it vegetarian by using chickpeas and vegetable broth.
Nutrition
- Serving Size: 1 serving
- Calories: 400
- Sugar: 6g
- Sodium: 600mg
- Fat: 15g
- Saturated Fat: 7g
- Unsaturated Fat: 6g
- Trans Fat: 0g
- Carbohydrates: 45g
- Fiber: 3g
- Protein: 30g
- Cholesterol: 90mg
Keywords: chicken soup, wild rice soup, comfort food, cold weather recipe
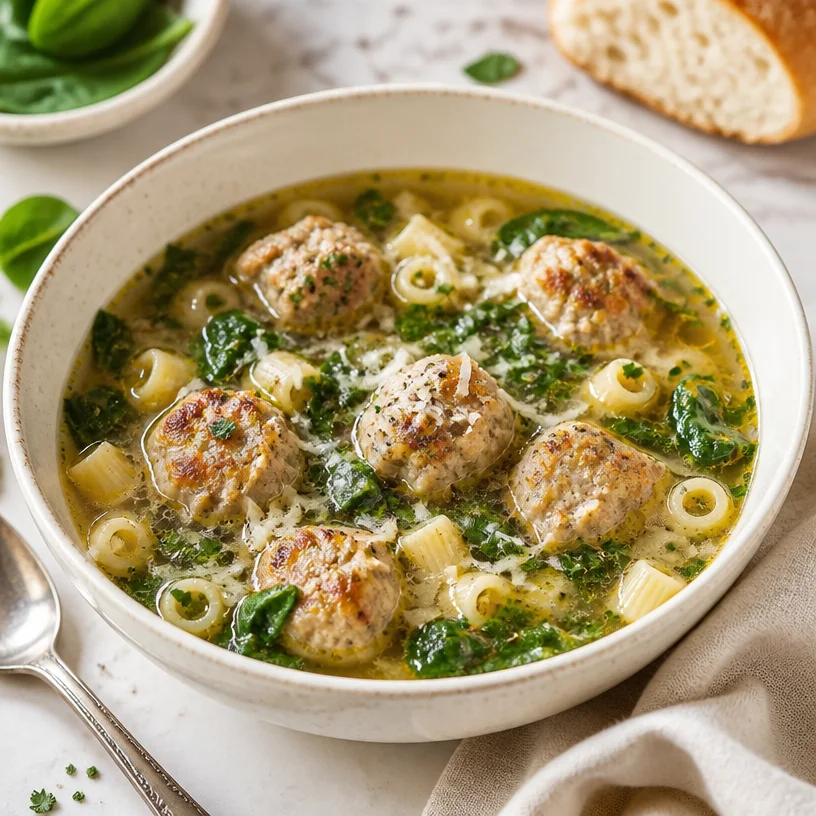
Healthy Italian Wedding Soup: 30-Minute Weeknight Dinner
A Warm Bowl of Comfort: Italian Wedding Soup
When the chill of winter sets in, or when you’re just craving a bowl of something comforting, there’s nothing quite like a steaming bowl of Italian Wedding Soup. This dish, dear friends, is more than just a meal; it’s a celebration of hearty flavors, cozy ingredients, and the warmth of togetherness. Let’s dive into how this Italian classic can bring a bit of joy to your kitchen, whether you’re hosting a gathering or just looking to warm up on a quiet evening.
My Love Affair with Italian Wedding Soup
Ah, Italian Wedding Soup. The mere thought of it takes me back to my childhood kitchen where the air was thick with the aromas of simmering broth and herbs. My grandmother, a tiny force of nature in an apron, would always prepare a massive pot every Sunday. Our family would gather, and the moment we walked through the front door, we could smell her rich, savory soup welcoming us like an old friend.
I remember thinking how magical it was that something so simple could taste so divine. The tiny meatballs bobbing in the broth were like little gems, and the vibrant greens made the soup look as lively as the conversations happening around the table. Sipping on that warm broth was like a hug for my soul, making every family story and laugh a bit more vibrant.
That’s why I’m so thrilled to share my take on this classic Italian dish! Using turkey meatballs for a lighter twist while still capturing the heartiness that we love, this Italian Wedding Soup is perfect for gatherings, weeknight dinners, or simply when you need a comforting bowl of love.
Ingredients: Filling Your Bowl with Flavor
Here’s what you’ll need to create this delightful soup:
-
Turkey Meatballs:
- These are the star of the show! Ground turkey keeps things light and flavorful. If you’re feeling adventurous, swap it for chicken or even beef. A little garlic and onion add depth—trust me, you’ll want to savor every bite.
-
Fresh Spinach:
- Spinach is what gives this soup its beautiful green color and delicate flavor. If you’re not a fan, feel free to use kale or Swiss chard. Just note that kale will take a little longer to soften.
-
Pasta:
- Small pasta shapes such as acini di pepe, orzo, or ditalini are perfect for this soup. They add a lovely texture! Don’t have any on hand? Any small pasta will work, but you might need to adjust the cooking time a bit.
-
Broth:
- A good quality chicken or vegetable broth is essential for flavor. Homemade is always the best, but store-bought works just fine. If you’re looking for a vegetarian option, opt for vegetable broth and keep the meatballs plant-based.
-
Herbs and Seasonings:
- Fresh thyme and parsley will elevate your broth’s flavor profile. Don’t have fresh? Dried herbs work too; just reduce the amount used as dried herbs are more potent.
Step-by-Step Instructions: Crafting Your Comfort Bowl
-
Make the Meatballs:
- In a mixing bowl, combine 1 pound of your choice of ground turkey, 1/3 cup breadcrumbs, 1 beaten egg, 2 cloves of minced garlic, salt, and pepper to taste.
- Tip: Keep your hands wet while shaping the meatballs to avoid sticking—the perfect meatball should be about the size of a golf ball!
-
Brown the Meatballs:
- Heat a tablespoon of olive oil in a large pot over medium heat. Once hot, add your turkey meatballs, browning them on all sides (about 5-7 minutes).
- Chef Hack: You don’t need to cook them through, as they’ll finish cooking in the broth later. Just get that lovely golden color!
-
Sauté the Aromatics:
- Remove the meatballs and set them aside. In the same pot, add chopped onions, a few cloves of minced garlic, and a pinch of red pepper flakes. Sauté until the onions are translucent.
- Insight: This step builds a flavor base, so don’t rush! Allow those onions to sweat and caramelize a touch.
-
Add the Broth:
- Pour in 6 cups of chicken broth and bring it to a simmer. Scrape the bottom of the pot to incorporate any flavorful bits left behind.
- Pro Tip: If you want to deepen the flavor even more, stir in a splash of white wine!
-
Cook the Pasta:
- Once your broth is simmering, add in your pasta of choice and cook according to package instructions. Fresh pasta options will only need a few minutes, while dried may take up to 10.
- Hint: To prevent overcooked pasta, you can cook it separately and add it directly into each bowl when serving.
-
Return the Meatballs:
- After your pasta is cooked, gently slide the meatballs back into the pot. Simmer for another 5 minutes for everything to meld beautifully.
- Tip: If you like a bit more broth, just add a splash more before serving!
-
Toss in the Spinach:
- Just before serving, stir in a couple of cups of fresh spinach and let it wilt for a couple of minutes.
- Chef Insight: Timing is key here! You want that vibrant color and fresh taste, not mushy greens.
Serving Suggestions: Plating with Love
Ladle generous portions of your Italian Wedding Soup into wide, shallow bowls. Finish with a sprinkle of freshly grated Parmesan cheese and a drizzle of high-quality olive oil for that extra touch. A few sprigs of fresh parsley on top will elevate both flavor and presentation. Serve with crusty bread or a simple green salad on the side to soak up all that delicious broth!
Recipe Variations: A Twist on Tradition
- Pesto Surprise: Stir in a spoonful of pesto at the end for a punch of basil goodness.
- Spicy Meatballs: Mix in some crushed red pepper or Italian sausage into your turkey mixture for a kick.
- Vegetarian Delight: Substitute the meatballs with lentils and opt for vegetable broth.
- Lemon Zest: Add a squeeze of fresh lemon juice before serving for a delightful brightness.
- Different Greens: Swap spinach for arugula for a peppery twist.
Chef’s Notes: The Evolution of My Recipe
As I’ve grown in my cooking journey, this soup has become a canvas for my creativity. What started with my grandma’s recipe has transformed through my personal tastes and interactions with fellow food lovers. I’ve discovered new spices, adapted meat options, and have enjoyed experimenting with gluten-free pasta. Each time I make Italian Wedding Soup, it’s a delightful reminder of those family gatherings, but it also reflects my growth as a chef.
And let me tell you—some of my funniest kitchen stories revolve around this dish! I once accidentally dropped an entire box of dry pasta in the broth. The soup turned out more like a pasta salad! Not my finest moment, but it became a family favorite story for years to come!
FAQs and Troubleshooting
-
Why are my meatballs falling apart?
- Ensure your meatballs are well mixed and form them tightly. You can also add another egg or breadcrumbs for better binding.
-
Can I make this soup ahead of time?
- Absolutely! Just prepare the soup but add the pasta and spinach right before serving to keep them fresh and al dente.
-
What can I serve with Italian Wedding Soup?
- Pair it with some crusty Italian bread, garlic knots, or a side salad for a complete meal.
-
How do I store leftovers?
- Store in an airtight container in the fridge for up to 3 days. It may thicken, so just add more broth when reheating.
Nutritional Info
Serving Size: About 1 cup
Calories: Approximately 250 kcal
Protein: 20g
Carbohydrates: 22g
Fat: 12g
Fiber: 2g
So there you have it—your step-by-step guide to creating a heartwarming bowl of Italian Wedding Soup! I hope this recipe finds its way into your kitchen traditions just as it has in mine. Remember to take your time, enjoy the process, and most importantly, gather those you love around the table. Happy cooking!
PrintItalian Wedding Soup

A comforting Italian classic featuring turkey meatballs, fresh spinach, and small pasta in a savory broth.
- Prep Time: 15 minutes
- Cook Time: 30 minutes
- Total Time: 45 minutes
- Yield: 4 servings 1x
- Category: Main Course
- Method: Cooking
- Cuisine: Italian
- Diet: Non-Vegetarian
Ingredients
- 1 lb ground turkey
- 1/3 cup breadcrumbs
- 1 beaten egg
- 2 cloves garlic, minced
- Salt and pepper, to taste
- 1 tbsp olive oil
- 1 onion, chopped
- Red pepper flakes, to taste
- 6 cups chicken broth
- 2 cups small pasta (acini di pepe, orzo, or ditalini)
- 2 cups fresh spinach
- Fresh thyme and parsley, to taste
Instructions
- Combine the ground turkey, breadcrumbs, beaten egg, minced garlic, salt, and pepper in a mixing bowl to make the meatballs.
- Heat olive oil in a large pot over medium heat and brown the meatballs for 5-7 minutes.
- Remove the meatballs and set aside. In the same pot, sauté chopped onions, minced garlic, and red pepper flakes until translucent.
- Pour in the chicken broth and bring to a simmer.
- Add the pasta to the broth and cook according to package instructions.
- Return the meatballs to the pot and simmer for 5 minutes.
- Stir in the fresh spinach just before serving, allowing it to wilt.
Notes
Serve with freshly grated Parmesan cheese and a drizzle of olive oil for added flavor. Pair with crusty bread or a simple salad.
Nutrition
- Serving Size: 1 cup
- Calories: 250
- Sugar: 2g
- Sodium: 800mg
- Fat: 12g
- Saturated Fat: 3g
- Unsaturated Fat: 5g
- Trans Fat: 0g
- Carbohydrates: 22g
- Fiber: 2g
- Protein: 20g
- Cholesterol: 80mg
Keywords: Italian Wedding Soup, comfort food, turkey meatballs, soup recipe, healthy soup
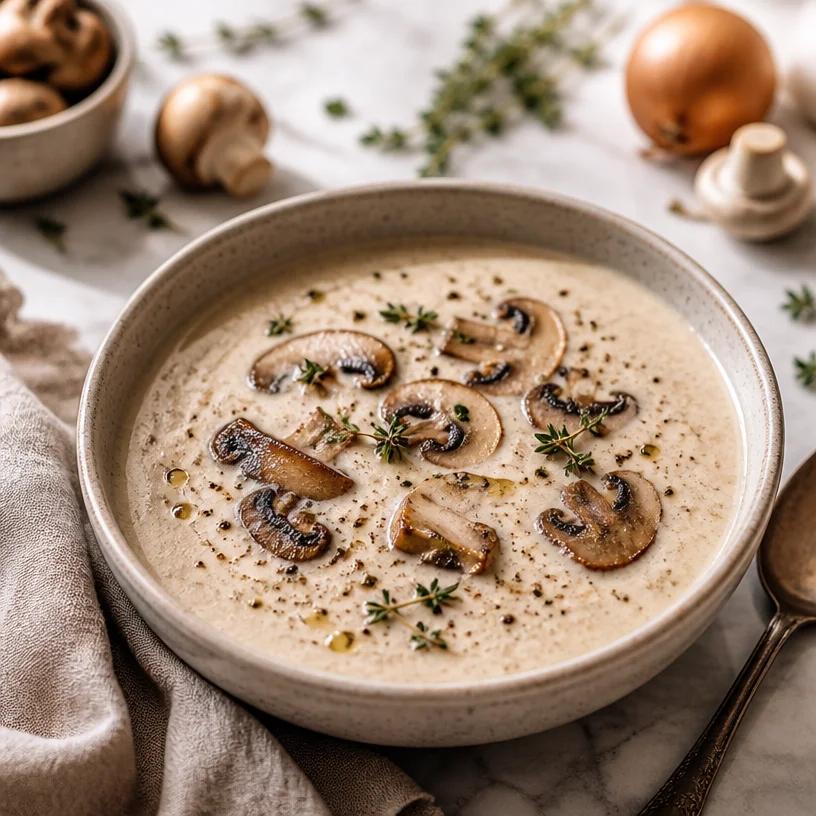
Creamy Mushroom Soup: 20-Minute Weeknight Comfort Recipe
The Comfort of Creamy Mushroom Soup: A Cozy Journey in Every Spoonful
Hello, dear food lovers! If there’s one dish that embodies warmth, comfort, and the kind of loving hug that your grandma might give you, it’s creamy mushroom soup. This delightful concoction isn’t just good for the soul; it’s quite versatile and remarkably easy to whip up in your cozy kitchen. My love for this fragrant, creamy dish runs deep, and I can’t wait to share why it holds a special place in my heart.
A Simple Yet Heartfelt Memory
Many moons ago, I remember standing in my childhood kitchen, the aroma of sautéing mushrooms and onions mingling with the rich scent of thyme wafting through the air. My mom would often make her famous mushroom soup on chilly Sunday afternoons, capturing the essence of comfort food in a single bowl. I can still picture the large wooden spoon my mom used to stir the pot, her laughter ringing out as my siblings and I snuck in bites before it was even ready. That’s the magic of cooking — it creates these beautiful, nostalgic moments that we carry with us forever.
As she served us each a bowl topped with a sprinkle of fresh parsley, my heart filled with happiness not only from the delicious flavor but from the lovely family time we shared. It taught me that food isn’t just sustenance; it’s about connection. This beloved creamy mushroom soup carries those cherished memories, making it an essential part of my culinary repertoire.
The Essential Ingredients
Now, let’s dive into the star players of our creamy mushroom soup! Each ingredient contributes its own unique magic, so let’s take a closer look.
-
Mushrooms:
- Why: These earthy wonders form the foundation of our soup. You can use cremini, shiitake, or even the classic button mushrooms for varied flavor and texture.
- Substitution Tip: If you need a change, try using canned mushrooms in a pinch, but fresh is always best!
-
Onion:
- Why: The onion adds depth and sweetness to the soup, balancing the earthiness of the mushrooms.
- Substitution Tip: Shallots or leeks work excellently if you want a milder flavor.
-
Thyme:
- Why: Fresh thyme imparts a lovely herby fragrance that ties everything together.
- Substitution Tip: If fresh thyme isn’t available, you can use dried thyme; just remember that dried herbs are more concentrated, so you’ll want about a third of the amount.
-
Cream:
- Why: Cream adds luxurious velvety richness that makes the soup so comforting.
- Substitution Tip: For a healthier option, you can use half-and-half, coconut milk, or a cashew cream for a dairy-free alternative.
Step-by-Step Instructions
Ready to get cooking? Let’s take this journey together, step by step!
-
Prepare Your Ingredients:
- Start by cleaning and slicing your mushrooms. Always use a damp cloth to wipe them clean instead of rinsing them under water; mushrooms absorb water, which can change their texture.
- Chop the onion finely and strip the thyme leaves from the stems. Feel free to inhale those beautiful aromas!
-
Sauté the Onions:
- In a large pot, heat a splash of olive oil over medium heat. Add the chopped onion and a pinch of salt. Cooking the onion for about 5-7 minutes until it softens and turns translucent will really enhance its sweetness. This step adds a beautiful base flavor, setting the stage for the mushrooms.
-
Add the Mushrooms:
- Toss in the sliced mushrooms and increase the heat to medium-high. We want to sauté these until they’re golden brown and have released their moisture, which should take about 10 minutes. This step is crucial; browning the mushrooms boosts that umami factor that elevates the dish to another level!
-
Incorporate the Thyme:
- Stir in the fresh thyme and continue to cook for another minute until the aroma hits you. It’s like a cozy blanket wrapping around your senses.
-
Pour in the Stock:
- Now it’s time to add 4 cups of vegetable or chicken stock. Bring it to a boil, then reduce the heat and let it simmer for about 15 minutes, allowing the flavors to marry beautifully.
-
Blend the Soup:
- Here’s a fun part! Either use an immersion blender or carefully transfer the soup into a blender. Blend until smooth (if you enjoy a chunkier soup, you can reserve some sautéed mushrooms to stir back in later). This step creates that luxurious texture we all crave!
-
Stir in the Cream:
- Return the soup to the pot and stir in one cup of heavy cream (or your chosen alternative). Allow it to gently heat through. Taste and season with salt and pepper as needed. This is the moment you can revise it to your taste.
-
Final Touches:
- Garnish with a sprinkle of fresh parsley or thyme for a pop of color and flavor. Serve hot with crusty bread or a crunchy baguette.
Serving Suggestions
When it comes to plating your creamy mushroom soup, simplicity is key. Ladle the soup into warm bowls and top with a spoonful of sautéed mushrooms, a drizzle of olive oil, and a few sprigs of fresh thyme for that picture-perfect finishing touch. Pair it with crusty bread for dipping — trust me; the combination is divine!
Recipe Variations
Want to shake things up? Here are a few creative variations to play with:
- Truffle Mushroom Soup: Add a dash of truffle oil just before serving for an elegant touch.
- Mushroom-Spinach Soup: Toss in a handful of fresh spinach at the end for a pop of color and added nutrients.
- Asian-Inspired Twist: Drizzle with soy sauce, sesame oil, and a sprinkle of toasted sesame seeds for a completely different flavor profile.
- Mushroom & Leek: Swap out half the mushrooms for leeks for a sweeter, more robust flavor.
- Peppery Variation: Add a hint of crushed red pepper for a warm kick!
Chef’s Notes
This creamy mushroom soup has been my go-to for cozy gatherings or even solo dinners when I want to treat myself. I hold dear the memories of friends who have gathered around my table to enjoy it. Over time, I’ve learned that the best recipes often evolve through experimentation. For instance, I’ve swapped out the cream for coconut milk during my vegan phase, and it still turned out incredibly delicious! Each bowl is a bit of love from my kitchen to yours.
FAQs and Troubleshooting
-
Why is my soup too thin?
- This may happen if the mushrooms released too much moisture. If this happens, you can thicken the soup by blending in a bit more cooked potato, or simmering it longer to reduce it.
-
How can I enhance the flavor?
- If you’re looking for more depth, consider adding a splash of white wine when you cook the mushrooms! It’ll elevate that flavor profile immensely.
-
My soup is too rich; how can I lighten it?
- Simply add more vegetable or chicken stock to dilute it. A squeeze of lemon juice can also balance out the richness beautifully.
-
Can I make this soup ahead of time?
- Absolutely! Make it ahead and store it in the fridge for up to 3 days. Just remember to wait until reheating to add the cream, which will keep it from curdling.
Nutritional Info
While I’m not a nutritionist, I can tell you that this creamy mushroom soup is packed with umami flavor while being relatively low in calories. It’s a great source of vitamins and minerals thanks to the mushrooms, especially Vitamin D, when exposed to sunlight!
Cooking is all about enjoying the process and forging connections with those around us. So tie on that apron, grab your favorite spoon, and let’s create a cozy bowl of creamy mushroom goodness that warms the heart! Welcome to the delightful world of Ivory Apron — where elevated cooking meets everyday moments. Bon appétit!
PrintCreamy Mushroom Soup
A comforting and versatile creamy mushroom soup that warms the soul.
- Prep Time: 15 minutes
- Cook Time: 30 minutes
- Total Time: 45 minutes
- Yield: 4 servings 1x
- Category: Soup
- Method: Sautéing, Blending
- Cuisine: French
- Diet: Vegetarian
Ingredients
- 8 cups mushrooms (cremini, shiitake, or button), sliced
- 1 onion, chopped finely
- 4 cups vegetable or chicken stock
- 1 cup heavy cream (or alternative)
- 2 tablespoons olive oil
- 1 tablespoon fresh thyme, stripped from stems
- Salt, to taste
- Pepper, to taste
- Fresh parsley or thyme, for garnish
Instructions
- Prepare your ingredients: Clean and slice mushrooms. Chop onion and strip thyme leaves.
- Sauté the onions: Heat olive oil, add onion, and salt. Cook for about 5-7 minutes until softened.
- Add the mushrooms: Increase heat and sauté mushrooms until golden brown for about 10 minutes.
- Incorporate the thyme: Stir in thyme and cook until aromatic.
- Pour in the stock: Add stock, bring to boil, then simmer for 15 minutes.
- Blend the soup: Use an immersion blender or transfer to a blender until smooth.
- Stir in the cream: Return soup to pot, add cream and heat through while seasoning as needed.
- Garnish: Serve with fresh parsley or thyme and enjoy with crusty bread.
Notes
This soup can be made ahead of time and stored in the fridge for up to 3 days. Add cream just before reheating.
Nutrition
- Serving Size: 1 serving
- Calories: 350
- Sugar: 5g
- Sodium: 400mg
- Fat: 24g
- Saturated Fat: 12g
- Unsaturated Fat: 10g
- Trans Fat: 0g
- Carbohydrates: 25g
- Fiber: 3g
- Protein: 8g
- Cholesterol: 60mg
Keywords: creamy mushroom soup, comfort food, vegetarian soup, cozy recipes
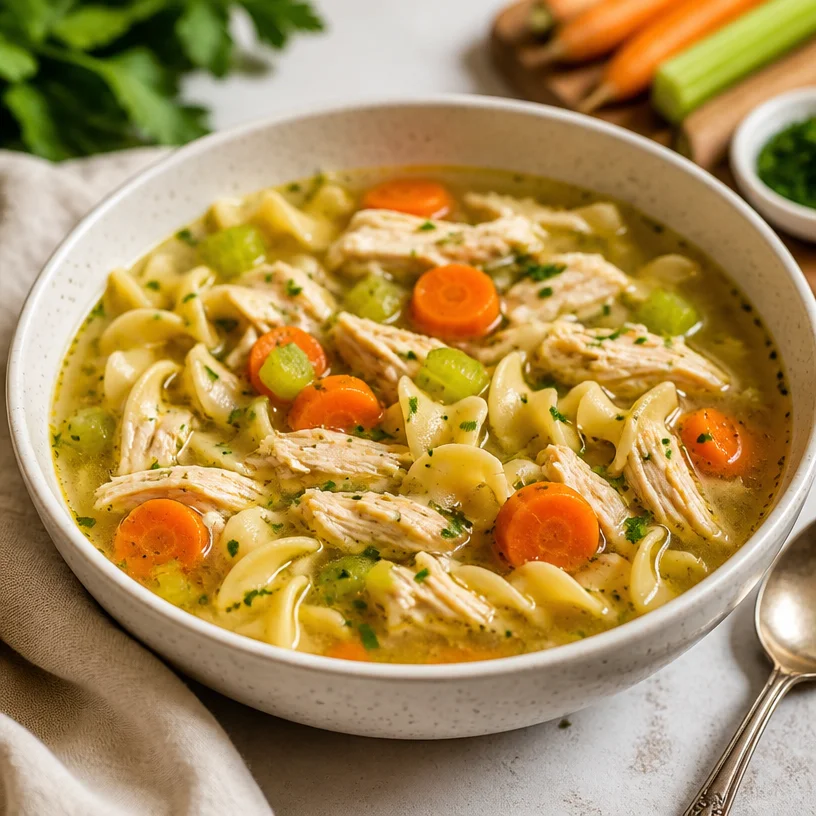
Minute One-Pot Chicken Noodle Soup for Busy Weeknights
The Comfort of Chicken Noodle Soup: A Timeless Classic
Hello, dear food friends! Today, we’re diving into one of my all-time favorite dishes: Chicken Noodle Soup. It’s a nostalgic recipe that warms the heart, brings family together, and serves as a culinary remedy on chilly days. Whether it’s the first snowfall of the year or just an ordinary Tuesday evening, there’s something wonderfully comforting about a steaming bowl of chicken noodle soup. Join me as we explore the magic behind this classic dish, share a personal cooking story, and whip up a batch that will make your kitchen feel like home.
A Spoonful of Nostalgia
Let me take you back to my childhood kitchen. I can still picture my mom stirring a large pot of chicken noodle soup on a rainy afternoon, the delicious aroma wafting through the house. I’d drift into the kitchen, drawn in by the scent of savory broth and tender chicken. She would always let me sneak slivers of carrots and noodles as we prepped the ingredients together. Those moments were filled with laughter, stories, and a sprinkle of love that only home-cooked meals can provide.
One of my favorite memories was when I got to help her make the soup for my grandparents’ visit. It was a simple affair, but the joy on their faces as they savored each bite made me realize that food isn’t just about nourishment; it’s about connection. Now, I find myself recreating that soup, adding my own little spins, yet maintaining the essence of that cherished recipe. Let’s whip up a pot of this classic together; I promise it will bring just as much warmth to your table as it did to mine!
Ingredients You’ll Need
Here’s a list of what you will need to create your very own delicious chicken noodle soup:
-
Chicken: I recommend using bone-in, skin-on chicken thighs for added flavor and richness. If you’re short on time, rotisserie chicken works wonders, too! Just shred it up and throw it in at the end.
-
Egg Noodles: These tender noodles soak up the broth beautifully. If you need a gluten-free option, try using rice noodles or spiralized zucchini for a fresh twist.
-
Carrots: Sweet and colorful, carrots add a lovely crunch. You can switch them out for parsnips for a slightly sweeter flavor.
-
Celery: Celery is essential for that classic flavor profile, contributing a subtle crispness. It can be substituted with fennel if you like a slightly anise-like taste.
-
Broth: Homemade is best! However, store-bought or low-sodium chicken broth works wonderfully. You can also combine chicken and vegetable broth for a richer flavor.
Step-by-Step Instructions
-
Prep Your Chicken: Start by rinsing your chicken pieces under cold water, then pat them dry with paper towels. Season them generously with salt and pepper. This will enhance their natural flavors.
Chef Tip: You can sear the chicken in a bit of olive oil before adding it to the pot for an extra layer of depth. Just brown it for about 5 minutes on each side.
-
Sauté the Aromatics: In a large soup pot, heat a tablespoon of olive oil over medium heat. Add diced carrots and celery, cooking for about 5 minutes until they start to soften. Throw in a minced garlic clove for an extra flavor punch in the last minute.
Little Chef Hack: If you’re feeling adventurous, add a splash of white wine after sautéing the vegetables—let it reduce for a couple of minutes to enhance the flavor.
-
Add the Broth: Pour in about 8 cups of chicken broth, then add your seasoned chicken to the pot. Bring this to a gentle boil, then reduce the heat, covering partially to let it simmer. Cook for 30-40 minutes, or until the chicken is tender and fully cooked.
Chef Insight: Skimming the surface of the broth occasionally will help keep your soup clear and beautiful!
-
Shred the Chicken: Once the chicken is cooked through, carefully remove it from the pot and let it cool for a few minutes. Once it’s safe to handle, shred it using two forks. Return the shredded chicken to the pot.
-
Noodle Time: Now, add the egg noodles to the pot and let them cook for about 8-10 minutes or until they are tender. Stir occasionally to prevent them from sticking.
Quick Tip: If you prefer firmer noodles, add them toward the end of the cooking time.
-
Final Touches: Taste your soup and adjust the seasoning with extra salt, pepper, or herbs like thyme or parsley. I also love a squeeze of lemon juice at the end for a fresh pop of flavor!
-
Serve Immediately: Nothing beats the aroma of freshly cooked chicken noodle soup. Ladle it into bowls and garnish with fresh parsley for that inviting touch.
Serving Suggestions
To really elevate your chicken noodle soup experience, consider serving it with a side of crusty bread or a light salad. A sprinkle of freshly cracked pepper and a dash of chili flakes can also add a nice touch. And let’s not forget the importance of a cozy atmosphere—light some candles and get ready for a delightful meal!
Recipe Variations
-
Herbed Twist: Experiment with fresh herbs like dill or thyme for a different aromatic profile.
-
Spicy Kick: Add a pinch of red pepper flakes or a swirl of sriracha for those who like a bit of heat.
-
Creamy Version: For a rich and creamy chicken noodle soup, stir in a dollop of heavy cream toward the end of cooking.
-
Vegetarian Delight: Substitute chicken with hearty vegetables like mushrooms or chickpeas, and use vegetable broth for a satisfying, meat-free version.
-
Pasta Upgrade: Switch out egg noodles for gnocchi for a special twist that adds a fluffy texture to the soup.
Chef’s Notes
Chicken noodle soup is a timeless recipe that has evolved along with my cooking journey. I fondly recall the first time I attempted to make this dish all on my own; let’s just say it was an adventure filled with mishaps and some overcooked noodles! However, after many batches and tweaks, I’ve found a rhythm that works and a recipe that feels just right. The beauty of this soup is how customizable it is; every bowl can tell a different story!
FAQs and Troubleshooting
-
Why is my soup watery?
If your soup ends up too watery, it might be because you added too much broth or not enough noodles. To thicken it, let it simmer uncovered for a longer time to allow some liquid to evaporate or add a cornstarch slurry as a thickener. -
How can I store leftovers?
Store your chicken noodle soup in an airtight container in the fridge for up to 4 days. To freeze, portion out the soup into freezer-safe containers, leaving space for expansion. -
What if my noodles are mushy?
Mushy noodles usually happen if they are cooked too long. Next time, add them towards the final cooking stages or cook them separately and mix them in just before serving. -
Can I make it in a slow cooker?
Absolutely! Simply combine all the ingredients except the noodles in your slow cooker and cook on low for 6-8 hours. Add the noodles in the last 30 minutes of cooking.
Nutritional Info
(Optional, but helpful—calculating details to provide based on serving sizes, ingredients used, and cooking method can complement your readers’ dining choices.)
So there you have it—my take on the classic chicken noodle soup, shared with a sprinkle of love and a dash of nostalgia. I hope this recipe helps you create cozy moments and delicious memories around your own table. Don your apron, bring some friends over, and let’s make those beautiful moments last! Happy cooking!
PrintClassic Chicken Noodle Soup

A comforting chicken noodle soup recipe that warms the heart and brings family together.
- Prep Time: 15 minutes
- Cook Time: 40 minutes
- Total Time: 55 minutes
- Yield: 4 servings 1x
- Category: Main Course
- Method: Stovetop
- Cuisine: American
- Diet: Gluten-Free Option
Ingredients
- 4 bone-in, skin-on chicken thighs
- 8 cups chicken broth
- 2 cups egg noodles
- 2 carrots, diced
- 2 celery stalks, diced
- 1 garlic clove, minced
- 1 tablespoon olive oil
- Salt and pepper, to taste
Instructions
- Prep your chicken: Rinse chicken pieces under cold water, pat dry, and season with salt and pepper.
- Sauté the aromatics: In a pot, heat olive oil and cook carrots and celery for 5 minutes, adding garlic in the last minute.
- Add the broth: Pour in chicken broth, add chicken, bring to a boil, then simmer for 30-40 minutes until chicken is tender.
- Shred the chicken: Remove chicken from pot, let cool, shred, and return to pot.
- Noodle time: Add egg noodles to the pot and cook for 8-10 minutes until tender.
- Final touches: Taste and adjust seasoning with salt, pepper, and herbs. Add lemon juice if desired.
- Serve immediately: Ladle soup into bowls and garnish with parsley.
Notes
Serve with crusty bread or a light salad for an elevated experience. Customize with herbs or spices for different flavor profiles.
Nutrition
- Serving Size: 1 serving
- Calories: 350
- Sugar: 5g
- Sodium: 400mg
- Fat: 12g
- Saturated Fat: 3g
- Unsaturated Fat: 7g
- Trans Fat: 0g
- Carbohydrates: 45g
- Fiber: 3g
- Protein: 22g
- Cholesterol: 80mg
Keywords: chicken noodle soup, comfort food, classic recipe, soup recipes, warming soup
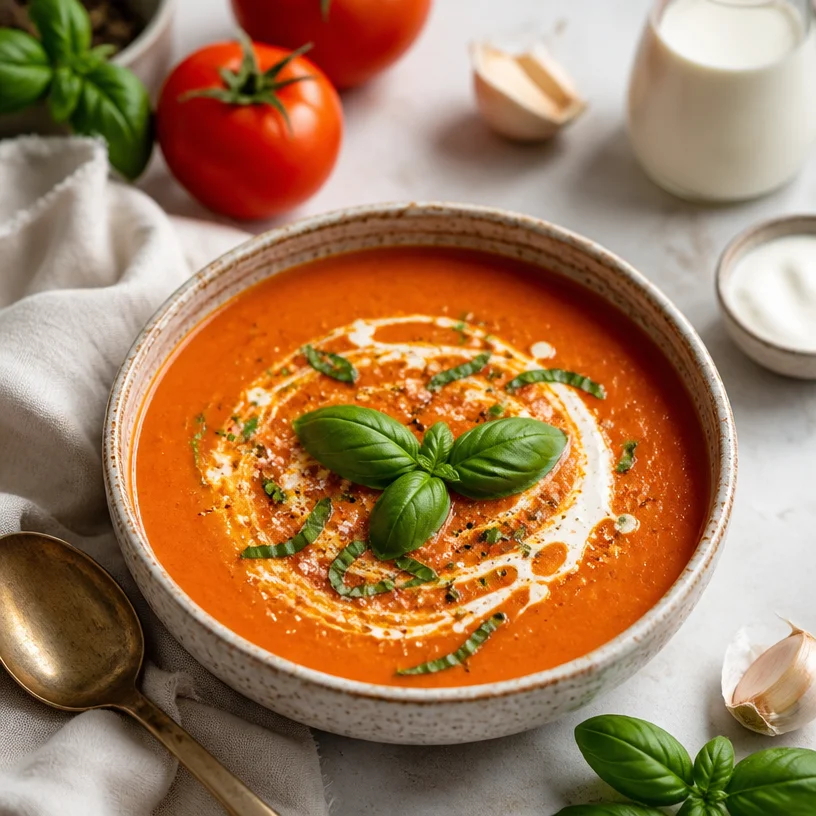
Creamy Tomato Basil Soup in 20 Minutes (Weeknight Ready)
Creamy Tomato Basil Soup: A Cozy Bowl of Love
Ah, tomato basil soup—it’s like a warm hug on a chilly day! This timeless classic has a way of bringing comfort, making it the perfect dish for any occasion. Whether you’re reminiscing about childhood lunches or serving it up at a dinner party, each spoonful brings back memories. Today, I’m super excited to share my take on this beloved recipe and help you create a bowl that feels elegant yet approachable.
Picture this: sunlight streaming through your kitchen window, the aroma of garlic dancing in the air, and vibrant, ripe tomatoes piled high on your countertop. This visualization is just the start of your culinary adventure! Cooking should be a joyful experience, and I’m here to show you how to channel that joy into every batch of creamy tomato basil soup you create.
A Childhood Memory
Growing up, my grandmother would whip up her famous tomato basil soup every Sunday afternoon. I remember the sound of her laughter mixing with the sizzling of garlic in the pan, while the rest of the family gathered around the circular table, eagerly anticipating our bowls of goodness. She would serve it with golden, crusty bread and a sprinkle of fresh basil on top.
One particularly rainy Sunday, we decided to have a cozy indoor picnic. Blankets were spread across the living room floor, and she somehow turned our mundane space into a magical bistro. As we dipped our bread into the soup, my grandmother shared stories from her youth, and the simple act of gathering became a cherished memory. It was in those moments that I learned that food wasn’t just sustenance—it was love, connection, and warmth. That’s why I created this recipe—to bring that same feeling of comfort and community to your table.
Ingredients
Let’s gather our ingredients! Here’s what you’ll need to whip up a pot of creamy tomato basil soup, along with some handy tips.
-
Tomatoes:
Fresh, ripe tomatoes are the star of the show! If you’re short on time, you can substitute with canned tomatoes—just make sure they’re high quality for the best flavor. Opt for San Marzano if you can; their sweetness is unbeatable. -
Fresh Basil:
Basil adds that lovely aromatic kick. If you can’t find fresh basil, dried basil can work in a pinch—just use about one-third of the amount. -
Garlic:
A few cloves of minced garlic elevate the flavor profile. Roasting garlic beforehand adds a sweet, caramelized note, but raw will add a sharper edge. -
Cream:
Heavy cream gives the soup its luscious texture. For a lighter option, you can substitute with half-and-half or even coconut cream if you’re aiming for dairy-free.
Step-by-Step Instructions
Ready to dive into the magical process of making this soup? Here’s how to create your creamy tomato basil soup:
-
Prep Your Ingredients:
Start by washing your tomatoes and basil. If using whole tomatoes, core and roughly chop them. For garlic, peel and mince it. This step is crucial, as it sets the stage for everything that follows! -
Sauté the Garlic:
In a large pot, heat two tablespoons of olive oil over medium heat. Add the minced garlic and cook for about 1-2 minutes until fragrant but not browned. Trust me, that garlicky aroma will make your kitchen feel like a cozy trattoria! -
Add the Tomatoes:
Toss in your chopped tomatoes and bring them to a simmer. Stir occasionally, allowing them to soften and release their juicy goodness. You’ll want to let them cook for around 10-15 minutes. If you’re using canned tomatoes, reduce this time a bit, as they’re already cooked. -
Season and Blend:
Once your tomatoes are nice and soft, throw in a pinch of salt, a splash of black pepper, and a handful of fresh basil. Using an immersion blender, puree the soup until smooth. If you don’t have one, carefully transfer the mixture to a regular blender in batches (just be cautious—hot soup can splatter!). -
Add the Cream:
After blending, return the soup to the pot if you used a regular blender. Stir in the cream and let it simmer for another 5 minutes. This is the moment when the soup goes from good to absolutely luscious! -
Taste and Adjust:
Before serving, take a little taste. Adjust salt and pepper as needed. If you want a bit more basil flavor, tear a few leaves and stir them in! -
Serve Hot:
Ladle the soup into bowls, and finish with a drizzle of olive oil, a sprinkle of crushed red pepper for some heat, and extra basil leaves for color.
Serving Suggestions
For a beautiful presentation, serve your creamy tomato basil soup in rustic bowls. A swirl of cream or a drizzle of good olive oil on top makes it look restaurant-worthy. Pair your soup with a crusty baguette, grilled cheese, or a fresh garden salad for a complete meal. Encourage everyone to gather around the table for a cozy experience!
Recipe Variations
Here are a few fun twists you can try:
-
Roasted Tomato Version:
Roast your tomatoes before adding them to the pot. Just toss them with olive oil, salt, and pepper, and roast at 400°F (200°C) until caramelized, about 25-30 minutes. -
Spicy Kick:
Add a pinch of red pepper flakes for a kick or a diced jalapeño for a fresher heat. -
Herbed Twist:
Throw in some fresh thyme or oregano along with the basil for an extra layer of flavor. -
Dairy-Free Option:
Use full-fat coconut milk if you’re avoiding dairy—it adds a lovely creaminess without sacrificing flavor. -
Additional Veggies:
Incorporate chopped carrots or bell peppers during the sautéing step for added nutrition and texture.
Chef’s Notes
I love how this recipe has evolved over the years! Initially, I used to make it with basic canned tomatoes and some dried herbs, but as my love for fresh ingredients grew, so did the complexity of the flavors. I remember one time, I was in a rush and tried to make it without blending—let’s just say it turned into a “chunky tomato adventure,” and while it was still tasty, my family had a good laugh at my “rustic” soup!
FAQs and Troubleshooting
-
Why is my soup too acidic?
Sometimes, tomatoes can be a bit tangy. Adding a pinch of sugar or a splash of cream will balance the acidity. -
Can I freeze this soup?
Absolutely! Let it cool completely, then store it in an airtight container for up to three months. To reheat, thaw in the fridge overnight and warm on the stove. -
How do I prevent my soup from burning?
Stir frequently and adjust the heat if needed. If you notice it sticking to the bottom, add a splash of water or broth to loosen it. -
Can I add protein to this dish?
Definitely! Shredded rotisserie chicken or cooked lentils could make this soup a heartier meal.
Nutritional Info
While nutrition information can vary widely, a typical serving of this creamy tomato basil soup is approximately:
- Calories: 250
- Protein: 6g
- Carbohydrates: 15g
- Fat: 20g
- Fiber: 2g
Conclusion
There you have it—your cozy bowl of creamy tomato basil soup is just a few steps away! I hope you enjoy creating this dish as much as I do. It’s all about sharing love through food, gathering at the table, and making memories. So tie on your apron, gather your ingredients, and let’s bring warmth and joy into your kitchen! Remember, whether it’s a rainy Sunday or a fancy dinner party, this soup is sure to impress. Happy cooking!
PrintCreamy Tomato Basil Soup

A cozy and comforting bowl of creamy tomato basil soup, perfect for any occasion.
- Prep Time: 15 minutes
- Cook Time: 30 minutes
- Total Time: 45 minutes
- Yield: 4 servings 1x
- Category: Soup
- Method: Stovetop
- Cuisine: Italian
- Diet: Vegetarian
Ingredients
- 2 cups fresh, ripe tomatoes, chopped
- 1/2 cup fresh basil leaves
- 3 cloves garlic, minced
- 2 tablespoons olive oil
- 1 cup heavy cream
- Salt and pepper to taste
- Crushed red pepper (optional, for serving)
Instructions
- Wash your tomatoes and basil. If using whole tomatoes, core and roughly chop them. For garlic, peel and mince it.
- Heat olive oil in a large pot over medium heat. Add minced garlic and cook for 1-2 minutes until fragrant.
- Add chopped tomatoes and bring to a simmer, cooking for 10-15 minutes.
- Season with salt and pepper, then use an immersion blender to puree the soup until smooth.
- Return to the pot if using a regular blender, stir in the cream, and let simmer for 5 minutes.
- Taste and adjust seasoning before serving.
- Ladle the soup into bowls, drizzling with olive oil and garnishing with basil and crushed red pepper.
Notes
For added richness, serve with a swirl of cream or a drizzle of good olive oil. This soup pairs beautifully with crusty bread or a fresh garden salad.
Nutrition
- Serving Size: 1 bowl
- Calories: 250
- Sugar: 4g
- Sodium: 300mg
- Fat: 20g
- Saturated Fat: 10g
- Unsaturated Fat: 8g
- Trans Fat: 0g
- Carbohydrates: 15g
- Fiber: 2g
- Protein: 6g
- Cholesterol: 60mg
Keywords: tomato soup, basil soup, creamy soup, vegetarian recipe, comfort food

Creamy One-Pot Broccoli Cheddar Soup in 25 Minutes
Cozy Comfort: Broccoli Cheddar Soup Recipe
Hello there, fellow foodies! Today, I’m thrilled to share one of my all-time favorite recipes: Broccoli Cheddar Soup. There’s just something magical about a rich, creamy soup that warms your heart and soul. It’s the kind of dish that invites you to slow down, savor each bite, and enjoy the moment, whether that’s a chilly winter evening or a rainy afternoon.
Introduction
Picture this: It’s a crisp, fall evening, and the sun is setting in hues of orange and pink. As I step into my kitchen, I’m enveloped by the comforting aroma of sautéing onions and garlic. Instantly, I’m whisked back to my childhood, where I would spend countless afternoons in my grandmother’s kitchen, watching her whip up delightful dishes that felt like hugs in a bowl. Her homemade broccoli cheddar soup was always a standout—a family favorite that would bring everyone together around the dining table.
Broccoli Cheddar Soup is a cozy classic that’s not only delicious but incredibly versatile. Whether you’re serving it as a starter or making it the star of the meal, it’s a dish that’s sure to impress. The best part? You don’t need to be a culinary wizard to recreate it. With a handful of quality ingredients and a bit of love, you can have a comforting bowl of goodness ready to serve in no time.
This recipe embodies everything that cooking should be—simple, elegant, and filled with warmth. So, tie on your ivory apron, and let’s embark on this culinary adventure together. I promise you, your taste buds will thank you!
Personal Story
I’ll never forget the first time I made this soup entirely on my own. I was about 12 years old and was intent on impressing my parents during one of their date nights at home. I gathered all the ingredients and set to work, channeling my grandmother’s spirit and the aromas of her kitchen. As my knife chopped through the vibrant green florets, I could almost hear her voice guiding my movements.
The kitchen quickly filled with a symphony of savory scents as I sautéed the onions and garlic. With a few accidental splashes and a couple of moments where I questioned my ability to pull off the dish, I finally ladled the creamy soup into bowls. My parents were amazed—my dad took a generous first spoonful, paused, and proclaimed it "the best soup ever." My heart swelled with pride! From that moment, I was hooked on the joy of cooking—not just for nourishment but for creating memories that last a lifetime.
Ingredients
Here’s what you’ll need to whip up your own delicious Broccoli Cheddar Soup:
-
Broccoli
- Fresh broccoli is the star of this soup! Its bright color, unique flavor, and health benefits make it a fantastic choice. If fresh isn’t available, frozen florets work too—just reduce the cooking time a bit.
-
Carrots
- Carrots add a touch of sweetness and color. They also provide a nice crunch. If you want a different flavor profile, try using parsnips or sweet potatoes instead for a unique twist!
-
Cheddar Cheese
- A good quality sharp cheddar takes this soup to the next level. It adds depth and creaminess. For a twist, consider using Gruyère or a blend of cheeses like mozzarella or Monterey Jack.
-
Heavy Cream
- This luscious ingredient contributes to that velvety texture we all adore. If you’re looking for a lighter option, you can replace it with half-and-half or even whole milk, but the richness will decrease.
-
Onion
- A yellow onion is perfect for this recipe. It adds sweetness when sautéed. If you’re short on onions, shallots can be a lovely substitute!
-
Garlic
- Fresh garlic is a must! It brings an aromatic punch to the soup. If you’re in a pinch, garlic powder can work as an alternative, but fresh is always better.
-
Vegetable Broth
- Broth is the backbone of many soups. You can use store-bought or homemade if you’re feeling adventurous! For extra flavor, use chicken broth instead.
-
Salt and Pepper
- These seasonings round out the flavors. Always taste as you go! If you want to spice things up, a pinch of red pepper flakes can add a little heat.
Step-by-Step Instructions
Ready to dive in? Let’s make this delicious Broccoli Cheddar Soup step by step!
-
Prep the Vegetables:
- Begin by washing and chopping your broccoli into small florets. Don’t forget to chop the stem, too! It’s delicious and nutritious. Next, peel and dice the carrots, and finely chop the onion. Mince the garlic. Here’s a little tip: If you’re short on time, you can buy pre-chopped veggies from the store.
-
Sauté the Aromatics:
- In a large pot, heat a drizzle of olive oil over medium heat. Once hot, add your chopped onion and sauté for about 5 minutes, until it’s translucent and fragrant. Add the minced garlic and cook for an additional minute, just until fragrant—be careful not to burn it!
-
Add Carrots and Broccoli:
- Toss in the diced carrots and the broccoli florets. Give everything a good stir, allowing the vegetables to mingle with the aromatics and absorb those savory flavors. Sauté for about 5 minutes to soften slightly.
-
Pour in the Broth:
- Pour in your vegetable broth, ensuring that the veggies are covered. Bring the mixture to a gentle simmer. This is where the magic happens! Let it simmer for about 15 minutes until the broccoli is tender but still bright green.
-
Blend It Up:
- Using an immersion blender, carefully blend the soup until smooth. If you don’t have an immersion blender, carefully transfer small batches to a regular blender (just be cautious of the hot liquid!) until silky and creamy. If you prefer a chunkier texture, don’t blend it completely—leave some broccoli pieces for added texture!
-
Add the Cheese and Cream:
- Return the soup to low heat and stir in the heavy cream. Gradually add the cheddar cheese, a handful at a time, and stir until melted and combined. Make sure the heat is very low to prevent the cheese from clumping!
-
Season to Taste:
- Season with salt and pepper to your liking. Taste and adjust. If you love that cheesy flavor (who doesn’t?), feel free to add more cheese!
-
Serve and Garnish:
- Ladle the soup into bowls and garnish with a sprinkle of freshly chopped chives or a little extra cheese on top.
Serving Suggestions
There are so many ways you can indulge in this Broccoli Cheddar Soup! Serve it warm with crusty bread for dipping, or pair it with a light salad for a complete meal. You could even pour it into bread bowls for extra flair during a dinner party! Remember, it’s all about creating an inviting atmosphere, so don’t shy away from presenting it with love.
Recipe Variations
Feel free to get creative with this soup! Here are a few delightful twists to consider:
- Spicy Broccoli Cheddar Soup: Add a teaspoon of sriracha or red pepper flakes for a spicy kick.
- Loaded Broccoli Cheddar Soup: Top the soup with crispy bacon bits and a dollop of sour cream for added texture and flavor.
- Vegan Version: Swap heavy cream for coconut milk and use a plant-based cheddar cheese to make it vegan-friendly!
- Herbed Broccoli Cheddar Soup: Add a handful of fresh parsley or thyme to elevate the flavor.
Chef’s Notes
This Broccoli Cheddar Soup has been a staple in my kitchen for years. It’s funny how something so simple became a crowd-pleaser at holiday gatherings and cozy weeknights alike. Over time, I’ve refined the recipe, adding a splash of creaminess here and a sprinkle of seasoning there, always making it my own.
Every time I make this soup, I’m transported back to those family gatherings, and I often find myself reminiscing about the faces around the table, eagerly slurping down their bowls. It’s remarkable how food has the power to create such beautiful memories and connections.
FAQs and Troubleshooting
Q1: My soup turned out too thick. What do I do?
- No worries! If your soup is thicker than you’d like, slowly stir in additional vegetable broth or water until you reach your desired consistency.
Q2: Why is my cheese clumping instead of melting?
- The most likely culprit is high heat. Always keep the heat low when adding cheese to prevent it from clumping. If it does clump, you can try blending the soup again to smooth it out.
Q3: Can I make this soup in advance?
- Absolutely! This soup stores beautifully in the fridge for up to three days. Just be sure to store it in an airtight container. You might need to add a splash of broth when reheating to bring back that creamy texture.
Q4: How can I add more flavor?
- Explore adding fresh herbs like thyme or rosemary when simmering the broth. A dash of nutmeg or Dijon mustard can also elevate flavors remarkably!
Nutritional Info (Optional)
While I believe that food should bring joy and comfort, I also know that nutritional information can be helpful. A single serving of broccoli cheddar soup (approximately 1 cup) contains roughly:
- Calories: 350
- Protein: 12g
- Fat: 25g
- Carbohydrates: 20g
- Fiber: 3g
(A note: Nutritional values can vary based on portion sizes and specific ingredients used.)
Now that you’ve got the scoop on making delicious Broccoli Cheddar Soup, I hope you’re inspired to try it out in your kitchen! Cooking is a beautiful way to express love, creativity, and warmth.
Remember, good food isn’t about showing off; it’s about showing up. So gather your loved ones, pour some wine, tie on that ivory apron, and let’s create something timeless together. Happy cooking!
PrintBroccoli Cheddar Soup

A rich and creamy Broccoli Cheddar Soup that warms the heart and soul, perfect for chilly evenings or rainy afternoons.
- Prep Time: 15 minutes
- Cook Time: 30 minutes
- Total Time: 45 minutes
- Yield: 4 servings 1x
- Category: Soup
- Method: Stovetop
- Cuisine: American
- Diet: Vegetarian
Ingredients
- 2 cups fresh broccoli florets
- 1 cup diced carrots
- 1 cup sharp cheddar cheese, shredded
- 1 cup heavy cream
- 1 medium yellow onion, chopped
- 2 cloves garlic, minced
- 4 cups vegetable broth
- Salt and pepper, to taste
- Olive oil, for sautéing
Instructions
- Prep the vegetables: Wash and chop broccoli, peel and dice carrots, chop onion, and mince garlic.
- Sauté the aromatics by heating olive oil, then add onion and cook until translucent, add garlic and cook until fragrant.
- Add carrots and broccoli, stir and sauté for about 5 minutes.
- Pour in vegetable broth, cover the vegetables, and bring to a simmer for about 15 minutes until broccoli is tender.
- Blend the soup until smooth using an immersion blender or regular blender.
- Add heavy cream and gradually add cheddar cheese, stirring until melted.
- Season with salt and pepper to taste.
- Serve in bowls and garnish with chopped chives or additional cheese.
Notes
For a vegan version, substitute the heavy cream with coconut milk and use plant-based cheese.
Nutrition
- Serving Size: 1 cup
- Calories: 350
- Sugar: 5g
- Sodium: 600mg
- Fat: 25g
- Saturated Fat: 15g
- Unsaturated Fat: 8g
- Trans Fat: 0g
- Carbohydrates: 20g
- Fiber: 3g
- Protein: 12g
- Cholesterol: 80mg
Keywords: broccoli cheddar soup, easy soup recipes, comfort food

One-Pot French Onion Soup Recipe: Weeknight Comfort
The Ultimate French Onion Soup: A Bowl of Comfort and Flavor
Ah, French onion soup! The mere mention of it conjures images of cozy Parisian bistros, crisp air, and the rich smell of caramelized onions wafting through the kitchen. This soul-warming dish is not just a recipe; it’s a tradition, an experience, and a journey back to simpler times around the dinner table. At IvoryApron.com, we believe cooking is all about bringing people together, and this classic offering is no exception.
So, gather your loved ones, pour a glass of your favorite wine, and let’s recreate the magic of French onion soup right in your own kitchen. Whether you’re a seasoned chef or just learning the ropes, I promise—I’ll guide you every step of the way. Are you ready to lift the lid on this heartwarming dish?
A Personal Story: Memories of My First Bowl
Let me take you back to a chilly winter evening when I first tasted French onion soup. I was just a young home cook, living in a bustling city filled with endless culinary adventures. My boyfriend and I had found this quaint little bistro tucked away on a cobblestone street. The ambiance was perfect—dimly lit with flickering candles, laughter, and the sound of clinking glasses filled the air.
As soon as I took that first spoonful, my heart melted. The silky, slow-cooked onions paired with the deep, savory broth transported me to France in a heartbeat. It was like a warm hug in a bowl! At that moment, I knew I had to learn how to make this dish for myself. Little did I know how much joy it would bring to my table—perfect for gatherings, date nights, or even just a peaceful evening alone. Let’s dive into this recipe and create our own cozy memories!
Ingredients: A Symphony of Flavor
Here’s what you’ll need to make a rich, comforting French onion soup:
-
Onions: About 4 large yellow onions will do the trick! They’re sweeter when caramelized and provide that rich base flavor we love. If you want a milder taste, try adding a couple of shallots.
-
Beef Broth: 6 cups of good-quality beef broth. It creates a deep, savory flavor. If you’re vegetarian, opt for vegetable broth—it works surprisingly well while still maintaining the essence of the dish!
-
Baguette: You’ll need a crusty French baguette. Its texture adds that beautiful crunch when toasted, making the perfect topper for your soup. You can substitute with any good artisan bread you have on hand.
-
Gruyère Cheese: About 1.5 cups of grated Gruyère. This cheese melts into gooey perfection and adds a nutty flavor that’s quintessential for French onion soup. For a twist, feel free to experiment with Emmental or even a sharp cheddar.
-
Butter: 4 tablespoons of unsalted butter. This adds richness and helps caramelize the onions beautifully. If you’re watching your butter intake, canola oil is a decent alternative, though it won’t provide the same depth of flavor.
-
Olive Oil: A splash (around 1 tablespoon) will help in sautéing the onions, ensuring they don’t stick. You can use any neutral oil if olive oil isn’t your thing.
-
Salt and Pepper: Generously season for a balanced flavor. Freshly cracked pepper is always a great choice here!
Step-by-Step Instructions: Let’s Get Cooking!
Now that we have our ingredients, it’s time to roll up our sleeves and create this delicious dish! Ready? Let’s go!
Step 1: Slice Those Onions
Start by peeling and slicing your onions. Aim for thin, even slices—about ¼ inch thick is perfect. This helps them cook evenly and caramelize beautifully. If you’re feeling dramatic, slice them while listening to some French café music—it adds to the experience!
Step 2: Caramelize
In a large, heavy-bottomed pot (like a Dutch oven), melt the butter and olive oil over medium heat. Toss in those onions and a pinch of salt; it’ll help draw out the moisture. Stir occasionally, and let the onions slowly caramelize for about 30 to 40 minutes until they turn a lovely, golden brown. Patience is key! If they start sticking to the bottom, feel free to deglaze with a splash of broth.
Step 3: Add Flavor
Once your onions are beautifully caramelized, pour in your beef broth! Stir it all together and bring it to a gentle simmer. Cook for an additional 10-15 minutes to let the flavors meld. You can also adjust the seasoning here—add salt and pepper to taste.
Step 4: Prepare the Baguette
While the soup simmers, preheat your oven to 400°F (200°C). Take your baguette and slice it into 1-inch thick pieces. Arrange them on a baking sheet and bake for about 10 minutes or until they’re nice and crispy. This will create that perfect base for your cheese and soup!
Step 5: Cheese Time!
Remove the soup from the heat and prepare your bowls. Ladle the hot soup into oven-safe bowls, placing 1 or 2 slices of your toasted baguette on top. Generously sprinkle your grated Gruyère cheese over the bread. Now, for the next step—broil! Place the bowls under the broiler for 3-5 minutes, or until the cheese is bubbly and golden brown. Keep an eye on it—it can go from perfect to burnt in seconds!
Step 6: Serve and Savor
Carefully remove them and let them sit for a minute (they’ll be hot!). Then, sprinkle a bit of fresh thyme if you fancy, and dive into that warm, cheesy goodness!
Serving Suggestions: Plating with Love
To serve up your French onion soup in style, consider presenting it in rustic individual ramekins or bowls. Garnish with a sprig of fresh thyme to elevate the visual appeal, placing a small salad or some fresh baguette pieces on the side for that added touch. You can also pair it with a crisp white wine or a light beer to complement the rich flavors!
Recipe Variations: Flavor Twists to Try
-
Herbal Infusion: Add a few sprigs of fresh thyme or rosemary during the simmering process for a fragrant twist.
-
A Splash of Wine: Try deglazing the pot with a splash of white wine after caramelizing the onions for a deeper flavor profile.
-
Mushroom Magic: Incorporate some sautéed mushrooms for an earthy addition that fits beautifully with the onions.
-
Veggie Delight: Use vegetable broth and swap out the cheese for a vegan alternative. You can also add more veggies like carrots or diced tomatoes for added nutrition.
-
Spicy Kick: Toss in a pinch of red pepper flakes to introduce a little heat!
Chef’s Notes: A Recipe with a History
French onion soup has a long-standing history, dating back to ancient Roman times. Originally eaten by the poor, it has evolved into a beloved classic. Over the years, I’ve played with the recipe, adding new ingredients that reflect seasons or leftovers in my fridge. I once made a delicious version with caramelized apples, which added a sweet contrast to the savory notes. Always remember, creativity in the kitchen leads to delightful surprises!
FAQs and Troubleshooting
1. My onions are burning instead of caramelizing. What did I do wrong?
Ensure you’re cooking them over medium heat and stir frequently. If they’re cooking too quickly, reduce the heat, and don’t be afraid to add a splash of broth to deglaze the pot.
2. Can I make this soup in advance?
Absolutely! French onion soup can be made ahead and stored in the fridge for about 3 days. Reheat gently on the stove before serving, and then add the bread and cheese just before broiling.
3. What if my cheese doesn’t melt properly?
Ensure that you use a good-quality cheese that’s fresh. Gruyère is known for its melting characteristics, but you want to ensure it’s grated finely for the best melt. If it’s not bubbling up, try moving your bowls a bit closer to the broiler.
4. How do I store leftovers?
Let the soup cool completely before storing it in an airtight container in the refrigerator. It’s best to keep the bread separate until you’re ready to reheat to maintain its crispness.
Nutritional Info (Optional)
While I won’t get into specific numbers here, it’s safe to say that French onion soup can be quite hearty! Packed with caramelized onions and a good source of iron from the beef broth, it’s a comforting meal that satisfies the soul.
There you have it—your ultimate guide to making a delightful French onion soup that brings warmth and elegance to any dining experience. As we tie on our aprons, remember, cooking is not just about following a recipe; it’s about creating memories, sharing love, and savoring every spoonful. Let’s set the table and enjoy this timeless classic together! ✨
PrintThe Ultimate French Onion Soup

A rich, comforting dish that combines caramelized onions, savory broth, and melted cheese, perfect for gatherings and cozy nights.
- Prep Time: 15 minutes
- Cook Time: 50 minutes
- Total Time: 1 hour 5 minutes
- Yield: 4 servings 1x
- Category: Soup
- Method: Baking
- Cuisine: French
- Diet: Vegetarian (with modifications)
Ingredients
- 4 large yellow onions
- 6 cups beef broth (or vegetable broth for a vegetarian option)
- 1 crusty French baguette
- 1.5 cups grated Gruyère cheese
- 4 tablespoons unsalted butter
- 1 tablespoon olive oil
- Salt and pepper to taste
Instructions
- Slice the onions thinly, about ¼ inch thick.
- Caramelize the onions in a large pot with butter and olive oil over medium heat for 30-40 minutes until golden brown.
- Add beef broth to the caramelized onions and let simmer for an additional 10-15 minutes.
- Preheat the oven to 400°F (200°C) and slice the baguette into 1-inch pieces, baking until crispy.
- Prepare bowls by ladling soup and adding toasted baguette, topped with Gruyère cheese.
- Broil until the cheese is bubbly and golden brown, about 3-5 minutes.
- Serve with a sprinkle of fresh thyme and enjoy!
Notes
For a different flavor, consider adding fresh herbs or a splash of white wine during the cooking process. This recipe can be made in advance and heated before serving.
Nutrition
- Serving Size: 1 bowl
- Calories: 350
- Sugar: 8g
- Sodium: 900mg
- Fat: 22g
- Saturated Fat: 10g
- Unsaturated Fat: 8g
- Trans Fat: 0g
- Carbohydrates: 30g
- Fiber: 3g
- Protein: 10g
- Cholesterol: 40mg
Keywords: French onion soup, comfort food, soup recipe, classic French recipes, cozy meals