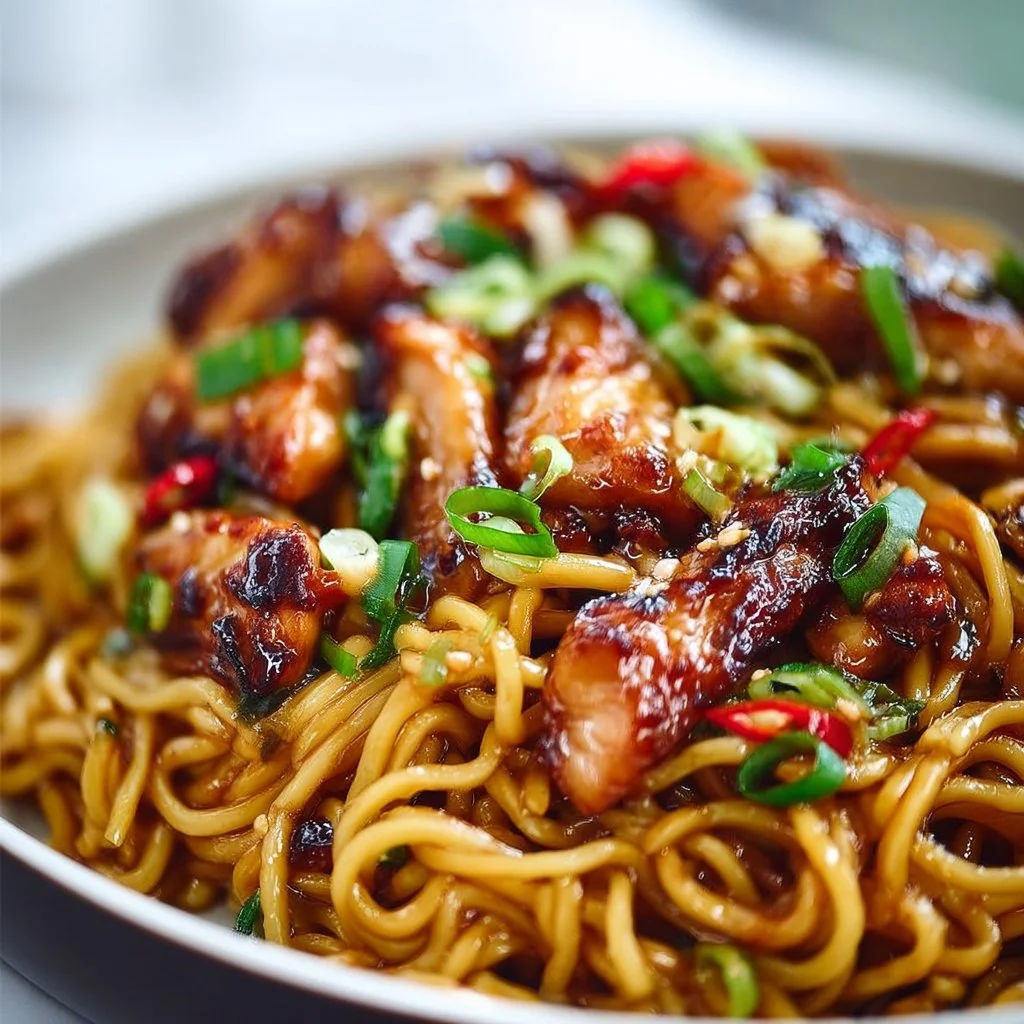
Sticky Garlic Chicken Noodles
Sticky Garlic Chicken Noodles: A Flavorful Journey
Hey there, fellow food lovers! I’m so excited to share one of my favorite dishes with you today: Sticky Garlic Chicken Noodles. This easy-to-make recipe is a perfect blend of sweet, savory, and a hint of spice—all wrapped up in a delightful noodle dish that’s sure to impress your family and friends. It’s cozy enough for a weeknight dinner yet elegant enough to serve at your next dinner party.
Picture this: a bustling kitchen, the tantalizing aroma of garlic sizzling in sesame oil, and the joyful laughter of loved ones gathered at the table. That’s what this dish embodies—an experience that warms the heart and satisfies the belly! Whether you’re a seasoned pro or just starting your culinary journey, you’ll find this recipe both approachable and delicious. So, tie on your apron, and let’s get cooking!
Personal Story
This dish brings back so many fond memories for me. I remember the first time I made sticky garlic chicken noodles for my friends. It was a chilly autumn evening, and we had decided to host a little get-together at my place. Feeling adventurous, I wanted to whip up something that would warm our hearts and tickle our taste buds.
After rummaging through my pantry and striking gold with a few staple ingredients, I found inspiration! I remember the kitchen filled with laughter as we danced around, taste-testing the sauce straight out of the bowl while the noodles cooked to perfection. When I finally plated the sticky garlic chicken, the moment was magical. Everyone gathered around, forks in hand, and within minutes, the deliciousness had us all cheering for seconds.
That evening reminded me of the power food has to bring people together. Nothing compares to sharing a meal, stories, and laughter around the table with those you care about. This recipe never fails to capture that spirit, and I can’t wait for you to experience it too!
Ingredients
Here’s what you’ll need to create these delightful sticky garlic chicken noodles:
-
8 oz noodles (such as rice or egg noodles)
Noodles are the star of the show! I love using rice noodles for a gluten-free option, but egg noodles add a lovely richness. If you’re looking for alternatives, soba noodles work beautifully too! -
1 lb chicken breast, sliced
Chicken breast gives a lean protein kick that pairs perfectly with the rich sauce. If you’re feeling adventurous, swap it out for tofu, shrimp, or even grilled vegetables for a vegetarian twist. -
3 cloves garlic, minced
Garlic is the heart of this dish! Feel free to add more if you’re a garlic lover like me. If fresh garlic isn’t available, garlic powder can provide a nice alternative—1/8 teaspoon will do! -
1/4 cup soy sauce
For that rich umami flavor, you can’t go wrong with soy sauce! For a gluten-free or less sodium option, tamari is an excellent substitute. -
2 tbsp honey
Honey adds sweetness that balances the soy sauce and garlic beautifully. You can swap it with maple syrup for a vegan alternative. -
1 tbsp sesame oil
This oil provides a wonderful nutty flavor. If sesame oil isn’t on hand, a light olive oil works just fine. -
1 tbsp vegetable oil
This is for cooking the chicken and preventing it from sticking. Use any neutral oil you have, like canola or grapeseed. -
1/2 tsp red pepper flakes (optional)
Spice it up! Adjust according to your heat preference—or leave it out if you’re catering to mild palates. -
Green onions, chopped (for garnish)
Fresh herbs elevate everything! Chopped green onions add color and a zesty crunch. Try cilantro or basil if you’re looking for something different.
Step-by-Step Instructions
Now, let’s dive into creating these decadent sticky garlic chicken noodles:
Step 1: Cook the Noodles
Start by bringing a large pot of salted water to a rolling boil. Add your noodles and cook according to the package instructions until they’re al dente. This usually takes around 5-7 minutes for fresh noodles (8-10 minutes for dried).
Chef’s Tip: Save a cup of pasta water before draining! This starchy water is magic when it comes to thicken your sauce later.
Step 2: Sauté the Chicken
While the noodles are cooking, heat 1 tablespoon of vegetable oil in a large skillet or wok over medium-high heat. Season your sliced chicken breast with a pinch of salt and pepper, then add it to the hot skillet.
Cook for about 5-7 minutes, stirring occasionally, until the chicken is golden brown and cooked through. Remove the chicken from the skillet and set it aside.
Chef’s Hack: For juicy chicken, don’t overcrowd the pan. Work in batches if necessary!
Step 3: Unlock the Flavors with Garlic
In the same skillet (don’t wash it—flavor lives here!), add another tablespoon of vegetable oil if the skillet seems dry. Toss in the minced garlic and sauté for about 30 seconds until it’s fragrant but not browned.
Note: Garlic can turn bitter if overcooked, so keep an eye on it!
Step 4: Make the Sauce
It’s time to create that sticky goodness! Add the soy sauce, honey, and sesame oil to the skillet. Whisk everything together until well combined. Let it simmer for about 2 minutes, allowing the flavors to mingle.
Chef Insight: Use this opportunity to taste your sauce! Adjust the sweetness with more honey or the saltiness with a splash of soy sauce.
Step 5: Combine Everything
Return the sautéed chicken to the skillet and toss it with the sauce until evenly coated. Now comes the fun part—add the cooked noodles! Toss the noodles in, ensuring they’re all beautifully coated with that sticky sauce.
Bonus Tip: If the mixture gets too thick, add in a splash of the reserved pasta water to loosen up the sauce.
Step 6: Add the Finishing Touches
Sprinkle in the red pepper flakes if you’re using them and give everything a final toss. Cook for an additional minute or so to heat through, allowing the noodles to soak up even more flavor.
Chef’s Note: This is where you can get creative! Consider adding broccoli, bell peppers, or snow peas for an extra pop of color and nutrition!
Serving Suggestions
Now, let’s talk presentation! Transfer the sticky garlic chicken noodles onto a large serving platter or individual bowls. Garnish them generously with chopped green onions and maybe even a sprinkle of sesame seeds for an extra touch of elegance.
Pair this dish with a chilled glass of sparkling water or a light white wine to create the complete dining experience. Trust me; your guests will be asking for your secret recipe!
Recipe Variations
Here are a few fun twists to try the next time you make these noodles:
- Spicy Mandarin: Add a tablespoon of sriracha or chili paste for a spicy kick.
- Citrus Burst: Incorporate a squeeze of fresh lime or lemon juice when serving for zesty brightness.
- Veggie Delight: Toss in pre-steamed broccoli, bell peppers, or snap peas for a colorful veggie medley.
- Noodle Swap: Use zucchini noodles for a low-carb twist—just sauté them lightly before mixing in the sauce.
- Protein Power: Experiment with shrimp, beef, or even lentils for added protein options.
Chef’s Notes
Oh, I have to share a funny kitchen story! One time, I got overly ambitious and decided to invite over 10 friends for dinner without really planning a menu. What did I make? You guessed it—sticky garlic chicken noodles! I doubled the recipe, but I forgot one important detail: my pot was too small! As the noodles boiled, they spilled over onto the stove; I was left frantically cleaning while trying to plate 10 servings. But in the end, all laughter and good memories flowed even as my kitchen looked like a noodle explosion. Sometimes it’s the messes that make the best stories!
Through trial and error, this recipe has evolved, and I’ve learned that simplicity is key. Always keep the core ingredients on hand, and you can make this dish any time the craving strikes!
FAQs and Troubleshooting
Q1: My noodles turned out mushy. What happened?
A: This can occur if you overcook the noodles, so it’s key to keep an eye on the timing and check for that perfect al dente bite. If they seem mushy, you can still salvage the dish by tossing them in the sauce and letting them soak in flavor!
Q2: Can I make this dish ahead of time?
A: Absolutely! Cook everything and store it in an airtight container in the fridge. To reheat, add a splash of water or broth to loosen up the sauce. It may thicken as it cools, but a bit of liquid will bring it back to life.
Q3: What can I use instead of honey if I’m allergic?
A: You can substitute honey with agave syrup, maple syrup, or even brown sugar mixed with a bit of water to dissolve. You’ll still get that lovely sweetness without any issues!
Q4: Why is my sauce not as sticky?
A: If the sauce seems too thin, try simmering it for a bit longer to reduce it down. If you’re looking for an even stickier consistency, adding a bit of cornstarch mixed with water can help thicken it up perfectly.
Nutritional Info (Optional)
This is a rough estimate per serving:
- Calories: 400
- Protein: 30g
- Carbohydrates: 40g
- Fat: 15g
And there you have it, my delightful Sticky Garlic Chicken Noodles recipe! I hope it brings you as much joy as it has brought into my kitchen. Remember, good food is all about intention, so enjoy the process, savor those moments with loved ones, and let your kitchen become a gathering place, just like mine. Happy cooking! 🍽️✨
PrintSticky Garlic Chicken Noodles

A perfect blend of sweet, savory, and spicy, this easy-to-make noodle dish promises to impress your family and friends.
- Prep Time: 15 minutes
- Cook Time: 20 minutes
- Total Time: 35 minutes
- Yield: 4 servings 1x
- Category: Main Course
- Method: Stir-frying
- Cuisine: Asian
- Diet: Non-Vegetarian
Ingredients
- 8 oz noodles (rice or egg noodles)
- 1 lb chicken breast, sliced
- 3 cloves garlic, minced
- 1/4 cup soy sauce
- 2 tbsp honey
- 1 tbsp sesame oil
- 1 tbsp vegetable oil
- 1/2 tsp red pepper flakes (optional)
- Green onions, chopped (for garnish)
Instructions
- Cook the noodles by bringing salted water to a boil. Add noodles and cook according to package instructions until al dente (5-7 minutes for fresh, 8-10 minutes for dried).
- Sauté the chicken in heated vegetable oil over medium-high heat for 5-7 minutes, until golden brown. Remove and set aside.
- Unlock the flavors with garlic by adding the minced garlic to the skillet and sautéing for about 30 seconds until fragrant.
- Make the sauce by adding soy sauce, honey, and sesame oil to the skillet. Whisk together and let simmer for about 2 minutes.
- Combine everything by returning the chicken to the skillet, then add the cooked noodles, tossing to coat evenly in sauce.
- Add in red pepper flakes if using, stir to mix, and cook for an additional minute.
Notes
Consider adding broccoli, bell peppers, or snap peas for added nutrition. You can swap honey with maple syrup for a vegan version.
Nutrition
- Serving Size: 1 serving
- Calories: 400
- Sugar: 8g
- Sodium: 600mg
- Fat: 15g
- Saturated Fat: 2g
- Unsaturated Fat: 12g
- Trans Fat: 0g
- Carbohydrates: 40g
- Fiber: 3g
- Protein: 30g
- Cholesterol: 70mg
Keywords: Sticky Garlic Chicken, Noodles, Easy Dinner, Asian Cuisine, Comfort Food

Cheesy Garlic Chicken Wraps
Cheesy Garlic Chicken Wraps: Elevate Your Snack Game!
Hey there, fellow food enthusiast! 🌟 Today, we’re diving into the delicious world of Cheesy Garlic Chicken Wraps — a dish that’s both simple and scrumptious! Imagine crispy, garlicky goodness wrapped up in a warm embrace of melted cheese, tender chicken, and fresh veggies. Sounds dreamy, right? Whether you’re preparing a quick lunch, a satisfying snack, or a showstopper for your next gathering, these wraps will not only please your palate but also fill your home with mouthwatering aromas.
Now, I know what you might be thinking: “Isn’t cooking something elaborate or fancy?” But trust me, cooking can be elegant without the intimidation factor. I started my cooking journey with simple ingredients, and these wraps are a prime representation of that ethos. They’re a perfect fusion of flavors with a kick of garlic, and they come together faster than you can say “Cheesy Garlic Chicken”!
So, grab your apron, pull on some tunes, and let’s start whipping up these fabulous wraps. With just a few ingredients, you’ll create a meal that feels like a restaurant experience right at your kitchen table. Ready? Let’s get cooking!
Personal Story
One of my fondest culinary memories goes back to my early days of hosting friends for movie nights. I was always looking for that perfect finger food, something that would impress while still being comfortable and cozy. That’s when these Cheesy Garlic Chicken Wraps entered the scene!
I remember one particular rainy Friday evening, the kind that screams for comfort food and a good flick. I had just finished up a long week and wanted to unwind with a warm dish that felt like a giant hug. I slathered garlic and shredded chicken into wraps and baked them until crispy. The aroma alone was enough to get my friends excited! As we gathered around the living room, munching on those ooey-gooey wraps, I realized that food isn’t just about sustenance — it’s about creating moments and memories. Laughing, sharing stories, and enjoying each bite, we quickly knew that these wraps would be a recurring favorite for all future get-togethers.
That experience taught me a valuable lesson: It’s the simplest recipes that often hold the most significance. So, let’s bring that magic to your kitchen!
Ingredients
To create these delightful wraps, you’ll need the following ingredients:
-
2 cups cooked chicken, shredded
Whether it’s rotisserie chicken for convenience or leftover grilled chicken from last night, this ingredient is your protein base. Got leftover turkey? Perfect switch! -
1 cup shredded cheese (cheddar or mozzarella)
Cheddar offers a sharpness that blends wonderfully with garlic, while mozzarella brings that gooey stretchiness we all crave. Want to spice it up? Try pepper jack for a kick! -
4 large lettuce leaves or low carb wraps
If you’re aiming for a low-carb option, go for lettuce for a fresh touch. Prefer something heartier? Whole wheat or spinach wraps work beautifully! -
3 cloves garlic, minced
Garlic adds an unbeatable flavor punch! If you’re garlic-shy, feel free to scale back, but remember — good garlic makes everything better! -
1 tablespoon olive oil
This helps to sauté the garlic and chicken, enhancing the flavor. Don’t have olive oil? Use melted butter or avocado oil — both will lend a rich taste! -
Salt and pepper, to taste
Seasoning is key! Play with your palate — add more salt, or toss in some Italian seasoning for an aromatic twist.
Step-by-Step Instructions
Get ready to bring those flavors to life! Follow these steps, and you’ll be devouring Cheesy Garlic Chicken Wraps in no time!
-
Preheat your oven: Set it to 375°F (190°C). This is where the magic begins!
-
Sauté the garlic: In a large skillet, heat the olive oil over medium heat. Add the minced garlic and sauté for about 1-2 minutes until fragrant. Be careful not to burn it; burnt garlic can taste bitter!
-
Add the chicken: Toss the shredded chicken into the skillet. Stir to combine and coat the chicken in the garlicky goodness. Let it heat through for about 3-5 minutes. Be sure to season it with salt and pepper; this is the moment to layer in those flavors!
-
Make the cheese meld: When the chicken is heated thoroughly, sprinkle the shredded cheese on top. Cover the skillet with a lid to allow the cheese to melt — this should take about 2-3 minutes. If you don’t have a lid, simply lower the heat and keep an eye on it!
-
Build your wraps: Take your lettuce leaves or low-carb wraps and lay them flat on a clean surface. Spoon the cheesy chicken mixture onto the center of each leaf or wrap.
-
Wrap it up: Fold the sides of the wrap over the filling and then roll it up from the bottom. If using lettuce leaves, you can use toothpicks to hold them together, making them easier to grab!
-
Bake for a crispy finish: Arrange the wraps on a baking sheet and pop them in the oven for about 5-10 minutes, just until the edges are lightly crispy and golden. If you want extra crispy, turn on the broiler for the last minute — but keep a close eye!
-
Serve and enjoy: Remove from the oven, let cool for a minute, and enjoy them as they are or with your favorite dipping sauce — ranch, salsa, or garlic aioli, perhaps?
Serving Suggestions
Plating is the final touch to elevate your wraps! Arrange your Cheesy Garlic Chicken Wraps on a platter with a sprinkle of fresh parsley or a drizzle of balsamic glaze for a little flair. Serve with a side of fresh veggies or a simple salad for a delightful balance.
For an extra pop, serve them with small bowls of dipping sauces — think garlic aioli, zesty sour cream, or spicy salsa. This interactive element not only excites your guests but allows them to customize their bites!
Recipe Variations
Feel like shaking things up? Here are some creative twists you can try:
-
Buffalo Chicken Wraps: Add a few tablespoons of your favorite hot sauce to the chicken mixture for a spicy kick.
-
Veggie-Packed Wraps: Add sautéed peppers and onions for added color and crunch, or toss in some spinach for an extra boost of nutrients.
-
Herbed Chicken: Infuse fresh herbs like thyme, basil, or cilantro into the chicken while sautéing for a refreshing twist.
-
Cheesy Spinach & Artichoke Wraps: Stir in some chopped artichoke hearts and fresh spinach before wrapping for a creamy, decadent alternative.
Chef’s Notes
Each time I make these wraps, I’m reminded of that cozy movie night with friends. It’s funny how food can transport us back in time! Over the years, I’ve tweaked this recipe many times, experimenting with different cheeses and proteins. Sometimes I even sneak in some roasted veggies — why not? It’s all about creativity and adapting to what you have available in your kitchen.
Pro tip? These wraps are excellent for meal prep! Make a double batch, store them in the fridge, and you’ve got a quick meal ready to reheat at a moment’s notice. You can even enjoy them cold — they’re that delicious!
FAQs and Troubleshooting
1. What’s the best way to store leftovers?
Place any leftover wraps in an airtight container in the fridge. They are best enjoyed within 2-3 days. Reheat them in the oven for best results.
2. Can I freeze these wraps?
Absolutely! Assemble them, but don’t bake before freezing. Once they’re frozen, you can bake them straight from the freezer — just add a few extra minutes to the cooking time.
3. How can I avoid soggy wraps?
Ensure your wraps are squeezed dry after washing and avoid over-saturating them with sauces before baking. If using lettuce, keep them cold until you’re ready to serve.
4. Can I substitute the chicken with another protein?
For sure! This recipe works wonders with turkey, shrimp, or even tofu for a vegetarian option. Just remember to adjust your cooking times as needed.
Nutritional Info (Optional)
While I don’t have the exact nutritional breakdown for these wraps, they are packed with protein from the chicken and healthy fats from the olive oil. Think of it this way: with a balance of protein, veggies, and healthy fats, you’re nourishing both your body and soul.
And there you have it! A delightful, approachable recipe for Cheesy Garlic Chicken Wraps that’s sure to become a regular feature in your culinary adventures. Cooking is not just about the food on your plate; it’s about the love and memories we create along the way. So, gather those around you, celebrate the art of sharing a meal, and enjoy every bite!
Happy cooking, and welcome to the wonderful world of Ivory Apron! 🍽️
PrintCheesy Garlic Chicken Wraps

Delicious wraps filled with cheesy garlic chicken, fresh veggies, and baked to crispy perfection.
- Prep Time: 10 minutes
- Cook Time: 15 minutes
- Total Time: 25 minutes
- Yield: 4 servings 1x
- Category: Snack
- Method: Baking
- Cuisine: American
- Diet: High Protein
Ingredients
- 2 cups cooked chicken, shredded
- 1 cup shredded cheese (cheddar or mozzarella)
- 4 large lettuce leaves or low carb wraps
- 3 cloves garlic, minced
- 1 tablespoon olive oil
- Salt and pepper, to taste
Instructions
- Preheat your oven to 375°F (190°C).
- Sauté the garlic in olive oil over medium heat for 1-2 minutes until fragrant.
- Add the shredded chicken to the skillet and season with salt and pepper. Heat through for 3-5 minutes.
- Make the cheese meld by sprinkling it on top and covering the skillet for 2-3 minutes.
- Build your wraps by placing the cheesy chicken mixture on the lettuce leaves or wraps.
- Wrap them up and secure with toothpicks if using lettuce.
- Bake in the oven for 5-10 minutes until crispy and golden.
- Serve and enjoy with your favorite dipping sauces!
Notes
For a spicier version, add hot sauce to the chicken mixture. These wraps are great for meal prep and can be frozen before baking.
Nutrition
- Serving Size: 1 serving
- Calories: 450
- Sugar: 1g
- Sodium: 350mg
- Fat: 20g
- Saturated Fat: 8g
- Unsaturated Fat: 9g
- Trans Fat: 0g
- Carbohydrates: 20g
- Fiber: 2g
- Protein: 30g
- Cholesterol: 70mg
Keywords: cheesy wraps, garlic chicken, easy snacks, meal prep, baked wraps
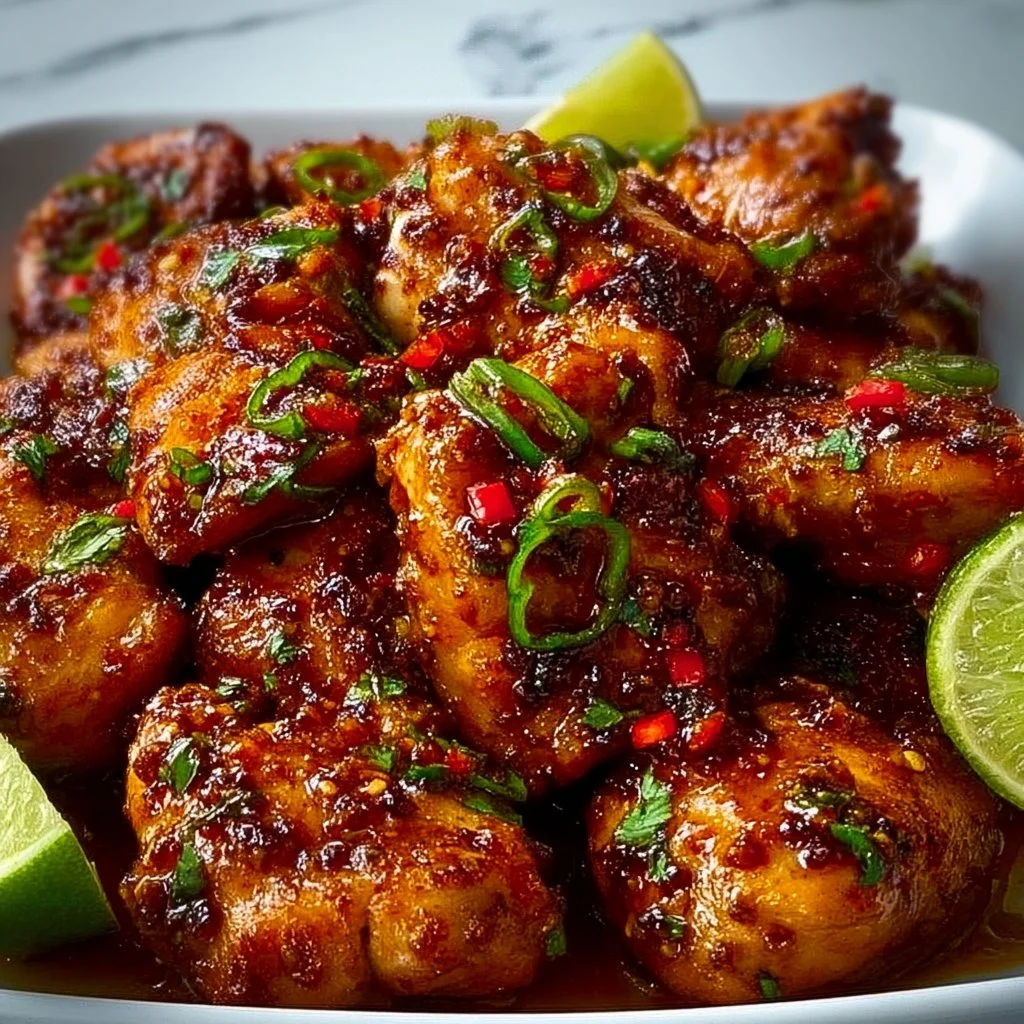
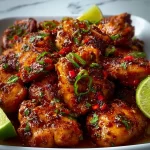
Chili Lime Chicken
Chili Lime Chicken: A Zesty Delight for Your Dinner Table
Hello, fellow food lovers! Today, I’m thrilled to share a recipe that’s become a staple in my kitchen—all while bringing a gorgeous pop of color and flavor to your table: Chili Lime Chicken! Picture this: succulent chicken breasts marinated in freshly squeezed lime juice and a sprinkle of vibrant chili powder. The result? A dish that dances on your palate with hints of citrus and a gentle heat that keeps things exciting.
We all have those go-to recipes that save us on busy weeknights and transform simple ingredients into something that feels remarkable. This Chili Lime Chicken is one of those dishes for me—it’s hassle-free yet feels like a gourmet experience. The best part? You don’t have to spend hours in the kitchen to impress your family or guests. The combination of zesty lime and smoky chili powder is an incredible flavor duo that will have everyone at the table asking for seconds.
So, gather your ingredients and let’s embark on this culinary journey together. Prepare to tie on your apron, pour a refreshing drink, and embrace the joy of cooking!
Personal Story
Let me take you back a few years to a sunny Sunday afternoon, where I found myself rummaging through my pantry, searching for something to whip up for dinner. I stumbled upon chicken breasts and remembered a similar recipe I had seen on a food blog. Inspired, I grabbed fresh limes from my fruit bowl and my trusty chili powder stash from the spice cabinet.
As I marinated the chicken, the fragrance of lime wafted through my kitchen and made me reminisce about family gatherings in my grandmother’s kitchen—where love was served on every plate. She would always say, “Cooking is like love; it should be entered into with abandon or not at all.” I kept her spirit alive that day by creating a meal from the heart. When my friends arrived, the aroma invited them to the table before we even sat down. We ended up sharing laughter and stories over platefuls of my Chili Lime Chicken. It was one of those evenings I’ll never forget, filled with joy, connection, and delicious food!
Ingredients
Let’s dive into the crucial players for our Chili Lime Chicken. Here’s what you’ll need:
-
Chicken Breasts
- A lean source of protein that soaks up flavors beautifully. If you prefer, you can substitute with chicken thighs for a juicier option or use tofu for a vegetarian alternative.
-
Fresh Lime Juice
- Provides zing—always use fresh limes for the best flavor. If you happen to be out of fresh limes, lemon juice will work in a pinch, though the flavor will be a bit different.
-
Chili Powder
- This spice adds a warm, earthy flavor with a kick. It’s versatile too! If you’re feeling adventurous, try out smoked paprika for a smokier flavor, or cayenne pepper for extra heat.
-
Olive Oil
- A key player in this marinade that helps keep the chicken moist and flavorful. You can swap it with avocado oil or even coconut oil for a different twist.
-
Garlic (minced)
- Fresh garlic elevates the dish with its rich aroma and taste. In a hurry? Pre-minced garlic from a jar can save time, but the fresh stuff is always better.
-
Salt and Pepper
- Never underestimate the power of seasoning! They bring out the natural flavors of your ingredients. Sea salt or kosher salt works wonderfully; for pepper, freshly ground will pack a bigger punch.
Step-by-Step Instructions
Now, let’s talk about how to bring this culinary masterpiece to life!
1. Marinate the Chicken
- In a large bowl, combine the fresh lime juice, minced garlic, chili powder, olive oil, salt, and pepper. Whisk until well blended.
- Chef Tip: Want more depth of flavor? Allow the chicken to marinate for at least 30 minutes, or for best results, overnight in the refrigerator. This will give all those flavors time to soak in!
2. Prep the Chicken
- If you’re using chicken breasts, pound them to an even thickness for uniform cooking. This prevents the thinner parts from drying out.
- Pro Hack: Use plastic wrap to cover the chicken while you pound it with a mallet—no mess and easy cleanup!
3. Coat the Chicken
- Add the chicken to the marinade, making sure each piece is fully coated. Cover the bowl with plastic wrap or transfer to a resealable bag. Let it hang out in the fridge for a while.
- Chef Insight: If you’re short on time, even a 10-minute marination can add flavor. But the longer, the better!
4. Prepare to Grill or Sear
- Preheat your grill or a cast-iron skillet over medium-high heat. You want it hot to achieve that lovely sear on the chicken.
- Tip: If using a skillet, add a splash of olive oil right before cooking to prevent sticking.
5. Cook the Chicken
- Once your grill is preheated, place the marinated chicken on it. If using a skillet, add the chicken to the hot oil. Cook for about 6-8 minutes per side, or until the internal temperature reaches 165°F (75°C).
- Crisp Tip: Avoid flipping your chicken too soon. Let it form a nice crust before you turn it over. This lock-in moisture and flavor!
6. Rest and Serve
- After cooking, remove the chicken from heat and let it rest for 5 minutes. This allows the juices to redistribute and keeps the chicken tender.
- Resting Insight: Don’t skip this step! Resting your meat is crucial for that juicy bite—trust the process!
Serving Suggestions
To plate your Chili Lime Chicken, slice it into juicy pieces and artfully arrange them on a crisp bed of mixed greens or your favorite grain. You can drizzle with a touch more lime juice and sprinkle with freshly chopped cilantro for that extra pop of color. Serve it alongside colorful roasted vegetables or a tangy salsa for a delightful touch!
Recipe Variations
Feeling creative? Here are a few fun variations you can try:
- Chipotle Lime Chicken: Add a bit of chipotle pepper in adobo sauce to the marinade for a smoky, spicy kick.
- Tropical Twist: Mix in some pineapple juice with the lime for a sweet and tangy marinade that screams summer!
- Herb-Infused: Toss in some fresh herbs like cilantro or parsley into the marinade for added freshness.
- Sheet Pan Dinner: Throw some sliced bell peppers and onions on the baking sheet while roasting the chicken for an all-in-one meal.
- Zesty Tacos: Shred the cooked chicken and serve it in taco tortillas with avocado, salsa, and lime wedges for a fun taco night!
Chef’s Notes
As I reflected on how this Chili Lime Chicken recipe has evolved over the years, I remember the mishaps that led to the magical moments in my kitchen. There was that one time I accidentally confused chili powder with cinnamon—yikes! Let’s just say, I quickly transformed it into a “sweet and spicy” dish that we all still laugh about to this day.
No recipe is flawless, and that’s where the adventure truly lies! Embrace those kitchen surprises and don’t be afraid to make each dish your own. Just remember, every great chef has a few stories up their sleeve.
FAQs and Troubleshooting
1. My chicken is dry — what went wrong?
Overcooking can dry out chicken; ensure you check the internal temperature and let it rest before cutting into it.
2. Can I use frozen chicken breasts?
Yes, but it’s best to thaw them fully before marinating and cooking for even flavor distribution.
3. What if my chili lime chicken is too spicy?
Adjust the amount of chili powder to your preference. Remember, you can always add more spice later, but you can’t take it away!
4. How can I store leftovers?
Store leftover chicken in an airtight container in the refrigerator for up to 3 days. It’s great cold on salads or can be reheated gently in the oven.
Nutritional Info (Optional)
This Chili Lime Chicken packs a punch with protein and zest while being low in carbohydrates, making it a healthy choice for any meal! Each serving generally contains about 200 calories, 30g of protein, 7g of fat, and 1g of carbohydrates.
There you have it! I hope this recipe lights up your kitchen as much as it has mine. Remember, it’s all about creating those moments of joy and connection around the dining table. So tie on that apron and enjoy every bite! Happy cooking!
PrintChili Lime Chicken
A zesty dish featuring marinated chicken breasts in lime juice and chili powder that delivers vibrant flavor and easy preparation.
- Prep Time: 10 minutes
- Cook Time: 15 minutes
- Total Time: 25 minutes
- Yield: 4 servings 1x
- Category: Main Course
- Method: Grilling
- Cuisine: Mexican
- Diet: Gluten-Free
Ingredients
- 4 Chicken Breasts
- 1/4 cup Fresh Lime Juice
- 2 tbsp Chili Powder
- 2 tbsp Olive Oil
- 3 cloves Garlic (minced)
- Salt and Pepper to taste
Instructions
- Marinate the chicken by combining the fresh lime juice, minced garlic, chili powder, olive oil, salt, and pepper in a large bowl. Whisk until well blended.
- Prep the chicken by pounding it to an even thickness for uniform cooking.
- Coat the chicken with the marinade, ensuring it is fully covered, and refrigerate.
- Preheat your grill or skillet over medium-high heat.
- Cook the chicken for 6-8 minutes on each side or until fully cooked through.
- Rest the chicken for 5 minutes before serving.
Notes
Resting the chicken is crucial for juicy meat. Consider variations with chipotle or tropical twists for different flavor experiences.
Nutrition
- Serving Size: 1 serving
- Calories: 200
- Sugar: 1g
- Sodium: 400mg
- Fat: 7g
- Saturated Fat: 1g
- Unsaturated Fat: 6g
- Trans Fat: 0g
- Carbohydrates: 1g
- Fiber: 0g
- Protein: 30g
- Cholesterol: 90mg
Keywords: chicken, lime, chili, easy dinner, grilling
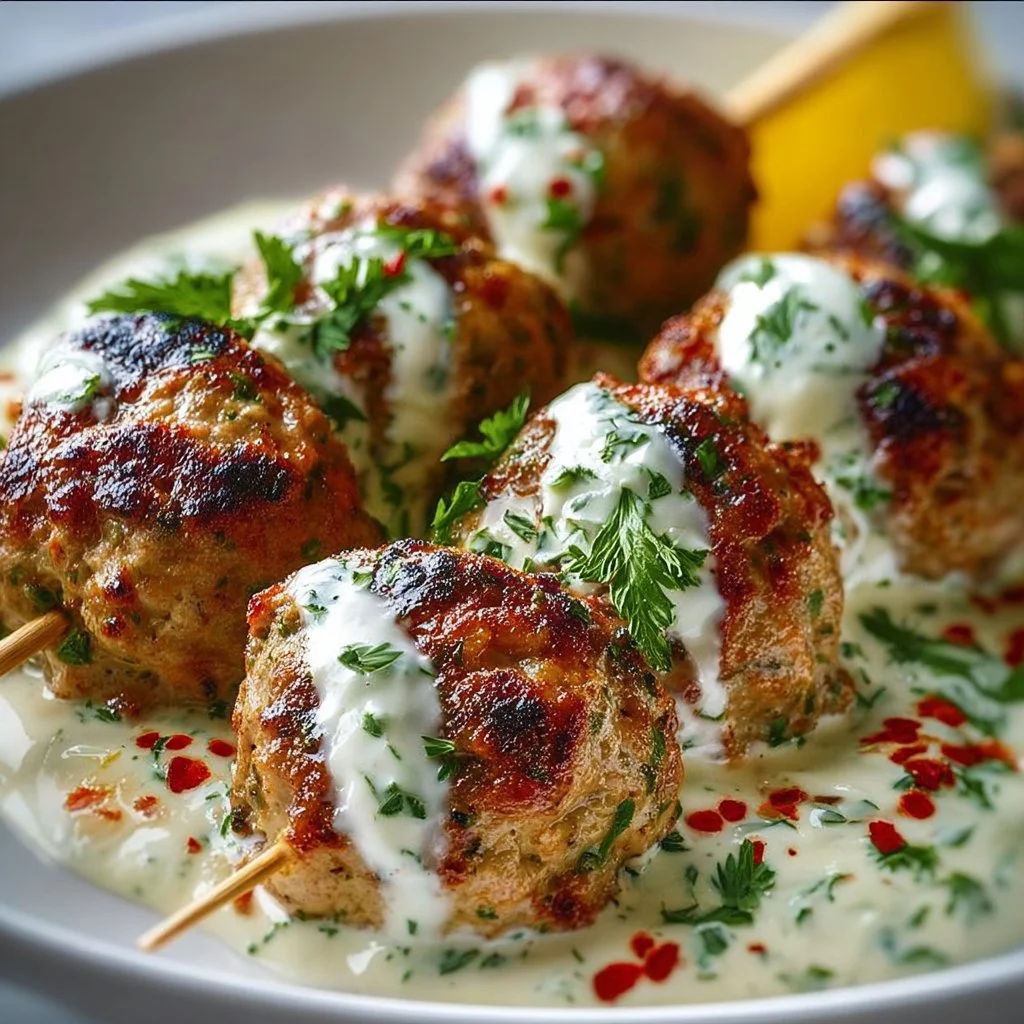
Chicken Kofta Garlic Yogurt Sauce
Juicy Chicken Kofta with Creamy Garlic Yogurt Sauce
Hey there, fellow food lovers! If you’re looking to spice up your weeknight dinners or impress your friends with a delightful dish that’s bursting with flavor, you’re in for a treat. Today, I’m excited to share one of my all-time favorites: Chicken Kofta with a luscious Garlic Yogurt Sauce. This dish is not only simple to prepare, but it also embodies everything I love about cooking—elegance, comfort, and a warm feeling of gathering around a table with loved ones.
Now, let’s be real—cooking should be fun, not intimidating. If you’ve ever felt overwhelmed at the thought of crafting a restaurant-quality meal at home, I’m here to assure you that with a little intention and quality ingredients, you can create something truly special. So tie on your ivory apron (if you have one!), and let’s get started on this savory journey.
Chicken kofta is a Middle-Eastern delicacy that’s essentially spiced ground meat rolled into delicious little morsels. With juicy bites of tender chicken combined with fragrant herbs and spices, these kofta are a surefire way to impress. And let’s talk about that Garlic Yogurt Sauce! Creamy, tangy, and packed with flavor, it’s the perfect complement to the spiced meat. Trust me; you’ll want to drizzle this sauce on everything!
Now, I know you’ll love this dish as much as I do, so let’s dive into my kitchen, and I’ll share my secrets for crafting this mouthwatering meal.
Personal Story
Back in the day, when I was just starting to host dinner parties, I discovered chicken kofta during a vibrant trip to a bustling Middle-Eastern market. The air was filled with warm spices, lots of laughter, and the smell of grilled meats—such a sensory feast! I remember trying my first kofta; it was so juicy and flavorful that I couldn’t help but smile. I instantly wanted to recreate that magic in my own kitchen.
With not much more than a basic understanding of cooking and a heart full of excitement, I returned home and set off on an experiment. I pieced together my version of kofta using ground chicken—an ingredient I loved for its lean and juicy profile. After several tries and a few mishaps along the way (let’s just say the first batch was quite… unusual!), I finally landed on the perfect blend of spices and flavors that spoke to my palate.
To this day, every time I whip up chicken kofta, it takes me back to that vibrant market. It reminds me of how cooking can transport you across the world while still keeping you firmly rooted at your own kitchen table. I hope my recipe brings a little piece of that joy to your home too!
Ingredients
Let’s check out what we’ll need for this delicious Chicken Kofta with Garlic Yogurt Sauce. Each ingredient is essential, but I’ve also included some fun tips and possible substitutions!
-
500 grams ground chicken: Lean and juicy, this is the star of the show! You can substitute with ground turkey or lamb if you’re feeling adventurous, but chicken keeps things light and flavorful.
-
1 medium onion, finely chopped: This adds sweetness and depth. If you’re in a pinch, shallots are a great substitute, or you can use onion powder in a pinch (about 1 tablespoon).
-
3 garlic cloves, minced: A must for that aromatic base! If you’re a garlic lover (like me!), feel free to add an extra clove or two.
-
1/4 cup fresh parsley, finely chopped: Fresh herbs brighten up the dish! You could swap this for cilantro or mint, depending on your taste preference.
-
1 teaspoon ground cumin: This spice is your key to that warm, earthy flavor. You can use caraway seeds, but grind them down first for a similar taste experience.
-
1 teaspoon ground coriander: Adds a citrusy note to balance the other spices. If you’re fresh-out, try using lemon pepper for a zing!
-
1 teaspoon salt: Essential for flavor enhancement! Remember, you can always add more, but you can’t take it out, so start with this amount.
-
1/2 teaspoon ground black pepper: This adds a gentle warmth. For more heat, try using black peppercorns and grinding them fresh!
-
1 cup plain yogurt: Creamy and delicious for the sauce! Greek yogurt is a fantastic replacement if you want it to be extra thick, or dairy-free options like almond yogurt work too.
-
2 tablespoons freshly squeezed lemon juice: For that zesty brightness! If you’re out of lemons, try using a splash of vinegar as an alternative.
-
Pinch of salt: For the sauce. This is just to taste, so you can adjust based on your yogurt’s flavor profile.
-
2 tablespoons olive oil: Essential for cooking and keeping the kofta moist. If you’re out, avocado oil or even melted butter would work!
Step-by-Step Instructions
Let’s jump into our cooking adventure! Here’s how to bring these amazing chicken koftas to life:
Step 1: Prepare the Mixture
In a large mixing bowl, combine the ground chicken, chopped onion, minced garlic, parsley, cumin, coriander, salt, and black pepper.
Chef’s Tip: Use your hands to gently mix the ingredients, but don’t overdo it! You want everything combined, but not overworked. Mixing by hand gives you better control over the texture—your koftas will be tender rather than dense!
Step 2: Shape the Kofta
Once the mixture is well combined, it’s time to shape your kofta. Use wet hands (to prevent sticking) to take a small amount of the mixture and form it into oval-shaped patties or skewers.
Chef’s Hack: If you want something truly beautiful, try shaping them around wooden or metal skewers. This makes for easy flipping on the grill or in the pan!
Step 3: Cook the Kofta
Heat 1 tablespoon of olive oil in a large skillet over medium heat. Once the oil is hot, carefully place the kofta in the pan, making sure not to overcrowd them. Cook for about 5-7 minutes per side, or until they’re nicely browned and cooked through.
Pro Tip: If you’re cooking on the grill, preheat it to medium and lightly oil the grates. Just keep an eye on them to avoid flare-ups!
Step 4: Make the Garlic Yogurt Sauce
While the kofta is cooking, let’s whip up that dreamy garlic yogurt sauce. In a small bowl, combine the yogurt, lemon juice, and a pinch of salt. You can also add more minced garlic if you’re feeling extra adventurous!
Chef’s Note: For a fun twist, try adding some grated cucumber for a refreshing tzatziki-style sauce. It adds crunch and keeps it cool!
Step 5: Enjoy!
Once the kofta are beautifully browned and cooked through (internal temperature should reach 75°C or 165°F), remove them from the heat.
Serving Suggestions
To serve, I like to present the kofta on a large platter, drizzled with the Garlic Yogurt Sauce and garnished with additional parsley or lemon wedges for an inviting touch. Serve alongside warm pita bread, a fresh salad, or your favorite side dish. A sprinkle of sumac or paprika can add an extra pop of color!
Recipe Variations
Now, let’s get creative! Here are a few fun variations you can try with this recipe:
-
Spicy Kofta: Add a diced jalapeño or a pinch of cayenne pepper for an extra kick.
-
Veggie Loaded: Incorporate finely grated zucchini or carrots into the meat mixture for added moisture and nutrition.
-
Pine Nut Twist: Mix in some toasted pine nuts for a nutty crunch.
-
Herbed Greek Style: Swap the parsley with fresh dill and serve with feta cheese for a Greek-inspired platter.
-
Quinoa Kofta: For a gluten-free option, mix in some cooked quinoa with the chicken to add texture and a good dose of fiber.
Chef’s Notes
This recipe has been a labor of love over the years and has evolved significantly since I first tried those kofta in the market. I remember my first attempt went horribly wrong; let’s just say I learned the value of seasoning early on!
Another funny memory that comes to mind—after wrestling with my grill one summer evening, I managed to serve a platter of charred kofta to my guests who just laughed and told me they loved "smoky flavors." I guess sometimes the best memories come from our kitchen mishaps!
Please share your fun stories too! Every kofta makes for a new story in the making—let’s write them together!
FAQs and Troubleshooting
Q: Why are my kofta falling apart while cooking?
A: This usually happens if the mixture is too dry or crumbly. Ensure you’re using enough moisture (chicken has a fair amount, but the onion and herb ratio matters too). Mixing the ground meat well helps bind everything. If needed, feel free to add an egg to the mixture for extra cohesion!
Q: Can I make these kofta ahead of time?
A: Absolutely! You can prepare the kofta mixture in advance and store it in the fridge for up to 24 hours. Just remember to shape and cook them fresh for the best texture!
Q: What’s a good side dish to serve with kofta?
A: So many options! You can serve them with couscous, tabbouleh, or a light cucumber and tomato salad. Anything bright and fresh goes beautifully with these kofta!
Q: Can I freeze the kofta?
A: Yes! Shape the kofta and then freeze them on a baking sheet before transferring them to a freezer bag for up to 3 months. Cook them from frozen, adding a few extra minutes to the cooking time.
Nutritional Info
(Optional section)
- Calories: Approximately 200 kcal per kofta (without sauce)
- Protein: 20g
- Fat: 10g (varies by cooking method)
- Carbohydrates: 2g
And there you have it! A brand-new dish to add to your weekly repertoire. I hope you enjoy making and devouring these Chicken Kofta with Garlic Yogurt Sauce as much as I do. Don’t forget to share the love by capturing those kitchen moments and tagging me!
Happy cooking, and let’s keep those conversations around the table going!
PrintJuicy Chicken Kofta with Creamy Garlic Yogurt Sauce

A flavorful Middle-Eastern dish featuring juicy chicken kofta paired with a creamy, tangy garlic yogurt sauce.
- Prep Time: 15 minutes
- Cook Time: 30 minutes
- Total Time: 45 minutes
- Yield: 4 servings 1x
- Category: Main Course
- Method: Grilling, Frying
- Cuisine: Middle Eastern
- Diet: Paleo
Ingredients
- 500 grams ground chicken
- 1 medium onion, finely chopped
- 3 garlic cloves, minced
- 1/4 cup fresh parsley, finely chopped
- 1 teaspoon ground cumin
- 1 teaspoon ground coriander
- 1 teaspoon salt
- 1/2 teaspoon ground black pepper
- 1 cup plain yogurt
- 2 tablespoons freshly squeezed lemon juice
- Pinch of salt
- 2 tablespoons olive oil
Instructions
- Prepare the Mixture: In a large mixing bowl, combine the ground chicken, chopped onion, minced garlic, parsley, cumin, coriander, salt, and black pepper.
- Shape the Kofta: Use wet hands to take a small amount of the mixture and form it into oval-shaped patties or skewers.
- Cook the Kofta: Heat 1 tablespoon of olive oil in a large skillet over medium heat. Carefully place the kofta in the pan, making sure not to overcrowd them. Cook for about 5-7 minutes per side, or until browned and cooked through.
- Make the Garlic Yogurt Sauce: In a small bowl, combine the yogurt, lemon juice, and a pinch of salt.
- Enjoy: Serve the kofta drizzled with the garlic yogurt sauce, garnished with additional parsley or lemon wedges.
Notes
For a refreshing twist, try adding grated cucumber to the yogurt sauce. This recipe can be made ahead of time and frozen for convenience.
Nutrition
- Serving Size: 1 serving
- Calories: 200
- Sugar: 2g
- Sodium: 500mg
- Fat: 10g
- Saturated Fat: 2g
- Unsaturated Fat: 8g
- Trans Fat: 0g
- Carbohydrates: 2g
- Fiber: 0g
- Protein: 20g
- Cholesterol: 60mg
Keywords: Chicken Kofta, Garlic Yogurt Sauce, Middle Eastern
Nigerian Chicken Stew Recipe
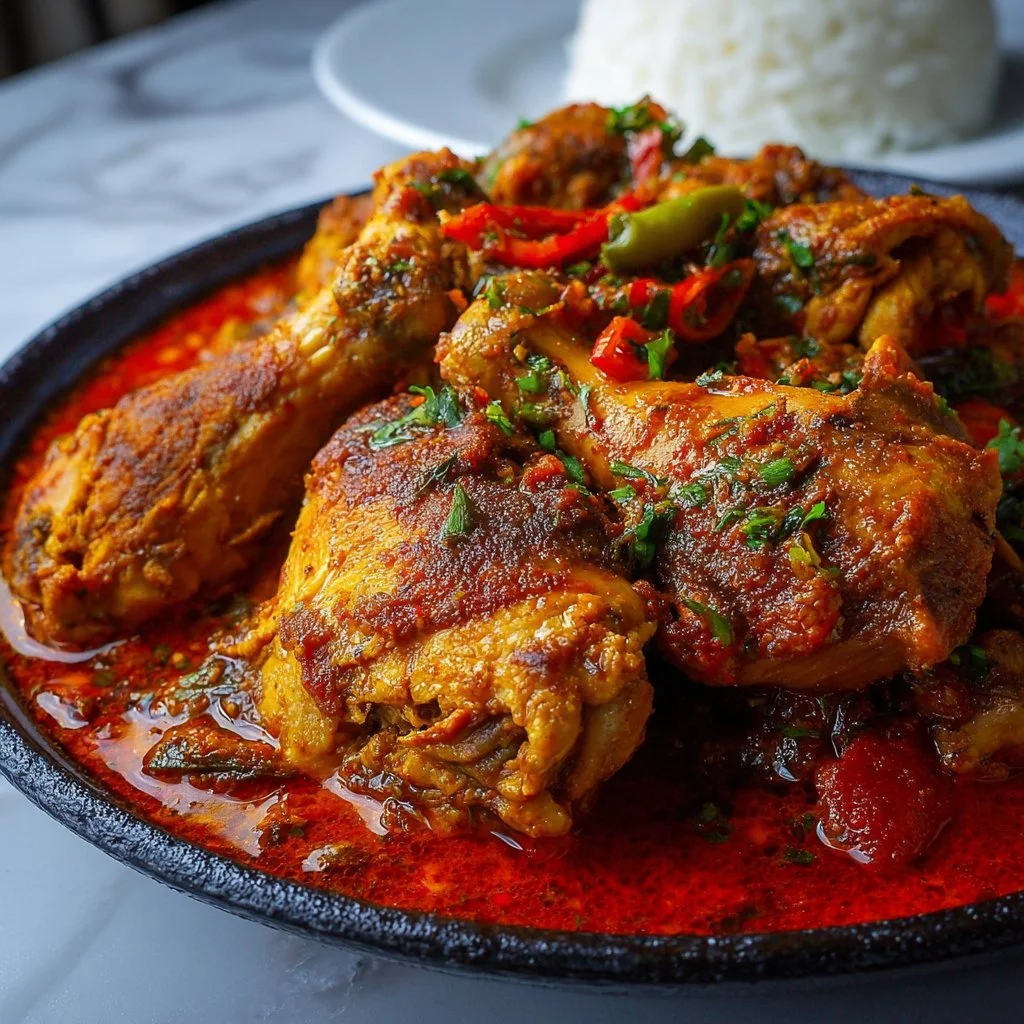
# Savory Nigerian Chicken Stew: A Flavorful Journey to Your Dinner Table

Hello, my lovely foodies! I’m so excited to share one of my all-time favorite recipes that not only warms your soul but also fills your home with rich, aromatic flavors—Nigerian Chicken Stew. When it comes to comfort food, this dish is nothing short of a celebration, embodying the very essence of gathering around the table and sharing love through food. Whether you're a seasoned cook or just taking your first steps into the culinary world, this starter guide will walk you through the delightful process of crafting a dish that's bursting with life.

The best part? This recipe is not just about cooking; it's about creating treasured moments in your kitchen, infusing every step with love, laughter, and perhaps a splash of mischief! So roll up your sleeves, tie on your apron, and let’s embark on this flavorful journey together.

## A Personal Story

I can still remember the first time I tasted Nigerian Chicken Stew. I was a wide-eyed teenager sitting at my friend Ada’s kitchen table, the air thick with the gently simmering aromas of spices and pepper. Her grandmother, an extraordinary cook, stirred a bubbling pot while sharing stories of their family's traditions. As the sun set, casting a warm glow through the window, we gathered around the meal, savoring every bite. The chicken was tender, the sauce was rich, and the whole dish seemed to tell a story of warmth and love. It struck me then—food is more than sustenance; it’s a beautiful tapestry of memories waiting to be woven. Little did I know this dish would inspire my own culinary adventures, leading to the creation of Ivory Apron and the belief that every meal can be a masterpiece, no matter how simple.

## Ingredients

Let’s gather our ingredients for this delectable Nigerian Chicken Stew. Each component is an essential piece of the puzzle, creating a delicious harmony of flavors:

- **2.5 lbs bone-in chicken (thighs or drumsticks)**: Bone-in pieces add richer flavor and juiciness. If you prefer, skinless chicken can be used, but the taste may be slightly less robust.

- **1 teaspoon salt**: Balances the flavors and enhances the taste of each ingredient. You can adjust this according to your taste or if you’re watching your sodium intake.

- **1/2 teaspoon black pepper**: A friendly kick that complements the dish’s warmth. For a milder version, opt for white pepper.

- **1 teaspoon paprika**: This totally amps up the color while adding a mild sweetness. Smoked paprika is fab for a unique depth of flavor!

- **1 teaspoon curry powder**: Don’t be scared; this isn’t the overpowering type. It adds warmth and aroma. If you're feeling adventurous, try garam masala for a nuanced twist.

- **1 teaspoon thyme**: A subtle herbaceous note! You can substitute with oregano or rosemary if thyme is not on hand.

- **1 onion, chopped**: Onions are the base for almost all great stews! Use yellow onions for more sweetness or red for a slightly sharper taste.

- **1/4 cup vegetable oil**: Helps with sautéing and adds richness. If preferred, olive oil works too, though it may impart a different flavor profile.

- **4 large Roma tomatoes**: These add acidity and sweetness; their thick flesh makes for a nice base. If fresh tomatoes aren’t available, use canned tomatoes—but remember, there’s nothing like fresh!

- **1 large red bell pepper**: This adds sweetness and color. Yellow or orange bell peppers can be swapped in—think of it as personalizing your dish!

- **1 small red onion**: This intensifies the onion flavor. White onions can also work if you need a substitute.

- **2 scotch bonnet peppers (or 1 for less heat)**: They're the stars of the heat show! If you want to tame the spice, consider using jalapeños or even chili flakes.

- **2 tablespoons tomato paste**: This thickens the stew and enhances its richness. Homemade tomato paste is amazing, but go for a high-quality store-bought version if you're in a hurry.

- **1 teaspoon garlic powder**: A trusty spice that brings layers of flavor. Fresh minced garlic adds a lovely kick, too.

- **1 teaspoon ginger powder**: Its warming essence brightens the stew. Fresh ginger is a great alternative if you love that zesty bite!

- **1 bouillon cube**: This packs in a punch of umami flavor. If you’re avoiding MSG, opt for a natural version or vegetable stock.

- **Salt to taste**: This is the final tweak that'll elevate your dish. Always taste and adjust!

## Step-by-Step Instructions

Now that we have everything set, let’s get our hands dirty—let's cook up this fabulous stew!

1. **Prep the Chicken**:
   - Start by patting the chicken dry with a paper towel. This helps achieve a beautiful golden-brown sear. Sprinkle the salt, black pepper, paprika, curry powder, and thyme all over the chicken, rubbing it in nicely—that’s the love right there!

2. **Sauté the Onions**:
   - Heat the vegetable oil in a large pot over medium heat. Add the chopped onion and sauté until fragrant and translucent, about 5 minutes. Stir occasionally and let it dance gracefully in the pan.

3. **Brown the Chicken**:
   - Move that beautiful sautéed onion to the side and add the marinated chicken pieces skin-side down. Let them get a nice golden-brown sear, about 6-7 minutes on each side. We aren’t cooking them all the way through just yet; we just want to lock in those scrumptious flavors!

4. **Create the Stew Base**:
   - While the chicken’s resting, it’s time for the star players—our tomatoes and peppers! Toss in the chopped Roma tomatoes, red bell pepper, and small red onion. Mix everything well and let them soften in the residual heat of the pot for 4-5 minutes.

5. **Add Those Spices**:
   - Stir in the tomato paste, ginger powder, garlic powder, and crushed scotch bonnet peppers (keep those taste buds on alert). Let this simmer for another 2-3 minutes, allowing all those spices to mingle.

6. **Simmer, Simmer, Simmer**:
   - Place the browned chicken back into the pot, including any juices. Pour just enough water to cover the chicken (about 2 cups), and toss in the bouillon cube. Cover the pot, reduce the heat to low, and let it simmer gently for 30-45 minutes; this is when the magic happens! Stir occasionally and let the stew develop those savory flavors.

7. **Final Touches**:
   - After simmering, taste and adjust the seasoning. Add a dash more salt if needed. If the stew seems too thick, add a splash of water; if it’s thin, let it simmer uncovered for a few more minutes.

8. **Serve It Up**:
   - Once the chicken is tender and oh-so-flavorful, take it off the heat. At this point, you can remove the scotch bonnet peppers if you prefer less heat—unless you're feeling brave and want an extra kick!

## Serving Suggestions

To plate the stew, serve it with a joyous mound of steamed rice or pounded yam. Ladle a generous portion of the stew over the rice or serve it alongside for a delightful dip. Add a sprig of fresh parsley or cilantro for a pop of color. Don’t forget to have some crusty bread on the side to soak up all that luscious sauce!

## Recipe Variations

Feeling adventurous? Here are some fun twists to try with this recipe:

- **Vegetarian Delight**: Swap the chicken for firm tofu or chickpeas, adding them in the last 15 minutes of cooking time.
- **Spicy Extra**: Experiment by adding more scotch bonnet peppers or a splash of sriracha for a fiery kick.
- **Herb Swap**: Instead of thyme, you can use rosemary or even a bunch of fresh coriander for a different flavor profile.
- **Smoky Flavor**: Add a teaspoon of smoked paprika for that lovely smoky undertone that pairs beautifully.

## Chef’s Notes

Over the years, I’ve learned that this stew is forgiving—each time I make it, I tweak it depending on what’s in the fridge or the season. I once made this for a gathering, and in a hilarious twist, my friend Tim accidentally swapped the sugar for salt! After an initial moment of panic, we laughed it off and added a touch more tomato paste, turning that potential disaster into a delightful surprise!

The moral of the story? Cooking is about enjoying the process—and sometimes, the most unexpected changes lead to the happiest surprises!

## FAQs and Troubleshooting

1. **Why is my stew too greasy?**
   - If you find your stew too greasy, ensure to skim off the excess fat from the top before serving.

2. **The stew is too salty; what do I do?**
   - If your stew ended up too salty, add a few extra chopped tomatoes or a splash of water to balance the flavors.

3. **Can I make this stew in advance?**
   - Absolutely! In fact, it tastes even better the next day as the flavors deepen. Just store it in an airtight container in the fridge for up to 3 days.

4. **Can I freeze this stew?**
   - Yes! This stew freezes beautifully. Let it cool completely before portioning it into freezer-safe containers. It can freeze for up to 3 months—just don’t forget to label your creations!

## Nutritional Info (optional)

While I typically focus more on flavor than numbers, it’s good to keep in mind that this hearty chicken stew is a wonderful source of protein and healthy fats. Pair it with whole grain rice, and you have a balanced meal bursting with nutrients—all while making your belly happy!

---

And there you have it, my foodie friends—a radiant dish brimming with culture, flavor, and love. I can’t wait to hear how your Nigerian Chicken Stew turns out! Tag me in your photos, share your stories, and let’s keep this delicious circle of cooking going. Until next time, happy cooking!
Savory Nigerian Chicken Stew

A flavorful Nigerian chicken stew that brings warmth and comfort to your dinner table with rich, aromatic spices.
- Prep Time: 15 minutes
- Cook Time: 45 minutes
- Total Time: 60 minutes
- Yield: 4 servings 1x
- Category: Main Course
- Method: Cooking
- Cuisine: Nigerian
- Diet: Non-Vegetarian
Ingredients
- 2.5 lbs bone-in chicken (thighs or drumsticks)
- 1 teaspoon salt
- 1/2 teaspoon black pepper
- 1 teaspoon paprika
- 1 teaspoon curry powder
- 1 teaspoon thyme
- 1 onion, chopped
- 1/4 cup vegetable oil
- 4 large Roma tomatoes, chopped
- 1 large red bell pepper, chopped
- 1 small red onion, chopped
- 2 scotch bonnet peppers (or 1 for less heat)
- 2 tablespoons tomato paste
- 1 teaspoon garlic powder
- 1 teaspoon ginger powder
- 1 bouillon cube
- Salt to taste
Instructions
- Prep the chicken by patting it dry and seasoning it with salt, black pepper, paprika, curry powder, and thyme.
- Sauté the chopped onion in heated vegetable oil until fragrant and translucent, about 5 minutes.
- Brown the marinated chicken pieces in the pot, searing on each side for 6-7 minutes.
- Create the stew base by adding chopped tomatoes, red bell pepper, and small red onion, letting them soften for 4-5 minutes.
- Add tomato paste, ginger powder, garlic powder, and crushed scotch bonnet peppers, simmering for another 2-3 minutes.
- Simmer the chicken with enough water to cover, adding the bouillon cube, and let it simmer gently for 30-45 minutes.
- Final touches involve tasting and adjusting seasoning, then serving with your choice of rice or pounded yam.
Notes
This stew can be made in advance and tastes better the next day. It freezes well for up to 3 months.
Nutrition
- Serving Size: 1 serving
- Calories: 450
- Sugar: 6g
- Sodium: 600mg
- Fat: 18g
- Saturated Fat: 5g
- Unsaturated Fat: 10g
- Trans Fat: 0g
- Carbohydrates: 30g
- Fiber: 4g
- Protein: 30g
- Cholesterol: 110mg
Keywords: Nigerian chicken stew, comfort food, rich flavors, homemade stew

Easy Street Corn Chicken Bowl
Easy Street Corn Chicken Bowl: A Recipe That’s Sure to Impress!
Hello, my lovely food enthusiasts! Today, I’m thrilled to share with you one of my all-time favorite weekday meals that is as satisfying as it is simple — the Easy Street Corn Chicken Bowl. This dish embodies everything I adore about home cooking: comfort, color, and a sprinkle of love served right on your plate. Not only is it packed with flavor, but it also celebrates fresh, wholesome ingredients that come together to create a meal that feels festive, whether it’s a Tuesday night dinner or a weekend gathering.
Picture yourself on a sun-drenched patio, a light breeze in the air while the chatter of friends fills the space. The inviting aroma of seasoned chicken wafts through as you serve this vibrant bowl filled with color and textures. The creamy avocado, zesty lime, and sweet corn are the kind of flavor explosions that can make any day feel special.
But what makes this bowl even more appealing? It’s ridiculously easy to prepare! In just about 30 minutes, you can have a delicious, nourishing meal on the table that looks like it belongs in a gourmet magazine. Whether you’re a kitchen novice or a seasoned chef, this dish will impress your guests and satisfy even the pickiest eaters.
So, roll up those sleeves, grab your apron, and let’s dive into my Easy Street Corn Chicken Bowl recipe — a dish that will not just fill your belly but also warm your heart!
Personal Story
I still vividly remember the first time I served a chicken bowl similar to this recipe at a dinner party. It was a sunny Sunday afternoon, and I had invited a group of my closest friends over for a casual gathering. The idea was to celebrate the end of summer with a laid-back vibe and some delicious food. I wanted to create a dish that felt fun and festive without keeping me shackled to the kitchen for hours.
After a little brainstorming and some inspiration from a local food truck that served mouthwatering chicken bowls, I landed on a colorful creation featuring seasoned chicken, freshly grilled corn, and a burst of toppings. As soon as I set the bowls on the table, I saw my friends’ eyes light up with excitement, and soon they were digging in. We laughed, shared memories, and enjoyed each other’s company while savoring every bite of that flavorful dish. It turned out to be the highlight of their day, and it solidified my love for sharing food with friends and family.
That joyous gathering taught me that cooking is not just about the food itself; it’s about the connections we create around the table. Here’s my version of that unforgettable chicken bowl, ready to bring laughter and joy to your dining experience!
Ingredients
Here’s what you’ll need to create this vibrant Easy Street Corn Chicken Bowl:
-
2 cups cooked chicken, shredded
Feel free to use rotisserie chicken for convenience, or season and grill your own for a fresh touch! You can substitute with turkey or even tofu for a vegetarian option. -
1 cup corn (canned or frozen)
Canned corn is convenient; just rinse it before adding. Frozen corn works beautifully too—simply thaw it or sauté for a few minutes for that sweet flavor. -
1 cup black beans, rinsed and drained
Black beans add protein and fiber. You can swap with kidney beans or chickpeas if you prefer. -
1 cup cooked rice or quinoa
Both options work great! Quinoa gives a nutty flavor, while rice (white or brown) is classic comfort. If you’re looking for a low-carb alternative, try cauliflower rice. -
1 cup diced tomatoes
Fresh, vibrant tomatoes are best, but you can use canned diced tomatoes for convenience. Add some green chilies for a kick! -
1 avocado, diced
Creamy and rich, avocados are a must. If you’re avocado-cautious, try substituting with some Greek yogurt or sour cream. -
1/2 cup shredded cheese (cheddar or your choice)
Cheddar is traditional, but feel free to get creative! Pepper jack brings a spicy zing, while queso fresco adds a lovely creaminess. -
1/4 cup cilantro, chopped
You can’t go wrong with a fragrant garnish! If you’re not a cilantro fan, fresh parsley works just as well. -
1 lime, juiced
A squeeze of lime brightens up the dish. For a twist, try lemon or even orange juice! -
Salt and pepper to taste
Don’t forget to season! A pinch of cumin or smoked paprika could elevate your bowl even further!
Step-by-Step Instructions
Now that we have our delicious ingredients ready, let’s get cooking! Follow along with these step-by-step instructions for a flawless Easy Street Corn Chicken Bowl.
-
Cook the Rice/Quinoa
If you are starting with uncooked rice or quinoa, prepare it according to package instructions. Typically, for quinoa, you’ll use a 2:1 water-to-quinoa ratio, simmering for about 15 minutes. For rice, the cooking time may vary, so keep an eye on it! This step is crucial as it serves as the base for your bowl. -
Prepare the Chicken
If you’ve got pre-cooked chicken, shred it into bite-sized pieces using forks or your hands — however you prefer! If you’re cooking it fresh, season chicken breasts with salt, pepper, and a touch of cumin or chili powder for that extra flavor. Grill, bake, or sauté it until it reaches an internal temperature of 165°F (about 20-25 minutes). Once done, let it rest for a few minutes before shredding it to keep the juiciness intact. -
Sauté the Corn
If you’re using frozen corn, sauté it in a non-stick skillet over medium heat with a drizzle of olive oil for about 5 minutes until it’s slightly caramelized and golden. If using canned corn, simply heat it through for 2-3 minutes in the pan. This adds a great depth of flavor! -
Combine Black Beans and Tomatoes
In a medium bowl, combine the rinsed black beans and diced tomatoes. Add a squeeze of lime juice, season with salt, pepper, and toss lightly. This will enhance the flavors while giving you that fresh, zesty profile! -
Assemble Your Bowl
Now the fun part! Grab your favorite bowls and start layering: add a generous scoop of rice or quinoa at the bottom. Top with shredded chicken, followed by a heap of the black bean and tomato mixture, and then add the sautéed corn. -
Add Creamy Avocado and Cheese
Place the diced avocado on top and sprinkle the shredded cheese generously. This adds a creamy, rich dimension that perfectly balances the other ingredients. -
Garnish with Fresh Cilantro and Lime
Finish your creation by adding freshly chopped cilantro and drizzling with lime juice. This adds a pop of color and flavor that takes your bowl from ordinary to extraordinary! -
Serve and Enjoy
Dig in! Serve immediately while everything is warm, and be prepared for compliments from your fellow diners.
Serving Suggestions
When it comes to serving this Easy Street Corn Chicken Bowl, presentation is key! Opt for shallow, wide bowls to allow each component to shine. You can even garnish with extra lime wedges and a sprinkle of chili flakes for those who enjoy an extra kick. For a festive touch, pair it with tortilla chips for some crunch or consider setting up a create-your-own bowl station where guests can customize their own with toppings like sour cream, pickled jalapeños, or your favorite hot sauce!
Recipe Variations
Now, let’s get creative! Here are a few twist ideas to keep things exciting:
-
Spicy Street Corn: Mix in some chipotle or jalapeño into the sautéed corn for a spicy kick.
-
Southwest Style: Add diced bell peppers and red onion for that extra crunch and flavor.
-
Asian Fusion: Swap out the rice for sushi rice and drizzle with soy sauce and sesame seeds. Add water chestnuts for crunch!
-
Vegan Delight: Replace chicken with tofu, and use cashew cheese or skip the cheese for a complete plant-based bowl.
-
Breakfast Twist: Top with a fried egg for a delightful twist that’s perfect for brunch!
Chef’s Notes
As a chef who loves to play in the kitchen, I always find every recipe evolves over time. This Easy Street Corn Chicken Bowl has seen many variations in my home, from spontaneous additions of seasonal veggies to experimenting with different international spices. My playful attitude toward cooking is what keeps it fresh and exciting!
Plus, I’ve learned over the years that the best cooking comes with a side of laughter and the willingness to try something new, even if it means a little mess! (Trust me, I’m a pro at cleaning up flour disasters!)
FAQs and Troubleshooting
1. What if my rice is mushy?
A little overcooked rice can happen, but don’t fret! Use a spoon to fluff it up gently, which can help separate the grains. If it’s too far gone, consider adding some crispy toppings to offer more texture!
2. How can I make this meal prep-friendly?
Absolutely! Cook your chicken, rice, and chop your veggies in advance. Store separately in airtight containers, and when you’re ready to eat, simply reheat and assemble!
3. My black beans are mushy; what did I do wrong?
Overcooked beans can lose their texture, so always check the package instructions for cooking times. If using canned black beans, simply rinse them and add them to the dish at the last minute to avoid softening further.
4. Can I freeze this bowl?
Yes! Store the assembled bowl without toppings in an airtight container. It should stay fresh for about 3-4 months. Just remember to freeze the guacamole and cheese separately. Thaw and reheat before serving, then top off fresh!
Nutritional Info
This Easy Street Corn Chicken Bowl is not only delicious but also packed with nutrients! Here’s a quick overview per serving:
- Calories: Approximately 450
- Protein: 35g
- Carbohydrates: 45g
- Fat: 15g
- Fiber: 10g
(Note: Nutritional values may vary based on ingredient brands and specific measurements.)
And there you have it — a delightful, colorful, and easy recipe perfect for any occasion. I hope you allow this Easy Street Corn Chicken Bowl to brighten your meal times as it has brightened mine. Tie on that apron, gather your ingredients, and let’s make some delicious memories together around the table! Happy cooking!
PrintEasy Street Corn Chicken Bowl

A vibrant and satisfying bowl packed with flavor, featuring seasoned chicken, fresh corn, and colorful toppings, perfect for any occasion.
- Prep Time: 15 minutes
- Cook Time: 30 minutes
- Total Time: 45 minutes
- Yield: 4 servings 1x
- Category: Main Course
- Method: Sautéing & Assemble
- Cuisine: Mexican
- Diet: Gluten-Free
Ingredients
- 2 cups cooked chicken, shredded
- 1 cup corn (canned or frozen)
- 1 cup black beans, rinsed and drained
- 1 cup cooked rice or quinoa
- 1 cup diced tomatoes
- 1 avocado, diced
- 1/2 cup shredded cheese (cheddar or your choice)
- 1/4 cup cilantro, chopped
- 1 lime, juiced
- Salt and pepper to taste
Instructions
- Cook the Rice/Quinoa according to package instructions.
- Prepare the Chicken by shredding or cooking fresh chicken until done.
- Sauté the Corn in a skillet until golden.
- Combine Black Beans and Tomatoes in a bowl with lime juice.
- Assemble your Bowl by layering rice, chicken, black bean mixture, and sautéed corn.
- Add Creamy Avocado and Cheese on top.
- Garnish with Fresh Cilantro and Lime juice.
- Serve and Enjoy immediately!
Notes
This meal can easily be customized with toppings like sour cream, jalapeños, or serve with tortilla chips.
Nutrition
- Serving Size: 1 bowl
- Calories: 450
- Sugar: 4g
- Sodium: 600mg
- Fat: 15g
- Saturated Fat: 7g
- Unsaturated Fat: 6g
- Trans Fat: 0g
- Carbohydrates: 45g
- Fiber: 10g
- Protein: 35g
- Cholesterol: 75mg
Keywords: chicken bowl, corn bowl, easy dinner, healthy meal, colorful bowl

Mediterranean Chicken Tenders
Mediterranean Chicken Tenders: A Flavorful Adventure
Hello, fellow foodies! Today, we’re diving into the world of Mediterranean flavors with a dish that’s sure to impress while remaining easy and approachable. Say hello to Mediterranean Chicken Tenders! These succulent tenders are marinated in a blend of fresh lemon juice, aromatic herbs, and spices that will transport you straight to the sunny Mediterranean coast with every bite. You don’t need a culinary degree or a fancy kitchen to whip these up, just a sprinkle of intention and a dash of love.
I remember the first time I tried Mediterranean chicken tenders—there was this quaint little restaurant in town that was all the rage with its vibrant vibes and delicious food. I took my best friend there for a birthday treat, and we ordered everything on the menu! But it was those chicken tenders, coated in fragrant herbs and grilled to perfection, that stole the show. The crunchy golden exterior, combined with the tender, juicy meat inside, was simply irresistible. Since then, I’ve brought my own spin to this classic dish, and I can’t wait to share it with you!
So, whether you’re planning a cozy dinner at home, throwing a gathering, or looking to elevate your meal prep game, these Mediterranean chicken tenders will not disappoint. Let’s roll up our sleeves, tie on our aprons, and get cooking!
Personal Story
As a child, my love for cooking blossomed in my grandmother’s kitchen. The air was always infused with the comforting scents of her delicious meals, and she had this magic way of turning ordinary ingredients into extraordinary culinary delights. I remember one particular summer, helping her prepare a Mediterranean feast for our family reunion. She taught me how to layer flavors, introducing me to vibrant herbs and tangy citrus that would awaken our taste buds. I still use her tricks, especially when making these chicken tenders, which echo the love she instilled in me for home-cooked meals. Tasting them takes me back to those sun-soaked days, where laughter and stories flowed as freely as the olive oil we drizzled on everything!
Ingredients
To create these delightful Mediterranean Chicken Tenders, you’ll need the following ingredients:
-
1 lb chicken tenders: Start with fresh or thawed chicken tenders for the best texture. Use boneless, skinless chicken breasts as a substitute if needed—cut them into strips for similar size.
-
2 tablespoons olive oil: Look for good quality extra virgin olive oil; its fruity flavor will enhance the dish. Canola or avocado oil can serve as substitutes, but they won’t add the same richness.
-
2 teaspoons dried oregano: Oregano is a staple in Mediterranean cooking that adds earthy notes. Fresh oregano will work as well—just use around 1 tablespoon, chopped finely.
-
1 teaspoon garlic powder: This adds a warm, comforting flavor. Feel free to use freshly minced garlic for an even more robust taste—just adjust according to your preference!
-
1 teaspoon paprika: This spice adds a smoky depth to the chicken. Swap it out with smoked paprika for an extra layer of flavor or use chili powder for a kick!
-
Salt and pepper to taste: Season generously! Freshly cracked black pepper always makes a difference—consider using a mix of sea salt and kosher salt for a nuanced taste.
-
Juice of 1 lemon: Fresh lemon juice brightens the flavors and provides acidity. Lime juice or a splash of white vinegar can be good substitutes if you’re in a pinch.
-
Fresh parsley for garnish: This adds a touch of color and freshness to the dish. Basil or cilantro can also substitute if you’re looking to change things up!
Step-by-Step Instructions
Now, let’s get those chicken tenders marinating and cooking to perfection!
-
Marinate the Chicken: In a mixing bowl, start by adding the olive oil, dried oregano, garlic powder, paprika, salt, pepper, and the juice of one lemon. Whisk it all together until you have a harmonious mixture.
Chef’s Tip: Taste the marinade! Adjust the seasoning according to your preference—it should taste bright and flavorful!
-
Coat the Chicken: Next, add the chicken tenders to the bowl, ensuring each piece is coated in the marinade. Cover the bowl with plastic wrap or a lid, and let it marinate in the fridge for at least 30 minutes, but if you have more time, let it sit for up to 2 hours for deeper flavors.
Chef’s Hack: If you’re short on time, you can even marinate them while you prepare your side dishes—multi-tasking magic!
-
Preheat the Oven or Grill: Preheat your oven to 400°F (200°C) if you’re baking, or preheat your grill to medium-high heat if grilling. You can also use a stovetop grill pan for this recipe.
Chef’s Note: Using a grill pan indoors? Make sure your kitchen is well-ventilated to combat any smoke!
-
Cooking the Tenders:
- Oven Method: Place the marinated chicken tenders on a baking sheet lined with parchment paper. Bake for 15-20 minutes until they are golden brown and cooked through (internal temperature should reach 165°F/75°C).
- Grill Method: Grill the chicken tenders for about 3–5 minutes on each side until they develop beautiful grill marks and are cooked through.
Tip: If you’re grilling, try to avoid moving them around too much; let them sit and get those lovely grill marks!
-
Rest the Chicken: Once the tenders are cooked, remove them from the heat and let them rest for about 5 minutes. This is key to locking in moisture!
Chef’s Insight: This resting time also gives you a moment to toss a quick salad or prepare any sides!
-
Garnish and Serve: Slice the chicken tenders if desired, serve them warm, and sprinkle with freshly chopped parsley for a lovely finish.
Serving Suggestion: A side of tzatziki or a Greek salad would be the perfect pairing along with your succulent chicken. You’ll have everyone raving!
Serving Suggestions
When plating your Mediterranean chicken tenders, arrange them on a simple white platter for a classic look, and garnish with fresh parsley. You can also serve them on a bed of vibrant greens such as arugula or spinach, drizzled with a little more lemon juice and olive oil for that extra culinary flair. For a fun twist, serve with colorful, grilled veggies on the side, such as zucchini, bell peppers, or cherry tomatoes, adding brightness and crunch to your dish!
Recipe Variations
If you’re feeling adventurous or have specific dietary needs, here are a few fun variations to switch things up:
-
Mediterranean Spice Blend: Swap out the oregano and spices for a pre-made Mediterranean spice blend for a flavor punch.
-
Za’atar Chicken Tenders: Use za’atar seasoning instead of oregano for a different flavor profile that is aromatic and delicious.
-
Lemon Garlic Marinade: Add minced garlic and a touch of honey to the marinade for a sweet and tangy kick.
-
Crispy Oven-Baked Tenders: Coat the marinated tenders in breadcrumbs or panko before baking for a crispy texture.
-
Gluten-Free Option: Use gluten-free breadcrumbs if you want that crunchy bite with breaded tenders!
Chef’s Notes
This recipe has gone through several iterations in my kitchen over the years. I started with basic spices, but as I experimented, I discovered the beauty of fresh herbs and citrus that brightened the dish. One particularly memorable night, I mixed up my spices and accidentally grabbed cumin instead of paprika! Surprisingly, it turned out amazing, and that was the night I learned that the kitchen is all about creativity and adaptability. No meal should feel like a chore; rather, it should be a chance to express yourself!
FAQs and Troubleshooting
Q: What should I do if my chicken is tough?
A: Chicken can become tough if overcooked. Always use a meat thermometer to make sure your chicken doesn’t exceed 165°F (75°C).
Q: Can I make this dish ahead of time?
A: Absolutely! You can marinate the chicken tenders the night before, and when you’re ready to cook, just pop them in the oven or on the grill.
Q: What can I serve with Mediterranean chicken tenders?
A: These are versatile! Pair them with Greek salad, roasted vegetables, or even over a bed of couscous or quinoa drizzled with lemon vinaigrette.
Q: Can I freeze the chicken tenders?
A: Yes, you can freeze the marinated tenders! Just ensure they are properly sealed in a freezer bag, and they’ll stay fresh for up to three months. Thaw in the fridge before cooking.
Nutritional Info
Per Serving (based on 4 servings, excluding sides):
- Calories: ~250
- Protein: ~30g
- Fat: ~12g
- Carbohydrates: ~1g
- Fiber: ~0g
Cooking can be such a joyful experience, especially when you’re sharing these moments with friends and family. I hope these Mediterranean Chicken Tenders find a special place in your kitchen, just like they have in mine. So go ahead, tie that apron, gather your loved ones around the table, and enjoy each bite together! Happy cooking, my friends!
PrintMediterranean Chicken Tenders
Delicious chicken tenders marinated in Mediterranean flavors, perfect for a cozy dinner or a gathering.
- Prep Time: 30 minutes
- Cook Time: 20 minutes
- Total Time: 50 minutes
- Yield: 4 servings 1x
- Category: Main Course
- Method: Grilling, Baking
- Cuisine: Mediterranean
- Diet: Gluten-Free, Dairy-Free, Nut-Free
Ingredients
- 1 lb chicken tenders
- 2 tablespoons olive oil
- 2 teaspoons dried oregano
- 1 teaspoon garlic powder
- 1 teaspoon paprika
- Salt and pepper to taste
- Juice of 1 lemon
- Fresh parsley for garnish
Instructions
- Marinate the Chicken: In a mixing bowl, add the olive oil, dried oregano, garlic powder, paprika, salt, pepper, and lemon juice. Whisk until combined.
- Coat the Chicken: Add chicken tenders to the marinade, covering each piece. Cover and refrigerate for at least 30 minutes or up to 2 hours.
- Preheat the Oven or Grill: Preheat oven to 400°F (200°C) for baking or grill to medium-high heat.
- Cook the Tenders: For the oven, place on a lined baking sheet and bake for 15-20 minutes. For grilling, cook for 3-5 minutes on each side.
- Rest the Chicken: Let the cooked tenders rest for 5 minutes to lock in moisture.
- Garnish and Serve: Slice if desired, serve warm, and sprinkle with parsley.
Notes
Taste the marinade and adjust seasoning as needed. Serve with tzatziki or Greek salad for the best pairing!
Nutrition
- Serving Size: 1 serving
- Calories: 250
- Sugar: 1g
- Sodium: 300mg
- Fat: 12g
- Saturated Fat: 2g
- Unsaturated Fat: 7g
- Trans Fat: 0g
- Carbohydrates: 1g
- Fiber: 0g
- Protein: 30g
- Cholesterol: 80mg
Keywords: Mediterranean, Chicken, Easy Recipe, Grilled, Baked Chicken, Healthy Dinner
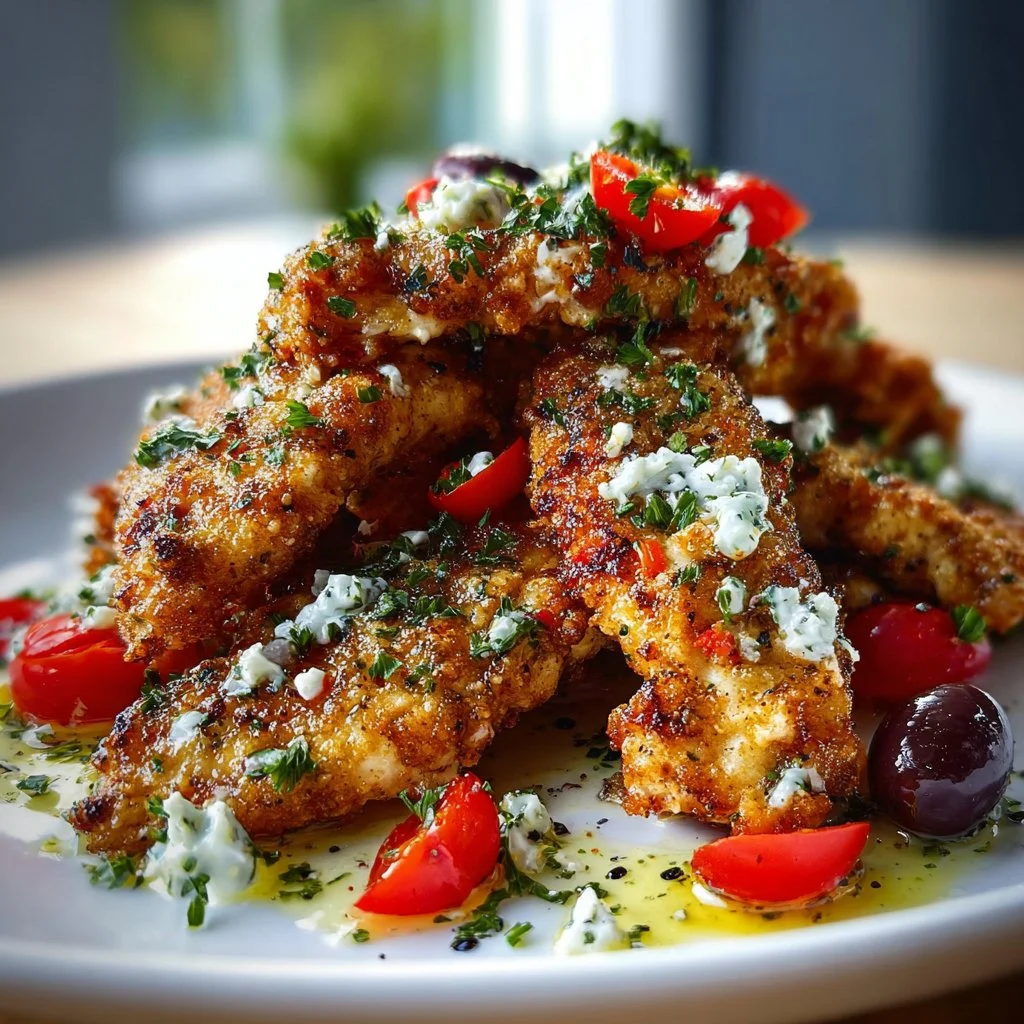
Greek Chicken Tenders
Flavorful Greek Chicken Tenders: Your New Go-To Recipe
Welcome back to Ivory Apron! Today, we’re diving into a dish that has quickly become a favorite in my home: Greek Chicken Tenders. Simple yet bursting with flavor, these tender bites of chicken marinated in a tangy, herby blend are perfect for weeknight dinners, casual get-togethers, or even upscale entertaining. The best part? You can whip them up in no time, making them a delicious choice when you want something special without the stress.
Think of this dish as a passport to the Mediterranean — each bite is like taking a sun-kissed trip to the Greek islands. I’m talking about juicy chicken morsels infused with the zest of lemon, aromatic garlic, and fresh herbs, all perfectly paired with a creamy Greek yogurt sauce that will make your taste buds dance. Plus, the vibrant colors and appealing presentation make for a meal that looks elegant, yet feels comfortably homemade.
In my years of cooking and hosting, I’ve learned that food has a magical way of bringing people together. These Greek Chicken Tenders are no exception; whether you’re serving them as an appetizer, tossing them into a salad, or enjoying them with a side of roasted veggies, they create a delicious moment that you and your guests will savor. So, tie on your apron, gather your ingredients, and let’s get cooking!
Personal Story
I’ll never forget the first time I truly embraced the flavors of Greece. It was a bright summer evening; my husband and I had just returned from a little trip to Santorini. We were enchanted by the sunlit streets, the vibrant blue waters, and of course, the delicious food we wouldn’t stop raving about. One night, we stumbled upon a quaint little taverna by the water, where the scent of grilled chicken and herbs wafted through the air as the sun dipped below the horizon.
We ordered a plate of grilled chicken skewers served alongside a homemade tzatziki, and each bite was a memory in the making. Trying to recreate that experience at home became my culinary quest! Fast forward to now, and these Greek Chicken Tenders have been inspired by that very moment. With fresh ingredients and a little love, I’ve brought those holiday flavors to my dining table, where they quickly became a family favorite — and I’m excited to share it with you!
Ingredients
Let’s get a closer look at what you’ll need to create these delectable Greek Chicken Tenders:
-
1.5 lbs chicken tenders (or sliced chicken breast): These chicken tenders are juicy and tender, perfect for absorbing the marinade. If you prefer, boneless, skinless chicken breasts work beautifully as well — just make sure to slice them into strips for quick cooking.
-
1/2 cup plain Greek yogurt: This ingredient adds creaminess and tang, making our marinate both rich and zesty. If you’re looking for dairy-free options, try a coconut yogurt or any plant-based yogurt that suits your taste!
-
3 tablespoons olive oil: A staple in Mediterranean cooking, olive oil not only enhances flavors but also aids in marinating and cooking. Feel free to use avocado oil for a different flavor profile.
-
2 tablespoons fresh lemon juice: Freshly squeezed lemon juice provides brightness and acidity – a crucial balance for the dish. If you’re in a pinch, bottled lemon juice can work, but nothing replaces the freshness of the real deal!
-
2 teaspoons lemon zest: This boosts the lemon flavor without adding extra liquid. Zest before juicing your lemons for ease. You can swap in lime zest for a fun twist!
-
3 garlic cloves, minced: Garlic adds an aromatic base that’s essential for depth of flavor. If you’re not a fan of raw garlic, roasted garlic offers a milder, sweeter profile.
-
1 tablespoon dried oregano: Oregano is a beloved herb in Greek cuisine. If you have fresh oregano, it’s even better – use about three times the amount as it loses potency when dried.
-
1 teaspoon salt: Essential for flavor enhancement. Remember, you can always add more, but it’s hard to remove it, so start small!
-
1/2 teaspoon black pepper: Freshly cracked black pepper elevates the overall flavor. If you want some heat, consider adding a pinch of cayenne or red pepper flakes.
-
Optional: 1/2 teaspoon ground cumin: Cumin adds a warm, earthy note that takes the flavors to another level. It can be skipped if you prefer a more traditional Greek flavor.
Let’s move on to the fun part: cooking these tasty tenders!
Step-by-Step Instructions
-
Prepare the Marinade: In a medium mixing bowl, combine the Greek yogurt, olive oil, lemon juice, lemon zest, minced garlic, dried oregano, salt, black pepper, and optional cumin. Give it a good whisk until all the ingredients are well incorporated. This is where the magic happens; the yogurt is going to tenderize the chicken and infuse it with flavor. It’s best to let the mixture sit for about 5-10 minutes to allow the flavors to meld.
-
Marinate the Chicken: In the same bowl or a large Ziploc bag, add your chicken tenders. Make sure they’re well-coated in that luscious marinade. If you have some time, let them marinate in the fridge for at least 30 minutes, or even overnight if you can plan ahead. The longer they sit, the more flavorful they’ll become.
-
Preheat Your Grill or Oven: If you’re using a grill, preheat it to medium-high heat. For oven cooking, preheat your oven to 400°F (200°C). The choice is yours, but grilling adds that fantastic smoky flavor!
-
Cook the Chicken: If you’re grilling, place the chicken tenders directly on the grill. Cook for about 5-7 minutes on each side until they are cooked through and have nice grill marks. If you’re using the oven, arrange the chicken on a baking sheet lined with parchment paper. Bake for 20-25 minutes or until they reach an internal temperature of 165°F (75°C).
-
Rest Before Serving: Once cooked, let the chicken tenders rest for 5 minutes. This step is crucial for juicy chicken as it allows the juices to redistribute throughout the meat. Trust me, it’s worth the wait!
-
Make Your Sauce: While the chicken is resting, you can whip up a quick dipping sauce or dressing. Simply mix some more Greek yogurt with a dash of lemon and a sprinkle of fresh herbs like dill or parsley. This light sauce is a perfect complement to the flavors of the chicken.
And voila! You’ve mastered the Greek Chicken Tenders.
Serving Suggestions
For a gorgeous presentation, serve the chicken tenders on a rustic wooden board or a white platter. Drizzle with your yogurt sauce and sprinkle with fresh herbs for a pop of color. Pair them with a light Greek salad with cucumbers, tomatoes, and feta, and you have a meal that looks as good as it tastes. For a heartier meal, serve over a bed of couscous or alongside roasted potatoes.
Recipe Variations
These Greek Chicken Tenders can easily be tweaked to suit your palate or dietary needs:
-
Herb-Infused: Swap in fresh herbs like thyme or rosemary for a different aromatic experience.
-
Spicy Kick: Add chopped jalapeños or crushed red pepper to the marinade if you enjoy a bit of heat.
-
Citrus Blend: Experiment with lime or orange zest and juice for a brighter flavor profile.
-
Vegan Option: Substitute chicken for tofu or tempeh, and use a dairy-free yogurt to make a plant-based version.
-
Skewered Delight: Thread the marinated chicken onto skewers with peppers and onions for a fun, grilled platter.
Chef’s Notes
As I mentioned earlier, cooking is all about love and sharing – and these Greek Chicken Tenders embody that. Over the years, I’ve experimented with this recipe flight of flavors, initially sticking to the classics and then growing bolder with additional spices and ingredients. I once hosted a friend’s birthday, and let’s just say we had a little too much “help” from a bottle of wine while preparing the marinade. It resulted in the most delicious “oops” moment when I accidentally added too much lemon juice! Despite that, the guests raved about a ‘new twist’ on my recipe. Lesson learned: embrace the accidents; they may lead to delicious discoveries!
FAQs and Troubleshooting
Q1: My chicken is dry; what did I do wrong?
A: One common mistake is overcooking the chicken. Always check the internal temperature with a meat thermometer. Remove it from heat as soon as it reaches 165°F (75°C).
Q2: Can I marinate the chicken longer than overnight?
A: You can, but be cautious! Recipes with acidic marinades can break down the chicken’s texture if left too long. Stick to 12-24 hours for the best results.
Q3: Can I use chicken thighs instead of tenders?
A: Absolutely! Chicken thighs will offer a richer flavor. Just keep in mind they may take a little longer to cook through.
Q4: How can I store leftovers?
A: Store any leftovers in an airtight container in the fridge for up to 3 days. You can enjoy them cold on a salad or reheated gently for another delicious meal!
Nutritional Info (if applicable)
While I won’t delve into exhaustive nutritional details here, it’s important to know that these Greek Chicken Tenders are a healthy, protein-packed option, thanks to the chicken and Greek yogurt. You can easily customize the recipe based on your dietary needs and make it your own!
There you have it! Your guide to creating unforgettable Greek Chicken Tenders that will surely impress. Thank you for joining me today, and happy cooking! I can’t wait to hear how your culinary adventures unfold. Don’t forget to share your creations and any adaptations you make; I love connecting with fellow foodies!
PrintFlavorful Greek Chicken Tenders
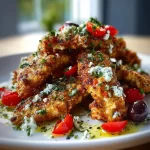
Juicy chicken tenders marinated in a tangy, herby blend, paired with a creamy Greek yogurt sauce for a delicious Mediterranean meal.
- Prep Time: 10 minutes
- Cook Time: 30 minutes
- Total Time: 40 minutes
- Yield: 4 servings 1x
- Category: Main Course
- Method: Grilling or Baking
- Cuisine: Greek
- Diet: Gluten-Free
Ingredients
- 1.5 lbs chicken tenders
- 1/2 cup plain Greek yogurt
- 3 tablespoons olive oil
- 2 tablespoons fresh lemon juice
- 2 teaspoons lemon zest
- 3 garlic cloves, minced
- 1 tablespoon dried oregano
- 1 teaspoon salt
- 1/2 teaspoon black pepper
- Optional: 1/2 teaspoon ground cumin
Instructions
- Prepare the Marinade: In a medium mixing bowl, combine the Greek yogurt, olive oil, lemon juice, lemon zest, minced garlic, dried oregano, salt, black pepper, and optional cumin. Whisk until well incorporated.
- Marinate the Chicken: Add your chicken tenders to the marinade and ensure they are well-coated. Marinate in the fridge for at least 30 minutes or overnight.
- Preheat Your Grill or Oven: Preheat the grill to medium-high heat or the oven to 400°F (200°C).
- Cook the Chicken: Grill for 5-7 minutes on each side or bake for 20-25 minutes until cooked through at an internal temperature of 165°F (75°C).
- Rest Before Serving: Let the chicken rest for 5 minutes before serving.
- Make Your Sauce: Mix Greek yogurt with a dash of lemon and fresh herbs for dipping.
Notes
For a lovely presentation, serve on a wooden board or white platter. Pair with a Greek salad or roasted potatoes for a complete meal.
Nutrition
- Serving Size: 1 serving
- Calories: 350
- Sugar: 5g
- Sodium: 400mg
- Fat: 12g
- Saturated Fat: 4g
- Unsaturated Fat: 6g
- Trans Fat: 0g
- Carbohydrates: 45g
- Fiber: 3g
- Protein: 15g
- Cholesterol: 30mg
Keywords: Greek chicken tenders, Mediterranean chicken recipe, healthy chicken tenders

Lime Chicken Party
Lime Chicken Party: A Flavorful Festivity at Your Table
Introduction
Hello, fellow food lovers! If you’re anything like me, the kitchen is your happy place—the sanctuary where flavors dance, and memories are born. Today, we’re diving into a vibrant dish that brings sunshine to your plate: Lime Chicken. Picture this: juicy, tender chicken breasts marinated in a zesty lime bath, infused with spices, and topped off with fresh avocado and cilantro. It’s a party on a plate that’s perfect for casual family dinners or lively gatherings with friends.
Every time I whip up this Lime Chicken, I’m transported back to summer nights filled with laughter, good conversation, and the irresistible aroma of grilled chicken wafting through the air. I remember those evenings spent at my family’s backyard barbecues, where we’d gather around the grill, the sunlight casting a warm glow on our faces. My uncle would be in charge, marinating the chicken while the kids ran around with sparklers, and the adults cracked open ice-cold beverages. The flavors of lime and cilantro were always predominant, twining into the fabric of our family stories. That’s the magic of cooking, isn’t it? It’s more than just a meal; it’s the canvas for connection and community.
So, whether you’re hosting a weekend potluck, celebrating a milestone, or simply treating yourself to a delightful dinner, this Lime Chicken is your go-to. It’s refreshingly delicious, effortlessly chic, and remarkably easy to make. Roll up your sleeves, tie on your apron, and let’s create some kitchen camaraderie as we squeeze out every bit of flavor in this recipe!
Personal Story
One of my fondest memories revolves around a summer cookout in my backyard. It was a typical balmy evening, the kind where the sun hangs low in the sky, painting everything golden. The grill was sizzling, and there was a medley of laughter and chatter as family friends mingled. I had prepared my signature Lime Chicken, albeit with a few mishaps along the way. Picture me, a clearly inexperienced cook at the time, attempting to impress everyone with my culinary prowess. I accidentally mistook a tablespoon for a teaspoon, dramatically increasing the lime zest by four times.
When it came time to serve the chicken, I was nervous. Would my bold zestiness overpower the dish? To my surprise, the bright citrus flavor captivated everyone, and that misstep added a delightful kick! From then on, my lime-infused creation became a staple at our barbecues, and everyone automatically associated it with summer festivities. That evening reminded me that cooking isn’t about perfection; it’s about enjoying the process and the company. Every bite of my Lime Chicken was filled with laughter, love, and memories that will last a lifetime.
Ingredients
-
4 boneless, skinless chicken breasts
- The star of the dish! Boneless skinless breasts are versatile and cook evenly. You can substitute them with thighs if you prefer a richer flavor.
-
2 limes (juice and zest)
- For delightful brightness! The zest is where the intense lime flavor lives, making it a key player in our marinade. Don’t have limes? You can substitute with lemons for a different twist.
-
1/4 cup cilantro (chopped)
- This herb adds a fresh, vibrant touch that balances the richness of the chicken. If you’re not a cilantro fan, parsley works as an excellent substitute!
-
1 avocado (sliced)
- Creamy avocados beautifully contrast the zesty chicken. If avocados are out of season, feel free to use sour cream or Greek yogurt for a creamier topping.
-
1 teaspoon chili powder
- Adds warmth and complexity! You can kick it up with smoked paprika or cayenne pepper for extra heat.
-
1 teaspoon garlic powder
- For that comforting, aromatic base. Fresh minced garlic is a great substitute, just be cautious with the amounts!
-
Salt and pepper to taste
- Always seasoning! Adjust according to your preference; remember that it enhances the overall flavor of the dish.
-
Olive oil for cooking
- Use this for grilling or sautéing the chicken. Avocado oil or even coconut oil can be delicious substitutes if you’re looking for a different flavor profile.
Step-by-Step Instructions
-
Marinate the Chicken:
- Begin by preparing the marinade in a large mixing bowl. Juice the two limes directly into the bowl, and don’t forget to zest them as well—this adds fabulous depth. Add the chili powder, garlic powder, salt, and pepper to taste. Drizzle in a few tablespoons of olive oil to help infuse the flavors.
- Place the chicken breasts into the bowl and ensure they are well coated in the marinade. Cover the bowl with plastic wrap and let it marinate in the refrigerator for at least 30 minutes. If you can, aim for at least two hours! You want those flavors to make their way deep into the chicken.
-
Preheat the Grill (or Skillet):
- If you’re using a grill, preheat it to medium-high heat. For those using a skillet, heat it over medium heat. Add a splash of olive oil, allowing it to heat up while you prepare the chicken for cooking.
-
Cook the Chicken:
- Once the grill is ready (or skillet heated), take the chicken out of the marinade, letting any excess drip off. Place the chicken onto the grill grates. Grill the chicken for about 6-8 minutes on each side, or until the internal temperature reaches 165°F (75°C). If you’re using a skillet, cook for a similar duration but remember to flip the breasts to achieve that lovely golden crust.
-
Let it Rest:
- After cooking, let the chicken rest for about 5 minutes before slicing. This allows the juices to redistribute, keeping the chicken moist and tender. Trust me, the wait is worth it!
-
Plate with Style:
- Slice the chicken on a diagonal and arrange it on a serving platter. Drizzle any remaining marinade from the grill or skillet over the top for an extra punch of flavor. Nestle slices of avocado around the chicken and sprinkle with chopped cilantro. Finally, don’t forget to add a lime wedge or two for that vibrant touch.
Serving Suggestions
To serve this dish, I recommend creating a colorful platter that highlights all the vibrant elements. Layer the sliced chicken elegantly next to the creamy avocado and fresh cilantro. You can even serve it alongside warm tortillas or over a bed of fluffy rice for a full meal. A sprinkle of extra lime zest over the dish adds a pop of color and freshness. Remember, presentation matters—shine a light on those beautiful flavors!
Recipe Variations
-
Lime Coconut Chicken:
- Add a splash of coconut milk to the marinade for a tropical flair—perfect for summer gatherings.
-
Mango Salsa Topping:
- Top the grilled chicken with a fresh mango salsa (diced mango, red onion, jalapeno, and lime juice) for an added sweetness and a burst of color!
-
Spicy Chipotle Version:
- Incorporate chipotle powder or adobo sauce into the marinade for a smoky, spicy kick.
-
Gluten-Free Choice:
- Serve the Lime Chicken with quinoa or a gluten-free grain instead of bread or tortillas for a gluten-free option.
-
Lighten It Up:
- Grill zucchini and bell peppers alongside the chicken. Toss them in the marinade as well for a complete, light meal!
Chef’s Notes
Cooking is often about trial and error, and sometimes those unexpected turns lead to the best recipes. This Lime Chicken is a testament to the beauty of culinary creativity. Initially, I dismissed this dish as too simple for entertaining, but it’s become a family favorite! Every time I make it, the kitchen fills with laughter and chatter, just like those summer evenings of my childhood. Each modification I’ve made has only enhanced its appeal—sometimes, a good recipe evolves based on the ingredients you have on hand, and that’s where the magic really happens.
FAQs and Troubleshooting
-
Can I use chicken with skin or bones?
- Absolutely! Just adjust the cooking time to ensure the chicken is cooked through.
-
My chicken turned out dry; what went wrong?
- This could be due to overcooking. Always use a meat thermometer and remember to let it rest after cooking!
-
Can I marinate the chicken overnight?
- Yes! Marinating overnight will deepen the flavors, just be cautious if you’re using high-acid ingredients like lime—they can break down the meat if left too long.
-
How can I make this dish more flavorful?
- Feel free to experiment with different herbs and spices, or even add a touch of honey or maple syrup to the marinade for a slight sweetness.
Nutritional Info (Optional)
- Calories: Approximately 280 calories per serving (1 chicken breast).
- Protein: 36g
- Carbohydrates: 8g
- Fat: 12g
So there you have it! Our Lime Chicken recipe, ripe with stories, flavors, and possibilities. Every dish we create in our kitchens is a chance to share joy and love with those around us. So, grab your ingredients, unleash your creativity, and let’s make some memories together. Happy cooking! 🍽️
PrintLime Chicken Party

Juicy, tender chicken breasts marinated in a zesty lime bath, topped off with fresh avocado and cilantro. Perfect for casual dinners or lively gatherings!
- Prep Time: 15 minutes
- Cook Time: 20 minutes
- Total Time: 35 minutes
- Yield: 4 servings 1x
- Category: Main Course
- Method: Grilling
- Cuisine: Mexican
- Diet: Gluten-Free
Ingredients
- 4 boneless, skinless chicken breasts
- 2 limes (juice and zest)
- 1/4 cup cilantro (chopped)
- 1 avocado (sliced)
- 1 teaspoon chili powder
- 1 teaspoon garlic powder
- Salt and pepper to taste
- Olive oil for cooking
Instructions
- Marinate the chicken: In a large mixing bowl, juice the limes and add the zest, chili powder, garlic powder, salt, and pepper. Drizzle with olive oil and coat the chicken. Cover and marinate for at least 30 minutes.
- Preheat the grill or skillet to medium-high heat.
- Cook the chicken for about 6-8 minutes on each side or until the internal temperature reaches 165°F (75°C).
- Let the chicken rest for 5 minutes before slicing.
- Plate the sliced chicken, drizzle with marinade, and garnish with avocado and cilantro. Add lime wedges for serving.
Notes
For a different twist, substitute limes with lemons. Garnish with extra lime zest before serving.
Nutrition
- Serving Size: 1 serving
- Calories: 280
- Sugar: 1g
- Sodium: 400mg
- Fat: 12g
- Saturated Fat: 2g
- Unsaturated Fat: 8g
- Trans Fat: 0g
- Carbohydrates: 8g
- Fiber: 2g
- Protein: 36g
- Cholesterol: 90mg
Keywords: lime chicken, grilled chicken, easy chicken recipes, summer meals, family dinners
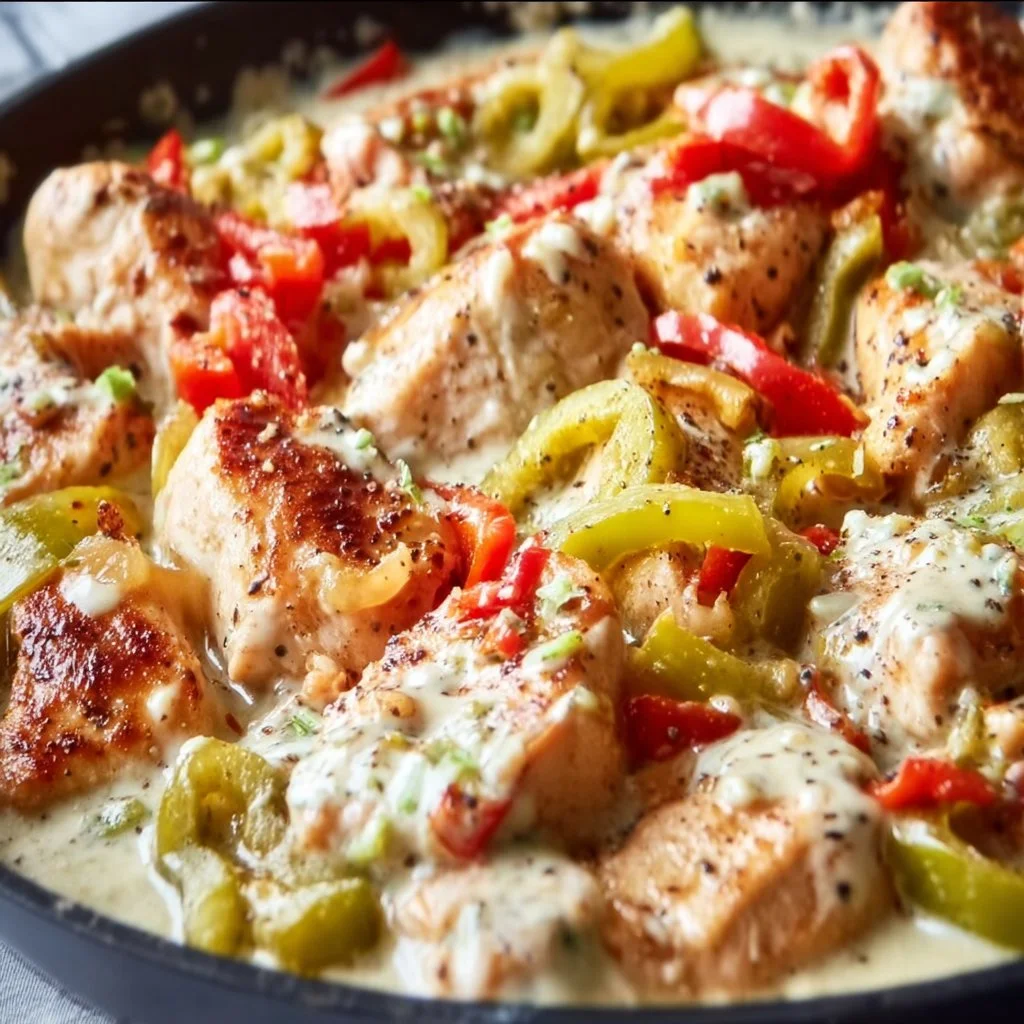
Creamy Banana Pepper Chicken Skillet
Creamy Banana Pepper Chicken Skillet: A Flavorful Journey
Welcome, food lovers! Today, I’m excited to take you on a culinary adventure with my creamy banana pepper chicken skillet. Picture this: succulent pieces of chicken, the zing of banana peppers, and a velvety sauce that dances on your taste buds. This dish is the epitome of comfort food, all cooked in one handy skillet. So, roll up your sleeves, tie on that ivory apron, and let’s elevate your weeknight dinner game!
A Taste of Nostalgia
Ah, banana peppers! Just the mention of them brings back fond memories of summer barbecues at my grandmother’s house. She was the queen of backyard gatherings, always blending flavors and colors in her dishes while effortlessly charming her guests. One particular dish that stands out is her creamy chicken sauté, infused with bright banana peppers. I remember sneaking bites when she wasn’t looking, the rich sauce coating my fingers as I’d lick them clean.
Fast forward to today, and I’ve recreated that gorgeous dish with my own twist! This creamy banana pepper chicken skillet is not just a meal; it’s a thread woven from cherished moments with family and friends, reminding us that good food is about connection, laughter, and, of course, flavor.
Ingredients
Here’s what you’ll need to bring this delectable dish to life:
-
1 pound chicken breast, cut into bite-sized pieces
Tender and juicy, chicken breast forms the hearty protein base for your dish. If you want to go for a lighter option, turkey breast works beautifully too. -
1 cup banana peppers, sliced
These vibrant peppers add a pop of heat and tang that elevates the creaminess of the sauce. Mild or hot, depending on your preference! If banana peppers aren’t available, try using sliced jalapeños or even bell peppers for a sweeter note. -
1 cup heavy cream
The magic ingredient! Heavy cream provides that luscious texture and rich flavor. If you’re looking for a lighter option, half-and-half works, but be mindful that it may not thicken quite as much. -
2 tablespoons olive oil
This will help cook the chicken, adding a hint of flavor. Feel free to substitute with butter for a richer taste or avocado oil if you prefer a higher smoke point. -
2 cloves garlic, minced
Garlic is a flavor powerhouse, bringing warmth and depth to the dish. Love garlic? Go ahead and add another clove! -
Salt and pepper to taste
Seasoning is crucial! Always taste as you go to find that perfect balance of flavors. -
Fresh parsley for garnish
A sprinkle of fresh parsley not only brightens up the dish visually but adds a subtle earthiness. You can also use basil or cilantro for a different twist!
Step-by-Step Instructions
Now, let’s get cooking! Follow these steps for a flawless creamy banana pepper chicken skillet experience.
Step 1: Sear the Chicken
-
Heat the olive oil in a large skillet over medium-high heat. Once shimmering, it’s time to add the chicken.
-
Season the chicken pieces with salt and pepper before tossing them into the hot skillet. This step is key to ensuring your chicken has flavor right from the start. Sear for about 6-8 minutes, or until the chicken is golden brown on all sides. Don’t overcrowd the pan; if you need to, work in batches.
Tip: If you want an extra crispiness, let the chicken sear without moving it for a few minutes before flipping!
Step 2: Add the Garlic and Peppers
-
When the chicken is cooked through (an internal temperature of 165°F), remove it from the skillet and set aside on a plate.
-
In the same skillet, add a little more olive oil if needed, then toss in the minced garlic and banana peppers—just a couple of minutes until fragrant. This is where your kitchen will start smelling incredible!
Chef Hack: For more intense flavor, let the garlic cook until it’s just golden—be careful not to burn it!
Step 3: Create the Cream Sauce
-
Pour in the heavy cream and stir gently to combine. Use a wooden spoon to scrape any tasty bits stuck at the bottom of the pan; these bits are packed with flavor!
-
Let the cream simmer for about 5 minutes, allowing it to thicken slightly. This is the perfect moment to taste and adjust your seasoning. Need a pinch more salt? Go for it!
Step 4: Combine Everything
- Add the cooked chicken back into the skillet, stirring well to coat it in that luscious cream sauce. Allow everything to simmer together for another 3-5 minutes. This is where the magic happens, as all those flavors meld together.
Pro Tip: If you like a little heat, try adding a pinch of red pepper flakes at this stage for an extra kick!
Step 5: Serve It Up
- Once everything is beautifully combined and warmed through, take your skillet off the heat. Garnish with fresh parsley before serving.
Presentation Tip: For a touch of elegance, spoon the dish into a shallow bowl and drizzle a little extra cream around the edge before placing the chicken in the center.
Serving Suggestions
I love serving this creamy banana pepper chicken skillet over a fluffy bed of rice, creamy polenta, or even with crusty bread for dipping. Pair it with a fresh green salad or some sautéed seasonal vegetables to round out the meal. And don’t forget a glass of something bubbly to toast your accomplishment!
Recipe Variations
Here are a few fun twists to make this dish your own:
- Spicy Creole Twist: Add in some diced Andouille sausage along with the chicken for a smoky, spicy version.
- Veggie Boost: Toss in some spinach or kale when adding the chicken back to the pan for a punch of color and nutrients.
- Swaps for Cream: For a lighter version, substitute half of the heavy cream with a creamy, low-fat yogurt stirred in at the end for brightness.
- Cheesy Goodness: Stir in a handful of grated Parmesan right at the end for a cheesy, umami-rich finish.
- Citrus Zing: A squeeze of lemon or lime juice at the end brightens the entire dish and cuts through the richness!
Chef’s Notes
Every time I whip up this creamy banana pepper chicken skillet, I think back to those days in Grandma’s kitchen. I’ve tweaked her original recipe over the years—using less cream, emphasizing fresh peppers, and adding my little kitchen hacks. It’s amazing how one dish can bring together generations of flavor and smiles.
I remember one time I invited friends over for dinner, and I was still fiddling with the prep when they arrived. Instead of panicking, I welcomed them in and made it a group effort. Everyone pitched in, and we laughed while cooking together, transforming an ordinary dinner into a memory we still talk about! Food truly has a way of connecting us.
FAQs and Troubleshooting
1. My sauce is too thin; how can I thicken it?
If your sauce isn’t thickening as desired, allow it to simmer a bit longer over low heat. Alternatively, mix a teaspoon of cornstarch with a tablespoon of cold water to form a slurry, adding it to the sauce and stirring well.
2. Can I use frozen chicken?
Absolutely! Just be sure to thaw it fully before cooking. If you’re short on time, you can also throw frozen chicken directly into the skillet, just extend cooking time to ensure it cooks through completely.
3. What can I do if my dish is too salty?
A pinch of sugar or a splash of vinegar can help cut the saltiness. You can also serve the chicken over more rice or noodles to balance the flavors.
4. How do I store leftovers?
Keep any leftovers in an airtight container in the fridge for up to 3 days. Reheat gently on the stove, adding a splash of water or cream to loosen up the sauce.
Nutritional Info (Optional)
While specific nutritional values can vary, here’s a rough estimate per serving (1/4 of the recipe):
- Calories: 450
- Protein: 35g
- Total Fat: 30g
- Carbohydrates: 10g
And that’s how you create a cozy, flavorful Creamy Banana Pepper Chicken Skillet! I hope it fills your kitchen with warmth and sparks joyful memories. Happy cooking, and don’t forget to share your creations with me—let’s keep the kitchen magic alive together!
PrintCreamy Banana Pepper Chicken Skillet

A delicious one-pan meal featuring chicken cooked in a creamy sauce with banana peppers, perfect for weeknight dinners.
- Prep Time: 15 minutes
- Cook Time: 30 minutes
- Total Time: 45 minutes
- Yield: 4 servings 1x
- Category: Main Course
- Method: Skillet Cooking
- Cuisine: American
- Diet: Gluten-Free
Ingredients
- 1 pound chicken breast, cut into bite-sized pieces
- 1 cup banana peppers, sliced
- 1 cup heavy cream
- 2 tablespoons olive oil
- 2 cloves garlic, minced
- Salt and pepper to taste
- Fresh parsley for garnish
Instructions
- Heat the olive oil in a large skillet over medium-high heat. Season the chicken pieces with salt and pepper before tossing them into the hot skillet. Sear for about 6-8 minutes, or until the chicken is golden brown on all sides.
- Add the minced garlic and banana peppers to the skillet and cook until fragrant.
- Pour in the heavy cream and stir to combine. Let the cream simmer for about 5 minutes to thicken.
- Combine the cooked chicken back into the skillet and allow it to simmer together for another 3-5 minutes.
- Serve the dish garnished with fresh parsley.
Notes
For a spicy twist, consider adding red pepper flakes or other peppers.
Nutrition
- Serving Size: 1 serving
- Calories: 450
- Sugar: 5g
- Sodium: 600mg
- Fat: 30g
- Saturated Fat: 15g
- Unsaturated Fat: 10g
- Trans Fat: 0g
- Carbohydrates: 10g
- Fiber: 2g
- Protein: 35g
- Cholesterol: 90mg
Keywords: chicken, creamy, banana peppers, skillet, easy dinner