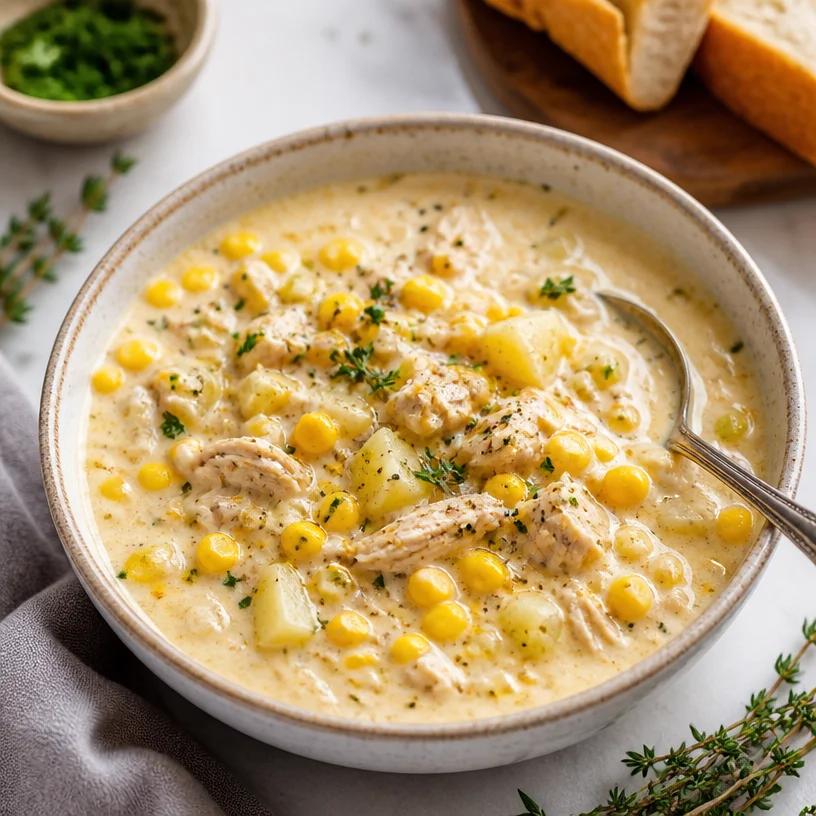
One-Pot Creamy Chicken Corn Chowder in 30 Minutes
The Creamy Comfort of Chicken Corn Chowder: A Kitchen Adventure
Welcome to my kitchen, fellow food enthusiasts! Today, we’re diving into a delightful bowl of warmth: Chicken Corn Chowder. As the weather turns crisp and the leaves begin to fall, there’s nothing quite like a hearty bowl of chowder to wrap you in cozy vibes. This creamy, dreamy dish whispers comfort in every spoonful and is perfect for those cooler evenings when your heart (and belly) craves something a little extra special.
There’s a beautiful simplicity to Chicken Corn Chowder that’s both nostalgic and inviting. Each ingredient harmonizes flawlessly in a comforting melody, creating a warm embrace—it’s like a hug from the inside! Whether you’re whipping it up for a weeknight family dinner or adding a touch of elegance to your next gathering, I promise this chowder will bring smiles all around.
So, grab your apron, light up those stovetop flames, and let’s create something timeless together. Trust me, you won’t just be making dinner; you’ll be crafting a fantastic experience. Let’s get started!
A Sweet Memory: The First Taste of Chowder
Imagine a brisk fall evening filled with the intoxicating scents of garlic, herbs, and sweet corn drifting through the air. I remember the first time I enjoyed chicken corn chowder; I was just a kid, huddled at my grandmother’s kitchen table, eagerly waiting for her to ladle out the fragrant goodness. She was always at her best in the kitchen, an artist of sorts, layering flavors in a way that made every meal feel like a celebration.
One specific evening stands out vividly in my mind. My grandmother had invited friends over, and as the dining room filled with laughter and stories, I sat there mesmerized, watching her move between the stove and the table. The way she stirred the chowder with love, added a sprinkle of herbs, and then smiled as she ladled it into bowls is forever etched in my heart. That warm, creamy chowder, paired with crusty bread, was the highlight of the evening.
Now, as I recreate that cherished dish in my own kitchen, I realize it’s more than just about the flavors; it’s about the love and gathering of friends and family. Chicken Corn Chowder is not just a recipe; it’s a moment—a memory filled with laughter and love. Now, let’s create our own memories as we gather around our tables!
Ingredients for Your Delicious Chicken Corn Chowder
Here’s what you’ll need to create this delightful chowder:
-
Chicken:
- Use boneless, skinless chicken breast or thighs; both work beautifully. If you have leftover rotisserie chicken, that’s a great time-saver too!
-
Corn:
- Fresh corn is ideal, but you can also use canned or frozen corn. If using fresh, just cut the kernels off the cob for that sweet, juicy flavor.
-
Potatoes:
- Yukon gold potatoes are perfect for chowder as they provide a creamy texture when cooked. Feel free to swap in red potatoes if that’s what you have on hand.
-
Cream:
- Heavy cream gives this chowder its signature richness. If you’re looking for a lighter version, you can use half-and-half or whole milk. For a dairy-free alternative, coconut cream works wonderfully.
-
Onion and Garlic:
- These aromatics are essential for building flavor. Fresh onion will add sweetness, while garlic brings a punch!
-
Chicken Broth:
- Opt for low-sodium chicken broth so you have better control over the seasoning. Homemade broth is always a wonderful touch!
-
Thyme:
- Fresh thyme is ideal for its fragrant, earthy notes. Dried thyme works too—just reduce the quantity by half.
-
Salt and Pepper:
- Essential for seasoning. Adjust according to taste. A pinch of cayenne pepper adds an optional kick if you’re feeling adventurous!
With these ingredients, you’ll be ready to create a bowl of warmth that sings comfort with every spoonful!
Step-by-Step Instructions to Your Chowder Masterpiece
Now, let’s take a step into the heart of the kitchen as we transform these ingredients into a steaming bowl of Chicken Corn Chowder. Follow along with me!
-
Prep Your Ingredients:
- Begin by gathering all your ingredients. Chop the onion and garlic, cube the potatoes, and slice up the chicken into bite-sized pieces. This always helps the cooking process flow smoothly—no one enjoys scrambling for ingredients during cooking!
-
Sauté the Aromatics:
- Heat a large pot over medium heat and add a bit of olive oil. Once shimmering, toss in the chopped onions. Sauté them until soft and translucent, about 5 minutes. Add in the minced garlic and sauté for another minute until fragrant. You’ll want your kitchen to smell like heaven at this point!
-
Cook the Chicken:
- Increase the heat to medium-high and add the chicken pieces to your pot. Season with salt, pepper, and thyme. Cook the chicken until it’s browned and cooked through, about 7-10 minutes. Don’t skip this step—browning adds incredible flavor!
-
Add the Potatoes:
- Toss your cubed potatoes into the pot, stirring to combine well. The potatoes will absorb all the good stuff, adding to the chowder’s creaminess later.
-
Pour in the Broth:
- Add the chicken broth to the pot, stirring to combine. Bring the mixture to a gentle simmer. Let your chowder bubble away for about 15-20 minutes, or until the potatoes are tender. This is when the magic begins to happen!
-
Incorporate the Corn:
- Once the potatoes are fork-tender, stir in the corn. Allow it to cook for another 5 minutes. This quick addition lets the corn retain its sweetness without becoming mushy.
-
Add Cream and Adjust Seasoning:
- Finally, pour in the heavy cream, stirring until well combined. Taste and adjust the seasoning with more salt, pepper, or even a pinch of cayenne if you’re feeling bold. Let it warm through for a few more minutes so that all those flavors meld beautifully together.
-
Serve It Up:
- The chowder is ready to be served! Ladle it into bowls and get ready for the compliments that will surely follow—it smells that good!
Serving Suggestions to Elevate Your Chowder
For a delightful presentation, consider garnishing your chowder with a sprinkle of fresh herbs—chopped parsley, chives, or thyme not only add a beautiful splash of color but also enhance the flavor. A drizzle of olive oil or a dollop of sour cream can elevate your dish even further. Serve with warm crusty bread or homemade cornbread for a lovely pairing. Your guests will be coming back for seconds (or thirds)!
Recipe Variations for a Fun Twist
This recipe can be your canvas for creativity! Here are some variations to consider:
- Spicy Chowder: Add diced jalapeños while cooking the onions for a spicy kick.
- Seafood Chowder: Substitute chicken with shrimp or crab for a coastal twist.
- Vegetarian Option: Replace chicken with chickpeas for a hearty meatless dish, using vegetable broth instead.
- Zesty Lemon: Add a squeeze of fresh lemon juice before serving to brighten up the flavors.
- Herb Infusion: Try using fresh basil or dill in place of thyme for a unique spin on the classic flavor profile.
Chef’s Notes: A Journey Through Chowder
As I’ve developed this recipe over the years, I’ve learned that it’s all about balance. You want a creamy texture, but a touch of brightness keeps it from feeling heavy. One evening, I accidentally added too much cream and thought I’d ruined it. But a splash of lemon juice saved the day, creating a deliciously balanced flavor! Cooking is a journey of discovery, and I love embracing the little hiccups that make us better chefs.
Remember, this chowder is versatile! It’s evolved from my grandmother’s traditional recipe into a reflection of my own culinary adventures. So, feel free to make it your own!
FAQs and Troubleshooting Your Chowder Journey
1. What if my chowder is too thick?
- If you find your chowder is thicker than you’d like, simply stir in more chicken broth or water until you reach your desired consistency.
2. Can I make this ahead of time?
- Absolutely! This chowder keeps well in the fridge for about 3-4 days. Reheat gently on the stovetop, adding a splash of broth if necessary.
3. How can I make this dish dairy-free?
- Use full-fat coconut milk instead of cream, and ensure that your broth is free from dairy ingredients.
4. What should I do if it’s too salty?
- If your chowder is too salty, you can balance it out by adding more potatoes or cream to dilute the saltiness. A pinch of sugar can also help counteract saltiness.
Nutritional Info
While this Chicken Corn Chowder is packed with comfort and flavor, here’s an estimated breakdown of its nutritional value per serving:
- Calories: 450
- Protein: 25g
- Carbohydrates: 30g
- Fat: 25g
- Fiber: 3g
Of course, this will vary based on the exact ingredients you use!
And there you have it—Chicken Corn Chowder, straight from my kitchen to yours! I hope you enjoy exploring this dish just as much as I have. Remember, cooking is about joy, creativity, and connection. So tie that apron on and let’s make something incredible together. Happy cooking, friends!
PrintCreamy Chicken Corn Chowder

A delightful bowl of warmth filled with chicken, corn, and creamy goodness, perfect for cozy evenings.
- Prep Time: 15 minutes
- Cook Time: 30 minutes
- Total Time: 45 minutes
- Yield: 4 servings 1x
- Category: Main Course
- Method: Stovetop
- Cuisine: American
- Diet: Non-Vegetarian
Ingredients
- 1 lb boneless, skinless chicken breast or thighs
- 2 cups fresh, canned, or frozen corn
- 2 medium Yukon gold potatoes, cubed
- 1 cup heavy cream (or half-and-half, or coconut cream for dairy-free)
- 1 onion, chopped
- 2 cloves garlic, minced
- 4 cups low-sodium chicken broth
- 1 tsp fresh thyme (or 0.5 tsp dried thyme)
- Salt and pepper to taste
- Pinch of cayenne pepper (optional)
Instructions
- Prep your ingredients: Gather, chop the onion and garlic, cube the potatoes, and slice the chicken.
- Sauté the aromatics: Heat olive oil in a large pot and sauté onions until soft, then add garlic and sauté until fragrant.
- Cook the chicken: Increase heat, add chicken, season with salt, pepper, and thyme, and brown for 7-10 minutes.
- Add the potatoes: Stir in the cubed potatoes and combine well.
- Pour in the broth: Add chicken broth, bring to a gentle simmer, and let bubble for 15-20 minutes until potatoes are tender.
- Incorporate the corn: Stir in the corn and cook for another 5 minutes.
- Add cream and adjust seasoning: Pour in heavy cream, stir, and adjust seasoning as needed.
- Serve it up: Ladle chowder into bowls and enjoy!
Notes
Garnish with fresh herbs and serve with warm crusty bread or cornbread for the best experience.
Nutrition
- Serving Size: 1 bowl
- Calories: 450
- Sugar: 5g
- Sodium: 600mg
- Fat: 25g
- Saturated Fat: 12g
- Unsaturated Fat: 10g
- Trans Fat: 0g
- Carbohydrates: 30g
- Fiber: 3g
- Protein: 25g
- Cholesterol: 90mg
Keywords: chicken, corn, chowder, soup, creamy, fall recipe
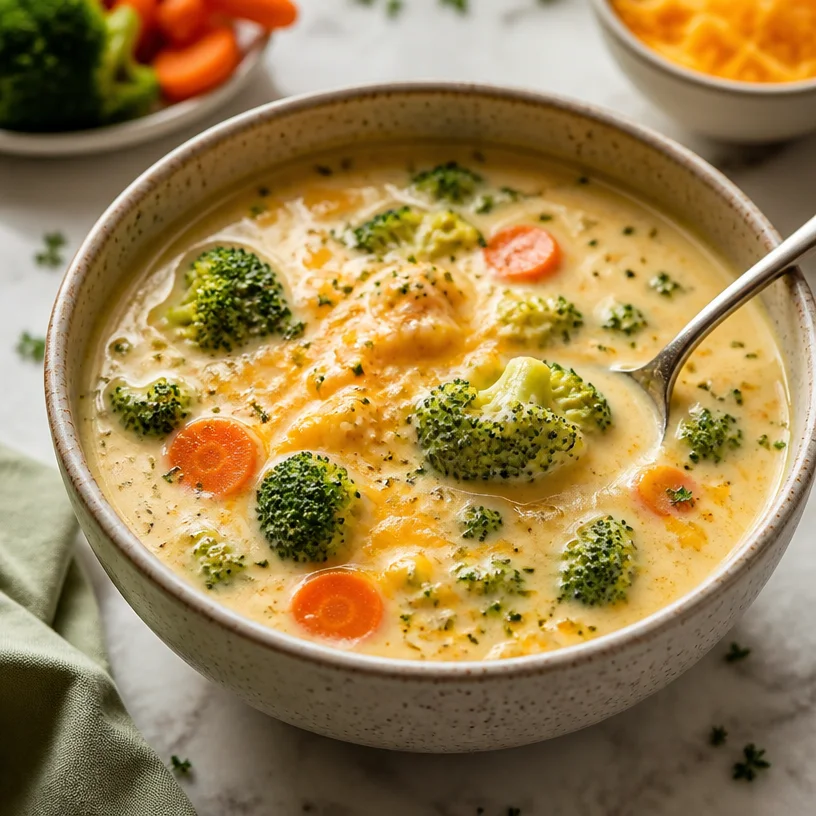
One-Pot Creamy Broccoli Cheddar Soup for Weeknight Dinners
A Cozy Bowl of Broccoli Cheddar Soup: Your New Favorite Comfort Food
Hello, my friends! Today, we’re diving into a cozy bowl of pure comfort: Broccoli Cheddar Soup. There’s something so warm and inviting about a creamy, cheesy soup that just makes your heart smile, don’t you think? It wraps you in a blanket of deliciousness like a big hug.
As the chill of fall sets in, we all start dreaming of hearty soups that not only feed our bodies but also our souls. This recipe is one of my personal favorites—and I can’t wait to share it with you. We’re talking about the kind of soup that makes you feel like you’re sitting at a quaint café on a rainy day, savoring every spoonful while remembering the joys of home-cooked meals.
A Spoonful of Nostalgia
Let me take you back to my childhood kitchen, where the air was always rich with the perfume of simmering vegetables and melted cheese. My mom would make this incredible Broccoli Cheddar Soup on chilly Sunday afternoons, and the entire house would transform into a haven of warmth and laughter. We’d gather around the table, bowls steaming, as my dad would challenge us to guess her secret ingredient (spoiler alert: it was love, and maybe a pinch of nutmeg!).
There’s just something about the combination of broccoli and cheddar that brings back memories of family togetherness and heartwarming chats. I remember my excitement every time she’d lift the lid off the pot, revealing that vibrant green color topped with a thick golden layer of cheese. I can still hear the sound of a spoon gliding through the creamy concoction, and the joyous gathering of family around the kitchen island, test tasting with our breadsticks dipped in.
So here we are today, ready to recreate that beautiful experience in our own kitchens!
Ingredients You’ll Need
To whip up this delightful Broccoli Cheddar Soup, gather the following ingredients:
-
Fresh Broccoli: About 4 cups of broccoli florets. Broccoli is packed with nutrients and gives the soup its vibrant color. If you’re in a pinch, frozen broccoli works too—just thaw it before cooking!
-
Carrots: 2 medium-sized, diced. Carrots add a sweet earthiness to the soup. If you want to switch it up, parsnips or sweet potatoes can substitute nicely.
-
Cheddar Cheese: 2 cups of sharp cheddar cheese, shredded. This is the star ingredient, bringing the soup to its cheesy glory! If you want a different flavor profile, feel free to mix in some Gruyère or Monterey Jack.
-
Heavy Cream: 1 cup. Cream adds that silky richness. For a lighter version, you can use whole milk or even a plant-based substitute like coconut cream.
-
Onion: 1 medium onion, chopped. Onion creates a flavorful base for the soup. Shallots or leeks can be a lovely alternative, introducing their unique sweetness.
-
Garlic: 2 cloves, minced. Garlic brings that savory aroma and depth of flavor. If you’re not a garlic fan, you can omit it—just know you’ll miss out on that wonderful depth.
-
Vegetable or Chicken Broth: 4 cups. This is the liquid gold that melds everything together! Use homemade broth if you have it, or opt for low-sodium store-bought options.
-
Salt and Pepper: To taste. These are essentials in any kitchen. Add a touch of cayenne or paprika for a hint of spice!
Step-by-Step Instructions
-
Prep Your Veggies: First things first, wash and chop all your vegetables. It’s like prepping for a performance—every actor (or ingredient) needs to be stage-ready!
-
Sauté the Aromatics: In a large pot or Dutch oven over medium heat, add a splash of olive oil. Once heated, toss in the chopped onions and sauté until they’re translucent, about 5 minutes. Add the minced garlic and cook until fragrant (about a minute). This is where the magic begins, filling your kitchen with heavenly aromas!
-
Add Carrots and Broccoli: Stir in the diced carrots and broccoli florets. Let them mingle in the pot for another 5 minutes—this step softens them up a bit and lets their flavors shine.
-
Pour in the Broth: Reduce the heat to low and pour in the vegetable or chicken broth. Give it a gentle stir, and bring the mixture to a simmer. Allow it to bubble away for about 15-20 minutes, or until the broccoli and carrots are fork-tender.
-
Blend It Up: Once the veggies are soft, it’s time to blend! Using an immersion blender, blend the soup until it reaches your desired consistency—smooth or chunky, whatever you fancy. If you don’t have an immersion blender, carefully transfer batches of the soup to a standing blender (don’t overfill) and blend until smooth.
-
Stir in the Cream and Cheese: Return the blended soup to the pot, and over low heat, stir in the heavy cream. Allow it to warm through before gradually adding in the shredded cheddar cheese, stirring until it’s all melted and wonderfully gooey. This step is like watching a cheesy magic trick unfold!
-
Season to Taste: Give it a taste, and don’t forget to add salt and pepper to your liking. If you’re feeling adventurous, a dash of nutmeg pairs beautifully with cheddar.
Serving Suggestions
To serve, ladle the soup into bowls and top it with a handful of extra cheese, a sprinkle of freshly cracked pepper, or some crisp croutons for added texture. A wedge of crusty sourdough bread (my personal favorite!) on the side is perfect for dipping, creating an extra cozy experience.
Recipe Variations
Feeling adventurous? Here are a few fun twists you can add:
- Spiced Broccoli Cheddar: Add a pinch of red pepper flakes or a splash of hot sauce to the soup for a spicy kick.
- Nutty Flavor: Stir in some toasted pine nuts or walnuts for an added crunch and a pop of flavor.
- Add Protein: Toss in some cooked diced chicken or white beans for a heartier meal.
- Greens Galore: Consider adding in some baby spinach or kale for an extra dose of nutrients.
Chef’s Notes
Over the years, this recipe has undergone its transformations as I’ve experimented with different cheeses and textures. I once added a splash of white wine, which lent a beautiful depth to the soup. Every time I tackle this soup, I think of how warming it was on those cold Sundays, and I find joy in bringing that same comfort to my family and friends today.
And, fun fact! I once accidentally used blue cheese instead of cheddar. While it didn’t go as planned, it was a funny kitchen mishap that led to a crazy concoction that, surprisingly, we enjoyed. Kitchen disasters may happen, but sometimes they create unexpected delights!
FAQs and Troubleshooting
1. The soup is too thick; what can I do?
No worries! If you’ve ended up with a thickness that feels more like a dip, simply add more broth or cream until it reaches the desired consistency.
2. What if my soup is too salty?
Taste as you go, but if you do find it a bit too salty, adding a few diced potatoes while simmering can help absorb some of that saltiness. Just blend it all together later!
3. Can I make this soup ahead of time?
Absolutely! In fact, the flavors deepen and become even more wonderful after a day in the fridge. Just reheating it gently before serving is key.
Nutritional Info (Optional)
While I did not include exact nutritional info, I can share that this delightful soup is rich in vitamins from the broccoli and carrots, plus the calcium from the cheese and cream. It’s comfort food that can nourish not just your belly but your soul.
So, gather your loved ones, pull out those aprons, and let’s create a bowl of Broccoli Cheddar Soup filled with love and laughter. Each spoonful holds stories, warmth, and the promise of togetherness. Let’s cook, enjoy, and make every meal a moment to remember! Your kitchen awaits!
PrintCozy Broccoli Cheddar Soup

A warm and inviting cream-based soup filled with vibrant broccoli and rich cheddar cheese, perfect for chilly days.
- Prep Time: 15 minutes
- Cook Time: 30 minutes
- Total Time: 45 minutes
- Yield: 4 servings
- Category: Soup
- Method: Cooking
- Cuisine: American
- Diet: Vegetarian
Ingredients
- Fresh Broccoli: About 4 cups of broccoli florets
- Carrots: 2 medium-sized, diced
- Cheddar Cheese: 2 cups of sharp cheddar cheese, shredded
- Heavy Cream: 1 cup
- Onion: 1 medium onion, chopped
- Garlic: 2 cloves, minced
- Vegetable or Chicken Broth: 4 cups
- Salt and Pepper: To taste
Instructions
- Prep your veggies: Wash and chop all your vegetables.
- Sauté the aromatics: In a large pot or Dutch oven over medium heat, add a splash of olive oil. Toss in the chopped onions and sauté until they’re translucent, about 5 minutes. Add the minced garlic and cook until fragrant, about a minute.
- Add carrots and broccoli: Stir in the diced carrots and broccoli florets. Let them cook for another 5 minutes.
- Pour in the broth: Reduce the heat to low and pour in the vegetable or chicken broth. Stir gently and bring to a simmer. Allow to cook for about 15-20 minutes.
- Blend it up: Once the veggies are soft, blend the soup until it reaches your desired consistency.
- Stir in the cream and cheese: Return the blended soup to the pot, and over low heat, stir in the heavy cream. Allow to warm through before adding in the shredded cheddar cheese, stirring until melted.
- Season to taste: Give it a taste and add salt and pepper as needed.
Notes
For a lighter version, substitute heavy cream with whole milk or a plant-based alternative. Feel free to customize with spices or extra ingredients like cooked chicken or greens.
Nutrition
- Serving Size: 1 bowl
- Calories: 400
- Sugar: 6g
- Sodium: 750mg
- Fat: 24g
- Saturated Fat: 14g
- Unsaturated Fat: 8g
- Trans Fat: 0g
- Carbohydrates: 30g
- Fiber: 5g
- Protein: 12g
- Cholesterol: 60mg
Keywords: broccoli cheddar soup, comfort food, easy soup recipe, creamy soup
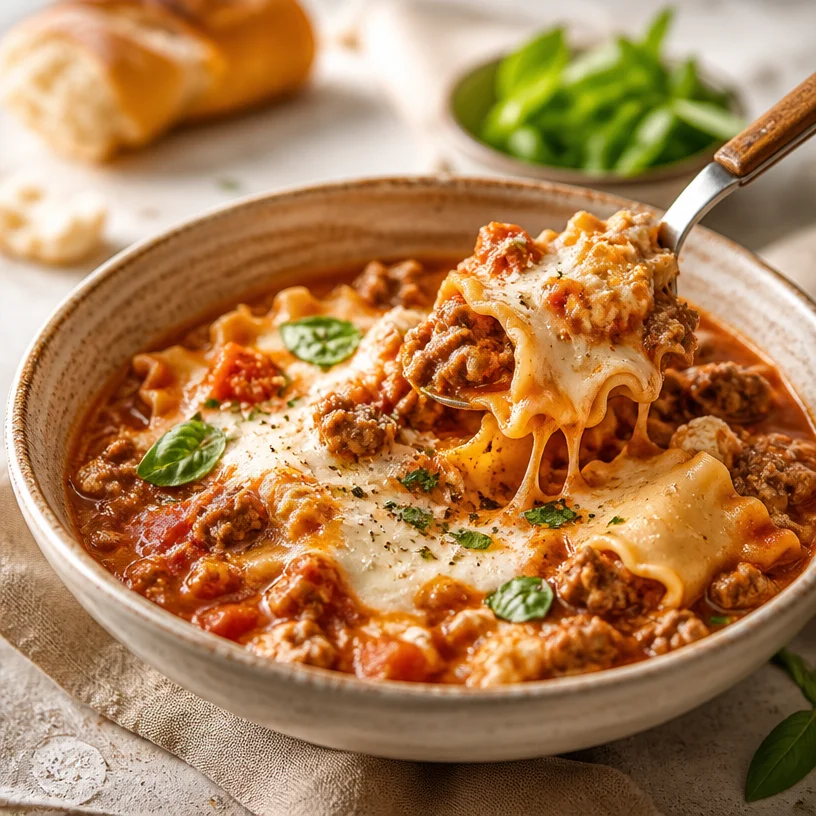
Lasagna Soup
Cozy Comfort: The Heartwarming Delight of Lasagna Soup
Hello and welcome back to the kitchen with me, Savannah Pierce, your friendly host and recipe creator! Today, we’re diving into a dish that’s not only a classic favorite but also a delightful twist on a traditional comfort food: Lasagna Soup. This recipe takes all the rich, savory flavors of lasagna and transforms them into a cozy, heartwarming soup that will warm your belly and your soul. Are you ready to gather around the table with me? Let’s get started!
A Delicious Nostalgia: My Lasagna Soup Story
Oh, the smell of lasagna baking in the oven brings me right back to my childhood! I still remember the family gatherings at my grandma’s house, where she would spend hours preparing her legendary lasagna. There was something magical about the way she layered those sheets of pasta, rich tomato sauce, seasoned meat, and creamy ricotta. The anticipation in the air was palpable as we all gathered around the table, voices buzzing with excitement and laughter.
Fast forward to my own kitchen adventures — I found myself craving those nostalgic flavors but without the fuss of layering and baking. That’s when I thought, “Why not bring those wonderful flavors into a cozy soup?” The first time I simmered up this Lasagna Soup, the aroma filled my home like a warm embrace, instantly reminding me of grandma’s kitchen. It was a hit right away, and I knew I had to share it with all of you!
Ingredients: Let’s Gather What You Need
Before we dive into the cooking, let’s gather our ingredients! Here’s what you’ll need:
- Ground Beef: The heart of our soup, adding a rich, meaty flavor. You can substitute with ground turkey or chicken for a lighter option.
- Lasagna Noodles: These are typically long, flat noodles, but for soup, you can break them into smaller pieces. Gluten-free pasta works beautifully too!
- Canned Tomatoes: I use crushed tomatoes for a smooth base, but diced or whole tomatoes will work as well. Just chop them up!
- Ricotta Cheese: Creamy and slightly sweet, this cheese adds a wonderful richness. If you’re out, cottage cheese can be a great substitute.
- Mozzarella Cheese: Melty and gooey! Opt for fresh mozzarella for an extra dimension of flavor, but pre-shredded works too.
Step-by-Step Instructions: Let’s Cook!
Ready to cook? Here’s how to whip up this delightful Lasagna Soup in a few simple steps.
-
Brown the Meat:
Start by heating a large pot over medium heat. Add about a tablespoon of olive oil, followed by the ground beef. Break it up with a wooden spoon and cook until browned (about 5-7 minutes). Chef’s Tip: Season the meat with salt and pepper while cooking to enhance the flavor right from the start! -
Add Aromatics:
Once the beef is nice and browned, toss in some chopped onions and minced garlic (about 1 onion and 3 cloves of garlic). Cook until the onions are translucent, about 3-4 minutes. Little hack: You can add a pinch of red pepper flakes here if you like a bit of spice! -
Stir in the Tomatoes:
Now it’s time to add those canned tomatoes! Pour in a 28-ounce can of crushed tomatoes with its juices. Stir well to combine everything. Chef Insight: Using a mix of crushed and diced tomatoes can add a nice texture to your soup! -
Add Broth and Noodles:
Pour in 4 cups of beef or vegetable broth and bring the mixture to a boil. Once boiling, add the broken lasagna noodles. Reduce the heat and let it simmer for about 10-12 minutes, or until the noodles are tender. Tip: Stir occasionally to prevent the noodles from sticking together! -
Incorporate Ricotta:
Once the noodles are al dente, stir in a cup of ricotta cheese along with a handful of fresh basil or spinach for added freshness. Chef’s Tip: Reserve some basil for garnish — it looks beautiful! -
Melt the Mozzarella:
Finally, right before serving, stir in shredded mozzarella cheese (about 2 cups) until melted and stretchy. Pro tip: You could sprinkle a bit of Parmesan cheese on top for extra flavor when serving!
Serving Suggestions: Setting the Table
It’s time to serve up this delicious Lasagna Soup! Ladle it into bowls, and if you’re feeling fancy, top with a dollop of extra ricotta cheese and a sprinkle of fresh parsley or basil. Serve with some crusty bread on the side, and you have an elegant yet comforting meal that’s perfect for any night of the week.
Recipe Variations: Get Creative!
This Lasagna Soup is versatile, and you can take it in so many directions. Here are some fun variations to consider:
- Vegetarian Version: Swap the ground beef for sautéed mushrooms and zucchini. This keeps the heartiness while making it a lighter option.
- Spicy Kick: Add cooked Italian sausage (spicy or mild) instead of ground beef for an extra flavor punch.
- Herb Infusion: Mix in fresh oregano and thyme for additional depth. They complement the flavors beautifully!
- Cheesy Delight: Try adding in a blend of cheeses like fontina and goat cheese for a different taste profile.
- Zoodle Option: For a low-carb version, replace the lasagna noodles with spiralized zucchini!
Chef’s Notes: A Dash of My Experience
I’ve gone through many iterations of this soup, and every time I make it, I discover something new! One night, my husband asked me to add in some more vegetables for extra goodness, and I ended up adding in bell peppers and carrots. Let’s just say they never made it to the table, as I polished off the entire pot myself!
Every recipe tells a story and evolves. I’m always tinkering with flavors and textures, and I can’t wait to hear how you adapt this recipe to make it your own.
FAQs and Troubleshooting
1. Can I freeze Lasagna Soup?
Absolutely! This soup freezes well. Allow it to cool completely, then transfer it to an airtight container. Keep for up to three months. Thaw in the refrigerator overnight before reheating.
2. My noodles turned mushy! What did I do wrong?
Overcooking the noodles can lead to mushiness. Make sure to check them a minute or two before the recommended cooking time. You want them al dente since they’ll continue to cook slightly when you serve!
3. What if I don’t have ricotta?
No worries at all! Cottage cheese or even a blend of cream cheese and sour cream can work wonders. For a dairy-free option, you can make a cashew-based cheese as well.
4. How can I make this soup spicier?
Adding crushed red pepper flakes or some diced jalapeños while cooking the meat can dial up the heat. Make sure everyone at the table is ready for it!
Nutritional Info (optional)
For those who are keeping track, a serving of this delightful Lasagna Soup is approximately:
- Calories: 400
- Protein: 23g
- Carbohydrates: 40g
- Fats: 15g
Note: Nutritional values will vary based on specific ingredients used.
Let’s Wrap It Up!
And there you have it — a comforting, delicious Lasagna Soup that brings warmth and joy to your dinner table. Perfect for those cozy nights in or unexpected gatherings with friends, this recipe holds a special place in my heart, and I hope it finds a cozy spot in yours too.
As you get ready to tie on your apron and cook this lovely dish, remember that cooking is about sharing moments, stories, and love. It’s not just about the food; it’s about the connections we create around our tables.
Thanks for joining me today! I can’t wait to hear how your Lasagna Soup turns out. Happy cooking!
PrintLasagna Soup

A delightful twist on classic lasagna in the form of a cozy, heartwarming soup, perfect for family gatherings and cold nights.
- Prep Time: 15 minutes
- Cook Time: 30 minutes
- Total Time: 45 minutes
- Yield: 4 servings 1x
- Category: Main Course
- Method: Stovetop
- Cuisine: Italian
- Diet: None
Ingredients
- 1 lb Ground Beef
- 8 oz Lasagna Noodles (broken into smaller pieces)
- 28 oz Canned Crushed Tomatoes
- 1 cup Ricotta Cheese
- 2 cups Mozzarella Cheese (shredded)
- 4 cups Beef or Vegetable Broth
- 1 Onion (chopped)
- 3 cloves Garlic (minced)
- Olive Oil
- Salt and Pepper to taste
- Fresh Basil or Spinach (for garnish)
Instructions
- Brown the meat: Heat a large pot over medium heat. Add olive oil and ground beef, breaking it up and cooking until browned (about 5-7 minutes).
- Add aromatics: Toss in chopped onions and minced garlic. Cook until onions are translucent (about 3-4 minutes).
- Stir in the tomatoes: Pour in the canned crushed tomatoes and stir well to combine.
- Add broth and noodles: Pour in the broth, bring to a boil, and then add broken lasagna noodles. Simmer for about 10-12 minutes.
- Incorporate ricotta: Stir in ricotta cheese and fresh basil or spinach just before serving.
- Melt the mozzarella: Stir in shredded mozzarella until melted and stretchy right before serving.
Notes
This soup can be frozen for up to three months. Check noodles for doneness before serving to avoid mushiness.
Nutrition
- Serving Size: 1 bowl
- Calories: 400
- Sugar: 8g
- Sodium: 600mg
- Fat: 20g
- Saturated Fat: 10g
- Unsaturated Fat: 8g
- Trans Fat: 0g
- Carbohydrates: 40g
- Fiber: 2g
- Protein: 23g
- Cholesterol: 65mg
Keywords: Lasagna, Soup, Comfort Food, Italian, Easy Recipe
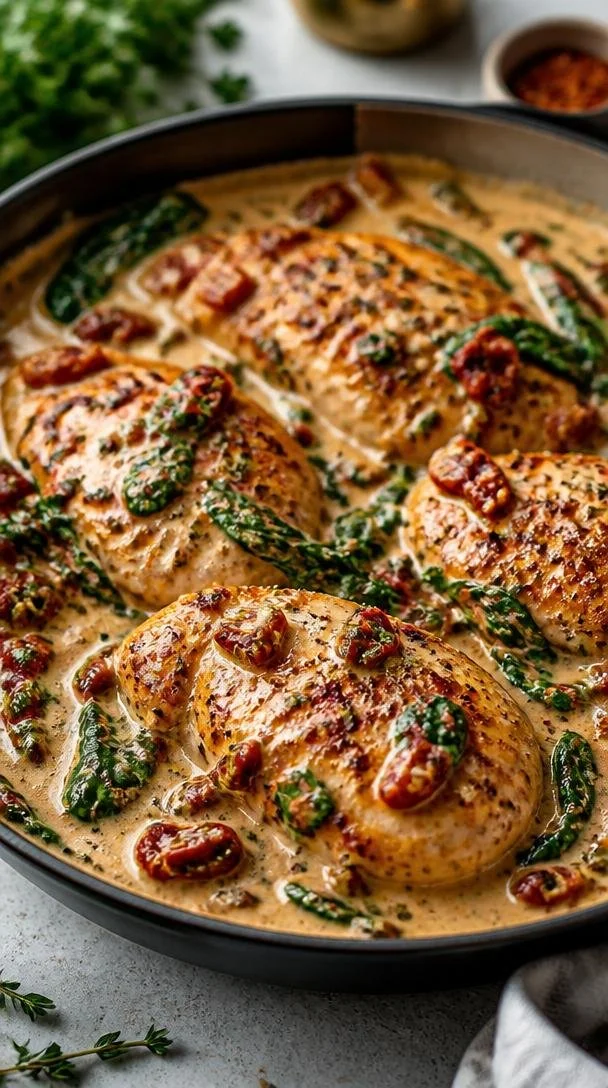
Marry Me Chicken
Marry Me Chicken: A Love Story in Every Bite
Introduction
Welcome back, culinary adventurers! Today, we’re diving into one of the most romantic dishes you’ll ever have the pleasure of crafting in your kitchen: Marry Me Chicken. What’s in a name, you ask? Well, let me tell you, this dish isn’t just about chicken – it’s a whole experience! With its creamy, dreamy sauce, sun-dried tomatoes, and vibrant spinach, Marry Me Chicken is a dish that promises to steal hearts and make taste buds dance.
Now, picture this: you’ve just come home from a long day, your kitchen is your little sanctuary, and you want something that looks elegant but feels cozy. Every time I prepare Marry Me Chicken, it reminds me of those laid-back evenings spent with friends and family where laughter fills the air, glasses are raised, and the aroma of good food invites everyone to the table. It’s the kind of dish that makes you feel like a culinary magician, effortlessly transforming a few ingredients into something extraordinary.
When I first discovered this recipe, I didn’t just fall in love with its rich flavors; I fell in love with how simple it was to impress my loved ones. The first time I served it, there were gasps around the table – gasps of joy, that is! Spoiler alert: there may have been a proposal – and no, not from me! This dish has a way of making moments memorable, and I can’t wait for you to experience it for yourself. So, let’s roll up our sleeves, tie on those aprons, and create some magic!
Personal Story
I’ll never forget the first time I made Marry Me Chicken. It was a warm summer evening, and I had invited a few of my closest friends over for dinner. The sun was setting, and the golden light cast a dreamy glow in my small kitchen. I wanted to impress, but my goal was also to create a cozy atmosphere where everyone would feel at home.
As I prepared this dish, I could hear the laughter of my friends wafting in from the living room. When I served them, their eyes lit up! The first bite was met with silence, and that’s how I knew I had success. After a few moments, one of my friends declared, “If I didn’t know better, I’d say this tastes like I’m dining in an upscale restaurant!” Little did I know, that night would solidify a tradition of gathering friends around the table, sharing not just food, but love, laughter, and unforgettable memories. Every time I cook Marry Me Chicken, I’m transported back to that beautiful moment – a reminder of the magic that happens when we share food with those we cherish.
Ingredients
To create this heartwarming dish, you’ll need the following ingredients:
-
4 boneless, skinless chicken breasts: This is your canvas! You can substitute with chicken thighs if you prefer a richer flavor or even use turkey cutlets for a lighter option.
-
Salt and pepper to taste: Essential for enhancing flavors. Feel free to experiment with other seasonings, but these basics are a must.
-
2 tablespoons olive oil: A healthier fat that adds flavor and helps to sear the chicken. You can swap olive oil with avocado oil for a different flavor profile.
-
4 cloves garlic, minced: Garlic adds depth and aroma. You can use garlic powder in a pinch, but fresh truly shines here!
-
1 teaspoon dried Italian herbs (basil, oregano, thyme): This a blend of classic Italian flavors. Substitute with Herbes de Provence for a twist.
-
1 cup heavy cream: The star of the show for that luscious sauce. For a lighter version, you might use half-and-half, but be aware it won’t have the same richness.
-
1 cup chicken broth: This enhances the sauce’s richness. You can use vegetable broth if you want to make it vegetarian-friendly.
-
1/2 cup sun-dried tomatoes, chopped: A burst of tangy sweetness! If you can’t find sun-dried tomatoes, you could use roasted red peppers for a different flavor.
-
1 cup spinach: This adds color and nutrition. Kale can be a fabulous substitute if you’d like a sturdier green.
-
Parmesan cheese, grated for serving: The finishing touch that brings it all together. Feel free to sprinkle with pecorino or nutritional yeast for a dairy-free option.
Step-by-Step Instructions
-
Prepare Your Ingredients
Start by gathering all your ingredients. This makes the cooking process smoother and less stressful. Take a moment to admire all the beautiful colors and textures. Trust me, cooking is way more fun when you feel inspired! -
Season the Chicken
Lightly season your chicken breasts with salt and pepper. Don’t be shy – this is where flavor starts! Heat your olive oil in a large skillet over medium-high heat. Once hot, add the chicken. -
Sear the Chicken
Cook the chicken for about 6-7 minutes on each side until it’s golden brown and cooked through. You want a nice caramelization for depth of flavor. Use tongs to flip them; that satisfying sizzle is music to my ears! -
Make the Garlic Magic
Remove the chicken from the skillet and set aside. Lower the heat to medium and toss in the minced garlic. Sauté for about 30 seconds until fragrant – but be careful not to burn it! It’s a fine line, and burnt garlic is a no-go! -
Add the Flavors
Stir in the dried Italian herbs and chicken broth. Be sure to scrape up any brown bits from the bottom of the pan – that’s flavor gold! Let it bubble gently for a minute or two. -
Creamy Indulgence
Pour in the heavy cream and let it come to a gentle simmer. This is where the magic happens, folks! You’ll notice the sauce thickening and becoming luscious. Add the sun-dried tomatoes and spinach. Stir until the spinach wilts and everything is coated in this dreamy sauce. -
Bring It All Together
Return the chicken to the skillet and allow it to soak in all those fantastic flavors for another 5 minutes. Turn off the heat, and sprinkle with grated Parmesan cheese. Let your kitchen soak in that delightful aroma!
Serving Suggestions
To plate your Marry Me Chicken, serve it over a bed of al dente pasta, creamy mashed potatoes, or even fluffy rice. Ladle that rich sauce generously over the chicken and garnish with a sprinkle of additional Parmesan and fresh herbs. Setting the table with some candles and a beautiful cloth can really create an inviting atmosphere, perfect for any gathering or even a special dinner for one.
Recipe Variations
-
Spicy Twist: Add some crushed red pepper flakes to the garlic for a spicy kick that will wake up your taste buds.
-
Mushroom Lover: Sauté sliced mushrooms alongside the garlic for an earthy addition.
-
Pesto Delight: Stir in a tablespoon of pesto instead of the Italian herbs for a different depth of flavor.
-
Citrusy Zing: Squeeze some fresh lemon juice into the sauce right before serving for a bright, refreshing finish.
-
Vegan version: Use plant-based chicken substitutes, coconut cream instead of heavy cream, and vegetable broth for a delightful vegan twist.
Chef’s Notes
Whenever I make Marry Me Chicken, it feels nostalgic. It reminds me of years spent trying to impress my friends and family with my cooking skills – and boy, did I learn a lot along the way! You can bet many failed soufflés and dry chicken breasts have led me to this creamy perfection. I love talking with my friends about our culinary experiences, and we often share stories about the dishes that transformed our home cooking.
Over time, I have played around with the recipe, adding different ingredients and spices, but I always come back to this version. It’s simple, elegant, and never fails to make everyone around the table feel special. Plus, there’s something utterly charming about a dish that’s downright swoon-worthy yet so easy to prepare!
FAQs and Troubleshooting
-
What can I serve with Marry Me Chicken?
Great question! This dish pairs beautifully with pasta, rice, or a fresh green salad. Garlic bread or crusty baguette is also a crowd-pleaser for soaking up that creamy sauce! -
Can I make this dish ahead of time?
Absolutely! You can cook it a few hours in advance and then reheat it gently on the stove. Just be cautious not to overheat or dry out the chicken. -
Why is my sauce not thickening?
If your sauce isn’t thickening, make sure you’re letting it simmer long enough. If it’s still runny, you can mix a cornstarch slurry (1 tablespoon of cornstarch and 2 tablespoons of cold water) and gradually add it to the sauce while stirring. -
Can I freeze Marry Me Chicken?
Yes! Allow it to cool fully before transferring it to an airtight container. It should last up to 3 months in the freezer. Just remember to thaw it in the fridge before reheating!
Nutritional Info
While it’s not the primary focus of this dish, an approximate nutritional breakdown per serving (based on 4 servings) includes:
- Calories: ~520
- Protein: ~36g
- Carbohydrates: ~6g
- Fat: ~40g
And there you have it! A delightful journey through Marry Me Chicken that’s sure to become a staple in your home. This dish is all about love, warmth, and creating cherished moments around the dinner table. Happy cooking, dear friends! Don’t forget to share your own culinary stories and transformations – I can’t wait to hear about your delicious adventures!
PrintMarry Me Chicken

A romantic dish featuring creamy sauce, sun-dried tomatoes, and vibrant spinach that is perfect for impressing loved ones.
- Prep Time: 15 minutes
- Cook Time: 30 minutes
- Total Time: 45 minutes
- Yield: 4 servings 1x
- Category: Main Course
- Method: Sautéing
- Cuisine: Italian
- Diet: Mediterranean
Ingredients
- 4 boneless, skinless chicken breasts
- Salt and pepper to taste
- 2 tablespoons olive oil
- 4 cloves garlic, minced
- 1 teaspoon dried Italian herbs (basil, oregano, thyme)
- 1 cup heavy cream
- 1 cup chicken broth
- 1/2 cup sun-dried tomatoes, chopped
- 1 cup spinach
- Parmesan cheese, grated for serving
Instructions
- Prepare your ingredients by gathering all of them for a smooth cooking process.
- Season your chicken breasts with salt and pepper, then heat olive oil in a large skillet over medium-high heat.
- Sear the chicken for about 6-7 minutes on each side until golden brown and cooked through.
- Make the garlic magic by sautéing minced garlic for 30 seconds in the same skillet.
- Add the dried herbs and chicken broth, scraping up any brown bits from the bottom of the pan.
- Pour in the heavy cream and allow to simmer until thickened, stirring in the sun-dried tomatoes and spinach.
- Bring the chicken back into the skillet and let it soak in the flavors for another 5 minutes.
Notes
This dish pairs beautifully with pasta, rice, or a fresh green salad. You can prepare it in advance and reheat when ready to serve.
Nutrition
- Serving Size: 1 serving
- Calories: 520
- Sugar: 5g
- Sodium: 600mg
- Fat: 40g
- Saturated Fat: 16g
- Unsaturated Fat: 20g
- Trans Fat: 0g
- Carbohydrates: 6g
- Fiber: 1g
- Protein: 36g
- Cholesterol: 100mg
Keywords: chicken, creamy sauce, romantic dinner, Italian recipe, comfort food
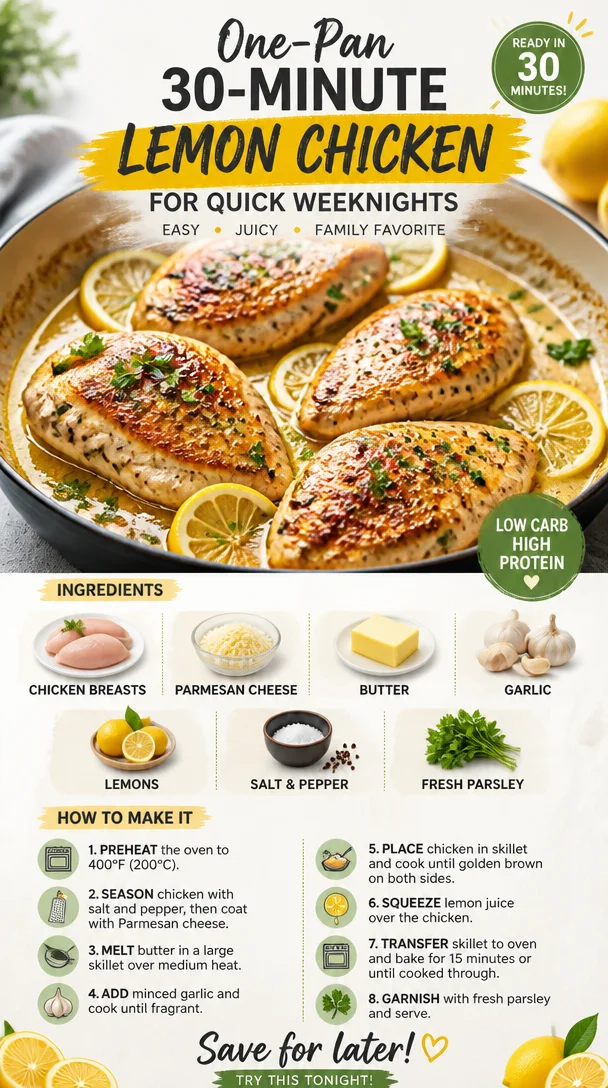
One-Pan 30-Minute Lemon Chicken for Quick Weeknights
30-Minute Lemon Chicken: A Flavorful Feast in No Time
Hello, fellow food lovers! Today, I’m thrilled to share one of my favorite go-to dishes: 30-Minute Lemon Chicken. This recipe is like a warm hug on a plate—simple, zesty, and bursting with flavor! Whether you’re entertaining guests or just whipping up a delightful weeknight dinner, this dish fits the bill perfectly.
Lemon Chicken has a special place in my heart and my kitchen. It’s the kind of dish that invites memories; memories of family gatherings, laughter around the dining table, and the intoxicating aroma of garlic sizzling in butter. Trust me, as you follow along, you’ll not only create a meal but also moments that linger long after the plates are cleared.
Now, let’s be honest. We live in a fast-paced world, where time is often not on our side. But that doesn’t mean we have to sacrifice taste for speed. This recipe marries the two beautifully. With tender chicken breasts coated in gooey butter, minced garlic, and the bright zing of lemons, you’ll have a dish that tastes like it took hours but came together in just 30 minutes! So, grab your apron, and let’s make some culinary magic!
Personal Story
I remember the first time I made Lemon Chicken for my friends. It was one of those spontaneous gatherings—everyone was busy, but I threw out the invite, and miraculously, they all showed up! It was just me in my small kitchen, surrounded by laughter and the clanking of wine glasses. I wasn’t quite sure what I would serve, but I had some chicken and fresh lemons, so I decided to wing it.
As I cooked, the tangy scent of lemons and garlic filled the air. When I set the table, I felt a nervous thrill as everyone dug in. The first bite—oh, what a delight! The chicken was tender and flavorful, the sauce luscious and bright. Laughter and compliments filled the room, and I knew I had found a beloved crowd-pleaser. Nothing beats the feeling of bringing people together through food, and this dish has become a staple for my dinner parties ever since. Let me guide you to a similar success in your kitchen!
Ingredients
-
4 chicken breasts
The star of the show! Look for boneless, skinless chicken breasts for ease. You can substitute with thighs for a juicier option or use tofu for a vegetarian twist. -
1/2 cup grated Parmesan cheese
This brings a savory depth to the dish. If you’re out of Parmesan, try Pecorino Romano. For a dairy-free option, nutritional yeast works wonders! -
1/4 cup butter
Butter adds richness; you can replace it with olive oil or a dairy-free spread if you’re looking for a healthier choice. -
4 cloves garlic, minced
Garlic is my favorite flavor booster! Fresh garlic packs the most flavor, but if you’re in a pinch, feel free to substitute with garlic powder—1 clove equals about 1/8 teaspoon of garlic powder. -
Juice of 2 lemons
Fresh lemon juice brightens everything. If you don’t have fresh lemons, bottled juice works in a pinch—just make sure it’s 100% juice for the best flavor! -
Salt and pepper to taste
These pantry staples elevate each flavor. Always taste as you go to find that perfect balance! -
Fresh parsley for garnish
A sprinkle of parsley adds a pop of color and flavor. If you’re not a parsley fan, fresh basil or thyme can also bring an aromatic touch!
Step-by-Step Instructions
Step 1: Prepare Your Ingredients
First things first, gather all your ingredients. This makes for a smoother cooking process. Preheat your skillet over medium heat with half the butter. While that’s warming up, pat your chicken breasts dry with a paper towel. This step is crucial; it helps achieve that golden, crispy crust. Season both sides with salt and pepper.
Step 2: Brown the Chicken
Once your skillet is hot, add your chicken breasts. Here’s a little kitchen secret: don’t overcrowd the pan. If your skillet is too full, the chicken will steam instead of brown. Let them sear for about 4–5 minutes on each side until golden brown and cooked through (165°F internal temperature!). If they’re really thick, you may need a few extra minutes.
Step 3: Add the Garlic
When your chicken is perfectly browned, pull it to one side of the pan. In the empty space, add the minced garlic, letting it sauté for about 30 seconds until fragrant—be careful not to burn it! If you notice it getting too brown, lower the heat a bit. We want flavor, not bitterness!
Step 4: Create the Sauce
Now, add the remaining butter to the garlic. Once it melts, pour in the lemon juice and sprinkle the Parmesan cheese over the entire mixture. You want that buttery, cheesy goodness to coat your chicken evenly. Carefully flip the chicken to ensure it’s covered in this luscious sauce. Let everything cook for an additional 2–3 minutes, allowing the flavors to meld beautifully.
Step 5: Plate and Garnish
Once done, take your chicken out of the pan and place it on a warmed serving platter. Spoon that delightful lemon sauce from the skillet over the top and finish with a sprinkle of freshly chopped parsley. It looks beautiful, right?
Step 6: Serve Warm
Serve it warm, maybe with a side of roasted veggies or a light salad. Just imagine your family and friends gathering around the table, the scent wafting through the air while everyone swoons over your culinary prowess!
Serving Suggestions
To elevate your presentation, plate each chicken breast individually and drizzle the lemon-garlic sauce on top. A sprinkling of fresh parsley will provide a stunning contrast and a dash of freshness. Serve alongside a side of steamed asparagus or a fluffy rice pilaf. If you have a zesty salad, place that on the table for a colorful, well-rounded meal!
Recipe Variations
- Herb-Enhanced: Add chopped herbs like rosemary, thyme, or dill for an extra layer of flavor.
- Spicy Twist: A dash of red pepper flakes will give you that delightful spicy kick to contrast with the lemony goodness.
- Mushroom Lovers: Toss in some sautéed mushrooms when you add the garlic for an earthy flavor boost.
- Creamy Version: Stir in a tablespoon of heavy cream or Greek yogurt to the sauce for a creamy lemon sauce!
- Zesty Citrus: Combine lemon juice with lime or orange juice for a citrus medley that’s refreshingly bold!
Chef’s Notes
When I first created my version of Lemon Chicken, it was born out of necessity—using what I had at home. The dish has evolved into a favorite among friends and family, each iteration a delightful surprise. My husband even jokes that we should rename our dinner table “Lemon Chicken Central”! Cooking is all about experimentation, so don’t hesitate to adjust the recipe to fit your taste. Embrace the process and share those kitchen stories with love!
FAQs and Troubleshooting
1. What if my chicken isn’t browning?
Ensure your skillet is sufficiently preheated before adding the chicken. Patting the chicken dry helps it sear rather than steam.
2. Can I use frozen chicken?
While it’s best to use thawed chicken for even cooking, you can certainly cook from frozen. Just increase the cooking time by 5-10 minutes, ensuring the internal temperature reaches 165°F.
3. My sauce turned out too salty. What do I do?
Add a splash of cream or a bit more lemon juice to balance the flavor. If you added too much cheese, consider a side of plain rice to balance the saltiness.
4. Can I make this ahead of time?
Absolutely! Cook and store the chicken in an airtight container for up to 3 days in the fridge. Reheat gently in a skillet with a splash of water or broth to avoid drying it out.
Nutritional Info
While the specific nutritional details can vary based on ingredient brands, here’s a rough estimate for one serving of Lemon Chicken (one chicken breast with sauce):
- Calories: 382
- Protein: 38g
- Fat: 22g
- Carbohydrates: 3g
- Fiber: 0g
Feel free to adjust portions to suit your dietary needs!
Now it’s your turn to make this 30-Minute Lemon Chicken an unforgettable part of your mealtime repertoire. Cooking can be a joyful journey, bursting with creativity and flavor, and I’m here cheering you on every step of the way. So tie on that apron, turn up your favorite playlist, and let’s create something scrumptious together! Happy cooking!
Print30-Minute Lemon Chicken

A quick, zesty, and flavorful dish featuring tender chicken breasts cooked in a buttery lemon garlic sauce.
- Prep Time: 10 minutes
- Cook Time: 20 minutes
- Total Time: 30 minutes
- Yield: 4 servings 1x
- Category: Main Course
- Method: Pan-Frying
- Cuisine: Italian
- Diet: Gluten-Free
Ingredients
- 4 chicken breasts
- 1/2 cup grated Parmesan cheese
- 1/4 cup butter
- 4 cloves garlic, minced
- Juice of 2 lemons
- Salt and pepper to taste
- Fresh parsley for garnish
Instructions
- Prepare your ingredients by gathering all items and preheating your skillet over medium heat with half the butter. Pat your chicken breasts dry and season both sides with salt and pepper.
- Brown the chicken by adding it to the hot skillet and searing for about 4–5 minutes on each side until cooked through (165°F internal temperature).
- Add the minced garlic to the empty space in the skillet and sauté for about 30 seconds until fragrant.
- Create the sauce by adding the remaining butter and lemon juice, then sprinkle the Parmesan cheese over the mixture. Flip the chicken to coat it in the sauce and cook for an additional 2–3 minutes.
- Plate the chicken on a serving platter, then spoon the lemon sauce over the top and garnish with freshly chopped parsley.
- Serve it warm alongside your favorite sides.
Notes
Feel free to experiment with herbs or spices for added flavor.
Nutrition
- Serving Size: 1 serving
- Calories: 382
- Sugar: 1g
- Sodium: 500mg
- Fat: 22g
- Saturated Fat: 11g
- Unsaturated Fat: 9g
- Trans Fat: 0g
- Carbohydrates: 3g
- Fiber: 0g
- Protein: 38g
- Cholesterol: 85mg
Keywords: lemon chicken, quick dinner, easy recipe, chicken recipe
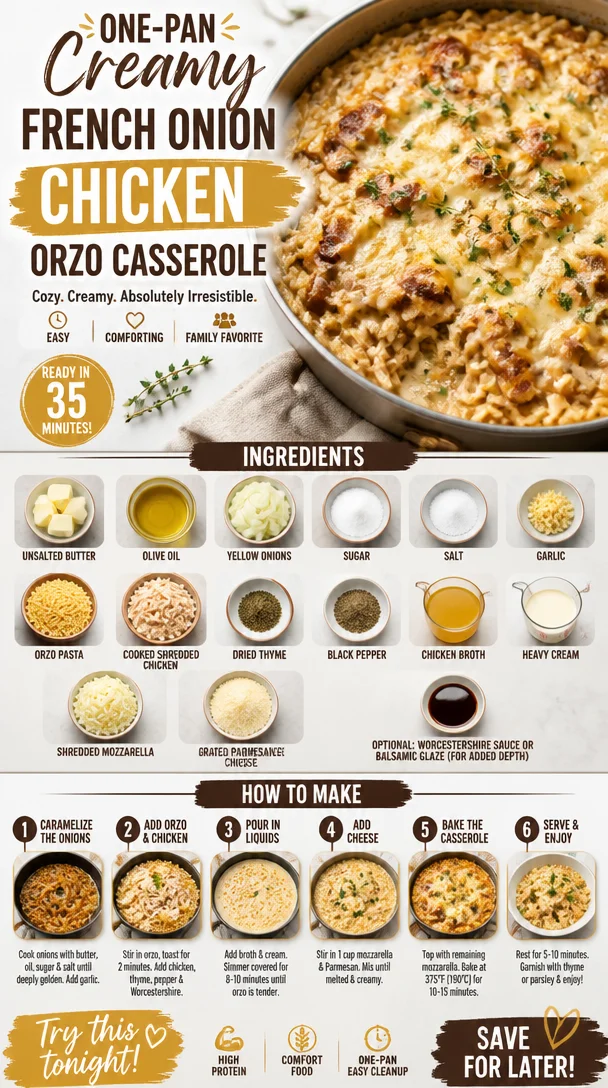
One-Pan Creamy French Onion Chicken Orzo Casserole
French Onion Chicken Orzo Casserole: A Cozy Comfort Meal
Hello, dear foodies! Today, I’m thrilled to share a recipe that will warm your heart and soul—the French Onion Chicken Orzo Casserole. This dish beautifully combines the rich flavors of French onion soup with the comfort of creamy orzo and tender chicken. It’s a cozy meal perfect for weeknight dinners or any time you’re craving something hearty yet elegant.
As I meander through my culinary journey, I can’t help but think of rainy evenings spent in the kitchen, the kind when the aroma of slowly caramelized onions fills the air. With the pitter-patter of rain outside, I’m transported back to my childhood, where my family would gather, laughing and sharing stories over a bowl of something wonderfully comforting. That’s what cooking is all about—the magic that happens when you bring people to your table, nourishing not just their bodies but their hearts.
So tie on your apron, turn on your favorite playlist, and let’s get cooking!
A Slice of Nostalgia
I remember the first time I had French onion soup. My grandmother, with her twinkling eyes, introduced me to the dish when I was just a little sous-chef in her kitchen. One evening, she patiently taught me how to caramelize onions, explaining how the transformation from raw to golden brown was a labor of love. The soup, adorned with toasted bread and bubbling cheese, became my comfort dish during long winter nights.
Fast forward to today, I’ve taken that classic flavor and woven it into this casserole that brings all those memories flooding back but in an easy-to-make format. So, grab your spoon, and let’s make some magic happen!
Ingredients
Here’s what you’ll need to create this delightful casserole:
- 2 tablespoons unsalted butter: For that rich, creamy base. You could substitute with ghee if you’re dairy-free.
- 1 tablespoon olive oil: Adds flavor and prevents the butter from burning. Use avocado oil for a higher smoke point.
- 2 large yellow onions (thinly sliced): Sweet and savory, the star of our dish! If you prefer milder flavors, try using shallots.
- 1 teaspoon sugar: This helps caramelize the onions, balancing their natural sweetness. Brown sugar also works if you have it on hand.
- 1/2 teaspoon salt: Enhances the flavors and aids in drawing moisture out of the onions.
- 3 garlic cloves (minced): For that aromatic kick. If you’re not a fan of garlic, you can skip it or use garlic powder instead.
- 1 1/2 cups orzo pasta: This tiny pasta shape soaks up the flavors beautifully. Substitute with quinoa or rice for a gluten-free option.
- 2 cups cooked shredded chicken (rotisserie works well): A great shortcut for busy weeknights. You can use turkey or even chickpeas for a veggie twist.
- 1/2 teaspoon dried thyme: Adds an earthy depth. Fresh thyme works wonderfully too!
- 1/4 teaspoon black pepper: For a touch of spice. Adjust to your taste.
- 2 cups low-sodium chicken broth: The flavorful base of our casserole; homemade broth takes it to the next level. Use vegetable broth for a vegetarian version.
- 1 cup heavy cream (or half and half for a lighter option): Creaminess is key! You can use coconut cream if you need it dairy-free.
- 1 1/2 cups shredded mozzarella cheese: For gooey goodness! Feel free to substitute with your favorite cheese blend.
- 1/2 cup grated Parmesan cheese: Adds a nutty flavor and enhances the dish. Nutritional yeast is a great alternate for a dairy-free option.
- Optional: 1/2 teaspoon Worcestershire sauce or balsamic glaze: Adds depth and complexity. This step really elevates the dish but can be left out if you prefer.
Step-by-Step Instructions
-
Caramelize the Onions: In a large skillet, melt the butter and olive oil over medium heat. Once hot, add the sliced onions and sprinkle them with sugar and salt. Cook for about 20-25 minutes, stirring occasionally, until they are a beautiful golden brown. Patience is key here! Low and slow caramelization unlocks sweet flavors. Pro tip: If the onions start to stick, add a tiny splash of broth to deglaze the pan.
-
Add Garlic: Once your onions are perfectly caramelized, add the minced garlic and cook for another 1-2 minutes. You want to smell that aroma wafting through your kitchen. It’s the good stuff, my friends!
-
Combine Ingredients: In a large mixing bowl, combine the cooked onions and garlic with the orzo pasta, shredded chicken, dried thyme, black pepper, and the remainder of the broth and cream. If you’re adding Worcestershire sauce or balsamic glaze, now’s the time! This mixture should be creamy and inviting.
-
Transfer to Casserole Dish: Grease a 9×13-inch casserole dish, then pour the orzo mixture into it. Spread it out evenly, making sure every bit is coated in that luscious sauce.
-
Cheese It Up: Sprinkle the mozzarella and Parmesan generously over the top. Because let’s be real, cheese is life!
-
Bake: Preheat your oven to 375°F (190°C). Bake the casserole for 25-30 minutes, or until the cheese is melted and bubbly. You want that golden crust that promises a delightful bite. If you want an extra crispy top, broil for an additional 1-2 minutes—but buddy, keep a close eye on it!
-
Rest a Bit: Once it’s out of the oven, let it rest for about 5-10 minutes. This allows the flavors to mingle and makes serving so much neater. Plus, it gives you a moment to breathe and admire your handiwork.
Serving Suggestions
When serving your French Onion Chicken Orzo Casserole, a simple side salad dressed with a light vinaigrette pairs beautifully. You can plate the casserole in individual bowls, topped with fresh herbs—like parsley or chives—for a pop of color. Trust me, thoughtful plating can transform your meal from ordinary to extraordinary!
Recipe Variations
Feeling adventurous? Here are a few ways you can mix it up:
- Add Vegetables: Incorporate spinach, mushrooms, or bell peppers for extra nutrients and flavors.
- Swap Proteins: Use steak, shrimp, or even a plant-based protein for a twist.
- Seasonal Flavors: Experiment with herbs like rosemary or sage during autumn for a seasonal flair.
- Spice It Up: Add a pinch of red pepper flakes for a hint of heat!
Chef’s Notes
Oh, the laughs I’ve had over this recipe! I remember one time when I invited a group of friends over for dinner, and I forgot to buy cheese. I had to get creative with a random assortment of cheeses from my fridge—cheddar, gouda, and even a bit of feta made an appearance. It turned out scrumptious, and now I always tell folks to use what they have on hand. Cooking should be flexible and fun, don’t you think?
This recipe has also evolved through the years. Initially, it was just a simple pasta bake, but as my love for French onion soup grew, I decided to take a classic and give it my personal touch.
FAQs and Troubleshooting
Q: Can I make this casserole gluten-free?
A: Absolutely! Just swap the orzo for a gluten-free pasta option or quinoa. The cooking times may vary, so keep an eye on it!
Q: It seems a bit dry—why?
A: If it feels dry, it could be that the pasta absorbed too much liquid during baking. Next time, add a bit more broth or cream before baking!
Q: Can I make this ahead of time?
A: Definitely! Assemble it as directed, cover, and refrigerate for up to 24 hours. Just add a few extra minutes to the baking time.
Q: How do I store leftovers?
A: Keep any leftovers in an airtight container in the fridge for up to 3 days. Reheat gently in the oven or microwave—add a splash of broth if it gets dry!
Nutritional Info
While I don’t typically focus on numbers, a serving of this casserole generally contains around 450 calories, depending on your specific ingredients and portion sizes. It’s packed with protein, and lots of cheesy goodness—as comfort food should be!
I hope this French Onion Chicken Orzo Casserole finds its way into your kitchen and creates as many lovely memories for you as it has for me. Remember, cooking is about joy, intention, and gathering around the table. Here’s to many beautiful meals ahead! Happy cooking!
PrintFrench Onion Chicken Orzo Casserole
A cozy comfort meal that combines the rich flavors of French onion soup with creamy orzo and tender chicken, perfect for weeknight dinners.
- Prep Time: 15 minutes
- Cook Time: 30 minutes
- Total Time: 45 minutes
- Yield: 4 servings 1x
- Category: Main Course
- Method: Baking
- Cuisine: French
- Diet: Gluten-Free Option Available
Ingredients
- 2 tablespoons unsalted butter
- 1 tablespoon olive oil
- 2 large yellow onions (thinly sliced)
- 1 teaspoon sugar
- 1/2 teaspoon salt
- 3 garlic cloves (minced)
- 1 1/2 cups orzo pasta
- 2 cups cooked shredded chicken
- 1/2 teaspoon dried thyme
- 1/4 teaspoon black pepper
- 2 cups low-sodium chicken broth
- 1 cup heavy cream
- 1 1/2 cups shredded mozzarella cheese
- 1/2 cup grated Parmesan cheese
- Optional: 1/2 teaspoon Worcestershire sauce or balsamic glaze
Instructions
- Caramelize the onions: In a large skillet, melt the butter and olive oil over medium heat. Add the sliced onions, sugar, and salt. Cook for about 20-25 minutes until golden brown.
- Add garlic: Once onions are caramelized, add minced garlic and cook for another 1-2 minutes.
- Combine ingredients: In a mixing bowl, combine cooked onions, garlic, orzo, shredded chicken, thyme, black pepper, remaining broth, and cream.
- Transfer to a casserole dish: Grease a 9×13-inch dish and pour the mixture into it, spreading evenly.
- Cheese it up: Sprinkle mozzarella and Parmesan over the top.
- Bake: Preheat oven to 375°F (190°C) and bake for 25-30 minutes until cheese is melted and bubbly.
- Rest a bit: Let it rest for 5-10 minutes before serving.
Notes
Serve with a side salad and fresh herbs for garnish. This dish is flexible; you can adjust ingredients based on what you have.
Nutrition
- Serving Size: 1 serving
- Calories: 450
- Sugar: 6g
- Sodium: 500mg
- Fat: 20g
- Saturated Fat: 10g
- Unsaturated Fat: 7g
- Trans Fat: 0g
- Carbohydrates: 45g
- Fiber: 3g
- Protein: 25g
- Cholesterol: 70mg
Keywords: comfort food, casserole, chicken, French onion, weeknight dinner, creamy, orzo, cozy meal

Ultimate Cheesy Ground Beef Melt
The Ultimate Cheesy Ground Beef Melt: A Comfort Food Classic
Introduction
Hello, culinary adventurers! I’m so excited you’re joining me today because we’re diving into one of my absolute favorite comfort food recipes: the Ultimate Cheesy Ground Beef Melt. It’s exactly what it sounds like—juicy, flavorful ground beef meeting a melty, gooey blanket of cheese all encapsulated in toasty bread. Yum, right?
There’s something so nostalgic about biting into a warm, cheesy melt that transports you back to those carefree days when dinner was simply about comfort, love, and the people gathered around the table. Whether you’re whipping this up for a weeknight meal, a cozy lunch, or a fun dinner party, this dish is sure to impress while still keeping things stress-free.
Now, let’s dive right in! I’ll share a personal story that showcases why this dish brings me joy, then take you through every step of the process, share chef tips, and sprinkle in a few fun variations that can personalize your melt. So, tie on your apron and let’s get cooking!
My Personal Story
When I think of the Ultimate Cheesy Ground Beef Melt, I’m transported back to my childhood kitchen, where my mom would host her “cheesy nights.” One evening, after a long day at school, I rushed home, my stomach growling in anticipation of the delightful aroma that filled our little home. My mom had whipped up this incredible ground beef dish, but the best part was watching her melt layers of gooey cheese over the top, transforming an everyday meal into something truly special.
We would sit around the kitchen table, my siblings and I, our plates piled high, laughter echoing against the walls as we shared stories from our day. Each bite was an explosion of flavor with the savory beef, the aromatic garlic and onions, and that melted cheese that stretched so beautifully—food that felt like a warm hug.
This simple yet fantastic recipe became a family staple, a tradition that I carry to this day. Whenever I prepare it now, I often find myself reminiscing, passing on the same warmth and joy to whoever joins me around the table. Trust me, my friends, once you taste this dish, it’ll weave its way into your own heart just like it did mine.
Ingredients
Before we get started, let’s round up our ingredients! Here’s what you’ll need for the Ultimate Cheesy Ground Beef Melt:
-
Ground Beef (1 lb): This is the star of the dish! I love using a higher fat content (80/20) for the juiciest results. For a healthier option, you can substitute it with ground turkey or chicken, but be careful not to dry it out.
-
Cheese (2 cups, shredded): Cheddar is my go-to for that sharpness, but mozzarella, Monterey Jack, or a melting blend can also do the trick. The creamier, the better!
-
Bread (4 slices or burger buns): Choose your favorite! Sandwich bread for a classic melt or burger buns for a heartier version. If you want a gluten-free alternative, look for gluten-free bread options or lettuce wraps.
-
Onion (1, diced, optional): Adds a lovely sweetness and complexity. If you’re not a fan, skip it, or swap in caramelized onions for a richer flavor.
-
Garlic (2 cloves, minced, optional): Fresh garlic brings that beautiful aromatic flavor. Feel free to substitute with garlic powder if you’re in a pinch!
-
Seasonings (Salt, pepper, paprika): Basic but essential! Salt enhances all the flavors, pepper adds a nice kick, and paprika tones it all down with a smokiness.
-
Butter or Oil (2 tbsp): For toasting the bread to perfection. You can choose olive oil for a lighter option or keep it classic with butter.
Step-by-Step Instructions
Now that we have everything ready, let’s get into the cooking! You won’t believe how simple this is to whip up. Follow these steps, and you’ll soon be savoring your cheesy creation.
-
Prep Your Ingredients: Begin by gathering all your ingredients. Chop that onion and mince your garlic, if you’re using them. Keeping everything within reach makes cooking much smoother and more enjoyable!
-
Cook the Ground Beef: In a large skillet, heat a tablespoon of butter or olive oil over medium-high heat. Once hot, add your ground beef, breaking it up with a spatula. Season it with salt, pepper, and paprika. Cook until browned, about 6-8 minutes, stirring occasionally. Don’t rush this step; you want all that flavor to develop! If you see excess fat, consider draining it off to avoid a greasy melt.
-
Add the Aromatics: If you’re using onions and garlic, now’s the time! Toss them in with the beef and let them sauté for about 3-4 minutes until the onions become translucent and the garlic smells heavenly. It’s like an instant flavor boost!
-
Melt the Cheese: Lower the heat to medium and sprinkle your cheese over the beef, covering it generously. Cover the skillet with a lid to let that cheese melt and become oozy, about 2-3 minutes. This is where the magic happens!
-
Toast the Bread: While your beef and cheese conjoin in cheesy harmony, heat another skillet or panini press with a little more butter or oil. If you’re using sandwich bread, take each slice or bun, and lightly brown them on both sides until golden and crispy—heavenly!
-
Assemble Your Melts: Now, take the toasted bread and pile on that flavorful beef and oozy cheese combo. Top it off with another slice of your crispy bread, creating a delicious sandwich that’s begging to be devoured.
-
Final Toasting: For extra melty goodness, consider grilling your assembled sandwiches in the same skillet over medium heat for a couple of minutes on each side until they’re golden brown and crisp. Nothing beats a perfectly toasted melt!
-
Slice and Serve: Once it’s all golden and cheesy, carefully slice those beauties in half. Feel free to get extra creative with your plating—maybe add a side of fresh greens or crispy fries for an indulgent touch!
Serving Suggestions
When serving your Ultimate Cheesy Ground Beef Melt, think of fun, hearty sides! A crisp salad with a tangy vinaigrette perfectly balances the richness of the melt, or consider some sweet potato fries for that added crunch. If you’re feeling adventurous, a touch of salsa or guacamole can elevate your melt to a whole new level!
Recipe Variations
Now for the fun part—personalizing your melt! Here are a few creative twists and flavor options to spice things up:
-
Spicy Kick: Add some diced jalapeños or a few dashes of hot sauce to bring on the heat.
-
Mushroom Delight: Sauté some mushrooms alongside the onions and garlic for an earthy component that pairs beautifully with beef and cheese.
-
Veggie Substitute: Incorporate lentils or black beans instead of beef for a vegetarian twist, maintaining that cheesy goodness.
-
Sourdough Bread: For a tangy, chewy texture, try sourdough bread instead of classic sandwich bread. The flavor combination is simply divine!
-
Herb Infusion: Fresh herbs like thyme or rosemary can give your melt a lovely aromatic flair. Just chop some finely and mix them in when cooking the beef.
Chef’s Notes
Oh, the stories I could tell about my cheesy nights gone awry! I once invited friends over for a “cheesy melt night,” only to realize I had burnt the first batch so badly it resembled charcoal. The laughter that erupted made it all worth it, but I learned the hard way to keep an eye on those toasting sandwiches! Since then, I’ve become a pro at keeping my kitchen timer handy.
I’ve also evolved the recipe over time, playing with the kind of cheese and seasonings until I landed on this dreamy combination. I genuinely believe that cooking should be fun and that experimenting in the kitchen can lead to delightful surprises!
FAQs and Troubleshooting
-
Why is my cheese not melting?
It can happen! Make sure you’re using a cheese known for melting, like cheddar or mozzarella. Covering the pan can also help trap in the heat for that gooey texture. -
Can I use a different type of meat?
Absolutely! Ground turkey or chicken work well too. Just remember to adjust seasoning and moisture, as lean meats can sometimes become dry. -
What if my bread is getting too brown before the cheese melts?
If you notice the bread browning too quickly, simply lower the heat. Alternatively, you can cover the skillet briefly to help the cheese melt while preventing the bread from getting overly crispy. -
Can I make this dish in advance?
Sure! You can prepare the ground beef mixture ahead and store it in the fridge. When you’re ready to eat, just reheat it, add cheese, and assemble the melts.
Nutritional Info
You might be curious about the nutritional breakdown. While this recipe is rich and indulgent, each melt can provide around 400-500 calories, depending on the ingredients used. If you’re counting calories, you can go light on bread and cheese or add more veggies to keep it balanced.
Now that you’re equipped with this Ultimate Cheesy Ground Beef Melt recipe, I hope you feel inspired to gather your loved ones, share some laughs, and create memorable meals. Remember, cooking should be joyful—just as much about the experience as the outcome. Happy cooking, friends!
PrintUltimate Cheesy Ground Beef Melt

A comforting and indulgent ground beef melt topped with gooey cheese and toasted bread, perfect for any meal.
- Prep Time: 15 minutes
- Cook Time: 20 minutes
- Total Time: 35 minutes
- Yield: 4 servings 1x
- Category: Main Course
- Method: Grilling
- Cuisine: American
- Diet: None
Ingredients
- 1 lb Ground Beef
- 2 cups Cheese (shredded)
- 4 slices Bread or burger buns
- 1 Onion (diced, optional)
- 2 cloves Garlic (minced, optional)
- Salt (to taste)
- Pepper (to taste)
- Paprika (to taste)
- 2 tbsp Butter or Oil
Instructions
- Prep your ingredients by gathering everything and chopping onion and mincing garlic if using.
- Cook the ground beef in a skillet over medium-high heat for 6-8 minutes until browned, seasoning with salt, pepper, and paprika.
- Add the onions and garlic to the beef and sauté for about 3-4 minutes until onions become translucent.
- Melt the cheese over the beef, covering the skillet with a lid for 2-3 minutes until oozy.
- Toast the bread in another skillet or panini press until golden and crispy.
- Assemble the melts by piling the beef and cheese on the toasted bread and topping with another slice.
- Final toasting of the sandwiches for an additional few minutes on each side until golden brown.
- Slice and serve your melts with preferred sides.
Notes
For a healthier option, substitute ground beef with turkey or chicken. Consider adding mushrooms, jalapeños, or herbs for a twist!
Nutrition
- Serving Size: 1 sandwich
- Calories: 450
- Sugar: 2g
- Sodium: 600mg
- Fat: 25g
- Saturated Fat: 12g
- Unsaturated Fat: 10g
- Trans Fat: 0g
- Carbohydrates: 30g
- Fiber: 2g
- Protein: 25g
- Cholesterol: 80mg
Keywords: ground beef, cheesy melt, comfort food, sandwiches, easy recipes