
Crispy Flaky Puff Pastry Donuts in 20 Minutes (Brunch-Ready)
The Irresistible Charm of Puff Pastry Donuts
Hello, dear friends! Let’s talk about a delightful little treat that will elevate your breakfast game to an entirely new level. Imagine fluffy, airy, and perfectly flaky donuts that practically melt in your mouth — I’m talking about Puff Pastry Donuts! Oh, I can already feel the sweet aroma wafting through the kitchen as we dive into this incredible recipe together.
You’ve probably experienced the satisfaction of biting into a fresh donut, and puff pastry donuts are no exception. They are the perfect blend of the classic donut’s charm with the elegant touch of flaky pastry. What’s even better? These gems take only a handful of ingredients and will have your friends and family swooning.
We all love a good donut, right? But, have you ever dabbled in making them from scratch? If not, allow me to rekindle those fond memories and inspire you with my homemade puff pastry brothers and sisters of the classic donut. Whether you’re whipping them up for a special brunch with friends or indulging in a cozy afternoon treat, this recipe is bound to impress. So, grab your apron, and let’s get started on making these delectable delights!
A Nostalgic Kitchen Memory
Let me take you back to my childhood, where the kitchen was always filled with laughter, chatter, and the sweet smell of baking. One of my fondest memories is from a warm Sunday morning when my mom decided we were going to make donuts together. The air was thick with the scent of cinnamon and sugar as we flourished our hands in the mix.
I remember sneaking bites of the donut dough while my mom wasn’t looking — it was the best kind of rebellion! She had this funny way of shaping the donuts with a jar lid and a smaller bottle cap for the perfect hole, and we giggled every time one of them ended up looking like a lopsided masterpiece. Those hot, fluffy donuts covered in a glaze of sugary goodness are imprinted in my mind as a cherished memory.
Fast forward to today, and I still relish in the joy of creating donuts — but I’ve found a way to elevate that nostalgic treat by using puff pastry. We’re talking about the joy of whipping up a delicious batch of Puff Pastry Donuts that are quick to prepare and utterly delightful to devour. Let’s make some delicious memories in the kitchen!
Ingredients
To create these golden, flaky delights, you’ll need the following ingredients:
-
2 sheets puff pastry (thawed): The star ingredient! Puff pastry creates those irresistible layers. You can find pre-made sheets at your local grocery store. If you’re feeling adventurous, you can try making your own, but store-bought is a total time-saver!
-
Vegetable oil (for frying): This is what will give your donuts that beautifully crispy exterior. Canola oil or peanut oil can also work well here.
-
2 cups powdered sugar: The sweet coating! It gives that classic powdered donut look. If you’re looking to cut down on sugar, feel free to adjust the amount based on your taste preferences.
-
4 tablespoons milk: This will help to create a smooth glaze for the donuts. If you want to keep it dairy-free, unsweetened almond milk or coconut milk will do the trick!
-
2 teaspoons vanilla extract: A splash of flavor! This adds warmth and depth. If you’re in the mood for something different, consider using almond extract for a nutty twist.
Step-by-Step Instructions
Now that we’ve gathered our ingredients, let’s break down the process for making these delicious Puff Pastry Donuts!
Step 1: Roll out the pastry
Begin by unfolding the thawed puff pastry sheets on a lightly floured surface. Roll them out gently with a rolling pin to about 1/4 inch thickness. This will ensure that your donuts are nice and flaky, with ample room for rising.
Tip: Try not to overwork the dough; remember, the magic of puff pastry is in the layers!
Step 2: Cut out the donuts
Using a round cookie cutter or even a drinking glass, cut out circles from the pastry. For the donut holes, take a small bottle cap or a smaller cookie cutter to remove the centers. It’ll look like a mini donut!
Tip: If you’re feeling whimsical, cut out shapes using other cookie cutters! Stars, hearts—nothing is off-limits when it comes to celebration!
Step 3: Heat the oil
In a deep frying pan or pot, pour in enough vegetable oil to submerge the donuts at least halfway. Heat it over medium-high heat until it reaches about 350°F (175°C). Use a kitchen thermometer if you have one; this ensures even frying.
Tip: If you don’t have a thermometer, sprinkle a small bit of flour into the oil—if it sizzles, you’re ready to fry!
Step 4: Fry the donuts
Carefully lower the donut rounds into the hot oil, ensuring you don’t overcrowd the pan. Fry them for 2-3 minutes on each side until they’re golden brown and fragrant.
Tip: Keep an eye on the temperature of the oil. If it’s too hot, the donuts will burn. If it’s too cool, they’ll soak up too much oil and become greasy.
Step 5: Drain and cool
Once they’re beautifully golden, remove the donuts from the oil and place them on paper towels to absorb any excess oil. Let them cool slightly before moving onto glazing.
Step 6: Whisk the glaze
In a separate bowl, combine the powdered sugar, milk, and vanilla extract for the glaze. Whisk until smooth. If the glaze is too thick, add a splash of milk; if it’s too thin, sprinkle in a little more powdered sugar until you achieve a a smooth, drizzling consistency.
Tip: Feel free to get creative with flavor additions—cocoa powder for chocolate glaze or citrus zest for a refreshing touch!
Step 7: Glaze your donuts
Dip the cooled donuts in the glaze, turning to coat quickly. Place them on a cooling rack to let the glaze set.
Tip: For a little extra flair, add toppings like sprinkles, shredded coconut, or crushed nuts immediately after glazing!
Serving Suggestions
Presentation is key! To serve your delightful puff pastry donuts, place them on a beautiful platter or cake stand. Arrange them in a playful cloche or tower for a charming display. If you want, dust with a little more powdered sugar before serving — it adds that extra touch of elegance. Enjoy alongside a steaming cup of coffee or tea for the perfect cozy afternoon treat!
Recipe Variations
Here are a few fun twists to give your Puff Pastry Donuts an upgrade:
-
Cinnamon Sugar Donuts: After frying, roll the donuts in a mix of cinnamon and granulated sugar for that classic cinnamon sugar vibe.
-
Filled Donuts: Before cutting out for frying, place a small dollop of jam, custard, or chocolate ganache in the center of the circles and seal them up before frying for delicious filled donuts!
-
Glazed with Lemon Icing: Swap vanilla extract for lemon zest in your glaze for a zesty kick!
-
Savory Version: Consider adding herbs to the puff pastry or topping with a sprinkle of sea salt for a savory rendition.
-
Vegan Option: Use dairy-free butter and almond milk to replace regular milk to make this recipe vegan-friendly!
Chef’s Notes
Creating these puff pastry donuts has been a delightful journey for me. They originally started as a simple experiment in my kitchen — I was attempting to make traditional donuts and found a leftover sheet of puff pastry in the fridge. The aroma that filled my home was incredible, and it’s been a favorite recipe ever since!
One day, my friend Grace popped over unannounced, and I whipped these up on a whim. Watching her eyes light up with that first bite was priceless! Now, she calls them my ‘party donuts’ because they’ve become a staple at every gathering.
And remember, don’t be too hard on yourself if they don’t turn out perfect. It’s all about the love you put into them!
FAQs and Troubleshooting
1. Why did my donuts come out greasy?
If your donuts are greasy, it’s likely because the oil temperature was too low. Ensure the oil is hot enough for frying — you want nice sizzles when you drop your donuts in.
2. Can I bake these instead of frying?
While frying gives that classic donut texture, you can bake them! Preheat your oven to 400°F (200°C) and bake for about 15-20 minutes until golden. Just be prepared for a different texture.
3. How do I store the leftovers?
These donuts are best enjoyed fresh, but you can store them in an airtight container at room temperature for up to 2 days. Beyond that, consider freezing them for future indulgence!
4. What if my glaze is too runny?
If your glaze is too runny, you can thicken it with more powdered sugar until it reaches the desired consistency!
Nutritional Info
While I usually focus on the pleasure of cooking rather than calorie counting, it’s good to know approximately what you’re indulging in. Each puff pastry donut is approximately 120-150 calories, depending on the glaze and toppings you choose.
And there you have it, my dear foodies! Puff Pastry Donuts that are not only a joy to make but are sure to be a hit every time. Remember, cooking is all about creativity, so feel free to experiment and make this recipe your own. Happy cooking, and may your kitchen always be filled with good vibes and even better treats!
PrintPuff Pastry Donuts

Delicious and fluffy puff pastry donuts that are easy to make and perfect for any occasion.
- Prep Time: 15 minutes
- Cook Time: 20 minutes
- Total Time: 35 minutes
- Yield: 12 servings 1x
- Category: Dessert
- Method: Frying
- Cuisine: American
- Diet: Vegetarian
Ingredients
- 2 sheets puff pastry (thawed)
- Vegetable oil (for frying)
- 2 cups powdered sugar
- 4 tablespoons milk
- 2 teaspoons vanilla extract
Instructions
- Roll out the pastry on a lightly floured surface to about 1/4 inch thickness.
- Cut out circles from the pastry using a round cookie cutter.
- Heat the oil in a deep frying pan until it reaches about 350°F (175°C).
- Fry the donuts for 2-3 minutes on each side until golden brown.
- Drain on paper towels and let cool slightly.
- Whisk the powdered sugar, milk, and vanilla extract in a bowl until smooth.
- Glaze the cooled donuts and let the glaze set.
Notes
For variation, try rolling the donuts in cinnamon sugar or adding jam before frying.
Nutrition
- Serving Size: 1 donut
- Calories: 150
- Sugar: 10g
- Sodium: 50mg
- Fat: 8g
- Saturated Fat: 1g
- Unsaturated Fat: 7g
- Trans Fat: 0g
- Carbohydrates: 19g
- Fiber: 1g
- Protein: 2g
- Cholesterol: 0mg
Keywords: donuts, puff pastry, dessert, sweet treats, breakfast
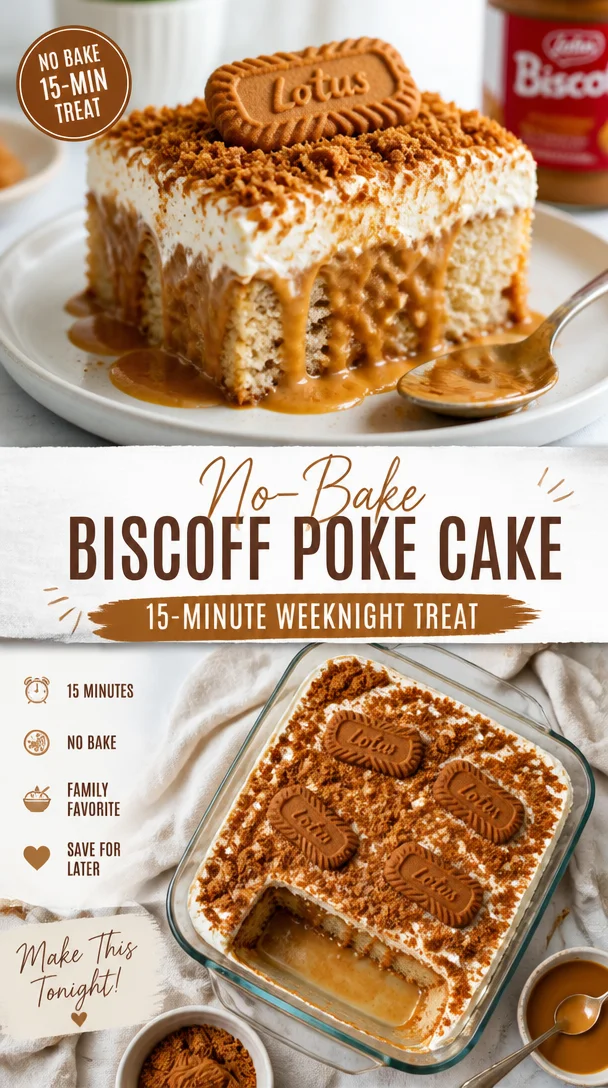
No-Bake Biscoff Poke Cake: 15-Minute Weeknight Treat
The Sweet Indulgence of Biscoff Poke Cake: A Delightful Journey into Dessert
Hello, fellow food lovers! Today, we’re diving into a world of decadence with a delightful creation that’s sure to become a favorite: Biscoff Poke Cake. Have you ever tasted those heavenly Biscoff cookies? You know the ones — perfectly spiced, subtly sweet, and utterly melt-in-your-mouth? Imagine transforming that unforgettable flavor into a moist, poke cake that dreams are made of! As soon as you poke into it, you’ll release waves of luscious flavors that take dessert to a whole new level.
I’ve been enamored with Biscoff cookies for years. Growing up, a simple Biscoff cookie paired with my afternoon tea was such a treat. The sweet aroma, the crisp texture — it all feels like home! It’s a flavor that brings back warm memories of family gatherings, lazy afternoons, and cozy moments. When I discovered Biscoff cookie butter, it felt like the universe had conspired to make my dessert dreams come true. That’s when the idea of a Biscoff Poke Cake was born.
The beauty of a poke cake lies in its simplicity; you create holes in the cake after it’s baked, and then fill those holes with a sweet, creamy filling. In this case, we’ll be incorporating a luscious vanilla pudding infused with Biscoff cookie butter. Trust me when I say, it’s a game-changer! So, grab your apron, and let’s make this mouthwatering Biscoff Poke Cake that will leave your friends and family in pure bliss!
Personal Story
One of my fondest childhood memories revolves around baking with my grandmother. Every weekend, without fail, we would gather in her cozy kitchen, adorned with family photos and the comforting scent of baked goods. While we whipped up cookies and cakes, laughter and stories filled the air. In those moments, I discovered the alchemy of combining simple ingredients into something magical. One day, she introduced me to her secret stash of Biscoff cookies, and after that, the world of flavors expanded in ways I never imagined!
We would often crumble those cookies on top of our favorite vanilla pudding dessert, creating layers of delight in each bite. The memory lingers to this day, and it’s from that nostalgia that my Biscoff Poke Cake was inspired. Every time I unwrap a package of Biscoff cookies or make this cake, I feel my grandmother’s warmth and love flowing through me. It’s my way of keeping her spirit and love for baking alive.
Ingredients
Here’s what you’ll need for this indulgent Biscoff Poke Cake:
Biscoff Cake:
-
1 box (15.25 oz.) Yellow Cake mix
- This is the base for our cake! If you’re feeling adventurous, you could also use a homemade yellow cake recipe. Just remember to adjust baking time as needed.
-
1 cup water
- Helps the cake mix combine! You can use milk for a richer flavor or even a nut milk for a dairy-free option.
-
½ cup vegetable oil (I used olive oil)
- This keeps the cake moist. Feel free to substitute with melted coconut oil or melted butter for added flavor.
-
3 eggs
- They add structure and richness to your cake. If you’re looking for a vegan option, you can use flax eggs (1 tablespoon of ground flaxseed + 2.5 tablespoons of water = 1 egg).
-
8 (about ½ cup) Biscoff cookies, crumbled
- Adds a lovely texture and extra flavor! If you can’t find Biscoff, you can use any speculoos-style cookies.
Vanilla Pudding:
-
1 box (5.1 oz.) Jello Instant Vanilla Pudding
- This gives our poke cake a creamy filling. You can also try butterscotch for a twist!
-
3 cups milk (2% or whole)
- Milk makes the pudding creamy. Try almond milk for a dairy-free version or even oat milk to keep it rich.
-
2 tablespoons Biscoff cookie butter
- This is the star of our filling! Consider making your own Biscoff spread if you’re up for a fun challenge!
Biscoff Buttercream:
-
1 cup (2 sticks) salted butter, room temperature
- Can’t go wrong with butter! For a vegan option, try using vegan butter instead.
-
½ cup Biscoff cookie butter
- Adds incredible flavor to the frosting. This is where the magic happens!
-
2 cups powdered sugar
- To sweeten up our buttercream. If you’re avoiding sugar, look for powdered coconut sugar as an alternative.
-
1 teaspoon vanilla extract
- Adds a lovely depth of flavor. Always choose pure vanilla extract for the best taste!
Whole Cake Decoration (Optional):
-
4 Biscoff Cookies (whole)
- These are for the top to elevate your cake’s appearance!
-
4 Biscoff Cookies (crushed)
- For a delightful crunchy topping that adds texture!
Cake Slice Garnish (Optional):
-
Whipped Topping
- Adds a creamy touch! You can use store-bought or make your own.
-
1 Biscoff Cookie (whole)
- A classic way to garnish each slice for that Instagram-worthy finish.
-
Crushed Biscoff Cookie Crumbles
- The more, the merrier! This adds a delightful visual appeal!
Step-by-Step Instructions
Let’s get our hands dirty and make this scrumptious Biscoff Poke Cake. Here we go!
1. Preheat the Oven
Preheat your oven to 350°F (175°C). This ensures that your cake bakes perfectly. Don’t skip this step; a preheated oven is crucial for even baking!
2. Prepare Your Cake Batter
In a large mixing bowl, combine the yellow cake mix, water, vegetable oil, and eggs. Mix until well combined! If you’re using an electric mixer, mix on medium speed for about 2 minutes until everything is smooth. Pro tip: Overmixing can lead to a dense texture, so mix until just combined.
3. Fold in Biscoff Cookies
Now, gently fold in the crumbled Biscoff cookies into the batter using a spatula. This will give your cake those fantastic bites of flavor! You can save some to sprinkle on top later if you want.
4. Bake the Cake
Pour the cake batter into a greased 9×13-inch baking pan. Make sure to spread the batter evenly. Bake in the preheated oven for about 30-35 minutes, or until a toothpick inserted in the center comes out clean. While your cake is baking, feel free to clean up your kitchen (or sneak a cookie – no judgments here!).
5. Make the Pudding
Once the cake is done, let it cool for a few minutes. In the meantime, make your vanilla pudding. In another bowl, whisk together the Jello Instant Vanilla Pudding mix, milk, and Biscoff cookie butter. Mix for about 2 minutes until the pudding thickens. You can taste test this mixture — guarantee it’ll be hard to resist!
6. Poke the Cake
Once the cake has cooled slightly, use the back of a wooden spoon or a skewer to poke holes all over the cake. Aim for about 20 holes — the more, the merrier!
7. Pour the Pudding
Carefully pour the Biscoff vanilla pudding over the poked cake, making sure it seeps into all those holes. Spread it with a spatula if needed to cover the surface evenly.
8. Chill the Cake
Cover your cake with plastic wrap and place it in the refrigerator. Allow it to chill for at least 1-2 hours (or even longer) — this will help the flavors meld beautifully!
9. Make the Biscoff Buttercream
While your cake is chilling, make the buttercream! In a mixing bowl, beat the room-temperature salted butter until it’s creamy. Gradually add in the powdered sugar, and mix until smooth and fluffy. Mix in the Biscoff cookie butter and vanilla extract and continue mixing until creamy!
10. Frost the Cake
Take your chilled cake out of the fridge and frost it generously with the Biscoff buttercream. Use a spatula to create swirls and peaks for that homemade look.
11. Decorate Your Cake
Finally, if you want to take your cake to the next level, add the whole Biscoff cookies and crushed cookies on top. It will not only look stunning but also add texture to each slice!
12. Slice and Serve
Cut into squares and serve with a dollop of whipped topping and a sprinkle of crushed Biscoff cookies.
Serving Suggestions
For a delightful presentation, serve your Biscoff Poke Cake on a beautiful platter. You can even layer it with fresh berries or a scoop of vanilla ice cream on the side—what a sweet surprise! Garnish each slice with a Biscoff cookie and a sprinkle of crumbs to make every piece a showstopper.
Recipe Variations
If you’re feeling a bit adventurous, here are a few ways you can switch up this recipe to suit your taste:
- Chocolate Lovers: Swap out some of the yellow cake mix for chocolate cake mix for a mildly spiced chocolate Biscoff poke cake.
- Nutty Delight: Add a tablespoon of chopped nuts into the cake batter for some crunch.
- Caramel Drizzle: Drizzle warm caramel sauce over the butterscotch pudding for an extra layer of sweetness.
- Fruit Twist: Add slices of bananas or strawberries on top of the Biscoff buttercream for a fruity version.
- Gluten-Free Option: Use a gluten-free cake mix, and you’ll have a gluten-free dessert that everyone can enjoy!
Chef’s Notes
Honestly, the inspiration for my Biscoff Poke Cake blossomed out of nostalgia and sheer love for easy, delectable desserts. I remember the first time I made this for a gathering; everyone was raving about how unique and delicious it felt.
Sometimes, the simplest recipes offer the most joy, and that’s what keeps me creating in the kitchen. I keep refining my recipes, finding ways to elevate them, and swapping ingredients as seasonal changes call for different flavors. And as always, I find joy in sharing these creations with you!
FAQs and Troubleshooting
1. What happens if my cake is too dry?
If your cake turns out dry, make sure you’re measuring your ingredients correctly. Overbaking can also lead to dry cake, so keep an eye on it!
2. Can I freeze my poke cake?
Absolutely! To freeze, cover the frosted cake tightly with plastic wrap and foil. It can be stored in the freezer for up to 3 months. Thaw in the fridge before serving.
3. My pudding didn’t thicken much. What did I do wrong?
Make sure to stir the pudding mixture until all lumps are gone. Also, giving it the entire 2 minutes to thicken is essential.
4. Can I make this a day ahead of time?
Yes, if you want to save time, you can prepare the cake a day before. Just ensure to add the frosting the day of serving for freshness.
Nutritional Info
This Biscoff Poke Cake is a delicious indulgence, and it’s meant to be enjoyed in moderation! Approximately, a slice contains around 350-400 calories, depending on the size of your piece and specific ingredients used.
So, what are you waiting for? Grab your Biscoff cookies and let’s create this unforgettable treat together! With every bite, you’re not just tasting cake, but the love and memories we’ve woven into each layer. Enjoy your baking adventure, and remember, good food is all about enjoying the moments around it. Happy baking!
PrintBiscoff Poke Cake
A moist poke cake filled with creamy vanilla pudding infused with Biscoff cookie butter, topped with rich Biscoff buttercream.
- Prep Time: 15 minutes
- Cook Time: 35 minutes
- Total Time: 50 minutes
- Yield: 12 servings 1x
- Category: Dessert
- Method: Baking
- Cuisine: American
- Diet: Vegetarian
Ingredients
- 1 box (15.25 oz.) Yellow Cake mix
- 1 cup water
- ½ cup vegetable oil
- 3 eggs
- 8 Biscoff cookies, crumbled
- 1 box (5.1 oz.) Jello Instant Vanilla Pudding
- 3 cups milk
- 2 tablespoons Biscoff cookie butter
- 1 cup (2 sticks) salted butter, room temperature
- ½ cup Biscoff cookie butter
- 2 cups powdered sugar
- 1 teaspoon vanilla extract
- 4 Biscoff Cookies (whole)
- 4 Biscoff Cookies (crushed)
- Whipped Topping (for garnish)
- 1 Biscoff Cookie (whole, for garnish)
- Crushed Biscoff Cookie Crumbles (for garnish)
Instructions
- Preheat your oven to 350°F (175°C).
- Combine the yellow cake mix, water, vegetable oil, and eggs in a large mixing bowl.
- Fold in the crumbled Biscoff cookies into the batter gently.
- Pour the cake batter into a greased 9×13-inch baking pan and bake for 30-35 minutes.
- Make the vanilla pudding by whisking together the pudding mix, milk, and Biscoff cookie butter.
- Poke holes all over the cooled cake using the back of a wooden spoon or a skewer.
- Pour the pudding over the poked cake, ensuring it seeps into the holes.
- Cover the cake with plastic wrap and chill in the refrigerator for at least 1-2 hours.
- Beat the room-temperature salted butter until creamy, then mix in the powdered sugar, Biscoff cookie butter, and vanilla extract.
- Frost the chilled cake generously with the Biscoff buttercream.
- Decorate with whole Biscoff cookies and crushed cookies on top.
- Slice and serve with whipped topping and crushed Biscoff cookies.
Notes
For best results, chill the cake for at least 2 hours before serving to allow flavors to meld.
Nutrition
- Serving Size: 1 slice
- Calories: 375
- Sugar: 28g
- Sodium: 300mg
- Fat: 20g
- Saturated Fat: 10g
- Unsaturated Fat: 8g
- Trans Fat: 0g
- Carbohydrates: 45g
- Fiber: 1g
- Protein: 4g
- Cholesterol: 60mg
Keywords: biscoff, poke cake, dessert, vanilla pudding, buttercream
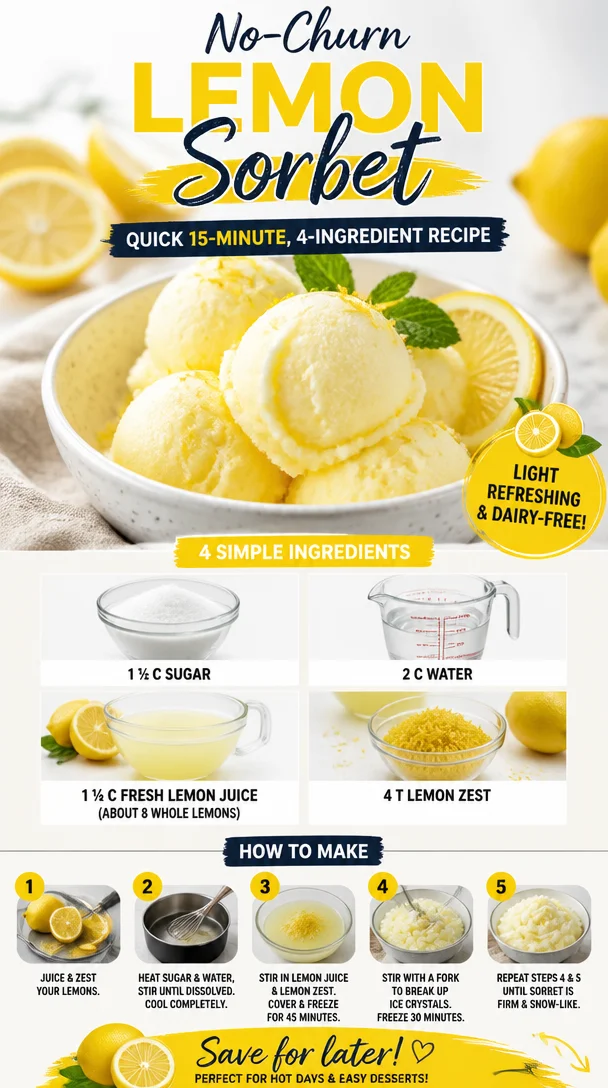
No-Churn Lemon Sorbet: Quick 15-Minute, 4-Ingredient Recipe
The Ultimate No-Ice Cream Maker Lemon Sorbet Recipe
Hello, fellow foodies! It’s Savannah from Ivory Apron, and I’m so excited to share a refreshing recipe that transports me to idyllic summer days — Lemon Sorbet. This dessert is not only incredibly simple to make, but it also brings a burst of sunshine to your table, regardless of the season. You won’t need any fancy equipment; all you need is a few pantry staples and a little bit of time.
Whether you’re wrapping up a dinner party or just trying to provide a sweet finish to a weekday meal, lemon sorbet is the perfect palate cleanser and a delightful treat that everyone will adore. Let’s dive into this simple yet elegant recipe!
A Dash of Nostalgia
Back when I was a child, summers meant long, sun-drenched days filled with family BBQs and laughter. My grandmother had this magical little lemon sorbet recipe that we all awaited each summer. I can still picture the cheerful yellow of the sorbet served in those quaint dishware she saved for special occasions. As my family and I took our first bites, the flavors danced on our tongues like a refreshing breeze wafting through the warm air.
Now, as a recipe creator, those memories encourage me to whip up sorbet every summer. Every spoonful is a nostalgic journey, and I love sharing it with friends and family, just like my grandma did. Let’s recreate those sweet memories together with this recipe that is both effortless and rewarding!
Ingredients You’ll Need
To make this delightful lemon sorbet, gather these ingredients:
-
1 ½ cups of sugar
This acts as the sweetener to balance the tartness of the lemons. You can substitute with half the amount of honey or agave syrup for a different flavor profile that adds a lovely depth. -
2 cups of water
Essential for creating a simple syrup when combined with sugar. If you want a more herbal note, consider using herbal teas like chamomile or mint as the liquid base. -
1 ¼ cups of fresh lemon juice (approximately 8 whole lemons)
Fresh is best! The acidity and brightness of the lemons provide a refreshing zing. In a pinch, you might use bottled lemon juice, but trust me, fresh lemons elevate the flavor immensely. -
4 tablespoons of lemon zest
This zest adds an extra layer of lemony goodness and aroma. If you’re out of lemons, you could use the zest of limes for a tropical twist.
Step-by-Step Instructions
Let’s get to the fun part — making the sorbet! Follow these steps to achieve a smooth, luscious lemon sorbet without needing an ice cream maker.
-
Make the Simple Syrup
In a medium saucepan over medium heat, combine the 2 cups of water and 1 ½ cups of sugar. Stir gently until the sugar dissolves completely. This should take about 3-5 minutes. You want the mixture to come to a gentle simmer — no need to boil vigorously! Once the sugar has dissolved, remove it from the heat and let it cool. -
Juice the Lemons
While your syrup is cooling, it’s time to juice the lemons! Roll them on the countertop for a few seconds to release more juice. Cut the lemons in half and use a citrus juicer or your hands to extract 1 ¼ cups of fresh lemon juice. Strain the juice to remove seeds and pulp if desired for a smoother texture. -
Combine
Once the syrup is at room temperature, mix in the fresh lemon juice and 4 tablespoons of lemon zest. This combination is the heart of your sorbet! Give it a good stir to ensure all ingredients meld beautifully. -
Pour and Freeze
Pour the lemon mixture into a shallow dish, preferably a metal pan as it conducts heat better to freeze faster. Cover it with plastic wrap. Place it in your freezer for about 4-5 hours. You want the mixture to be solid, but not rock-hard. -
Scrape for Fluffiness
After 4-5 hours, take the dish out of the freezer. Using a fork, scrape the frozen layer to break it up. This will give your sorbet that light, fluffy texture. If you prefer a creamier consistency, you can blend the mixture briefly in a food processor. -
Final Freeze
Return the sorbet to the freezer for an additional 2 hours to firm up. Trust me; it’ll be worth the wait!
Serving Suggestions
Once your lemon sorbet is ready to serve, scoop it into charming bowls or elegant glasses. A sprig of fresh mint or a twist of lemon peel can elevate the presentation. Serve this sorbet as a stand-alone dessert or alongside a fruit salad or a slice of cake for added flair.
Recipe Variations
Feeling adventurous? Here are a few creative twists you can add to the classic lemon sorbet:
- Berry Lemon Sorbet: Blend in some pureed berries like strawberries or raspberries before freezing for a vibrant twist.
- Minty Lemon Sorbet: Add a handful of muddled fresh mint leaves to the mixture, giving your sorbet a refreshing herbaceous finish.
- Ginger Lemon Sorbet: Grate fresh ginger and add it for a zesty and spicy kick.
- Honey Lemon Sorbet: Swap sugar with honey (use about 1 cup as it’s sweeter) for a unique flavor profile and added health benefits.
- Creamy Lemon Sorbet: Stir in a bit of coconut cream or yogurt for a richer texture.
Chef’s Notes
This recipe holds a special place in my kitchen because it harkens back to those sun-soaked summers spent with my grandmother. As I refine it, I’ve learned that adjusting the sweetness to your taste is completely normal! Depending on the tartness of your lemons, you might want to add a bit more sugar — that’s the beauty of cooking! Feel free to experiment a bit and find the right balance for you.
And fun fact: I once made this sorbet for a big family gathering and forgot to set a timer. When I finally remembered it, I rushed to the kitchen in a panic, but to my delight, it turned out perfectly! A little spontaneity can sometimes lead to the most delightful surprises in cooking.
FAQs and Troubleshooting
-
My sorbet is too hard. What can I do?
If your sorbet is rock-hard, let it sit at room temperature for about 10 minutes before scooping. You can also blend it in a food processor with a splash of water or juice to soften it up. -
Can I use store-bought lemon juice?
Yes, while fresh lemons are best for flavor, if in a pinch, bottled juice can work. Just ensure it’s 100% lemon juice with no added sugars or preservatives. -
What if I don’t have a shallow dish?
A shallow dish helps the mixture freeze evenly, but you can use any container. If using a deeper container, check the sorbet more frequently and scrape it with a fork as it freezes. -
Can I make it ahead of time?
Absolutely! This lemon sorbet can be made a few days in advance. Just give it a good scrape before serving!
And there you have it — a refreshing, chic, and utterly delightful lemon sorbet that’s perfect for any occasion. It’s a beautiful way to wrap up a meal or simply cool down on a warm day. There’s something undeniably special about whipping up something so simple yet stunning. So, tie on your apron, grab those lemons, and let’s make some delicious memories together! Cheers to crafting culinary magic!
PrintThe Ultimate No-Ice Cream Maker Lemon Sorbet

A refreshing lemon sorbet that is simple to make and a perfect palate cleanser.
- Prep Time: 10 minutes
- Cook Time: 15 minutes
- Total Time: 150 minutes
- Yield: 4 servings 1x
- Category: Dessert
- Method: Freezing
- Cuisine: American
- Diet: Vegan
Ingredients
- 1 ½ cups of sugar
- 2 cups of water
- 1 ¼ cups of fresh lemon juice (approximately 8 whole lemons)
- 4 tablespoons of lemon zest
Instructions
- Make the Simple Syrup: In a medium saucepan over medium heat, combine the 2 cups of water and 1 ½ cups of sugar. Stir gently until the sugar dissolves completely, about 3-5 minutes. Remove from heat and let cool.
- Juice the Lemons: Roll them on the countertop to release more juice. Cut in half and extract 1 ¼ cups of fresh lemon juice. Strain to remove seeds and pulp if desired.
- Combine the cooled syrup with the fresh lemon juice and 4 tablespoons of lemon zest. Stir to mix.
- Pour the mixture into a shallow dish and cover with plastic wrap. Freeze for about 4-5 hours until solid but not rock-hard.
- Scrape the mixture with a fork to achieve a fluffy texture. Optionally, blend briefly in a food processor for creaminess.
- Final Freeze: Return the sorbet to the freezer for an additional 2 hours to firm up.
Notes
Adjust sweetness to your taste depending on the tartness of the lemons. This sorbet can be made a few days in advance.
Nutrition
- Serving Size: 1 serving
- Calories: 180
- Sugar: 36g
- Sodium: 5mg
- Fat: 0g
- Saturated Fat: 0g
- Unsaturated Fat: 0g
- Trans Fat: 0g
- Carbohydrates: 46g
- Fiber: 0g
- Protein: 0g
- Cholesterol: 0mg
Keywords: lemon sorbet, dessert, vegan, refreshing, summer treat
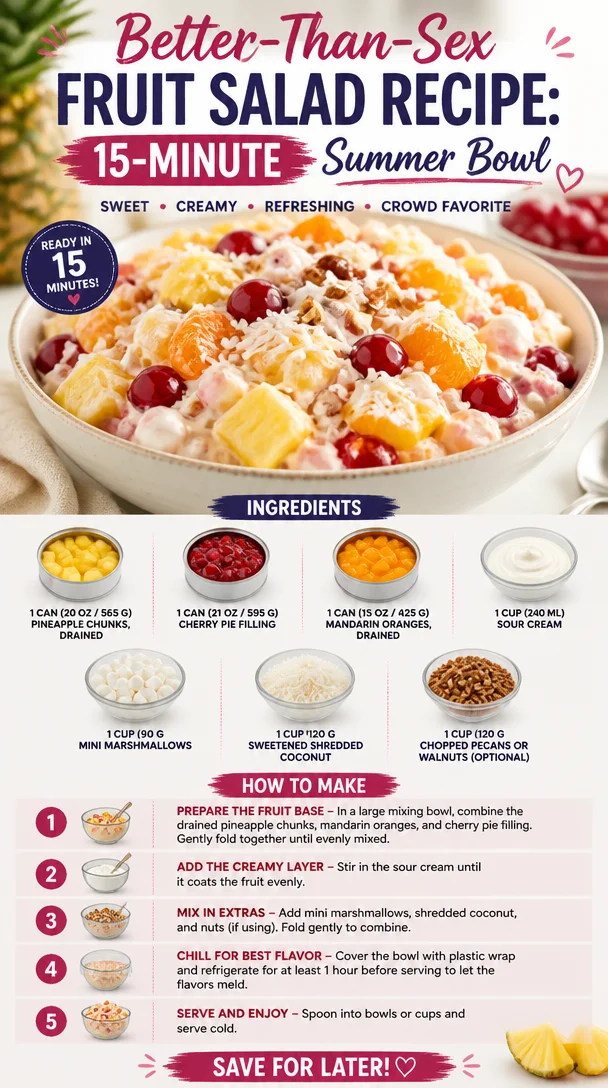
Better-Than-Sex Fruit Salad Recipe: 15-Minute Summer Bowl
Better Than Sex Fruit Salad: A Sweet Indulgence for Every Occasion
Hello, my lovely foodies! Today, I am bursting with excitement to share a recipe that never fails to bring smiles and giggles to the table. We’re diving into the delightful world of Better Than Sex Fruit Salad – a dish so tempting, you’ll wonder how something so simple can bring such joy!
Now, let’s get real here. Who wouldn’t want to enjoy a fruit salad that combines fun, nostalgia, and a hint of cheeky humor? This salad has garnered a reputation for being the star of barbecues, potlucks, and family feasts alike. It’s fruity, creamy, and sweet – all the things we love in a dessert as we gather with friends and family.
Let’s set the scene: Imagine a vibrant, sunny day with laughter echoing as you flip burgers on the grill. The air is tinged with the sweet scent of summer, and you reach for the dish that ties it all together – this luscious fruit salad. A harmonious blend of flavors and textures, garnished with a sprinkle of laughter, it becomes a centerpiece everyone wants to dig into second and third servings.
Let me take you back to the first time I tasted Better Than Sex Fruit Salad. It was at my Aunt Clara’s backyard barbecue. She always had a flair for dramatic cooking, and this dish was no exception. As soon as she plopped that giant bowl on the table, the crowd erupted with oohs and aahs. I remember sneaking a few spoonfuls before dinner, captivated by the combination of juicy fruits, creamy sour cream, and crunchy nuts. It was a simple dish that ignited a whirlwind of joy, and I was hooked.
Fast forward to today, and I’ve made my own tweaks while keeping the essence of Aunt Clara’s creation alive. It remains a family favorite, proving that great food truly brings us together. So, are you ready to make magic happen in your kitchen? Let’s roll up those sleeves and get to it!
Ingredients
To whip up your own Better Than Sex Fruit Salad, you’ll need the following ingredients:
-
1 can (20 oz / 565 g) pineapple chunks, drained
Fresh or canned, pineapple adds a tropical sweetness. If you prefer fresh, just chop up an equivalent amount, and grab a ripe pineapple for that extra zing! -
1 can (21 oz / 595 g) cherry pie filling
This is one of the stars of the show! You can find it in the baking aisle. Don’t fancy cherries? Swap with strawberry pie filling for a berry twist. -
1 can (15 oz / 425 g) mandarin oranges, drained
These little gems add a burst of color and flavor. You can use fresh mandarin oranges, but peeling those little guys takes patience. -
1 cup (240 ml) sour cream
The creamy dressing that ties everything together. Greek yogurt works well as a health-conscious alternative, offering a similar texture with extra protein. -
1 cup (90 g) mini marshmallows
Adding a hint of nostalgia, these soft bites bring sweetness. Swap with chopped dates or dried fruit if you prefer a healthier option that still satisfies that sweet tooth. -
1 cup (120 g) sweetened shredded coconut
Coconut adds a tropical flair and a chewy texture. Unsweetened coconut works too, especially for those who want to dial down the sweetness. -
1 cup (120 g) chopped pecans or walnuts (optional)
A nutty crunch elevates the dish. Don’t have nuts on hand? Try sunflower seeds or omit them entirely for a nut-free treat.
Step-by-Step Instructions
Now that we’re prepped and excited, let’s dive into making this luscious fruit salad!
-
Prepare the Fruits
Start by draining the canned fruits. This step is key to avoiding a watery salad. Make sure your pineapple, cherries, and mandarin oranges are all well-drained. Use a fine mesh strainer if you have one. Place them in a large mixing bowl with enough space for stirring. -
Add the Cherry Pie Filling
Next, scoop in that cherry pie filling. The tartness of the cherries pairs beautifully with the sweetness of the pineapple and oranges. Gently fold it into the fruits, being careful not to break up the oranges too much. It should feel like a delightful, colorful mashup! -
Incorporate the Sour Cream
Time to introduce the star dressing! Add the cup of sour cream to the bowl and start folding it in. This is where the magic happens—the creamy texture envelops the fruits, creating a luscious filling. Make sure every piece of fruit gets kissed by that creamy goodness! -
Mix in the Mini Marshmallows and Coconut
Sprinkle in the mini marshmallows and sweetened shredded coconut. Again, fold them in gently. This is where the texture of the salad starts to shine! Don’t forget to taste the mixture at this stage—oh, the sweetness will have you swooning. -
Add the Chopped Nuts
If you’re opting for those delicious pecans or walnuts, now is the time to add them. Stir lightly to distribute evenly. This crunch factor makes this fruit salad a must-have on your table! Plus, it adds that lovely contrast in texture. -
Chill Before Serving
Cover the mixing bowl with plastic wrap or transfer the salad to a serving bowl with a lid. Refrigerate for at least 30 minutes before serving to let the flavors meld together. Trust me; this waiting game is worth it! -
Serve and Enjoy
When you’re ready to serve, give it a quick stir to mix any settling. Scoop it into individual bowls or let guests serve themselves from a big, beautiful platter. Don’t forget to go in for seconds!
Serving Suggestions
When it comes to plating, simplicity is key. Use a chilled glass bowl to showcase the vivid colors of the salad, or opt for individual dessert cups for a more polished presentation. Garnish each serving with a light sprinkle of coconut on top and a few extra pecans for that added crunch.
Serve alongside grilled meat or barbecue for a satisfying contrast, or enjoy it as a stand-alone light dessert. Either way, don’t forget the spoons and enjoy every spoonful!
Recipe Variations
Want to play around with flavors? Here are a few ideas:
- Tropical Twist: Add banana slices and swap out the cherry pie filling for mango puree.
- Berry Delight: Replace the cherries with mixed berries for a fresh take filled with seasonal flavors.
- Creamy Dream: Stir in a splash of vanilla extract for a deeper flavor profile, elevating the creamy aspect.
- Nut-Free Option: Omit the nuts and double down on the marshmallows for that added sweetness, perfect for those with allergies.
- Healthy Spin: Use low-fat Greek yogurt instead of sour cream and ditch the mini marshmallows. Add a handful of fresh berries for extra color and flavor!
Chef’s Notes
Oh, the stories I could tell you about this fruit salad! Over the years, I’ve seen it grace countless tables – from birthday parties to holiday feasts. Once, I absentmindedly added a sprinkle of cinnamon, and you wouldn’t believe the compliments that rolled in! It prompted a new trend among my friends, who now swear by the addition.
This recipe has evolved but kept its roots firmly planted in joy and comfort. Keep it playful, get your little ones involved by letting them pour the ingredients in, and don’t shy away from making it your own. Every kitchen holds a unique flavor story, and this dish can be a memory waiting to happen.
FAQs and Troubleshooting
-
Can I make this fruit salad ahead of time?
Absolutely! It can be prepared the day before; just keep it covered in the fridge. The flavors deepen and become even more delightful! -
What if my fruit salad seems too sweet?
Balance is key! You can add a squeeze of lemon or lime juice to offset the sweetness. Plus, it adds a refreshing zing! -
How long will leftovers last?
If stored properly, this fruit salad can last 2-3 days in the fridge. Just keep in mind that the fruits may soften over time. -
Can I change the base?
Definitely! Greek yogurt or light cream cheese blended with a little whipped cream will give you different textures and flavors while keeping it creamy.
Nutritional Info
While I typically focus on joy rather than counting calories, it’s helpful to know that each serving packs a punch of vitamins from the fruits, healthy fats from the nuts, and a touch of sweetness from the sour cream and marshmallows.
And there you have it, friends! Your ultimate guide to making a Better Than Sex Fruit Salad that’s sure to impress and satisfy. I hope you have as much fun making it as I do. Here’s to countless delicious memories around the table—grab that apron and let’s create something beautiful together!
PrintBetter Than Sex Fruit Salad
A creamy, fruity salad that combines tropical flavors and textures for a delightful dessert perfect for any occasion.
- Prep Time: 15 minutes
- Cook Time: 0 minutes
- Total Time: 30 minutes
- Yield: 8 servings 1x
- Category: Dessert
- Method: No Cooking
- Cuisine: American
- Diet: Vegetarian
Ingredients
- 1 can (20 oz / 565 g) pineapple chunks, drained
- 1 can (21 oz / 595 g) cherry pie filling
- 1 can (15 oz / 425 g) mandarin oranges, drained
- 1 cup (240 ml) sour cream
- 1 cup (90 g) mini marshmallows
- 1 cup (120 g) sweetened shredded coconut
- 1 cup (120 g) chopped pecans or walnuts (optional)
Instructions
- Prepare the Fruits: Start by draining the canned fruits and place them in a large mixing bowl.
- Add the Cherry Pie Filling: Scoop in the cherry pie filling and gently fold it into the fruits.
- Incorporate the Sour Cream: Add the sour cream and fold it in until every piece of fruit is coated.
- Mix in the Mini Marshmallows and Coconut: Sprinkle in the mini marshmallows and sweetened shredded coconut, folding gently to combine.
- Add the Chopped Nuts: If using, stir in the pecans or walnuts evenly.
- Chill Before Serving: Cover with plastic wrap and refrigerate for at least 30 minutes before serving.
- Serve and Enjoy: Give it a quick stir before serving in individual bowls or on a platter.
Notes
This fruit salad can be made a day in advance for deeper flavors. Add a squeeze of lemon to balance sweetness if desired.
Nutrition
- Serving Size: 1 serving
- Calories: 320
- Sugar: 22g
- Sodium: 200mg
- Fat: 15g
- Saturated Fat: 5g
- Unsaturated Fat: 10g
- Trans Fat: 0g
- Carbohydrates: 48g
- Fiber: 2g
- Protein: 4g
- Cholesterol: 10mg
Keywords: fruit salad, dessert, summer recipe, easy recipe, potluck dish
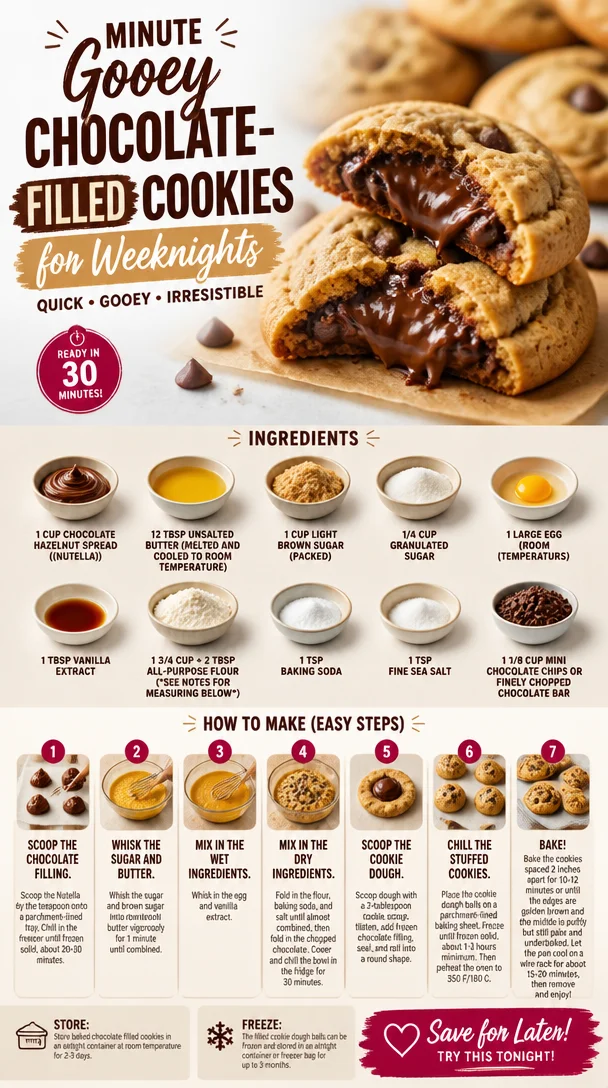
Minute Gooey Chocolate-Filled Cookies for Weeknights
Indulge in Chocolate Heaven: The Ultimate Chocolate Filled Cookies Recipe
Hello, fellow foodies! I’m so excited to have you here today at Ivory Apron, where the kitchen is buzzing with creativity and the air is filled with the sweet aroma of deliciousness. Today, we’re diving into a recipe that produces cookies so good they’ll make you weak in the knees: Chocolate Filled Cookies! These delightful treats are not only filled with smooth chocolate hazelnut goodness but also boast that perfect balance of crispy edges and a gooey center. So, tie on your apron, and let’s get baking!
A Sweet Memory
Every time I whip up a batch of Chocolate Filled Cookies, I can’t help but take a stroll down memory lane. Picture this: a rainy Saturday afternoon, the kind where you’re cozied up inside, and the world outside feels a little grey. My sister and I were tasked with preparing a treat for our family game night, and chocolate was the only requirement on our list. Enter our trusty jar of chocolate hazelnut spread. We slathered it over everything, from toast to spoonfuls straight from the jar (because who can resist, really?).
As we would bake our cookies, the kitchen would fill with laughter, playful arguments over which cookie shape was best, and the dreamy scent of melting chocolate. Those cookies became the highlight of our game nights, bringing our family together surrounded by laughter and love. Now, every time I make these cookies, I’m reminded of how food can create bonds and weave little moments of joy.
Ingredients
Let’s gather our ingredients! Each one plays a crucial role in achieving cookie perfection.
-
1 cup chocolate hazelnut spread (Nutella)
This golden ingredient adds a rich, creamy chocolate flavor. If you’re on the hunt for substitutions, try almond butter or any nutty spread. Just ensure it’s smooth for that dreamy filling! -
12 tbsp unsalted butter (melted and cooled to room temperature)
Butter gives our cookies richness and a tender crumb. If you want to make it dairy-free, coconut oil works like a charm (just solidify it before mixing). -
1 cup light brown sugar (packed)
This sweetener adds depth and moisture to our cookies. If you prefer a less sugary bite, swap with coconut sugar for a healthier sweet fix. -
1/4 cup granulated sugar
For added sweetness and a slight crunch! You can use coconut sugar here as well; it’ll offer a lovely caramel flavor. -
1 large egg (room temperature)
The egg binds everything together. If you’re looking for an eggless version, try replacing it with 1/4 cup unsweetened applesauce. -
1 tbsp vanilla extract
A must-have ingredient that enriches flavors and amplifies the chocolate notes. Homemade vanilla extract? Even better! -
1 3/4 cup + 2 tbsp all-purpose flour
This is the backbone of our cookies. Make sure to spoon and level the flour for accuracy, as too much can lead to dry cookies. For a gluten-free option, oat flour works great! -
1 tsp baking soda
This helps our cookies rise and become light. If you’re out, cream of tartar or baking powder can serve as substitutes, just in different amounts. -
1 tsp fine sea salt
Salt elevates flavors, making the sweetness pop. If you prefer a finer taste, use kosher salt. -
1 1/8 cup mini chocolate chips or finely chopped chocolate bar
These little gems will add delightful pockets of melty chocolate throughout your cookies. You can replace them with white chocolate chips for a fun flavor twist!
Step-by-Step Instructions
Ready to bake? Let’s jump into the nitty-gritty. These steps are designed to make your baking adventure smooth and, dare I say, enjoyable!
-
Preheat the Oven
Preheat your oven to 350°F (175°C). This is the secret to getting those cookies nice and golden. Make sure to preheat for at least 10 minutes for an even bake! -
Prep Your Baking Sheet
Line a baking sheet with parchment paper. This helps prevent sticking and makes cleanup a breeze. If you run out of parchment, you can lightly grease the pan with some butter or cooking spray. -
Mix the Wet Ingredients
In a large bowl, mix the melted butter with chocolate hazelnut spread using a whisk. We’re looking for a homogenized mixture that’s silky smooth. If you find the spread is stubborn, warm it slightly in the microwave to make it easier to combine. Then, add in the brown sugar and granulated sugar. Whisk until well combined. Blend in the egg and vanilla extract until the mixture is glossy and lovely. -
Combine the Dry Ingredients
In another bowl, whisk together the flour, baking soda, and salt. This step is crucial for even distribution of the leavening agents and ensures our cookies bake evenly. Little chef hack: sift the flour directly into the dry mix to eliminate any lumps. -
Merge Wet and Dry
Gradually add the dry mixture into the wet one, stirring gently until just combined. Be careful not to overmix; we want tender cookies, not chewy ones! Fold in the mini chocolate chips or chopped chocolate for those delicious melty pockets. -
Scoop and Chill
Here’s where the magic happens! Using a cookie scoop or two spoons, drop generous tablespoons of dough onto the prepared baking sheet, leaving enough space in between for spreading (about 2 inches apart). Pro tip: For extra flavor, chill the dough in the fridge for 30 minutes—this enhances the cookies’ flavors and helps them hold shape! -
Bake
Bake these beauties in your preheated oven for 10–12 minutes or until the edges are set, and the centers look slightly underbaked (they’ll firm up as they cool). It’s a true test of patience (but you can always sneak a taste while they’re baking!). -
Cool
Allow the cookies to cool on the baking sheet for about 5–10 minutes before transferring them to a wire rack. This helps them retain their chewy center while still crisping up on the outside.
Serving Suggestions
These Chocolate Filled Cookies are best served warm, straight from the oven! Consider stacking them on a beautiful plate, adorned with a dusting of powdered sugar. For an extra touch, drizzle them with melted chocolate or serve them alongside a scoop of vanilla ice cream for a delightful dessert experience. Trust me; your friends will be raving!
Recipe Variations
Why not get a little adventurous with your cookies? Here are some fun variations to try:
-
Nutty Twist: Add chopped nuts like hazelnuts or walnuts for a satisfying crunch.
-
Spicy Kick: Mix in a pinch of cayenne or ground cinnamon for unexpected warmth.
-
Stuffed Surprises: Try filling the cookies with caramel or a tangy fruit jam instead of chocolate hazelnut spread.
-
Dairy-Free Delight: Substitute the butter with vegan butter and use dairy-free chocolate chips for a vegan version.
-
Double Chocolate: Replace a portion of the flour with unsweetened cocoa powder for a more intense chocolate experience.
Chef’s Notes
This recipe has evolved over the years in my kitchen. I remember my early attempts were always a bit too flat (I might have been a little heavy-handed with the flour!). But with practice, these cookies became my go-to treat for any occasion. Whenever I feel the need for a little comfort or just want to impress some guests, I reach for this recipe. Plus, no matter how many times I share it, the joy of seeing friends and family bite into a warm, gooey cookie never gets old!
FAQs and Troubleshooting
Q: Why did my cookies spread too much?
A: Overmixing or not chilling the dough can cause excess spreading. Ensure you mix just until combined and allow the dough to chill for at least 30 minutes.
Q: Can I freeze the cookie dough?
A: Absolutely! Just scoop the dough onto a baking sheet, freeze until solid, then transfer them to a zip-top bag. Frozen dough can be baked directly from the freezer, just add a couple of additional minutes to the baking time.
Q: My cookies came out too dry. What happened?
A: This could be due to the flour measurement. Make sure to spoon and level your flour instead of packing it in! Also, be careful not to overbake; those cookies should have a soft center.
Q: How can I tell when the cookies are done?
A: The edges should be set and slightly golden, while the centers may look a tad underbaked—that’s okay! They’ll continue cooking on the baking sheet after you take them out.
Nutritional Info (Optional)
While I always encourage savoring every bite, here’s a general idea per cookie (this can vary based on ingredient brands):
- Calories: 200
- Total Fat: 10g
- Saturated Fat: 4g
- Carbohydrates: 25g
- Sugars: 14g
- Protein: 2g
Final Thoughts
Making these Chocolate Filled Cookies is more than just baking; it’s about creating moments that matter and sharing joy with those you love. I hope you bring your own memories into the kitchen as you bake these sweet delights. Remember, there’s no perfect cookie—just delicious ones made with intention and love!
Thanks for joining me today at Ivory Apron! May your kitchen be filled with warmth, laughter, and, of course, the aroma of freshly baked cookies. Happy baking, my friends!
PrintChocolate Filled Cookies
Indulge in these delightful Chocolate Filled Cookies, featuring a rich chocolate hazelnut filling surrounded by crispy edges and a gooey center.
- Prep Time: 15 minutes
- Cook Time: 12 minutes
- Total Time: 27 minutes
- Yield: 24 cookies 1x
- Category: Dessert
- Method: Baking
- Cuisine: American
- Diet: Vegetarian
Ingredients
- 1 cup chocolate hazelnut spread (Nutella)
- 12 tbsp unsalted butter (melted and cooled to room temperature)
- 1 cup light brown sugar (packed)
- 1/4 cup granulated sugar
- 1 large egg (room temperature)
- 1 tbsp vanilla extract
- 1 3/4 cup + 2 tbsp all-purpose flour
- 1 tsp baking soda
- 1 tsp fine sea salt
- 1 1/8 cup mini chocolate chips or finely chopped chocolate bar
Instructions
- Preheat your oven to 350°F (175°C) for at least 10 minutes.
- Line a baking sheet with parchment paper.
- Mix the melted butter with chocolate hazelnut spread using a whisk until smooth. Add the brown sugar and granulated sugar; whisk until well combined. Blend in the egg and vanilla extract.
- Whisk together the flour, baking soda, and salt in another bowl.
- Gradually add the dry mixture to the wet mixture, stirring gently until just combined. Fold in the mini chocolate chips.
- Scoop generous tablespoons of dough onto the prepared baking sheet, spacing them about 2 inches apart. Chill in the fridge for 30 minutes.
- Bake for 10–12 minutes until edges are set and centers are slightly underbaked.
- Cool on the baking sheet for 5–10 minutes before transferring to a wire rack.
Notes
For extra flavor, chill the dough before baking. These cookies can be served warm with a dusting of powdered sugar or alongside vanilla ice cream.
Nutrition
- Serving Size: 1 cookie
- Calories: 200
- Sugar: 14g
- Sodium: 200mg
- Fat: 10g
- Saturated Fat: 4g
- Unsaturated Fat: 6g
- Trans Fat: 0g
- Carbohydrates: 25g
- Fiber: 1g
- Protein: 2g
- Cholesterol: 30mg
Keywords: chocolate cookies, dessert, baking, chocolate hazelnut, cookies recipe
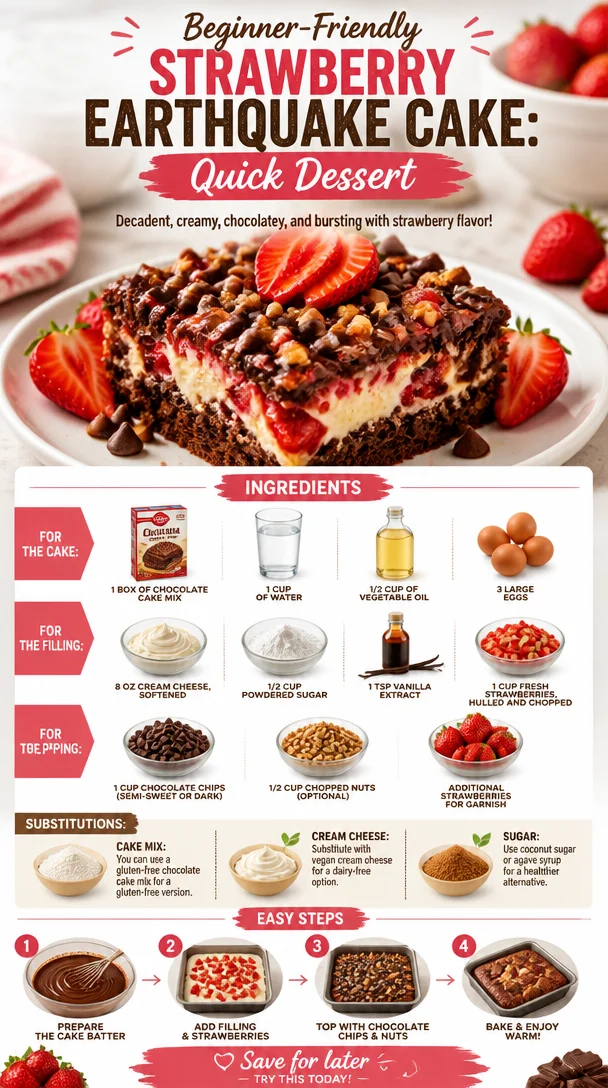
Beginner-Friendly Strawberry Earthquake Cake: Quick Dessert
Strawberry Earthquake Cake: A Deliciously Unique Dessert
Hello, fellow food lovers! I’m so excited to share a delightful treat that’s just bursting with flavors and memories—my delicious Strawberry Earthquake Cake! This cake is a delightful mix of melt-in-your-mouth chocolate, creamy filling, and fresh strawberries, creating a dessert that’s truly unforgettable.
But before we dive into the recipe, let me take you on a little journey down memory lane, back to a time when flavors were bold, and desserts were the pièce de résistance of every gathering.
Personal Story
One of my favorite childhood memories revolves around summer BBQs at my grandparents’ house. The backyard was filled with the smell of grilled vegetables, and laughter echoed around as family and friends came together. But what truly brought everyone together at the end of the meal was my grandma’s famous cake. She had a special recipe that combined chocolate and fresh strawberries, and it was always the star of the show.
I still remember the anticipation as the cake cooled down on the counter, the aroma wafting through the air, making our mouths water. When Grandma sliced into that cake, it was like an earthquake—rich chocolate and creamy layers would ooze out, making everyone gasp. That moment of delight has stuck with me, and it inspired this Strawberry Earthquake Cake. Let’s create that same magic together in your kitchen!
Ingredients
To get started on your Strawberry Earthquake Cake, here’s what you’ll need:
For the Cake:
-
1 box of chocolate cake mix (or homemade chocolate cake)
You can use any chocolate cake mix you love or make your chocolate cake from scratch for an enhanced flavor. -
1 cup of water
Just tap water will do the trick. You could also use milk for a richer flavor. -
1/2 cup of vegetable oil
Vegetable oil keeps the cake moist. Olive oil adds a delicious twist, but it may alter the flavor slightly. -
3 large eggs
Room temperature eggs blend better and help the cake rise higher.
For the Filling:
-
8 oz cream cheese, softened
Gives a wonderfully creamy texture. For a dairy-free option, choose vegan cream cheese. -
1/2 cup powdered sugar
Sweetens the filling without the graininess of granulated sugar. You can use coconut sugar for a more natural alternative. -
1 tsp vanilla extract
Enhances the flavor beautifully. A splash of almond extract adds a unique twist too! -
1 cup fresh strawberries, hulled and chopped
Fresh strawberries give the filling a juicy, fruity burst. You can substitute with other berries if you prefer.
For the Topping:
-
1 cup chocolate chips (semi-sweet or dark)
Chocolate chips add that gooey chocolatey goodness. Swap with butterscotch chips for a different flavor profile! -
1/2 cup chopped nuts (optional)
Nuts give a delightful crunch. Walnuts or pecans work wonderfully, but leave them out if you have nut allergies. -
Additional strawberries for garnish
Always a classic touch to decorate your dessert and add a pop of color!
Step-by-Step Instructions
Now that you’ve gathered your ingredients, let’s get down to the nitty-gritty of making this showstopper!
-
Preheat Your Oven
Set your oven to 350°F (175°C). This is always the key first step—your oven needs to be nice and hot when your cake is ready to go in! -
Prepare Your Baking Pan
Grease a 9×13 inch baking dish with butter or non-stick spray. This will prevent any sticky situations later on! -
Mix the Cake Batter
In a large mixing bowl, combine the chocolate cake mix with 1 cup of water, 1/2 cup of vegetable oil, and 3 large eggs. Whisk until everything is combined and smooth. You can use an electric mixer for a fluffier texture, but a hand whisk works just fine too. A little elbow grease never hurt anybody! -
Pour and Bake
Pour half of the cake batter into your prepared baking dish and smooth it out evenly. Now comes the fun part—set it aside and let’s make the filling. -
Prepare the Cream Cheese Filling
In a separate bowl, mix the softened cream cheese, powdered sugar, and vanilla extract until creamy and combined. You can use a fork or an electric mixer—whichever you have handy works. -
Layer It Up
Spoon dollops of the cream cheese mixture over the cake batter, followed by the chopped fresh strawberries. You want to create pockets of sweetness that will erupt like an earthquake when the cake bakes! -
Top with Remaining Batter
Carefully pour the remaining cake batter over the cream cheese and strawberries. It doesn’t need to cover completely—some filling peeking through is just what we want. -
Sprinkle on Chocolate Chips and Nuts
Now sprinkle those chocolate chips and nuts over the top. Those chocolate morsels are going to melt down into the cake, creating delicious pockets of gooeyness. -
Bake
Pop your cake into the oven and let it bake for about 30-35 minutes, or until a toothpick inserted in the center comes out clean. The tops should be slightly cracked (hence the ‘earthquake’ effect!). -
Cool
Let the cake cool in the pan for at least 10-15 minutes. It’ll be hot and bubbly, full of delicious flavors waiting to meld together.
Serving Suggestions
When it comes time to serve, here’s a tip: Slice your Strawberry Earthquake Cake into generous squares and plate each piece with a sprinkle of powdered sugar on top. Add a fresh strawberry or two for garnish, and if you’re feeling fancy, a scoop of vanilla ice cream on the side will elevate your presentation and taste to new heights.
Recipe Variations
Looking to switch things up? Here are some fun variations to try:
-
Chocolate Lovers Delight: Swap out the vanilla extract in the filling for a bit of chocolate extract, giving you a double chocolate punch!
-
Add a Zesty Twist: Mix in a little zest from an orange or lemon into the cream cheese filling for a zesty, refreshing flavor.
-
Berry Bonanza: Replace the strawberries with a mix of your favorite berries (like blueberries, raspberries, or blackberries) for a burst of color and flavor.
-
Nutty for Nuts: If you love nuts, try adding some pecans or walnuts to your filling, too—they’ll add a delightful crunch against the creaminess.
-
Gluten-Free Goodness: Use a gluten-free chocolate cake mix to make this delightful dessert gluten-free — trust me, no one will be able to tell the difference!
Chef’s Notes
Over the years, this Strawberry Earthquake Cake has evolved from my grandmother’s original recipe into my very own creation. Each time I make it, I find myself reminiscing about those warm summer nights filled with family laughter and delicious desserts. It’s become a staple in my home, and my friends can’t get enough of it.
Don’t worry if it isn’t perfect – remember, it’s all about the journey in the kitchen and the memories you create along the way. I once accidentally added double the amount of strawberries to the filling, and while it didn’t look quite right, the taste was phenomenal! That’s the beauty of cooking: you’re always learning and adjusting.
FAQs and Troubleshooting
1. Why is my cake too dense?
If the cake feels dense, it’s possible you overmixed the batter. Mixing just until everything is incorporated helps keep it light and fluffy.
2. Can I make this ahead of time?
Absolutely! You can bake the cake a day ahead and store it covered in the refrigerator. Just let it come to room temperature before serving.
3. How do I store leftovers?
Keep any leftover cake covered at room temperature for a day or two or in the refrigerator for longer storage. Just remember to enjoy it within a week!
4. My chocolate chips sank to the bottom; what happened?
This happens sometimes when the batter is too thin. Next time, consider chilling the chocolate chips in the fridge before sprinkling them on. It helps them stay suspended in the batter!
Nutritional Info
While I believe in enjoying dessert in moderation, if you’re curious, here’s a quick overview of the nutritional benefits of this delightful cake—especially when made with fresh strawberries! They provide Vitamin C, antioxidants, and have relatively low calories. Pair that with the rich chocolate cake, and you find both comfort and joy in every delicious bite.
And there you have it! Your very own Strawberry Earthquake Cake awaits. I’m thrilled you joined me on this tasty adventure, and I can’t wait to hear how your baking turns out. So, tie on that ivory apron, pour a glass of something bubbly, and let’s create more magical moments around our tables! Happy baking!
PrintStrawberry Earthquake Cake
A delightful mix of melt-in-your-mouth chocolate, creamy filling, and fresh strawberries that creates a dessert truly unforgettable.
- Prep Time: 15 minutes
- Cook Time: 35 minutes
- Total Time: 50 minutes
- Yield: 12 servings 1x
- Category: Dessert
- Method: Baking
- Cuisine: American
- Diet: Vegetarian
Ingredients
- 1 box chocolate cake mix
- 1 cup water
- 1/2 cup vegetable oil
- 3 large eggs
- 8 oz cream cheese, softened
- 1/2 cup powdered sugar
- 1 tsp vanilla extract
- 1 cup fresh strawberries, hulled and chopped
- 1 cup chocolate chips (semi-sweet or dark)
- 1/2 cup chopped nuts (optional)
- Additional strawberries for garnish
Instructions
- Preheat your oven to 350°F (175°C).
- Prepare a 9×13 inch baking dish by greasing it with butter or non-stick spray.
- Mix the chocolate cake mix with 1 cup of water, 1/2 cup of vegetable oil, and 3 large eggs in a large mixing bowl until smooth.
- Pour half of the cake batter into the prepared baking dish and smooth it out evenly.
- Prepare the cream cheese filling by mixing softened cream cheese, powdered sugar, and vanilla extract until creamy.
- Layer dollops of the cream cheese mixture over the cake batter, followed by the chopped fresh strawberries.
- Top with the remaining cake batter over the cream cheese and strawberries.
- Sprinkle chocolate chips and nuts over the top.
- Bake for 30-35 minutes, or until a toothpick comes out clean.
- Cool the cake in the pan for at least 10-15 minutes before serving.
Notes
For variations, consider adding a zesty twist with citrus zest or using a gluten-free chocolate cake mix.
Nutrition
- Serving Size: 1 slice
- Calories: 350
- Sugar: 20g
- Sodium: 450mg
- Fat: 15g
- Saturated Fat: 6g
- Unsaturated Fat: 7g
- Trans Fat: 0g
- Carbohydrates: 45g
- Fiber: 2g
- Protein: 6g
- Cholesterol: 70mg
Keywords: cake, dessert, chocolate, strawberries, family recipe, baking
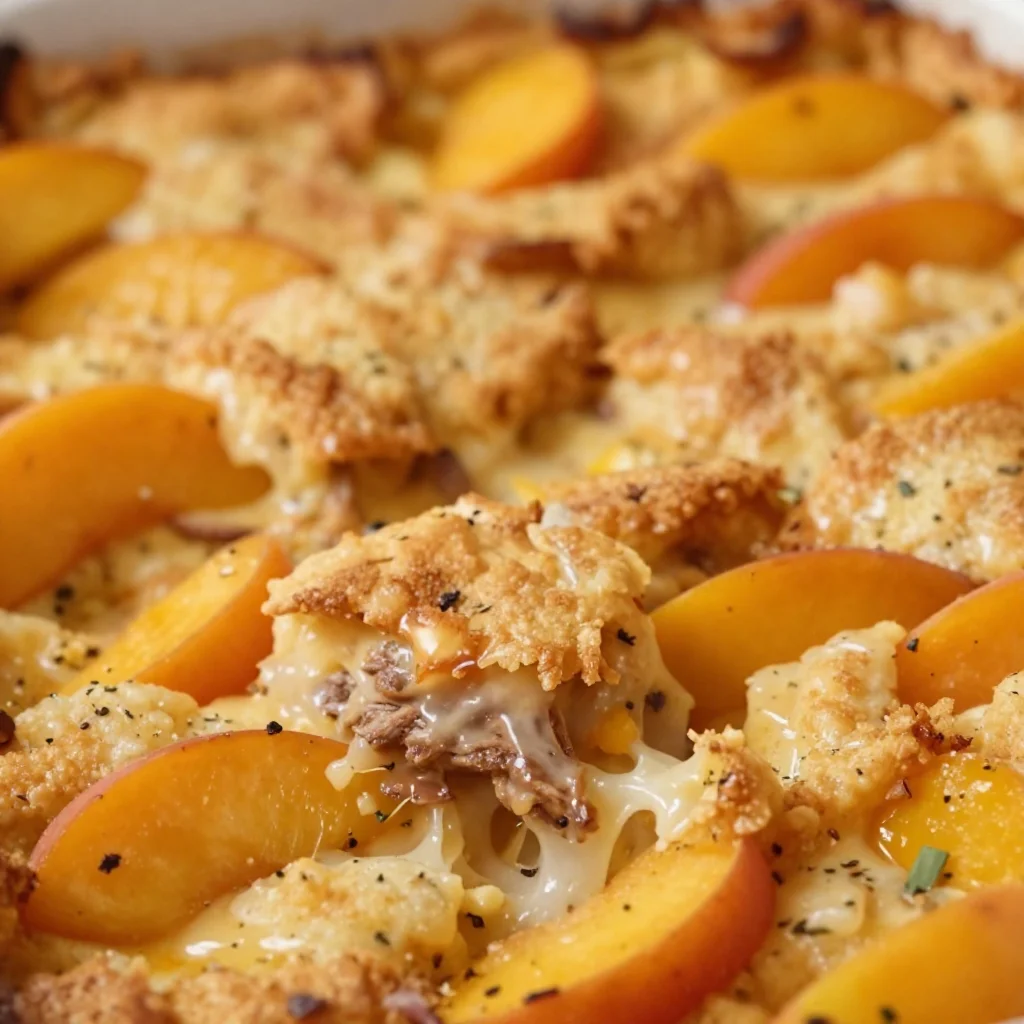
One-Pan 15-Minute Peach Cobbler with Canned Peaches
Easy Peach Cobbler with Canned Peaches: A Delightful Dessert
Hello, fellow food enthusiasts! Today, I’m excited to whip up a beloved classic that will warm the heart and bring smiles to your table — Easy Peach Cobbler with Canned Peaches. This recipe is not just about indulging in a sweet treat; it’s a way to celebrate the joy of gathering. Picture a golden, bubbling dessert served warm, topped with a scoop of vanilla ice cream while everyone around the table savors every bite. Sounds dreamy, right?
Peach cobbler is the kind of dessert that invites memories and laughter, and it’s incredibly simple to make — perfect for busy weeknights or casual gatherings with friends. Let’s get started on this delightful culinary adventure!
A Nostalgic Memory
Growing up, the kitchen was the heart of my home, filled with laughter, love, and, of course, the sweet aroma of my grandmother’s desserts. One vivid memory that always brings a smile is her peach cobbler. Every summer, when peaches were in season, she would gather the family, setting the stage for a fun-filled afternoon of baking and bonding. She had a magical way of transforming simple canned peaches into something that felt like summer itself.
I remember standing on a stool next to her, eagerly mixing the ingredients and stealing spoonfuls of the syrupy peaches (don’t tell her!). Her cobbler often emerged from the oven golden and bubbling, the sweet smell wafting through the house. Sitting at the table with family, indulging in that velvety, buttery goodness, was a feeling like no other.
That memory ignited my passion for cooking and inspired me to create this easy peach cobbler recipe, perfect for anyone who loves simple yet elegant desserts. With just a few ingredients, we can create a dish that’s steeped in warmth and happy memories.
Ingredients
Before we dive into the cooking process, let’s gather our ingredients. Here’s what you’ll need:
-
2 cans of peaches in syrup, drained: Canned peaches are convenient and maintain their sweetness. If you prefer fresher options, you can use fresh peaches (about 4-5 medium), but make sure to peel and slice them first!
-
1 cup all-purpose flour: This forms the base of our cobbler and creates that lovely golden crust. For gluten-free options, consider using a gluten-free flour blend.
-
1 cup granulated sugar: This adds the essential sweetness, balancing the tartness of the peaches. You can reduce this slightly if you want a less sweet dessert or substitute with coconut sugar for a different flavor profile.
-
1 cup milk: Milk gives our batter a nice consistency. Unsweetened almond milk or oat milk works as good alternatives if you’re dairy-free.
-
1/2 cup unsalted butter, melted: Butter enhances the flavor and creates a beautiful golden crust. You can also use coconut oil for a dairy-free option.
-
1 tablespoon baking powder: This is crucial for giving our cobbler that lovely rise. Remember, double-check the expiration date to ensure freshness!
-
1/2 teaspoon salt: Just a pinch helps balance out the sweetness and enhances the flavors.
-
1 teaspoon vanilla extract: Vanilla adds a lovely aroma and rich flavor — a must-have in any dessert!
Step-by-Step Instructions
Now that we have our ingredients ready, let’s get started on making this easy peach cobbler! Follow these steps carefully, and I promise you’ll have a delightfully scrumptious dessert in no time.
-
Preheat Your Oven: Begin by preheating your oven to 350°F (175°C). A well-heated oven ensures that your cobbler rises beautifully and cooks evenly.
-
Prepare the Baking Dish: Grab an 8×8-inch or 9×9-inch baking dish. You can spray it lightly with cooking spray or butter it up to prevent sticking. It’s an extra step, but trust me, it’s worth it!
-
Mix the Batter: In a bowl, combine the flour, sugar, baking powder, and salt. Whisk together until well combined. Next, add in the milk, melted butter, and vanilla extract. Mix until smooth. The batter should be somewhat runny but well combined. Don’t be too fussy here — small lumps are perfectly fine!
-
Pour the Batter: Carefully pour your batter into the prepared baking dish. It’s okay if it doesn’t cover every inch of the dish. It will rise and spread as it bakes, creating that beautiful cobbled texture.
-
Add the Peaches: Open your cans of peaches, drain the syrup, and evenly distribute the peaches over the batter. This layering technique allows the sweet juices to seep into the batter, creating a luscious flavor.
-
Bake: Place the baking dish in the preheated oven and bake for approximately 35-40 minutes, or until the cobbler is golden brown and bubbling. The top should have a delightful, slightly crisp texture — a sign that it’s cooked perfectly!
-
Cool and Serve: Once baked, remove it from the oven and let it cool for a few minutes. This allows the juices to settle and makes it easier to serve. If you can resist the urge to dive in immediately, let it cool for about 10-15 minutes.
Serving Suggestions
When it’s time to serve your peach cobbler, get creative! A delightful scoop of vanilla ice cream or a dollop of whipped cream can elevate your dessert to a whole new level of deliciousness. Plate it in simple bowls to showcase the rustic beauty of your cobbler, and don’t forget to sprinkle a little cinnamon on top for an extra pop of flavor and presentation. Trust me; your guests will rave about this dish!
Recipe Variations
Here are a few creative twists on the classic peach cobbler:
-
Berry Twist: Mix in some fresh or frozen berries such as blueberries or raspberries with the peaches for a delightful fruity explosion.
-
Cinnamon Spice: Add 1 teaspoon of ground cinnamon or a pinch of nutmeg to the batter for added warmth and depth of flavor.
-
Nutty Crunch: Stir in a handful of chopped nuts (like pecans or almonds) into the batter for some crunch and a lovely texture contrast.
-
Coconut Delight: Use coconut milk instead of regular milk and sprinkle some shredded coconut on top before baking for a tropical twist.
-
Chili Flake Surprise: For the adventurous spirit, sprinkle a pinch of chili flakes into the batter to create a surprising but delightful kick.
Chef’s Notes
This easy peach cobbler recipe has evolved over the years as I’ve played around with flavors and textures. The first time I made it with canned peaches was a eureka moment! It made the process so much simpler, and not having to worry about peeling fresh peaches means anyone can join in on the fun.
I’ve tried various toppings, and while traditional ice cream is my go-to, drizzling some caramel sauce over the top can be heavenly, too! Don’t hesitate to make this recipe your own and play around with seasonal ingredients. Food is all about joy and exploration; embrace it!
FAQs and Troubleshooting
1. What if my cobbler is too runny?
If your cobbler turns out runny, it’s likely due to the moisture from the fruit. Try adding a tablespoon or two of cornstarch to the peaches before placing them in the batter. Alternatively, letting it cool a bit longer may help thicken it up.
2. Can I use frozen peaches?
Absolutely! Just thaw and drain the frozen peaches, and they will work beautifully in this recipe. You might want to include a tablespoon of flour to counteract excess moisture.
3. What can I do if my topping is browning too quickly?
If you notice the cobbler starting to brown too quickly, cover it loosely with aluminum foil during baking. This will allow the cobbler to cook through without burning the top.
4. How can I store leftovers?
Store any leftovers in an airtight container in the refrigerator for up to 3-4 days. Reheat in the oven or microwave before serving again. Enjoying it warmed up can be just as blissful!
Nutritional Info
This delightful peach cobbler feels like an indulgence, but in moderation, it can be enjoyed guilt-free! While the nutritional breakdown can vary based on portion sizes and added toppings, a typical serving contains:
- Calories: Approximately 250
- Protein: 3g
- Fat: 8g
- Carbohydrates: 41g
- Sugar: 18g
Conclusion
Creating an Easy Peach Cobbler with Canned Peaches connects us to cherished culinary memories while allowing us to create new ones around the table. With simple ingredients and straightforward steps, you can whip up this delightful dish in no time! So, give it a try, tie on that apron, and invite friends or family to share in this beautiful experience. Every bite will awaken the taste of nostalgia, turning an ordinary day into something truly special. Happy baking, friends!
PrintEasy Peach Cobbler with Canned Peaches

A delightful dessert that combines convenience and nostalgia, perfect for gatherings and sweet cravings.
- Prep Time: 15 minutes
- Cook Time: 40 minutes
- Total Time: 55 minutes
- Yield: 8 servings 1x
- Category: Dessert
- Method: Baking
- Cuisine: American
- Diet: Vegetarian
Ingredients
- 2 cans of peaches in syrup, drained
- 1 cup all-purpose flour
- 1 cup granulated sugar
- 1 cup milk
- 1/2 cup unsalted butter, melted
- 1 tablespoon baking powder
- 1/2 teaspoon salt
- 1 teaspoon vanilla extract
Instructions
- Preheat your oven to 350°F (175°C).
- Prepare an 8×8-inch or 9×9-inch baking dish.
- Mix the flour, sugar, baking powder, and salt in a bowl.
- Add the milk, melted butter, and vanilla extract; mix until smooth.
- Pour the batter into the prepared baking dish.
- Add the peaches evenly over the batter.
- Bake for approximately 35-40 minutes or until golden brown.
- Cool for a few minutes before serving.
Notes
Serve with vanilla ice cream or whipped cream. You can also add a sprinkle of cinnamon for extra flavor.
Nutrition
- Serving Size: 1 serving
- Calories: 250
- Sugar: 18g
- Sodium: 200mg
- Fat: 8g
- Saturated Fat: 5g
- Unsaturated Fat: 3g
- Trans Fat: 0g
- Carbohydrates: 41g
- Fiber: 1g
- Protein: 3g
- Cholesterol: 30mg
Keywords: peach cobbler, dessert, easy recipe, canned peaches, baking
Pin by Crimson Warrior on All no. 1 | Baking sweets, delicious desserts, easy dessert recipes
Indulge Your Senses: The Ultimate Chocolate Chip Cookie Recipe
Hello, fellow foodies! Savannah Pierce here, your go-to recipe creator and host-at-heart from IvoryApron.com! Today, we are diving into the world of Chocolate Chip Cookies — but not just any typical recipe. We’re crafting the kind of cookies that make your house smell like heaven and make you feel like a kid again. So, grab your apron, and let’s get baking!
Introduction
Who doesn’t love a warm, gooey chocolate chip cookie? It’s like a hug in dessert form! There’s something magical about those chunks of chocolate melting into a soft, chewy base. The crispy edges, the tender center, and the pleasantly sweet aroma wafting from the oven — it’s a delightful symphony that invites everyone to gather ‘round.
These cookies are perfect for all occasions: whether you’re hosting a cozy gathering, celebrating a birthday, or simply need a pick-me-up after a long day, you really can’t go wrong. You might even want to double the batch because trust me, these little delights vanish faster than you can say “fresh out of the oven!”
Today, I’ll take you step-by-step through the process of creating the ultimate chocolate chip cookies. But more than just giving you a recipe, I’ll share my personal touches and little chef secrets that elevate this classic treat from ordinary to extraordinary. Let’s embark on this delicious journey together, shall we?
Personal Story
I still remember the summer as a child, when my grandma would invite me to her cozy kitchen. With classic checkered curtains fluttering in the breeze, I watched with wide eyes as she expertly whisked batter, her hands dusted with flour. She always said, "Cookies are meant to bring people together.” Every Sunday afternoon, we’d bake dozens of chocolate chip cookies, and I’d relish the sound of them dropping onto the baking tray with a satisfying plop.
Those moments were more than just about baking; they were filled with laughter, storytelling, and a sprinkle of mischief (like sneaking chocolate chips straight from the bag). Grandma’s chocolate chip cookies became a family staple, the recipe was passed down, each generation adding their unique flair.
Today, as I whip up these cookies in my own kitchen, I feel her spirit with me, guiding my hands. It’s not just about good food; it’s about creating memories, earning smiles, and sharing love, one cookie at a time.
Ingredients
Let’s gather our ingredients! Here’s what you’ll need to create your own batch of chocolate chip happiness:
-
2 1/4 cups all-purpose flour
This is your base! For a healthier twist, try whole wheat flour or even a gluten-free blend — just make sure to adjust the liquid slightly since whole grain absorbs differently! -
1/2 teaspoon baking soda
This helps our cookies rise just enough to give them that perfect fluffy center. You can substitute it with baking powder, but the cookies will have a slightly different texture. -
1 cup unsalted butter, softened
Butter makes everything better! Don’t have unsalted butter? You can use margarine, but make sure to reduce any additional salt in your recipe. -
3/4 cup granulated sugar
This sweetens our cookies and helps achieve that golden color. For a deeper flavor, consider using light brown sugar instead or a mix of both! -
3/4 cup brown sugar, packed
This adds a rich caramel-like flavor and moisture to your cookies. You can use coconut sugar or maple syrup as a substitution, but you’ll need to adjust the liquid content of the other ingredients accordingly. -
1 teaspoon salt
Salt enhances all the sweet flavors. Scale it back a little if you’re sensitive to sodium or using salted butter. -
2 large eggs
Eggs bind everything together and add richness. For a vegan option, try using flax eggs — just mix 1 tablespoon ground flaxseed with 2.5 tablespoons water and let it sit until it thickens (about 10-15 minutes)! -
2 teaspoons vanilla extract
This is a flavor powerhouse! If you don’t have vanilla extract, almond extract can work in a pinch, though it will give a distinctly different flavor profile. -
2 cups semi-sweet chocolate chips
The star of the show! Feel free to mix and match with dark chocolate, milk chocolate, or even white chocolate for variety. You can also use chopped chocolate bars for a more gourmet twist!
Step-by-Step Instructions
Now that we have everything gathered, let’s get our bake on!
-
Preheat the Oven:
Preheat your oven to 375°F (190°C). This is crucial for those perfectly baked cookies that are crispy on the edges but soft in the center. -
Mix the Dry Ingredients:
In a medium bowl, whisk together the flour, baking soda, and salt until fully combined. This ensures that the leavening agent is evenly distributed, giving us that ideal rise in every bite. -
Cream Butter and Sugars:
In a large mixing bowl, beat the softened butter, granulated sugar, and brown sugar together until the mixture is light and fluffy. This typically takes about 2-3 minutes with an electric mixer. The goal here is to incorporate air into the butter, so don’t rush this step! -
Add Eggs and Vanilla:
Next, beat in the eggs one at a time, mixing well after each addition. Then, add the vanilla extract. Scrumptious smells will fill your kitchen at this point! -
Combine Wet and Dry Ingredients:
Gradually add the dry mixture to the wet ingredients, stirring just until combined. Overmixing can lead to tough cookies, and nobody wants that! -
Fold in Chocolate Chips:
With a spatula, gently fold in the chocolate chips. Make sure they are evenly distributed throughout the dough. If you’re feeling adventurous, toss in some chopped nuts for added crunch! -
Scoop the Dough:
Use a cookie scoop or tablespoon to drop dough balls onto a parchment-lined baking sheet, leaving enough space for spreading (about 2 inches apart). -
Bake:
Pop those trays into your preheated oven for 9-11 minutes. Keep an eye on them; they’re done when the edges are golden but the centers still look slightly underbaked. Trust me, they’ll firm up once they cool down! -
Cool Down:
Allow the cookies to cool on the baking sheet for about 5 minutes before transferring them to a wire rack. This little resting period is crucial for that perfect texture!
Serving Suggestions
When it’s time to serve these beauties, consider plating them on a beautiful cake stand to make a statement. A dusting of sea salt on top just before serving will enhance the chocolate flavor and add a touch of sophistication. Pair them with a cold glass of milk or warm coffee for the ultimate treat experience!
Recipe Variations
Want to mix it up? Here are some fun twists on the classic chocolate chip cookie recipe:
-
Oatmeal Chocolate Chip: Add 1 cup of rolled oats to the dough for a chewy texture boost and extra heartiness!
-
Nutty Chocolate Chip: Throw in 1 cup of chopped pecans or walnuts for a delightful crunch.
-
Double Chocolate Delight: Substitute half of the flour with cocoa powder for a rich chocolate version that even the most dedicated chocoholics will adore.
-
Orange Zest: Add 1 tablespoon of fresh orange zest to bring a bright, fragrant twist to your cookies!
-
Chili Chocolate Chip: For the adventurous, a pinch of cayenne pepper can add a surprising kick to your cookies!
Chef’s Notes
As I’ve perfected this recipe over the years, I’ve learned a few essential tips and tricks. Did you know that refrigerating your dough for at least 30 minutes can help improve the flavor and texture of your cookies? It allows the ingredients to meld together beautifully.
Once, while hosting a dinner party, I accidentally used sea salt instead of table salt. The result was a delightful accident — everyone raved about the unique flavor twist it added! Sometimes, the kitchen provides beautiful surprises.
FAQs and Troubleshooting
Q1: My cookies spread too much while baking. What went wrong?
A: This could happen if your butter was too soft or if you didn’t chill the dough long enough. To avoid this next time, make sure your butter is softened but not melted, and consider refrigerating your dough before baking.
Q2: How can I make my cookies softer?
A: If you prefer a softer cookie, slightly underbake them (remove them from the oven when the centers still look a bit doughy). Also, using more brown sugar than white sugar can help achieve a chewier texture.
Q3: Can I freeze the dough for later?
A: Absolutely! Form the dough into individual cookie balls and freeze them in a single layer. Once frozen, transfer them to an airtight container. Just pop them in the oven straight from the freezer, adding an extra minute or two to the baking time.
Q4: What’s the best way to store leftover cookies?
A: Keep your cookies in an airtight container at room temperature for up to a week. For longer freshness, you can refrigerate them, but be aware that they may lose some of their chewyness.
Nutritional Info
While this recipe is all about indulgence, here’s a quick breakdown of the nutritional info per cookie (assuming you make about 24):
- Calories: ~150
- Total Fat: 7g
- Saturated Fat: 4g
- Trans Fat: 0g
- Cholesterol: 20mg
- Sodium: 70mg
- Total Carbohydrates: 20g
- Dietary Fiber: 0.5g
- Sugars: 10g
- Protein: 2g
Let’s Tie on Your Apron!
I hope you feel excited to embark on this chocolate chip cookie adventure with me. Remember, cooking is about joy, creativity, and sharing. So, gather your loved ones, get your hands a little messy, and most importantly, have fun! Let the sweet aroma fill your home, and soon, you’ll have a platter of cookies that will absolutely steal the show. Until next time, happy baking, friends!
Welcome to Ivory Apron! Let’s create something timeless together!
PrintUltimate Chocolate Chip Cookies
Indulge in the warm, gooey goodness of these ultimate chocolate chip cookies that fill your home with delightful aromas.
- Prep Time: 15 minutes
- Cook Time: 11 minutes
- Total Time: 26 minutes
- Yield: 24 servings 1x
- Category: Dessert
- Method: Baking
- Cuisine: American
- Diet: Vegetarian
Ingredients
- 2 1/4 cups all-purpose flour
- 1/2 teaspoon baking soda
- 1 cup unsalted butter, softened
- 3/4 cup granulated sugar
- 3/4 cup brown sugar, packed
- 1 teaspoon salt
- 2 large eggs
- 2 teaspoons vanilla extract
- 2 cups semi-sweet chocolate chips
Instructions
- Preheat your oven to 375°F (190°C).
- Mix the dry ingredients: In a medium bowl, whisk together the flour, baking soda, and salt until fully combined.
- Cream butter and sugars: In a large mixing bowl, beat the softened butter, granulated sugar, and brown sugar together until light and fluffy.
- Add eggs and vanilla: Beat in the eggs one at a time, mixing well after each addition.
- Combine wet and dry ingredients: Gradually add the dry mixture to the wet ingredients, stirring just until combined.
- Fold in chocolate chips.
- Scoop the dough onto a parchment-lined baking sheet, leaving enough space for spreading.
- Bake for 9-11 minutes until edges are golden.
- Cool on the baking sheet for about 5 minutes before transferring to a wire rack.
Notes
Refrigerating the dough for at least 30 minutes helps improve flavor and texture. Use sea salt for a unique flavor twist!
Nutrition
- Serving Size: 1 cookie
- Calories: 150
- Sugar: 10g
- Sodium: 70mg
- Fat: 7g
- Saturated Fat: 4g
- Unsaturated Fat: 2g
- Trans Fat: 0g
- Carbohydrates: 20g
- Fiber: 0.5g
- Protein: 2g
- Cholesterol: 20mg
Keywords: chocolate chip cookies, homemade cookies, baking, dessert, sweet treats
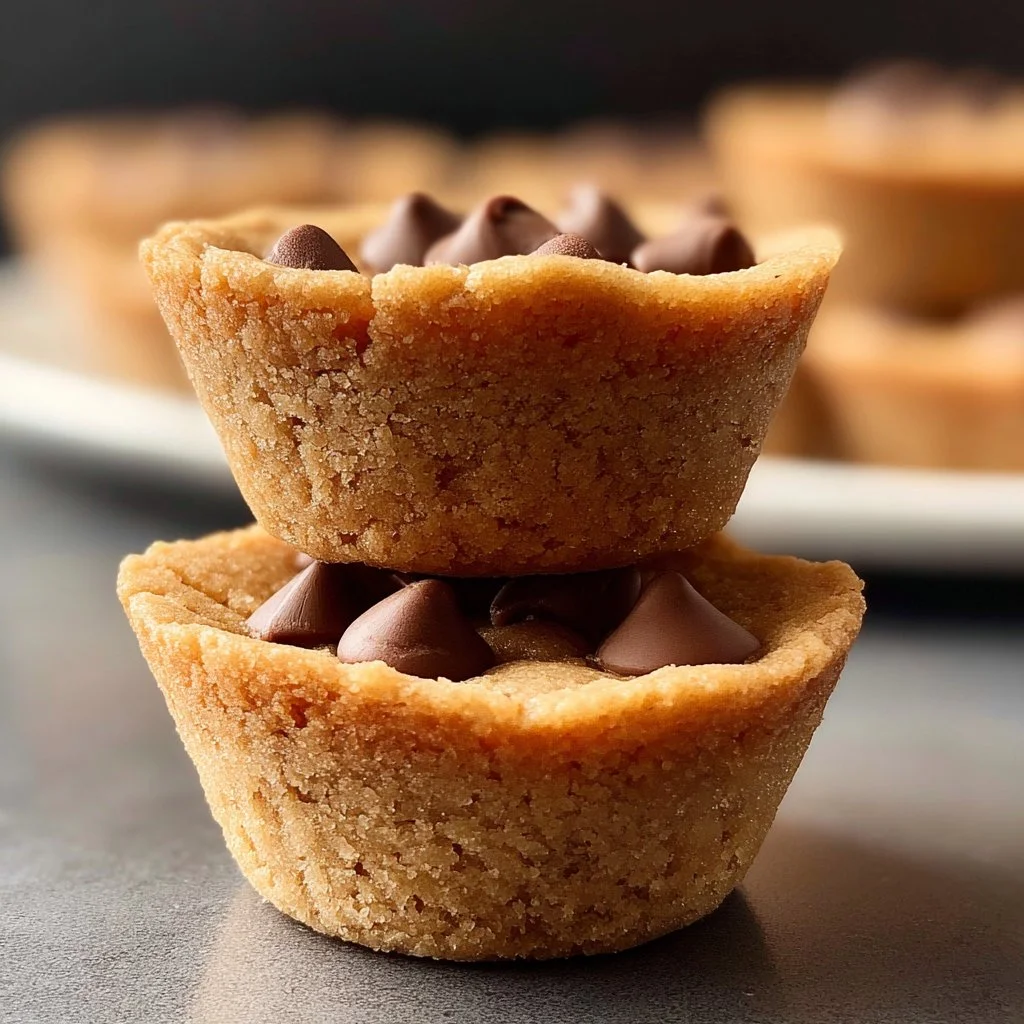
2 Ingredient Cookie Cups
The Perfect 2-Ingredient Cookie Cups: A Deliciously Simple Treat
Hello, fellow foodies! Welcome back to Ivory Apron, where we’re all about making cooking feel elegant yet accessible. Today, I have a delightful treat that’s sure to leave your taste buds dancing: 2-Ingredient Cookie Cups! Yes, you heard that right—only two ingredients! This recipe is perfect for those hectic weeks when you crave something sweet but don’t have the time or energy to whip up a full-on patisserie display.
Imagine a warm, gooey cookie cup filled with your favorite treats, all baked in the comfort of your own kitchen. These little lovelies are not only easy to make but are also gluten-free and can be customized to fit any dietary need. Plus, they come together quicker than you can decide which movie to binge-watch next!
Now, let me share with you a little backstory. A few years back, I was hosting a last-minute gathering and realized I had a serious cookie craving but zero time to bake an intricate dessert. After rummaging through my pantry, I discovered I had two simple ingredients: peanut butter and brown sugar. It was a match made in heaven! The deliciousness that ensued made me realize that sometimes, simplicity can lead to the most flavorful outcomes. That evening, everyone raved about my quick-fix cookie cups, and I knew I had to share this easy recipe with all of you!
So, grab your apron, and let’s dive into the world of 2-ingredient cookie cups. Whether you’re treating yourself, hosting friends, or looking for a fun cooking project with the kids, these cookie cups are a perfect solution!
Personal Story
A few summers ago, my friend Jenna and I decided to have a bake-off at her place, armed with ingredients we could find in her kitchen. Picture this: flour dust swirling in the air, laughter bouncing off the walls, and a large bowl filled with all sorts of permissions—flour, sugar, chocolate chips you name it!
Halfway through our flour fight, we realized we were missing a crucial element: time! Our delicious dreams were quickly turning into panic. As we sifted through her pantry, we stumbled on a jar of natural peanut butter and a bag of brown sugar sitting innocuously on a high shelf. Jenna, ever the optimist, said, “Why not try it?” At that moment, I felt like a culinary magician as my mind raced with possibilities.
Within minutes, we had dollops of dough pressed into muffin tins, filling her kitchen with a warm, nutty aroma. When those cookie cups emerged golden-brown and perfectly formed, it felt like the universe was smiling down on us (or maybe it was just the smell of cookies). That simple concoction became our go-to recipe for lazy afternoons when the sweet tooth kicked in without a full cookie lineup. To this day, every bite brings back that joyous summer memory of fun, creativity, and tasty success!
Ingredients
Here’s the kicker—this cookie recipe uses just two ingredients! You probably have both of these in your pantry right now:
-
1 cup natural peanut butter
- Chef Insight: Go for the creamy stuff for a classic texture, but if you prefer chunky peanut butter, that works remarkably well too! It adds a delightful texture to your cookie cups. If you’re allergic or not a fan of peanuts, almond butter or cashew butter are fantastic alternatives. Just make sure they’re natural, meaning minimal added ingredients.
-
1 cup brown sugar
- Substitution Tip: If you’re out of brown sugar, you can easily make your own! Just mix white sugar with a tablespoon of molasses—voila! A great way to keep your baking running smooth! Light brown sugar lends a milder taste, while dark brown sugar gives a deeper molasses flavor, which can be a delicious twist on the classic.
These two simple ingredients create a soft, tender base that’s incredibly versatile!
Step-by-Step Instructions
Now, are you ready to whip these up? Let’s guide you through the process step by step!
Step 1: Preheat the Oven
Preheat your oven to 350°F (175°C). (Chef tip: This step is crucial to get your cookie cups perfectly baked with that delightful golden hue.)
Step 2: Combine the Ingredients
In a mixing bowl, combine 1 cup natural peanut butter and 1 cup brown sugar. You can use a spatula or, if you’re feeling adventurous, mix it by hand! Get in there, and don’t be afraid to embrace the sticky goodness. The mixture will be thick and a tad challenging to combine, but that’s part of the fun!
Step 3: Form Your Cookie Cups
Once you have a nice, cohesive dough, it’s time to form your cookie cups! Lightly grease a muffin tin with a touch of cooking spray or oil. Using a small scoop or your hands, create small balls of dough and press them into the bottom of each cup. Make sure to push down in the center to create a well for your desired filling.
Step 4: Bake
Place the muffin tin in the preheated oven and bake for about 10-12 minutes. Keep an eye out for them—your kitchen will smell amazing! When they are lightly golden and set, take them out and allow them to cool in the pan for a few minutes.
Step 5: Fill and Serve
After a few minutes, gently remove the cookie cups from the muffin tin and place them on a cooling rack. Now is the fun part! Once they’ve cooled slightly, fill each cup with your favorite treats: chocolate chips, candy, fruit, or a dollop of jam. The options are endless!
Final Presentation
If you’re feeling fancy, a dusting of powdered sugar on top elevates the look without adding complexity. Place them on a beautiful platter and watch your guests’ eyes light up!
Serving Suggestions
These cookie cups are perfect for any occasion! Serve them warm with a scoop of vanilla ice cream on top for a delightful sundae-inspired treat. Alternatively, serve them alongside a cup of coffee or tea for a cozy afternoon. They’re undeniably fun to eat—bite into one, and you’ll find a soft center and delightful morsels waiting within!
Recipe Variations
The beauty of these 2-Ingredient Cookie Cups is their versatility! Here are a few tasty variations to try:
- Chocolate Drizzle: Melt some chocolate and drizzle it over the top for a decadent touch.
- Nut Medley: Mix in chopped nuts like walnuts or almonds into the dough for added crunch.
- Stuffed Surprise: Use a layer of Nutella or caramel sauce inside the cookie cups for a gooey center.
- Seasonal Touch: Add a pinch of cinnamon or pumpkin spice for a warm, autumn-inspired flavour.
Feel free to get creative—experimenting is half the fun!
Chef’s Notes
You know, baking has a funny way of teaching us patience, especially when it comes to not eating the finished product right away! I can’t tell you how many times I’ve tried to sneak a taste before they were fully cooled down. The first time I made these cookie cups, I definitely burned my tongue while trying to get that warm, gooey filling!
Over the years, I’ve played around with the recipe and found that chilling the dough slightly before baking creates a sturdier cup. So, if you’re in a hurry, just bake as is, but if you want that perfect form, let the dough chill for about 30 minutes in the fridge before forming your cookie cups.
And remember, if they don’t turn out as expected on your first try, don’t fret! Every kitchen adventure is a chance to learn. The best part is that even less-than-perfect cookie cups are still delicious!
FAQs and Troubleshooting
Q: Why aren’t my cookie cups holding their shape?
A: This can happen if the dough is too warm or if you didn’t press it firmly enough into the muffin tin. Try chilling the dough for 30 minutes before baking the next time!
Q: Can I use a different nut butter?
A: Absolutely! Almond butter and even sunflower seed butter can be great substitutes. Just make sure they’re of similar consistency to peanut butter for best results.
Q: How do I store leftover cookie cups?
A: Store them in an airtight container at room temperature for up to three days. If you want to keep them longer, refrigerate them—though I doubt they’ll last that long once you start eating them!
Q: Can I double the recipe?
A: For sure! This recipe is easy to scale up. Just remember to bake them in batches if your oven doesn’t fit more than one muffin tin!
Nutritional Info
(If applicable, feel free to add specific nutritional info based on the ingredients used, including calories, fat content, and other vitamins/minerals.)
So there you have it! A delicious and straightforward recipe for something that feels special, yet comes together in no time. I hope you enjoy making these 2-Ingredient Cookie Cups as much as I enjoyed sharing them with you. Remember, it’s not about culinary perfection but rather enjoying the process and the memories created along the way. Happy baking, and until next time—keep those aprons on and your hearts open to the joy of cooking!
Print2-Ingredient Cookie Cups

Easy and delicious cookie cups made with just two simple ingredients: natural peanut butter and brown sugar.
- Prep Time: 10 minutes
- Cook Time: 12 minutes
- Total Time: 22 minutes
- Yield: 12 servings 1x
- Category: Dessert
- Method: Baking
- Cuisine: American
- Diet: Gluten-Free
Ingredients
- 1 cup natural peanut butter
- 1 cup brown sugar
Instructions
- Preheat your oven to 350°F (175°C).
- Combine 1 cup natural peanut butter and 1 cup brown sugar in a mixing bowl.
- Form small balls of dough and press them into a greased muffin tin.
- Bake in the preheated oven for 10-12 minutes.
- Fill each cookie cup with your favorite treats once they have cooled slightly.
Notes
Chilling the dough before baking creates a sturdier cookie cup. Store leftovers in an airtight container at room temperature for up to three days.
Nutrition
- Serving Size: 1 cookie cup
- Calories: 200
- Sugar: 12g
- Sodium: 50mg
- Fat: 10g
- Saturated Fat: 2g
- Unsaturated Fat: 8g
- Trans Fat: 0g
- Carbohydrates: 20g
- Fiber: 1g
- Protein: 5g
- Cholesterol: 0mg
Keywords: cookie cups, two ingredient cookies, easy dessert, gluten-free treats, peanut butter cookies